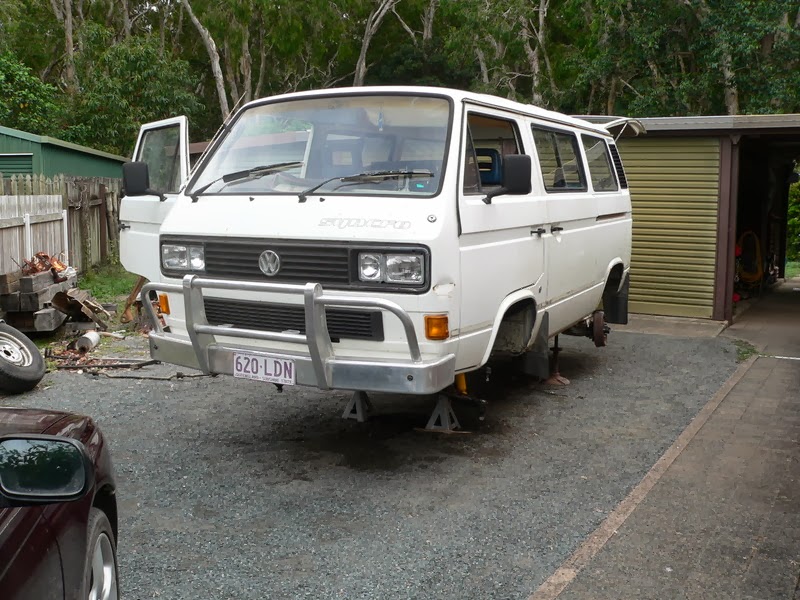
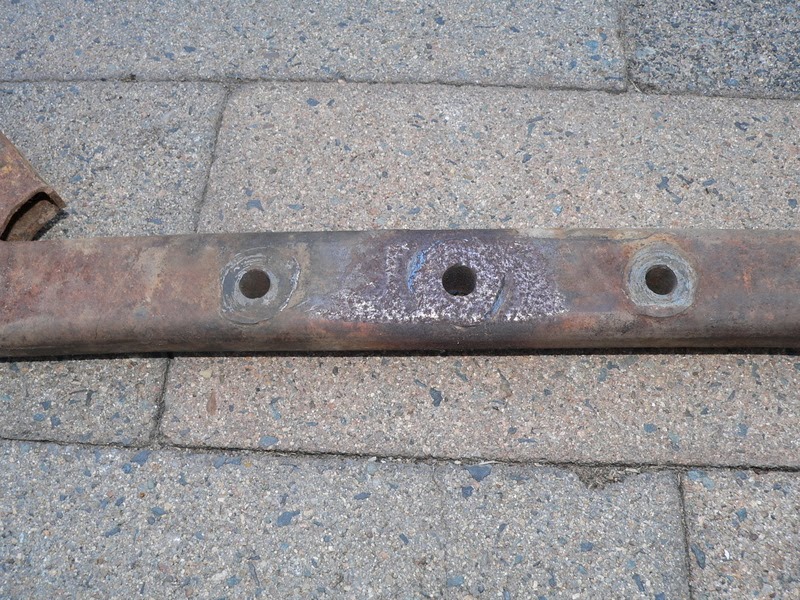
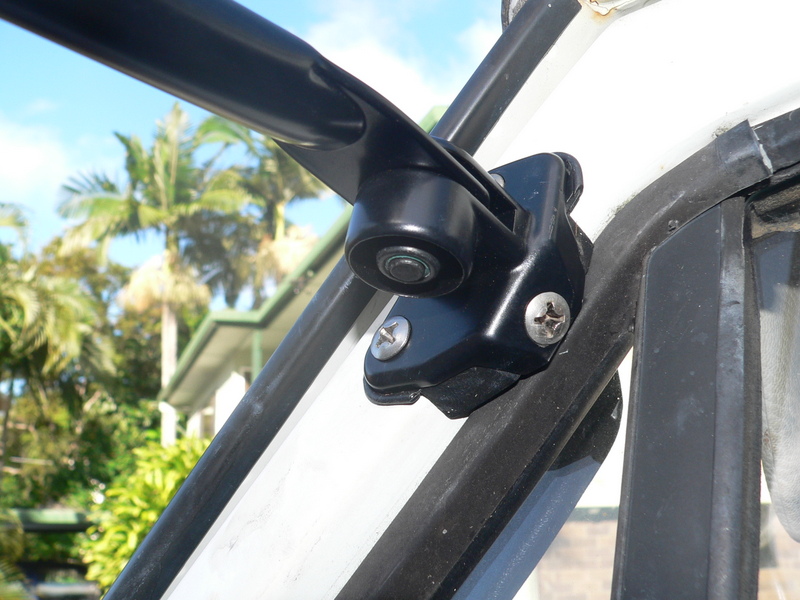
Well it's time to start work on the syncro. Was planning to keep this on the road as I went through it but it had other ideas. Mick drove this for over 12 month and it didn't miss a beat, I drive it 400km from Townsville to Mackay and arrive with a loose cam gear.
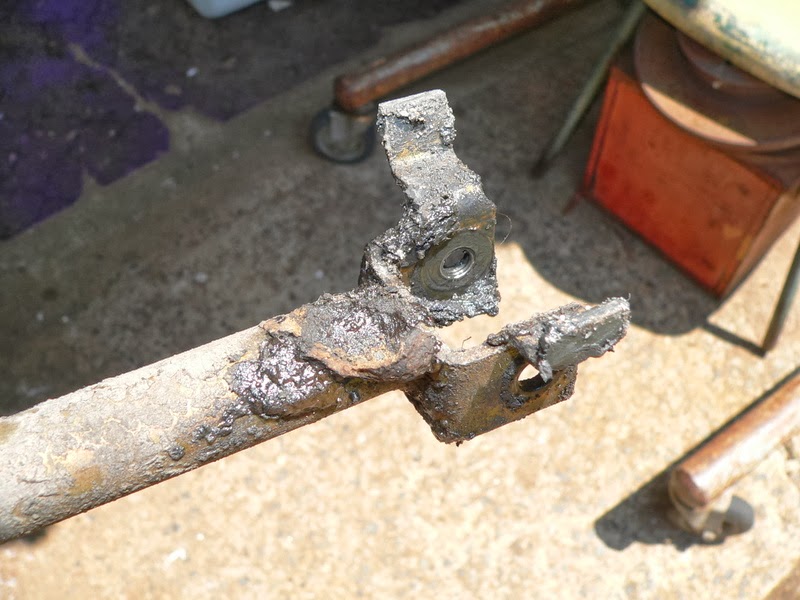
Rebuit the shift linkage, front complete with remains of a mud wasp nest.
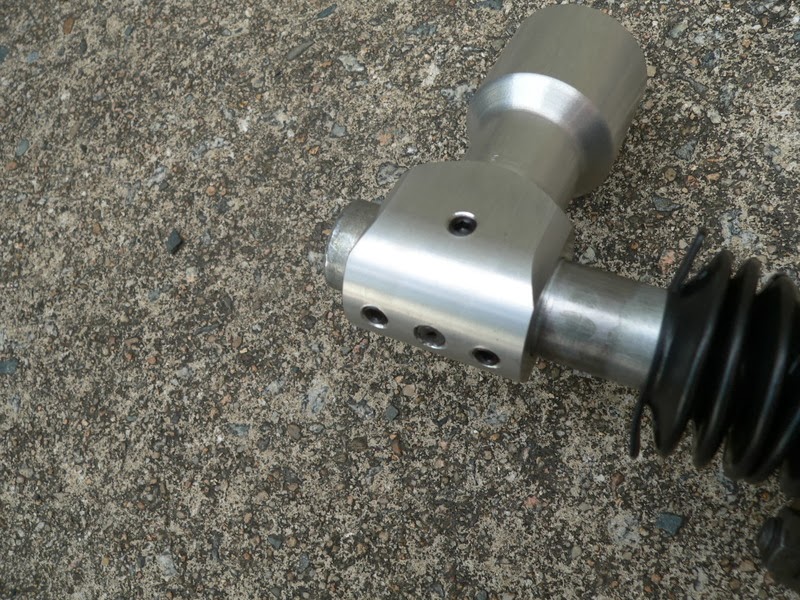
After with new tips.
This boot on the middle section was cactus, couldn't find a part number for this or a listing anywhere.
Used a boot from the gearbox selector shaft, not perfect but will keep the dirt out.
Replaced the selector lever but ther was some play after install, so tightened it up with some grub screws.
mackaymanx ·
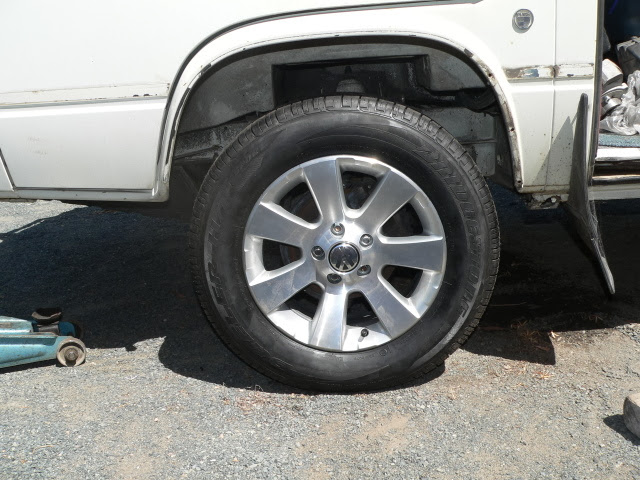
Decide to go for some Tiguan 'San Diego' wheels, 16X6.5 ET 33. Shown here with 215/65 R16 tyres.
Front
Rear
Rear Clearance
MickH ·
Mate yer turning it into a trailer queen...... it only broke because ya didn't flog it.....😁
mackaymanx ·
I didn't get a chance to flog it and you gotta have a little bling.
Ben386 ·
Keep the updates coming Brent
mackaymanx ·
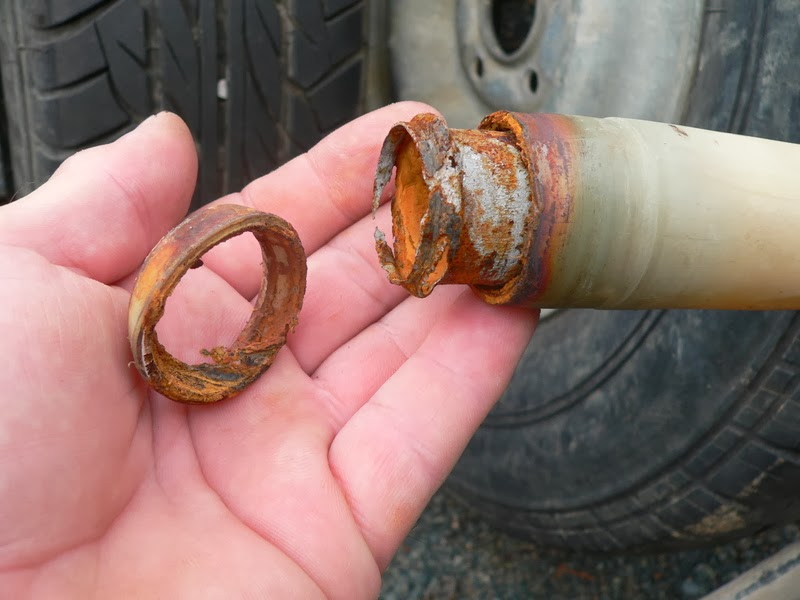
Some of the surprises so for, well maybe not the coolant line.
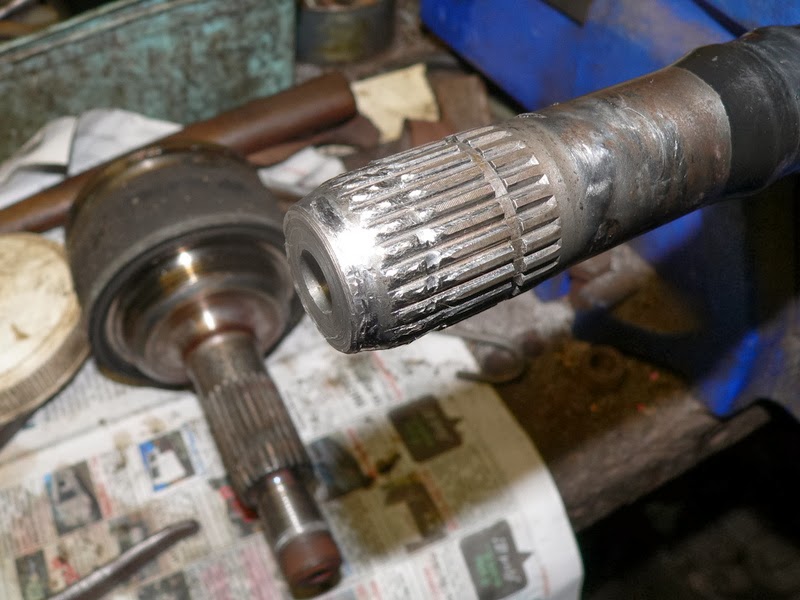
Front outer drive shaft spline. This must have been an old repair as the spline in the CV showed no damage and must have been replaced. Circlip mustn't have been seated properly and the CV walked it's way off the shaft. This will be replaced with a spare shaft.
What's left of my accelerator cable tube.
Coolant line end, other end of this pipe is similar.
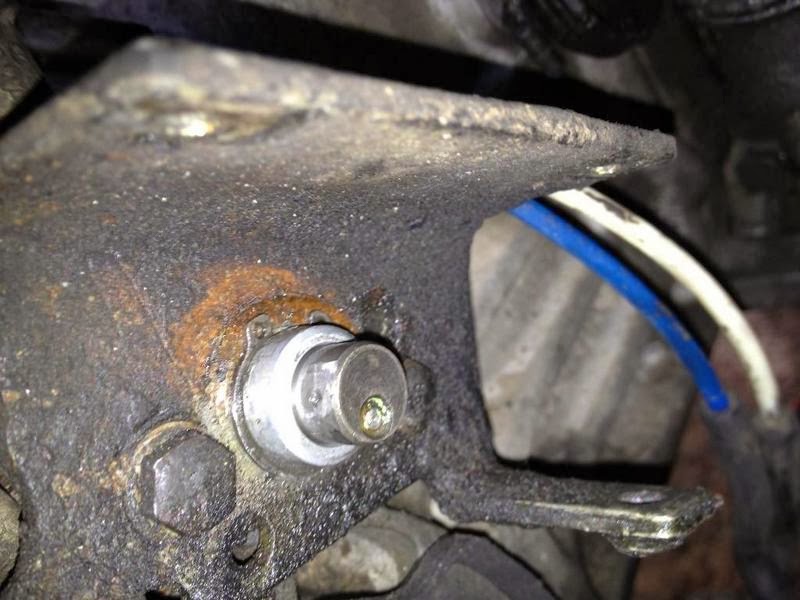
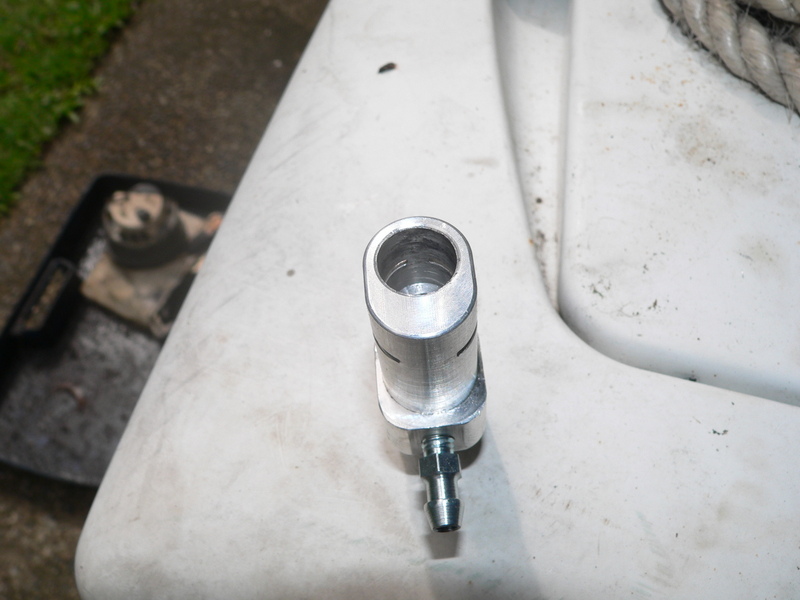
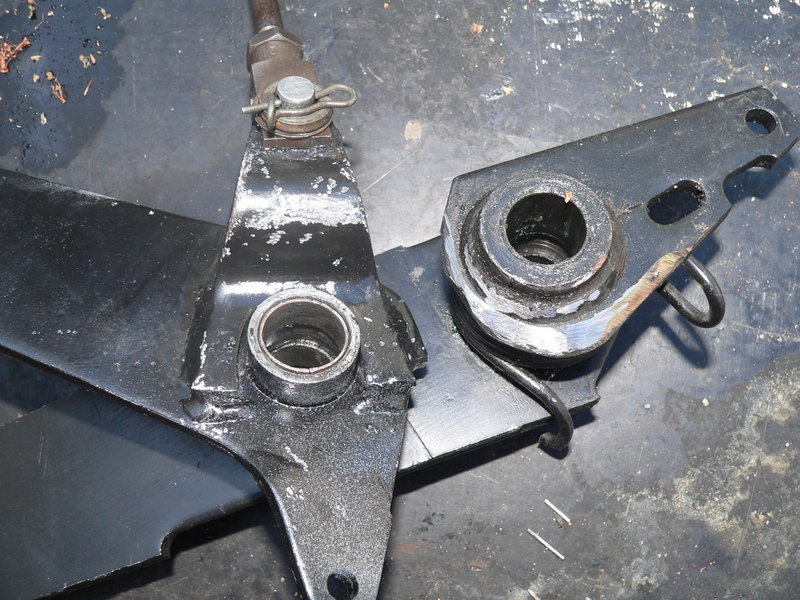
When Mick first got this Syncro the rear diff lock actuator was missing along with the bracket, after trying to fit a new actuator and bracket I found out why. The gearbox had previously had work done and when the diff lock was assembled they installed the actuator shaft wrong. Photo is from thesamba(Tristar Eric), I forgot to get a photo.
This is how it should look, a gearbox out, bellhousing off job to correct.
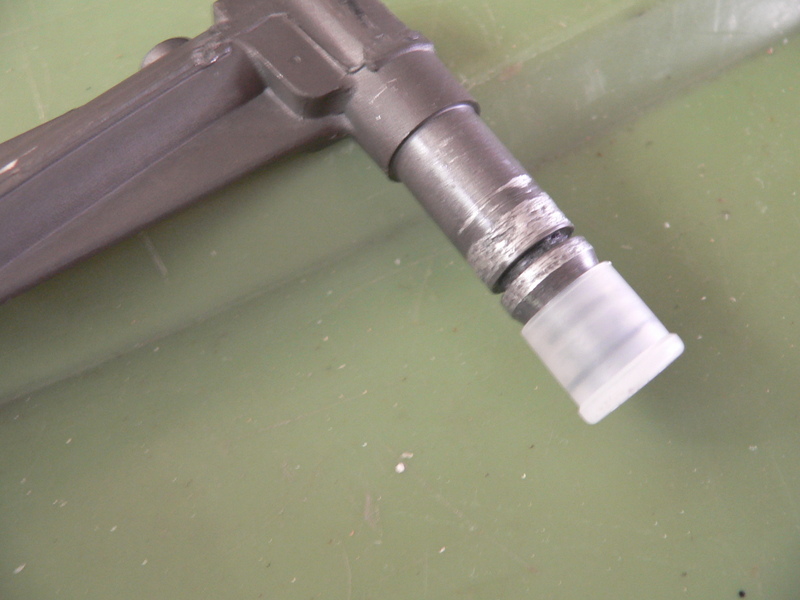
And what is does to the end of vacuum actuator shaft.
h ·
wow great build in progress!
I look forward to following your progress..
keep at it
enjoy 🙂
mackaymanx ·
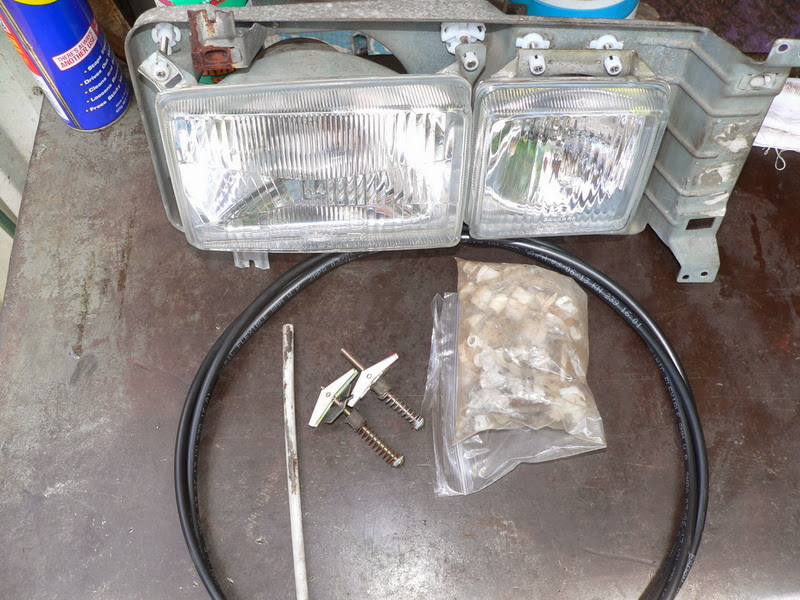
Got the headlights out of the way, new adjusters all around from Van Cafe so I was able to ditch the make shift one I had for the outside corners. Adjusters were very stiff and needed some silicone grease. Profile in the adjuster screws phillips heads were not great. Also got some 8mm nylon tubing to replace the throttle tube
Previously had cleaned up the foggy high beam lenses and swapped them side to side. They had been installed wrong and gave a cross eyed look. Cut off the old connectors and crimped on the right fitting.
AA003 ·
It looks like yours was a single headlight originally. Was the spare wheel in the back or underneath the front?
mackaymanx ·
Spare is in the back and yes it originally had round headlights.
AA003 ·
You must have one of the earliest Australian syncros.
Built in April 1988 if your VIN is 083488.
mackaymanx ·
MickH ·
Awww....you took the mod plate off!!!
MickH ·
Hey put up a pik of how good it is underneath.....you know you want to...
mackaymanx ·
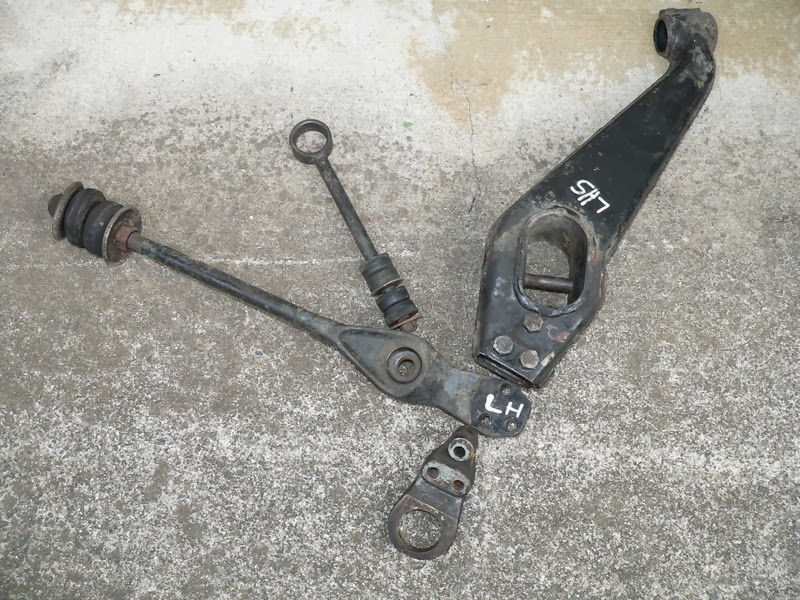
So I have gone from the pressed steel/welded lower control arms....
to the later cast steel arms. Replaced the bushes and ball joints, not impressed with the "Febi Quailty" upper control arm bushes and caster rod bushes from JK turning out to be noname and "Rubberex".
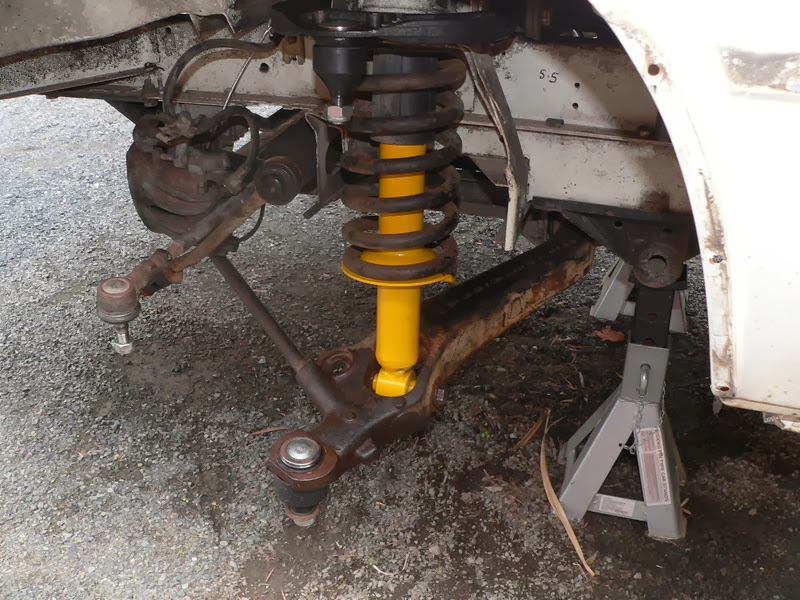
Went for Old Man Emu shocks from Van Cafe, when I combined them with a big order it was cheaper than buying them from ARB locally.
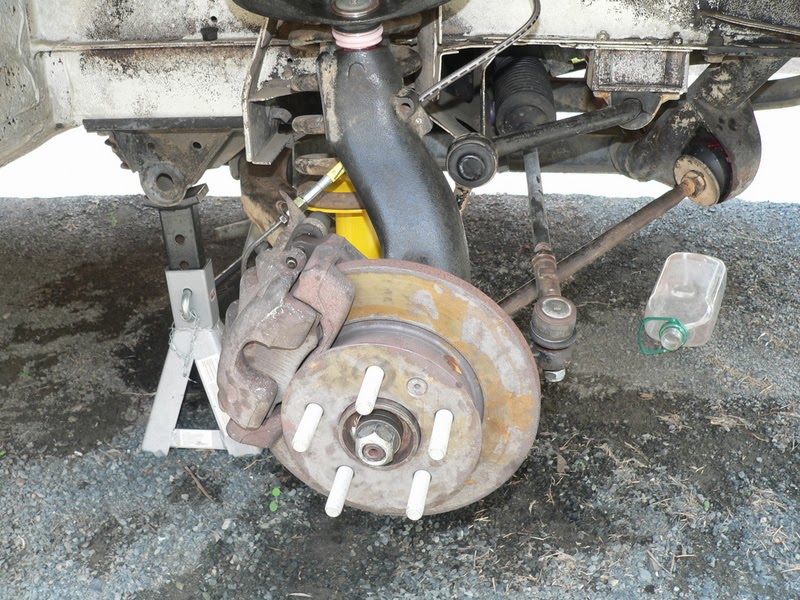
Here is the front back together. I have installed longer stud in the front in case I want to go to larger brakes later. Had to shop around for the front seals, got the lip seals from VC and the V-Ring seals from Brickwerks.
mackaymanx ·
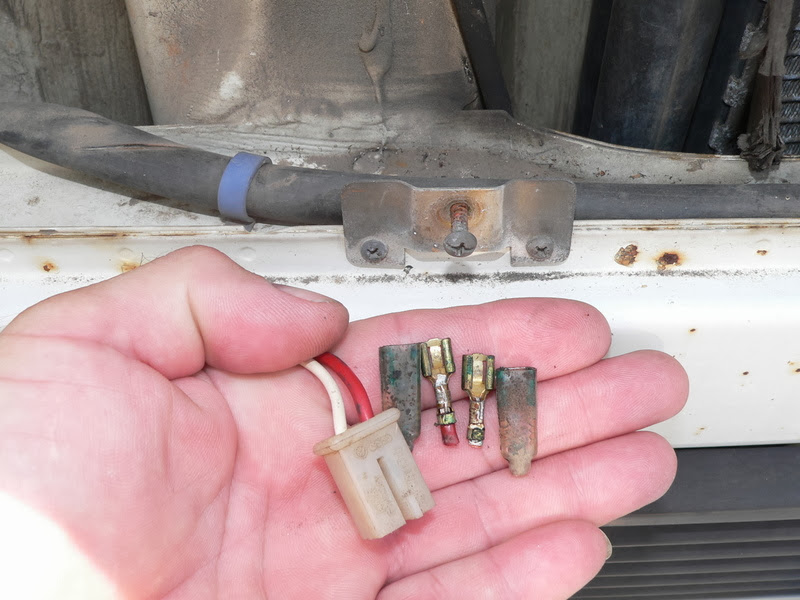
Went through the brakes, as the pedal would go to the floor occasionally when you least expected it. So fitted a new ATE master cylinder, had to split the brake light switch connectors as they went from 2 prongs to 3 prongs on the switches.
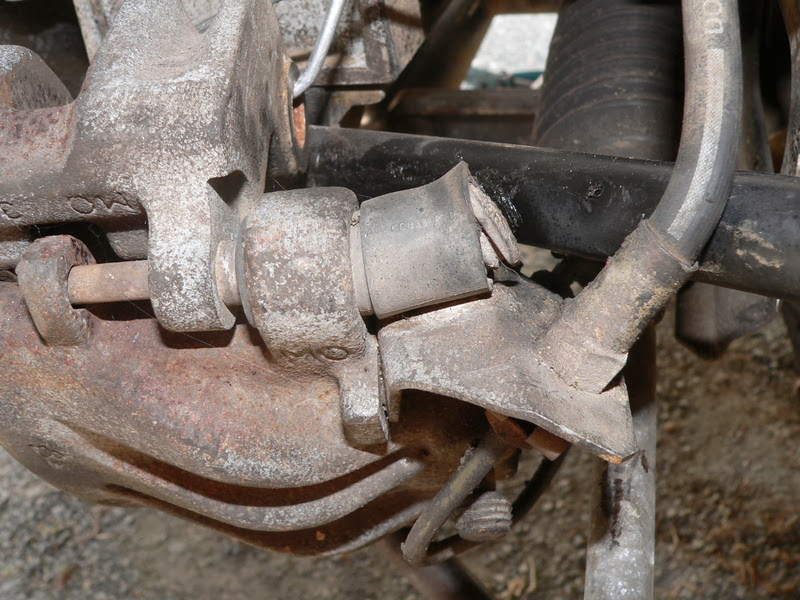
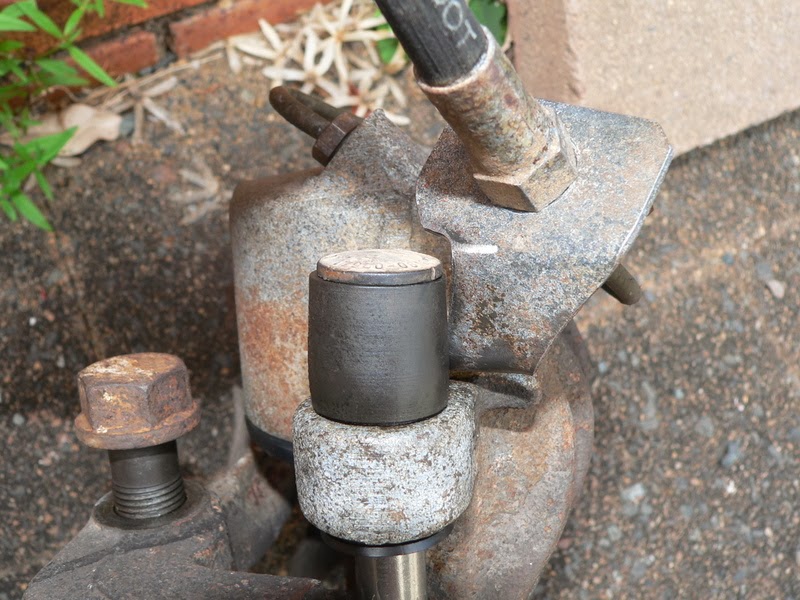
Rebuilt the front calipers and clearanced the brake pipe brackets to clear the guide pin bushes.I had four different caliper and they all had problems here.
Rear brakes got new slave cylinders and changed the brake hose bracket on the front to better suit the new brake hose size.
mackaymanx ·
Boot on the front diff lock actuator was shredded, fortunately BrickWerks have them for about $5. This is a cheap repair for an $80 actuator, they will leak vacuum if the boot is torn.
mackaymanx ·
Replaced the front pinion seal. Had the front diff out but the seal didn't turn up until after I had the diff back in. It wasn't that hard to replace in situ, knocked up a tool to hold the input flange and torqued it up.
Brickwerks have this seal $8.50 compared to $54 from Van Cafe
Scottkombi ·
Great progress.
Keep em coming!
Very interesting for those with Syncro
MickH ·
Looking good!!!
mackaymanx ·
Bit extra about rebuilding the ATE front calipers.
They take the same kit as the Girling caliper (piston seal and dust boot)
Guide pin bush kit part number 11010160042 (11.0101-6004.2)
Got the axles back from the powdercoater and got them assembled. CVs were still good. Front inner CVs on the 4 axles I had all had rear CVs fitted, so I've kept them on there for now but I pretty sure that is not correct. Might have to change them over to the correct syncro inners or get some Porsche 944 CVs which you can also use.
Decided it was time to get the correct tools to make the job easier, banding tool and Oetiker Pliers.
mackaymanx ·
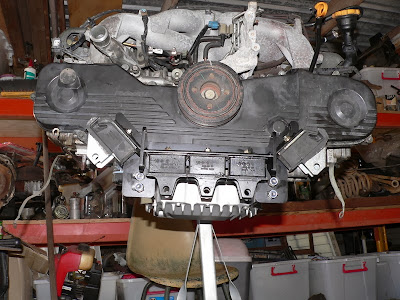
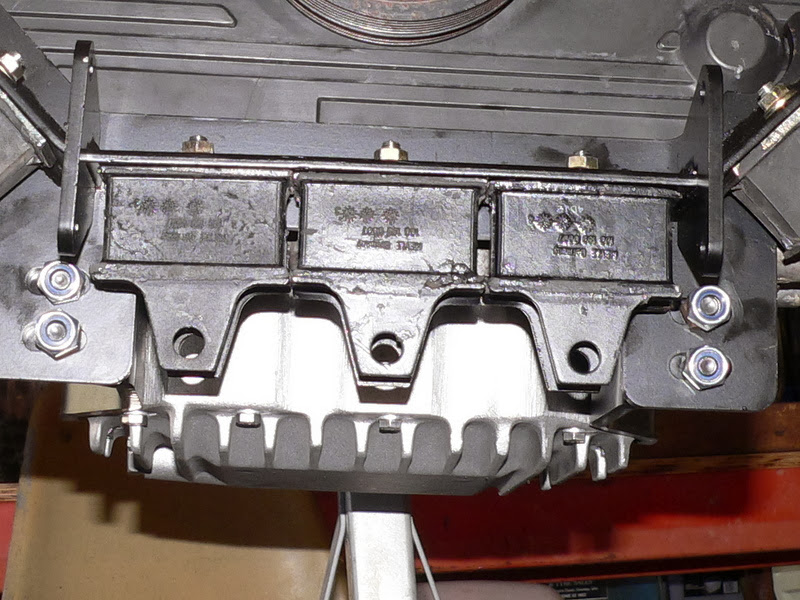
Installed an extra mounting bush in the engine carrier. The SmallCar mount allows for a third centre mount. Usually used for the H6 motors but I thought it might be a good idea for a syncro installation.
Scottkombi ·
Nice work Brent.
Did you use small car bellhousing as well as the sump and mounts?
What other Smallcar stuff are you using?
Cheers,
Scott
mackaymanx ·
Yes I'm using the Smallcar bellhousing(see picture above), finish on the machining on the bellhousing was a lot better than previous and the fit of the dowels(gearbox side) is improved. I will go into the bellhousing more later.
Also have the drive by wire pedal bracket and coolant line(usually used on the H6 and turbo H4) which lets you not reverse the coolant manifold.
Scottkombi ·
Thanks Brent.
I am planning on doing this conversion shortly.
What model scooby 2.5 donk are you using? Who is doing your harness re-wire and could you please list the smallcar or other bits required and costs.
Thanks heaps in advance. Just want to make sure I get everything I need.
Cheers,
Scott
mackaymanx ·
Engine is a EJ252 from a 2005 Liberty.
Haven't decided on the harness yet, I have several choices there. If I can't get my head around it will go to AM Autos but using an EJ22E system or LinkPlus G3 are also options.
Part Number------- Description----------------------------------- List Price----------ORD-----SHIP-----TOTAL
MSG 2005 LEGACY/LIBERTY 2.5L W/METAL DBW PEDAL
1988 SYNCRO KIT W/O HMK
025SYNCROCOMP SUBAGON PARTS KIT SYNCRO 1595.00 1 1 1595.00
VGF-PANEL GAUGE FACE WARNING PANEL BL 9.95 1 1 9.95
OPSV45 OIL PAN ALUMINUM SUBAGON 4- 19.00 2 2 638.00
HPSQ14 HOSE POWER STRG SUBERVAN QU 95.00 1 1 95.00
CP3320 PIPE COOLANT 3.3 AND TURBO 99.95 1 1 99.95
Shipping on above was $665 for 5 shipments. US dollars.
mackaymanx ·
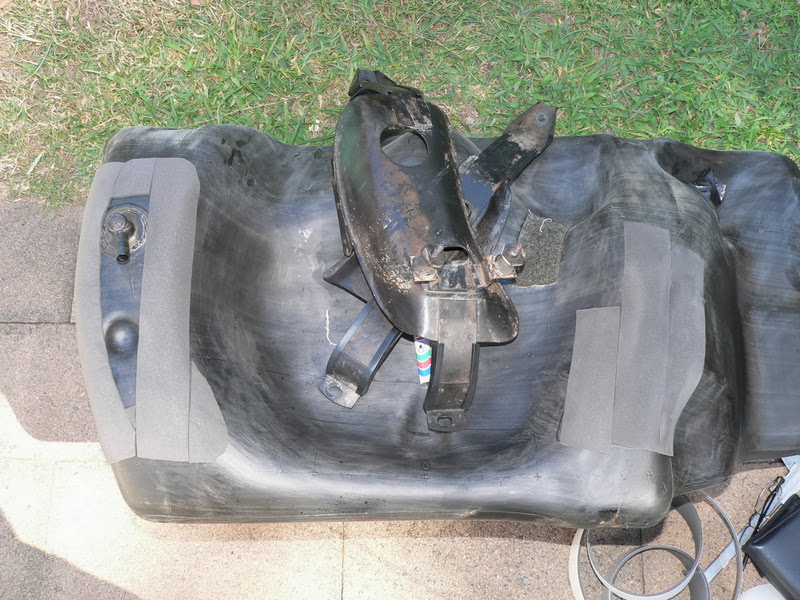
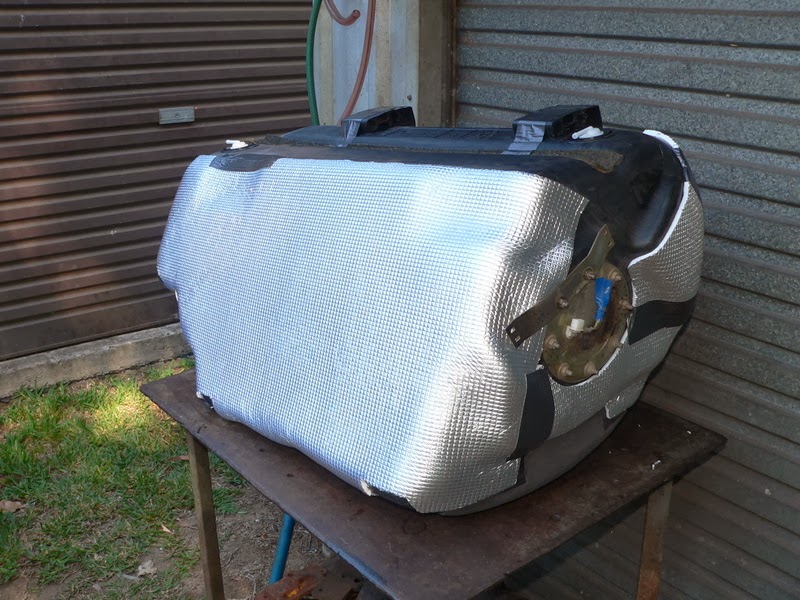
This is one job I was putting off but it actually came out with too much hassle. So new fuel pump, new filter and reseal kit from Van Cafe. Tank has no insulation from factory, so it will be getting some.
mackaymanx ·
Gave the tank a good scrub, getting the wax over spray off the tank was the tedious bit. Started with some foam under where the straps sit.
Got some tank strap from Clark Rubber.
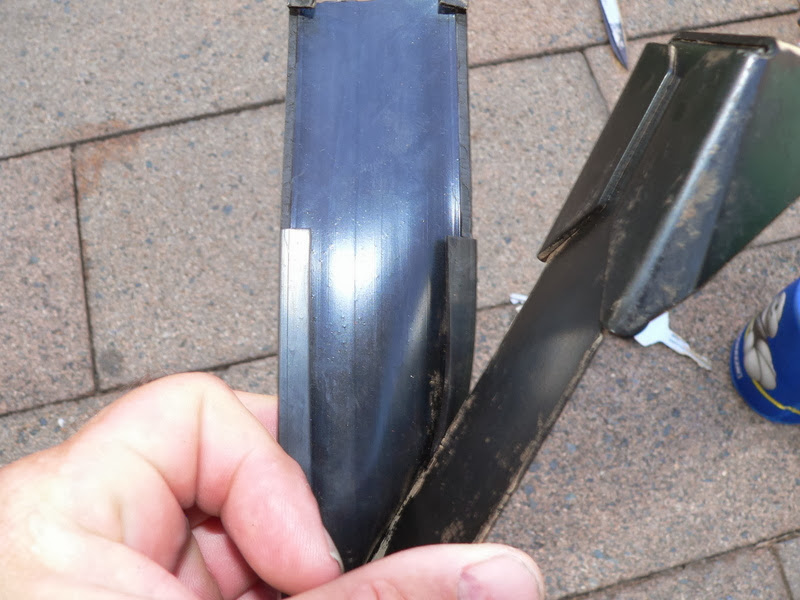
Insulation off eBay, not as good as factory but better than the nothing that was on there. Used some sikaflex to glue the hose brackets on as the tabs had broken off the tank.
Scottkombi ·
Thanks Brent for the list of bits required.
I thought you could only easily use a 2003 and earlier model scooby donk as they went can-bus from then on?
Anyway, interesting regarding your tank - mine is a 10/88 model syncro and it has no tank insulation either - must have started that in 89?
I have had a 2.7 6 cyl scooby in mine for the last 17 years and the lack of tank insulation hasnt really been an issue but I plan to do this as well - any link to the insulation seller you found?
Thanks,
Scott
Scottkombi ·
Also,
Will you need a speed sensor kit?
I think Smallcar have the one that bolts to the gearbox CV - I have always wondered how that would go with it being plastered with mud?
The car never had any issue with fuel tank heat but I thought it would be a good idea to upgrade while I had the tank out, Volkswagen must have insulated the later tanks for a reason.
VSS
I do have a CV style vss left over from my caravelle conversion as I used the Jetta cruise control Hall effect sensor instead. The Jetta sensors are nearly impossible to find now, it took me 6 months waiting on eBay to get the one I used on the Caravelle.
Fastforwardautomotive (Canada) are selling a german made copy on eBay.
I like the idea of having the vss at the speedo as it keeps it out of the mud, grease and stray rocks.
Oh and to answer the question, yes I will be needing a vss. Might try a Gowesty one.
mackaymanx ·
In regard to CAN bus, it was introduced in the US/Canadian market in 2005 but from what I have read Australia didn't get it until 2007.
One way to tell is to look at the OBD-2 port, if pins 6 and 14 are occupied the vehicle has CAN bus and if they are blank the vehicle doesn't have CAN bus.
Scottkombi ·
Brent,
Thanks for all that info - will be ideal for when I get around to the conversion. Might do it bit at a time slowly and re-co the donk with new head gaskets and timing belts before installation.
I really like the idea of a VSS in the dash cluster - the CV joint option would be loads easier but as we both agree - it would not cope with water and mud real well.
Still I plan to use a Gen 3 2.5 scooby SOHC donk - they are strangely more powerful than the ODHC donks and less bulky.
Just need to find a good local source that will sell me the donk, the computer, the ignition barrel and key and the main harness.
I am still wondering why a reversed coolant manifold is required - wasnt needed for by 2.7 scooby donk?
mackaymanx ·
I'm actually not reversing the coolant manifold on this conversion, i have got the pipe that smallcar supplies for H4 turbo and H6 conversions. Shown here with pipe for the return(cold) side.
Scottkombi ·
Brent,
I am defiantely not going for the reversed cooling manifold AM Autos can do that if they want but mine is aready set up for the original subaru design which has worked very well for the last 17 years.
I have made it my New Years resolution to get this donk swap done in 2014. I already have a few parts which have been cleaned up and painted and will be talking to Small Car as soon as I have cleared my Tax bill.
I will be following your install closely.
Cheers,
Scott
Andy ·
Great read Brent, thanks for all the info!
Who did you go with for the decoupler? And was it the US or German style?
mackaymanx ·
The decoupler I'm getting from Daryl at AA Tranaxle, I believe it's the German style one. I haven't actually received it yet, he was waiting on parts to be made so I'm still waiting.
Andy ·
Cheers, had not heard of them before. Be interesting to see what you get.
I was looking at the Van cafe ones, but they are the US style (bushed shaft, not needle bearing).
What does it cost to ship each way (just ball park is fine)
I see the kits to do your own are cheaper, but they do not supply details of the machining (even though it appears simple)
I sent Florian (the lowest gear) a couple of e-mails months back and got nowhere, sort of gave up on trying to contact him. Did manage to find his site for his real job through thesamba ( http://www.zolawindows.com/portfolio/reps/ ) but decided to go to Daryl as he was answering his e-mails.
Scottkombi ·
Brent,
How is this build going?
Looking forward to updates....
I just had my AA transaxle decoupler fitted and tried a long freeway run and then an steep bush track run in 4wd and it worked well. Thumbs up for Matt's work from A transaxle.
Forget Florian - I dont think he does decouplers anymore and just makes windows (for houses - not computers).
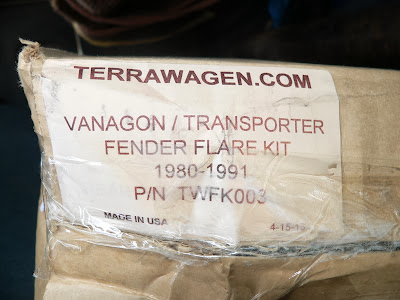
How did you go with installing the Terrawagen Flares?
mackaymanx ·
I've been meaning to update this. The decoupler has finally turned up, it was delayed by Daryl's unfortunate recent passing and sort of misplaced. The delay was understandable and I have been kept busy with other things anyway.
mackaymanx ·
I've been sidetracked by the beastie on the right.
I went from this
To this.
But we couldn't get it to idle just right so attempted to adjust the valves. Bad sign when you stick a telescoping magnet down the pushrod tube and pull this out!
Head of the valve had taken some punishment as a result.
mackaymanx ·
Add to this cracks between the valve seats it was time for a change.
mackaymanx ·
Successful viscous coupling test
Scottkombi ·
Brent,
Im a bit confused (nothing unusual there) - was the valve issue with the original VW motor or the scooby motor?
Whee did you find that other syncro? Show us more pics!
Cheers,
Scott
mackaymanx ·
Valve issue was with the original WBX motor, the other syncro I picked up locally.
Base model transporter, not a Telstra van as it has seatbelt mounts in the back.
Scottkombi ·
Brent,
Nice collection
Do you know Hamish from Mackay way somewhere?
He has a Westfalia roof on an ex-telstra panel van with raised suspension and a bigger motor (2.5 VW donk I think) plus he has a green high roof monster truck with 31" tyres.
There cant be too mnay syncro nutters in your town.
mackaymanx ·
Ran into Hamish along time back, probably 5 years ago before I had a syncro and was cruising around in my manx.
Didn't know he owned the green monster but I have seen it once on the road.
There is another syncro up this way that pops up now and again.
mackaymanx ·
This is it.
Scottkombi ·
I dont know that one - but it looks real good being a Caravelle GL syncro it has all the goodies including power mirrors I see.
I also know Bruce Black from Rockhamption with his 1.9 VW turbo diesel syncro of mid blue colour. They are such rare vehicles you usually spot them fairly readily.
Did you get the new scooby motor in the 88 syncro?
mackaymanx ·
Back here again, to finally answer you question no the 88 is still motorless. I hasn't help that I pinched conversion parts to get my other syncro up and running.
But I have had some progress, picked up a poptop today. Needs a lot of TLC but fixable.
mackaymanx ·
Will have to do some mods to it because there is no way I'm cutting this big a hole in the roof of my synco.
Scottkombi ·
Thats the same hole in my roof although a slight bit smaller as mine is a recent version of the camperize design and has a slightly different rear tray but still this conversion is great as it doesnt cut out the front safety cell and mine is still stiff even after a fair bit of off-roading up rocky trails and on corrugated dirt roads.
Im sure yours was a lot cheaper than mine to buy though.
mackaymanx ·
Finally some progress after doing conversions on two other vans. Sump, headers and engine mount on it way from Smallcar to replace the ones I borrowed for the other conversion.
Decoupler finally installed, think I will spend more time plumbing in the switch than it took to install this.
Engine is half prepped.
head gaskets, timing belt, water pump, coolant bypass, crank and cam seals are done. Waiting on the sump, headers and mount to turn up. EJ252 running EJ251 injection system with 105K km on it.
mackaymanx ·
Well the sump and engine mount turned up on Friday so some work could get done.
Smallcar seem to have changed the way they make their pickups and have gone to a brazing process.
Had to do the usual clearance around the water pump.
But this is different, never had an issue here before now. Sump overlaps here and sits on the oil pump, had to shave it back so it was under the plane of the sump.
Installed
Engine mount was not as good as usual and was a little out. This pulled together but basically twisted the centre section a little. Paint is crap as you can see here. Bits were flaking off as I was pulling it out of the bubble wrap. Powder coated over unprepared steel.
mackaymanx ·
Check the sump for casting sand, I found a few spots hiding up under the lip. Also sections of the inside look like the are peppered with little black spots, again this is casting sand. Most can be removed with a good blast with an air gun and most of the rest with a scriber and air gun.
mackaymanx ·
Here is the coolant bypass on this engine, seems every time I do an engine I end up with a different way of doing it.
Elbow on this end is from the power steering return line off a Liberty. There was a nice port off the coolant manifold just there in the background but it was too close to plumb in.
Nice port here to come out of the manifold, put the temperature gauge sensor in here while I was at it.
Proper terminal for the sensor. Plastic cover can be scavenged off the earlier 2WD Hilux Utes.
Scottkombi ·
Awesome detail in your work.
This engine should last a long time.
Hope the gearbox can handle it and last as long.
Did you get a speed sensor worked out from the dash pod speed sensor?
Cheers,
Scott
mackaymanx ·
Looking into trying to use a Subaru gauge cluster this time around, so the speedo sensor is not the best option for this one. Have trialed the Subaru cluster in my Red Caravelle and it is working well. Ordered a SmallCar sensor which I mount my own way up high away from the road grim.
mackaymanx ·
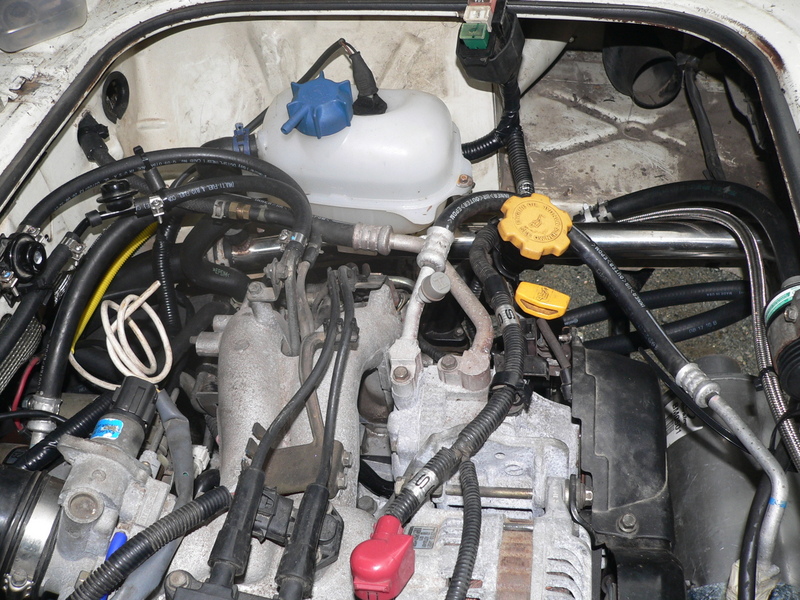
We I've managed to get a bit done, engine and gearbox are in.
Yeah what a mess! But this ran like this, well a least it did after I remembered to earth the main relay.
Now looks like this, still more work to do but I can see the light at the end of the tunnel.
mackaymanx ·
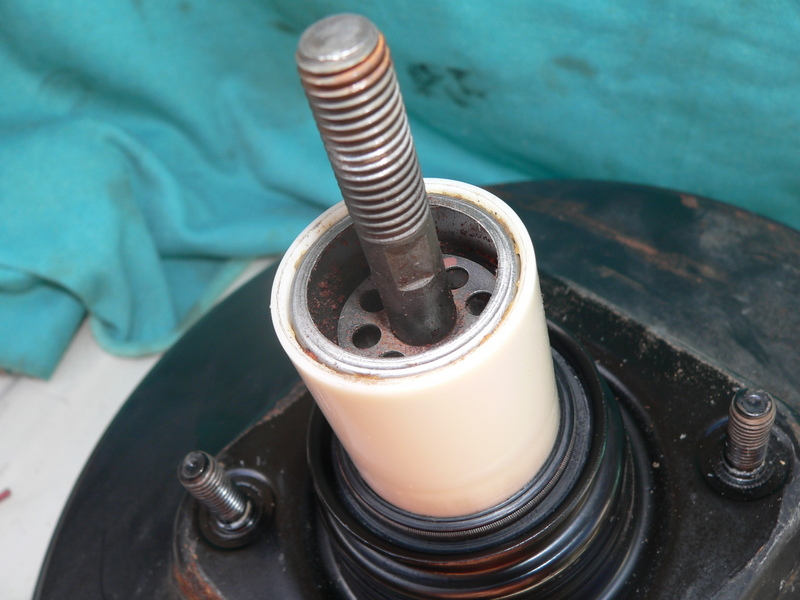
Well my BMW E30 brake booster arrived this morning, here is a comparison to the stock booster. Note the BMW booster is thicker between where the master cylinder mounts and where the booster mounts to the frame.
M9x1.0 thread on the VW booster
M10x1.5 thread on the BMW booster.
Comparison of the clevises, BMW on top.
This is the felt seal/filter from the VW booster.
This is the BMW booster, there should be a filter here but has disintergrated with age. As the booster works, air flows through here and eventually ends up at the intake manifold.
The VW filter installed in the BMW booster, section removed to let it fit.
mackaymanx ·
This is the VW clevis tapped out to the M10x1.5 BMW size and trial fitted, rod will need to be trimmed back as it will interfere with the brake pedal.
Clevis fitted, rod trimmed and adjusted to the correct length. That is the prep on the booster finished, install later.
rocknrob ·
Nice! i have to do something similar...I have BA ford front brakes but the booster lets me down...maybe i'll cheat and copy you!
mackaymanx ·
I went the Audi/G60 route.
mackaymanx ·
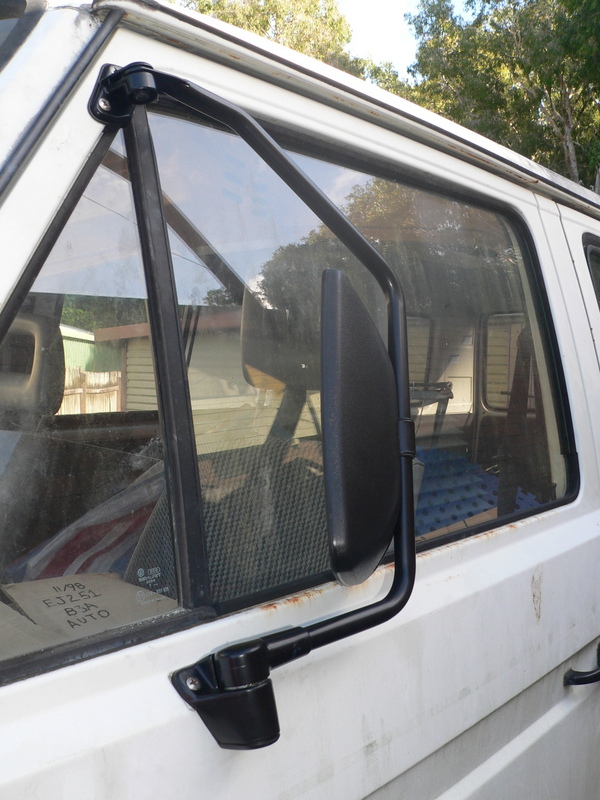
Got one of my LT mirrors installed, run out of rivnuts/nutserts so the other side will have to wait. Plus I've run out of the correct screws.
This is the mirroer folded back(not the best angle to show how flat it goes)
Scottkombi ·
Very nice work and great detail for others to try and follow your conversion leads.
Such as me 🙂
mackaymanx ·
These are some of the parts used-
Power steering resevoir - VS Commodore(and similar)
Hose power steering resevoir to pump - Mackay CH3291 - OEM 92075417
Hose power steering return pipe to resevoir - Mackay CH4045 - OEM 92050721 - VT Commodore
Hose radiator to thermostat housing - Dayco 71035 - Gates 21201 - Chevy/GMC - ordered from eBay are they are from an American vehicle.
Air cleaner is Commodore mixture of VN,VS. Joiner is modified Commode air flow meter. Intake pipe is from 1990 to 1994 Liberty.
Fuse holder is from early Mitsubishi Pajero(at battery terminal), this goes between the alternator and to starter terminal/B+
Modify to this and upgrade the fuses to suit the alternator you have(120 amp for this install), 30 amp supply to ECU etc and supply to air con system. This style holder can also be found on earlier Toyota Camry etc.
mackaymanx ·
This is the SmallCar VSS mocked up on the transaxle while it was out.
Set up a bit better.
And installed.
mackaymanx ·
These are the clutch mods I am making on this.
This the plastic supply line which has to be shortened by about 50mm, use a heat gun to form a new bend in the line. Go for gentle bend this is a bit sharp but will be ok. Salvage the banjo fitting, use the heat gun to soften the end of the line and push it in.
Got caught out here, just a little tight going together and it picked up on me. Was not expecting trouble with a new genuine vw slave cylinder, but it cleaned up ok after some cursing and swearing.
mackaymanx ·
Pedal mods are a bit more involved. The clutch slave is designed to have a 16mm(5/8") master cylinder but the T3 master is 19mm(3/4"), unmodified this can result in over extension of the slave cylinder leading to failure of the cylinder. There a three solutions to this-
1) resleeve the T3 master 5/8" - too much work and you end up with a one off part which is expensive and hard to replace.
2) spacer on the push rod to limit travel - this is what SmallCar supplies, cheap and nasty(not very happy with how it works)
3) change the pivot length on the pedal which limits the stroke on the master cylinder - one off mod which lets you use an unmodified master cylinder(easy to replace)
I have gone with the third option.
This is the pivot arm in it's original position already clearenced to be moved back.
Moved back about 10mm
Spacers under the master, about 11mm.
mackaymanx ·
All together, extra spring is there to keep the pedal pulled back against the cruise control switch.
There was a little wear in the pedal/clevis so I went up to a 3/8" (9.5) clevis pin from the stock 8mm.
mackaymanx ·
This is where the booster has clearence problems with the top bracket.
Here is the paint transfer off the bracket.
This is after some cutting and hammering, this tweeked the bracket slightly which of course made the bolts hard to get back in.
Back together with the steering column brace modified to miss the brake hard line.
mackaymanx ·
This is the rest of the clutch pedal modification. Push rod had to be shortened a little.
Had to do some clearancing here on the brake pedal boss as the repositioned clutch pivot arm was rubbing on it. Note this has nothing to do with the brake booster conversion just the clutch mods.
Scottkombi ·
It seems like a fair amount of work here for this mod.
I heard there was some bloke in the USA that had another mod that Small Car were also looking into to eliminate the clutch throw issue - I just couldn't find what it was on theSamba.com.
mackaymanx ·
Once you have done one and know what has to be done it is not that involved. Most difficult part is pulling the pedal assembly and getting it back in.
mackaymanx ·
Here is the RH snorkle modified to fit on the LH side. Remove the original lugs with a knike to break the heat weld and fit to the opposite side. Riveted and Sikaflex.
Both the lugs with the rubber mounts attached. As the snorkle is designed for the RH side it ends up at a slightly different angle and lower down so it can fit. There is also some self adhesive foam in several places where it is up against the body.
Fitted to the body, the tabs are at different heights on the body Rh to LH side. This is because they use the same rubber mount RH and LH sides but it is offset one way.
mackaymanx ·
Finally got the plumbing for the decoupler finished and the switch installed.
All the lights working with the diff locks and decoupler engaged.
But this is going to need a lot more work, this is so brittle I doubt I will be able to salvage it.
nils ·
Great to see this moving ahead again, I really like that you took the time and effort to move the snorkel to the other side for the subi motor
Scottkombi ·
Some plastic welding and some vinyl paint will make that locker panel come up like new.
Judging by your work to date - I am sure you have the skills.
You cant beat 3 knobs - I only have 2.
Hence, I have knob envy 🙂
mackaymanx ·
nils wrote:Great to see this moving ahead again, I really like that you took the time and effort to move the snorkel to the other side for the subi motor
I'd been trying to work out the snorkle for awhile and decided to try and get a diesel one form overseas as the diesel uses the lefthand air channel. Then I found a post on theSamba where they had modified the RH one to the LH side.
I then used that idea and did it a slightly different way. Photos show how they did it.
nils ·
Scottkombi wrote:Some plastic welding and some vinyl paint will make that locker panel come up like new.
Judging by your work to date - I am sure you have the skills.
You cant beat 3 knobs - I only have 2.
Hence, I have knob envy 🙂
I think Scott is right... not enough knobs😂
I mean about the locker panel. All the interior parts are ABS, welding with some acetone slurry may get you 90% there
mackaymanx ·
Managed to finally get my engine to run sweet today, always used to stumbled and stalled on startup the first few times but would then run ok. Check engine light was always on but I couldn't read any codes.
Had a spare Impreza loom for an EJ201 tucked away so I broke it out and stripped it down. Swapped over my ECU, Immobilzer etc and wired it into van. After I chased down a missing earth it now runs smooth as. Starts properly and no codes.
This of course means I've stuffed up somewhere and have to strip the loom I have installed out and find where I went wrong.
Scottkombi ·
Nice work on the snorkel.
I quite like this version of a snorkel from Sebastian who lives in the red centre of Australia and clearly needs the dust extracting ability of this version of a snorkel:
mackaymanx ·
The old faithful Donaldson Pre-Cleaner, cleaned my share of those when I worked underground.
Had some success with my wiring, turned out to be a missing earth which told the ecu it was a manual and made the diagnostic plugs work. Hence the fault code and my inability to read them. Test it out tomorrow.
mackaymanx ·
Did my test today but still had the starter signal and the Inhibitor/neutral mixed up. Things you get when you swap an automatic loom to manual.
All good now starts up and purrs (OK it's a bit of a growl with the exhaust on it at the moment.)
Scottkombi ·
Great stuff.
That wiring loom is a nightmare - there is no way i would have attempted to shorten it by myself.
Just hooking it all up to the right places was a big task that worried me until it was all done.
I still get a code from my computer looking for the auto signal input - cant work that one out.
What air filter box did you use?
mackaymanx ·
Air filter box is from a VS or similar Commodore, they use the same element that the earlier Libertys. Find an earlier box as the later one have an air temp sensor in them, you either have to leave it there or plastic weld the hole up.
mackaymanx ·
You can tell the autos that they are manual with an extra earth to the ECU, you just have to change the inhibitor/starter/neutral wiring to suit.
This is partly where I went wrong on this loom. I have used this ECU/Inhibitor/Key from an auto Forester (1998) in my Red Caravelle (manual loom 2003 Outback), it worked perfectly and my diagnostic cable showed a manual ECU with no fault codes.
Scottkombi ·
I noticed on the wiring diagram that the wire that went to the Auto box was the same wire that goes to the speed sensor.
I cant earth that one as it goes to the speed sensor now only.
There was a Pink/ black wire that also goes to the auto yet routes off to a connector which is now not used. That whole pink/ black wire went with the auto wiring being removed.
mackaymanx ·
For the autos the speed sensor is in the transmission, so the transmission control module sends the vehicle speed to the engine ecu and the dash. While on the manual is come straight from the gearbox to the engine ecu and dash.
An extra earth has to be added to the ecu, B25 on mine. I remove the auto wiring from the ecu plugs and use a tail to reinsert it in the proper terminal and then wire it into the earth(usually black/blue).
I done know what loom you have, so I can't guess what colours are for what. What is it out of?
Scottkombi ·
This is my wiring harness which has been drastically shortened, plugged in and works great except for the code that is searching for the auto transmission input.
mackaymanx ·
Diagram you show is for 2.2 to Vanagon which makes me suspect that it is for an American spec engine.
I may be able to help but I need to know what engine and what it is out of.
Scottkombi ·
Sorry the post kept getting deleted as I added photos.
I didn't use that diagram but it gives an idea.
It was from a 2000 model Subaru Liberty Wagon - Auto.
USDM manual are at top, general market are further down the page.
Scottkombi ·
Thanks Brent
mackaymanx ·
Got the servo for the cruise mounted in behind the RHR light. Using a unit from a Impreza, would have prefered the electric unit from a Liberty/Outback which I have used before but haven't been able to source one yet.
mackaymanx ·
Decided to get brave with the dash/gauge cluster. Gen 3 Subaru gauges and double din mount from a Commodore.
Bizarre ·
Great work
Will be watching with interest
mackaymanx ·
Put new universals in the driveshaft, the ones I got were greasable so I modified the yoke so the nipple was accessable. I will have to drop the shaft to grease them but at least I can do it and it is not a job that has to be done often. Got some bungs from Clark Rubber to keep any water out of the flange.
mackaymanx ·
This is where I am with the dash. It is a bit boxy but I still need to get some pading and cover it properly. May redesign it later but this will do for now.
I have had this going in my red caravelle before I sold it, so speedo, tacho and temp gauge all work. But need a module for the fuel gauge and some of the warning light want to see earth rather than a +12v.
Scottkombi ·
Nice job on the uni-joint - I did a similar thing and used a Hardy Spicer version as it had a grease-able nipple which was altered to be accessible and grease-able as required.
Not sure on the dash just yet but it will provide a lot more info for you.
mackaymanx ·
I'm not sure on the dash either, but if it doesn't work out I have 2 spare complete dashes to replace it with.
mackaymanx ·
Made up an alignment tool for the drive shaft, got some laser pointers off eBay (6 for $15). Got extra in case one dies on me. Stripped it down to fit the magnetic base I already had and added a switched battery pack (Jaycar @ $2.75).
mackaymanx ·
At the other end I needed something to line up to, used an old car speaker magnet. Machined it so it centralized on the flange and added a plumb line for reference. Stick a bit of paper under the plate for the laser to shine on.
mackaymanx ·
Set the laser on the flange and spin it, then move it across to reduce the circle it will scribe down to a point as best you can. Now you can see how your alignment is.
mackaymanx ·
A bit of a warning and information about lasers, 1 mW are the legal power laser in Australia because you can blink fast enough to prevent damage to your eye. Above 1 mw permanant damage is possible in literally the blink of an eye.
A sample was tested and out of the 41 tested 1 was of legal power with one testing at 112 mW. I ordered 1mW but they are labeled at less than 5 mW, so use with care as you don't know what you will get.
When you installed the gearbox/ engine was it much out of alignment with the front diff/ VC?
All I could do was measure and string line it.
Seemed to work out fine though - no vibration - nice and smooth.
mackaymanx ·
Alignment was out 10-15mm(where the laser shone at the front diff) for the gerabox, I was able to adjust it out on the smallcar mount as the holes are slotted.
Front diff was ok.
Scottkombi ·
I have the smallcar mount so i might check mine again.
My front diff has never been out so it should make a good reference point.
mackaymanx ·
T4 brake install in progress, handbrake still to be finallised. I did it on the Kombiclub site as that is where the discussion was started about this brake conversion.