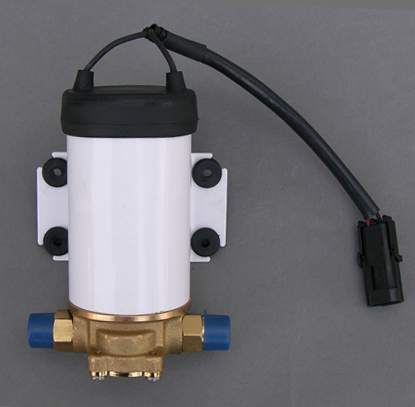
Stage 1 of this project will be to get the oval back on the road and registered.
Initially I wanted to get it going in stock form, but despite having the rear drums skimmed and new shoes, and a clean up of the fronts...there was no pressure still after bleeding. M/c was probably shot so I decided to replace it with a dual circuit unit (Type III in this instance).
Before you worry, I am not going to wreck the old oval - I love it and will restore/modify it how I see fit. For those people think "why not turn a later, less rare beetle into a street/strip project?".....well, because:
- this is the car I have and this is the one I want to keep
- the oval provides a super solid base which will save a lot of work in the long run if I started with a crappy base
- I'm inspired by the DRKC cars in the US and want to build something similar (eventually).
Sorry to be defensive, but it gets to me when people have a go at others for what they do with their cars - if you don't agree, feel free not to look at this thread....however in the mean time I just want to get it on the road.
So, back to the project - new master cylinder and dual reservoir to go in along with a 2in narrowed beam which I pick up next week. I was going to keep it looking stock for a while but since I had to start work on the m/c etc I figured I may as well start the "upgrades".
[ Edited on 2-10-2007 by Dasdubber ]
Dasdubber ·
So the old beam is out, gave the pan a quick coat of paint to keep any rust at bay. The dual circuit reservoir will take the place of the old single unit.
Remember I am not too worried about making this car pretty like the ragtop was (at this stage). I just want to make it 'go' first then worry about the 'show' later.
Cheers,
Alan
byronbus ·
Looking good alan, looking forward to a drive in the old girl...should go a bit quicker than the last time i drove it...not to mention stop, gotta wonder about the last pink slip, brakes past fine...
Proud_Dad ·
Ooo Another Dasdubber project. I'm looking forward to this mate. Good luck with it!
Spellbound ·
Proud_Dad wrote:Ooo Another Dasdubber project. I'm looking forward to this mate. Good luck with it!
I agree...I need inspiration. :thumb
Dasdubber ·
byronbus wrote:Looking good alan, looking forward to a drive in the old girl...should go a bit quicker than the last time i drove it...not to mention stop, gotta wonder about the last pink slip, brakes past fine...
I'll be keeping the massive 36hp donk in there for a while so it will be a slow cruiser until I can save some money for the engine and gearbox upgrade later this year!
In the mean time I just want to make sure it stops okay 🙂
dangerous ·
Bring it on Alan!
kroozzn63 ·
das where did you get the beam from?? im doing a 63 and want to go down a similar path to this baby , is there a particular part number for that typ3 dual circiut master cyc thingy so i can get one , r u doing wide five front ,rear wat brake setup u getting for the front ? where from?
Turbo54 ·
Dont do it Alan, save the old girl from the grinder... leave her as she is and restore her to stock. You dont see many of these around anymore blah blah blah. Looking forward to this mate and remember if you have any questions on parts etc. let me know. I have also worked out how to brace the rear end but I am on dial up for a bit so i will sedn through pics when I can. 😉 Turbo54
Dasdubber ·
Cheers for the encouragement guys :thumb
With regards to the front beam - I ended up ordering one from Custom Offroad in Brissy. They narrowed the beam 2inches, added adjusters, modifed the shock towers with flat plates on the inner side to avoid body rubbing, narrowed the tie rods and spring packs/leaf springs (whatever they're called).
The rear brakes will be upgraded to wide 5 type III drums and backing plates when "stage 2" of the project starts. I intend to use the Vintage Vee Dub front wide 5 discs which I have my name down in line for (hopefully they will be ready soon). They do not increase the track, and supposedly are engineered already (will have to go through a QLD engineer too though but the ground work will make it easier for me to get them approved).
I'll have a look at the master cylinder part number at home - a type I would have worked but the increased bore of the type III (within reason - you don't want to go too big) will help. I'll report on pedal travel and subjective braking force required once it is all up and running.
Cheers Heath (re. drawings of rear end bracing) - I'm always interested to see what other ideas people have!
Thanks
Alan
66deluxe ·
Go for it Alan and knowing you you will probably have it done before me. But mine will be ready for the warwick drag meet. Cheers Damo.
VWMA Editor ·
The VVDS front disc brake kits have just been finished. I spoke with Michael today and I'll have my kit at the end of the month. Looking forward to bolting them on.
VWMA Editor ·
Picture of the VVDS wide 5 disc brake kits for King and Link.
kroozzn63 ·
how much is a kit like that?
bond ·
yeah true - i wouldnt mind one of those kits too... ta
nick
Dasdubber ·
Sweet - hopefully mine aren't too far away then!
You'll have to double check with VVDS but just under $1K from memory for the kit.
After incurring the cost of bringing in CB discs for the ragtop (front and rear), by the time you add in shipping and duty it cost me around the same (for front and same for back).
vwtyp2 ·
how much extra width does that disc brake kit add?
good luck with the beetle btw.
sounds like the path I'm slowly headed down with my '54
Dasdubber ·
vwtyp2 wrote:how much extra width does that disc brake kit add?
\
supposedly zero change in track (width) which is attractive as all other kits to date pretty much add at least 1inch and up to 2inches total.
5PL1TDCS10N ·
Oooo this is going to be a scorching thread! All the best Alan...no doubt it will turn out awesome!**grabs popcorn, large spiked coke and watches eagerly.
W🙂
whatnow ·
any idea what the VVDS wide5 kit weighs compaired to stock drums?
i was thinking about dual circuit mastercyls in early cars and was toying with the idea of opening up a orig metal header tank, adding a 3/4 depth divider in and two tubes out of the bottom. (i never got to the point of sticking my head under a car to check if the 2 outlets would fit though). just a thought.
henry.
btw looking foward to following this one.
[ Edited on 17-1-2007 by whatnow ]
vw54 ·
there about 10mm narrower
57oval ·
is that 10mm overall or each side?
beerdoc ·
Well ok al .I will settle to watch an oval resto :PBUT
I really want too see the the D/Door get started:thumb
Cheers mate and I am sure you wont let us down
:beer
Dasdubber ·
Don't worry splitty fans - I haven't forgotten the resto of the double door.
If business was a little better I'd have a carport and have started on the panel.....but for now it will have to wait patiently 🙂
It's funny you have a new perspective of cash flow when you own a business - you start to realise very quickly all the non-essential items you buy in your life!
Don't feel bad though, hopefully in a few months all will be sweet!
ren ·
Great another members ride novel from Dasdubber, which will keep me entertained while I'm overseas, feeling home-dub-sick! Lovely car Das.
sinecure ·
Looking forward to following this one, and congrats on the cover/story in VWMA, really did justice to all your efforts.
demon ·
About time you started on the oval.Looking forward to another excellent result/tuff beetle!
Cheers
Damo
Dasdubber ·
Hey Damo - yeah took a little time but funds are tight! Looking forward to getting it rego'd soon but there is a slight hiccup with the narrowed beam that may mean it will miss dubs to the pub (away camping next weekend so time is running out).
063bug ·
.... as always another professional project is about to put us all to shame again.... go Das... as always, only a phone call away and about 80kms 😏
Dasdubber ·
Cheers Alan :blush
PS No need to worry - this oval will remain an ugly duckling for quite some time (at least until I complete the performance upgrades)
herbsta ·
If there was a DasDubber t-shirt i would buy it and wear it proud.... another project, you little beauty. Looking forward to getting online now and checking out your progress.
Well done on the past projects, nearly sold my kids to get my hands on them when they were forsale.... All the best and keep up the great work
Herbsta..
Dasdubber ·
Cheers Herbsta - stay tuned......
And splitty fans, fear not, I haven't forgotten about the double door panel - that one will be interesting to watch!
Dasdubber ·
After a false start (supplied with the wrong master cylinder because it was in the wrong box)...I managed to get the type III m/c into position and reused the existing brake lines. Remember this is to get it moving and registered - when I upgrade to discs I will run all new lines including front to rear.
Reservoir is dual circuit (obviously) and although it is a fairly rough installation (in my books)....just remember the primary focus on this beetle is "go" rather than "show". That may come later if I still have the motivation to do a full body off once I am happy with the performance. 🙂
Dasdubber ·
Here was one of those "oh crap" moments (but add a few more expletives)....kicked the near full bottle of brake fluid.
D'oh.
Dasdubber ·
Here is a beam update - 2 inch narrowed adjustable unit with flat inner shock towers.
Adjusters look like they will need to be repositioned as the height is way to high even on lowest setting.
Beam came back out tonight.
Dasdubber ·
Well you can probably guess what wheels I will be running....new 205/70 15 Firestone Destination. It is a pretty low end tyre on the rear but funds are tight so I had to compromise.
Eventually I'd like Erco's and slicks so it won't make too much difference for the strip.
Michelin 145 XZX tyres are for the front.
Dasdubber ·
Here are a few random pics of the oval.
Hopefully more progress next week (going away for the long weekend so no updates for a while) 🙂
decked dubby ·
Very nice work mate.........always interesting, always top qual.
Octa ·
Looks great.
What is that in the window?
❓
[ Edited on 24-1-2007 by Octa ]
063bug ·
I recognise those wheels......and haven't they had a history :P
Dasdubber ·
Indeed they have Alan - who knows what they will end up on next!
Octa, the thing in the window is a "bee catcher" - kinda a crude old school way of sucking air directly into the cabin when the window is closed. There is a little slide inside you can open/close to dictate the amount of air flow. Haven't used it yet (had it laying around for years) so I'll see how it goes soon!
Picked up the amended beam today so hopefully next week I"ll get that bolted back into position.
bond ·
amazing how different the colour of the body looks, the last photos looking almost white.
lookin good alan. question - will you use the type 3 dual circuit m/c with discs? - am thinking ill go a similar way.
nick
Dasdubber ·
Yep, I will eventually be running discs up front (wide 5) and wide 5 type III drums on the rear.
I have been assured it will be up to the task with the slightly larger bore than the type I m/c.
Dasdubber ·
Finally got the beam back into position after being away on the long weekend. Much more respectable ride height now!
I have to get some more lugs to suit the brms so hopefully the oval will be rolling on its new shoes on the weekend (need to bleed the brakes after the new m/c went in as well).
squizy ·
I have no idea where you find the time Alan. Good job. Looking forward to watching the progress.
Octa ·
I agree with squizy. Makes me think that either you don't sleep or you are so good mechanically that the work that you do to your cars take 1/3 the time that it would take normally. Maybe you have super powers like thos people in "Heroes"... wait that's it, I spent too much time watching TV after the kids go to sleep, that is why I can never finish anything....
Stance looks great. Can't wait for a side on shot.
Dasdubber ·
Thanks guys - you are both right....time is very limited especially with spending two days a week away from home for work (as an employee for someone else) and also running my own business on the other days.
Most of my work occurs between 5.30-7pm then 8-9pm (no noise though) plus weekends. I have to be careful to make sure I still spend time with the love and kisses though as its all a careful balancing act 😉
DubbinDan ·
Looks amazing. I love stock rims on a lowered bug - esp when there's lots o hp in the back. Sleeeepah
[ Edited on 2-2-2007 by DubbinDan ]
bond ·
do you really think you need a break between 7pm and 8pm?
hehe nice work alan
nick
Flintstones ·
Dasdubber wrote:I have to be careful to make sure I still spend time with the love and kisses though as its all a careful balancing act 😉
I know where your coming from, it definatetly is a careful balancing act!!
It's good to see that your family are still a major priority first.:thumb
Cheers
Dasdubber ·
Fairly productive today - managed to:
A) fix the indicator arm (a flip switch was previously rigged up under the dash to activate the blinkers);
B) fix the LHS headlight fortunately with a NOS bulb bought off this forum;
C) Modify the front dust caps so the BRM centre caps could fit (see pics below);
D) Fitted the new Berg shifter;
E) Fitted the new Empi steering wheel (sits a little too close to the driver but will leave it as is for now);
F) Have a surf with a good mate this morning, drove to brissy to pick up some parts off my brother in law (thanks blup58 for those bits and pieces), spent some time at the beach with the wifey, had a swim with the dog (after taking her to the vet)...had a few beers, a nice dinner and now settling in with a bottle of wine.
One of those bloody good days with no dramas/mishaps/hassles! Life's good 🙂
[ Edited on 3-2-2007 by Dasdubber ]
Stanley ·
Good to here Allan. Nothing worse than 3 steps forward and 2 steps back.
Keep up the good work
Dasdubber ·
Okay, hosting the pics on manxclub gallery so hopefully shouldn't have probs uploading.
Sasa (my pooch) supervising again.
Dasdubber ·
NSW plates are from when it was last registered 2 owners ago.
Dasdubber ·
Owners of BRMs who want to run them on stock drums will know the centre caps won't fit. This procedure only took about half an hour for both sides.
Here is the spindle and lock nut as per normal:
Step 1) With an angle grinder,trim the spindle threads down to the lock nut.
Step 2) You need to hammer down the dust cap flat.
Step 3) Couldn't take a pic whilst grinding, but you need to trim around 3-5mms (each spindle seems to be slightly different) from the inside lip of the dust cap.
reub ·
Very cool dude....:thumb
Just as well I have decided to hang on to my oval. I've another project like this to look forward to.
Dasdubber ·
Step 4) Once the dust cap goes on, the inside of the cap should pretty much be within ~1mm of the lock nut.
Step 5) After bolting up the BRM (but before putting the centre cap on, you should be able to put a straight edge across the rim centre cap opening - the dust cap should not protrude outside the straight edge. Cap goes on and all is good.
On the LHS, you'll have to pull the speedo cable in so it does not stick out of the cap - a dob of silicone will hold it in place as you cannot fit the circlip on.
That's it for now - hopefully will bleed the brakes and get the tank back in tomorrow with new rubber lines and filter etc. Remember....not pretty for now, just functional!
beerdoc ·
good stuff Al
I love to see atthose little hints
Some times its the little things that you cant get your head around
:beer
66deluxe ·
Looking good Alan, looking good. Hows the hammy?
Octa ·
Nice. hey Das, didn't you have a Subby Liberty at some point? What happened? Was the Mitsu 5 year warranty to hard to resist?
Dasdubber ·
Cheers guys. Hammy is good Damo - back to surfing so I'm happy 🙂
Octa we had to sell the suby a while back to help fund the setup of my business (Pacific Hearing - plug plug)....the repayments are a lot less for the outlander than they were for the liberty! I loved it though and would own another one some day.
Back to work now 😵💫
Dasdubber ·
Well tank went back in today and fired her up. Fixed the drivers door check rod and a quick running repair to the passenger outside door handle. I had a good condition oval era handle to replace it but I guess the 54 is different to other models 🙁
Brakes are causing me frustration - after installing the new m/c and bleeding the whole system, I still don't get any pedal pressure (ie. the brakes don't work at all). Possibly a wheel cylinder is busted - may have to do some more research on that problem.
So now I have to get the tail-lights working and horn - slowly but surely getting closer to having it rego'd.
LUFTMEISTER ·
check your hard lines as they can clog with gunk. ran a pipe cleaner through mine and also your rubber hoses also can swell shut with age. you probably have already done all this but can't hurt.
koolkarmakombi ·
Try flushing from the furthest point back to the reservoir, use a 50ml syringe and push the fluid back up through the M/C. Then do all the closer ones. Flushing up through the system usually removes more bubbles. The best other tool if you dont have access to a syringe is a cheap pressure sprayer modded to squirt the fluid under pressure. Have to be carefull not to froth the fluid though.
Luck
kkk
ps nice work on the BRM's
063bug ·
Looks good with the BRMs and being lowered.....
Check all the hard brake lines for any oil spots (leaks) and replace all the hoses (if you haven't already) as the old ones will swell due to age when you put pressure on the pedal. You only need the smallest leak or smallest expansion of the hoses to get the feeling of no pressure on the pedals. When checking for leaks, check all your mechanical joints on the system for any "wetness" and also look on the back of the brake drums around the slave cylinder mounting points... S#!tty job but you gotta be able to stop unless you want to be the lead car 😂
byronbus ·
That was the original rego, hadnt been unregsitered til i sold it. I have the original rego plates in the shed. Looking good, cant wait for a ride...
Dasdubber ·
Good stuff Bruce - hopefully you'll get a chance to have a drive soon!
Cheers for the pointers on the brakes guys - I might try changing the rubber lines and see if that makes any difference.
063bug I had a good look for leaks as that was my first thought - no evidence of any drips etc inc the main line inside (front to back). I'll let you know once the problem is solved!
Alan
Dasdubber ·
Of course when you try to do things on the cheap, it costs you more in the long run.
The plan was to try and reuse as much as I could (brake wise) to get it on the road then upgrade to discs/type III rears soon......but despite stuffing around with the brakes for a solid day, I ran out of time and had to get the beetle towed to a veedub shop on the coast.
Obviously I can do this type of work myself but in this case I've run out of time! So now all 4 rubber lines had to be replaced, both front wheel cylinders and most likely one new front drum....it should hopefully be fixed. Touch wood I'll get it towed back home tomorrow - registration and roadworthy by Dubs by the Pub is looking more unlikely unfortunately. 🙁
LUFTMEISTER ·
come on AL "you can DO it!"
Octa ·
Great stance. I dig the heart tail ights. I hope you get it back soon....
Dasdubber ·
Beetle is back - wallet is lighter but at least the brakes work. Hindsight is a wonderful thing I guess but I should have just shelled out for the discs straight away. Ah well, thems the breaks.
Few little things to sort out now like horn, tail or brake lights not working (despite getting voltage to them), left headlight parking light not working, rust hole in LHS a-pillar needs to fixed....I doubt I'll get all this sorted in time for roadworthy this week (considering I am away from home two days for work), but I'll try. If not, I'll scab a lift with blup58 in his ghia (to dubs by the pub).
Just finished work for the night - seatbelt are in (almost - need to get a couple longer bolts tomorrow), licence plate light is working again, side view mirror is on etc.
Alan
bond ·
thems the brakes? ha
nick
Dasdubber ·
hehe 😁
Dasdubber ·
Well after a mammoth effort last night (11.30pm finish) I had completed the welding on the lower LHS a-pillar and did a quick fill and prime/rattle can paint. Also installed the 3 point static seat belts, fixed the brake lights, reinstalled the front shocks (needed a shorter bolt) and miscellaneous other jobs that I have forgotten.
Today I took it to the servo for the roadworthy and it passed (just). A quick trip to the dept of transport 10 mins before it shut meant I finally have a registered VW again!
Now just to sort out all those other niggling jobs which I put on the backburner whilst getting it ready for rego :duh
Eventually I'll loose those beautiful indicators but they'll stay for now....I'll wait for stage 2 of the upgrades once the funds recover again.
Alan
dangerous ·
Good effort Alan!
Hope to catch up on Sunday!
kombikim ·
yep, unreal you have managed to finish in time, I am coming up from Sydney in Peach , '54s are gonna be pretty common there, really looking forward to meeting you ,
except for BRMS it looks just like the car I grew up in
Dasdubber ·
Cheers guys, looking forward to catching up with you both on sunday = lets hope the weather is better than currently predicted!
bugboymatt ·
Congrats Alan. Good to see........... I'll keep my eyes open around the coast !!!
bond ·
caught these on the return trip from dubs today.
congrats on the rego.
nick
the front on view isnt so bad considering it was taken in the rear view mirror lol
VWFREAK ·
sweet ride
Dasdubber ·
Hey Nick - thanks for the pics mate! I was hoping you wouldn't crash whilst snapping the photos - I know my bug was getting blown around a bit (not to mention I haven't had time to get a wheel alignment yet).
Here is the bug before I left the goldy:
Here is the oval at the show:
Nice chatting to all the folks I crossed paths with, sorry for those whom I didn't get around to saying g'day to!
The oval made the journey to and from the pub incident free - can't wait to get some more power though 😉
reub ·
Very nice mate!
Really makes me want to get into my 56 that's sitting under the house...hmmm, to many projects 😀
Type3Sicko ·
You can never have too many projects Reub...as long as they see the tarmac eventually, and Purple Haze?...Top stuff mate, individual and creative engineering at it's finest. Which is not to say that Alan hasn't had his moments of genius either 🙂 , VERY NICE OVAL mate, I have enjoyed seeing the progress and finished product shots of your VW's over the past couple of years, how long before you are at the bank managers door again? Good luck with the Notch if you still have it 🙂
Dasdubber ·
Cheers mate, no notch anymore unfortunately - had to sell all my other cars (blue bug, notch plus motorbike) whilst the business establishes itself. I regretted having to let the notch go, but you gotta do what you gotta do sometimes! Short term sacrifice for long term benefit 🙂
Dasdubber ·
No exciting updates, just bolted (sort of) up the extractors to see how much modification is required.
I reversed the direction so the collector now faces forward from which a single pipe will be routed up and over the g'box to facilitate the turbo.
You can see the interference with the crankcase - I will extend the primaries slightly to solve the problems.
I'll tack the extensions in place and then have it tigged by a pro - just need to buy some pipe first.
Last pic for now
Type3Sicko ·
Nice pipe work Alan, Is that the same handy work that did your (old) rag top exhaust? If so... may i have their phone number please?
Dasdubber ·
Yeah mate this is the type IV engine (and exhaust) out of the old ragtop - I sold it with a type I 1916 in it.
CES Racing certainly do fantastic work - not cheap but it's been said a thousand times, you get what you pay for.
Hey mate, why above your gearbox when you could run it under your rear apron and not have the servicing hassles. Adam Debiasi ran his on the drivers side and it worked great, Air cleaner under your guard out of the hot air stream and the exhaust tucked in under the apron. Saves you cutting the crap out from behind your back seat. PWR coolers fit almost anywhere and you could run it after the TB like me. I personally dont like the turbo low and in front of the engine, just seams like a hassle, long pipes and not really streetable. The hot air also blows back over the engine. What about behind the drivers side and intake exiting through the innner of the rear guard to a PWR mounted water to air intercooler under the rear guard and then back up into the tb and then into injection manifolds that Rod Penrise has for sale at the moment? Could be possible. Just make it as easily accessible as possible. I tried but it has bakfired in a few ways and now I wish I had done it a little differently. This would also save stuffing up those beautiful extractors. Also give you room for oils coolers and filters under the pass rear guard. Just have a reallt big think b4 you go ahead.
If you got any questions let me know,
heath
T54
Dasdubber ·
Cheers Heath - that is certainly why I have held off for so long before cutting up the extractors....I am always open to ideas and advice!
I originally thought of having the extractors run in their current configuration (ie. merge facing backwards) however I had concerns of the turbo height in relation to the case for oil return....I was hoping to not have to run a pump for the oil return.
So with your suggestion, at what height would you envisage the turbo placement? Hypothetically, would I run a pipe from the merge towards the rear apron, then position the turbo kinda like the placement of your setup? I think I asked you the question before but can't remember, where are you running the oil return line to (and feed from) - considering I don't have a deep sump, I am unsure if this would be a problem for me?
Having the exhaust in its current config (before mods), would make life easier. I was planning on using one of the PWR barrel intercoolers (4x6) - PWR are based one suburb away from me on the gold coast which is handy. I was planning to run a radiator (small) next to the tranny and an oil cooler on the other side with the intercooler reservoir behind the rear seat, along with the surge tank (possibly unless I find a better location).
I'll have to think this through further, cheers for the suggestions.
PS where did you see the efi manifolds from rod penrose - are they type IV?
Alan
Dasdubber ·
This will kind of picture how the extractors sit in their unmodified form....
The oval won't be as low as the ragtop was so ground clearance will be okay. Thoughts on turbo placement if I rant it backwards as you suggest?
Turbo54 ·
Hi Alan,
There is no harm in mounting the turbo low and running a pump. Lots of people do it and thats what I am doing. A 4x4 accessories shop has pumps for external oil coolers that are fine. The only problem is you dont want to draw out too much oil and suck the turbo dry so I have got a little tank 180long x 30 round that I am gravity draining the turbo into and then sucking the oil form there. I am returning my oil into the rocker cover and letting it drain down the pushrod tubes back into the sump.
When you actually look under your apron there is a fair bit on room undre there to stuff bits + this way you could leave your oil filter where it is.
As for your exhaust manifold, you would have to do a bit of a bend towards the center of the car as the exhaust side of the turbo is on that side and work out your intake plumbing before you start anything but of you base your turbo there and your intakes at the top make up the inbetween.
I used a ton of cardboard, masking tape and PVC pipe to work mine out and I think this all pays of cause you arn't wasting money building thing 2 - 3 times.
I will get under my car and have a think for you,
heath
Dasdubber ·
Thanks again Heath - the filter will be remote mounted anyway as I will be running a spin on adaptor that allow me to take a line in/out to and back from the oil cooler (plus remote mounted filter).
With your "turbo oil drain tank", you don't think the pump will over-scavenge that? I have no idea what sort of flow those pumps push out so the question may be a dumb one.
Turbo54 ·
No they dont scavenge that much, do some research on the nissan GTR's R32's I think they use some kind of pump to suck oil out there diffs into a cooler. This is similar to what you want but they are exy!
Heath
Dasdubber ·
but they are exy!
I hate when I hear that :P
Flintstones ·
Alan, rather than "cut" up your extractors, just build on from the stub pipes that you've already got. It'll be easier, rather than trying to reconfigure the extractors. Even if you sold the extractors, the money you'd get for them would buy you enough pipe and mandrels to build a custom setup for your application and you won't have to worry about drain tanks......
Cheers
RAZ34 ·
Hi Al,
This is the first time I have seen this thread. Car looks good. What times are you aiming for ?
Rod.
Dasdubber ·
Hey Rod,
Ultimatley I would love to reach a high 11 second pass but I doubt I will reach that with the current 2L type IV combo. I am going to have to keep the heads, valves, rods and crank all fairly standard and therefore limit boost with a smaller turbo.....but anyway, time will tell. I am still hoping to have it done by warwick - lot of work to do and too little money but I'll keep trying 🙂
Alan
Turbo54 ·
Any more thoughts with the turbo placement/ Arrangement?
Heath
Dasdubber ·
Heath I am still seriously considering keeping the extractors in their original form (as you suggested) - and running the turbo behind the rear valence (like a hideaway system ala CB performance). I am doing a bit of research on oil scavenge pumps which are designed for a turbo application (ie. damn hot oil) - this is one I found (not in oz though):
Also doing some more research on intake design and plenum construction for a single throttle body application....hopefully once I can work through some design issues, I can start playing around with the actual parts (which I have to save some more $ for as well!).
Alan
Turbo54 ·
Alan,
Ring a 4x4 place near where you live and ask them what they use for a scavenge pump when they fit external oil coolers to there engines / gearboxes. I have heard this would be more than sufficient. remember It doesn't need to be mega pressure as its not forcing the oil into anything just the rocker cover, I will ring my turbo guyand ask him tomorrow what I am exactly using and let you know. I would do the hide away system if I was you, your almost half way there but each to there own. Are you going to make your apron removable with this one? I have been thinking about it with mone. So hard getting it in and out all the time.
heath
Dasdubber ·
Yeah apron will definitely be removable (the original apron is pretty shagged anyway (big dent and crease) so I don't feel too bad cutting it off!
I shall ring a few 4x4 places and get a better idea of oil scavenge pump costs.
Cheers for the help.
I love your new ride. What is the colour? I've come across that colour so many times.
The BRMs and steering wheel are cool and so are the blinds and the roof rack.
As much as I'd like to see a cal-look donk in the car I'm sure you'll do a killer turbo conversion that will have us all drooling over this post.
How do you find the handling with the swinger and the narrowed beam compared with your rag top?
Regards
CT
Dasdubber ·
Hey CT - thanks for the kind words! I have no idea of colour as it was resprayed quite some years before I took ownership and it is not the original colour.
In terms of handling the rag had a swinger too so the rear end is comparable. Apart from the skinny tyres up front I feel the narrowed beam doesn't adversely affect cornering too much on normal street driving (remembering it only has a 36hp engine at the moment!). The rag had a 80mm narrowed beam as well but since I had to run spacers with the ET52 17in wheels, it sufferred a bit in the handling. Damo who now owns the car took the spacers and 17in wheels off and runs 16in Fuchs and it handles a heap better than when I owned it!
My primary aim for this oval is to go fast in a straight line....I'm slowly working through the details of the turbo and EFI (see drag section if interested) and when I finish the research and save some coin, I'll start doing some actual work! Hopefully it will be up and running by warwick!
whatnow ·
ct i think the colours you are thinking of are mandalay ivory on 54/55's and coastal ivory 56/58 or surfers white 56/57.
i like those colours... my first car was either coastal or surfers.
henry.
fullnoise ·
My car started off as a similar colour. Mind you, I'm assuming the top coat wasn't the original since it was applied with a paint brush. The picture below shows the japanese tuner-style black bonnet before they even invented the look.
I really like the cream colour/s for a sleeper. Light blue would be my next choice.
I can't believe they actually varied the colour between the model years; it's like Richie Beneau's jacket, as the 12th man says, it's beige, ivory,off-white, cream and bone.
Dasdubber ·
I think I have chosen the colour for its respray (whenever that will happen)....but I'll keep it under wraps until its done!
I won't be painting it though until the drivetrain is sorted - otherwise you have to worry about scratching paint during the trial fits of bits and pieces!
demon ·
This is shaping up to be a ripper of a thread.Can't wait to see how the old girl comes up.I pulled the 2110 out of the Rag the other day,damn main seals,and I'm still amazed at the perfection that greets me under the car.I have to say I am glad I didn't sell it!If you ever need a hand Alan just give me a call anytime.
Cheers
Damo
Dasdubber ·
Cheers Damo. Although I understand if you had to sell it, I was secretly glad you held onto it as I know you'll give it the use it deserves but still look after it! I bet you are glad for the removable rear apron after pulling the engine again!
Although the oval will never be as detailed or as pretty as the ragtop, hopefully the sting in the tail will make up for it 🙂
Flintstones ·
Dasdubber wrote:Although the oval will never be as detailed or as pretty as the ragtop, hopefully the sting in the tail will make up for it 🙂
Famous last words 🙂 hehe
I reckon if you understand detail then it's in your blood, and this oval will be no different :thumb
Cheers
LIFE IN THE LOW LANE ·
Alan give me a call and you can come up to my brother's place(Beenleigh) and have a look at the set up he has exhaust wise and also the intake set up CES did for his car in detail. Might give you the insight into something suited for the oval.
cheers mate:thumb
Dasdubber ·
Cheers Brendan - will have a chat soon!
Dasdubber ·
Nothing too exciting to report - just been putting around in the oval to and from work, my wife loves it but is not overly fussed with the roller pedal (must have sensitive feet?).
Turbo (T03) will be coming from WA shortly (thanks humpty), as well as PWR water to air intercooler from Cairns (cheers Ian and thanks for all the behind the scene help with the thousand questions I ask), plus Sway A Way axles should be here from the US before Easter as well as super diff and heavy duty side plate (thanks Rod Penrose).
Still finalising the gearbox case and internals - hopefully over the next week I'll have that sorted so come easter-ish, it's rebuild can start (cheers to dangerous!).
So no pics as nothing has changed. Wish I had more money - things could happen faster! 🙁
PrettyBlueBug ·
Dasdubber wrote:Wish I had more money - things could happen faster! 🙁
Likewise! :P
Good luck with it all Alan, can't wait to see the finished product!
66deluxe ·
Das i have been reading a lot about a 1971 type 4 turbo on Raby's forum, they suggest not to use ths stock pistons as they cant handle any more than 11psi befor the ring lands collapse and suggest a J&E piston, also the rod bearings used on the 71 crank need to be upgraded due to load points on the crank beeing affected under boost. As for an oil pump i have seen stick shift auto beetle pump used as they supply oil to the engine and also to the tranny to help gear change, with this pump they simply blocked the inlet return from the tranny and used the outlet to feed oil to the turbo and then it could return to the sump after lubing the turbo from all accounts it worked great. Another suggestion is to use a 71mm crank with type 1 journals then the use of a wiseco 94 piston could be used, a 71mm crank with type 1 journals non counterweighted is only $300 US, you don't need counterweights on a type 4 crank cause the are very tough an dont whip like type 12 crank and dont oval the main bearing bores. Something for you to ponder mate. Cheers Damo.
humpty ·
Another TIV!.... Oh my god Alan... When will you learn?..... Huh!... But seriously mate.... Best of luck to you and the project.... If its anything like the last one, this baby should be a load of fun.... As for turbo charging a TIV.... Maybe you should have a chat to Hermann (ADOLF on here).... He's pretty full bottle on making those things make power, both turbo'd and NA....
Dasdubber ·
Cheers for the info/advice Damo and Simon....I think initially I am trying to build this on as tight a budget as possible (without risking it going off like a hand grenade). As I accumulate a few more parts I'll start posting some pics especially as I pull down the current engine to check bearings, change cam etc.
Dasdubber ·
Well as mentioned above (somewhere), looks like I will be leaving the headers in the standard configuration and hide the turbo behind the rear apron. PWR cooler arrived today (thanks Ian) - once I accumulate some more parts I will start working out the plumbing positioning!
Type III drums will adorn the rear:
Dasdubber ·
Well there is a first time for everything....like learning how to weld and paint on the ragtop, I've decided its time to start building engines.
Here is the type IV which was in the ragtop (thanks again to Damo for allowing me to hang onto it!)....prior to disassembly.
Ran out of time today so only got it to this stage:
The plan is to change the cam and lifters, check all bearings, despite the rings all looking spot on, I may consider better rings due to the addition of boost. Until funds improve I figure I'll tinker with the stuff that will just cost me time (like having a go at headwork - ala Daimo (dumone) who inspired me to give it a crack).
It is not going to be perfect (esp since I don't have access to flow bench etc), but I am using this entire engine as a learning process so I am not expecting perfection!
Volksaddict ·
Wow ...little did i know my little baby would get so much TLC ....new i shouldnt have sold it!!!
Great work and look forward to seeing it finished
Dasdubber ·
G'day Ray - wow another owner pops up!
Whereabouts in the time line do you fit in? I know Bruce from Byron owned it before Damo (in Noosa), and before Bruce, a girl named Alice owned it (in NSW somewhere).
It is cool to get some history.
Although I will never be restoring this old girl to stock condition (that is not my "thing"), hopefully you'll know I won't destroy her either (although purists may not like me too much). I say (not just to previous owners!), read along if you like as progress continues, but if you don't like what you see.....it's as simple as not clicking on the thread!
Alan :kiss
beerdoc ·
"It is not going to be perfect (esp since I don't have access to flow bench etc), but I am using this entire engine as a learning process so I am not expecting perfection!"
YE Right AL
You dont know how to do it any other way :beer
Hows self employment??
[ Edited on 15-4-2007 by beerdoc ]
Dasdubber ·
beerdoc wrote:Hows self employment??
Ask me in another 6 months and you'll get a different answer!
To date, a lot more stressful than I ever imagined, even with a conservative business plan/cash flow forecasts prior to setting up....the sleepless nights are becoming far less nowadays :P
Luckily I have VWs (and surfing of course) to keep sane/de-stressed outside of work!
PS How is Daryl?
Volksaddict ·
Alan ..I bought it of Bruce ..stored it in ipswich in my mothers garage ...tinkered with it on visits ...getting it running and rolling ..brakes where locked up when i picked it up ..had to skull drag the poor thing onto the trailer...themn Damo advertised a splitty D/cab , couldnt resist and the rest is history as they say ...I owned it for about ayear .
555bug ·
Alan, why not make your own flow bench? looks pretty easy, i've put together a injector cleaner from similar plans that worked a treat.
Best of luck Stephen
byronbus ·
Good to see her getting the attention she deserves...I would have liked to keep it being a 54, but just dont have the time, dollars or space...
Ray did a good job on the front lawn getting her out, should have helped i guess...
fullnoise ·
Hi Alan,
I saw your old ride in Fast Fours yesterday. It looks hot, well done.
It wouldn't surprise me if your oval ends up in there too.
Regards
Dasdubber ·
Cheers CT - hopefully this one might run some decent numbers one day so the ricers might have to pay a bit more attention to our lowly old veedubs!
Cheers for the history of the car as well guys - looks like it must have passed through quite a few hands over the years. Fortunately there were no 'major' bodge jobs to haunt me 🙂
Stephen I guess anything is possible (re. flow bench), but I am not sure if a home made job would be accurate enough to provide useful info? Even so, I guess I am probably not going to be doing enough heads to warrant spending the time/money to set one up (but who knows down the track!).
Alan
Dasdubber ·
After a few delays (had to get a decent pair of circlip pliars), the rest of the engine was torn down...here is the "big block" of vw engines:
Most of these bits will be reused after clean and inspection. All cylinders sealed well (no head leaks) and piston rings held up well:
Crank and rods will stay....cam will go (dual pattern with symmetrical lift, around 6 degrees of split duration favouring the exhaust...and approx 0.500 lift, 242 duration @ 0.50 - haven't got exact specs yet, but this is close to the mark). Maybe straight cuts but not sure yet (depends if I change the oil pump as well):
Dasdubber ·
Thanks to Dave for the phone call - nice to pick such a "great brain" when issues pop up (turns out the lower half of the case sealed really well and didn't want to split - after some more coaxing it came apart).
Also my sway-a-way 1200 length axles arrived along with the super diff and heavy duty side cover from Rod (Penrose).
Now just have to work out how to get some money before purchasing the Albins gear set - if I can scrape together enough cashola, I'll go full custom 1st to 4th as follows:
1st 3.333
2nd 2.08
3rd 1.44
4th 1.04
3.88 r&p - all selected to optimise the turbo application.
If $ runs short I'll go 1st and 2nd above, but will run kombi 3rd (1.26) and 4th (0.89)....if only money grew on trees 🙂
Alan
reub ·
This all is great to see mate....thanks for sharing the buildup with us all.
Look forward to seeing the car at Warrick.
humpty ·
What Reuben said....
66deluxe ·
Alan you want your case super cleaned, can do this for you at work will make assembly a nicer experience. Also do you have the oil gallery plugs drilled and tapped, can help you out there too mate. Cheers Damo.
Dasdubber ·
Hey Damo - the cleaning would certainly help out a lot! I will have to check re. the oil gallery plugs - I am not 100% sure if they were done on the first rebuild (as I didn't assemble the block myself).....if not, will definitely take you up on the offer and will reimburse you for your time. I might debur the case in a few areas (amazing how many little casting imperfections just break off with a little persuasion).
once that is done I'll see if I can get the case up to you!
Hopefully will be ordering the RAT cam and lifters (plus some other bits and pieces) soon - let me know if you need anything in case you want to combine the order.
Alan
66deluxe ·
No worries Alan, I actually have a CJ series 2 litre case here all cleaned, drilled, tapped and DTM ready, all dimesions/tolerances are stock, I was going to use it for my build then i scored a 1700 W case, which ihas checked out perfect for my build. If you want a possible swap of cases, then no down time for you, just a thought. Also let us know when you are going to order your cam as i want to get a set of KB 96mm pistons and a solid rocker spacer kit from TIV store. Cheers Damo.
Dasdubber ·
Shall do mate - hopefully will order the bits over the next few weeks.
I'll probably hang onto the case for now as I am reusing the bearings (all spot on)....saves worrying about slight variations in bearing tolerances etc. I appreciate the offer though - I'm sure you'll be able to throw together another type IV using that case in no time! Should be able to sell it and recover some of your costs.
Dasdubber ·
Case was deburred of casting marks including the really rough sump inlet (looks like something has broken through!)
After a quick cleanup. Didn't take any pics of internal cleanup areas (nothing too exciting!).
Dasdubber ·
Due to a lack of funds, progress has been kinda slow.
So I decided I may as well do something that doesn't require a bit outlay of $....only time. There have been a few areas of rust (mainly surface) and blemishes that have been annoying me for a while. So I decided to sand them back to check what was underneath (rust but not major).
Had to do a few bits of welding where there were cracks in the bonnet, and all 4 guards plus a few holes in the passenger door (inside handle which I no longer wanted). Finished up tonight with a skim of filler but since I am out practice I didn't add enough hardener so had to scrape most of it off, so called it a night! Ah well, learn from mistakes I guess 🙂
For now I'll just leave it in patches after a bit of primer and rattle can colour....pending time, I might give the oval a full respray (not back to bare metal though) soon.
beerdoc ·
I am glad that some one else does the old not enough hardner #$%^ up
Leave the spots exposed or clear coat looks kind of cool or dare I say it Ratty:beer
Dasdubber ·
beerdoc - it is one the few things that makes me swear and carry on like a pork-chop.....I wasted about 3 hours because of one simple mistake!
Fortunately it was incident free after that...a few more coats of skim filler, more sanding then a bit of rattle can primer and rattle can cream colour paint....finished.
It will stay patchy for now until I get around to fixing the remaining dents and imperfections and actually strip it down to do a proper repaint (not bare metal though, I already found a few bubbly surprises so if I dig too deep it will end up taking me 2 years again to finish it!)
bond ·
suprisingly nice job. well done
nick
66deluxe ·
Alan, your case is drilled and tapped and clean sir. From this to this. Damo.
LUFTMEISTER ·
it's amazing what a toothbrush and a bit of Jiff can do.😏
Dasdubber ·
Damn Damo that looks super sweet! I really appreciate the assistance - as I said before just let me know what you want for your time, be it cash or labour which I'm happy to provide where you need help....we'll work something out!
Now I just have to pull together that cash for the RAT cam, lifters and valve train components....then it can start to go back together! Of course I have to do the headwork as well though - the list is endless.
Cheers again Damo.
bond ·
alan - are you going to get a turbo cam from raby? or is that the same cam as the rat?
nick
Dasdubber ·
Yeah Nick, I will be going turbo cam from RAT - I think I refer to some numbers on a previous post (haven't got exact specs yet).
76bug ·
hows the car coming along?????
Dasdubber ·
76bug wrote:hows the car coming along?????
Well, no money = no progress. But I have been slowly accumulating parts so hopefully over the next month or so I will have my new albins gears installed into the IRS case (converted to swinger), along with the new super diff and side plate etc etc.
In the interim I have disassembled the heads and will start some unshrouding of the ports etc. The order from the US will hopefully be on the way soon (new cam, lifters, rockers, valve springs etc).
I'd like to have it in naturally aspirated form for warwick, but will depend on funds and time - I'll be doing my best!
Alan
Will post pics when there is something of interest to look at 🙂
Craig Torrens ·
how did you get the case so clean............................c'mon tell us the secret !!!
bond ·
there is only 1 - don damo 🙂
looking forward to pics alan!
whats the plans exactly for warwick then - n/a? then sort the turbo stuff for the street/strip afterwards???
nick
Dasdubber ·
Craig - yep, Damo has access to some pretty cool cleaning facilities at his work (aircraft engine mechanic/engineer (sorry damo not sure of your exact title)). I could eat off it but didn't want to get it dirty!
Nick in regards to warwick - I am confident I can get the box ready (thanks to dangerous), and long block built (if RAT gets my order processed sooner than later). I don't think I will have the time or money to sort out the EFI/turbo stuff by then, so I may borrow a pair of carbs and just run it N/A to have some fun. Won't be fast, but at least I will be able to race which is all part of it....I only ran a best of 10.5sec in the 1/8 last year but I had so much fun, I couldn't wait to get back out there!
Dasdubber ·
Well, finally the head disassembly tool arrived so I stripped the heads (although valve guides and seats will remain in place as they were done when the engine was rebuilt for the ragtop).
Here they are before any work began - valves are 1800 size (41mm inlet and 33 exhaust) with 2L chambers:
When the heads were rebuilt, I feel there was too much material removed from under the exhaust valve seat on the short radius...so I will probably expect a dropped seat or two eventually (hopefully not for a little while).
Ports will just receive a bit of clean up and smooth out.
Inlets pre-porting
Exhausts pre-porting
Dasdubber ·
I should now put a disclaimer up and say I am by no means an expert (far far from it) - I have tried to read and research as much as I could about porting techniques and theories and have asked questions of guys with more experience than me (not hard!). I am not striving for perfection with this engine, remember it is a chance for me to actively learn about assembly techniques and familiarise myself with turbo/efi applications etc, as well as porting.
Exhaust port was hard with its sharp bend especially with the guide in place.
I tried to avoid the short radius and spent a bit of time smoothing out the long radius, removing as many imperfections as possible.
I tried to blend the ports into the seats - the deeper pits visible on the right were hard to remove and I wanted to avoid taking too much material away, so they will stay for now.
Dasdubber ·
Unfortunately mine won't be quite as clean or tidy as Daimo's (dumone)....but he did give me some inspiration to have a go (along with dangerous's encouragement). If anyone can see where I have f'ked up or areas I should improve, feel free to let me know as I am here to learn!
The inlet from chamber side:
I opened up the upper inner edge slightly half way down the port as it was visible restriction point - no major mods, again just a slight change and then a clean up:
The nicks on the guids are from the sanding flap wheel only (not tungten carbide cutter), so hopefully it won't cause any major problems. (fingers crossed)
Dasdubber ·
Obviously inlet manifold stud needs repair (stripped out on disassembly).
I do not know enough about chamber design to fiddle with these so they will retain their stock 2L shape - just cleaned the sharp edges in attempt to avoid hot spots.
Dasdubber ·
View down the inlet manifolds showed a lip on the lower edge which potentially obstructs flow.....this time around I spent more time ensuring accurate manifold positioning (would be best to bush the manifolds with say steel inserts to avoid movement and misalignment when bolting them up). I do however now know what position they need to be in when I install them.
Once I was satisfied with the manifold position, I scribed its position on the head mating surface (at least where the scribe could reach):
Fortunately the manifold ports were perfectly round which made this job easier for me - they were 36mm so I could use my old graphics template to transfer the manifold port onto the head:
Using the scribed line in the earlier pic as a positioning guide, the template was used to extend the manifold port shape onto the head - of course this wouldn't work with a non-round manifold port.
Black pen and newly scribed line shows material to be removed and blended into the inlet ports, plus some more smoothing inside the inlet manifolds.
Remember this is DIY home garage stuff so of course these are not going to flow anywhere near as well as a professionally done job = I am happy to make that sacrifice to further my knowlege base...even if it is to justify the expense of a professional job down the track (since I now know how tricky it is to get right!).
More work and hopefully pics on the weekend probably.
Alan
Dasdubber ·
Forgot to say - rules of thumb which I have read include port size should equal ex valve size...and another 'rule' is port size should be 90% of inlet valve (which would equal 36.9mm). Original inlet port size was 33mm before mods, I will take it out to 36mm as indicated above and see how it goes. The turbo should give me some margin of error unlike a naturally aspirated version which this would probably be much more critical.
New Lucas indicators arrived from the UK - still undecided if I will use them but have lots of time to decide as I'll do all the mechanical work before I tackle paint:
dangerous ·
Good work Alan!
hellbugged ·
👍........nice work
humpty ·
Top stuff Alan... Tell me mate.... What sort of valves are you planning to run?
And its good to see you can still get those Lucas seals.... I've got an OG amber set that need them!
Dasdubber ·
Well, finally received all the bits required for the gearbox bits.
First up is the Moore midmount (cheers Damo), Super diff, and heavy duty side plate (thanks Rod P)...
A fair chunk of credit card debt later yielded the Albins gears (3.333 1st, 2.08 2nd, 1.40 3rd (would have been an 8 week wait for the 1.44), and 1.04 4th).
Sway-A-Way race axles (not pictured) have also been sourced so hopefully when Dave (dangerous) gets a chance, the gearbox will slowly come together! In the mean time my dog Sasa guards all my gearbox goodies 🙂
Awesome Alan, I hope the puppy doesnt eat any of those bits!
Dasdubber ·
Yeah that course tooth 4th gear wouldn't tickle on the way out!
I wanted to get some pics of the nice shiny gears before they get hidden away inside the tranny 🙂
humpty ·
Bugger fitting them to your transaxle..... They'd be pretty flash paper weights!!! 😉
bond ·
ooo very nice and clean and shiny!!! getting there! well done
nick
063bug ·
Holy smokes..... so much for taking it easy on this one 😵💫 knew you couldn't only half do a job..... :thumb
Dasdubber ·
Yeah you know me Alan 😉
I will stick to my guns (for now) and not paint it until I get all the mechanicals sorted out....so hopefully for warwick the new box will be in as well as the fresh long block which will just run with carbs and dizzy. After warwick I will start on the turbo integration and EFI upgrade (when funds allow). After all that is said and done, then I may make it all look pretty (but we'll wait and see as plans seem to have a habit of changing!).
humpty ·
Dasdubber wrote:...... (but we'll wait and see as plans seem to have a habit of changing!).
No shit!
:kiss
Dasdubber ·
??
66deluxe ·
Nice photo Alan, now does that feel weird having it back even though only for a little while? Damo.
humpty ·
Dasdubber wrote:??
Kissin' cousin's....
063bug ·
He must've been excited, look how much he was shaking when he took the photo 😂
Dasdubber ·
Well, after a continuing super diff fiasco, the gearbox is finally built thanks to Dave (dangerous) Butler.
Components include (as mentioned previously):
- IRS case converted to swing axle (thanks to Damo for the case)
- 3.88 r&p
- super diff (3rd one and still a dud - thanks to dave for the machining work to get it right)
- 10/15 tooth spider gears
- Albins main shaft plus 3.333 1st, 2.02 2nd, 1.40 4th, 1.04 4th (remembering this is designed for a turbo engine)
- heavy duty side plate
- steel shift forks
- Sway a way axles
I think that is about it. Thanks again to Dave for his persistence with the super diff issue as well as the advice along the way. I can't wait to rip the 36hp donk (well 20.1 at the wheels) and non syncro tranny out and get ready to have this bad boy copping some abuse!
Alan
bond ·
good to see its coming along alan! is the case getting painted as yet? or down the track?
nick
Dasdubber ·
Probably not at this stage Nick - maybe down the track but for now I just have to get things ready for warwick sooner than later without getting pretty 😉
Not that there is anything wrong with that! Just no time in this instance
66deluxe ·
Good to see my old case in use again, looks good Alan. Thats going to love getting abused with the type 4 turbo, yip yah.
Damo.
Dasdubber ·
Thanks again Damo for the tranny case - can't wait to get it into the oval!
Well after a bit of problem with my camera software (now sorted), time to update a bit of progress.
For anyone not frequenting the drag section, during assembly I had some problems with cam to case clearance - after some investigation (during assembly) the cam bolts that came with the new cam and gear were ~2mm too long and thus hitting the case. Easily fixed by grinding them flush with the gear.....however whilst trying to figure the problem out, I had the crank in, crank out, cam in, cam out, crank in etc - and on the last time I dropped the crank in, I misaligned the rear main bearing on the dowel (I checked my scribe line on one side but not the other!)....thus when other case half was dropped in place and pre-torqued to 12ft/lbs (prior to full torque of 25), and of course crank no longer spun.
Sooooo, new set of bearings was tracked down, sealant all cleaned off....and lesson well learnt!
So with new bearings in place, I was sure to make more than enough alignment marks:
Rear main (no damage this time round!):
One of the scribe lines for cross check of correct seating:
Lowly old stock 71mm crank, stock rods etc (all balanced) - no fancy stuff in here so it will be interesting to see how the stock rod bolts hold up when boost is applied later this year!
Dasdubber ·
Thanks yet again to Damo for drilling and tapping the case for full flow. Shadek 30mm pump with new full flow cover in place and stock filter location blocked off:
New front seal in place and DTM support bolted in place:
Curil T used under case bolts etc, Curil K2 on case sealing surfaces etc.
Hopefully I will pick the heads up tomorrow (have had some delays at the head shop)....things are going to have to ramp up soon as warwick is approaching fast!
matberry ·
Looks good mate.
How much boost later?
Matt
Dasdubber ·
Just a small T25G for now Matt, I would say max around 12 psi (maybe 14 at the most). Hopefully will use dual stage boost controller so normally will be limited to around 8 psi for daily driving (my wife uses the oval to get to work and back a few times a week!)
I'll be running a single throttle body, water to air intercooler, and most likely microtech ECU with crank trigger (so 009 is just for warwick pretty much so I can run carbs). It is all a budget build up so I'm using it as a way to learn more (eg. make mistakes like the above on cheaper components) so when I build a bigger/better engine I'll be able to do so more confidently!
Dasdubber ·
Got the heads back today - will have to pull the inner springs out for break in (machine shop forgot to leave them out)....will also have to sort out geometry and check for coil bind etc (hopefully won't run into same problems as dumone!)
Tiny little 1800 valves will stay for now....hopefully will upgrade down the track some time!
derraux ·
Das
Are you worried about a river flowing through your back yard (i laugh everytime i see this in dumone's post) or maybe getting lots of practise of putting sping and shims in and out,
If it's anything like any of the other thing's you takle youll do a great job and remember all problems are great learning ecperiance.
Derek
Dasdubber ·
Slowly but surely when time allows I'm progressing with the engine. Crank endplay with dry shims came in at 0.003" which is a little tight (0.004" required)....Didn't have spare shims so may need to 'borrow' a couple different thicknesses from Dave (thanks again Dave!).
Case plugs also in (thanks Damo!).
Dished pistons are retained, especially since I'll be going turbo down the track whcih makes lower compression ratio simple without having to run excessive deck height. Rings were all removed and cleaned - barrels still have perfect hone marks still as the engine did bugger all kms when in the ragtop.
Deck height clamp and dial indicator (again borrowed - need to save some money and invest in these tools now I am will be doing more and more) may need slight modification to sit over or on top of type IV barrel lips as my readings were a bit inconsistent. once sorted deckheigh will be measured and then onto the next step!
Dasdubber ·
derraux wrote:Das
Are you worried about a river flowing through your back yard (i laugh everytime i see this in dumone's post) or maybe getting lots of practise of putting sping and shims in and out,
If it's anything like any of the other thing's you takle youll do a great job and remember all problems are great learning ecperiance.
Derek
Yep - I think there will be a lot of practice whilst trying to sort out valve train geometry....hopefully no major problems though!
66deluxe ·
Lookin good Alan, i remove excess sealant on the case halfs with a tiny bit of thinner on a rag just makes it look better and prevents dirt/dust sticking too it. When i do valve train geometry i use the type 4 rocker shaft springs one on top of the other, prevents lube getting wiped off the cam, where as the double springs will remove it. But you are doing a great job as usuall.
Cheers Damo.
Dasdubber ·
Thanks for the tips Damo - hopefully I'll be back onto measuring deck height tonight after work (and after work on the notch - I'm getting used to these 11pm-12am days which is good as I dare say there will be quite a few leading up to warwick). Valve train geometry is going to be fun, my only concern is coil bind so I'll probably leave the dual springs in and check for that first, then remove them as per your advice....then leave the inners out for cam break in.
dangerous ·
66deluxe wrote:Lookin good Alan, i remove excess sealant on the case halfs with a tiny bit of thinner on a rag just makes it look better and prevents dirt/dust sticking too it.
But you are doing a great job as usual.
Cheers Damo.
Biddy Sticks are good for that purpose too.
What is a Biddy Stick?
Cotton buds.
(My Dad calls them 'biddy sticks'
and I never new it was a 'made up' name
'till I asked for them at the shops one time...the lady gave me a real strange look!)
063bug ·
c'mon guys.... cleaning your engine case with "biddy sticks" talk about anal.. :P
Dasdubber ·
Well I broke out the biddy sticks and cleaned up the sealant last night 🙂
Also reset end play as it was previously 0.003" (dry shims) so fortunately Dave had a spare few type IV shims laying around so with the right combo I got 0.004" which is spot on.
Heads have been torqued on in readiness for valve train geometry procedure - Dual springs left in place for now to measure coil bind etc. Just have to work out the adjustable pushrod length and will go from there.
Dasdubber ·
In between sessions working on the notch resto, I've been slowly tinkering with the engine (thanks to Dave for his over the phone guidance!). When I get a chance I'll update compression issues etc, but for now the good news is the oval has reclaimed its garage spot from the notch so its all systems go for warwick prep - lots to do so I'll update whenever I get time.
westi ·
were do you find the time.
Dasdubber ·
westi - long days mate......looooong days (and an understanding wife as I've said many times before!). Just finished work again for the night (told you I'm getting used to these 12am finishes after working a full day at my 'real' job. Ah well, its not a chore when you enjoy it.
The 36hp engine is out (dyno'd at 21.1hp at the rear wheels mind you) - it has a new owner already - just have to find the time to get it to brisbane for transport down south.
Gearbox should be out tomorrow.
Pulled the dual valve springs out, and mocked up the rocker spring for geometry setup. Chromoly retainers, keeper and heavy duty rocker studs all in place.
Keeper edges are touching so they will be clearanced tomorrow for an effective clamp on the valve stem.
Will udpate the pic tomorrow night (if I get time) for comparison of keeper gaps.
better get a few hrs sleep - at least there is no surf at the moment so I won't miss out on anything tomorrow 🙂
Dasdubber ·
Gearbox came out today - bit oily/greasy in there...
After a quick clean up you can see the front mount which will be cut off tomorrow to make way for the later style front mount.
Since everything will come out again when its time to plumb in the turbo, I am not worried about making everything pretty at this point in time. Rear apron is pretty hammered as the rear end has had a pretty big shunt in the past - both bumper mounts are buckled, inner guards are a little kinked, and engine bay surround tin is not straight either. I am going to do a quick removable apron to make engine installation etc easier.
Night off tonight which is a nice change - better still have some semblance of a social life. 😉
Dasdubber ·
Nothing too exciting to report tonight - quick upload of photo and then will be back into it tonight.
New gearbox was slotted in for trial fit today - solid rear mount (thanks Daimo) went it well - will need to solid mount the mid mount as well (currently a urethane mount)....and will have to fab up a front solid mount adaptor as well (can you tell this won't be a daily driver?) 😉
Very quick tidy up and flat black slapped on so at least one part of the oval is one colour:
063bug ·
Sounds like the poor old girl won't know what hit her 😁
Dasdubber ·
Started (finally) to sort out rocker geometry tonight after pulling the heads off, and putting them back on many times to sort out deck height (with the addition of a 0.006" thicker spacer under the barrels). That brings the deck to (with 0.002" allowance for silicon):
#1 0.040"
#2 0.035"
#3 0.045"
#4 0.035"
Close to the optimal 0.004". So now that is sorted, the head gaskets could be removed as when the engine was built originally, the extra 12cc of chamber volume was not accounted for thus CR which was supposed to be set at 7.5:1 ended up being 6.7:1 - as Dave mentioned "no wonder it was so slow"!
This time the head gaskets will be left out, so that will bring me right back to 7.5:1 (variation from 7.388:1 to 7.555:1 depending on cylinders). Remembering this will be receiving a turbo down the track hence why CR is kept very mild. Research thus far does not suggest head sealing will be a problem since boost will be kept low in this application. For warwick though, it will just get carbs (thanks to Rod for the loaner!).
Outer springs only in place for now (tried the rocker spacer springs but there was too much play in the retainer with dial indicator in place so went back to outers only). At full lift after fiddling with #1 inlet I obtained exactly 0.500" lift which is spot on with cam card - took a few revolutions to get it right but very happy with the outcome thus far. Pic shows dial on 0.000 after it spun 5 times around.
Geometry at full lift (911 swivel feet adjusters and clearanced 1.7L rockers):
Dial indicator set to half actual lift (in this case 0.250") to check adjuster to valve stem geometry - looking good thus far.
Will have to get some bigger vernier calipers tomorrow so I can measure the adjustable pushrod before I change its length for the exhaust pushrod.
Dasdubber ·
Thanks to Nick for the sale of the VVDS disc brake kit - gave the rotors a lick of high temp black paint and bolted it all up with some fresh bearing grease etc:
I must admit its killing me a little leaving stuff so shabby....but I feel a full body off DRKC style resto will happen some day so I can rest easy for now. Over the weekend the line lock and new brake lines will get plumbed in plus cheap elec fuel pump....just to add to the to do list!
555bug ·
top work as always 🙂 if you need a hand to get you over the line with something in Brissy let me know.
Cheers Stephen
Dasdubber ·
Thanks Stephen - I'll keep it in mind and give you a call if I get stuck! My brother in law is coming down on the weekend (so we can fit his line lock to his ghia, and to help me get this thing sorted) - so hopefully we'll have it covered. Cheers again for the kind offer.
Forgot to say, looks like the original oval front mount will stay in place as I'll just make up a solid mount adaptor to couple to the gearbox. Hopefully today I'll get time to buy some steel so I can get these mounts finished and start bolting some stuff back in!
Alan
Stanley ·
lookin' good Alan. Looking forward to seeing and hearing your work at Warwick.
bond ·
black rotors look sick!
nick
Dasdubber ·
bond wrote:black rotors look sick!
nick
I thought it would look better black when I finally get the new wheels on there at some stage (not before warwick unfortunately as funds won't permit new slicks etc in time!).
Dasdubber ·
Didn't get a chance today to get the longer vernier calipers to measure pushrod length accurately...will hopefully get tomorrow. For now engine is waiting patiently for next phase.
T-bars arrived today and bolted in place:
Line lock temporarily in place (will hopefully get the brake lines made up in the next day or two).
More tomorrow I am sure!
Dasdubber ·
I just wrapped up for the night a little disappointed - looks like I got one too many 1.7L type IV exhaust rockers, and hence one short intake rockers from the US. These are standard 1.7 rockers but have been clearanced for the 911 swivel feet adjusters....I'm going to get in touch with Damo (66deluxe) to see if he has one I could borrow until I can replace it from the US to get me out of trouble - also have to pinch Damo's oil filler/dipstick adaptor as mine won't arrive in time.
Apart from that all the geometry is now sorted and pushrod lengths measured - at half lift all adjusters have been dialled into good alignment with the valve stems and although only the outer springs are in at the moment, looks to have miles of clearance before bind at full lift (0.500").
Now I just need pushrods cut to length, piston rings back on, heads back on and pushrod tubes installed. If I can get the 1.7 intake rocker off Damo maybe tomorrow evening, I'll hopefully be able to button it up. Solid mounts (mid and front) should be done tomorrow thus g'box firmly in place. New front brake lines were made today for line lock (but I buggered up one length so I'll hopefully get it remade tomorrow).
66deluxe ·
Das, i have replied to your U2U, i have 6 sets of rockers the ones sitting on my flywheel i think are complete with shafts and have been clearanced for the 911 adjusters. I hope you get it done mate, good luck Damo.
Dasdubber ·
Thanks Damo - picked up the rocker and oil dipstick adaptor the other day - much appreciated.
Thanks to Alan for dropping down his 40 dells on loan (as well as the pipe benders which helped with the new brake lines and fuel line (8mm stainless)).
Took heaps of photos today but accidentally deleted them before the transfer to the puter finished - D'OH!
So here are a few crappy late night poor light photos just to show I have got a bit done lately!
Original rear brakes were skimmed and new shoes matched and just quickly paint detailed to look semi tidy. New flex and hard lines (on axle) also installed.
Solid mid mount worked out well (obviously paint was just slapped on to stop rust for now)
All the purists can relax (you included Craig T 😉 - the 54 front mount stayed in tact and new solid front mount fabbed to suit. All bolted up and loctited in place in readiness for the vibrations (thanks for the tip Craig)
Nice new starter (bosch)....heater hoses will be removed tomorrow)
Line lock was plumbed in finally and wired up. Big thanks to Spinners Automotive at Christine Ave (Burleigh) particularly Peter who came back to the shop at 6pm last night to fix some fittings that were wrong - he went out of his way to get us sorted (myself and Brad with his karmann ghia)....would recommend them for any brake help (or new car servicing etc).
A quick disconnect has been installed on the wires to the switch (mounted on handbrake) so the line lock is not functional on the street.....not that this makes it 'legal' however without the switch there is no way of operating it so hopefully that may give me a bit of leeway if pulled up.
Tested it out on Brads ghia - worked well (no burnouts yet though - we are responsible of course)...save that for warwick!
Can't see myself getting to bed earlier than 1am this week! D'OH
LUFTMEISTER ·
Hi alan have been noticing the posting times have been getting later and later(or earlier and earlier the next day) man, you must have hyper active veedub disorder 😵 to keep putting your nose to the grindstone like that. hope it all goes to plan and look forward to seeing you at Warwick.
Dasdubber ·
DUBB61 wrote:Hi alan have been noticing the posting times have been getting later and later(or earlier and earlier the next day) man, you must have hyper active veedub disorder 😵 to keep putting your nose to the grindstone like that. hope it all goes to plan and look forward to seeing you at Warwick.
Yeah - early night tonight - actually just finished work before 12am which is a change!
Rings are back on pistons, brakes are all bled (thanks to my wife Katie for being the "pedal pusher"), miscellaneous wiring was completed including fusing the line lock and fuel pump. Half day at work tomorrow so with the help of Dave, pushrods should be cut to length and then (hopefully) will lap cylinders to heads, clean them and torque them up. Can't wait for the engine to be buttoned up (finally) so it can get bolted in place. It would be nice to at least have a day or two for tuning before putting it on the trailer (providing there are no major mishaps).
Time for sleep now I think. 🤪
Dasdubber ·
Big day today (8am-3pm at my proper job, then 4pm-1am on my real passion!).....so forgive me if I am a walking zombie at warwick (although the adrenalin will kick in I'm sure!).
Cylinders were lapped to heads tonight then cleaned thoroughly. Because no head gaskets will be used, copper coat was applied in aerosol form which (supposedly) promotes carbon build up around cylinder/head junction to help sealing.
Pistons installed in respective jugs and finally longblock has been buttoned up. Yet again a big thanks to Dave for cutting my pushrods to length today - they would have gone in tonight but I need to get some loctite 565 to seal the pushrod o-rings (stays pliable to allow movement) - will get them in tomorrow and rockers on....and then fanshroud etc etc!
Tank back in and thus everything underneath it is all done. Fuel line is plumbed to above gearbox and will be finished once engine is in (and regulator is mounted). Another couple of late nights ahead of me!
Dasdubber ·
Just a quick udpate whilst I sit down for a few minutes (haven't had much of a chance since this morning.....erm...yesterday morning) - engine is in, currently giving the carbs a quick clean (thanks Alan for the loan!), need to mount breather box in the morning when I can make some noise to drill holes....likewise for fuel pressure reg. Will try and update pics later, or perhaps tomorrow since I dare say I'll be knackered by the time I wrap up later. Spring plates (adjustable are on) after a couple hours of modifying and head scratching since the poor manufacturing did not allow them to fit in the torsion housing. JCL retainers are also on and looking schmick - probably the prettiest part of this car!
Hopefully it will be on its wheel later tonight or in the morning. Just need to fill g'box with oil and put axle boots on, hook up clutch cable and sort out linkage and a thousand other little jobs.......back to it 😉
If I get it to warwick and it actually runs, it will be somewhat of a miracle, but I am committed to do it!
Alan :blah
Dasdubber ·
I've run out of puff for the night - will get to pics at some stage.
Getting closer - the to-do list for tomorrow:
- mount fuel pressure reg, cut remaining fuel lines inc braided lines to carbs since Alan's carbs had AN banjo fittings
- Mount breather box and tighten up braided lines
- Stub pipes on, mount headers and muffler (for break in - will run home made "stinger" [ie. straight pipe] for warwick)
- Fill engine and box with oil and install axle boots
- Make adaptor plates for linkage as Alan's hex bar setup is for offset manifolds and with the DTM, it fouls so I will use plates to extend the mounting point for the cross bar toward the back of the car. This will probably be the most time consuming bit tomorrow morning.
- Finish wiring mods (ie. splicing wires to convert from generator to alternator)
- remount carbs and misc ancillaries
That is it to get it started....then there are other things like fixing up the rear apron quickly and remounting it and rear guards, t-bars etc etc.
I have a funny feeling I will be doing the break in tomorrow night at the rate I am going (always unexpected hiccups).
:jesus
063bug ·
No need for a mention I only gave you carbs I wasn't using.
Nothing like a bit of pressure to keep you running on a high.... looking forward to seeing it run on the weekend. :bounce
Keep up the good work :thumb
VDUBXTC ·
Nice work Alan.
Can't wait to see this old sleeper run down the track on the weekend.:thumb
Dasdubber ·
Started again at 8am this morning and still going strong. Lots of little things took a lot longer than anticipated due to miscellaneous problems.
Just turned over the engine and got oil pressure so that is a good sign! Lots achieved today but no time for pics yet again. Now a few hours to fab up linkage adaptors to clear the DTM - couldn't find any internal threaded rod (ie. inside of rod threaded) so I'll have to make it from scratch (won't have to modify your linkage Alan which is good!).
Back to it - looks like it will be broken in an eighth mile at a time! 😉 That is if it starts and runs (may do it early tomorrow morning) as it will be too late to do a 20min cam break in tonight!
Craig Torrens ·
tick,tick,tick,tick,tick.................do you need some "stuff" to keep you going ???!! I know a good pharmacist 😉
Dasdubber ·
Natural highs for me only!
I am sure to crash and burn after warwick though :beer
Craig Torrens ·
👍
555bug ·
well done mate, excellent dedication 🙂
Stephen
Dasdubber ·
This is where it was yesterday (hard to believe it may be racing tomorrow (saturday)...
Another reason I haven't got as far as I hoped - despite assurances of quality, the cheaper copies of sway a way spring plates didn't fit into the torsion housing - this shows the amount that had to be clearanced.
Engine as of last night...
Engine as of this arvo:
Dasdubber ·
Rear bumper hanger was shot - since the oil filter is to be mounted off the hanger, it needed a repair.
New nut welded onto some flat steel and that was welded in - all good now.
Very quick aluminium filter mount was fabbed up
Site supervisor was keeping progress under control today.
So as mentioned above, it turned over to get oil pressure tonight but I couldn't make the carb linkage adaptors since it was too late to fire up the grinder/jigsaw etc etc....so they will be done in the morning, as well as torquing up the rear axle nuts. Rear guards are back on - apron on tomorrow.....then will have to fire it up to see if runs before loading onto the trailer and heading to warwick!
So this will be the last post - anyone going to warwick will find out if it actually runs....I'll update probably on monday. Fingers crossed!
OZ Towdster ·
Alan i had a similar problem with linkages when i fitted webers to my old manx , so i made 2off triangular flat plates that bolted to the linkage up rights on the air cleaners that relocated the hex bar 30mm approx further to the rear .
You can also buy what they call "booker rod nuts" which come in M8 , M10 ,M12 threads and are approx 40mm long and the closest shop to you that will have them will be Coventry Fastners on Reedy Crk Rd Burliegh Heads
Hope this helps and i'll see ya out there.
Craig Torrens ·
Best of Luck for the weekend Alan :kiss
Dasdubber ·
Well a quick update before some well earned sleep - the beetle got there and ran well all weekend.
Big thanks to Brad (custom offroad) for helping with the starter motor issues - he spent a couple of hours lending a hand which was really appreciated. Also thanks to Col for loaning his starter after blowing up his box.
The car was actually slower than I thought (best 10.8 for the 1/8th mile which was slower than last year!)....but remembering the gearbox (which thanks to Dave performed flawlessly!) is geared for a turbo (ie. really tall first gear), and the tall tyres didn't help. From a seat of the pants perspective it has heaps more torque than before and much more responsive so its all looking good come turbo/efi time. No oil leaks, valve clearances were consistent, really happy with it overall.
Line lock was heaps of fun - yet again though turbo will help keep the wheels spinnning much better/longer (or at least bigger valves and better flow wouldn't hurt either).
So considering the oval went from a 20.1hp split case g'boxed putt-putt mobile to a (semi) close ratio, solid mounted trannied, type IV dual carb powered, line lock equipped beast in two weeks.....I'm pretty stoked. Now time to spend some time with my wife again (and finish the notch for ben!)
alan
PS pics some time soon after I recover some energy!
Craig Torrens ·
what MPH Alan ?
Dasdubber ·
Craig Torrens wrote:what MPH Alan ?
Sloooooooooow......not even 70mph which was disappointing but such is life.
Not to make excused but I had to remind myself that this is still basically a stock bus engine with a different cam (0.500" lift) - stock crank, rods, pistons, cylinders, valve sizes, and 7.5:1 compression. So I can't really expect too much - so for any of those who were asking "why did he keep that engine considering it is so slow?" - well because this is all part of the learning experience! After teh turbo/efi goes on, if it is still too slow (which I am sure it will be given my expectations will increase!) - I'll start planning the next engine! 😉
Was nice today to have a day off and hit the beach/pool/see my wife etc! All good, now back to the notch.
Alan
bond ·
al - what was the cam duration at .050?
nick
Craig Torrens ·
seems to be too slow for the combo....
Dasdubber ·
bond wrote:al - what was the cam duration at .050?
nick
240 intake and 249 exhaust @ 0.050
Craig I was expecting more - I am not sure how much the 3.88r&p and 3.333 first gear plus 215/70 tyres had to play as it seemed to take a long time to get to second gear despire the engine feeling much more crisp and responsive than before the cam change. Also the dells which were borrowed were way too rich given the jet sizes. So many variables - the only accurate way to tell would have been to run it in the blue bug I had last year with the same carbs and same gearbox, tyre size etc.
As I said, I'm not too worried though - I stipulated the ratios for the 1/4 all along and with the turbo in mind to allow adequate time to spool up.
bond ·
my cam is 250 @ .050 / 525 lift
turbo motor??? lol
nick
Dasdubber ·
bond wrote:turbo motor??? lol
?? Not sure what you mean 🤖
bond ·
lol - neither do i......
well done on getting the car to warwick though! huge effort and a fantastic result for you irrespective of how fast you went!
bring on the turbo! 🙂
nick
Dasdubber ·
I am really keen to see how it performs when the dual springs go back in (rather than just the outers at the moment) and when the ignition and fuel can be optimised (all I really focused on for warwick was to get it running so nothing really was fine tuned - another reason why it was so slow).....but it was all about having fun! Got to do a few skids and a heap of passes including beating Brad (brother in law) in our round of Air Cooled bracket racing - just proves you don't always have to be fast to have fun (so I keep telling myself 😉
matberry ·
Huge effort just getting there, so well done Al. Car looked great Al and sounded crisp, afterall she is still in commercial dak configuration. Go forced induction!
Dasdubber ·
Well, bringing this thread back from the dead eh?
Not too much has been happening with the oval since I've been working on other friend's cars instead! Since Warwick the type IV has been sold to Michael in brissy for his ghia so it sat engine-less for a little while.
Fortunately Damo stepped in and we struck up a barter deal for his old 1200 engine - I just gave it a quick clean, changed the oil, straightened out a few pushrod tubes, adjusted the vales, chucked in a dizzy I had laying around and an alternator and she fired up! Thanks to Damo and Dave (dangerous) for the various bits and pieces to get me on the road again.
Apart from no engine I needed to sort my headlights out (12V bulbs didn't fit the old buckets) - thanks again to Damo! Must have an earth problem or something because I can only get high beams and parkers though (will work on them again when I get a chance).
Then there was the issue of brake/tail lights. Since going from 6V to 12V for warwick, I had to change the bulbs etc to 12V. For better vision I changed around the wiring so the hearts are the tail lights, and the oval lenses are the brake lights. But the bulb holders on both sides were cactus (kept braking and splitting etc) so I kept loosing the brake lights.
I decided to rig up some fancy shmancy (not really) LED's:
Dasdubber ·
Rather than trying to wire up my own LED panels, I took the easy option and pulled apart the trailer lights to pinch the panel and save me some time.
There are three wires - black (ground), red (tail light), and yellow (brake light).
Because the oval will get a resto at some stage either this year or next, I'll leave everything pretty ratty/ghetto for now (like the seals) - a small aluminium bracket was bent up into shape to hold the LED panel in place:
[im]http://www.manxgallery.org/gallery/albums/album447/Mar18_LED5.jpg[/img]
I've just bent the original bulb holder out the way rather than cutting it off so it can still be resurrected some day if required.
Just had to make sure it cleared the glass lens (bit fiddly but got there eventually).
voila
Safety star will be hooked up as a third brake light soon.
AL
PS pending finances I'll hopefully start collecting parts for a big type I based turbo/efi engine soon. I doubt it will be ready for warwick due to time/finance restrictions however I'll be there even if I have to race with the 1200!! I can still take out the aircooled bracket if I am consistent 🙂
Turbo54 ·
Cool Alan,
I have been thinking about doing that and now I know how. The lights are so small that they are hardly visible 6v.
T54
Cam ·
Dasdubber wrote:
Safety star will be hooked up as a third brake light soon.
AL
🤓 Wow! That looks wicked, so subtle & yet innovative - not to mention heaps cooler than the usual bulbs. It's much safer too, the TUV have shown in studies that LED brake lights get noticed significantly more than regular bulbs, due to their instant on/off manner. 😎
fullnoise ·
Hats off to everything you do Alan!
CT
Dasdubber ·
Cheers guys, this was just a quick fix since I didn't know of any repro heart tail-light bulb holder assemblies available! It's a bit ghetto chic and not too tidy but I wasn't too worried in this instance as A) it's hidden from sight, and B) I know the oval will get a full resto down the track and I'll redo it nicer some day!
Al 😁
XXX-1.8T ·
top idea mate love ur work!
U should incorporate indiactors as well 🙂
Dasdubber ·
Not much has been happenning on the oval front of late as I've been busy with 'customers' cars now DAS Resto Haus is up and running (part time at the moment). However I couldn't pass up a great engine deal which was for sale in the US - the UK owner had a change of plans and sold it partly assembled (short block) with all other components included (except for EFI ECU etc). It is being built by a well known US VW engine builder - I'll keep the rest a surprise.
I'll make you all wait for details since it is being assembled in the US, I can't control the frequency of pics so you'll have to wait just like I do!
Type I CB raised roof case, 88 Bugpack flanged crank (411 centre main, chevy journals), Competition Engineering straight cuts.
Al
Golde60 ·
haha
I was reading about this engine, looked like a good price, and with the exchange rate at the moment you guys back home are laughing.
good work das, and congrats on the name.
howbig is the hairdryer gonna be?
pm me if you wanna keep it a secret!!
Dasdubber ·
Yet to finalise cam and hair dryer specs. Was a pretty good deal - not the bargain of the century but still saved a few quid/US/AU$ etc in the long run!
Golde60 ·
go big mate, thats what he specialises in.
you can always dial in more boost later!
Craig Torrens ·
will be nice and loud with the straight cuts.................hope you don't intend driving it on the street ??!
hellbugged ·
Craig Torrens wrote:will be nice and loud with the straight cuts.................hope you don't intend driving it on the street ??!
hogwash!
Craig Torrens ·
ok, its alright for the street...................just bloody annoying on a long trip !
hellbugged ·
sorry, "WHAT DID YOU SAY?"😉.........
engine sounds interesting Alan.
OZ Towdster ·
Go the straights , you can't hear them above offroad mud tyres anyway
Dasdubber ·
Mostly it will only travel about 400m at a time so the noise shouldn't be too much of a problem 😉
Brad ·
Dasdubber wrote:Mostly it will only travel about 400m at a time so the noise shouldn't be too much of a problem 😉
mm not to many strips within 400m of your house ..
Dasdubber ·
I guess it will have to become a trailer queen then! (apart from the odd blast around the block). 😀
Brad ·
Dasdubber wrote:I guess it will have to become a trailer queen then! (apart from the odd blast around the block). 😀
Well then you will need a Subie in your split to pull it with.
😎
Stanley ·
Dasdubber wrote:I guess it will have to become a trailer queen then! (apart from the odd blast around the block). 😀
One dilemma with going from a streeter that sees the track every now and again to a full out drag car. I’m hearing ya there. That is my next project once I’ve finished the current project.
Dak-A-Tak ·
Allan ,that was the shortage top secret ever , motor on paper looks good mate ! Can we borrow it ?
Dasdubber ·
Yeah Pete, I couldn't resist once I saw the pics of the first stage of the engine build.....I'm still not revealing any of the finer details though (but I must admit I struggle to keep secrets of something I'm so excited about!).
We'll see about the loaner! 😉
Dasdubber ·
Engine is back to shortblock stage after its cam change....it is race season in the US at the moment so the builder hasn't had a lot of time to devote to the engine. It won't be ready for warwick this year so I'm not pushing him too hard anyway.
Golde60 ·
looking good Das
cant wait to see it come together
you must be getting impatient, I know I am
kroozzn63 ·
MMMM YUMMO
Dasdubber ·
Decided to give the oval a freshen up with a new coat of paint before Warwick (probably should have started earlier but I have always worked best under pressure!).
Here it was as of last night:
After a quick sand (120 on short throw D/A sander and some by hand), then mask up, clean and prep the primer was thrown down (sealer first then high build) then guide coat....today it was hit with a quick 240 sand (D/A again) before cleaning and a couple coats of the single stage (direct gloss) 2K beige paint. Trying to keep it simple and costs down for this one!
Al
Dasdubber ·
After work tonight I got stuck into the horrendous job of removing the hiddeous fibreglass based sound proofing that was applied in a former life (what were they thinking!!). This is a job that is not fun at all.
No primer yet (hopefully over teh weekend!)....will be tight for warwick but it will be there!
Al
westi ·
just cut it all out,cut cut cut.
love it man i can't wait to see the finished project.
you are a very very busy man.how's the buba going ,getting some sleep between all this work and crying i hope.
pete wood ·
Buggy Brad wrote:
Dasdubber wrote:I guess it will have to become a trailer queen then! (apart from the odd blast around the block). 😀
Well then you will need a Subie in your split to pull it with.
😎
amen brother, preach it! 😂
matberry ·
Nothin wrong with a vw towcar, even air cooled will cut it, if you know how.
Dasdubber ·
westi wrote:just cut it all out,cut cut cut.
love it man i can't wait to see the finished project.
you are a very very busy man.how's the buba going ,getting some sleep between all this work and crying i hope.
At the risk of jinxing us, the little bloke (Kai) is sleeping quite well with only a 1am feed then up at 5am which is okay since the sun is up sooner and it is warmer nowadays! Still tired though due to long hours as you'd know.
Speaking of which, today was proving to be quite constructive as my brother in law (who will be driving the 'other' beetle that will debut for some tongue in cheek fun if ready) came down to lend a hand sanding the oval.....until the compressor finally $hit itself. Not really up to trade use and I've been delaying the purchase of a screw compressor due to cost, but looks like I have to sell my left nut and bite the bullet! So I'll hopefully hire one in the mean time to keep the work going until I source a new (used) one.
Little fiddly stuff today like repairing rust in heater channel:
I was sick of the crappy "bolt through the b-pillar" seat belt mount so I welded up the holes..
As I'm going with the clean shaven look (on the inside anyway), the headliner will remain only in the centre section like the old ragtop....the retaining teeth were removed along with the carpet retaining lip on the channels (both had some rust so the decision to shy away from originatity was easy). Access hole was cut up top then a 5mm thick plate with as much surface area as possible (inc M10 high tensile nut welded to it) was dropped in and welded, then the access hold welded up.
Skim coat of filler was applied after that (sanded tomorrow hopefully once I get a compressor back up and running!). If I can get one, the oval should be in primer tomorrow.
Al
LIFE IN THE LOW LANE ·
matberry wrote:Nothin wrong with a vw towcar, even air cooled will cut it, if you know how.
Bingo oh wise one!! nothing wrong iwth air cooled power and low doown torque for towing. All you have to do is build it the "right" way and it'll serve you well for a long time.
Al oval will look sweet at warwick with some new colour and the race proven 1915 monster in the back!!
Dasdubber ·
Long night tonight after work today....hired a compressor and finished sanding the oval down with 120 on the D/A sander (that Brad (blup58) started on the weekend.
Then cleaned and prepped (luckily with some help from a couple other vw mates who owed me some hours in return!) it before applying the primer surfacer.
Then a coat of high build primer was applied in readiness for some sanding hopefully tomorrow after work (or maybe wednesday - better get home a little earlier to spend some time with the family)!!
reub ·
Nice work Alan...always great to see.
Turbo54 ·
Nice one Alan, any chance your coming down to radelaide soon?
T54
Dasdubber ·
Turbo54 wrote:Nice one Alan, any chance your coming down to radelaide soon?
T54
Hey Heath, no plans to head down at this stage mate - too busy with work and family!
No work today unforunately as spent all day at an auction hoping to buy a screw compressor but both went for silly money....got another one organised though - anyone reading this have any leads on how to transport one from Point Cook (Victoria) to Gold Coast (its already strapped on a pallet with dryer)...
cheers
AL
LIFE IN THE LOW LANE ·
Road transport through one of the interstate trucking companies would be the best bet.
DubCrazy ·
slightly off track but a mates shop is shuting down in Coffs and he is selling everything cheap Al. drop me a line if ur chasing anything other than the compresser and i'll see what prices he is after. i know his prep booth is a few months old, cost 15 grand selling for 5, everything is for sale.
let me knows hey
steff...........
VWFREAK ·
Coming together nicely, good luck with the completion date 😀
Dasdubber ·
Thanks Steff will have a think about it! Having the booth assembled but non operational at the moment is frustrating! Sparky is so busy I think I'll need to tee up another, then just filters etc etc. Screw compressor should be here late next week.....credit card and bank balance hurting 🙂
Things always take longer than expected, but still on track - lots more dents to fix than anticipated and although I'd like to spend another week getting it right, it will have to do for now. Last bit of body work happened last night and it was then reprimed and guide coated ready for its final wet rub before paint maybe tomorrow, maybe monday.
AL
LIFE IN THE LOW LANE ·
You are a machine Al!!
cram ·
1 week to go - think I'll just paint my car!!
crazy stuff! wish I was this productive!
Dasdubber ·
Amazing what you can achieve when you do 14 to 16 hour days 😉
Looking forward to resuming normal hours and sleep patterns after warwick! Spent the last two days finishing paint on the new debut beetle that my brother in law will be driving....should get a bit of attention and will give folks a good laugh. So it will be a last minute rush to get the oval completed, but it will be there in some form or another!
Al
Dasdubber ·
Of course everything takes longer than expected (hence the 2am finish again)....but after a long day of sanding the oval was ready for paint:
And finally into paint....
Now just the reassembly 🙂 (sounds easy when you say it like that!)
AL
LIFE IN THE LOW LANE ·
Good luck getting it all back together!! 2 and a bit days to go.....
westi ·
why do you keep stoping at 2 am .Girl.lol.
look's great as per usual.
can't wait to see the finished product.
STOCK ·
looks awesome mate
i think i might have to send
my next project up to you for paint
wow 👍👍👍👍
reub ·
👍👍
Dasdubber ·
westi wrote:why do you keep stoping at 2 am .Girl.lol.
look's great as per usual.
can't wait to see the finished product.
Hehehe....I reckon it may be more than a 2am finish tomorrow night to get it done! (ie. thursday night ready for a friday departure....at least we don't have to travel as far as you guys so I can even squeeze some work in on friday!
Paint is okay but not great since I couldn't see too well so late at night and without that fricken booth - its an expensive storage shed at the moment (roped in another sparky though so hopefully it will be done soon).
Al
Dasdubber ·
Well our Friday departure didn't happen despite doing around 36 hours straight, however we left on saturday morning. Here were the cars on friday morning....got to warwick and still needed to put windows in etc
The bug in the background was a bit of fun for Brad and I - a real tribute to the 80's with its rad whale tail and graphics! The "RAD BUG" ran well at warwick despite lots of wheel hop off the line (need traction bar and some supension work desperately!) with a best of 9.12. With some non-light-truck tyres on the rear and some tweaking it should be in the 8's on the 1/8 mile.
Not so lucky for my oval though as I managed to get onto the starting line twice and had to be pushed back twice! Saturday was plagued with strange tapping/clicking noise at idle (shut it off straight away, pulled rockers etc etc etc).....figured out late that arvo that dizzy shaft was intermittently popping out of drive as clamp seemed to be pulling it up slightly despite Pete having no such probs last year with teh same clamp (I must be cursed!).
Fixed that late saturday, the went into frist pass on sunday morning and engine siezed on the line just as I went into the second stage beam. So all up I had the engine running for about 5 minutes total and not revved past 3 to 4000rpm (whilst synching carbs etc when the dizzy probs were fixed), and unfortunately didn't make a single pass.......nonetheless it made it to warwick and got onto the strip (albeit didn't cross the start line). At least its painted, will have a break for a bit (1200 will go back in), and figure out what to do next including sorting out Rod's engine! (sorry bout that Rod).
This is how the oval spent most of the warwick weekend - in the pits 🙂
Al
Cam ·
A shame you had such a bummer of a weekend Al. If it's any consolation, the car looks fantastic!!! 😀
Dak-A-Tak ·
Don't worry mate , we'll fix it up ! Maybe it was already sad after last year event . If it's a easy fix up , back in your car and then back to willowbank for some fun !.
Dasdubber ·
Cheers Pete, I felt pretty bad being a borrowed engine and all....but if repairable I'd love to run it on the 1/4 and get another veedub on the strip more regularly whilst I wait for the turbo engine to arrive (few months off still). I'll pull the engine probably tomorrow or wednesday and throw the 1200 back in temporarily.....let me know if you want me to do the tear down on the 1916, but I understand if you want to do it or Dave or whoever, happy to help in anyway I can.
AL
dangerous ·
If you just bring the long engine(rocker cover to cover) with dizzy here Al',
and I will give it a birthday over the next couple of weeks.
Dasdubber ·
Sounds good Dave.
Also forgot to thank Dave (dangerous), Dave Becker, and Peter K for their help trying to get the oval going over the weekend...especially when there were other things they could have been doing! Cheers to Aaron for the multiple loans of the timing light (forgot mine) and anyone else I forgot!
That is the great thing about these events and VW racers as a whole, everyone is always more than happy to lend a hand/parts etc to get/keep the cars running, that is why even though I didn't get a run I was still on a high from the atmosphere and comraderie of teh weekend.
So if anyone reading this didn't come this year, be sure to get there next year as you won't be disappointed!
Al
Grey 57 ·
Sorry for your bad luck Das. Oval looks sweet tho mate. You do great work. I think it needs an old skool Hi Po 36HP donkey😀
auraofgabriel ·
Oval looks a hell of alot better than last time I saw it parked near mine at the Fairfield show! Beautiful job!!! Just dont crash it when you get the turbo in!!!🙅 Hehe....
sgetty ·
hey looks good man!
i like that colour😉
Dasdubber ·
Whilst over in the US at the moment I dropped into Marty Stagg's place to check out the 2442 engine. It has been on the backburner for a while since Marty has been busy with other more urgent projects and his own Altered drag car....but will be back onto my engine shortly.
This should bring the engine to life.....
Not too many more udpates for a while but will obviously post more pics when the engine is completed and arrives in Oz!
Al
Turbo54 ·
any pics of the altrd behind the turbo?
Looks great alan,
Heath'
Stanley ·
Nice Al...every thing is so shiny
Dasdubber ·
Cheers guys.
Heath, I didn't take any pics of Marty's altered just out of respect in case he wanted to keep any bits on it secretive.
It is a pretty awesome setup though with a Pauter 3L plus twin turbo setup that he is expecting to run close to mid 7's with (its only licenced down to 7.5sec). I'm sure there are lots of pics on the net though - it is called the Enfourcer.