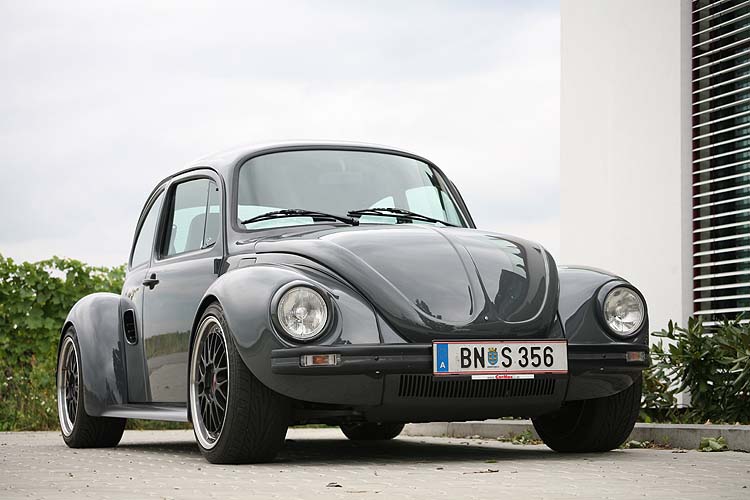
I came into possession of a 1973 L Bug for my first car on the 15/5/2011. I called her Zelda after the very first Nintendo 64 game that I ever played... Then, when I found out that Zelda was a German name, it was confirmed that that is what she would be called.
Like every build thread, let's get some photos up on here! I took the following photos the day I got her.
Then of course, here are some photos of her engine. Very dirty when I first got her and she's missing her tinware as well. If anyone knows of where I can grab a dress kit for her, someone tell me!
I also went interior photo crazy. I wanted to find every little nook and cranny that was either dodgy looking or just looked in dire need of fixing.
I also noticed that the roof lining is very dodgy. Seems the last owner or some previous owner has tried to redo it and has forgotten to put the interior light back in!
I also found and took a photo of the uncovered wires under the dash. Previous owner installed a little sound system, so this could be the cause.
Like I said, the sound system is very dodgy looking. Currently it is lying flat instead of upwards.
There isn't much else to say other than last Friday, her exhaust fell off. Was very loud to say the least. She's currently having a sleep over at GHR Motors and I'll hopefully be picking her up tomorrow evening!
I'm thinking the first thing I do to tidy her up is clean up the interior. So, in other words, replace the head unit, clean up the roof lining, replace the padded dash with one that isn't cracked (images coming soon) and get myself a nice looking parcel shelf for the rear, mounting speakers and grabbing a subwoofer to shove in a box underneath.
I'm also thinking about going back to stock rims. If anyone could send me the details about the exact hubcaps and sizes, including width (my front tires seem to rub on the guard when at full lock), I'll get around to going stock as soon as possible...
One last thing, you may have all noticed that the rear taillights aren't, well, stock to say the least. Seems at some stage she had the rear fenders and rear bumper replaced with some sort of LH Torana kit. Want to replace them soon...
SebastienPeek ·
After a few days without her, she's back in my possession!
The guys over at GHR Motors definitely took care of me and Zelda, so did those at Carline motors. Carline did the exhaust and GHR looked after her for me.
I'll have some photos of the new exhaust below when it gets lighter, probably tomorrow morning. Definitely sounds tinnier and such.
Albeit, driving home, every time I took my foot off the accelerator, the engine died. Was very odd...
STIDUB ·
pics of wheel/guard touching on lock? looking at size & estimated offset, im gueessing 14x6 +30ish they shouldnt be rubbing anywhere, might be worth looking into incase anything else is rubbing
SebastienPeek ·
STIDUB wrote:pics of wheel/guard touching on lock? looking at size & estimated offset, im gueessing 14x6 +30ish they shouldnt be rubbing anywhere, might be worth looking into incase anything else is rubbing
I'll grab a photo tomorrow when the sun is up! I am assuming it is the wheels, but not 100%, can't imagine anything else rubbing.
Will post soon with the new exhaust photos too.
SebastienPeek ·
Must mention quickly, while driving home and at prime time where Zelda would be nice and warm, she kept dying as soon as I took my foot off the accelerator.
I would be assuming this is due to the increased back pressure now from the new exhaust and in turn it'd need a nice little tune up.
So, I'm thinking I'll go out and grab myself a timing gun and get a mate of mine to help me tune her. Seems her idle is way too low to keep up with the new exhaust.
Will report back tomorrow evening!
Joel ·
STIDUB wrote:pics of wheel/guard touching on lock? looking at size & estimated offset, im gueessing 14x6 +30ish they shouldnt be rubbing anywhere, might be worth looking into incase anything else is rubbing
Theyre 6" hotwires, et12.
It would be the disc splash plates rubbing, I had the same problem when I ran them as well.
SebastienPeek ·
Joel wrote:
STIDUB wrote:pics of wheel/guard touching on lock? looking at size & estimated offset, im gueessing 14x6 +30ish they shouldnt be rubbing anywhere, might be worth looking into incase anything else is rubbing
Theyre 6" hotwires, et12.
It would be the disc splash plates rubbing, I had the same problem when I ran them as well.
So, I'm thinking back to shtockies then. I found me some wheels, just need to source some of the hubcaps that are in decent condition.
SebastienPeek ·
As promised, I've got some photos of the new exhaust. Unfortunately didn't take any photos of the old one so can't do a compare shot.
Seems that due to the new exhaust, the timing seems to be off. I called GHR Motors, they said that it could be some dirt in the idle jets. I'm going to try and fix myself tonight with a couple of mates, will be sure to grab photos and such of everything.
SebastienPeek ·
Here's another picture, took it late last night, shows the welding done by Carline in case the exhaust wants to full off again.
Joel ·
What makes you think the timing is off?
swapping the exhaust wont have an effect on the timing, escpecially when its the same header just with a new muffler fitted.
If it's running like a hairy goat like they have said it's probably blocked up the idle jet.
SebastienPeek ·
Joel wrote:What makes you think the timing is off?
swapping the exhaust wont have an effect on the timing, escpecially when its the same header just with a new muffler fitted.
If it's running like a hairy goat like they have said it's probably blocked up the idle jet.
One of my mates reckon the timing was off with the old exhaust as well, so we're going to take a shot at it tonight with an old timing gun and give it a whirl, see what we can do.
It sure is running like a hairy goat, so going to grab some carby cleaner and see whether or not that fixes it. Bit of a nuisance to say the least, but all apart of the fun of owning a beetle that is for sure!
SebastienPeek ·
This afternoon was crazy. This is going to be big, so we'll start at the very beginning.
First, I drove a mate back to his place and we took a look at Zelda with everyone. This is what we were faced with, Zelda's 1500 single port engine, that enjoyed idling out and stalling as soon as my foot was off the accelerator.
Us being us, we wanted to get to the source straight away. We knew it was something going wrong with the carby, but we didn't exactly know what. So, it was time to get our hands dirty and start pulling her apart.
We took off the air filter, and I got the shock of my life, found the hard way that my air filter isn't an air filter, it's a Oil Bath Aircleaner. (When I got home, my mate found this article, great read.)
Next, we went at the carby with some carby cleaner that a mate had stored away in his garage. We applied per the instructions on the can below. This here, didn't work, it kept idling out and it just would not continue to idle. We were running out of ideas.
Then, we figured that the automatic choke was being weird. Gay we said. So we decided to tinker with it. Realising that the thread was too little, we decided to make the accelerator cable shorter and in turn keep the thread on the lowest cog on the butterfly valve, as it seems that the butterfly valve is worn out a little. (Maybe it is called a throttle valve, I don't know).
The little thread.
So currently the setup looks like the following.
And then, after we thought everything was going fine, and she was idling veryveryvery high, she conked while I was driving home. I freaked out, smacked her dash and started her back up. As I got home, I thought it best I call Siggi from GHR Motors. But it was 5:30pm and it was a bit of a long shot.
He answered, and to my relief, he knew what was going wrong.
After explaining what was going wrong and deciding that it was the automatic choke, I found that the connection from the negative solenoid to the alternator had come dislodged.
As you can see above, they are all connected now and she's idling fine. I'm going to take her for a full test drive in a few hours once I've got the idle re-adjusted.
I'm just happy that she's idling now, was really freaky driving her with some mad heel toe action at the lights!
SebastienPeek ·
Thought I'd add this. While the Oil Aircleaner was off, we wanted to catch all the leaks. So, being German and all, we did the following.
waveman1500 ·
Looks like you guys are learning a lot! Turning an oil bath air cleaner upside down is definitely a trick for beginners. Usually you first realise when you go to put it back on and there is a huge puddle around it on the floor! If you didn't know, you guys did well to put it down the right way up!
There are a couple of tips I can give, hopefully they will help out.
First things first, keep the Hotwires. The car will handle a LOT worse on stock rims and tyres, and those skinny tyres are expensive. Not to mention that a 4" wide rim will look completely lost inside those wide fiberglass guards on the rear! Take off your front wheels, get an angle grinder and trim down the splash shields on the brakes. They do not need to be as oversized as they are, if you cut about a centimetre off the radius all the way around then your wheels will fit properly and everything will be good again! I personally did this on my Superbug, and although it was nerve-wracking, the results are definitely worth it.
Secondly, what tinware are you missing? You seem to have all of the important bits on there. The only thing which you need which isn't shown in the photos is the lower cylinder tins (air deflectors), which sit between the cylinders on the underside of the engine. All of the stuff which you have up top seems to be fairly complete, so I assume that those will probably be on there as well.
SebastienPeek ·
waveman1500 wrote:Looks like you guys are learning a lot! Turning an oil bath air cleaner upside down is definitely a trick for beginners. Usually you first realise when you go to put it back on and there is a huge puddle around it on the floor! If you didn't know, you guys did well to put it down the right way up!
There are a couple of tips I can give, hopefully they will help out.
First things first, keep the Hotwires. The car will handle a LOT worse on stock rims and tyres, and those skinny tyres are expensive. Not to mention that a 4" wide rim will look completely lost inside those wide fiberglass guards on the rear! Take off your front wheels, get an angle grinder and trim down the splash shields on the brakes. They do not need to be as oversized as they are, if you cut about a centimetre off the radius all the way around then your wheels will fit properly and everything will be good again! I personally did this on my Superbug, and although it was nerve-wracking, the results are definitely worth it.
Secondly, what tinware are you missing? You seem to have all of the important bits on there. The only thing which you need which isn't shown in the photos is the lower cylinder tins (air deflectors), which sit between the cylinders on the underside of the engine. All of the stuff which you have up top seems to be fairly complete, so I assume that those will probably be on there as well.
Thanks man! We're definitely learning a lot indeed, it is awesome! Zelda being my first car, it's great to finally get my hands dirty with her!
As for the wheels, I really want her to have 15x4.5's on the front and 15x6's or even 15x7's on the rear. I understand that she'd handle worse, but I'm not racing her any time soon and it is just commute between school, work and home. I haven't been on any cruises yet, but definitely want to tag along with the next VW Club of SA or even the VW Enthusiasts Club of SA...
I thought there was supposed to be a bit in front of the engine that covers the gap between the engine and the engine bay? I can grab some more photos if you need me...
waveman1500 ·
Ah, right. So you mean the one towards the front of the car, between the fan housing and the firewall? If you can find one then by all means put it on, but they're really not all that important in my opinion. You already have all of the major ones which are needed for cooling. I'll have a look through my shed on the weekend and see if I have a spare one of those tins, I'm pretty sure I do. If I find one then you can have it for free.
With the wheels, you can go for stockies if that's what floats your boat. Don't forget that you need them in 4x130mm stud pattern though, not wide 5! I was browsing the forum and noticed that you were expressing interest in some wide 5 rims I believe? 4 stud stock rims are pretty common though, so you'll easily find a set very cheap. A couple of years ago I picked up a set of four with tyres which held air for free at the end of a Day of the VW show.
SebastienPeek ·
waveman1500 wrote:Ah, right. So you mean the one towards the front of the car, between the fan housing and the firewall? If you can find one then by all means put it on, but they're really not all that important in my opinion. You already have all of the major ones which are needed for cooling. I'll have a look through my shed on the weekend and see if I have a spare one of those tins, I'm pretty sure I do. If I find one then you can have it for free.
With the wheels, you can go for stockies if that's what floats your boat. Don't forget that you need them in 4x130mm stud pattern though, not wide 5! I was browsing the forum and noticed that you were expressing interest in some wide 5 rims I believe? 4 stud stock rims are pretty common though, so you'll easily find a set very cheap. A couple of years ago I picked up a set of four with tyres which held air for free at the end of a Day of the VW show.
Not quite, I'm talking in front of the crankshaft pulley, I thought there is supposed to be some form of tinware there, but I may be mistaken... She definitely needs a degrease and clean though.
Ah, you're right, I thought I was looking for wide 5's but was wrong indeed. I'm trying to see if I can get the hubcaps first, rims can come afterwards. I haven't seen many wide however, I am hoping I can find some for the rear that are at least 15x6's, if not, I guess 15x5's will do for both front and rear.
waveman1500 ·
Oh, so you want the piece of tinware which covers the crank pulley bolt? Bugs did originally have a piece of tinware there, which sort of arches upwards to cover most of the crank pulley. I've only seen them on a handful of cars. They've almost always been thrown away by a mechanic at some point, as they do absolutely nothing and can sometimes get in the way if you're trying to set the timing or change a fan belt. If you wanted one I reckon they'd be pretty hard to find. If you want your car to be restored period-correct then you have bigger issues though! For starters it should have a 1600cc twin port, as none of the Superbugs came with single-port engines in Australia. The engine you have looks like it's from a '68-'71 1500 bug.
Wide 15" steel rims are extremely rare. The more popular size back in the day was 14". People used to take their stock wheels and separate the centres from the rim. Then they would get a wide 14" rim, usually 14x6", either aftermarket or from a Holden or similar. Then turn down the VW wheel centre on a lathe until it fits into the 14" rim, and weld it on. This is what I have on my car, a set of widened 14" rims which were made back in the '70s or similar.
If you want 15x7" rims in 4 stud, I would suggest that you'll probably have to get them made especially for you. I'm not sure what it would cost, but there should be a couple of places around Adelaide that could do it. All you need is a half-decent machinist with a wheel lathe and a welder. You also need a set of stock rims to use their centres. One day I'm planning on doing this so that I can upgrade to 15x6" and choose my own offset, but for now the 14x6"s will do.
By the way, stock rims are either 15x4" or 15x4.5", not 5". They'll take a 165/80R15 tyre but not much wider. I have a strong feeling that a 165mm wide tyre will look quite silly with those wide guards on the back of your car!
SebastienPeek ·
Now that is an epic amount of information.
Yeah, I figured that my engine was from an older 1500 bug, but because I want to turn Zelda into a nice little sleeper car, the engine will most likely disappear and I nice little 1916cc with a dual carb setup would suit her nicely. I just want her to look stock on the outside and interior (meaning I have to ge rid of the sport style bucket seats with the original, I am pretty sure they're the ones with the headrest on the front seats too).
As for the wheels, it looks like I'll be looking for some 14x5's for the front and I could probably get, with the current rear guards, 14x8's on there. But, because I'll be replacing the rear guards with stock ones, I found someone that said he has rear ones up at his farm, so hopefully grabbing left and rit and a new bumper as well.
The aim is to put them on as soon as possible during the holidays and then have her up and running for back to school. Once I have enough cash for the 1916cc dual carb setup, I'll grab me some pea shooters and new extractors. Then, she'll get a new coat of paint and sit at the original height. I'm fair sure only the drop spindles have been changed, so will just grab ones with the stock (offset?).
Damn, just realized how much I truly am learning about this!
Joel ·
God damn that engine's a bitza.
You got an early 68 1500 bottom end, 70s 1300 twinport carby, 71 onwards generator, vacuum only distributor and an early 60s 1200 aircleaner 🤪
The upper pulley tin is the only piece of tinware that is fine to leave off, even VW stopped fitting them in 72.
The 31pict3 carbs are abit more tricky to tune than earlier ones.
The screw on the throttle arm is not used for setting idle or anything it should be all the way out and only just touching the fast idle cam.
It's only there to stop the butterfly jamming shut.
Idle is set on these pict3 carbs using the mixture screw and air bypass screw on the left side.
That front end is at stock height, it just looks a bit lower cos of the smaller diameter wheels and tyres plus the springs have probably sagged abit with age.
Dropped spindles dont exist for struts cars, only way to lower them is to lower the spring either by adjustable struts or rewelding the spring cup.
Cut springs = ghetto dangerous mod.
waveman1500 wrote:Take off your front wheels, get an angle grinder and trim down the splash shields on the brakes. They do not need to be as oversized as they are, if you cut about a centimetre off the radius all the way around then your wheels will fit properly and everything will be good again! I personally did this on my Superbug, and although it was nerve-wracking, the results are definitely worth it.
Why not just unbolt them, they're not essential especially on a city car.
Mine sees lots of shitty dirt roads in rain and I removed them when I had hotwires on 12 years ago and haven't run them since with no noticable effects.
SebastienPeek ·
So in other words Joel, time for a new engine that actually matches...?
LOL
Once again, a lot of great information and a lot of learning done on my part, I must thank you and everyone else on this forum for their kindness and actually explaining stuff, have a few friends on other forums that seem to only receive hate. Always good to find a group of people that are actually willing to help!
I heard stories of my Dad cutting springs in his Cortina, definitely something I will not do in Zelda.
As for the front wheels, this weekend I should be able to pick up some nice hubcaps and I'm hoping by the end of next week I'll have gotten rid of the hotwires and have me some nice hubcap action going on!
The rear wheels may be a little trickier, depending on whether or not I can source some fatter 15's, I may be in for a shock and have to run my hotwires on the rear and steelies on the front. But. I shall pray a little and hope that I can source these fatter 15's. However, if I do go back to original spec rear guards, what are the fattest rears that I should get? Currently with the flare, I reckon I could probably fit 15x8's in there easily, but as I am in the position to buy original rear guards, I want to cater for both if necessary...
Joel ·
You'll find the VW bunch is a very tight knit crew with very few drop kicks.
I've spent alot of years in Ford, Toyota and Mazda circles and it's pretty much all about outdoing each other and how much money you waste on your car trying to do that. 🙄
That engine isn't a bad combo of parts, they will all work pretty well together, I wouldn't worry about it too much just enjoy the fuel economy it will give.
Your best bet if you're going back to stock steelies is find some stock rear guards to replace those Carerra Torana ones.
Steelies will look right at home then.
All beetle rear guards fit, just depends whether you want the correct elephants feet tail lights or not.
You can fit upto 7" but You gotta get the offset right to prevent rubbing.
SebastienPeek ·
Aha, yeah, I've noticed that everyone loves each other. Massive pun, and lame joke, but it's cos of all the Lovebugs around 🙂
Yeah, fuel economy is great in her, albeit I did pay for a bloody 1600cc dual port, obviously the bloke didn't know what he was talking about.
I've got some stock guards coming, I'll have to text the bloke about whether or not they're for elephant feet lights or not. How hard will it be to replace the current rear guards? I took a peek and it only seems to be a few bolts and the seal... Electrics may be good fun to play with however!
Alright, I'll grab some 7" ones and will have to do some research on what the correct offset would have to be as well.
SebastienPeek ·
With all good intentions, went hunting through Zelda to find everything I could about her.
Will upload images about it all ASAP.
SebastienPeek ·
So, as promised, here's another lot of photos that I took yesterday. I hadn't actually looked at the battery and under the rear seat during the day, so I decided it was time to pull her out and see what was going on. It is bloody dirty, and I'm thinking about taking a vacuum cleaner to her. The battery also needs to be anodised, and it seems that the negative and positive connections are starting to rust.
I then took a look at the right hand side of the battery, and there is this BOSCH thing that I currently have no idea what it does? Nor do I understand what the shit is that is covering the heater pipes. I'll probably take them off and there will be rust right through them...
I then decided to start her up and let her sit for a bit, I think it was a major mistake as I ruined a fence by doing so as below. I don't know what it is spitting out, but I don't think it is fuel...
I decided to take a look at this choke issue again, and I'm not sure if this is where it is supposed to be sitting?
I'm also wondering as to why my fans nor heater works. Does anyone else have a padded dash that knows how to work the heater or even just the fans for that matter... I'm assuming it has something to do with the two levers beside the handbrake?
I then realised that maybe I'm missing some stuff as I pulled out a page of which I had in the manual and it stated that there should be a switch for a demister on the back window, but as you can see below, there definitely isn't one there...
And I'm curious as to what the hell this could have been used for?
Joel ·
That's the voltage regulator under the backseat.
Fence artwork is just condensation mixing with the soot and shit in the muffler, nothing to panic about
If the choke is working when you first open the throttle it should spring shut,
there are alignment marks on the choke unit itself and the carb body which need to be lined up.
If they arent the choke wont come on as strong as it;s supposed to.
The heaters only work off the engine fan, the right lever opens the heaterboxes up and the left one just opens and closes the back footwell heaters, thats if all the cables are still good
All the electric fan does is blow fresh outside air through the vents above the radio or the windscreen defrost depending on how you have the knobs set.
Nothing missing from your dash, aus never got heated back windows, foglights or gas heaters which is what the blanks are for next to the hazard.
Big sqaure blank is for the clock which we never got either.
Other spots were for handbrake and brake fail warning liights etc.
SebastienPeek ·
Joel, you are full of information, it is almost scary!
How would I be cleaning the soot and the other shit out of the muffler? Glad it doesn't mean she'll blow up!
The choke is working perfectly fine, so I won't be panicking about this. I'll take her to GHR some day after work/school next week and see what they say about her engine though, just to make sure everything is working.
I'm thinking the cables don't work at all, the heaters aren't seem to be working and that is kind of disappoint. Might have to ask GHR as to how much it'd cost to fix, I remember seeing a receipt from the previous owner mentioning something about the heaters, may have to check exactly what it said...
Ah, thanks Joel, least I now know where there is a decent spot for where I want to mount a clock, maybe even a tachometer. I haven't seen much crazy stuff done with a padded dash, seems all the good mods are with metal ones. Only sweet mod I have seen is your own mod :P
SebastienPeek ·
I may have to take photos of the cracks in the dash. Not good at all, they're terrible and run all the way across the top near the windscreen.
Might keep the current carpet piece on it.
Once the stock wheels are on her and she's got the normal rear fenders on her, I might look at selling her and buying an older bug with a metal dash.
It is definitely a possibility...
I might keep her and grab another one anyway :P
SebastienPeek ·
Found the exact picture that I was looking at the other day when I decided I wanted to have stock hubcaps.
Can anyone tell me what I have to do to get the wheels below for my own?
Obviously mine would be painted gloss black. But want the white wall insert(?).
Joel ·
It's not easy to get early 6 volt bug wheels on to later bugs and you can make later wheels look very similar anyway with early hubcaps, some paint and whitewalls
Even late model wheels with stock hubcaps, white walls and chrome beauty rings doesn't look half bad
SebastienPeek ·
Alright, so stock hubcaps, steel four lug wheels, some gloss black paint and whitewalls.
That'll be the wheel look for Zelda.
I'm really tempted to lower the front and rear, maybe even get a narrowed beam for her to point her nose down a little more.
Would definitely give here a menacing stance, but then again, it'd take away from the sleeper look I want.
I'm really excited about putting normal rear guards back on her. She deserves them that is for sure.
Ollie ·
Looks like it's coming together mate, keep up the good work!
SebastienPeek ·
Thanks man! I'll post some photos when I get the hubcaps and wheels.
Hopefully I hear back about these rear guards, it'll be great to get my hands dirty with them.
STIDUB ·
strut bug mate, no such thing as a narrowed beam for us 🙂
your alternative is coilovers, either vforce in sydney, topline in the usa, kerscher-tuning in germany, jefferys vws in japan, depends how much $$$ you have to throw at it to get the height you want. just dont go cutting springs PLEASE
see mustards thread on here for the cheaper way to lower with struts, or helbus' thread for re-welding cups for cheaper again 🙂
SebastienPeek ·
Aha alright, thanks STIDUB, seems I shall look into the alternatives, however I don't know just yet as to whether or not I should lower her.
Want to make her look like a sleeper, so basically stock on the outside, and then grab a new 1916cc engine for her.
Hopefully this will complete her saga, but for now it is just getting the exterior up to the stock looking standard, then I'll work on the interior as it definitely needs a new look. Back to original as well.
Does anyone know what the original stereo looked like in the padded dash? Or if there are "plugs" for the padded dash as I want to install the head unit in the glovebox and grab a rear parcel shelf and "hide mount" the speakers.
Joel ·
You will need to lower a fraction, and add some under the skin suspension improvements.
They are too much of a handfull with a high performance engine and all stock suspension.
It seems to be Lbug owner etiquette to throw away the radio plate, most of mine have been missing.
They are just a clip in plate that matches the switch panel
Here's a stock one and another I opened up for a DIN cradle.
SebastienPeek ·
Alright, sounds like that is what I'll need to do then, as long as it doesn't look too different from the exterior as to what a stock one would look like, then I'm happy.
Now, the taillights for mine are the elephant feet, what were the lights before they came in? In the photo you showed me of the wheels, the tan looking bug, I want those taillights for her. Or, do you recommend I just go back to stock completely and get the elephant feet ones?
As for the plate, how hard are they to come by? Might need to grab one soon as am looking at doing a lot next weekend when it comes to actually doing everything to her that I have planned...
Joel ·
Your only hope with a radio plate is second hand, they are pretty hard to come by.
Those oval shaped lights are early 60s up to 67.
There was one more shape in between them and elephants feet called tombstones but which ever tickles your fancy,
only consideration is your bug originally had reverse lights so it should by rights still have them now to meet ADRs.
just the old Toranas used to light up the indicators for reverse lights.
SebastienPeek ·
Alright, best put something up for WTB.
Alright, seems I'll have to get elephant feet then, if it is requirements for them to have reverse lights, I might as well just do it.
Yeah, currently the lights don't do anything when I'm in reverse :P
Joel ·
You're not limited to elephants feet, the earlier tombstones have reverse lights, but you will only find the actual bulb holders in 72s, 68-71 just have the provision there for it.
SebastienPeek ·
Ah, they're definitely the ones that I want then.
Albeit there will be some fidling to get all the wiring done, it'll be a tonne of fun 🙂
STIDUB ·
go to a wrecker & grab the backing plates out of one, pop the single blade plastic bit out of the indicator hole, fits in the blank section for reverse lights in the lights your using, easy as 🙂 - i have 100s here if u need pics of what im talking about.
SebastienPeek ·
STIDUB,
Would I need those if I am to put on the tombstone guards?
Trying to source everything, really hoping I can get some.
Lights I can easily order off of a site if the guards don't have them...
waveman1500 ·
If you're finding it difficult to find stuff, I could sell you my spare pair of rear guards with lights. The guards would need some work to get them ready for painting but they're usable. You can buy new reproduction lenses with the clear reversing light part as well. The wiring is pretty simple, just 5 wires per side.
SebastienPeek ·
Waveman, just sent you a PM.
😉
STIDUB ·
Yes, i was reffering to the tombstone lights that you want to use...
the light housing is a bolt on item with the base, lense & a plate in the middle that holds the bulb holders & works as a reflector, more often than not the reverse light hole will be blank/empty, grab a spare plastic bit to clip in & it will be fine, oh and you need the reversing switch on the gearbox nose cone to run the signal for the lights from, also a hit & miss item if its actually there or not ive found 🙂
ill get pics of what i mean later if your stuck 👍
SebastienPeek ·
STIDUB,
you able to grab some photos for me, about all of which you mentioned above?
Want to make sure I know what I'm getting myself into before jumping in.
Seb
gerggl ·
For dress up kits complete go to JBugs - California .... great prices!
SebastienPeek ·
Went for a cruise last night in Zelda, had some fun with mates from school, grabbed a coffee on Norwood.
While driving down The Parade, I saw this beetle parked on the side of the road. Me being me, I pulled over and decided to take a happy snap of the two parked next to each other.
SebastienPeek ·
Seems Zelda is on her way out.
Was reversing out of the drive way, put her into first, and bang, her gearbox went.
I don't know if it is definitely her gearbox or her differential, but she doesn't want to move forward, or anywhere for that matter without my aid.
Have to organise a tow-truck to get her down to GHR Thursday afternoon.
Oh well 🙁
waveman1500 ·
That's a shame. Best of luck! Hopefully it's only something cheap like a CV joint.
SebastienPeek ·
It'll be something more substantial than that, was a very loud bang.
Could be multiple things.
- Clutch
- Driveshaft
- CV Joints
- Gearbox
🙁
SebastienPeek ·
I thought I best take some photos of Zelda while she's lying in her current coffin. It kinda makes me sad, I can't believe how attached and dependant I am...
Anyway, check out my mad parking skills while I was pushing her on my lonesome.
I took a photo of her donk to see if there was any discrepiencies, but I'm fairly certain it either has something to do with the syncros in the gearbox, the drivetrain or the actual gearbox itself.
Hopefully booking my tow truck tonight with a mates help, then I just have to wait and see what Siggi says. It is somewhat depressing, seeing her all helpless and not being driven, just parked on the side of the road... 🙁
I guess this gives me a chance as to decide what happens next. The plan is to keep Zelda instead of selling her and getting myself a new one. In turn, I'm thinking that what I do is I actually spend, if necessary, a decent amount on getting a new gearbox in there (not second hand), one that'll be all ready for the 1916cc Stan Pobjoy motor that I want to put in her.
But what it comes down to in the end is costs. Depending on how much a new gearbox will be depends on how long until I can buy the new donk for her.
After the Pobjoy goes in, I'll be upgrading the rear brakes to discs. I'll no doubt have to work on the suspension as well, so what do you recommend I do suspension wise?
Basically I just need to get an idea of costs and how much I should be budgeting for. Am hoping to get it all done by the end of November before I head to Europe!
🙂
waveman1500 ·
Wow, so you're still at school, travelling to Europe at the end of the year and yet you still want to go down the road of a complete new engine and transmission within the next few months?! Unless you're made of money, I'd be advising you to just patch up the old girl with the minimum possible, perhaps a used transmission, then save your money for the trip. You don't want to have to sell your car to fund the trip.
Okay, now that the sensible advice has been dispensed, some budgeting! For a new transmission rebuilt by a workshop I'd be budgeting at least a couple of thousand dollars, although I'm not sure as I've never had one done. A new hotted-up engine will cost you from about $4000-$5000 minimum. Add in some change for suspension, brakes and a little bit of bodywork/interior and you won't have much change from $10,000 to get your car to the standard which you're aiming for. Not to mention the fact that the installation will cost big dollars if you have to pay a mechanic to do it. Now, if that seems like too much for you, have a look around the forums and classifieds websites and see how cheap some already restored Beetles are going. If you have the ready cash and can find the right car, it's much cheaper to let someone else build it and then buy it second hand. Conversely, if you build up yours and sell it you will lose about half your money.
What's the answer to all of this? I can offer advice based on what I've done. First, I got a stock Beetle and enjoyed it. Drove it everywhere, entered motorsport events and took it on road trips to the Yorke Peninsula. I did all the maintenance and mechanical work on it myself, with help and advice from knowledgeable friends and relatives. Then, when I could afford it, I found a used 1600cc twin-port engine in good running condition for $800. Installed it myself at home with a mate's help. It provided a good improvement in performance over the single-port and was great value for money. Zelda is in better condition than my old 1500 was, and I loved driving it for about two years until I crashed the poor thing and wrote it off.
The moral of the story? Stock bugs are good cheap fun. The faster you want to go, the more expensive it rapidly becomes!
SebastienPeek ·
Ah, I sure am still in school, it is somewhat a ball breaker. The trip to Europe at the end of the year is courtesy of the fact that it is my Mum's 40th and she wanted to celebrate it in France or something, I'm just tagging along in the eyes of the rest of the family...
I have to heed your advice, it sounds exactly like what everyone in my family has said and I guess hearing it from another volkswagen enthusiast, well it just settles it.
I'm thinking about doing exactly what you did then, search around a 1600cc dual port in good running order and swap her over. I feel bad for my Dad however, as he paid for Zelda thinking she already had a 1600cc dual port engine in her. How difficult was it to take out the 1500 and dump the 1600 in her? I'm assuming that it could very well be a two day to three day job if I wanted to do it myself with a couple of mates, maybe even my Dad could lend a hand if I can find an engine in good enough condition and at the right price...
Stock bugs really are fun and very cheap to run. If Zelda was somewhat more reliable, I'd not have such big dreams I guess. I am somewhat disappointed that I might not be able to make it to the Bay to Birdwood this year in her, but I guess it all depends on whether or not I have enough money and enough time to do what I want to do with the rear end, wheels and such during the holidays. Looks like I'm going engine hunting though, might have to take a look at the classifieds on here and then hit up Gumtree as well.
DylanTheDubber ·
Mate a new 1916 Pobjoy motor would be soo good in it i dont know how your pushing the old gurl round on 1300 donk.
From Dylan
SebastienPeek ·
Dylan,
It's a 1500 singleport donker, I'm thinking I just go to a 1600cc dual port, single carby donk and then upgrade to a dual carby setup when I can afford it.
🙂
SebastienPeek ·
Alright, just got off the phone to the tow service, getting her towed from my place down to GHR Thursday afternoon.
I wonder if GHR will have any 1600cc dual ports lying around that are in fair good condition...
waveman1500 ·
VW engines are very easy to swap. All you need is a big trolley jack and a pair of big axle stands. The first time I ever swapped one it took me a whole day with one mate's help. The second time around we knew what we were doing and it only took about 30 minutes to swap the engine from my crashed white bug to the new red bug.
SebastienPeek ·
That definitely sounds like something I could do with a group of mates.
What sort of "research" did you do before you did your first swap?
waveman1500 ·
Read the workshop manual, looked online and most importantly, asked my uncle. My uncle is a mechanic who worked in a specialist VW workshop since before I was born. He helps me out with a lot of tips.
The actual process of swapping engines is easy though. You just need to take off a few pieces of tinware, disconnect the coil wiring, fuel line, throttle cable and heater control cables. Then you undo the four bolts which attach the engine to the transmission, slide the engine back off the gearbox input shaft and it's free!
It's helpful to have some large wooden blocks which are taller than your jack. That way, you can lower the engine down until the heater boxes rest on the blocks. Then slide the jack out from under it. Then, lift up one side of the engine at a time and remove the blocks. I left mine sitting on a piece of cardboard so that I could slide it along easily. Beetle engines are light enough that two blokes can pick one up and carry it fully dressed with the exhaust on. You can then put it on a workbench for disassembly. No engine cranes or stands are required!
In order to get it out of the engine bay you need the car to be high enough in the air to slide the engine out from underneath. It's very high, something like 66cm. I found out after doing this that you can go lower if you slide the engine out sideways through the wheelarch.
In order to achieve this with only axle stands you need some monster stands. I got mine from Sprint Auto Parts, they're enormous and are rated to about 4 tonnes. They're so tall that I normally use them fully collapsed for oil changes and other servicing. They will barely slide under the car with my jack at full reach. To get the car up to the right height for the engine change, I jacked it up to the full height of the jack, put the stands under it, let the jack down and then stacked wooden blocks on the jack! Then back up to full lift again. Be very careful and make sure you never get under the car unless it's properly secured.
SebastienPeek ·
Alright, looks like I have a lot to do before even going ahead with buying an engine.
I'll go for a trip down to Sprint Auto Parts down the road from mine once Zelda is back up and running, that'll give me an extra weeks worth of pay to spend on her.
Just wondering how much you grabbed those axle stands for? I'm thinking that'll be the easiest way for me to get Zelda up and get the engine out.
If only my Dad lived in Adelaide, he changed the engine on a Type 3 Squareback back in the day, so I'd assume he wouldn't have too much of an issue with Zelda...
Albeit he is down Saturday morning, he might be here for the engine swap if he takes the bill for whatever is wrong with Zelda, because then I'd easily have enough cash to grab a 1600cc dual port as soon as possible.
Was your 1600 a single carby when you picked it up or what? I'm seriously considering grabbing a dual carby kit off of http://vwparts.net if all goes according to plan.
Must thank you for all of this information, it's great to have a community that actually want to help and not just boast about their own cars 🙂
waveman1500 ·
My 1600cc engine was stock when I got it, with a 34Pict carby. It's still on there now in fact! Here is a photo from the day of the swap, of the two engines together. I painted the muffler and heater boxes before the swap. As you can see in the photo, I swapped over a few parts from my old engine onto the new one, including the generator and various other things. The fan shroud was off the engine in this photo because I had been cleaning and painting it. Always easier outside the engine bay!
Vee Dub Parts Unlimited (which you linked to) are very good and I do recommend them as I had no problems with buying my stuff through there and it was at a good price. If I hadn't already bought my stuff though, I would be going for these on eBay:
Look like a bargain. For now, I'd recommend that you keep focused on just getting the car fixed and running again. A car on the road is worth 10 in the garage!
I can't remember how much I paid for my stands, but they weren't super expensive. Something like $70 seems to ring a bell. Just shop around at a few places. I remember going to about 4 shops that day and Sprints were the cheapest by about $40 or so. To give you an idea of the size of these stands, here is one fully extended, next to an average pin-type axle stand.
When you do get around to the swap, if I'm not busy I'd be willing to even come around to your place and help out if you like. Since you're taking your car to GHR I assume you're roughly in the southern suburbs so probably not too far away from me.
SebastienPeek ·
Sounds like a plan, to get her back on the road and to get her rear guards and bumper changed, after that it'll be the engine.
I'll definitely shop around for everything and check prices everywhere before committing to anything, I want to make sure I get what I need no matter what.
Unfortunately I'm not in the southern suburbs, I'm just willing to drive an hour/hour and a half in traffic to get her to GHR and back. I live in the eastern suburb of Glynde, no doubt too fair for you to travel to come and lend a hand in swapping her out :P
Anyway, tow truck is booked and seems like everything is a go for tomorrow afternoon, somewhat depressing. Just want to get her back on the road and really want her to be running perfectly again.
waveman1500 ·
Glynde is closer to Volksfactory at Holden Hill than it is to GHR. I'm very surprised that you're not going there. Paul from Volksfactory definitely knows his VWs at least as well as GHR do. If you need used parts, Volksfactory also happens to be pretty much the only shop in Adelaide which is still wrecking Beetles. Paul mentioned to me on the weekend that he just recently had a few Superbugs in, so if it turns out that you need a used transmission he would probably be the man to ask.
Oh, and the eastern suburbs aren't that far away. I drive 50km each way to work every day! 🤓🤓
SebastienPeek ·
I originally took her to Volksfactory first, but something about Siggi at GHR, well, let's just say he talks to me more and likes me (I think) :P
I'm thinking that if I do need a used transmission I'll definitely approach him, but I somewhat want to stick with GHR. More of a, well, sentimental value knowing that the Type 3 Squareback that I used to grow up in is being serviced by them...
Damn, that is a massive trip per day, I drive about five minutes to my work! But yeah, it'll be during the school holidays, depending on the price of which this repair will cost me, hopefully it won't be like, a million dollars!!
But regardless, if you're keen to lend a hand, I will supply beer or whatever beverage you prefer :P
SebastienPeek ·
Zelda goes in this afternoon.
Really hoping it isn't something massive. But I guess I just have to go with the flow, regardless of what happens.
Really hoping I get her back next Monday or Tuesday afternoon. Hopefully it doesn't take too long, I hate having to rely on mates to take me places.
Guess you really do realise how much you rely on your car when it's gone.
Went out last night and had a look.
This is what is happening.
Clutch in, gear stick into first (yes, it feels normal, so that is a start), then slowly off the clutch (without the car even on) and nothing happens.
Did the same with the car on, didn't even feel like it was trying to move forward.
So, my thinking is it definitely isn't the gearbox, as the linkages feel fine. It could very well be the clutch, but I don't think it is.
That leaves one major thing, the drive train. It could have just popped out or something, I don't know exactly.
Joel ·
SebastienPeek wrote:Clutch in, gear stick into first (yes, it feels normal, so that is a start), then slowly off the clutch (without the car even on) and nothing happens.
Did the same with the car on, didn't even feel like it was trying to move forward.
So the clutch pedal feels completely normal?
and no strange noises when you let it out with the engine running?
SebastienPeek ·
Clutch pedal felt perfect, and there were no weird noises at all.
Gave Siggi a phone call last night, he said exactly what I thought, the drive shaft had gone bang and six CV joints had cracked. Supposedly they were really loose after a lot of wear and tear, and had just exploded.
Cheap fix thank God, only $145 for the removal of all the crap throughout the rear end. Going to pick her up Monday afternoon with the father hopefully, depends if he wants to come and pick me up from school and go for a long drive! :P
Joel ·
If the Clutch still feels fine and there's no trouble getting it into gear like that it's the first sign the problem's in the axles.
The CV bolts may have been slightly loose, amazes me how many people try to tighten them with Allen keys 🙄
Another common one is the splines on either the axle or the brake drum strip and not having a LSD it just tries to drive the wheel with the least resistance, but usually you get some horrible noises letting the clutch out.
SebastienPeek ·
Yeah, I'm just extremely grateful it wasn't something a lot more time consuming/expensive.
Looks like I'm going to pick up the guards tomorrow, along with the rear bumper and wheels.
Should be good!
waveman1500 ·
Great stuff! I'm glad that it was cheap to fix for you. Now to get out there and rack up some km! Enjoy driving it.
SebastienPeek ·
Heading down to pick up the guards, rear bumper, hubcaps and steelies.
Looks like this should be good fun!
Will post pictures when I get back and have them all tucked away in the garage.
Have been scanning through other members rides and am seriously thinking about doing what Joel has done with the LED strip inside the speedometer.
I'll than take a look at mounting LED strips underneath the dash so that I can actually see during the night, otherwise, it is pitch black inside Zelda.
They seem to have removed the interior light too, (there was one originally, right?) and I'm thinking about adding one.
I'm assuming it would have been attached to a sensor somewhere, where would I be looking on the doors to find where I should be mounting a sensor?
I'd probably link it to the LED strips underneath the dash in the end as well.
Joel ·
I just fed mine off the interior light, so they only work when the interior light does either always on/off/door mode.
SebastienPeek ·
Hmm, that makes it a lot more difficult for me, as my interior light is missing...
I'll grab a few photos, where is the interior light supposed to be?
beetleboyjeff ·
There should be a hole in the metal frame above the passenger side door for the interior light, and if you are lucky, there may still be the wiring for it as well. If you get a pin, you should be able to feel for the hole by sticking it through the holes in the headliner.
Here is a photo (not a very good one though) of where the hole is located on the passenger side.
Here is a better photo, but it is of the light switch hole I cut in the corresponding location on the drivers side, so I could have a 2nd interior light.
waveman1500 ·
SebastienPeek wrote:I'll than take a look at mounting LED strips underneath the dash so that I can actually see during the night, otherwise, it is pitch black inside Zelda.
They seem to have removed the interior light too, (there was one originally, right?) and I'm thinking about adding one.
Why do you need light inside the car at night? Having the car interior as dark as possible is best for night driving, it lets you see the world outside much more clearly. The only thing which needs to be lit is your speedo. You shouldn't be looking down at the gearknob or any other controls whilst driving so you don't need light for those. If you're talking about light for when you're parked at night, then by all means go for it. I haven't even bothered to wire up my interior light in my current bug because I don't need it.
I'm not sure about L-bugs, but most late Beetles have the interior light in the headliner, just above the rear corner of the LHS door. You should have switches mounted on the A pillars of the body inside each doorjamb, which have little rubber flange seals around them.
Barnabie ·
Glad to hear Zelda's on the road to recovery, all credit to you for persevering and staying so positive - especially when on a part time wage whilst juggling school also!
Keep the updates coming when time permits.
Kris 😀
SebastienPeek ·
Jeff, as soon as I have Zelda back in my possession tomorrow afternoon, I'll have a look around and see what I can find.
I can say now though, there will probably not be wiring. The previous owner at some point redid the interior, I'm hoping to rip up all the carpet some time next year and redoing the whole interior at the same time I am putting a new engine in her.
Mark,
I only want interior lighting when the car door is open. Basically like what Joel said, on/off/door mode and that is all. I find that my speedo however is very dim, I'm thinking it has something to do with what joel mentioned on his build thread about the numbers not being transparent, so I might see what I can do about that as well. If I get enough time though.
Kris,
Yeah, I figured that I have to look after Zelda and in turn she'll respect me, hence why these upcoming school holidays I'll be putting in a lot of effort to get her looking beautiful again.
As for this afternoons adventure, I picked up the following from a fellow forum member, SpLiTmEiStEr.
Four four lug wheels.
Front bumper and rear bumper (three hubcaps too).
Rear right hand guard with tombstone light.
Rear left hand guard with tombstone light.
The guards do have a lot of surface rust and the left hand side one has a bubble, will sand them back when the school holidays start. Really feel like sandblasting the wheels and getting them done as soon as possible, but the mother is being really strict about the fact that I'm taking up her garage space and in turn I have to wait till the holidays.
One more week and then I get to start though, so that should be good fun!
waveman1500 ·
Nice work on the fenders and lights. Polish up those lenses and keep them! The new reproduction ones which you can buy now are nowhere near as good quality and don't last long.
SebastienPeek wrote:I find that my speedo however is very dim, I'm thinking it has something to do with what joel mentioned on his build thread about the numbers not being transparent, so I might see what I can do about that as well.
The dash lights are dimmable, try fiddling with the dimmer as they can sometimes have weaker/stronger spots in their range of adjustment.
SebastienPeek ·
Thanks Mark! Yeah, I'll polish these ones up and keep them, but I'll grab the new reproduction ones for when I'm just driving her normally. Can never have too many spare parts I learnt today!
I'll give that a shot, will see what happens tomorrow afternoon. Going to have a look for this whole where the interior light was too.
Joel ·
Here's where all bugs after 6/70 have the interior light
before 5/70 it was directly above the B pillar.
As Jeff said if you find the opening hopefully the wires are still there although one is live all the time so if it is still there I would hope its well insulated.
SebastienPeek ·
Joel, thanks for that, will definitely take a look tomorrow afternoon.
I guess I'll be looking for it with something that doesn't conduct electricity though!!
I've also found that my head unit is straight off the battery, don't have to turn the ignition on first. When I get the chance I'll rewire it so that it automatically turns on and off with the car.
Joel ·
That's the best way to have it if you don't listen to music while the cars not running.
But if you leave the ignition turned on while the engine's not running to listen to the radio you will soon fry your ignition.
SebastienPeek ·
You're right, I was just thinking about it and I do sometimes listen to the radio when the car is off. Well, once or twice anyway.
I shall just have to always remember to turn it off when I get out, if I decide to hide it in the glovebox then I'll have to have a sticker somewhere to remind me :P
But nah, did you ever get your glovebox light to have it's own switch for when the glovebox is opened or closed?
SebastienPeek ·
Seriously considering that once the rain has ceased and it is the school holidays, I'll clean Zelda right up. Give the interior a massive vacuum and give the exterior a nice wax and polish.
Should be very good to start cleaning her up and making her look respectable. Can't wait to start on the wheels as soon as possible!
SebastienPeek ·
Got Zelda back!
Put in some good kilometers in this afternoon, driving really smoothly again and am loving life.
Can't wait to drive her again tomorrow, it's just something about her that makes her so much fun too drive.
I guess that's what all VW lovers say about their cars though 🙂
SebastienPeek ·
Just a quick little update, I took a peek at where the interior light should be. Here's a photo of what I currently have above the passenger door.
And seeing as though I was there and found where it should be, I marked it in red pen. What I'm thinking is if I can find an original light fitting I'll install it. I don't want to cut anything until I'm certain I can install the light straight away, so I'm not too sure if there are any wires behind it...
As you can see, whoever redid the interior did it shockingly. So that is definitely something on the list to do, but I just want to get an interior light in as soon as possible.
Also, where are the door sensors and where is the switch to set it on/off/door supposed to be?
waveman1500 ·
The switch is part of the light and the door 'sensors' are little switches in the front of the door jambs, below the check straps. If you open the door and look at the front edge of the body they should be there, or at least some square holes.
SebastienPeek ·
Ahhh, so that's what those weird little things are for! Finally, I understand!
I'm pretty sure the driver side one gets a little stuck, but not all the time...
I'm assuming that if the wires are still there, then they'll still be connected to the sensors?
If not, is it a hard task to get them connected? How much work will be needed to put into ripping everything out to get it done.
waveman1500 ·
It should all be easy mate. I've got a spare interior light which you can have for free as well.
SebastienPeek ·
Alright, sounds like a plan for this coming weekend. I can get down to wherever you are to pick it up if you want? PM me details if need be!
Basically this weekend I'm clearing out the garage to start sanding back the wheels and getting rid of all the surface rust.
I have a mate that works in a powder coating factory and I can get each rim done in gloss black for ~$20 so that is pretty damn good!
beetleboyjeff ·
SebastienPeek wrote:If not, is it a hard task to get them connected? How much work will be needed to put into ripping everything out to get it done.
Even if the wires are not there, you should be able to push a stiff wire up the A pillar to use as a pull wire to get new wires through.
Actually, when you cut out the headliner for the interior light, if you can't see the wires, have a fish around with a piece of wire with a hook in it and see if you can fish any out before you try and fit new ones.
SebastienPeek ·
Alright, too easy Jeff!
I'm just praying that the wires are still there somewhere, it'll make my life a whole lot easier when it comes to reinstalling the interior light!
Must say thanks to everyone who helped me with the light issue, I'll be taking everyones ideas and thoughts into consideration when I get around to installing everything.
Something that I'm very excited about doing is installing two LED strips under the dash, just like Joel has done. I think this will give sufficient lighting as during the holidays, the boys do like to have their midnight cruises in Zelda.
I'm somewhat of a nerd. I enjoy programming way too much and spend way too much time behind a computer. By me going through and doing everything to Zelda that I want to do, not only will it mean I become somewhat healthier by spending more time outside, but it means I'll be able to learn about all these new things that I could only imagine when I was a kid. The fact that I'm living out my childhood dream of owning a beetle and playing with it, well, that's great in itself.
I'm thinking about designing my own parcel shelf and sub enclosure by utilising a CAD program. I've got a few great ideas that mates and I have thought of and I can't wait to put them into action. I guess I'll learn all about fibreglassing too! 😀
SebastienPeek ·
Couple more days and everything starts.
Started thinking about and planning out the design for the sound system, shall be very good indeed.
Have made a plan for what is to happen during the holidays, as follows, starting Friday morning.
- Pick up reproduction tombstone light.
- Pick up interior light.
- Go to Super Cheap Auto or Autobahn and pick up everything I need to get started on the repairs. Sand paper, elbow grease, the works.
- Rip out interior carpet, look for rust, vacuum everything.
- Cut a hole in headliner for interior light, pray wires are there.
- Take steelies to tire place to get tires removed.
- Give steelies a quick rub down with some sand paper to get rid of the surface rust.
- Take steelies to mate at powder coat factory, get them powder coated gloss black.
- Take them to tire place to get tires put back on.
- Get the hubcaps to a better standard, need to get a few kinks out of a couple, otherwise they can just bang straight onto the new wheels.
- Remove taillight assemblies from rear guards.
- Sand rear guards back to bare metal. (Pray there are no rust holes).
- Knock small dent out of LHS(?) guard.
- If there are no rust holes in need of fixing, line guard with body filler to make smooth.
After all this is done I'll no doubt have no more time for much else other than putting on the steelies and cruising around with them. I'll hopefully be putting in a new head unit too, I'm looking into how the previous owner setup the current sound system and it doesn't look too dodgy, he has run the wires where I can actually see them and so forth, so that is always good. I'll be purchasing a couple of LED strips for the footwells too, just to give it a little more flare I guess...
I'm really wanting to white wall them, but have heard along the grapevine that they're actually now illegal in South Australia? Defectable?
SebastienPeek ·
Before heading out to school this morning I took a couple of photos of Zelda and her current stance. She looks like she's sagging at the rear, but I'm not going to complain about that, although the exhaust still likes to scrape going over speed humps.
These are the dreaded stickers that'll be replaced with the forum sticker come whenever it arrives in the post. I got myself a white one to match her.
SebastienPeek ·
Also, I'm pretty sure that nothing is connected when it comes to the fan and heating.
The back window likes to frost up every morning and so does the front. No way I can see in the morning without wiping it down every ten seconds.
I usually crank all the windows down and have the quarter panels open as well.
Is there anyway that I can check whether or not the heaters are connected or the fan is? I would really like to get this working, seeing as though it is bloody freezing here in Adelaide!
SebastienPeek ·
Going for a little road trip tomorrow morning to pick up my reproduction taillight.
Might get SpLiTmEiStEr to have a look at my heating while I'm there, if he isn't too busy, was bloody cold driving home this evening!
Really hoping it is something bloody simple.
Tomorrow I shall start to write down exactly what I need to accomplish what I want.
I'm somewhat nervous about the cost of tools and such. Although I'm really hoping a mate has a few tools that I can borrow...
More news come tomorrow!
donn ·
Tools are cheap, they last forever. Keep up the good work and updates. 👍
SebastienPeek ·
Took the liberty of cleaning up Zelda's interior this morning, got the vacuum into her and got all the junk off the floor.
As I have mentioned before, my heaters don't seem to be working. I decided I'd take a couple of photos of the heaterboxes and such.
Heater box from passenger side.
Heater box from drivers side.
I also noticed this little thing hanging out of the pan, it might actually be the heater box connection but I'm not too sure. (You can just see it dangling)...
Anyway, is there any way to determine the original colour of my beetle? Is it possible by the chassis number or not really? I took a photo of under the dash and well, she's definitely a mustard yellow...
(Oh, and check out the poor wiring, may need to redo it at some point!)
STIDUB ·
that PM scared me 😂
feel up the top of your heater boxes where the papery hose connects, i think theres a flap in there that opens/closes with the lever next to the handbrake. get a second person to more the lever while you watch under the car. - the other cable runs to flaps under the rear seat to control incar or demister options once the other is open, cant remember the specifics of it, its been awhile since i had all that but 2 peoples hands & eyeballs should be able to find where it all goes, if somethings disconnected it should be self explanitory to trace back to where it should go.
just dont die of exhaust fume inhalation or swallow any chunks of stuff that come off under the car while the cables/flaps move 👍
waveman1500 ·
Yep, that pin is definitely your heater control cable. Get it connected back up and see if it works! If you bring it round to my place tomorrow we should be able to sort it out.
The wiring looks really neat and tidy! Don't mess with it. Most beetles are far worse, lol. All you have there is the factory loom all nice and neat, plus a couple of speaker wires run loose and taped to the loom with electrical tape. It will be fine. If you wanted to be neat then you could replace the electrical tape with a couple of cable ties.
Joel ·
Yep there's why the heaters arent working.
good chance the barrel bolt for the cable is now missing.
Your factory colour is Wattle, same as my 74 1300 beetle.
If your lucky the paint code sticker may still be on the apron like this
SebastienPeek ·
STIDUB,
You think that PM scared you! It has definitely given me a reality check and well, I think we'll be taking a breather and rethinking everything :P
Mark,
I'll see you around 10:30 - 11 tomorrow morning. Hopefully we can have a look and try and get these heaters attached, I'm sick of cold drives like this evening! As for the wiring, just had a second loo at Jeff's thread on his dash, he has a wiring issue. I definitely don't in comparison!!
Joel,
The sticker isn't there, I'm assuming it wold have been removed when they resprayed it. That's somewhat a disappointing find, but I guess now I know what her real colour is... I just don't see why they would have gone to so much trouble to do everything but that one section of the body!
STIDUB ·
sorry, should of suggested you were sitting somewhere you couldnt fall over before reading 😂
still reckon u could do it, just learn to like migoreng & baked beans on toast haha
SebastienPeek ·
Today has been, well, interesting.
Went to Mark's place to grab an interior light, he seemed to have absolutely every other part for a beetle except an interior light!
So instead, we decided to take the liberty of raising Zelda up and trying to reconnect the heater boxes. This is her raised and a shot of the heater cable that is actually there!
So, after a bit we got that one connected and Mark tried to grab another one out of the bug that was sitting on her lonesome out the backyard. After no prevail, I drove home confidently. That was until, well, all hell broke loose.
Today was a very yucky day indeed, pouring with rain and the roads were extremely slippery. Heading down the highway, all of a sudden everything went to shit. I was doing about 70km/h and my engine just conked. I pulled to the side of the road in the pouring rain, got under Zelda and unhooked the heater box just in case. Got back into Zelda and tried to start her. Nothing.
So I jumped back out into the rain and had a look under the decklid. I found the problem, and even in the rain, took a photo. Somehow this had come loose. (It looks attached in the picture, but it was just the angle I took the photo on, the black wire had come loose and was floating around).
So once I'd done this, it was a perfect trip home. I got back home and figured I might as well try my hand at reconnecting the heater box back to the cable. So I did and here it is all connected and lovely looking.
Now, you're probably all, well not really but I'll tell you anyway, I have no cable coming from the drivers side of the pan. It's just, well, missing.
SebastienPeek ·
STIDUB,
I'll be sure to be sitting down next time I PM anyone asking about prices! :P
But yes, I am willing to do that, although I'm quite fond of both migoreng and baked beans on toast, so shouldn't be too much of a hassle.
Just have to continue to save more and more cash through work and then I'll be able to do it!
SebastienPeek ·
Hmm, seems I keep having bad luck with Zelda. Get her back a couple of days and then something new goes wrong.
This time it is the indicators, they seem to only like to engage sometimes. Both from the indicator stalk(?) and the hazard light switch.
I don't know if this could be a fuse, it just seems to be very weird that they only work sometimes and not the others. Dad did say something about a blinker can?
Also, somehow Dad was able to get her working in second, but he was definitely revving her hard.
Are you supposed to drive beetles extremely hard? He was in second till about 40km/h and staying in third for just driving around the block.
I must baby Zelda, I usually am in third before 40km/h and cruise in fourth 50km/h and above...
waveman1500 ·
Mate, second gear at 40km/h is not driving the car hard! If anything, changing up at such low revs is harder on the engine. Bugs sound like they are revving a lot more than a modern car because there is so much noise from the fan and the lack of sound absorption by water jackets and a heavy engine block. My normal around-town speeds to change gears when accelerating would be something like 20km/h in 1st, 50km/h in 2nd and 80km/h in third. Because fourth gear is an overdrive, you shouldn't really use it until at least 60km/h. At 60km/h I will only use fourth for cruising on the flat or downhill, as any acceleration or hills loads up the engine too much and it is better to shift down to third.
SebastienPeek ·
I will definitely keep that in mind Mark, looks like I'll only be going into fourth when I head up to the Barossa or into the Clare Valley!
Seems my fourth is now my third :P
Maybe going down to second gear will work then, I don't know, it just seems very strange. I don't understand though, I will just have to get into the car with Dad and show him what is going on...
SebastienPeek ·
This morning I went down to Imparts and picked up and interior light and a couple of door sensors that I needed to fix up the interior light issue.
I then picked up a mate who is good with the whole electronic side of cars and we went to Supercheap Auto to pick up an LED "bulb" to fit the interior light fitting.
Drove home and decided it was time to install it. I cut away the section I had previously marked.
And then what I had been dreading. There are no wires to fit the light!
So now starts a big task of actually getting the wires there. How would I go about doing this? I can't seem to even get into the pillar to actually check if there are any wires in there but have just fallen down? How would I go about feeding new wires down, where would they need to go?
I'm really sorry about all the questions, I just was really hoping to get the interior light installed and ready before this weekend, and it seems that isn't going to be the case if I need to do something big to get into the crevice and feed the wires up...
Joel ·
It's pretty easy to run the wiring, they go down the windscreen A pillar.
I had to run an extra wire for mine down to my under dash LEDs so they worked on whatever setting the interior light is on.
Just tape a wire to some sort of snake and feed it down and it will come out next to the glovebox in the boot.
The wiring is dead simple.
just a positive feed from one of the live fuses, it would be number 8 or 9 to the non switched side of the light.
then there is a ground to on of the switched sides and the two door switches T toghether and go to the other terminal on the switched side.
SebastienPeek ·
I took the liberty of taking out the door sensors this evening and took a couple more photos to go with it.
Right hand side current door sensor. Like I said, it likes to get stuck...
Right hand side somewhat hanging out of the pillar.
And this is the brand new one comparing it to the older one. Massive thanks to SpLiTmEiStEr for them!
New right hand side door sensor being installed.
And this is the right hand side door sensor completely installed.
I then moved onto the left hand side door sensor. This one had no issues with it other than the fact that it was now a different size/colour to the right hand side one.
So, this one was weirder than the other. It looks like there is a second cable coming off of the connection that hooks onto the door sensor... (Sorry about the blurry picture, it's dark).
But yeah, it was a lot harder than I thought to pull it out. I'm assuming something is caught somewhere? I'll try and take a couple more photos tomorrow morning when it is light, but is the second cable supposed to head up into the interior light section?
I took another photo of the hole in the headliner, obviously towards the A pillar of the windscreen this time as Joel had said that is where the wires should have been.
So looks like I'll be doing what Joel has said, unless I can find what this second cable does that is coming off the left hand side door sensor...
cam070 ·
Wire coat hangers, like the ones from a dry cleaner will be your friend
SebastienPeek ·
I'll have to grab a couple out of my cupboard, and go fishing with them, hopefully I'll catch something!
SebastienPeek ·
Ah, and few some good research, I found this little website on how to replace the interior light.
They had no wires either, so that makes it good for me!
This morning I decided it was time to get rid of the, well, dodgy sticker job of the previous owner. I should probably apologise to whoever it is, he may be on here I don't know!
I took this photo before I started, turned out pretty decent...
So, this is the sticker on the front window. These VW stickers were really weird, the blue was like a type of rubber. The silver, it was the sticky part. Was very weird.
And here it is without the sticker, after about ten minutes worth of work!
I then moved to the three on the back, starting with the right hand side VW sticker.
Right hand side one removed.
Left hand side one removed.
Now the middle one was a task and a half. Took me a good part of an hour to get everything off and even still there are a few sticky bits that need to be removed. But here is the back window clean!
I'm thinking about putting the new stickers on her tomorrow or later this afternoon!
SebastienPeek ·
Went out to Zelda today with a few mates with the intention of fishing out these wires for the interior light. Now what I ball breaker.
You know how I showed you all how neat and tidy the wiring was, well because of how neat it was, it made it a bit of a headache to even get to the correct wires.
But we somewhat figured it out. We disconnected the battery and had a play with the passenger side wiring underneath the dash.
Then, we popped off the fuse box cover to see what we were up against.
We then traced the positive wire (I'm assuming it is red, factory) from the 9th fuse and found it going into the hole just underneath and tucked behind the dash.
This is where it got a bit messy. Due to it being in its black little condom (as we called it all day today), we were unable to just pull the red wire and then push it back up. We pulled the condom back as far as possible and I started yanking on the red wire. This is when it kinda went, snap.
So not only were we unable to fish out the wire, but she is definitely broken. The aim is to now rip out the current wiring for the interior light and door sensor setup and feed the necessary wires up the windscreens pillar and so forth to rewire the whole setup. This shouldn't be a too difficult job, but famous last words as it'll probably result in the ripping out of the dash.
But I guess it definitely allows us to see what her original colour was. I just don't know if I'm definitely up to the task of ripping out her dash and fixing the wiring. I might as well do it while we're fixing up the rear guards. It all starts Friday!
STIDUB ·
so, about those rear lights i mentioned its easy to add a reverse to if not already having one...
extra/spare peice is the same as an indicator one
tight fit but goes in, and hey presto, reverse light capability
thats assuming your gearbox has the reverse light switch & you run the appropriate wires, though you should already have that being a 73 🙂
SebastienPeek ·
Hey STIDUB!
Thanks for that! I'm curious though, how do I determine whether or not I have the reverse light switch on the gearbox and the appropriate wires are still in fact there?
I don't want to be bent over again as I already have been with the interior light and those wires, so I want to find these ones before I even attempt the rear guard change.
Thanks again!
SebastienPeek ·
Considering putting up the new stickers later today, just the forum sticker will go on the rear windscreen.
I'll leave it at that for now, may try and get a custom sticker done though...
We'll see what happens.
Also looks as though Thursday we'll be starting the guards and rewire job for the interior light. Shall be good!
SebastienPeek ·
Got these in the post on Monday, decided it was time to put them on Zelda! I never intended to put the Dub Invader sticker on her, but I thought it looked pretty good on the LHS rear window...
Forum sticker!
Dub Invader sticker!
Joel ·
Geez it puts a smile on my face everytime I see one of those Aussieveedubbers stickers.
mainly because the one on the back window of my car is the mother to them all 😂
All the ones Warb is selling over the last few years are made from a copy of the one on my car.
It's about the only surviving original from nearly 10 years ago.
SebastienPeek ·
Joel!
Ahaha that is awesome, well I am glad to say that a child of your own sticker is resting on the rear window of Zelda! 😀
There will be lots of news tomorrow, as tomorrow begins the day of the guards and rewiring the interior light and door sensors.
Lots of photos will be taken no doubt!
SebastienPeek ·
Today was a very productive day indeed!
It all started this morning. I was up at 8am, a mate coming around at 9am. We got all the stuff that was needed. Sand paper, etch primer, enamel primer and of course, wires. All of this to fix up the rear guards and to wire in the interior light.
The aim was to clean up both of the blue rear guards that I had purchased and to finally finish installing the interior light. First we took off the light assemblies. Man there was a lot of dirt build up behind them!
I was lucky enough to find that the light assembly had already had a reverse light bulb installed, which is definitely handy!
But both light assemblies are extremely rusted and I'll most likely try and grab new ones from somewhere. Basically just need the actual "holder" as I already have the part that holds the bulbs and the plastic attaches to it...
After all of this, we cleaned up the guards before starting to sand them back! You can definitely see where the paint has faded and it hasn't!
And then started the sanding... and more sanding... and more sanding.
Then, while a couple of my mates were doing the guards, I jumped into the car and started playing with wires. Bloody hell these were annoying. Finally, after at least six hours of playing, I had it figured out. But this was after I had tried removing the glove box to get into and behind the dash fan thingy! We could actually see, if I removed the trunk lining, the section on the A pillar where we could run the coathanger with the wires attached! It definitely took us a lot longer than expected...
This was us first attempt, coming the wrong way!
But then, after a few more hours of playing around, we finally got all the wires up to the interior light and everything was working... Well, it wasn't. We couldn't figure out the freaking door sensor and where it's ground was!
One of my mates, after taking a break, came back and was just like, well hang on, we have to actually put them back into the body as the body is there ground. And then, tadah! She worked!
We then got all the wires sorted and tucked away under the dash, so that is definitely a bonus as well!
We all cruised down for dinner and I was happy to get back and just take this glory shot.
I didn't, however, get a photo of the guards completely finished. They are sanded back and are ready to be primed when the time is available!
donn ·
Well at least the bug is keeping you busy sebastien, good to see the progress. 👍
SebastienPeek ·
Definitely keeping me busy, lost a whole day, but you know what, it was definitely worth it!
Will upload more pictures of the guards as soon as I get the chance!
waveman1500 ·
Hey Seb, I can give you a pair of those tail-light housings next time I see you. I've got heaps of them.
SebastienPeek ·
Took the misses out with her friends to a pub last night for her birthday.
Got home and well, took a look at the trunk lid. Massive dent in it, in the shape of someones arse. So obviously, while it was parked at the pub, someone had decided to either sit on her and pose, or stumbled onto her.
Either way, I punched the shit out of the dent and now it is gone. It was seriously the shape of an arse. I'll have to take a look sometime today when the sun is actually out to check the real damage. Zelda definitely has some bad luck. Something good happens, and then something bad, so far anyway.
Guess I just have to keep persevering...
SebastienPeek ·
I'm curious as to whether or not anyone can tell me what this is?
It's inside the engine bay, along the back firewall, there is this cutout for it and everything, I can get more photos if needed. Want to work out what it is for first though...
Joel ·
Highly saphystimitcated thingamajigga 😂
It's the dealership diagnosis system connector
A very prehistoric OBD system if you will.
SebastienPeek ·
Ahaha that is awesome!
So it is somewhat like an ECU, minus all the tuning tools. It's a diagnostic "checker" for VW dealers somewhat 40 years ago.
Were VW the first to implement such a tool?
Love the fact that they got Buzz to do that commercial!
Joel ·
Sort of but not really.
It's basically just a continuity tester of various circuits and a few sensors to test things
Most of them have been chucked long ago like the float that sits in the battery to test the electrolyte levels and the Inductive pick up sensor that went on the #1 spark plug lead.
Amazingly mine still had that when I got it, I remember thinking WTF is this thing, thought it was part of a broken timing liight pick up.
There has been a huge number of threads over the years of people wondering what the TDC sensor in the crank case was.
SebastienPeek ·
Ah okay, so it solely checks various circuits and sensors, still though, that is pretty damn good for the 70's!
Yeah, originally my mates and I thought it was for a timing light, but guess not anymore...
It sounds like it is something that most people really have no idea about, but thank you for being able to fill me in! 🙂
SebastienPeek ·
You might not be able to see it, but this is where the massive arse dent was.
I used my fist to bump it out, but there are a few things that need to get beaten out by either someone professional, or I take the trunk off and grab a mallet and bump it out myself...
donn ·
Un-notified arse dents are put there by arswipes. Mongrell bastards in another language. 😬
SebastienPeek ·
Donn, I couldn't agree with you more. I was devastated when I saw it, I couldn't believe someone would actually dent the crap out of her and not leave a note or anything. Probably some drunk bastard.
The fact is though, L bug bonnets are completely different to other bugs. Meaning they're a lot more difficult to find. So either I beat the rest out myself, or I pay someone else too, because I highly doubt I'll find another one in such good condition as mine is in (minus the arse dent that is).
SebastienPeek ·
The guards are all nice and sanded back now. Just thought I'd share another photo of how pretty they look.
Aha and of course you have one! What a small little community we have here :P
But you're right, that is a very long distance to travel to pick it up.
Shipping that would be huge costs too! 🙁
donn ·
More than once we / I have sent an item on the relay system, getting passed from one person to another as they travel from point to point between home and destination. 👍🙄
SebastienPeek ·
Yeah, but I doubt anyone would be coming to Adelaide any time soon or anyone from Adelaide heading out your way either for that matter.
Although, if it is possible, I'll see what I can do with mine first, and if worst comes to worst, I'll be sending you a PM... 🙂
SebastienPeek ·
While driving Zelda, and going from third to second, I keep slipping into fourth.
I am pretty sure this is because second and fourth are extremely close to each other, especially when my current gearstick is extremely loose.
Like, I can wiggle it when it is in gear, as if it was in neutral.
Now, is this a gearstick issue or a gearbox issue?
If I was to purchase a new gearstick, say a berg or csp shifter, would this fix all issues with it slipping into fourth instead of second?
Maybe I just shift too quickly with a stock gearshifter... :P
SebastienPeek ·
So my indicators had it this afternoon. Zelda was parked out in the elements last night and I blame this.
I went to check the fuses, and you'll never guess what I found. Water. Dripping.
So I thought I'd go to the source, where the fan is. I don't know what it is called though. But I ripped off the cover (nicely of course) and found this.
And you can see the little build up on the lip of the lid.
This is all the water in the fuse box cover, not good!
I tried to take a couple of photos underneath the dash to see whether or not there were any holes there, but I couldn't find any...
You can see the water on the carpet as well...
Another thing that could be causing this is the fact that I have no rubber seal on the bonnet? Any ideas would be greatly appreciated to fix this. I need to fix this as parking her under the carport, well, it is a bit difficult when I'm competing with Mum's Territory...
Joel ·
Looks like there's a small rust hole near the drain hose spigot, that lets water in.
All that dirt and leaves blocks the drain and holds moisture.
If it makes you feel any better about your hood it's not the original.
Thats a 75Lbug hood.
SebastienPeek ·
Joel,
Looks like I'll be cleaning it out tomorrow morning and seeing what is going on!
Massive shock with the hood, like, massive!
What are the differences between the years?
What should mine look like?
Joel ·
It's only a cosmetic thing
73 and 74 Lbug have that classic curvy beetle pressing at the front either side of the handle, from 75 they squared it off more and put the big bump under the handle for some reason.
For a while there that was the only type hood available new so many ended up with them after accident repairs.
SebastienPeek ·
Ah okay, thanks Joel!
So I drove the misses home in Zelda, and well, weird shit was going down.
The indicators were working, but they weren't blinking. So we're one step closer to them blinking I would assume?
Regardless, I'll be up bright and early to clean out that box behind the dash/in the bonnet to see what I'm dealing with.
SebastienPeek ·
Went and did a little clean up of the thingy in the bonnet (what the hell is it called?!).
I found that there is a hole, a factory hole it looks like, and that's where the water has gone through. I cleaned up as much as I could but it got dark. Will do the rest tomorrow morning and see what else I can find.
The indicators got to one step closer to working, now the green indicator light in the speedo is working. But only sometimes. Wishful thinking that it'd just dry out and fix itself?
ryana89 ·
Geeez you aircooled fellows are always kept on your toes.... makes me feel kinda lazy.
Keep up the good work on those numerous small jobs.
SebastienPeek ·
Ahaha thanks Ryan!
Had a look at your thread, seems you had a few issues starting off too, hope all is well now!
matberry ·
Inside your air box should look more like this one. Give yours a good clean to find all the rust.
SebastienPeek ·
Alright, looks like I have a job to do on Wednesday! 😀
Same colour too!
Joel ·
That little rust hole to the right of the drain is where the water is getting in.
THat;s what fecking with your indicators, the water is getting into the flasher relay.
Also make sure the drain pipe is nice and clear, they block up with dirt and leaves
SebastienPeek ·
Joel!
Yep, Mum picked that straight away as well, I am surprised I didn't see it to be honest with you, too busy taking happy snaps... Looks like I'll most likely have to get a new flasher relay?
Or, if I wipe down the current one, I'll have to rip it out anyway to see the damage, would that do?
May actually need to replace a lot of the electrics. Could either be a quick job, or very disastrous.
SebastienPeek ·
While I'm at it though, I'll try my hand at fixing up the fan unit as well, most likely not even attached or if it is, then the fan might have, well, a lot of shit in it to be blunt.
What is the best practice for removing it? I would assume remove the bonnet, then get my hands dirty?
While the bonnet is removed, I might try and bang out the left over dents. Shouldn't take too much effort.
Zelda has definitely turned into a little project car, still, I drive her daily, to and from work and school!
Guess it goes to show though, with a little love, beetle's will last.
Joel ·
Most Lbug dash fans are dead, the moisture in there kills them, they don't do a whole lot anyway, i barely used mine in the last 12 years before i ripped it out.
The flasher relay in old cars is mechanical so water getting in them rusts and sticks up all the moving parts.
You can fit newer solid state ones, I had one in mine when i had my LED indicators, i hated it, too quiet.
I was often doing the old fart trick of driving along with them on cos i couldnt hear it.
Mums new Peugeot actually plays the indicator click clack noise through the stereos front speakers, cos the relay itself makes no noise.
SebastienPeek ·
Yeah, how did you cope in the winter with the front window frosting over? Mine seems to do it all the time, even if I have the quarter panels open...
So really, I have no choice but to replace the current one with a reproduction flasher relay?
Ahaha I do that anyway sometimes, sometimes they don't like to switch themselves off when I'm turning, but sometimes they do.
This is what I'm planning on what Zelda will look like, sitting a little lower than stock, but everything else is decent.
Get those wicked popout rear windows, that is the next thing I want to do once everything is out of the way and she's driving nice.
Joel ·
I just used to put the heat on the windscreen that keeps it clear as long as you're not sitting idling at traffic lights all the time.
Just any 3 pin relay thats the right orientation, VWs are positive on the right from memory.
SebastienPeek ·
I may need to learn how to do that then :P
I'm going to figure out how to connect the heaterboxes so that they are either always on or always off, shouldn't be too difficult.
I'm picking up one tomorrow hopefully, a lot is going to happen tomorrow!
SebastienPeek ·
Might be giving Stan Popboy a call.
Who says yes to a 1916cc twin port in Zelda?
If I do, what else would need to be replaced? Suspension, gearbox, clutch, I need a list to work through!
I bought some things for Zelda's interior the other day. Looks like she'll be getting her sound system setup done very soon 😉
SebastienPeek ·
20th of June, a day to remember in the life of Zelda.
Woke up this morning to find the passenger side mirror completed smashed to pieces and the drivers side one lying on the floor.
Rule number one, don't park Zelda on the road, ever again!
After the massive rampage I went on, I went down to Imparts to pick up a couple of things, specifically a new blinker relay, gear rod bush and a correct lens for a rear guard.
Got home and it was time to start working on her. We needed to patch up the rust in the air box (damn there was a shitload) and install the new relay. It all started with the removal of the bonnet.
(You can see the arse dent better in this picture).
We then ripped out all the bonnet lining and got stuck into the rust. This is what we found.
So went down to Supercheap Auto and found us some rust converter and primer. Applied and waited about half an hour, then applied another coat.
After waiting for the second coat to dry, we started putting on this liquid metal in a tube substance. This worked a treat, filling in everything perfectly. After a few goes anyway, we kept getting tiny pin holes in one of the rust spots.
While we were eating lunch after this was all done and dusted, a package arrived. It was something that was needed for interior fitting. I have photos of what came but they're currently on my other camera. That'll be for another post! Especially what happened after lunch anyway, will post everything tomorrow.
donn ·
Jeez Seb, you must live in a bogan saturated area, sounds like you wpouldn't want to leave anything unguarded overnight, bloody mongrels. 😬
SebastienPeek ·
It isn't even that donn, I think it was an ex-friend that must have either figured out what car is mine or he's been planning it for a while.
Don't worry, I went crazy when I saw what happened, almost went to his place straight away to letterbox smash.
It isn't that we live in a bogan area, I think because Zelda has character, people look at her. And then they decide to do stupid things.
No doubt the arse dent was from some drunk bloke posing with her.
I'm just happy that now I get a place in the drive way, no matter what. I'm also taking down my P plates wherever I drive her, so it looks like an old farts car. I have a blanket across the back seats now as well, once again, trying to capture the old fart feel!
SebastienPeek ·
Today is going to be big.
Watch this space.
Getting a lot done today.
SebastienPeek ·
Today was supposed to be my speaker install, but kinda turned into a get as much as possible done day.
While waiting for a mate to come down to get the measurements for the sub box and the parcel shelf, I decided to rip the backseats completely out and to see what was in place when it came to sound deadening. I found the following...
As you can see, the sound deadening is pretty much non-existent. After doing this, I gave my mate a call and he said he wasn't going to be able to make it today, so currently Zelda has no back seats!
After I'd done this, SpLiTmEiStEr came around with a new set of side mirrors (yes, I know they're not matching) and a set of new windscreen wipers. I only used one of the windscreen wipers to fix up the bent one.
I then decided to give priming one of the guards a go, I only had enough time to put one coat on one of the guards before it started to rain.
Who would have thought government property would come in so handy! 😉
Hopefully tomorrow will bring the ability to finish off coating this guard and getting everything ready for the new speaker and sub install. Will post more tomorrow!
SebastienPeek ·
Just another little update.
The other day when we were fixing the rust holes in the fresh air box, we installed a new head unit too.
I also got myself some new anti-theft billet door locks.
And I even got myself a new gear knob!
SebastienPeek ·
Today was a very special day, well yesterday was anyway. It marked the day Zelda got some new and very loud speakers and subwoofer too... Yes, in Zelda.
But instead, we went out on a limb and decided to build something fairly different. It all started with one cardboard template.
We then went and got all the wood for the custom subwoofer box, that at this stage we were still going to build. This is what we had and how it was originally going to be like.
So that when it was to be mounted inside and with the parcel shelf on top, it'd look like this. But obviously with the holes cut and so forth. Just a mock up.
The idea was to rip apart this and mount it all into the new custom subwoofer box that we were going to make. This is the subwoofer that was going to meet it's doom.
But this is where Mum came out and said, why don't we do it this way? So we decided to give it a shot and this is what happened. The subwoofer would be, in it's current enclosure, mounted within a simpler "box" with the parcel shelf mounted on top still.
We than ran into another problem. If we were using the original design, and basing it off of the link I had above for inspiration, it would easily bolt into the body. The subwoofer that I had purchased came with mounts, but they wouldn't be enough to hold in the two sides onto the floor.
So we ripped out the carpet out of Zelda's back section, and figured there really wasn't much else we could do but build a base and rest everything on top. So we did.
After we knew what was happening with the subwoofer and parcel shelf, we started to wire in the subwoofer to the head unit. We also found a nice little place to mount the bass control remote, nicely tucked away as well.
It was then time to make sure we got the base for where the subwoofer would be mounted to and positioned and the speakers all mounted to the parcel shelf perfect before we placed the subwoofer into it's section. A lot of cutting up MDF to make sure everything would fit perfectly for the wires and the subwoofer enclosures bass port.
So once all of this was done, it was time to get the subwoofer and the base into place. I didn't take any photos of the base mounts, but basically four screws (metal screws) were drilled into the bottom of the MDF wood and through the base of rise in the body. This held the base of the enclosure into the car, it wasn't going to move anywhere!
We then wired up the subwoofer, screwed the parcel shelf to the top and wired up the speakers.
After all of this, the install itself took six hours. Incredible! It was then time to put the back seat back in and see how it all fit. Perfect fit.
But that isn't all. Tomorrow comes the task of figuring out how to cover the top parcel shelf and what in. Will post more updates tomorrow when everything is finalised and looking even more awesome!
I forgot to mention, the battery died while we were pumping it for a bit. So we had to push start her the first time to get her back up and running. After I did a lap of the block, I parked out the front and a police car parked on the other side of the road. They had had a complaint of excessive bass from one of our neighbours. First night of having it in Zelda, and the police are already out to get me!
SebastienPeek ·
Have discovered that with the current setup, I'm going to have to take the whole assembly out of the car and cover it.
While doing this, I'm going to spray paint the whole assembly black, which means I have to remove the speakers from the parcel shelf, spray, install speakers and then wrap in some sort of cloth.
I want it to be black, so what sort of black cloth will I need? Is there such thing as speaker cloth, where is a simple place to pick it up? Any fabric shop or will it have to be a specialist car audio shop?
Will start the removal process soon, should only take an hour. Good thing is, I build this, and I can put it in any bugs luggage area because they are all the same! So if anyone needs dimensions to make one the same/similar to mine, just hit me up via PM and I'll be able to send you everything you need.
beetleboyjeff ·
Nice work Seb. 👍
kaiisons ·
what about carpet?
SebastienPeek ·
So today, things went from good to bad to good.
I pulled everything apart. I figured that I'd paint the top of the parcel shelf black with a spray can. This was to make sure when the speaker grille cloth went over it, it was black underneath.
I then test fitted it before we went to get the speaker grille cloth. It is black, got it from Jaycar for $18. Bloody cheap and works a treat!
We then started to line the parcel shelf with the speaker grille cloth. This is where the photos stopped until I'd had it all in place as it was getting dark quick. However, the speaker grille cloth is held in by staples around the back and sides and thumbtacks were hammered underneath the front to give the cloth the tucked under look.
As you can see though, it doesn't line up at the back anymore. Which is a massive disappointment. However, Mum has found this foam stuff that I can use to stuff down there and cover it up. Hopefully this will fix it.
This isn't the finished project either yet. I still have two major factors to do which will blow you away. But, due to school starting back tomorrow, I'll be out of action for a bit and will be enjoying the massive headaches induced by the new subwoofer!
shokwave2 ·
Nice shelf! I built a similar parcel/speaker shelf on sunday, except no subwoofer. Mine has the two speakers and a flip up lid so i can hide stuff under the shelf. I'll try and post some pics today. I also curved the ends of the shlef so it would sit flush and there would be no gap under the window like you have.
Keep up the great work.
SebastienPeek ·
Shockwave,
Originally there were no gaps, but is seems when we covered the MDF afterwards I must have lined it up wrong.
I may have to pull it apart and have another go, but that is going to mean a lot of work and have to recover the parcel shelf again.
We'll see what happens. Seems like my rear seat doesn't close properly either now...
SebastienPeek ·
I really hope taking off the speaker cloth isn't going to be a massive pain in the arse.
I'm going to have to rip it off, unscrew the parcel shelf, slam it right at the rear, and screw back in.
Then cover the the shelf back in the speaker cloth. Just going to have to make sure the shelf is clean and what not.
I think I might as well do it tonight after school, really hoping it'll be a simple job. Touch wood.
Seems everything goes a little wrong with Zelda. But we're almost there, and then she'll be finished.
SebastienPeek ·
Ordered new window cranks to match the billet door locks.
Also ordered me some new black side mirrors.
Hopefully they come from classic vee dub soon, there online ordering system is a bit weird.
But seems every decent VW store is in Sydney or Melbourne, a fair drive from where I am at.
ian.mezz ·
you can buy those shelf s alreay made. $65
I hope link works.😊 page 6
I didn't want to buy one pre-made, I wanted to give it a shot building something myself with mates.
I think it turned out pretty damn good, just have to make sure everything is perfect before finalising the designs.
Still have a lot to do, that only this custom shelf would be able to do, if I bought a already made one, the rest of my designs wouldn't be able to be acted upon.
Joel ·
Those pre made ones are way to light and piddly to mount decent speakers to let alone a sub and amp.
Sebastien, make sure the back seat locks back in place once its all in and finished.
You wouldnt believe the damage an unsecured enclosure can do in a rear ender, emergency stop or roll over accident.
Many hatchback drivers have been injured by unsecured sub enclosures in accidents.
The main battery feed to the amp I hope they gave you an inline fuse for and it's fitted right down at the battery?
shokwave2 ·
I was thinking of buying a pre-made shelf as well, but i wanted one with a compartment or lid, instead of lifting the whole shelf to get something from underneath.
My shelf cost me $15 to build. All i had to buy was one larg piece of MDF. I already had a jigsaw, drill, screws, paint. And it took about 2 hours from cutting to painted to installed.
SebastienPeek ·
Joel!
That is definitely another major factor in why I have built my own.
I'm going to take her out tonight, basically do the following.
- Get a flat head screwdriver and take out all the staples holding the fabric down on the back and sides.
- Slowly peel the speaker cloth back.
- Unscrew the parcel shelf from the sides underneath that are holding it onto the base.
- Push the parcel shelf as far back as possible and then screw back in.
- Attempt to lock the back seats back into place.
- If all goes well, cover the parcel shelf with spray adhesive and recover the parcel shelf with the material.
Hopefully this will be achievable within a two hour timeframe. Need to get it done as soon as possible as it is very dangerous, as you said, to be driving around without the back seats locked in properly. They sure did give me an inline fuse and it is fitted right down to the battery, the wiring job was done by a mate the first time and is absolutely perfect, but I had to run the RCA cables a second time due to a stupid issue.
SebastienPeek ·
Shockwave,
Unfortunately the Mitre 10 down the road only sold sheets of MDF for $40.
I decided if I got all the measurements down, they can cut it all for me.
We had to cut the angles on the parcel shelf, speaker holes, subwoofer hole and a hole where the wires were to go ourselves.
It took about four hours all up to complete, wiring and everything done.
Smiley ·
Hey Sebastien
Great to see you getting stuck into your car!
I bought my first Beetle at the start of grade 12, and it's been all downhill from there 😂😂😂
Here are few pictures of the shelf I built for her, it's very solid and has a removable panel in the top. I built it to house two 6x9 speakers that I bought. And the back seat is a very snug fit up against it.
There are two pieces of angle riveted onto the firewall which hold the back up and support the lid when it is in place.
And there is a large piece of angle with the ends bent to shape that runs along the front edge. It supports the front of the lid and is riveted to the sides to hold the front of the shelf up. The seat falls back into it's stock location against the stops but also seals along the front of the shelf.
As for the actual shape of the shelf itself. That took me a few weekends of trial and error and lots of measuring. My shelf doesn't sit flat, it's angled slightly upwards towards the back of the car. I first made a few templates from cardboard. Then one out of Masonite, and finally the MDF one fitted. The back edge is curved and chamfered to match the car. It took a long time of sanding and trial fitting. But I'm happy to say it was a prefect snug fit, then I covered it with marine carpet. It took quite and effort to make but it's one of the parts of the car that I'm proudest of because it turned out so well.
I hope this offers some inspiration to you, and keep up the great work!!
Smiley 🙂
SebastienPeek ·
Hey Smiley!
Well, I can't say I got mine at the very start of Year 12, it was about half way through 😉
As for what you have done, it is bloody awesome!
Albeit, I can't actually install a shelf that has a cutout for the luggage as that is where the subwoofer is housed. However, there are little sections underneath the speakers on the side, that I could easily use to store little things. I just use the backseat for my luggage anyway, hence why the subwoofer is there.
The parcel shelf, mine, is a perfect fit, but I mounted it wrong and that is where the current issue has arisen from. But, I'll be fixing it tonight if time allows, shouldn't be too difficult, but touch wood it is a simple fix.
SebastienPeek ·
Alrighty, so the job only took about half an hour to do!
Basically I pinpointed where the current screws were, unscrewed (through the fabric) making sure not to tear the cloth nor twist it. I then pushed the parcel shelf right up flush against the rear of the luggage area and started screwing them in.
The front ones went in extremely easy (as they had already been put in before in the current position) and the rear ones were a bit of a struggle as there isn't a lot of hand room there!
But now, it is all perfect and currently looks like this.
The moment of truth was when I pushed the back seat back into place and it locked perfectly. I then checked out the gap between the parcel shelf and the rear. It was non existent again!
I then coloured in the top of the screws with a permanent marker until I can source some screw caps to put over them. Then, she'll look perfect!
beetleboyjeff ·
Good work. I just love it when a plan comes together.
SebastienPeek ·
Me and you both Jeff, me and you both!
Have still got a lot to do before my final design/idea is reached, just ordered the last parts to finish it off and then it'll be complete!
SebastienPeek ·
While waiting for everything to come in the post, it is finally time to get back to enjoying the drive that she delivers.
It is great fun to drive Zelda, albeit she is very loud now and people turn to stare, but I guess they were doing that anyway due to the loudness of the exhaust.
Really hanging out for these new parts that are coming, she'll look beautiful once they're all on.
🙂
SebastienPeek ·
This morning was very interesting indeed. On the way to school, one of the fuses popped. The fuse for my speedometer.
So, basically I had no warning lights, and for some reason my indicators weren't working. I knew exactly what fuse had blown, but it still worried me with the lack of indicators again. Got home and replaced the fuse, so everything is all good again.
However, I have a feeling that the current sound system is having a huge load on the engine. Specifically the alternator (mine is an alternator, right? Not a generator?) with the amount of power the subwoofer draws, it must drain the battery pretty quickly and in turn the engine has to charge the batter more. It just seems to be idling very low on the way home, it may be time for a service...
No, the later ones came standard with an alternator. You can get bigger alternators too if you need.
Post a picture Seb.
SebastienPeek ·
This is her currently Jeff, she's a 1500cc single port, so not the original spec engine unfortunately.
Am I correct in assuming that the new load of extra power consumption by this new sound system could cause the engine some sort of distress?
Smiley ·
That's definitely a genny.
I would recommend upgrading to an alternator if you have the means.
I have one to handle the bigger lights on my Baja and it handle it like a champ.
Smiley 😎
SebastienPeek ·
Smiley,
So I'm definitely correct in assuming that the heavier load on the engine from the new sound system could very well be causing Zelda to idle a lot lower than usual?
Or is that something else entirely?
I'm thinking that next year I invest in a whole new engine. I don't want to do any short term fixes, if it means disconnecting the subwoofer I will do it until the new engine is built and installed. Unless of course I can source a 1600cc twin port with an alternator already on it for a grand or so, not in too bad of a condition. However, that may be me dreaming a little.
No, the later ones came standard with an alternator. You can get bigger alternators too if you need.
Post a picture Seb.
Shows what I know about type 1s haha.
Joel ·
SebastienPeek wrote:Smiley,
So I'm definitely correct in assuming that the heavier load on the engine from the new sound system could very well be causing Zelda to idle a lot lower than usual?
It's a viscous cycle, the drain from the stereo loads up the generator which slows the revs down which drops the charge even further thus reducing revs further.
The main reason Generators went out of fasion for alternators is generators don't charge much at idle, the higher the revs, the more voltage they put out which is then regulated.
Alternators charge at the same rate be it idle or valve bounce.
I'd bet also 38 year old tired wiring and ignition switch would be delivering less than 12 volts to the coil.
SebastienPeek ·
So in other words Joel, get a new alternator for it?
Because it sounds like that is the best way to go regardless of cost... How hard is it to install a conversion kit for it? Or should I just continue to use the current generator and wait until sometime next year when I'm thinking I am going to get a brand new engine?
SebastienPeek ·
If I was to purchase the following, that would solve my issues? Is this all I need to convert it to an alternator or is there more needed?
Non chrome is probably cheaper and will look better in a few years time.
Trust me taiwanese chrome will have a lovely shade of rust brown to it after a few months in a car with a vented engine lid.
beetleboyjeff ·
Joel wrote:Yep.
Non chrome is probably cheaper and will look better in a few years time.
Trust me taiwanese chrome will have a lovely shade of rust brown to it after a few months in a car with a vented engine lid.
Joel, mine is 4 or 5 years old, and the chrome is still fine.
SebastienPeek ·
Well looks like I know where my tax and next pay check are going!
Engine bay will look nice and weird once one part is chrome and the rest is dirty as all hell!
Might have to get the degreaser out 😉
SebastienPeek ·
My twelfth fuse kept popping, so I'd lose all my speedometer warning lights and blinkers.
It was an 8amp fuse, so I replaced it with a 16amp and everything is all good now.
I'm allowed to do that, right?
🙂
STIDUB ·
is your stereo drawing power from that circuit by any chance? check the original, it may of been the wrong one but too high a rating fuse means it doesnt blow other stuff on the circuit do. check it over use the right fuse 🙂
SebastienPeek ·
Alright, I'll see what I can find. I'm pretty sure we just put it on one that was linked to the ignition for the head unit.
I'll see what I can do
🙂
SebastienPeek ·
I have noticed that Zelda is running a lot different since installing the sound system.
I'm assuming that it has something to do with the lack of electricity being generated, could this result in low idle revs and my fuel consumption going crazy?
I really hope that I can get this alternator kit as soon as possible.
Oh, I got new side mirrors, reproduction black ones and got some billet door handles from Classic Vee Dub! 😀
SebastienPeek ·
Been a while since I posted on here, but I have some bad news.
Two days ago I drove to school, thinking nothing of the rain as we had fixed the holes in the air box. I finished school, it had been pouring with rain throughout the day, and I got into the car. First thing I saw was a massive wet patch on the carpet underneath the passenger side of the dash, and then I looked closely and it was all on my side too, more on my side than the passenger side.
I didn't expect her to start, as she barely starts now with the subwoofer and lack of an alternator combination. She started but was even more lumpy than before. The test was whether or not any fuses blew or if my indicators were going to work or not.
I got all the way home and then it happened. My indicators stopped while I was indicating into my own driveway. So I got honks and everything from people behind me until I realised what had happened. I stuck my hand out of the window and continued to drive into the driveway. Do you know how hard it is to turn right with one hand out the window and the other hand slipping on the steering wheel?!
So, I decided, once I parked her under the carport, it was time to find out what the issue was once and for all. and I'm pretty sure I found it, I found where the actual leak was. In the top left hand corner, there are two holes that are underneath the window seal from what I can gather. It is here that I am pretty sure the water is coming from.
So what I did was, there was this foamy hard stuff that was lining the bottom of this side. We didn't touch it last time as from what we could see, it was holding up pretty damn good. But, I took a closer look and there was a gap between where the foam ended and where the metal started. I had to shovel my way through this foam shit to see where the holes were. And boy did I find them.
Lining the bottom of the whole side, there is rust. This rust has eaten its way through the metal. Meaning that the bottom on this side doesn't even touch the back. There are also two prominent holes in the back of the ari box. I don't think that these really matter if I solely block up where the water is coming from. Obviously it comes through the grates at the top of the bonnet, but it comes from this other place now and this other place is what is causing the issues.
It is in the following crevice that the water pours in. It isn't a little leak, it is a steady flow of water that actually comes in. Somehow I don't think it is meant to be there, but I just thought I'd check if it actually is or not? Because if it is meant to be there, then I'll have to fix the rust holes, if it isn't meant to be, then I fix the culprit of where the water comes in.
And yes, I did fail at siliconing it up. It was going to be a quick fix, but soon after I realised what I had done I tried to get it all off. Some remnants still remain however.
Also, I got a pair reproduction black side mirrors and a pair of billet window winders. Next up is some new door panels and some chrome door pulls. I'm seriously considering just buying a new engine instead of getting an alternator kit and installing on my current one. I guess we'll have to wait and see what happens at work...
Bizarre ·
is that in the air box??
You are better off sealing the vents up good and propper.
A new window seal would work wonders as well
SebastienPeek ·
Bizarre,
Sure is in the air box, I got a few other photos of where the rust holes are as well if you want me to put them up on here...
So, you mean the vents where the water can come in from above the bonnet lid? I think it is where the window washer thing used to go, but has been removed since.
But replacing the window and window seal is a massive job, right? Because my windscreen is already scratched to pieces, it'd probably be best if I replaced both at the same time...
SebastienPeek ·
This is the aforementioned grates where the water gets in, situated above the bonnet lid, between the bonnet and the front windscreen. It is directly into the air box, kind of a design flaw if you ask me...
These are also the two rust holes that I found while digging out the foamy stuff.
Joel ·
Definately a Derp on VWs part the design of 1303 Fresh air box.
Years ago i thought about making a catch pan with a tube drain to stop the water entering the box but still let air in.
Till I realized I never even used the fan so I ditched the vent and fan.
Looks much cleaner and no risk of leaks.
SebastienPeek ·
Joel,
Looks like that is what I'm going to do, ditch the fan (already ripped that out) and fill in the vents.
How easy is it to fill in the vents? What did you use?
Where'd you get the black trim set by the way? Instead of the chrome, I've been considering redoing the exterior trim in the black to match my side mirrors.
Bizarre ·
best answer is to cut out - big job though
Leave the fan and just take the cover off (or prop open with spacers)
I just pull air from inside the bonnent.
it dont seal THAT well 🤪
I just brazed a plate to the bottom and sealed around each slot
Another answer is to fabricate a plate with 4 threaded posts and bolt it down from the top
Definitely a "d'oh" on VW's part for L bugs
second "d'oh" is the stupid lip that holds the rubber seal and starts rust
Get rid of it and use mexican seals on the bonnet
SebastienPeek ·
Over the past hour or so I've been out with her and figured out how I could fix those bloody rust holes once and for all.
I headed down to SuperCheap Auto for my good old friend, Liquid Metal. I wire brushed the sections back and started to fill the holes in and what not. Basically the same way I did the other side (which is perfect and has no leaks!).
So now, after a good hours work and hurting my back, I've accomplished the following... I ripped out the black hose that attaches the fan to behind the dash as well. More room for my hands.
So yeah, now she's just sitting out in the sun (I don't understand Adelaide's weather, one day it is sunny, the next, thunderstorms) and getting dry. Hopefully it dries quickly and I'll put her back under the carport before the rain comes.
Joel ·
SebastienPeek wrote:Joel,
Looks like that is what I'm going to do, ditch the fan (already ripped that out) and fill in the vents.
How easy is it to fill in the vents? What did you use?
Where'd you get the black trim set by the way? Instead of the chrome, I've been considering redoing the exterior trim in the black to match my side mirrors.
I see you did the professional chopity chop fan wiring disconnect 😂
Just make sure to either disconnect the other end or insulate it really well.
It'll pop the wiper fuse if it shorts out on you.
Like Barry said best way to remove the vents is chop them out and weld a plate in.
I'm doing that when I repaint but for now it's just patched with fibreglass, didn't wanna do anything too permanant at this stage.
Black trim on mine is just the stock stuff painted.
SebastienPeek ·
Hey Joel!
Yes, I sure did do the professional chopity chop of the fan wiring 😉
I will be insulating it very soon, at the moment she is just sitting under the carport while the rain goes away. As soon as the sun is shining I'll get back in there and get it all nice and perfect. However, where is the wire connected under the dash?
Alright, I'm going to have a go with some fibreglass and do it like that.
Just for now as like you, I don't want to do it permanently just yet but when I do get the chance to respray her, I'll do the welded plate option.
Alright, I'm really considering making Zelda into a Germanlook sleeper.
I have a feeling my front guards aren't the original as my headlamp trims are three screws instead of one...
Also, if I do go to the Germanlook, do I need to get new front guards that have the smoother top (minus the indicator) and get the euro look bumper?
Joel ·
Your front guards would be original.
73 was the only Lbug that had the skinny bumper slots.
74 and 74 had the big American D cut outs like mine has.
and the 1 screw headlights were only 75 and 76, I just fitted some 76 Kombi ones to mine about 10 years ago.
You don't have to go turn signal bumpers to be German look.
I only did cos I like the look.
Took me alot of years to find a good non dented German bumper though.
The Mexican ones bend just from the draft of someone walking past.
SebastienPeek ·
I see, well that is definitely what I have then!
I see, alright, I need to get halogen headlamps however as mine are currently very dodgy... I just don't know what ones I need exactly. Don't want to spend money to find out they are the wrong ones when I go to fit them.
Alright, that is fair enough, I like the clean look however. Although, I am thinking at the moment just to do the black trim set like yours, as I don't really enjoy all the chrome on the outside. Should be a good little project.
Yeah, I've heard a lot about the Mexican quality being very poor. But there is a plethora of Mexican parts and hardly any German ones!
Joel ·
There's 2 ways you can go about getting new headlights.
1 is buy a straight bolt in setup from a VW parts supplier, or fit some sealed beam mounts from some non-VW and then fit any of the 7" headlight insert kits availible on ebay or at autobahn etc.
That's the way I went, some Lucas sealed beam mounts from a Morris and a pair of Autopal Crystal vision inserts.
Bolt ins from a VW shop make it pretty easy though, they just don't look as fancy
George sells these hella ones for $75 each which bolt straight in, as long as your mounting tabs are still ok in the guards.
I did notice last time I was in Mick Motors he had some bolt in setups like that on the counter but with the crystal vision lenses like I've got in mine.
SebastienPeek ·
Alright, it looks like I'm leaning more towards the bolt in ones from a VW supplier.
I'm pretty sure I can pick some up on JustKampersAustralia for around $75 as well.
Unfortunately there aren't any big VW suppliers here in Adelaide, so getting them online is the easiest solution for me.
Also, I have no windscreen washer. How easy is it to install? Where are the wires from it, I'm pretty sure there is a black tube that was coming through to where it should have beens, but there was no wires inside of it. Probably have to rewire the whole thing...
Thanks for your help Joel!
PS, next weekend will see me fibreglassing the vents above the bonnet. Will just make it look so much cleaner.
Joel ·
VWs were super hi-tech and didn't require electricity for the washers.
They just used air pressure from the spare to operate it so theres no stock wiring for it.
Just get an inline pump and push button and hook them to the stock washer bottle if it's still there on the drivers side of the boot.
Run the hose from the bottom of the bottle to the pump then up to the nozzle.
I think i may have a few superbug washer bottles laying around if yours is missing.
SebastienPeek ·
I have to admit however, that is definitely a pretty good system!
However, how does the wiper stalk connect to the washer bottle so that the water actually comes out?
I definitely don't have a washer bottle however, I just have the brake fluid one on the passenger side.
I'm in dire need of replacing my wiper blades and wiper arms to something, well, newer. And black!
SebastienPeek ·
The rains opened up again, and it seemed so did Zelda.
As a quick fix I have siliconed up the inside where I found the holes were. Pin prick holes.
The best fix for me to do is get rid of those vents. Then I won't have to worry about any water going into the air box through the bloody vents.
I might give it a shot come Saturday, just depends on time.
SebastienPeek ·
I have noticed that my fuel consumption fluctuates a lot lately. One moment I could have half a tank left, the next I am in the red. This can happen three to four times each trip I make (in the space of ten minutes).
Now, I know for a fact that this is dodgy. But, is it something to do with the extra load on the engines generator or is it something to do with my fuel system?
I might need to take her in for a service, I am pretty sure she is idling very roughly.
Might be time to actually seriously consider investing in a new alternator.
Joel ·
SebastienPeek wrote:how does the wiper stalk connect to the washer bottle so that the water actually comes out?
I definitely don't have a washer bottle however, I just have the brake fluid one on the passenger side.
I'm in dire need of replacing my wiper blades and wiper arms to something, well, newer. And black!
The hoses run to the wiper switch, there's a valve inside it that stops the pressure till you pull on the lever.
Sux when you get a hose leak as it tends to shoot a jet of water into your crotch.
Better than into the radio though like 71 and earlier beetles.
Yes VW wiper arms and blades tend to be shit after almost 4 decades.
I've tried all sorts of things with mine, new replacement wiperblades don't work so well with old wiper arms.
My latest creation has worked a treat though, you can see them in that pic at the top of the page.
AU falcon wiper arms and those were Trico aero-blades but i've swapped to Trico Ultras now.
I've been meaning to post soemthing about them for a while now, i did put a quick vid about them on my youtube channel but i just gotta sort through the pics first before i can post something.
SebastienPeek wrote:I have noticed that my fuel consumption fluctuates a lot lately. One moment I could have half a tank left, the next I am in the red. This can happen three to four times each trip I make (in the space of ten minutes).
Now, I know for a fact that this is dodgy. But, is it something to do with the extra load on the engines generator or is it something to do with my fuel system?
I might need to take her in for a service, I am pretty sure she is idling very roughly.
Might be time to actually seriously consider investing in a new alternator.
It's probably just the fuel gauge playing silly buggers
More the likley the tank float is just getting tired and worn which is causing fluctuations in the needle reading.
SebastienPeek ·
I'm pretty sure that hose is coming out, I'll have to take a few photos of what I think is the actual hose...
I saw that, I watched the video (yes, I stalk everyone on the internet) and have decided that that is probably the best way to go as mine are completely shit.
It shouldn't be too difficult to source some AU falcon wiper arms and decent blades. Is it a difficult procedure or not really?
Something like this? http://goo.gl/vV3hJ
How would I go about fixing the tank float and so forth? I would prefer to know where my fuel is rather than guessing and just filling up when I think she needs some fuel...
Thanks again Joel, I really appreciate your help!
SebastienPeek ·
So I took the opportunity today to take a couple of photos of the suspension setup at the back.
LHS Rear
LHS Rear Brake
RHS Rear
From what I can tell, it is bone stock and is in dire need of replacement. But I need help in finding exactly what is needed for this upgrade of sort.
I don't want her any lower than she already is, which is due to sagging from what I can diagnose myself.
So, I think, by replacing the shocks I'd get rid of this sag, right? I need to get rid of this "saggyness" as soon as possible, I don't want to go through exhausts anytime soon!
SebastienPeek ·
I had a spare hour that I decided to waste a little bit of.
I took off the weird bumper on the rear and had a look. I kinda like it right off, with no bumper at all. Is this legal in South Australia or not?
You know how I kept going on about the front quarter window being dodgy? I decided to take it apart and fix it once and for all.
I found this, and it kinda scares me a little as it holds the glass. It is rusted through :l
Overall picture of the door panel off.
But regardless, this is how it looks now, all pretty!
ryana89 ·
SebastienPeek wrote:You know how I kept going on about the front quarter window being dodgy? I decided to take it apart and fix it once and for all.
I found this, and it kinda scares me a little as it holds the glass. It is rusted through :l
I see your situation and raise you one up!
Even late(er) model VW's window holders can suffer the same fate.
SebastienPeek ·
Far out, that is crazy!
I'm going to try and find some replacement ones that are in good condition and replace them. Maybe some time next year though, have to keep up with school unfortunately!
beetleboyjeff ·
Just buy new ones. A lot of the advertisers on here and it AVW have them.
SebastienPeek ·
beetleboyjeff wrote:Just buy new ones. A lot of the advertisers on here and it AVW have them.
I didn't know you could get new ones? Haven't seen any for sale on here... I'll have to keep my eyes peeled!
I found out, while I was removing the rear bumper, that it was obvious Zelda had had a rear end smash as I could see a crumpled section. (Didn't get a picture unfortunately, maybe tomorrow).
What this means though, is that rear valance is fibreglass as well. Which, hopefully, means that I'll easily be able to make it a removable one. Meaning I can swap and change and it'll make taking the engine out even easier! I'll have to investigate tomorrow, but I'm praying that it is definitely a removable one.
Time will tell.
ryana89 ·
SebastienPeek wrote:I didn't know you could get new ones? Haven't seen any for sale on here... I'll have to keep my eyes peeled!
You most deffinantly can.
I just bought a pair off ebay UK last night.
SebastienPeek ·
ryana89 wrote:I just bought a pair off ebay UK last night.
Do you have a link to the seller? Do they fit any VW or do you have to get specific ones for specific types?
🙂
waveman1500 ·
GHR stock them, I got some for my Type 3 there not too long ago. There are a couple of different types of them, I think the main difference is early or late.
SebastienPeek ·
waveman1500 wrote:GHR stock them, I got some for my Type 3 there not too long ago. There are a couple of different types of them, I think the main difference is early or late.
Thanks Mark, I'll give Siggi a buzz on Monday and see what he has in stock. Might as well inquire about a 1600tp while I'm at it.
I decided, well the law decided for me, that I had to put a rear bumper back on Zelda. So, luckily I had a nice chrome one spare!
I still think she looks better with the current Torana lights without a bumper, but that is just me. I'll soon have those guards off and have new ones on.
ryana89 ·
Wavman's on it.
The pair I bought are apparantly MK2 only, but they do look alot like the one's in your car?
Thanks Ryan!
Yeah, you're right, Waveman definitely has it. I'll give Siggi (my mechanic) a call tomorrow some time and see if he's willing to part with any and/or he's willing to give me some pointers on how to replace them.
So, have decided that I am going to say %$^^ it and get rid of the dreaded rear bumper. I'll drive along and see if I get pulled over. Even if I do, I can just make up some sort of excuse!
🙂
SebastienPeek ·
Alrighty, so the rear bumper is off again!
And trust me, it looks so much cleaner without one on.
I'm hoping that I'll be able to pick up a ventless decklid soon and then she'll look even cleaner at the back.
All I need now is to be able to paint those rear guards and get them on!
SebastienPeek ·
Dammit!
So the courier came this afternoon, 1:25pm. Mum got home at 1:40pm.
So she missed the bloke by like, 15 minutes. Which means I only just missed out on having a shiny alternator!
However, it is getting delivered tomorrow, which means I have another thing to do on the weekend!
Anybody in Adelaide know who'd paint some guards white for like, $50? If I supply paint, have them sanded back? They'd need to be primed as well, but if I supply primer as well, then yeah? 🙂
Smiley ·
SebastienPeek wrote:I'm hoping that I'll be able to pick up a ventless decklid soon and then she'll look even cleaner at the back.
I wouldn't recommend this as the vents are there to supply air for the cooling of the engine.
Smiley 🙂
waveman1500 ·
I have a spare ventless decklid, but as already mentioned, the vents really do help with cooling. If you're keeping the engine stock then a ventless decklid should be fine, otherwise if you plan on going quickly then I would keep the vents on there.
SebastienPeek ·
Hmm, very valid points from both of you.
If it weren't for the fact that I will be going to a larger engine some time next year, then I would consider getting a ventless one.
However, because this engine upgrade won't be until later next year, and I won't be here to drive Zelda during the Summer, I don't think installing a ventless decklid for the time being would be an issue!
Also, before I put the ventless decklid on, I'd definitely replace the old oil bath cleaner for an air filter. We'll see what happens though, just depends on next paycheck and whether or not I'd be able to afford it after paying for my new laptop and so forth!
🙂
SebastienPeek ·
Looks like tonight I'll be getting a quote on those guards, finally!
Thank God for mates 😉
Will update here with costs and so forth when I know!
Turbo54 ·
Do it yourself, hire a gun from kennards and go crazy. Or get your colour mixed in a can at crash supplies,
I cant see it happening for $50.
T54
SebastienPeek ·
Well, I have everything ready here, so I'm really tempted to just whip out some cans and go for it.
I can't see it either, but one can dream.
I'm seriously contemplating installing the alternator kit tonight.
SebastienPeek ·
So, the blokes at Classic Vee-Dub upgraded me to a 75AMP KIT due to the sale, at no extra price!
In all though, that may mean more work for me...
Currently the generator, from what I can tell, is connect to an external regulator which is located underneath the backseat. This one actually...
Now, with this new alternator, found below, I am pretty sure that it has an internal regulator. Which may cause issues, right? As now there is no need for this regulator (shown above), is there anywhere on here that shows the replacement of this/bypassing? I'm just wanting to make sure I have everything down packed before I continue.
This is my current clearance between the generator and the fuel pump on the carby, it looks very close as it is, so I know for a fact that I may have issues when it comes to attaching it.
Other than that, I am really thankful that the blokes at Classic Vee-Dub upgraded me at no extra cost. Hopefully it won't be difficult to install the new one this weekend when it comes to the wiring of the car. Also, I have a G on my tacho, shouldn't it really be an A now? :P
Took this artyfarty photo this afternoon too, quite like it myself...
My horn continues to sometimes work and sometimes not.
Where should I be looking when it comes to fixing this? Could it just be loose wires behind the horn button itself or on the actual horn?
Mine sounds like a truck, is this normal of a 12V horn?
I want the meepmeep noise...
cam070 ·
I'd say the horn issue is a worn contact on the steering column. The copper contact that meets the back of the steering wheel wears through. It is part of the indicator stalk assembly that may need to be replaced.
To check it you Need to yank off the horn cover and then undo the large nut, I think it's 19mm. Then just pull off the wheel. Just make sure the wheels and steering wheel are all pointing straight ahead before you remove anything so it's all easy to line up when you reassemble.
SebastienPeek ·
Alright Cam, looks like another job for this weekend!
Saturday will be massive, hopefully that a lot of photos of the happenings too.
Aim is to have the alternator installed before 3:30pm. Which means I'll be up bright and early at around 7am to get everything done.
Which means Sunday I'll hopefully be able to get around to picking up these taillight assemblies from waveman1500.
Also, tomorrow night I'll be getting a quote on how much those rear guards would cost to do. I'm really hoping it is like, $200 maximum for both. Then, I can live with that that is for sure.
Will keep everyone posted. Sometimes I feel like I'm talking to myself on here... :l
beetleboyjeff ·
Are you kidding? Your enthusiasm and somewhat wide eyed inocence as you learn about you beetle is like an enthusiasm drug for me, and I am sure many others as well.
Please don't stop, I love it, and am prepared to offer any help I can.
SebastienPeek ·
Ahaha thanks Jeff, I'll continue to post up on here then! 🙂
I got the guards in to be painted in the next two to three weeks, $200.
Think it is a fair trade, professionally done. Good thing I have friends with Dad's who own shops!
I'm somewhat nervous about Saturday, this alternator conversion should be very fun indeed, but very, confronting as well.
Have to make sure I get a Y connector for spades connections, so that everything is all beautiful and nice when it is done.
SebastienPeek ·
Boom! This engine business is bloody difficult with the decklid still on and the engine still inside. Unfortunately I don't have the means to get the engine out, and the decklid was being a pain in the arse to remove. But I digress...
Have finally gotten around to pulling apart the engine of Zelda. Going to give everything a clean, but here is what is currently out...
This is what her donker currently looks like...
I'm curious, how does one remove the oil filler? This thing here.
And these are the old wires that I will be using to feed through the new ones, hopefully this will be a very harmless job.
Really hoping that by the end of the night the generator is completely out and that tomorrow, I'll be able to put the alternator back in.
Brass Munky ·
The oil filler should just twist off... Did you get a new stand in the kit? If you did, the filler will come out when you remove that, when its out, its easier to take off, A LOT easier... If not and your using the standard stand, leave it in if you dont have any reason to remove it...
SebastienPeek ·
New kit definitely came with a stand, so I'll leave it in there until I'm taking the stand off and then remove it. Should be a lot simpler as you just mentioned 🙂
shokwave2 ·
To remove the oil filler from the stand, remove the oil cap and you'll see two slots just inside the filler. This is the oil filler nut which usually needs a special tool to unscrew it. You could probably make your own tool if you don't want to buy one. http://www.justkampersaustralia.com/shop/oil-filler-neck-nut-tool-j11206.html
SebastienPeek ·
Looks like it'll take a little bit of an effort to remove the oil filler from it's current stand and put it onto the new stand that came with the kit. But time will tell tomorrow morning.
I need a socket set to get the nut off of the fan at the rear of the fan shroud. Hopefully a mate has one that fits, anyone know the exact dimensions of the nut?
This is turning out to be a pretty easy install, I'm just really worried about this bloody wiring. Do I need to completely remove the rear seat to get everything through the firewall?
Looks almost like the current wiring comes through the heater channel, but not 100%. Will take a photo tomorrow morning before starting.
SebastienPeek ·
Found it!
It needs a 36mm socket to get it off. Really hoping a mates socket set has one that large! 😀
SebastienPeek ·
Have failed dismally. Hopefully SpLiTmEiStEr will come to the rescue later this afternoon.
Taking her engine out, so that I can get the nut off of the fan at the rear, so that it is so much bloody easier than it currently is.
Battle wounds all over my hands.
Also cleaning up a ventless decklid that may have gotten into my possession somehow... 😉
Smiley ·
All the times I've ever done it I just remove the fanhousing and generator as one piece then pull them apart afterwards.
Though I do have a bit more room in the engine compartment with mine being a Baja.
Smiley 🙂
SebastienPeek ·
Yeah, I was thinking about doing that, but that in itself would have been a task and a half.
The easiest way to do it in my case is to drop the engine and then give it a go.
Hopefully all works!
beetleboyjeff ·
Seb, try taking your engine lid off, then you can take off the fan housing and generator all in one piece - that is the usual way.
You just undo the 2 small 10mm bolts at each side of the fan housing and the strap that goes around the generator and generator stand (the clamp bolt is usually down on the drivers side. I assume you have already removed the fan belt.
Having said that, you may have other tight bits if your engine has a doghouse cooler, or if the thermostat is still connected - it is accessed to be able to disconnect it by removing the small piece of tin on the drivers side below the pushrod tubes. You will also have to remove any wiring or plug leads attached to the fan housing or coil, as well as the heater tubes.
Maybe send a photo if you have any more questions.
SebastienPeek ·
Hey there!
So today was very, well, entertaining to say the least! Looks like, thanks to the help of one SpLiTmEiStEr, I was able to put the alternator on and damn it looks shiny!
Look! I have clearance, and it doesn't rub or anything.
And even the alternator is shiny!
However, like shokwave2 mentioned, I was unable to take off the oil filler. So the aim is to just put some duct tape over this and order something from Just Kampers Australia!
I did what you said though, we took the bolts off of either side of the fan shroud so we could lift it up enough to pull both the generator and the fan itself out.
We just needed to clear the manifold and it was smooth sailing.
Although, we had to do something very nifty to get that large nut off the back of the fan. Bloody bastard that nut I tell you, took at least two hours just to get it off.
beetleboyjeff ·
So........... it nearly drove you nuts? rofl
SebastienPeek ·
Baha that is definitely the truth! The next thing is getting myself that oil filler, then everything should be hunky dory.
That and bypassing the external regulator.
SebastienPeek ·
After all the pain and wiring, everything was done.
So I thought.
Now Zelda won't turn over at all. Something is definitely wrong. But it isn't with my alternator, all the wiring is done correctly and the light pops up in the dash cluster fine.
On closer inspection, seems my coil is screwed. I reckon water has gotten into it, the connections are covered in water or some form of liquid. Could even be fuel? :l
Seems my luck has run out, I'm thinking she is going to be garaged for a bit until I find the time to strip her bare and start again.
SebastienPeek ·
I think I spoke way too soon.
I cleaned up the coil and made sure everything was alright with the distributor cap as well (just in case I had put a lead into the wrong section and so forth, WHICH I ACTUALLY HAD).*
I got my brother to sit in the car and basically put his foot flat on the accelerator and turn the car on.
Boom, life.
However, thanks to my brother, I am pretty sure something may have blown off the engine. She's now leaking like a bastard.
I'm pretty sure it is from here.
How can one fix this?
Other than that, alternator conversion is done. Now it's time to take her around the block a couple of times and then to get petrol.
She definitely needs to be timed as well, anyone ever timed a 31Pict/3 Solex carb before with a timing light?
*Thanks Mum, as much as you can be a pain, you're most of the time right.
Anthiron ·
Dont give up so easily.
If your starter motor wont even turn over then its not the coil. even if your coil was broken you wouldnt be able to tell via a "Closer inspection"
If everything was fine before you did the Alt conversion then i would put my money on wiring.
PUT THE CAR IN NEUTRAL
Get under the car (on jack stands not a jack) and look for the Starter motor which is on the driver side in front of the engine sitting off to the side of the gearbox bellhousing. You should see 2 terminals on the motor. Get a screwdriver and jump the terminals together (by doing this you are bypassing the switch in your igniton which completes this circut and therefore if you have a faulty switch or wiring in that circut you will find out now. The engine should turn over when you do this and there may be sparks. If you didnt put your car in neutral you probobly just got run over by the back wheels.
If this still does nothing - find the big thick power wire that connects to the Starter. Get your test/trouble light out and earth one lead and attach the other to this wire. Do you have power? If yes then your starter is most probobly cactus. If you have no power to this wire then trace it back and find out why. This will be the souce of your problem.
Nicko
PS: a Starter motor is pretty easy to replace yourself.
Anthiron ·
Ok so the car was turning over. but wouldnt fire......
Glad you got it running. Where is the oil coming from? it kinda looks to be like it is just being blown out of the oil filler hole.....Which is to be expected if you dont have a filler in there.
Hard to tell without a picture of the filler hole though
SebastienPeek ·
Nicko!
If you have a look at my last post, on page 9, you'll see that cleaning up the coil and finding the correct match with leads for the distributor cap has fixed it.
She's blowing a bit of black smoke which I have a feeling has something to do with the timing, but other than that and the massive oil leak now, she's running fine.
She was whining, but loosened the pulley so the that the belt had a little more space and now she has no whine!
I'll never give up, I want to make Zelda into something I can have for a while. Next year I'll hopefully be getting a new engine for her.
Next pay check I'll be purchasing some decklid stand offs from Craig Torrens so I can run her with a ventless decklid. I also really need to fork out for a new oil filler too.
I'll try and grab a photo of the oil filler hole. The breather tube isn't there because I have no oil filler attached, currently it is just covered by a piece of duct tape... :l
Anthiron ·
I would suggest you head to supercheap and get a couple of cans of good citrus degreaser and go to town with a toothbrush on that engine and clean it right up.
And follow the instructions (make sure you identify all of your components correctly as it appears you have quite a bitzer engine)
to get your engine running nicely. Once this is done and your engine is all clean you will be able to see where oil is leaking from clearly as it wont have had a chance to just splatter around everywhere.
SebastienPeek ·
Alrighty, luckily Mum is already down there so just gave her a buzz to pick some cans up for me.
Had a quick gander at that website just before, will definitely have a look once the engine is all cleaned up. You're right, she's so bloody filthy it is impossible to pinpoint exactly where the leak is coming from.
She is definitely a bitzer! I'll have to find a mate that has a timing light and that is close enough to me to actually bring it down. If not, I'll just have to make sure I don't let her idle out at the lights. I'm not fussed if the timing is out at the moment, it is mainly this oil leak. Mum is having a go at me because it is on the pavers, and I don't want to park Zelda on the side of the road because of what happened last time she was on the road.
Anthiron ·
I would suggest your problem more lies with Points or Carb tuning rather than Timing. However doing the whole tune up will leave you with a clean slate to start with. If you cannot get a hold of a timing light you might be able to set the timing on your dissy statically. I am not familiar with vacumm only dissys so i cant help you much there.
Remember that to do your tappets the engine needs to be cold. ie: park it for the night and do them in the morning.
SebastienPeek ·
Alright, I'll take off the distributor cap and clean up the connections on the rotor and so forth, that may be an issue too. May have gotten some dirt in there when trying to remove the carb.
I'll definitely try my hand at tuning the carby, will have to read up a lot more on dual tuning point carbys.
I won't be able to tune it tomorrow, not until next Saturday morning actually...
So hopefully I don't destroy the engine by driving it during the week.
Going to get underneath the car with some degreaser and a toothbrush. Let's see how it cleans up.
Smiley ·
That oil is probably being blown out because if you have no filler tube and block the hole then you also have no breathers. This means that the crankcase is going to pressurise and the pressure has to be relieved somewhere. So you get oil leaks. You definitely need to get a filler and breathers back onto the engine. I wouldn't be running the engine let alone driving it around until you get that sorted. For two reasons.
One - the above mention pressurising the case.
And two - if you haven't blocked the filler off very well it's a spot where contamination can enter the engine. And you don't want that.
Smiley 🙂
SebastienPeek ·
Just took a couple of photos of what she looks like at the moment. Hopefully there will be a massive difference once I have gone to town on the rest of the engine with some degreaser and elbow grease!
I must say, the new shiny alternator does look a little out of place. Once I get the oil filler, I think everything should be alright.
Need to replace the hoses from the fan shroud to the heater boxes too...
This is the current wiring setup. A little dodgy, but for the next week it'll do. I'll redo it when I have the correct parts to make sure it runs without having a short.
Kinda living life on the edge at the moment.
Also, this is the external regulator. It is practically brand new! I'm thinking I'll put it up for sale, if anyone needs one...
Everything is wired up perfectly though, but wish I could tell how much charge I had in the battery before and after. I guess we'll have to see how the battery holds up when the subwoofer is blasting. Only time will tell I guess...
Also, have figured out how I'm going to light up the number plate when I put the new decklid on. Shall look very nice indeed once it is done.
That'll solve all the aforementioned issue, correct?
Smiley ·
I'd be running a stock breather setup personally. Especially if the engine is a little tired.
I put that same filler on my old 1300 and because it had a bit of blowby the number and severity of the oil weeps would have doubled.
So I went back to a stock one.
With the breathers like the one you have posted there's only one hole for the blowby to get out, the one that is connected to your air filter.
The stock ones have that as well as the tube that runs down through the tinware with a duckbill valve on the end.
The other thing I have to say is that the filler that I bought was exactly the same as that one (though blue to match my car 😀, and from a different VW parts supplier) and the plastic cap on it last maybe 2 months before the top cracked off it. I also found that the O-ring seal worked very poorly, because if you tightened it down too much it would squish the O-ring out the side.
These things combined with the poor breathing made me go back to the stock setup.
As they say "Chrome won't get you home"
Smiley 🙂
matberry ·
Good advice as usual Smiley
SebastienPeek ·
Alright Smiley!
I wish I could run the stock breather setup, but my oil filler and such is stuck on the generator stand and I seriously have no idea how to get it off within the next hour.
Plus, it would mean I'd have to take the alternator back out and the alternator stand too, just to attach the stock oil filler.
With the linked oil filler though, I can still run a breather hose to the oil bath air cleaner, which is my main concern at the moment.
I'm not after the chrome look, the rest of the engine is screwed as it is. My issue is that I need to get the car back on the road as soon as possible and I think that means buying the aforementioned filler and fitting it as soon as possible.
matberry ·
No source of heat to heat the alloy around where the nut is?Even a gas stove top may do, but a gas torch or oxy is better. With the alt stand in a vise have a tool made from a piece of flat steel, 3-6mm thick and ground to size to fit into the internal nut, heat it up, drive in the tool with a very solid blow with a hammer, and undo nut by turning tool with a large shifter......easy 🙂.
Paulc1964au ·
Seb,
You are doing so well keep up the great work
SebastienPeek ·
Matt,
First issue is the fact that I do not want to have to go through the removal process of the alternator again, whatsoever.
I was kinda hoping to never take it off until I actually sold Zelda :P
Second issue is that Mum doesn't like me having car stuff everywhere, so I'm very limited when it comes to tools and a workbench, let alone a vice 🙁
SebastienPeek ·
Thanks Paul, appreciate it! 😀
Can't wait till she's back on the road though, just have to sort out this issue with the oil filler and so forth, then she'll be back on the road and I'll be able to enjoy driving her again!
matberry ·
Understand mate, not easy with limited tools. I was explaining a method to remove your old filler from your old alt stand. Changing the stands over is definately a big job.
SebastienPeek ·
I know, but to put the same breather and oil filler setup back on from the original genny stand onto the new stand would be near impossible without removing the alternator and the stand again, which is something no one would enjoy!
Smiley ·
SebastienPeek wrote:I know, but to put the same breather and oil filler setup back on from the original genny stand onto the new stand would be near impossible without removing the alternator and the stand again, which is something no one would enjoy!
No it's not.
Once you undo the 'bolt' out of the filler it just lifts out.
The you can install it onto your new stand while it is already fitted to the engine. Sit the filler in place then install the bolt down through it. I made a tool at work last year to remove and install them. It's just a large nut welded to a piece of flat ground to shape. But as Matt has said you could do without the nut and just throw a shifter on the plate.
I'm heading out now but when I get home later I can throw a picture of it on here.
Smiley 🙂
SebastienPeek ·
Well, I just ordered that filler but I'm up for anything that means I can get her back on the road quicker than a couple of days.
Was hoping I'd be able to drive her to school tomorrow, but definitely not likely.
Thanks to all for the pointers though, really appreciate the help!
By the way, I've also got the ventless decklid waiting to be cleaned up and installed. Think it is off of a 68 1500 Deluxe... Now, I need a key lock for it (it is a larger lock mechanism and housing than my current one which kinda sucks) and have figured out how I'm going to light up the number plate.
My only issue with this is that of cooling for the engine. As discussed before, there will be a need for better cooling. Can this be achieved by installing a decklid standoff at the bottom? I think Craig Torren's on here sells them...
Smiley ·
Ok. I have some pictures for you. better late than never.
This is the tooling that I made up. It's a bit of flat that is a nice tight fit into the notches on the oil filler nut.
This is the engine that I've just pulled out of my Baja. fortunately it was sitting in the garage so i could show you this. You can see the two cutouts inside the filler tube.
The tool slots down inside the filler and you crack it off with the appropriate spanner.
Then all you do is wind the little 'bolt' out and your breather comes off! Easy peasy! I couldn't see you having many dramas doing this with the engine installed in the car.
So all you need to do is remove the filler from your old stand and screw it down on the new stand on the engine.
Hope this has helped.
Smiley 🙂
SebastienPeek ·
Smiley!
If I had the tools to fabricate something like that, I'd do it in a jiffy.
Hopefully I'll be getting the new oil filler as soon as possible, don't know how long it'll take to ship to Adelaide though.
I poked about a 5 cent piece size hole into the duct tape on the oil filler so that relives some of the pressure I would assume, I haven't tried starting her just in case.
I kinda don't want to start her until everything is back on the engine and she's "supposed" to be working properly.
Thanks though Smiley, really appreciate your help and everyone elses!
SebastienPeek ·
While Zelda is currently parked doing nothing, I have been planning my next interior additions to her.
I currently have, in my possession, four blue LED strips that will be wired up inside Zelda.
I'm thinking that the two that I put under the dash will be wired up to the interior light circuit so that they too, will have three different states like the interior light.
The other two, well that will be a different story. I'll have to figure out how to make it as clean as possible, but it'll definitely look very neat when it is finished.
Let's just say, it'll have something to do with two VW emblems off of a bay window kombi glow blue. 😉
Joel ·
If you got an angle grinder and a steady hand you can make one like I did from a 27mm socket if its not a paper thin cheap one.
SebastienPeek ·
Wish I had an angle grinder!
Bloody hopeless. The filler came today, but wasn't home when the bloke dropped it off. So I get it some time tomorrow.
I'm thinking I skip school and stay home, means I'll be able to get her back out on the road.
Brass Munky ·
4 inch grinders are cheap Bud... a $20 Bunnings special is probably all you will ever need. Most of the time nowadays they come with a replacement warranty, so If it breaks, go back, get another one, and continue on...
SebastienPeek ·
Yeah, I might as well go down and grab one soon.
I need to cut out the rear valance as soon as possible too, hopefully SpLiTmEiStEr will give me a hand not the coming weekend, the next one we'll get grinding.
Just means I'll be able to buy fibreglass ones and change them whenever I want.
Makes engine removal easier too!
Brass Munky ·
Why are you cutting the rear valance?
waveman1500 ·
Brass Munky wrote:Why are you cutting the rear valance?
Amen to this! You have more important things to worry about at the moment. Removable valances are for drag cars, unless you're going to have the engine out every weekend then you really don't need one. Keep up the good work!
SebastienPeek ·
So that, when I do my engine next year sometime, it'll mean less work to get the current engine out and the new one in.
But you're right Brass Munky & waveman1500, it isn't really necessary unless I was planning on taking the engine out and so forth, every weekend. Which I won't be doing.
I'm curious about your bug, those T-bars in your signature, are they legal in Adelaide?
Also, say I want to get Zelda's stance, well, lower. What needs to go into Zelda to get her say, 2" lower all round?
SebastienPeek ·
Look at what found it's way onto Zelda!
I'm just about to take her out for a quick trip around the block. Hopefully she holds up and nothing goes while driving...
Will report back once I am back!
Joel ·
Hope you tightened up that B+ wire before you start up.
Thats Live all the time, might wanna get a rubber boot for it.
waveman1500 wrote:
Brass Munky wrote:Why are you cutting the rear valance?
Amen to this! You have more important things to worry about at the moment. Removable valances are for drag cars, unless you're going to have the engine out every weekend then you really don't need one. Keep up the good work!
I used to think like that once, till I actually did it to my own bug.
It's one of the most sensible and logical modifications, they should have come from the factory like it same as Kombis did.
You don't actually cut it, just drill out the spot welds and grinding off a couple of tack welds, same as replacing the apron only you dont weld it back on, bolts in place instead.
all easily reversible and is not even visibly different.
Has far more purposes than just easing engine removal.
Makes replacing the engine bay seal a 5 min job without removing the engine and muffler replacement is alot easier too as is removing the crank pulley.
SebastienPeek ·
Alrighty, reporting back my findings after driving around the block a couple of times.
She's very bloody sluggish, like, accelerating takes so bloody long now!
Gave Siggi at GHR a buzz, he reckons it is timing. Just did some research into it and will most likely do it myself tomorrow at some point. I have like, 5 litres of petrol in her, so if I make it to school and home again, I'll time her.
I think Joel has swayed me to do it once again, bloody hell. Looks like I'll be undertaking it really soon, should be good!
SebastienPeek ·
Found the issue! Went and had a look again, after studying the picture above.
Check out where the tube from the vacuum advance on the distributor goes... DOH!
Brass Munky ·
SebastienPeek wrote:I'm curious about your bug, those T-bars in your signature, are they legal in Adelaide?
Also, say I want to get Zelda's stance, well, lower. What needs to go into Zelda to get her say, 2" lower all round?
If I could give you a straight answer on those, I would... A Police officer couldn't give me a straight answer, we did talk about the legality over a beer, I don't remember his EXACT words, but I think its going to come down to the individual officer, their mood, and my attitude at the time.
To lower yours, I believe that you have a strut front end and not a torsion bar, so the front end would be a spring change or compression, the rear is a simple case of adjusting the torsion bars to where you want. There are lots of tutorials around the place to do it...
I used to think like that once, till I actually did it to my own bug.
It's one of the most sensible and logical modifications, they should have come from the factory like it same as Kombis did.
You don't actually cut it, just drill out the spot welds and grinding off a couple of tack welds, same as replacing the apron only you dont weld it back on, bolts in place instead.
all easily reversible and is not even visibly different.
Has far more purposes than just easing engine removal.
Makes replacing the engine bay seal a 5 min job without removing the engine and muffler replacement is alot easier too as is removing the crank pulley.
No doubt that it has its uses, (The next time my engine comes out, im doing it to mine) but I think his time right now would be better spent getting the car running perfectly and back on the road for regular use. If the 1916cc engine he keeps talking about eventuates, then it could be a fantastic Idea then, but for now, there are better things to be spending time and money on...
SebastienPeek ·
Brass Munky wrote:If I could give you a straight answer on those, I would... A Police officer couldn't give me a straight answer, we did talk about the legality over a beer, I don't remember his EXACT words, but I think its going to come down to the individual officer, their mood, and my attitude at the time.
To lower yours, I believe that you have a strut front end and not a torsion bar, so the front end would be a spring change or compression, the rear is a simple case of adjusting the torsion bars to where you want. There are lots of tutorials around the place to do it...
Ah, fair enough! I'm currently driving around with no rear bumper as it is. I'm just hoping that when I do get pulled over, there isn't any issues and I'm able to work myself out of a fine if anything was to eventuate from it...
Yeah, I'm pretty sure I have a MacPherson Strut Suspension setup at the front, so I'll have to do some more research into how to go about lowering her. Thanks though!
Brass Munky ·
I drove my type 3 Panel for years with no rear bar, and my old white type 3 wagon, for years with no front and never had any issues... Deal with them when they arrive... Alternatively... I'm pretty sure you can get brakets that adapt early bumpers to late cars if you want to go that route...
SebastienPeek ·
Nah, I'll just drive without my rear bumper for now anyway, just have to see what happens.
I have to be more focused on getting her back on the road and working perfectly before going into customisation and so forth.
SebastienPeek ·
Drove her to school and back again. Noticed the engine having a nice high whine...
Could be something to do with the belt, but here's a video below!
Also, have noticed a weird thing going on with the generator light. I videoed me turning the car on and then turning the car off. All focused on the dash. Watch the generator light.
Any ideas? Really struggling to find any information on such, well, weird things going wrong :l
SebastienPeek ·
Fixed Zelda's whine!
I was using the old generator belt, not the supplied alternator belt.
All fixed now, she's running perfectly.
Hopefully this fixes my issue of her guzzling petrol like a V6.
SebastienPeek ·
Since the alternator conversion, Zelda has been aggressively guzzling petrol.
What would be the main cause for this?
It almost sounds like it is time to take her in for a service, or better yet, complete one myself.
SebastienPeek ·
Alrighty, has been a while (yes, three days in my eyes is a while) and just thought I'd update everyone on what has been happening.
Like I have mentioned before, Zelda is guzzling petrol like no tomorrow and she is starting to smell of fuel inside the cabin.
Now, I'm pretty sure this isn't just because of the alternator conversion but I could very well be wrong. I have taken a look at the fuel lines from the fuel tank to the engine (ones that are clearly visible in the bonnet area) and couldn't find anything that would be causing it to leak...
However, I found this, and have no idea what is doing here nor what it is meant to be doing...
Also, while driving the other day, a bit of my chrome trim fell off. Good thing I was at the lights and heard it, jumped out and picked it up. No thanks to the people behind me honking, the lights weren't even green!
So I'm currently deciding whether or not to rip the whole trim off and bog up the holes. Would look very clean, have seen a lot of other bugs with the same look too.
I also found something very interesting in my drivers side front wheel arch. I have noticed that whenever I go full lock in a clockwise direction, I get some sort of rubbing. Think I found where it was rubbing. But funny enough, there are no marks on the inside of the wheel itself...
Hopefully by the end of today I have installed the LED strips under the dash and they're working perfectly. Then it comes down to mounting and playing with the parcel shelf setup...
Brass Munky ·
That's the tyre rubbing on the inside of the guard.... All my cars have done that... but all my cars have been LOW....
SebastienPeek ·
Might have to get the measuring tape out and see what height Zelda is at.
I'm pretty sure she isn't stock, obviously, I scrape everywhere, even just getting out of my driveway and that isn't even that big of a change in the road!
Will see what I can find tomorrow. Hopefully getting the LEDs in tomorrow as well!
Tomorrow is going to be very busy, got my only trial exam.
The end of Year Twelve is coming, time to get your pants off!
(Yes, I am currently delirious and it is late).
OldTimer ·
Looking good Seb. What's a bit of rubber when the stance is right? 😂
Good luck with the rest of the year.
Old Timer
P.S. I KNOW who Zelda is. 🙄
SebastienPeek ·
Ahah definitely nothing wrong with a bit of rubber, her stance is nice, just want it a little lower!
Thanks Old Timer!
...
What do you mean you know who Zelda is?! 😀
As in, you know the character or as in you know her before she was mine OR you know her due to the fact that my signature asks? :P
I'm pretty sure I read way too deep into that...
SebastienPeek ·
Alrighty, have installed all the LED strips that I had, two under the dash and then one each under the front seats, all wired to perfection and all hidden.
I'll take some photos later this evening when it gets dark.
Have an issue though. Sounds like my fan inside the fan shroud is rubbing. I really don't want to have to take it out and replace it just yet, is it dangerous for me to be driving with it rubbing?
Here are some awesome photos. Two under the dash and then the front seats, looking pretty awesome!
SebastienPeek ·
Taking Zelda into GHR tomorrow morning so that I can figure out what is going on with her.
I do know that it is the fan rubbing in the shroud, but that, from what I can determine, isn't much of a big deal it just sounds terrible.
Hopefully Siggi can figure out what is going on with her damn fuel consumption.
SebastienPeek ·
Alrighty, took her in and she is healthy again besides a few things.
So, her timing was definitely out, way too retarded according to le mechanic! So, timed and then he just yanked the crap out of the fan shroud and now there is no rubbing.
However, I have another issue now. Woo.
Seems my oil bath cleaner is leaking like no tomorrow. It has gone all over the coil.
So, I'm buying a new coil, an air filter, and an air breather for the oil filler.
Least her donk will look nicer!
Lucky Phil ·
SebastienPeek wrote:Thought I'd add this. While the Oil Aircleaner was off, we wanted to catch all the leaks. So, being German and all, we did the following.
Errrrr. You do realise Heineken is Dutch beer, Don't you?
Still, Points for your green approach!
SebastienPeek ·
Goddammit, I did not know that actually, but thanks!
She's leaking so much oil it isn't funny. Going to have to figure out what to do to fix it.
We'll see what tomorrow brings.
SebastienPeek ·
Alrighty, so yesterday was full of fun happenings with the aid of SpLiTmEiStEr even though he was a little under the weather and I may have got him in trouble with his misses.
However, we got a breather pipe attached firmly to the oil bath cleaner, fixed the carby back on properly with a new gasket and got a new coil for her as well.
We all know how Seb likes to put images up, I must apologise for my photo whoreness. Enjoy though!
New coil.
New breather hose, this is where oil was leaking onto the previous coil, not good!
So after all of this, I went to check this morning if she was still leaking. Yep, you guessed right, she sure is!
Now, I don't know how well the following pictures will demonstrate where the oil is actually dripping from, but lemme try and explain.
There are four bolts holding the sump onto the block I assume, the back left bolt is the culprit from where the oil is dripping off.
Now, I don't know how to fix this, and any ideas would be very appreciated. Let's see if some images help explain what I'm talking about!
Joel ·
What have you got the other end of that hose connected to?
THat's the pre-heat hose and ducts hot air into the carb when it's cold.
early ones sucked in hot air from the heaterbox and later hot air of the heads.
Little lever is a summer/winter control
Trouble is it's mix-matched and isnt for that engine, its an early 60s 6volt 1200 air cleaner so that engine wouldn't have the connection for the preheat for it.
Oil leaks are just the usual pushrod seals and most likely oil cooler too.
SebastienPeek ·
The other end of the hose just goes down under the engine bay through the back, pops out next to the gearbox.
Looks like I'll be in dire need of that bloody aftermarket air filter and so forth as soon as possible then, if it isn't really doing anything anyway...
So, do you think it'd be best if I took it into the mechanic to fix oil leaks or if I should attempt myself?
SebastienPeek ·
Okay, so took Zelda for a bit of a spin this afternoon and took a couple of photos while out for my Graphic Design major that is coming up.
Beautiful day here in Adelaide, glad I took the opportunity to take her for a spin up Gorge Road/Corkscrew Road/Montacute Road.
Ollie ·
Looks good mate! When are you changing those rear guards?
SebastienPeek ·
Ollie!
As soon as they are back from getting painted and I've got me some white tombstone assemblies, they'll be on there in a flash!
Hopefully before next weekend, aiming to have everything done before Bay to Birdwood.
Brass Munky ·
I sold a pair of 60's rear lights not long ago! Dont have anymore to offer you though to get rid of those horrible Torana lights...
Have you thought about painting the front bar black to break up the white a little?
SebastienPeek ·
Chris!
Dammit, looks like I'll be on my toes looking, waveman1500 has a pair but hasn't returned my PM yet...
The front bumper is actually chrome, has just been painted over with what I can seriously say is a brush and a can of house paint.
I'm in the process of deciding whether or not to take it off, paint strip it and then put it back on.
SebastienPeek ·
Just reporting back in, yes, I am currently an AVD addict.
Today parts were shipped from Wassim (Vollks) for Zelda, hopefully arriving very soon.
All I can say is great customer service, and was up for a chat via Email as well so that was pretty damn good!
Hoping that Vollks does get some more parts, seems they are currently not stocking a heap but still enough to keep me happy anyway.
Want to get this baby going a little faster on the road, so on the look out for a 1600tp case, I have every other bit needed to put the engine in Zelda.
snitz ·
Ooh ooh ooh!!..what did you buy?..lol. You can reuse your case you know..or are you gonna build another donk while the car is still being driven?.
SebastienPeek ·
Well, I have my breather setup coming, I have got a new ignition setup in the pipeline and have found myself a couple of dual carb kits that I'm eying off.
However, if I got a 1600tp case, I'd just bolt on everything that I currently have and use that for a bit, until everything came.
The main aim is to fix this damn oil leak, and I might as well upgrade in the process. Just hoping I can source a cheap 1600tp case somewhere.
Keeping my eyes peeled.
Brass Munky ·
I'd offer you one of my spare cases, but They are all spoken for at the moment.
Have a look at cip1.com and vwparts.net for stuff Vollks doesnt stock. I use those guys for everything I buy.
And Hit Andrew up for the taillights off the vert he cut up 😉
SebastienPeek ·
Aha, I'll keep searching for cases 😉
Yeah, really want to use vwparts.net next pay check, so we'll see what is on the check list and get it done!
As for those taillight assemblies, already had a peek (I find it funny that I laughed when typing this word, because it's my last name and all... I am a sad, sad, very sad teenager...) at them and they are rusted in the normal spots. Might hit up CVD as I saw full taillight assembly reproduction ones on there that are already white.
We'll see what happens, will keep everyone updated with purchases and overall whatever happens with Zelda as my luck may have hit a high, she didn't have anything wrong with her today!
Besides that damn oil leak.
SebastienPeek ·
Alrighty, so some stuff came in the post today that I couldn't wait to put on. Wonder if you can guess what came? :P
Looking damn fine if I must say so myself.
I do, however, have a question... Under the air filter there is a breather tube thingy, should I have something attached to this or is this normal?
Also, the exhaust is still spitting a lot of this black crap out.
Have gone for a bit of a drive with the new accessories on the donk. Love the sound when the carby is sucking in air, sounds awesome! Very happy indeed with my purchase, next up is the rear guards which will be on come Saturday afternoon if I can source some tombstone taillights.
SebastienPeek ·
Okay, so this morning was very interesting indeed.
Was driving along, pulled up, and conk she died. Exactly the same as last time she was doing it.
Low and behold, the automatic choke wires were effed.
Just redid that wire, putting it behind the carby and not in front.
Seems every time I accelerated, the wire was getting pushed, and in turn, falling off the coil.
Have found where the oil is leaking exactly.
Note to rookie (aka myself), always replace gaskets, especially ones where the alternator stand goes.
SebastienPeek ·
Just a quick little update, getting the guards back from paint on Saturday. I don't have the taillight assemblies however, so won't be able to fit them until I pick some up.
The ones I have are too rusted to go on, in my opinion anyway.
Next week shall be very interesting, getting some wheels on her. They should, hopefully, be something very original looking and something that will make Zelda stand out at the Bay to Birdwood.
Going to push in the line and just trail along with a couple of mates, should be good fun!
Will post some more photos when everything comes together.
snitz ·
Have you hit up Splitmeister for the tailights off of the '70 vert that he is wrecking?..
SebastienPeek ·
Already had a perv at them, they're a bit rusty for my liking, but might take another look. Will text him in the morning, want to get the guards on as soon as possible.
But like I said, probably won't be until next week at some point, next pay cheque is Tuesday!
SebastienPeek ·
Found the culprit of my fuel smell in the cabin.
My heater boxes are completely busted, looking at getting some J tubes, but they were letting the fuel smell leak into the cabin as they were wired open.
Doh.
All fixed now.
kaiisons ·
that mini filter on your breather should have a hose to the little thing on the chrome aircleaner. it is the case breather, and as the case pressurises oil is forced out of every orifice. the vacuum created by the carb will relieve this pressure so i would re route that asap.
SebastienPeek ·
Yeah, Joel and I were discussing the oil filter, that it shouldn't be there and I should hose it from there to the air filter as soon as possible.
I should be able to do it sometime next week, as for now it'll just be like that.
Once I get all my debts paid, then I'll be able to run down to SCA and get some tubing for it 🙂
Brass Munky ·
Talk to the Debiasi's, they will probably have some J tubes lying around...
smithy68 ·
I thought Debiasi closed shop?
Brass Munky ·
Yes and No... Adam is working for a friend of mine, while Pete is still doing small things from home as far as I know...
SebastienPeek ·
Yeah, might talk to Adam (I know he is debiasi4 on here), see what they have lying around.
I don't know if there is really any point in getting J tubes right now, I just want her to look (on the outside) nice for Bay to Birdwood, so guards and shoes are first.
Then comes the engine, clutch and suspension.
Brass Munky ·
The problem with the fuel smell, is that it will put you to sleep behind the wheel. Forget the shoes, and fix the heater boxes... I know from experience the whole petrol vapour sleep thing... Your highest priority should be getting it safe to drive. Throw the new guards on, leave the wheels the way they are for now, and get those heater boxxes fixed!!!!
SebastienPeek ·
Had a fuel smell problem since I bought it, so you're probably right in saying I should get it fixed as soon as possible.
It hasn't made me massively dizzy, I just drive with all my windows open as it is anyway, raining or not.
I wonder if someone like Adam or Peter could take a look at where the smell is coming from... Might send Adam a PM.
Yep, have sent Adam a PM. We'll see what comes of it!
SebastienPeek ·
Just got a phone call from my painter.
Looks like the guards came up shit twice, so he's stripping them completely back, fixing the rust and repainting.
Should be done by next weekend, so that gives me some extra spending money over the next week.
Best part is he isn't charging me extra, so it'll only be $200 regardless of everything going on.
Time to go and rip off all of my chrome trim except for the bonnet one. I'll post some pictures of what it looks like once I'm done.
SebastienPeek ·
Alrighty, so all the chrome is off now.
Basically, at the current moment, with all the holes that were left over, I have just masked them up with some masking tape to hold out the elements of rain that we get oh so often here in Adelaide.
I have run into yet another issue that I am faced with. The below pictures show the difference between two sections that I'm somewhat confused about. I have reason to believe that the drivers side one has been bogged up previously, so that is no biggy, but the passenger side has all these weird indents, which, to be honest, don't even look like they are supposed to be there. Regardless, by the time I am finished with it, she'll be smooth as a baby's bottom as Mum always says.
Drivers side.
Passenger side.
Passenger side closeup.
But other then that, I stood back and took a good look at her. She's definitely a lot cleaner looking without that trim, and she'll look a lot more cleaner without the masking tape hiding the holes. Depending on the weather tomorrow, I'll be sanding back a little, bogging, sanding again, priming and painting the hole sections. Good thing I have a carport that I have got access to by telling Mum I've done more of my homework than I really have...
I apologise for photos above too, took them with a crappy iPhone 4 camera. Can't wait till the new one comes out, 8 megapixels of pure bliss.
SebastienPeek ·
Okay, after a long day out in the elements (under a carport thank God for that!), I have completed, with the aid of two very good friends of mine, got rid of the holes in Zelda's body and got them all primed.
Front Passenger Side.
Passenger Side Door.
Passenger Side Rear Panel.
Drivers Side Rear Panel.
Drivers Side Front Panel.
Drivers Side Door.
And so, in the angst of wanting to see what Zelda would look like with a ventless rear, I decided to take the previous decklid off and install the ventless one I had. James (a friend) filled the holes where the trim would usually go and primed it too.
Another one with the lights all working, thankfully.
I then got a little carried away with the photos, and we all know how people enjoy photos, so I snapped this one trying to be arty farty.
If you look closely in the following photo, the ventless decklid actually doesn't close properly. It kind of, indents a little. Now, I'm buying standoffs so that won't be an issue, what is an issue though, is that the spring that goes underneath doesn't fit. Hence, I currently have no spring for the decklid which is somewhat awkward. I also had to take my rear number plate out of it's holder thingy and just bolt it straight on.
But yeah, will order those decklid stand offs as soon as possible, probably through CVD as well as Vollks doesn't have any in stock at the moment.
Hope you enjoyed this update, I sure did enjoy today!
Oh, and excuse the dirty parts, I still have to clean her.
SebastienPeek ·
Once again, Zelda has another decklid.
But this is because I took the previous one off (ventless one) and decided, well, let's sand back and make it smooth, and then prime.
I did the above, and now they're out in the garage drying.
Almost, but no cigar.
I'm after the Tombstone ones, they look like this.
They're the ones that I currently have, but they're completely rusted through.
Trying to source some from polak but haven't heard back from him.
SebastienPeek ·
Look what just arrived!
/Phone Camera Photo/
Very exciting. Hopefully getting some assemblies sent from Adam (polak) soon, just need to hear back from him.
Then, I need to get the ventless deck lid painted white by the same guy, who did a fantastic job!
Going to have to go and talk with SpLiTmEiStEr about using his garage before the 28th of November to paint Zelda white.
We'll see, want to get it done before I head to Europe and after my exams finish.
Until next time I have something done. (Probably the tombstone assemblies).
snitz ·
Nice work!..I so want to burn those torana taillights..😂😂..its gonna look a squillion times better thats for sure!.
SebastienPeek ·
Ahaha trust me, so do I! But might be selling them, depends what condition they are in when I take them off.
I'm going to see if I can get the same bloke that has done the guards to do the whole body.
I don't want to strip her completely bare. So I'd just get him to sand back the clear (or I'd do it) and he'd just spray the outside.
Might talk to him tomorrow about it.
snitz ·
I doubt you would have clear to sand down as clear is usually for C.O.B (Clear over base) paint jobs. You generally only clear over metallics..Probably not worth sanding down..he'll have the air powered sanders that could do your hard work all in 5 mins..
SebastienPeek ·
Cruising along last night at 60km/h in fourth gear and some douchebag was right up my arse.
As he went to over take me in the left lane, I dropped Zelda into third and raged.
Had some fun.
Saving my cash for something called an EJ20. Sounds good.
Time to do some research though, need to find out everything about doing such a conversion...
surfpig ·
haha thats sick man, i love pissing off douchebags! best fun
sounds like zelda is going along nicely, keen to see what it looks like when you have the different guards on it👍
SebastienPeek ·
Yeah, she's definitely running good at the moment, really enjoying driving her!
Ah, yes, I still have to get those on, but need the tombstone taillight assemblies before I can even think about doing it.
Will look odd though, having bloody nice white guards and a cream coloured body... :P
seagull ·
SebastienPeek wrote:Cruising along last night at 60km/h in fourth gear and some douchebag was right up my arse.
As he went to over take me in the left lane, I dropped Zelda into third and raged.
Hit 100km/h+ and this bloke had no idea what had hit him...
Its you that should be in the left lane, unless your about to turn right up the road. + you have an old car that does not perform like a modern car ie , brakes handling, power & most of all safety
so forward think about your actions and wise up before you become a statistic on the road and we read about you in the paper or on the news.
SebastienPeek ·
Yep, I'm out.
I'll update when something good has happened.
nbturbo ·
Finally !!!!!!
SebastienPeek ·
After a bit of research and some time away from AVD that I thought was necessary for me to clear my head, I have decided that I need to accomplish the following to please everyone on the forum.
It seems that everyone has their own opinion, but I am one to please all.
Firstly, I see it necessary to have all four brakes as disc brakes.
Does anyone have any threads that would include a lot of information on doing such a conversion?
Secondly, I think it is necessary that if I am going to convert to the dark side, that I upgrade both front seats and seat belts.
I'm assuming people have retractable seat belts in their bugs, do they mount straight onto the original bolts or do I need to do something fancy?
Thirdly, tyres. What type of tyres should I be running that will give me good enough grip but not too much grip.
Fourthly, should I get a newer type of steering wheel or should I get the original?
Does the size of a steering wheel drastically change the handling of a VW?
I apologise for taking up people's times. I am trying to learn as much as possible.
nbturbo ·
SebastienPeek wrote:Yep, I'm out.
I'll update when something good has happened.
That didn't take long-so what's happened that's good?Keep us all in the "loop"
SebastienPeek ·
nbturbo,
First off, didn't know I wasn't allowed to ask questions on a public forum?
I also didn't know I had to have permission from you to post on my own build thread?
Oh well, I have the sides ready to be painted, ventless deck lid is about to be painted and tombstone taillight assemblies are on there way.
Deck lid stand offs arrived today as well.
Paulc1964au ·
You dont need front and rear disc brakes, i have front disc and type 3 rear drums and the braking is sufficient.
you can bolt retractable i have retractable in my 69
My tyres are front 175 X 65 X 15inch and rear are 195 X 65 X 15 inch however I do have a 2 inch narrowed beam and drop spindles
SebastienPeek ·
Hey Paul,
Thanks for the information!
I'm curious, where did you buy your retractables from?
I'm thinking upgrading them sooner rather than later, the safer the better.
Yeah, for now I'll be keeping her at her current height.
Will head to a tyre place soon as I need some new treads.
Almost at wear line.
seagull ·
SebastienPeek. I am quite amazed that your $180000.00 net annual income being a computer nerd ( as quote to me in PM ) does not allow you to purchase out right or net salary sacrifice a late model car. One would think all those hours you work at your office in Adelaide's central business district saving the said company billions of $ with computer fraud you would not have time to work on this low budget VW. Shame you got the hard word from your mother,but I am pleased having a son my self at your age she is looking after your account for you and your best interest not to have a subaru powered Vw.
Quote to Seagull,
I'm wanting that engine, but currently in year 12 and have a nagging Mum.
Is it possible, that if it doesn't go, I'd be able to pick it up early next year?
Seb
many LOL to be had hahahahaha
SebastienPeek ·
I beg your pardon?
I work as an iOS developer in a business situated on the outskirts of Adelaide. I have no such connection to computer fraud.
I also stated that I would be on that salary as of the 1st of January, 2012.
I like how you take everything out of context to create humour for others not knowing what you're doing to other people.
I'm glad you find it funny. I think you'd probably find it funny if I took it to heart and did something stupid?
How about you let me have fun with my car in whatever way I fucking want to and you fuck off?
It is obvious that you enjoy stalking teenage children, especially on the Internet. Don't people have a name for that?
The fact that you tried to find out who I was, and failed dismally, is just wrong.
One should also realise that VW's have been in my family since before I was born. My grandmother used to race her own Beetle with the MG Club at Mallala back when she was a kid. My Untie and Uncle have both owned VW Beetles and my Mother and Father, when I was a kid, owned a Type 3 Squareback.
Get your facts right before you start slandering me, fuck head.
I have a different last name to what Seagull would have searched for.
This is bullshit. The way that one is treated just because I want to dream big and I will have the ability to do so next year?
It is a public forum, I get that, and people can have their own opinion. Some people, however, take it too far.
Did I also mention that I am the developer of a very successful note taking application for the iPhone? http://notacio.us
Oh, and by the way, I won't be stopping visiting the forum because I am better than that. I won't hide. I will continue to update my thread with whatever the hell I want, as I want to document what I have done with Zelda as I think it is important.
Ben386 ·
Gentlemen,this has been a very amusing thread till tonight.
Boys will be boys,let the boy be a boy.
surfpig ·
seagull wrote:SebastienPeek. I am quite amazed that your $180000.00 net annual income being a computer nerd ( as quote to me in PM ) does not allow you to purchase out right or net salary sacrifice a late model car. One would think all those hours you work at your office in Adelaide's central business district saving the said company billions of $ with computer fraud you would not have time to work on this low budget VW. Shame you got the hard word from your mother,but I am pleased having a son my self at your age she is looking after your account for you and your best interest not to have a subaru powered Vw.
Quote to Seagull,
I'm wanting that engine, but currently in year 12 and have a nagging Mum.
Is it possible, that if it doesn't go, I'd be able to pick it up early next year?
Seb
many LOL to be had hahahahaha
mate, try not being a complete dickhead and time waster.
he's having fun doing what HE wants to HIS car.
your pathetic,
yours faithfully, brad.
snitz ·
What he said^^^^^..Is it so hard to contribute to a persons thread in a positive way instead of whoring his thread with negative rant?...Self censorship is only a finger away..if you dont like Sebs thread or its content..dont fucking click on it..P.S I went to your sister school Seb..C.B.C in Wakefield Street!.
SebastienPeek ·
Thanks guys, I'm glad most people on here are here to help out, not slander.
Snitz, nice to see a Christian Brother Old Collegian have an appetite for VW's.
I'll be classified as an old collegian next year, somewhat weird.
seagull ·
SebastienPeek wrote:I beg your pardon?
I work as an iOS developer in a business situated on the outskirts of Adelaide. I have no such connection to computer fraud.
I also stated that I would be on that salary as of the 1st of January, 2012.
I like how you take everything out of context to create humour for others not knowing what you're doing to other people.
I'm glad you find it funny. I think you'd probably find it funny if I took it to heart and did something stupid?
How about you let me have fun with my car in whatever way I fucking want to and you fuck off?
It is obvious that you enjoy stalking teenage children, especially on the Internet. Don't people have a name for that?
The fact that you tried to find out who I was, and failed dismally, is just wrong.
One should also realise that VW's have been in my family since before I was born. My grandmother used to race her own Beetle with the MG Club at Mallala back when she was a kid. My Untie and Uncle have both owned VW Beetles and my Mother and Father, when I was a kid, owned a Type 3 Squareback.
Get your facts right before you start slandering me, fuck head.
The facts are you are clearly trying to hid the fact your not what your are or have any credibility what so ever.
one did not look / search for you, you sent a Pm telling advising of your income & your position as a professional in business. As for Linkin why on earth would one think to look for you there.
As a mature professional one would not state there salary or confess there importance in life to others via PM, nor would good well educated persons that attended a private school swear as you have done with in your public posts.
At the end of the day you did not have the permission from your mother to fit a wrx turbo motor in your vw showing your nothing but a child who clearly lives at home with mummy.
Your statement on the history of your Vw has no relevance what so ever on the subject of the said post
If your family sent to a private school its to to all that read this post that your education has not provided any fundamentals, respect, or manners in the world out side the school room let alone in business.
The issue we all have is your not the only one of your kind that is from your generation who are bring down society.
There are some good persons your age that have credibility, however you clearly lack these every day skills.
Thanks to the more mature members of SA who also woke up to this clown.
my tip. Join the army or navy any of the Australian forces, then come back in a few years and tell us what you have learned about respect & responsibility & trust. It may well make the change you require to man up a little
surfpig ·
hey buddy, what your job title at 17?
and what the fuck are you talking about with this 'bring down society'? im pretty sure your the low life piece of crap that is bringing down your society.
seagull ·
Surfpig , you clearly not reading the post , you are jumping to conclusions read the post again from the start
JVLRacing ·
will someone make some popcorn😂
seagull ·
best make that a bucket full and get your self a drink JV hahaha
surfpig ·
mate, you have edited that since i read it. youve added joining the army etc etc.
and god do i hate it when people say "join the army, it will make you man up"
thats a joke, your a joke. why would someone want to 'man up', thats just a ridiculous statement made by meatheads.
and you still havent answered my question.
JVLRacing ·
seagull wrote:best make that a bucket full and get your self a drink JV hahaha
hahaha😎
SebastienPeek ·
seagull wrote:The facts are you are clearly trying to hid the fact your not what your are or have any credibility what so ever.
one did not look / search for you, you sent a Pm telling advising of your income & your position as a professional in business. As for Linkin why on earth would one think to look for you there.
As a mature professional one would not state there salary or confess there importance in life to others via PM, nor would good well educated persons that attended a private school swear as you have done with in your public posts.
At the end of the day you did not have the permission from your mother to fit a wrx turbo motor in your vw showing your nothing but a child who clearly lives at home with mummy.
Your statement on the history of your Vw has no relevance what so ever on the subject of the said post
If your family sent to a private school its to to all that read this post that your education has not provided any fundamentals, respect, or manners in the world out side the school room let alone in business.
The issue we all have is your not the only one of your kind that is from your generation who are bring down society.
There are some good persons your age that have credibility, however you clearly lack these every day skills.
Thanks to the more mature members of SA who also woke up to this clown.
my tip. Join the army or navy any of the Australian forces, then come back in a few years and tell us what you have learned about respect & responsibility & trust. It may well make the change you require to man up a little
Okay, let's do this point by point.
1. I am not trying to hide who I am, hence why I directly linked you to my LinkedIn (least I spell it right) account.
2. As a mature professional, one would not slander a 17 year old.
3. I never said I didn't have "permission" of my Mother. I clearly said, and I quote, "a nagging Mum". Not once, did I mention permission.
4. You're right, I should speak better than what I do, but you have no fucking idea about my history, who I am, what I have done, nor do you have any idea about the family in which I come from. Just because I go to a private school, it doesn't mean I can't speak the way I have to some fuckstain like yourself?
5. What mature people in SA that have woken up to myself? I haven't done anything wrong.
6. You're obviously some red neck from somewhere that reckons joining the Army is the bee's knees. My apologies that I already own a business, that I am employed as a Software Developer and that I have attended a private school (which, due to your lack of respect, I don't think you did).
Now, I don't understand what the fuck your problem is with me, as I haven't done anything to you other than ask a simple fucking question.
It has been bugging me a lot too, but I must say, at least I can form proper sentences, with correct punctuation as well. Something they teach at all private schools.
seagull ·
surfpig wrote:mate, you have edited that since i read it. youve added joining the army etc etc.
and god do i hate it when people say "join the army, it will make you man up"
thats a joke, your a joke. why would someone want to 'man up', thats just a ridiculous statement made by meatheads.
and you still havent answered my question.
yes I went back and placed that info for good reason
you ( again ) are not reading the post, your jumping to placing a statement before you read the reason the post was made in the first place.
your adding a question to move the discussion to one side of the defendant. The post is not directed at you + you have no credibility to defend.
SebastienPeek ·
Oh, and I never mentioned my professional position. I simply stated I was a computer nerd.
How does one become tied with computer fraud by stating I'm a computer nerd?
Makes no sense.
surfpig ·
seagull wrote:
surfpig wrote:mate, you have edited that since i read it. youve added joining the army etc etc.
and god do i hate it when people say "join the army, it will make you man up"
thats a joke, your a joke. why would someone want to 'man up', thats just a ridiculous statement made by meatheads.
and you still havent answered my question.
yes I went back and placed that info for good reason
you ( again ) are not reading the post, your jumping to placing a statement before you read the reason the post was made in the first place.
your adding a question to move the discussion to one side of the defendant. The post is not directed at you + you have no credibility to defend.
yep my bad, ill let you and seb have your beef, besides im too young to even understand what your talking about.😵💫
SebastienPeek ·
seagull wrote:one did not look / search for you, you sent a Pm telling advising of your income & your position as a professional in business. As for Linkin why on earth would one think to look for you there.
LinkedIn is for professionals by the way. It is a platform where professionals are able to communicate online.
People that are actively looking for iOS Developers (I'm going to assume you don't live with your head up your arse all the time, and that you know what iOS actually is) as people like myself are continuously being searched for.
nbturbo ·
Seagull-give it a rest and stop wasting your time with a couple of fuckwits.The Peek reckons he's been to Uni-I bet he majored in Master Bater.
SebastienPeek ·
nbturbo wrote:Seagull-give it a rest and stop wasting your time with a couple of fuckwits.The Peek reckons he's been to Uni-I bet he majored in Master Bater.
"The Peek" sounds quite nice, thanks for the new name. Pity, however, it should be "The Peek-Taylor".
Also, I didn't "been to Uni", I did an external course which would be counted as a one year of Uni.
It isn't that hard, courses can be found all over the place online.
The best part, it is important for someone that owns their own business at the age of 17 to have some sort of idea.
Right?
Shouldn't you get back to your own build instead of wasting your time on here adding in stupid comments?
Smiley ·
Hasn't this thread taken a massive downhill spiral.
How is your car going? Fixed all those leaks yet??
Smiley 🙂
snitz ·
Seagull...why would you tell Seb to man up when you are the one annoying the shit out of a 17 year old?..Seems a bit predatory to me. Man up yourself and leave "kids" alone.
Seems like this so called "kid" ruffles your feathers..so what move on..BTW I know plenty of his generation that have gone on to serve our country so dont bag the generation that protects you and the freedom you enjoy.
SebastienPeek ·
Smiley,
Leaks are all fixed up the front thank god, we've had a couple of downpours that have put it to the test but thankfully she survived.
She's tooting along nicely though, I'm just damn worried about the vent deck lid letting water (when raining) into the engine bay? Should I be worried?
You're right though. The thread has taken a downhill spiral and I don't understand what I did wrong.
beetleboyjeff ·
Seb, don't go down to their level. Remember, if you can't say anything nice, don't say anything.
I love the way you jump onto any idea that is going, and are desperate to learn all you can about your bug.
Quite often your ideas are impracticable, or don't even apply to your car, but at least you are thinking about them, and working out whether this is indeed the case - this is the way good ideas eventuate - challenge the norm.
Things like dragging off other cars on public roads probably aren't real smart, and writing about them online is even less smart, but lets face it, pretty well everyone on here has done it when they were young (and probably not so young), I know I am guilty. We know it is probably not the right thing to do ......... but it does feel like so much fun at the time. :-)
Keep looking at the bright side of life - you know who you are, what you have done, and what you plan to do - you don't have to prove it to anyone, especially casual aquantances you have only met online. I think if you cut through it all though, they are only trying to give you advice (whether it is good advice or not is open to interpretation), but unfortunatley have done it quite clumsily, though I suspect there basic motives are good. Maybe give them the benifit of the doubt - it makes the world look better when you do.
I look foreward to many more of your enthusiastic posts.
SebastienPeek ·
Thanks Jeff, I really appreciate your wise words.
I won't stoop down to their level and I do apologise for doing so. You're right, I know who I am and I don't need to prove to anyone else who I am other than I am allowed to have fun with my car and others can have fun with theirs. I agree that dragging other cars is stupid, especially on the roads, and I also know for a fact that most likely everyone on this forum has done so in an act of stupidity, but I will not apologise for what I did as everyone has some fun. I am here to learn as much as possible, to gain as much information and do what I want to do with Zelda. I have dreams, but everyone does, and I didn't know that for one "kid" to dream was wrong.
I can still remember going into my Uncle's blue ragtop and saying to him, I'm getting one of these one day. I have, so I have completed one of the aspects of my dreams. Since that, my dream has exploded into what I can now do with my own car. It won't stop there either, with dreams of getting a kombi next year too. But I have to remember, I probably should keep some dreams to myself as other people will frown upon them.
I have taken on board the fact that I do need to upgrade the safety in Zelda and in doing so, the first thing I will do is get retractable seat belts for the two front seats as of next week.
One step closer to being safer.
As Paul has mentioned, there is no need for disc brakes all around because I'm not going down the Subaru conversion road anymore.
It is also apparent that maybe I should finish off my body work, so that too will be completed next week. Thank god I have school holidays soon.
Ben386 ·
This thread is out of control !!
This is a build thread.
Seb, take Seagulls advise and learn to drive correctly.
Left hand lane unless overtaking.
You drive an old vehicle and you dont have much driving experience.Playstation doesnt count.Being a dickhead on the road will one day end in tears,and maybe not yours!
Get back to amusing us with your novice comments on playing with Zelda.
This isnt the school yard.
Seagull,man,chill-out.I know where you are coming from with respect,maybe these young fellas will learn some someday.Hopefully by learning it from others leading by example.
Its obvious this guy doesnt have the skill to do a Suby turbo conversion in his Beetle,so if he can afford to get someone to do it for him,good luck to him.
He will have to save 20g+,get his Mums permission and get of his P-plates.
But he can still dream.
Surfpig,you sound like a School girls Blouse.
Grow-up or shut up.
SebastienPeek ·
All I can do is shake my head in disbelief.
Smiley ·
SebastienPeek wrote:Smiley,
Leaks are all fixed up the front thank god, we've had a couple of downpours that have put it to the test but thankfully she survived.
She's tooting along nicely though, I'm just damn worried about the vent deck lid letting water (when raining) into the engine bay? Should I be worried?
You're right though. The thread has taken a downhill spiral and I don't understand what I did wrong.
I wouldn't worry in the slightest. If you look at my car (a Baja) it has no engine lid and it's covered by mesh. The engine is basically sitting in the weather every second of every day, rain hail or shine. I've never had a single problem with my Baja not starting or things getting wet.
Because your car has a lot more protection from the weather I wouldn't give the issue a second thought.
Smiley 🙂
SebastienPeek ·
Cheers Smiley!
I'm just worried about the cables on the alternator.
Might find some rubber boots for the cables and cover them.
That'll ease my concern a little, and then once the ventless deck lid is on, I won't be concerned at all.
Smiley ·
SebastienPeek wrote:Cheers Smiley!
I'm just worried about the cables on the alternator.
Might find some rubber boots for the cables and cover them.
That'll ease my concern a little, and then once the ventless deck lid is on, I won't be concerned at all.
The main power wire on the alternator should always be covered by a boot anyway. This wire has constant power from the battery and is always live, even when the car is off.
It's a pain when you're working near it and you earth it out with a spanner or screw driver. This will give you a fright!
My personal experience is when I was adjusting the auto choke with a screw drive and it touched the terminal. Welded the tip clean off the screwdriver!😂
So cover it up pronto.
Smiley 🙂
SebastienPeek ·
Have already had similar happen to me actually, so will get a rubber boot on it as soon as possible!
Least now I know why there was a massive bang, all got to do with the alternator!
Will have something on it tomorrow after school hopefully, will find somewhere I can get them close by.
Thanks again!
Smiley ·
SebastienPeek wrote:Have already had similar happen to me actually, so will get a rubber boot on it as soon as possible!
Least now I know why there was a massive bang, all got to do with the alternator!
Will have something on it tomorrow after school hopefully, will find somewhere I can get them close by.
Thanks again!
This reminds me too.
I need to get some for my new engine. I'll see what we have at work 🥷
Smiley 🙂
SebastienPeek ·
Yeah, will head down to the local SuperCheap Auto as soon as possible to grab one or a pack.
Really want to get that ventless deck lid on, needs a coat of paint and then it is done. We'll see what next week and the school holidays bring.
JVLRacing ·
anyone want to share my popcorn🙅 *RESPECT* where has it gone...
SebastienPeek ·
Have contacted Mick Motors in regards to upgrading the front seat belts to retractable ones.
This is the current setup that Zelda has.
Anyone have any idea what the front seats are out of? They're definitely not stock and have discovered the dodgy weld job on the seat rails.
Have given myself a little job to do before it gets dark tonight. Will upload a photo when it is completed.
beetleboyjeff ·
I just got my retractable seatbelts from Autobarn. I can get you the brand & part number off the box when I get home tomorrow night if you wish.
You will also need an angle bracket for the mount at the bottom of the B pillar. If you wish, I can take a photo of it tomorrow and give you sizes. I know people who have copied it before to fit inertia reels.
Let me know if you want me to do these things Seb.
SebastienPeek ·
That would be great if you could Jeff, really want to upgrade the seat belts as soon as possible!
Note to self: Don't put a negative to a positive and a positive to a negative, will cause fuse to start fire inside car.
Yep, just happened to me. Luckily I knew the exact problem and have fixed it now.
I owe everyone photos, when I get the chance to upload them I will.
beetleboyjeff ·
Don't talk to the panel shop that did my rollover repair then - they did 4 or 5 of them. The most noticable were the front blinkers - both connected the wrong way round - took me a week to get to find it (eventually by going through every connection - even Grumble had it for a few hours and couldn't find it), and burnt out a flasher can on the way.
The others were in LEDs, so they just didn't work untill I connected them the correct way.
On the plus side, they did a GREAT job on the paint and panel - I guess they just aren't auto electricians. lol
SebastienPeek ·
Alrighty, thought I might as well get it over and done with.
This afternoon I put the deck lid stand offs on and to be honest, as much as they give me the desired look I'm not really happy with them.
Will most likely get myself some hood jax ones that I found here.
So, this is what happened.
I went to go down to SpLiTmEiStEr's place to see something and to see whether or not I could pick up some lug nuts for the stock wheels.
I got about ten metres before I started to smell something, and fifteen before I saw the smoke billowing from near my left knee.
I pulled over and had a look at the fuse box. Two fuses had caught fire, and were melting the plastic.
You can see the plastic that had melted too. The blue and red ones are new fuses, but those two are the ones that blew and caught fire.
Anyway, I got the fire out, fuses out and determined what the problem was straight away. The number plate light at the rear.
I knew it'd be it and had a look. Yep, smoke there too.
So I pushed Zelda back to my house and got the crimping set, some wire and some scissors. I wanted to fix this.
So I did. Rewired it and got it correct first go. No more positive to negative and negative to positive. I left a lot of slack in the wires as I'll be perfecting it tomorrow by making it able to simply unclick instead of having to cut wires every time I want to remove and replace the deck lid.
Anyway, all fixed now and she's looking the goods.
beetleboyjeff ·
Ok Seb, here is the info on my inertia reel front seat belts.
They are Klippan brand, and I got them from Autobarn (about 6 or 12 months ago). They just looked up 74 beetle in their catalogue, and there they were (looking at the Klippan website, most auto parts stores have them). This is the 2nd set I have got (the last set were years ago, and the retactor springs were wearing out). I thought I had the number on the box, but I only have the box for the inertia reels I put in for the back seat. I gave Dylan the Dubber has the other boxes and the old belts. You may be able to get the numbers off him if you can't get them any other way.
Anyway, here is a photo of the bracket you need to fit them. This is the one VW fitted for their late beetles that had inertia reel seat belts. As you can see, it is basically a shaped piece of angle. It also has a locating pin in it, but I don't know that it would be essential, I think it is only to stop back seat passengers kicking the reel over onto an angle. If the bolt is tight (or you don't carry back seat passengers), it wouldn't be a problem anyway.
Here is the other side of the bracket. The 2 smaller holes in the top of it (to the right in the photo) are actually threaded for the bolts that hold the reel. I suppose you could just use bolts & nuts.
Here is the reel bolted to the bracket.
And here is the bracket bolted onto the bottom of the A pillar. I have taken the reel back off so you can see how it goes more clearly.
And here it is all bolted up.
I have had a few people copy the brackets to fit inertia reel seat belts into their bugs - it isn't hard to do. You may even be able to round up some second hand ones on the forum.
SebastienPeek ·
Hey Jeff!
Thanks for all that information, very good indeed and will use it wisely.
Actually, because of the information you gave me above, I'm curious.
If I was to purchase the inertia stand offs from Mick Motors (has them quite cheap actually) and get the same Klippan seat belts as yourself from Super Cheap Auto, that should do it and I'd have it all done and dusted for safety wise when it comes to seat belts anyway, right?
Really appreciate your input though Jeff, thank you very much!
SebastienPeek ·
It was destined to happen with the dodgy weather of Adelaide.
Deck lid stand offs have been taken off and I will most likely continue to use the vent deck lid when the new engine goes in.
During the Winter anyway, unless I think of a way to protect the engine electronics from the water as it is and with the new engine as well.
I have also fixed the hose from the oil filter to the air filter issue as well. All working great.
Have been in contact with a few people and it has been decided on Zelda's new engine. Will all start very soon.
SebastienPeek ·
I have a question/worry that has been bugging me for a bit now, since I bought it actually.
My alternator seems to enjoy having it's internals knocking around.
At first I thought it was the pulley, but from what I can determine, it is the actual internals of the alternator knocking.
(I took the belt and pulley off to test this theory and I was right, the alternator).
Now, is it worth rebuilding the alternator or just leave it for now?
As it'll be replaced within the next four months with a brand new engine and fan setup, is there any point in worrying about it?
I won't be driving Zelda from the 28th of November till the 15th of January and then from there I'll probably not drive it for about a week.
Should I just leave it and wait for the new engine?
SebastienPeek ·
So, a lot went down last night.
Seems people don't see Beetles when they are in there blind spots and they merge in bloody intersections.
I was in the left line, putting along at 50km/h in a 60km/h zone (seagull would be pleased), and there was this car in the middle lane at the same time.
Now, here is a picture of the intersection that is occurred in.
There are three lanes at the intersection. The far right is right hand turn only, the middle is right turn and straight and the left hand lane is left turn and straight.
But this lady decided that it was okay to come into the left lane from the middle lane in the middle of the intersection while I was putting along right there.
She clipped the front fender of Zelda and sent me towards the stobie pole right here.
Thanks to Dad taking me out driving up at the block and being able to deal with situations like this, I was able to miss the stobie poll and save a lot of carnage.
At this point it was red light for me and green lights for everyone else. I'd locked up in the middle of the intersection and came to a stop about 40cm away from that stobie poll.
I slammed her in reverse in rage, wheel spin, then slammed her into first, wheel spin. I pulled over behind the car that had hit me and got out just before the girlfriend said don't.
I was raging pretty hard, but after looking at the damage to Zelda all was good.
It is a dent with some paint rubbed off. Nothing too major.
So really, I'm thinking it'd be appropriate to just replace both front fenders as they are pretty rusty where the lip is. If you look closely in the above photo you can actually see the bog lining it to make it smooth. Might be ordering some from Just Kampers Australia, but they only seem to have the LHS one...
beetleboyjeff ·
Seb,
I was talking to the Just Kampers guys at the Kombi festival at Old Bar (NSW) this morning (before we got rained out), and they gave me one of their catalogues. I see in the beetle mudguard section that they only have photos of the LHS, but there are part numbers for both sides - eg. for a 1302/1303 (indicator hole and triangular bumper slot) 1973>74, the nearside is J14557 and the offside is J14558.
You should be able to get a pair from them. Just ring them on 02 9645 7660 to check if you still aren't sure or can't work it out.
I hope this helps.
I am glad your damage was only minor.
That is a lesson in watching other drivers - trying to spot people doing stupid things - it is called experience. Can pay off at times, although it is hard to make things foolproof these days, because these days, fools are so bloody ingenius. lol.
SebastienPeek ·
Hey Jeff!
Thanks for that, might give them a call and see what I can organise.
I have been taking a look around the place and might go for the whole clean look and euro bumper, but I'm still not 100%.
Yeah, I'm lucky Dad taught me how to watch what was ahead in the road and not focus on the next two metres. I'm always very alert when driving and I guess this was one of those times that it paid off that I was being so alert. If I hadn't been, could have been a lot worse and I probably wouldn't be typing on here...
Quite scary, have tried to steer clear of that intersection the past day but unfortunately it is the quickest way to the misses place, so I guess I just have to get over it.
I'm still yet to contact the lady who did merge into me. We'll see, I don't even know if it is worth making a claim for the damage done or I just spend my next pay check on fixing it up out of my own pocket. I should probably just claim but we'll see what has to happen for me to do so. Excess fee for a P plater is $1,600. Not nice.
SebastienPeek ·
I don't want to make another thread about this, but just a quick question.
Are hub adapters illegal in South Australia?
Or should I seriously just get Ford/Holden disc brakes drilled for Zelda so I can run really common rims?
Yeah, I thought so, thanks Joel!
Yep, will be getting some disc brakes doen from John, but in the mean time I'm getting the new iPhone...
I still can't get over the fact how much fun it is to drive Zelda.
Every time I get in, it's just great fun now. No need to worry about anything, I just get in and drive her.
beetleboyjeff ·
Carefull - more addictive than drugs I reckon. 😂
SebastienPeek ·
Ah, I have to agree with you their Jeff.
Over the past week I put on about 600km.
100km solely last night.
Been turning heads lately too. People been waving here and there, and had some kid pointing at me at the lights the other day.
I just hope it turns heads more when I have the right rims on her and the new guards, new engine, new paint and new interior.
Aiming for next Bay to Birdwood to have everything done.
Been doing a heap of research into what I want the interior to look like.
Here are some images that have aided in my inspiration.
Luckily one of Mum's cousins is an upholsterer. So getting it done shouldn't be an issue. I'm just curious about seats.
Have been looking at trying to source some Porsche 944 seats and getting them recovered, but not 100% sure.
German look equals what seats? I'm confused about it. Obviously Porsche seats are definitely a plus, but what do other people have?
I am leaning towards having a leather interior, probably black. Just depends on the overall look. I really like the cream leather in the above images though...
Also, Kamei front spoilers. Where should I be looking to grab one?
Are they actually worth the money? What are the pro's and con's of having one installed?
SebastienPeek ·
Also, I probably should have asked this a while back, but now that I'm actively looking for disc brake kits and so forth, I want to make sure I get the right one.
Zelda's chassis/vin number is 1333011208. Is that definitely a 1973 L bug?
Can anyone tell me more information about Zelda just from that number?
Where it was assembled and so forth. I want to find out as much information as possible about her.
Always learning.
Turbo54 ·
Hub Adapters are not legal. You can have your brake disks redrilled and legal once engineered. I have converted my car to ford pattern and have 13mm spacers but they ate not called wheel spacers, they are hub backplates and just happen to be 13mm thick. You just have to have a good engineer and a imagination.
T54
SebastienPeek ·
Alrighty, have been a busy little bee.
I found the time to do some stuff with those steelies I got ages ago.
Two of them were steel, the other two had already been painted black, with a red lip.
So I got cracking on the two that were "normal" and they turned out really good after two coats of paint.
Might do another coat tomorrow just for arguments sake but highly doubt it.
These are the two that I did and they came out really nice. Don't worry about the overspray, getting brand new tyres for them as don't know how old the ones on there already are and don't want to risk it. Might take them somewhere and use them as burnout treads one day. This was after two coats of paint.
The two black with red lips ones, they didn't work at all.
The black was covered easily, but the red, that decided to go pink. So I'm going to have to sand them back and do it again, which is no biggy, was just hoping to run all four of them as soon as possible.
I figured out the exact issue with the oil leak too. It's the gasket between the alternator stand and the case.
I was meant to go and pick it up today but didn't get the chance so will head in tomorrow to get it so that I can replace it and be able to park Zelda in the driveway without a tray underneath her.
Albeit I might be picking up a new case within the next couple of days, we will see what happens. I might just put up with the leak until the new engine is ready for Zelda.
SebastienPeek ·
Big things to come with Zelda.
One such person told me what I was doing with Zelda had no style. It was common.
So I decided I'd do something that I haven't seen done before.
More news coming as it happens.
Brake master cylinder being picked up today, hopefully installed today too.
Tombstone taillights also being picked up today.
Which means, with any luck, those guards will be going on as well. If I get the reverse lights working that is.
More news and pictures when it happens.
SebastienPeek ·
Alrighty, so here's a quick little update.
Zelda now looks like this.
I also replaced the gasket between the alternator stand and the block.
I found this while taking it all apart to put the new gasket in. Is this even supposed to be there?
A mate said that I need to drain the oil and change it. Said that it was because the oil hasn't been changed for ages?
Also found out that it is "normal" for winter operation.
Issues are as follows:
- Distributor blew up (I'm an idiot).
I think we can all guess what happened there...
New one has already been ordered. Figured I needed one with a vacuum advance as I am running an original Solex carburettor.
Cleaned it up actually, made in Western Germany.
Anyway, back to what is happening.
- Brake hose needs to be replaced, not whole cylinder.
- Brake lights don't activate when foot is on brake pedal.
I'll update with some more information as it comes.
Don't think I'll have Zelda back on the road till next weekend.
SebastienPeek ·
All packed up ready to be towed to where she'll be stored for a while.
Sad day.
Smiley ·
What's going on?
Did you buy something else to drive? It better be VW!!!
Smiley 🙂
SebastienPeek ·
Smiley,
She died. Well, she's being stored for another day.
And yes, the new car will be a VW. I don't know if it'd be appropriate to make a thread on here for a watercooled VW...
Seems everything on here is a Beetle, especially in the Member's Ride section anyway.
I guess when I get the new one I'll put something up somewhere.
SebastienPeek ·
Alrighty, as most of you are probably aware by now, Zelda has died and is going into storage. However, she may be out sooner than I had anticipated, if people think it is the best thing to do.
I'm heading overseas for a month and a half, family holiday and work. Now, as I'll be working over there, I'll still be earning an income. Therefore, by the time I get back, I'd have enough money to get Zelda towed somewhere, do a WRX conversion on her, and then drive her back.
My issue is this.
I need a daily driver as soon as I get back from overseas. Do I not bother with Zelda for a bit and buy myself a nice MK3/MK4? I'm even contemplating a MK3 VR6.
What do you think? Zelda will definitely be back, and she'll be done properly. The aim is to spend around 20k getting her perfect. That includes a complete respray, all body work (rust), interior and engine. The thing is though, that would have to wait till the start of 2013.
Open to discussion on this.
Smiley ·
SebastienPeek wrote:Alrighty, as most of you are probably aware by now, Zelda has died and is going into storage. However, she may be out sooner than I had anticipated, if people think it is the best thing to do.
I'm heading overseas for a month and a half, family holiday and work. Now, as I'll be working over there, I'll still be earning an income. Therefore, by the time I get back, I'd have enough money to get Zelda towed somewhere, do a WRX conversion on her, and then drive her back.
My issue is this.
I need a daily driver as soon as I get back from overseas. Do I not bother with Zelda for a bit and buy myself a nice MK3/MK4? I'm even contemplating a MK3 VR6.
What do you think? Zelda will definitely be back, and she'll be done properly. The aim is to spend around 20k getting her perfect. That includes a complete respray, all body work (rust), interior and engine. The thing is though, that would have to wait till the start of 2013.
Open to discussion on this.
Just do it.
You should do the sensible thing and buy yourself a later model watercooled Golf/etc to drive around in. But I know I wouldn't.
Smiley 🙂
SebastienPeek ·
I am buying a MK3 Golf, that is a done deal, I just don't know what I should do with Zelda when my time in storage is up...
Subaru conversion does sound good though.
And thanks Smiley, at least I can count on your input! 😀
donn ·
Why not sell it, put the money away and get another when you get back, we all know what happens to well laid plans that are put "on the backburner"😵💫🙅🤪
SebastienPeek ·
But who's going to buy a car that needs an auto-electrician to come and have a look at the ignition wire?
Currently she gets no spark.
Smiley ·
Plus that new car wouldn't be Zelda!!
I still have my first Beetle with the intention of restoring her.
I was even stupid enough to keep her registered for 2 years without driving it, despite the fact she had no engine fitted at all.
Smiley 🙂
SebastienPeek ·
I know the new car wouldn't be Zelda, and that's why I'm trying to hold onto her.
I have the intention on restoring her later down the track, be it a year or two, I don't necessarily want to sell her.
I might sell some of the parts that I have collected though, they might make me some cash that I can put towards the new car...
ian.mezz ·
I would ship it off to Joel's and give him some cash to make a start.
I would never recommend to any one to buy a newer vw 🥲
Better off with a Toyota or something Hyundai 😊
SebastienPeek ·
Ian,
I was kinda contemplating sending it off to someone that had done the conversion before...
I wonder...
Might try and get Joel to jump on MSN and talk to him about it.
Could get Zelda towed to his place and give him some money to get it all started...
However, is it a realistic option? Would Joel actually do the conversion or is he too busy? I guess these are all questions I'll have to ask him...
We'll see what happens.
As for the newer VW comment, I have read a lot and they do seem to be very dodgy... Might see what I can find under Hyundai or Toyota, any specific models?
Just need something reliable.
Special Air Service ·
SebastienPeek wrote:But who's going to buy a car that needs an auto-electrician to come and have a look at the ignition wire?
Currently she gets no spark.
Tell me this is not the reason it's being packed up & stored away? That really shouldn't be that hard or expensive of a fix?
ryana89 ·
I can hear Joel groaning😂
As for the newer VW comment, I have read a lot and they do seem to be very dodgy
Depends whether your talking about an abused VR6 or a well taken care of 8valve.
If maintained, virtually any watercooled VW is fine.
SebastienPeek ·
It isn't the main reason, but one of.
The main reason is that I am heading overseas for a month and a half and it was going to be garaged regardless.
I thought, instead of it being garaged, someone could be converting her to a Subaru engine while I'm away.
SebastienPeek ·
Alright, there has been a change of plan and it is due to me waking up a little.
It's all well and good to just send Zelda away to get all her problems fixed, but then it wouldn't be, my Zelda. People that work on their own cars will know what I mean by that.
What I am, however, going to get done is over the next month and a bit I'm going to hand Zelda over to Siggi at GHR.
Monday, I'm going to give him a call and see whether or not he can rewire Zelda completely. And I mean completely. All wiring will go back to stock, obviously bypassing an internal regulator due to the alternator on the engine.
However, even this is up in arms. I know for a fact that the reason why she isn't running at the moment is due to no spark. This is due to me putting the distributor wiring on back to front onto the coil. I have replaced both the distributor and coil, so the only thing that hasn't been replaced is the ignition wiring. Now, to me, this is just screaming for me to put in electronic ignition while I'm at it, maybe even an electric fuel pump. But I digress, the only thing that really needs to be replaced is the ignition wiring.
So yes, Monday morning I'm going to give Siggi a call. Hopefully I can organise something and get her towed down there.
I'll find out tomorrow whether or not Dad is going to be in Adelaide or in Port Hughes and maybe he can then lend a hand getting Zelda down to Siggi's...
I guess Siggi could do a full service on Zelda as well. A month and a half is a long time, no doubt I could get him to do a full service, check brakes, all of that as well.
Time will tell.
I'll update on Monday.
DylanTheDubber ·
Main thing I have learned and it's very hard to do sometimes but ONLY fix whats broken and get it driving and back on the road again THEN do other things later when its on the road and you have the money.
Best Advice i got for VW's cause as Jeff Said "more addictive then drugs!" 😀
From Dylan
Joel ·
SebastienPeek wrote:Might try and get Joel to jump on MSN and talk to him about it.
Could get Zelda towed to his place and give him some money to get it all started...
Oh god damn it I only just got rid of most of the VWs and random cars around the place.
Ians right though as good as modern VWs are as daily drivers, parts and servicing cost is bull crap.
I nearly bought a 2001 Passat for a daily till I started looking into replacement parts costs.
Euro cars are shocking for it, thats why I stick to my Jap-scrap.
Even alot of Korean stuff aint bad daily transport if you can live with the odd rattle and fading plastic and paint.
SebastienPeek ·
Dylan,
You're right, it is bloody hard to stop once you get started. I guess now that I have just moved out of home today, I need to get her up and running as soon as possible. I guess we will see what tomorrow brings.
Joel,
All good man, Zelda ont be heading up your way anytime soon, unless of course she gets completely fixed, then there might be a road trip on our hands!
But I digress, I might look at some japcrap stuff anyway, but we will see what happens?
Let's just say the only definite thing is that Zelda needs to get fixed as soon as possible and be as reliable as possible now that I'm not at home...
SebastienPeek ·
Bought a brand new exhaust as well.
Going to get an auto electrician out within the next couple of days.
VW day is next Sunday. Going to try and sell some of the parts that I have collected over the past few months.
Seems I'm still leaving for Europe the day after, so whatever I sell I sell and whatever I don't, I don't.
Need to get Zelda fixed before then.
snitz ·
SebastienPeek wrote:Bought a brand new exhaust as well.
Going to get an auto electrician out within the next couple of days.
VW day is next Sunday.
Volksfest is this Sunday..
SebastienPeek ·
Yeah, that's what I meant, my bad! 😀
If all goes well, I'll see what happens, hopefully can cruise down in Zelda but we'll see.
SebastienPeek ·
Boom, Zelda is coming alive.
Found out it was my distributor, it wasn't sitting properly in the block...
Like, the shaft of the distributor wasn't long enough. God that sounds so wrong.
But we're charging the battery now, so hopefully tomorrow we can get her started after work.
We'll see what happens.
DylanTheDubber ·
All the best, Good luck!
VW POWER!! BRING ZELDA BACK TO LIFE (:
From Dylan
SebastienPeek ·
And Zelda is alive!
Had her running this evening, got it done around ten o'clock!
It is done, she is running, brake lights are working, and next up is a new exhaust.
Boom, Zelda is back.
And God it feels bloody good to know that I did it myself.
All that is needed now is this exhaust to be bolted on tomorrow and the reverse lights done.
Will post some photos of the new additions.
DylanTheDubber ·
Yeah kool Seb, Get a Bangin zorst wiv some mean sound 😎
From Dylan
SebastienPeek ·
Already got one Dylan, check it!
She actually looks like a beetle from the rear now.
Fat chick she is. Hrmmm.
SebastienPeek ·
I think it was definitely time to upload a video of Zelda working to YouTube. So I did so.
I think she sounds, bloody tough. It is a great feeling, knowing that I fixed her myself, installed the new exhaust as well, by myself. Massive sense of achievement.
Has been great to drive Zelda around the past day, I got my sound system setup with my new head unit and it is seriously full on.
Hopefully going to be showing off her sound system at VolksFest.
Let's just say, she won't be there for good looks, but she'll be a good sight for bass heads like myself.
I think I'm getting fumes in my cabin again.
Only thing I can think that would be doing it is the heater pipes, but the thing is, the right hand side heater pipe isn't connected by a hose to the fan shroud. However, there is a hose from the fan shroud down below the engine tinware. It just wouldn't get into place properly.
Going to bug bomb her tomorrow, had some nasty crawlers inside and to be honest, I hate them, especially when they are massive!
Will update with some photos tomorrow if the rain clears up.
DylanTheDubber ·
Seb,
Can Definatly see a big change in yourself and Zelda since you first got it. The Bug is now looking and running better and you now know alot more about the vee dubbs and esspecially superbug model and it's great that you and your car are comign along way in the VW World. You also got P.M (:
From Dylan
SebastienPeek ·
Thanks Dylan, it has been great to work on her and fix things as they popped up and then break things and then refix it.
I've definitely learnt a lot from %^&*ing around with her, which is sometimes a bad thing but most of the time, a good thing.
Anyway, bug bombed her today and got her washed for tomorrows VolksFest, going to be good fun!
Have tuned the subwoofer and speakers as well, going to go for a cruise tonight and test her out before showing off the sound system tomorrow.
Monday morning she's going in the garage for a month and a half. Off to Europe Monday, so won't be playing with her for about a month and a half.
When I get back, have already got a complete lowering kit lined up from Airkewld and some 914 wheels from Vollks are already on my shopping list.
Once they are done, she'll be getting a respray before my 18th. Aim is to have her completely resprayed before April next year. Will be good to have her Antarctic White.
Exciting 😀
SebastienPeek ·
Alrighty, yesterday was great!
Drew a few crowds around Zelda, answered a few people's questions about the exhaust and taillights, lack of trim and so forth, also got a few bassheads around and gave them a few demos of the sound system, met a few people that were definitely awesome and overall, had a great time.
But I'm paying for it now, I am sunburnt, like a tomato!
Anyway, as you're probably all aware, I leave for overseas today. In an hour and a half to be exact, I have to be at the aiport.
Zelda is parked inside the garage! That is a first, hence the exclamation mark, I never in a million years expected Mum (especially after the last week) to let me park Zelda inside the garage!
I took some photos of some new additions to Zelda (stickers) and got a photo of the exhaust as well. And the engine bay like it was yesterday 🙂
And last but not least.
I'll still be floating around the forum and I'll still be ordering stuff for Zelda while I'm gone, but definitely going to miss cruising around in her.
I'll be taking a heap of photos in the UK of basically every single Kombi/Beetle I see, and will put them up on a thread elsewhere.
Ciao for now.
thebullfrog ·
Looking nice man, if only my parents park mine the one of our 3 sheds -_- haha. Enjoy your holiday! Look forward to your lowering kit when you arrive home.
SebastienPeek ·
Ahaha if only, it took me almost a year to even get close to putting it in the garage.
The lowering kit is going to be mad. Adjustable coilovers, 1" to 6".
Oh, and I also got these wheels lined up too.
DylanTheDubber ·
Im likening the wheels and suspension soon to come (:
From Dylan
SebastienPeek ·
Quick update,
Back in Adelaide, moving out, playing with Zelda.
Keep an eye on this space. A lot of new photos and information will be up on here...
Think, twin port.
Smiley ·
SebastienPeek wrote:Quick update,
Back in Adelaide, moving out, playing with Zelda.
Keep an eye on this space. A lot of new photos and information will be up on here...
Think, twin port.
This should all be done by now? 😀
Smiley 🙂
SebastienPeek ·
Smiley,
You're right, it should be done by now, but have met a mechanical fuel pump that is seriously hating the new setup.
Just need to grab an electric fuel pump and then everyone will see what has happened to Zelda.
She has definitely had a makeover that is for sure. Once everything is done to her, she is going to be a mind blowing car.
But, a sneak peek from a couple of nights ago. Have cleaned her up a bit more since...
Sorry for the terrible image quality, will take a better one once she's finished.
Smiley ·
What's the issues with the mech fuel pump??
Aside from that she's looking good.
Smiley 🙂
SebastienPeek ·
Well, she isn't doing the job properly whatsoever.
Got the RAA to come out, he confirmed that that was the problem and yeah, it could be the rod inside that may be the issue as we didn't change that but changed the actual pump three times...
Might try and take the rod out of the 1500sp and put it in the 1600tp, could that work?
Just need to get her running, then I can get the carbs tuned.
Aside from that photo, a lot more has been sorted out (such as wiring and accelerator cable).
However, seems something is wrong with the accelerator cable as well, pedal gets stuck a little bit. Any recommendations to get it fixed?
Joel ·
SebastienPeek wrote:Well, she isn't doing the job properly whatsoever.
THat's cos you have the hoses arse about.
Top is the inlet on those kinda pumps 😉
What's up with the pump on the old engine? looks reasonably new?
SebastienPeek ·
Top hose was definitely the inlet hose into the above picture, what about on the older motor?
I'm pretty sure we had the hoses going the right way... Or else the RAA dude wouldn't have been able to use his hand pump thing instead, I think?
Yeah, the one that is on her now is the one from the old single port, but still isn't doing the job.
I'll take a photo in the day time of it now and post it.
Joel ·
Hard to tell for sure as the pic is dark but it looks like in the pic above that is the T-piece going to the other carb infront of the coil on the hose coming off the top of the pump?
If thats the case then it is back to front.
Those metal dome top pumps have the inlet on the top and outlet on the bottom, complete opposite to the early pumps
Catches alot of people out.
SebastienPeek ·
Nah, in that one, the T-piece is coming off of the lower hose connected to the fuel pump, the top line is straight from the tank...
I've currently got the old fuel pump on the engine, the top of that goes to the T-piece which then goes to the carbs. I think that is correct...
If that is the correct thing, do you think just changing the rod inside might fix things or do I just jump the gun and get an electric fuel pump setup?
Just received my distributor without vacuum advance too, so that's going in tonight.
SebastienPeek ·
Alrighty, this is just a quick update with some veryvery new photos that I just took.
Basically this is the current mechanical fuel pump with the fuel lines connected as they are...
And from another angle.
As you can see, the fuel line from the tank goes into the side of the current fuel pump and the fuel line from the top of the pump goes to the T-piece and then to the carbs.
I'm pretty sure this is correct, but if I am wrong (and it is an easy fix) then I should be able to fix her and take her for a drive tonight.
Otherwise, it won't be till next Tuesday when I have enough funds to purchase and install an electric fuel pump.
snitz ·
Looking good Seb..hope you can get all those alternator wires away from the hex bar otherwise you are gonna have some big problems when it wears through..😂
SebastienPeek ·
Thanks Snitz.
Yeah, they've been looked after, I sorted them out before getting her towed back to my place 😉
Smiley ·
So what exactly is the problem with the fuel pump?
Not pumping fuel, not pumping enough fuel? Pumping too much fuel?
They are a very basic system and there isn't a heap that can go wrong with them.
Your pushrod could be the incorrect length or worn down.
The plastic guide tube that goes into the block can somtimes break and cause issues.
The shaft that the rocker in the pump pivots on can also work its way out of the pump and cause dramas.
One problem that I have had with my 1500 Beetle was that the pump would work for a while, but the when it got hot it would stop pumping. I pulled it down a number of times and the diaphrams appeared perfectly fine. But still the problem occured.
I asked an experianced VW mechanic about it, and he said that when the pumps get old they can just stop working when they are hot, even if the internals appear fine. I bought a new one and all the problems went away.
I the think it'd be easier for you to diagnose and fix the stock pump instead of speading more money on an electric version. The stock one pumps more than enough fuel, I'm using one on my 2054 with twin 40mm Kadrons and it's perfect. I actually have to regulate the pressure back because it pumps a little too much.
I hope this helps.
Kepp at it!!
Smiley 🙂
SebastienPeek ·
Hey Smiley!
Alright, the current issue with the pump is that it isn't pumping whatsoever.
Sometimes there is a little bit of fuel coming from the line from the tank, but it isn't getting to the carbs.
I've got the rod from my 1500 that I'll give a shot tomorrow with, but other than that I'm all out of ideas, unless I get the whole pump systems (black holder thingy as well) from my 1500 and put it into the 1600 and see how that goes.
Just want to get her up and running, kinda need her as she is my daily driver and am currently relying on the misses car, which isn't good for any of us and is just an annoyance to be honest. Plus, I always dreamt of driving her in the Summer with all the windows open and yeah, just sad that on the hottest days I can't be doing that...
But yeah, tomorrow night I'll swap over the rod and if that doesn't work, them I am all out of ideas.
DylanTheDubber ·
Sorry if I'm wrong but I'm pretty dam sure you do have the lines round the wrong way. The bottom pipe is the outlet, it should go to the T piece and then to the carbs and the fuel supply line goes in the top. This should work.
From Dylan
SebastienPeek ·
Dylan,
Will give it a shot tonight and see if it changes anything.
Will update back here if any success.
Cheers!
DylanTheDubber ·
Ok mate,
If it is setup right you should be fine I know many people running stock fuel pumps with dual kads. best of luck Seb.
From Dylan
Joel ·
SebastienPeek wrote:Nah, in that one, the T-piece is coming off of the lower hose connected to the fuel pump, the top line is straight from the tank...
Yep you're right was just an optical illusion.
Also as smiley mentioned there is 2 different lenght pushrods 100mm for alternator pumps and 108mm for generator.
That style pump with the outlet facing straight up I'm sure use the long one.
SebastienPeek ·
Sure was Joel!
Will try the different pushrod for the different pumps tonight when I get back from work.
I shall see what I can find at home, but should have everything to get her running tonight.
Will see what I can do!
SebastienPeek ·
Have taken a look, swapped around the hoses and I definitely had them the right way first. I tested this by pumping the crap out of the pedal and there was definitely fuel getting sucked into the pump.
It just isn't sending it to the carbs. Which is the weird thing...
I haven't tried putting the new pushrod in, as I don't have a 13 socket to get the nuts off to get the pump off to replace the pushrod thing.
Maybe tomorrow night. Charging the battery because it sounded like she wanted to start, so might give it a go in another two/three hours and see if I can get the petrol to the carbs.
Any ideas, would love to know what the hell is going on, it seems like it would be something very simple but it is driving me insane.
Edited on Tuesday, 24 January 2012.
I was taking a quick peek around Zelda, and I was finding all sorts of things. Such as the fact that Zelda already must have a H4 conversion as, peeking through the really crappy lenses, I could see the writing on the bulb. Woot!
Which means I can get some new ones, but I think my issue now is the fact that the lenses themselves are shot to death. Any ideas on getting new lenses and where I should be looking? I'm going to assume I have the bucket to attach any 7" sealed beam if I have H4 bulbs in there, but I am not 100%.
Any information would help!
Smiley ·
I'm no pro on this. But when I did my Baja I just bought the 7" Narva lenses from Repco.
I also bought the buckets to mount them into because It doesn't really matter what you use on a Baja, you make it fit 🙂
You could just buy a pair of them and fit them to your current mountings.
I also run 90/100W bulbs in mine. But just watch out, cause I've burnt out a headlight switch with bulbs that big. Shouldn't be an issue if you're running relays though.
Smiley 🙂
Joel ·
Outta luck, they're just stocko headlights fitted with H4 halogen bulbs fitted, youll still need mounting buckets like Smiley did.
SebastienPeek ·
Smiley wrote:I'm no pro on this. But when I did my Baja I just bought the 7" Narva lenses from Repco.
I also bought the buckets to mount them into because It doesn't really matter what you use on a Baja, you make it fit 🙂
You could just buy a pair of them and fit them to your current mountings.
I also run 90/100W bulbs in mine. But just watch out, cause I've burnt out a headlight switch with bulbs that big. Shouldn't be an issue if you're running relays though.
Smiley 🙂
Thanks for that Smiley!
I'll try and take the headlight rim off and take a look to see if I have the buckets there.
Joel wrote:Outta luck, they're just stocko headlights fitted with H4 halogen bulbs fitted, youll still need mounting buckets like Smiley did.
I'll have to find a place that do RHD mounts, or are they the same for LHD & RHD?
Would love to finally upgrade my headlights and what not, and hopefully get me new front fenders and a front bumper.
Soon everything should piece together, just need to get the engine working which I am pretty sure is going to have to be an electric fuel pump at the front but we shall see.
From what I have heard, the dual carbs that I am running are plenty for a bone stock 1600tp. I might upgrade her a little bit and get her to a 1641cc or just jump the gun and get her up to a 1916cc.
What's the maximum you can bore out a 1600cc?
beetleboyjeff ·
SebastienPeek wrote:Have taken a look, swapped around the hoses and I definitely had them the right way first. I tested this by pumping the crap out of the pedal and there was definitely fuel getting sucked into the pump.
It just isn't sending it to the carbs. Which is the weird thing...
I haven't tried putting the new pushrod in, as I don't have a 13 socket to get the nuts off to get the pump off to replace the pushrod thing.
Check your hoses from the pump to the carbies aren't blocked. I had my carbies off for a few weeks at one stage, and when I re-fitted them, I couldn't get fuel to them.
After LOTS of stuffing around, I ended up finding it was mud from wasps in the fuel lines - they had found the open ends.
Smiley ·
SebastienPeek wrote:What's the maximum you can bore out a 1600cc?
For a street engine, 94mm.
When you combine this with the stock 69mm stroke crank this gives you the 1915.
He's a handy little link that I like to use for engine sizing.
beetleboyjeff wrote:Check your hoses from the pump to the carbies aren't blocked. I had my carbies off for a few weeks at one stage, and when I re-fitted them, I couldn't get fuel to them.
After LOTS of stuffing around, I ended up finding it was mud from wasps in the fuel lines - they had found the open ends.
Hey Jeff,
The hoses from the pump to the carbs are all brand new, I checked them as well to make sure.
It has to be the fuel pump then, I'm going to try the pushrod and if that fails, I'll just install an electric fuel pump.
Thanks Jeff!
SebastienPeek ·
Smiley wrote:For a street engine, 94mm.
When you combine this with the stock 69mm stroke crank this gives you the 1915.
He's a handy little link that I like to use for engine sizing.
That is a great link Smiley, thanks for that!
I'll see if I can get into contact with a decent engine builder and get them to bore her out to 94mm. Then need to find some decent pistons.
Yeah, I don't want to stroke her any higher than the standard crank. Although, I'd love to stroke her up to a 2332cc, that would be amazing, maybe one day...
Smiley ·
SebastienPeek wrote:That is a great link Smiley, thanks for that!
I'll see if I can get into contact with a decent engine builder and get them to bore her out to 94mm. Then need to find some decent pistons.
Yeah, I don't want to stroke her any higher than the standard crank. Although, I'd love to stroke her up to a 2332cc, that would be amazing, maybe one day...
If you have the money I wouldn't bother having an old block bored. At the end of the day it's still 40+ years old. When my engine was built by Rod Penrose he just used a brand new block. They are surprisingly cheap and brand new, so you should expect no problems or cracking.
An engine that big would be nice. My current is 2054 and a type one. My next engine will be 2.5L and a Type 4.
Smiley 🙂
SebastienPeek ·
Smiley wrote:If you have the money I wouldn't bother having an old block bored. At the end of the day it's still 40+ years old. When my engine was built by Rod Penrose he just used a brand new block. They are surprisingly cheap and brand new, so you should expect no problems or cracking.
An engine that big would be nice. My current is 2054 and a type one. My next engine will be 2.5L and a Type 4.
Smiley 🙂
Yeah, that's a pretty good point. I'll just do a tiny upgrade and get the 1600cc to a 1641cc and then just run this engine into the ground. By the time it gives up, I'll have enough to do a monster Type IV build as well.
We'll see what happens, just have to get the new engine up and running so I can stop relying on the misses car. That and I really want to get back to driving Zelda in the heat.
Smiley ·
Personally I wouldn't bother pulled the engine down to a short block just to fit a set of 87mm pistons and cylinders. You're not going to get a noticeable performance boost by doing this mod. You're certainly not going to be able to feel it in the seat of your pants.
That's a lot of time and a bit of money to spend for no real gain.
Just run with the stock 1600 and save your time and money for the next engine.
A stock engine will be nice and reliable and gives enough power and good fuel economy if driven gently.
You can do whatever you want, it's your dub. I just think that there's more important things to spend your money on than an extra 56cc.
Smiley 🙂
SebastienPeek ·
Fair enough!
I guess the money that I save from not doing this tiny performance upgrade, I'll spend it on a very nice set of wheels that will look awesome.
Need to save money for something else that will surprise a lot of people on here.
I guess I shall just continue to prod along and keep doing bits and pieces until I get enough for the big surprise.
Just need to get the current engine working properly and then I can continue going on with the current plan.
Smiley ·
SebastienPeek wrote:Just need to get the current engine working properly and then I can continue going on with the current plan.
Well get out in the garage and fix her then!!! 😀
Smiley 🙂
SebastienPeek ·
Wish it was that simple. Might go and take a night photo of her where she currently is with my new fancy camera...
I need the cash, I spent too much in Europe and am only just making ends meet. Pay day is soon though!
Which means more cash spent on making Zelda one mean Germanlook 1303S.
SebastienPeek ·
Quick snap from tonight.
Currently her grave. We'll see what happens.
Going to fix it as soon as possible. I want to drive Zelda again so badly!
Joel ·
SebastienPeek wrote:It has to be the fuel pump then, I'm going to try the pushrod and if that fails, I'll just install an electric fuel pump.
If ICTs are anything like Kdogs you'll need a pressure regulator as well if you electric.
SebastienPeek ·
What do you mean ICTs and Kdogs?
I am getting a pressure regulator anyway just to be on the safe side.
snitz ·
Joel wrote:
SebastienPeek wrote:It has to be the fuel pump then, I'm going to try the pushrod and if that fails, I'll just install an electric fuel pump.
If ICTs are anything like Kdogs you'll need a pressure regulator as well if you electric.
Aren't 3-4psi Facet pumps okay without regs?..Do higher psi pumps without regs cause pulsing in the fuel lines causing havoc with floats and needle and seats?..sorry to ask but you have got me intrigued..lol
Smiley ·
snitz wrote:
Joel wrote:
SebastienPeek wrote:It has to be the fuel pump then, I'm going to try the pushrod and if that fails, I'll just install an electric fuel pump.
If ICTs are anything like Kdogs you'll need a pressure regulator as well if you electric.
Aren't 3-4psi Facet pumps okay without regs?..Do higher psi pumps without regs cause pulsing in the fuel lines causing havoc with floats and needle and seats?..sorry to ask but you have got me intrigued..lol
Kadrons don't like anything more than 2psi max fuel pressure. Otherwise it just pushes past the needle and seat, overfilling the float bowl and spilling out into the throat of the carby.
Smiley 🙂
SebastienPeek ·
We have semi-lift off!
Engine started and I got a video of it too, not going to call it first start, but will call it second start (first successful one).
You can watch it here. Enjoy!
Replaced the little rod thingy in the fuel pump, took out the one that came with the engine originally and replaced it with the one that I had in the old engine and booyeah, she started after some pumping. Now the carbs just need to be tuned, the heater hoses reattached and the pre-heats on the exhaust need to be blocked off, then we have real lift off!
Joel ·
Smiley wrote:Kadrons don't like anything more than 2psi max fuel pressure. Otherwise it just pushes past the needle and seat, overfilling the float bowl and spilling out into the throat of the carby.
Smiley 🙂
Yep and I bet those ICTs are no different.
SebastienPeek ·
Joel wrote:Yep and I bet those ICTs are no different.
I'm taking her to carby specialist to get her tuned. He'll be able to tell me what is needed, right?
Joel ·
If the stock mechanical pump is working fine you should be able to leave good enough alone unless the carbs need rejetting.
was this new engine a runner out of a car or built up and not used?
SebastienPeek ·
Yep, sure is working fine, and the dual carbs have never been used, so they just need a tune.
It was running 18 months ago, then teared down and sold to me teared down.
So I have built it all up myself and yeah.
Was definitely a good learning experience that is for sure!
Bizarre ·
SebastienPeek wrote:I'm taking her to carby specialist to get her tuned. He'll be able to tell me what is needed, right?
Make sure he knows Webers and ICT's
No good paying for some one to learn 🙅
SebastienPeek ·
Thanks for the kind words Bizarre, I'll head down there (not in the bug) first to make sure he does know his way around them.
They're EMPI branded carbs, 34's, are they Weber's or ICT's?
I'm going to assume ICT's. But don't want to seem like a fool.
Thanks for that Bizarre,
Just wanted some clarification that's all!
Appreciate everyone's help, just glad I got her running-ish, now I just need to get them tuned and all the other bits installed properly and then we're done 😀
cam070 ·
iCT's are a model of webers. Empi's are a whole different kettle of fish. I am guessing you are not familiar with their "quality".
Hopefully your carb guy is familiar with them as I don't think they are all that common, especially outside of vw circles.
SebastienPeek ·
I got the carbs cheap, and I already have an EMPI branded exhaust and for my current setup all I need is 34's, just to get her up and running.
I am well aware of EMPI quality "issues" but have yet to fall witness to it myself personally, touch wood. Once the carbs are tuned I'll be happy, I'm sure they will know what they're doing as a mate of mine went there with an old TA22 Celica and he knew his way around easily. I'm sure he will be fine with some EMPI 34's, but will check with him first.
Just need to get her running as she's my daily and it's kinda annoying borrowing the misses car or her Mum's car to get to work.
cam070 ·
Haha I had a TA22 celica ages ago with 2TG and twin solex carbs ages ago. Same mate who painted that will be doing my bug soon.
SebastienPeek ·
Yeah, I'm pretty sure that's exactly the same car as my mates!
So the guy who did his carbs will be doing mine, well, the same place anyway.
Will take Zelda there probably Monday night. Have to block off the preheats on the exhaust first and then I can take her there. Don't want her spewing fire into the engine bay that's all, she did twice and it is definitely a nerve racking experience...
Anyway, will take some cool photos tomorrow hopefully. Need to get my heater hoses installed from the fan shroud to the boxes until I get the J Tubes. Hopefully my distributor without a vacuum advance arrives tomorrow too, that would be awesome. Albeit I'll have to re-time her or just be exact in the way I put it in (the same position as the current one).
Will update tomorrow.
SebastienPeek ·
Have contacted Richard at V-Force about the adjustable front struts.
Hot damn, the price tag for those is definitely in the high region.
But, money aside, I have replied to his email with another question, wondering if a 7.5" wheel would fit with them in the front fenders...
Wonder if anyone on here would know anything? Or am I going to have to purchase a 2" wider set of front fenders (which I really don't want to do at all)?
Have got the information back from the wheel supplier too, looks like they won't do a 6" wide front wheel like I thought they'd be able to do.
But they can still do my 8" wide rear wheels which is all good. Have approached them with an offset of 35mm, I'm pretty sure that should be plenty to get the look I want.
SebastienPeek ·
Zelda is off to meet Peter DeBiasi on Tuesday.
I figured it best get tuned by someone that knows what they're doing.
Let's just hope she comes back home running great, that is my main concern. If I can get her home running perfectly and be able to drive her next weekend, then I know I'll be cruising in Zelda to work Monday week. That, that excites me!
I'm looking forward to getting the new front struts too, she'll be a lot lower at the front which is exciting. Then, just need to notch her down a couple of splines and boom, she'll have perfect static stance... Only issue is I won't be able to get into the work car park without scraping off the exhaust. Might be time to start investing in new exhausts!
Anyway, will report back when I get Zelda back from Peter, will probably make another YouTube video and see how she goes, very excited indeed!
smithy68 ·
Hey Sebastien, where is Peter working now, does he have a new shop?
SebastienPeek ·
Nah, from what I know he's doing it from home nowadays.
Trailer from mine to his and then he is going to tune her up.
Excitedness.
DylanTheDubber ·
Best of Luck Seb,
Im pretty jelous of the twin carbs set up. I'd love to put a set of K-Dogs (Kadrons) on the bug and i have a extractor exhaust system waiting to go on with the carbs (:
From Dylan
SebastienPeek ·
Thanks Dylan!
Yeah, the twin carb setup should be pretty good once she's going properly, but until then she's just sitting doing nothing, which is kinda sad.
A set of Kadrons would be awesome, but not something I'd put on a stock 1600tp. Maybe something I'd put on a 1836 or 1916, but not a stock 1600...
As for exhaust, I think the one that I have on at the moment will stay. I'll stock up on them though (might order another couple) just in case I start going through them scraping everything everywhere with how low Zelda will be in the coming month.
Smiley ·
SebastienPeek wrote:A set of Kadrons would be awesome, but not something I'd put on a stock 1600tp. Maybe something I'd put on a 1836 or 1916, but not a stock 1600...
I have a friend in Rocky that is running a set of 40mm Kadrons on a stock 1600 twinport in his Superbug, it loves them. Goes really well.
Smiley 🙂
SebastienPeek ·
Maybe one day, but first thing is first, just need to get her running again.
Then I can work on her stance and what not and then we'll be all good.
Just have to make sure she drives great and not the way she does too.
Tuesday can't come soon enough.
SebastienPeek ·
Stance is being put on hold for a bit.
Change of mind with what sort of setup I'm going with, will surprise everyone that is for sure.
Instead, something even better will be happening.
Smiley ·
SebastienPeek wrote:Stance is being put on hold for a bit.
Change of mind with what sort of setup I'm going with, will surprise everyone that is for sure.
Instead, something even better will be happening.
You're Baja-ing her!! Nice work!!! 😂😂😂
Smiley 🙂
SebastienPeek ·
Smiley,
Trust me, my next bug will be a Baja, that's a promise.
Zelda will be getting a little bit of a front end remodel and something else too.
Shall be very good!
DylanTheDubber ·
The Front Altitude drop will really make a big difference looks and handaling. V force dose good stuff. I will be getting the slimline struts when i have the $$$$
From Dylan
SebastienPeek ·
Not altitude Dylan, look, all about look.
Altitude drop will be coming, but I'm focusing on getting the body where I want it and all that, then focusing on the drop stuff.
You'll see.
DylanTheDubber ·
Who care what it looks like, leave it as a rat, get it handinging and goen real good 😎
From Dylan
SebastienPeek ·
I care if she looks good. I want her to look awesome, to turn heads, then when she drops, people will drool.
I've got a lot of planning to do; a lot of custom stuff.
She'll be a Euro looker. If anyone doesn't knows what I mean, check out StanceWorks or the common MKIV Golf or something running some very nice rims...
Zelda will be a head turner that's for sure.
My front end will go to something similar to Joel's, the indicators in the bumper and so forth.
That is what is happening first before the body off the pan paint job.
When the body is off the pan for painting, I'll be tackling the new suspension upgrade. This will be something completely different to what most 1303's or 1302's for that matter run.
I've got a lot of custom stuff being made and some interior upgrades coming too. When Zelda gets back from Peter and the tuning is done on the engine, I'll be upgrading a bit of the interior just for fun, and then will come the body off respray with some extra body modifications done too (getting rid of the air vents on the bonnet) and filling in the holes properly (not filler).
I'll be doing a big order from JustKampersAustralia within the next month, and then she'll be off to spray.
Will be a bit of a difference before my birthday that's for sure...
DylanTheDubber ·
Seb,
I Was only Joking mate (:
I want my car to look good and turn heads and i got big plans and ideas for it too but i dont have any where near the money i need to do that so im happy with my flatt black mean looking slammed super!
From Dylan
SebastienPeek ·
Aha all good Dylan,
I was trying to keep it all a secret and surprise everyone but I got a little tired of keeping secrets.
Luckily, where I work I am very well looked after so I should be able to get all this done very soon.
I wanted flat black, but have decided against it (since seeing you do yours) and will be doing something more, metallic...
The suspension setup will be completely different to anything I've seen done to a 1303.
DylanTheDubber ·
Seb,
Where do you work? Can i get a job there? haha (:
I only went flatt black cause it looks good for a cheap can job. I Have spend probly about $150- $200 all up on Paint and it is'nt that good, i left it looking a bit ruff body wise but its solid with no rust and its pretty straight now. I Wouldnt change the design of the suspension too much to something you never seen on a bug cause it might not handal good. unless ur an mechanical engineer i wouldnt change the design cause its a very good design, cars still come out with macpherson strut front end today. But if you do alot of different mods and ugrades to brakes, struts, balljoints, steering, bushes and more you can make it very modern such as coil over struts (that all the JDM Drift scene use) and porche or simmilar brake setup with big calipers nad drilled and slotted rotors and so on so forth.
From Dylan
Smiley ·
SebastienPeek wrote:The suspension setup will be completely different to anything I've seen done to a 1303.
Swingaxle??? 😀😀😀😀😀😀😀😀
Smiley 🙂
SebastienPeek ·
Dylan,
I work as a Software Engineer for a company here in Adelaide. If you have skills in PHP, JQuery, Java, JavaScript, Objective-C or maybe even C++ (and lived in SA) then probably...
As for paint, I know that matte black always looks good from a can, but mine will be a full, body off respray in 2-pac. Not that expensive, but still a lot more than a can job that is for sure!
The suspension setup has been done on other bugs, just not 1303's or 1302's that have the MacPherson strut front end. I don't think many people have tried/attempted to do it, but I know that it is possible if you get some custom stuff done...
Smiley,
Not Swingaxle, there is no point (in my eyes) to go from IRS to swingaxle on a super...
I wish I could say more, but I really want to surprise people with what happens.
Zelda will be freshly painted in a 2-pac black by the time I am 18. Meaning I have exactly three months from today before my 18th to get it done.
She will look like a completely new car and I honestly think it'll be worth it. I might even invest not only in new front guards, but rear ones as well (from JustKampersAustralia) as I think doing all of that brand new would be a lot better than just re-using the ones currently on her. One of the fronts has a little bit of damage, but both have a fair amount of bog and rust going on. The rears are a little warped where the bumper brackets stick through and therefore the rubber seals don't actually fit. I'll put together a shopping cart on JustKampersAustralia and see how much everything will come too.
Zelda is getting picked up tomorrow morning which is really exciting to be honest. Can't wait to be able to drive her again, should be able to do a couple of photoshoots with mates as well which will be damn exciting.
Have you priced up a body-off respray yet?..factor in 6-10k for a respray and thats nit including rust repairs,seals, POR15 or KBS'ing the pan,replacement parts....Just had my beetle bonnet bare metalled,resprayed in 2pak (show quality)..that alone cost me $1000..mainly due to labour to flip up a single ply bonnet and get it killer on the underside aswell as the outside. 2 Pak is something you dont want to do half-arsed due to the expense of materials..so save up and do her properly..it aint gonna be cheap!!!.
SebastienPeek ·
Hey snitz,
Have already contacted a couple of people, basically I will be the one who takes the body off the pan and strips the body.
As for the pan, I'm not going to do anything to it while she's being painted. I'll be doing the pan probably in October some time when I have enough cash to splurge on the suspension upgrade and all of that.
Some people have gotten back to me with around the $2,000 mark, someone up in Willunga who has done other Beetle's and Kombi's as well. Still waiting on a reply from him via email or even a phone call, but haven't heard back since asking whether or not I can go and have a look at the workshop. Other people have said $4,000 and someone else said $8,000. If this dude up in Willunga falls through, then I'll way up my options, but basically will do all the stripping myself and all they need to do is the preparation and paint.
I know that the paint itself is really expensive, and I do want show quality, but from what I have heard around in Adelaide, it is possible to get some really good jobs done for a fraction of what some people quote you for. I guess you just need to do a lot of research and thankfully my research did me good by finding this bloke in Willunga. We'll just wait and see what happens...
I feel as though my thread needs some decent photos. Might push Zelda to the oval near my place and take some cool night photos later tonight.
Ollie ·
Seb Mate, great to see such progress in the bug.
Makes me feel like I need to get off my ass and working on mine!
Wish I was around your area to get some nice before and after shots
SebastienPeek ·
Ollie,
Will definitely be getting some very nice before and after photos.
Treated myself in Singapore and got a Nikon D3100 for very cheap indeed.
Want to take her out tonight, push her down the road to the oval and get her on the oval for some nice night shots.
Don't know if I will, weather looks like crap.
Aha smithy68, that is exactly who I contacted! He quoted me $2,000 for a full body off pan spray!
I'm going to go to his workshop and see what's going on.
I'm so excited to get her black, so very excited.
SebastienPeek ·
Quick happy snap from tonight, no editing whatsoever, just some tinkering with the ISO on my camera.
Turbo54 ·
Sebastien, be carefull on the respray. Cheap = shit. I have done a lot of cars and painted a few myself and I cant tell you enough that if the prep isn't up to scratch the paint won't be either.
Also the quality of the paint is another big factor. You can use cheap paint but how long will the shine last? My paint alone for my 54 is over 2 grand off the shelf. I can't sure your paint might look goos for 6-12 months but then what happens when it starts breaking out and all the filler starts shrinking back. Also you are going gloss black? The car better be ruler straight or it will look crap. Black shows all so any floor in the prep or the paint will show.
If I was painting your car and was paying someone to do it, I would paint it white again. White hides all. Even some of the bright colour plastic looking colours would be better than black.
I can comment on the quality of the guy at willunga as I haven't seen it but go and have a look at the workmanship, before and after paint, cars that he has painted and see if you can see some that are a year + old.
Then you will know how well the job is done. My best mate is a painter here in adelaide and he is very good and done a few show quality jobs around. He won't paint a car for less than 6K. This does not include paint or panel. Just laying it on.
Do your reasearch.
T54
SebastienPeek ·
T54,
Yeah, I'm going down to his workshop to take a look before I book her in. I want to see the quality of the products and the quality of the workshop itself. He currently has 7 cars in, so I'm going to assume he has a good reputation though, or he just does really cheap jobs?
As for the body work, I'll be getting new guards all around and hopefully get some dents beated out. That's about it though, the body of Zelda is pretty straight from what the naked eye can see and I'm sure the panel beater will see the imperfections I can't see. I'm budgeting around $4,000 as a maximum for this bloke at Willunga (if body stuff does need to happen, obviously the $2,000 quote will go out the window). I just want to get her painted and then work on the suspension stuff, so a $4,000 paint job is definitely something that I can do, but something like an $8,000 - $10,000 job is something I definitely can't afford, not yet anyway.
If I want Zelda black before my 18th, then the Willunga bloke is the way to go. Otherwise, it won't happen.
SebastienPeek ·
Zelda is off to Peter DeBiasi's house.
Will have her back before the weekend.
Shall be good!
snitz ·
If you go black on a cheap job you will be very dissappointed.I resprayed my scorpion in a chook shed at a mates place with me buying all the etch primer,knife putty,2k hi-fill,2pak basecoat and clear,reducer and hardener and helped my mate block the 2pak hi-fill back and he painted it..That alone cost me 4k. Going a shit job in black for 2-4k now and then respraying it later to show quality is just a waste of your money..If the guy promises the world for $2000 he's full of shit to be honest and all you will get is a slapper job..
SebastienPeek ·
I've seen a few cars that he has already done in black and they look pretty decent...
I dunno, I'll take a look up at his workshop before I commit to anything, he's going to knock out the dents as well and get the body as straight as possible.
I'm sure everything will be alright, and to be honest, even if it only lasts for a year, I'll be happy. I just want to be able to take her to a couple of shows and that's about it, maybe do some cruises and photoshoots with a few mates here but that is all.
Will report back when I go down to his workshop once Zelda is back up and running.
Which, I get news of tomorrow. Carbs are being torn down, cleaned, tuned and reinstalled tomorrow.
Will see what happens!
SebastienPeek ·
Zelda arrives tomorrow morning.
Very excited. Can't wait to go for a cruise with some mates in her. Will bug bomb her first though, just in case, I hate tiny critters.
Will do a night shoot tomorrow night hopefully with some of my mates, not to sure where, but should come out really nice.
But I just can't wait to get back in her and drive her around, that is what excites me the most.
DylanTheDubber ·
Keen as Seb!
Keen for them pics, take heaps the more the better. Im also into photography.
From Dylan
SebastienPeek ·
Will do Dylan, should get some great ones and will get some of the engine as well!
I'm more excited to just get back in her and drive her again. It's been way too long!
DylanTheDubber ·
Yearh i know what you mean my bug been off the road for 6 months and the pain of wanting to drive it instead of the familys jap scrap cars is enourmous. get pics of you and ur mates with the car, at night too im sure you will get some real kool shots.
From Dylan
SebastienPeek ·
Zelda is back!
She's a little dirty and has a bit of an exhaust leak, but she's back and she actually drives now!
Looking forward to heading out tonight for some photos and what not, I'm just excited to get back in her and drive to work now!
Edited at 10:40 3/2/2011 by SebastienPeek
Seems the exhaust leak is a little too strenuous on Zelda. Got to work though, but seems it is sucking all power and I still have some nice popping going on. I think people spend a lot of money getting cars to backfire like Zelda is...
Called Siggi at GHR and he's going to take a look at her early next week.
Ollie ·
I got the same prob with mine Seb.
Though the backfiring sounds tough 😉
SebastienPeek ·
Ollie,
Do you still drive around fine? I'm a little worried about driving long distances in her just in case something goes bad?
It does sound tough, scares a few people though, kinda funny!
DylanTheDubber ·
I Like the sound too a bit, although my exhaust leak gives a real clacking sound so not real happy with that. new bottom exhaust clamp will fix it soon.
From Dylan
DylanTheDubber ·
Also im waitin up late for you to get home and upload these pics from your night shoot (:
From Dylan
SebastienPeek ·
Just a couple of shots of Zelda from last night. Have a heap of others with the mates Torana but just going through them now.
SebastienPeek ·
Currently battling an exhaust leak. I don't know if it is because of the pre-heat blockoffs that we made or if there is something else a bit wrong...
Somewhat considering forking out for a Sidewinder Exhaust. It tucks up quite a bit, which is what I am going to need very soon.
What do you reckon? Have had a look at the sounds they make and am excited to grab one.
Bizarre ·
Try and find the leak. Get the car idling and use a rag or a thong or something and block your exhaust. You engine "should" choke and stall. Feel around for the leak. Sould be easy enough to find.
SebastienPeek ·
Was sold a set of dodgy carbs. They are absolutely screwed.
It is my fault anyway, I was told they were dodgy to begin with and that the previous owner couldn't balance them either...
Will be taking them off for now and trying my luck at buying some new ones.
I don't have the money at the moment (poured way too much into the current set of carbs) to get anything so unless someone has some spare dual carbs that are actually working and willing to ship them to me, then I'm all ears.
I know it won't happen, but I guess it's wishful thinking. Originally was though just to be the fuel pump but is something more.
Will see what I can put together in the next few days. I have till Friday to make a decision as to whether I pay even more on the set of carbs that are screwed to get them re-jetted and the sort or if I spend $500 - $700 on brand new ones.
Any ideas, any helpful comments, anything would be great.
DylanTheDubber ·
Get a Kadron twin carb kit for about $850 new and you wont look back.
Empi are shit! Shame you got some shit carbs but try fix em up a bit and ebay em. try get some money back atleast.
From Dylan
SebastienPeek ·
I won't be able to get anything for the carbs, they are shocking...
Got any links to kadron kits or anything?
Thanks Dylan!
Joel ·
What's actually wrong with them?
SebastienPeek ·
No idea, they're just making the engine run like absolute crap.
They're probably running way to rich or something. No acceleration, no power, it's crap, I just have no idea what is happening and it is annoying me quite a bit...
Sometimes I wish shit just went right with Zelda the first time.
Joel ·
There's probably nothing wrong with them physically, just a whole bunch of small tuning issues - jetting, linkage and butterflies not synced up, vac leaks etc.
Unless a set of carbs came off an indentically setup engine it's pretty rare you can just bolt them on and drive.
SebastienPeek ·
That's fair enoug Joel.
Do you think it wise I get a carb specialist to look at her before giving up?
Just worried about costs now. Not nice at all, I've spent way too much on this already, was supposed to be a cheapish upgrade.
Won't have anything done till next week sometime which kinda sucks as well.
Bizarre ·
OK - what did the bloke do that you took them to??
I feel your pain, I went down the same road.
Stick with it. You will learn a lot.
Do you have a fuel regulator??
Do they have a balance tube yet??
SebastienPeek ·
He was supposed to "tune" them, but to be honest, he didn't do anything other than break my oil light wire.
I'm going to stick with it, I want to get them working and what not, I hate not being able to drive her.
GHR Motors (VW Mechanic here in Adelaide, probably the only ones I trust) have got a new fuel pump in there and everything is fine with the fuel, no need for a regulator according to them and I trust them fully.
However, there isn't a balance tube installed at all. Like I mentioned, the manifolds don't support the installation f a alance tube. I might just wait till Friday, drive her to the carb specialist that GHR recommended and see what he says.
Special Air Service ·
SebastienPeek wrote:Zelda is off to Peter DeBiasi's house.
Will have her back before the weekend.
Shall be good!
SebastienPeek wrote:Carbs are being torn down, cleaned, tuned and reinstalled tomorrow.
Will see what happens!
What did this achieve? What did Peter say about the carbs? Did he say they were rooted?
I would have thought that a leaking exhaust manifold would have had some effect on the tunability of the engine.
SebastienPeek ·
It achieved something for about two days, and then everything went back to shit while I was driving home at one in the morning, it's great driving her at 10km/h because going any faster will cause her to die...
It probably does have something to do with the exhaust leak as well. I will try and get GHR to take a look and see if it is still there, if it is, then they can sort her out.
Just another bit to the bill.
Bizarre ·
You could be lucky with the pressure.
Kads like 2 psi or something
I believe ICTs are like IDFs and happy up to 3.5 - stock
At least get a test gauge put on there
If for some reason it is putting out higher it could be causing all your problems
All the links above say that they need a balance line and people had to cut one in
ICTs have a balance line
Honestly - sit down and go through the set up on the CB link
It takes you right through the set up and dialing in
Well worth a Saturday spent playing with your car
I agree Bizarre, I think it's worth another Saturday behind the bugs engine bay and see what's happening.
Just have to figure out how to cut a line in as you said others have had to do...
We'll see what happens.
Bizarre ·
drill, tap, screw in barbs
SebastienPeek ·
All things I'll need to buy, I don't have any of this sort of stuff, nor do I even have a garage to play around in anymore.
It pisses me off that I could have spent $500 on a brand new pair if I had of known about them.
And the manifold would already be correct and all of that.
Might have to contact Mum and talk to her about borrowing some cash.
Then maybe I can install them properly, tune them and all of that shit.
SebastienPeek ·
Have found what I'm looking for.
I know they're EMPI still and all that crap and "empi is shit quality" and "empi stuff is crap" but to be honest, I just want her driving.
Has the correct manifolds and comes with detailed instructions. It's all about instructions I tell you!
If I'm supplied with them, I will get these carbs working beautifully. I swear it.
SebastienPeek ·
Geeze it has been a while since I have posted on here.
Zelda is running fine with the EMPI 34's, just need to give her a bit more rather than babying her.
Have got new wiper blades from Joel which I'm fitting now.
Have got stuff planned for Zelda, will post up here when stuff starts moving forward.
SebastienPeek ·
Time for a quick update of things that have been happening around the place.
Currently, I am awaiting for a complete engine tinware kit from ClassicVeeDub and am also waiting for a fuel pressure regulator from them too.
I am waiting for a dual kadron kit (40's) from a member by the name of shokwave2. I am also waiting on a SuperFlow 38mm Header exhaust from Vintage Speed.
Last night went out with a couple of mates that also own a white 70's cars. We went for a cruise, took lots of photos and just had a lot of fun.
Some images from the escapade to wet the whistle of this post.
And we even got a rolling shot of Zelda too!
We were out quite late and when I got home, I had to work. Which is kinda shit, damn timezones and working with international clients isn't good.
So I was up till about 3am this morning and awake at 7am to do some more stuff for the international client. Solved all the issues and jumped back into bed around midday, falling asleep to the droning noise of the V8's going around the Adelaide track.
I was, however, rudely awoken. My brother came in saying that Zelda was leaking fuel down the road out the front of ours. I just shrugged it off and rolled over.
Then Mum came in demanding I go do something about it. So I did, quite quickly too, and I got some new tools out of it as well which will make the new exhaust install quite easy.
The puddle that I was faced with.
So, I quickly found the problem without any issues (besides the fact that it was absolutely pissing out fuel). It was the hose that goes between the hardline from the tunnel and the hardline into the engine bay. I had to do a quick fix before going down to the local SuperCheap Auto to pick up the new fuel hose, hose clamps and while I was at it, a new trolley jack. In the photo below you can see I bent the hose with the split in it over on itself and zip tied it up. You can also just make out the hardline that goes to the engine bay at the top...
I had to persuade Mum to drive me down to SuperCheap (so glad she agreed) and I picked up the necessary parts. So, after lifting her up so I had more room to move, I got everything back together again. It now looks like this.
In the space of about an hour and a half it went from pissing fuel down the street to being leak free. It still weirds me out how the actual leak started, it seems the hardline from the engine bay had actually pierced through the hose and therefore causing a massive fuel leak...
Anyway, she's back up and running, took her for a spin around the block and no leaks which is good. Went from a full tank of petrol to just under half a tank. Bit annoyed, but glad the problem is fixed and I'll be able to drive to work tomorrow.
Bizarre ·
glad to here - but yeah, hoses split.
You just need to keep on top of things and change everything over a bit of time
So, anyway.................... how are the carbs running??
SebastienPeek ·
Hoses sure do split, this new one is definitely a lot tougher than the old one, did a comparison and the new one looks like it is double walled.
Carbs are running good enough for a daily. But are getting swapped out for some 40 kadrons sometime this week.
Along with the Vintage Speed exhaust and complete new tinware, we should have a winning looking engine bay!
I'm going to try and replace all tinware parts with the engine inside the bay.
Will be a bit fiddly, but reckon it is possible.
DylanTheDubber ·
Shit! cool photos aye!! what headlights you running they look sweet as!
From Dylan
SebastienPeek ·
Dylan!
Yeah, the photos came out awesome, I've got a heap more but have to go through them, a mate also has heaps as well.
Headlights are a good question, hell, I don't know to be honest. They're German lenses though!
The photo makes them look better then they are. They actually blink.
When the standard beam is on, the left headlight stays on parkers and the right is on standard beam.
But when I put high beams on, the left headlight goes to high beam and the right ones stays on standard beam.
Is quite funny and I should probably get around to fixing it, but at the moment it is more about the rear being finished.
DylanTheDubber ·
Yeah tru okay mate well yeah im having trouble friggin around with my headlight i got them both working now but i suspect a voltage drop on low beam but atleast both lights do the same thing.
From dylan
SebastienPeek ·
Yeah, I guess it's like the inner Herbie of my bug 😉
DylanTheDubber ·
Yes!
Inner Herbie for sure, im expiriencing strange stuff with my tail lights that i cant get my head around.
From Dylan
SebastienPeek ·
Woohoo!
First package out of four have arrived.
Hopefully next three packages arrive before Friday, need to install everything Friday night and fine tune it all Saturday for Sunday.
First package contains the following...
Dual 40 Kadrons including Manifolds and air cleaners.
Also contained a CSP linkage for them.
Major thanks must go to shokwave2 (Matt) for the dual kadrons! Can't wait to get them installed and go for a drive.
Awaiting on the following still...
- Vintage Speed SuperFlow 38mm Header Exhaust.
- Complete tinware kit (black doghouse w/o heater outlets).
- Fuel regulator. 1.5psi to 5psi.
Hoping everything comes before Friday!
SebastienPeek ·
As most people are aware of what happened to Zelda, there are most likely some that aren't.
Last Friday morning I went out to Zelda (who is parked on the road) to find her, in well, not a very nice condition that is for sure.
She now looks like this.
Now, the past weekend, being the long one, I have actually gone hunting for a new car and I think, if the pan is okay, I will be purchasing it.
It's a Type 3 Squareback, and I went to take a look at it yesterday. It has some rust, but it is 40 odd years old and nothing some rubbing back couldn't fix.
This morning I had to take Zelda down to the crash repairer. He basically looked at it, took some photos, asked me how much the car was worth and then bluntly stated that it was probably going to be a write off. So, if that is the case and I don't get any money for her from the insurance company, I'll be selling bits and bobs off of her for enough to get me some cash in my pocket to spend on Gretel, the Square. I know that I can easily just push out the roof with my back and what not, but I don't know if it is worth the time now, because it may just happen again and again, as this isn't the first time something like this has happened to her...
We'll see what happens, but there could possibly be her engine, gearbox and other bits and bobs for sale very soon...
Anyway, I'll know by the end of today as to whether or not Zelda will be classified as a write off or not. I have a very big feeling she will be.
donn ·
Seb, you stated in a previous post that you only had 3rd party insurance, how can you get insurance if that is the case, I've never heard of an insurance company giving anything away for nothing, this insurance company must be the most generous insurance company in existence, I want to place my businesss with them.
69bug ·
He said he was gonna part it^ if they give him money he dosent get the car unless he pays....
Sorry to hear man.... Makes me nervous dailying mine 🙁
Is this common for bugs?
SebastienPeek ·
Alrighty, here is a quick update.
Zelda wasn't covered by insurance. A bit shit that they had it all accessed and everything and made it look like she was going to be covered, and then bang, say no once the quote came back. I kinda expected it though.
So, at the moment she is just parked in the garage not doing anything. I did the back trick with the roof and got it looking a little better, but when funds permit, she'll be seeing a panel beater.
I'll update this thread every now and then, but the engine is out (in a total of two/three hours, which I think is pretty damn good for my second time!) and being stripped and cleaned up.
Will be back to update the happenings in a couple of weeks I reckon.
shokwave2 ·
Take your time and hang in there Seb. Before you know it, the body will be fixed, the motor will be purring, and you'll be smiling.
kempos ·
DAMN!!!! That's f@cked up!!! I've followed most of your thread and your passion for Zelda and all things VW is admirable. This is a real disappointment to see. I wish you and Zelda all the very best during these tough times.
Simesuper ·
Its so sad that people can heartlessly destroy the property of others without a single thought....I really feel for you mate...BUT dont give up! Ive read through this whole build thread and its been fantastic to read about your highs and lows and how much youve learned. Dont give up on your old fat chick...I scored a fat chick myself, a 71 that belonged to a friend. It caught fire and was given to me. The motor was covered in molten aluminium and melted plastic. I cleaned it up, threw on a new set of leads, an old dizzy and carb and of she went...These old cars are amazing and Zelda is no different. Continue loving your old girl and get her back on track...chin up .......Simesuper😀😀😀
SebastienPeek ·
So, if you haven't been around the forum much, I've been doing quite a bit to Zelda over the past week or so.
I ripped Zelda's engine out out of frustration, anger and sadness. How it all started you might ask?
I went to pick her up from the crash repairs place after finding out she wouldn't be covered by insurance. All well and good until I started to accelerate. She was shooting out plumes of black smoke and there was no acceleration at all, I was just putting along at 10km/h. I hate that, I'm a P plater and I enjoy getting from 0-50km/h as fast as possible. So I got home, and in frustration and anger I started to take the engine out.
It wasn't long till she looked like this.
I did it the long way. Stripped her in the engine bay and then dropped the engine completely...
Then I removed the tinware, installed the VintageSpeed SuperFlow 38mm Header exhaust and then all the new tinware.
Everything went back on, got the engine back into Zelda and went to start her up. Boom, the LHS carby caught on fire. This was because, like an idiot, I rushed things. I hadn't checked the timing 100% and had actually timed her 180 degrees out. As the carb was on fire, I did the stupidest thing I've done since owning her. I grabbed the closest thing and threw it on her. Kitty litter went into the carb, down the manifold and into the valve inlet. I thought the engine was doomed, it had seized and I was about to give up.
Then I started a new thread on here. Got into contact with a fellow VW enthusiast here in Adelaide and he came around and we got the engine un-seized! What I relief, knowing that she'd be back on the road as soon as possible.
Photo of the engine back in the bay. Check out the burn marks on the decklid hinge...
After tinkering and some more tinkering, I got Zelda's new dual 40 kadrons tuned up and idling at a very high idle indeed. Too high. But she was alive, and that was all that matters.
This is a photo from the 23rd of March. The photo that I am the proudest of that I have taken, so far...
So that brings me to today.
Zelda is back up and running and boy does she sound good. Got her idling at a decent RPM this afternoon, but I think one or two of my engine mounts are a little dodgy... She does tend to shake a bit, but nothing drastic I don't think.
Last night was the installation of CSP valve covers. Today was the final idle change and a new fuel hose put in place as one was leaking a little. Don't want to risk anything that is for sure.
I also took a quick video of her idling. This was when she was still a bit too high for my liking, but have since charged as previously mentioned...
Have taken her for a couple of drives today, albeit very illegally as I don't have any side mirrors... But regardless, holy hell she sounds good in the cabin. The exhaust sounds awesome and it's great to finally drive her again. Tomorrow I'll hopefully have another little blip around the block before putting her back into the garage to rip off the current smashed up bonnet.
Tomorrow I'll be picking up a front bonnet and installing it. Will continue to update this thread with the happenings and some more images as they come. Before I can drive her on the road without getting into trouble I'll need to pick up/purchase some side mirrors as well. Not too long now and she'll be back!
Oh, and for those wondering what happened to the roof? It now looks like this. Definitely going to be a roof cut repair job!
snitz ·
Nice work Seb and love the rocker covers...well I am biased towards them..lol
SebastienPeek ·
Thanks Jason!
Yeah, the rocker covers are great, the RHS one was a bit of a pain to put on while the engine wasn't out, had to bend some metal to get there but we're all good now!
Excited for next week, getting the Serpentine System from Vee Dub Parts Unlimited, Excalibur version in anodized blue will definitely finish off the engine bay.
After that, it's driving her around like a bomb for about four months and then will do the transformation body wise.
Joel ·
I've seen good panel beaters fix panels crumpled and creased far worse than that.
It would probably cost more to weld a new section in the massage that back into shape.
SebastienPeek ·
I think that might be the case too Joel...
What did they do with Jeff's bug when he rolled it? Did they just push it out or did they cut and re-weld the roof?
Picked up the new bonnet, going to get back out there and install it as soon as possible and grab a photo.
Should rub the bonnet back but not going to bother as in about three to four months she'll be getting painted and what not.
Paulc1964au ·
SebastienPeek wrote:I think that might be the case too Joel...
What did they do with Jeff's bug when he rolled it? Did they just push it out or did they cut and re-weld the roof?
Picked up the new bonnet, going to get back out there and install it as soon as possible and grab a photo.
Should rub the bonnet back but not going to bother as in about three to four months she'll be getting painted and what not.
Hope your not parking it out the front anymore?
SebastienPeek ·
Definitely not!
In the garage when I'm not playing with her.
More pictures to come as new bonnet is on...
Looks like she might need a top end rebuild on the engine since the kitty litter incident...
SebastienPeek ·
Boom, new bonnet.
Question for everyone, top end rebuild kits, possible to purchase them?
1776cc kit? Maybe even just a 1641cc kit? Need some links.
SebastienPeek wrote:What did they do with Jeff's bug when he rolled it? Did they just push it out or did they cut and re-weld the roof?
Seb, they just removed the headliner and beat it out. On my roof, a lot of it was where the gutters had been pushed down by the roof racks. Came up sweet though. I reckon they should be able to repair yours though.
SebastienPeek ·
Yep, I am going to need new heads, push rod tubes and all the gaskets inbetween.
Will see what I get recommended to grab, but need to find out as much as possible and yeah.
Going to be another big job, will see what happens.
She's running on three cylinders. Will refurb the current engine, I think that is the most cost effective.
TorxKiwi ·
I bought one of Classic's, Top End Rebuild Kits, 1641cc for $750. Halfway through putting it in. I'm sure there are better out there and I guess I'll found out if I am to learn the hard lesson of you get what you pay for. End of the day it was a case of going for what I could afford at the time ...... and get past the 'Minister For Finance and Entertainment' without having to explain myself.
Ollie ·
Seb been trying to PM you but it keeps bugging out?!
SebastienPeek ·
beetleboyjeff wrote:Seb, they just removed the headliner and beat it out. On my roof, a lot of it was where the gutters had been pushed down by the roof racks. Came up sweet though. I reckon they should be able to repair yours though.
Thanks Jeff!
Yeah, it seems my gutters are a little screwed as well. Inside anyway. Too afraid to rip out the headliner to see the full extent of the damage...
Might see if I can find anyone here in Adelaide who has had a lot of luck with beetle bodies. I guess any panel beater could do it and charge a lot, but I wouldn't trust them over someone who's done it to VW's for a while...
SebastienPeek ·
Ollie wrote:Seb been trying to PM you but it keeps bugging out?!
That's kinda crap Ollie! I'll send you one and hopefully you can reply.
SebastienPeek ·
TorxKiwi wrote:I bought one of Classic's, Top End Rebuild Kits, 1641cc for $750. Halfway through putting it in. I'm sure there are better out there and I guess I'll found out if I am to learn the hard lesson of you get what you pay for. End of the day it was a case of going for what I could afford at the time ...... and get past the 'Minister For Finance and Entertainment' without having to explain myself.
Will definitely have to keep an eye on this then, can you report back your findings and so forth? What is the current build quality?
I may be able to salvage my current heads and so forth, but I would be kinda keen for getting a nice little bit of performance upgrade to a 1641cc. Not much, but enough for a P plater!
Smiley ·
SebastienPeek wrote:Looks like she might need a top end rebuild on the engine since the kitty litter incident...
Maybe you should do a compression test on the engine as well as check for spark before you go diving into an engine rebuild that might not be required.
Could be something as simple as a dodgy spark plug or internally broken plug lead that is causing the miss.
Smiley 🙂
SebastienPeek ·
Quite possibly.
She is leaking quite a bit of oil from where the head joins the case though, it is looking quite bad anyway.
Will take a photo tomorrow morning of what I'm talking about.
I am under the impression that it'll need a top end rebuild.
After that, she should be fine.
SebastienPeek ·
Alrighty, tomorrow night we'll find out what the go is with the lack of firing on the third cylinder.
I do have a question however, CSP Kadron linkage or, is it possible to get a HEX bar for Kadrons?
A lot of people are commenting on the fact that I should keep Zelda like it is with the front bonnet.
Have also been told that I should try and do the sunroof option. We will see what I can find and invest in!
SebastienPeek ·
Zelda is alive!
I don't think I have been this happy for a while when it comes to happenings with Zelda!
To finally know that I can now drive Zelda around as soon as I have the side mirrors.
Absolutely loving life, it is awesome!
Next up will be getting the decklid all fixed up properly. Will go ventless and drill holes behind the number plate, raise the plate up and there we have an area for airflow.
After that, it comes saving my money for the respray and sunroof installation.
MST Billet Serpentine Belt System shall be leaving American shores on Friday, which means 6 to 10 days from Friday and it'll be in my hands and within an hour, on Zelda.
Looking forward to having everything come together, we will see what happens though, will keep everyone updated that is for sure!
Once again, I must thank one such person who, not only goes out of his way to come and help, but has taught me so much about Zelda.
Thanks again!
Smiley ·
Why wasn't it firing on one cylinder?
Smiley 🙂
SebastienPeek ·
Could have been something as simple as a lead not being attached to the spark plug properly...
Just don't tell anyone. But no, we solved the whine as well, replaced the metal gaskets with rubber ones and made sure the manifolds were as tight as possible. Next up is her voyage around the block, most likely tomorrow morning!
SebastienPeek ·
Been driving along nicely, has a little back fire when accelerating through second and think I have a fuel leak somewhere, or my fuel sender is being a bit dodgy...
Keeps fluctuating (more than just depending on how I'm driving) and it is quite weird, last night had a leak at the front, seems to have dripped down the fender beading or something, was very odd!
Will investigate some more today, but will hopefully be reinstalling the sound system today, determining fuel leak and then comes a week of waiting for my belt system to come.
I get some nice belt slippage and the new exhaust, hell, I think I still have a tiny air leak on the RHS manifold, but it makes Zelda sound like she has a turbo whine!
Anyway, just thought I'd do a quick update!
Getting a quote this week on the roof fix too, so we'll see what happens there as well. Alarm system will hopefully be installed this week at some point too.
SebastienPeek ·
Oh, I forgot to mention something!
I was just checking over Zelda when I noticed a tech screw embedded in the LHS front tire!
So, we changed the front wheels over to steelies, LHS front has a hubcap on, RHS doesn't.
It's quite funny how much of a bomb she does look like at the moment.
On the up side, it means I have no "Super bug shimmy" going on anymore!
Mum says that she has a severe case of cellulite on the roof, which always makes me have a little laugh!
Looks like a full brake system upgrade will be had soon. Will be running 5x120 PCD so that will make finding wheels a little easier that is for sure!
What is needed to convert the rear drums to discs? Links would help!
SebastienPeek ·
Backfire through second gear is most likely caused to Zelda being timed to retarded.
Will time it to 7.5 degrees BTDC and see if that helps tomorrow. Something to do before work I guess!
Fuel sender is being a bit dodgy as previously mentioned, what are the things I should do to get it working properly?
Some things that occur every time I start the car.
- Key in, accessories position, gauge goes to halfway and then falls right off past zero.
- Engine started, gauge goes up to about the end of the red section.
- Accelerating off, gauge goes to the "correct" position I guess.
It is just odd, would like to know of any pointers or of where I should be looking to fix this problem?
Turbo54 ·
Seb, for the PCD of your wheels have a look at the most range of offsets/sizes available for a individual PCD and then choose which one you will go with. If you are going to drill them anyway. I went Ford stud pattern and that opens wheels styles that I like for my individual car to all ford, nissan, honda, jeep and more. Research it all first, do just do it because it is done before.
T54
SebastienPeek ·
Hey T54,
I've already got 5x120 full disc brake setup coming, that is what BMW's and Holden's run so I'm pretty sure I'll be looked after when it comes to wheel sizes and offsets.
The fronts are cross drilled vw rotor/twin calipers, the rear are cross drilled EA Falcon discs brake as well. I'll be going discs all around solely due to the fact that I am seriously considering something a bit bigger in the engine department.
I will definitely be doing something I haven't seen before with Zelda, sure some things will be stuff that other people have done, but when it comes to wheels (offset, size, monoblock or three piece) I will be doing something quite different that is for sure. As well as when it comes the actual stance of Zelda, it'll be quite low indeed, but we all know what Adelaide roads are like and that isn't very practical for a daily driven car. So I'll be doing something quite different there too...
Anyway, quick update. Tried my hand at the static timing of Zelda this morning. Seems she was already timed to 7.5 BTDC but I left it too late to do any real changes before having to head off to work. Will have to time her to 10 degrees BTDC and see how much that changes the acceleration issue tonight when I get home. It could also be the air leak on the RHS manifold that is causing it so will go and get new gaskets and fix that up over the weekend hopefully. Belt slips and the generator/alternator pulley is actually cutting into the alternator. May change the pulley to the old generator one and change to the old generator belt as well, see how that goes when it comes to rubbing the alternator itself. The new belt system is currently in transit from Los Angeles to Adelaide which is exciting!
More news to come.
SebastienPeek ·
Had some really strange issues lately. Petrol being the common denominator for both...
The other night I pulled up in the driveway to notice a pool of petrol at the front of the car. This got me a little worried that's to say the least.
I tracked it back to a line, which, makes me wonder what is going on. I'll let the pictures do to the talking...
As you can see, there is a small line coming off the thicker line here.
This line then runs down inside the bonnet area and out of a hole under the front fender.
For some reason it was pooling petrol in the fender and therefore causing a leak at the front.
I don't understand why this is only happening now, but my fuel gauge is also out. Could these two things be linked somehow?
Any help would be greatly appreciated!
Bizarre ·
That is the breather hose
It needs to be up high - clipped to the under side of the "apron"
If its too hot in there this is where the air expands to and "can" push fuel out it
Joel ·
Holy crap, no wonder the thing was puking out fuel and smelling of vapours all the time.
Like that when ever you went round a left hand corner it woulda sloshed fuel out that hose.
Barrys has had replacement hoses fitted probably when the charcoal canister was removed?
which makes it a little hard to see whats going on.
I'm too lazy to replace my 37 year old breather hoses 😂
they are still ok, so you can see how its meant to go.
that hose needs to go up under the windscreen panel and down out the other side, youll see the clips that hold the hose.
1303Steve ·
Hi
You can buy new elbows from Vintage or maybe someone down your way, these could get hard to buy in the future.
I went a slightly different on my bug route and used a AN 90 degree fitting.
Steve
Bizarre ·
yeah - my tank is different as well
The 75 tank had a take off at the front of the tank.
that is where the braided hose goes that taps into a 3 piece brass bit
Mine also has 2 take offs on the rear passenger side - but these are just looped
The trick seems to be keeping the breather up high
SebastienPeek ·
Thanks again guys, have corrected the problem minus one tube, just need one more flex tube and she'll be complete.
I'm also wondering.
Have read up a lot about the 009 distributors and how there is usually a delay between throttle response and so forth. Causing hesitation when coming out of a corner for me anyway.
What can be done to correct this? Basically, the reason why I think it may be the distributor, is that when coming into a corner in second and coming out still in second, she backfires and the continues. Could this also be due to a small air leak on one of the manifolds?
Hopefully today or tomorrow another bit comes for the engine and she'll be looking a lot better. Going to have to book her in somewhere to get the endless amount of oil leaks to be fixed sooner rather than later. She's definitely marking her territory everywhere.
SebastienPeek ·
Something looks a little different...
snitz ·
Nice 😎
SebastienPeek ·
Now if only I could get the oil leaks to stop and a little squeak fixed, the engine would be complete and perfect...
Still waiting on word on when the brakes and wheels will need to be organized to get from Darwin to Adelaide, that'll then help me out with the stance and wheel choice for Zelda. From there comes saving the money for the paint job.
Will be heading down to Mum's cousins husbands shop at a later date to have a go at the roof. He's a hot rodder by trade and has many beautiful old Holden's under his belt so I'm hoping he can give me a hand with the roof and pointing me in the right direction when it comes to a painter here in Adelaide. We'll see what happens, now to just organize the oil leak fix and figure out what this damn squeak is!
Turbo54 ·
Stick the Wheels and Brakes on The Ghan. Darwin to Adelaide 2 times a week.
T54
SebastienPeek ·
Hmm, how would one organise such a thing?
I'll probably just get it couriered from Darwin to Adelaide, might cost quite a bit but those wheels and brakes will definitely be worth it.
Fitment is going to be insane I reckon, and while I'm at it I'll try my hand at lowering Zelda a little bit more at the rear.
We will see what happens I guess. Time to tighten all the nuts and just drive her around for a while and enjoy her.
Followed someone in a Volkswagen S this morning down Payneham Road and then down North Terrace a little bit.
Number plate started with ROB. Was a nice looking bug, but could only think of cutting the roof off of it and putting it on Zelda...
dragsters for life ·
cracking along there seb
SebastienPeek ·
Thanks man!
Still a lot to do though...
Smiley ·
That pully looks the goods 👍
I've been thinking of getting one for mine but need to try and find a sand sealed one.
Smiley 🙂
SebastienPeek ·
Thanks Smiley!
Yeah, my next bug will definitely be a baja one, then I'll get a sand sealed one, but for normal road driving, it's great.
No belt slippage when I put my foot down anymore.
Oh, the S bug I followed into town this morning, well, he followed me back home tonight.
Was cool, gave him a wave as he turned off Payneham road. 🙂
Next up, fix the oil leaks!
Turbo54 ·
Ring great southern rail. They are who owns the ghan. Wouldn't hurt to ask. They used to be one of our clients and I can honestly say the parts would very very safe in the luggage store. T54
SebastienPeek ·
Thanks man, will have to check it out as soon as I hear from Reub about weight and dimensions, then I have to organise pick up and everything like that.
Can't wait to get everything to my door. Then, should be a weekend job if all goes to plan to fit everything. Need to order some new front struts, might go for Topline MaXX one's instead of V-Force ones as they're quite pricey at the moment and I just don't have that cash when I'm trying to save for a house.
Going to get into contact with someone I know that will be able to lend me a hand when it comes to the oil leak.
Might give him a buzz tomorrow to see what we can come up with.
69bug ·
nice!
SebastienPeek ·
Find out today basically everything that is wrong with Zelda and will then be able to go through it all and fix it.
There's one thing that I haven't mentioned, but the window winder thing that attaches to the actual glass has rusted through and fallen off the glass on the drivers side.
Stinking hot day today and I'm gonna have to drive for about an hour without the window open on my side.
Blergh.
But, all for a good cause that is for sure! Will report back with all the findings later tonight.
Lucky Phil ·
Very common problem with the glass regulator bracket, seb. The other side is probably no better.
Very hard to find one secondhand that is any good and I don't think you can buy them new.
One option is to have a section bent up and weld the bracket off your old one to the bottom.
I need a pair for my beetle and will probably do some extra's. Let me know if you are interested.
Phil.
SebastienPeek ·
Hey Phil!
I have to take the door card off of both in the near future to check them out, but probably won't be until next weekend unless I can do something at work.
Got a long week ahead so as long as I can get to and from work I am happy. But it is definitely going to be a hot week this week and working in the corporate world where jeans and a shirt is needed, it's going to get very hot inside!
Once I get the door cards off and figure out exactly what the problem is (my current thinking is a guess, but I'm pretty sure I'm right), then I'll be able to determine my next steps, and I am thinking I'll probably need something either made or sourced, but like you said, it is difficult to find good second hand parts these days!
SebastienPeek ·
Today, have basically started the build on what could very well be Zelda's third engine. This is what is going to happen.
1. Currently in the process of putting together a "rebuilt" engine from good second hand parts.
2. Once the long block is complete (valve cover to valve cover), remove Zelda's current engine.
3. Strip down current engine and determine issue. If not worth fixing see 4. If worth fixing, see 5.
4. Put all the current parts I have on the second engine on to the third long block and get it in Zelda. Drive it!
5. Fix the current engine and then put it all back together, then just drive it!
donn ·
prety sure I have a couple of good window regulators includiung glass track thingie, postage might be a bit of a problem though.
Joel ·
Lucky Phil wrote:I don't think you can buy them new.
When it comes to 70s bugs there isn't much you can't buy new, you just have to buy from the bigger overseas companies.
SebastienPeek ·
Joel,
I'm pretty sure they're the exact things I'm after.
Now, if I remember right, there is supposed to be a rubber seal that holds the window into the regulator, whereas, mine was actually siliconed in.
Not good. Will hopefully get new windows and window seals too.
Will see what I can get.
DamianG ·
SebastienPeek wrote:...snip....
After explaining what was going wrong and deciding that it was the automatic choke, I found that the connection from the negative solenoid to the alternator had come dislodged.
....snip....
This made me laugh. My first VW (a 62 bug) used to be really gutless and would only do 80km/h flat out when I first got it. After a couple of weeks I decided to give her a tune up and noticed a plug wire had melted to the heat riser for the carby. Pulled plug lead free and hey-presto she now did 110km/h. Was well pleased at the time.
cheers
Damo
SebastienPeek ·
Aha yeah, there are quite a few funny things in here if you read it all the way through...
Quite a few dodgy things happened too at one stage but oh well.
Waiting for an email from Topline about some MaXX struts that I'm going to need very soon.
Also waiting on a PM telling me that everything is off and ready to get shipped to mine from Reuben and then we're going to get some great looking fitment on Zelda.
Hopefully this weekend we'll see what happens with the engine department.
Getting excited that the engine, brakes, wheels and suspension is all coming together and it is going to be awesome.
We'll see what happens.
Lucky Phil ·
Joel wrote:
Lucky Phil wrote:I don't think you can buy them new.
When it comes to 70s bugs there isn't much you can't buy new, you just have to buy from the bigger overseas companies.
Well blow me! Don't believe everything you hear!
More to put on the next order.
TorxKiwi ·
Seb, you still there. You've gone a bit quiet 🙂
snitz ·
Yeah Seb..If you aint on here you better be working on the beetle...😂
SebastienPeek ·
Has been a while hasn't it?
Have been busy the past week doing sixteen/seventeen hour days, sleeping at the office and just overall exhausting myself.
Today saw more progress on the third engine that is looking more and more likely to go into Zelda next weekend. Also have ordered Topline MaXX Struts for the front of the car and am about to make an order from CIP1 but don't think $30AUD of parts is worth an order from CIP1.
Might have to think of something else to buy while I'm at it. We'll see what happens.
Quite possibly reshelling Zelda at some point too.
There are two people, one who is on here but I won't name, well, they are the most genuine people I've ever met. Not only are they willing to help, but they're the most genuine people I've met so far in the VW community here in Adelaide.
SebastienPeek ·
snitz wrote:Yeah Seb..If you aint on here you better be working on the beetle...😂
Working on her today if that counts? 🙂
Just not the past week, been a bit bullshit with work lately, but oh well, is coming to an end and parts will be arriving soon too so that is always good!
SebastienPeek ·
Topline order is being sent today (today being America's Monday) so that is cool.
Should be here before the end of the week all going well, if not, next Monday.
Next weekend will hopefully see engine three go into Zelda and see how that goes.
Hopefully by then I also have a clear direction I want to take Zelda, and it's looking more and more like a Germanlook bug.
Just a matter of getting everything ready and sourcing parts.
Craig Torrens ·
Just a thought, maybe you should get the roof fixed before you spend $$$ on parts etc..........just my advice 😵💫
SebastienPeek ·
Craig,
I agree with you completely, but I might have got my hands on a new 1303 shell.
Just a matter of time now. I'd prefer to get the drive train and suspension done before moving onto the body work. To me, mechanically A1 and rolling on nice suspension with a little bit of lows is worth more than getting the body perfect and painted.
I guess it is each to their own, but trust me, I've spent a lot on Zelda and seeing her looking like the way she does, makes me feel like shit inside.
But when everything is done and she is looking the works, it'll be worth the pain and hours that are still yet to go into her.
SebastienPeek ·
I'm happy to report that Zelda did a 300km round trip yesterday from mine to Mintaro, Clare Valley.
She stuck to 100km/h the whole time and I did get a little faster down hill which was a little scary, but she definitely held herself around corners going quite fast, which to any teenager who's just played racing games his whole life, well, it just felt amazing!
I digress. She's leaking oil like no tomorrow now after I topped her up before taking on the trip yesterday.
Oh well, what can you expect, she is old and the engine is old too.
Excited to receive the next package in the post that is for sure!
SebastienPeek ·
Looks like engine three will be getting into Zelda on Sunday if all goes to plan.
The past few Sunday's have been great, learning quite a lot and I will hopefully learn even more come this Sunday.
Topline MaXX struts didn't arrive today though, but they should arrive on Monday...
Will be a nice eighteenth birthday present to come home from work to, which will be awesome to say the least!
whathaveidone ·
any pics of the new shell??
SebastienPeek ·
I can try and get some if all goes to plan Sunday, still need to confirm but I'm sure everything will be okay.
Hopefully everything goes to plan on Sunday and I become a happy chappy again.
Just need to put in the hours 🙂
SebastienPeek ·
Quick update.
New engine is in and running really smoothly.
Only issue is the LHS Kadron seems to have had water in it at one stage in its life time. Causing it to run quite rough and when tuning, not have much of an effect.
I may start to consider going to Webers or I might just try and pick up another 40mm Kadron, we will see what happens. But for now, it is running smooth enough for a daily that I'm extremely happy.
Best part, no oil leaks on the drive way!
A year ago Dad bought me Zelda. A year later, she's had a lot done to her!
Shuffs ·
SebastienPeek wrote:Quick update.
New engine is in and running really smoothly.
Only issue is the LHS Kadron seems to have had water in it at one stage in its life time. Causing it to run quite rough and when tuning, not have much of an effect.
I may start to consider going to Webers or I might just try and pick up another 40mm Kadron, we will see what happens. But for now, it is running smooth enough for a daily that I'm extremely happy.
Best part, no oil leaks on the drive way!
A year ago Dad bought me Zelda. A year later, she's had a lot done to her!
Was only thinking that the other day,whilst reading your latest updates.She's had a pretty lively time since you have owned her.
Smiley ·
Just pull the Kadron off and check it out. Rebuild it if necessary. There's no need to go buying another set of carbies cause of a little problem like that. Find out what the issue is then fix it!
Smiley 🙂
SebastienPeek ·
Ahaha alright, will do Smiley!
I got the struts today in the post. Get to open them up very soon, quite excited to see them!
Yesterday was my birthday, and as much as Mum hates me playing with Zelda, she bought me a MechPro 143pc toolbox! 😀
surfpig ·
your last post just made it 666 replies, unless your a demon i thought i would add this comment for no reason at all.
keen to see the struts too
SebastienPeek ·
Struts won't be going on until I've got new wheels as they don't work with 15" rims, the rim will supposedly hit the ball joint and to be honest with you, I don't want to find out the hard way!
So, I have purchased some wheels, straight from Japan.
Now I need to get some disc brakes studded for me in a 114.3x5 pattern.
Some very nice wheels coming for Zelda that is for sure, just a long arse wait now, six to eight weeks they should arrive on my door step, then I'm upgrading the lip sizes and the sort to get them perfect.
Need to get them sand blasted and powder coated as well, might even re-barrel them but not 100% sure on that.
Joel ·
The ball joint doesn't change, you're just replacing the strut.
All adjustable struts including Maxx are same as stock struts just abit shorter.
The only time it's a problem is when you fit wider wheels that interfere with the ball joint, and 15" rims its only a matter of cutting the excess thread off.
SebastienPeek ·
Oh, okay, that's weird, they said that anything below 16, 17 and 18 inch wheels will hit the ball joint...
I guess that means when they're 15x7 or something of the sort.
Will see what happens.
Joel ·
Who reckons that? Jon at topline?
It depends on offset and width more than diameter.
You can see here on mine where the problem is.
I've got some 15x6 speedy rims that clear it no problems
But a 15" wheel with same width and offset as my 17s would touch the excess ball joint thread sticking through the bottom of the control arm.
It can be trimmed down though.
SebastienPeek ·
Yeah, it stated in the instructions.
So you're saying I should be able to just put them on with the steelies that I currently have?
If that's the case, then I'll put them on ASAP while I'm waiting for the new wheels to come from Japan land.
Joel ·
He's just covering his arse by saying all wheels so people cant ring up and bitch booo hooo these XXXX wheels don't fit.
If stock wheels rubbed with Maxx struts then they would rub with stock ones too 😉
As I mentioned you're not changing the ball joint, only strut and even that is the same basic design, jut shorter with a skinnier spring and adjustable perch.
SebastienPeek ·
Awesome, will attempt it on Sunday.
Have a long day ahead of me at work that is for sure.
SebastienPeek ·
Here's a quick picture I took this evening just out the back of work.
As for what is happening, hoping Thursday can get some stuff done.
Until then, still waiting on word about my wheels. Once they arrive, got a lot to do!
Thinking about doing a winter mode. 1600tp with a stock exhaust/heater setup.
Summer mode will hopefully be a nice 1835cc with engine two case. Obviously that will be running the VintageSpeed exhaust without heaters...
We'll see what happens!
DylanTheDubber ·
Engines Looking Great!
But what is happening with the Body? did you fix the roof?
From Dylan
Bizarre ·
1835? 🙅
SebastienPeek ·
Dylan,
Roof is as it was before (pushed out a little) and gaining some rust.
There are a couple of things I can do. I have the option for another body, I also have the option to get the current roof panel beated and I also have the option to get a roof cut and someone graph it into the current body.
Bizarre,
Either a 1835cc or a 1916cc, it is currently up in the air.
I find out what way I should/can go tomorrow when I put the struts in.
Only time will tell.
DylanTheDubber ·
Seriously don't go for a 1835cc Seb, go the 1916cc because 1835's have alot of problems, i cant remember the exact reason for why they arnt as good a motor as a 1916 but i do know it costs around the same money for a 1916cc and they are a better more reliable motor. If i was you Seb i wouldnt waste this body i would try repair it as well as i could and yes you have a few options of if you graft new roof section in or just pannel beat this one out. Have a good yarn to a specialist in body accident damage (or in your case, on purpose by arseholes damage) and decide what would be the best option. All the best with it seb, it has come along way since you bourght it, just gotta fix the bump in the roof and she be right.
From Dylan
Lachlan VL ·
my 1835cc runs fine actually a really gutsy motor
DylanTheDubber ·
Yeah i have heard they can be good but i have heard they are more likley to have problems and things go wrong, thats only what i have heard and it's more common to see 1916's around then 1835's so must have some truth but im not an expert in engines, ill be looking at hotting up mine once i get it Regoed.
From Dylan
Smiley ·
1835's have a thinner bore than 1915's.
So they have a greater tendency to be effected by heat. Cause the cylinder walls are thinner they warp a lot more easily, causing excessive blowby etc.
The cost is exactly the same for both. There is no difference. So why would you go with the smaller one that has the above problems?
Go for the 1915 Seb, there's no replacement for displacement 😎
Smiley 🙂
sander288 ·
or if your set on the 1835 combo go with the "thick wall" 92's these are just as thick as a standard bore
Joel ·
Smiley nailed it, 92mm are just the 1776 made even thinner to fit bigger cylinders.
THey're marginal if you drive like a stocker in a light bug but not many people build bigger engines to drive like a nanna.
I had an 1835 years ago, it used more oil than fuel ran hot etc 🤪
The new thick walled 92s menitioned above are the go, they are 1916 bore but with thicker walls but abit overkill when 94s work fine.
JVLRacing ·
Lachlan VL wrote:my 1835cc runs fine actually a really gutsy motor
yep😎 more than u need at the moment....
SebastienPeek ·
Aha yeah, well, tomorrow I will find out what I head for.
I'm pretty sure I'll end up with a nice 1916cc, we'll see what happens.
Tomorrow also starts my first break from work in a while.
Five day weekend here we come! Going to try and get a lot done, we will see what happens I guess!
Have to decide on a colour for Zelda too.
Thinking Porsche grey, don't know for sure yet, have to decide soon though!
Shuffs ·
SebastienPeek wrote:Aha yeah, well, tomorrow I will find out what I head for.
I'm pretty sure I'll end up with a nice 1916cc, we'll see what happens.
Tomorrow also starts my first break from work in a while.
Five day weekend here we come! Going to try and get a lot done, we will see what happens I guess!
Have to decide on a colour for Zelda too.
Thinking Porsche grey, don't know for sure yet, have to decide soon though!
After all Zelda's been through,now your'e going to paint her Battleship grey?
SebastienPeek ·
Let's ust say, she is going to not look like Zelda soon.
She'll be a new Zelda. I guess, thanks to the idiots that stomped on her, I have figured out the exact look I want to do and go for it.
Now that I have a higher up job at work, I can pour as much money into her as I want.
But I guess I do have a limit however, still living with Mum means she doesn't enjoy me spending too much on her.
Wheels have been sent from Japan today.
Which means there is a nice long wait until they arrive at my door step.
I have six to eight weeks to get blank rotors and get them studded to 114.3x5 PCD.
I have six to eight weeks to get the 1916cc into Zelda.
I have six to eight weeks to get the body ready for paint.
She'll be completely different in two to three months that is for sure!
Today also brings lowering Zelda a few inches at the front with the MaXX Struts from Topline.
Will post up an image or two tonight when it is all done.
Smiley ·
Got those struts in yet?
Smiley 🙂
snitz ·
Must be still putting them in...Hurry up Seb!..😂
SebastienPeek ·
They are in, just need to take some photos and upload them.
Have to get a wheel alignment at some point today as well.
Until then.
vinnies72 ·
This is gonna be one sweet bug!
SebastienPeek ·
Have decided on the exact colour that I will be painting Zelda's new body once all the work has been done on it.
Painting it a Lamborghini colour called Grigio Telesto. Paint code is PPG *0098.
Very nice colour, have seen it on a 1303 before and have fell in love with the colour.
Here's a preview of what Zelda will look like, colour wise anyway...
Taking a couple of photos in the day time today of the nice drop Zelda now has at the front.
Wheel alignment was also done yesterday so she is driving as good as new. Bloke said there isn't a way to adjust camber on the rear of an IRS bug... Is this right or wrong?
SebastienPeek ·
Alright, quick happy snap from today.
Happy with the drop, but kinda feeling going down a couple more steps...
Will look at what happens when the new wheels arrive and I also have to get some brakes done for me.
Going to convert Zelda to all disc brakes, will buy blank rotors and get them studded locally.
Before.
After.
Ollie ·
Yeeeeeeeeeees! Dat colour
SebastienPeek ·
Yes sir, now to find out how much the paint costs that is the next step...
Give it six months and everything will be done.
Ollie ·
SebastienPeek wrote:Yes sir, now to find out how much the paint costs that is the next step...
SebastienPeek ·
^^ LOL.
Hate the fact that I now have to wait like, six weeks before my wheels come.
Albeit, gives me time to save for the brakes and tyres...
Have to adjust tappets soon, almost hit 500km's on engine three.
Special Air Service ·
pretty sure camber is adjustable to a certain point, something to do with rotating the bearing housing on the trailing arm. Joel or someone else in the know will help out here I'm sure.
AyeBee ·
Is that the remnants of a whitewall flapper still stuck between the tyre and rim?
SebastienPeek ·
Sure is 😉
I'm seriously not concerned about the current look of Zelda. I am thinking, couldn't get much worse, the roof is screwed as is and she just looks hilarious.
But, when the wheels come and the new body is done, then I'll be taking the utmost care of her appearance that is for sure.
TorxKiwi ·
PM Sent.
Joel ·
Special Air Service wrote:pretty sure camber is adjustable to a certain point, something to do with rotating the bearing housing on the trailing arm. Joel or someone else in the know will help out here I'm sure.
There's no adjustment as such but you can tweak with it slightly by loosening the spring plate bolts and moving the trailing arm in a sort of scissor movement up and down.
You just have to avoid moving it front to back and upsetting the toe in/out settings.
SebastienPeek ·
Dean,
PM replied to!
Joel,
I don't think I'll need to be changing it, but I was just curious because the wheel alignment bloke said that there was no way to adjust it.
Went for a nice cruise last night with a mate in his TA22. Zelda handled like a trooper, but let's just say, I need slotted/vented rotors as soon as possible if I'm going to do hill runs like we did last night. Pulled over to the side of the road because they were feeling a bit spongy. Smelt like absolute shit!
Took it easy the rest of the way down, went to a servo and bought some DOT4 brake fluid and filled her up. Brakes feel much better today that is for sure.
Guess the next step is getting new rotors (going discs on the back too) and getting them studded for 114.3x5. Is it possible to put Nissan brake calipers onto a VW rotor or do I have to install Nissan discs instead of getting VW rotors studded? I want to upgrade my brakes, and I've heard the stock Silvia brake setup is quite a good one, so was wondering if I could transplant a Silvia setup onto Zelda? I'd assume Joel of all people would be able to help out here, but any help would be appreciated!
Got some nice photos last night too, will upload them later.
Turbo54 ·
Seb, I have just put honda NSC brakes on my car. I think they are very similar to nissans. It is not as easy as you seem to make out you think it is. First you need hubs made to bolt the disks too. After this you need to work out the offset of the disk to be able to mount the caliper without fouling of the wheel any suspension. Once you do that you then have to built caliper mounts that are strong and at the perfect offset so you caliper is true to the disk rotor.
On top of this it all has to be engineered.
It took me 4weeks of reaserch and testing different disks from all models of 114.5 cars.
Ford are not the only one.
You can use different disks that are within the caliper limits and close to the original disk diameter.
T54
Joel ·
Unless you're riding the brakes all the way down a hill they shouldnt get hot and fade.
I've really gotta hammer mine hard with some extended spirited driving before they start getting hot.
You really have to be careful when upgrading VW brakes as being RR cars the front to rear bias is crucial.
You put huge big 4 pot calipers on the front and they will wanna just lock up.
TorxKiwi ·
Others will know better ..... but wouldn't the need to top up brake fluid indicate potentially leaky cylinders?
SebastienPeek ·
Heath,
Thanks for all of that, really do appreciate it! I may look into just getting a set done for me (blank VW rotors studded to 114.3x5) as it may be a lot simpler. I may upgrade the caliper though, so will see what I can find. I may even get into contact with Pete from Airkewld and see if he'll do a BAD series brake setup for me but with the aforementioned pattern.
Joel,
Wasn't riding the brakes down, but when I did have them off the other day, I'm pretty sure they are the originals. Had quite a bit of wear on them already and I really should have replaced the brake pads on the calipers while they were off... Ah well, next time I guess!
Dean,
The need to top up brake fluid does indicate that. I do remember a while back my master cylinder leaked a little bit, but didn't think much of it. Will keep an eye on it now however.
I have to admit though, I've had Zelda for almost a year now and I haven't touched the brake fluid since having her. I guess she was due for some as the bottle itself was actually empty!
SebastienPeek ·
Just got off the phone with Das Resto Haus, plan is to get blank hubs and cross drilled rotors and build up the brakes myself.
Will the get the hubs studded to the correct pattern and just go from there.
I have six weeks so it isn't a major rush, but would like to get the ball rolling as I get quite bored on the weekends when I'm not doing something to Zelda...
snitz ·
Have a chat to Richard from VForce Seb..He's a wealth of knowledge when it comes to brake setups/suspension..anything really.Helped me out with my suspension with the wifes car.
I would look at making sure the stock system is up to scratch first.
Non-leaking master/good lines/ full fluid flush/ decent pads and machined or new disks rotors is what I would be looking at first.
Brake upgrades will neccessitate more than just calipers. The front/rear bias can be screwed with and the master cylinder may need upgrading to a bigger bore size. Brakes are best left to the experts like Hopper Stoppers and the like. Get it wrong and you could lose more than just your car in an accident.
SebastienPeek ·
Hey Jason!
Yeah, that's definitely the truth. I might take it down to the local brake specialist and see what he says, like you said, it is best left up to the professionals.
It might be worthy of me actually talking to someone here in Adelaide that actually races VW's... Might be worth taking a look at his brake setup so I can get some ideas.
I do need to get new hubs though, that is something that I definitely need as soon as possible to accommodate the new wheels coming. I guess, making the stock system work appropriately with new hubs would be the best thing to do right now, once that is done, then I can look into upgrading. Just worried me that they were stinking up quite a bit coming back down the Corkscrew and so forth. Got a bit spongy under foot but that's all good now that brake fluid is in and they have cooled down.
Time to focus on the new body though. That is the next thing to tackle! Going to do some cool stuff hopefully, will see what I can do with a 1303 dash and some bits from a Subaru. 🙂
Turbo54 ·
Seb, why don't you speak to adam debiasi and get him to build you a set of brakes. The Ford stud patterned ones he had on his turbo car where cheap to build and would be overkill for your 1915. You should have a think about how you are going to use them and what you want out of them.
I asked a guy at a petrol station one day how his brakes in his NSX performed. He said 'from 300kph to 200kph there pretty average but everything under that there great.
I thought to myself that they should do the trick!
T54
SebastienPeek ·
Yeah, I might give Adam a buzz, but not necessarily doing it because of engine upgrades, for now it is just body work and getting Zelda to look intense.
I'm actually leaning towards a nice 1776cc instead of anything bigger, for now anyway. Got off my P's so I'm hoping that if Zelda is looking good (instead of terrible like she is now), and they see no P's, she won't get jumped on. That's my main concern, if I'm putting big dollars into the body work, well, let's just say she won't ever be parked on the street unless I'm heading into town or something.
Regardless, 300kph to 200kph?! Where in Adelaide is there even a road that he can get up to those speeds? Holy crap!
But, for me, just getting blank hubs and fitting them to the current discs and maybe upgrading the rear to discs as well, that should be enough until I do go insane one day with a Type IV donk. Won't be a while, not for a couple of years anyway.
Turbo54 ·
Look at Type 3 drums on back and disk on front. Tried and tested with good results and cheap on the wallet.
Heath
SebastienPeek ·
Thanks Heath, I might actually investigate that sooner rather than later.
Will be good, just had a couple of mates talk me into doing some crazy stuff interior wise.
Will see what happens!
Lucky Phil ·
Hey Seb.
Have you flushed the brake system yet?The older the brake fluid the lower the boiling point.
Flushes all the cr#p out too.
Don't underestimate the original braking system, either.
New stock drums, discs & linings are not dear and work quite well.
SebastienPeek ·
Hey Phil!
There was actually no brake fluid in the bottle as it was, so I don't know how long it has been like that...
I'm not underestimating it, I just need to change the hubs for the new wheel application.
On a side note, I have been interested in installing a MSD Ignition setup for quite some time.
Can anyone give me any information on how to setup one? What is needed to setup one?
A parts list would be great. From what I am aware of, Zelda will be a daily and once or twice I'll take her around Mallala.
I also have a neat little idea that I want to accomplish. I want to graph in a Subaru dash cluster into a 1303 dash.
Now, the graphing isn't a problem, it's whether or not the dash will actually work. If I get the MSD ignition kit, then the tachometer is sorted.
However, the oil temperature is a little bit of a concern for me. Is it possible to install oil temperature senders into a VW engine? If so, where?
Also, being a new dash cluster from a Subaru, is it needed to be connected to the ECU? Can I just buy a mechanical to electronic adapter to get the speedo working?
I'm going to start working on the interior and new body as soon as possible, would just like to know the above before diving onto the path of getting a Subaru cluster into the dash and then into Zelda... She'll be as modern as possible when I'm done.
SebastienPeek ·
Bah, I remember when I hated the 1303 dash.
Now, a year later, I'm in love with it. Retro fitting other dash clusters are going to be easy as.
Picking up some stuff tomorrow morning and then hopefully Saturday can start cutting up a dash and seeing how it'll fit.
Have to get some expandable foam, fibreglass and some MDF to get everything sorted, will definitely be documenting the dash creation.
Until tomorrow!
SebastienPeek ·
Have decided to go MSD Ignition. Have contacted Mr Robinson to get some more details about it so I'll see what he says. I guess I get what I pay for and I'm really wanting to get Zelda as perfect as possible in the coming months.
Got to be up early tomorrow morning to head down to Lonsdale to pick up some shiny bits for the interior!
Time to get excited again about more changes to Zelda.
TorxKiwi ·
Post pictures of the work you do on the dash Seb. I'd be interested to see how you go about working on it. I'm still on the 'not a fan' side of the fence with my dash. Don't quite know how to attack it as a previous owner has stuck the traditional carpet pad on using glue that has eaten away much of the vinyl.
SebastienPeek ·
Ahaha yeah, I know what you mean mate!
Hence the massive disturbance in the force where I am going to hack up one and see what I can do.
Picked it all up this morning, dash cluster surround and fuel tank sender.
Now to figure out all the wiring!
Will post some images up later of all the fancy bits, then comes the fun part of pulling everything apart! 😀
SebastienPeek ·
And so it all begins, parts have been purchased, now it's just a matter of getting it all to work appropriately.
As you can see in the image above, I also have the correct fuel sender and wiring loom for the dash, this will definitely make the job a lot easier. But still a long couple of nights ahead, unless anyone knows anyone that can strip the wiring loom down to a plug and play solution to work with a VW? Which I highly doubt is the case...
The dash cluster itself is mighty sexy. I can't wait to see it all light up and actually receive the correct information and so forth.
Hopefully Saturday I can mock everything up and start on the custom dash build, we'll see how it all goes!
Close up!
SebastienPeek ·
Alrighty, a quick update of today's happenings.
Started to hack up one dash that was already pretty hacked up and got it down to something that could be usable for a nice Porsche VDO gauge dash.
But, it wouldn't have worked for what I needed. So we got another one, that too was in pretty poor quality. But, that didn't matter, because I'm going t get it all re-skinned and so forth once all the customisation is done to fit the cluster and surround above.
We also adjusted the tappets appropriately today as well and had a huge discussion about what happens next.
There is still some trimming to be done to get everything setup, then need to weld in something for the cluster and surround to attach to.
Everything needs to be removable as well, so taking my time working out what is needed to mount everything.
Tomorrow I'll trim it some more tomorrow and upload some photos, I also need to figure out where the best place to mount everything to is going to be.
Also, as I have mentioned multiple times now, I've got a shell. Now, obviously I need to start putting it altogether.
I'm pretty sure I've got everything on my list that I need to get, but was wondering what people most commonly forget when doing a bare shell restoration?
From what I'm aware of and what I've documented, I need the following to go from bare shell to functional 1303.
- Blank hubs drilled and studded for 114.3x5.
- Two new pan halves without seat rails.
- Headliner (what else is required for the headliner to be installed?).
- Carpet kit from 1916Baja.
- Full wiring harness.
- Subaru seats mounted appropriately.
- Obviously sanded back, primed by myself and Dave, and then painted professionally. Just need to find where and someone who would do it for a reasonable price.
There is obviously parts needed to accomplish the above, just need to find prices and compare them. Time to whip out Excel and put together a huge list of parts and different prices. Not going to worry about the engine for a while now, the current engine is absolutely amazing. Might just get some Webers for this engine later on and leave it a 1600 for a while, just get the body done.
Until tomorrow. Have to get the dash all trimmed and see what happens with the wiring. Then we are good to go and do the new shell. Would love to hear from anyone who has done a bare metal restoration to lend me a hand in parts list of what is needed?
SebastienPeek ·
Currently in this current position. I am able to mount the bottom of the dash cluster to original steel behind the dash but I need a metal tab welded at the top to mount the top of the cluster too.
Once the tab is welded in, I need to figure out how I'm going to get the dash surround mounted and easily removable. At the moment, the cluster itself is removable so that is good.
Next weekend, Sunday, will see the dash put into the new body to make sure everything is clearing. Then, if that's the case, will continue on with the build and then go from there.
Sunday I'll also check out the fuel tank sender mounting in the fuel tank and see what goes on there, hopefully it is quite an easy fix and doesn't require too much effort to fit.
The plan is to finish off the dash, fit it into Zelda's current body and see how everything goes.
Then, complete the new body over a space of however many weeks it takes. Just have to get everything before starting on the new body and don't want to miss anything.
Turbo54 ·
Seb, most important tools is a big bank balance and knowledge.
do it all at once, not in stages. As preparation is the key to a good job you need to really know what you are doing as the rubbing down stage.
Blocking a body back has to be done right especially on a round car like a beetle or you will get block marks.
Personally Seb, if I was in your shoes and haven't done it before and am painting my car in that dark lambo colour, I would pay for someone to do it all.
Track down Paul Roberts here in SA. RetroResto on here. Ask him to do it for you and just pay for it.
T54
SebastienPeek ·
Hey Heath!
As for the painting side of things, I'll be doing all the prep work with David, he is definitely a bundle of knowledge and knows what he is doing!
I will, however, will be getting the paint done by someone else. Mum's cousin's husband is a hot rod restorer and is keeping his eyes out for someone that can paint the body for me if I do all the prep work and so forth myself. Will try and document as much as possible when it comes to it.
Just a matter of time Heath, I'm sort of thinking Zelda will be off the road for ~four months. But boy will it be worth it in the end, I'll have the bug that I want and it'll be shmexy.
But first on my list is wheels and dash, then from there we go forward. Getting very excited about the progression so far and I am learning so much about everything as possible.
Time will tell, and until next weekend I won't be able to do much but plan.
snitz ·
Turbo54s on the money here..You need someone who ia a competent beater/painter or who has done beetles before..I bought the bonnet that is now on my wifes car from Paul..Ive seen the super beetle that he was painting (Which has been sold or parted out) and can say his work is killer.I have a couple of mates who own Panel shops and can honestly tell you that respraying a car can make or break a project and be prepared to pay more than you budget..cause budgets and paint jobs shouldn't be in the same sentence.
SebastienPeek ·
Thanks Jason!
Yeah, David has done his fair share of painting beetles and panel work on them too.
It all starts next weekend when I can get the new body into a workable area and go from there.
Shall be good to get started, but finding out everything that is needed for the full body restoration is quite a big task in itself.
Struggling to get started because as soon as I think of one thing I go through everything needed and then loose what place I was in.
Not good!
I think my plan is to get the dash done, then start on the rust repairs on the new body. Only minor ones from what I can tell, but will find out more come next Sunday. I then have to figure out whether or not I need widened guards at the rear, do the blocking off of the indicators on the front guards and fix up the ventless deck lid I have ready. Then to paint. While everything is being painted, I'll be doing the pan halves, then painting it all in POR15. Once the body is back, go from there.
I have a funny feeling I'll be spending quite a few thousand dollars on her. But the results will be amazing.
Turbo54 ·
Seb,
Not to put down your enthusiasm as you seem into it but don't tunnel vision your way into thinking you are going to save money doing something like this yourself.
The time it takes for a panel / paint guy to rectify any issues with the work you have done will cost you.
3 of my mates are top class painters and have done show and drag cars and will not lay paint on anything they haven't done the prep on. You will find this with most of them.
I was like you with my first car, a 180B SSS and it turned out real nice... but it most likely cost me 3-4K more than it should of with all the sanding and fixing and refixing. Seriously look into having it done by someone who knows what they are doing from start to finished. You might be surprised and have $$$ left over for all the other bits on here you have mentioned.
My 54 has cost this much so far and you can see the pics on here:
Body strip soda - $700
Panel work is at $45p/hr. This includes making coffee, toilet, cleaning guns etc.
We estimate that it is going to take around 60-90hrs.
Paint cost me $1200. Hi fill + glasurit 2pac + hardeners etc.
I still don't know how much it is going to be to lay the paint on yet but most likely around the 2K mark
Hope this helps
T54
SebastienPeek ·
Hey Heath!
You have definitely proven your point. I think what you're saying is definitely worth listening to and I think the plan will be to get someone else to do it.
I want to do it right once and not have any problems along the way. So I think you're right in saying that I should get a professional to do the preparation and paint.
Will see what happens.
Thanks again!
SebastienPeek ·
Plan of attack is the following.
Sunday we get the body into the correct position to do the rust fixes. From what I've been told and I will most likely witness on Sunday, the body is very straight. This will also include getting the mock up of the car alarm and central locking system mocked up as well as the dash board I'm building. From there we'll get the holes and mounting positions sorted and start body work. All the body work (rust fixes and so forth) will be done before sending the shell to be soda blasted and etch primed by someone else. From there, whatever imperfections that come up will be fixed and then we'll be doing the final preparation work on the body.
Going to be getting all the chrome powder coated a gloss black so everything will be blacked out except for the lips of the wheels.
Time to start collecting more parts as well. Going to do some very cool electrics and hopefully build something that, well, is different to anything before.
I guess I want to do something that isn't the normal and with what is planned, that's definitely what is going to happen...
Until Sunday.
SebastienPeek ·
Car alarm and central locking kit arrived today.
Hopefully the Skydrive GPS Antenna from Classic Gauges arrives tomorrow ready for the dash...
Killed two birds with one stone with the GPS Antenna. Not only is it accurate, but it already is the correct output for the Subaru dash cluster that I'm retro fitting.
Just a matter of getting the voltage down with a regulator.
Have also started my spreadsheet of all the parts needed. It is crazy, I think I have a good chunk of the stuff sorted out, but want to get the body soda blasted before ordering any of the parts just yet.
Really excited for Sunday, just not so excited about the weather.
Lucky Phil ·
Hey Zeb.
I know you were after a couple of these.
Picked them up yesterday from Paul at volksfactory.
SebastienPeek ·
Nice one Phil!
I've got them in an order ready to go from West Coast Metric, just need to make sure there isn't any other seals I've forgotten in it and then it's good to go.
Really hope this weather comes down for Sunday...
Driving in the rain without wipers is very, umm, dangerous.
madness726 ·
Just catching up on your Post.. And damn sorry to see what happened to your car.. but happy to see it coming back together! good luck
Turbo54 ·
SA Fast Blast for the soda. Tell him Heath sent you. Top bloke and a very good job.
Heath
SebastienPeek ·
Thanks Heath, will do the major fixes first and then get the body soda blasted.
Will make sure to mention you, thanks again!
peter87 ·
Hey Seb,
I'm going through the complete rest stages my self at the moment and it's costing a fair bit more than i expected, i have rubbed the body back to metal and etch primed it. I have minimal rust in my shell as the previous owners took awesome care of it. I'm a hopeless welder so i'm getting a guy just to plug weld a few small holes and repair the rear wheel arches and thats going to cost around 600 alone .The shell has been taken of the chassis so it's a lot easier to work with. I still have to spray putty and 2 pac prime the car and body work the guards. I have the help of a restorer so it's a lot easier for me and my paint job is only setting me back 1500 in total. I'm thinking of going a lighter colour than gun metal grey and was thinking custom diamond pearl white with a touch of blue.... pretty sure i'm going metallic as well. Anyway good luck with the resto 🙂
Pete
SebastienPeek ·
Hey Peter!
Yeah, I have budgeted all my costs and by doing quite a bit of the work myself I shall be able to keep costs down as well. The only major costs that I'm going to have are parts, the paint and obviously getting someone to spray the paint. The soda blasting will hopefully be done for a decent amount, and I figured, why do it more than once then just doing it right the first time? Sunday we will be moving the shell to a more accessible area and start the work, hopefully get some more of the dash done too as that is a big deal and will set Zelda apart from a lot of other 1303's that is for sure.
GPS Antenna arrived Friday, but I missed it. Delivered it at 8:31am and I got into work at 8:34am. Missed the guy by three minutes!
Regardless, will get that in my hot and sweaty hands on Monday so that gives me yet another week of work and pay to get up a little bit before the massive splurge...
But, hoping we can get the dash cluster installed into the dash tomorrow and go from there. A lot of work ahead of me that is for sure.
Just wish I had more time...
peter87 ·
same, i just took a week of work to strip the car completely, at the moment i have primed the shell and just geting the rust out of the chassis (thank god it's only surface rust). hopefully be ready to paint by tonight. Anyway good luck with it all if u need a hand let me know 🙂
SebastienPeek ·
Current status.
All wires labeled and ready for the install into the dash for the finalisation of the dash.
Using a GPS antenna called the Skydrive from Classic Instruments. Have taken it for a spin around the block and it works.
Next up is fixing the fuel gauge sender and getting that all working. Need to double the resistance (only using one sender, where the fuel gauge needs two senders, therefore need to double the resistance for it to work).
Current status of the fuel gauge sender.
Yeah, the current wire is holding it together, but there will be a rod made up to make this finished.
And yes, that is using the original VW sender balls, adapted to the Subaru sender mechanism.
All it needs, as mentioned above, is the resistance doubled. Winning.
Until next time.
1303Steve ·
Hi
That gauge bezel looks like it was made for the job, well done.
Steve
SebastienPeek ·
Yep!
Lots of time has gone into it to get it to where it is now.
Lots more to go, will spend more time on the wiring during the week, hopefully get everything sorted by the end of the week!
Joel ·
Clever thinking on the tank sender.
Now you're gonna have to fit a full subi driveline so you can make use of the DCCD, airbag and Rear Diff temp lights and that 8K redline 😂
SebastienPeek ·
Ahaha thanks Joel!
Was a very intuitive idea from Dave, that is for sure!
Aha yeah, the rear diff temp light can be easily removed (just needs a wire into B4 and then taped over), but the DCCD light and airbag light are somehow interrelated...
More wiring to go on this week that is for sure!
As for the 8k redline, I don't think that will ever be used, but maybe one day when there is a beefy Type IV engine in Zelda, we might get close to 7.5k!
Smiley ·
Very neat work so far.
And what are you pair talking about! VWs have got a rear diff. And it's quite possible to build a VW engine that will rev to 8k revs 😎
Smiley 🙂
Joel ·
Smiley wrote:it's quite possible to build a VW engine that will rev to 8k revs 😎
be sure to be seated when you see the price tag 😉
SebastienPeek ·
Yeah, I highly doubt Zelda will be seeing anything with that much power for a very long while that is for sure!
No Subaru drivetrain in Zelda either, might as well buy a Subaru WRX and put the VW emblem on it 😉
But the rear diff light could be adapted for something, just a matter of finding a sender and sender position.
Oh, and with the GPS antenna, I'm going to set it to warn the driver that it is over 100km/h by turning the seat belt light on.
Just for shits and giggles, think it could be fun to see that light pop on.
Ollie ·
Perhaps rear diff light could disappear once the engine has reached a certain temp? Kinda like a warm-up system so you don't thrash it early?
SebastienPeek ·
Yesterday saw some progress with the central locking, actuators have been mounted into the doors and all the wiring seems to be going good.
Ordered some stuff from CIP1 the other day and am expecting that to arrive Tuesday.
That will mean that next Sunday we can get the one piece window kit all mocked up and go down to U-Pull It and get some electric window mechanisms.
For those wondering, or planning on doing something similar, the lift that is needed in a VW Beetle (68 onwards I will assume) door to see the window go from the bottom to the top is 380mm.
Hopefully on the U-Pull It trip we can get the Outside Air Temperature sender out of a Subaru and get that all fitted up with the dash too.
Umm, what else happened yesterday...
Oh, the fuel sender that we had mocked up, doesn't fit into the actual fuel tank hole.
So we have had to change the design, I didn't get a photo of it as the redesign hasn't finished.
Oh, and the CIP1 order contained the following.
- Deluxe One Piece Window Kit
- Sunvisor Clips (black)
- Black Sunvisors
- Black Front Door Cards (W/O Pockets)
- Black Rear Door Cards
- One Piece Black Perforated Vinyl Headliner (W/ Door Post Material)
- Door Panel Clips (50pcs)
- Door Panel Clip Seals (50pcs)
Have a funny feeling I'm going to need more clips and clip seals, hoping we can salvage enough from Zelda's current doors and door cards when the time comes.
If not, another CIP1 order is in progress as going to need to get some more interior stuff as it happens.
Oh, also, had a mishap with JustKampersAustralia. They sent me the wrong bumper, was expecting one with the indicator holes in it but received one without.
Was a mistake on their behalf and they have corrected the issue. Unfortunately, however, they actually didn't have any of the bumpers with indicator slots in stock so they have to order from the UK and could be quite a long wait till I receive said bumper.
Wheels will either arrive in the coming week or sometime the week after. Hopefully we can get those mocked up on the new body and see what needs to be done.
I have a funny feeling that my three point turns will turn into a ten point turn, but I'm happy doing that as long as it's still drivable, which it will be. I guess I'm more of a form over function kinda person.
Didn't do much with the dash cluster itself, I figured out what needs to be done to get the rear diff temperature light to turn off and Dave has found what sender is needed to get the oil temperature to work with the water temperature part of the gauge so that shall be cool.
Has been a while since I got any photos of Zelda, she hasn't changed for a while which is kinda sad but oh well, not enough time in the day to do anything. I might finally install my hands free before work tomorrow, and clean up the wiring under the current dash for the sound system.
Other than that, that's about all that has happened. Will keep everyone posted I guess.
SebastienPeek ·
One piece glass door kit arrived, along with the headliner, door card clips and door clip seals.
Won't get the glass out until Saturday to get it all into the door.
Ollie ·
This Thread:
SebastienPeek ·
Aha thanks Ollie!
Will be full of win soon, just need to get some more photos and show everyone what is actually happening behind the scenes.
Till the weekend.
SebastienPeek ·
Something came in the post today.
TorxKiwi ·
Nice wheels Seb. When will you have them 'rolling'?
snitz ·
Wheels......................yep..............any more pics..I like progress pics.😂😂😂
SebastienPeek ·
Not for a while, test fitting them on the weekend hopefully, but won't roll them until they're all cleaned up and looking damn fine.
Getting the centers powder coated black. Barrels and lips will be sandblasted/soda-blasted and then probably just polished.
They have a tiny bit of corrosion which I want to fix up but other than that, they're pretty good for how much I got them for!
Jason,
Not much progress was achieved last weekend, but this weekend will see a lot done hopefully!
Plan is to get an old disc brake, re-drill and then stud them.
Then we can bolt one up to Zelda and see where it fouls.
Will definitely be taking some photos next weekend, I'm really keen to get a lot done so we'll see what happens.
snitz ·
👍
cam070 ·
+30's, interesting offset. I'll be interested to see how these fit. Looking forward to the pics.
Joel ·
BBS RS rims are flavour of the month in the VW scene at the moment
Someone on my facebook only put this up a couple of days ago 😂
toey1984 ·
just wodering where did you find the pin out on the cluster???
ive been looking online for ages ( as thats the same dash im looking at converting to rather than adapting te gen 2 dash in to the beetle) and dont know if its just me putting the wrong words in or what, but just end up at forums who never go into where they get the info from>??
SebastienPeek ·
Cam,
Will be an interesting fit that's for sure. Will see how it goes come Sunday.
Might need to rebuild them as it is, new lips and barrels may be in order, we'll see where it fouls.
Joel,
To right, BBS RS rims are what the go is, not just for VW's either, most "Eurolook" cars now run them.
Toey,
I got all the diagrams I needed from http://ken-gilbert.com/impreza-manuals.
It takes a long time to go through them, and definitely not something you want to rush.
Turbo54 ·
Seb, the 114.3 pcd is also Honda, ford, and a bunch more cars when you come to do the brakes.
The hardest thing for you is going to be getting them under your guards and not scrubbing. Especially when turning.
Not my choice of wheels but interested to see how they will turn out
T54
SebastienPeek ·
Thanks for that Heath.
I reckon I'll have more troubles with them fouling on the inside, they'll fit under the guards and all, but when turning I won't have full lock.
Which, to be honest, I'm actually not fussed with that to be honest.
Oh well, not going to be everyone's cup of tea!
When Zelda is done, she'll be done, and done to what I want.
Woot.
sander288 ·
Not exactly your model (far from) but the wheels and picture I'd thought you'd appreciate, I love the look... tempted
from a video game I believe
Cheers
Shaun
SebastienPeek ·
Sure is from a game, GT5 for the PS3 to be exact!
Anyone should be able to appreciate something like that!
Definitely need to be wider rims though, that's for sure...
Dub_Life ·
heres a couple of pics I had with your wheels for inspiration
SebastienPeek ·
Alrighty, test fitted the wheels today!
From the side, reckon I could go down another inch or so. We'll see what happens...
From the front, she tucks in nicely and has a tiny bit of negative camber.
And now for some underneath shots. It clears the strut easily, but has taken my full lock down to half the original. In regards to the front, there are is one more issue that needs to be resolved and that is where the brake line is mounted. Have to move it up so it won't cut up the tire,
And at the rear, where the bump stop hits the top of the tower, that we need to trim so that when the wheel has travel, it doesn't hit the inside of the barrel.
snitz ·
SA-------WEEEEEEET!!!!.👍
Lachlan VL ·
😵
cam070 ·
Look like a nice fit. Bet you can't wait to get re-drilled hubs and tyres.
smithy68 ·
I like those wheels seb very nice choice mate
SebastienPeek ·
Thanks guys, the aim is to get them all ready to be put on when the brakes arrive and so forth.
Tomorrow should be getting everything powder coated gloss black and then a mate is coming around to help me polish the lips.
Going to look intense when they are complete and wrapped in some very stretched tires.
Then comes the painstaking task of getting everything perfect.
I don't know about you guys, but I think wheels can either make or break a car. I honestly think Zelda will look really freaking awesome as she is with those wheels.
All banged up and shit, but rolling on some sweet wheels, that is what I enjoy.
Joel ·
Don't go too nuts with the stretch, aside from handling issues you'll get very used to being cop bait.
The pressure stretched tyres take to stay beaded properly is alot more than the front of a bug needs.
They are gonna come up awesome with a powder coat 👍
SebastienPeek ·
Nice and powder coated.
Time to rebuild them, wrapped in 205/40/r16 Falken's I reckon, and put them on Zelda's current body.
And get new drums/discs drilled, then it'll be game on to get them to fit perfectly.
Could probably have taken better pictures but meh, will take more when I have sanded back the lips and polished them.
cam070 ·
Dude, the look great, but not sure if they are so nice you shoud be sleeing with them. Looks like you have teken them to bed with you!
SebastienPeek ·
Thanks Cam!
Ahaha nah, haven't taken them to sleep with me yet, they have been pulled apart again and am in the process of sanding the lips back and then polishing them up, and throwing on a couple of coats of clear. Then I am just waiting on George from Classic Vee Dub to get me the brakes and then get them drilled and tapped. A lot of work to go, but going to be awesome when they're done.
TCS_58 ·
VERY! interested to see how you get on with the 1pce window kit. I'm getting tempted but still holding back..
SebastienPeek ·
Hey mate!
Yeah, the one piece window kit has definitely become a bit of a pain.
We're going to do it right, so the plan is to actually split the door and add in some more metal to the door frame so that the felt strip fits perfectly.
Then comes the whole issue of getting the window to go up and down smoothly.
Either we find dual lift regulators or we use a different type of lift mechanism altogether.
However, we didn't have much luck on Saturday with using a different window mechanism.
Was going to adapt a Mercedes 190e electronic window system but because the doors on a beetle are so skinny, it just wasn't going to fit.
So looking for alternatives now while waiting for the rest of the parts to arrive.
Turbo54 ·
Hey Seb, The man who is helping you is a great source of knowledge. Be sure you take as much in as possible.
T54
SebastienPeek ·
Trust me Heath, I really am!
I have taken in everything so far, from bolt torque to how to use an angle grinder.
I guess, thanks to Dave, I have been exposed to things I'd never be exposed to before when it comes to DIY car stuff.
I am very grateful for the opportunity too, he's definitely helped me a huge amount and I don't think I'd ever be able to thank him enough!
As for the current position that I am in with Zelda, I have rebuilt one wheel completely and still have three to go.
From sanding back the lips to getting them back together, I'm doing it all.
Brakes should arrive next week some time from George at ClassicVeeDub and then I'll be taking them down to a place on South Road to see if I can get them drilled.
So hopefully by next weekend, I'll be running on some very nice looking BBS RS's...
TorxKiwi ·
Great to see the progress Seb. I hope the brakes do actually arrive 'next Tuesday or Wednesday mate', but have another job lined up as a fall back .... experience would lead me to think you'll need it!!!
I was going to fit adjustable struts and inserts after they arrived 'next Tuesday or Wednesday mate' and that is getting on to about 3-4 months ago now!!!!
SebastienPeek ·
Yeah, will definitely have something else lined up to do next weekend, but really, I just want the wheels to be on and to be done with them.
Don't have much else to do, can't really do body work until the weather is somewhat nicer and it isn't freezing cold outside.
I do need to organise quite a bit though, especially when it comes to the interior. Still need to finish the dash but we'll see what happens with that.
Might setup the electronic ignition or something, Zelda is starting to struggle to turn over in the cold morning, I guess points aren't very happy with the weather.
Maybe going electronic ignition will help, maybe not, guess we'll see when I've got it all setup and what not. Still need to figure out how to and where I am going to mount the coil pack, I don't like shit in the engine bay that just looks out of place, and that's what the coil pack will look like unfortunately.
If I had a type three or a bus, you can hide it easily. But beetle, not so much. Everything is visible when you open the rear, and everyone judges on how neat your engine is.
Well, I know that's what I do...
TorxKiwi ·
I'm still very much a novice but I reckon I've recently seen a photo of an engine bay in which they had mounted the coil on the front of the fan shroud. It'd be a shit to get to and you'd likely have to install it with the engine disengaged at a minimum, but would tidy it up a bit. No idea what problems it might cause or whether I just imagined it!!!!
snitz ·
Coil pack fits fine in my engine bay..lol. Does the coilpack in my engine bay look shit then?..lol.
SebastienPeek ·
No, I just like my fan shroud to have nothing on it 🙂
Smiley ·
SebastienPeek wrote:No, I just like my fan shroud to have nothing on it 🙂
I'm a bit with Seb on this one.
Though your setup looks fantastic and incredibly neat. I've had coils crack the mounts off the fanhousing twice now. Mine is an offroad car so it sees more vibration, but even on a street car it will eventually happen.
I have my coil mounted on the firewall on the LHS. You can still get to it between the left carby and the fanhousing, though it's become a little more cramped after I changed to an airbox.
Have you thought about mounting it in the rear parcel tray Seb?
Smiley 🙂
SebastienPeek ·
Two down, two to go.
cam070 ·
Nice work!
Clean enough to take to bed with you 😁
SebastienPeek ·
Two more tomorrow, then wrapped.
Blank discs are coming from Wassim from Vollks.
Trying to find blank drums but can't, seems everyone is out of stock...
Will get discs drilled and studded next week hopefully.
Lots of shit to do, not enough time.
SebastienPeek ·
Alrighty, after many hours of sanding and polishing the wheels, all four of them, are finished.
Have called up a tire place and they're going to call me Monday morning with a quote for a set of Falken 205/40/r16's. Starting to get excited too, as the blank discs should be here Monday as well.
Bizarre ·
They have come up sweet
SebastienPeek ·
Yeah, they sure did!
Can't wait till they're on her.
Trying to find some blank drums but can't find any anywhere...
Might put up a WTB.
1916baja ·
Have you tried john sherman at volks conversions up here in QLD? he normally stocks all that sort of stuff...
SebastienPeek ·
Have shot Sherman an email.
Will hopefully find out Monday, so we'll see what comes of it.
cam070 ·
I've heard john's not big on email. Phone is a better bet.
SebastienPeek ·
It's been a while guys!
Haven't been up to anything as I've been in America with work for the past two weeks and will be here for another two weeks.
Going to try and grab some stuff from CIP1 while I'm over here and just stuff it into my luggage, cheap postage for the win!
Until then, I'll keep stalking everyone's build threads while I'm over here.
Special Air Service ·
If you cant fit in it your luggage, pack it up & send it by US postal service. Heaps cheaper that FEDEX etc that they normally use.
SebastienPeek ·
Just a quick update.
I'm still in the US of A. Just a little closer to home now than I was before. Was in Tampa, Florida but am now in Santa Monica, California.
Will be back in Adelaide on the 4th of September and then will get back into Zelda stuff. Hopefully will have the wheels mounted up and will have Zelda rolling with new shoes as soon as possible.
Still need to sort out some rear drum brakes though, have got blank ones waiting at home that I need to get machined. Will hopefully be all systems go when I get back home though, I just want to roll on my BBS's!
matberry ·
👍
SebastienPeek ·
Hit a dead end with the brakes that I had.
They had the webbing in them and are not good when wanting strength if you're re-drilling them.
So, doing things right the first time, I decided to hit up Pete at Airkewld and get myself a set of his discs and drums. Just waiting for word that they are on the way to my place now.
Getting all the wheels wrapped tomorrow as they are all sealed up and waiting. Will post some photos when I have them all wrapped and will take some mock up photos of the fronts as soon as possible. Going 205/45/16's all around. Concerned about turning circle, need to make some customisations to where the brake lines run at the front and the rear trailing arm, so we'll see how it all goes.
This will all happen to Zelda's current pan in preparation for the new one. So excited to get the wheels on and rolling around on them. Soon!
SebastienPeek ·
Wheels have been wrapped.
Minor stretch. Measured them up against my current wheel and tyre combination. These actually have a smaller rolling diameter which is great, not going to rub on the guards!
Waiting on discs and drums from Airkewld. I know one set has been sent already.
sander288 ·
can't wait to see these wheels fitted on the car
Keep it up! 👍
thebullfrog ·
You will recognise the stopping power with Pete's brake. Great product.
h ·
just had a retread thru your journey..
you have done so much n good on you!
keep up the work achieving what you want out of your dub..
great pics too, keep it up
look forward to seeing the new shoes being worn..
cheers
SebastienPeek ·
Thanks H!
I'll have some photos up soon, we have to modify the front brake line mounts so that the tyre doesn't get cut up, but other than that they should fit nicely.
The brakes are on the way to Adelaide, they have lest America and should be here soon, so I'm very excited. Would be awesome if they come this week and that means next weekend everything can hopefully get done.
Can't wait to get some more photos of Zelda. We're finally going to see some good weather again, which means photo opportunities.
I do, however, need to give getting the dents out of the roof another shot and I might even spray the front bonnet to at least be white.
We will see what the future holds!
SebastienPeek ·
Front discs arrived today from Airkewld, hopefully the rear drums aren't too far away.
It wouldn't be me if I didn't run into another problem. The wheel nuts that I have from my BBS are 12mmx1.25, but the studs on the brakes are 14mm. So need to get some 14mmx1.25 before I can mount them.
Hopefully fitting them on Sunday, but we will see.
Plan is to get the electronic ignition in this weekend too, and maybe even give the bonnet some love so that Zelda doesn't stand out so much for the bad things, but for the wheels.
Will post some photos as I have them.
cam070 ·
Just check they are actually 14x1.25, I seem to remember mine being 14x1.5, but I could be wrong.
Seb just make sure the rims fit on the 14mm studs ok.
BBS are usually ok to clear 14mm but some other brands are only clearanced for 12mm.
Like Cam I would have thought it would be 1.5 pitch as well.
M14x1.25 is an odd size, does exist but not a common one.
SebastienPeek ·
Hey Cam,
The ones I have are 12mmx1.25, so I would assume I'd need 14mmx1.25 but I could be very wrong... Might be, like you said, 14mmx1.5, I might have to go to the place you mentioned tomorrow and take a wheel and the disc with me.
Joel,
The studs fit fine through the holes in the BBS, that's how I knew I had wrong lock nuts, because when test fitting they didn't fit.
Will see what happens!
cam070 ·
Hang on a sec, you said you had studs on the brakes. That might mean that you have had studs added in which case they could be anything.
Std VW is wheel bolts that run 14x1.5 on later bugs. But if you had yours re-drilled to a new stud pattern, who knows what that did unless you specified exactly what you wanted. If you got them from the US, they could even be imperial.....
SebastienPeek ·
Cam,
They're from Airkewld and Pete states in his video in regards to the BAD Series Billet Rotors that they're 14mm studs.
They're a new bolt pattern too, 5x114.3 so means I can run any wheel I want, custom make them and what not.
A big plus to going with Airkewld Rotors is that I can buy new hubs for them and change the PCD whenever I want.
Can't do that to the drums though, unfortunately...
SebastienPeek ·
Have fitted the rotors and wheels. The rotors came up mint, and had to do some fancy stuff to get the actual wheels to seat properly, but once that was all done and the brake hose mount was modified, we took her for a spin. Here we found that the passenger side of Zelda has had a hit in her past life, as the actual wheel itself sits forward in the guard.
So we had to roll the guards to get everything clearing as needed!
Some images, will get some of the wheels on tomorrow.
snitz ·
Looks good Seb!.Are you worried about the front end damage to Zelda or are you putting all this gear in the new shell eventually?.
SebastienPeek ·
I'm a little worried, but we rolled the guards to accommodate for the damage.
It's just the passenger side that's a little dodgy, but I fix.
Once I get back from the America's all systems will be a go on the new Zelda.
For now, I'll try and get as much done to the current Zelda as possible so I can enjoy her for a bit before I leave.
SebastienPeek ·
Here we go, wheel pictures.
Driver's side. As you can see, the lip of the guard was actually lined with bog, therefore when rolling the guards we cracked it off. Wonderful!
Passenger's side. Same on this side too, there was bog lining the guard's lip and when we rolled it, cracks formed.
Never heard of someone having to roll their guards to fit wheels, but we did. We also had to modify the brake hose bracket to make sure it didn't cut up the tire.
But, we have full lock both sides without any rubbing until it hits the sway bar.
sander288 ·
very nice; be good to see it in the open
Bizarre ·
SebastienPeek wrote:Never heard of someone having to roll their guards to fit wheels, but we did. .
Umm..... pretty common with VW's
As guards are of dubious quality and fit after 30 or 40 years and the number of poor off set wheels that were fitted
As for your wheels - they look great.
I was concerned that the rim was going to stick out but the tyre fitment is good
SebastienPeek ·
Sander,
Thanks man, been a long wait to get them on that is for sure!
Will get more photos when the back ones are on.
Bizarre,
I just have never heard of it personally, but I'm glad that I'm not the only one then!
I wanted the rim to poke out from the guard, something different, but happy where they are right now.
Just need to get the back ones on now and see how that goes.
DylanTheDubber ·
Looking Great Seb!!
Good Stuff!
From Dylan
SebastienPeek ·
Thanks Dylan!
Will hopefully have the rear ones on as soon as possible. Then I'll take some photos of her overall.
Keen to get it all done!
DylanTheDubber ·
Okay Sweet As!
You know you can buy blank hubs from Volks-conversions in Labrador, Qld
they will ship to you and an engineer can drill to your pattern.
From Dylan
SebastienPeek ·
I went with Airkewld brakes as they were actually cheaper than Sherman, and that was shipped to my door.
Plus, I have a funny feeling that these are a better build quality too, just saying...
More to come. Drums still haven't arrived, but I reckon they'll come tomorrow.
SebastienPeek ·
Little mishap, means big update for you guys!
I took Zelda away for the weekend last weekend, went to Stansbury on the Yorke Peninsular.
Was beautiful, sat on 110km/h the whole way and she had enough grunt up the top to pass a few slower cars with ease.
But, I guess the long trip took it's toll. Fan belt decided to shred itself on Tuesday morning when I started her up.
My guess is, because it never fitted /perfectly/ that it got very warm on the long trips, and then when it cooled down it became very brittle.
Therefore, starting it back up, a brittle belt means a broken belt. One thing I have learnt from all of this, always have spare belts and the tools to fix if this ever happens.
Oh, the drums came. They need to be machined out for the 14mm studs that were provided.
That is hopefully being done today, then tomorrow morning I'll pick them up, give them a couple of licks of paint to stop rusting and then put them on Zelda.
That means wheels should be on by tomorrow night, which means Zelda will have her suspension setup done.
I should mention. Getting 16x7.5j wheels under the front of a 1303 with only minor modifications needed to the position of the brake hose mount is a decent feat. Getting them under the rear will need a lot more modifying. We have to trim the tower arm where the bump stop hits. I've decided I'm happy with the stance of Zelda, if anything I would lower the rear a tiny bit to just match the front, but I saw a photo of Zelda from behind and when under load, the rear comes down quite a bit.
I'll definitely be getting some photos up when the rears are done. Also, thinking I might grab a roof rack to just cover up the roof damage.
Joel ·
As long as the offset is ok you should be fine at the back, at worst you may have to grind a bit off the upper bump stop plate and spin the spring plate bolts around.
I've had 18x8 under mine and Pauls old Lbug is running 17x9s with stock guards too with no clearance issues.
Those front brakes are screaming out for some upgraded calipers, that's not part of the kit?
SebastienPeek ·
Rears cleared everything fine.
No need to trim anything, or even flip the spring plate bolts around.
Joel, the brakes will definitely be getting some upgraded calipers in the coming weeks.
Now focusing on the other body and building up an engine.
Meanwhile, froth session.
Going out with mates tonight for a car wash session, will hopefully get some sweet photos tonight and will upload them.
In all honesty, I think the rear needs to come down a bit to match the front. I like where the front sits (albeit causing a bit of scraping), but I like it quite a bit.
Final wheel specs.
16x7.5j +35ET in a 5x114.3 PCD wrapped in Achillies 205/45/16's.
smithy68 ·
Nice Seb, I agree bring the back down a touch... looking really good now.
Are you planning on fixing your current body or swaping it out?
SebastienPeek ·
smithy68 wrote:Nice Seb, I agree bring the back down a touch... looking really good now.
Are you planning on fixing your current body or swaping it out?
Thanks mate!
I think just dropping the rear to match the front would look perfect, and still drivable. We will see!
Have a whole new car I'm building up, got big plans for it too!
ragged ·
Seb, looking good.
SebastienPeek ·
Some photos from last nights car wash, cruise and car park life.
Photo with one of my mates KE70. Very straight KE70.
Third time Zelda has been washed since I took ownership of it.
Nice car park photo. Everyone needs a good one.
Got quite a bit done today as well.
Got what was needed for the dash, just need some expandable foam and a lot of hours.
Pulled apart my previous crank case, in very good condition. Just need to tunnel bore it and then bore out to necessary size for upgraded pistons.
All in due time.
AndyT ·
let me know when you are ready to get machining done, ill pass on number
SebastienPeek ·
SpLiTmEiStEr wrote:let me know when you are ready to get machining done, ill pass on number
Alright, sweet!
Will see you this weekend 😉
sander288 ·
Looks schweeeeet!
The back end could come down a bit; especially seeing your signature refers to a saggy arse....
SebastienPeek ·
sander288 wrote:Looks schweeeeet!
The back end could come down a bit; especially seeing your signature refers to a saggy arse....
Yeah, I guess it looked lower due to the higher profile tires that were previously on the old hotwires. Now there is too much fender to tire gap.
All in due time will it come down a bit.
At the moment we're going to start on body work. Thanks to the lovely weather of late we should be able to get a lot done in the coming month or two. I hope anyway!
Joel ·
Wheels looking pr0n there Seb 👍
Just need to drop that back one spline and grab a few cans of aussie export white or black and hit that bonnet.
You've probably also noticed with those tyres being over 2" smaller than stock your speedo will be greatly exaggerated.
SebastienPeek ·
Joel wrote:Wheels looking pr0n there Seb 👍
Just need to drop that back one spline and grab a few cans of aussie export white or black and hit that bonnet.
You've probably also noticed with those tyres being over 2" smaller than stock your speedo will be greatly exaggerated.
Thanks Joel!
Yeah, I think the plan is to drop it when the body is off and we're doing pan halves. We will see what happens!
As for the bonnet, I kinda like it how it is at the moment, new body is definitely more what I'm focused on getting done.
Actually, that was one thing I was going to comment on but forgot about. Grabbed my GPS speedometer and compared the pair. The GPS speedo reads to the kilometer in comparison to my speedometer. Which means no need to worry!
This means that at some point the speedo was modified for the 14 inch hotwires. Or there is just some slack in the cable. Either way, it explains why I got a speeding fine the other day on the old wheels.
SebastienPeek ·
A small update to say the least.
My windscreen wipers now match again. Chopped up the wiper arm I had and welded back on the blade/arm that Joel sent me.
All painted and now that's all on and looking shmick.
I had a bad leak in the left rear wheel Saturday night. Tyre needed to come off and needed to reseal the wheel.
Have to put that back on tonight and then fix up my number plate light. Then comes a little photoshoot/video.
Got a bit more done with the custom dash we're building, but hopefully can spend some time on Saturday doing some body work.
Unfortunately I won't have the body work done before I wanted as I'm being shipped back over to Florida for three months on the 28th.
This brings up a nice little opportunity though, if anyone needs anything from the states and only wants to pay a fraction of the shipping, hit me up via PM and we'll work something out.
Hopefully I'll have a couple of photos and a video for you guys in the coming days/weeks.
SebastienPeek ·
This is what happens when I finally have some spare time after work.
Thanks Joel!
Will hopefully get more video and photos over the weekend.
Need to get a new lens as well.
SebastienPeek ·
Sometimes I forget to update this. As mentioned previously, I needed a new lens, so I got one. Took the following pictures the same day.
sander288 ·
phat👍
SebastienPeek ·
Thanks!
So, I took next week off of work to work completely on the bug. I'm hoping to get it ready for paint, so minor welding, sand blasting the bits that need it, fixing rust and hopefully getting my new engine built. Next week is going to be pretty full on and will hopefully see stuff move very quickly for the bug. I guess that is what Summer is for!
On a side note, have to start looking into the interior colours. Need to finalise the colour the dash will be, carpet and seats. I also actually need to finalise what seats I'm going to use as well as making sure we can mount them.
More news next week I guess!
cam070 ·
Those wheels and tyres look like a great fit. Quite jealous!
SebastienPeek ·
Yeah, they're not a bad fit, the fronts rub every now and then but only when I go full lock, so I just don't do that.
The wheels will be getting rebuilt very soon, going to surprise and disgust a few people, but I'm building my car for me and to be honest, that's all that counts in my eyes.
If I'm proud and happy with my cars end result, then I don't care what others say.
🙂
SebastienPeek ·
Hmm, been a while.
Here's some photos from the 31st of December cruise.
Been working hard on the new body. Will share when it is finished.
1303Steve ·
Hi
Looks sweet, needs to be a bit lower in the back.
Steve
Doug Sweetman ·
Love that song in your vid, nice editing and focus shifts !
TorxKiwi ·
Seb, did you finish putting your modified dash together or still a work in progress?
Dean
SebastienPeek ·
1303Steve wrote:Hi
Looks sweet, needs to be a bit lower in the back.
Steve
Steve,
I agree completely, but a lot of people keep saying chunkier tires. I'd love to lower it a bit at the rear, but it won't be until the new car is finished.
I've been collecting photos of the build of that and will create a new build thread when it is finished.
Doug Sweetman wrote:Love that song in your vid, nice editing and focus shifts !
Thanks Doug!
I made another video with a mate, we went driving through the hills and what not. Check it out below!
TorxKiwi wrote:Seb, did you finish putting your modified dash together or still a work in progress?
Dean
Hey Dean!
I haven't finished the modified dash, I've been focusing more on getting the new beetle done and painted. Once that is painted, the interior will be getting a lot more attention.
However, in saying that, this is where it currently stands with the dash.
They were taken ages ago, on the 19th of November to be exact.
SebastienPeek ·
Got a new camera the other day, was a late Christmas present to myself I guess.
Went out that night and took some sunset shots of Zelda. You can definitely tell she's driven daily, check out that bird shit on the bonnet.
Not much has been happening with Zelda or the new bug. I had a mishap with the wiring in Zelda the other day under the rear seat, seems it must have got a bit hot and melted and therefore was shorting out and what not, but that was fixed.
I'm planning to call someone to bore out the new engine to the required size so I can start putting that together, so we'll see what happens.
My expected time frame to have the new bug in paint has been pushed out due to some personal issues at home, but hopefully I can pull my finger out and get some it done still.
I guess I just want to have the car finished so I can have something to be proud about and be able to show people what I've been able to accomplish over the past year...
Joel ·
SebastienPeek wrote:
1303Steve wrote:Hi
Looks sweet, needs to be a bit lower in the back.
Steve
Steve,
I agree completely, but a lot of people keep saying chunkier tires. I'd love to lower it a bit at the rear, but it won't be until the new car is finished.
Bigger tyres wouldn't hurt, those ones you are running are over 2" smaller in rolling diameter than stock.
Assuming your gearbox is stock Lbug instead of doing 2950rpm at 100 you'd be at 3300rpm, take that upto 110 on the motorway and you're at 3600rpm.
Still perfectly safe on a vw engine that's in tune but doesnt do your fuel economy or ear drums any favours.
SebastienPeek ·
Upgraded the rear suspension to Type 3 torsion bars and double spring plates. Also replaced the bushes. Now it probably sits at the same height, maybe a tad lower. Which sucks as I still want it lower.
I should have taken more photos during the day, but I was way too dirty. Had to get hosed off out the back actually.
Only photo I got of the double spring plate really. Shitty iPhone photo is shitty.
Then went and took some photos. Still is not sitting where I want it. About an inch and a half lower, maybe two, and it'll sit where I actually want it to.
Oh well, doubt anyone is interested but, I am waiting on some new lips and bolts from Germany to come so I can rebuild my RS's for a show next month.
Hopefully by then the new engine will go in, a 1914cc, and the new bushes will wear in so it sits just that little bit lower. The barrels and pistons for the 1914cc arrived today so I just need to get the case bored out for 94's and the heads done. Just using standard heads and what not. I don't want anything with too much grunt currently as I'm still on my P's and Zelda already draws enough attention as it is.
All in good time.
Scarab ·
Great update mate, lovin the pics in the Marden car park! 🙂
sander288 ·
Seb where did you get the BBS wheels from?
SebastienPeek ·
Scarab wrote:Great update mate, lovin the pics in the Marden car park! 🙂
Thanks!
Yeah, can't believe I've never taken photos there before, great spot that is for sure.
SebastienPeek ·
sander288 wrote:Seb where did you get the BBS wheels from?
I originally purchased them from Japan.
I have since rebuilt them, got them powder coated black and what not. They're about to come off again and get new lips and bolts so they'll look completely different in the next couple of weeks, if the parts come.
SebastienPeek ·
Contacted a couple of people in regards to getting the dash finished off.
I got the basic shape done and all the cracks fixed up, so now it just needs the final shape finished off, a few holes filled and then leather look vinyl wrapped.
In other news, case, heads and a barrel was taken to a machinist. Hopefully have that back Tuesday/Wednesday next week and that start building that as quickly as possible.
1915cc here we come.
SebastienPeek ·
Current plan to be accomplished before the 8th of March for ILV.
1. Rebuild my RS's.
- Stockies will need to have tyres put on.
- RS's off and stockies on, tyres taken off of RS's.
- Split RS's.
- Get centers re-powder coated black. (Have some chips in them that I want removed).
- Install 1.5" lip and 2" lip on two wheels and trial fit.
- If all goes well, build the other two and get the tyres back on.
- Final specifications of the wheels will be the following.
- Front wheels will be 16x8j +17.
- Rear wheels will be 16x8.5j +11.
2. 1915cc needs to be built and installed.
- Need to pick up the case, a barrel and the heads from the machinist next week.
- Rods and crankshaft needs to be bead blasted.
- Make sure all other parts have been cleaned and ready to install.
- Build up the engine to a long block.
- Current engine needs to be removed from Zelda and a replacement needs to go in.
- Get crankshaft, pulley and flywheel balanced for the 1915cc.
- Replace all ancillaries from the current 1600cc and install on the 1915cc.
3. Lower Zelda another 30/40mm in the rear.
- This may or may not happen, but would like to bring her down a bit more.
And that there is my planning for the next three weeks. Going to be a very tight schedule, but, one can try.
SebastienPeek ·
Measured up sides. Here's my research.
Drivers side sags an extra 10mm (roughly).
Which means the following to get the ride height equal to the front.
40mm on the passenger side, 30mm on the drivers side. This will also mean the rear levels out as expected.
From the help from Joel and reading up, this means I'll need to do the following, tonight.
+6 inner splines, -6 outer splines on the drivers side.
+8 inner splines, -8 outer splines on the passenger side.
The above will get me roughly to where I want to get, within mm's anyway. So, will be attempting the above tonight.
Hopefully more photos with the new stance tomorrow and photos of the process will be taken tonight as well.
SebastienPeek ·
Will be posting photos tonight, after finding a place to take them anyway...
The rear is down a bit, but found an issue with the fronts and they're not level after first measurements.
We'll see what happens.
SebastienPeek ·
Current status.
Zelda is sitting where I want her to sit. I have received notification that the parts for the wheels have landed here in from Germany.
Picked up my case, heads and barrel yesterday from the machinist. Now to clean the case some more and start putting it together.
Not long now until the 8th of March. But looks like I'll have everything done if all goes to plan.
SebastienPeek ·
Just thought I might as well keep this thread updated with the changes of Zelda also, this is the build thread after all...
BA Falcon stockies went on.
The tyres came off the RS's and then came the lips and new bolts and nuts. This is where stuff got interesting and my dream started to come true with the direction I wanted to take Zelda.
So that is all well and good, minor poke but nothing much, exactly how I imagined it would look. Now came the rear. This is where I got excited.
And now for the overall effect at the rear, look at that dish!
Test fitting basically went really well in my eyes. Got them all inside again and started building them. With the help of Mum and Phoebe I was able to get all four wheels sealed before packing in for the night. This is how I left them at home.
Then, the day after that I got the tyres wrapped bright and early in the morning and fitted them onto Zelda. There was a decent amount of scrubbing, but if you ain't scrubbin', then you ain't dubbin'!
My favourite photo at the moment is the following one. I found another L bug, pretty sure it was a '73 but regardless, an L nonetheless. It was in bone stock condition. Stock, vs customised by Seb.
Then there was this photo last night.
Today, I got the bonnet painted matte black and refitted. It looks pretty damn good and has completely changed the way Zelda looks that is for sure. I haven't gotten any photos to put in here, but I'll most likely update the Melbourne trip thread before updating this one.
cam070 ·
Lookin good Seb.
Scrubbin' aint my thing, but it does kinda look tuff.
SebastienPeek ·
Doesn't scrub anymore, rolled the guards and we're all clear now!
But thanks Cam, appreciate it.
sander288 ·
To tell the truth I was sceptical about how this would look but.... THIS LOOKS SHIT HOT 😀😀😀😀😀
Nice work mate!
SebastienPeek ·
Aha yeah, I think everyone was sceptical with how this would turn out in the end. People still hate it, but I'm happy it came out the way I wanted it too and I'm glad it works.
Thanks for the love!
Craig Torrens ·
👍👍👍
snitz ·
The spray can black bonnet looks soo much better Seb..Same stance on your new bug with these wheels is crying out for carbon bumpers and bonnet!..Nice amount of poke and stretch...well played sir.😎
SebastienPeek ·
Jason! You weren't supposed to tell anyone yet.
But you're right. Carbon bumpers would be great. Don't know about the bonnet though! Kamei bumper for sure.
Thanks for the kind words though!
In other news.
Went for a quick drive to get some photos of the current status. The photos aren't the best but I was in a rush.
Bonnet has been painted matte black. No more orange. Just a spray can job for now.
Front bumper has been stripped of the white paint and is now ready to be polished and have the black strip installed to match the rear.
Need more rear camber.
69bug ·
Looks fantastic seb?
What's a quick run down of the parts you have used to achieve this look?
And what does she drive like that low?
I hope this makes it on the stance works page very worthy of it
SebastienPeek ·
69bug wrote:Looks fantastic seb?
What's a quick run down of the parts you have used to achieve this look?
And what does she drive like that low?
I hope this makes it on the stance works page very worthy of it
Thanks mate!
Quick run down would be Topline MaXX struts, custom built BBS RS's (by yours truly) and then just lowering the rear end.
She drives okay I guess. It's quite a stiff ride at the rear due to being 15mm above the bump stop and on what look like original rear shocks.
Hopefully when I'm in Melbourne I'll be getting some shocks that are for lowered rears.
One can only wish it makes the S|W page! Would be brilliant if it did though. I think it wouldn't though, the roof is the one part that lets it down unfortunately.
SuperOwen ·
put some heavier torsions in the back and it will ride better when low I found. firmer but more progressive if that makes sense so you dont bottom out. I think i used 26mm long bars from memory with kyb shocks.
SebastienPeek ·
Thanks Owen, I've already got the Type 3 torsion bars and double spring plate setup.
Just need new shocks and it should be a lot nicer.
69bug ·
Is it a swing axle or proper IRS?
SebastienPeek ·
IRS baby.
Maybe one day I'll own a bug that has a full Mendeola Suspension rear end. That would be awesome.
1303Steve ·
Hi Seb
You nailed it, it really looks the goods. My son David said you got right as well.
The photo next to the stocker is choice.
How did you roll the guards? I'm expert now, I often do the guards on David's Skyline with a bit of 2 inch steam pipe.
Steve
SebastienPeek ·
1303Steve wrote:Hi Seb
You nailed it, it really looks the goods. My son David said you got right as well.
The photo next to the stocker is choice.
How did you roll the guards? I'm expert now, I often do the guards on David's Skyline with a bit of 2 inch steam pipe.
Steve
Thanks Steve!
I'm glad both you and David like it, I love it 🙂
Basically rolled them with a flag pole to begin with, but then went at it with some multi-grips and pulled the lip up. Then finished it off with a mallet.
Thanks again for the love!
turboty ·
Love these wheels! Only if there was somthing like these in 4 x130!
Joel ·
You can buy them blank and get them drilled for 4x130 but be sitting down when you see the price tag.
That's why one of the best things you can do is get away from VW stud pattern.
Go with a common one and your choice is almost unlimited.
Turbo54 ·
114.3 x 5
All the wheels you could want. It also becomes a burden as it is hard to choose as the choice is so great!
T54
SebastienPeek ·
Yep, changing over to 5x114.3 was the best decision I made I reckon.
Well, another trip has been booked for Melbourne. I can't stay away, that place is so much better than here in Adelaide.
Luckily I have a bit more time to work on Zelda and getting her a bit more prettier before the trip over.
Plan is the following.
1. Finish engine.
2. Clean up roof (remove headlining, push out dents, paint).
3. Clean up guards (swap rears for elephant feet and fronts need indicator holes welded up, painted).
4. New front bumper installed with indicators in it.
Let's see how we go. I've got about five weeks before I leave.
Joel ·
Turbo54 wrote:114.3 x 5
All the wheels you could want. It also becomes a burden as it is hard to choose as the choice is so great!
T54
Or just do what I do, pick up a used set of rims with good tyres.
It's win win, cheaper than buying 4 brand new tyres and you get some new look rims at same time
At one point I had 8 different sets of rims in circulation, few of my other cars have same stud pattern too.
SebastienPeek ·
Engine won't be ready in time for the next Melbourne trip, so will clean up the current one a bit. Just routine maintenance really.
Need to take the front guards off and weld up the indicator holes. Either that or just fibreglass over.
I'll be doing this tomorrow night/tonight all going well.
Hopefully get the new front bumper installed this weekend. I'm hoping I can grab some elephant feet fenders too. We'll see what happens.
SebastienPeek ·
It was DOVW yesterday. There was a 2013 Beetle there and we decided it would be interesting to get some photos of Zelda next to it.
Forty years between the two models and it is obvious that they're both Beetles.
You can also see in this photo that I've started the roof work. There is a lot of work that needs to be completed before the 24th of April.
There will be some massive changes happening in the coming weeks, the majority of them will be kept secret until everything is finished.
One thing is for sure, Zelda will hopefully see a new coat of white paint once the body work has been finished. The rear guards will also need to be changed out.
DylanTheDubber ·
Seb,
It looks tuff as!
love what you've done with the wheels, roof getting sorted i can see, love the flatt black bonnet. Good on you it is really coming along.
From Dylan
SebastienPeek ·
Thanks Dylan!
Yep, bringing Zelda back in style. She's going to look very different in the next four to five weeks.
That's all I have really. Time to get cracking.
Less updates on here, more working in the shed I reckon.
Will probably end up doing weekly updates or something. I'm assuming people enjoy this thread with the amount of views it gets a day.
Cleaning out the shed tonight. Body work starts this weekend. Getting shit done!
hrastovica ·
SebastienPeek wrote:Here's another picture, took it late last night, shows the welding done by Carline in case the exhaust wants to full off again.
Where can i buy this exhaust set up, it is exactly what i had on my first beetle, best sounding exhaust ever. Maybe its worth mentioning mine also broke off as it was just hanging there.
hrastovica ·
SebastienPeek wrote:It was DOVW yesterday. There was a 2013 Beetle there and we decided it would be interesting to get some photos of Zelda next to it.
Forty years between the two models and it is obvious that they're both Beetles.
You can also see in this photo that I've started the roof work. There is a lot of work that needs to be completed before the 24th of April.
There will be some massive changes happening in the coming weeks, the majority of them will be kept secret until everything is finished.
One thing is for sure, Zelda will hopefully see a new coat of white paint once the body work has been finished. The rear guards will also need to be changed out.
Tough wheels!!! Looks awesome.
SebastienPeek ·
hrastovica wrote:Where can i buy this exhaust set up, it is exactly what i had on my first beetle, best sounding exhaust ever. Maybe its worth mentioning mine also broke off as it was just hanging there.
This was originally just a four into one header system and then I took it to CarLine Exhaust here in Adelaide and they fabbed something up for.
Thanks for your kind words in regards to the wheels!
SebastienPeek ·
The life of Zelda has come to an end.
Found too much rust to be bothered to fix her.
Will be parting her out shortly. Have a few boxes of bits and pieces that hopefully some people will like.
Already have a new car. Still has a boxer motor, it's just Japanese instead.
Dropping the engine tonight hopefully and will start to strip it back.
All the ancillaries will be for sale. Will post everything up in the for sale section tonight/tomorrow.
1303Steve ·
WTF, your leaving the VW scene, cant you keep an eye out for clean stocker and put your good stuff on it?
Steve
SebastienPeek ·
I could, but currently I need to just get some money back from what I've spent and pull my head in for a bit.
I did what I did with Zelda, and she's known internationally, but I can't afford to spend any more money on her.
When I'm thirty/forty years old I'll take another crack at doing a Super, if I can find a shell that hasn't been molested by the foam of death.
I'm not leaving the VW scene, I can't do that, I'll be around for a bit no doubt, but I'll be driving around a Subaru for the next few years no doubt.
Zelda and I had a good run. Almost two years ago I got her. She's my first car and she'll be dearly missed, but life goes on and I'm making the right decision financially and personally also.
Carl and Emily ·
Don't do it Seb.👎
Maybe sell your items that are worth something.
But stick the car in the shed for another day.
Turbo54 ·
Seb, what about the other one?
T54
DylanTheDubber ·
You will regret it seb,
I feel like giving up but even I will be sticking the bug in the shed for another time if i do throw in the flag.
From Dylan
SebastienPeek ·
Carl and Emily wrote:Don't do it Seb.👎
Maybe sell your items that are worth something.
But stick the car in the shed for another day.
I have no room to store the car in the shed for a rainy day. Maybe if I was twenty plus and had my own garage it would be easier, but currently living at home with a Mum that doesn't want car shit everywhere makes it quite difficult.
I'll be selling everything I can and then probably taking the car to the scrap metal place.
The pan is in okay condition, and the heater channels are fine. Maybe someone will want the pan and shell, not sure yet.
Turbo54 wrote:Seb, what about the other one?
T54
Don't get it anymore because of what I have done to Zelda.
DylanTheDubber wrote:You will regret it seb,
I feel like giving up but even I will be sticking the bug in the shed for another time if i do throw in the flag.
From Dylan
I don't think I will regret it, unfortunately. I feel like I've wasted the last year trying to do this other shell to then have nothing come of it.
Sure I've learnt a tonne of shit and I now have a heap of knowledge on how to do my own project one day, it's just disappointing that the end result to the last year is far from what I thought it'd be.
Live and learn I guess.
One door is closing, another opening.
Turbo54 ·
What do you mean you dont get it anymore? I know of a 60's body around the place if your keen.
Read this Seb, speaking from experience I know where your at. Those VW people are a weird bunch.
I hope you stick to be around here and be inspired and then when the time is right you can jump in with both feet.
Cheers Steve
SebastienPeek ·
1303Steve wrote:Hi Sebastian
I hope you stick to be around here and be inspired and then when the time is right you can jump in with both feet.
Cheers Steve
I'll be sticking around Steve, I'll be watching for a good starting point that is for sure.
Thanks!
ragged ·
No, I'm not helping Sebastien anymore. I will not air my disappointment in public other than to say I am bitterly disappointed. I wish Seb all the best in the future, and just ask that anything he says on social media is the truth. I hope one day Seb will share with everybody the opportunity he was given, well in excess of 300 hours of my time, any parts that I had lying around, workshop space, all the tools you could dream of, we fed him and even hosed him off in the back yard and gave him a clean change of clothes to send him home clean. And I didn't charge him one cent.
Good luck Seb.
Turbo54 wrote:What do you mean you dont get it anymore? Dave isn't helping out anymore? I know of a 60's body around the place if your keen.
Read this Seb, speaking from experience I know where your at. Those VW people are a weird bunch.
Hi Ragged, I have edited out names from my post and I suggest you edit the above post. Social media can come back and bite us all one day.
Also when I wrote 'Those VW people are a weird bunch.' this is directed at the whole community on and off the forum, not yourself personally.
VW's in Adelaide is such a small part of the car scene that one day you will bump into each other and hopefully it will be back to normal.
T54
Dub_Life ·
Thats a shame mate, don't worry about fixing the rust in it, plenty of rusty vws driving around, just drive it its a cool looking car as is!
Joel ·
SebastienPeek wrote:I'll be selling everything I can and then probably taking the car to the scrap metal place.
The pan is in okay condition, and the heater channels are fine. Maybe someone will want the pan and shell, not sure yet.
Put as many of your stock parts back on it to keep it as close to complete as possible and a viable project for someone.
Put it on ebay and gumtree, someone will take it, project bugs of any sort are getting harder to find now, you will have no trouble selling it.
To someone who likes bodywork there is about 2 weekends work in getting that body up to scratch.
Far far worse ones sell on ebay when the sellers don't think its an old "rare Volswagon" car and worth elebenty million dollars.
SebastienPeek ·
Joel wrote:Put as many of your stock parts back on it to keep it as close to complete as possible and a viable project for someone.
Put it on ebay and gumtree, someone will take it, project bugs of any sort are getting harder to find now, you will have no trouble selling it.
To someone who likes bodywork there is about 2 weekends work in getting that body up to scratch.
Far far worse ones sell on ebay when the sellers don't think its an old "rare Volswagon" car and worth elebenty million dollars.
That's the plan Joel. I've got it ready this morning to take the engine out as that has already sold minus the exhaust.
I'll basically sell the pan/shell as is with stock suspension in it and what not, rolling if I can get some wheels and someone should take it.
Aha that is definitely true, I love those eBay listings, I think they're great for a laugh when you're feeling really depressed about the whole situation.
sander288 ·
I know where your at seb; but think a little longer term. If you can store the car do so!!!
I have thought about selling my bug for a while but I'm just going to throw a blanket over it and store it until I can afford the time and money to make it "whole". I've had mine since I was 14; so this year is it's 11th anniversary.
SebastienPeek ·
sander288 wrote:I know where your at seb; but think a little longer term. If you can store the car do so!!!
I have thought about selling my bug for a while but I'm just going to throw a blanket over it and store it until I can afford the time and money to make it "whole". I've had mine since I was 14; so this year is it's 11th anniversary.
Unfortunately I don't have the room to store it at the moment, nor the money to pay to store it somewhere.
Which means that, angrily, I have to part her out and sell her. She'll always be my first car and all that jazz, but life goes on and one day I'll have another project car to do.
For now, I'll just enjoy the luxuries of a newer car. Today I drove into work with windscreen wipers that work and the air conditioner on. I even popped the sunroof for a bit instead of turning the demister on.