
Removable rear valance for beetle
Dirtbag - November 25th, 2009 at 12:17 AM
I was asked about making the rear panel of a beetle removable to make engine swaps easier. After a bit of a think I came up with what I think is a
simple way to do it without it looking too different. It took a day, as being the first one I've done I did a lot of double checking.
Here's the car when it first came in.
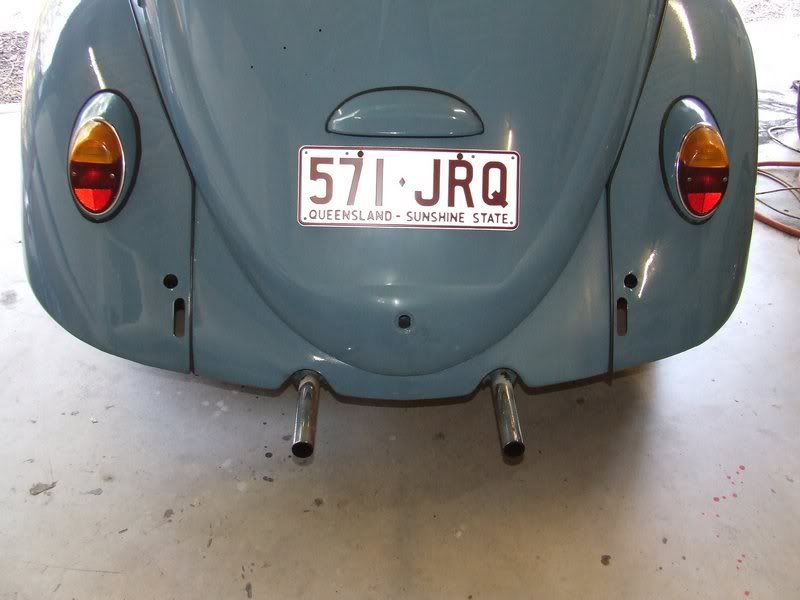
First thing to do is take off the rear wheels and guards.
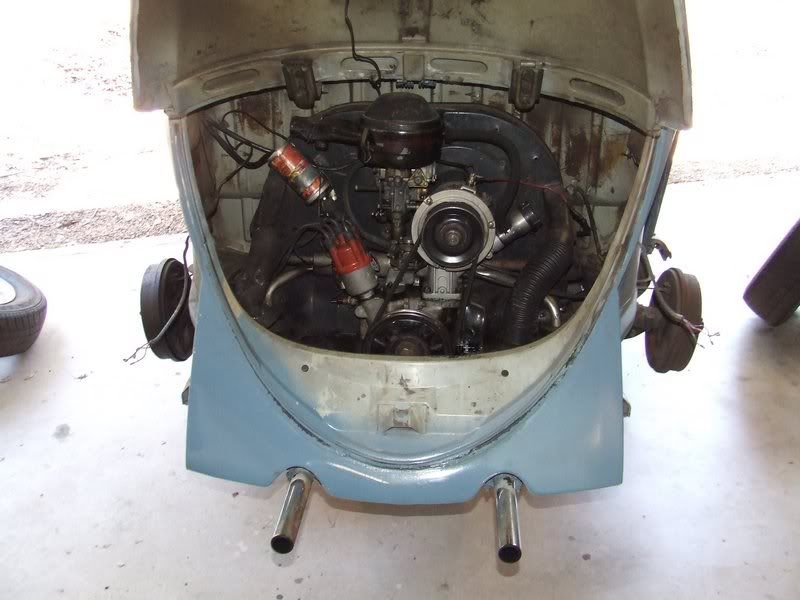
After looking around the engine bay, I decided where I wanted to remove the rear panel. I chose the point where the top of the rear panel meets the
decklid (when it's closed). This will hide the new panel gap. Also, if I cut the panel further back, the engine bay narrows at the back so the engine
wouldn't have fitted through the hole anyway. Another reason was the bumper mounts. I've cut it where it can still use the stock bumper mounts.
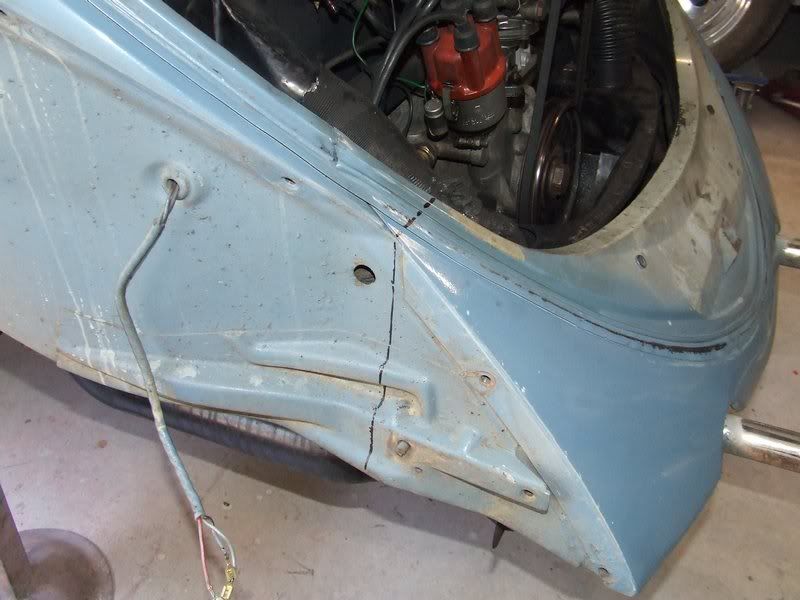
Measure 1000 times if you have to, before you start up the grinder. Make sure both sides are marked out the same. When that's all sorted, chop it off
: )
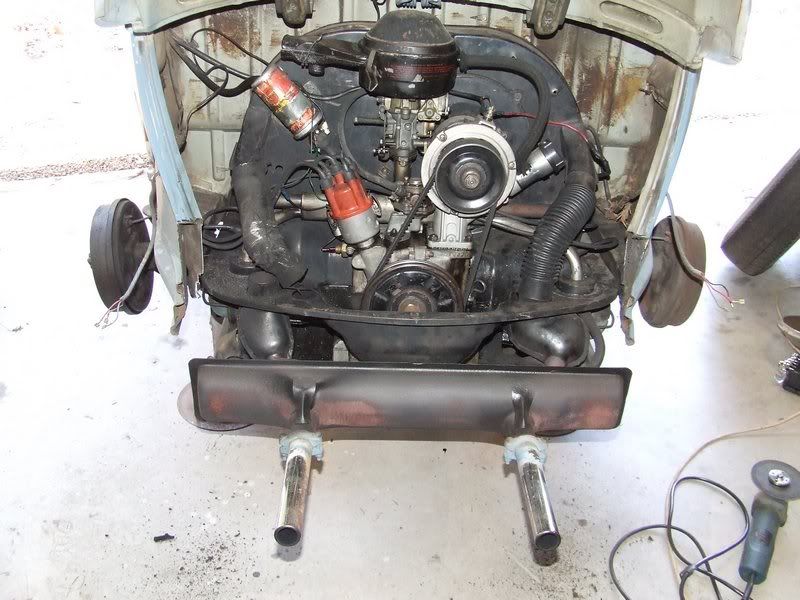
I then made up 4 flanges from 1.6mm sheet metal. These not only allow for the two panels to bolt together, but also to join the inner and outer panels
together, giving its strength back. Make sure the flange doesn't protrude where the rear guard bolts on.
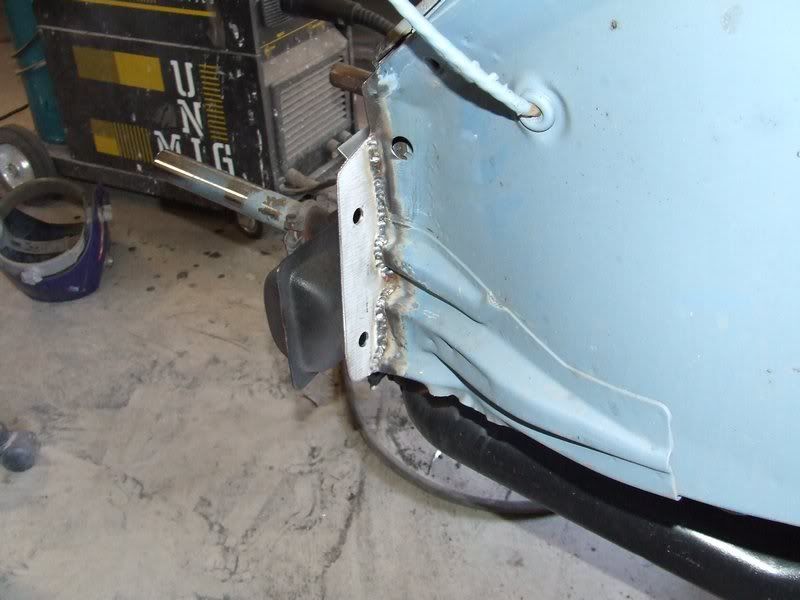
Dirtbag - November 25th, 2009 at 12:28 AM
You can see where the welds have penetrated where the inner and outer panels are. Joining the panels like this make the flange a lot stronger.
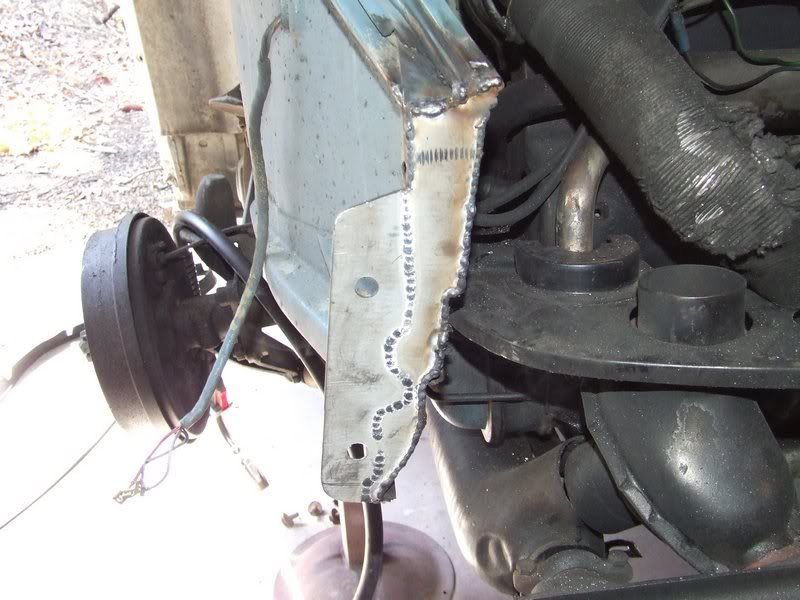
I'm no fantastic welder, but try to make the welds as strong as you can. Vibration is the enemy of weak welds and these little cars are good at
vibrating : )
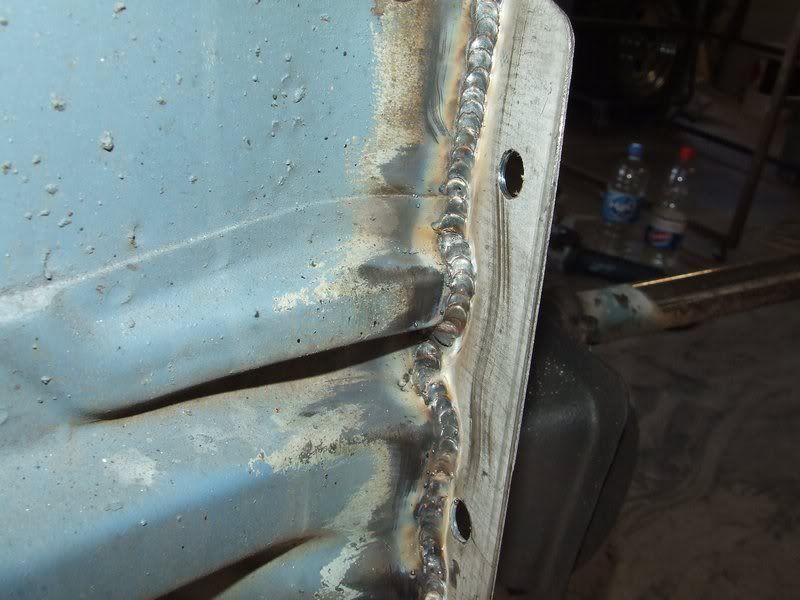
I did the same with the rear panel by welding the inner and outer panels together with the flange. It's a much cleaner look too. I welded the bolts
into the flanges on the rear panel so it's a one spanner job to remove and install, plus they make it easy to line back up.
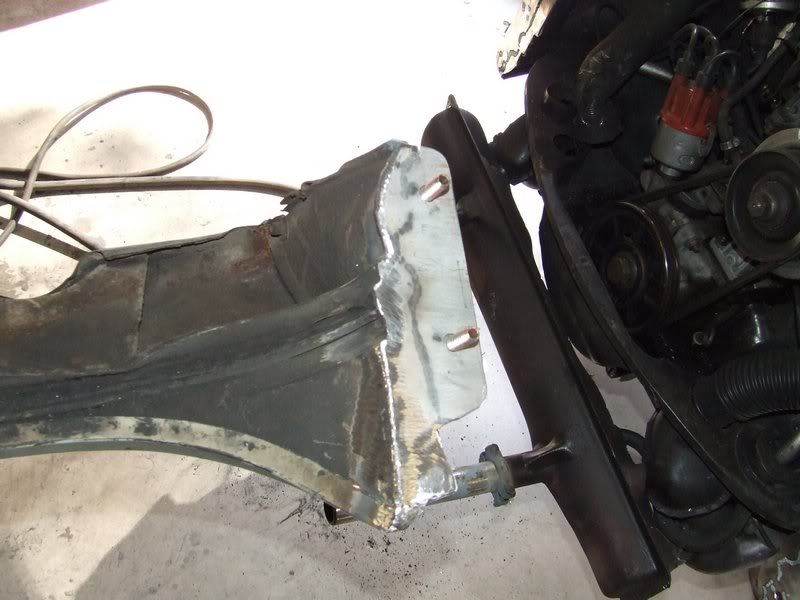
Once all the welding was done I cleaned the area and blew a bit of etch primer on just to stop it getting surface rust.
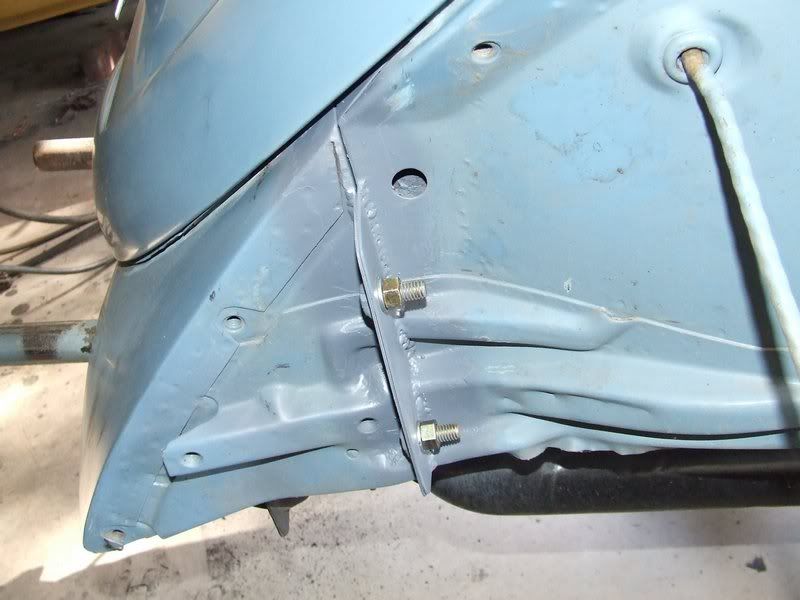
Here's the rear guard re fitted so you can see how much room there is around the flange making access for removal really easy. Once it's painted I
don't think anyone would even really notice it.
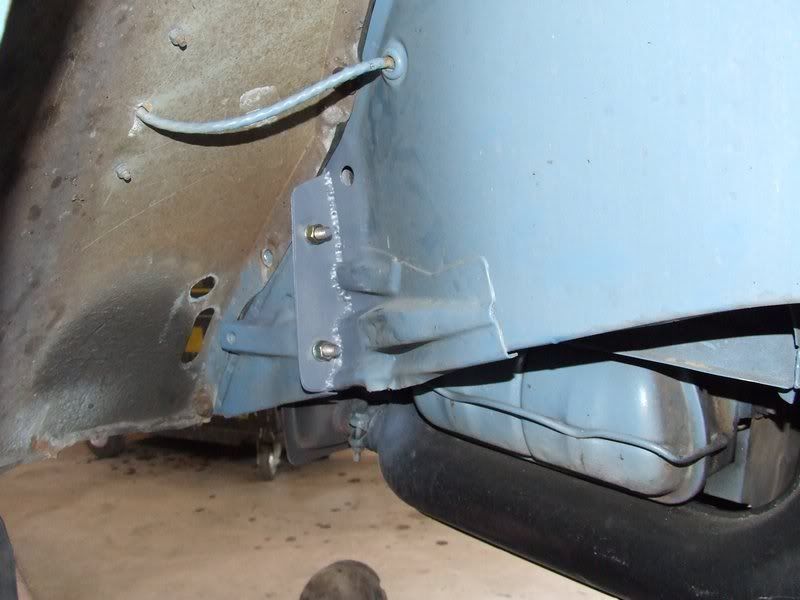
Dirtbag - November 25th, 2009 at 12:34 AM
Again, with a bit of paint this seam would go pretty much unnoticed. Another thing I like about doing it this way is how strong it still is. There's
not just the 4 new bolts holding the panel, there's also 4 rear guard bolts holding it there too.
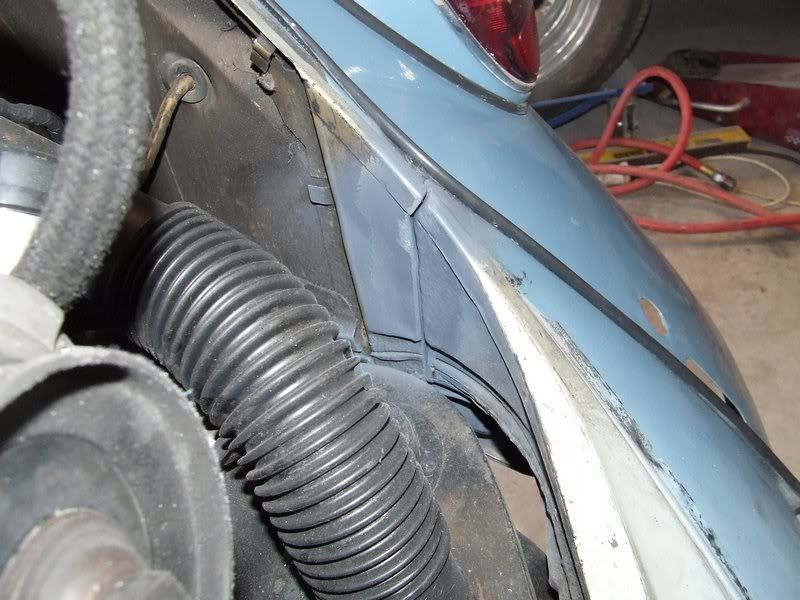
This is all that's visible with the decklid closed. The etch primer makes it a bit noticeable, but with paint I don't think anyone would notice it
at all.
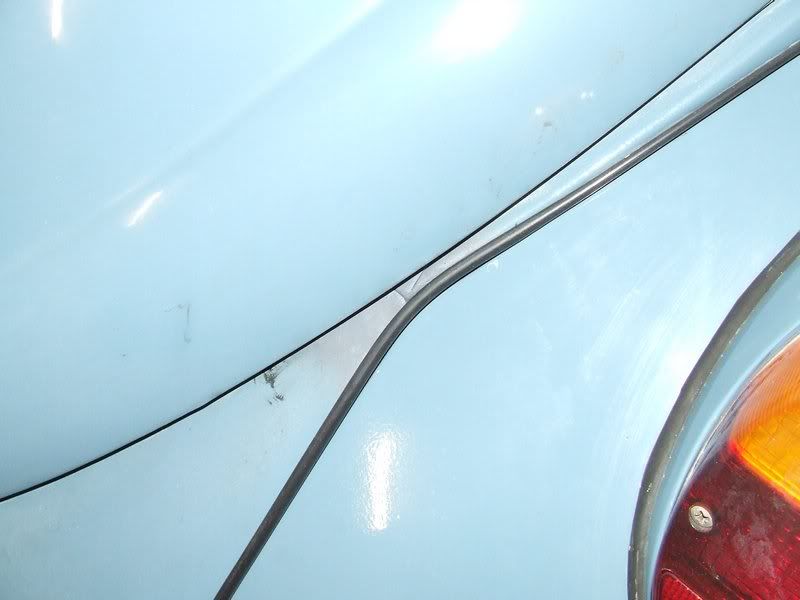
Well that's it. Job done. I'm sure there's been lots of these done before, but I haven't seen them, so that's why I posted this. I might be
useful for some newbie like me : )
Camo - November 25th, 2009 at 07:42 AM
Good work, I like it. Also if you took a photo from the same position as the very first photo, I think it would be less noticeable.
Great to see someone helping others and not hiding their work 
Kev
psimitar - November 25th, 2009 at 10:25 AM
Hiya Tim,
Thats a very interesting way of doing a removeable valance. I like it. You're lucky that the year of bug you did this too had a double skin so that
you could weld the flange to. If you take a gander through my resto thread you'll see how I did it for a 59 body, as only single skin.
Oh btw how's me beam coming along? I got my floorpan painted last weekend. Came out pretty well though needs a bit of a rub down here and there for
air bubbles.
Laters,
Mike
Joel - November 25th, 2009 at 06:56 PM
im sure ive said it before but it was by far one of the best mods ive done to my bug
i went a more conventional method and just unpicked the valance, so that there was no welding or cutting needed
i did it that way more so that i didnt have to disturb the bumper mounts
but your way gives more working room
theres pics of mine floating around on here
Dirtbag - November 25th, 2009 at 07:38 PM
Hi guys. We discussed unpicking the outer skin like you say Joel, but this way just seemed easier to me. Yes, I am cronically lazy : ) Also, that
inner panel wrapped right around the back, so would have been in the way anyway.
grogy - November 25th, 2009 at 07:38 PM
i got to do it to my bug, really appreciate the pics and also the others that replied so i can look at theirs. thanks again
psimitar - November 25th, 2009 at 10:27 PM
| Quote: |
Originally
posted by Joel
im sure ive said it before but it was by far one of the best mods ive done to my bug
i went a more conventional method and just unpicked the valance, so that there was no welding or cutting needed
i did it that way more so that i didnt have to disturb the bumper mounts
but your way gives more working room
theres pics of mine floating around on here
|
Exactly what I did dude tho I do like the idea of just loping the rear end off 
Grogy, take a look at my resto thread. It should make sense as I didn't take many photo's.
mikew - November 28th, 2009 at 06:24 PM
Just a quick thanks for working on my car. The way it comes out is easy as... Took it off today to paint and the motor slips out with minimal
jacking up of the car, as i have always wanted.
Now i'll slowly get on with the rest of the car.
Cheers
Mike
68AutoBug - November 28th, 2009 at 10:22 PM
Now that is much better than the fibreglass removeable rear valance....
much much stronger and easier to put back on...
the fibreglass ones are a pain to put back in....
thanks for the pics
Lee
colonel mustard - January 30th, 2010 at 08:22 PM
ahh..... the wrong photo's in there now.....
Dirtbag - January 30th, 2010 at 11:35 PM
Yeah, photo bucket is to blame. OK, I renamed a heap of pics, so I am to blame hahaha
It should be all back to normal now I hope. I think I put the same pics as last time in there. Close enough anyway.
colonel mustard - February 1st, 2010 at 10:48 AM
Hey Mate, cheers for putting the right photos back up. looks solid.
do you have an email/phone number i can catch you on?? Are you able to do this for other people? Im interested in sending you an email with photo's
of what i want to do. 
Gibbo - February 1st, 2010 at 01:53 PM
Great stuff mate, thanks for the how-to!
68AutoBug - February 1st, 2010 at 03:32 PM
[size=5]BEST INFO WAS.. MEASURE 1000 TIMES...LOL
this idea is EXCELLENT...
COULDN'T BE BETTER....I LOVE IT...]
MUCH BETTER and stronger THAN FIBREGLASS...
Lee
[/size]
Dirtbag - February 1st, 2010 at 03:59 PM
No worries guys, I kind of hoped it might be useful to someone.
I can be annoyed/contacted on either timbojohnston@bigpond.com or 0423 818180.
Cheers.
colonel mustard - February 1st, 2010 at 06:29 PM
Cool, will be contacting you this week some time.
colonel mustard - February 8th, 2010 at 02:39 PM
You have email. 


