Board Logo

67 pannel
bags - June 10th, 2008 at 09:46 PM

hello all,here's my new project bus,it's a 67 bought from highet in melbourne a few yerrs ago and sat ever since,well it's been movd around about ten times just waitng to be brought back to life,so let the magic begin it's time to get grindn

http://i297.photobucket.com/albums/mm211/ittoirb/67combi/IMG_0378.jpg

http://i297.photobucket.com/albums/mm211/ittoirb/67combi/IMG_0380.jpg
http://i297.photobucket.com/albums/mm211/ittoirb/67combi/IMG_0382.jpg
http://i297.photobucket.com/albums/mm211/ittoirb/67combi/IMG_0384.jpg


bags - June 10th, 2008 at 10:13 PM

http://i297.photobucket.com/albums/mm211/ittoirb/67combi/IMG_0391.jpg
http://i297.photobucket.com/albums/mm211/ittoirb/67combi/IMG_0393.jpg
http://i297.photobucket.com/albums/mm211/ittoirb/67combi/IMG_0395.jpg
http://i297.photobucket.com/albums/mm211/ittoirb/67combi/IMG_0396.jpg
http://i297.photobucket.com/albums/mm211/ittoirb/67combi/IMG_0397.jpg
http://i297.photobucket.cohttp://i297.photobucket.com/albums/mm211/ittoirb/67combi/IMG_0377.jpgm/albums/mm211/ittoirb/67combi/IMG_0413.jpg


bags - June 14th, 2008 at 05:47 PM

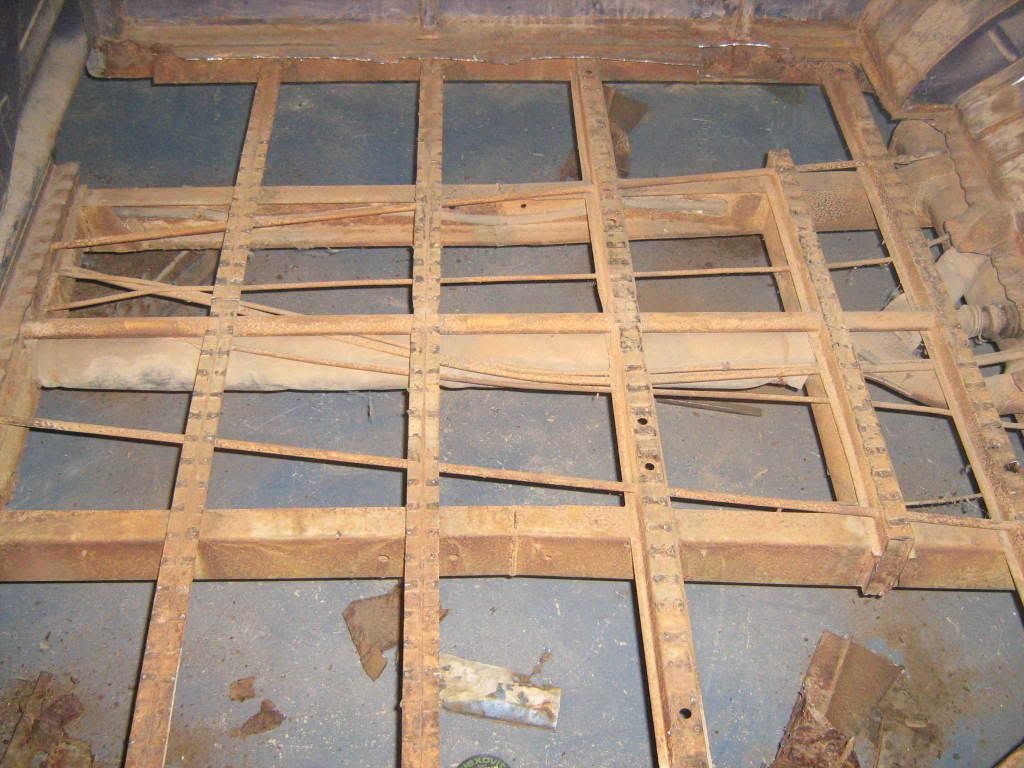
had a bit of fun with hammer and chisel and got that rusty floor out of the way,only to see that the outriggers that i thought to be good, were well and truly rustn away.so i've chopped out all the outriggers,floor and jacking points,all ready to be sandblasted hopefully ths week if the sun stays out


bags - June 14th, 2008 at 07:25 PM

http://i297.photobucket.com/albums/mm211/ittoirb/67combi/IMG_0424.jpg

http://i297.photobucket.com/albums/mm211/ittoirb/67combi/IMG_0420.jpg

http://i297.photobucket.com/albums/mm211/ittoirb/67combi/IMG_0421.jpg

http://i297.photobucket.com/albums/mm211/ittoirb/67combi/IMG_0423-1.jpg


bags - June 17th, 2008 at 09:00 PM

had a chat to mr sandblaster and was advised to strip the paint from all the larger panels (warpage)so out came the paint stripper (bad stuff) ,gets the job done though

http://i297.photobucket.com/albums/mm211/ittoirb/67combi/IMG_0433.jpg
http://i297.photobucket.com/albums/mm211/ittoirb/67combi/IMG_0435.jpg
http://i297.photobucket.com/albums/mm211/ittoirb/67combi/IMG_0436.jpg
http://i297.photobucket.com/albums/mm211/ittoirb/67combi/IMG_0442.jpg


bare metal inside,out and underneath

the sandblaster did a sweet job,good price to,only took him 4 hours to do

http://i297.photobucket.com/albums/mm211/ittoirb/67combi/IMG_0462.jpg
http://i297.photobucket.com/albums/mm211/ittoirb/67combi/IMG_0461.jpg
http://i297.photobucket.com/albums/mm211/ittoirb/67combi/IMG_0459.jpg
http://i297.photobucket.com/albums/mm211/ittoirb/67combi/IMG_0453.jpg
http://i297.photobucket.com/albums/mm211/ittoirb/67combi/IMG_0454.jpg
http://i297.photobucket.com/albums/mm211/ittoirb/67combi/IMG_0457.jpg
http://i297.photobucket.com/albums/mm211/ittoirb/67combi/IMG_0451.jpg

cleaned up the bits left over from paint strippn with a paint strip disk,they're a bit pricey but don't heat your panels as mutch as a sanding disk,also doesn't leave scratches in the steel

http://i297.photobucket.com/albums/mm211/ittoirb/67combi/IMG_0452.jpg
http://i297.photobucket.com/albums/mm211/ittoirb/67combi/IMG_0463.jpg
http://i297.photobucket.com/albums/mm211/ittoirb/67combi/IMG_0450.jpg
http://i297.photobucket.com/albums/mm211/ittoirb/67combi/IMG_0458.jpg
http://i297.photobucket.com/albums/mm211/ittoirb/67combi/IMG_0466.jpg
http://i297.photobucket.com/albums/mm211/ittoirb/67combi/IMG_0465.jpg


next mission is to get the inside and underneath in 2k primer


Brad - June 17th, 2008 at 10:09 PM

Cool looking ride.

On a side note. If you put [img] before your picture link and [/img] after then the image will display in your post. You can also just click the little picture icon in the post template and it will allow you to enter the link in and then do it for you.

I have done it to your first post to show you what happens.

Everyone love pics :yes:


bags - June 17th, 2008 at 10:33 PM

thanx heaps for the tip brad

it took me long enough to get them on the site,not to good with computers

pictures are a little on the large side,is there any way of makeing them smaller after they've been posted


bags - June 22nd, 2008 at 10:43 PM

all primed up

http://i297.photobucket.com/albums/mm211/ittoirb/IMG_0480.jpg

i tell you it's a bitch of a job doing the underside without a rotisserie

http://i297.photobucket.com/albums/mm211/ittoirb/IMG_0482.jpg
http://i297.photobucket.com/albums/mm211/ittoirb/IMG_0476.jpg
http://i297.photobucket.com/albums/mm211/ittoirb/IMG_0481.jpg
http://i297.photobucket.com/albums/mm211/ittoirb/IMG_0477.jpg


rocknrob - June 23rd, 2008 at 05:07 PM

it's always good to see an old veedub come back from the grave...good on you:tu:


kroozzn63 - June 23rd, 2008 at 08:17 PM

looks like your working up a storm, doesnt look to bad keep up the momentum ,thanks for the pics


bags - June 25th, 2008 at 09:33 PM

yea, it's good to finally see the bus come back to life, im pretty sykt on this project things are movin along nicely so far hopefully i can keep it up

i'v got this picture in my head of the finished product that keeps me crankn


dumped on chrome raders

dove blue

safaries

deluxe interior

hell yea


bags - June 25th, 2008 at 09:42 PM

well it's time to start puttin some metal back in,since i've cut most of it out

think im going to start on the floor first

http://i297.photobucket.com/albums/mm211/ittoirb/67combi/IMG_0489.jpg

heres a few supports i fabed up
http://i297.photobucket.com/albums/mm211/ittoirb/67combi/IMG_0488.jpg

http://i297.photobucket.com/albums/mm211/ittoirb/67combi/IMG_0489.jpg

http://i297.photobucket.com/albums/mm211/ittoirb/67combi/IMG_0497.jpg

http://i297.photobucket.com/albums/mm211/ittoirb/67combi/IMG_0496.jpg


Brad - June 25th, 2008 at 11:43 PM

is that pallet racking you are welding in there ?


bags - June 29th, 2008 at 07:48 PM

no pallet racking here,only wolfsburg west repair panels


bags - June 29th, 2008 at 08:13 PM

got the left hand side outer sills in,tested the door for gap at the bottom and alls good

outriggers and jacking points in and sitting flush with the bottom of floor,starting to get a little structure in the floor it's lookn sweet


http://i297.photobucket.com/albums/mm211/ittoirb/RANDOM/IMG_0502.jpg

http://i297.photobucket.com/albums/mm211/ittoirb/RANDOM/IMG_0503.jpg

http://i297.photobucket.com/albums/mm211/ittoirb/RANDOM/IMG_0500.jpg


bags - June 29th, 2008 at 08:22 PM

front crossmember in

was a little to wide,suprised, thought wolfsburg west would be sweet so i stretched out the end folds a little on the anvil

had to make up a section for the rear crossmember as it was rusted out in the corner

http://i297.photobucket.com/albums/mm211/ittoirb/RANDOM/IMG_0504.jpg

http://i297.photobucket.com/albums/mm211/ittoirb/RANDOM/IMG_0509.jpg

http://i297.photobucket.com/albums/mm211/ittoirb/RANDOM/IMG_0505.jpg

http://i297.photobucket.com/albums/mm211/ittoirb/RANDOM/IMG_0506.jpg


bags - July 1st, 2008 at 08:20 PM

.


bags - July 1st, 2008 at 08:28 PM

while i'm waiting on the outer sill to start the other side of the floor,i cleaned up yhe rust at the bottom of the window sillls

was mainly the passengers side that was rusted out,drivers only had a little in the corner


bags - July 1st, 2008 at 08:29 PM

http://i297.photobucket.com/albums/mm211/ittoirb/67combi/IMG_0520.jpg


bags - July 1st, 2008 at 08:33 PM

cut it out and cleaned it up,made up a new section to put in

http://i297.photobucket.com/albums/mm211/ittoirb/67combi/IMG_0524.jpg


bags - July 1st, 2008 at 08:36 PM

tacked a straight edge along the face,so it doesnt bow in when i weld it up

http://i297.photobucket.com/albums/mm211/ittoirb/67combi/IMG_0526.jpg


bags - July 1st, 2008 at 08:41 PM

all welds ground back and smoothed out with a sanding disk

was a shit of a job to grind back, specialy in the corners,glad it's done

http://i297.photobucket.com/albums/mm211/ittoirb/67combi/IMG_0530.jpg


bags - July 13th, 2008 at 10:02 PM

got my outer sill and some other autocraft pannels the other day so get weldn on my floor again


bags - July 13th, 2008 at 10:11 PM

got the inner sill clampt in so i can get the right hight for the outer sill to sit in nicely,then ill tak in the outer and take out the inner so i get at it easier to dolly up

http://i297.photobucket.com/albums/mm211/ittoirb/67combi/IMG_0585.jpg

all welded up and ground smooth

http://i297.photobucket.com/albums/mm211/ittoirb/67combi/IMG_0604.jpg


bags - July 13th, 2008 at 10:16 PM

now i can start oin the outriggers and jax

http://i297.photobucket.com/albums/mm211/ittoirb/67combi/IMG_0606.jpg

http://i297.photobucket.com/albums/mm211/ittoirb/67combi/IMG_0613.jpg

http://i297.photobucket.com/albums/mm211/ittoirb/67combi/IMG_0615.jpg

http://i297.photobucket.com/albums/mm211/ittoirb/67combi/IMG_0614.jpg

nearly all done just got to put the stifeers bak on the side panel and then i can put the floor in

http://i297.photobucket.com/albums/mm211/ittoirb/67combi/IMG_0617.jpg


silver - July 13th, 2008 at 10:35 PM

Well done
Cant wait to see it finished Love a splitty panels


bags - July 20th, 2008 at 09:04 PM

hellalulia,we have a floor again just got to grind up the welds and do the plate for the bottom latch,smudge some seam sealer in there and were done

pics still loding


bags - July 20th, 2008 at 09:09 PM

http://i297.photobucket.com/albums/mm211/ittoirb/67combi/IMG_0664.jpg


kroozzn63 - July 20th, 2008 at 09:38 PM

man got skills very nice work. gas or gasless? im assuming gasless nice welds


LUFTMEISTER - July 20th, 2008 at 10:26 PM

Gasless by the smudges on the spot welds. Very nice construction work. Will look very Shmick:tu: