Ian's Oval
dangerous - April 4th, 2009 at 01:00 PM
I hope that Ian will post some pictures of his Oval,
that is a very clean and original car.
It will be getting some mechanical upgrades (possibly 2275cc),
and a strong transaxle that will still allow low rpm cruising on the highway if need be.
With original intentions of a five speed,
I suggested perhaps keeping a four speed,
and select a spread of ratios that will work well with the extra engine torque,
but also improve the rev drops between the gears.
Also, strength upgrades were chosen
so that drive train failure will be the last thing on Ian's mind
if he should choose to "check the throttle reponse".
Ian was able to track down a NOS Bugpack super diff.
This was a good quality unit.
Most of the ones getting shipped here fom the USA lately
have excessive run-out of the crownwheel in relation to the bearings....so even buying a brand new one is a big gamble.
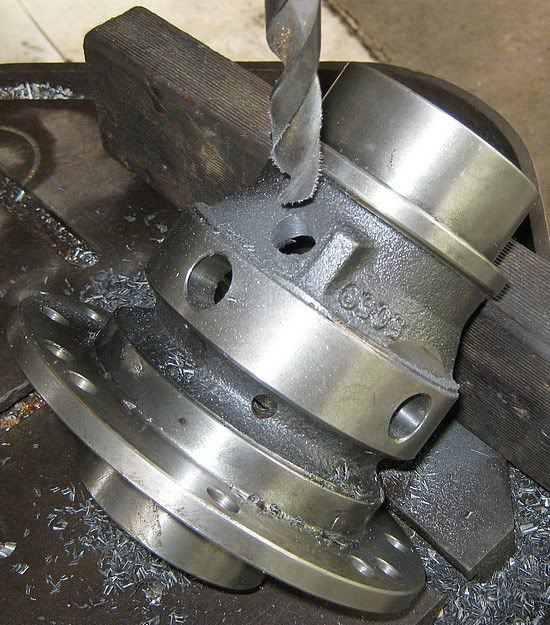
First step, after checking the item was machined true from the factory,
was to drill the oil holes in the body for better lubrication.
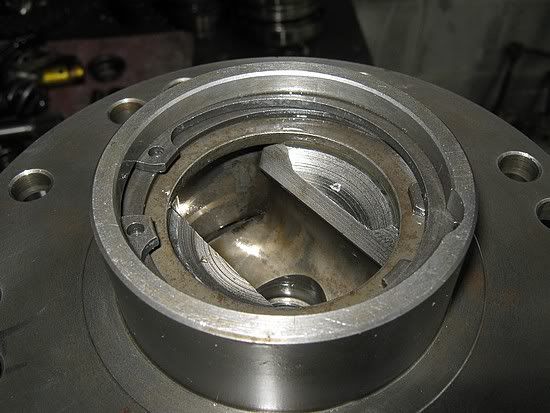
Here you can see the four spider gears.(stock only has two) :
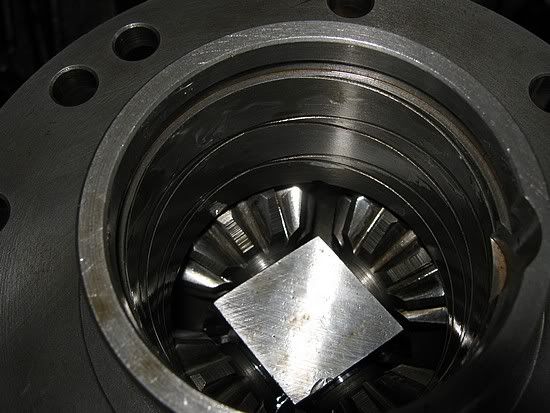
It is not just the extra spider gears that make these stronger.
They also have a much beefier body,
and dual circlips (instead of one per side),
to retain the side gears.
dangerous - April 4th, 2009 at 01:12 PM
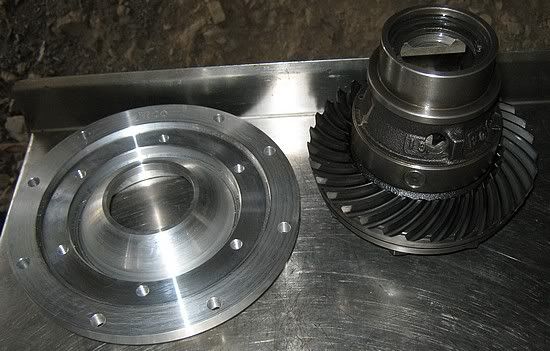
Also a billet side cover was chosen to retain the super diff.
These billet ones are about twice the price of the cast versions,
but far better material and finished quality.
Another one of the strength upgrades was also an excuse to get better ratios.
An ALBINS custom order mainshaft set was orered with a taller first and second gear ratio.
Stock is 3.778 and 2.0588 for second.
This one is 3.444 and 2.000 for second.
The larger engine torque will easilly use the taller gearing,
and subsequently,
they will be closer to third gear, for much more driving pleasure.
Third gear will be a 40hp third of 1.3182 ratio (stock 1500 beetle is 1.26),
and an L Bug 4th with ratio of 0.931.
With Ian's proposed 205-70-15 tyre, rpm on the high way will be around 3000.
All the ratios are now spaced better than VW ever had in their 1500 beetles.
dangerous - April 4th, 2009 at 01:28 PM
As you may guess,
all these parts do not simply bolt into place.
Because Ian wanted a swingaxle trans for his Oval,
we needed parts from various different VW models.
The basic case was an AH code beetle from the early seventies,
and parts from late DC code '73 type3,
1973 AT code L-bug,
2litre Bus,
and very early sixties bug trans were all selected,
as being the best features of all models.
A 4.125 gleason crownwheel and pinion was set up in the case,
until the correct pinion depth,
and crownwheel backlash and preload were found.
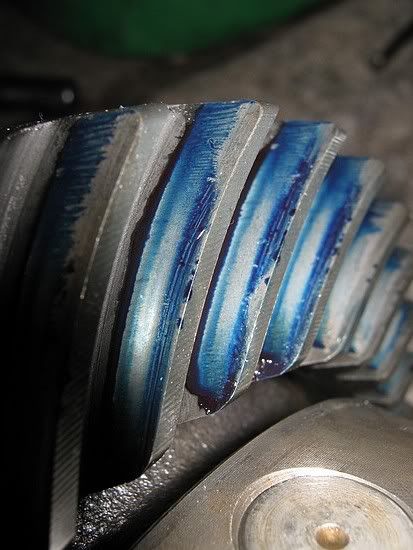
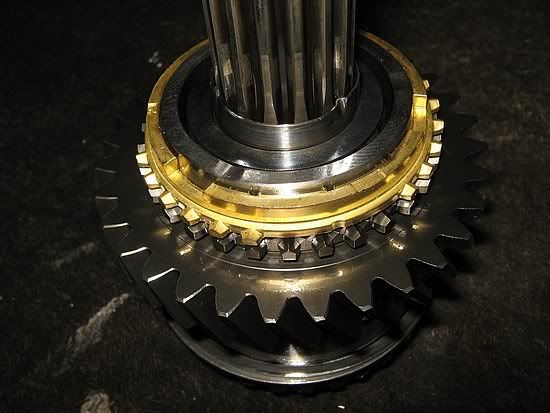
Then the gears were set up on the pinion shaft for the correct end clearance.
Here is 1st gear:
colonel mustard - April 4th, 2009 at 01:35 PM
Looks very sweet. Someone is a pro at gear boxes!! 
dangerous - April 4th, 2009 at 01:46 PM
The gears on the mainshaft are not a simple process.
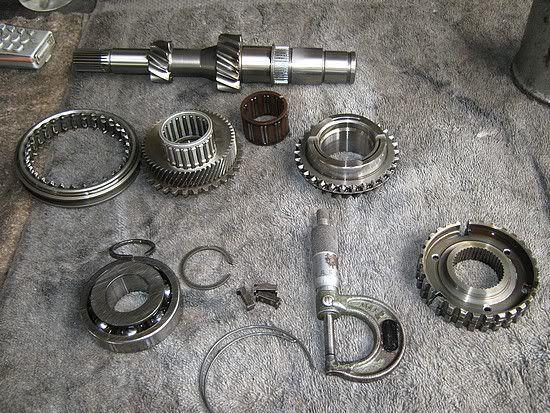
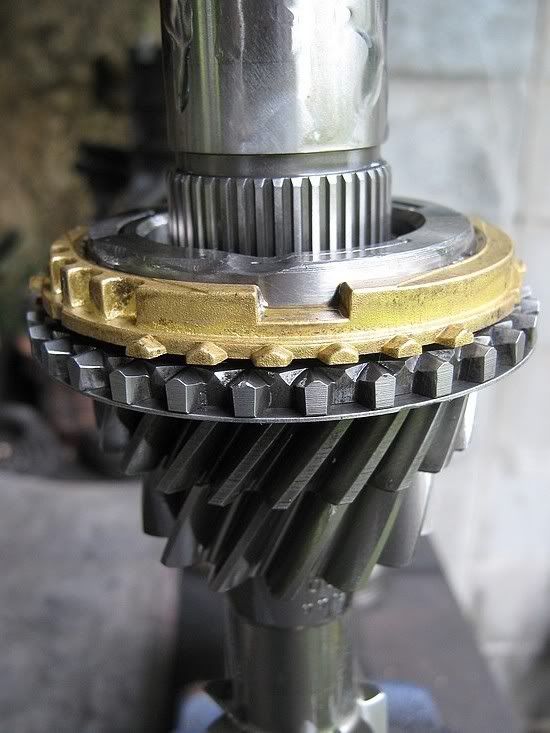
First, the synchro cones were welded onto the gears of third and 4th is factory furnace brazed.

An 091 circlip (091 is VW-speak for the trans from 2lt bus),
was used because it is very strong,
and will allow the end clearances to be set
by machining the 3/4 gear selector hub.
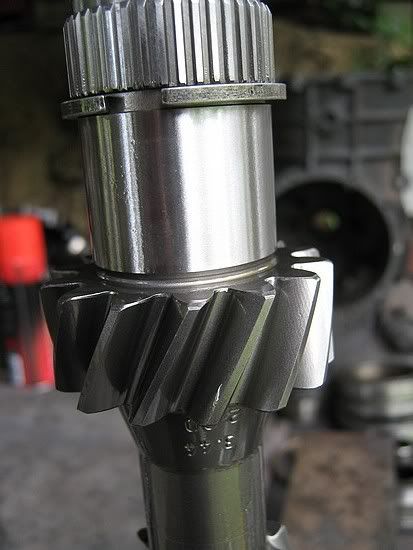
Both the gear and hub are machined to fit correctly together,
and control the correct end float for third gear.
This takes careful measurement and some trial assemby.
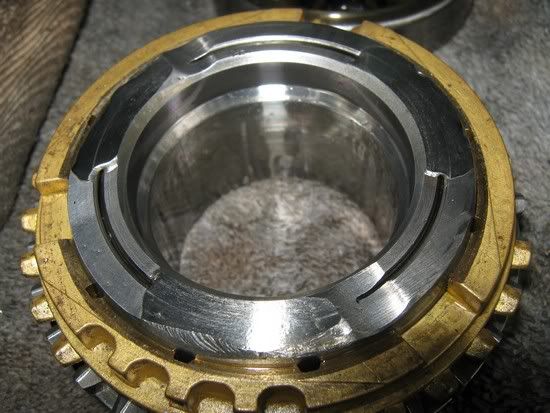
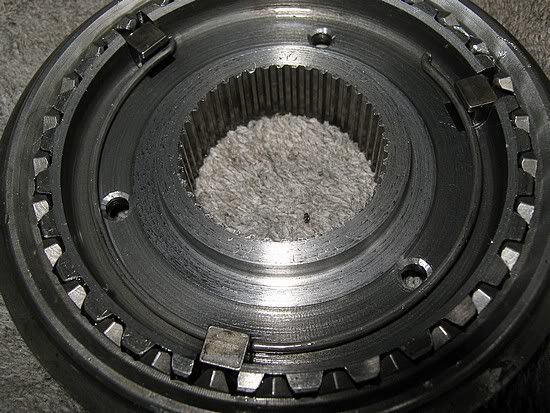
As you can see in the picture above, the hub also gets extra oil holes.
Then the other side of the hub is machined
...just enough...
to get the other circlip on nice and tight.
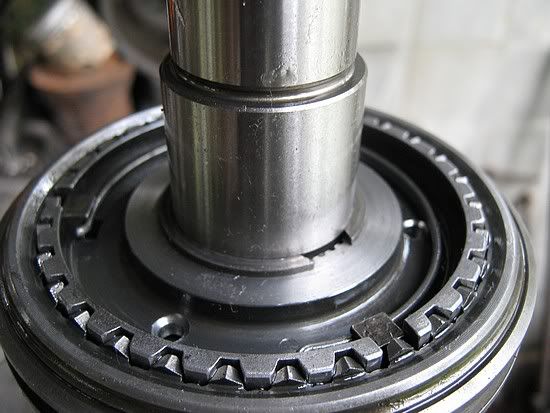
If you use these ALBINS mainshafts with stock thin circlips,
the hub can float back and forth, removing any clearance that the gears had,
thus burning the faces, and usually the cages in the bearings too.
This is a 40 hp needle bearing for 4th, which has a metal cage and more/longer rollers.
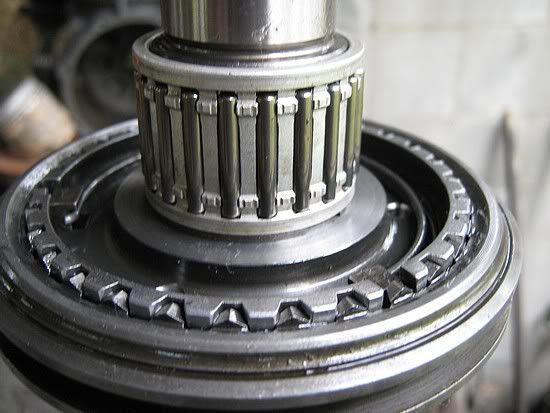
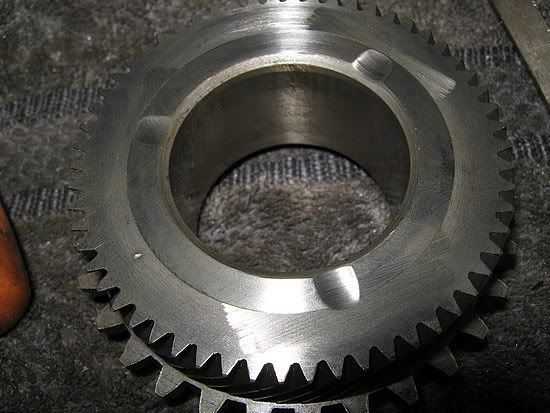
Then finally the end float of 4th gear was set,
and some oil grooves added to the face to bear against the 091 mainshaft bearing.
westi - April 4th, 2009 at 01:50 PM
love you work.
another box is getting the royal treatment.
sounds like a cool car were's the pic's.
trickysimon - April 4th, 2009 at 02:04 PM
Do you mind me asking how much this sorta work is going to cost Ian? I may be talking to you in the future about a box.
dangerous - April 4th, 2009 at 02:08 PM
This late model case uses the long clutch arm:
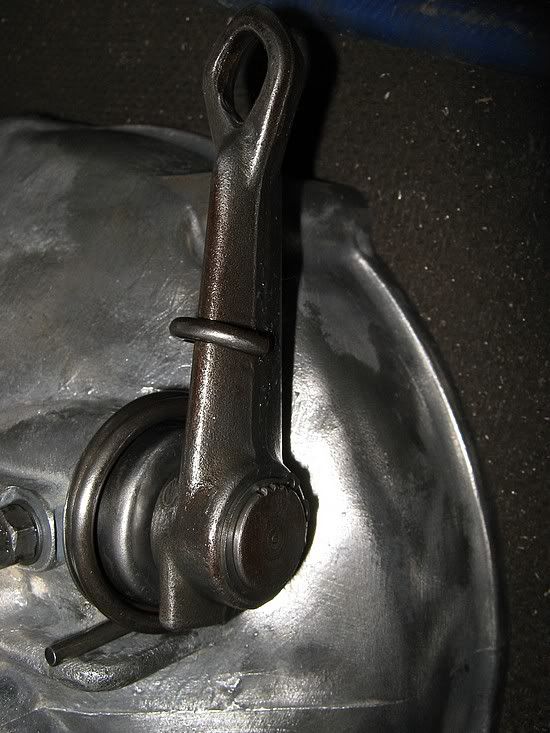
...and 20mm fat shaft clutch fork for the later style throw out bearing.
The arms were fully welded.(stock is spot welded).
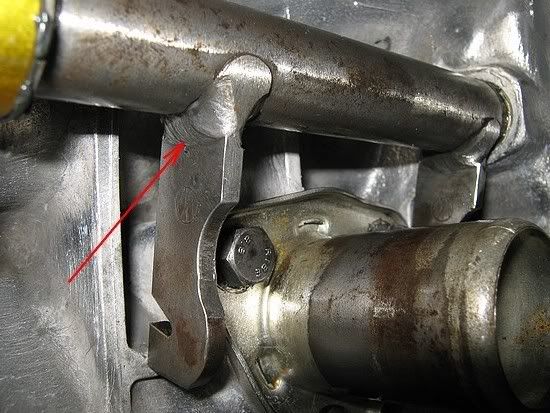
The coupling to join the ALBINS mainshaft,
and the input shaft,
had to have the inside spline removed for a short section to clear the splines on the albins shaft.
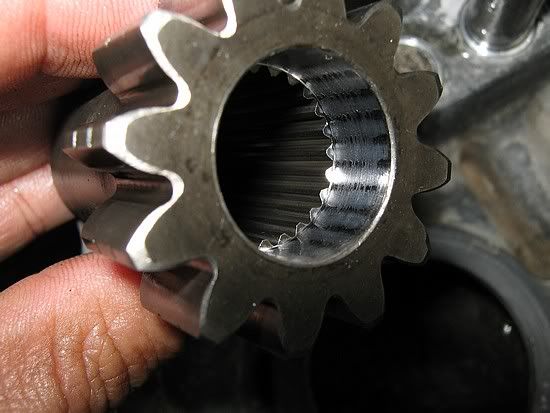
And the reverse idler gear has extra body clearace to clear the taller 2.000 second gear.
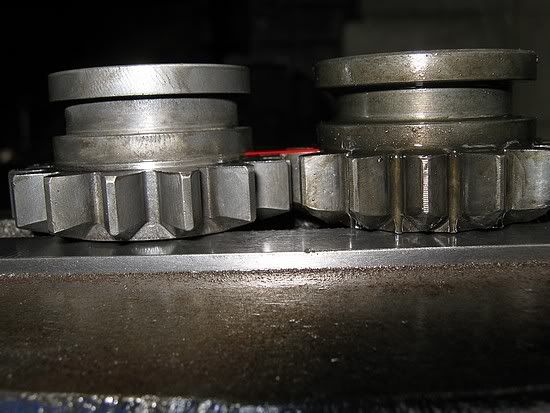
Because the 2nd gear is also wider, and equal amount needed to be removed from the reverse gear.
Here is a comparison with a stock used one and the new on the left.
colonel mustard - April 4th, 2009 at 02:14 PM
How long roughly does it take for you to do one of these boxes Dave?
dangerous - April 4th, 2009 at 02:16 PM
The intermediate housing gets its rail holes re-bushe with 6 series aluminium.
Better than new.
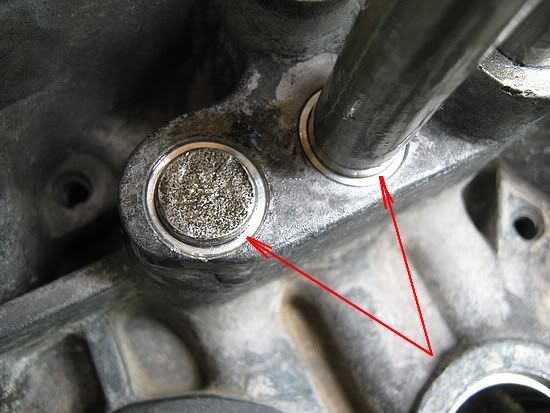
Then the assembly is pressed together with new German mainshaft bearing,
and gear selection adjusted.
Here it is in the jig that simulates the case depth:
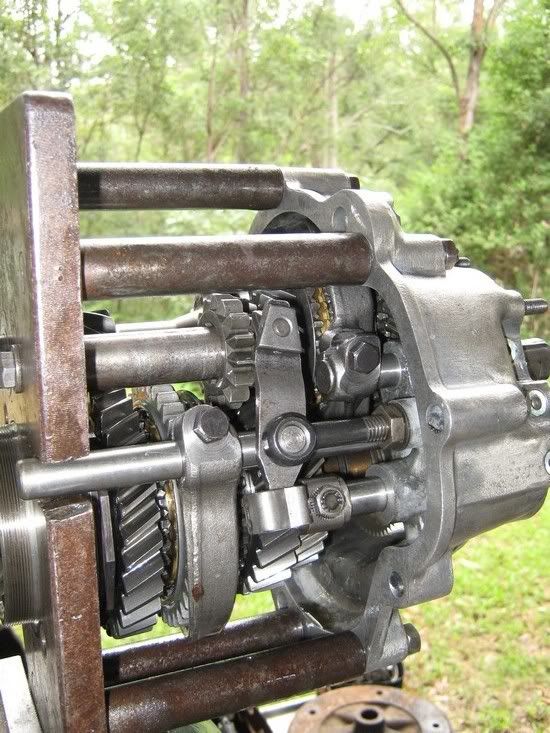
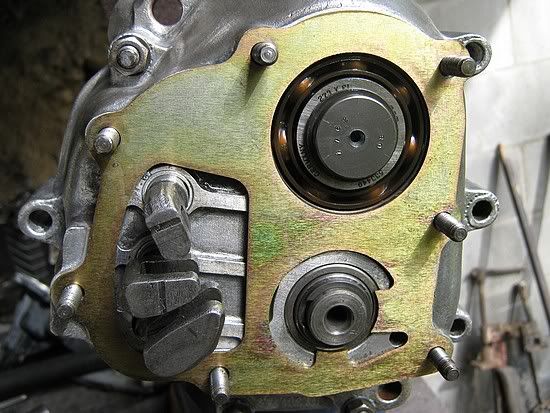
This steel plate sandwiches under the nose cone,
and helps to retain the mainshaft and bearing position.
Otherwise thrust loads will damage the nos cone.
dangerous - April 4th, 2009 at 02:22 PM
Ian's car (being pre 1960) will most likely need a swingaxle bus nose cone.
Normally I will machine the face of a used nose cone(and some new ones!!),
to account for the above plate thicness,
but also because most are just not flat at all.
Most used ones need new bushes too,(and some new ones that I hae seen..made in china?).
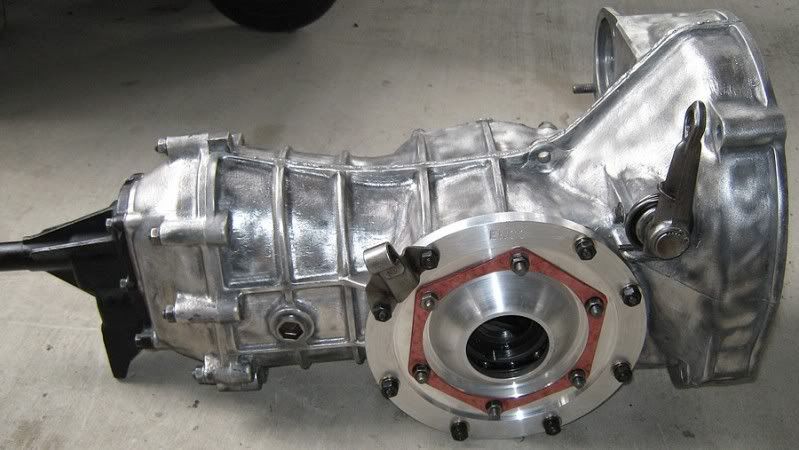
Until then, just a stock old nose cone is fitted to keep the dirt out.
Turned out pretty spiffy:
Now, where's those car pictures Ian?!!!!
dangerous - April 4th, 2009 at 02:41 PM
| Quote: |
Originally
posted by colonel mustard
How long roughly does it take for you to do one of these boxes Dave?
|
Most boxes like this take around 25 hours.
This varies greatly depending on mods,
and wether or not I fit the axles and tubes.
Reduction hub Bus or C'Buggy trans can add a many hours and dollars to assemble all those extra bearings and gears.
Basic IRS trans is usually less hours,
but a modified one can be the same.
Just for a reality check,
a box like Westi's took over 40 hours,
and my own IRS bus trans took me 60 hours.
Lucky I don't have to pay wages.
colonel mustard - April 4th, 2009 at 02:47 PM
So... Bug IRS about 25 hours??
But obviously varies on what sort of power will be on the end of it.
estimate for a Irs box with mediumish 1916 power running through there. Guessing 120hp at the most... (you dont have to say if its so varied its
insane...haha)
Sweet work man. 
dangerous - April 4th, 2009 at 05:09 PM
There are many variables depending in the condition of what you have to begin with.
If you have 125hp, possibly a stock rebuilt L-model box, (or equivalent year type 3).
Then upgrade ratios and strength to suit how you use that power.
OZ Towdster - April 4th, 2009 at 06:18 PM
Dave , you never cease to amaze us all with your attention to detail , well done
vassy66T1 - April 4th, 2009 at 06:24 PM
Great looking work Dave!!
Might as well show it off before it disappears under the car never to be seen 
Stout gearbox for a street car ...
Aussie - April 4th, 2009 at 09:19 PM
Thanks for starting the post off Dave – I have been meaning to do this for a week now but being busy at work and also sick at the moment has delayed
things.
I have been back in Australia for around 18 months now after a long stint living over in the UK. It was in the UK that I first became involved in all
things VW and have built a couple of beetles over the last 10 years while teaching myself to weld, paint and so on. I have been planning my next build
(this Oval) for quite some time now and hope that once it is finished it will be something that I can get in and enjoy and keep for a very long time.
I had looked at a fair few cars for sale until eventually I stumbled onto this ’56.
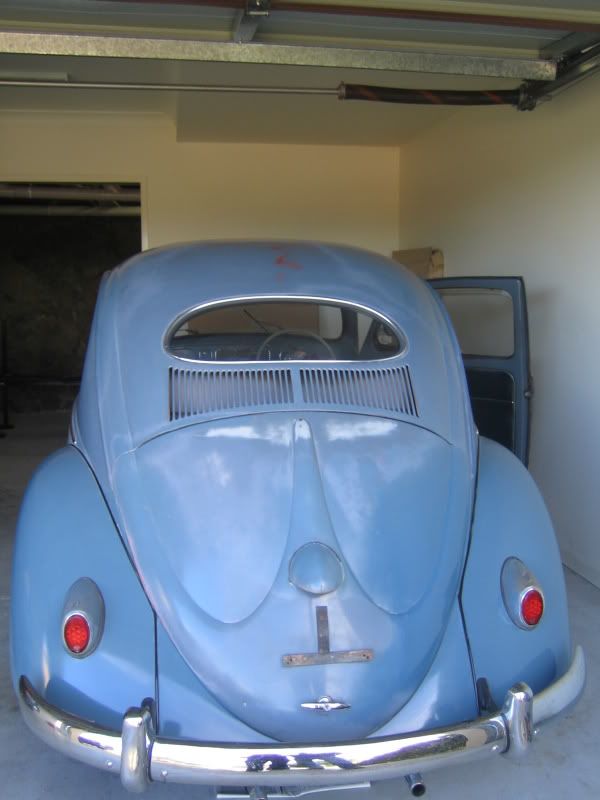
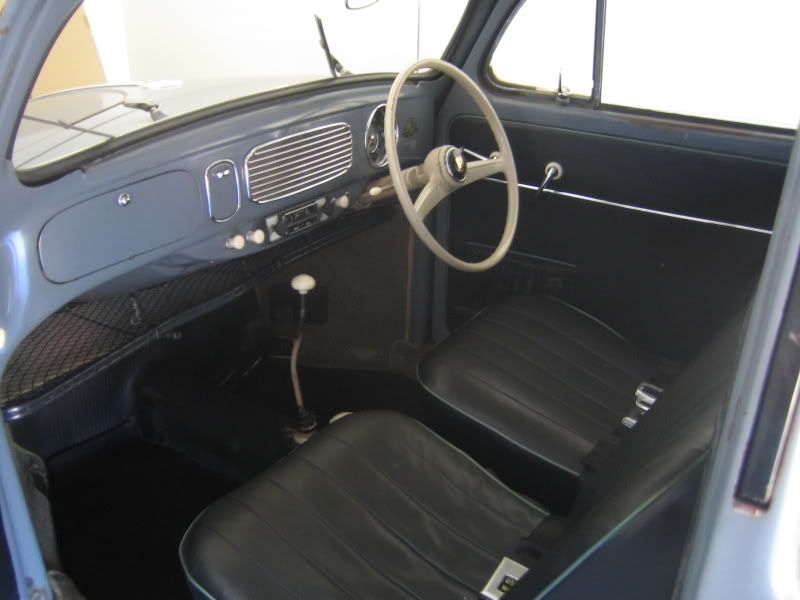
Very original and straight with all the original panels. The paint is mostly original except for a blow over on the wings and a bit on the decklid.
From what I have seen so far I shouldn’t have any welding to do at all. The guy who had it before me used to regularly give good coatings of fish
oil to all the usual rust traps which seems to have preserved things well. He owned it for over 30 years and only put about 30,000 miles on the clock.
I don’t plan to do anything to upset the cars current character but will be making some changes as time goes on.
I am in the process of collecting together lots of the parts I need before taking the car off the road. This included a gearbox which I have been
lucky enough to have Dave build up for me. Not looking for a close ratio drag box, Dave came up with a nice spread of ratios and we put together a
good parts list to build a sound street box.
I am busy at the moment building a couple of frames to help lift the body off and will be updating the thread as things progress.
A big thanks to Dave and also Alan (Dasdubber) who have been very helpful so far in getting the project off the ground.
Cheers, Ian
Aussie - April 4th, 2009 at 09:31 PM
Couple of extra pics:


Parts stash mmmmmm shiny stuff:

My last bug:

vassy66T1 - April 4th, 2009 at 09:39 PM
The oval looks very cool Aussie 
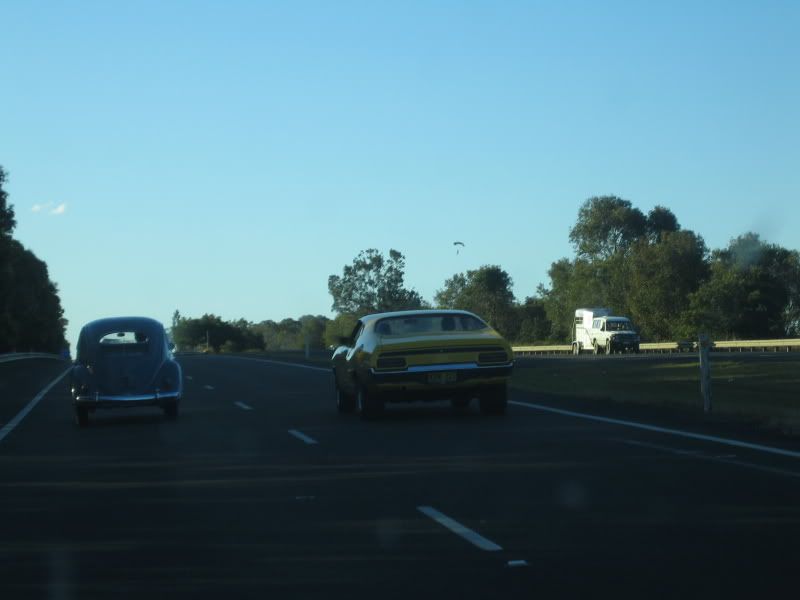
From the sounds of it you will easily embarrass that XA coupe you are driving next to in the cool photo.
Looking forward to seeing it progress.
cheers
Marcus
izac - April 4th, 2009 at 09:41 PM
wow that is a a nice stash of shiny bits u got there man
colonel mustard - April 4th, 2009 at 09:47 PM
| Quote: |
Originally
posted by Aussie
Parts stash mmmmmm shiny stuff:

|
You got some doubles there... not building 2 are ya???
izac - April 4th, 2009 at 10:02 PM
are they wide 5 discs? just wondering where you got them from/what brand cheers
matberry - April 4th, 2009 at 10:35 PM
Very nice, mmmmm IDA's
Aussie - April 4th, 2009 at 10:38 PM
| Quote: |
Originally
posted by izac
are they wide 5 discs? just wondering where you got them from/what brand cheers
|
Discs are CSP - Bought them directly from Germany when I was in the UK, the quality of these kits is real good! Porsche PCD but you can get wide 5.
Expensive to buy from Australia (postage) which is why I got them before I came over.
Aussie - August 28th, 2009 at 06:26 PM
Havent posted for a while so doing a quick update. Still waiting for my beam to turn up but have the wheels and a couple of extra bits I have been
waiting for. Once the beam turns up I can make sure it fits and then get the body off and get going on the pan.
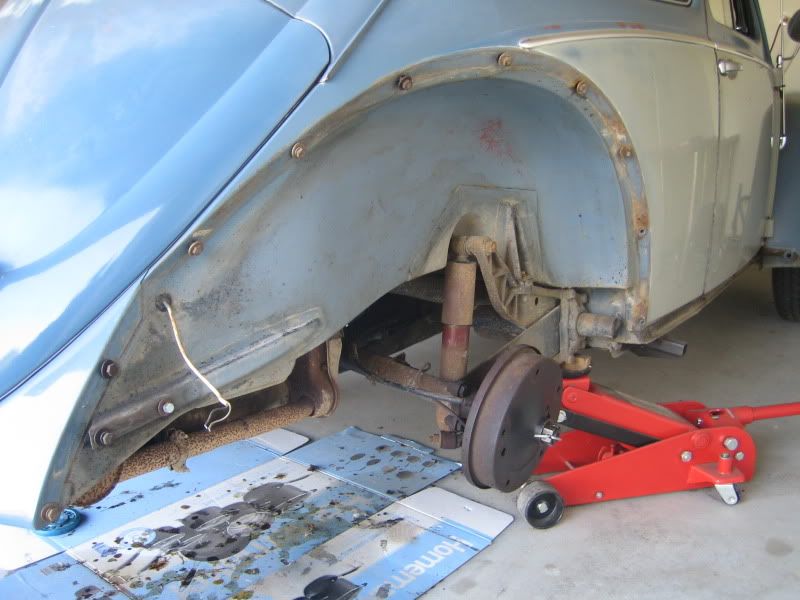
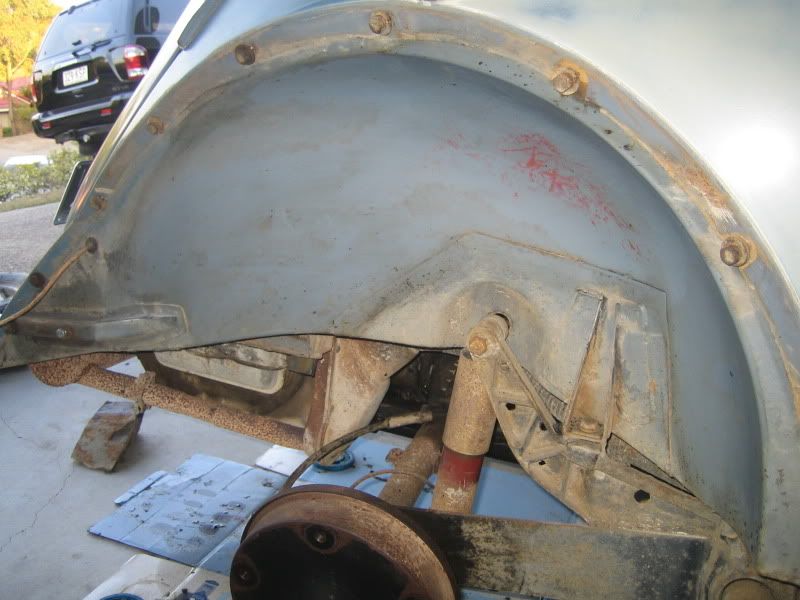
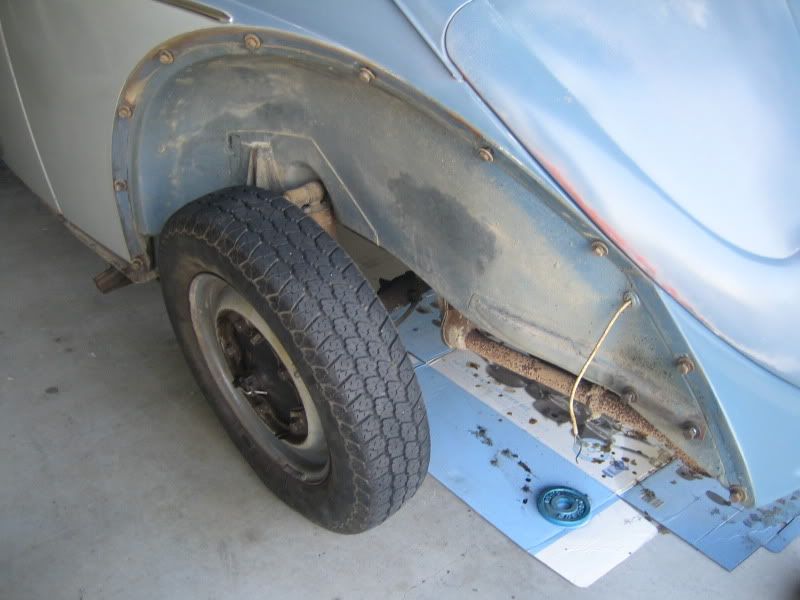
Decided today to start getting the ball rolling and get some stuff done. Pulled off the running boards and rear wings and then spent the best part of
the afternoon getting the old crusty underseal off the arches. Only a couple of small bits of surface rust and on the whole pretty damn solid. 
pod - August 28th, 2009 at 06:46 PM
nice clean body
colonel mustard - August 28th, 2009 at 09:20 PM
What is being bolted onto that trans?? anything taken shape yet??
Aussie - August 28th, 2009 at 09:40 PM
| Quote: |
Originally
posted by colonel mustard
What is being bolted onto that trans?? anything taken shape yet??
|
Not much as yet. Will probably run with the stocker for a while to get everything set up right. Then it will be time to sort the new motor!
Aussie - August 30th, 2009 at 07:22 PM
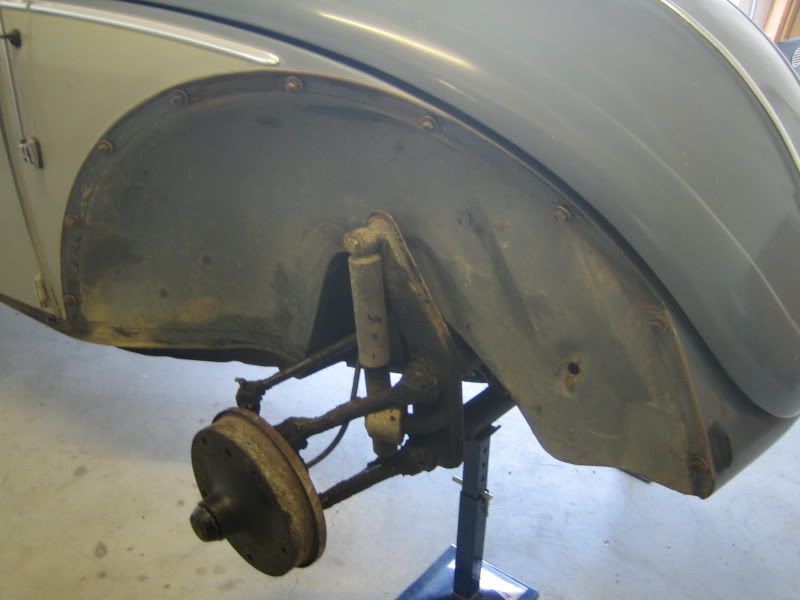
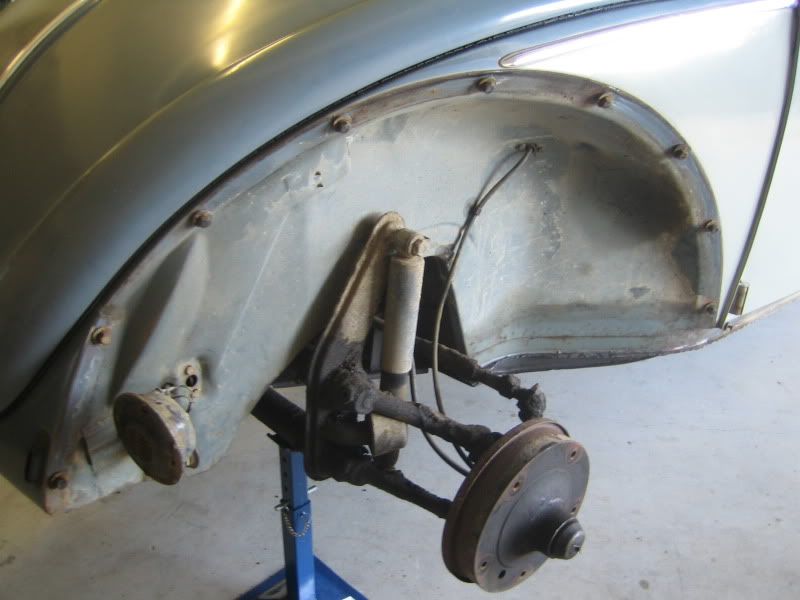
Bit more progress.... Took the front wings off and carefully got rid of the last remaining bits of old underseal. Turned up nice again with no rust
issues at all. 
Aussie - September 13th, 2009 at 06:57 PM
Finally the beam turned up. Been waiting for about 4 months but very happy with whats turned up. Airkewld 3 inch narrow with shock towers and no body
mods required. If it fits as good as it looks then I will be happy.
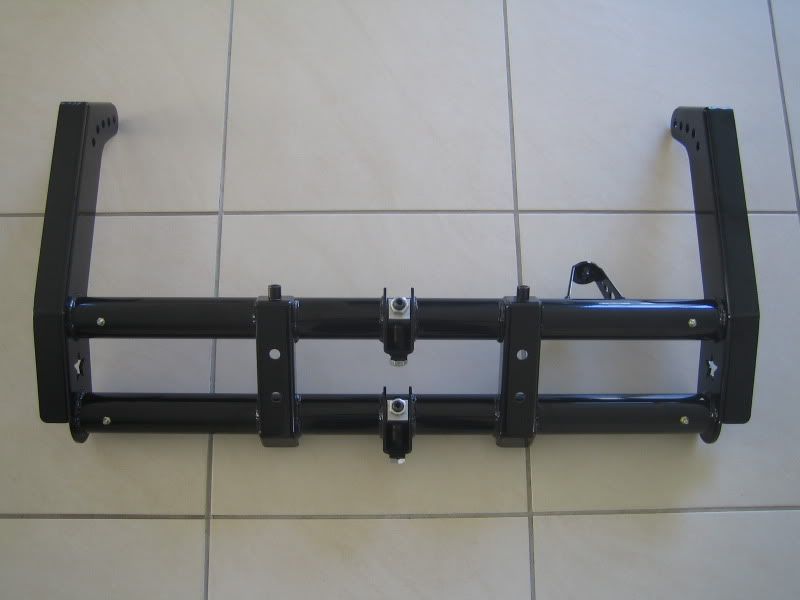
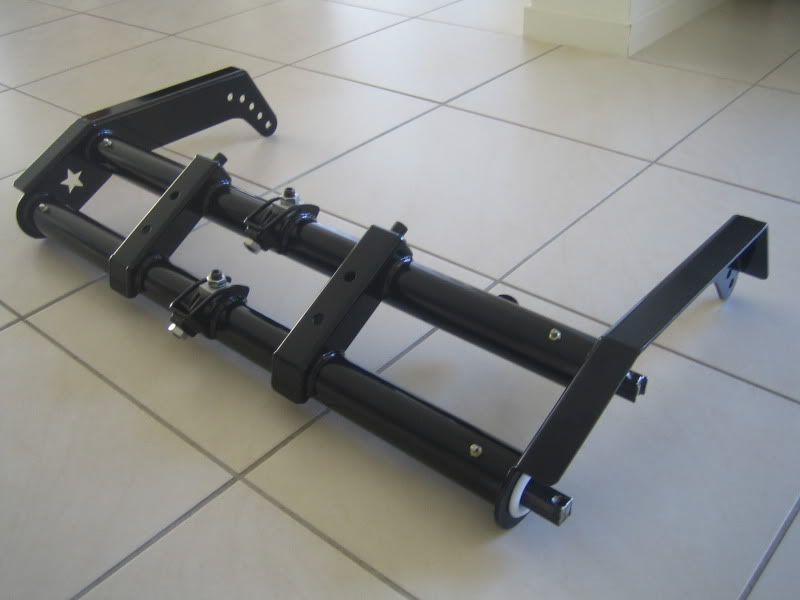
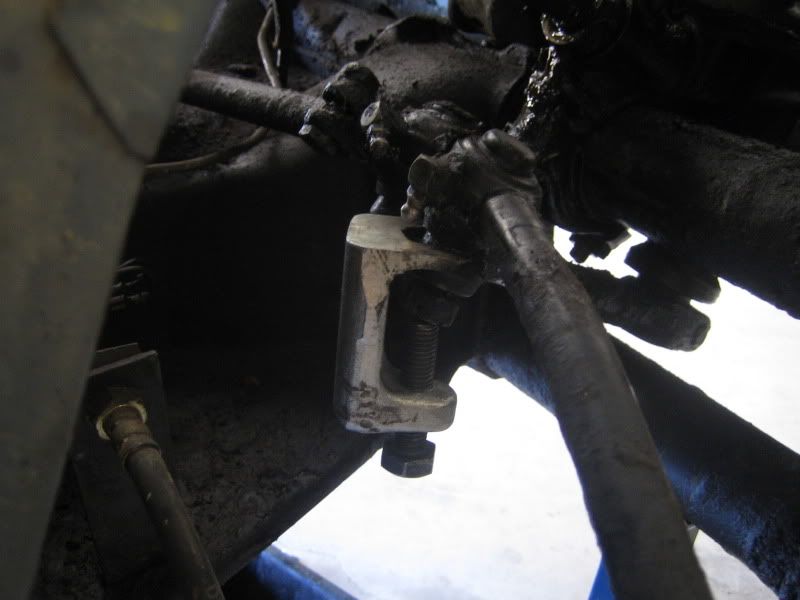
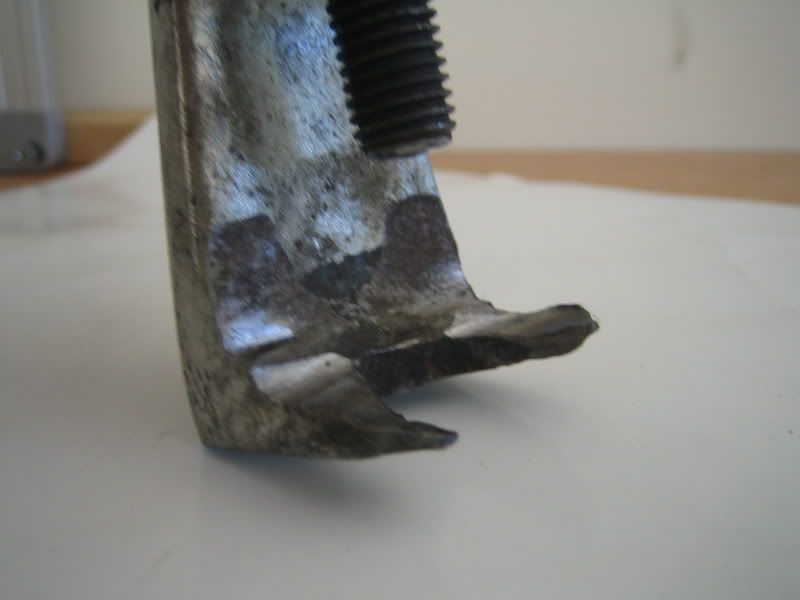
Jumped into the front end today and killed my ball joint tool......those things are tight!
