
How to repair an early Beetle decklid
psimitar - April 6th, 2015 at 07:26 PM
I thought I'd put up a thread whilst I repair a 66 Beetle decklid for a friend. From the number of dodgy bodge jobs smash repair places seem to do on
these older panels is quite disgusting as they just fill the rotted out area with filler and in many cases don't even treat the rust so it eventually
creeps thru the filler and paint.
Anyhow, so my mate can keep track of the work being done to his lid I'll make this picture book so anyone else can also see how to fix the decklid
properly and keep it rust free for many decades to come 
So first is all the filler removed from the rusted out area
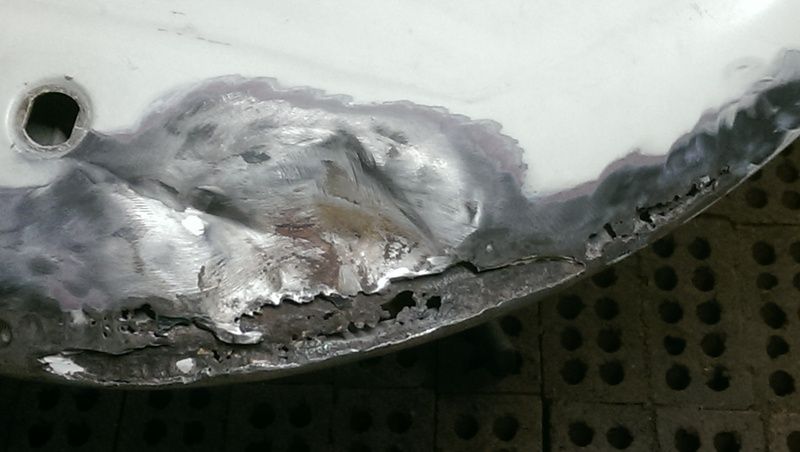
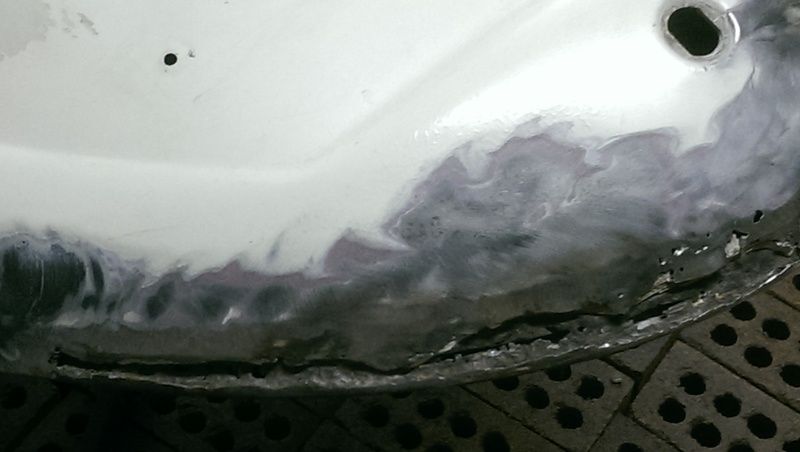
How thick the bondo was cause they were too lazy to pull the dent
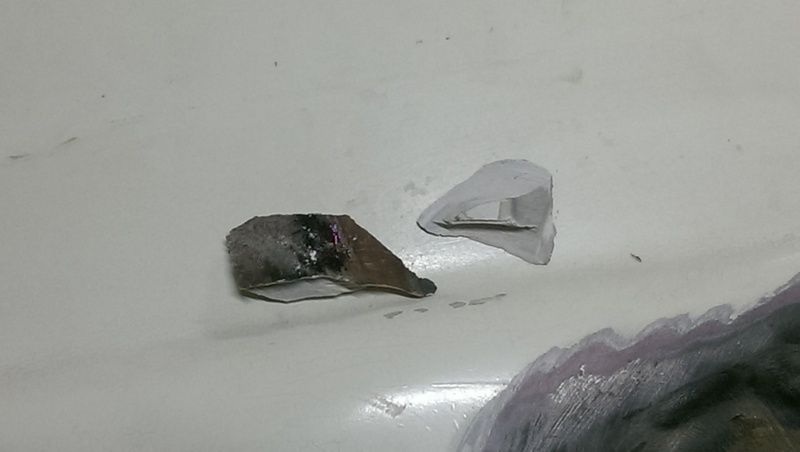
and the first side trimmed up ready for repair pieces
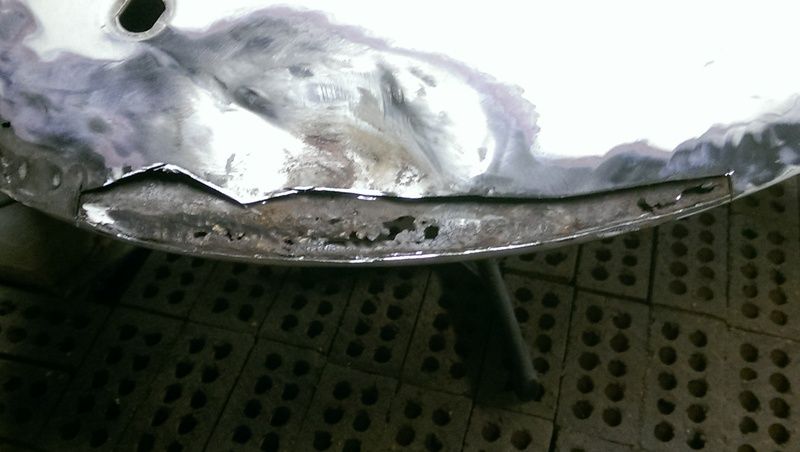
1303Steve - April 6th, 2015 at 08:32 PM
Hi
I did a journey man panelbeating course at Tafe many years ago, one of the exercises was making the bottom of a early Beetle decklid.
Steve
psimitar - April 6th, 2015 at 09:00 PM
| Quote: |
Originally
posted by 1303Steve
Hi
I did a journey man panelbeating course at Tafe many years ago, one of the exercises was making the bottom of a early Beetle decklid.
Steve
|
Making one? Cool. Oh if only I had an english wheel, sandbag and mallet plus a mechanical planisher then the wife would never get me outta the shed

vw54 - April 7th, 2015 at 07:24 AM
Best of removing the inner panel as well
HappyDaze - April 7th, 2015 at 07:33 AM
| Quote: |
Originally
posted by 1303Steve
Hi
I did a journey man panelbeating course at Tafe many years ago, one of the exercises was making the bottom of a early Beetle decklid.
Steve
|
For my final [practical] exam at Ulimo Tech - not TAFE back then - it was making the back half of a VW rear guard. As I was an apprentice at a VW
dealer's panel shop, it was a 'piece of cake', but some others had a lot of trouble. The biggest mistake was to put too much 'shape' into the
flat area where the tail light sits.
The best way to repair the engine lid is to remove the inner frame [drill out the spot-welds]. Make a new lower outer section - not difficult, is itSteve ?  - and weld it in [oxy is best]. Make sure it fits neatly on
the rear apron, then hammer & dolly to the correct shape.
Replace any damaged section on the inner frame, and make it fit neatly in the lid. Plug-weld through the old spot weld holes, then give it a final fit
and nice tidy-up. I wish they had those flap discs back then.
psimitar - April 7th, 2015 at 07:21 PM
| Quote: |
Originally
posted by HappyDaze
| Quote: | Originally
posted by 1303Steve
Hi
I did a journey man panelbeating course at Tafe many years ago, one of the exercises was making the bottom of a early Beetle decklid.
Steve
|
For my final [practical] exam at Ulimo Tech - not TAFE back then - it was making the back half of a VW rear guard. As I was an apprentice at a VW
dealer's panel shop, it was a 'piece of cake', but some others had a lot of trouble. The biggest mistake was to put too much 'shape' into the
flat area where the tail light sits.
The best way to repair the engine lid is to remove the inner frame [drill out the spot-welds]. Make a new lower outer section - not difficult, is itSteve ?  - and weld it in [oxy is best]. Make sure it fits neatly on
the rear apron, then hammer & dolly to the correct shape. - and weld it in [oxy is best]. Make sure it fits neatly on
the rear apron, then hammer & dolly to the correct shape.
Replace any damaged section on the inner frame, and make it fit neatly in the lid. Plug-weld through the old spot weld holes, then give it a final fit
and nice tidy-up. I wish they had those flap discs back then.
|
| Quote: |
Originally
posted by vw54
best of removing the inner panel as well
|
Gimme a chance guys.
I've left the inner panel for the time being as it's still solid in places and so adds strength so the outer skin keeps it's shape whilst welding
the outer panel. I found this out when I did my first lid as it was much more of a pain to get the inner panel back in compared to doing the outer
skin with the inner still attached.
There is method to the madness 
Anyhoo, decided to do some more to get away from the mossie hours outside.
Now the repair patches I prefer to make from a knackered decklid as you get the same profile to weld back in instead of having to shape flat steel.
It's not necessary to use up an old decklid but if you've got a cruddy one sitting around you may as well recycle it 
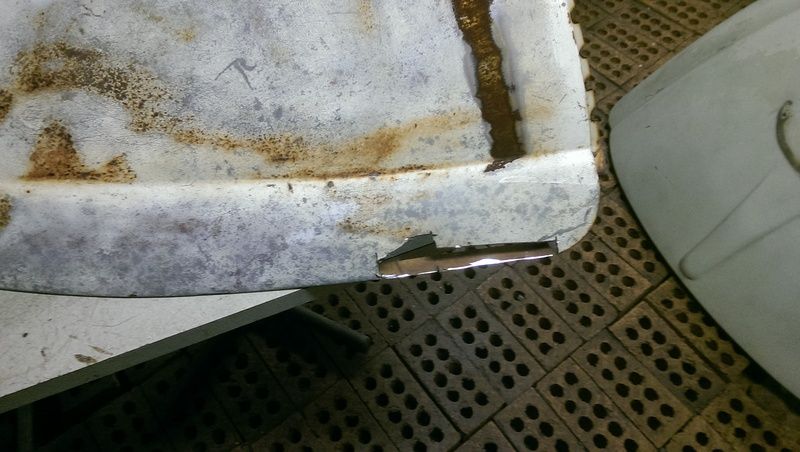
Then welded the first 2 patches in
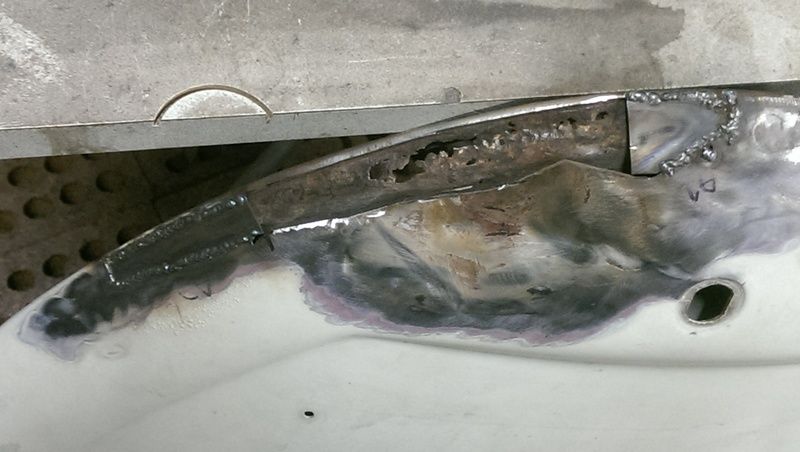
and dressed the welds
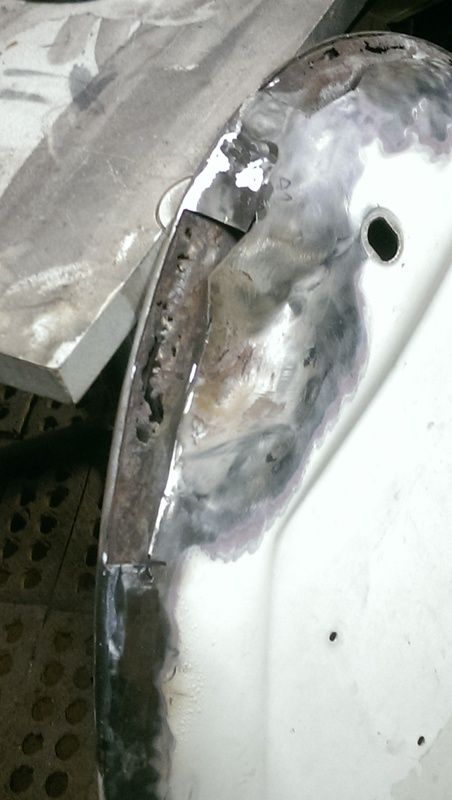
Unfortunately the area between the 2 repair panels shall be left until the inner strengthener is out cos the metal has pull in from the dent so the
repair pieces would end up being the incorrect profile so best to do them afterwards.
So onto the other side the first of probably 4 patches welded in and dressed.
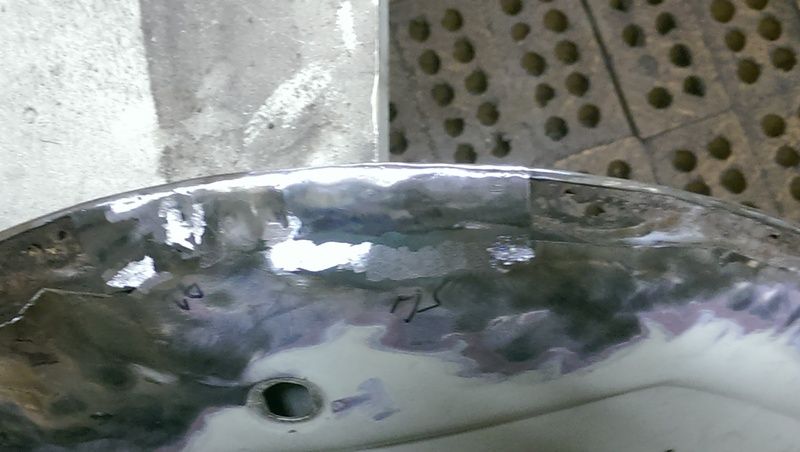
Once those are done it's time to remove the inner panel. Until then 
DubbyDo - April 7th, 2015 at 07:46 PM
More naked steel porn

psimitar - April 21st, 2015 at 09:21 PM
Been busy working on me Oval and inability to do much due to chronic back pain.
Anyhoo, the un-dented side is all solid steel again and the second pic shows where the spot welds are so I can use my spot weld drill, brad drill in
USA, to seperate the skins.
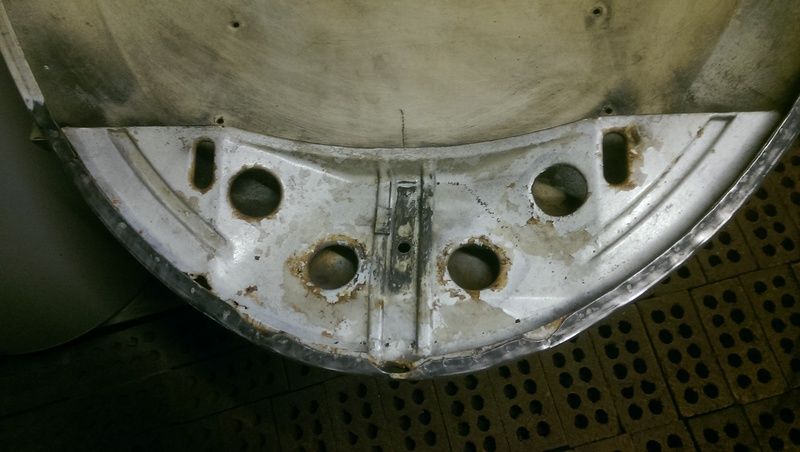
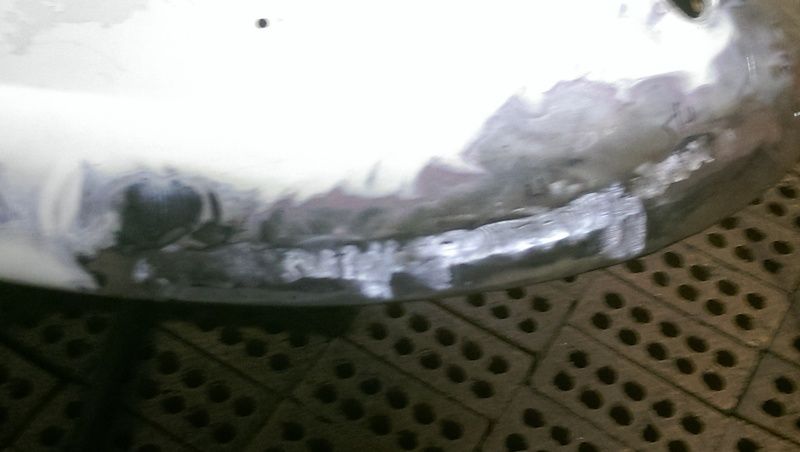
Apologies for the second pic being a tad blurry. Inner panel all removed now and the rust treatment is drying so few more pics tomoro plus the large
dent came out pretty easy with a bit of dolly n hammer work 
psimitar - April 22nd, 2015 at 08:56 PM
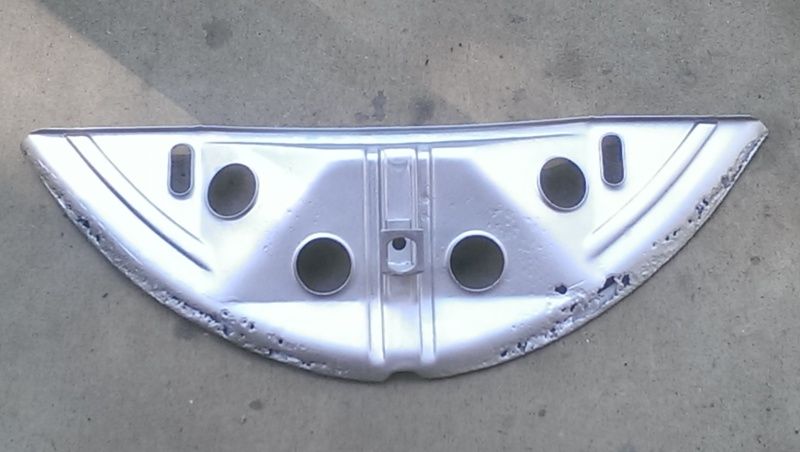
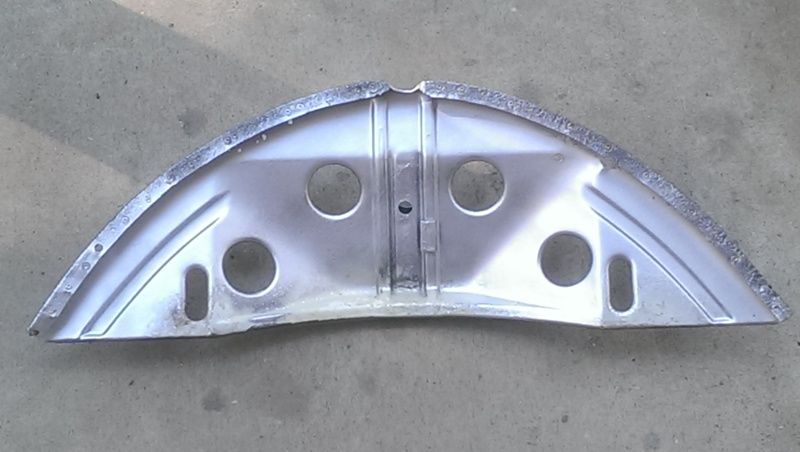
Inner panel cleaned up and zinc primered ready for repairs.
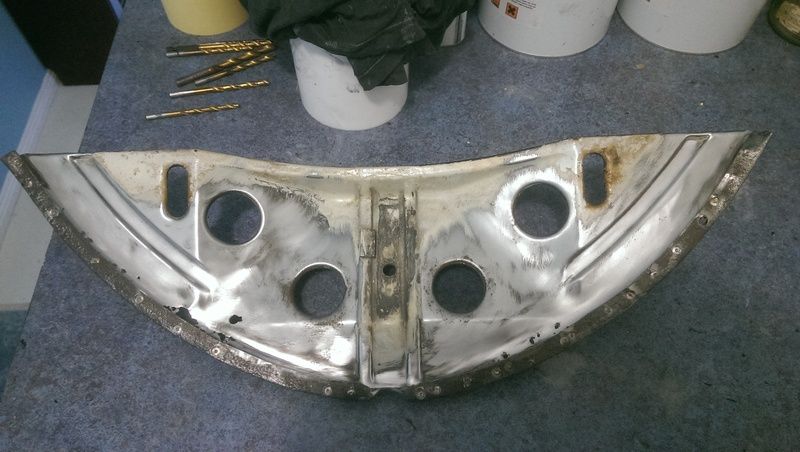
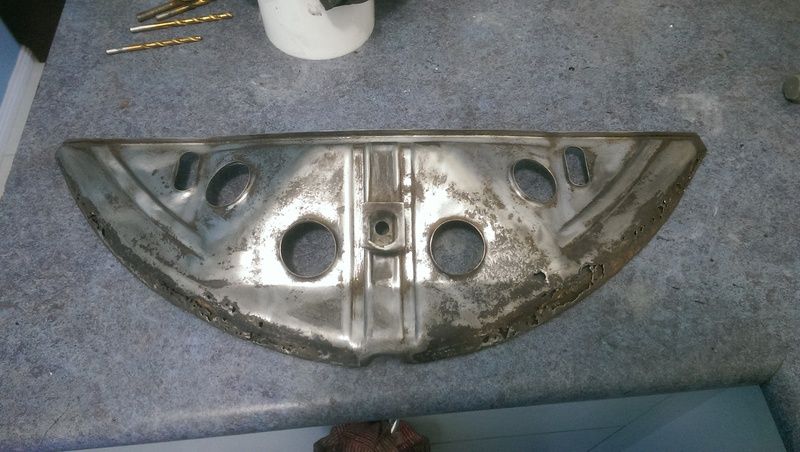
psimitar - April 23rd, 2015 at 10:17 PM
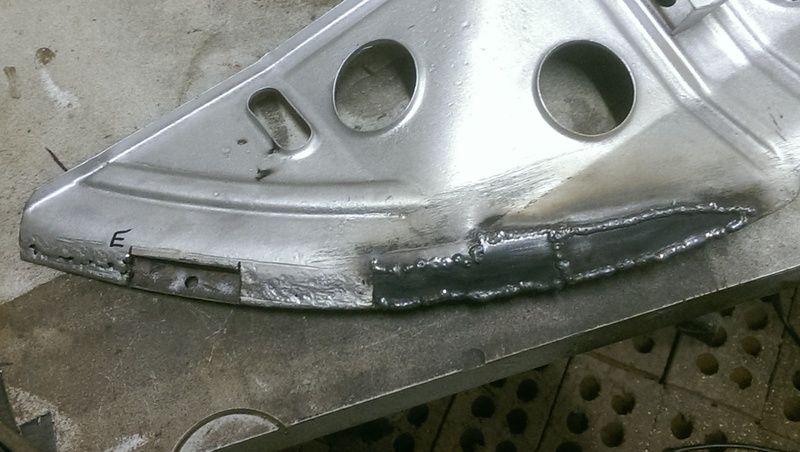
And the lengthy process of welding in repair pieces to the inner panel so as not to loose the profile and dimensions of the original as the remenants
keep the joining lip where it should be 
vw54 - April 24th, 2015 at 08:45 AM
nice work
bugmaniaar - April 24th, 2015 at 06:14 PM
I love the smell of welding in the morning.......smells like old Volkswagens..
Looking good.
psimitar - April 24th, 2015 at 09:01 PM
Cheers guys. Inner panel all welded and just needs dressing now.
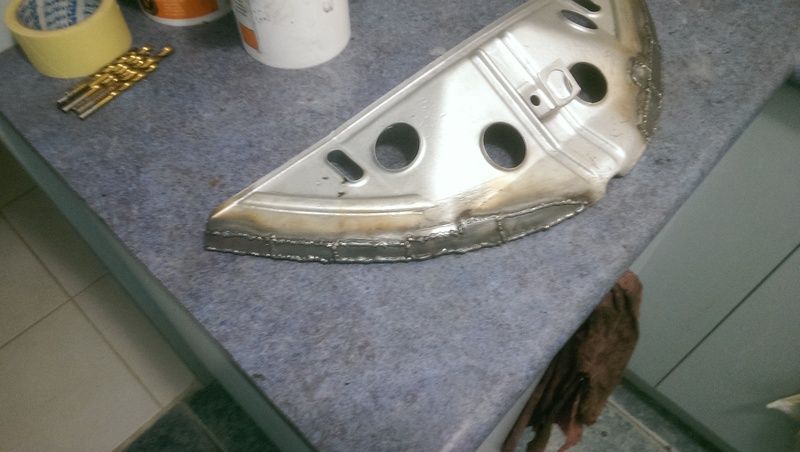
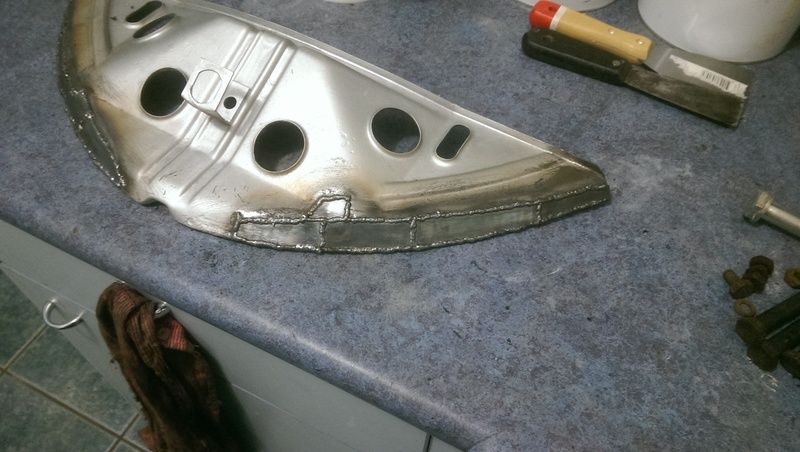
Coupla patches left on the outer skin and then clean up, zinc prime and pop back together again 
Might do a Semaphore refurb thread next cos got a broken and slightly rusty pair on fleabay last week 
psimitar - April 26th, 2015 at 10:30 PM
And to nearly finish things off we have the inner panel dressed and zinc primered
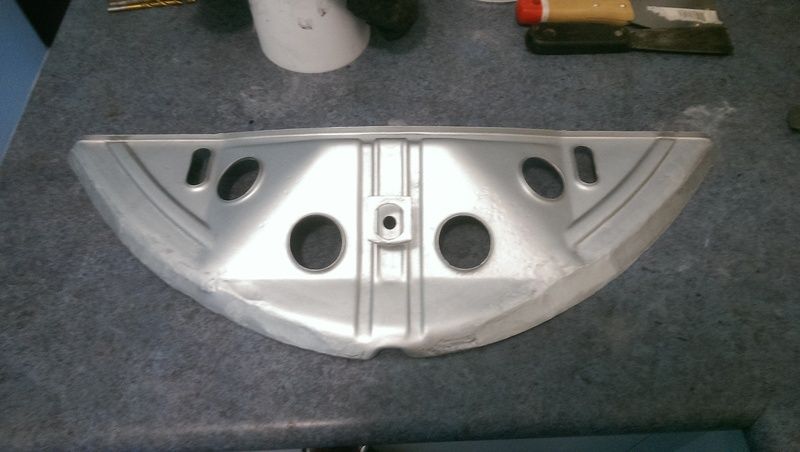
Then the inside of the outer skin cleaned up and zinc primered
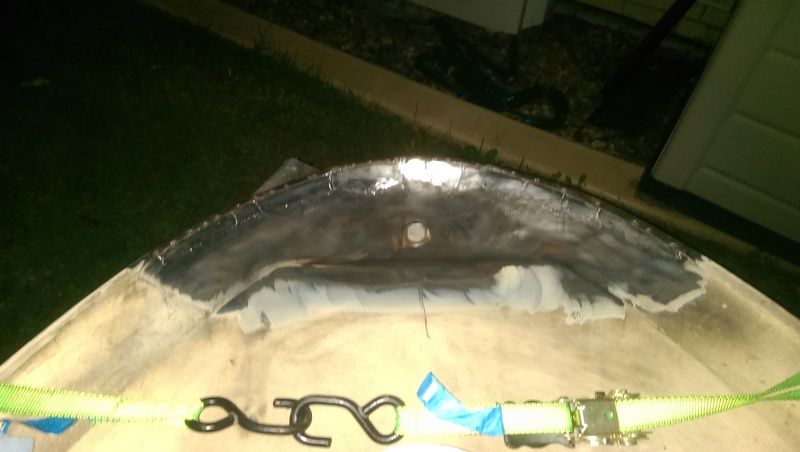
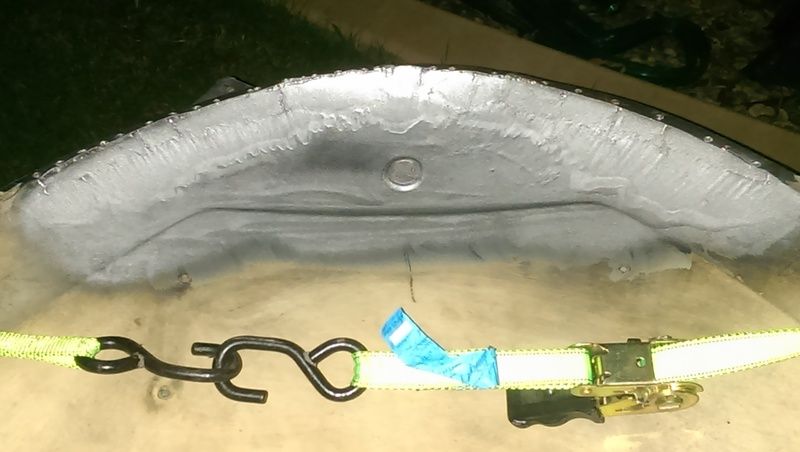
It's all plug welded back together now but lighting weren't great so will post the end result up tomoro 
psimitar - April 30th, 2015 at 06:28 PM
I thought I'd also show a DIY method to remove dents in the bodywork that you can get to from behind.
First you make a porcupine
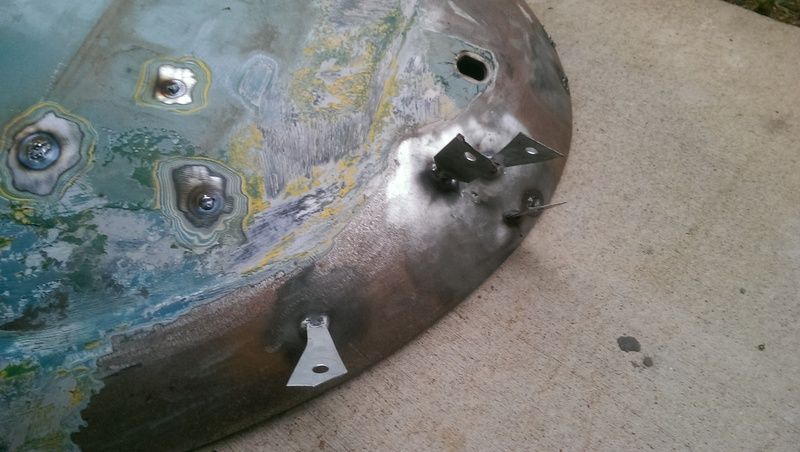
The tags are 1mm thick steel with an 8mm hole drilled in one end and tack welded to the lowest part of the dent to be pulled. I then attach my slide
hammer with the chain attachment and bolt thru the chain and tag. Make sure the chain is pointing in the direction the dent needs to be pulled and do
the bolt n nut up. Then you just use the slide hammer in the direction the dent needs pulling to pull the dent out. Much cheaper than the professional
dent pullers with the spot welded pins and can be pretty precise depending on the size of your tag.
And unlike many bodyshops here's how to properly fill unwanted holes in the bodywork.
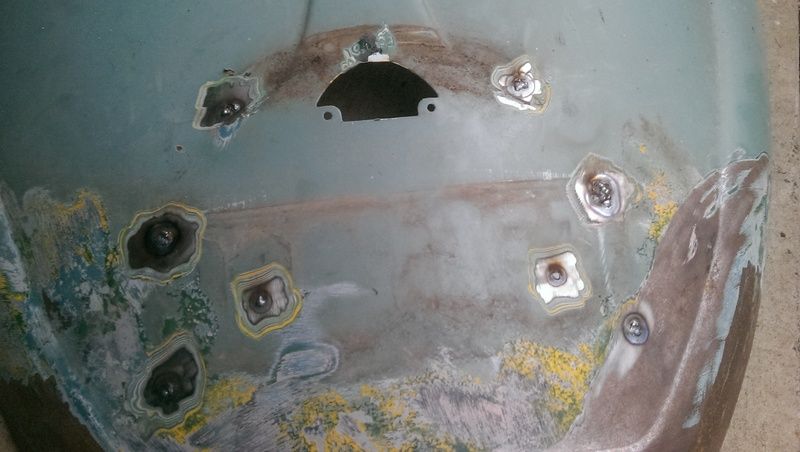
After dressing only a skim of filler required and shouldn't crack off like a filler filled hole would eventually. 
Just got the hinge panel to repair and find a hinge to weld on and then all done and will pop the finished article up 
psimitar - April 30th, 2015 at 06:52 PM
Oh and here's my Oval W lid that I did many months ago.
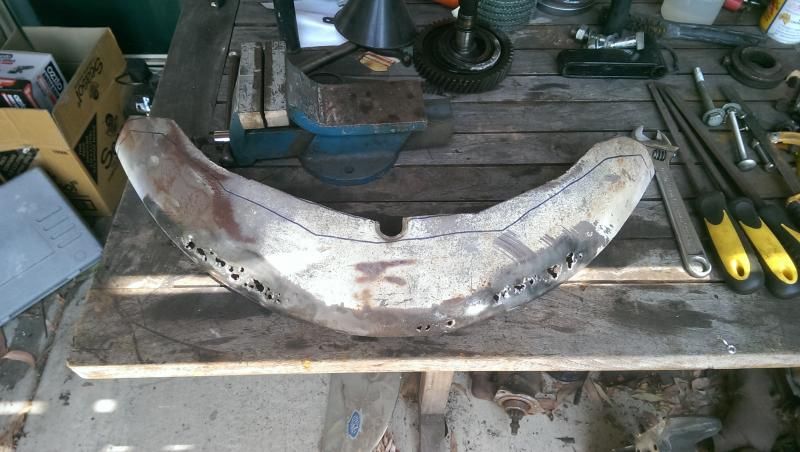
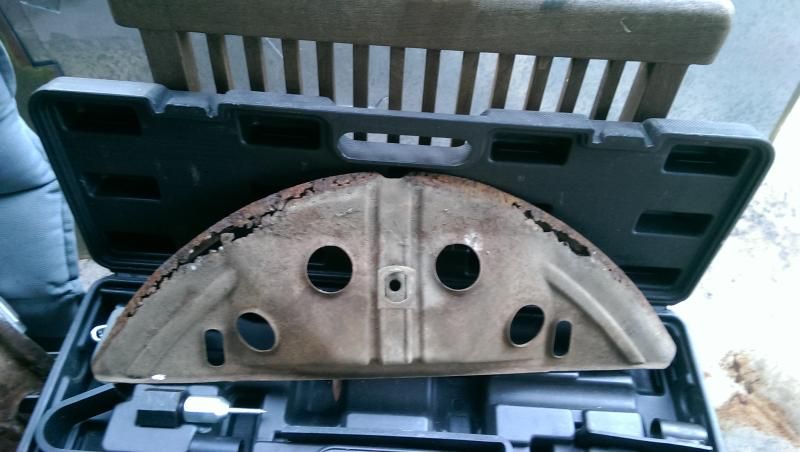
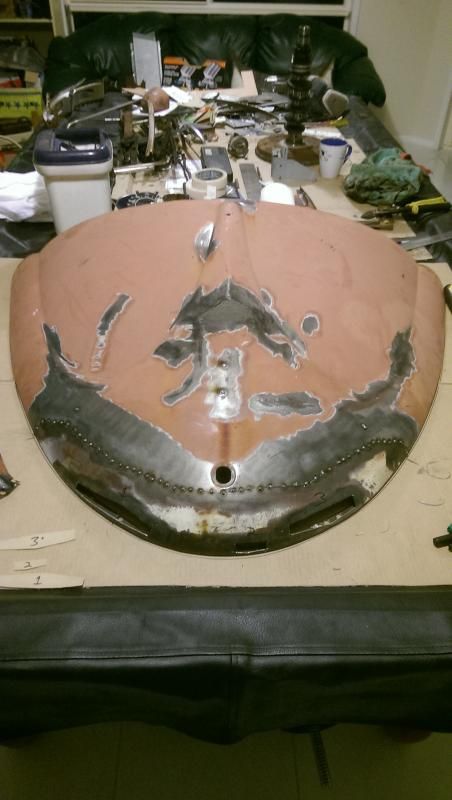
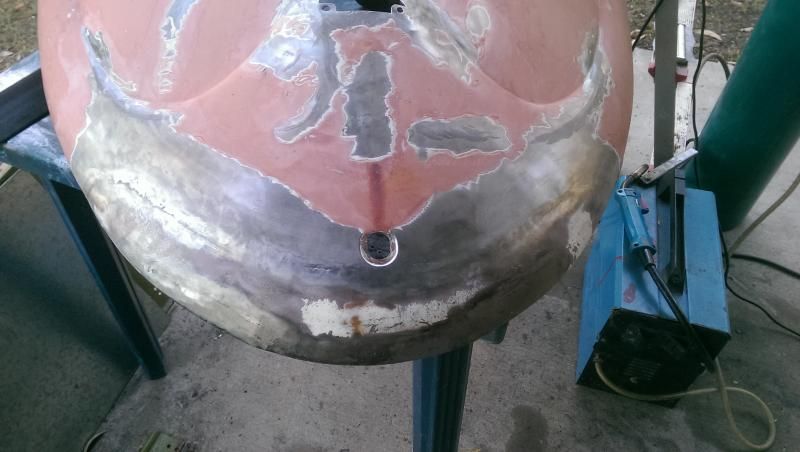
I never did take a picture of how bad the bottom of the lid was but the inner panel was only held on by the T handle and the entire lower edge had
returned to nature.
The top 2 photos are what the supposedly 'good' secondhand lid I used to repair the W left me with. $100 my arse 
beetle_nut - May 2nd, 2015 at 06:59 AM
Nice work mate.my w lid is worse same rust but its bent and dented bad aswell...will take me longer to fix it than the whole car hahahaa..
psimitar - May 2nd, 2015 at 11:01 PM
| Quote: |
Originally
posted by beetle_nut
Nice work mate.my w lid is worse same rust but its bent and dented bad aswell...will take me longer to fix it than the whole car hahahaa..
|
Cheers dude 
My W was quite dented as well as very rusty. I had to replace the entire hinge panel as that had rotted out too. As for dents, well all the areas you
see without paint are where I've had to panel beat it back into shape. Still needs a little more finessing but will only need a light skim of filler
when done 
Good luck with yours unless you want to drop it round and I'll take a crack at it?
beetle_nut - May 7th, 2015 at 06:38 PM
Thanks mate.il finish it thats what learning is all about haha.it will take me longer to sort it than the whole car hahahaa...
psimitar - May 7th, 2015 at 09:01 PM
| Quote: |
Originally
posted by beetle_nut
Thanks mate.il finish it thats what learning is all about haha.it will take me longer to sort it than the whole car hahahaa...
|
Nowt wrong with a bit of self learning. Tis how I've learnt most of the things I know 
adlbeetle66 - May 12th, 2015 at 08:46 AM
Thanks Mike! 

psimitar - May 12th, 2015 at 06:40 PM
| Quote: |
Originally
posted by adlbeetle66
Thanks Mike!  
|
No worries 


 - and weld it in [oxy is best]. Make sure it fits neatly on
the rear apron, then hammer & dolly to the correct shape.


