
How To:- Rear Lowering
Joel - August 9th, 2009 at 06:53 PM
There's been a few people asking me to do this for a while so a big thanks to them for being so patient
i did this last year some time, its just taken me forever to write it up
this is lowering the rear of my IRS Lbug but swingaxle is the same but with less steps involved
and KG, type3 and kombi are all similar process to.
At the time i did this my bug was at standard rear height
I'd had it lowered previously but in a moment of weakness after destroying one to many exhausts i cracked the shits and put it back to stock
height
it looked stupid but atleast it was practical........ nothing like a german looker with rake 
it didnt stand out as much with my old 18" rims but with smaller 17s on it looked like a baja in the back
but these days i was only driving my bug to shows and on club cruises so it didnt have to contend with shopping carpark speedbumps and spoon drains
which meant i could drop it again
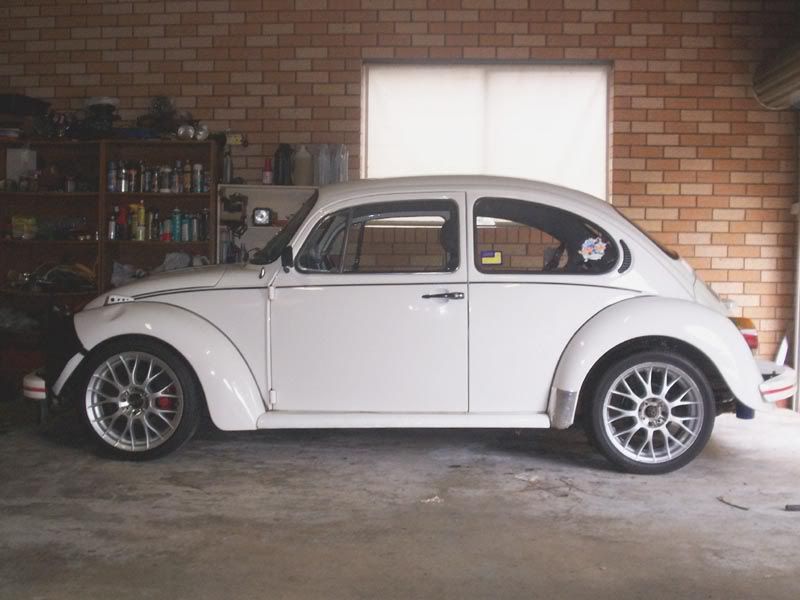
Standard rear height
Joel - August 9th, 2009 at 06:54 PM
If your contemplating doing this yourself then you probably already have a pretty good idea of how the setup works
and that the inner and outter splines have a different count and result in different heights.... blah blah blah
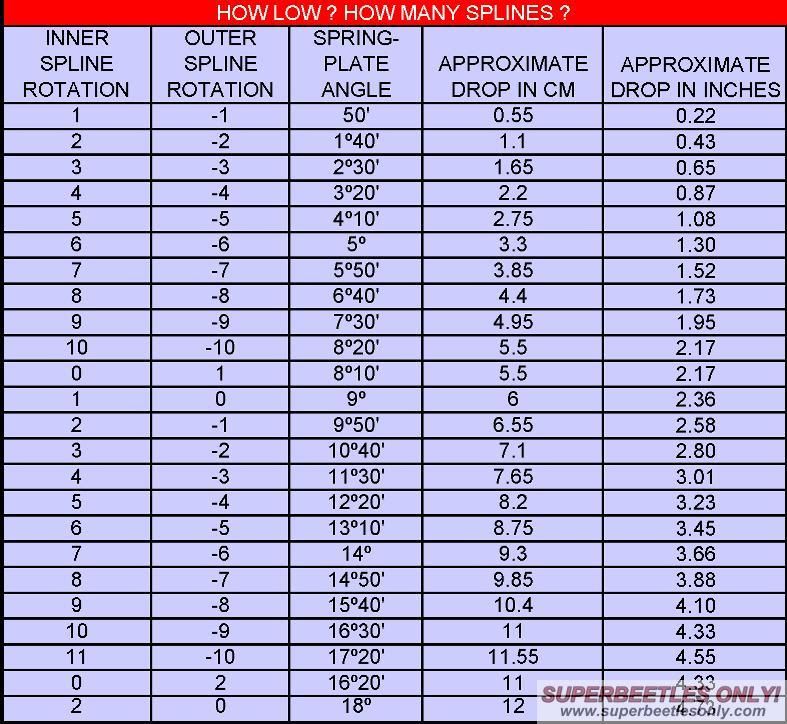
ive always just dropped in single spline moves
1 outter spline drops about 50mm, one inner drops 60mm
but you can get the movement down to about 6mm drops by playing with the 2 together
but heres a chart showing splines with the relative drop
Joel - August 9th, 2009 at 06:55 PM
theres a few necesssary tools for this job
aside from the obvious like trolley jack, axle stands etc is a good tyre iron or pinch bar for levering off the spring plates and torsion bar
covers
for IRS - a 17mm hex fitting of some sort for the trailing arm pivot bolt
i made my own years ago for the gearbox plugs which are the same size
its just a 17mm headed vw wheel stud which i think was from a type3 and a 19mm wheel nut that was from a kombi or porsche screwed toghether and
welded
you can buy ready made ones. but i just happened to have the parts laying around
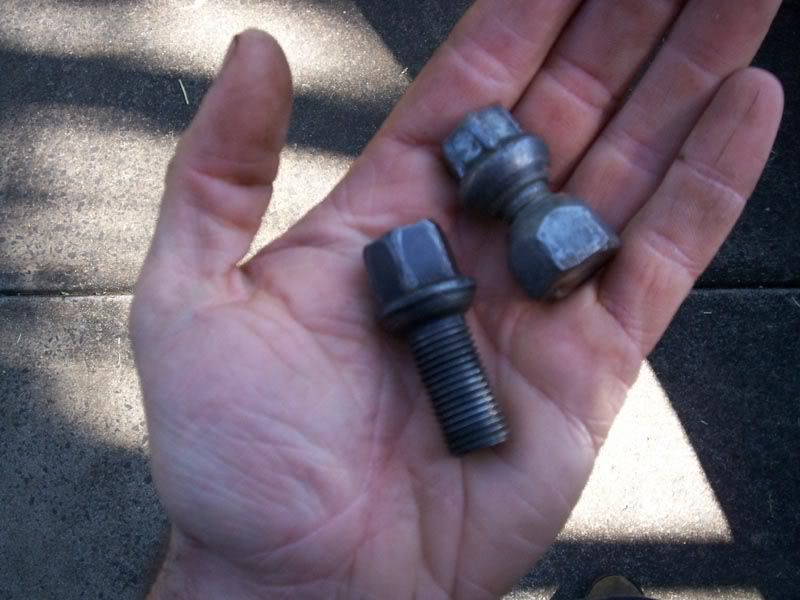
some longer bolts for the torsion bar covers than the stock ones to help pull them back down
thread is M10x1.5 you will need atleast 2 about 30-40mm long works well
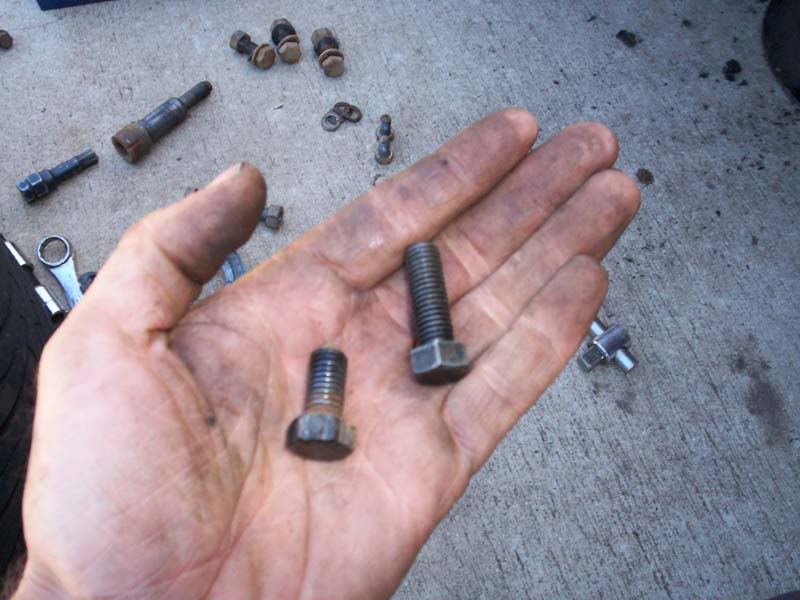
and an angle finder takes the guess work out of setting the spring plates up
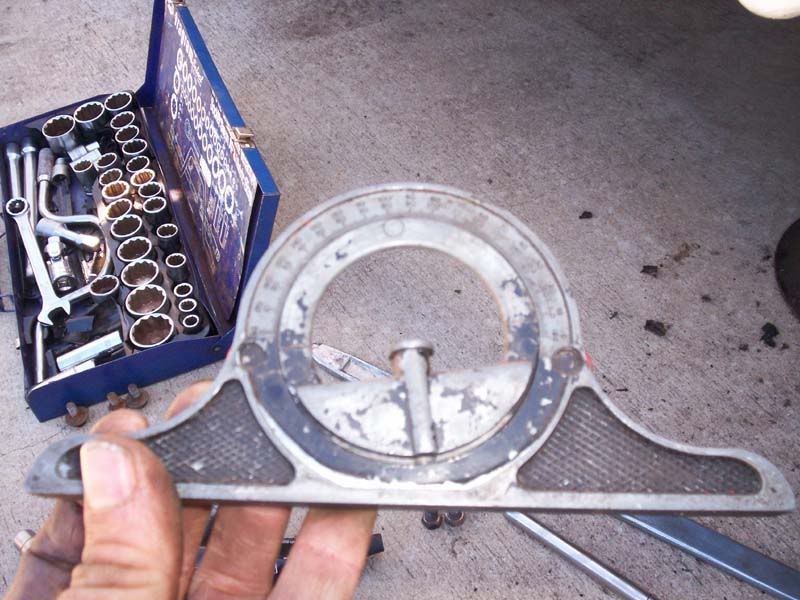
Joel - August 9th, 2009 at 06:56 PM
this job is best done on a nice flat and level concrete slab
put the axle stands under the torsion bar tubes and take the wheels off
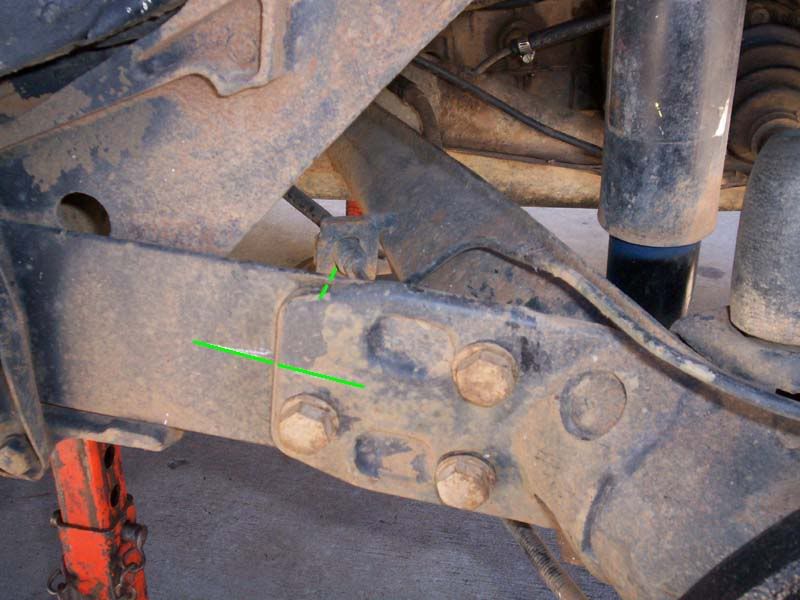
now before you go loosening anything its important to mark where the spring plates are bolted to the trailing arm/axle
MS paintshopped in green cos my marks didnt show up in pics real well u need to mark the front to back position (top marks) that they sit together as
the holes are slotted for tweaking the toe in/out
i also mark the up/down but its not as critical
also the 3 bolts usually face the otherway.
i had to turn them around for clearance with my old 18" rims
on IRS the lower rear one is a PITA to remove as theres only just enough clearance to get it out between the trailing arm and the spring plate when
they face the correct way
Joel - August 9th, 2009 at 06:58 PM
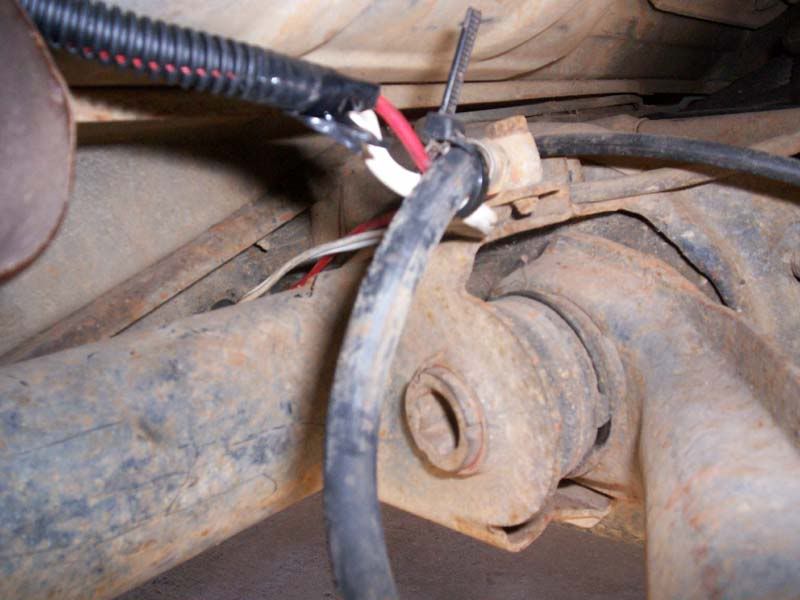
IRS need the trailing arm pivot bolt taken out
you can leave it bolted in but it means unbolting the CV joint to get it to drop down low enough which is far more work
naturally skip this step on swingers
also when undoing it there are spacer washers in there so take notice of where they're positioned
it may be very tight as the heads have slots in them that the surrounding metal is peened over into to stop them backing out
Joel - August 9th, 2009 at 06:59 PM
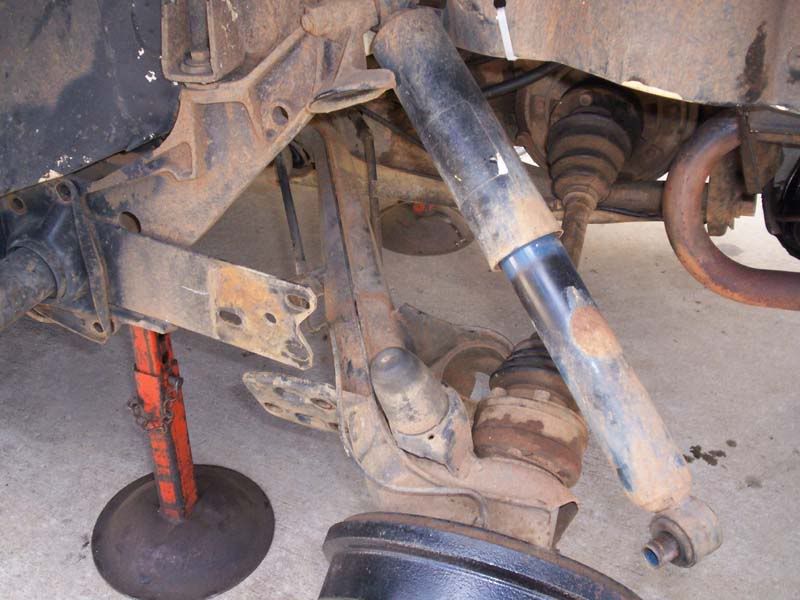
once that bolt is out remove the lower shocky bolt and the 3 spring plate bolts so the trailing arm can drop down out of the way of the spring
plate
or on a swing axle pull it back towards the engine out of the spring plates way
on later swings you may need to disconnect the Z-bar if theres still one there to get enough movement
Joel - August 9th, 2009 at 07:00 PM
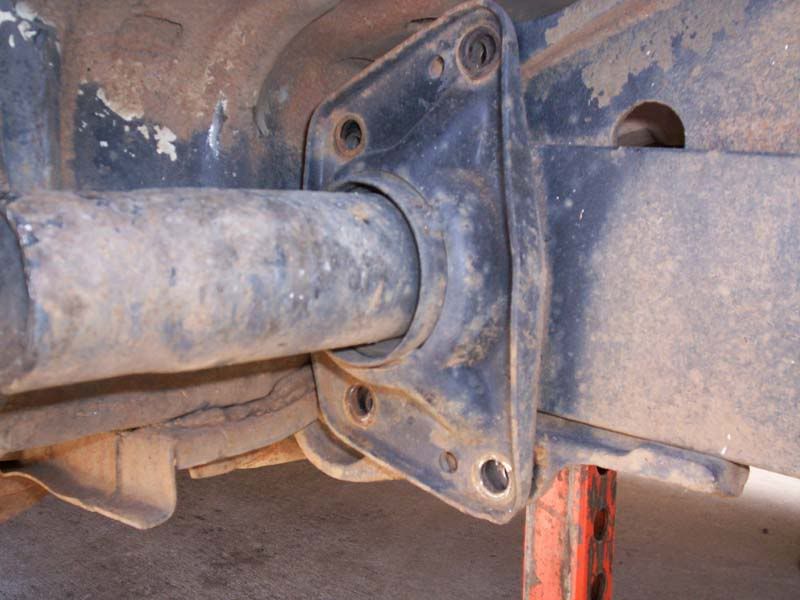
the 4 bolts can be taken out of the torsion bar cover
Joel - August 9th, 2009 at 07:01 PM
depending on the condition of your torsion bar rubbers they can be fairly tight to get off
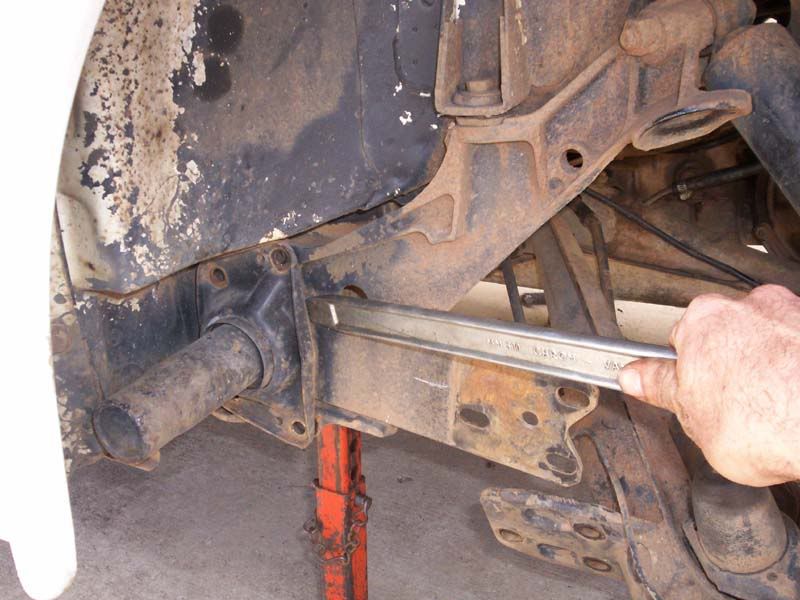
first duty of the tyre iron is lever it off
Joel - August 9th, 2009 at 07:02 PM
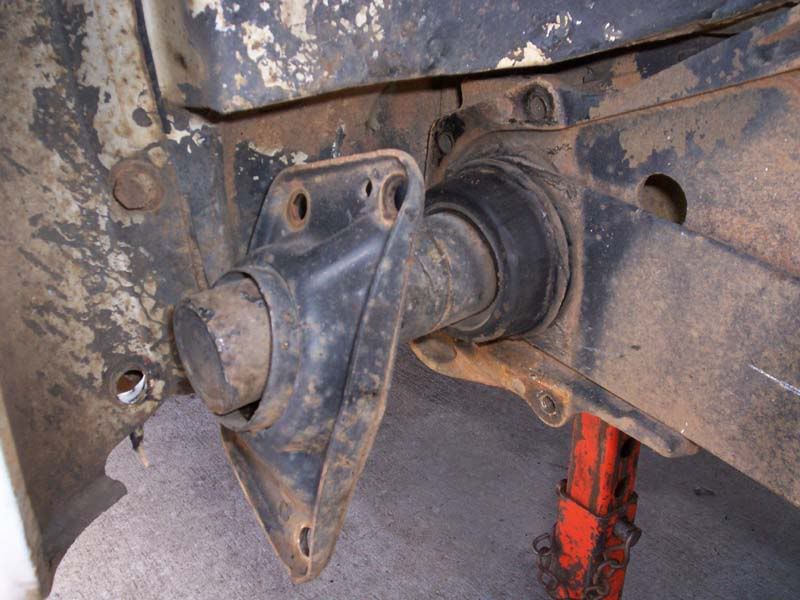
you will notice the spring plate is resting on its stop
theres alot of tension on this particually at stock or higher ride height
Joel - August 9th, 2009 at 07:03 PM
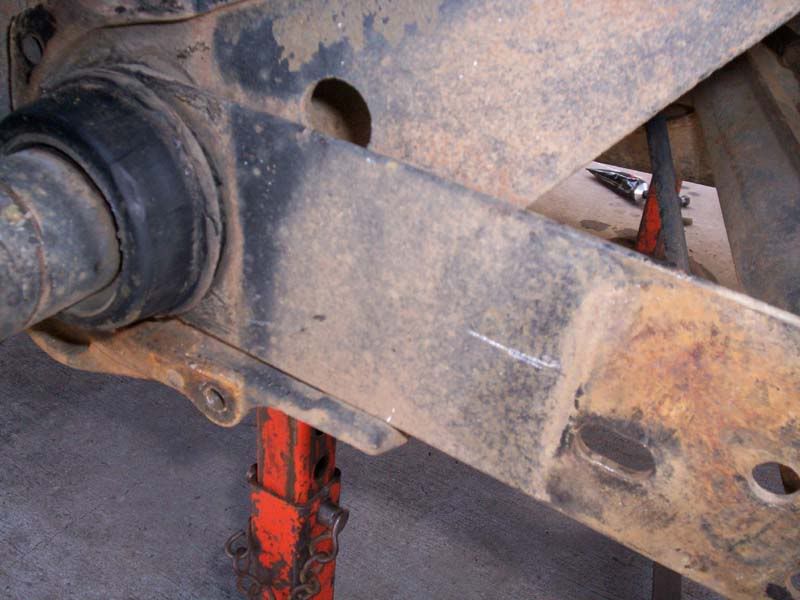
this is the part that scares alot of people
theres all sorts of rumours floating around that they can cut your leg off or start world wars etc
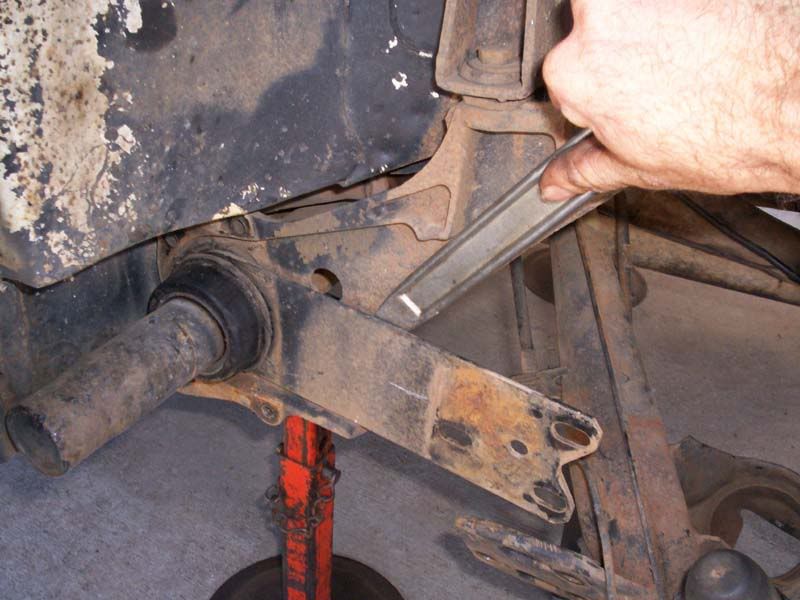
by all means exercise caution when releasing them but if your carefull its a real anti-climax
tyre iron job #2 is lever the spring plate off its stop
Joel - August 9th, 2009 at 07:04 PM
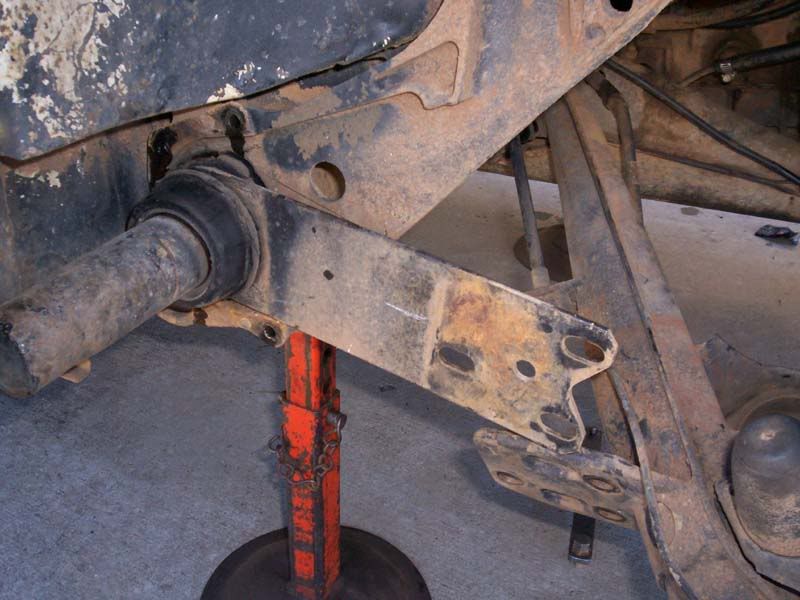
they can be really tight depending on how long its been since they were apart but with carefull prying it will just pop over its stop
and move down a whopping inch or so
not enough to severe a limb but the noise may give you a startle
Joel - August 9th, 2009 at 07:05 PM
without dissengaging the splines pull it out enough so its clear off the chassis but still engaged and let it hang.
it may take some jiggling and swearing
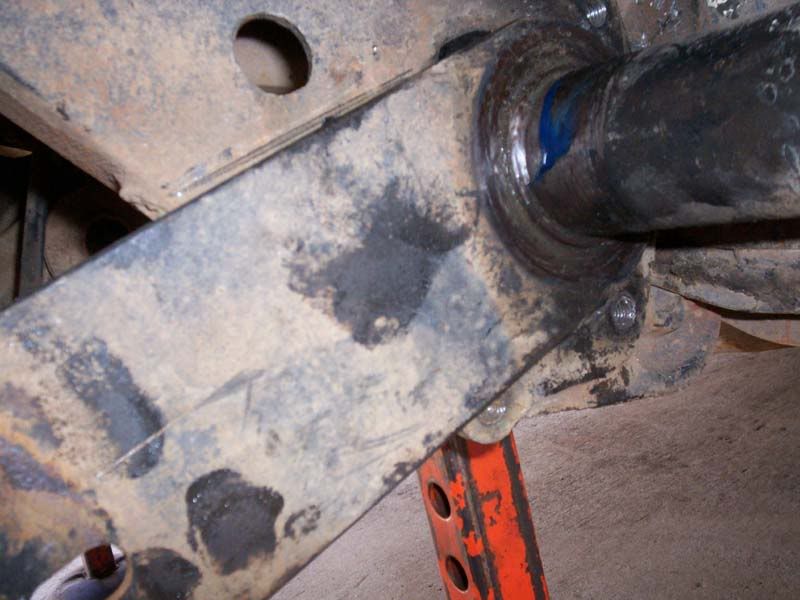
one thing i've always done at this point if doing it for the first time on a bug is scribe a permanant line on the chassis so you always know where
stock is (providing your cars at stock height to start with)
Joel - August 9th, 2009 at 07:07 PM
now heres where i couldnt take any real usefull photos
mainly cos my hands were covered in grease but also cos i was only lowering one inner spline i wasnt pulling the torsion bar out real far
on bugs to get the torsion bars right out requires removal of about 4 or 5 of the gaurd bolts so that the guard can be pulled up out of the way
type3s and KGs have the round plug in the side of the body
another thing ive learned is before u completely disengage the torsion bars from the inner splines its a good idea to mark the very top so you always
know where to put the bar in the inner splines for stock position
they pull out a fair way before they disengage, when theres a big enough gap a small mark of white paint on the very top of the torsion bar does the
trick
quite often u find atleast one end of the torsion bars get stuck in place
in my bug its always the outer ends in the spring plate which didnt bother me as i was dropping an inner spline
but if i was lowering it by outter splines id have to undo the guard bolts, pull the spring plate out of the car with the torsion bar still attached
and get them apart on the bench with some camels piss (WD40)
changing the splines is all done by feel as you cant really see what your doing
as u pull the torsion bar out u can feel as it disengages from the splines then just turn till u feel it line up with the next one along and push back
in
to lower the car obviously u want to have the spring plate sitting higher so on the passengers side you would want to turn it in a anti-clockwise
direction
heres where the angle finder comes in
from memory the stock ride height angle when hanging free off the stop in my bug was 14degrees but that depends on how high the back is and how low
your front is as they work from horizontal axis
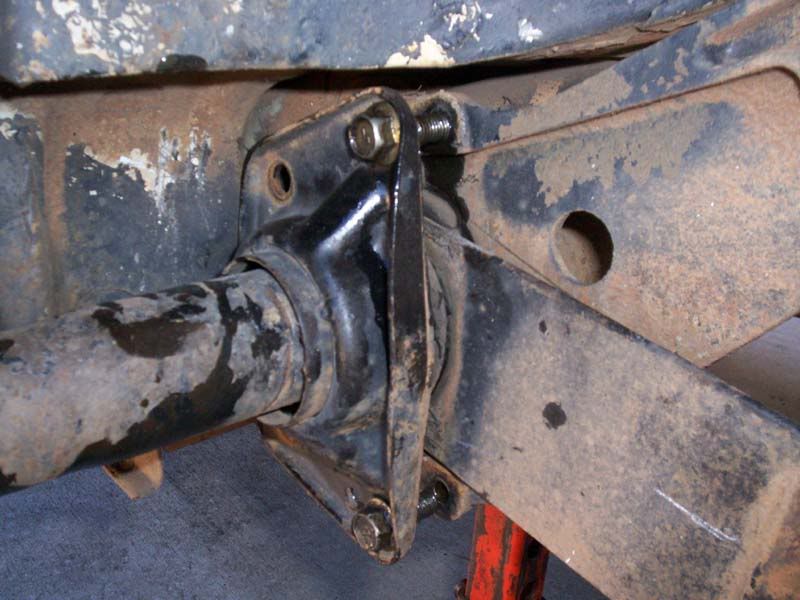
once your happy that you have the right position set you can bolt the torsion bar covers back on
this is where the longer bolts come in cos the cover wont slip straight over the rubbers into place
so 2 longer bolts diagonally opposite usually do a good job of pulling it down squarely if you alternate between them
ive just permantly left all long ones in mine as they're straight through holes but once its pulled down u can swap it back to stock ones
they dont need doing up fully as the spring plate will still be sticking out passed its stop
just enough so they're down fairly snug and theres no risk of anything disengaging
you can see the angle difference that the spring plate is on now compared to the stock position mark ive put on my chassis
Joel - August 9th, 2009 at 07:08 PM
now for the fun part......getting the spring plate back up onto the stop
this can be a frustrating job
if you just chuck the trolley jack under it and try to jack it up, you will just end up lifting the whole car up before its any where near close
ive heard of people chaining the trolley jack to the shock tower to stop this happening.....so much unnecessary work....
heres a little trick that my Volkswagen Sensei taught me
its taking advantage...... of mechanical advantage
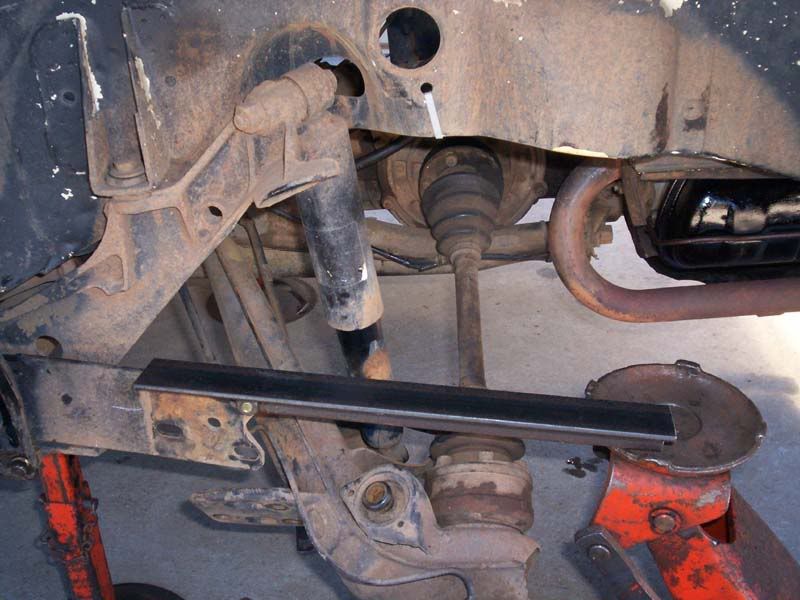
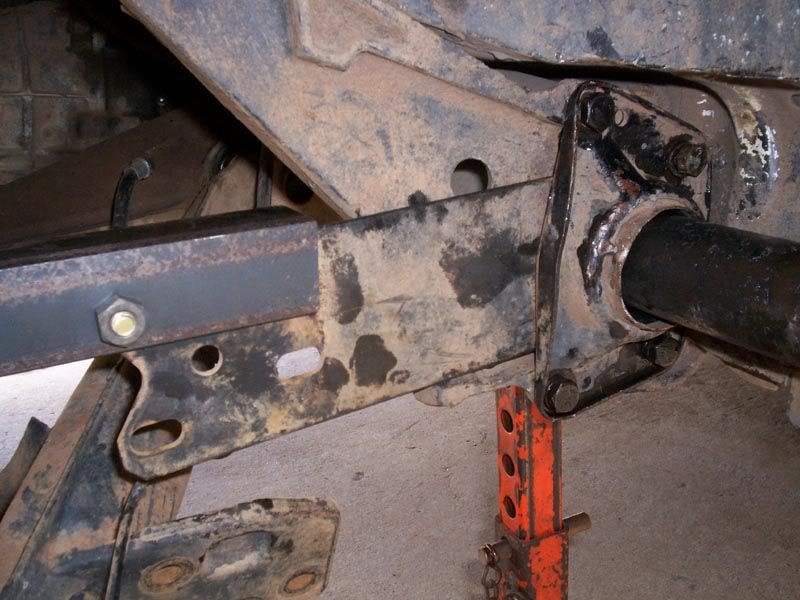
a simple length of angle iron about 500mm long with a hole drilled in it to pick up the upper rear spring plate bolts
putting the trolley jack under this from the other side of the axle takes most of the fight out of it
once its up above the stop a few taps with the mallet and doing the torsion bar cover bolts up fully should bring it home
Joel - August 9th, 2009 at 07:09 PM
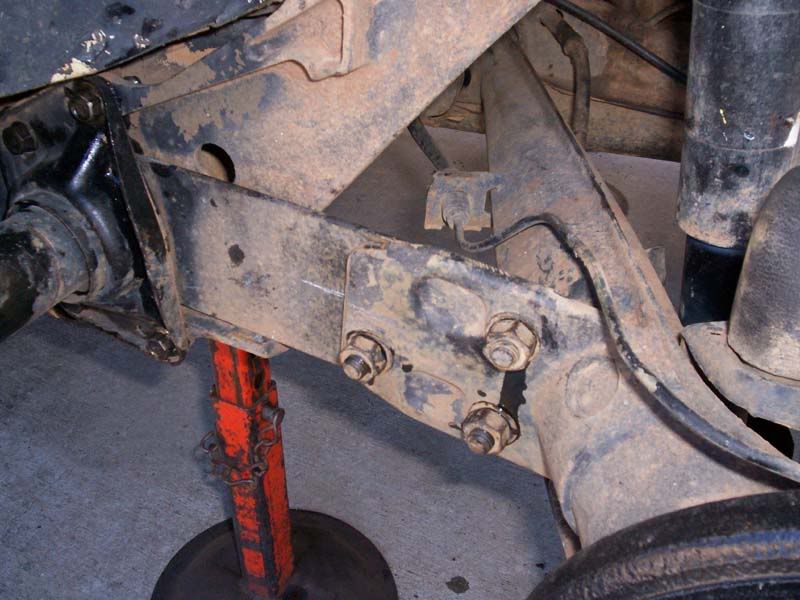
trailing arm bolts loosely done up (and now turned the right way around) and shock bolted back in place
Joel - August 9th, 2009 at 07:10 PM
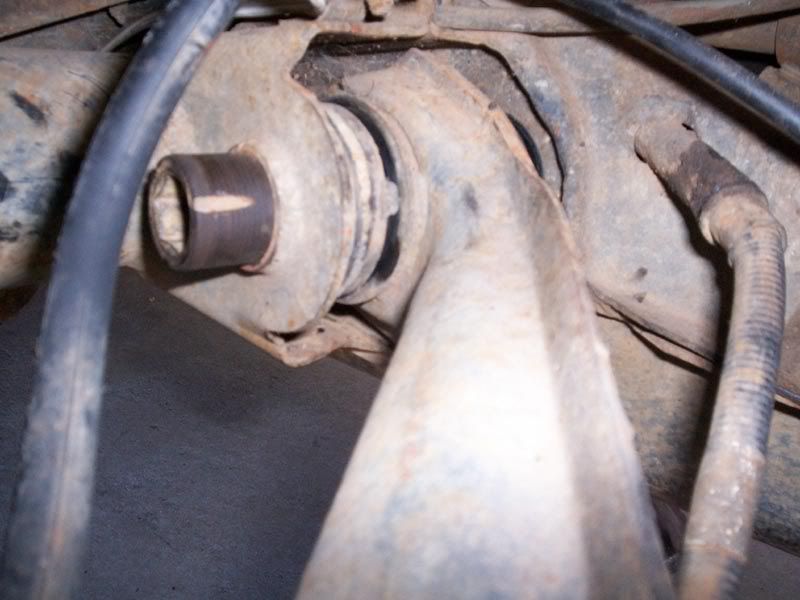
washer shims in place and the pivot bolt installed
As i mentioned earlier the slot in the head is there for a purpose
theres a couple of these around the head and once the bolt is done right up find one and peen the surrounding chassis into it to stop it backing
out
i once bought a bug that had lost this bolt and i now make it habit to double check that this is done
Joel - August 9th, 2009 at 07:11 PM
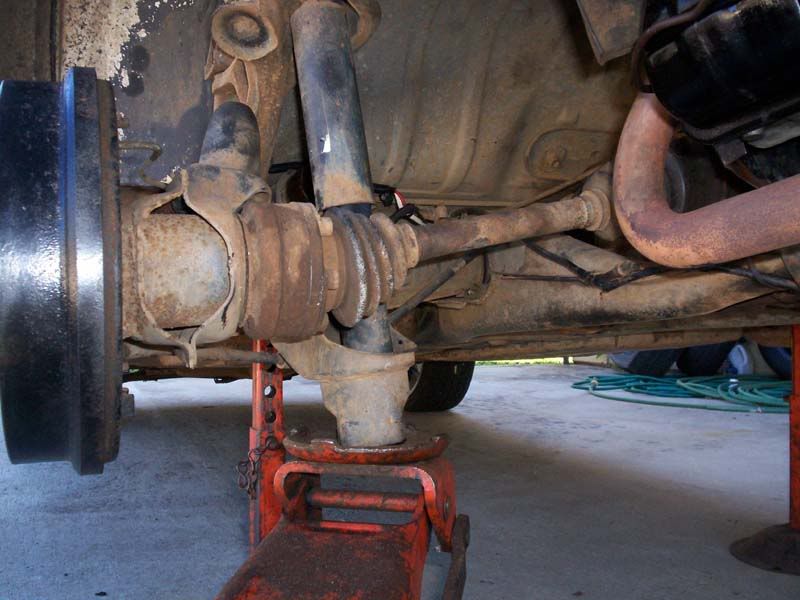
now before tightening the spring plate bolts is a good idea to take a bit of weight of the axle abit with the trolley jack
another thing Sensei taught me, not sure exactly why but on an IRS car u can end up with uber neg camber if you dont do this
Joel - August 9th, 2009 at 07:12 PM
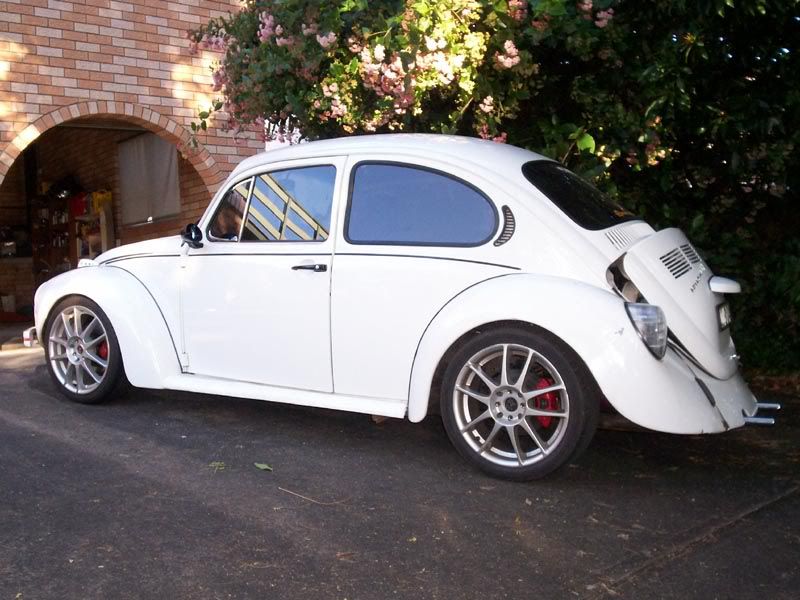
Now it sit better
Joel - August 9th, 2009 at 07:13 PM
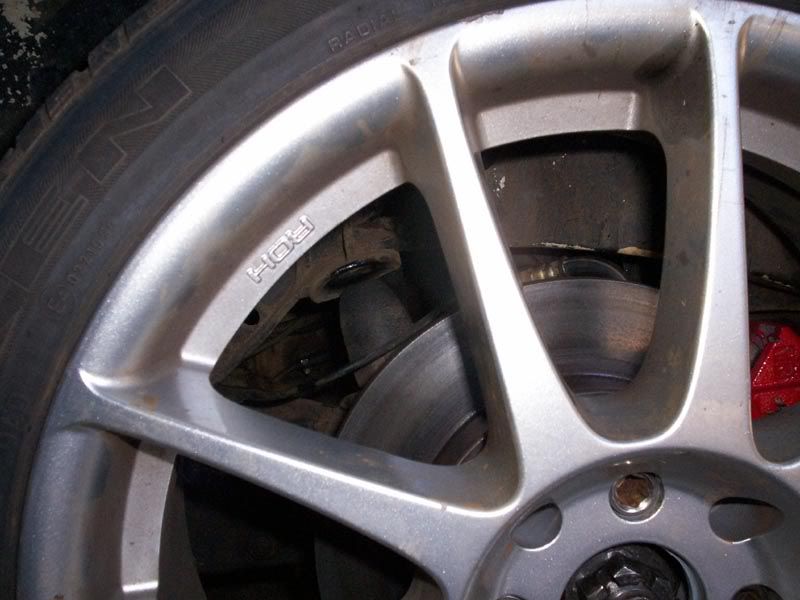
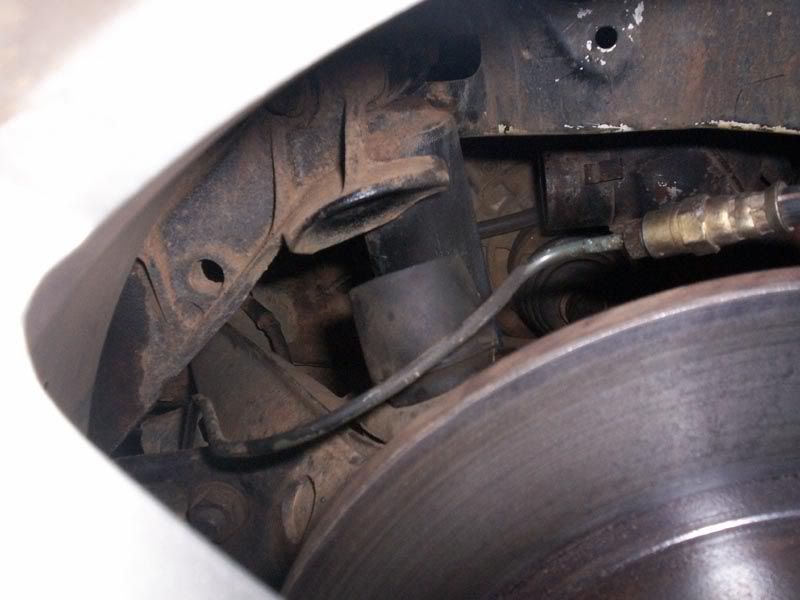
only other problem with going this low is the bumpstops dont give much suspension travel
all i do i cut them in half
not ideal but it works
eraser - August 9th, 2009 at 07:53 PM
Here is a nice video i found, its a type 3 but same basic idea. Thanks for the pics and the story and it looks mean.
http://www.youtube.com/watch?v=AMxBolHOJR4
Joel - August 9th, 2009 at 08:11 PM
yeah those are good vids
just some people cant access them with only dial up and others are to lazy to sit through 40mins of video
helbus - August 9th, 2009 at 08:17 PM
Similar way of lowering IRS bus rear. I used the same inner/ outer spline 'dialing in' method. I also used 6mm per spline inner/ outer movement as a
guide, and after doing 14 movements, I came close to what I wanted. I have decided I want another 4 movements to get where I want, and I would say
that for a bus it was closer to 5.5mm per movement.
helbus - August 9th, 2009 at 08:19 PM
One advantage with the bus is that the rear bump stop is bubbled like the Michelin mans body, so you can cut one or two bubbles off, and it still
looks like a stock bumpstop. When you go low enough to do this you will need to notch the rear springplates.
beetleboyjeff - August 9th, 2009 at 09:20 PM
I have re set my torsion bars a number of times, usually up as my daughters got bigger and heavie. I still have them set up for when I tow my trailer,
which weighs the tow bar down.
If it is any help, I just use my builders protractor and a spirit level to set the angle of my spring plates (see photo). The anlge is measured from
the door sill, so if the door sill is dead level, the angle for stock ride height (in later beetles anyway) is 20 degrees 30 minutes 50 seconds for
beetles to May '73, and 21 degrees 20 minutes 50 seconds from May '73 (according to Haynes, which I think is Pommy model years). If the sill isn't
dead level, just adjust the spring plate angle by the amount the door sil is out of level (if you can follow what I mean it is easy, if yoiu can't
this probably isn't the way you should do it).
Another thing I do is to set up both spring plates ready to lift onto the stops ready, then sight across under the car to chech they are both
parrallel, in other words, set at the same angle.
gsa2at - August 26th, 2009 at 09:07 PM
thx for the great photos and info
might try this later
colonel mustard - August 26th, 2009 at 09:26 PM
Saved into favorites!
71-BEETLE-SEDAN - September 21st, 2009 at 08:18 PM
Is there any tricks for doing this with muffler boxes still on, i seen youve got j tubes on, is that easier.
Joel - September 21st, 2009 at 08:33 PM
makes no difference there miles away
cesiumfrog - September 21st, 2009 at 10:59 PM
nice write up Joel...thanks
question..re jacking at outer swingarm to remove excess -ve camber
when getting wheel alignment, the bolts are loosened to adjust toe, how do you prevent the same thing recurring? ie how to take the weight off without
affecting setting before doing bolts up tight again?
phil.
Joel - September 21st, 2009 at 11:19 PM
Hi Phil,
cant say ive ever had a rear wheel alignment done but i;d imagine that they would set the toe in and camber in one hit
but best thing you can do if the alignment was good before the lowering just be sure to mark where the spring plates sat in relation to the axles and
get it in that same area then get the up/down direction right
if that makes any sense 


