
Brake booster & master cyl retrofit
gazman - May 24th, 2010 at 05:41 PM
Thought I'd share this brake upgrade on our V6 lowlight with everyone here, I'm always interested to hear other peoples comments on our work.
We've known since the beginning that the brakes were shot on this bus, but after stepping hard on the pedal and having it go to the floor and stay
there we knew it was time to fix them. Having recovered from the mild heart attack brought on by seeing the price for new parts, and knowing that
we'll probably go for a bigger caliper / disk setup at some stage, we looked at the possibility of fitting a larger Holden Commodore booster &
master cylinder.
Here are the stuffed original parts-
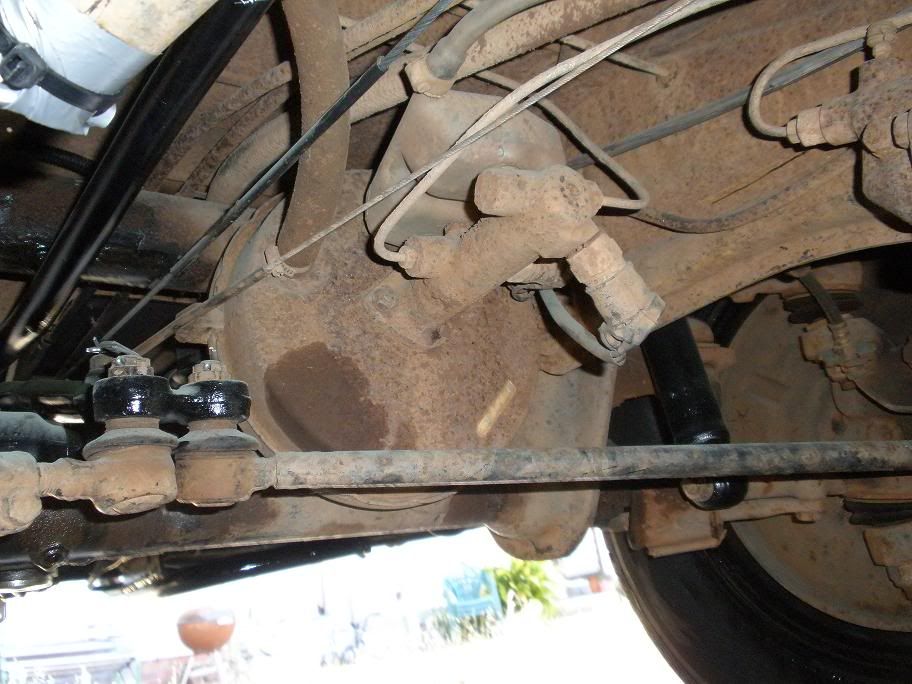
And removed from the bus, the booster, master cylinder and reservoir, hoses and brake lines.
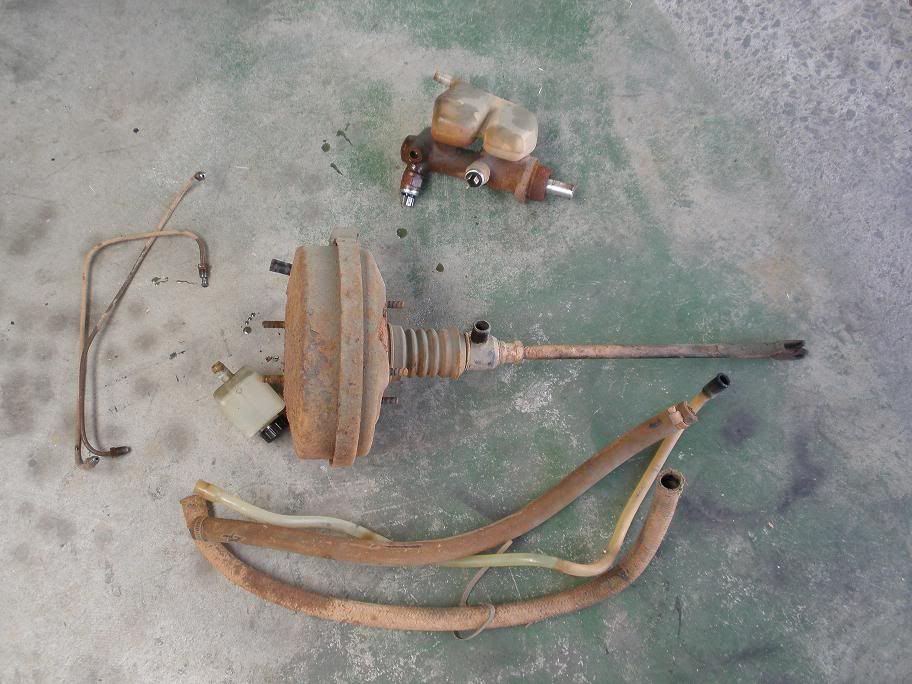
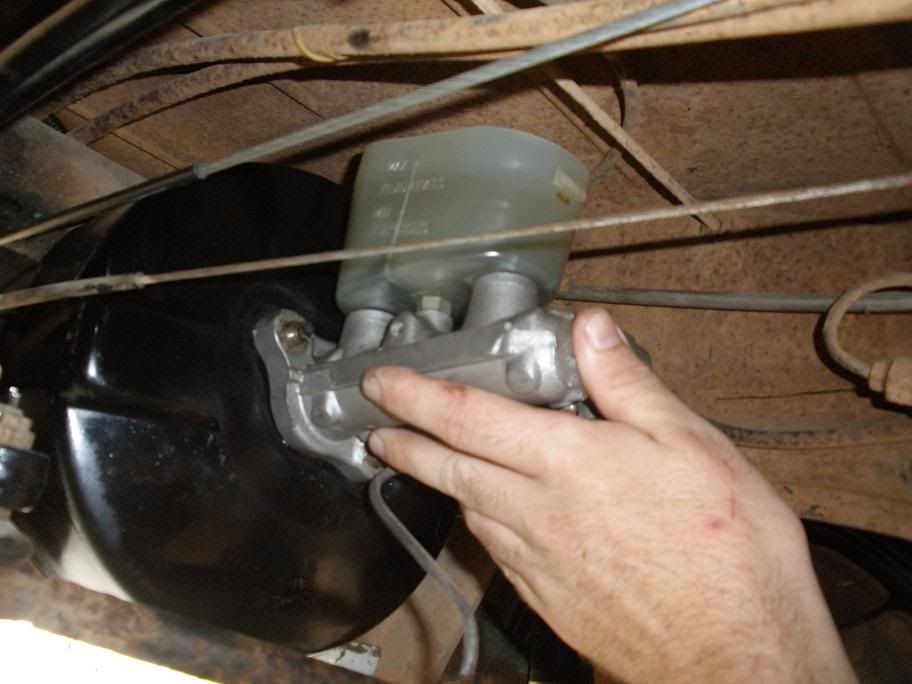
A rummage through the shed-full of left over Commodore parts from the V6 conversion found a good secondhand VN Commodore booster & master cyl.
These were held roughly in place to see if they would physically fit in the original space on the bus.
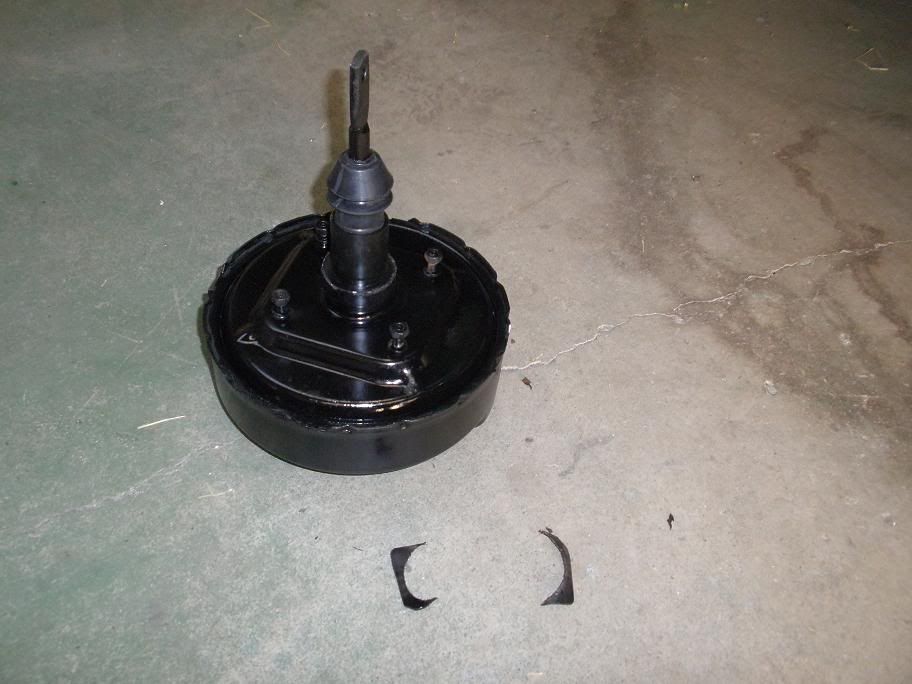
Because the position of the booster on the bus is more exposed it will need a dust boot to keep the crud out. A spare vw gear selector rod boot fits
perfect. The square flange on the rubber bushing on the new booster is also cut off so it will fit in the vw booster bracket.
gazman - May 24th, 2010 at 05:43 PM
Obviously the Commodore booster doesn't bolt straight on. Here is the VW booster bracket, the white paint marks show where the Commodore booster
bolts need to fit.
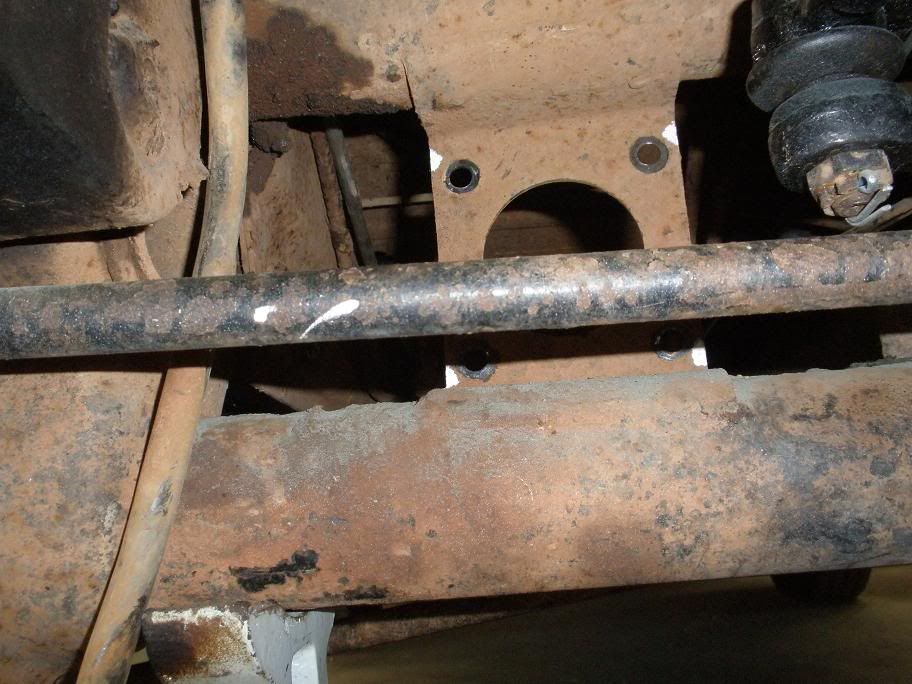
A little grinding and the new booster fits in place. If the beam comes out in the future (for adjusters maybe) I'd like to weld in a new booster
plate that's been drilled to suit the Commo booster. Meanwhile if we had any probs with our retrofit the original parts can still go back in!
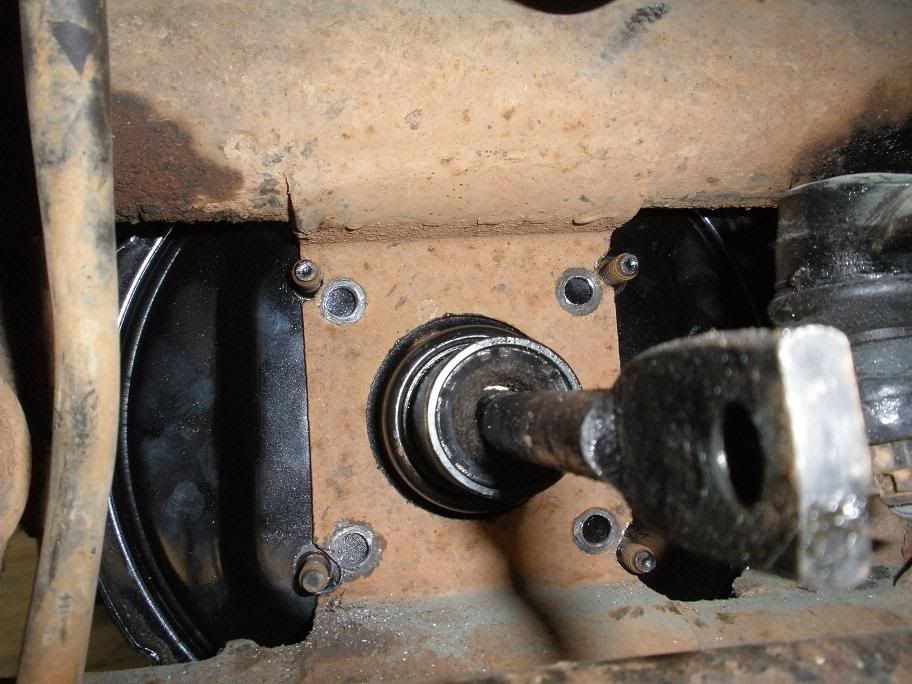
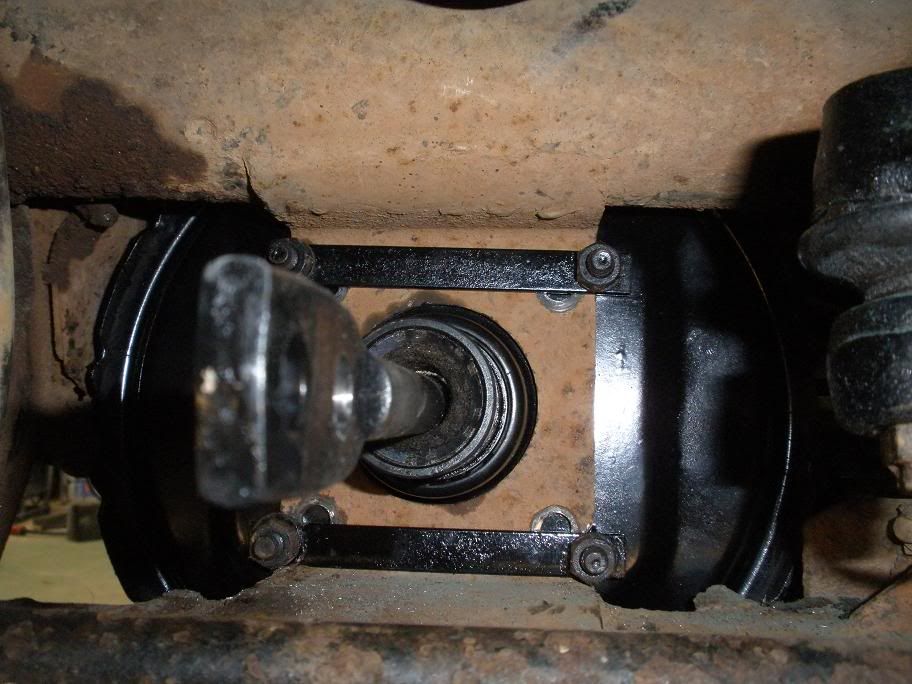
A couple of pieces of flat-bar with holes drilled are fitted, and the booster bolts on nice and solid.
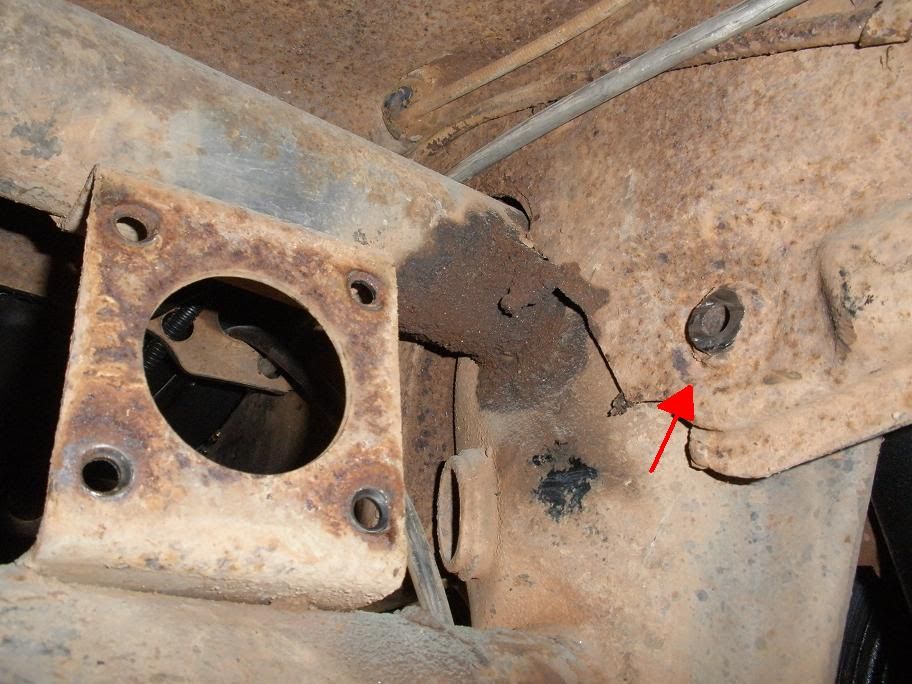
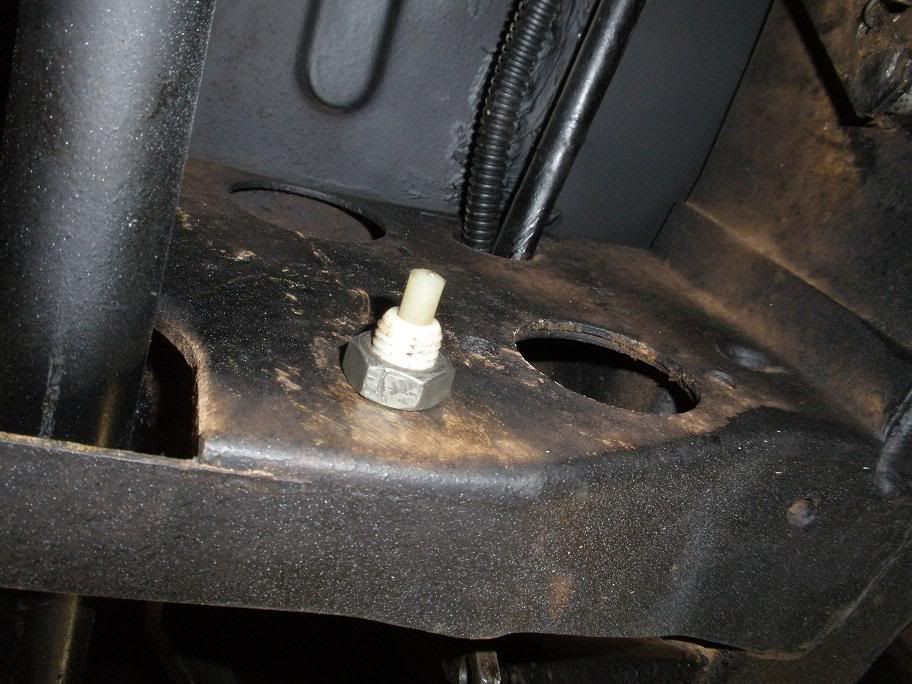
This threaded insert holds one of the beam bolts, but touches the new booster. Since the bolt stops before exiting the other side we could safely
grind a few mm's off to clear the booster.
gazman - May 24th, 2010 at 05:46 PM
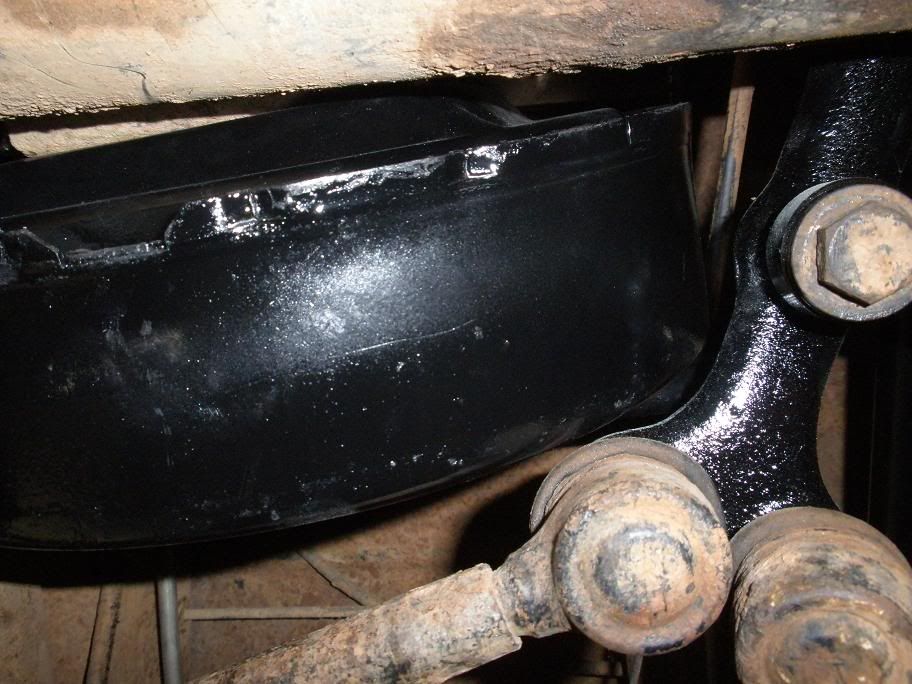
Well its close, but at full steering lock the steering bits just clear.
Next a new linkage rod needs to be made to go from the brake pedal lever to the booster.
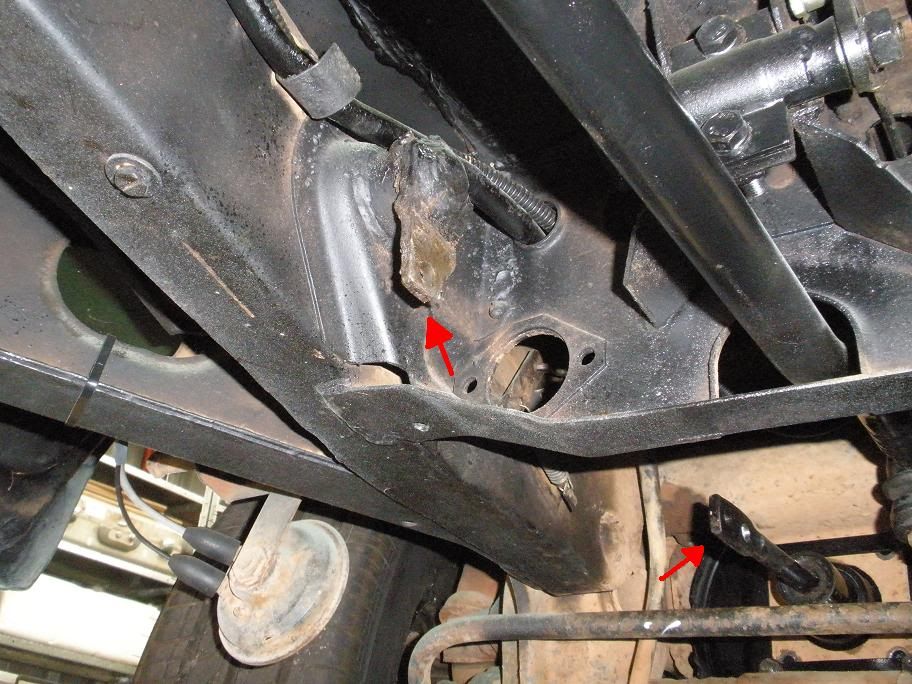
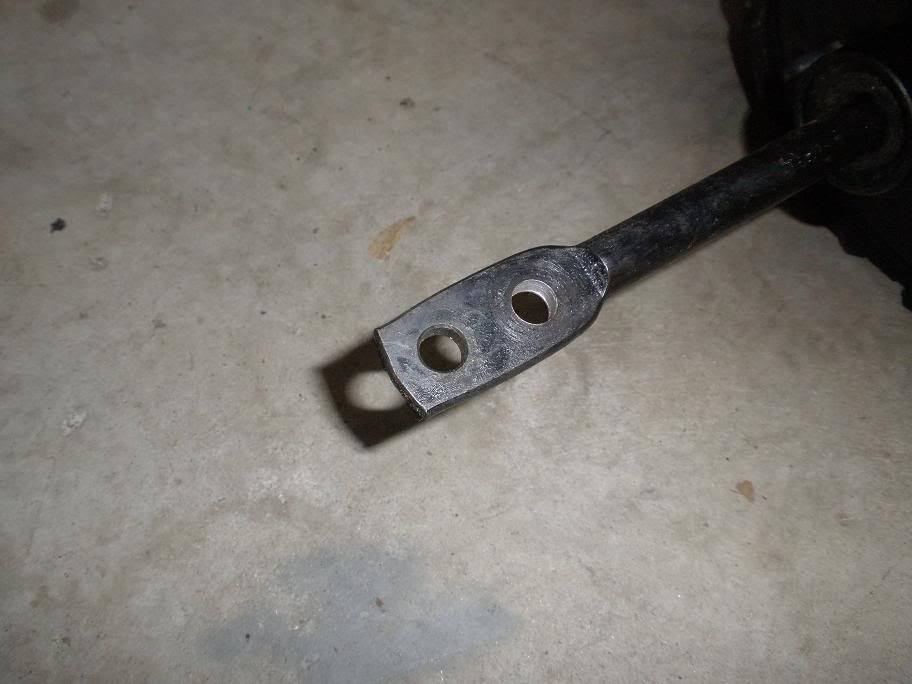
An extra bolt hole is drilled in the end of the booster rod to give the new linkage rod some stability.
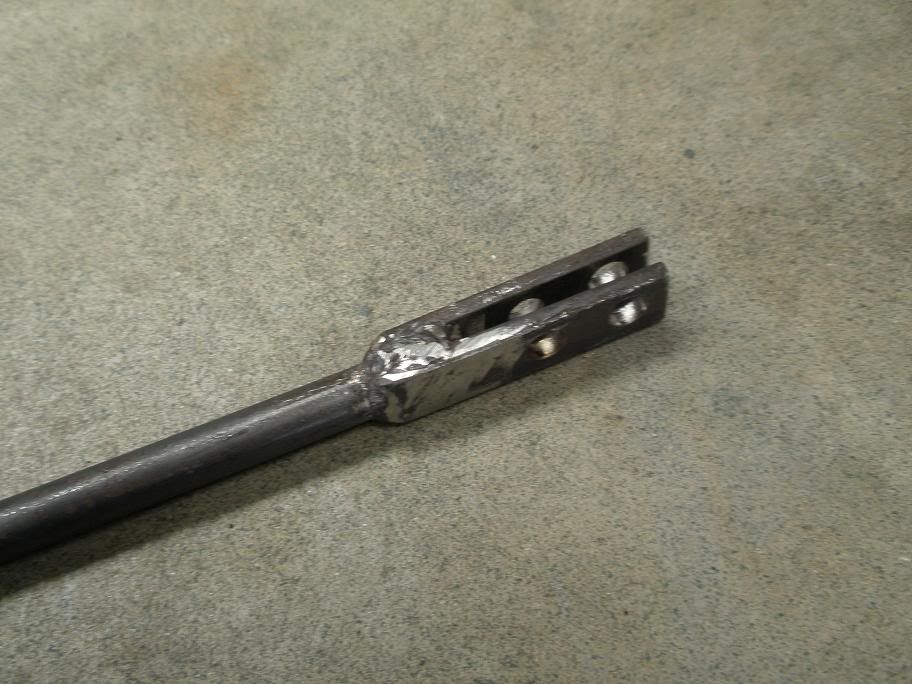
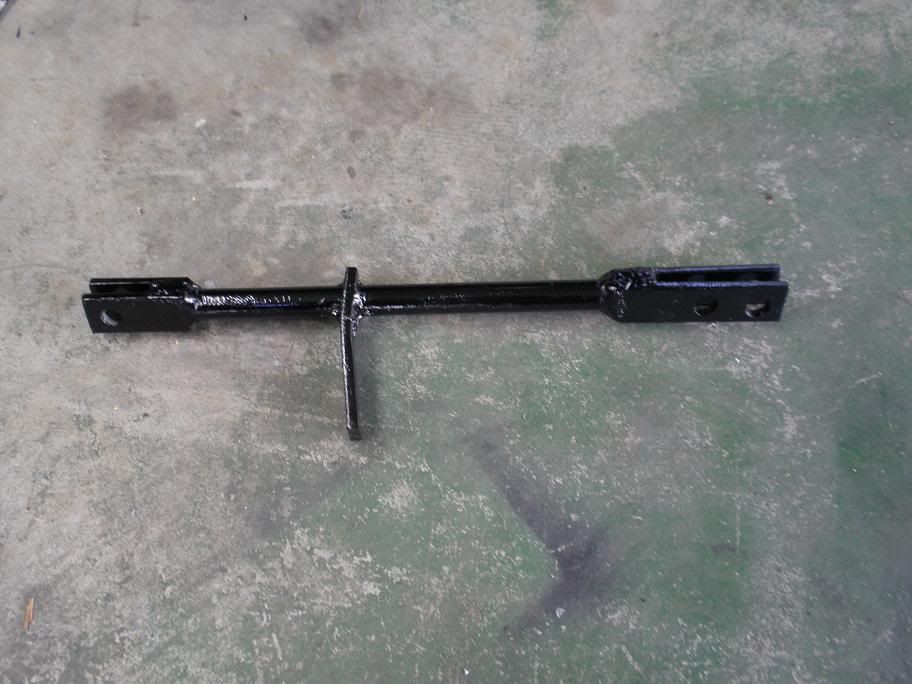
Two pieces of flat bar drilled to fit the booster are welded to a length of rod.
gazman - May 24th, 2010 at 05:48 PM
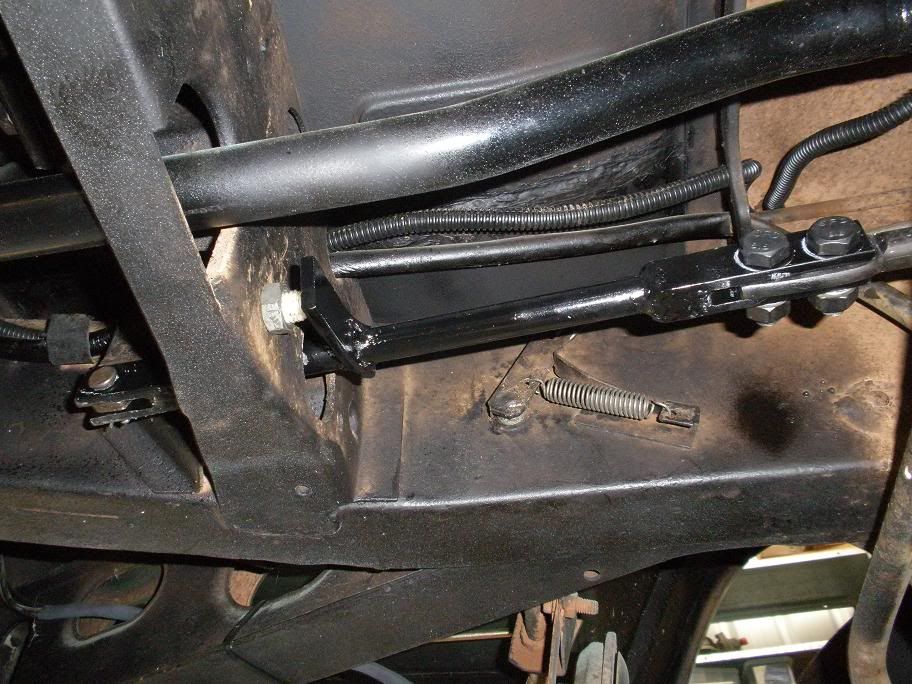
Kombi's have the brake switch mounted on the master cylinder, but Commodores have one mounted above the brake pedal. Since we kinda need brake lights
we had another rummage through our shed of endless Commodore parts until we found a brake light switch. We then fitted it into the chassis, next to
the hole that the linkage rod passes through.
The linkage rod is finished and includes a lever to operate the brake light switch.
Here is the rod fitted, you can see how it operates the brake light switch.
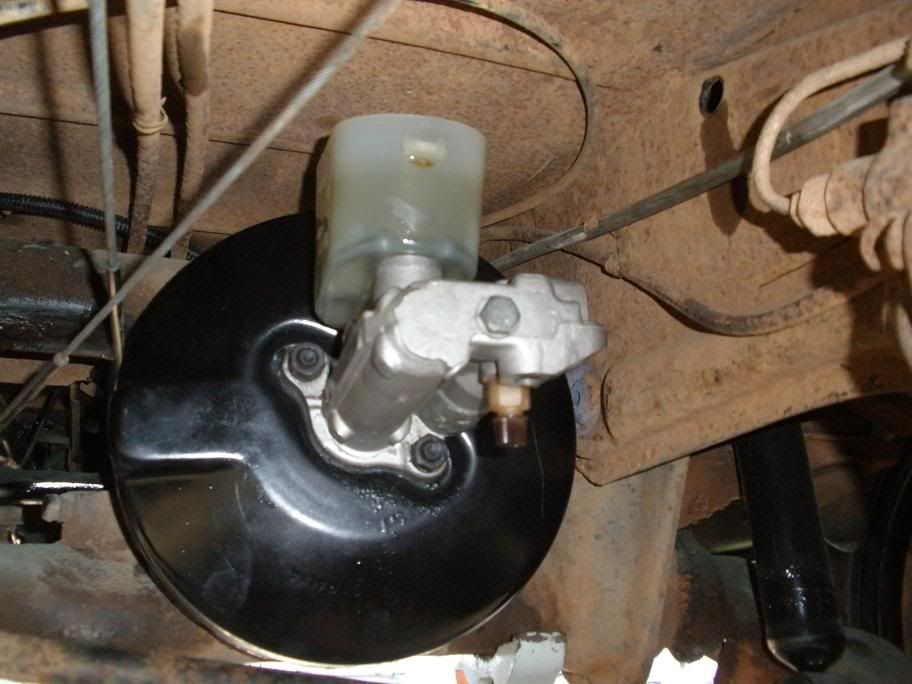
Next the master cylinder is fitted. Commodore master cyl's are dual circuit with a built-in proportioning valve. Part of the original proportioning
valve can be seen on the far right of this pic, and it can be removed from the vehicle.
gazman - May 24th, 2010 at 05:51 PM
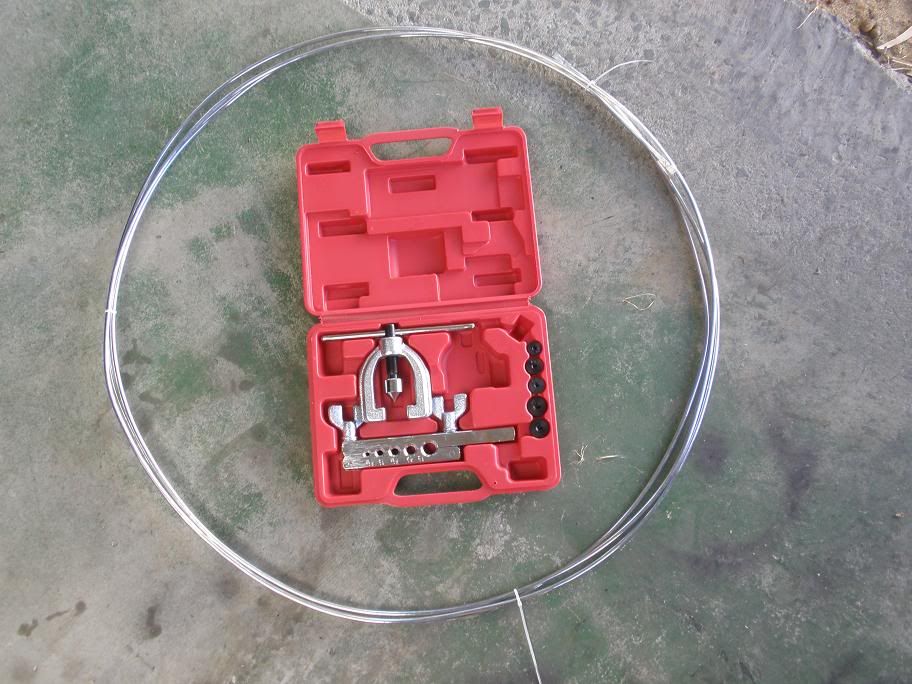
Now we need to make some new brake lines. You must use an 'internal/external' flaring kit to avoid leaks.
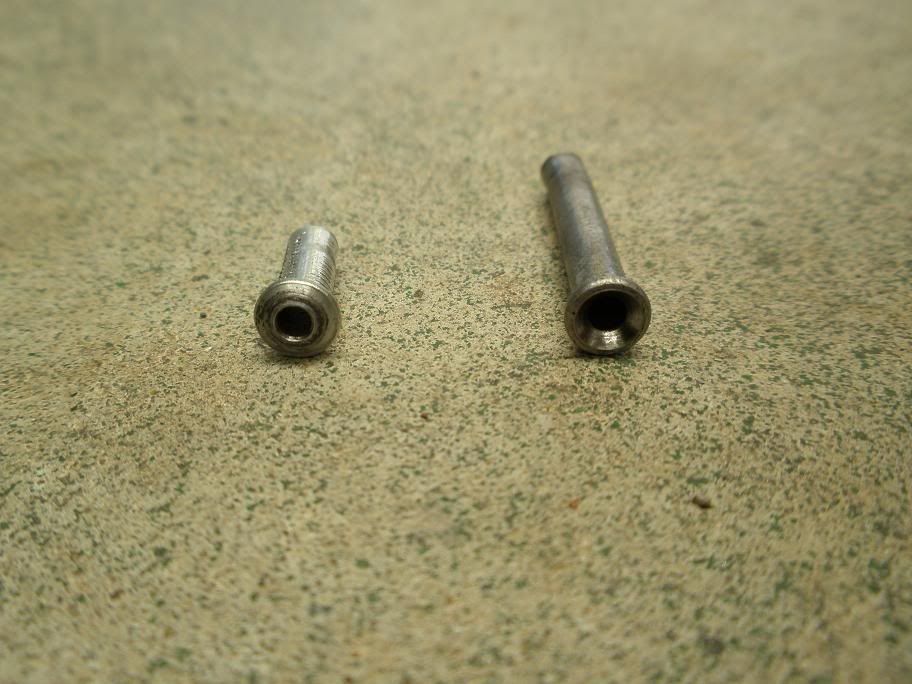
The flare on the left is the kombi one, a 90d external flare. The commodore one on the right is a 45d internal/external flare. We'll need the lines
to fit the commodore master cyl on one end, and the kombi flexible brake hose on the other end.
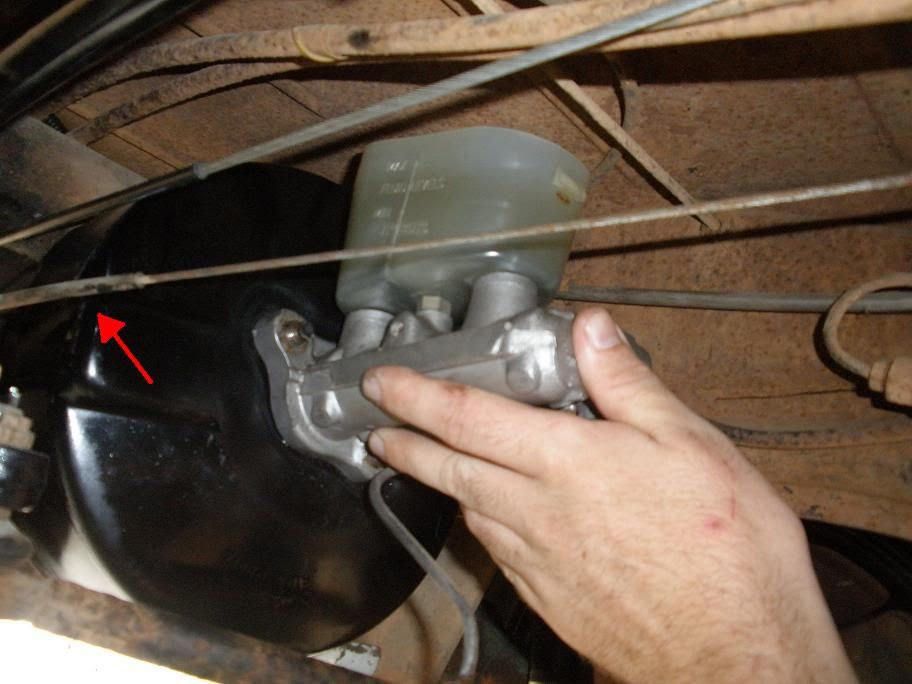
The lines are finished and fitted. The threaded end fittings can be bought new, but there was nothing wrong with the vw ones, and of course we had
some good s/hand commodore ones, so we just reused these.

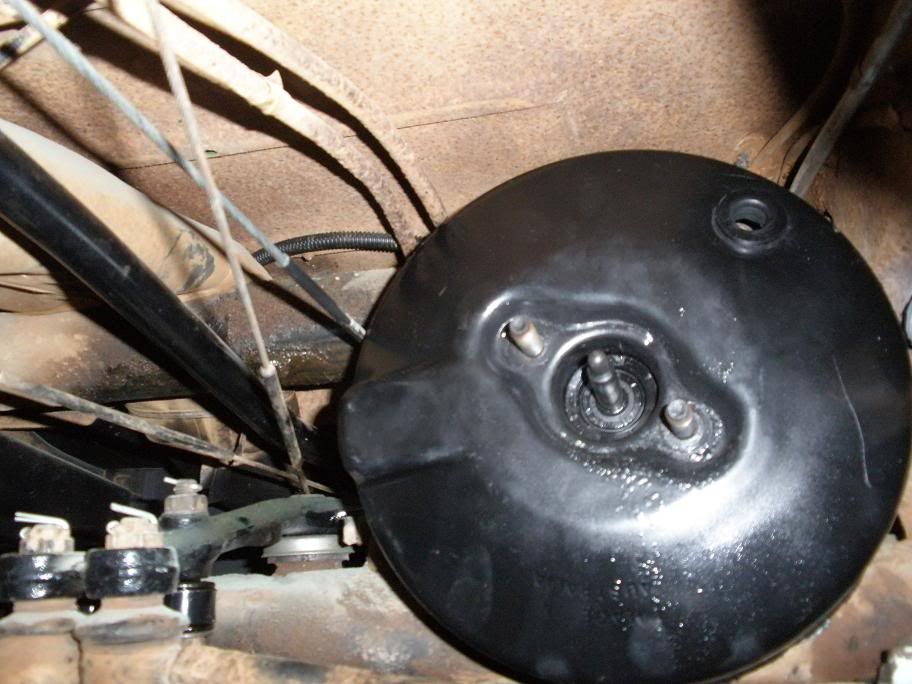
The last problem we had was the handbrake cable rubbing on the booster.
gazman - May 24th, 2010 at 05:53 PM
Here's how the handbrake assembly looks-
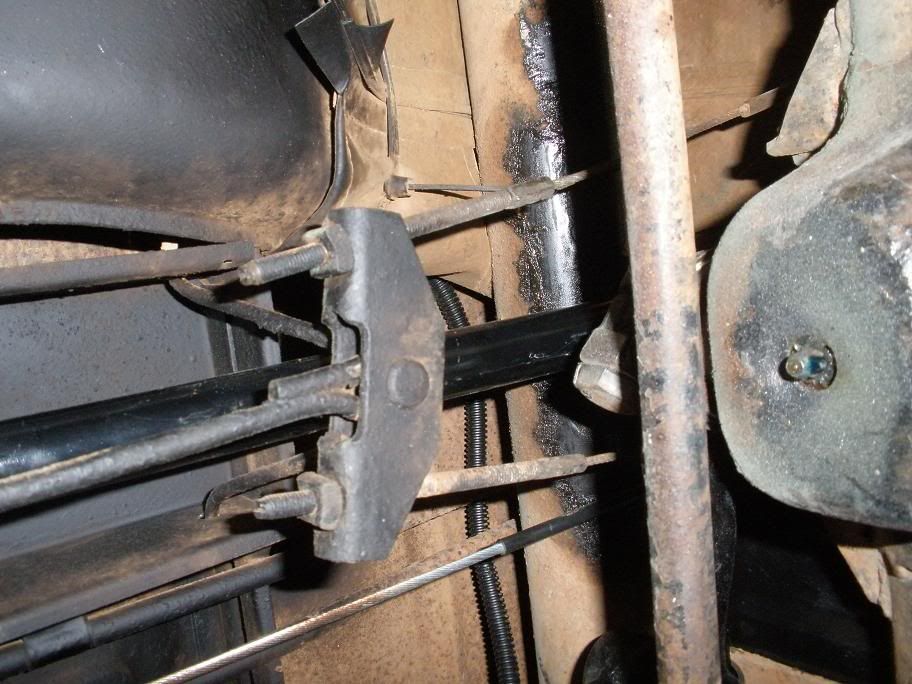
We took off the handbrake link rod and made another one slightly longer (hard to tell in the pic)
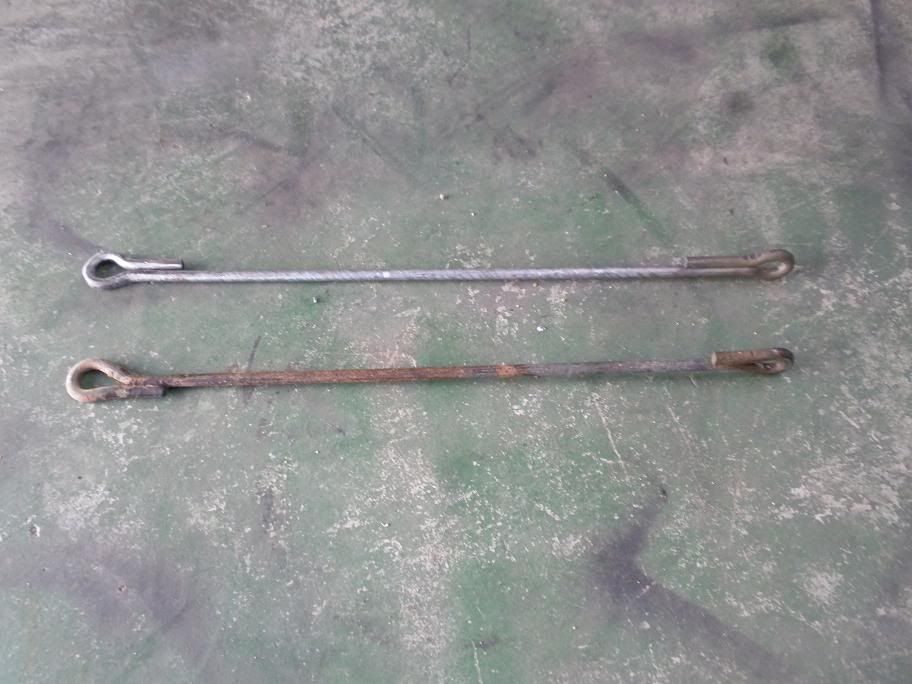
Then when we refitted the new rod we were able to cross over the cables to gain the clearance we need.
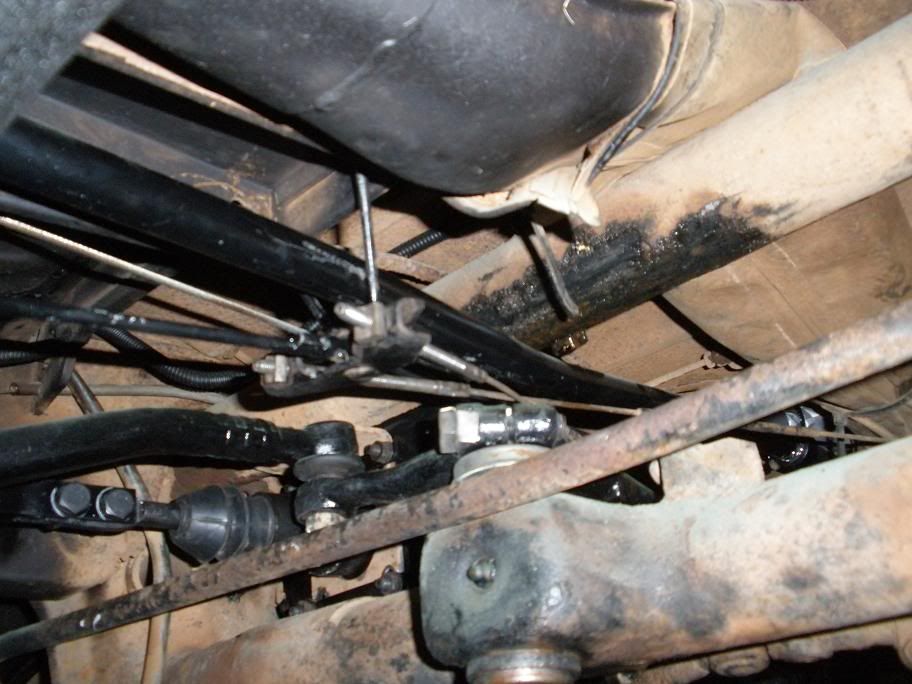
The handbrake works great, doesn't rub or bind anywhere and it misses the booster by heaps.
gazman - May 24th, 2010 at 05:56 PM
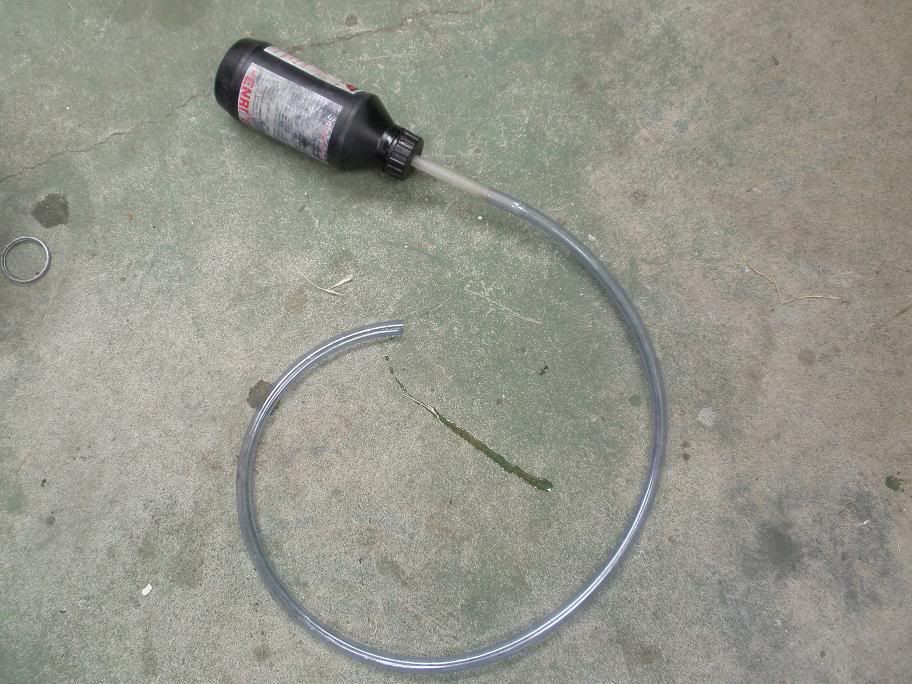
You might have noticed that the Commodore master cyl doesn't have a remote fill reservoir so it's a little tricky to fill and bleed from under the
kombi. We used an old fluid bottle with a long hose attached to the lid to squeeze the fluid in, taking care not to get any dirt etc in there.
Fortunately we don't need to do this too often.
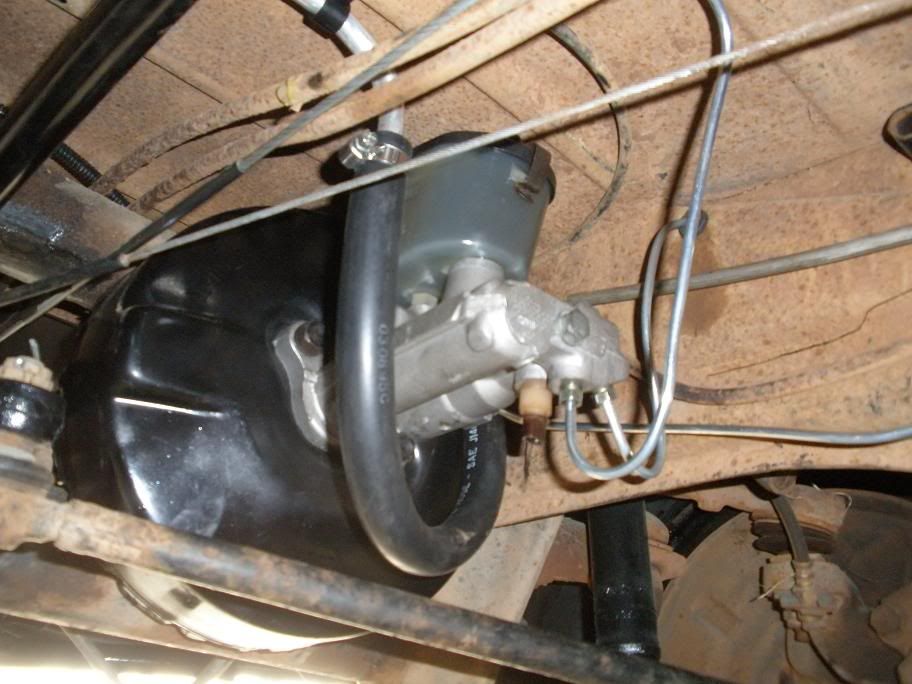
The brakes are bled, vacuum hose connected to the booster and jobs done. The bus stops really good now, considering its got stock discs & drums,
plus the extra V6 engine weight. Very happy with the results and I'm looking forward to doing more soon 
ernie norley - May 28th, 2010 at 09:44 AM
Gsay gazman have you looked at using push in fittings similar to beetle dual cylinder in your master cylnder & placing remote in cab I did this on
my split when I fitted a combination booster & it save a lot of hassle given how often you need to top its not a need but is easier in the future
Ernie
gazman - May 28th, 2010 at 06:59 PM
Yeah but its one of those things, it hasn't been hard to fill up yet so I probably wont do it until it starts giving me the shits...
lliszabailey - January 7th, 2011 at 01:14 PM
| Quote: |
Originally
posted by gazman
Here are the stuffed original parts-

And removed from the bus, the booster, master cylinder and reservoir, hoses and brake lines.

A rummage through the shed-full of left over Commodore parts from the V6 conversion found a good secondhand VN Commodore booster & master cyl.
These were held roughly in place to see if they would physically fit in the original space on the bus.

Because the position of the booster on the bus is more exposed it will need a dust boot to keep the crud out. A spare vw gear selector
rod boot fits perfect. The square flange on the rubber bushing on the new booster is also cut off so it will fit in the vw booster bracket.

|
Hi thanks you for sharing this and take the time to post the pictures really appreciate it..thanks!


