
The Subabeetle project
Joel - June 6th, 2009 at 05:59 PM
OK well i guess its about time i pulled my finger out and started a thread on the conversion
ive already started one on VWKD awhile back but have been very slack keeping it updated so most of this is just copied and pasted from it
for those that dont know yet im putting an subaru EJ22 in my beetle and im one of these people who likes to do alot of research on things before i
start especially something as big as an engine conversion
and i found that while plenty of people have done this and made threads about their car noone has really done an indepth thread showing whats involved
from go to whoa so ive decided to do that for people that are maybe considering this conversion in the future
i'm an ex photography student so be warned you will be bombarded with photos but i find most interested parties generally like it this way anyway
Just a quick project overview without trying to bore people to much.
ive wanted to subi power a vw for a long time, i fell inlove with the idea after a local put an EJ20T in his superbug convertable back in the mid
90s
I do love VW motors, ive grown up with them and have knocked that many toghether over the years i could do it in my sleep.
i had planned on always keeping my Lbug pretty well standard and VW powered so in 2001 i bought my 70 beetle which already had already been fitted
with a mazda rotary and was going to swap it over to an EJ20T as it was already setup for water cooled engine
well that worked...... i sold the car last year cos after nearly 8 years taking up valuable garage realestate i had only got as far as fixing the body
and giving it a quick paintjob cos i was too busy always doing something to the Lbug and various other VW projects i dragged home
i hadnt ever given any thought to converting the Lbug, being an unmolested car i never had the heart to cut it up or do anything that was
irreversable
but then i started looking into new 2 projects - Fuel injection and Air conditioning
looking at off the shelf EFI kits starting at $3k and even building up myself a junkyard kit wouldnt have left much change out of $1.5k, and mounting
a compressor and setting up belts and pulleys on a vw was a hassle id already been thro once already setting up the supercharger so i wasnt sure what
direction to take but i definately wanted to step into the 21st century and get away from carbs
after almost 10 years ownership i realised i would never sell it and should just make it into what i really wanted so all of a sudden a Subaru
conversion was looking more and more attractive
i wasnt actively looking for a subaru engine, i was happy enough with my 1776 which is only 4500kms old for the time being but a guy i know locally
had just bought a Liberty only to get a few parts from for his and the car was just sitting on his front lawn so i jokingly made him an offer and to
my surprise he accepted
it had been a well maintiained old ladys car untill some kids decided to use the roof as a trampoline
it was still complete and drivable so not only could i see the engine running i was actually able to take it for a good drive
that was all it took to convince me, it ran like clockwork, none of the usual subaru lifter clacking or shaking around, the oil and coolant were nice
and clean and the sticker on the firewall showed the timing belt was done only 3 years ago with a quality Dayco belt and best of all no oil leaks from
the engine, only abit of auto trans oil around the back of the engine and a bit of residual shit around the rocker covers
I was told it didnt use any oil either but we'll see, it certainly didnt blow any smoke
for people considering going down this route the best advice i can offer is if you have the room and resources get a donor car as apposed to buying
the engine and bits
main reasons are: everything matches. Subaru changed things on a yearly basis particularly ECUs and more often than not parts are not compatible
ive heard horror stories of people buying engines from a wrecker and the loom has been taken from another vehicle and doesnt match the engine
there are also lots of small fiddly parts seprate to the engine that are needed but can easily be missed
it often works out cheaper to, a whole running car can be bought rusted or damaged for as little as $400
you may pay around $1k just for an engine and loom from a wrecker that u cant hear running and maybe a mis match to, plus compression test figures can
be fudged
pulling the engine out isnt real difficult but the wiring is a big job and also very delicate and time consuming, wreckers have bad habits of just
cutting wires and breaking things being rough with them etc
and you can also recoupe costs selling off uneeded stuff from the car and maybe get some cash for scrap with the shell
I went the EJ22 for a number of reasons, the main one was fit
theyre almost identical in dimensions to a 1600 so theres no body cutting needed except for 2 minor sections of the seal lip cut off the valance in
either corner to clear the timing belt covers
you can even leave the valance attached and a few people do but its no biggy to remove and acutally makes life a hell of a lot easier, even with vw
motors
the quad cam motors like EJ20T need basically the whole bumper mount area of the innergaurds removed to fit which i wasnt prepared to do
you need to move the gearbox forward 2" unless you want to cut whopping great holes in the valance, gaurds and decklid for the timing belt covers to
stick out which totally looks like ass and i dont think engineers would be real impressed by it either plus the rear firewall and parcel shelf area
need cutting out for turbo and charge cooler fitting
Ian was telling me at warwick his bug is getting incredibly hot inside from the heat of the turbo sitting in the parcel tray area
theres also significantly more cost involved and they love eating gearboxes, a gearbox to handle the power would cost more than my entire EJ22
conversion will
yes, an EJ20T would have been nice but my bugs a cruiser not a race car and in my case the cons out weighted the pros
EJ22 are widely regarded as the most bullet proof subaru motors, they easily make 300,000 to 400,000KMs with no attention
theyre very common, from 89 to 98 they were used in libertys and the engine itself was unchanged in that time so can be swapped.
only minor details like single port exhaust outlets which i think started with OBDII in 95ish which just means another exhust is needed and the change
from hydraulic lifters which is only an internal difference
cos of this there cheap too, replacement engines can be picked up easily from $500 and low KM jap import motors are cheap to
and power, 100KW standard with plenty of scope for improvement and a low boost turbo setup would make for one torquey engine
theres a turbo EJ22 bug getting around VWKD thats allegedly got 300hp
i have looked into putting one of my blowers on, someone on aus subaru has fitted an SC12 on an EJ22 but in a bug there just isnt room to do it
other things like already fitted with A/C compressor, high output alternator, full self diagnostics and far smoother and quieter than VW motors will
ever be are just bonuses
I also want this conversion to be nice and neat to, not something that looks like a bunch of junkyard parts slapped in the arse of a bug in someones
backyard after to many beers
Joel - June 6th, 2009 at 06:00 PM
Stripping the Donor
one nice sunny day back in march (I've forgotten what those are like) i went back up and we stripped the donor liberty of all required parts.
i must have been to full of excitement (or dread) cos i forgot to take my camera with me, which im really quite shitty about cos its one of the most
important parts knowing what to take and how to remove it
engines come out fairly easily just unplugging a couple of electrical connections, fuel lines, radiator/heater, AC and power steering hoses, throttle
and cruise control crap and the lower cross member mounts oh yeah and exhaust system
then just remove all the bell housing bolts to remove the engine
however he had a nice shiny new engine crane so we took the engine and gearbox out as one which ended up a god send as when we got it down on the deck
and unbolted they were well and truely stuck toghether
i dont think they'd ever been separated before and it turned out the culprit was a little locating lug on the side of the bellhousing so getting them
apart still in the car would have been a nightmare
after lots of swearing, WD40 and gentle prying with a screw driver they came apart
it wasnt much extra work doing it this way, just d/c the front CVs, rear tail shaft, linkage thing and a few other mounts and electrical
that was all pretty straight forward.
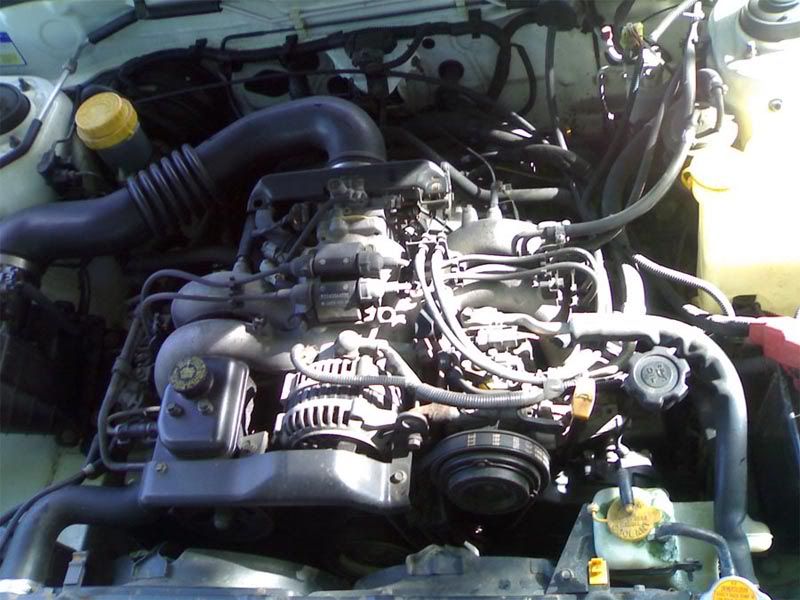
The Engine as removed
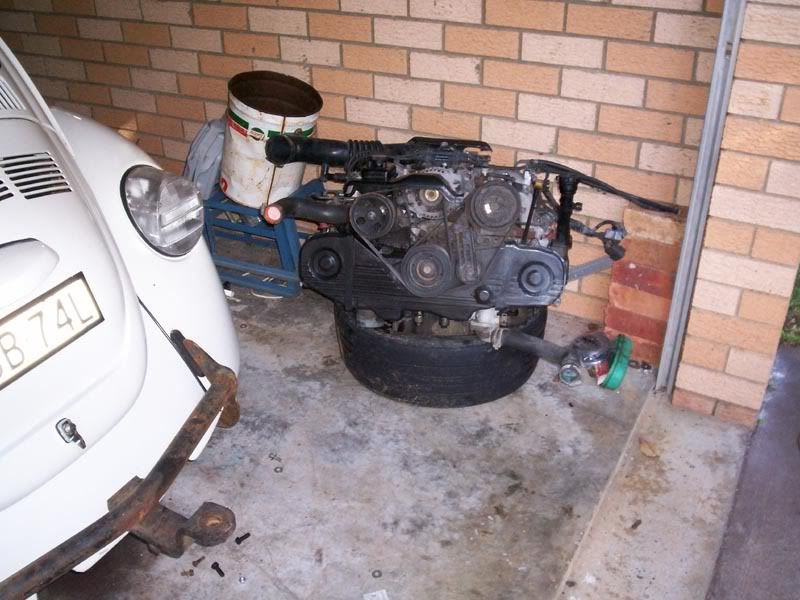
along with the engine here are some of the other critical parts to get from the engine bay
these are all parts that more often that not arent included when an engine is bought seprately
Air box with Air Flow Meter
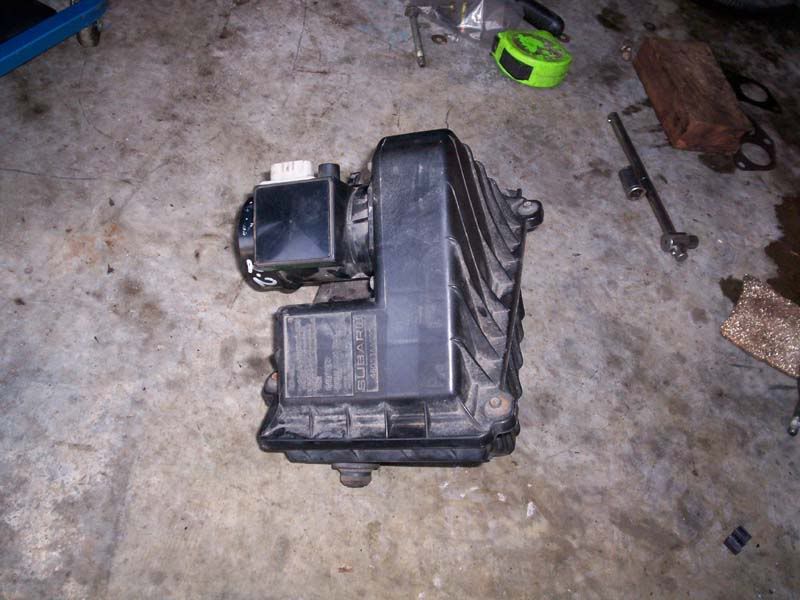
altho the only part thats required is the actual AFM
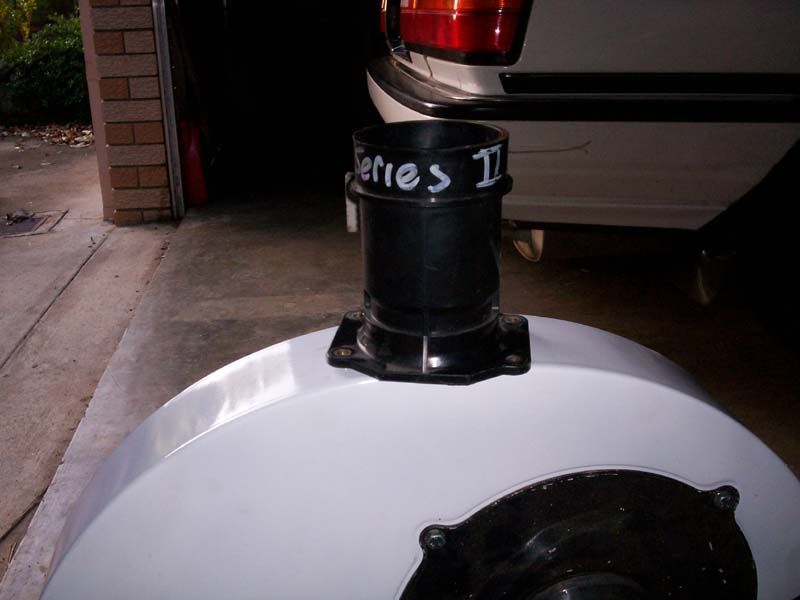
Ignitor which is mounted on the center of the firewall
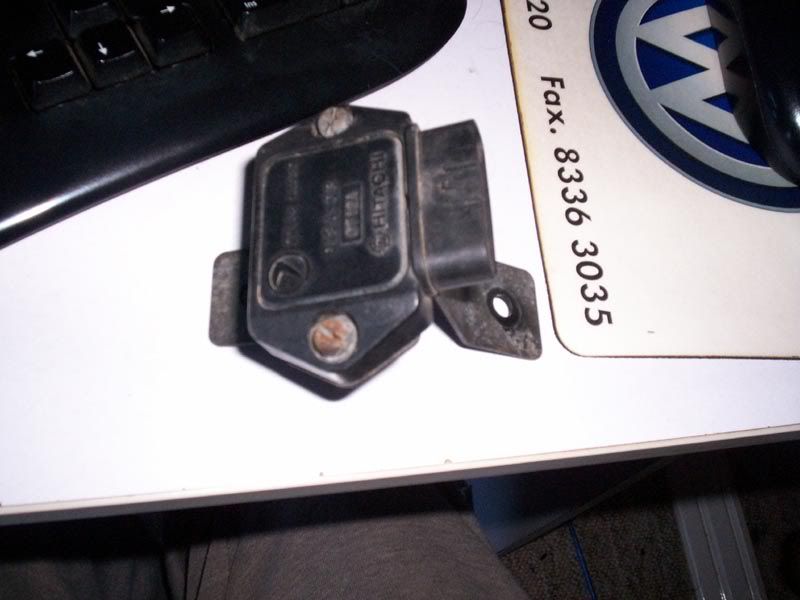
charcoal canister with mounting bracket and the little non return valve. this isnt needed for the engine to run but is required for emissions
purposes
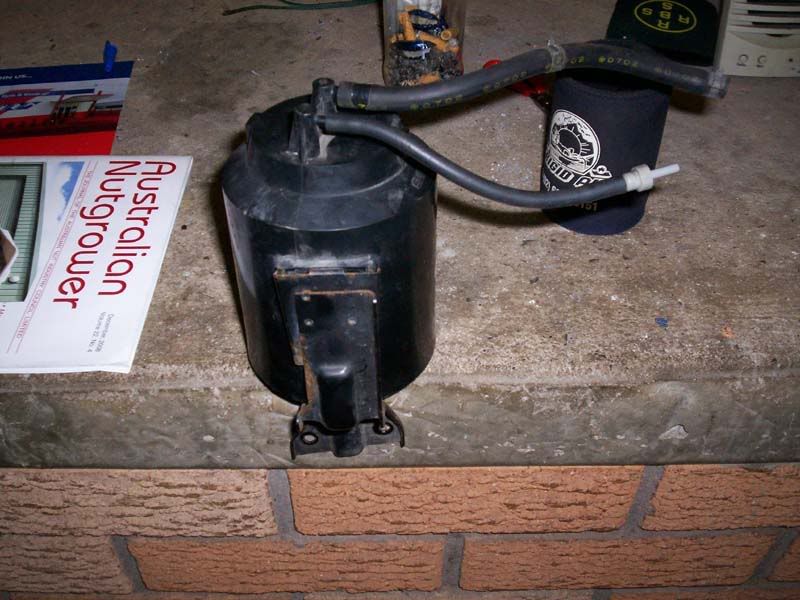
i also grabbed the fuel filter mount and all the A/C parts even tho i would be replacing the drier, hoses and the condensor has seen better days
OK the loom-o-doom.....
here was where pics are really needed, its removal was epic to say the least, its a good 5hours plus work
i'd read about its removal on US sites but turns out RHD cars are worse yet again
only the left gaurd on LHD cars has to come off but with RHD its both front gaurds needed removing and the ENTIRE bloody dashboard
then the main engine loom goes thro the firewall right down behind the heatercore and A/C evap which meant they need removing to
there were 4 main looms in this liberty and im assuming most subis are the same
i kept 3 of them:
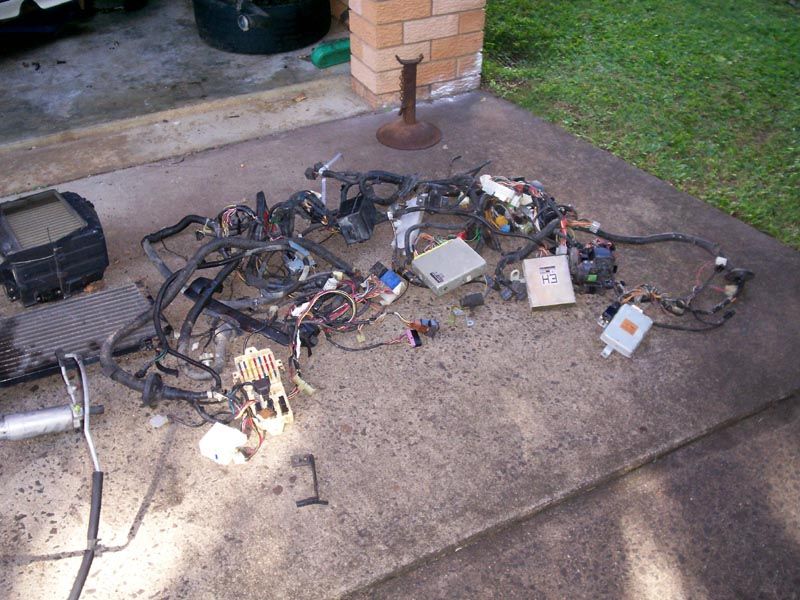
the critical one, the main engine management loom:
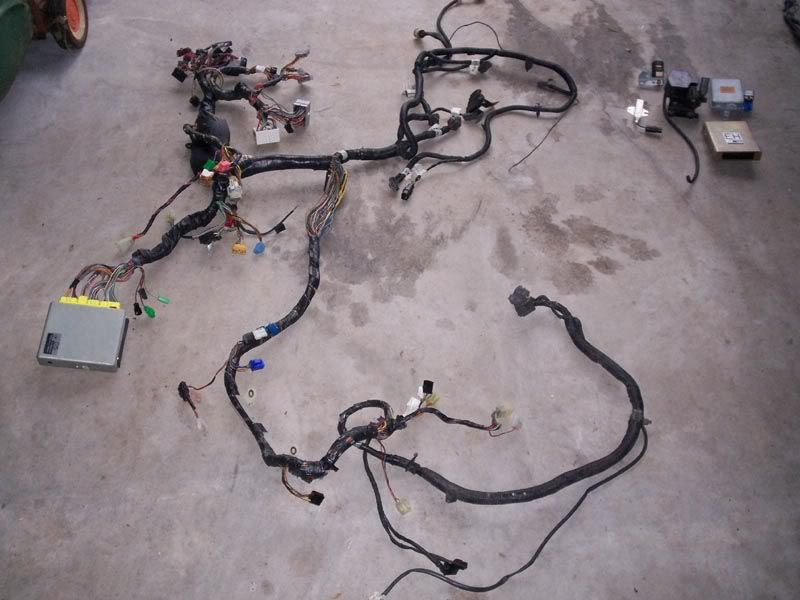
parts in the top right corner are all redundant equipment like the cruise control brain and pump, auto tranny brain, duty resistor etc
the ECU, fuel pump, ignition and fan relays etc were all part of it and were mounted behind the dash, it sent 2 looms to the engine bay, one thro the
middle of the firewall and another under the Left front gaurd
this was the other main loom,
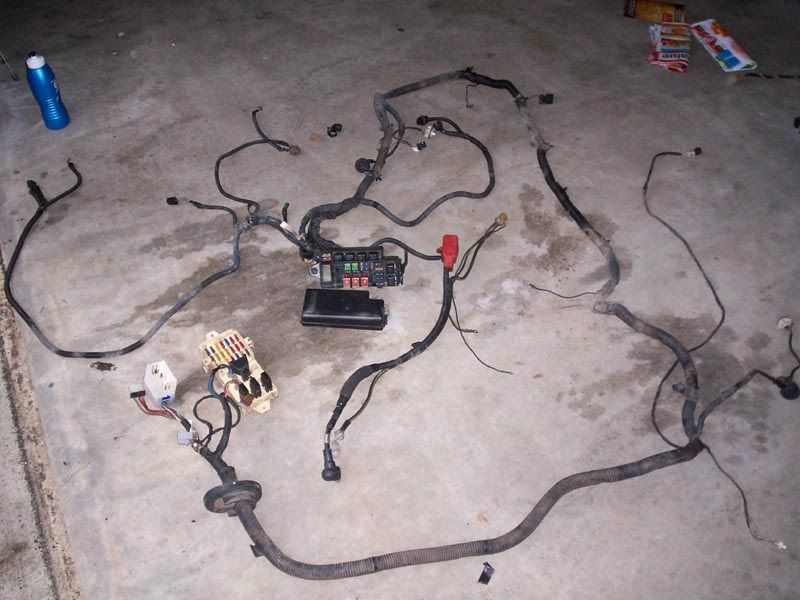
i didnt really know it at the time but it doesnt actually have any engine related parts except for the alternator connections which could just be cut
off it so it probably could have been left in the car which wouldnt have required the right gaurd removed
it has the main fusebox under the bonnet with a big loom feeding all the lights, fans, indicators etc then goes under the Right front gaurd into the
car and has the main interior fuse box
there was another loom that run back to the rear of the car obviously for all the rear lights, fuel pump, speakers etc, so i just left that in the
car
and finally this is the dash loom
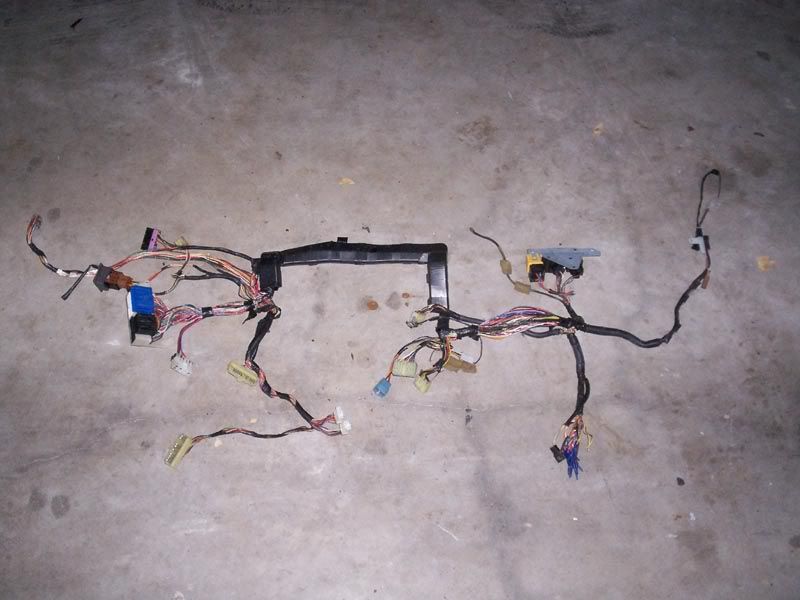
i only grabbed this as i kept the liberty dash cluster which i was thinking of grafting into one of the Lbug dashes i have laying around
As i wanted to adapt the A/C system it had all the controls for it and lots of outlet vents, plus other things like electric mirror controls,
fog-lights, demister and hazard switch and the speedo has a built in Vehicle Speed Sensor which the ECU needs
but also my donor car being auto you can see it has the ugly P for pass, D for drag, R for race, etc icons down the middle which means i would want
another from a manual
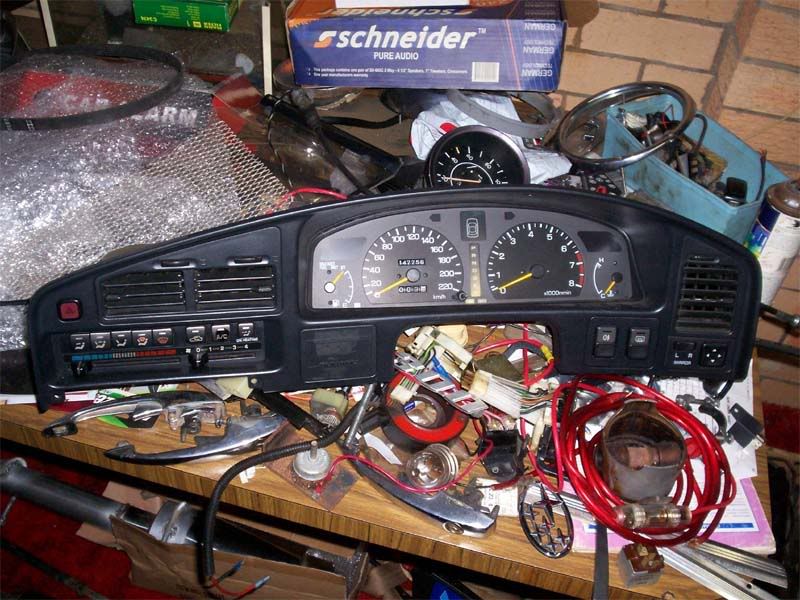
so for now i gave up on that idea, plus ive already got a full range of gauges in my bug anyway
but Neil on VWKD did this with his split and it does look awesome

subaru parts network can be frustrating trying to order parts thro
their systems work off VIN numbers so if you dont have that its quite often you'll get- computer says nooooo......
so if possible record the VIN number of the donor
i took the lazy way and just kept the compliance plate off mine
im sure they'll look at me crossed eyed when they ask for the vin and i hand them the compliance plate
Joel - June 6th, 2009 at 06:01 PM
So with all the donor parts sitting in the garage i decided not to jump in too quickly and instead begin planning out the conversion and start
gathering parts
i got one of seagulls new 200mm adapter kits (thanks again mate)
the aftermarket clutch scene is alot better for 200mm type1s than the 215mm type4 clutches that alot of them use
also i already had a HD clutch on my 1776 i wanted to reuse as it was only 4500kms old
Ebay and various car forums have been invaluable for buying parts at really good prices
the donor rad was there but i found that it was just to wide to fit neatly in the Lbug spare wheel well so i began looking for replacements.
brad used the EJ22 rad in his Lbug but it sat up very high, i still wanted room to chuck a spare tyre in if needed.
on a front mounted rad, with metal lines under the car you get free cooling thro conduction so the rad doesnt have to be as big, also the long lines
from engine to front gives increase coolant capacity
i spoke to simons (humpty) brother mark, hes got a notch that has an EJ20T thats been in for something like 10 years and his rad...... a tiny little
thing from an early model honda civic
Even in 40c WA summers it has never over heated, he also puts it down to the conduction thro metal pipes
I ended up getting this one which has been reconditioned and in execellent nick off ebay for only $20
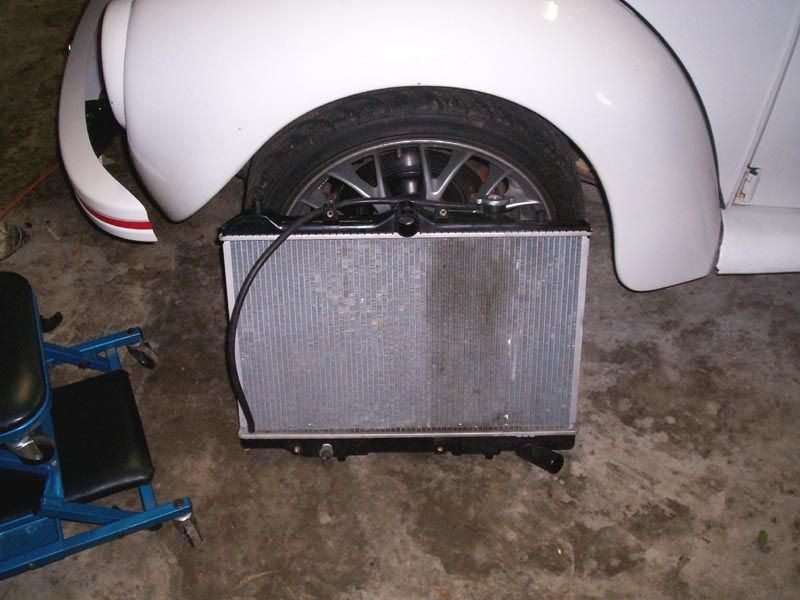
its from a B6 mazda engine so its fairly common and is perfect size for a Lbug wheel well and the hose spigots are also right size
i tried to show the scale against a 17" rim and tyre
it also has a sender in the bottom for cycling the fan on and off as the temp gets up
EJ motors have a sender in the coolant manifold that switches on the fan and many use and swear by this
all well and good but my take on it is the water coming out of the engine will be hot yes, so the computer turns the fan on.
by the time its run thro the pipes up to the front its shed a bit of heat, then going down thro the radiators sheds most of the heat then back to the
engine even more heat gone
so i can see potential for the ECU to be over cooling it and the thermostat constantly opening and shutting
by using this sender instead if the coolant is still too hot coming out of the rad then it will turn the fan on so to my way of thinking the temp
differential between leaving the engine and returning should be smaller but we shall see
Copper is one of the best conductors out there so ill probably run my lines in that plus its so easy to work with
its an expensive option which is why radiators arent made from it anymore but i worked for years in the the refrigeration game ages ago and can get it
cheap thro old work contacts
Ive also got a brand new 14" thermo fan that was bought for the roof top A/C condensor on one of the tractors after i took out a low branch and
smashed one of the blades off
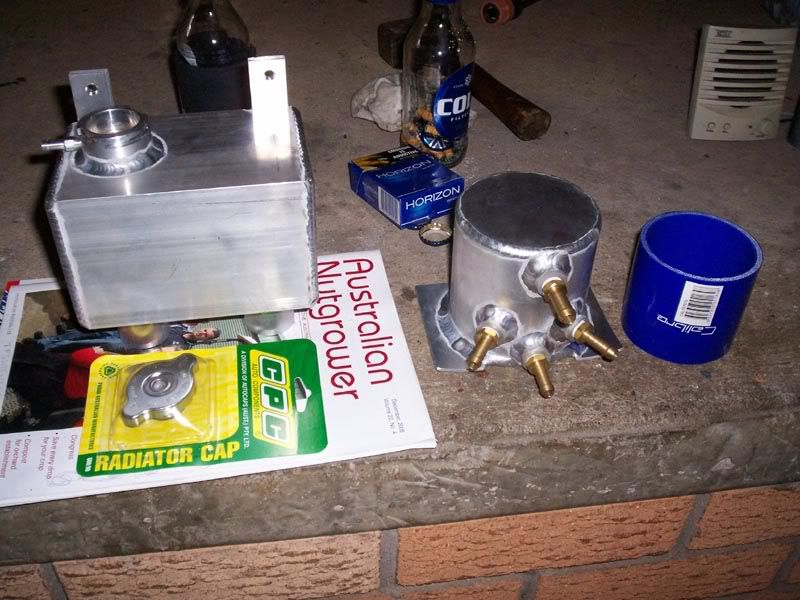
i had an aluminuim header tank and surge tank tigged up by bloke up the coast who does great work at very good prices
as well you can see the new rad cap and some of the 3" silicon hoses for the intake i got
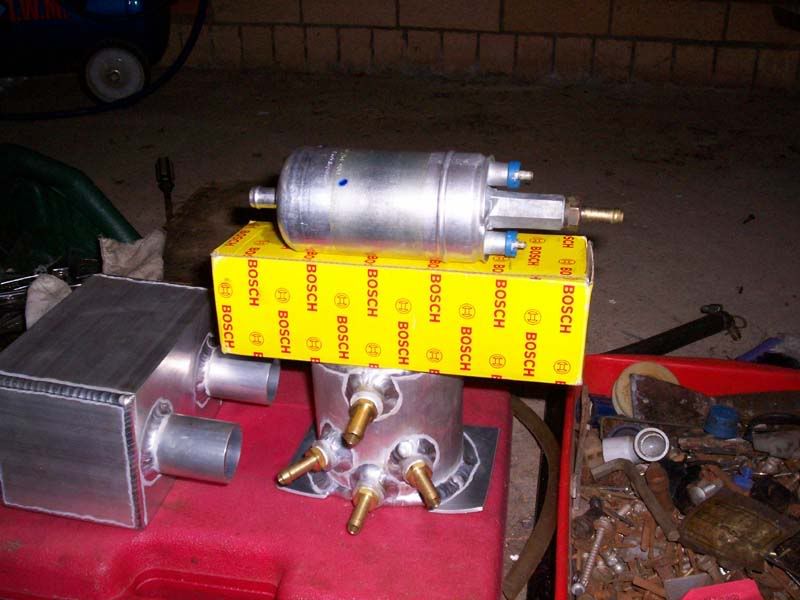
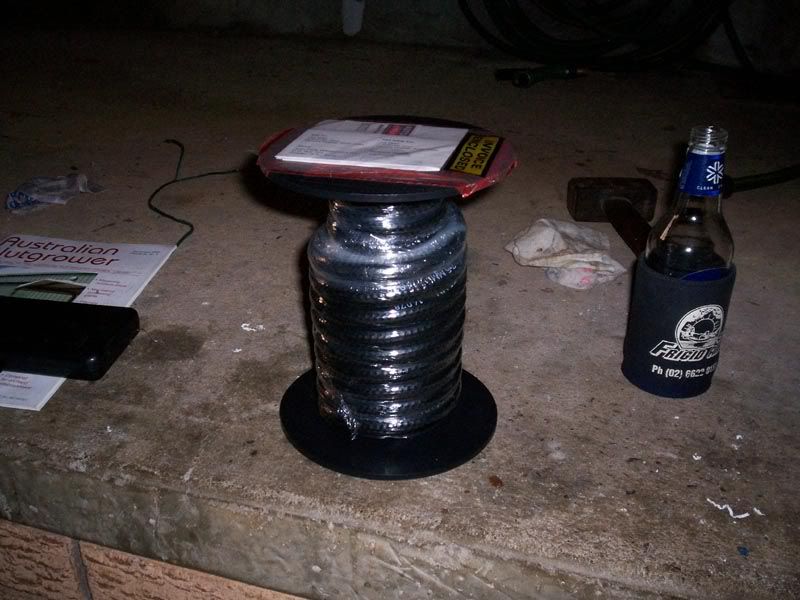
genuine Bosch VL turbo fuel pump for $51
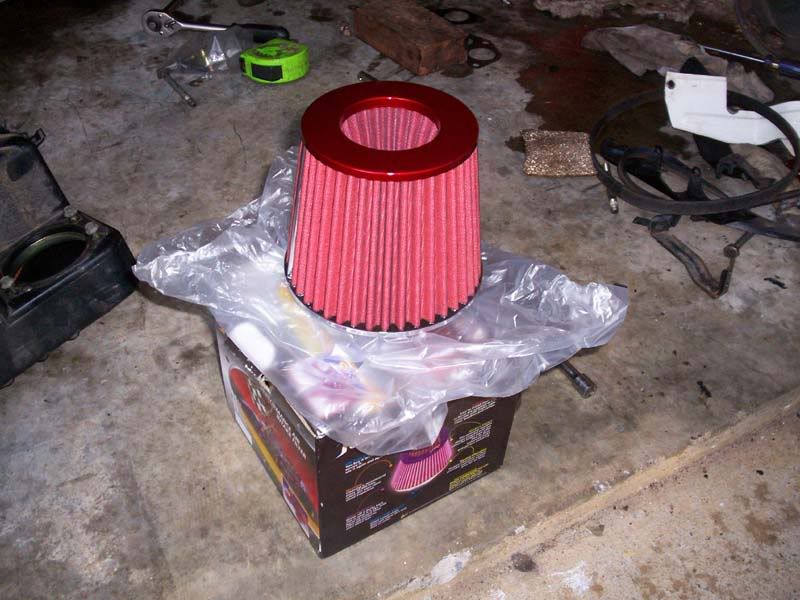
brand new pod filter for $12
this is the fan belt needed when the powersteering pump is removed
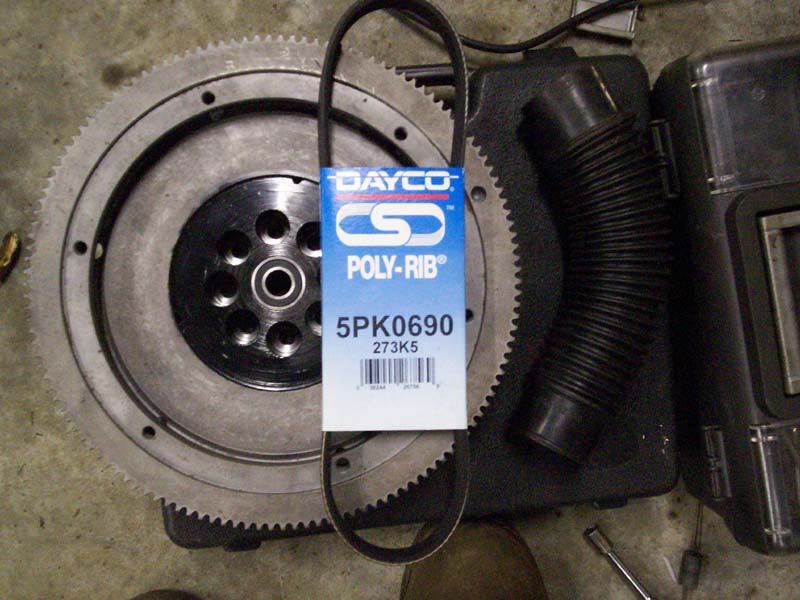
lots of EFI hose
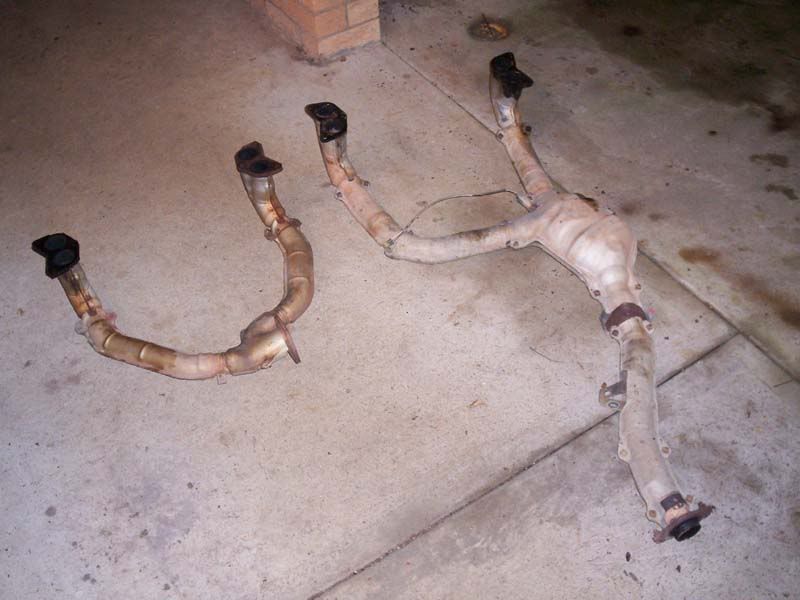
i did get the header and cat from the donor but they really are a shitty design and as i would be making a custom system up i prefered a better
starting point
so i picked up a stock EJ20 forester/imprezza header
you can see it on the left is much better basis to build something from than the stock EJ22 obscenity
ppl have made good systems for bugs using the EJ22 header but i was after something abit more elegant and better flowing
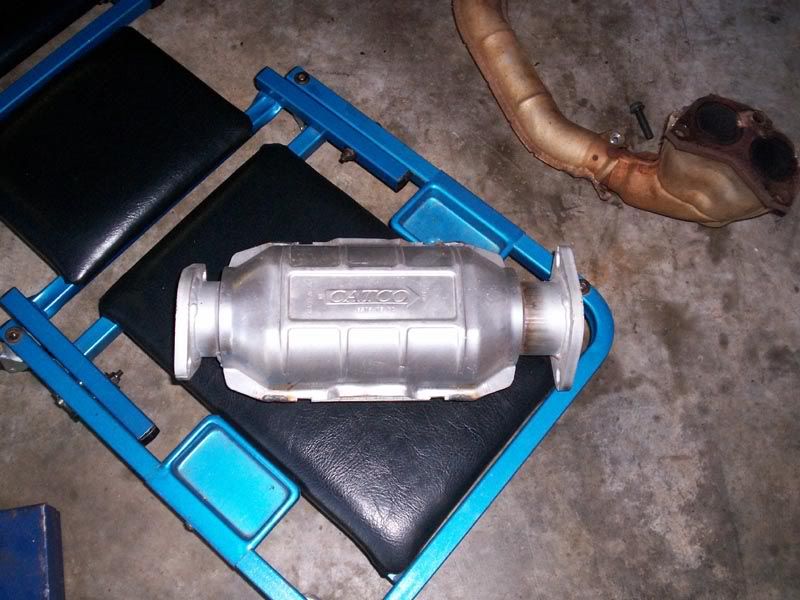
so i was gonna need a cat as the EJ20 header didnt come with one
i got this hi-flow catco one brand new off ebay for $50
i checked up on the catco US site and its worth $279US new so im cheering on that
Joel - June 6th, 2009 at 06:02 PM
The Little EJ chariot
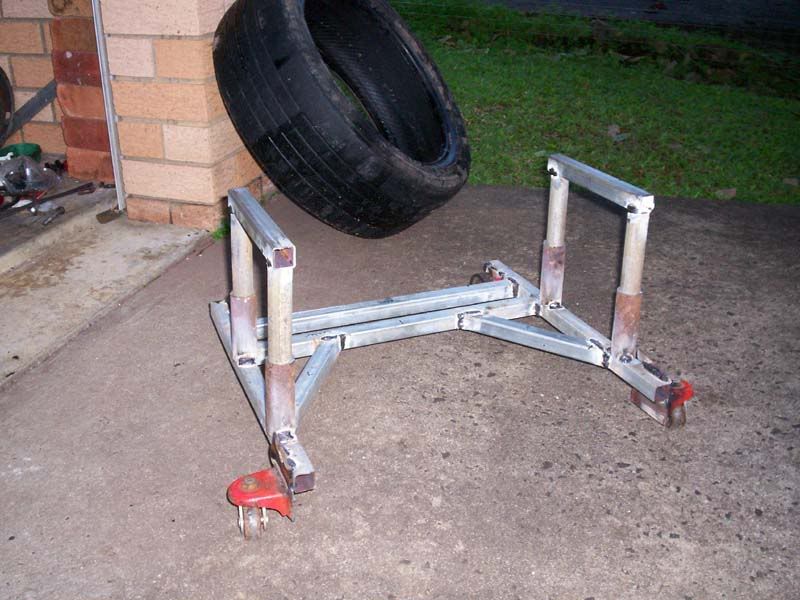
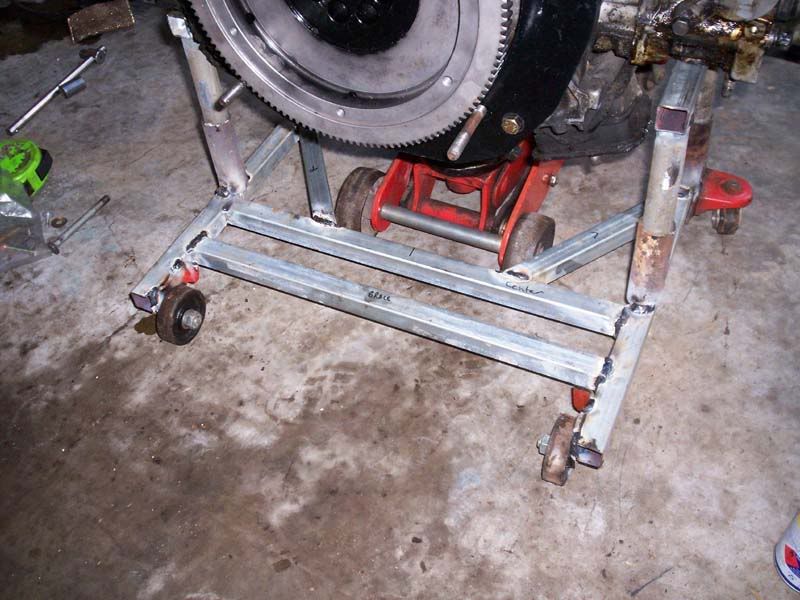
Before i started doing anything to the engine i needed to make it easily movable so one of my first tasks was to make an engine trolley
EJ22s are only supposed to be 25kg heavier than a 1600.......
i may have a rooted back but i can still manhandle a 1600 up onto the work bench
but this bloody thing.... i nearly had a hernia lifting it off the trailer with the old man
taking off the powersteering pump and A/C compresser shed abit of weight but it was still a heavy little f'ker
me being a stereotypical farmer means im a shocking hoarder of all things unvalueable especially scrap metal
but times like now it really pays off
"Little Red" here was a birthday present from my grandparents a long time ago.
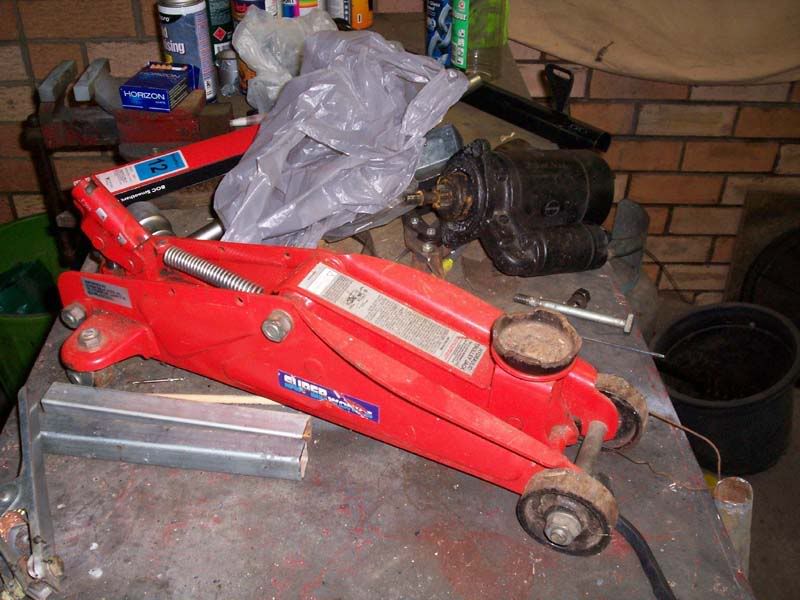
After 14 years of faithfull service it stopped getting it up so to speak but i never chucked it out
so it went under the grinder and very kindly donated its wheels
also an old farm gate and some scrap RHS resulted in a height adjustable trolley that can move the engine around with enough room for "Big Red" to
get under the sump and lift it up
the height adjustable stands sit under the exhaust ports
Joel - June 6th, 2009 at 06:03 PM
Fitting the Adapter kit
as my engine came from an auto meant it had this big ugly torque converter on the back
theres 4 bolts holding it to the flex plate
these face the engine so theyre acessed thro a hole in the crank case on the top left which has a rubber plug over it
you can see here the plug sitting on top of the torque converter and a 14mm ring spanner was the only tool that would get down there without ripping
off the intake manifold
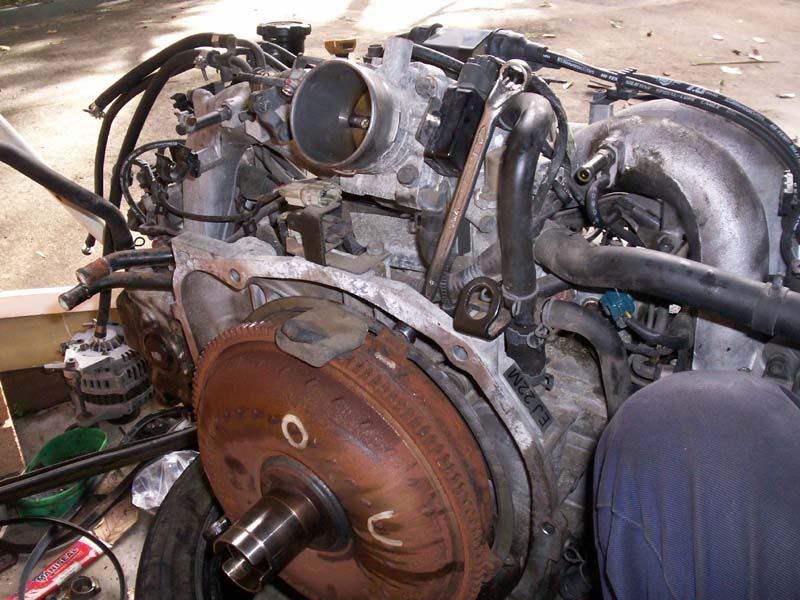
with the 4 bolts out the torque converter is just pulled off the crank
be aware it maybe full of auto trans fluid
with it gone i was left with just the flex plate bolted to the crank
its easily removed by undoing the 8 bolts
i locked it from turning by sticking 2 large screwdrivers thro the holes in the case that line up with holes in the flex plate
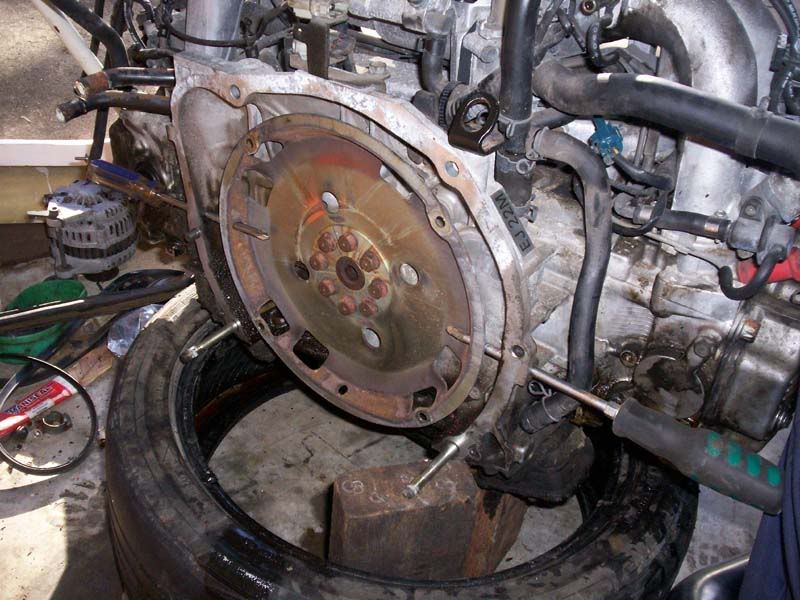
and gone
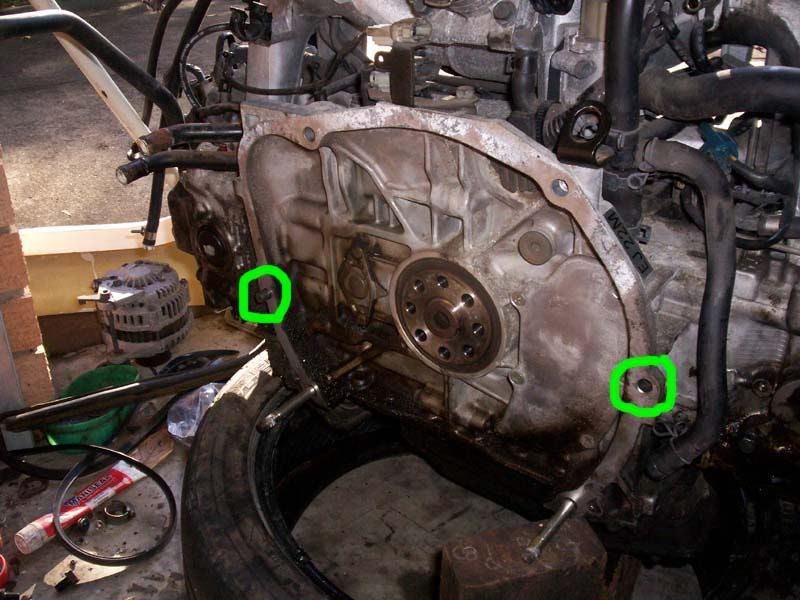
in the circles you can see on the left is the locating lug
the one of the right was the little bastard that stuck the engine and trans together and i didnt notice at the time but it must have stayed in the
tranny.
im not overly concerned, youll see why when i bolt on the adapter plate but they're the same on all EJ motors and even the EG has the same ones as
well
at this point i was fairly chuffed with a few things
as you can see the crank seal is bone dry no leaking and its also a brown OEM one
the subaru world has the same problem as VWs with inferior quality aftermarket seals out there (coloured black like shitty brazillian ones for vws)
also the oil separator (big plate inside the bellhousing) is metal and not leaking either
alot of models had a plastic one which leaks badly and can go brittle with age
this is also the case with the thermostat housing, some of them where made of plastic but luckily mines a metal one.
i think the added weight of long coolant lines connected to them could cause a problem with plastic versions
i did notice too that this engine shows all the signs of never being frigged with
the factory sealing paint is still undisturbed on all the adjuster screws for the throttle adjustments, idle control valve, throttle position sensor
etc
my poor engine is abit dirty in couple of spots tho
the bellhousing has a bit of nasty stinky ATF around the bottom, the powersteering pump has leaked abit where i disconnected it and has left residue
in that area and all down that side of the sump and the rocker cover areas are a bit weepy but all in all im more than happy
the bottom 2 engine studs needed to come out
that was easy as just locking to nuts together and unscrewing them out
it seems nearly all of the threads with the engine are 1.25 pitch
which isnt handy when nearly all VW is 1.5pitch
i got caught out with the flywheel bolts too,
seagull told me to use the stock subi bolts as they're very strong
problem tho is the bolts for a flex plate are alot shorter and wont dont stick thro even far enough to get started.
No worries i just went to the bolt shop and got some nice new high tensile bolts to do the job
Problem..... the subi bolts have a round shoulder on them and a little 14mm head, the aftermarket bolts i got had bigger 16mm heads and would do the
job fine but i couldnt get a 16mm socket down the flywheel bores to get them done up
that was solved by going and seeing Bernie at subi village and getting some manual EJ bolts
the adapter plate came with cut outs for the 2 locating lugs
but i hit on an idea thanks to my missing one
as an extra bit of insurance i put bolts thro them as to help bolt the adapter plate to the engine as even tho it only had 4 bolts like a vw its 25kg
heavier
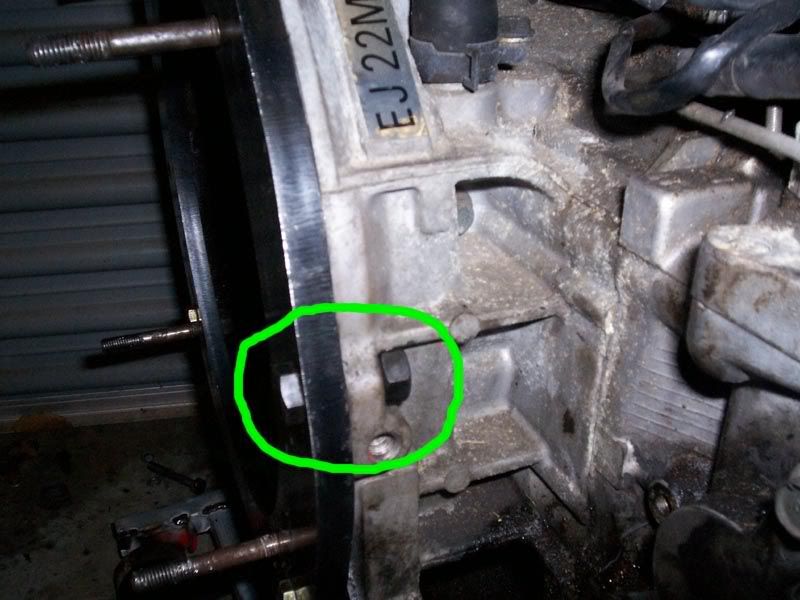
you will have to excuse this shitty pic as it was late one night in the middle of the floods we were having and it was cold and miserable and my
camera lense was obviously fogged up.
I didnt take as many pics as i meant to, not that theres much to it,
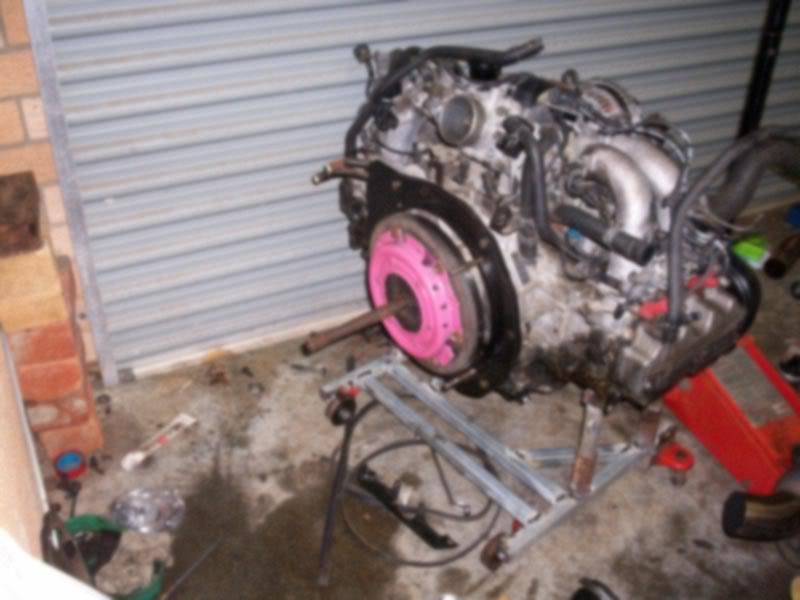
adapter bolted up, followed by the flywheel then clutch went on like a normal vw and clutch plate aligned with an old input shaft, something every VW
tinkerers should own if they dont have a purpose made alignment tool
Joel - June 6th, 2009 at 06:05 PM
Removing the Valance
this was a job ive been planning on doing for a long time even if i hadnt gone the subaru conversion
my black beetle had the valance removed and was fitted with one of John Shermans at volksconversions fibreglass ones which are just a mould of a
factory 75 onwards EFI type with no peashooter cutouts,
it made engine installation and removal so much easier and faster, i was able just roll a vw motor straight in on a trolley jack and bolt it up
without even jacking the bug up, it also meant that extractors, heater hoses and breastplate didnt even need to come off as per normal removal and
also with stock metal ones the gen pulley nuts and vac advance cans cans just love catching on them and ripping up the seal in the great drop down
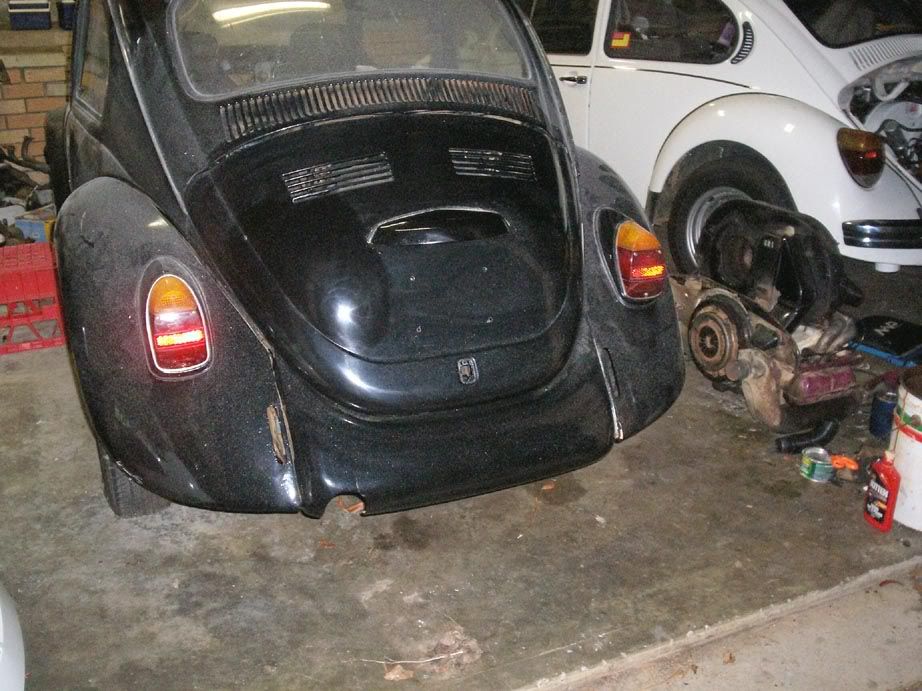
heres a couple of pics just showing how it looks and the fit
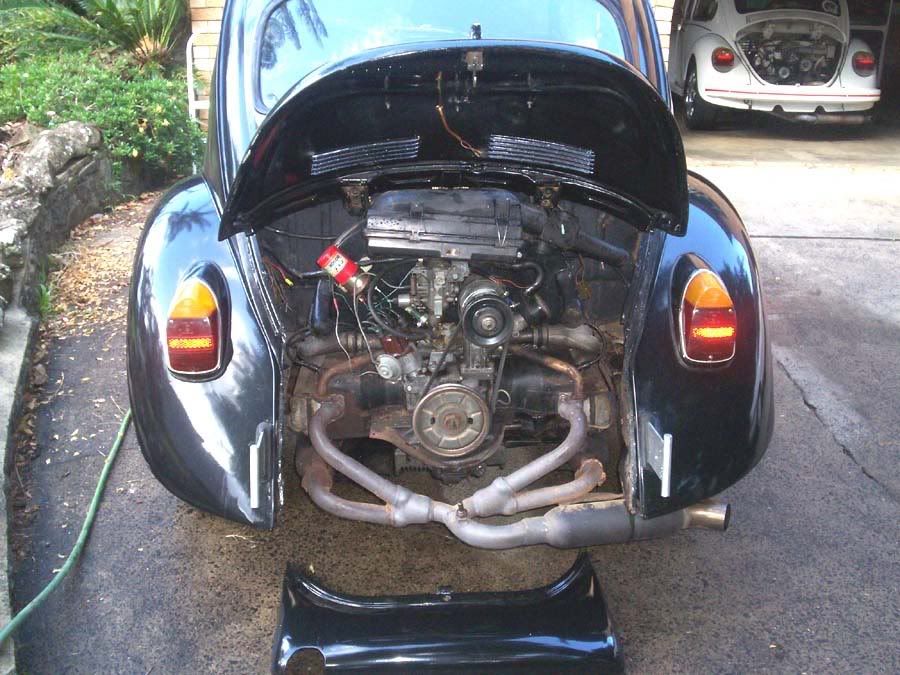
so when i saw john last i grabbed another off him
by this time i'd dropped my 1776 engine out as removing the valance is something that cant be done with the engine in
i have seen ppl fit EJ22 motors with the valance left in place but from what i can see the only way you would have enough clearance to get the engine
to clear it on installation would be remove the timng belt covers and take off the 2 cam gears and even then before it could be done requires some
trimming of the seal lip in either corner for clearance
first things needed doing are removing the back bumper, brackets and both rear gaurds
cleaning up the flange down the gaurd mounting surface shows up all the spot welds
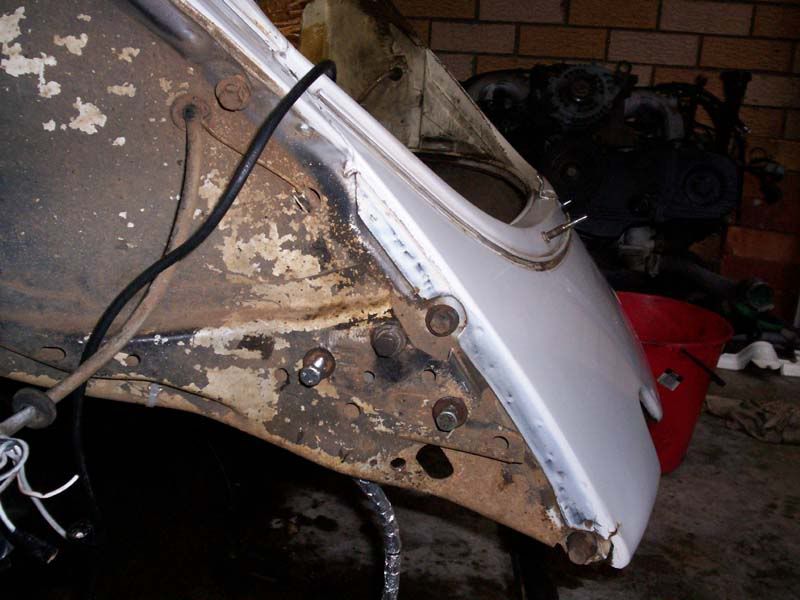
with a 4mm drill bit i started drilling out the welds trying not go all the way thro but it was inevitable that it would happen on a few
theres no pattern to the welds, it totally random and all over the place, u can also see in the first pic theres a tack weld right near the top, the
other side didnt have this yet its the original valance thats never been worked on
there was also a few spot welds around the decklid rubber area but again only on the left side, guess the apprentice must have done the right
side.....
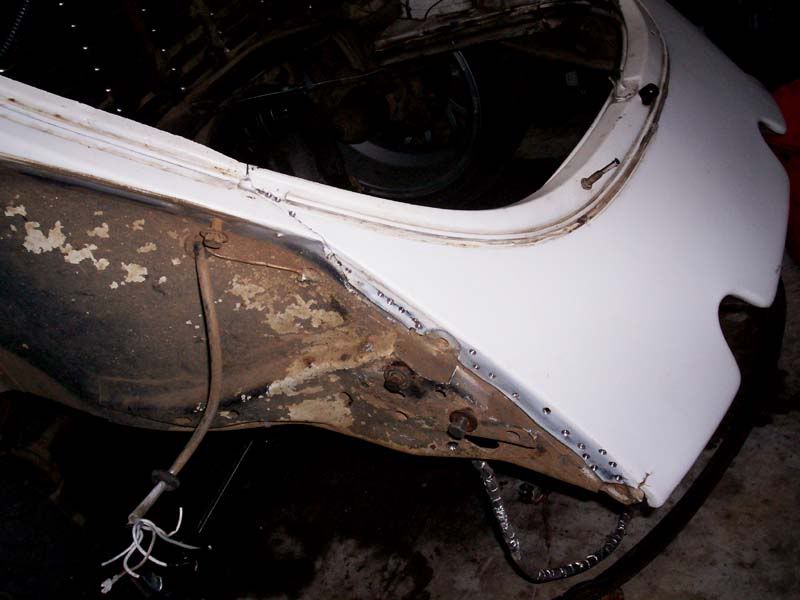
inside the engine bay theres a long tack weld that needs grinding off just below the engine bay seal lip and more spot welds up the inside flange
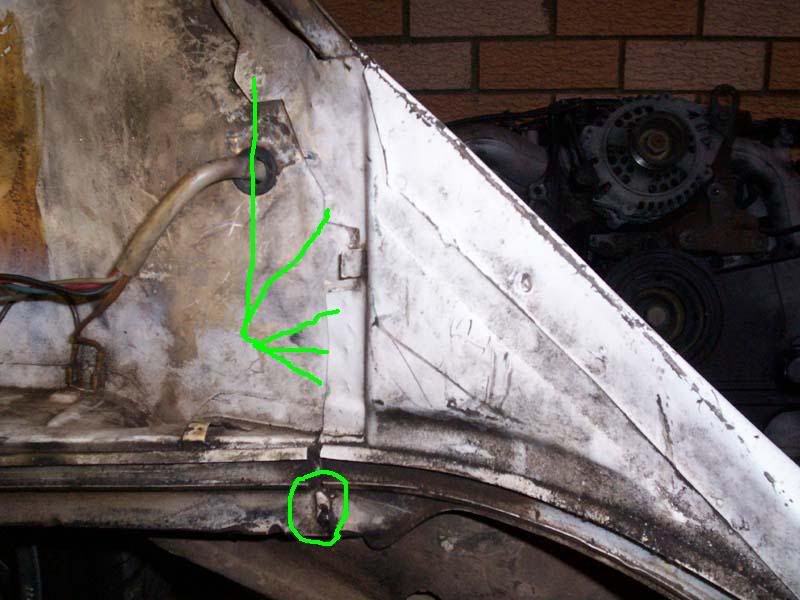
once all those are broken it should slightly break loose
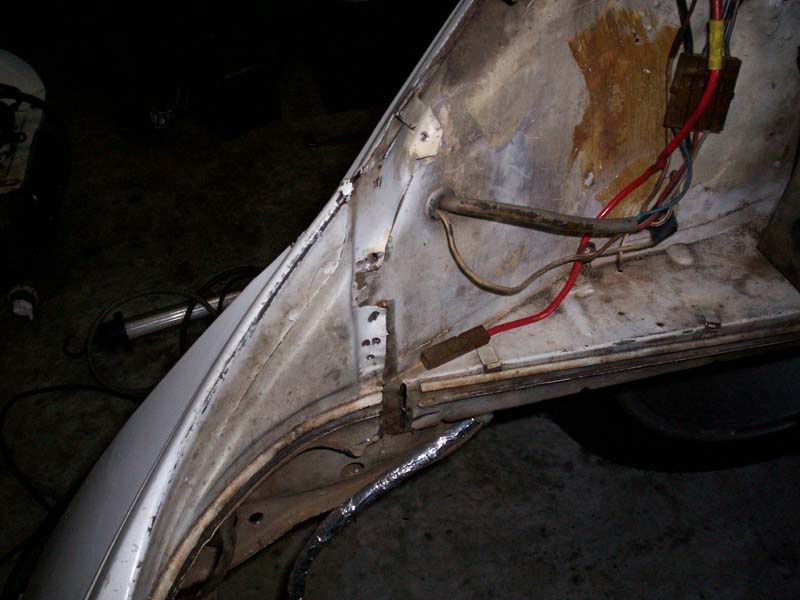
last thing left to do is cut thro the welds on the seal area
john told me to use a hack saw and i gave that ago but it wasnt quite cutting it so to speak
so out came mr grinder with one of those really thin wafer wheels and made light work of it
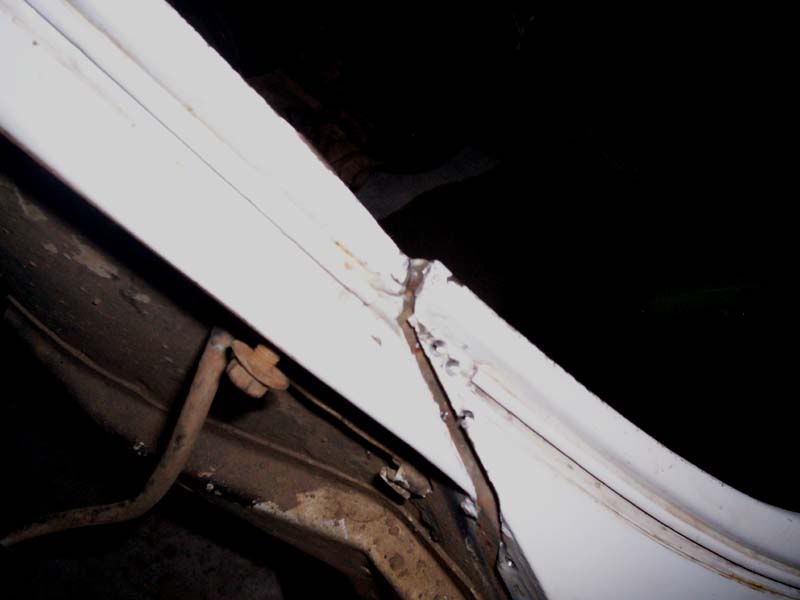
and now go thro all that again on the otherside and with some wriggling, grunting and swearing it should come free
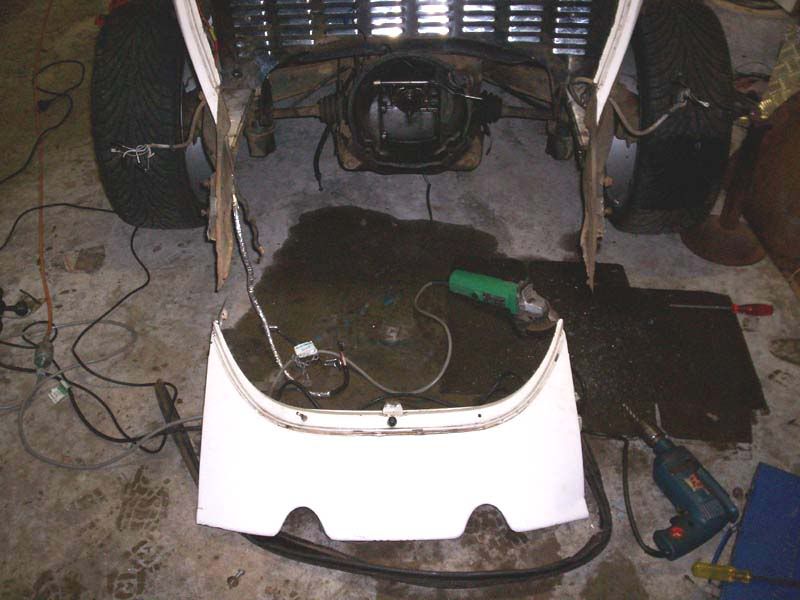
once the gaurds are back johns valance is just aligned with the decklid and bottom line of the gaurds then holes are drilled thro it so that the
bottom 2 gaurd bolts hold it in place
a quick dummy fit
Joel - June 6th, 2009 at 06:06 PM
Trial Fit
so it was time to put the little chariot and big red to work
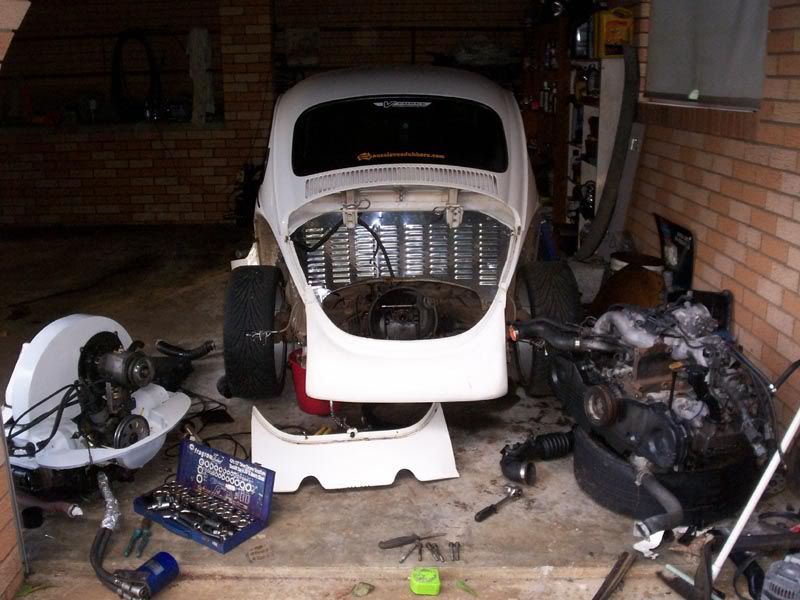
engine slid staight thro the old valances domain and straight into position like it meant to be there
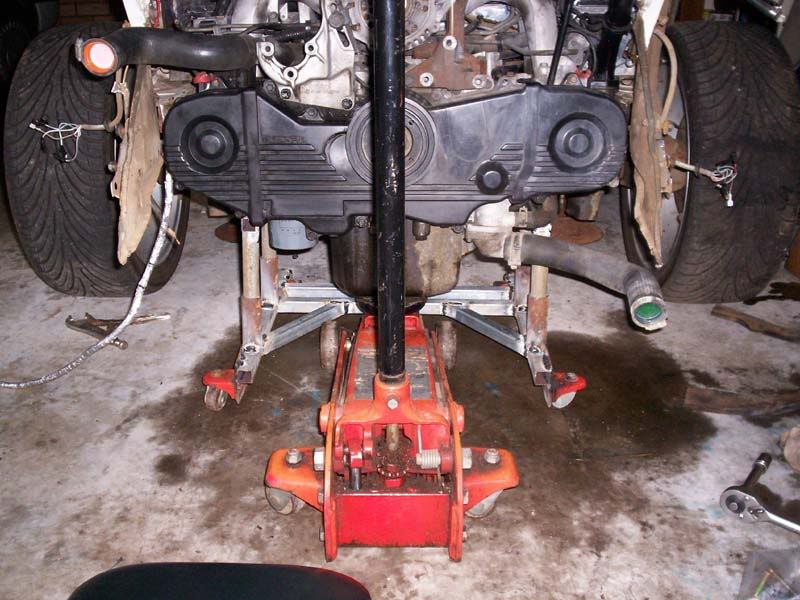
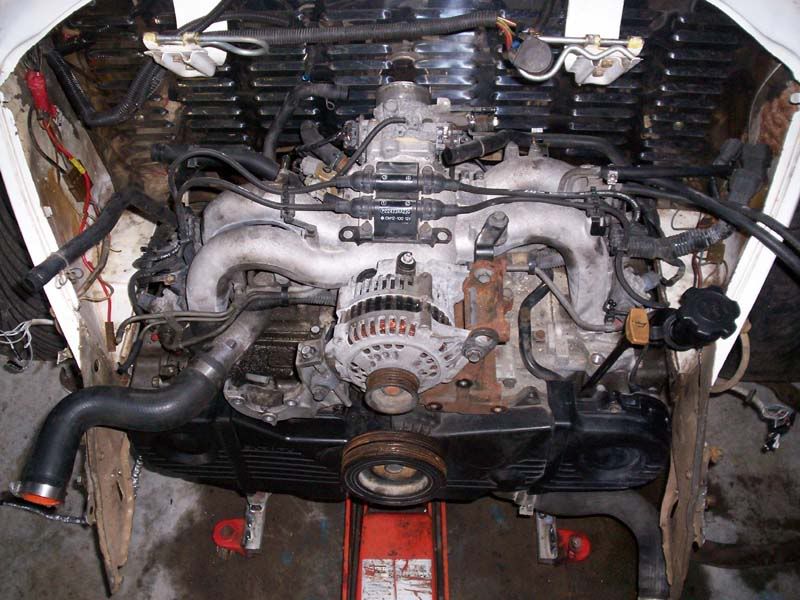
i quickly nipped up the nuts and ran into a problem most ppl in this situation face
the mounting bolts holdign the adapter plate to the engine were hitting the gearbox mounts and stopping the engine from pulling up flush
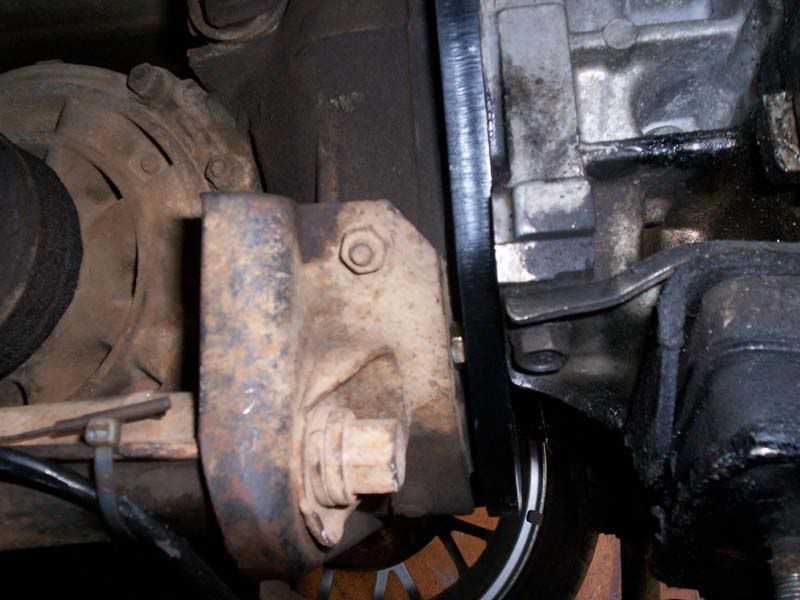
ive swapped my gearbox cradle and mounts for the earlier pre 72 type as there a much better and stronger design so i dont know if this would be an
issue if i still had the cruddy late model parts but it was easy fixed,
out it came and a big drill bit (think it was 3/4") just chewed out a abit of rubber
not much at all, wasnt even the depth of the bolt heads but enough that when i tried again the engine pulled up flush beautifully
dropping it down off the jack soon revealed why shortened sumps are necessary with subi engines
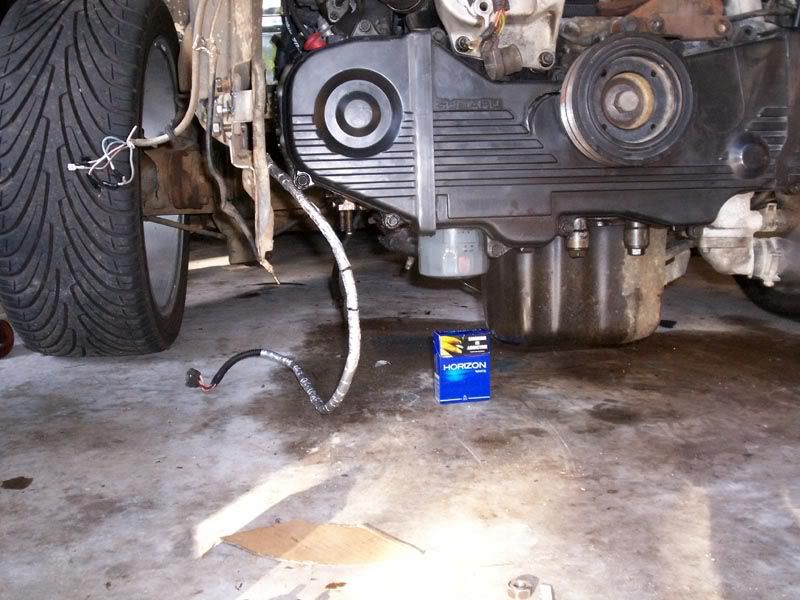
my bug isnt exaclty a ground scrapper but it is fairly low
somehow part of one of my old engine cases snapped off once where the tinware sleds mount bottoming out and ive destoyed plenty of exhausts over the
years,
ive tweaked the torsion bars that many times that its somewhere between a 1 and 2 spline drop, around 3.5" lower than stock so ive established i may
need to lift it back up abit even with a shortened sump
Back up ontop all looked pretty good
the throttle body was hard up against the firewall
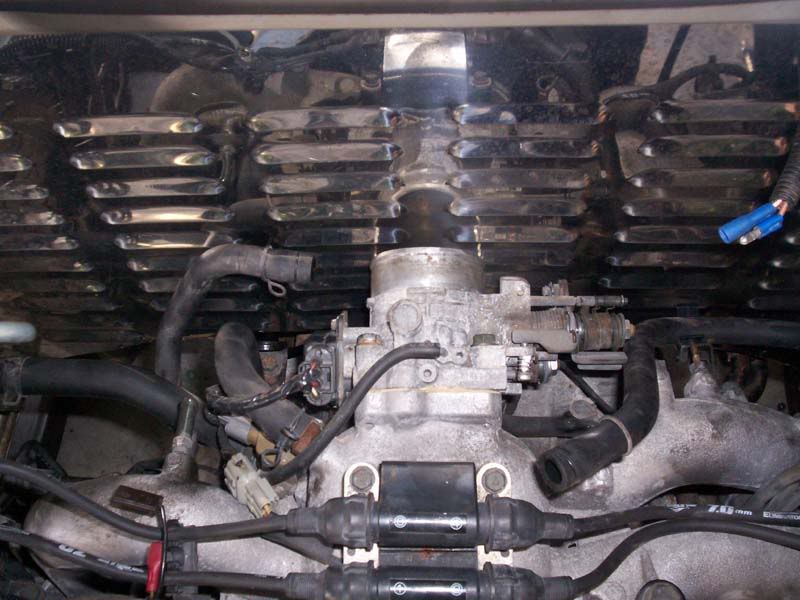
some people cut away the firewall for clearance but i plan on making up an elbow to mount it like this so the firewall remains untouched
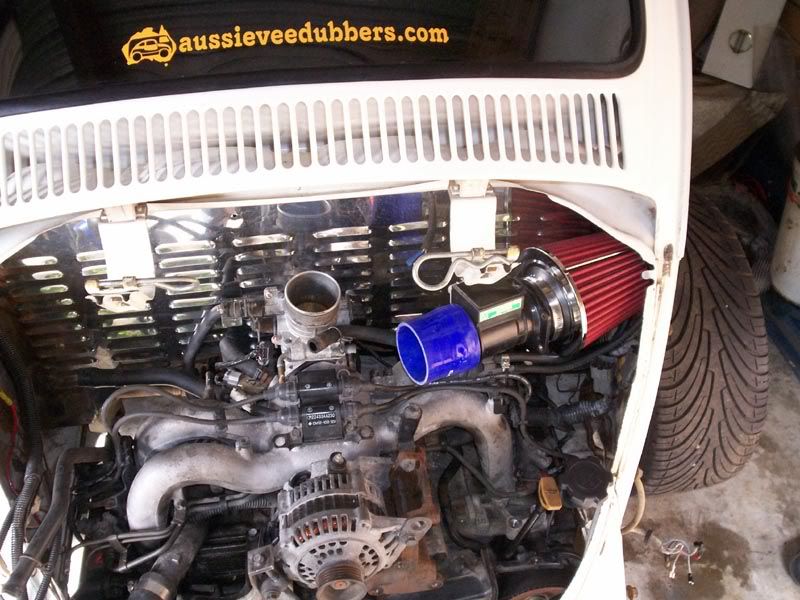
the stock oil filler was sticking up just abit to high for the decklid to close, also easily fixed just by shortening it
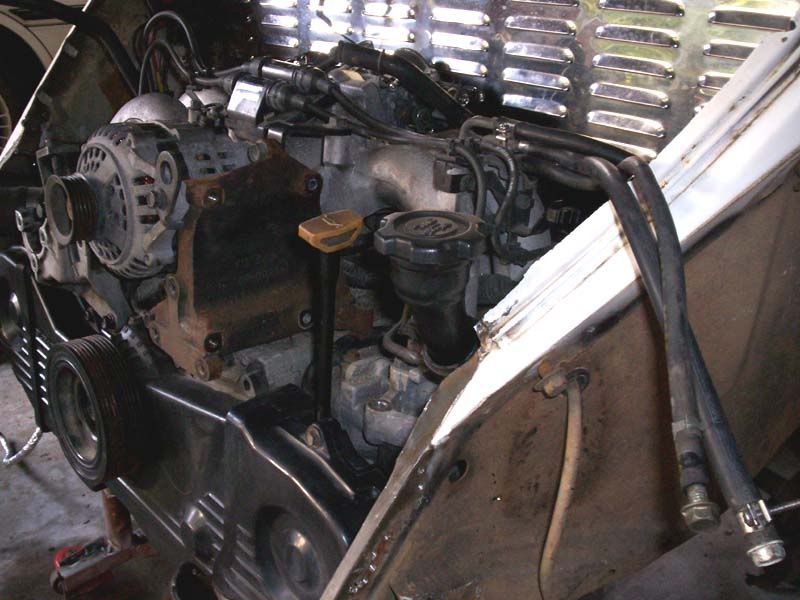
putting the stock valance back on also showed where the slight bit of trimming was needed for the timing belt covers to clear
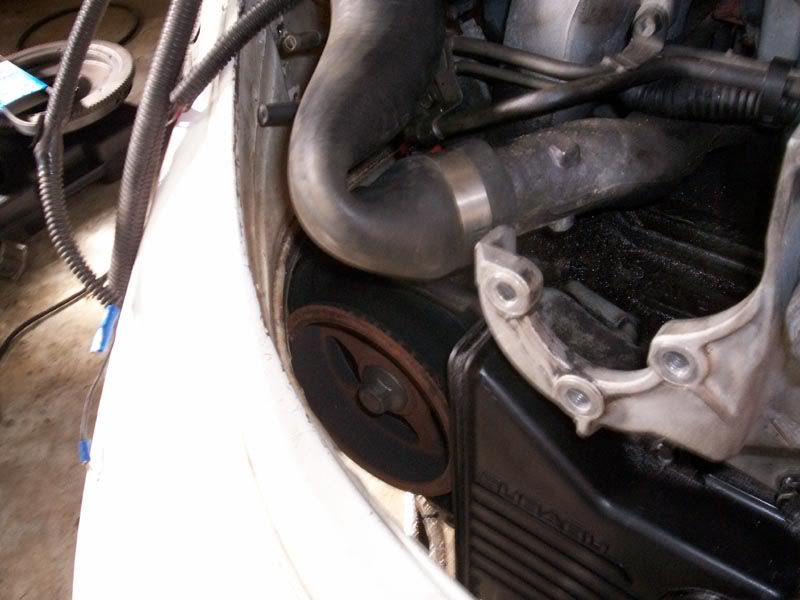
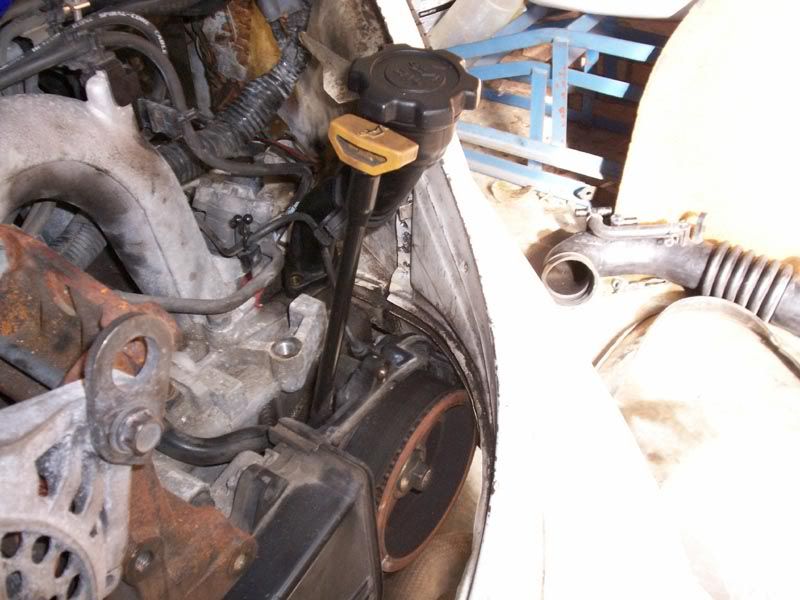
after seeing how well the stock valance fitted i've decided to modify it to clear the covers and bolt in place same as johns would have
i dont want to alter the cars appearance to much and also ive come up with an exhaust design that will have to outlets that will exit the cutouts same
as stock
im not sure how the strength would be affected of the fibreglass one with 2 big cutouts added,
black bug had only one cut out and i wondered about its how good its strength was, you can see in the pic of it a tiny crack line going up from it
Joel - June 6th, 2009 at 06:08 PM
i had originally planned on chopping down the loom myself
ive been messing around with auto electrics for the best part of 15 years plus working at a couple of car audio/air conditioning places has given me
pretty good knowledge of it all
however stripping down the loom, tracing all the wires, discarding the unused stuff, shortening and lengthening various wires then rewrapping it and
tidying it all up was gonna make $250 money well spent to have Al at AM auto do it for me
even someone wiht my experience in auto electrics doing this for the first time i reckon would take a minimum of 15-20 hours which is just something i
cant face going thro at the moment
cram - June 6th, 2009 at 07:09 PM
great thread Joel!
tagging along
trickysimon - June 6th, 2009 at 07:43 PM
Any pics on how you mount valance back on?
Joel - June 6th, 2009 at 08:00 PM
havnet got that far yet
will be pretty simple tho
where the cutouts are to go around the 2 gaurd bolts ill weld in some sheet metal with holes thro to pick up the guard bolts
and also the flat flange in the engine bay i will reinforce and put some bolts thro the inner gaurd
that should keep it firmly in place
Euro_67 - June 6th, 2009 at 10:08 PM
Nice work Joel. Looks like a good fit, not too much cutting. Can you reverse the inlet to face the rear and avoid the elbow ? Im sure I have seen it
done before.
Mr I - June 6th, 2009 at 10:57 PM
Awesome read. Will have some questions for you if we go down this road. Hope you don't mind.
Cheers,
Scott
alien8 - June 6th, 2009 at 11:41 PM
Lovin this thread and great work so far mate!
This should be a sticky.
Joel - June 7th, 2009 at 08:53 AM
| Quote: |
Originally
posted by Euro_67
Nice work Joel. Looks like a good fit, not too much cutting. Can you reverse the inlet to face the rear and avoid the elbow ? Im sure I have seen it
done before.
|
yep sure can and i intend on doing that to as it dramatically tidys up the engine bay and also simplifies the coolant path
it was another point i forgot to make
subarus are a like VW engines in that they're very symetrical
the 3 manifolds, exhaust, intake and coolant can all be flipped around to face the other way
Scott ask all the questions you like, thats the reason i started this thread
pete wood - June 7th, 2009 at 05:26 PM
damn that sump is low! I'd be getting the thinnest one I could if I were you. CustomVeeDub make a very skinny sump. Be worth every dollar and I know
they aren't that cheap. Coz if it's cheap it will leak. BTW, I agree with you re having the loom ct down by someone else. Best thing I did.
Joel - June 7th, 2009 at 08:56 PM
that wasnt even settled either just straight off the jack so it will probably drop another inch
initially i was gonna chop my sump down myself and add some wings to get some capacity back but im starting to think its alot less hassle to just get
mine shortend by someone like COR or sharpbuilt, I think even Al might do the them
Joel - June 8th, 2009 at 07:36 PM
for those people that were interested in the removable valance, ive put it all back together with the valance sitting in position the gaurds clamped
it in place when they were tightend down very firmly
if u diddnt notice the joint had been cut thro in the seal area next to the taillight it could pretty much pass for undisturbed
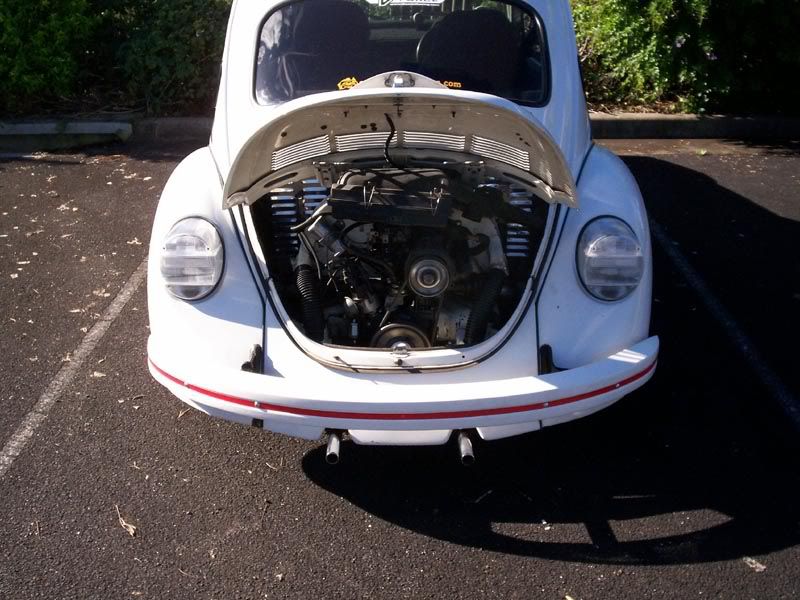
poor old girl hasnt been to a show since valla last year, i took the mainstreamer to warwick, actionday, goldcoast show, dubs by the pub and
mardigrass
so i wanna take it to klubfest on sunday
people are starting to question its existance
1303Steve - June 8th, 2009 at 11:33 PM
Hi Joel
Don't give my son any ideas with your car.
When I fitted the Wasserboxer to my 1302 I kept the car running as long as I could before dropped the air cooler out, I fitted up the cooling system
etc while still driving it around.
Steve
jzk25 - June 9th, 2009 at 08:02 PM
Loom is ready Joel. Give us a call tomorrow and we'll get it in the post.
Joel - June 9th, 2009 at 08:16 PM
now theres the best news i've heard all week
cheers Al
will give you a buzz tomorrow
Joel - June 10th, 2009 at 08:11 PM
| Quote: |
Originally
posted by 1303Steve
Hi Joel
Don't give my son any ideas with your car.
When I fitted the Wasserboxer to my 1302 I kept the car running as long as I could before dropped the air cooler out, I fitted up the cooling system
etc while still driving it around.
Steve
|
I'm sure David's already been corrupted by fathers blue project in the garage 
i know i would be
im not gonna take the plunge and cut the wheel well till the rumble of a subaru boxer rattles the neighbours windows first
the bugs a fair weather toy so im not relying on it as a daily, otherwise i would do it the same way
flat_iv - June 11th, 2009 at 08:29 AM
Joel,
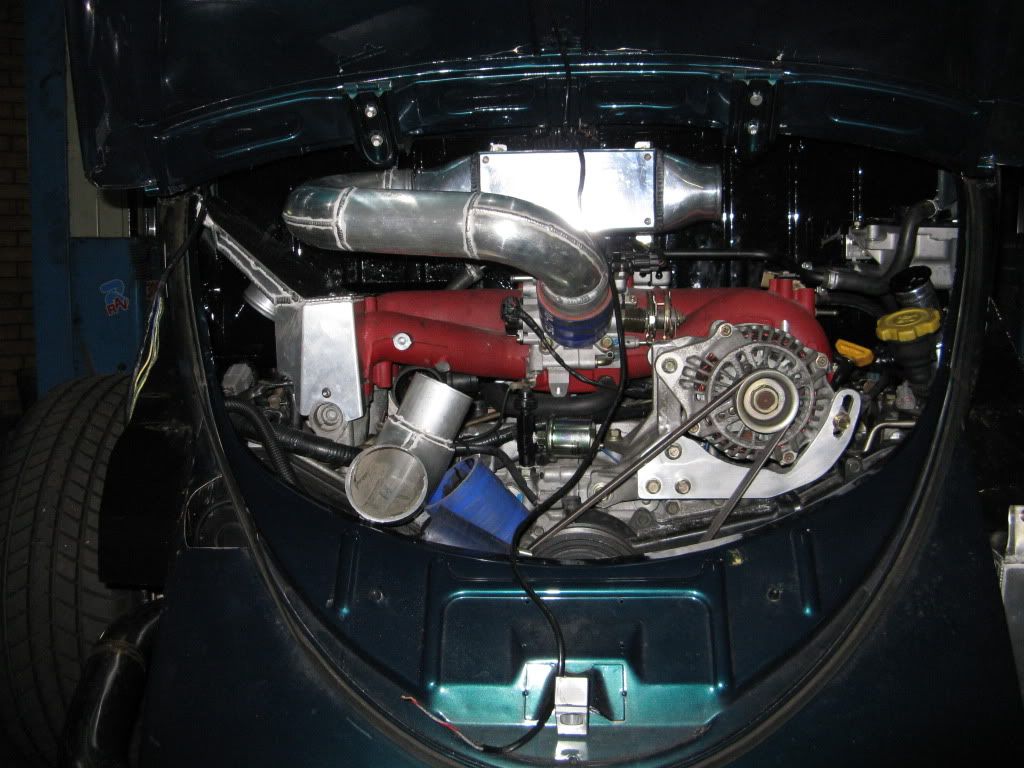
Why dont you rotate the complete intake around 180 degrees? I can email you a few pics of my 2.2 in the back of my ghia with the complete intake
rotated 180.
flat_iv
Mick058 - June 11th, 2009 at 09:57 AM
like this???
Jak Rizzo - June 11th, 2009 at 02:53 PM
Hi Mick
Is your intercooler bolted to your Fire wall? if so, are u not worried about the motor moving but the intercooler bolted solid thus putting strain on
the intercooler piping & joints?
Juat a thought
regards
Jak
Joel - June 11th, 2009 at 04:33 PM
i must have been in noddy land when i answered waynes question the other day
the reason i didnt flip the intake is the A/C compressor is staying so the alt would need mounting on the left side where the powersteering pump
was
which means a custom bracket would need fabbing up
abit more work than making a simple elbow for the TB
rocknrob - June 11th, 2009 at 05:47 PM
pretty simple brackets Joel...
[img] [/img]
[img] [/img]
l
rocknrob - June 11th, 2009 at 05:56 PM
cover it up with the ironing board...
[img] [/img]
leaves room in the middle for you know what...
[img] [/img]
Joel - June 13th, 2009 at 01:11 PM
i like your thinking rob,
im thinking of the same project later on down the track
i really do have to say a huge thankyou to Al and Miles who did a fantastic job on my loom
it came back about 1/10th the size of what i sent to them all clearly labled with a nice simple instruction sheet
even on a shoe string budget i would still recommend it and anyone who did it themselves says for that money its well worth it
about a month ago a nice old bloke with a subi powered buggy came and checked out my bug as he also has an Lbug hes planning on converting. he had the
whole engine swap inthe buggy done by Al and Miles and also speaks very highly of them
Miles sorted me on the rad fan wiring
its best of to use the ECU control, main reason being the computer Idles the engine up to compensate for the load of running the fan.
on the subject of radiators i meant to say earlier in the thread i found when trying to find a rad that fitted theres a few sellers that give the core
dimensions and outlet sizes on ebay which is really handy, thats how i found that my mazda rad would be the perfect size:
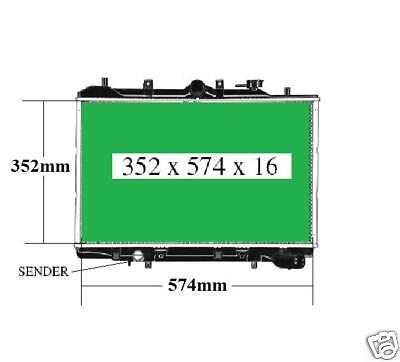
this is the stock ej22 lib rad, you can see how the core alone is another 100mm wider and the end tanks are on the sides not top and bottom which
would add another 100mm as well so thats why it was just to wide for my application

most people would think the B6 rad is too small but thing to remember is 6Meters worth of copper lines under the bug in road draft are gonna shed
nearly as much heat as what the rad will
most ppl that fit big rads have over cooling probs
ian.mezz - June 13th, 2009 at 02:39 PM
Yeah then sizes should be OK as my EJ20T bug Radiator is
600 x 360 x 16 cross flow with custom side tanks so that the hose fitting are in the best spot
One little fan in centre of radiator that comes on when the computer tells it to 


 [/img]
 [/img]
 [/img]
 [/img]