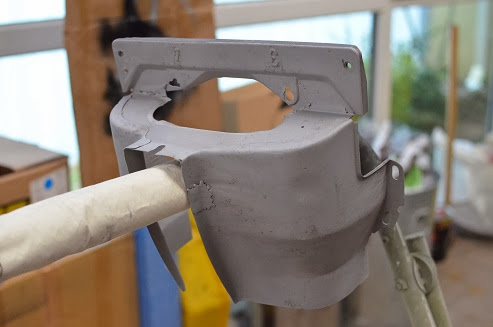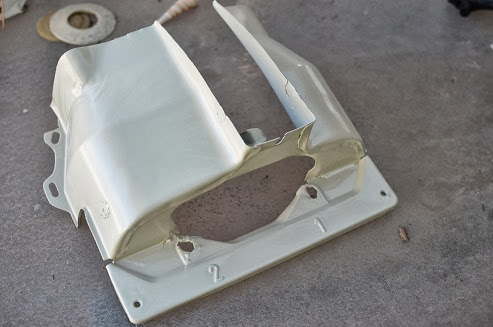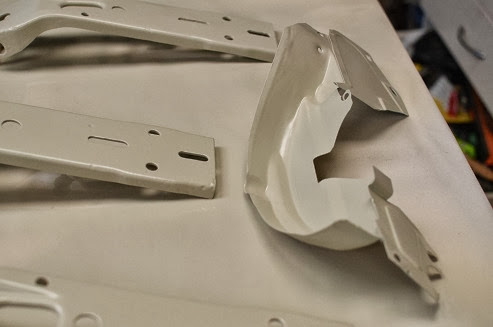

Hey all, I just got the bits and pieces back from the sandblaster and plan is as follows:
epoxy prime
bend and trial fit and work them to where I want them
2k primer
basecoat
2k clear
sound good? likely to stand up to temps around the cylinders and in the engine bay with all the vibrations and oil mist and heat etc etc?
PS sadly the rest of the car is already painted using somewhat more dubious prep methods... except the rear bumper, which is still mostly chromed; would this be a reasonable thing to put over the chrome if I rough it up a little, or should I use a self etch 1k rattle can primer instead/as well on it?
Just be aware of the dangers of 2K paint.
| Quote: |

Peter, I hope you weren't looking for POSITIVE comments, were you? 
I'm sure it will turn out great
| Quote: |


2K paint will stand up to 100 degree heat easily. On the actual heads, manifolds or even brake calipers, you will need higher temperature paint.
Cheers Helbus,
So bare metal, epoxy primer, sanding/bodyfiller, graphics/basecoat, 2k clear is good, or should there be another 2k primer between sanding and
basecoat whether there's filler or not?
sprayed the epoxy primer with a 1.8 tip and I have to say it levels out better than I thought it would... hence the slightly overwet application and
the runs 
Still, that's what sanding sponges are for, and it's mostly to keep it safe from rust and tart it up a little. Next layer will be 2k primer in
readiness for the fun part 

amazing how many cracks and holes you find under all the old paint....


sadly the epoxy did not fill them 


had the bumper brackets and a few other little bits blasted at the same time, so they get the treatment too.
| Quote: |
Guess we're going to see .... unfortunately this is the original original cylinder tin from my first ever beetle and it's been with me since day one
on each engine iteration, so it's been through hell. If I'd welded and panel-beat the buggers before I began all this powdercoating would have been
great, but as you can see they're in fairly ordinary condition. I'm hoping that filler and sanding and 50 coats of clear will make them look
reasonable, but I'm not hoping for a miracle 
Will post the stages as I go as a cautionary example for others 
Sweet fella, you'll f
Ind once assembled the odd marks and imperfections will not be as noticeable. If you are really fussy you could wet sand or spray a guide coat. I
would bog and sand as necessary then reprise prior to base coat.
Good luck
Great! I'm hoping the gaping holes and birdpoo welding will completely disappear on assembly 
Bit late for you Peter, but there is a filler available that will withstand powder coating temps. [aroung200c].
Lead or solder will melt at those temps....I found out the hard way.
Gee, Cheers Greg... for NOTHING!!!!! 
I guess I'm going to see how it goes with the 2K.. failrly late in the piece to change tack now. Reckon polyester spray putty will handle the
cylinder and head temps under the tinware okay? That stuff hides damn near anything.
so when you REALLLLY look at your tinware you realise it has a lot of weird lumpy and bent bits that are not so much fun to fill and sand. anyway-
here's the next stage of the tinware paintup thread. one day I hope to actually fit it to an engine rather than leaving it strewn about the alfresco
area in various stages of completion.
and some other bits copped a little primer while the gun was out 
for some reason my urls aren't working so well. so attachmentarianism it is.
and on... and on...
time will tell how long it lasts (especially the bumper which is reasonably well chromed underneath the epoxy and 2k primer)
Frankly I'm not keen on hearing time's opinion until the last possible minute.
| Quote: |
Hi Lee,
familiar with the results spray can jobs, but this one's going to try and be a bit more pro looking  The killrust stuff is pretty good if you're just covering up the odd scratch and looking to improve the appearance in a
basic way, but I'm aiming for something that looks like it's been carefully applied. All my last 'paintjobs' on the tinware were like that, and
they stood up fairly well, but they didn't like degreasers and never looked quite right.
thanks to the 36 degrees in perth nothing has happened Paint-wise this weekend. just saying. unless you count emptying out my paint storage locker
when my HOK Tangerine Kandy Koncentrate tin sprung a leak and ran down over everything underneath the top shelf 
did do some more wiring tho 
Hot weather again, but not being one to listen to the voice of reason I busted out the LVLP, the sanding pads, the basecoat, the prepsol, the plastic
sheeting and the thinners. But not in that order. I used some old dried up basecoat that had been sitting around since the original painting began 2
years ago as the latest batch of base didn't quite match. Incredibly it reverted to liquid form and is a brilliant match in the bumper and supports
 Way too hot to mess with the clear and by Sunday arvo the bugs were out
and sniffing the 2k thinners, so I'll give it all a light rub over next weekend and bomb it with clear next Sunday morning -with any luck. The wierd
shaped pieces are going to be prone to runs and be a b1tch to get even so I predict a fair bit of post painting cutting and buffing is in my near
future. pics to follow when they get here from the box across the room.
Black went down okay
reconstituted basecoat was a little thin, but it stuck

this happened after the black basecoat but it's hard to see until the clear goes on and you get some sun on it, so y'all have to wait til nex tahm,
y'hear 


We have clearcoat.......
a few runs and dry bits here and there, and some of the prep was not what you'd call concourse or professional, or even passable, but we have
clear.
pics to come as soon as my camera monkey has finished screwing around trying to make it look okay. 
why not bare metal chemical strip them and por15 them few coats, sand and coat again for filling/smoothing pits?
you could also use their engine enamel if you didn't want to use the rust preventative paint. That fills imperfections even better! its really really
high solids paint.
Their stuff is tough as! and resits high temps, fills pits well and very nice finish.
Also, alternative.
bare metal chemically stripped and treated
wattle super epoxy super etch
high temp rated epoxy. (POR15 top coat range)
cheap and good alternative 2.
bare metal chemically stripped
acid etch treated, rinse and dry.
VHT engine enamel.
bake in oven 100ºC for 1 hour
tough as boots, sticks like dog shit and lasts years on sumps where stones chip are common and much longer in the engine bay.
only it doesn't fill pits.
Hmmm... good idea vlad...
but they're already painted  promise to post pics shortly, even tho
they're not cut and buffed.
There used to be a product made by taubmans/white knight called SLS etch primer. Legend has it that the letters stood for 'Sticks Like Shit', as it
was named after the results came back from the tests the industrial chemists ran. I like to believe it 
Meanwhile I'm using epoxy, 2k primer, black base, HOK 'Orion Silver Shimrin', four or five candy colours mixed in intercoat clear, topped with
generic 2K clear. 'twill be interesting to see how they stand up to the rigours of an aircooled engine bay 