| [ Total Views: 3257 | Total Replies: 17 | Thread Id: 91483 ] |
|
|
 beetleboyjeff beetleboyjeff
A.k.a.: Jeff Walsh
Custom Title Time!
    
Posts: 1783
Threads: 40
Registered: February 13th, 2009
Member Is Online
Location: Port Macquarie
Theme: UltimaBB Pro Blue ( Default )
Mood: Drive bugs hard
|
| posted on July 9th, 2011 at 11:05 PM |
|
|
L Bug interior re-do.
OK, after posting a build thread on customising my L Bug dash ( http://forums.aussieveedubbers.com/viewtopic.php?tid=91433 ), I thought I would do a thread on the rest of my interior,
most of which was done in conjuction with a full re-spray a few years later.
First up, I wanted to install electric windows, and I wanted some way to cover the 'lump' made by the winder adapter as it went over the splines of
the window winder handle shaft, so I got some parts off the door cards of a Mazda 626 (I think), then worked out how to fit them.
I needed to change the location of the interior door handles so they would fit into the top of the new (Mazda?) arm rests, so I had some angle
brackets made and the linkages modified so the handles would be horozontal instead of the standard vertical, and fitted the electric window winder
mechanism from Autobarn. The motor mounts to the bottom of the inside of the door, and it has a sort of chain drive inside 'tubes' up to an adaptor
over the window winder handle shafts.
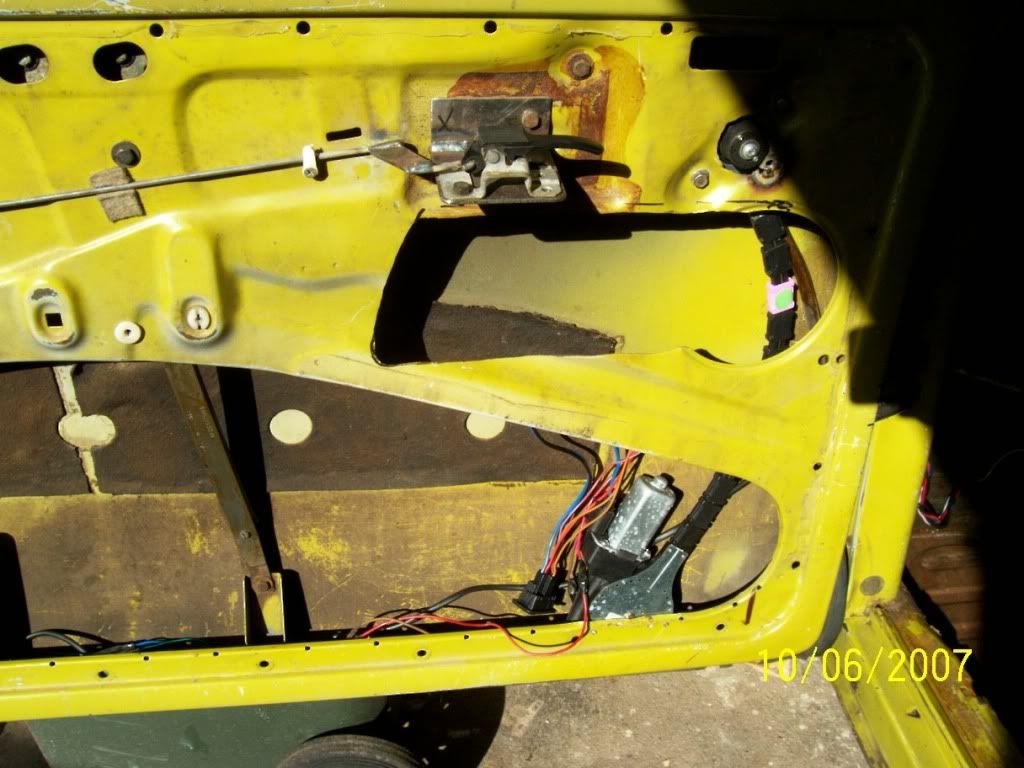
I then fitted remote central locking which attaches to a bracket in the bottom of the door.
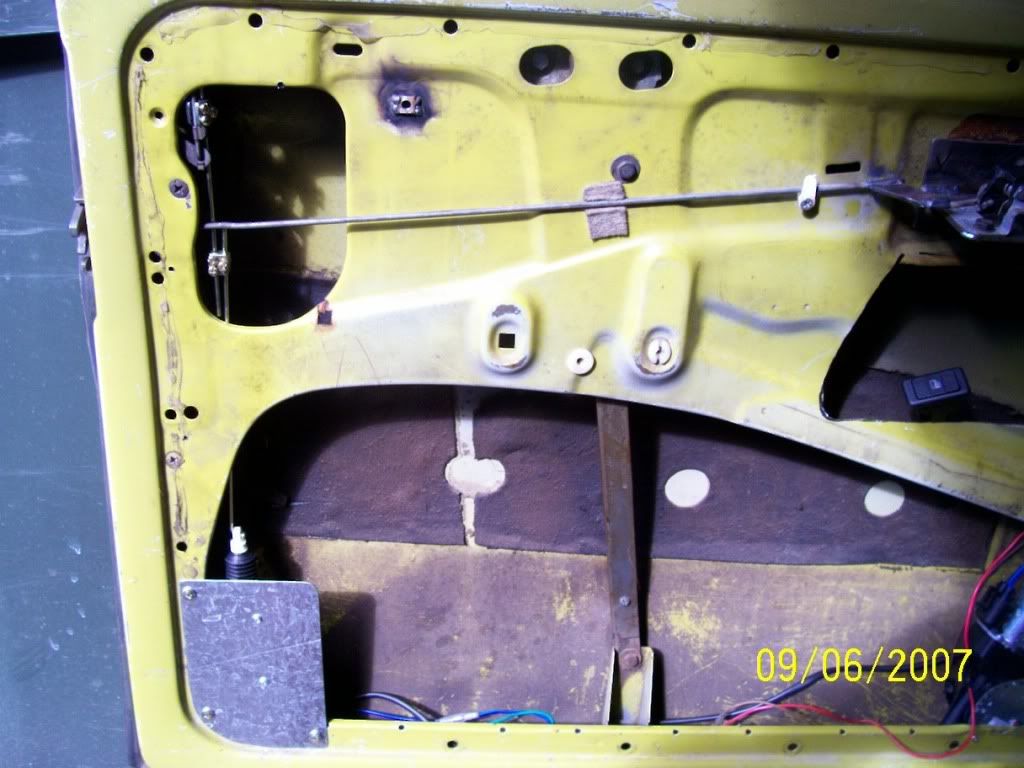
To run the wiring into the doors, I 'tapped' both the door jamb (A pillar) and the front of the door in a bit to increase the gap between them on
the inside, then drilled holes in both that aligned so I could run a rubber tube between the 2 (fuel or oil hose I think). The side in the jamb is a
tight fit with a gromet to hold the tube firm, and the side in the door is free to slide in and out. The wiring is then run through them undamaged.
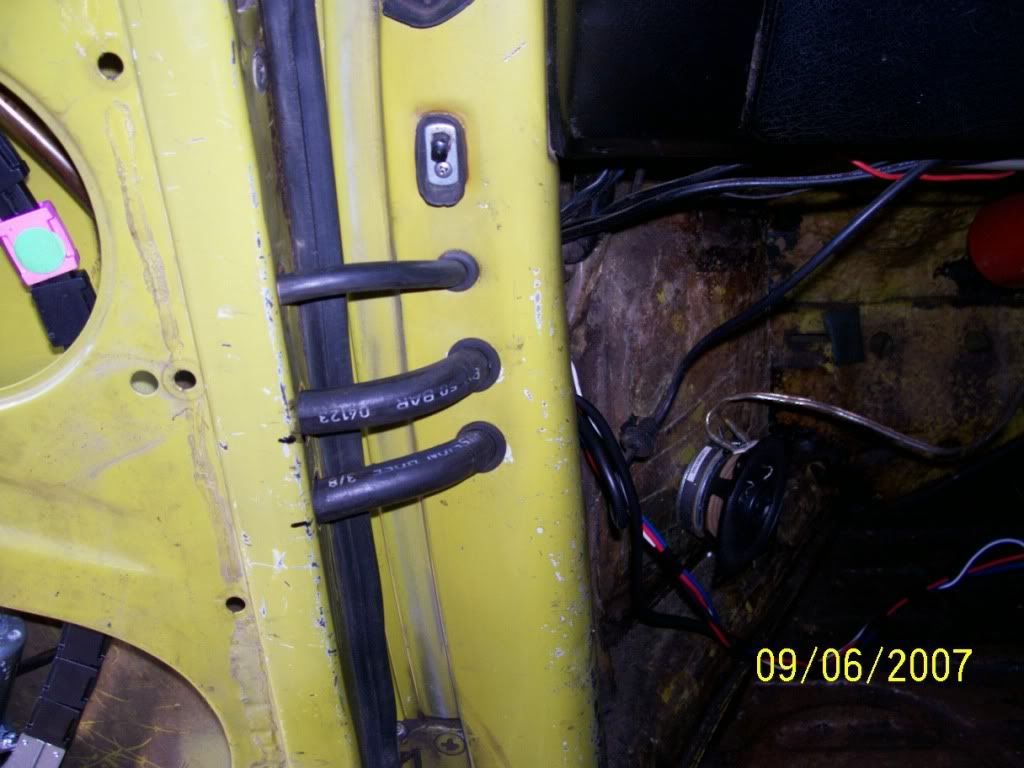
In amongst this 'rats nest' of wiring is also an alarm.

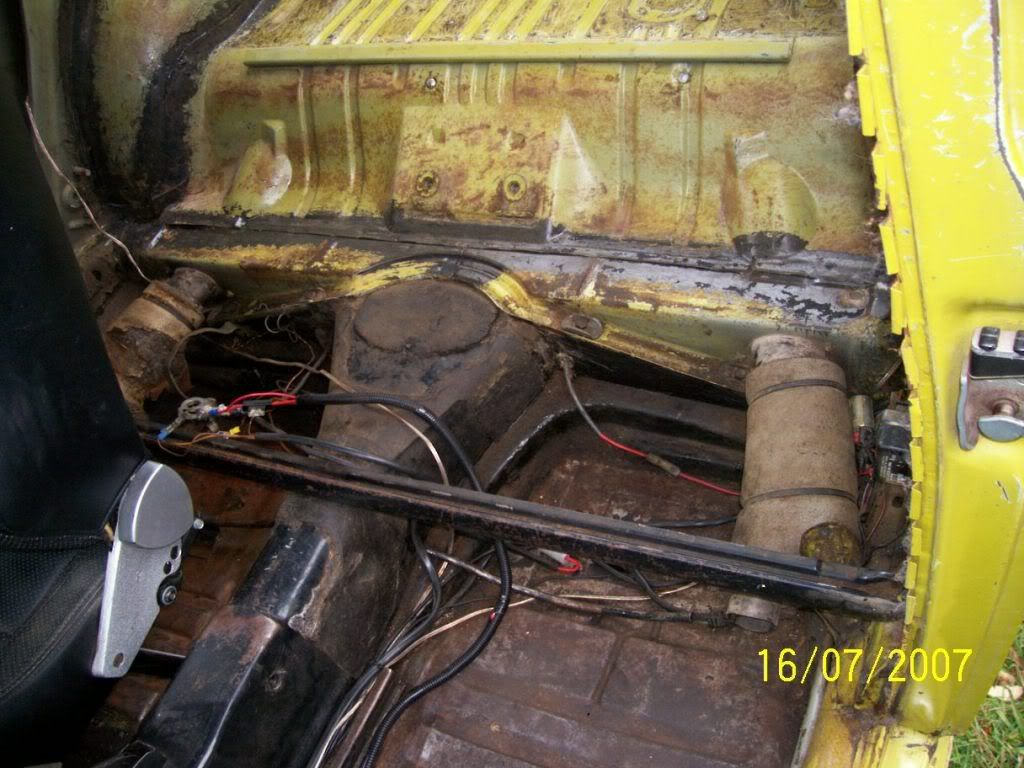
This was all a few years before the re-spray etc. The first thing to do was to strip out the existing interior. In this shot of the back, you can see
one of the old antena holes (I had 3 of them - HF CB radio, UHF CB radio, and mobile phone). I had them filled for the re-spray.
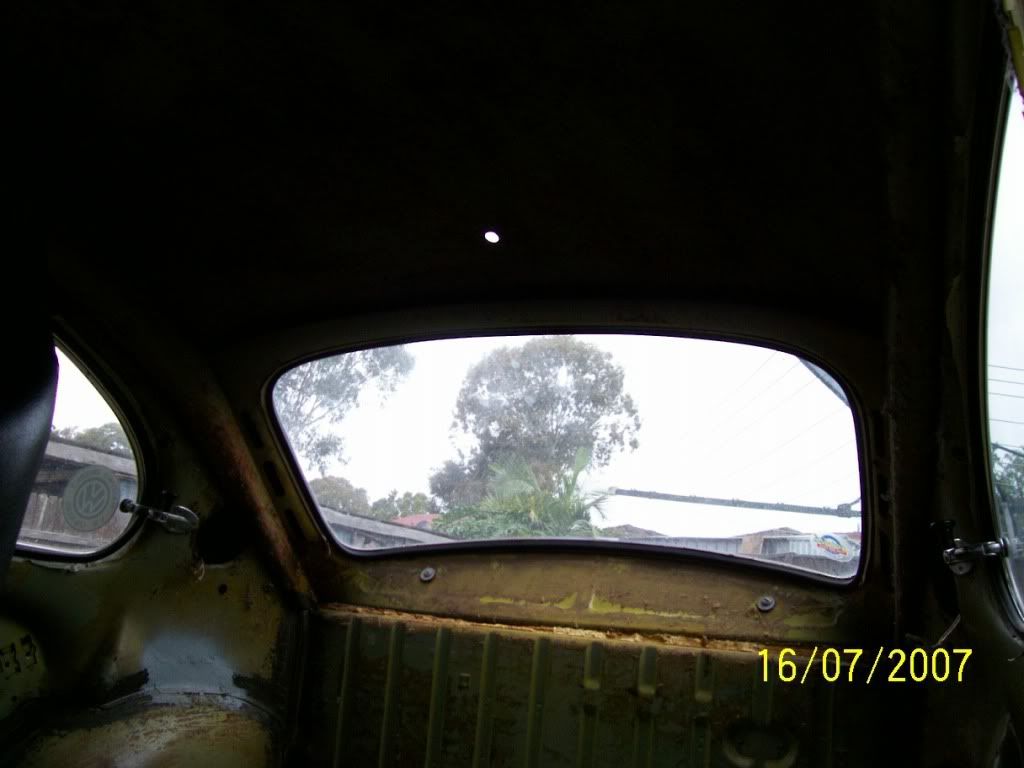
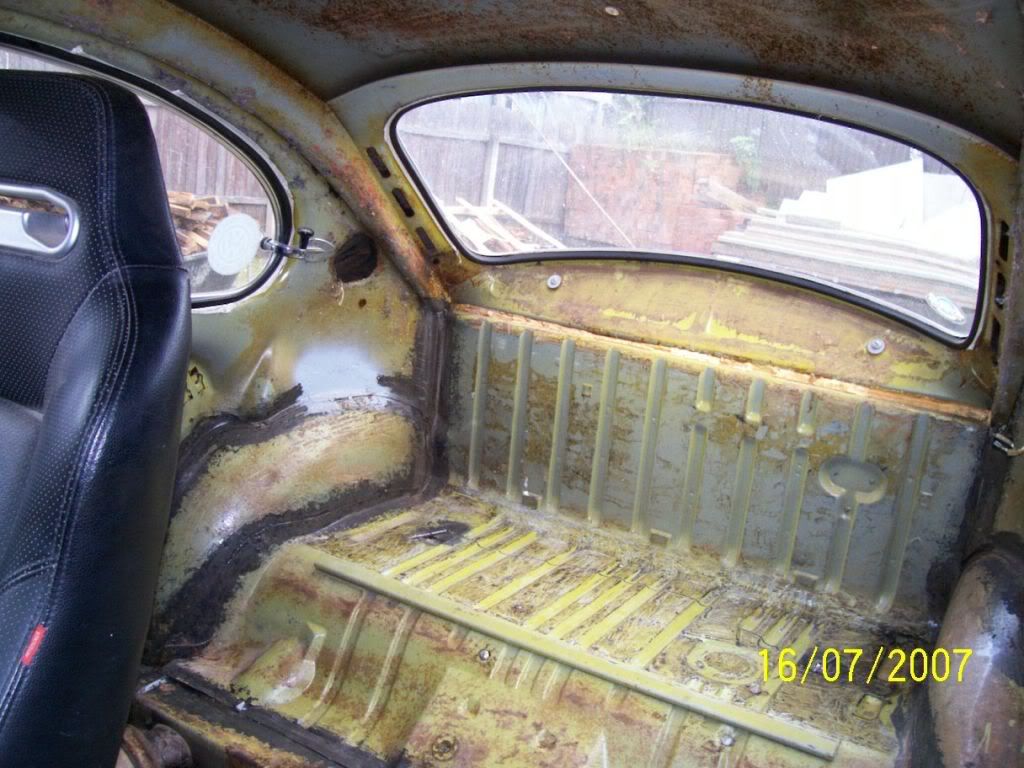
The back seat area.
In the area behind the back seat, you can see where I fitted the rear speakers years ago. It is a bit of a bugger in these later bugs with the flow
through ventilation, as it 'broke through' into the vent area, so I had to make up and install shields inside the speaker holes.
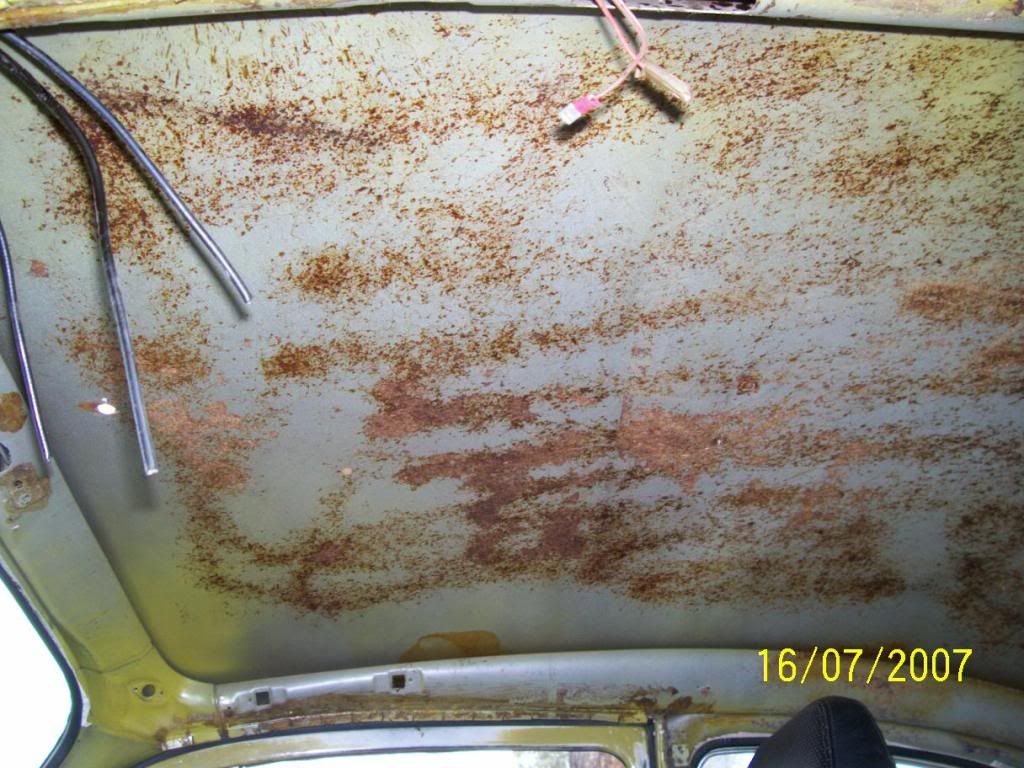
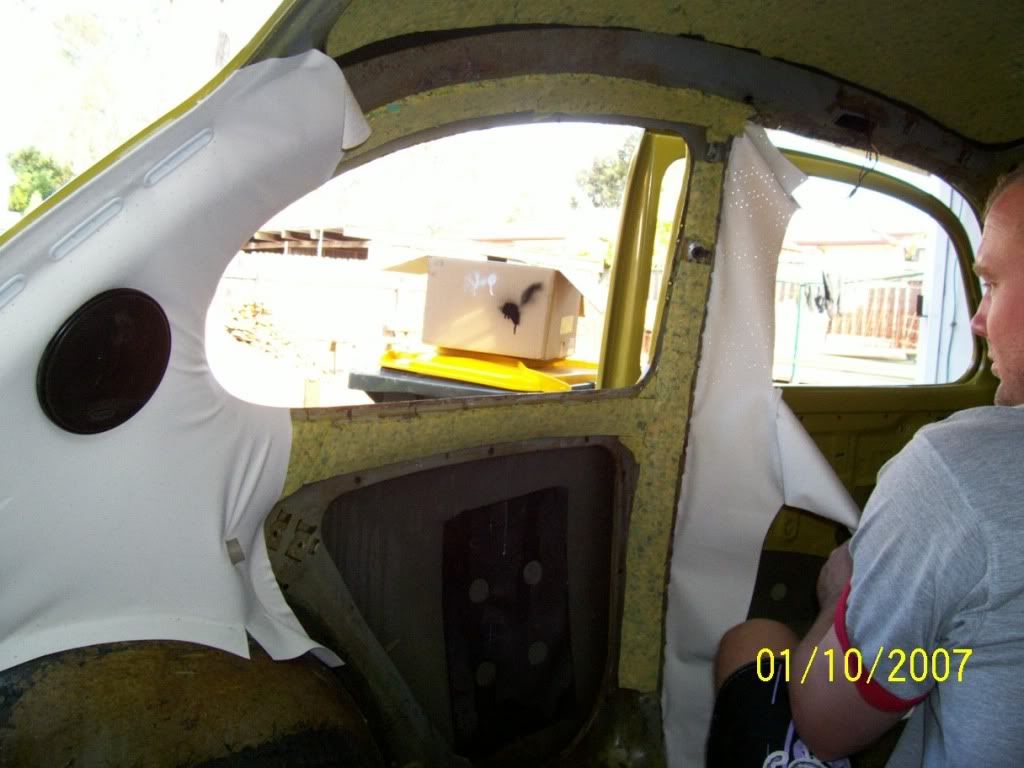
The roof liner was stripped out (yeah, I know, more arial holes).
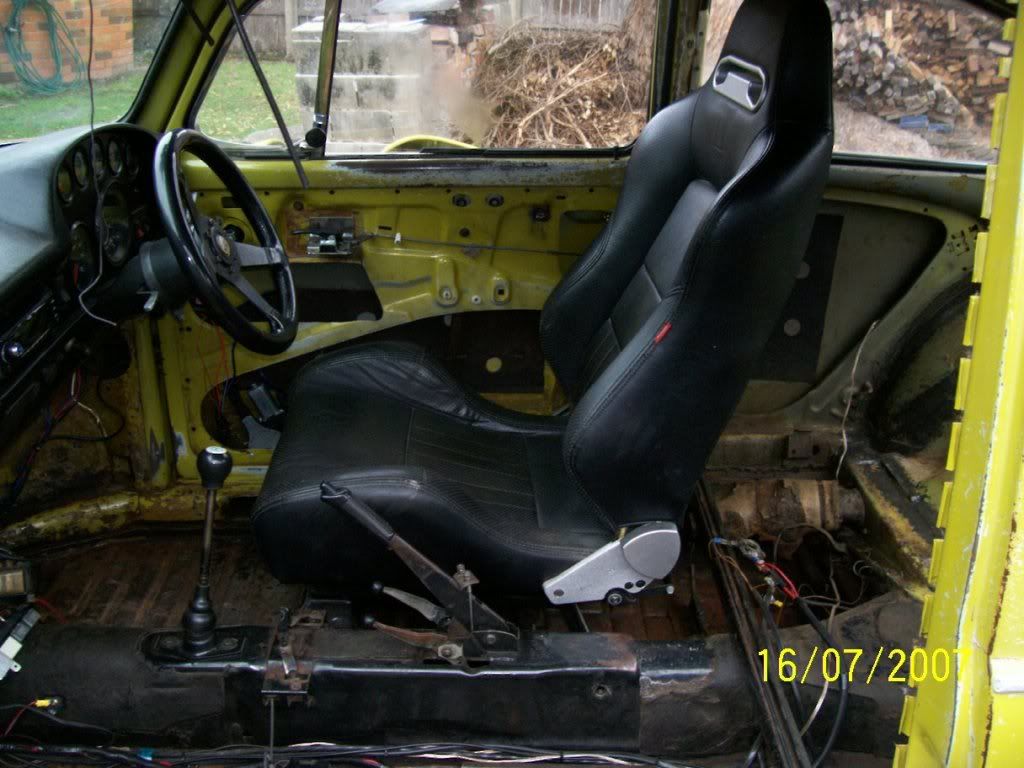
These are the Autotechnica seats I bought and fitted from Autobarn a few years earlier. We (my engineer welder mate Bernie did the technical stuff)
modified and beefed up the original seat bases and bolted the seats to them. They use the original slides etc, and are excellent.
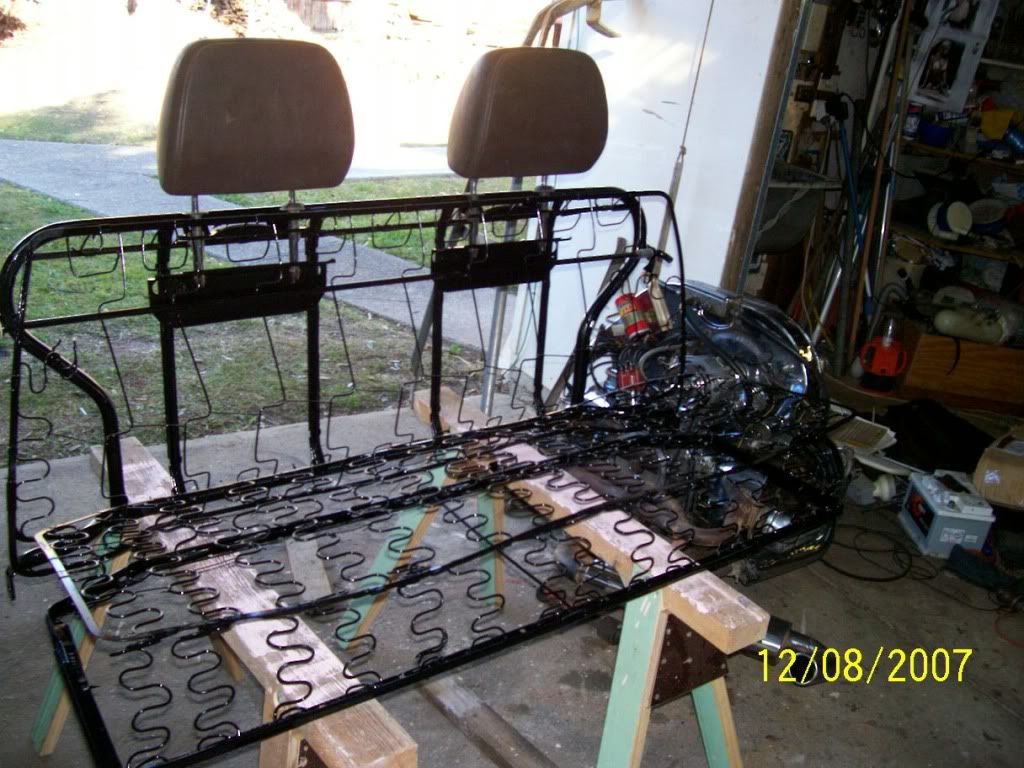
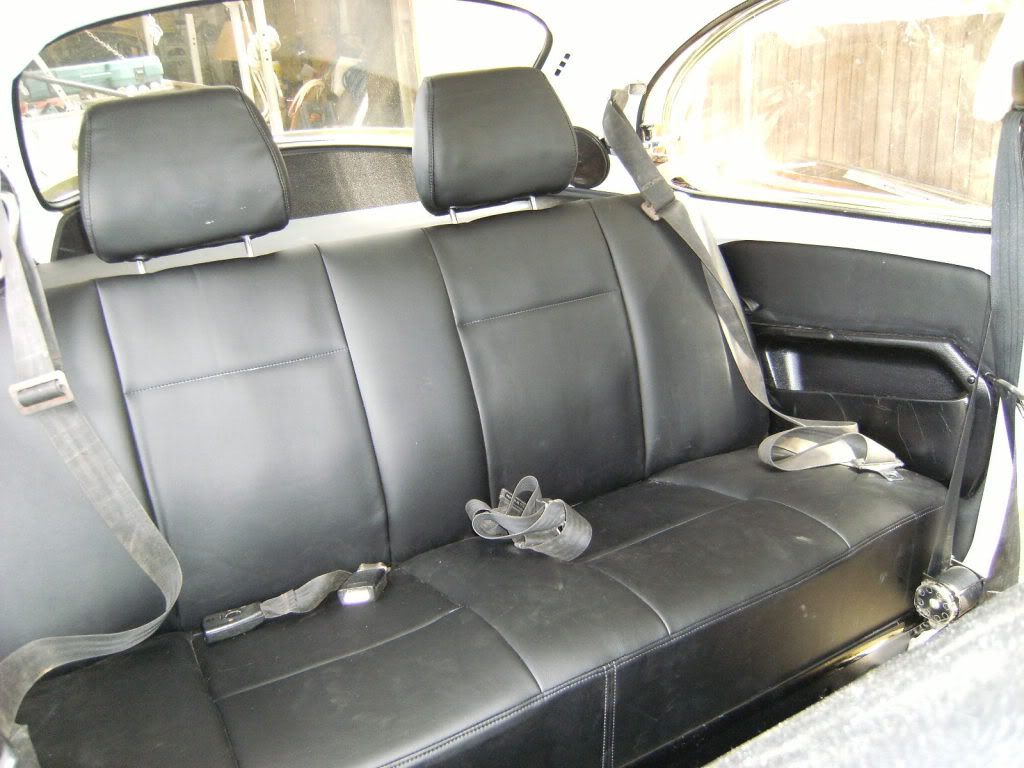
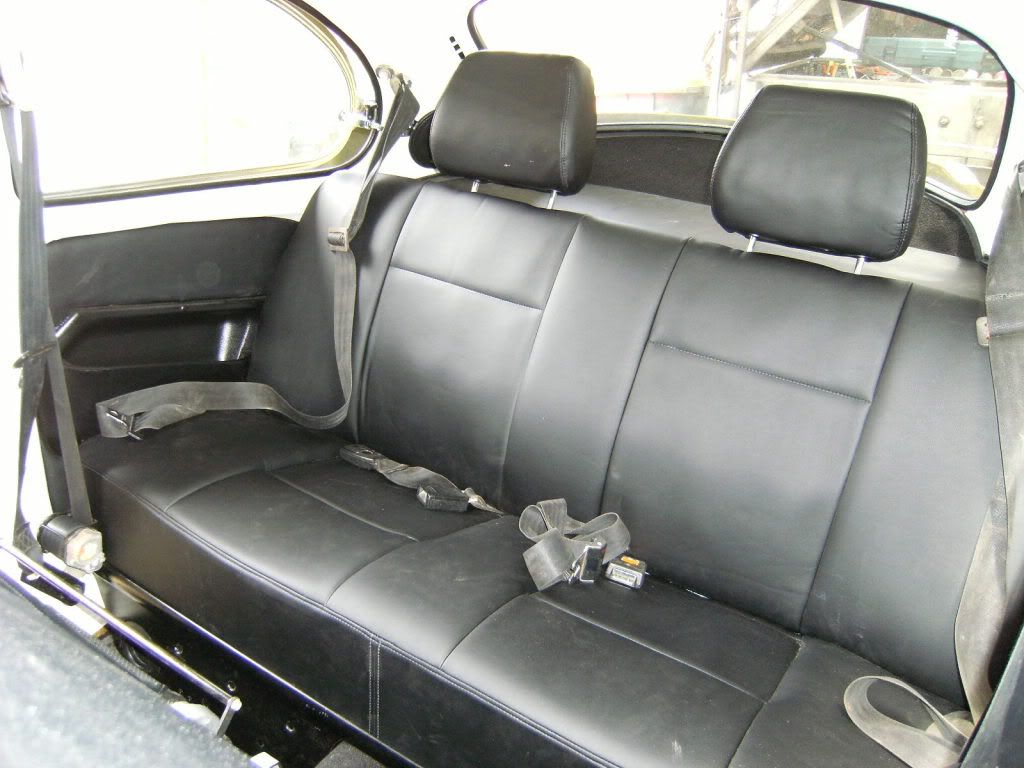
I wanted to put headrests in the rear seats, so I bought a pair of front seats with headrests that I liked from the wreckers, cut out all the back
part of the seat with the headrest bracing and mounts, and fitted them into the existing back seat back. The rear seat base was also cut in half, and
shortend by 25mm to make removal easier due to pockets I was fitting in the back side cards. Once again, Bernie did the welding etc. for me.
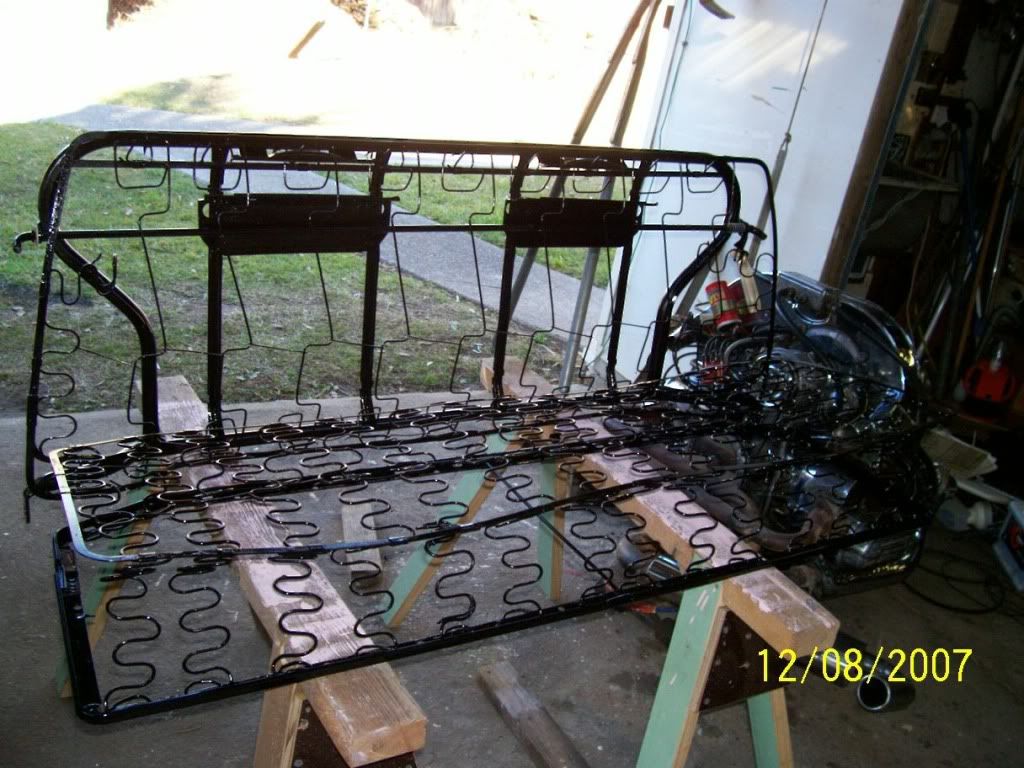
And close up.
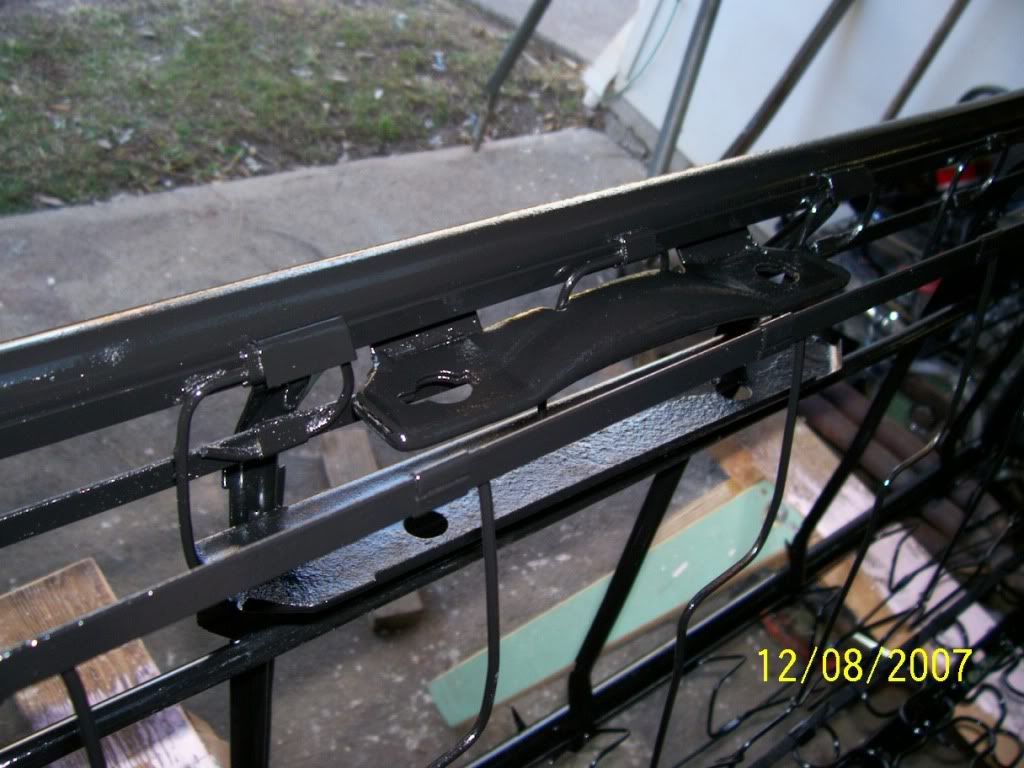
The headrest tubes were then fitted.
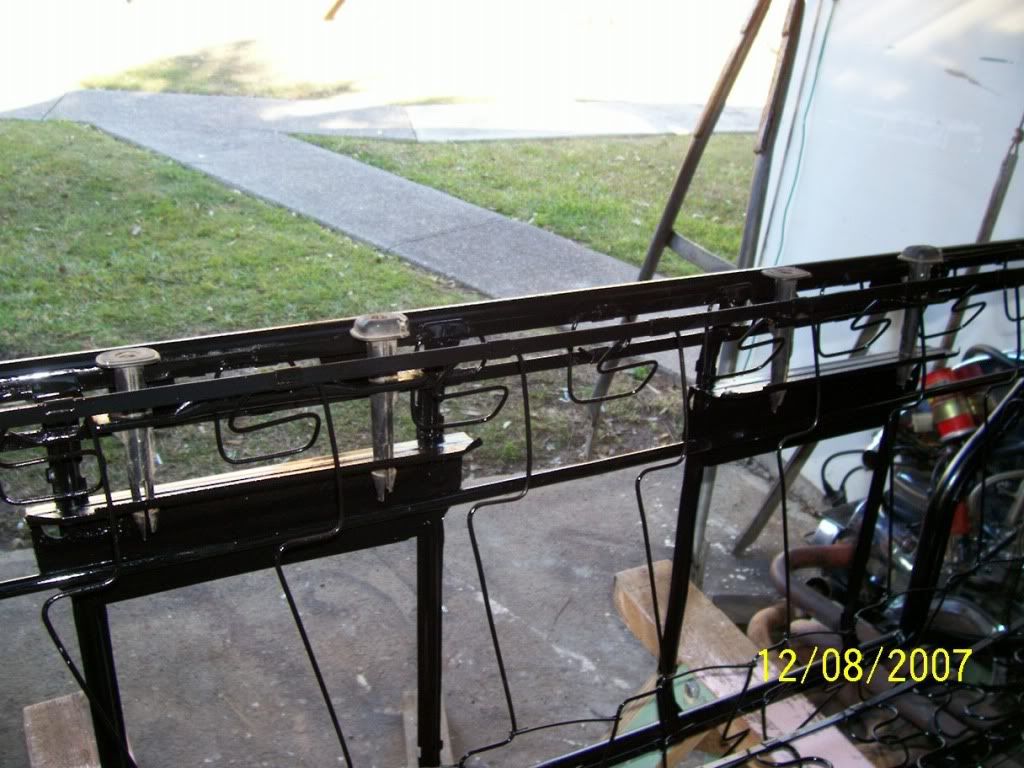
Then the headrests themselves could go in.
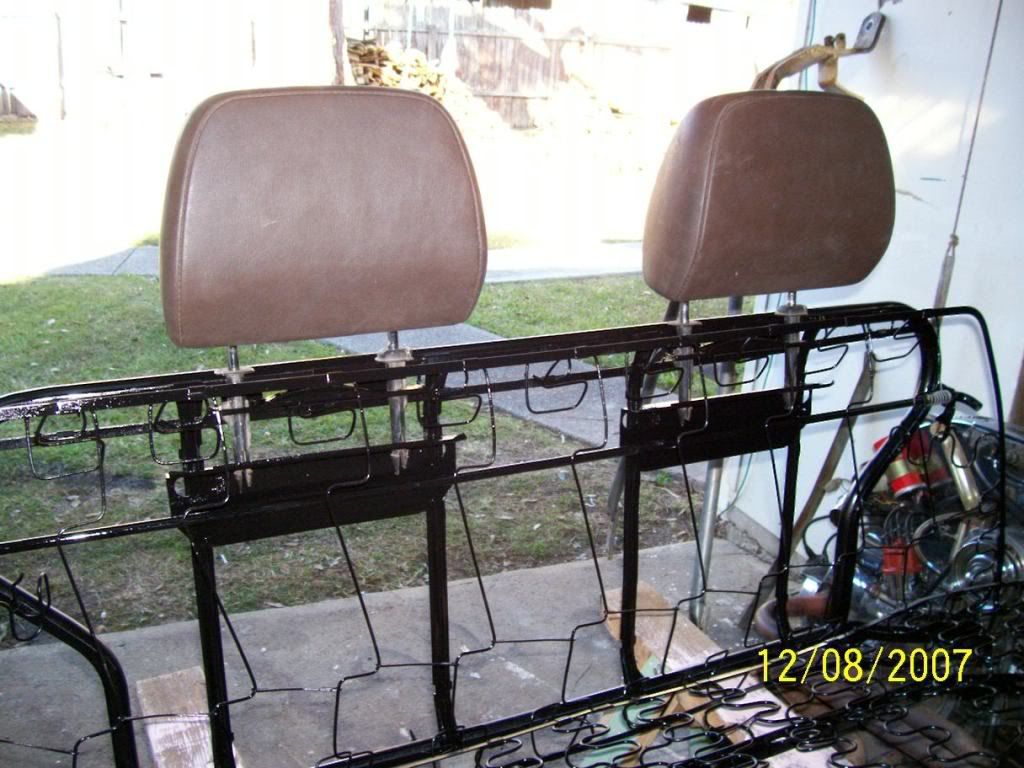
So the whole setup looked like this, ready to be covered.
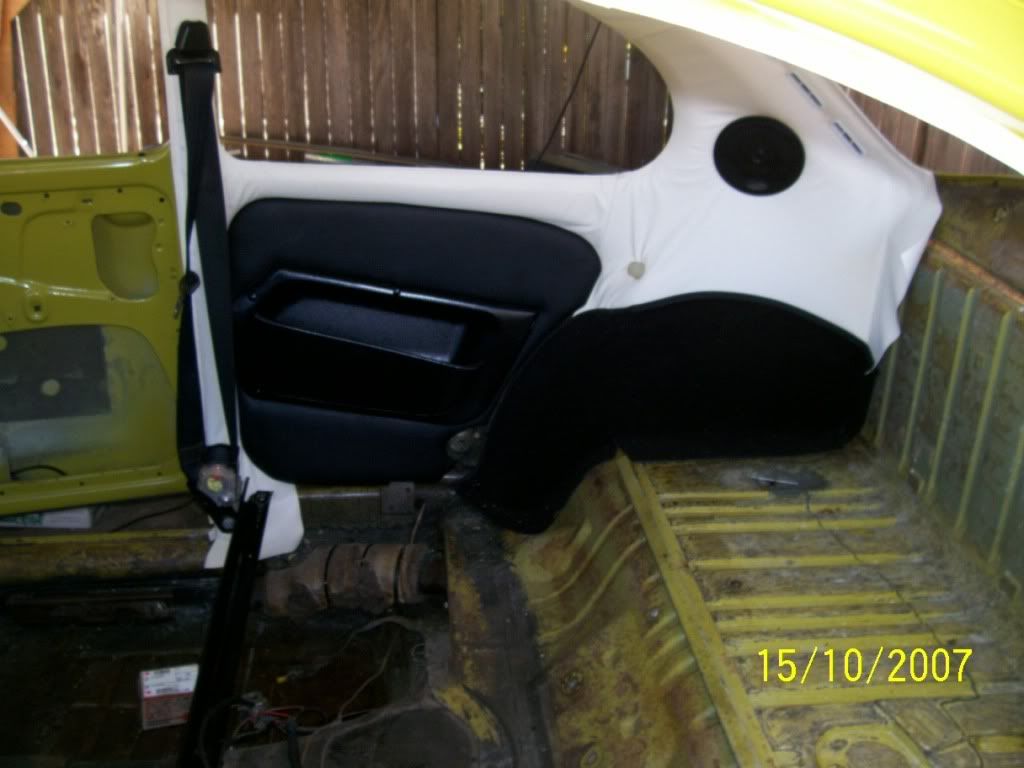
I had Rod at R & B Wild Interiors in Port Macquarie do the trimming for me. There was the back seat and headrests, front door cards ready for the
(Mazda?) pockets to go on them, and the rear side cards, which I had modified for pockets also (from a Suzuki 4wd I think).
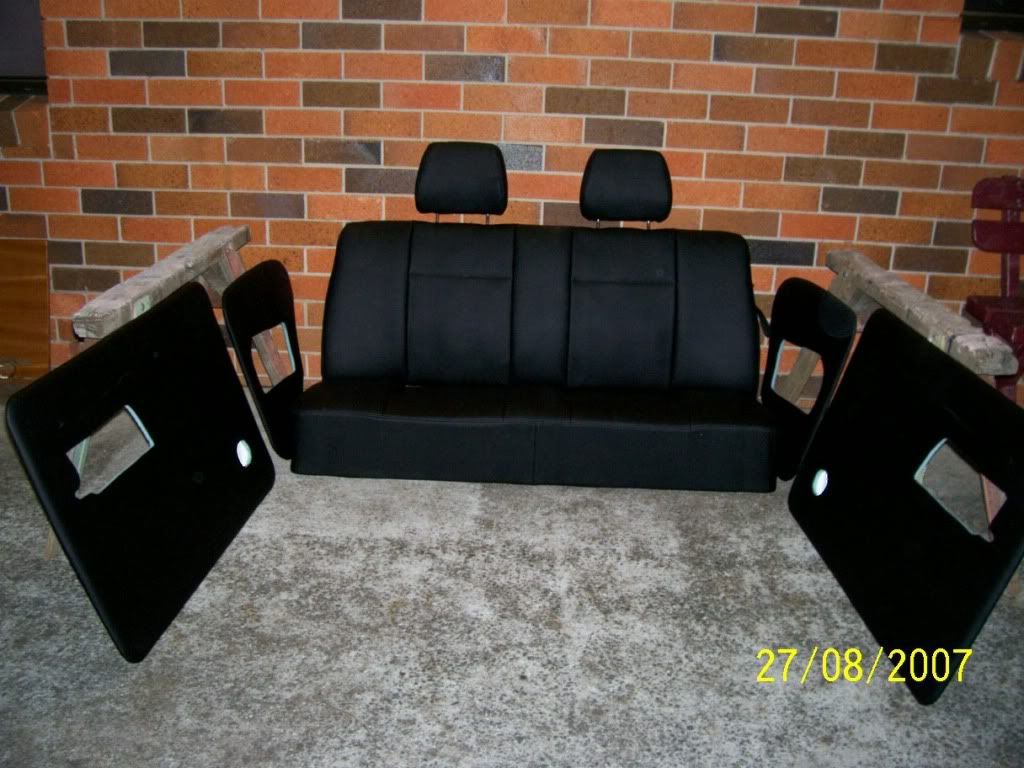
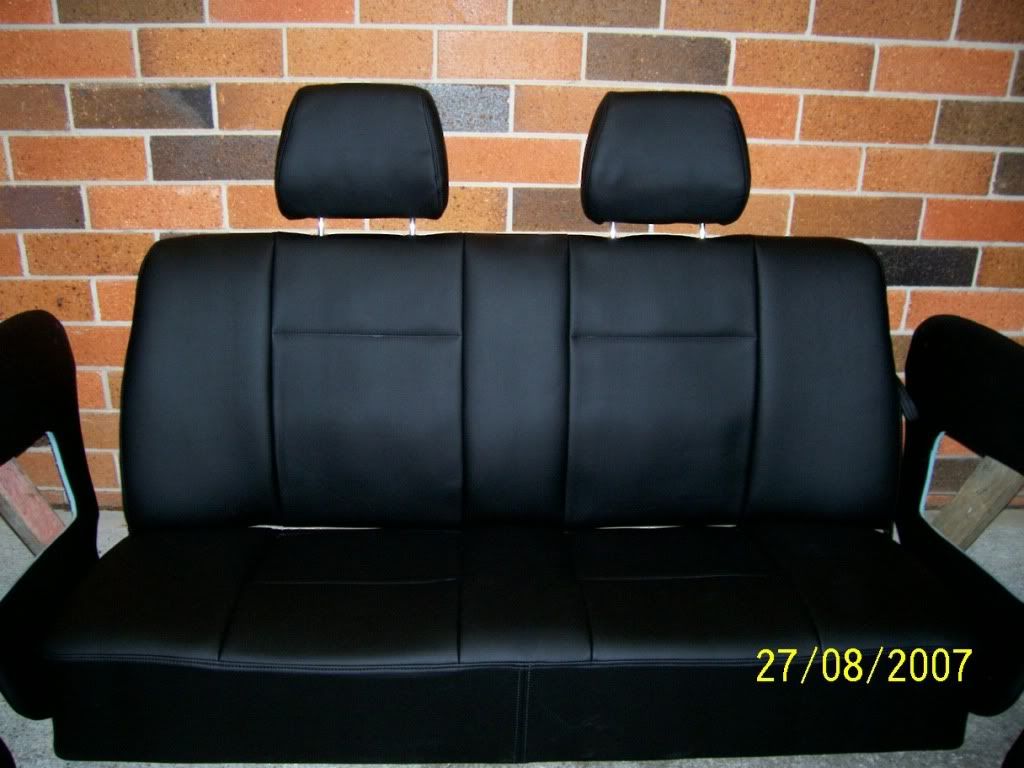
Rod padded and shaped the back seat quite a bit. My kids had grown up and moved out by then - they were a bit disappointed that they had put up with
the old worn out padding for most of there kid lives. lol The grandkids reckon they are great though. :-)
I cut in and wired a 2nd interior light on the drivers side, then Rod helped me do the rest of the trimming. We glued carpet foam underlay on the
roof.
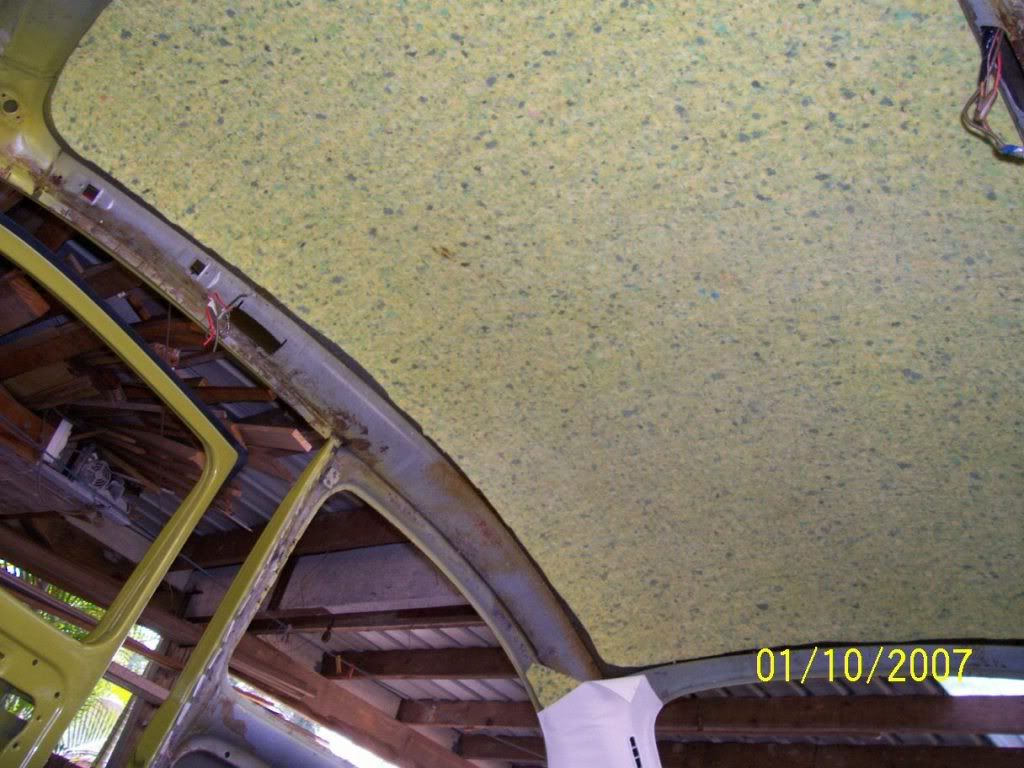
and a lot of other places that needed padding, and fitted the headliner etc.
I then fitted the rear side cards with their pockets in them.
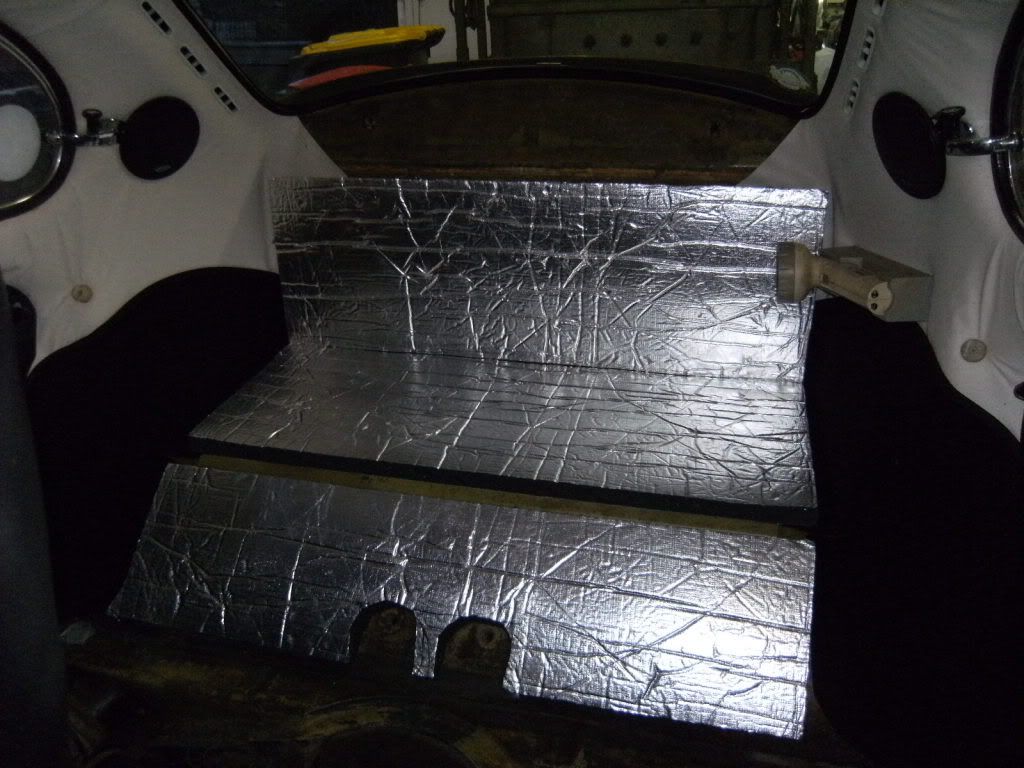
Sound insulation in the back area.
Then fitted the back seat.
And
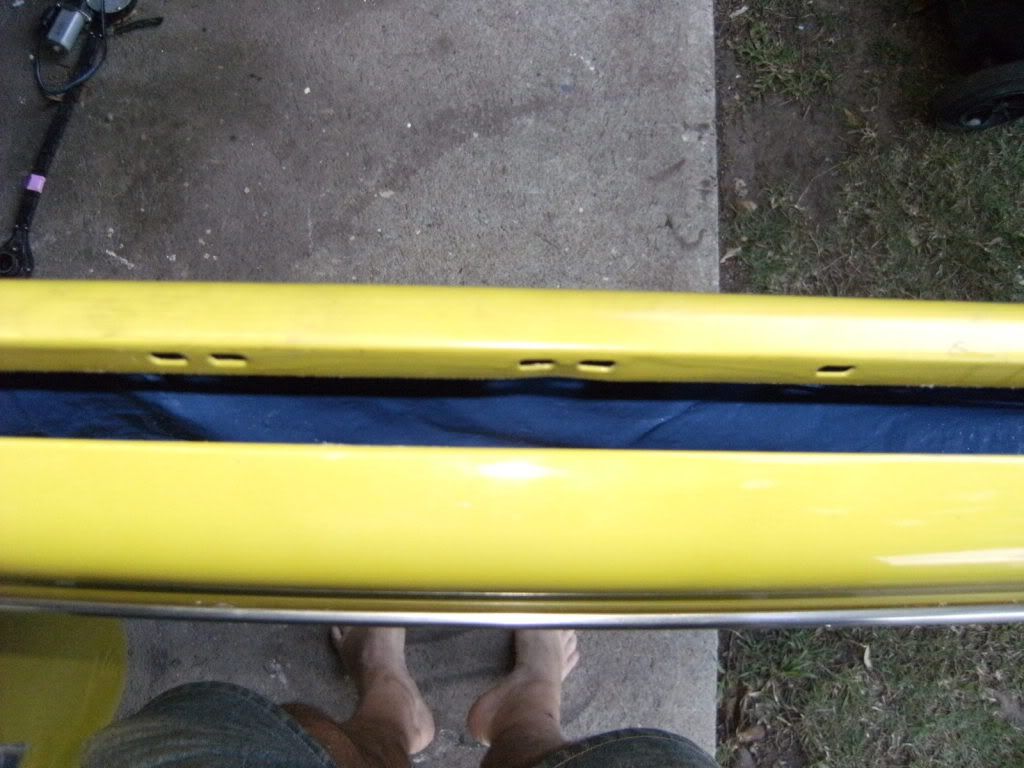
The doors had a waterproof sheet fitted from up inside the inner window scraper to keep the water out of the electrics.
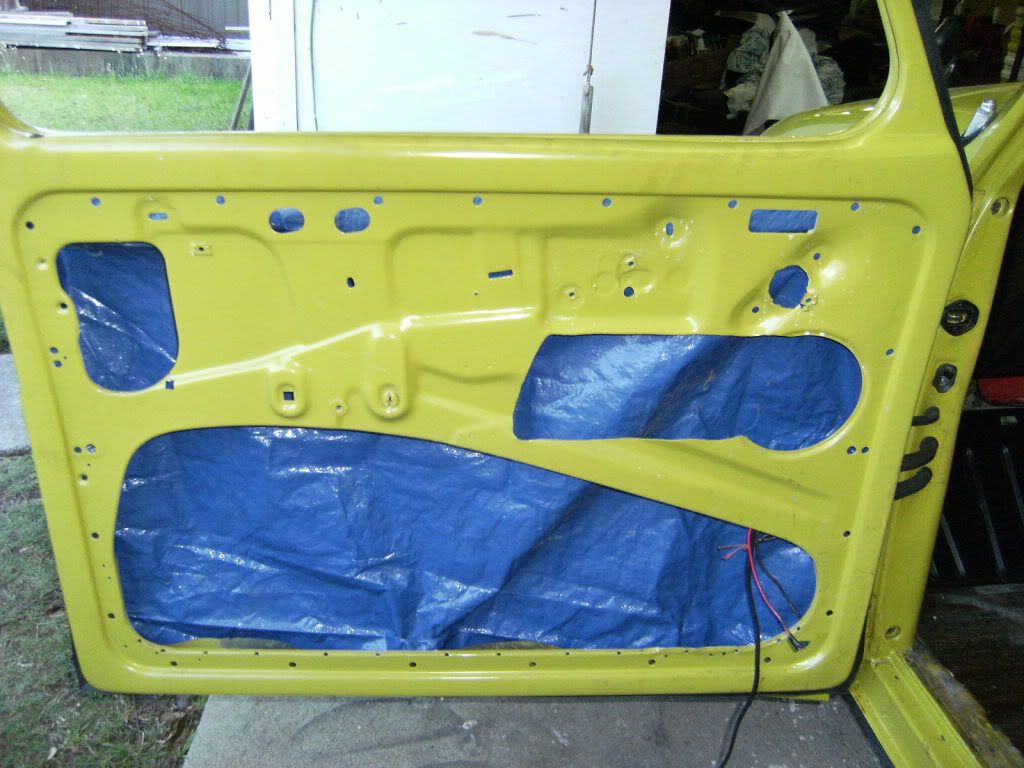
and from the top.
The electrics (central locking, electric windows, and courtesy lights) were then intalled back into the doors.
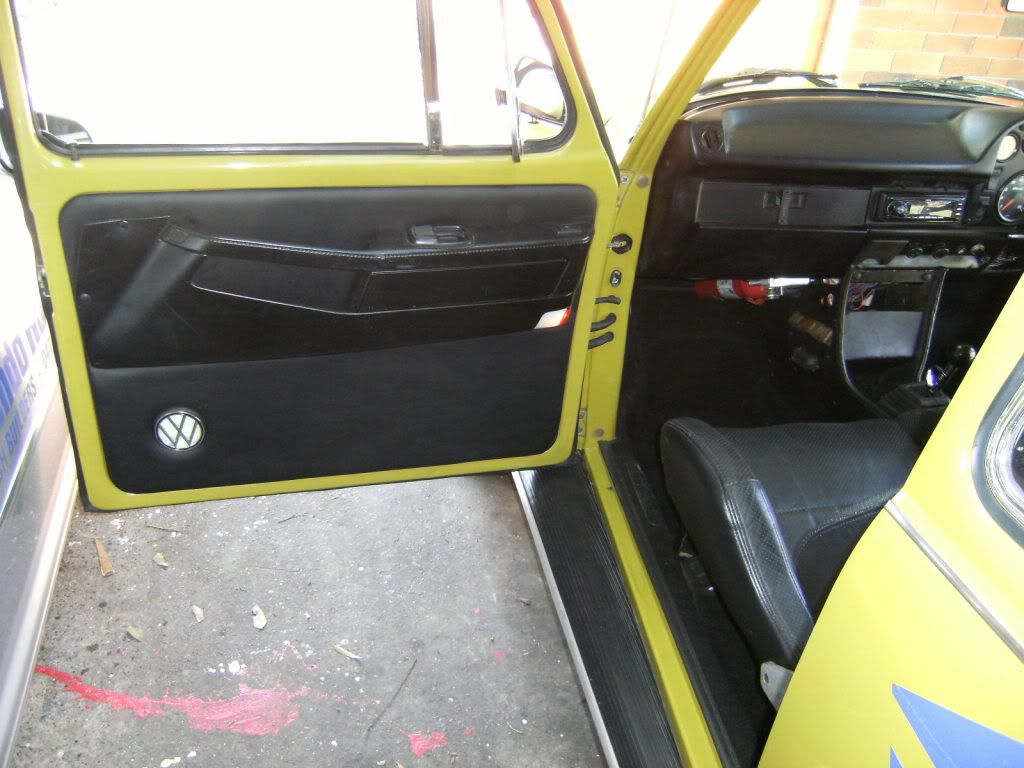
The door cards had the pockets installed, as well as a VW emblem with a hole and an opaque disk behind it.
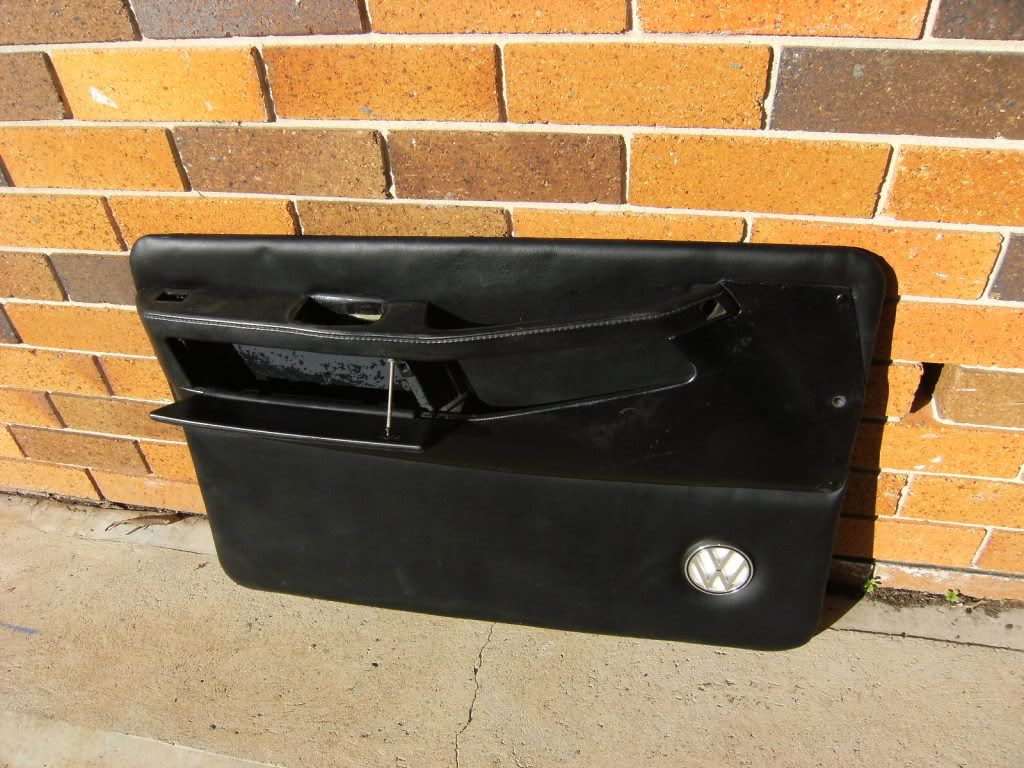
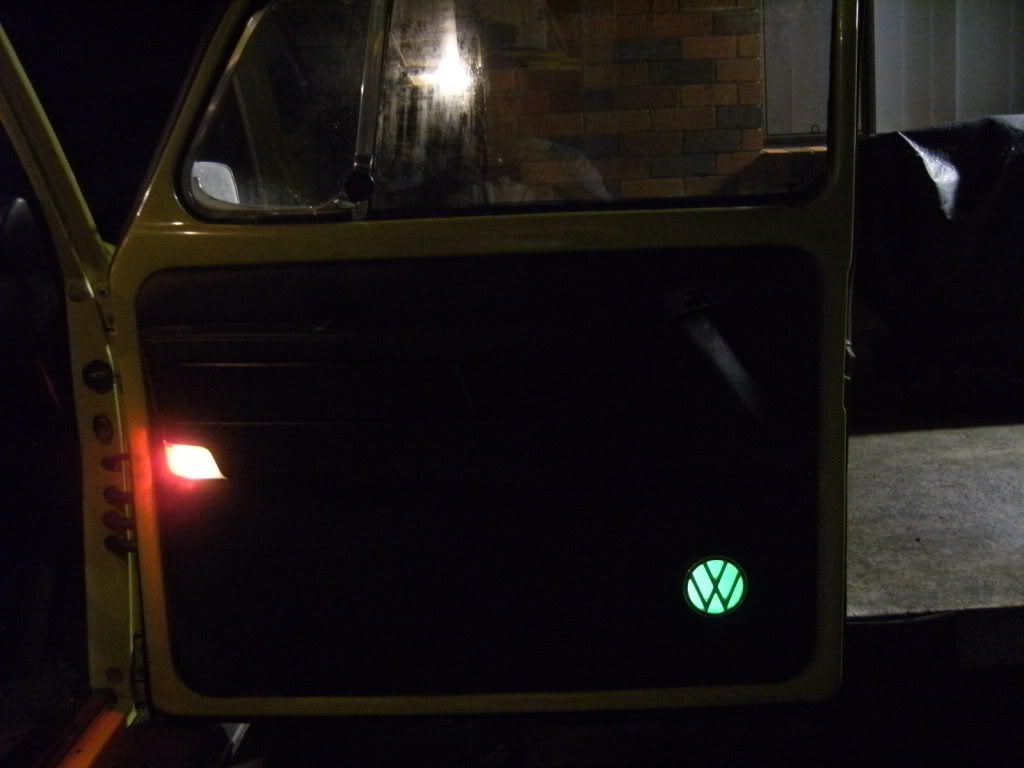
And from behind, you can see the VW emblem has a light box behind it, and it has a green neon in it. The door pockets have a courtesy light in them as
well, and both are connected to the door switches, so come on when the doors are opened. There is also a switch on the dash so they can be switched
off if you have the doors open for a long time, such as when working on the car.
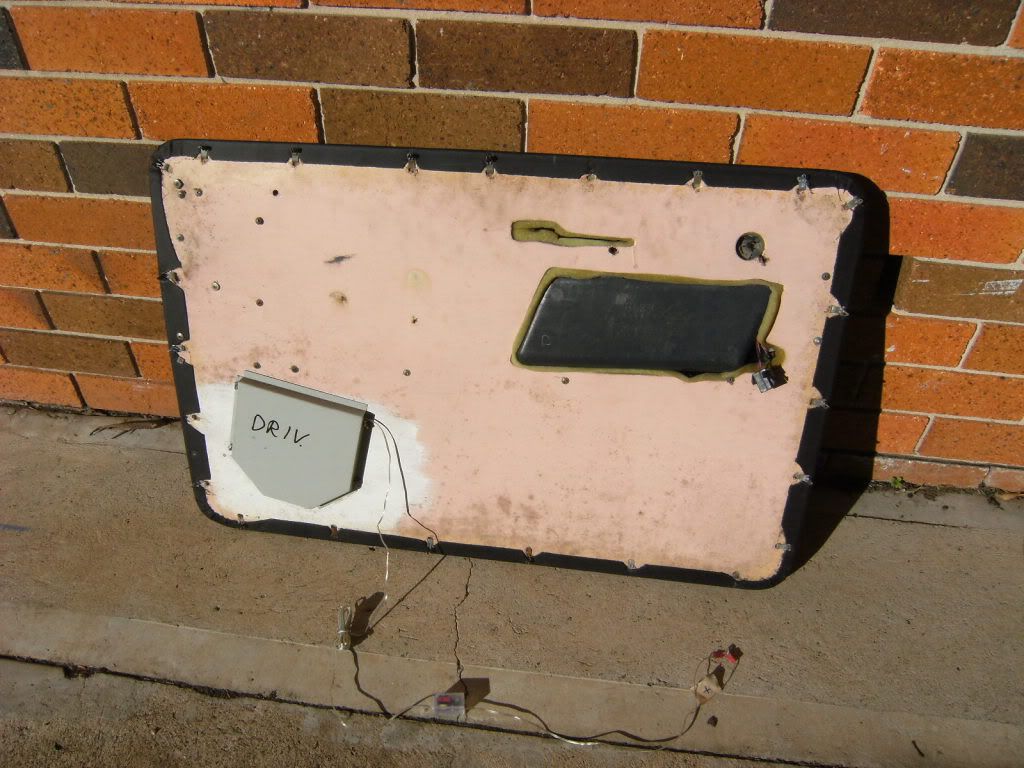
The door cards and associated hardware were installed - drivers side.
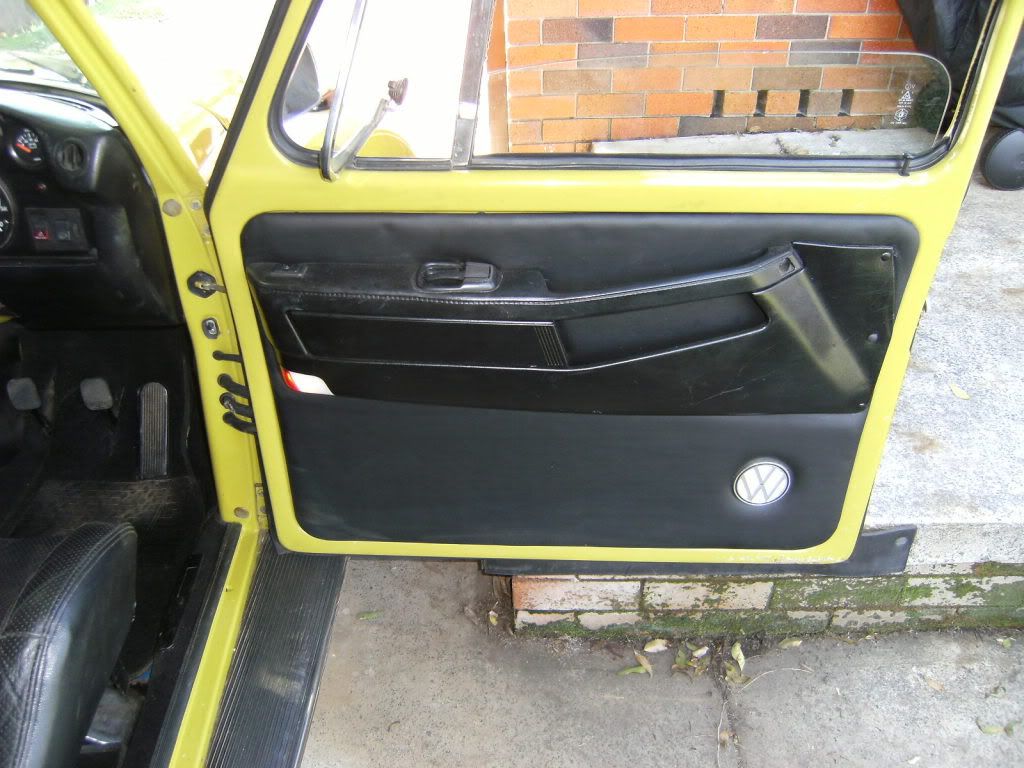
And passenger side.
So that in the dark the courtesy lights look like this.
And the front seats were installed.
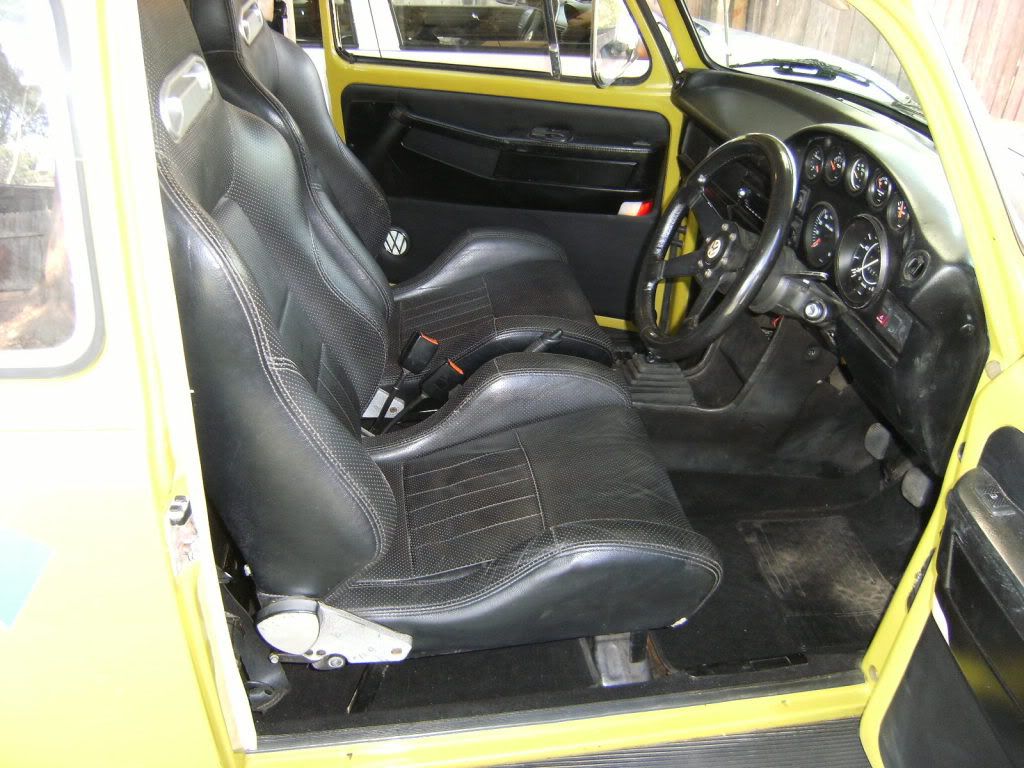
This was about 4 years ago, and I have done a few other small things since then, so I will post more photos as I find them (and take them lol).
From your ole' mate Jeff
|
|
|
 waveman1500 waveman1500
Custom Title Time!
Also rides a Honda
    
Posts: 1346
Threads: 13
Registered: December 17th, 2009
Member Is Offline
Location: Adelaide
Theme: UltimaBB Pro Blue ( Default )
|
| posted on July 10th, 2011 at 10:57 AM |
|
|
Wow, very impressive Jeff! You must have the most modern Bug interior around!
|
|
|
 SebastienPeek SebastienPeek
Custom Title Time!
    
Posts: 1657
Threads: 89
Registered: May 31st, 2011
Member Is Offline
Location: Melbourne
Theme: UltimaBB Pro White
|
| posted on July 10th, 2011 at 11:07 AM |
|
|
Jeff!
Thanks for posting this up, has given me ideas for my own door inserts!
I'd already planned an awesome parcel shelf area, but with your idea of the glowing VW emblem in the doors, that is definitely something I'm going
to investigate!
Really want to see this car in person one day!
|
|
|
 beetleboyjeff beetleboyjeff
A.k.a.: Jeff Walsh
Custom Title Time!
    
Posts: 1783
Threads: 40
Registered: February 13th, 2009
Member Is Online
Location: Port Macquarie
Theme: UltimaBB Pro Blue ( Default )
Mood: Drive bugs hard
|
| posted on July 10th, 2011 at 11:44 AM |
|
|
| Quote: | Originally
posted by SebastienPeek
Really want to see this car in person one day!
|
You may be a little dissapointed - bear in mind it is a daily driver/work vehicle. It does mean that I get to enjoy it every day though, and for about
460,000km so far (It already had 145,000km on it when we bought it :-)). It does however have the usual bumps, marks, dirt, etc on it (and at the
moment is being repaired from my rollover :-().
From your ole' mate Jeff
|
|
|
 Paulc1964au Paulc1964au
Custom Title Time!
    
Posts: 1627
Threads: 59
Registered: March 5th, 2010
Member Is Offline
Location: Sydney, NSW
Theme: UltimaBB Pro Blue ( Default )
|
| posted on July 10th, 2011 at 11:53 AM |
|
|
looks great Jeff mine goes in next week for a new interior
|
|
|
 SebastienPeek SebastienPeek
Custom Title Time!
    
Posts: 1657
Threads: 89
Registered: May 31st, 2011
Member Is Offline
Location: Melbourne
Theme: UltimaBB Pro White
|
| posted on July 10th, 2011 at 07:26 PM |
|
|
Damn, very sorry to hear about the rollover! 
But those door trims, they are crazy goodness, so I'm definitely going to implement something very similar into my own door trims!
Thanks for sharing Jeff!
|
|
|
 HappyDaze HappyDaze
A.k.a.: Greg Mackie
Son of Jim - Creator of Good
Superannuated
     
Posts: 2887
Threads: 141
Registered: June 13th, 2009
Member Is Offline
Location: Southern Highlands NSW
Theme: UltimaBB Pro Blue ( Default )
Mood: Happy enough
|
| posted on July 10th, 2011 at 07:40 PM |
|
|
How are the repairs progressing, Jeff?
I'd rather wear a Beetle out by racing it than by polishing it!
|
|
|
 beetleboyjeff beetleboyjeff
A.k.a.: Jeff Walsh
Custom Title Time!
    
Posts: 1783
Threads: 40
Registered: February 13th, 2009
Member Is Online
Location: Port Macquarie
Theme: UltimaBB Pro Blue ( Default )
Mood: Drive bugs hard
|
| posted on July 10th, 2011 at 11:07 PM |
|
|
Talked to the panel shop last week - all dismantled and underway. Will possibly be a few weeks yet.
From your ole' mate Jeff
|
|
|
 Kafer Lover Kafer Lover
Officially Full-On Dubber
  
Posts: 370
Threads: 71
Registered: August 28th, 2002
Member Is Offline
Location: Geelong
Theme: UltimaBB Pro Blue ( Default )
Mood: Low
|
| posted on July 20th, 2011 at 10:01 PM |
|
|
Hi there,
do you have any pics of how you mounted the seats to the 3 point mounts?
I have some recaros, that I am intending to mount in mine, and just wondering about the best way to do it.
cheers
|
|
|
 beetleboyjeff beetleboyjeff
A.k.a.: Jeff Walsh
Custom Title Time!
    
Posts: 1783
Threads: 40
Registered: February 13th, 2009
Member Is Online
Location: Port Macquarie
Theme: UltimaBB Pro Blue ( Default )
Mood: Drive bugs hard
|
| posted on July 20th, 2011 at 10:18 PM |
|
|
Sorry Kafer Lover, I don't have any pictures of the mounts. I will take some when I get the car back.
Basically, a mate of mine with a welding/engineering shop worked with me to make the bases. We used the centre section with the adjuster holes in it
and the 'ears' off the bottom of the legs (that slide in the tracks), and welded them into and onto a new frame that we made to suit the seats. We
also put in provision for a 'skirt' to go on the outside of the frames (next to the doors - similar idea to the originals), but I haven't got them
made or installed yet.
From your ole' mate Jeff
|
|
|
 68AutoBug 68AutoBug
A.k.a.: Lee Noonan
Aircooled Master
Beetle Restorer - Experience over 138% - YIKES --
         
Posts: 11654
Threads: 449
Registered: August 31st, 2002
Member Is Offline
Location: SCONE in UPPER HUNTER VALLEY NSW
Theme: UltimaBB Pro Yellow
Mood: Really Mentally Ill - all of the time -
|
 posted on July 20th, 2011 at 11:36 PM posted on July 20th, 2011 at 11:36 PM |
|
|
| Quote: | Originally
posted by waveman1500
Wow, very impressive Jeff! You must have the most modern Bug interior around!
|
Yes,
I hadn't noticed all the modifications to Jeffs 1303S
He certainly has one Different Beetle...
I do have two interior lights though... lol
LEE
- [size=4]Helping keep Air Cooled VWs on the road - location: SCONE in the Upper Hunter Valley - Northern NSW 320 kms NNW of SYDNEY--- [/size]
|
|
|
 cam070 cam070
Custom Title Time!
    
Posts: 1332
Threads: 53
Registered: July 25th, 2009
Member Is Offline
Location: Sydney
Theme: UltimaBB Pro Blue ( Default )
Mood: Getting hands dirty stripping the bug down
|
| posted on July 21st, 2011 at 08:51 PM |
|
|
Hey Jeff, any particular reason you cut all that metal out starting from what looks like the speaker hole?
|
|
|
 beetleboyjeff beetleboyjeff
A.k.a.: Jeff Walsh
Custom Title Time!
    
Posts: 1783
Threads: 40
Registered: February 13th, 2009
Member Is Online
Location: Port Macquarie
Theme: UltimaBB Pro Blue ( Default )
Mood: Drive bugs hard
|
| posted on July 21st, 2011 at 10:44 PM |
|
|
cam070, the hole I have cut in the inside door skin is for the pocket in the door card. You can see it in the later post of the door card, but I guess
you can't really see how far it sticks out.
Lee, it does look like a lot of mods when you see them all in one go, but they have been done slowly over many years. I get an idea, then sus out how
I might do it, source what I need to make it happen, convince the boss to let me spend money on it (that is the hardest part lol), then try and find
the time to do it.
The next big thing I want to do is put an inbuilt GPS with a reversing camera (for reversing up to trailers several times a week) in the old CB radio
hole in the centre console. I have been working on this for 3 or 4 years now, but they keep evolving faster than I can get it organised. lol
From your ole' mate Jeff
|
|
|
 cam070 cam070
Custom Title Time!
    
Posts: 1332
Threads: 53
Registered: July 25th, 2009
Member Is Offline
Location: Sydney
Theme: UltimaBB Pro Blue ( Default )
Mood: Getting hands dirty stripping the bug down
|
| posted on July 22nd, 2011 at 11:48 AM |
|
|
| Quote: | Originally
posted by beetleboyjeff
The next big thing I want to do is put an inbuilt GPS with a reversing camera (for reversing up to trailers several times a week) in the old CB radio
hole in the centre console. I have been working on this for 3 or 4 years now, but they keep evolving faster than I can get it organised. lol
|
Jeff, maybe you should look at a whole new stereo. One with the flip out screen. I've got a mate who installed a no-name brand one from China
(admittedly) it was double DIN, but in all likelihood, it is made by the same guys who make them for the OEMs. It has all the bells and whistles, ipod
connectivity, GPS, radio TV and provisions for reversing cameras. I think he paid about $400 from ebay.
Maybe somethng like this http://www.ebay.com.au/itm/7-Car-DVD-Player-Stereo-DVB-T-Bluetooth-GPS-1-DIN-...
|
|
|
 beetleboyjeff beetleboyjeff
A.k.a.: Jeff Walsh
Custom Title Time!
    
Posts: 1783
Threads: 40
Registered: February 13th, 2009
Member Is Online
Location: Port Macquarie
Theme: UltimaBB Pro Blue ( Default )
Mood: Drive bugs hard
|
| posted on July 22nd, 2011 at 09:26 PM |
|
|
Not too keen on doing it that way - my duaghter did that for her Mazda, but it started to play up after a few months. They said they will fix it under
warranty, but she has to send it back to China with one of their nominated carries - cheapest is $155.00. She isn't real happy about that, and there
is also the time she will be without it.
From your ole' mate Jeff
|
|
|
 SebastienPeek SebastienPeek
Custom Title Time!
    
Posts: 1657
Threads: 89
Registered: May 31st, 2011
Member Is Offline
Location: Melbourne
Theme: UltimaBB Pro White
|
| posted on July 23rd, 2011 at 12:02 PM |
|
|
Jeff, where did you get that centre console from?
Really keen in getting one the same, more room for some fancy gauges/switches.
Cheers!
|
|
|
 beetleboyjeff beetleboyjeff
A.k.a.: Jeff Walsh
Custom Title Time!
    
Posts: 1783
Threads: 40
Registered: February 13th, 2009
Member Is Online
Location: Port Macquarie
Theme: UltimaBB Pro Blue ( Default )
Mood: Drive bugs hard
|
| posted on July 23rd, 2011 at 11:54 PM |
|
|
I bought it from someone in Sydney who was making them (I think). It was about 15 - 20 years ago I think. I have a feeling it could have been Dave
Birtchal, but I am not sure.
Interestingly, Dylan asked me the same question only about a week ago. I told him I was looking at removing it at some stage to have some of the holes
filled etc, and we could make a mould of it then. It wa originally for a flat dash bug, and I had to cut the tops off the sides to fit it into the L
bug. The original mould would be far better to use if we could round it up.
If we end up making a mould of it, I will let you know, or at least, post it on here.
From your ole' mate Jeff
|
|
|
 SebastienPeek SebastienPeek
Custom Title Time!
    
Posts: 1657
Threads: 89
Registered: May 31st, 2011
Member Is Offline
Location: Melbourne
Theme: UltimaBB Pro White
|
| posted on July 24th, 2011 at 12:08 AM |
|
|
Awesome!
Very interested in it, would just mean more room to have a couple of extra bits and bobs around the place...
|
|
|