| [ Total Views: 5145 | Total Replies: 47 | Thread Id: 101904 ] |
| Pages: 1 2 |
|
|
 Marco_VESS Marco_VESS
Casual Dubber

Posts: 43
Threads: 5
Registered: December 12th, 2012
Member Is Offline
Location: Canberra
Theme: UltimaBB Pro Blue ( Default )
|
| posted on May 6th, 2013 at 02:39 PM |
|
|
'71 Super Beetle
This is "Olivia", my 11/71 Super Beetle:
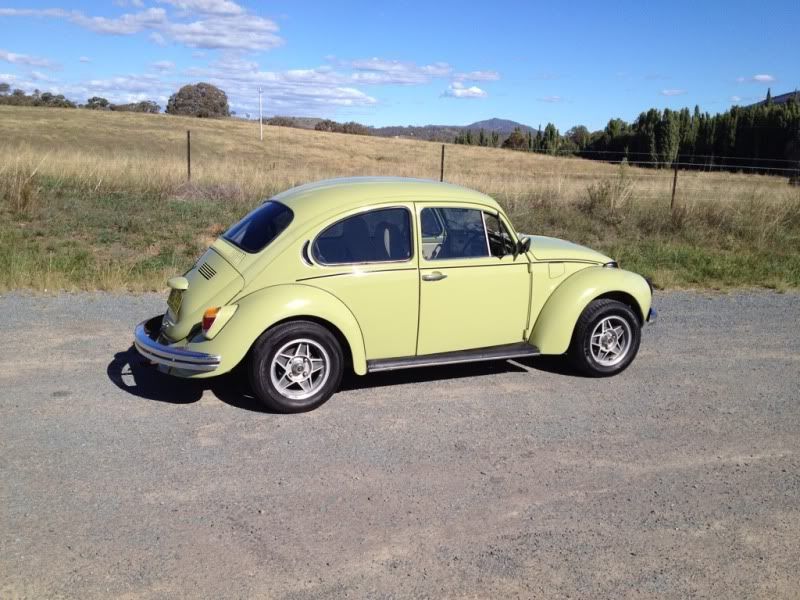
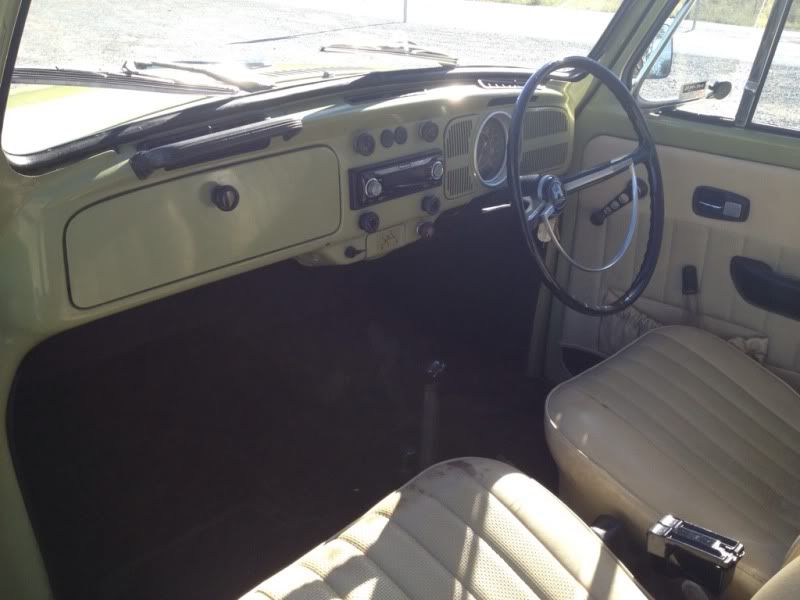
I spent a few months looking for a good $5k project/hobby/weekend car and while I cast the net far and wide, as I was keen on something older and
fairly simple which was both big enough to fit me inside and small enough to fit in the spare side of my garage, old VWs kept coming up in my search.
So in late March I bought this particular example which is generally in good order but needing a small amount of TLC - just perfect for what I wanted
to do. It's actually the first car I've owned that isn't a Holden 
To date I've brought the paint back from borderline chalky to nice and shiny with a good polish and wax, managed to get most (but not all) of the
surface rust off the bumpers, and replaced a rusty and noisy muffler with a new one including neat looking chrome tips.
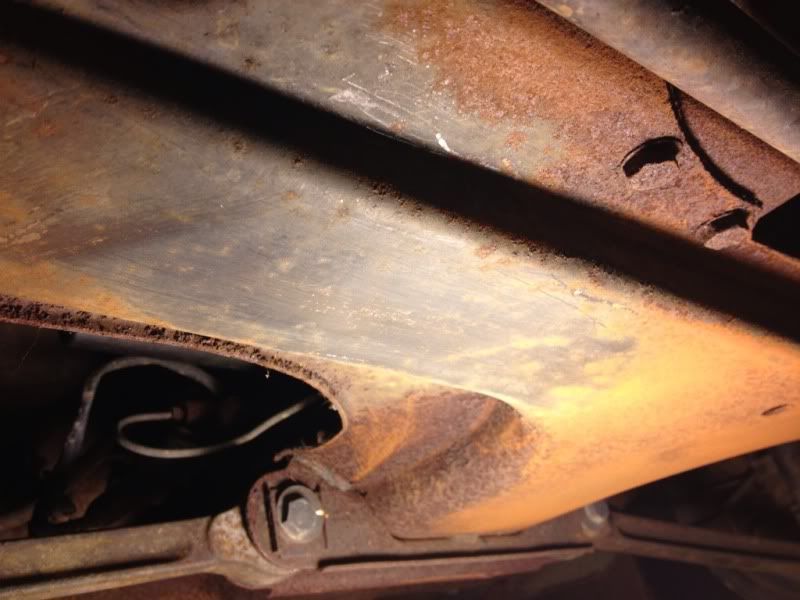
Most recently I've been attacking underbody surface rust, so we've gone from this...
...via some wire brush, rust converter and KBS Rust Seal work to this:
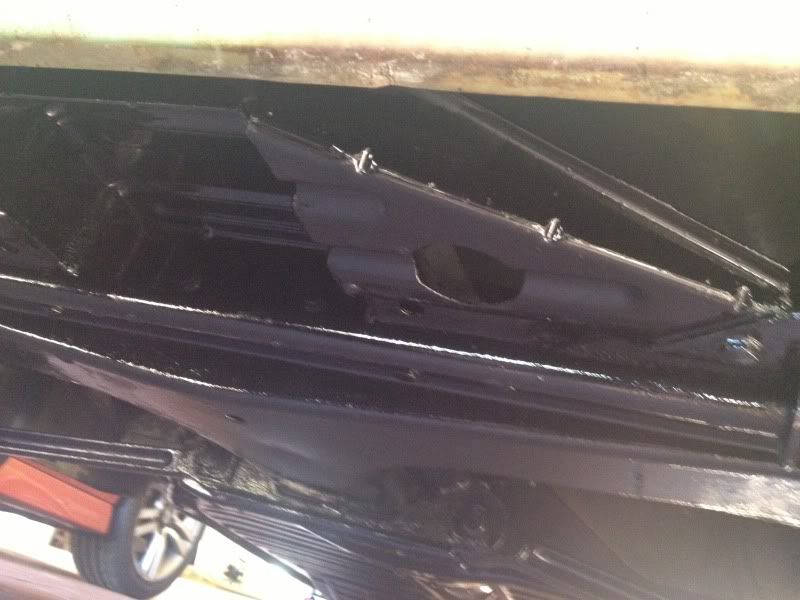
Which brings us neatly up to date. I have a long list of minor jobs to do so looking forward to getting stuck in and of course driving it around 
1971 Super Beetle "Olivia" - Moss Green
|
|
|
 Isola Isola
Officially Full-On Dubber
  
Posts: 217
Threads: 15
Registered: October 4th, 2011
Member Is Offline
Location: Brisbane
Theme: UltimaBB Pro Blue
|
| posted on May 6th, 2013 at 06:28 PM |
|
|
Very nice! It puts the VE to shame  congrats on your bug. It's coming
along nicely congrats on your bug. It's coming
along nicely
|
|
|
 Bizarre Bizarre
Super Moderator
The artist formerly known as blue74l
      
Posts: 12780
Threads: 734
Registered: August 25th, 2002
Member Is Offline
Location: Abbotsford, Sydney
Theme: UltimaBB Pro Blue ( Default )
|
| posted on May 6th, 2013 at 07:21 PM |
|
|
g'day and welcome
Nice looking beetle
Should provide you with hours of fun
Futue te ipsum!!!
|
|
|
 1303Steve 1303Steve
A.k.a.: Steve Carter
Scirocco Rare
        
Posts: 8650
Threads: 564
Registered: August 27th, 2002
Member Is Offline
Location: Sydney, NSW
Theme: UltimaBB Pro Blue ( Default )
Mood: Parrot Heading
|
| posted on May 6th, 2013 at 10:05 PM |
|
|
Hi
Nice bug, al foil and WD40 bring bumpers up nice.
Steve
|
|
|
 Marco_VESS Marco_VESS
Casual Dubber

Posts: 43
Threads: 5
Registered: December 12th, 2012
Member Is Offline
Location: Canberra
Theme: UltimaBB Pro Blue ( Default )
|
| posted on May 6th, 2013 at 10:44 PM |
|
|
| Quote: | Originally
posted by Isola
Very nice! It puts the VE to shame  congrats on your bug. It's coming
along nicely congrats on your bug. It's coming
along nicely
|
The VE is still very much my baby, have had it from new and still love it 6 years and 170,000km later. Best purchase I've ever made  But I'm really enjoying the bug, it's good fun to drive and so simple to
work on and play with and I'm enjoying how well it seems to be coming along, so thanks But I'm really enjoying the bug, it's good fun to drive and so simple to
work on and play with and I'm enjoying how well it seems to be coming along, so thanks 
1971 Super Beetle "Olivia" - Moss Green
|
|
|
 Marco_VESS Marco_VESS
Casual Dubber

Posts: 43
Threads: 5
Registered: December 12th, 2012
Member Is Offline
Location: Canberra
Theme: UltimaBB Pro Blue ( Default )
|
| posted on May 6th, 2013 at 10:56 PM |
|
|
| Quote: | Originally
posted by 1303Steve
Hi
Nice bug, al foil and WD40 bring bumpers up nice.
Steve
|
How does that work? Spray on WD40 and scrub with aluminium foil? I had good results with Autosol but my bumpers seem to be rusting from the inside
out so I don't know if it will be possible to get it all off.
1971 Super Beetle "Olivia" - Moss Green
|
|
|
 1303Steve 1303Steve
A.k.a.: Steve Carter
Scirocco Rare
        
Posts: 8650
Threads: 564
Registered: August 27th, 2002
Member Is Offline
Location: Sydney, NSW
Theme: UltimaBB Pro Blue ( Default )
Mood: Parrot Heading
|
| posted on May 7th, 2013 at 12:18 AM |
|
|
Hi
Just use the al foil as a scrubber and the WD 40 as a lube, I use Gibbs Brand which is similar to WD 40.
The headlight rings on my sons bug started to rust and this brought them up really good.
Steve
|
|
|
 Marco_VESS Marco_VESS
Casual Dubber

Posts: 43
Threads: 5
Registered: December 12th, 2012
Member Is Offline
Location: Canberra
Theme: UltimaBB Pro Blue ( Default )
|
| posted on May 8th, 2013 at 09:47 AM |
|
|
Thanks, will give that a go.
1971 Super Beetle "Olivia" - Moss Green
|
|
|
 Marco_VESS Marco_VESS
Casual Dubber

Posts: 43
Threads: 5
Registered: December 12th, 2012
Member Is Offline
Location: Canberra
Theme: UltimaBB Pro Blue ( Default )
|
| posted on May 10th, 2013 at 03:55 PM |
|
|
Passed its ACT rego inspection this afternoon - so ready for new number plates. Hooray!
1971 Super Beetle "Olivia" - Moss Green
|
|
|
 Super1302 Super1302
Officially Full-On Dubber
  
Posts: 361
Threads: 76
Registered: July 31st, 2008
Member Is Offline
Theme: UltimaBB Pro Blue ( Default )
|
| posted on May 14th, 2013 at 08:41 AM |
|
|
Nice ride and I sprayed aluminium heat paint on the inside of my bumpers and yep the wd40 is a goer
|
|
|
 Marco_VESS Marco_VESS
Casual Dubber

Posts: 43
Threads: 5
Registered: December 12th, 2012
Member Is Offline
Location: Canberra
Theme: UltimaBB Pro Blue ( Default )
|
| posted on May 14th, 2013 at 04:05 PM |
|
|
Yep silver on the inside is the plan for my bumpers too 
1971 Super Beetle "Olivia" - Moss Green
|
|
|
 Marco_VESS Marco_VESS
Casual Dubber

Posts: 43
Threads: 5
Registered: December 12th, 2012
Member Is Offline
Location: Canberra
Theme: UltimaBB Pro Blue ( Default )
|
| posted on August 12th, 2013 at 03:56 PM |
|
|
Some progress. Incremental, but progress all the same. One of the things I was keen to do was take it to a car show or two, and with German Autofest
coming up here in Canberra on 22 September I'd better get cracking. I need to clean up and straighten the bumpers, and repaint some of the black
bits on it which are starting to chip and peel. Went to get some supplies and was trying to decide which dolly I needed when I saw a kit with three
hammers and four dollies for $36 - quality isn't top notch but it'll do.
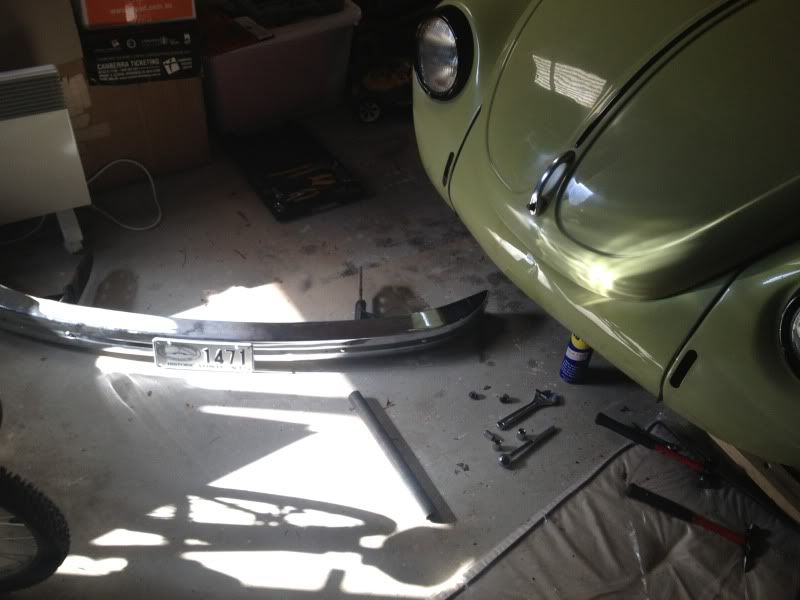
Again with this car, if something is held on with say 3 bolts, 3 different sized spanners will be required. The front bumper was a combination of 12,
13 and 14mm. And whoever had it off previously had sheared off one of the bolts, which was enough to prevent bumper removal with every other bolt
undone. The last bolt on the passenger side also retains the horn, and its enough to not be able to get a ratchet in there. Anyway, off it came in
the end.
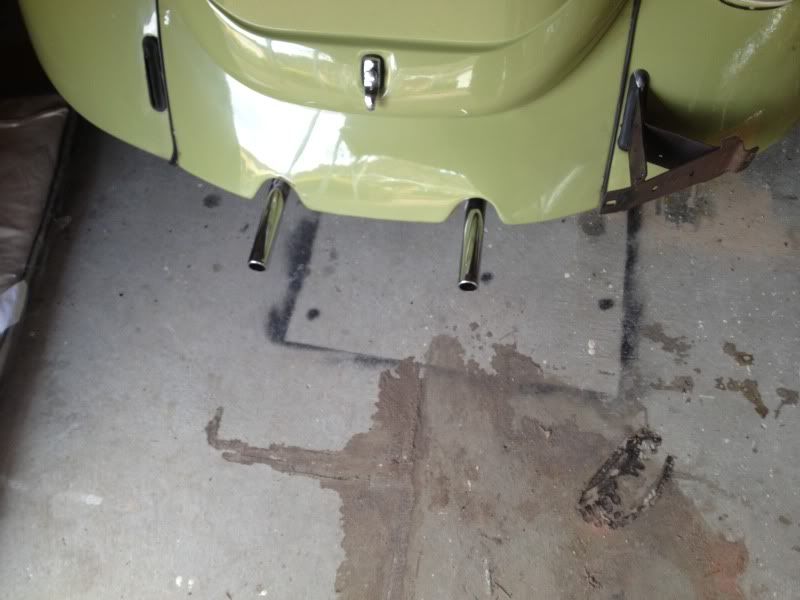
Rear was more difficult. I broke the first bolt I tried to undo, and the other two wouldn't budge. Not wanting to break off all three and have a
real problem, I separated the bumper from the mounting bracket instead. Not ideal as I want to paint the brackets, so that will need to be worked out.
Surprisingly, the other side undid easily and here we are:
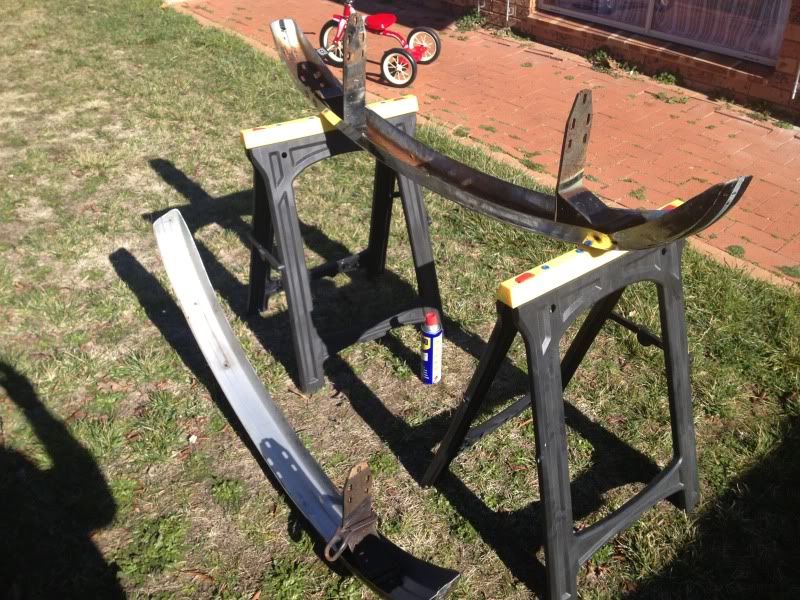
Started on the clean-up of the bumpers. Basically they need a couple of dents beaten out, some surface rust removed, and a repaint of the inner
surface which isn't chromed (my bumpers appear to be cheap Brazilian knockoffs, not genuine VW items). If I can't make them look decent then
another set of cheap knockoffs is about $340 for the pair and will no doubt outlive my ownership of the car so I'm not too worried about ruining
these ones through amateur incompetence.
I don't recommend the plastic saw horses by the way, which saw the bumpers hit the grass a couple of times. Still, in the absence of a proper panel
stand or a workbench that isn't actually a repurposed desk, that's what I've got.
(I suspect also that the people across the street wondered what the go was with the dulcet sounds of home panelbeating wafting across suburbia on a
Sunday morning, but they'll live).
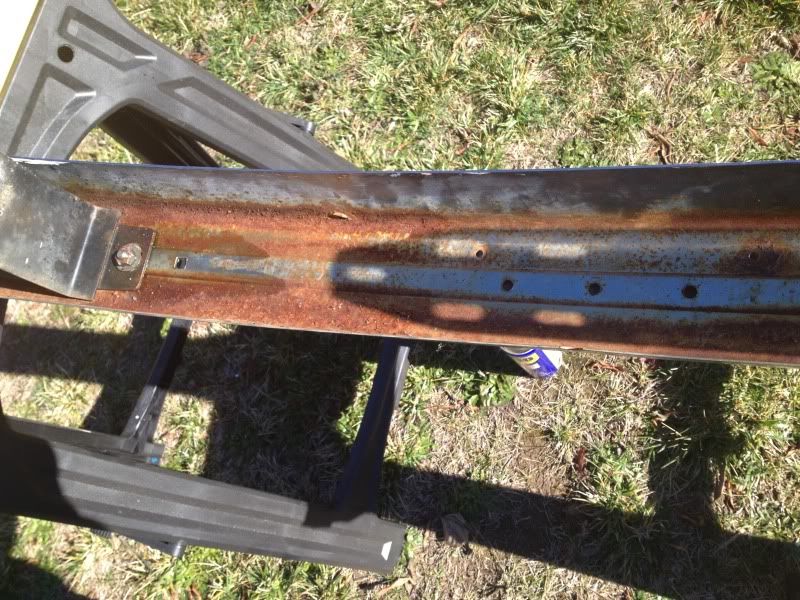
We'll see whether these can be salvaged, but anything I do has got to be an improvement on this. Plan is to get that rust out of there and spray the
inside silver. The mounting brackets will be resprayed black. The brackets separated from the bumpers easily enough, but I still have one of the
mounting brackets stuck fast on the car; got one of the two bolts out but there is one that just isn't moving - need to get some penetrating oil and
try that, I'm still on WD40 at the moment. Problem is that if I break another bolt, there will only be one bolt holding the bumper on that side of
the car...
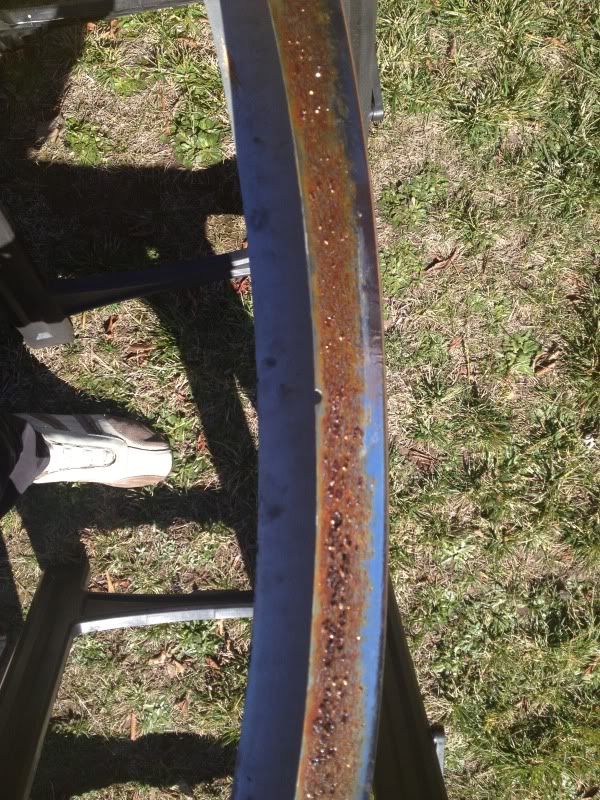
I tried the WD40 and aluminium foil idea. (This is the before shot). Yeah, kinda works, but no better than metal polish which I used to clean the
top side of the bumpers not long after I got the car home.
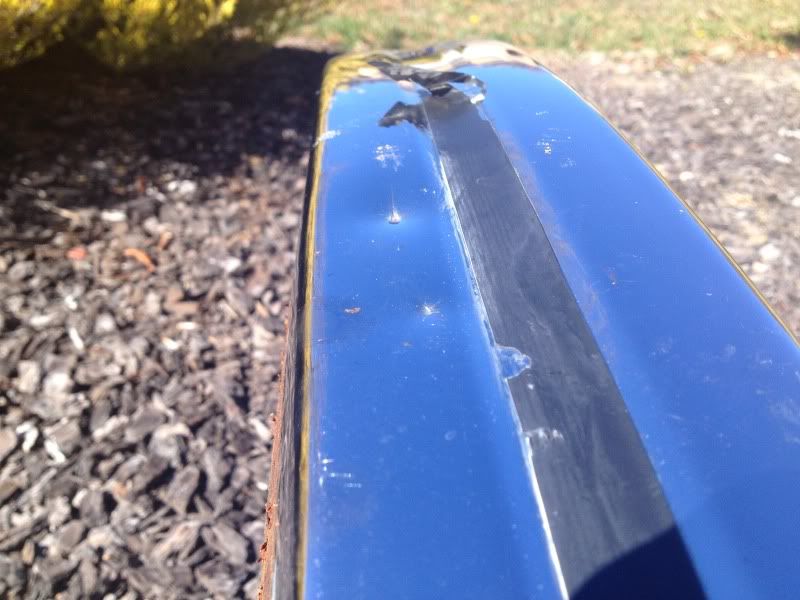
I didn't get a before shot of the kinks in the front bumper which I successfully managed to hammer out (although you may be able to see them in the
earlier photos) - damage was consistent with someone nudging the front corner of the car into something. I need to deal with the smaller dents as
above, which look like being harder work (especially without a proper stand or work surface to use for hammer and dollying). Then I need to replace
that black tape, which as far as I can tell is just electrical tape or something very much like it.
1971 Super Beetle "Olivia" - Moss Green
|
|
|
 Marco_VESS Marco_VESS
Casual Dubber

Posts: 43
Threads: 5
Registered: December 12th, 2012
Member Is Offline
Location: Canberra
Theme: UltimaBB Pro Blue ( Default )
|
| posted on August 12th, 2013 at 03:57 PM |
|
|
Separately, I mentioned on another forum I'm a member of that I get out of this car and I don't feel right - a bit agitated, like a sensory
overload. I don't know if its the noise (I can't do nightclubs because the noise and lights and people are all a bit much), or that I'm not relaxed
driving it (thanks to other drivers and being vulnerable), or maybe there's fumes getting in (windows always open for this reason) but 10-15 minutes
at a time is about it before I want to get out of it. In the midst of all the discussion on this point, someone suggested to me that apart from
having to be more switched on all the time than you do in a modern car, I might have an issue with fumes getting into the cabin somewhere. This, I
thought, warranted investigation.
If I'm looking at this system the right way, I think I have some answers:

Looking at the exploded view above, as I understand it the way the heater system works is that fresh air comes in through pipe J, passes through those
egg-shaped extensions on the muffler (which envelop the exhaust outlets for the rearmost pair of cylinders), through where clamp E is located, through
blue heat exhanger B, and then heads towards the cabin, now warm, through pipe A.
On my car, the area around clamp E actually looks like the exploded view:
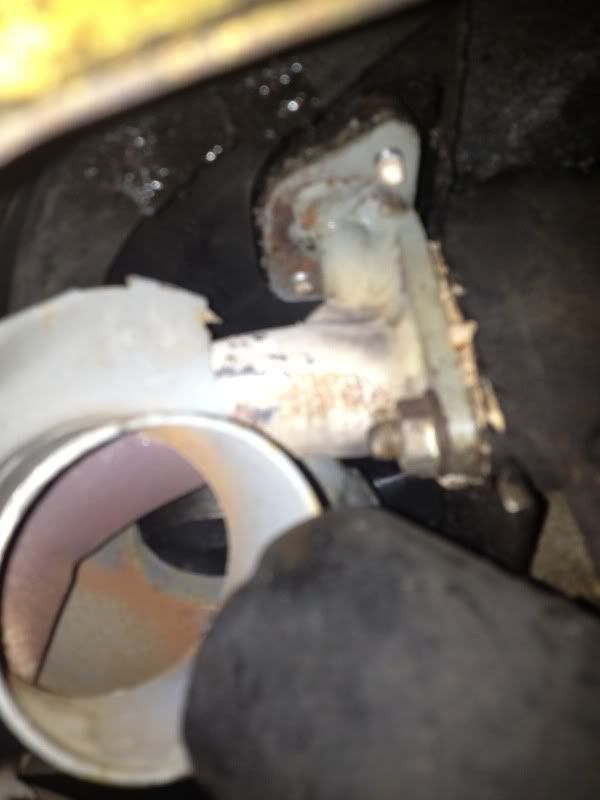
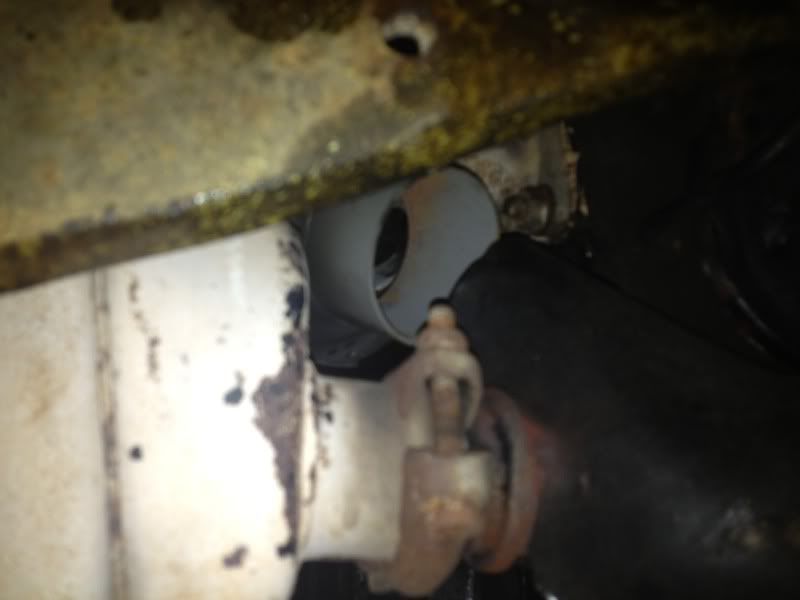
That's the driver's side where there is no connection at all between the two parts of the system and an air gap of 2-3cm betwen the parts. On the
passenger side, the two halves are touching but not correctly aligned so there's an overlap of about 1-1.5cm. That's a new muffler so I'm not very
impressed with that being the case.
If I've understood this system correctly, this may mean that what I've actually got is a couple of pipes which are directly transmitting engine
noise, and possibly fumes, into the cabin. It's kind of like those recent cars which have the pipe through the firewall to pipe in engine sound, but
bad.
What I'm not yet clear on is what the story is with the ventilation system when you don't want heat, so it could be that keeping the heater valve
closed deals with the problem, but my next step might be to try and block off those pipes at the engine end and see if there's any difference.
Plausible?
1971 Super Beetle "Olivia" - Moss Green
|
|
|
 Marco_VESS Marco_VESS
Casual Dubber

Posts: 43
Threads: 5
Registered: December 12th, 2012
Member Is Offline
Location: Canberra
Theme: UltimaBB Pro Blue ( Default )
|
| posted on August 25th, 2013 at 01:18 PM |
|
|
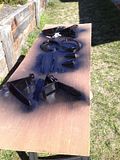
More progress on repainting things:
1971 Super Beetle "Olivia" - Moss Green
|
|
|
 Bizarre Bizarre
Super Moderator
The artist formerly known as blue74l
      
Posts: 12780
Threads: 734
Registered: August 25th, 2002
Member Is Offline
Location: Abbotsford, Sydney
Theme: UltimaBB Pro Blue ( Default )
|
| posted on August 25th, 2013 at 01:26 PM |
|
|
you are better off getting the heating system working properly
When the heat is off the air is waited at "B"
The problem will also be the rubbish joints at "F"
If they are leaking (and they WILL be) then there is a venturi effect that sucks the exhaust into the heater system and into the car.
Best answer is to flange "F" and connect all the other pipes as normal
Futue te ipsum!!!
|
|
|
 Marco_VESS Marco_VESS
Casual Dubber

Posts: 43
Threads: 5
Registered: December 12th, 2012
Member Is Offline
Location: Canberra
Theme: UltimaBB Pro Blue ( Default )
|
| posted on September 2nd, 2013 at 11:16 AM |
|
|
Thanks, I'll go back and have another look at those joints.
On another note, got the cold start system partially working properly this weekend - the stepped cam wasn't lining up properly with the pin which was
part of the problem; but it seems like there's something wrong with the mechanism that triggers it in the first place.
1971 Super Beetle "Olivia" - Moss Green
|
|
|
 Bizarre Bizarre
Super Moderator
The artist formerly known as blue74l
      
Posts: 12780
Threads: 734
Registered: August 25th, 2002
Member Is Offline
Location: Abbotsford, Sydney
Theme: UltimaBB Pro Blue ( Default )
|
| posted on September 2nd, 2013 at 07:56 PM |
|
|
have a look here
http://www.vw-resource.com/
There is a lot of things that could be binding or mucked up on a carb
Futue te ipsum!!!
|
|
|
 Marco_VESS Marco_VESS
Casual Dubber

Posts: 43
Threads: 5
Registered: December 12th, 2012
Member Is Offline
Location: Canberra
Theme: UltimaBB Pro Blue ( Default )
|
| posted on September 5th, 2013 at 10:40 AM |
|
|
Work proceeds on making this car presentable for German Auto Display on the 22nd. Some new parts arrived:
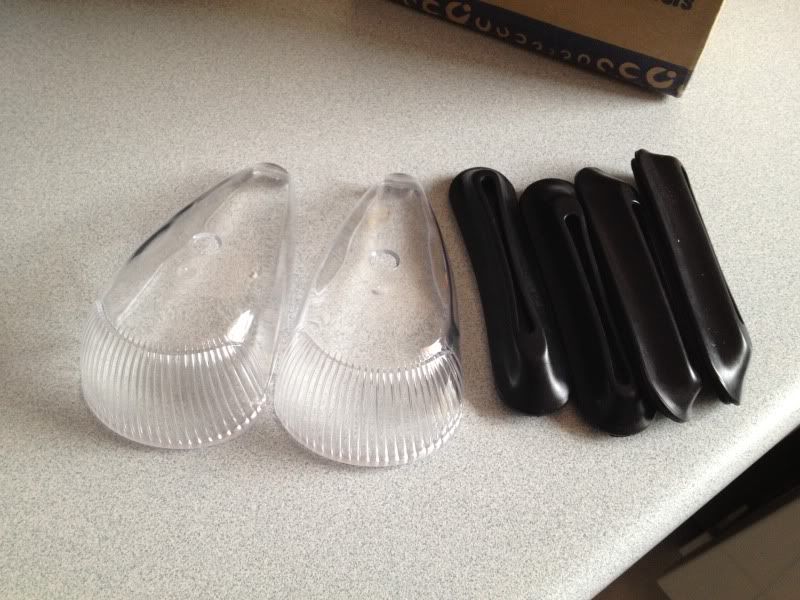
Not that happy with the repainting results I'm getting so far though. Here's an example:
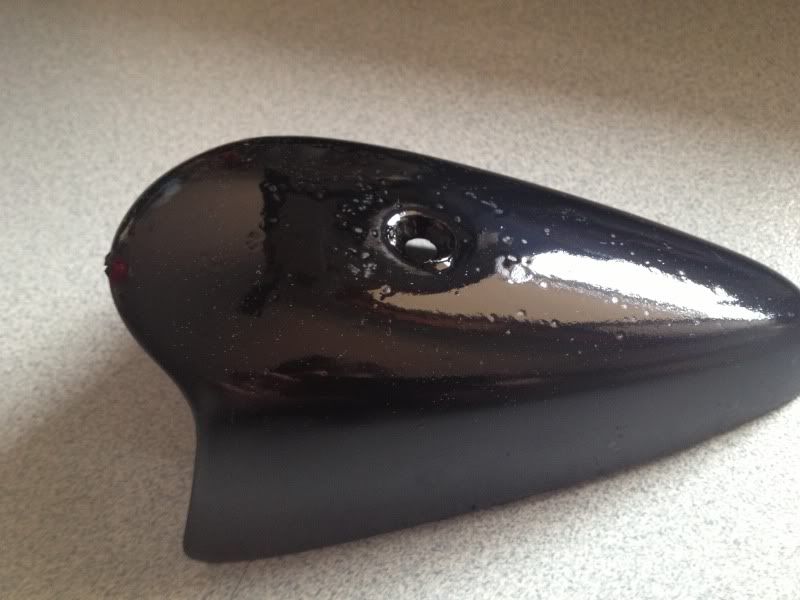
Will redo tomorrow and see how I go. I could just take it somewhere for painting but I'd prefer the satisfaction of doing it myself.
1971 Super Beetle "Olivia" - Moss Green
|
|
|
 1303Steve 1303Steve
A.k.a.: Steve Carter
Scirocco Rare
        
Posts: 8650
Threads: 564
Registered: August 27th, 2002
Member Is Offline
Location: Sydney, NSW
Theme: UltimaBB Pro Blue ( Default )
Mood: Parrot Heading
|
| posted on September 5th, 2013 at 12:05 PM |
|
|
Hi
That looks like fish eyes caused by silicone on the surface, better prep is needed.
See you in Canberra.
Steve
|
|
|
 Marco_VESS Marco_VESS
Casual Dubber

Posts: 43
Threads: 5
Registered: December 12th, 2012
Member Is Offline
Location: Canberra
Theme: UltimaBB Pro Blue ( Default )
|
| posted on September 5th, 2013 at 05:03 PM |
|
|
Yep, have had the same answer in a few places now - looks like bad prep was my problem. I'll do them again tomorrow, properly this time!
1971 Super Beetle "Olivia" - Moss Green
|
|
|
 Marco_VESS Marco_VESS
Casual Dubber

Posts: 43
Threads: 5
Registered: December 12th, 2012
Member Is Offline
Location: Canberra
Theme: UltimaBB Pro Blue ( Default )
|
| posted on September 6th, 2013 at 04:10 PM |
|
|
Second attempt with the black paint:
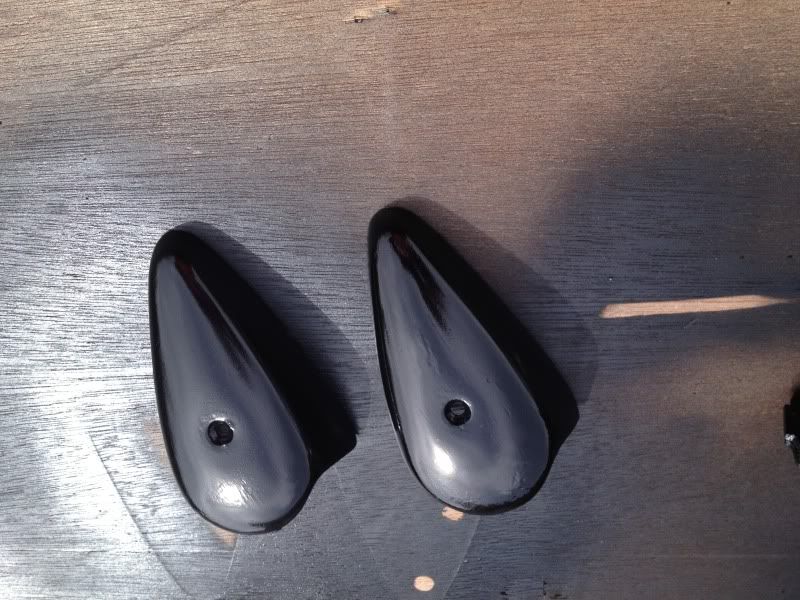
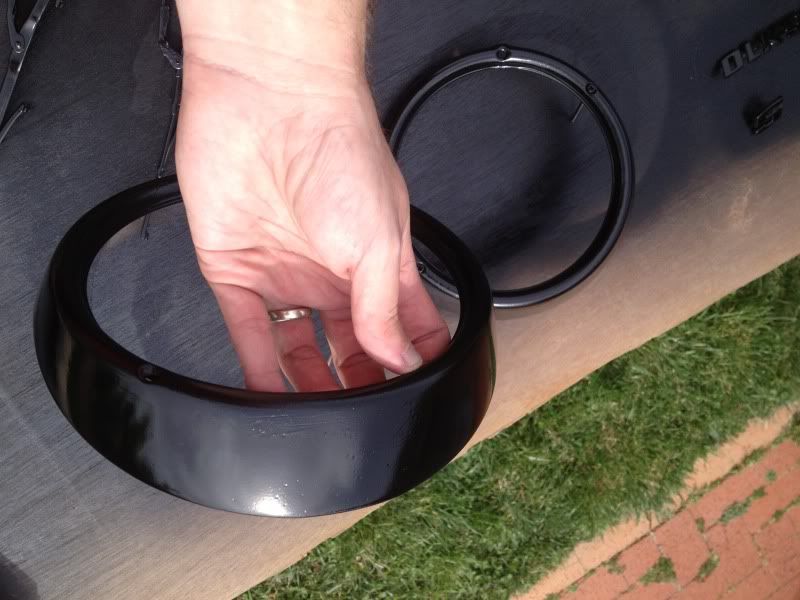
Better but I'm not happy yet. Had some problems with runs this time. Worked out a better technique halfway through but by then I'd already messed
it up a bit. I'll see how they look tomorrow and see if some polishing will help, but at the moment I'm thinking of having a third go at it if I
have time between now and the 22nd. (My wife thinks hey look fine, but the best I can say is that they're better than when I bought it).
Inside of the bumpers went well though:
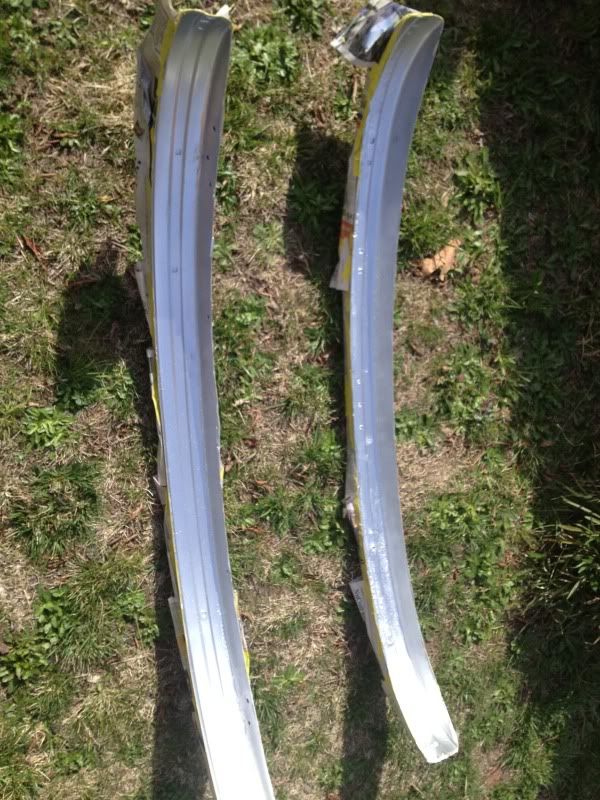
Unfortunately this badge broke while I was wiping off the grease and wax remover (yeah, I can't explain it either):
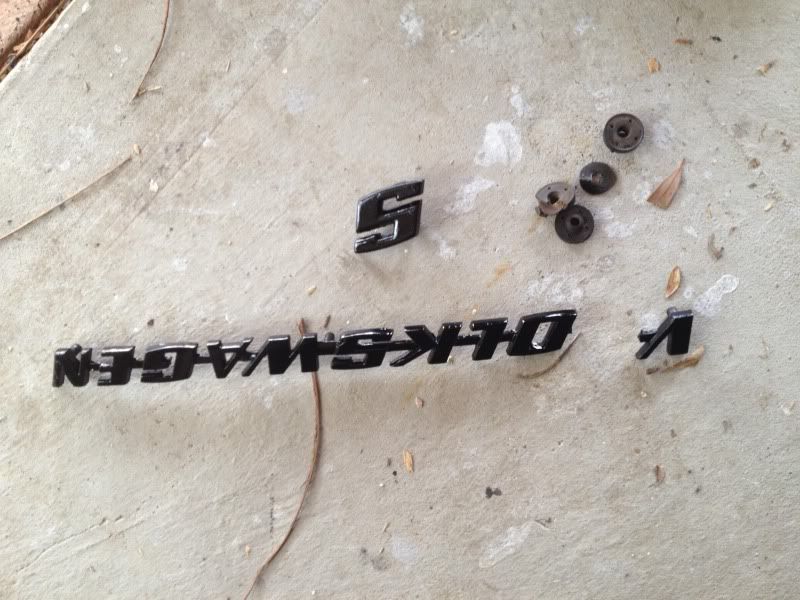
But fixed easily enough, and it felt like progress to be putting something back on the car rather than removing it!
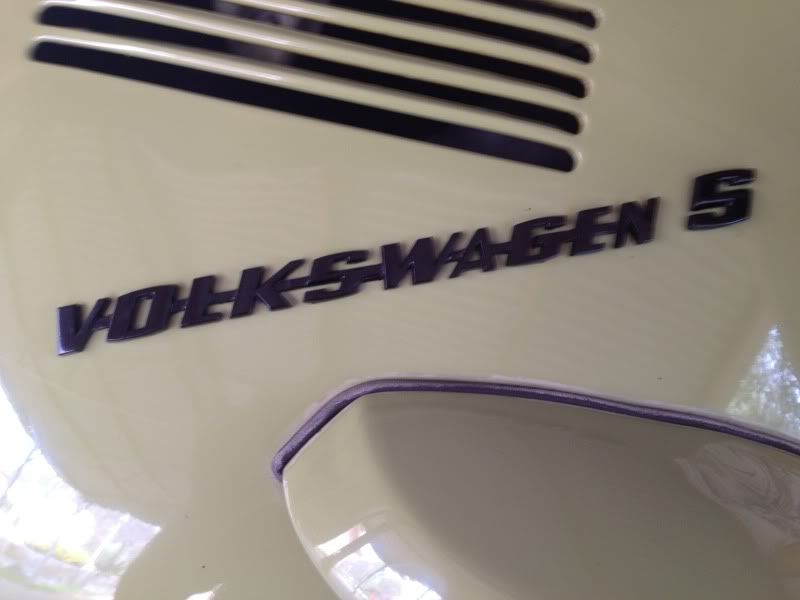
To do before the show: finish polishing bumpers and replace black tape bumper trim, and reattach everything I've repainted. Needs an oil change and
fan belt replacement soon but that can wait a few more weeks.
1971 Super Beetle "Olivia" - Moss Green
|
|
|
 1303Steve 1303Steve
A.k.a.: Steve Carter
Scirocco Rare
        
Posts: 8650
Threads: 564
Registered: August 27th, 2002
Member Is Offline
Location: Sydney, NSW
Theme: UltimaBB Pro Blue ( Default )
Mood: Parrot Heading
|
| posted on September 6th, 2013 at 05:18 PM |
|
|
Hi
Looking a bit better, black bits go well with that colour, have you thought about painting the chrome strips? Or you can remove the clips and put a
1/4 black pinstripe to cover the holes.
Steve
|
|
|
 FinallyGotADub FinallyGotADub
Learner Dubber

Posts: 15
Threads: 3
Registered: September 4th, 2009
Member Is Offline
Location: Canberra
Theme: UltimaBB Pro Blue ( Default )
|
| posted on September 7th, 2013 at 08:16 AM |
|
|
Hey Marco, Your car looks great. Nice work. We have the same model in the same colour and are also in Canberra. Ours is much more of a project though
(normal rust, dead motor etc). Seeing yours is inspiring. Hopefully we can get along to the car show on the 22nd and see yours in person and maybe
even have a chat.
Cheers,
James
|
|
|
 Marco_VESS Marco_VESS
Casual Dubber

Posts: 43
Threads: 5
Registered: December 12th, 2012
Member Is Offline
Location: Canberra
Theme: UltimaBB Pro Blue ( Default )
|
| posted on September 9th, 2013 at 01:34 PM |
|
|
| Quote: | Originally
posted by 1303Steve
Hi
Looking a bit better, black bits go well with that colour, have you thought about painting the chrome strips? Or you can remove the clips and put a
1/4 black pinstripe to cover the holes.
Steve
|
Do you mean the chrome strips up the centre of the bonnet and along the doors? They're already black (but hard to tell from the photos I've posted).
A previous owner somewhere along the line did the strips, headlight and indicator trims, wipers and mirrors in black so all I'm doing is touching up
what looks like 20+ year old work.
I was undecided about leaving it black or going back to chrome when I bought it, but I've decided to leave it at is - it's been that way for so
long, including the wheels, that I think it has a bit of a "retro-mod" feel to it now; kind of like what you'd be doing if you were hotting up your
bug in the early 80s. I think it's now an essential part of the character of this particular car, basically, and worth preserving for that reason.
1971 Super Beetle "Olivia" - Moss Green
|
|
|
 Marco_VESS Marco_VESS
Casual Dubber

Posts: 43
Threads: 5
Registered: December 12th, 2012
Member Is Offline
Location: Canberra
Theme: UltimaBB Pro Blue ( Default )
|
| posted on September 9th, 2013 at 01:38 PM |
|
|
| Quote: | Originally
posted by FinallyGotADub
Hey Marco, Your car looks great. Nice work. We have the same model in the same colour and are also in Canberra. Ours is much more of a project though
(normal rust, dead motor etc). Seeing yours is inspiring. Hopefully we can get along to the car show on the 22nd and see yours in person and maybe
even have a chat.
Cheers,
James
|
I didn't think this car would be inspiring anything so that's nice to hear  By all means come by and say hello, I'll be around. By all means come by and say hello, I'll be around.
I know of/have seen three others in this colour in Canberra: one that's currently for sale on Gumtree, one standard looking one that surprised me
when it appeared at my local shops one day, and another one that I've been which appears slightly modded and has child seats in the back (I'd like
to see that car up close to see how they got the anchor points in; my kids can't ride in mine).
1971 Super Beetle "Olivia" - Moss Green
|
|
|
 Marco_VESS Marco_VESS
Casual Dubber

Posts: 43
Threads: 5
Registered: December 12th, 2012
Member Is Offline
Location: Canberra
Theme: UltimaBB Pro Blue ( Default )
|
| posted on September 13th, 2013 at 09:34 PM |
|
|
I'm going to have one final attempt at the headlight and indicator trims this weekend, otherwise they'll go on as is - show is next weekend so I'm
out of time.
Meanwhile, the bumpers are just about done. Managed to beat out some parking dents so they're almost straight, and they're about as shiny as
they're going to get - the rear is too rusty to be fully resurrected but they will do for the moment.
So because it's Friday night and I'm a party animal, I'm retrimming the bumpers (with, yes, electrical tape)...
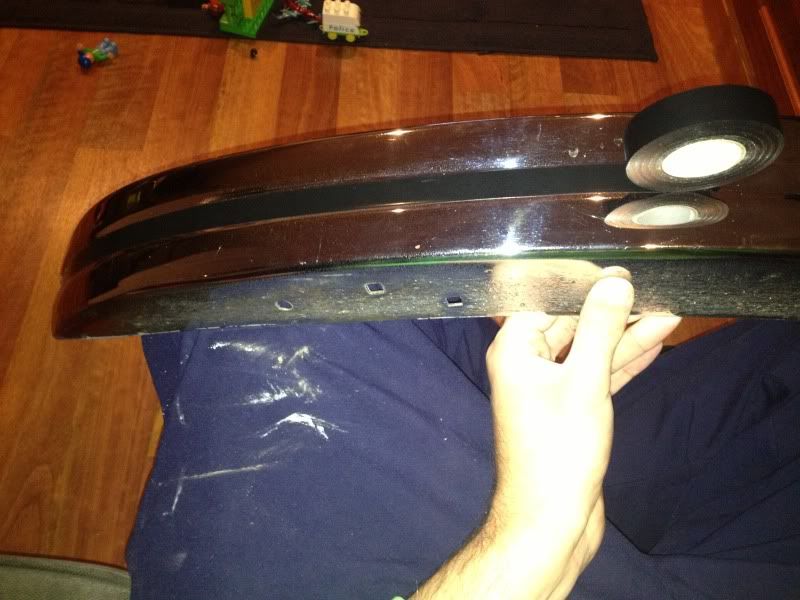
I don't really have the patience or the precision for this sort of thing, but it turned out well:
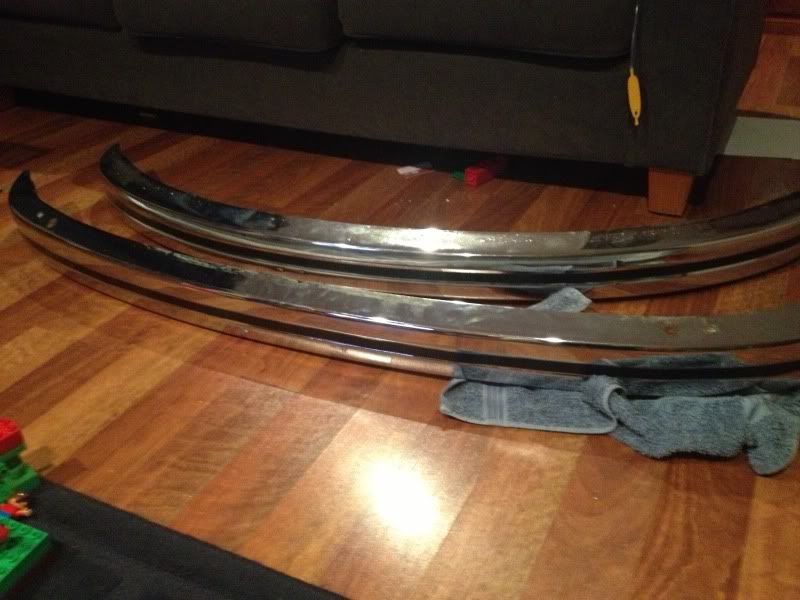
They can go back on the car tomorrow and then we're nearly done for the time being 
1971 Super Beetle "Olivia" - Moss Green
|
|
|
 Marco_VESS Marco_VESS
Casual Dubber

Posts: 43
Threads: 5
Registered: December 12th, 2012
Member Is Offline
Location: Canberra
Theme: UltimaBB Pro Blue ( Default )
|
| posted on September 14th, 2013 at 09:27 PM |
|
|
Anyway, close to finishing this today but not quite there. I had hoped to actually take it out for a drive but that didn't quite work out. Read on
for a Tale of Woe...ish.
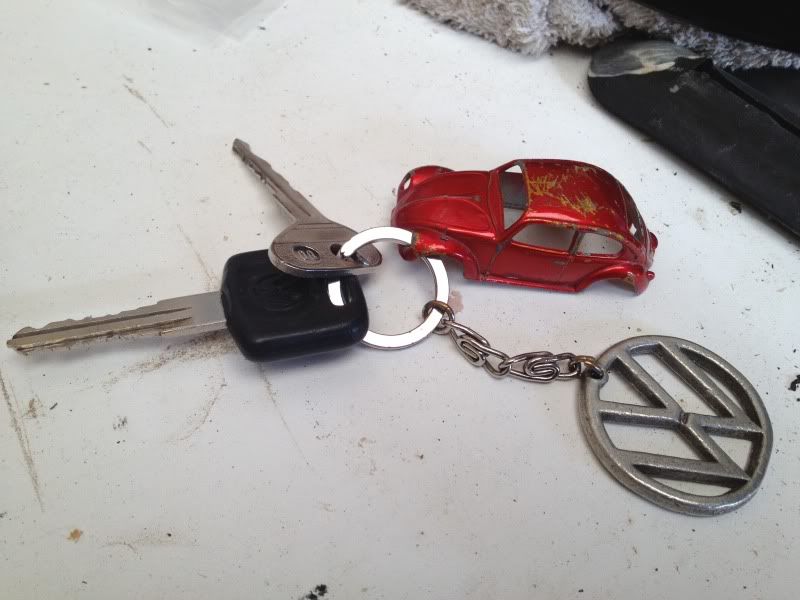
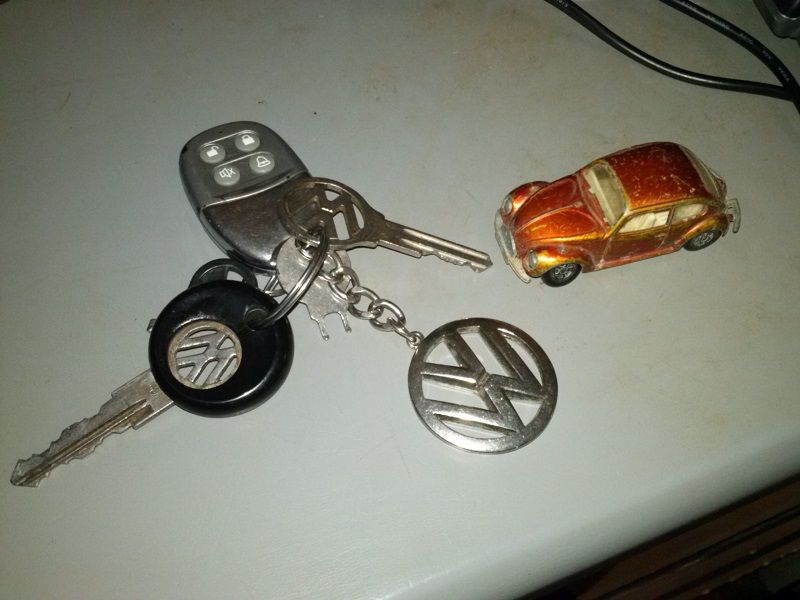
But first: I had this Matchbox Beetle when I was a kid and it turned up disassembled a few years back; my Mum's hobby, nay, mission in life is
throwing stuff out that you want to keep, so some of the disassembled bits are gone but I found a use for what was left:
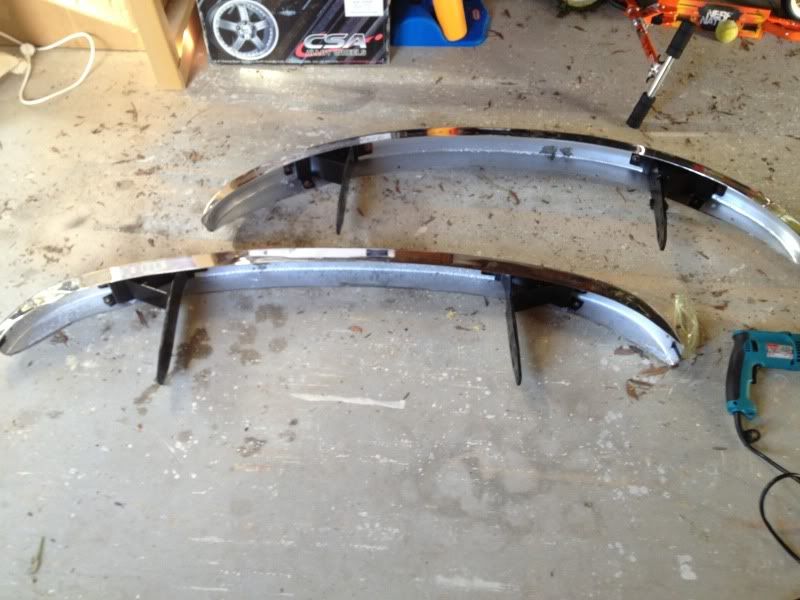
But enough of that. Started out well enough with the bumpers reattached to their brackets, but had to enlarge one of the holes in the bumper as it
seems my home bumper straightening caused the holes to no longer line up. (In hindsight I needed to bend the bumper back to its original shape - I
merely hammered the kinked area flat). Still, so far so good:
The horn attaches to one of the front brackets and I'd left it dangling in place by its wiring; it fell off with a slightly alarming thud when I was
moving the car around last week. Reattached and reconnected it and...no sound.
Swapped the connectors around in case it made a difference. Still no sound. Pondered whether I should have disconnected the battery first. Further
pondered whether a car battery has enough voltage to harm you. This is ponderous, man. Really ponderous. (Ten internets to you if you know the
reference).
Made sure everything was attached properly, swapped sides again, peered intently at the horn in case some obvious problem jumped out at me
(optimistic, I grant you, given I don't know how it works...) - not a peep. Or, should I say, not a beep.
Hmm. Irritation level going up several notches. Decide not an essential component for a quick drive this arvo. Move on.
When I was taking the indicator bulbs out last week, this happened:
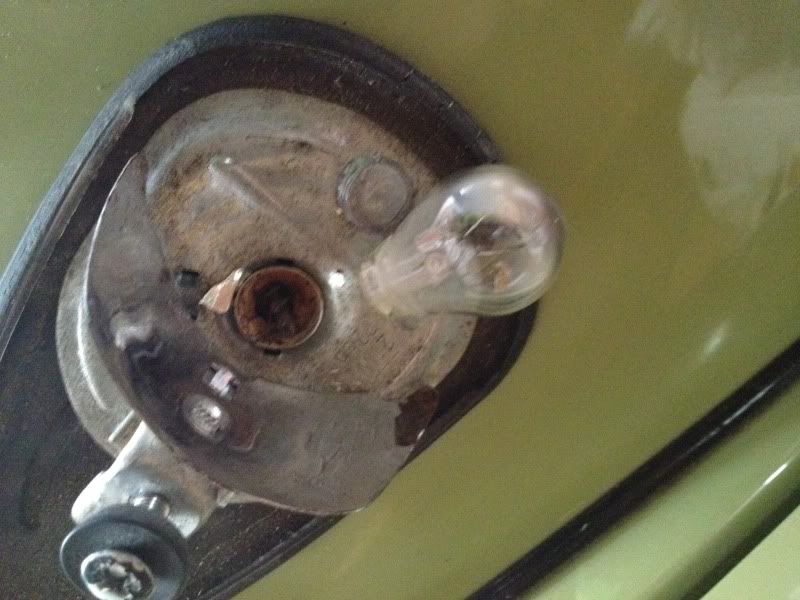
Because I'm an idiot, I assumed that it would either be a screw or bayonet bulb and twisted. In fact it was a bayonet bulb, but not inserted properly
so they came out very easily when I merely...pulled straight up :facepalm: On the upside, I now have a set of six nice new pliers that I bought to
extract the broken bit. (This project is proving great for acquiring new tools and learning new ways to use existing ones).
But now the new orange bulbs won't go in. Why not? I put on my most serious "inspecting things" face and compare and contrast the two bulbs like a
HSC essay. The pins on the new bulb are in the ten to two rather than quarter to three position. Thats novel. Well there's nothing for it, one of
those pins will have to go. I've never filed a lightbulb before today...but it worked. (Is that likely to be harmful? I can't see why it would
be).
New clear indicators look good, I reckon:
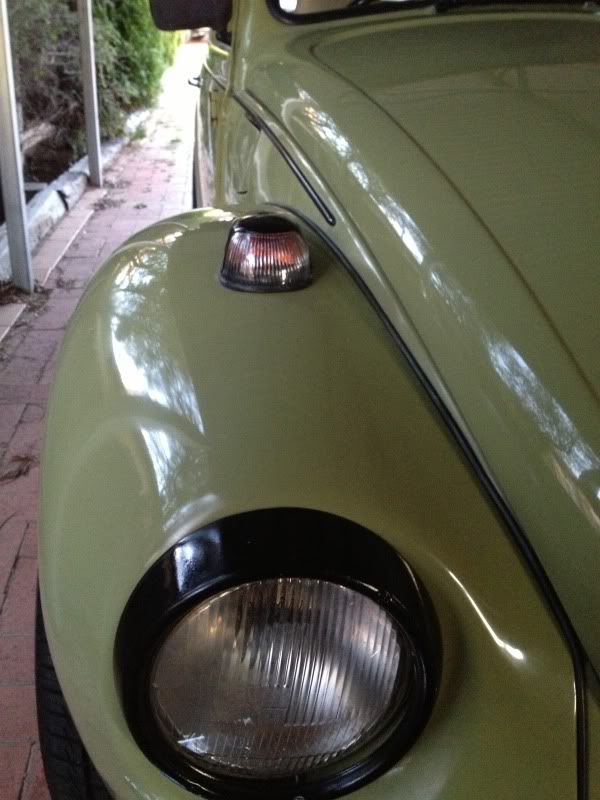
It looks like the headlights are done in that pic too but...they're not.
The backstory is that I'm not mechanically minded, and I struggle with fiddly jobs especially - my fingers just aren't that agile. I knew when I
took the headlights out that I'd have trouble getting them back together, and I was right. The shop manual isn't much help ("reassembly is the
reverse of the disassembly procedure" when the disassembly procedure is only scantly explained reminds me of Year 11 maths, where you had an x and a
y and some numbers, something you didn't understand happened but apparently everyone else got it, and the answer was 42) and by this point I was
rushing to get finished, like an American Hotrod episode where the unveiling is tomorrow and the car's only just come back from the paint shop and
Gabe needs half a day to do the interior. I could feel my inner Duane coming out.
Damned if I could get them back together. I can get the trim ring to hold the glass in place so it doesn't fall out, but the light assembly isn't
otherwise held down in any way. I've obviously done something wrong. But by this point the neighbour's cat, and possibly their kids, have expanded
the profanity section of their vocabulary, and suddenly I'm channeling my father, who is a bit of a tool chucker when frustrated. Memories of
hunting around in a garden bed looking for a thrown screwdriver after an unsuccessful lightbulb change in his VP come back to me. It's now 5:45,
it's getting dark, I don't want to also have to go looking for a Philips head amongst the springtime blooms...I give up.
Grumpy and frustrated, I briefly consider leaving the Beetle outside just to spite it, but drive it in anyway. Out of sheer, unbridled optimism I try
the horn again.
"Beep" comes the cheerful response.
Well, at least that's something. Maybe the horn only works with the ignition on?
I'll try the headlights again tomorrow. I think now i can visualise what is needed to hold the glass in place, now that I'm past the point of
attempting distance records for tools. There's a slim possibility that someone, somewhere, has done this job before on one of the other 21,529,463
Beetles built since 1938 too, I suspect...
1971 Super Beetle "Olivia" - Moss Green
|
|
|
 Joel Joel
Scirocco Rare
Now containing 100% E-Wang
        
Posts: 9368
Threads: 211
Registered: February 14th, 2006
Member Is Offline
Location: Northern Rivers NSW
Theme: UltimaBB Pro Purple
Mood: Tact Level 0.00
|
| posted on September 14th, 2013 at 11:26 PM |
|
|
| Quote: | Originally
posted by Marco_VESS
But first: I had this Matchbox Beetle when I was a kid and it turned up disassembled a few years back; my Mum's hobby, nay, mission in life is
throwing stuff out that you want to keep, so some of the disassembled bits are gone but I found a use for what was left:

|
Sorry to derail your thread slightly but that picture just tripped me out somewhat....
My bug keys have the almost the same keyring but more weirdly I have the exact same Beetle matchbox sitting on my desk that I've had for 25+ years
yes the horn only works with ignition on.
Oh and yes I also get the 2NU reference.
That song always was a little disturbing 
|
|
|
 Bizarre Bizarre
Super Moderator
The artist formerly known as blue74l
      
Posts: 12780
Threads: 734
Registered: August 25th, 2002
Member Is Offline
Location: Abbotsford, Sydney
Theme: UltimaBB Pro Blue ( Default )
|
| posted on September 14th, 2013 at 11:32 PM |
|
|
Maybe the horn only works with the ignition on?
correct 
Futue te ipsum!!!
|
|
|
 Bizarre Bizarre
Super Moderator
The artist formerly known as blue74l
      
Posts: 12780
Threads: 734
Registered: August 25th, 2002
Member Is Offline
Location: Abbotsford, Sydney
Theme: UltimaBB Pro Blue ( Default )
|
| posted on September 15th, 2013 at 11:27 AM |
|
|
| Quote: | Originally
posted by Marco_VESS

but the light assembly isn't otherwise held down in any way.
|
When you look at the light there are 3 phillip head screws
the diagonal 2 are for adjusting the headlingt to shine up or down
The other should go a 6 o'clock
There is a tab at the bottom of the headlight and you need to put the screw into that tab.
When doing this - you first "screw" the assembly onto the bucket.
There are 2 mating lips at 12 o'clock on the chrome ring and the bucket.
That holds the light in place.
The screw at the bottom locks it in place.
You can see in your pic above that the locking screw is not at 6 o'clock. More 5.30
I have had the tab rust away
You then need to make something up.
I can send some pics if that doesnr make sense
Futue te ipsum!!!
|
|
|
| Pages: 1 2 |