| [ Total Views: 2887 | Total Replies: 16 | Thread Id: 106283 ] |
|
|
 Ascort Ascort
Casual Dubber

Posts: 29
Threads: 4
Registered: April 9th, 2011
Member Is Offline
Theme: UltimaBB Pro Blue ( Default )
|
| posted on June 9th, 2014 at 09:53 AM |
|
|
Ascort TSV 1300 #005 (Original BXL-022)
I thought that it is probably time to put a bit of information on the forum about my Ascort TSV 1300.
My car was one of the first Ascorts built after the prototype, if not the first one after the prototype. It is fitted with ID plate 005, which just
adds to the puzzle of Ascort ID Numbers. I have found out that my car built in 1959 and was originally registered BXL-022. When the car was near new
it was involved in a significant accident which severely damaged the front left corner. It was repaired by the factory and was fitted with a towbar
and was used in the photos of the Sonic brochure. The car changed hands a few times in the 1960s and the rego changed to DJT-008. By the early 1970s
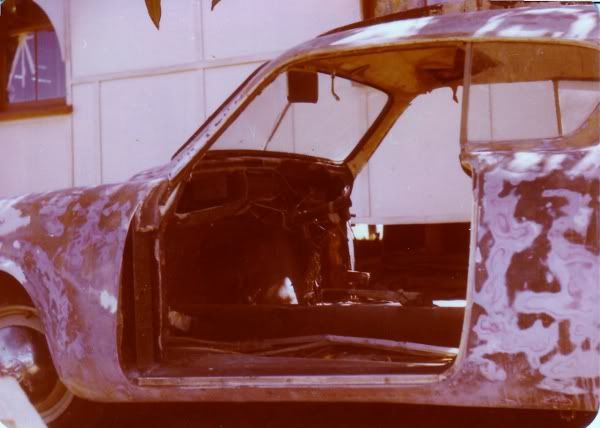
the car had fallen into disrepair and was bought by the owner of a Toowoomba marine shop but restoration did not occur and the derelict stripped out
car was put on sale in the front yard.
In 1974 when at college I saw the car and was fascinated by it, but as a student I could not to buy it. The following year I had my first job and the
car was purchased.
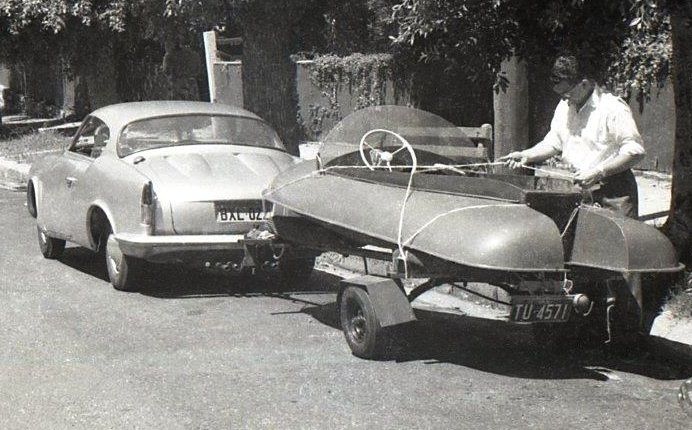
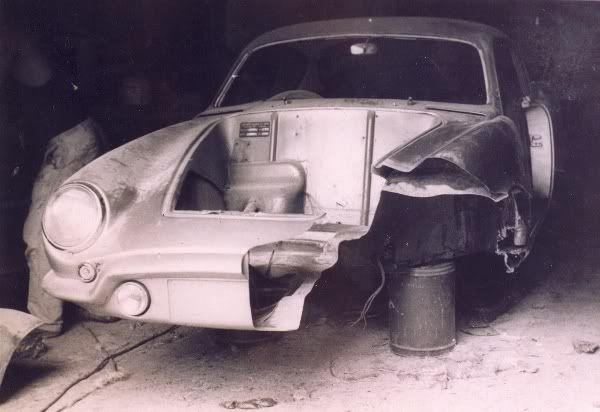
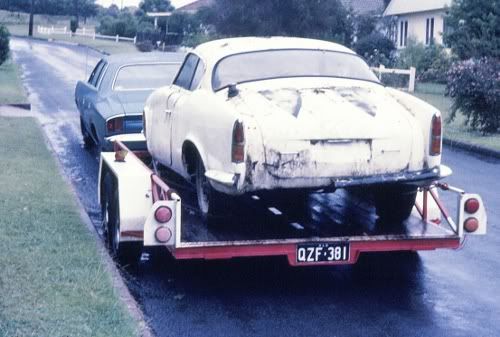
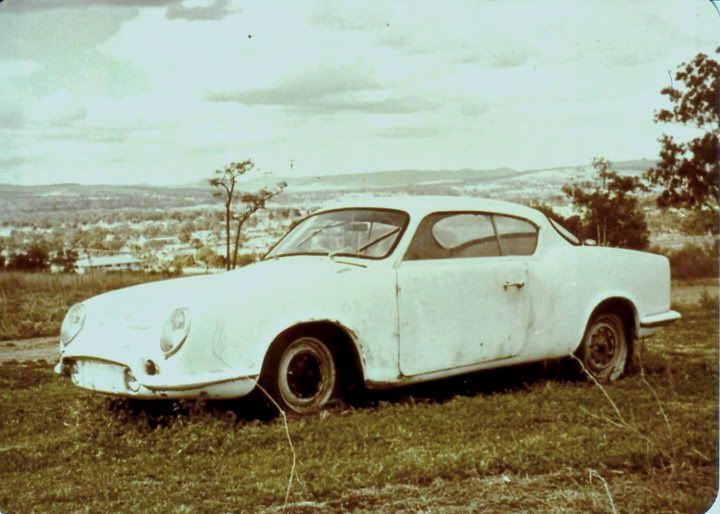
The car interior had been stripped out, the engine bay had been stripped, the pan was rusted, the dash had been removed and a rough ply wood dash had
been roughly put into the car. Lots of other bits were missing such as window regulators. It was a case of purchasing in ignorance of what was
really required to get the car running.
|
|
|
 Ascort Ascort
Casual Dubber

Posts: 29
Threads: 4
Registered: April 9th, 2011
Member Is Offline
Theme: UltimaBB Pro Blue ( Default )
|
| posted on June 9th, 2014 at 10:19 AM |
|
|
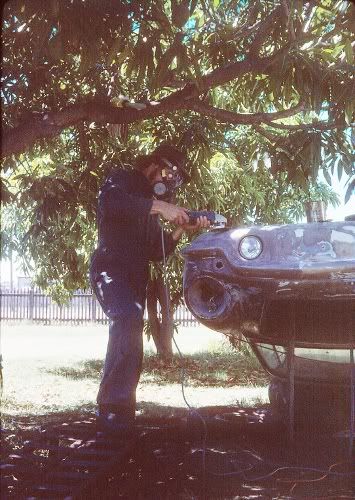
The Ascort was taken to western Queensland where I was working and I began stripping paint and doing some fibreglass repairs to the major problem
areas. At the time I had ideas of doing the minimum work required to put the car onto the road. All I knew about Ascorts was a photo and a couple
paragraphs in a "Sports Cars and Specials" magazine from the mid 1960s.
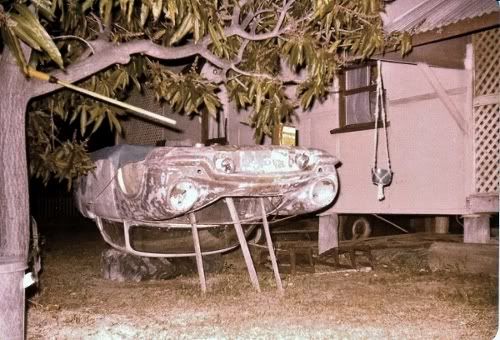
The ply dash was removed and the body was lifted from the pan and tipped upside down in the back yard to allow repairs to the underside and to the
inside of wheel arches. (I cringe now at the thought of what was done.)
The problem I had was that I was so totally ignorant of Ascorts, but this was about to change. A magazine came out in the late 1970s called Cars and
Drivers and in the first issue there was mention that they planned to write an article about Ascorts and that they were interested in hearing from
anybody who had one. I wrote to the magazine and my letter was published in the second issue. From this I received a letter from Adrian Shagen from
Club Lotus with magazine articles, contact details for the Ascort designer Mirek Craney and also contact details for the owner of a red Ascort which
was often seen at the Sandown racing circuit.
I spoke to Mirek Craney and he provided a lot of information, but could not help me with dash plans. I tried to contact the Sandown car's owner but
initially received no reply. I decided to use the photos in the magazine to fabricate a replica dash. I set to work with plaster of Paris to create
the shape.
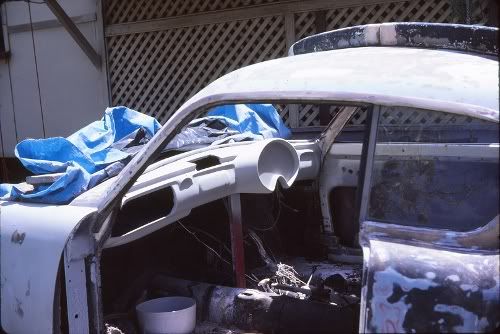
A fibreglass mould was then taken.
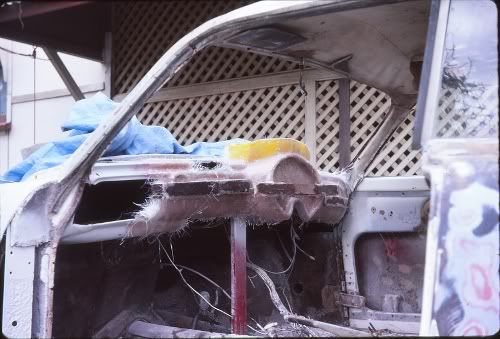
I had just finished making my dash when I heard from the Sandown car's owner. I was able to get dozens of photos of the dash and realised that my
home made dash was close but not quite right. I would have to redo it.
The door hinges were rusted and broken so I set about hand making new hinges. These turned out well, but work was about to come to a stop due to the
arrival of children and a transfer back to the Darling Downs area.
|
|
|
 Ascort Ascort
Casual Dubber

Posts: 29
Threads: 4
Registered: April 9th, 2011
Member Is Offline
Theme: UltimaBB Pro Blue ( Default )
|
| posted on June 9th, 2014 at 11:55 AM |
|
|
After returning to the Darling Downs area my attention turned to the new home and young family. The Ascort was parked in the back of the shed where
it remained until around 2007 when work was re-commenced.
By this time there was the internet which had put me in contact with a couple other Ascort owners, including the then owner of the silver Ascort which
was under restoration. After Geoff Starkey sold the Ascort, I took over where Geoff had left off with the collection and collating of Ascort
information and history.
In 2007 I dragged the Ascort out of the shed and took it to the Warwick 2007 VW Drags where some people on this forum may have seen it.
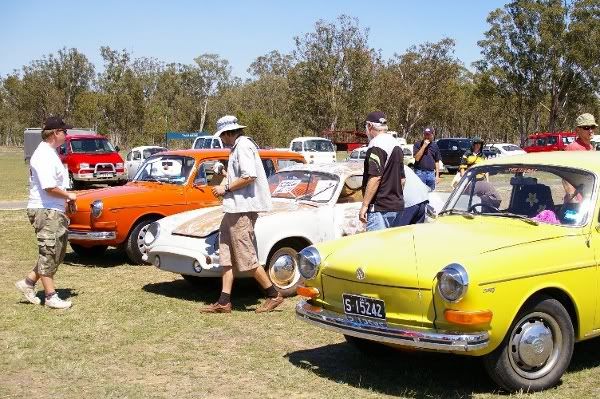
Barry Lord organised a mould to be taken from the remains of the NZ Ascort and this was delivered to me at the 2007 Warwick meet. I set about fitting
the dash and collecting the instruments that I needed and then have them restored.
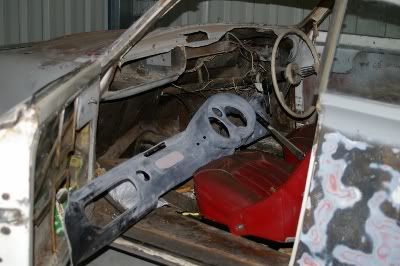
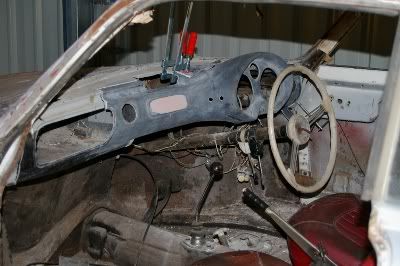
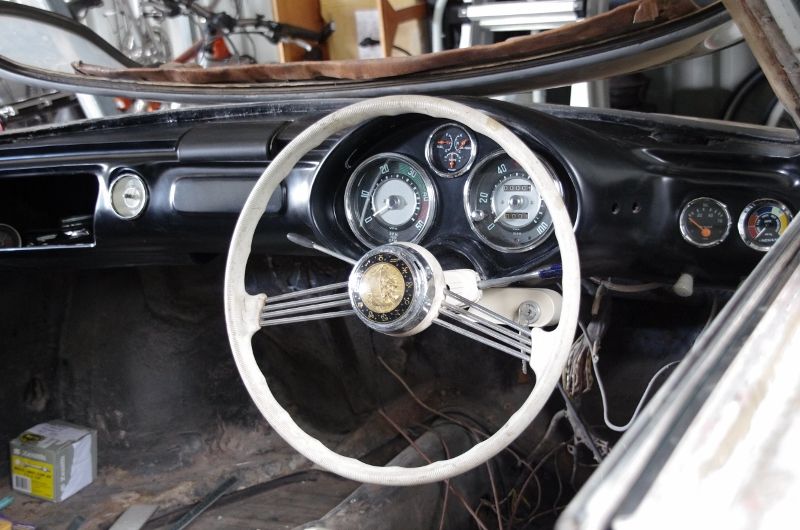
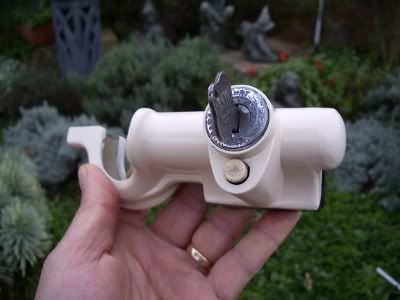
The dash finally looks like it should, although the instrument restorer fitted the wrong needle to the tacho. In the above photo the car does not
have the correct steering lock. One was found on The Samba and it was restored ready for the car.
|
|
|
 Ascort Ascort
Casual Dubber

Posts: 29
Threads: 4
Registered: April 9th, 2011
Member Is Offline
Theme: UltimaBB Pro Blue ( Default )
|
| posted on June 9th, 2014 at 12:41 PM |
|
|
As well as the main work on the car, I began doing a lot of other time consuming little jobs which I eventually hope will add to the look of the car
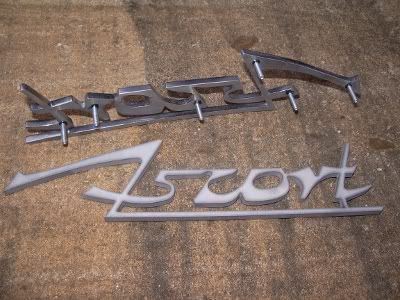
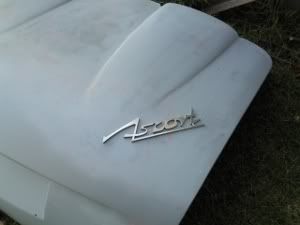
when it is completed. One of these jobs was the emblems. My car had all the emblems missing and there was only one front emblem known to exist, but
I could not get access to it. I decided to make my own.
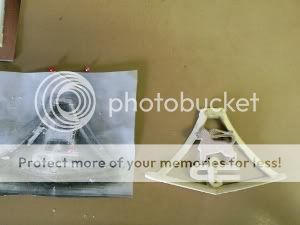
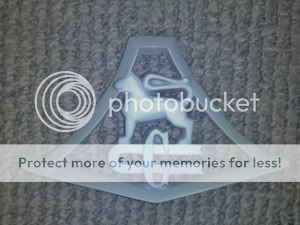
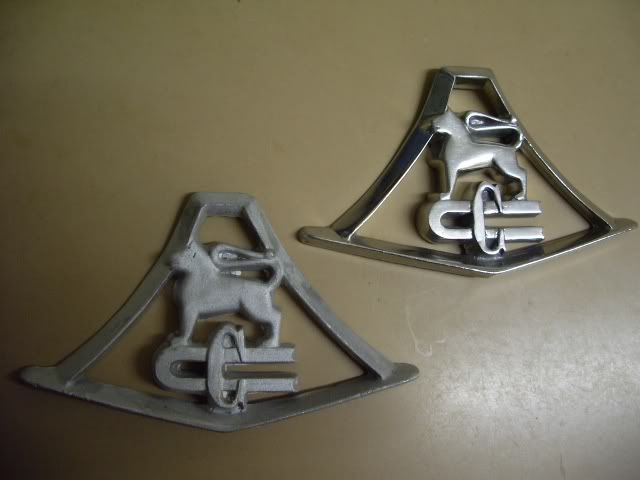
I collected every photo that I could find of the front of Ascorts and blew up the section showing the emblem. From this I was able to get a 1:1 scale
picture of the emblem, using the original mounting holes on my bonnet as a guide to the size.
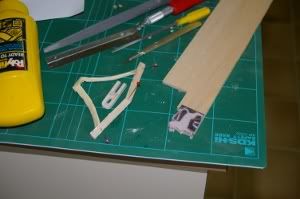
I crafted an emblem from Balsa wood, then used fillers and finally automotive primer to obtain a high finish. A silicone mould was then taken. I
decided that I had one section wrong, so the correction was made and the process repeated. After many hours of work I was able to make resin emblems
from my mould. One of these was "chrome" plated and the result looked good, but I wanted metal, so with significant cost a pattern was made from my
resin emblem and a batch of stainless steel emblems were cast. Many hours of filing, sanding and polishing were required to complete the emblem for
#005.
The rear emblem was a little simpler. I was able to get access to an original failed casting, and also I was able to trace and photograph a rear
emblem from a NSW car. I used this information to draw the emblem in CAD. I then had the shape water jet cut from 5mm stainless steel. It was then
a couple days of work to hand finish the emblems, curve them to fit the body work and also fit the mounting screws so that they fit into the original
holes on the car.
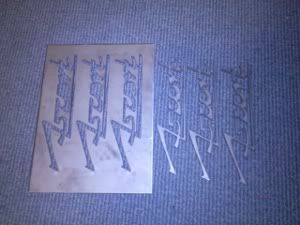  
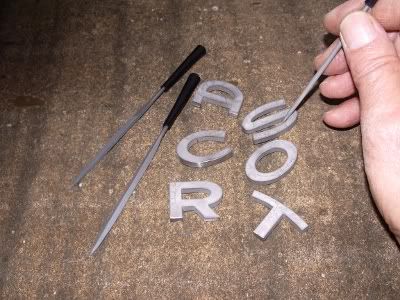
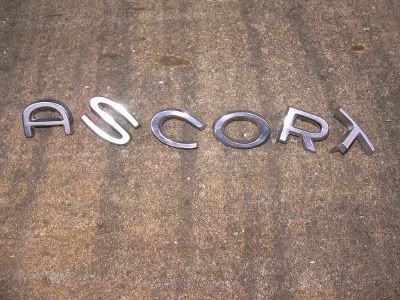
I was able to get a loan of some original front letters. I attempted to find matching letters, but I was not able to find letters of the same font.
I decided to make my own. I scanned the original letters and then worked in CAD to create files of the shapes. These were then water jet cut from
stainless steel and then hand finished. This was a slow process with each letter taking about 2 days work to taper the sides, fit mounting pins that
matched the original mounting points, and to polish them. Letters such as the "S" required the taper work to be done with needle files to fit into
the tight shape which was a painfully slow process.
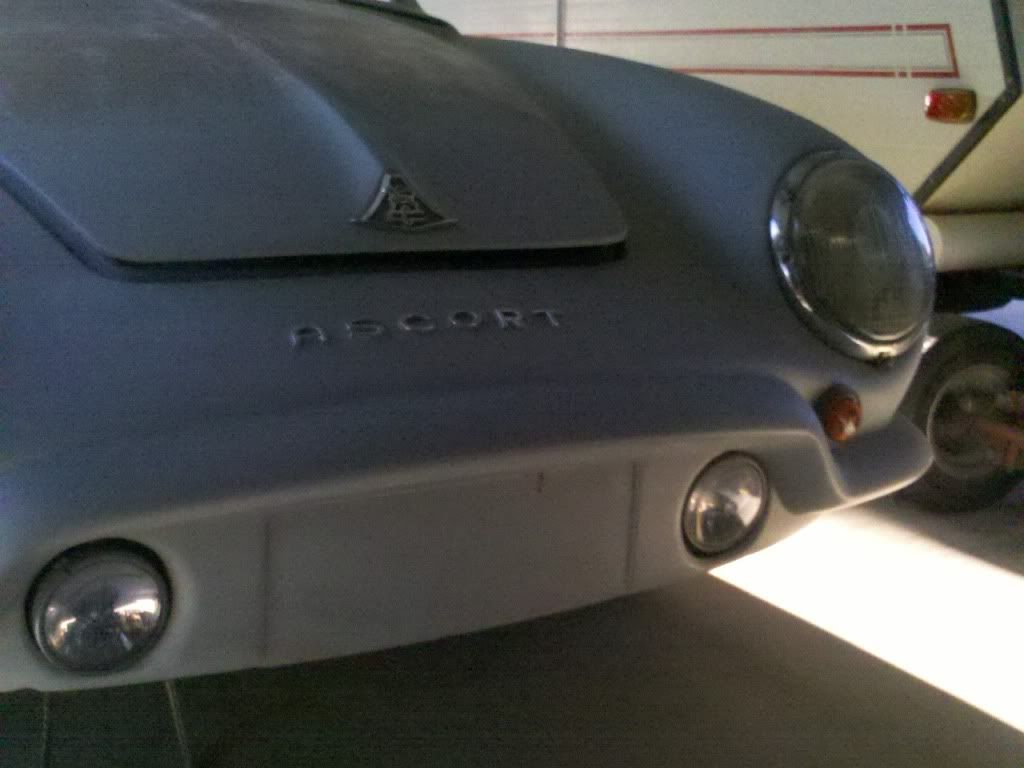
|
|
|
 Ascort Ascort
Casual Dubber

Posts: 29
Threads: 4
Registered: April 9th, 2011
Member Is Offline
Theme: UltimaBB Pro Blue ( Default )
|
| posted on June 9th, 2014 at 01:50 PM |
|
|
The interior of #005 had been stripped out. The fibreglass was damaged and it could generally be considered to be a mess.
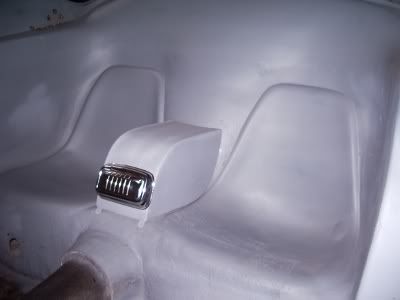
I was fortunate to get the remains of the trim from 2 other Ascorts which can be used as patterns for a new interior. The rear seat area was repaired
and strengthened, but I was missing the rear armrest. I bought the required FJ holden ashtray off eBay and then used the old vinyl trim that I had to
re-create the shape of the armrest. The original screw holes were filled, but no attempt was made to totally hide the original hole positions as it
was felt that this could assist when it comes time to do the re-trimming.
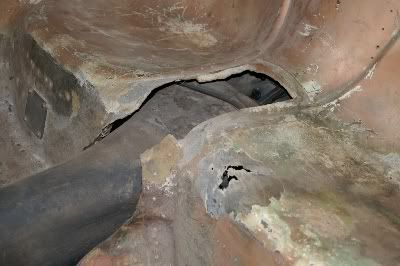 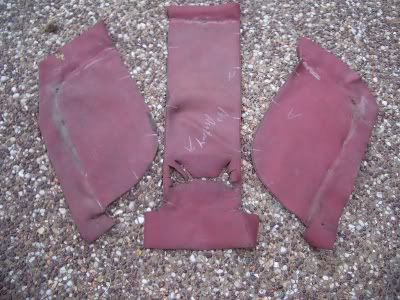 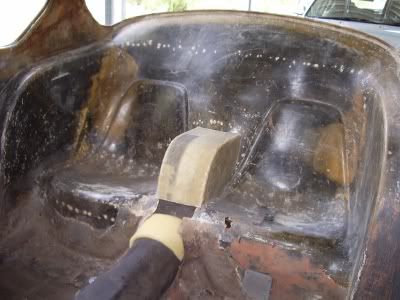 
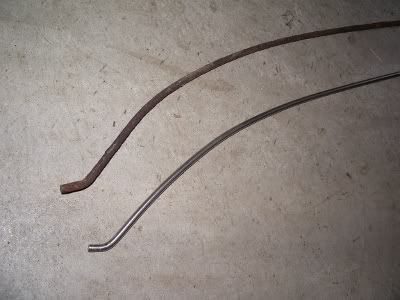
The original roof bows were badly rusted and weakened, so I decided to make replacements. I decided to use 4mm stainless steel bar as it was stiff,
springy and would not have any rust issues into the future.
The original mirror on my car had been removed years ago and the acrylic sunvisors were in poor condition. I tried to get a replacement unit from The
Samba, but I was not successful in finding what I wanted. It became necessary to re-build the existing unit. I purchased 2 replica 1954 units and
used parts to re-build the #005 car's unit. This involved cutting and threading the mirror bracket. I then scratch built a copy out of stainless
steel for a second Ascort that I now own.
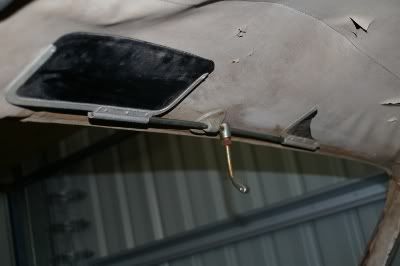 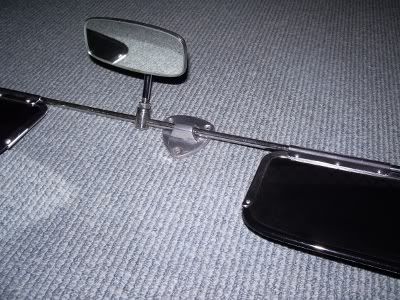 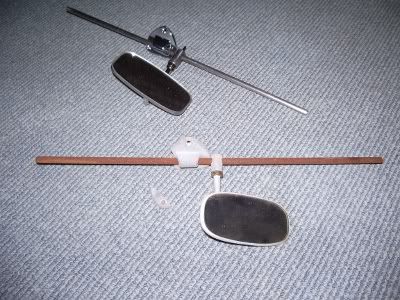
Wolfburg West was able to supply the acrylic visor replica units.
|
|
|
 oldskoolguy oldskoolguy
Officially Full-On Dubber
  
Posts: 329
Threads: 13
Registered: September 6th, 2011
Member Is Offline
Location: Coffs Harbour NSW
Theme: UltimaBB Pro Blue ( Default )
Mood: Ticking over nicely.
|
| posted on June 9th, 2014 at 01:58 PM |
|
|
Great story and pictures, great work and attention to detail by yourself. What a fantastic car that will be when you have finished.

"The best trophies are stone chips"
1969 1500 Beetle "Otis"
2008 Golf GTI
|
|
|
 Ascort Ascort
Casual Dubber

Posts: 29
Threads: 4
Registered: April 9th, 2011
Member Is Offline
Theme: UltimaBB Pro Blue ( Default )
|
| posted on June 9th, 2014 at 02:03 PM |
|
|
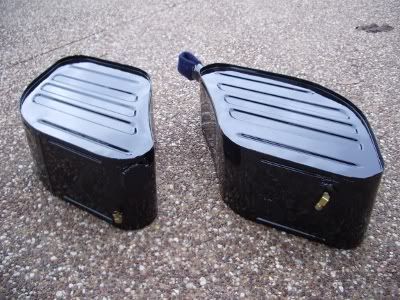
The fuel tanks were also in only fair condition. They are modified Ford 105E Anglia units. There is one tank fitted each side of the car ahead of
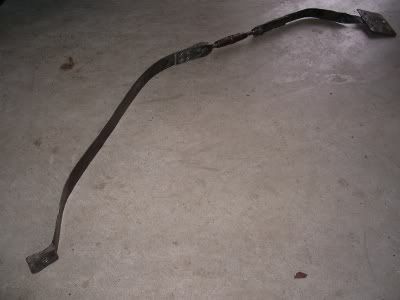
the rear wheels giving the car a total of 16 gallons of fuel (about 72 litres) and 1000km fuel range. Each tank is held in place by a steel strap and
turnbuckle. The left tank has the filler cap and the right tank has the fuel gauge sender unit. There are cross feed lines for fuel and air
venting.

My car had some pin hole rusting and the fittings were in poor condition. The rust holes were repaired, the fittings were replaced and then the tanks
were treated in POR15 fuel tank sealer and POR15 paint. The mounting straps were then rebuilt.
|
|
|
 Ascort Ascort
Casual Dubber

Posts: 29
Threads: 4
Registered: April 9th, 2011
Member Is Offline
Theme: UltimaBB Pro Blue ( Default )
|
| posted on June 9th, 2014 at 02:13 PM |
|
|
| Quote: | Originally
posted by oldskoolguy
Great story and pictures, great work and attention to detail by yourself. What a fantastic car that will be when you have finished.

|
Thanks for that. The only problem with getting carried away with the detail is the time that it takes lots of time. I also get side-tracked with
other Ascort related actions such as setting up the Ascort web page http://www.ascort-tsv-1300.com and making models of Ascorts (I should put something about that in the toys section).
|
|
|
 Ascort Ascort
Casual Dubber

Posts: 29
Threads: 4
Registered: April 9th, 2011
Member Is Offline
Theme: UltimaBB Pro Blue ( Default )
|
| posted on June 9th, 2014 at 04:06 PM |
|
|
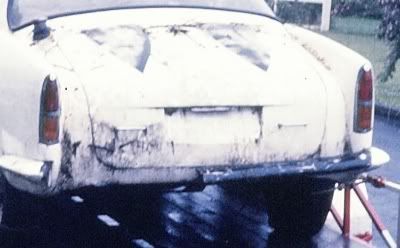
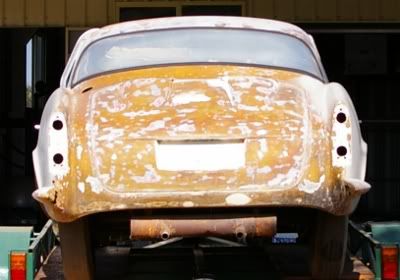
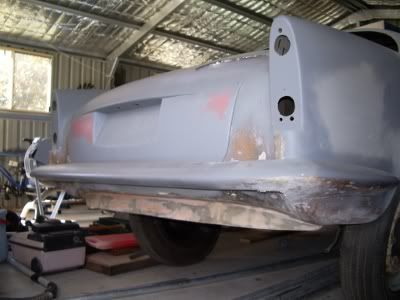
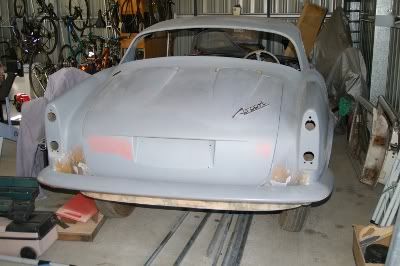
The back of the car was in poor condition with weakness in the body over the rear wheel arches, a broken bumper and a damaged rear panel and
skirt.
The rear wheel arches were strengthened when the body was inverted. In the 1970s I had also repaired the nose which had significant damage, and also
the rear panel. Unfortunately at the time I did not realise that the car was supposed to have a skirt under the rear panel as it was missing.
I have now recently scratch built this panel and repaired the broken bumper and re-fitted it. I still have some more repairs to do in the area in the
bumper/tail light area to repair some cracks in the body. I just keep avoiding the job at the moment as it will be a bit fiddly in some areas.
The rear is very much work in progress and the grey paint is just keeping the UV off the resin and is just a sacrificial layer that is helping to show
up the air bubble holes etc.
|
|
|
 Ascort Ascort
Casual Dubber

Posts: 29
Threads: 4
Registered: April 9th, 2011
Member Is Offline
Theme: UltimaBB Pro Blue ( Default )
|
| posted on June 9th, 2014 at 04:56 PM |
|
|
The doors have been the biggest nightmare so far. The car was missing its window regulators, the hinges were broken, the widow channels were in poor
condition, the fibreglass was cracked, the pillar area had problems the handles were corroded, etc etc etc.
The first problem was to identify the parts that were needed. The catch mechanisms were 1959 VW. The door handles were Morris Isis/Oxford. The
channels and hinges were custom built and to date I have not been able to identify the missing window regulators, which was a major problem.
New hinges were made in the 1970s by making the hinge plates, then cutting and drilling the individual sections for the spine of the hinge on a lathe.
These were placed onto the hinge pin and individually welded onto the plates. The pin was then riveted over to complete the hinge. The new hinges
actually work very nicely.
The window channel repairs were fairly straight forward, as were the rebuild/replacement of catch mechanisms.
Not so easy was the striker plate, as it was found that #005 differed from other Ascorts in that the striker plate was recessed into the panel. It
was loose and it was found that the reason was the striker plate was mounted onto timber which had rotted. Obviously this poor design was fixed on
later vehicles. The trick was to replace the timber and make it structurally sound, but not lose the unique identity of the car. So far I have only
fixed the passenger. I have replaced the timber with a steel plate and have made the striker plate adjustable to get a better door fit. The door now
shuts very smoothly with a good fit. I now have to repeat the task on the drivers door.
The doors of the Ascort have a diagonal cable fitted with a turnbuckle that adjusts the sag and twist of the door to get a better fit. The cable was
missing from one door and the other had a seized turnbuckle. I made new cables using stainless cable and stainless turnbuckles.
The biggest problem remained the window regulators. I wanted regulators with the handles in the correct position and with the original gearing. I
searched the internet numerous times. I contacted car clubs, I searched at swap meetings, asked people etc, but was never able to identify the
regulators that were used.
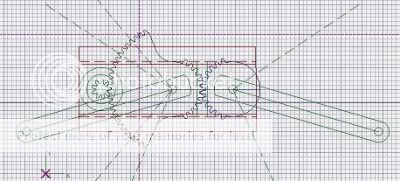
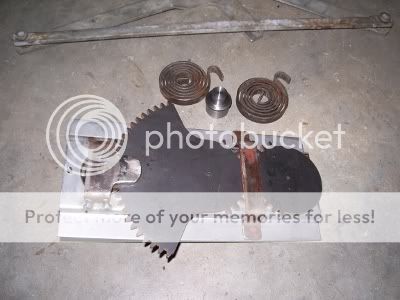
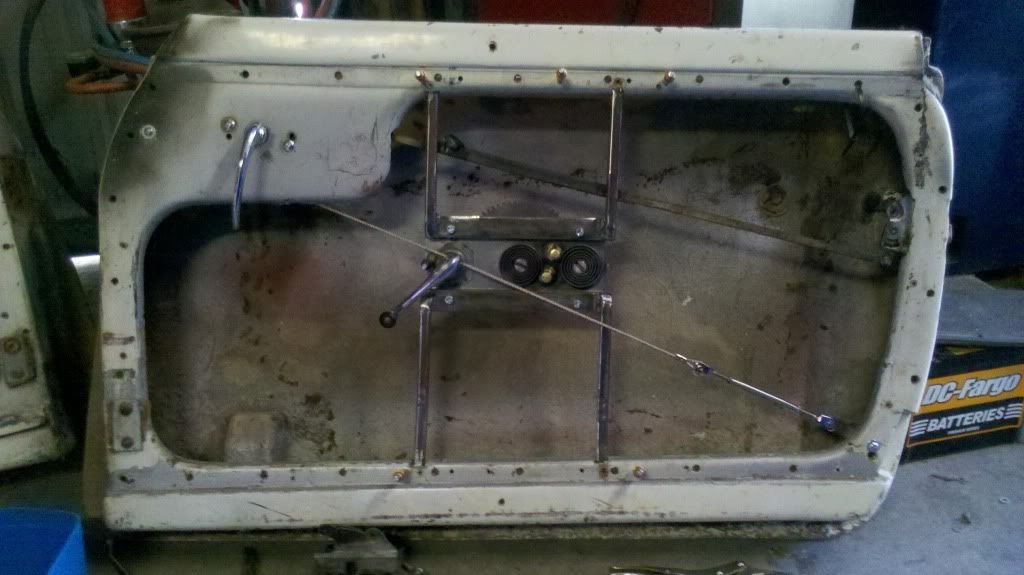
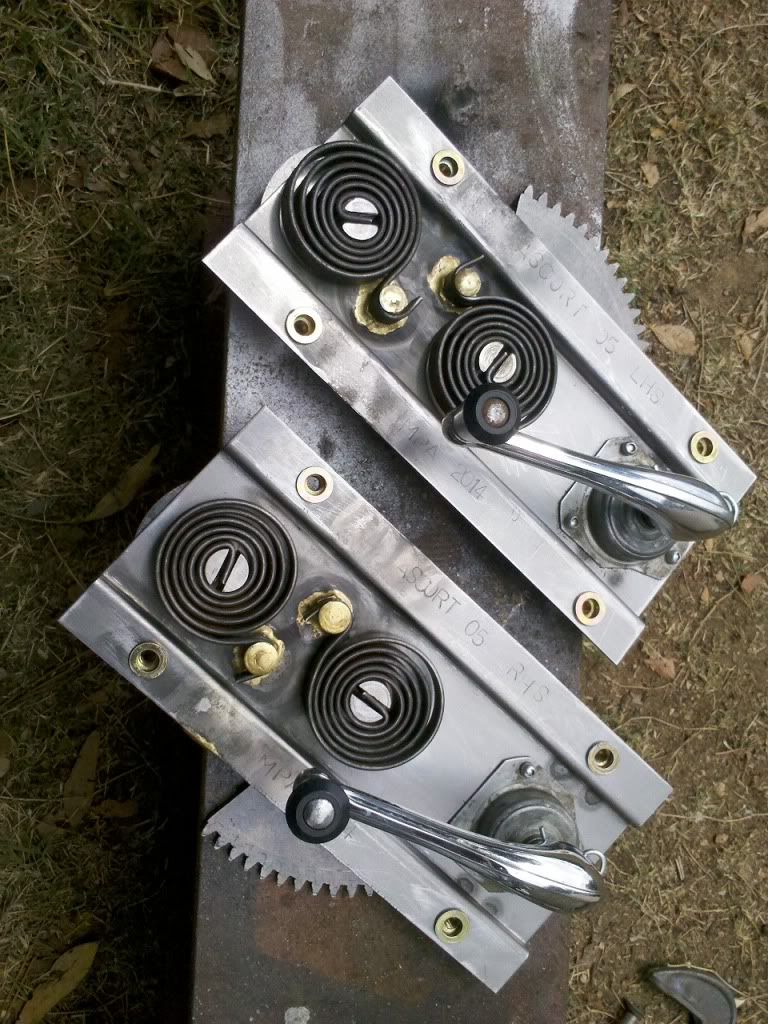
Oh well! I have done lots of other dumb things with this car, so I thought that I may as well make my own regulators. I had a couple photos of what
the regulators looked like and one door had the mounting brackets for the regulators. I reverse engineered the regulators and designed them in CAD.
I then had the quadrant plates water jet cut from the CAD design and the chassis plates folded. It was then a matter of turning bushes, welding small
components, adding rivet-nuts etc. If I write it quickly it sounds simple, but they were very time consuming as the gears had to be hand filed to get
the correct clearances for smooth operation.
The basic mechanisms are now assembled and work smoothly, but the lift arms have still to be added to complete them.
Door handles were simpler than I had first thought. I had been advised years ago that they came from Morris Isis, which I am sure is quite rare now.
I thought about it and realised that they were a 6 cylinder Oxford, and Morris Oxfords as still built in India as Hindustan Ambassadors. I checked
ebay and found that new handles could be bought very cheaply from India.
The doors are still being worked on and remain the biggest nightmare getting everything working properly, but I think that I am finally over the hump
with them.
|
|
|
 Yogie Yogie
Super Moderator
      
Posts: 1606
Threads: 108
Registered: June 7th, 2003
Member Is Offline
Location: Brisbane
Theme: UltimaBB Pro Blue
|
| posted on June 9th, 2014 at 05:57 PM |
|
|
I am humbled by your dedication and perserverance. What a great job you are doing for yourself and the car community as a whole.
Congratulations to you.
Yogie
|
|
|
 waltermitty waltermitty
Custom Title Time!
Legend when my beer goggles are on
    
Posts: 1993
Threads: 268
Registered: August 29th, 2002
Member Is Offline
Location: Port Macquarie now Yipee!
Theme: UltimaBB Pro Grey
Mood: Hungry for mor
|
| posted on June 9th, 2014 at 06:48 PM |
|
|
Farque!!!!
AMAZING!!
great read thanks
23 windows ...8 too many!
|
|
|
 vduboy vduboy
Insano Dub Head
   
Posts: 702
Threads: 41
Registered: October 6th, 2012
Member Is Offline
Theme: UltimaBB Streamlined2
Mood: Dying to get more buggy building time..
|
| posted on June 9th, 2014 at 07:11 PM |
|
|
Absolutely amazing attention to detail mate, really nice to see, hope to see the car in real life one day! 
It will all be OK in the end, if it's not OK it's not the end!
|
|
|
 Ascort Ascort
Casual Dubber

Posts: 29
Threads: 4
Registered: April 9th, 2011
Member Is Offline
Theme: UltimaBB Pro Blue ( Default )
|
| posted on June 10th, 2014 at 09:11 AM |
|
|
Thanks for the kind words. I just really need to get it finished and on the road. I keep using up precious time on things such as restoring old
Ascort photos, setting up the Ascort web page and Facebook page and have also tried my hand at model making. The models are 1:43 solid resin without
turning wheels, but they look ok from 30 metres if you don't have your glasses on 
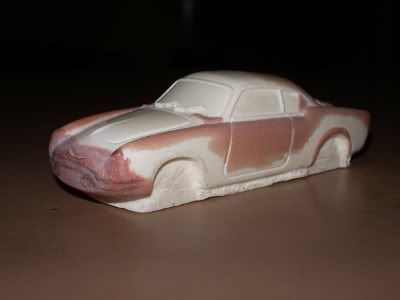 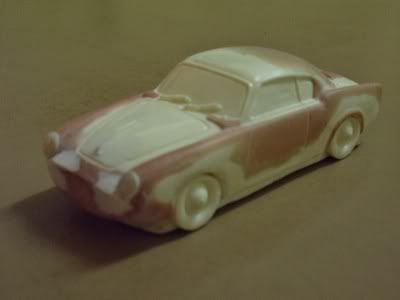
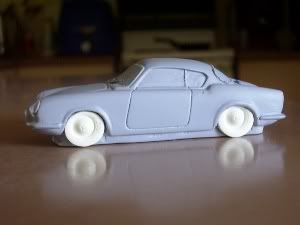 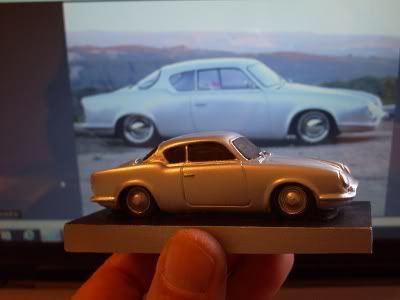
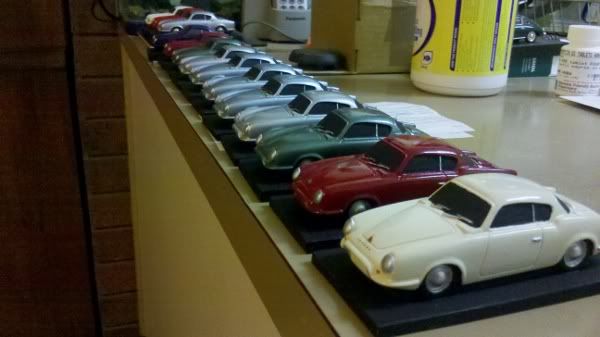
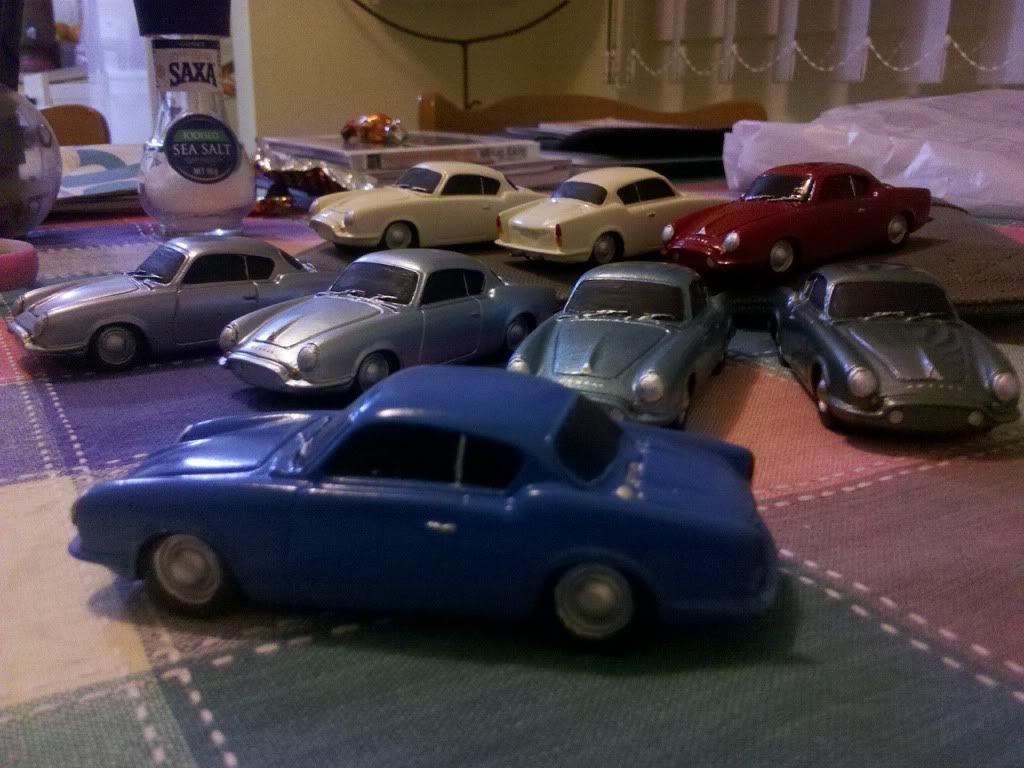
My babies have gone to various Australian enthusiasts, the family of the designer, other Ascort owners, and enthusiasts in NZ, US, Germany, Holland,
Britain and Belgium.
|
|
|
 empi empi
A.k.a.: Empstar
Compulsive Aussie Vee Dubber
      
Posts: 4131
Threads: 178
Registered: August 27th, 2002
Member Is Offline
Location: melbourne
Theme: UltimaBB Pro Blue ( Default )
Mood: thunderous
|
| posted on June 10th, 2014 at 12:06 PM |
|
|
Wow great article, any more models available?
Even a raw cast one... can dummy up the car im working on
"If at first you don't succeed, skydiving is not for you." - Anonymous  |
|
|
 Ascort Ascort
Casual Dubber

Posts: 29
Threads: 4
Registered: April 9th, 2011
Member Is Offline
Theme: UltimaBB Pro Blue ( Default )
|
| posted on June 10th, 2014 at 12:41 PM |
|
|
| Quote: | Originally
posted by empi
Wow great article, any more models available?
Even a raw cast one... can dummy up the car im working on
|
I have a few people wanting models, so it may be getting time to dust off the mould and do a few castings. PM me for details.
|
|
|
 Ascort Ascort
Casual Dubber

Posts: 29
Threads: 4
Registered: April 9th, 2011
Member Is Offline
Theme: UltimaBB Pro Blue ( Default )
|
| posted on June 10th, 2014 at 01:04 PM |
|
|
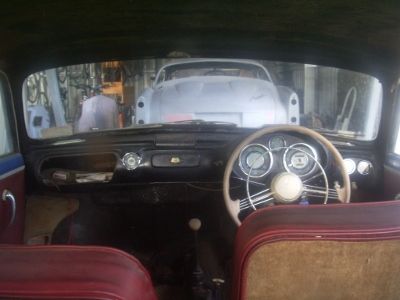
My #005 Car seen through the windscreen of my blue Ascort which is sitting waiting its turn.
My blue Ascort
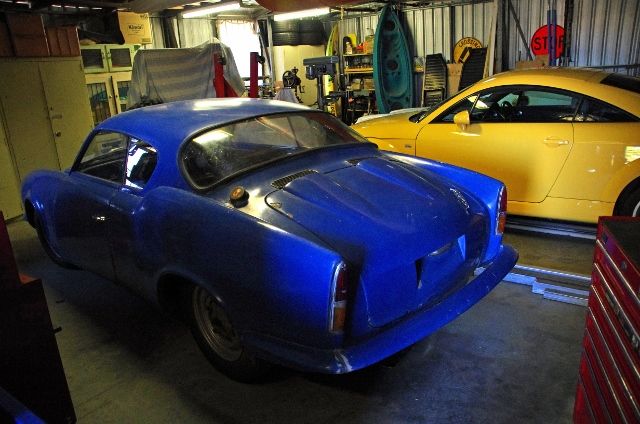
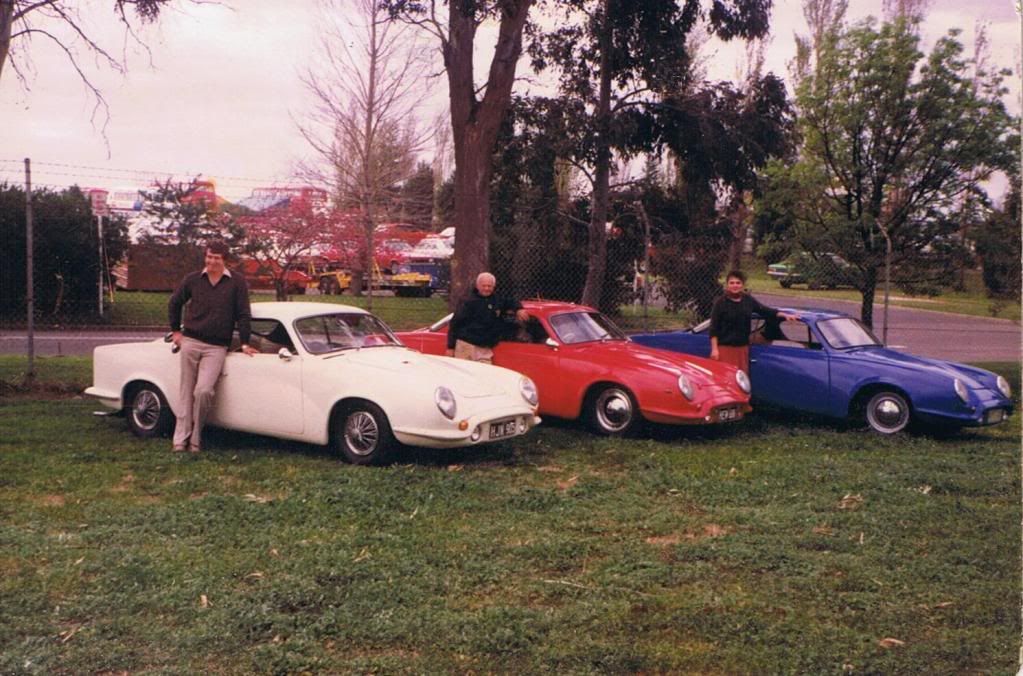
The blue Ascort in the 1980s with the red car that is currently being restored http://forums.aussieveedubbers.com/viewtopic.php?action=attachment&tid=89... and the white car which is also now being
worked on.
http://forums.aussieveedubbers.com/viewtopic.php?action=attachment&tid=10...
|
|
|