| [ Total Views: 6938 | Total Replies: 65 | Thread Id: 61892 ] |
| Pages: 1 2 3 |
|
|
 Nevada51 Nevada51
Seriously Crusin Dubber
 
Posts: 169
Threads: 41
Registered: August 16th, 2005
Member Is Offline
Theme: UltimaBB Pro Blue ( Default )
|
| posted on April 17th, 2007 at 10:26 PM |
|
|
The '56 Oval Project
Right I thought I’d finally get off my arse and post some pics of my ’56 oval project. After looking for the right Oval for the right price for
several months, I finally scored a ’56 model (thanks Nathan :thumb). Originally I planned on doing a full resto on an oval, however given the
condition of this one was so original, I became a little undecided as to what to do.
The ’56 is mostly in its original paint with minor parking dings only, minimal rust (other than surface rust!) and the original interior (except the
front seats). Its a great base for a restoration, but it seems like a shame to make it all ‘new’ again, so instead I’ve drawn inspiration from
Martin Henriksson’s ’55 project (meanbugs.com) and Andy Ham’s ‘Bitch’ ’59 project (restowagenUK.com).
The plan is to remove the body, powdercoat the pan, paint all the suspension components, replace all the brake components with new parts, tie-rods,
link-pins, king-pins, underbody items, new rubber seals, refresh the 36hp engine, convert to 12 volt, drop it a few notches at the rear, lowered CB
spindles, plus a narrowed front beam with adjusters. Still undecided about what wheels to roll at this point.
“Let the games commence!”….
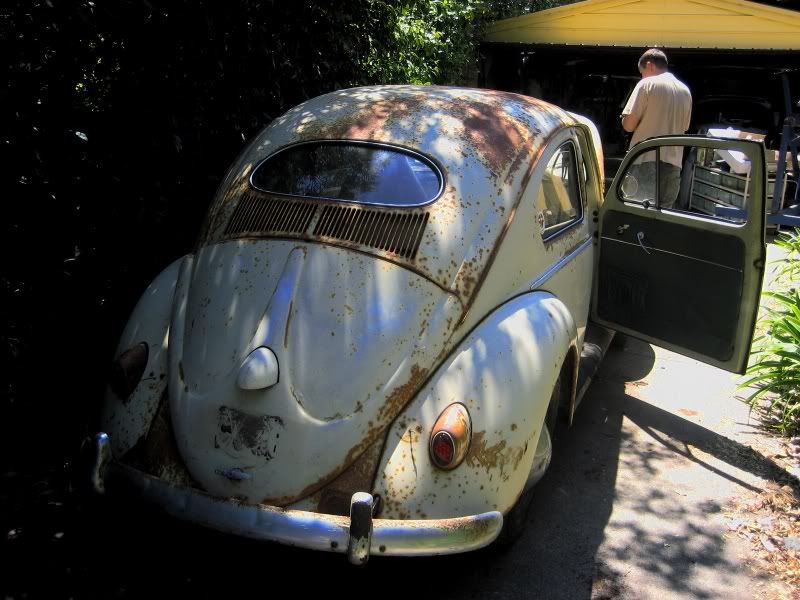
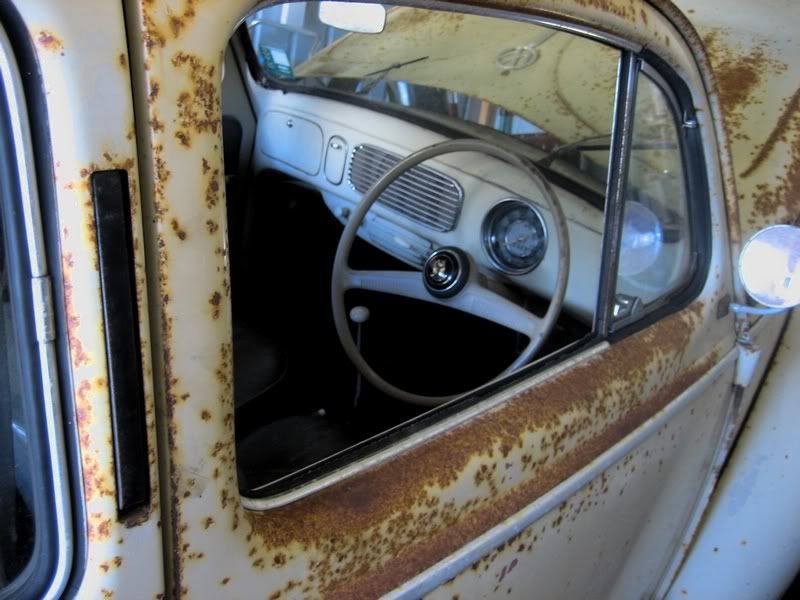
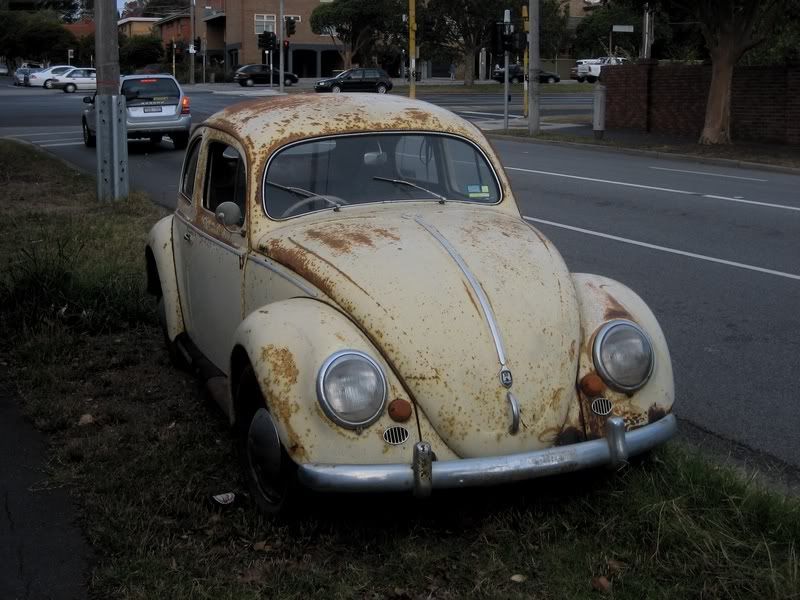
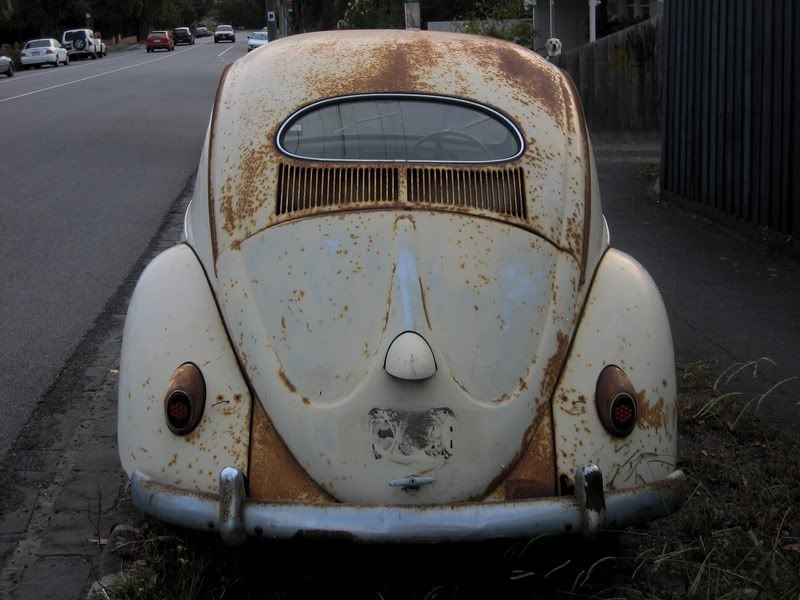
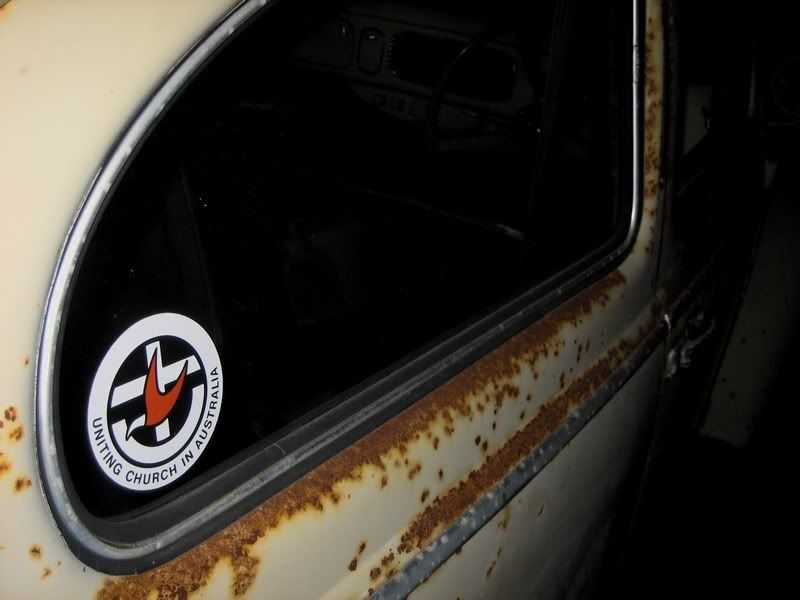
Surely this means it was only ever driven to church on Sunday’s……..
|
|
|
 Nevada51 Nevada51
Seriously Crusin Dubber
 
Posts: 169
Threads: 41
Registered: August 16th, 2005
Member Is Offline
Theme: UltimaBB Pro Blue ( Default )
|
| posted on April 17th, 2007 at 10:28 PM |
|
|
:o Probably should be in Members Rides section...... Can this thread be moved??
|
|
|
 empi empi
A.k.a.: Empstar
Compulsive Aussie Vee Dubber
      
Posts: 4131
Threads: 178
Registered: August 27th, 2002
Member Is Offline
Location: melbourne
Theme: UltimaBB Pro Blue ( Default )
Mood: thunderous
|
| posted on April 17th, 2007 at 10:44 PM |
|
|
Noice, it needs to be lowered.
"If at first you don't succeed, skydiving is not for you." - Anonymous  |
|
|
 DubbinDan DubbinDan
Officially Full-On Dubber
  
Posts: 211
Threads: 51
Registered: September 6th, 2005
Member Is Offline
Location: Concord NSW
Theme: UltimaBB Pro Blue ( Default )
|
| posted on April 18th, 2007 at 01:08 PM |
|
|
Damn that is awesome. Best find I've seen on here for a while. Where do you get one of those? Who's Nathan? I want his number - haha.
|
|
|
 dvs_vw dvs_vw
Wolfsburg Wizard
  
Posts: 433
Threads: 37
Registered: September 13th, 2006
Member Is Offline
Location: Brisbane
Theme: UltimaBB Pro Blue ( Default )
|
| posted on April 18th, 2007 at 01:29 PM |
|
|
I like it, good base for that style of project....good luck with it and chuck up some more pics as it comes along.
|
|
|
 steviebeats steviebeats
Learner Dubber

Posts: 19
Threads: 2
Registered: April 3rd, 2007
Member Is Offline
Location: Wembley WA
Theme: UltimaBB Pro Blue ( Default )
|
| posted on April 18th, 2007 at 04:35 PM |
|
|
congrat's looks like a absolute gem
|
|
|
 greedy53 greedy53
Bishop of Volkswagenism
     
Posts: 3062
Threads: 468
Registered: March 4th, 2006
Member Is Offline
Location: camden nsw 2570
Theme: UltimaBB Pro Grey
Mood: strung out
|
| posted on April 18th, 2007 at 05:19 PM |
|
|
paint don't need no stinking paint it's like chrome hurts ya eyes should be baned
|
|
|
 boristherat boristherat
Wolfsburg Wizard
  
Posts: 563
Threads: 47
Registered: March 12th, 2006
Member Is Offline
Location: Adelaide
Theme: UltimaBB Pro Blue ( Default )
Mood: The times they are a changin'
|
| posted on April 18th, 2007 at 06:11 PM |
|
|
Goddam, that is a gorgeous thing! One of the most beautiful ovals I've seen.
Will be watching progress closely!

1959 Mercedes Benz 190
1963 Chevrolet Corvair
1969 BMW 2002 Auto
1973 Mercedes Benz 230.6 |
|
|
 captainvw captainvw
Officially Full-On Dubber
  
Posts: 230
Threads: 24
Registered: February 28th, 2007
Member Is Offline
Theme: UltimaBB Pro Blue ( Default )
|
| posted on April 19th, 2007 at 10:13 PM |
|
|
nice... it would look so much better all shiney though dont wat you guys get out of rusty slammed cars LOL
|
|
|
 peppermintjones peppermintjones
Learner Dubber

Posts: 6
Threads: 2
Registered: March 10th, 2007
Member Is Offline
Location: melbourne
Theme: UltimaBB Pro Blue ( Default )
Mood: moody
|
| posted on April 19th, 2007 at 11:28 PM |
|
|
holy sh#t the paint on that thing looks amazing PLEASE dont paint it ever.
great score.
|
|
|
 reub reub
Veteran Volks Folk
VWRX is gone...
    
Posts: 2054
Threads: 160
Registered: September 2nd, 2002
Member Is Offline
Theme: UltimaBB Pro Blue
|
| posted on April 20th, 2007 at 12:33 AM |
|
|
Still got that sweet 54 356?
Nice score:thumb
Reub
|
|
|
 Nevada51 Nevada51
Seriously Crusin Dubber
 
Posts: 169
Threads: 41
Registered: August 16th, 2005
Member Is Offline
Theme: UltimaBB Pro Blue ( Default )
|
| posted on April 20th, 2007 at 09:41 AM |
|
|
Reub - the '54 has been sold to a good home to make way for this project 
|
|
|
 BUGBOY BUGBOY
Super Moderator
Chief Toy Dude / Head Cruiser
      
Posts: 2147
Threads: 403
Registered: August 27th, 2002
Member Is Offline
Location: Bass coast
Theme: UltimaBB Pro Blue ( Default )
Mood: A wise German once said
|
| posted on April 25th, 2007 at 10:19 PM |
|
|
started
Good to hear you have started on it mate.
Didn't take long for me to fill her space in the shed after she was gone. LOL
Everything 36HP !
Change over king and link spindles
6-12volt semaphores

Find us on Facebook
|
|
|
 skyfrog skyfrog
Casual Dubber

Posts: 46
Threads: 5
Registered: August 31st, 2006
Member Is Offline
Theme: UltimaBB Pro Blue ( Default )
|
| posted on April 26th, 2007 at 07:53 PM |
|
|
A SET OF PPQ WOULD SUIT IT NICELY.....
CARE TO BY THE ONE I HAVE FOR SALE?/????
OVA156
|
|
|
 Nevada51 Nevada51
Seriously Crusin Dubber
 
Posts: 169
Threads: 41
Registered: August 16th, 2005
Member Is Offline
Theme: UltimaBB Pro Blue ( Default )
|
| posted on April 28th, 2007 at 11:57 AM |
|
|
Body Removal from Pan
The body is now off the pan. If anyone’s interested, the link below provides an excellent step by step guide for anyone considering removing the
body from the pan:
http://www.wolfsburgwest.com/wired/wired_03_02/wired_03_02.htm
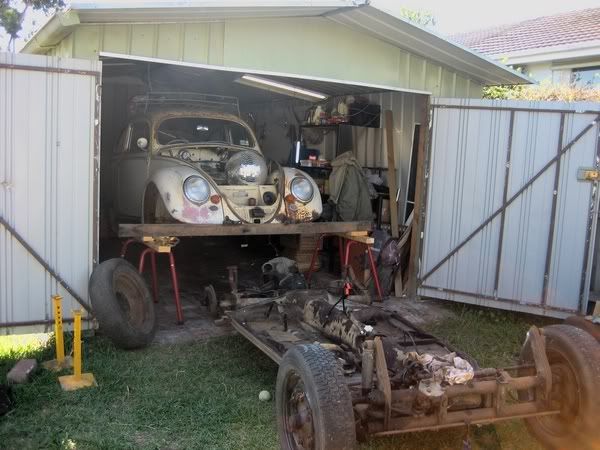
This was a pretty straight forward process (to get it off at least) – I did it with a mate in an afternoon, although I had gone around and WD-40’d
all the bolts several times in the days leading up to doing this). Getting it back on the pan, I suspect, will be a little more challenging. Here it
is once the body was off
IMG]http://i83.photobucket.com/albums/j312/Nevada51/tn_IMG_0898-1.jpg[/IMG]
Note the ultra rare VW accessory – the disco mirror ball (note to self: always check what’s above you before lifting the body….fortunately it
hit the ground and not the car when it fell).
The next step was the disassembly of the pan. To make the whole assembly process a little easier, I’ve bagged and labelled all the bolts and small
parts so I actually know what goes where when I go to put it all back together (well that’s the theory anyway  ). ).
Here it is in the process of disassembly. The project supervisor was keeping a close watch…..
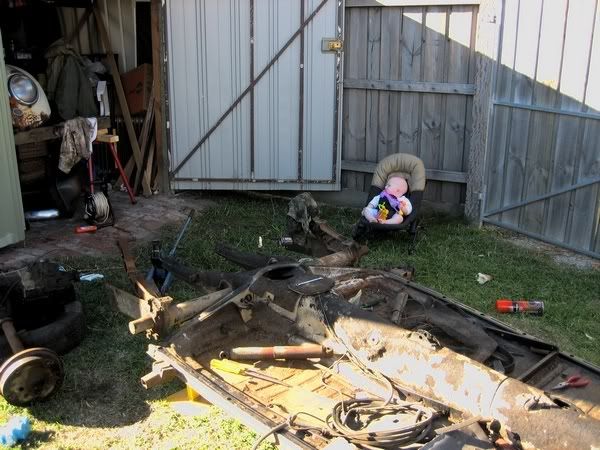
I’ve tried to take as many detailed shots of things along the way so I have a reference when I go to put it all back together.
The pan has now been sent to be media blasted so I can assess how much rust repair is required (there is a small amount just forward of the battery
tray, but not much else that I can see).
Numerous parts have also been sent to be stripped and are now awaiting powdercoating.
|
|
|
 Nevada51 Nevada51
Seriously Crusin Dubber
 
Posts: 169
Threads: 41
Registered: August 16th, 2005
Member Is Offline
Theme: UltimaBB Pro Blue ( Default )
|
| posted on April 28th, 2007 at 12:00 PM |
|
|
D'oh - here's the first pic in the above post.....:duh
|
|
|
 Dasdubber Dasdubber
A.k.a.: Alan Agyik
23 Windows of Awesome
DAS Resto Haus
       
Posts: 5746
Threads: 289
Registered: August 26th, 2002
Member Is Offline
Location: Gold Coast
Theme: UltimaBB Pro Blue
Mood: feeling fine...
|
| posted on April 28th, 2007 at 05:15 PM |
|
|
Good work mate - best of luck with the hard work which lays ahead! 
|
|
|
 Nevada51 Nevada51
Seriously Crusin Dubber
 
Posts: 169
Threads: 41
Registered: August 16th, 2005
Member Is Offline
Theme: UltimaBB Pro Blue ( Default )
|
| posted on May 6th, 2007 at 08:33 PM |
|
|
Rust Repairs - Pan
I finally received the pan back from blasting and it did not reveal any surprises – just the rust around the battery tray area - the rest of it
appeared really solid. I didn’t want to go with a repro pan section as the pressing is different and the metal gauge is thinner than the original
pans…..plus I am wanting to keep the car as original as possible  so a
replacement section was/is required. so a
replacement section was/is required.
Here’s the pan in the process of being measured up for a new (old) section.
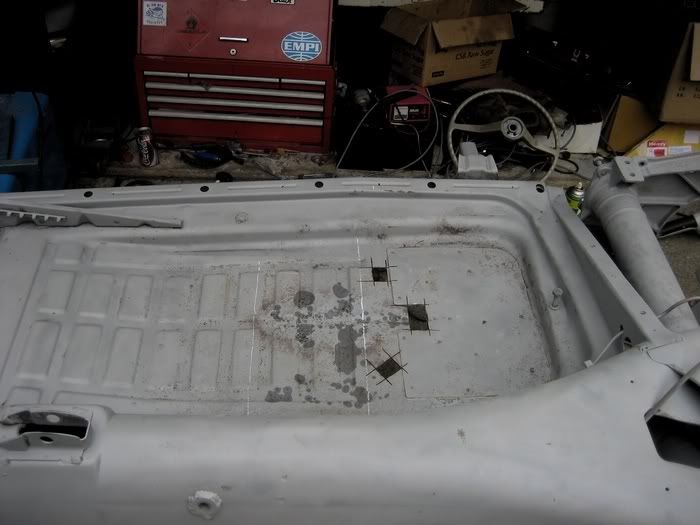
As you can see above, the battery tray area had been repaired at some stage in the past and wasn’t too bad, but the blasting did show the metal was
very thin in this area so rather than do a half arsed job of it, a replacement was considered necessary.
Here’s the pan after the installation of the battery tray area – thanks for doing this Nathan, quality job so far :thumb
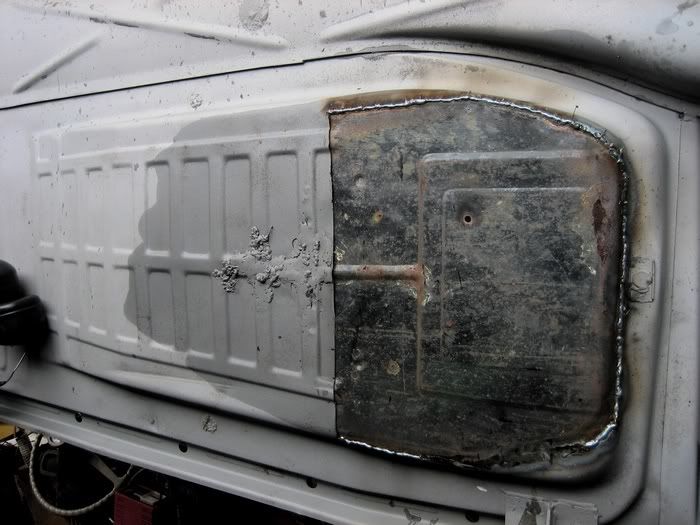
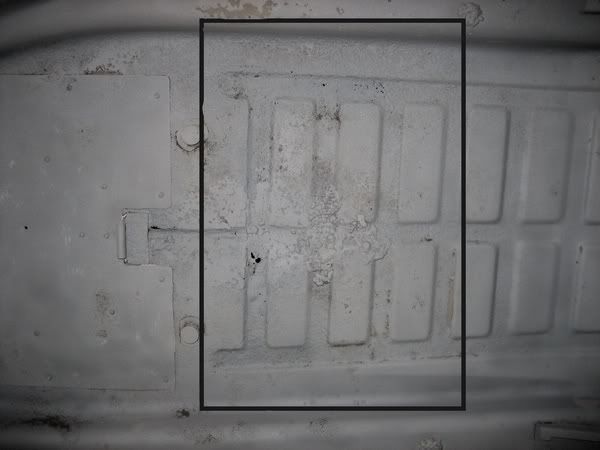
Forward of the new section you can see where attempt was made to weld up the holes that were existing, however the metal was so thin the welder kept
blowing holes in the metal. So I'm now after a second-hand section as shown below. If anyone has a section like the highlighted section in the
photo below or knows where I could get one from, please send me a u2u :thumb
|
|
|
 BUGBOY BUGBOY
Super Moderator
Chief Toy Dude / Head Cruiser
      
Posts: 2147
Threads: 403
Registered: August 27th, 2002
Member Is Offline
Location: Bass coast
Theme: UltimaBB Pro Blue ( Default )
Mood: A wise German once said
|
| posted on May 15th, 2007 at 09:44 PM |
|
|
Grinding
Hows the grinding going mate?
Everything 36HP !
Change over king and link spindles
6-12volt semaphores

Find us on Facebook
|
|
|
 Nevada51 Nevada51
Seriously Crusin Dubber
 
Posts: 169
Threads: 41
Registered: August 16th, 2005
Member Is Offline
Theme: UltimaBB Pro Blue ( Default )
|
| posted on May 16th, 2007 at 07:35 PM |
|
|
| Quote: | Originally
posted by BUGBOY
Hows the grinding going mate?
|
Grinding is now complete - thanks for your assistance on this :thumb. The pan is now at the powdercoaters to be zinc'ed and powdercoated.
Other parts, including axle tubes, spring plates, pedals, etc, etc are all awaiting powdercoating also.
Bolts are getting plated at the moment also. I deliberated over coatings for ages and have finally gone with zinc.
I haven't even given the engine situation much thought yet, but I plan on getting the exhaust and heater boxes ceramic coated in the next few weeks,
as well as the engine tin powdercoated (satin or gloss black??). I think I'm keeping the powdercoater in business at the moment..... 
|
|
|
 Nevada51 Nevada51
Seriously Crusin Dubber
 
Posts: 169
Threads: 41
Registered: August 16th, 2005
Member Is Offline
Theme: UltimaBB Pro Blue ( Default )
|
| posted on June 10th, 2007 at 08:52 PM |
|
|
Pan
The pan rust repair has now been completed and has now been zinced and powder-coated in gloss black and it looks awesome . I had the pan
blasted and powder-coated at A-Class Powder Coating in Moorabbin for a very reasonable price – significantly less than if it was professionally
sprayed, but more expensive than brushing on POR-15.

If you are considering powder-coating your pan, you might like to do something about the chassis number before you get it done as mine has almost
disappeared!
Here’s some of the other parts I had powder-coated.

|
|
|
 Nevada51 Nevada51
Seriously Crusin Dubber
 
Posts: 169
Threads: 41
Registered: August 16th, 2005
Member Is Offline
Theme: UltimaBB Pro Blue ( Default )
|
| posted on June 10th, 2007 at 08:53 PM |
|
|
Bolts
All the undercarriage bolts and washers have now been zinc plated. Pretty reasonable price of $40 for a can of bolts at Andrews Metal Finishing in
Moorabbin. Other bolts such as spring plate cover bolts, fender bolts and interior shifter and pedal bolts are stainless items from Coventry
Fasteners….not so cheap at around $1.50 per bolt…...

|
|
|
 Nevada51 Nevada51
Seriously Crusin Dubber
 
Posts: 169
Threads: 41
Registered: August 16th, 2005
Member Is Offline
Theme: UltimaBB Pro Blue ( Default )
|
| posted on June 10th, 2007 at 08:54 PM |
|
|
Door Cards
There is nothing worse in an interior than crappy door cards, so in the spirit of trying to keep most things original on the car (and as the original
vinyl and piping was in great shape) , whilst tidying it up a little, I had the original vinyl and piping removed from the cards and put onto new card
with plastic backing. No pic, but you all know what great looking door cards look like :thumb
|
|
|
 Nevada51 Nevada51
Seriously Crusin Dubber
 
Posts: 169
Threads: 41
Registered: August 16th, 2005
Member Is Offline
Theme: UltimaBB Pro Blue ( Default )
|
| posted on June 10th, 2007 at 09:00 PM |
|
|
| Quote: | Originally
posted by Dasdubber
Good work mate - best of luck with the hard work which lays ahead! 
|
"hard work which lays ahead" - you're not wrong  This is my first
semi-serious project and I must admit I didn't think there'd be this much stuffing around involved (it all looked so easy on paper LOL). Its
amazing how when the car is in bits and the body's off the pan your mind starts to think "well I might as well do x to it while its all
apart"...... This is my first
semi-serious project and I must admit I didn't think there'd be this much stuffing around involved (it all looked so easy on paper LOL). Its
amazing how when the car is in bits and the body's off the pan your mind starts to think "well I might as well do x to it while its all
apart"......
|
|
|
 reub reub
Veteran Volks Folk
VWRX is gone...
    
Posts: 2054
Threads: 160
Registered: September 2nd, 2002
Member Is Offline
Theme: UltimaBB Pro Blue
|
| posted on June 10th, 2007 at 10:13 PM |
|
|
Pan looks sweet....thinking of the same for when I start on my 56 oval....
Reub
|
|
|
 kroozzn63 kroozzn63
Bishop of Volkswagenism
     
Posts: 3005
Threads: 317
Registered: January 31st, 2004
Member Is Offline
Location: sydney
Theme: UltimaBB Pro Yellow
Mood: mmm coffee
|
| posted on June 10th, 2007 at 11:29 PM |
|
|
wow ,looked scary at first "ive started in a similar fashion once before" a few pics later man your on a roll, looks great
show us your gates
|
|
|
 BUGBOY BUGBOY
Super Moderator
Chief Toy Dude / Head Cruiser
      
Posts: 2147
Threads: 403
Registered: August 27th, 2002
Member Is Offline
Location: Bass coast
Theme: UltimaBB Pro Blue ( Default )
Mood: A wise German once said
|
| posted on June 11th, 2007 at 03:23 PM |
|
|
mmmmmmmm
I like shiny.
Looks grest mate!
Everything 36HP !
Change over king and link spindles
6-12volt semaphores

Find us on Facebook
|
|
|
 Mr Bubble Head Mr Bubble Head
Insano Dub Head
   
Posts: 829
Threads: 107
Registered: August 29th, 2002
Member Is Offline
Location: Melborne,Australia
Theme: UltimaBB Powder
|
| posted on June 15th, 2007 at 09:34 PM |
|
|
good effort
It'll all be worth it in the end !!
Cheers Nick:thumb
recycle, restore, enjoy
|
|
|
 DubbinDan DubbinDan
Officially Full-On Dubber
  
Posts: 211
Threads: 51
Registered: September 6th, 2005
Member Is Offline
Location: Concord NSW
Theme: UltimaBB Pro Blue ( Default )
|
| posted on June 16th, 2007 at 08:03 PM |
|
|
Inspirational. Looking forward to watching this come come togther. Best of luck.
|
|
|
 Nevada51 Nevada51
Seriously Crusin Dubber
 
Posts: 169
Threads: 41
Registered: August 16th, 2005
Member Is Offline
Theme: UltimaBB Pro Blue ( Default )
|
| posted on July 29th, 2007 at 09:56 PM |
|
|
b]CLR
An update on my slow progress so far.
I’m currently in the process I tidying up the inner guard sections and interior paint work. I’ve been using CLR to get rid of the surface rust in
these areas. Here’s a comparison shot – guess where the CLR has been applied!
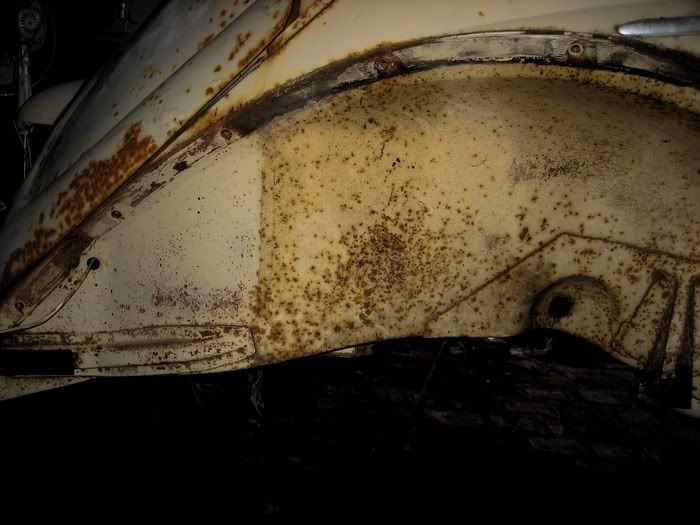
After CLR I plan on using a rubbing compound, followed by polish to restore that factory shine on (what’s left of) the factory paint, on the
undersides of the car - I don't think I'll touch the patina yet 
|
|
|
| Pages: 1 2 3 |