| [ Total Views: 6155 | Total Replies: 46 | Thread Id: 87769 ] |
| Pages: 1 2 |
|
|
 Inane Cathode Inane Cathode
Casual Dubber

Posts: 48
Threads: 2
Registered: November 21st, 2009
Member Is Offline
Theme: UltimaBB Pro Blue ( Default )
|
| posted on December 23rd, 2010 at 09:19 AM |
|
|
Pokey the Wunderbus! (1976 Westalia Conversion, ej22)
I was talking to a parts guy today and he brought up something i wasnt aware of.
I've got a 76 westy that will be getting an ej22 come summer time (im up here). I plan on using an adapter plate and flywheel from kennedy
engineering (or hecker machine, identical parts really). I understand the flywheel will have a 200mm clutch (not an issue) but what i wasnt aware of
is the buses have different input shafts and bellhousings year to year.
Or thats how he made it sound.
He said if i have a 091 trans it'll have a different input shaft and bellhousing some how? Does anyone know anything about this? I'm leaning towards
it doesnt matter cause i havent read a single thing about that being an issue but, who knows?
EDIT:
Hijacking my own thread to make a build thread on this beast. Might as well start somewhere 
|
|
|
 mackaymanx mackaymanx
A.k.a.: Brent
Custom Title Time!
    
Posts: 1611
Threads: 97
Registered: January 12th, 2006
Member Is Offline
Location: Mackay.QLD
Theme: UltimaBB Pro Blue
Mood: Brad'ed Off 
|
| posted on December 23rd, 2010 at 09:35 AM |
|
|
The 1600 kombi box has a shorter input shaft than the 1700/1800 box input shaft. This is due to different engines they use.
The 091 bellhousing is longer to cope with the larger clutch(228mm) and pressure plate. I don't know if the input shaft is longer again on the
091.
edit: the 091 input shaft will stick out past the bellhousing face the same amount as the 1700/1800 input shaft
Quote of the week
"Do I wish to send them to you again, nope, no interest can't be bothered really, to much hassle for little or no return."
 |
|
|
 Inane Cathode Inane Cathode
Casual Dubber

Posts: 48
Threads: 2
Registered: November 21st, 2009
Member Is Offline
Theme: UltimaBB Pro Blue ( Default )
|
| posted on December 23rd, 2010 at 01:11 PM |
|
|
Do you know how much shorter? My t1 box seems to jive alright with the conversion plate, with the t2 jive with it ok?
|
|
|
 Inane Cathode Inane Cathode
Casual Dubber

Posts: 48
Threads: 2
Registered: November 21st, 2009
Member Is Offline
Theme: UltimaBB Pro Blue ( Default )
|
| posted on December 27th, 2010 at 03:31 AM |
|
|
Soooo, i take it it wont be an issue. I'm sure if someone has had problems i'd know about it the amount of reading i've done 
|
|
|
 Inane Cathode Inane Cathode
Casual Dubber

Posts: 48
Threads: 2
Registered: November 21st, 2009
Member Is Offline
Theme: UltimaBB Pro Blue ( Default )
|
| posted on January 3rd, 2011 at 08:39 AM |
|
|
Alrighty well i talked to KEP and they say that as long as i use the 200mm clutch i can use the 200mm flywheel with any transmission. The
bellhousing/input shaft confusion was just that. The input shafts are the same, but the bellhousing is larger to accept a larger flywheel. I opted to
go with a 200mm kit with a much stronger pressure plate as there are far more options as far as pressure plates and clutch disks go.
Here's some pictures of the beast:
Ubiquitous interior shot:
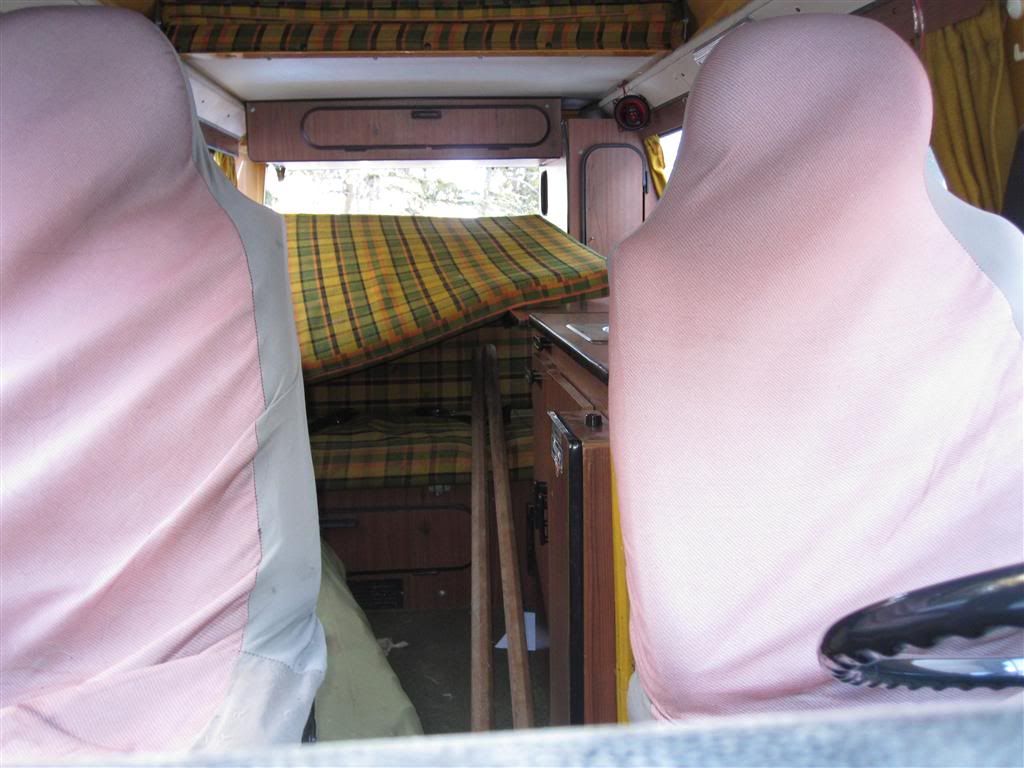
Sure is slow driving on THREE CYLINDERS!?
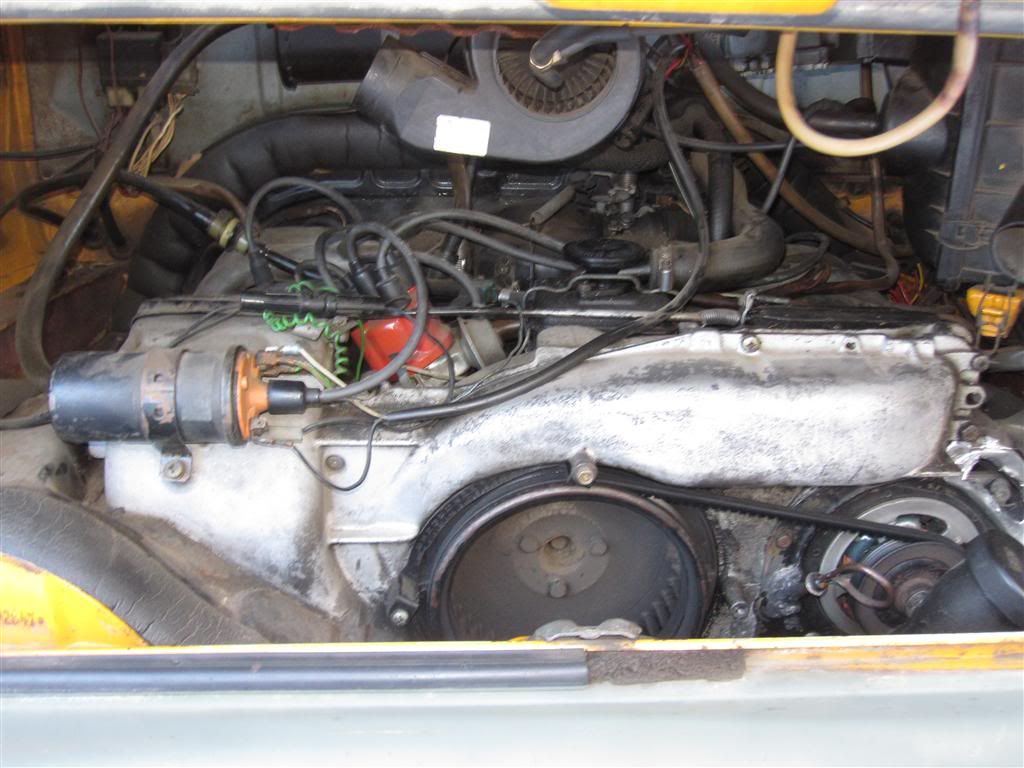
This is the good side, the other is barf green:

And of course the lowly japanese lump that'll push it around some day:

|
|
|
 Inane Cathode Inane Cathode
Casual Dubber

Posts: 48
Threads: 2
Registered: November 21st, 2009
Member Is Offline
Theme: UltimaBB Pro Blue ( Default )
|
| posted on January 3rd, 2011 at 08:46 AM |
|
|
So, a few questions, first is the easiest:
Where the heck do i put the radiator? I remember reading about 'between the rails' radiators so i stuck my head under there and had a look. Do you
really put a radiator between the frame rails? How does it fit in there without sticking out and getting smacked with rocks? I drive alot on rough
dirt roads, so i need something that i'm not going to destroy. Is there somewhere else to put it?
I was eyeing the space to the right of the right frame rail, sure theres no 'skid protection' there but the space is alot deeper, i might be able to
squeeze in a radiator there but i dont know how the fans will fit.
Am i missing something? Feels like i'm not seing an obvious solution to where to put the radiator.
In the beetle i put it up front, but that was only 20 feet total of steel line i had to run, plus i had somewhere to put it. I'm just not seeing
anywhere that sticks out as a good place to put one.
|
|
|
 Inane Cathode Inane Cathode
Casual Dubber

Posts: 48
Threads: 2
Registered: November 21st, 2009
Member Is Offline
Theme: UltimaBB Pro Blue ( Default )
|
| posted on January 7th, 2011 at 09:37 AM |
|
|
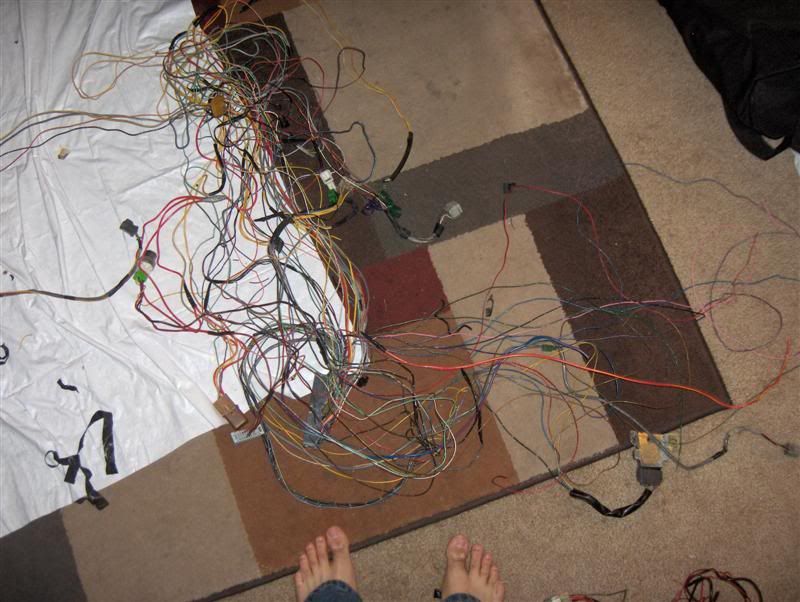
Woo! I got my harness, ecu, and exhaust manifold today. I got the harness the old fashioned way and tore the entire thing out without cutting anything
(except obviously not engine stuff, namely the umbilical going back to the rear of the car).
That is ALOT of work, although the car was already mostly taken apart (steering wheel off, dash loosened). I had to take the dash out (unhook all the
wires from it) take out the dash support frame (big piece of steel going left to right that stiffens the car) the heater blower (nice unitized
construction, i might use that for my heater) evaporator core and box, heater core and box.
So now i have about 40 pounds in wiring i have to pare down to whatever is running the engine, shouldnt be too hard. Alot easier (technically not
physically) than what i did with the Volksaru (i cut the computer harness, and the engine harness, and put them together later).
I'll get my camera going, this bundle of wires is pretty impressive.
Edit: Got some pictures
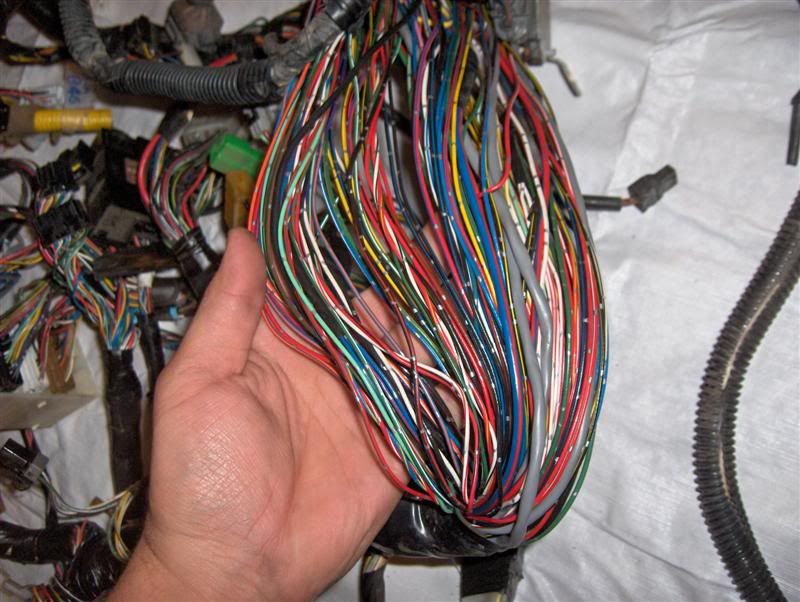

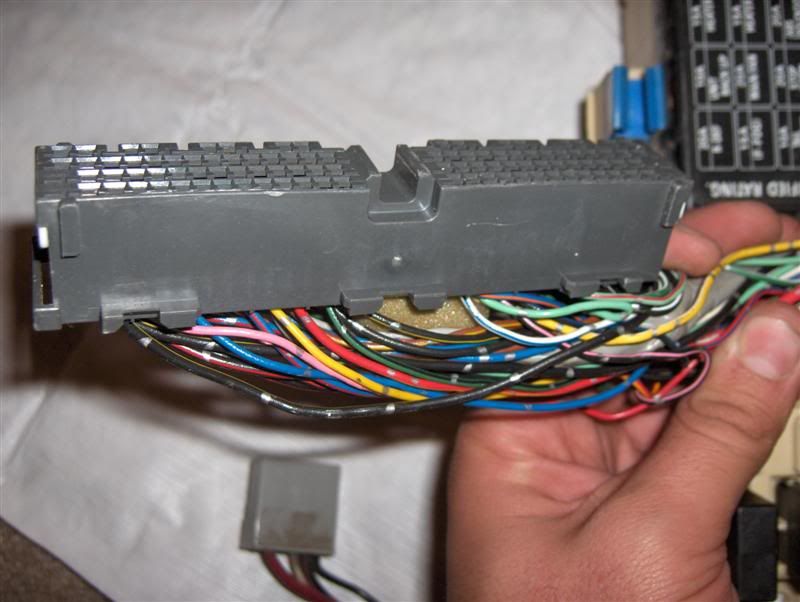
|
|
|
 Joel Joel
Scirocco Rare
Now containing 100% E-Wang
        
Posts: 9368
Threads: 211
Registered: February 14th, 2006
Member Is Offline
Location: Northern Rivers NSW
Theme: UltimaBB Pro Purple
Mood: Tact Level 0.00
|
| posted on January 7th, 2011 at 01:00 PM |
|
|
If your not fussed about looks the old fashioned way to mount them here in aus was on the front to a bullbar.
back in the 80s and early 90s when baywindow busses were worth absolutley nothing and the people that drove them were too tight to spend money on
type4 engines there were 100s and 100s fitted with EA81 and EA82 subarus, amonst other crap like mitsubishi arsetrons, 4A toyotas, L20B nissans etc
nearly all had front mounted rads, pipe length doesnt seem to be an issue just as long as its easily bled.
No different to factory watercooled caravelles.
|
|
|
 Inane Cathode Inane Cathode
Casual Dubber

Posts: 48
Threads: 2
Registered: November 21st, 2009
Member Is Offline
Theme: UltimaBB Pro Blue ( Default )
|
| posted on January 7th, 2011 at 05:44 PM |
|
|
Hrmm, thats not a bad idea. I guess pipe length isnt important, as long as its one column of water. My challenge would be to make it look right.
Meaning i dont want it sticking way out in front, and i dont want it look like it was pasted on.
Probably a fiero radiator with a slim fan on it, sucking through from the front of course.
|
|
|
 Inane Cathode Inane Cathode
Casual Dubber

Posts: 48
Threads: 2
Registered: November 21st, 2009
Member Is Offline
Theme: UltimaBB Pro Blue ( Default )
|
| posted on January 8th, 2011 at 04:32 PM |
|
|
Fat trimmed

Lean retained 
|
|
|
 Joel Joel
Scirocco Rare
Now containing 100% E-Wang
        
Posts: 9368
Threads: 211
Registered: February 14th, 2006
Member Is Offline
Location: Northern Rivers NSW
Theme: UltimaBB Pro Purple
Mood: Tact Level 0.00
|
| posted on January 9th, 2011 at 09:11 AM |
|
|
You're getting too much practice at that.
There's big demand in the US for someone that knows how to strip the looms 
with the radiator at the front there's a few options
Search for Rocknrobs conversion, he enclosed his just behind the nose skin under the dash with the fresh air grille as an intake and has been running
it that way for years.
Or there was a a guy on here years ago with I think a V8 conversion, he put a cover over the rad so it looked like a spare wheel.
|
|
|
 Inane Cathode Inane Cathode
Casual Dubber

Posts: 48
Threads: 2
Registered: November 21st, 2009
Member Is Offline
Theme: UltimaBB Pro Blue ( Default )
|
| posted on January 9th, 2011 at 05:10 PM |
|
|
Hah, well i could strip looms, its not that hard. Not 800 dollars worth of hard i see charged on some sites, yeesh. Maybe out the door but not as a
per-unit job.
I've been pondering the radiator situation, and i'm settling into the idea of incorporating the radiator into a roo bar type setup. Big square
radiator in the middle, slim fan on the back, and bent up tube for a bumper type arrangement.
|
|
|
 ElusiveStranger ElusiveStranger
Officially Full-On Dubber
  
Posts: 330
Threads: 30
Registered: May 28th, 2006
Member Is Offline
Location: Kent. England
Theme: UltimaBB Pro Blue ( Default )
|
| posted on January 11th, 2011 at 05:34 AM |
|
|
Could always do a "Roadcow" rad  Google it IC Google it IC
|
|
|
 Inane Cathode Inane Cathode
Casual Dubber

Posts: 48
Threads: 2
Registered: November 21st, 2009
Member Is Offline
Theme: UltimaBB Pro Blue ( Default )
|
| posted on January 11th, 2011 at 04:02 PM |
|
|
Whoa, damn. I thought about doing a roof radiator for about two seconds, then laughed heartily and dismissed it. That's one way to do it, but im
pretty set on one out front  I dont have a little experience with front
mounted radiators lol I dont have a little experience with front
mounted radiators lol
|
|
|
 Inane Cathode Inane Cathode
Casual Dubber

Posts: 48
Threads: 2
Registered: November 21st, 2009
Member Is Offline
Theme: UltimaBB Pro Blue ( Default )
|
| posted on January 17th, 2011 at 07:40 AM |
|
|
Update!
Did some more work with pokey today. More fat trimming:
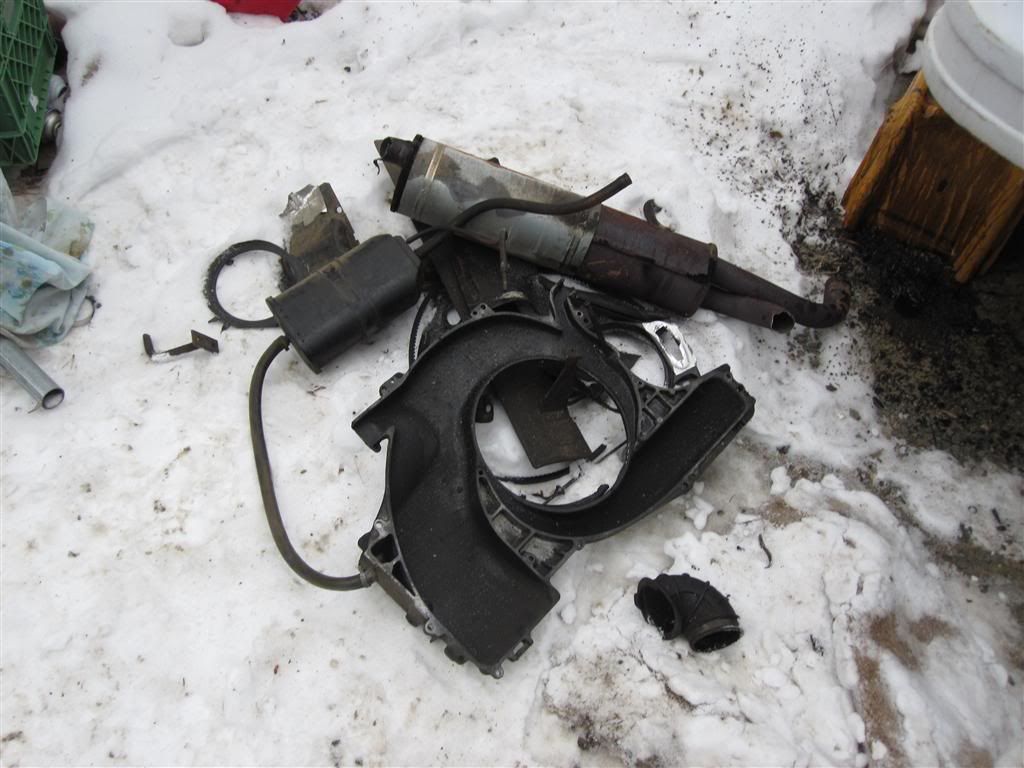
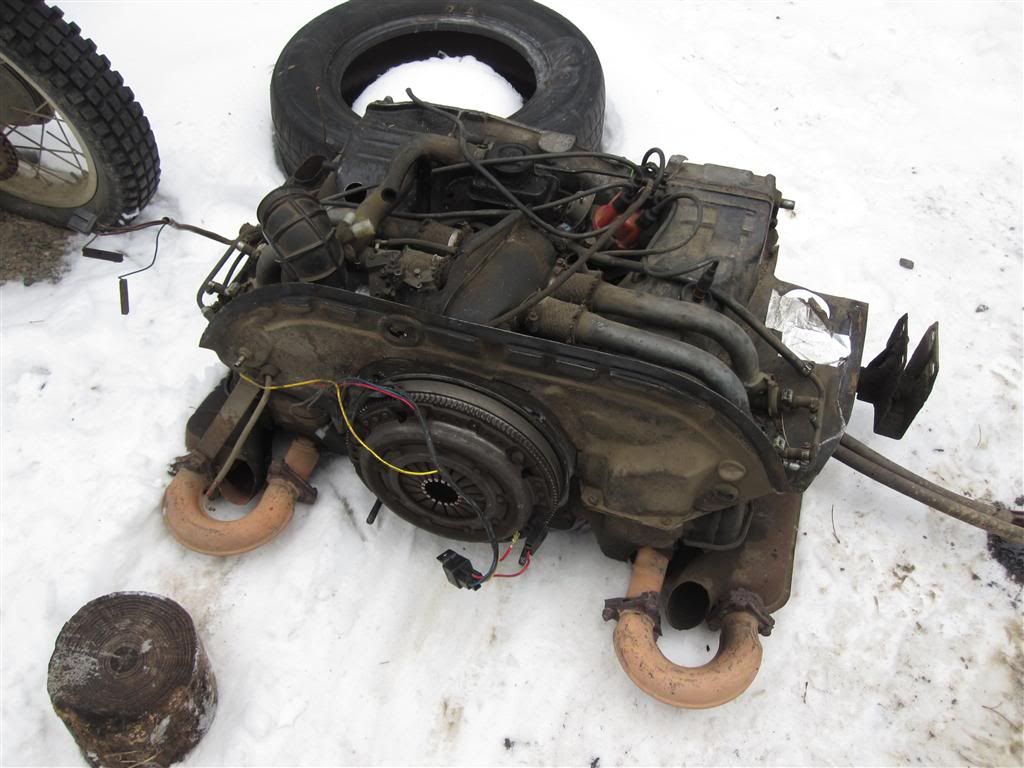
This motor is absolutely gigantic. I could live in the engine compartment after the engine is removed:
In fact i think i might just do that:
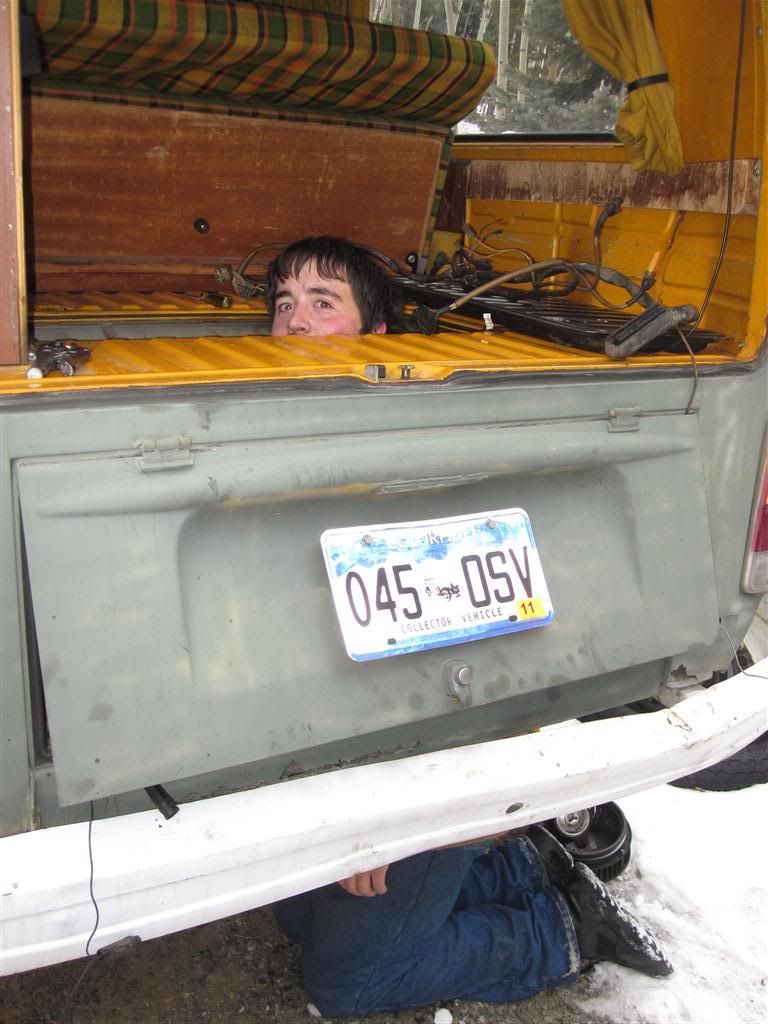
Hmm, something is missing i just cant quite put my finger on it:

That is all, have a good day.
|
|
|
 matberry matberry
Super Moderator
Go hard or go home
      
Posts: 8114
Threads: 134
Registered: March 7th, 2006
Member Is Offline
Location: Cooroy Qld
Theme: UltimaBB Pro Blue
Mood: enjoying waving at all my Kombi buddies from my T3
|
| posted on January 17th, 2011 at 08:24 AM |
|
|
Well done on the chilly looking progress. The 091 input shaft is definately longer than any others so you will need to remove it to swap or
shorten.
Those type 4 engines are large to say the least, but like all good air coolers, they are a complete power plant, cooling system and all.
How's life in the enginebay??
Matt Berry Motorsports...air cooled advice, repairs and mods Ph 0408 704 662
OFF-ROAD,CIRCUIT,DRAG,STREET,ENDURANCE
 |
|
|
 Inane Cathode Inane Cathode
Casual Dubber

Posts: 48
Threads: 2
Registered: November 21st, 2009
Member Is Offline
Theme: UltimaBB Pro Blue ( Default )
|
| posted on January 17th, 2011 at 03:09 PM |
|
|
Hmm well, we'll see how the input shaft situation shakes out. I've a feeling it wont be a problem, buts its tackleable later down the road 
Will other input shafts swap in?
|
|
|
 General_Failure General_Failure
A.k.a.: Tristan
Custom Title Time!
Use your head, don't abuse it!
    
Posts: 1036
Threads: 107
Registered: June 15th, 2004
Member Is Offline
Location: Peaceful Finley, NSW
Theme: UltimaBB Streamlined2
Mood: Not too bad. Thanks for asking!
|
| posted on January 23rd, 2011 at 08:39 AM |
|
|
| Quote: | Originally
posted by Joel
If your not fussed about looks the old fashioned way to mount them here in aus was on the front to a bullbar.
back in the 80s and early 90s when baywindow busses were worth absolutley nothing and the people that drove them were too tight to spend money on
type4 engines there were 100s and 100s fitted with EA81 and EA82 subarus, amonst other crap like mitsubishi arsetrons, 4A toyotas, L20B nissans etc
nearly all had front mounted rads, pipe length doesnt seem to be an issue just as long as its easily bled.
No different to factory watercooled caravelles.
|
*Cough. mutter mutter* at least the definition of cheap has changed. These days a very nice used car costs less than a type 4 rebuild.
I'll say one thing, a DIY frame rail rad install is a huge PITA. As soon as I get this thing roadworthy I'll be collecting up parts for a roo bar
mounted rad so when I mutilate the underneath rad on a rock (and the sump and exhaust) its successor will be a drop in replacement.
hows the work going? Looks nice and cool there.
What's this about there being more space on one side of the frame rail? How is the space deeper there? The floor is at the same height, and the
crossmembers taper upward toward the floor. It's also a lot narrower. Or am I missing something here?
If at first you don't succeed. Build, build again.
Vehicle: 1975 Special order delivery walkthrough panel based LCA pop-top camper. Motor: Nippon 1.8L Single port Wasserboxer, Transmission: 3 rib 002.
|
|
|
 Inane Cathode Inane Cathode
Casual Dubber

Posts: 48
Threads: 2
Registered: November 21st, 2009
Member Is Offline
Theme: UltimaBB Pro Blue ( Default )
|
| posted on January 24th, 2011 at 09:07 AM |
|
|
Eh, it was just a thought. The front right side under the sliding door has a bit more vertical space, but you'd have to have a long skinny rad to use
it. I'll be going with the rad up front, thats more my skill level at this point.
Update, dateline The Woods, temperature:20f wind:~20mph
The garage, as it were:

The motor is installed, sort of. It's up against the trans, the splines are meshed, but no nuts are on yet.

I had a hangup with one of the heater lines it took me a bit to find. I cut the hose off and bent the top line down about half an inch. I had to
remove the EGR valve, it stuck out too much. Theres no way to rig it so the egr can stay, so i'll be making (40 dollars for a block off plate, lol) a
plate to cover it.

I want to leave the throttle body as it is because i'd rather not go through the nightmare of the alternator versus the iac again. I also would like
to see if i can run an a/c compressor as a regular compressor, just flip a switch and it'll start pushing air. Hmm.
Anyhow, i'll have to zip the nuts down, then go to work on making the motor mounts hook up to the frame. I'll be using the stock hangers on the
frame, and the stock motor mounts on the engine. Maybe some square stock going up to the mount, to the other side, then back out to the other mount.
The motor is probably the physically hardest part. Nothing real tricky about it, line it up, push it in. I had an issue with the ramps being too high,
so i had to jack up the right side, take the ramp out, and set it down on a jack stand thats about 9 inches lower. That did the trick 
(thanks to joz on advrider for lending me his atv jack. worked perfectly just the way i hoped it would  ) )
|
|
|
 rocknrob rocknrob
A.k.a.: Rob
Insano Dub Head
   
Posts: 844
Threads: 90
Registered: December 18th, 2003
Member Is Offline
Location: Gold Coast
Theme: UltimaBB Pro Black
Mood: mystic
|
| posted on January 24th, 2011 at 10:51 AM |
|
|
and i thought my workspace was primitive
well done you are going great
[img] [/img] [/img]
|
|
|
 Inane Cathode Inane Cathode
Casual Dubber

Posts: 48
Threads: 2
Registered: November 21st, 2009
Member Is Offline
Theme: UltimaBB Pro Blue ( Default )
|
| posted on January 24th, 2011 at 06:05 PM |
|
|
| Quote: | Originally
posted by rocknrob
and i thought my workspace was primitive
well done you are going great
[img] [/img] [/img]
|
Haha wtf are those wooden wheels?
|
|
|
 dlrecord dlrecord
Learner Dubber

Posts: 19
Threads: 2
Registered: September 15th, 2010
Member Is Offline
Location: Colorado, USA
Theme: UltimaBB Pro Blue ( Default )
|
| posted on January 26th, 2011 at 05:46 AM |
|
|
Hey Inane,
I see you are in Colorado, least your plates are. I'm in the front range, greater Denver/Boulder area.
What year Subie engine do you have and are you going to use a throttle reverser or flip and rotate the manifold/wiring arrangement? I have a throttle
reverser on mine but am worried about the idle air control valve, which sits on top of the throttle body. The gasket is a solid gasket with only the
large round hole, no vacum port holes, so I am hopeful my arrangement is going to work.
I had to bend the top heater tube down about a 1/4 inch as well to align the upper cross bar bolt holes. Learned that the hard way! Did you have any
issues with interference of the original air box arm and the oil filler tube? I had to "shorten" the original air box arm to get the oil filler
tube to fit.
Looking forward to seeing your progress!
|
|
|
 Inane Cathode Inane Cathode
Casual Dubber

Posts: 48
Threads: 2
Registered: November 21st, 2009
Member Is Offline
Theme: UltimaBB Pro Blue ( Default )
|
| posted on January 27th, 2011 at 01:31 AM |
|
|
Haha yeah that's funny, i forgot about that but yes the original airbox arm interfered with the oil filler about a quarter inch. I just stuck a
honkin screw driver in the hole in the arm and twisted the arm out of the way 
For the throttle body, i'm going to see if i can get by with squeezing the ducting i've used before (central states hose, they're in commerce city
and have EVERY kind of hose/duct/pipe/fitting you can possibly think of) in between the gas tank and the throttle. I removed the baffle for the gas
tank to give me a few extra inches of space.
The throttle cable, i'll probably do what i did on the beetle and 'make' a cable of sorts. I used a PTFE tube (that opaque white/gray tubing thats
about a quarter inch or so) then just a 1/16th braided steel cable as the inner cable section. All i did was hoop it through the throttle cable hole
in the pedal (with a grommet) and swedge it down on itself. Works great and its much stronger than any one part of the system. The extra travel i
needed i just got out of the pedal by lopping off the stop on the back of the pedal and smoothing it out so full throttle was another 10* or so in the
pedal travel.
I know on the bus the accelerator pedal setup is different, so i'll have to look at it to see where that extra travel can come from. If it's a bell
crank type setup i'll see if i can change the moment of one of the lever pieces in there. Same idea with the cable, though only this time i hope to
make a much longer bit on the end, then just hoop it around and anchor it so its pointing backwards (or god help me even the stock accelerator cable
anchor!).
Small world though, finding a few people that are 20 miles away on a forum website focusing on a place thousands of miles away 
|
|
|
 Inane Cathode Inane Cathode
Casual Dubber

Posts: 48
Threads: 2
Registered: November 21st, 2009
Member Is Offline
Theme: UltimaBB Pro Blue ( Default )
|
| posted on January 27th, 2011 at 01:34 AM |
|
|
| Quote: | Originally
posted by dlrecord
Hey Inane,
I see you are in Colorado, least your plates are. I'm in the front range, greater Denver/Boulder area.
What year Subie engine do you have and are you going to use a throttle reverser or flip and rotate the manifold/wiring arrangement? I have a throttle
reverser on mine but am worried about the idle air control valve, which sits on top of the throttle body. The gasket is a solid gasket with only the
large round hole, no vacum port holes, so I am hopeful my arrangement is going to work.
I had to bend the top heater tube down about a 1/4 inch as well to align the upper cross bar bolt holes. Learned that the hard way! Did you have any
issues with interference of the original air box arm and the oil filler tube? I had to "shorten" the original air box arm to get the oil filler
tube to fit.
Looking forward to seeing your progress!
|
Oh! Lemme answer your actual questions too lol:
My engine is a '96, and it sounds like you've got a '99 or newer due to the better IAC design. I dont know how the iac interacts with everything on
that kind of setup with a throttle reverser. I did flip around the intake on the beetle, it worked pretty good except the alternator mount i had to
make big long feet on it to clear everything (in fact, that just broke yesterday i'm heading out right now to re-weld it and add some gussets  ) )
|
|
|
 ElusiveStranger ElusiveStranger
Officially Full-On Dubber
  
Posts: 330
Threads: 30
Registered: May 28th, 2006
Member Is Offline
Location: Kent. England
Theme: UltimaBB Pro Blue ( Default )
|
| posted on January 28th, 2011 at 08:29 AM |
|
|
| Quote: | Originally
posted by Inane Cathode
I know on the bus the accelerator pedal setup is different, so i'll have to look at it to see where that extra travel can come from. If it's a bell
crank type setup i'll see if i can change the moment of one of the lever pieces in there. Same idea with the cable, though only this time i hope to
make a much longer bit on the end, then just hoop it around and anchor it so its pointing backwards (or god help me even the stock accelerator cable
anchor!).
|
Simples dude, extend the crank mechanism (cable end) by welding on some more plate. Drill the hole at 15mm further out. I'll double check on my bus
this w/e for ya. (Mine's a leftie too)
Runs off to "other side" http://www.vwkd.co.uk/bb/viewtopic.php?t=2898
|
|
|
 Inane Cathode Inane Cathode
Casual Dubber

Posts: 48
Threads: 2
Registered: November 21st, 2009
Member Is Offline
Theme: UltimaBB Pro Blue ( Default )
|
| posted on January 29th, 2011 at 08:36 AM |
|
|
Did some more pokeylogical related activities today:
First off, nuts are tightened now the engine is supported by the trans mounts (temporary of course). The nut for the starter bolt took 15 minutes by
itself to do up. No other way to arrange that i suppose but damn.

Took the stock exhaust, stripped the heat shields (and suspiciously asbestos-but-not-actually off of it. Then i whacked the exhaust off the flanges,
shortened each piece where it goes onto the flange by about an inch and a half, shortened the bottom leg. This brought the exhaust up under the
transaxle, plenty of clearance, and provides a handy and well oriented flange to build the rest of the exhaust off of. I thought i had a clever idea
using a zip tie as a nut :B


Finished product: One pokey exhaust manifold!

|
|
|
 Inane Cathode Inane Cathode
Casual Dubber

Posts: 48
Threads: 2
Registered: November 21st, 2009
Member Is Offline
Theme: UltimaBB Pro Blue ( Default )
|
| posted on January 30th, 2011 at 09:09 AM |
|
|
Did astonishingly little in a long period of time today:
Made these thingies for the mustache bar

Then i made some of these plate thingies

Then i boxed them in (white with flux dust)


They go together like this (have to make another little piece to go between the mounts, it'll be a three piece deal, cant make it one piece with the
way the motor mount studs are pointed

Then i found a new and exciting way to break a cheap drill
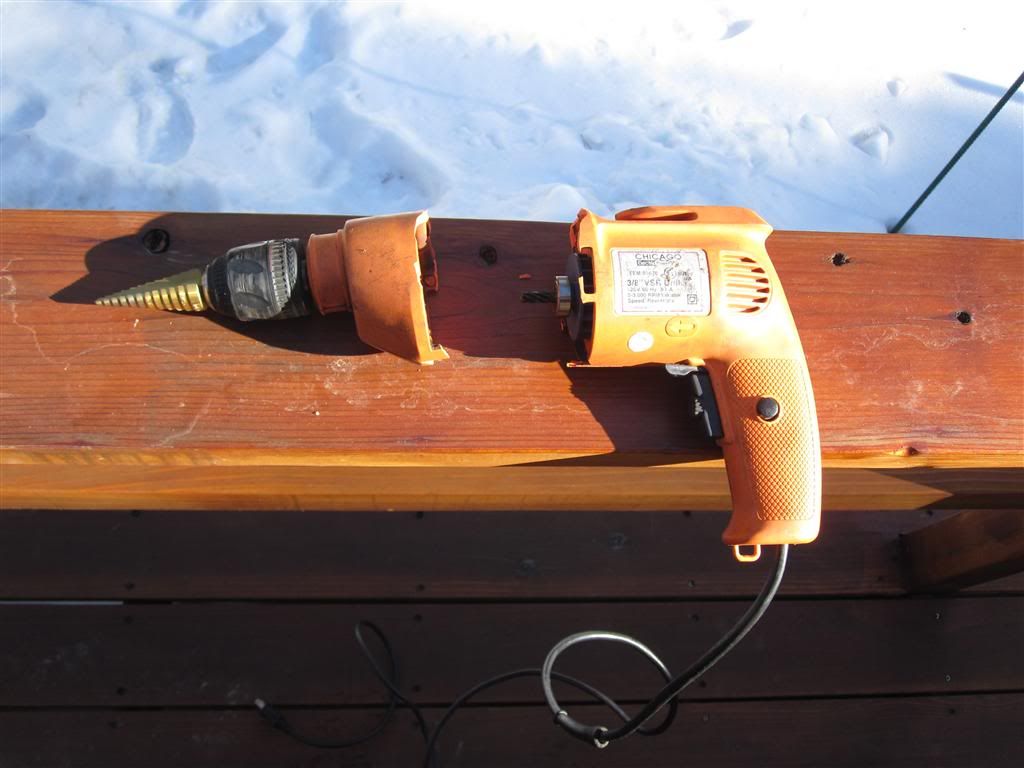
Meh, i got more than $20 worth of use out of it, i'll just exchange it tomorrow 
|
|
|
 Inane Cathode Inane Cathode
Casual Dubber

Posts: 48
Threads: 2
Registered: November 21st, 2009
Member Is Offline
Theme: UltimaBB Pro Blue ( Default )
|
| posted on February 20th, 2011 at 04:25 PM |
|
|
Sorry about the hiatus, bad weather and a speeding ticket blew through my universe and put a temporary halt to Mister Pokeylope's operation. With
some funds and nice weather lately i've done a few more things to him.
First thing was finishing the engine mounts, and doing up the exhaust on there and checking clearances. Everything looks pretty good i think (ignore
the poor welds, they could be better but they could be alooooooot worse)

Then i started on mounting the radiator. It's hard just coming up with a place and a way something is to be there when it hasnt before, if that makes
any sense.

I did a pretty simple design, i think. The bottom has a couple of pieces that rest partly on the front bumper, partly welded to the front apron. The
bottom supports the actual weight of the radiator vertically...

And the top part of the radiator mount keeps the radiator from wanting to fall back into the body, or fall out forwards in front, as well as keeps the
weight straight up and down on the lower mount instead of trying to torque it out

Something like this

There are two struts that connect the top and the bottom. Hopefully, there will be a screen of some kind behind the struts to keep gravel from
knicking any of the galleries.

Well thats pretty much it as far as progress. Doesnt look like much, i know. I think my welder creates some kind of time warp, because i spend all day
working on -something- and at the end of the day i got hardly anything done, huh.
|
|
|
 General_Failure General_Failure
A.k.a.: Tristan
Custom Title Time!
Use your head, don't abuse it!
    
Posts: 1036
Threads: 107
Registered: June 15th, 2004
Member Is Offline
Location: Peaceful Finley, NSW
Theme: UltimaBB Streamlined2
Mood: Not too bad. Thanks for asking!
|
| posted on February 23rd, 2011 at 07:12 AM |
|
|
My welder has the same time warping ability. So far I've sunk a couple of days into the rear window sill and don't have much to show for it. All
I'm really doing is rebuilding the lip in a few places!
Your progress is making me look bad. I'm loving this thread. I laughed at the snowy motor in the engine bay. Sorry.
Do you have any plans on reusing that oil cooler?
If at first you don't succeed. Build, build again.
Vehicle: 1975 Special order delivery walkthrough panel based LCA pop-top camper. Motor: Nippon 1.8L Single port Wasserboxer, Transmission: 3 rib 002.
|
|
|
 Inane Cathode Inane Cathode
Casual Dubber

Posts: 48
Threads: 2
Registered: November 21st, 2009
Member Is Offline
Theme: UltimaBB Pro Blue ( Default )
|
| posted on February 28th, 2011 at 03:47 PM |
|
|
Mister Pokeylope update:
Woo! Cooling system is (almost all) done!
Hoses come out of the radiator, here
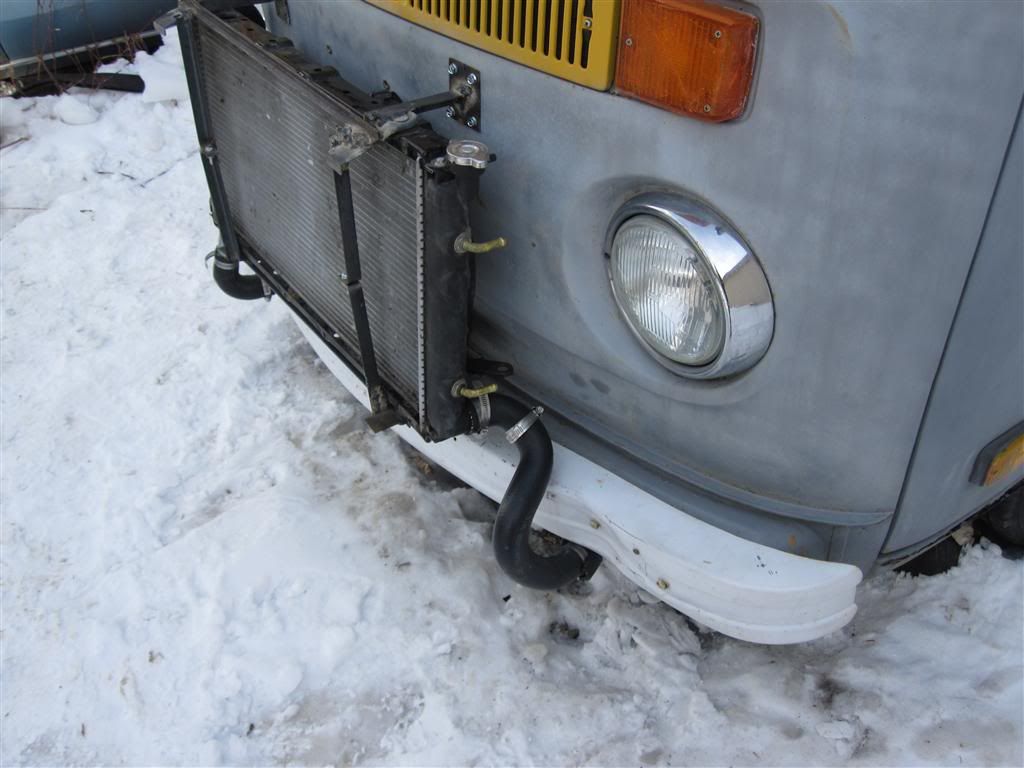

Go under the front apron here:

Up and over the steering linkage here:

And finally, up to the inlet/outlet on the motor 

Now its on to smaller projects, wiring, hoses, cables, that sort of thing. Home stretch 
|
|
|
| Pages: 1 2 |