| [ Total Views: 122471 | Total Replies: 1280 | Thread Id: 60666 ] |
| Pages: 1 .. 11 12 13 14 15 .. 43 |
|
|
 westi westi
Custom Title Time!
what the
    
Posts: 1610
Threads: 28
Registered: August 30th, 2005
Member Is Offline
Location: milperra
Theme: UltimaBB Pro Blue
Mood: not blue, pink
|
| posted on April 24th, 2008 at 10:31 AM |
|
|
there on there way
32 nut's and washers
so if for say a set of heads flowed 185cfm@ 10' that should be 311cfm @ 28' is that right.no carbs just manifolds with new lift and valve job.650
lift.
as for the wife she has all long weekend to learn how to walk again.lol.i wish .
down sharon.
 |
|
|
 polarbus93 polarbus93
Seriously Crusin Dubber
just cruisin slowly
 
Posts: 197
Threads: 21
Registered: April 1st, 2008
Member Is Offline
Location: western sydney for now
Theme: UltimaBB Pro Blue ( Default )
Mood: fat and happy mostly
|
| posted on April 24th, 2008 at 12:15 PM |
|
|
you could a company called blackwood's they produce all metal type fasteners. not sure of number though
|
|
|
 dangerous dangerous
A.k.a.: Dave Butler Muffin Man
23 Windows of Awesome
       
Posts: 5901
Threads: 178
Registered: January 6th, 2005
Member Is Offline
Location: Gold Coast
Theme: UltimaBB Pro Blue ( Default )
Mood: 591
|
| posted on April 24th, 2008 at 05:41 PM |
|
|
| Quote: | Originally
posted by westi
there on there way
32 nut's and washers
so if for say a set of heads flowed 185cfm@ 10' that should be 311cfm @ 28' is that right.no carbs just manifolds with new lift and valve job.650
lift.
as for the wife she has all long weekend to learn how to walk again.lol.i wish .
|
I get 309.5642...but!
If you got that much CFM it would be a world record!
| Quote: | Originally
posted by westi
That's mad Alan.
|
|
|
|
 westi westi
Custom Title Time!
what the
    
Posts: 1610
Threads: 28
Registered: August 30th, 2005
Member Is Offline
Location: milperra
Theme: UltimaBB Pro Blue
Mood: not blue, pink
|
| posted on April 24th, 2008 at 07:51 PM |
|
|
maybe i did my calcs wrong then.
89 percent @ 210cfm @ 254mm of water.
i have one of the old flowbench manufacturing of australia doohickies.
0 was set before start and the test plate was instal and correct with in .5 of a percent before starting.but in saying that i don't know how correct
the bench is itself.
it was purchase before christ was born and never used,that's how i cam to be the new owner,the guy said do you know how to use it,i said i think i
can get my head around it ,he said all yours knock yourself out,even delivered it for me.
i don't know how accurate it is but i have just been ussing it to show me gains or losses.
it's good fun..
the heads actually flowed 17 percent better with the manifolds on.
i havent tried it with the carbies on yet.maybe next week.
any how i will show some pics of the heads and other stuff as i go.
down sharon.
 |
|
|
 westi westi
Custom Title Time!
what the
    
Posts: 1610
Threads: 28
Registered: August 30th, 2005
Member Is Offline
Location: milperra
Theme: UltimaBB Pro Blue
Mood: not blue, pink
|
| posted on April 26th, 2008 at 06:43 PM |
|
|
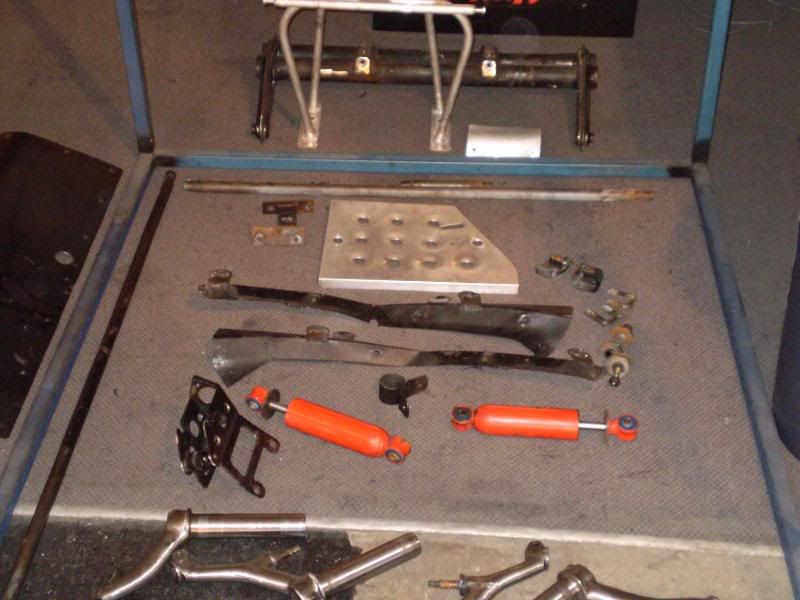
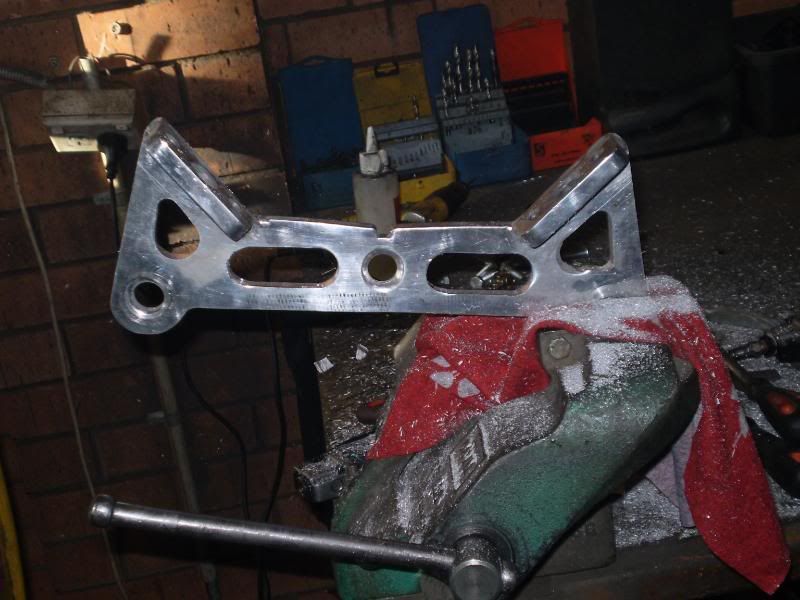
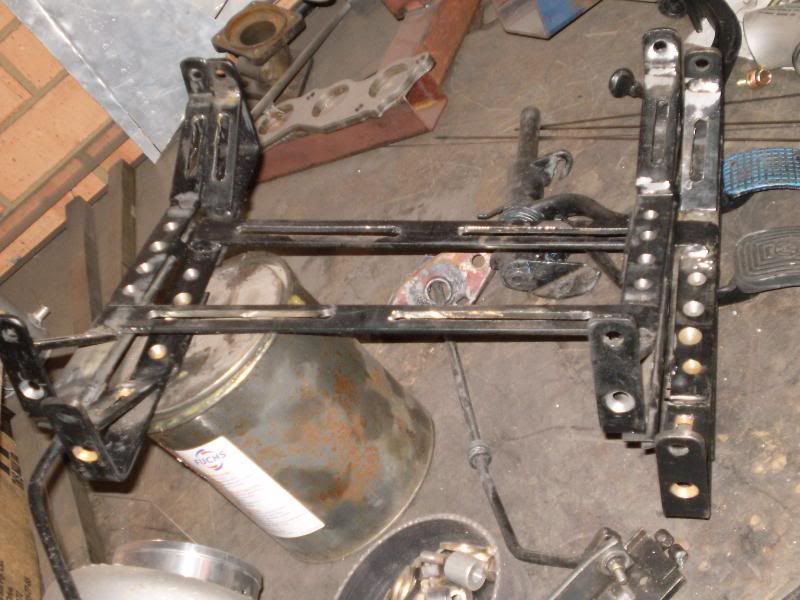
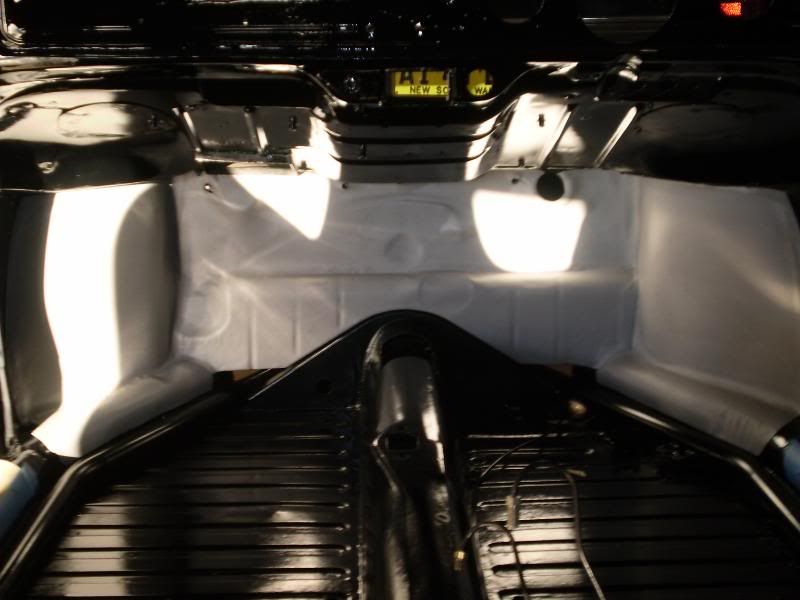
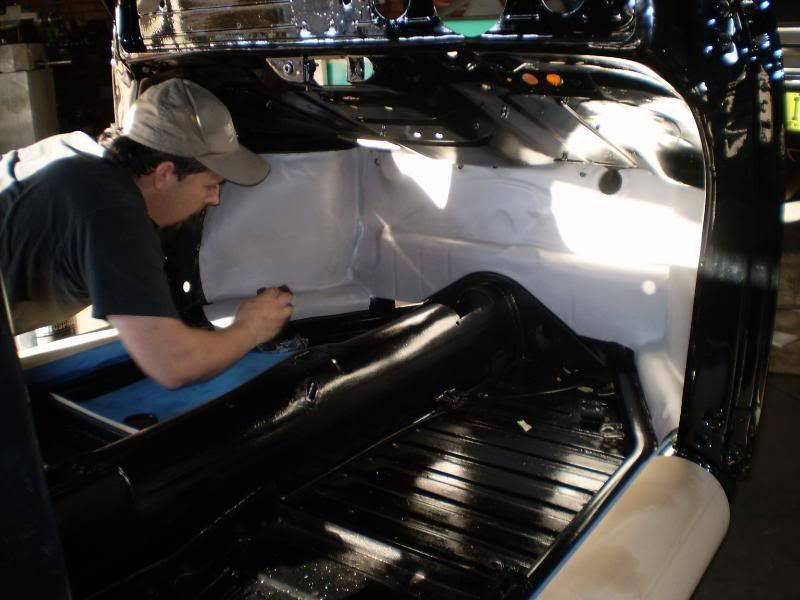
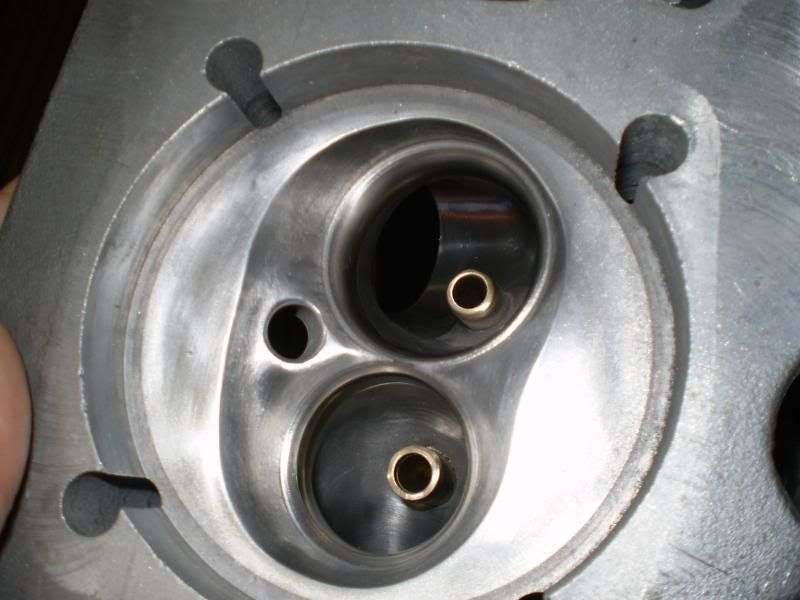
here is some pic's of general stuff i have been doing while waiting for my bit's to arrive.
enjoy
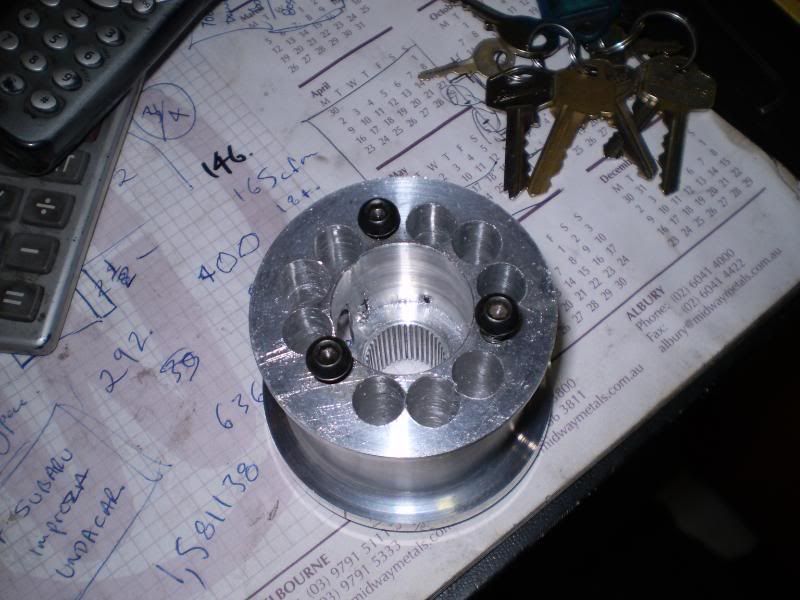
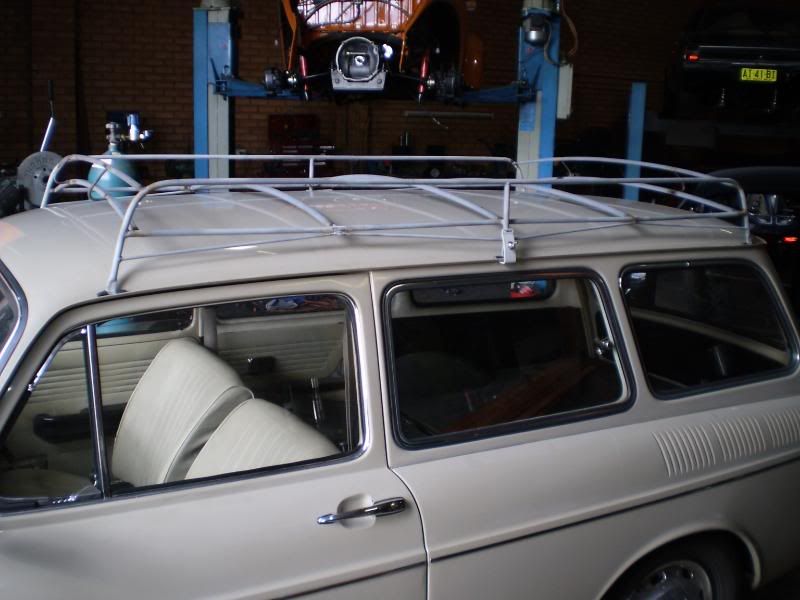
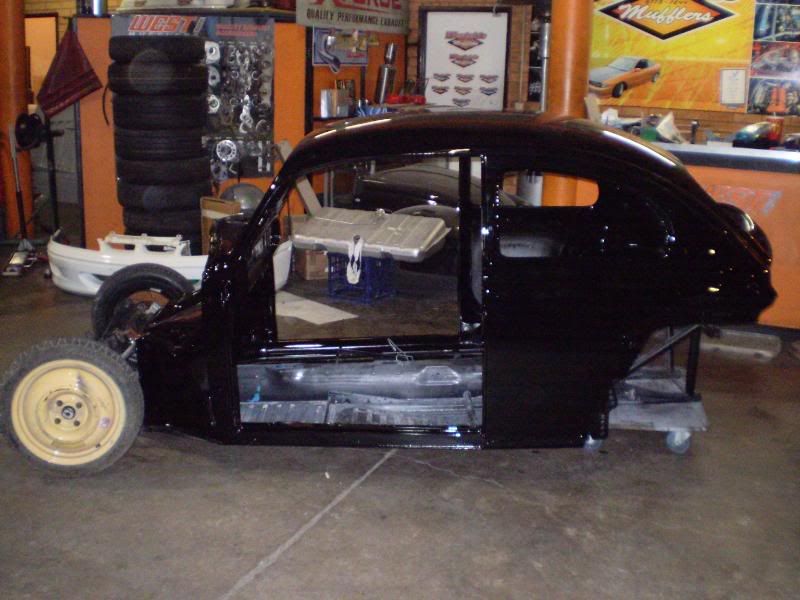
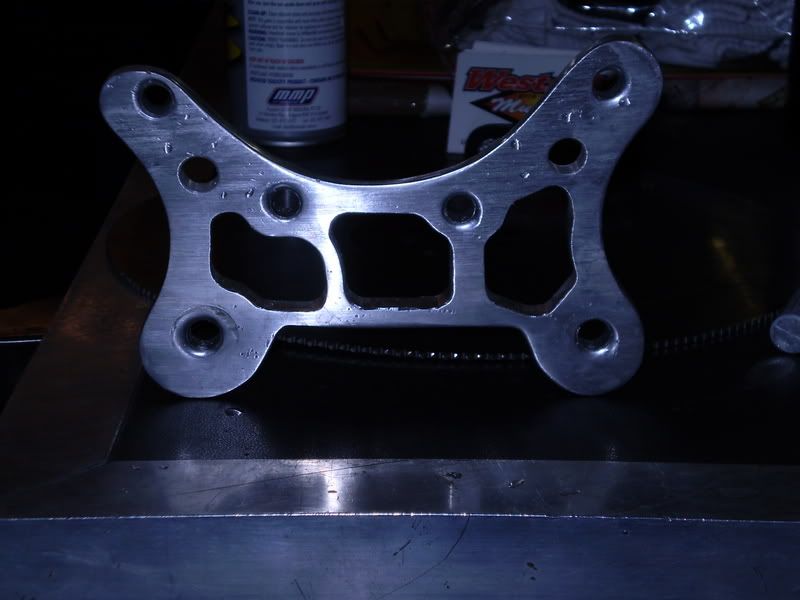
down sharon.
 |
|
|
 dangerous dangerous
A.k.a.: Dave Butler Muffin Man
23 Windows of Awesome
       
Posts: 5901
Threads: 178
Registered: January 6th, 2005
Member Is Offline
Location: Gold Coast
Theme: UltimaBB Pro Blue ( Default )
Mood: 591
|
| posted on April 26th, 2008 at 06:54 PM |
|
|
Did you have the spark plug in?
There will be some big gains in the chamber shrouding.
Especially around the inlet.
| Quote: | Originally
posted by westi
That's mad Alan.
|
|
|
|
 matberry matberry
Super Moderator
Go hard or go home
      
Posts: 8114
Threads: 134
Registered: March 7th, 2006
Member Is Offline
Location: Cooroy Qld
Theme: UltimaBB Pro Blue
Mood: enjoying waving at all my Kombi buddies from my T3
|
| posted on April 26th, 2008 at 09:30 PM |
|
|
Thanks for sharing Westi.
Matt Berry Motorsports...air cooled advice, repairs and mods Ph 0408 704 662
OFF-ROAD,CIRCUIT,DRAG,STREET,ENDURANCE
 |
|
|
 westi westi
Custom Title Time!
what the
    
Posts: 1610
Threads: 28
Registered: August 30th, 2005
Member Is Offline
Location: milperra
Theme: UltimaBB Pro Blue
Mood: not blue, pink
|
| posted on April 26th, 2008 at 10:59 PM |
|
|
yeh plug in.
afer you said that it was aliitle high i went and redid everything from scratch,came up with the same reading.
i am going to do it again though.i am playing around with chambers and swirl.
thanks for the heads up on the valve area,as you can tell nothing has been done there yet.
the biggest improvement i have found was with the manifold.after re-welding and shaping so that it tappers all the way down to the valve,it gave a 16
percent gain.
i am going to be doing my tests with the full exhaust and inlet in tack ,it won't be easy but i would like to play around abit.
once i have finished all my testing i will post up all of my results,gains and losses with pics.should make for some interesting conversation's.
down sharon.
 |
|
|
 dangerous dangerous
A.k.a.: Dave Butler Muffin Man
23 Windows of Awesome
       
Posts: 5901
Threads: 178
Registered: January 6th, 2005
Member Is Offline
Location: Gold Coast
Theme: UltimaBB Pro Blue ( Default )
Mood: 591
|
| posted on April 27th, 2008 at 08:50 AM |
|
|
Your maths seems correct but the numbers are still high.
The only other thing to check is leakage with both valves shut.
The other thing is a temp correction,
but this does not account for the huge numbers.
On the SF bench the flat out scale is 185cfm I think,
but other than calibration, and a correction for temp rise, everything else looks good.
Regarding the chamber unshrouding, the latest word is not to go too far based solely on CFM.
Also apparently too much area at low lift can produce a pressure drop and air speed reduction.
A good rule of thumb(too late on my own heads!),
is to ONLY have as much clearance around the valve
as the gap from seat to valve at a given lift.
I also put a centre hole/dimple in an old valve to scribe a concentric line on the chamber around the valve.
The deep unshrouding I did on my chambers produced good low lift flow,
but all this has seemed to do was extend the rev range,
effectively making less power at lower rpm without any gains to the peak power number....or so my theory goes.
Luckily the roller profile cams can get past these areas pretty fast,
and even with small duration at .050"
can still have the lift area curve as good as most flat tappet profiles.
Smaller duration for me soon.
Where most high power VW engines seem to differ from mine,
is the high flow number and air speed (without going "sonic choke") at maximum lift used.
On a VW based casting you should not have too much problem keeping the air speed high.
| Quote: | Originally
posted by westi
That's mad Alan.
|
|
|
|
 kroozzn63 kroozzn63
Bishop of Volkswagenism
     
Posts: 3005
Threads: 317
Registered: January 31st, 2004
Member Is Offline
Location: sydney
Theme: UltimaBB Pro Yellow
Mood: mmm coffee
|
| posted on April 27th, 2008 at 09:42 AM |
|
|
wow westi looking sweet
show us your gates
|
|
|
 dangerous dangerous
A.k.a.: Dave Butler Muffin Man
23 Windows of Awesome
       
Posts: 5901
Threads: 178
Registered: January 6th, 2005
Member Is Offline
Location: Gold Coast
Theme: UltimaBB Pro Blue ( Default )
Mood: 591
|
| posted on April 27th, 2008 at 02:30 PM |
|
|
More Tranny Progress
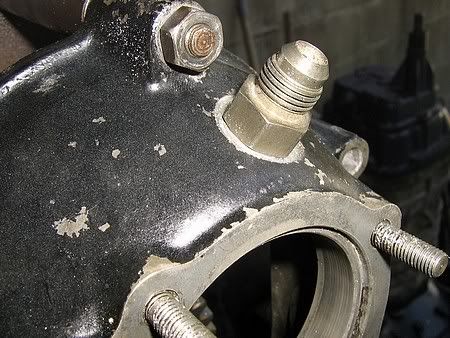
I Spot faced and tapped a hole in the intermediate housing to allow oil feed to 4th gear.
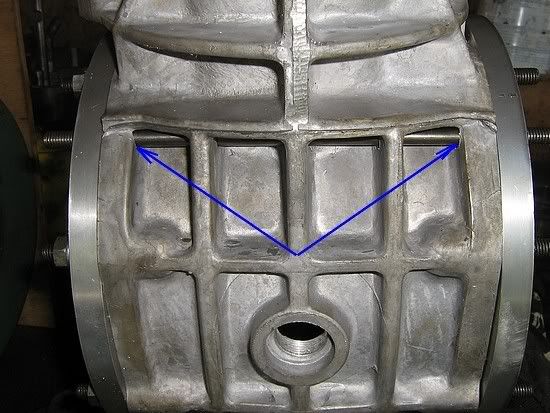
Then drilled the Rhino case to add a through-stud between the original side cover studs.
This is meant to help maintain crownwheel and pinion mesh.
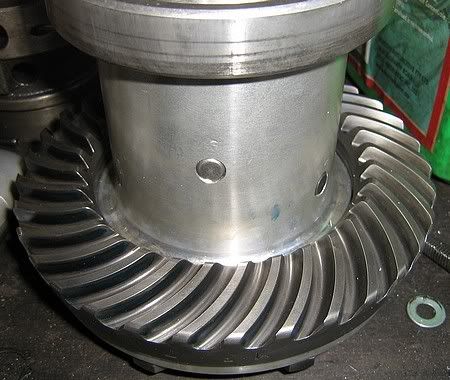
Here is Westi's spiffy spool,
and the ultra rare 4.125 "O" series crown wheel.
Very stout tooth form.
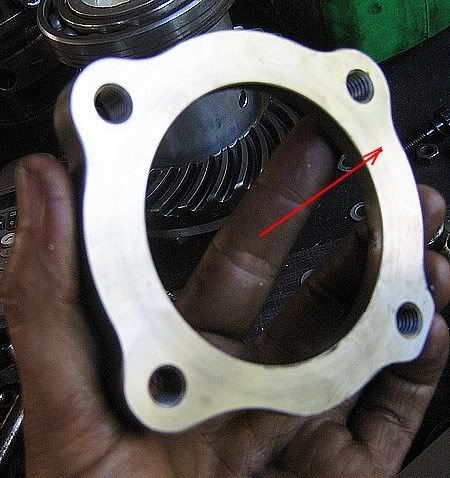
Here is the chrome moly pinion bearing retainer.
This needed 0.010" off the face to give room for the wider first gear.
I rebushed the shift rod holes in another intermediate housing.
Westi's old tranny had this done in the USA,
but the bushes were only half length, and had too much slop.
The nose cone was the same.
It had a new bush, but only on the out board end, and very sloppy fit.
I have re done them all for more precise shift quality.
| Quote: | Originally
posted by westi
That's mad Alan.
|
|
|
|
 dangerous dangerous
A.k.a.: Dave Butler Muffin Man
23 Windows of Awesome
       
Posts: 5901
Threads: 178
Registered: January 6th, 2005
Member Is Offline
Location: Gold Coast
Theme: UltimaBB Pro Blue ( Default )
Mood: 591
|
| posted on April 27th, 2008 at 02:49 PM |
|
|
The other mod I have done is add a thust bearing on the end of the pinion.
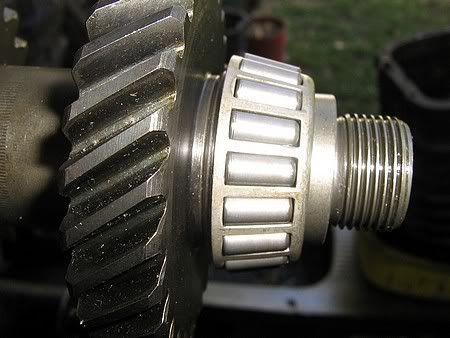
Because the intermediate housing is made from mag and not alum like mine,
this type of arrangment takes the thust out to the steel plate that goes under the nose cone.
I made up a 4140 holder to match the bearing hole in the housing,
and it is machined on its end face to control the bearing preload.
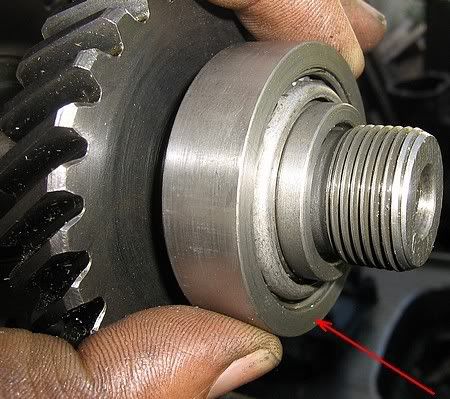
A recess is cut into the intermediate housing to take a hardened steel thrust washer.(VW part)
Also in the pic is a small spacer to position the nut back to original position,
and well clear of the inner race.
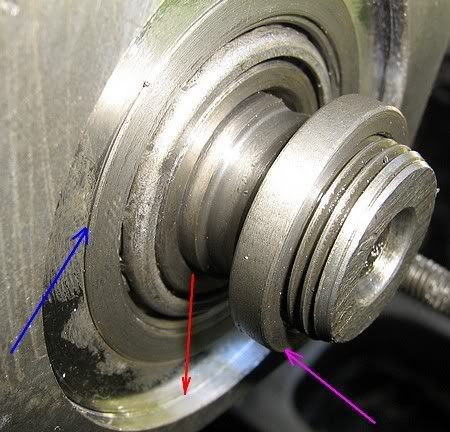
I have 0.010" preaload built in.
Here is the washer in postion.
The thrust plate and nose cone clamp all this down.
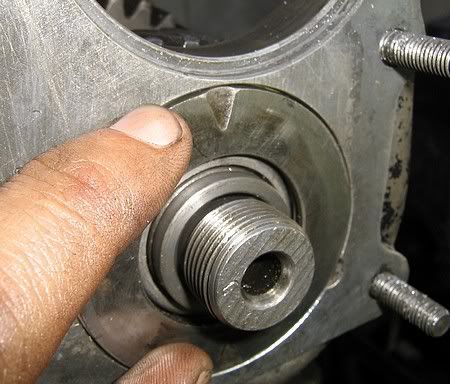
Here is a thrust plate I spoke of: (file photo)
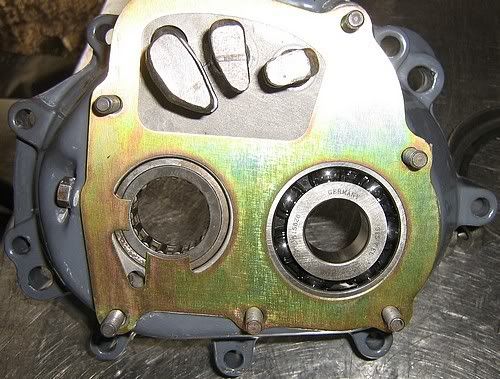
Now for final wash up and clean assembly time!
| Quote: | Originally
posted by westi
That's mad Alan.
|
|
|
|
 westi westi
Custom Title Time!
what the
    
Posts: 1610
Threads: 28
Registered: August 30th, 2005
Member Is Offline
Location: milperra
Theme: UltimaBB Pro Blue
Mood: not blue, pink
|
| posted on April 27th, 2008 at 08:52 PM |
|
|
looking great dave.thanks once again for you hard work.
i can't wait .
i am getting so excited.i think i might have it ready for the nationals.
that would make a good first cruise for when she gets back on the road.
down sharon.
 |
|
|
 Dasdubber Dasdubber
A.k.a.: Alan Agyik
23 Windows of Awesome
DAS Resto Haus
       
Posts: 5746
Threads: 289
Registered: August 26th, 2002
Member Is Offline
Location: Gold Coast
Theme: UltimaBB Pro Blue
Mood: feeling fine...
|
| posted on April 27th, 2008 at 09:21 PM |
|
|
Nice stuff Dave - don't mind a bit of gearbox porn every now and then 
I bet you can't wait to get your hands on it westi!
|
|
|
 FLT42C FLT42C
Learner Dubber

Posts: 7
Threads: 2
Registered: April 20th, 2008
Member Is Offline
Theme: UltimaBB Pro Blue ( Default )
|
| posted on April 27th, 2008 at 10:54 PM |
|
|
one of my most watched threads on here 
westi , how did the cooling setup work out ? any feedback vs a standard shroud/porsche shroud ? temps etc
|
|
|
 westi westi
Custom Title Time!
what the
    
Posts: 1610
Threads: 28
Registered: August 30th, 2005
Member Is Offline
Location: milperra
Theme: UltimaBB Pro Blue
Mood: not blue, pink
|
| posted on April 28th, 2008 at 09:24 AM |
|
|
head temps sat @ 180 but we haven't checked them against a standard or porsche as yet.
oil temps were a bit cold.it takes about 1/2 at idle to reach good oil temps or about 5-10 driving it.we made the oil cooler alittle to big.
oil temp at is hottest doesn't go over 140' -155' f.
yes alan ,i can't wait.
the car is long over due for a good thrashing.
down sharon.
 |
|
|
 Dak-A-Tak Dak-A-Tak
A.k.a.: Peter Page
Custom Title Time!
Volksie Pete
    
Posts: 1381
Threads: 216
Registered: January 9th, 2004
Member Is Offline
Location: Qld , Bethania
Theme: UltimaBB Pro Blue ( Default )
Mood: faster ,faster ,Done
|
| posted on April 28th, 2008 at 03:09 PM |
|
|
Is that car Bird Shit Blue ?
|
|
|
 westi westi
Custom Title Time!
what the
    
Posts: 1610
Threads: 28
Registered: August 30th, 2005
Member Is Offline
Location: milperra
Theme: UltimaBB Pro Blue
Mood: not blue, pink
|
| posted on April 28th, 2008 at 03:49 PM |
|
|
which one
down sharon.
 |
|
|
 dangerous dangerous
A.k.a.: Dave Butler Muffin Man
23 Windows of Awesome
       
Posts: 5901
Threads: 178
Registered: January 6th, 2005
Member Is Offline
Location: Gold Coast
Theme: UltimaBB Pro Blue ( Default )
Mood: 591
|
| posted on April 28th, 2008 at 05:12 PM |
|
|
Final Assembly
The set up of the crownwheel & peanut was straight forward,
except for a couple of issues.
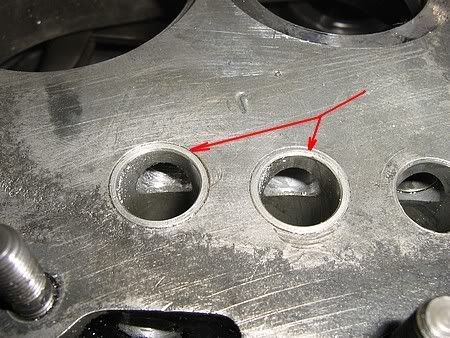
I had to machine out the bearing recesses in the side covers
because their interference was excessive, at .004"!
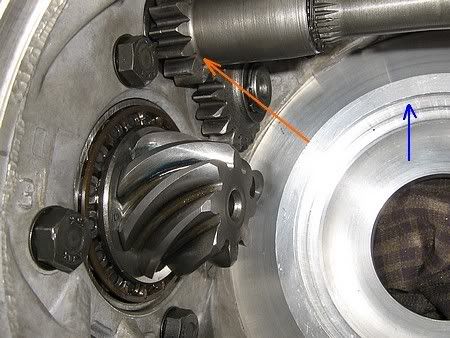
The blue arrow points toward the bearing holes,
and the other thing in this photo is the coupling
that needs to be bored out to clear the splines in these mainshafts.
This one was done from the factory, but not quite enough.
So back in the lathe and another 0.004" removed.
Pretty hard matrerial too.
Also the left hand side cover needed 2.5mm off the inside to clear the bolt heads of the crownwheel.
Once these parts were machined, the bearing preload could be set,
and then the pinion depth and backlash.
I have covered these processes in the past so I wont bore you.
But the pinion shim was reduced by 0.1mm
because with the reduced backlash I like to run (less than .004"),
the pattern had moved too far along toward the nose.
The backlash is adjusted with side cover shims,
while maintaining the same stack to keep preload the same.
Also not shown is the setting of the gear's end floats,
and welding of the hubs on 3rd & 4th.
I have covered these things in previous posts I have done if you want to search.
I like to give the gears a little more end float
and more clearance on the needle bearings too.
I have found a special type of lathe tip that is very good for machining hard materials.
So in this case I have given Westi extra clearance,
but not exceeding the factory 0.25mm end clearance.
3rd and 4th close up when welded, so these were bored with .001" extra clearance.
this is because the input shaft spins inside them,
some times at maximum engine rpm.
1 & 2 were left standrd in the bore, and between 0.2mm and 0.25mm end clearance.
When in the jig two issues arose.
One was that reverse gear was rubbing on the 2.08 second gear.
Because of its larger diameter,
1mm needed to be removed from the shoulder of reverse.
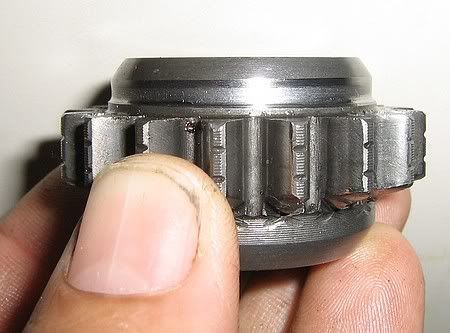
Also the 4th gear was excessively noisy.
This is unusual unless the teeth are straight cut.
On a chance, I stripped everything down again and deburred the teeth and roots with my trusty Dremel.
Problem solved.
Most modern gears will not have this problem,
but because the key style gears are less common these days.
This one was a NOS one that I was able to find with the ratio I wanted.
I installed a hard key in this case.
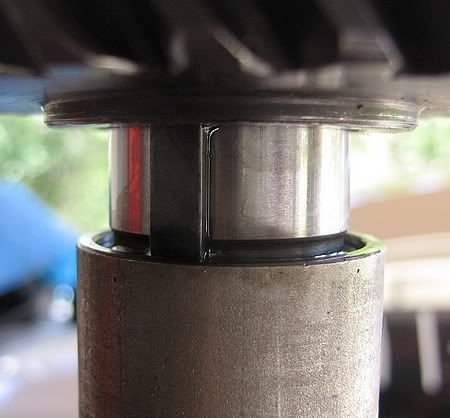
This particular keyed design is excellent because after assembly, a large nut(32mm socket size) clamps down after the gear and bearing are pressed
on.
The Weddle mainshaft design is also a favourite if mine.
Where VW went to a large diameter spline,
and you press the hub down on a flimsy circlip,
THIS mainshaft has a smaller spline,
and a nice shoulder for the hub to press onto.
It also has the big nut to hold everything down.
(not a circlip)
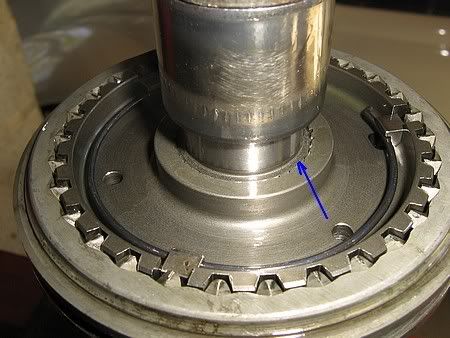
The appropriate hub is also used,
and this one is steel rather than cast.
Supoib!
Westi sent up a whole heap of 15mm spanner size 8mm nuts and washers.
These are from VW head studs on later type 1's.
I used these on the side covers and intermediate housing.
This will help keep everything clamped down (I hope! Westi the cain merchant!!)
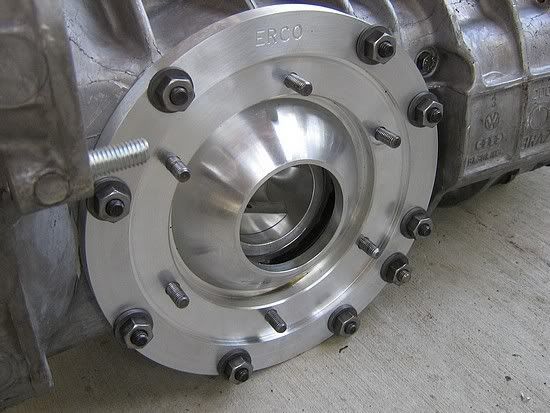
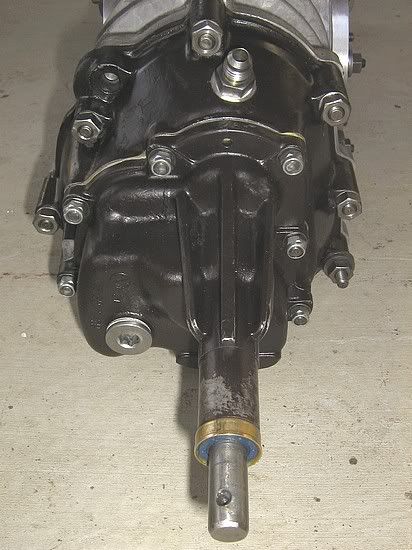
The nose cone and thrust plate retain the new thrust bearing on westi's tranny,
so I machined the face of the nose cone before bolting everything down.
This ensures a nice flat surface,
and also to account for some of the thickness of the thrust plate.
The nose cone also got new bushes(outside AS WELL AS INSIDE!),
and a nice new German seal.
These bushes can be bought from most stores, except for a few odd models.
I made the one on the inside for Westi,
but the outside one that holds the seal is an off the shelf item.
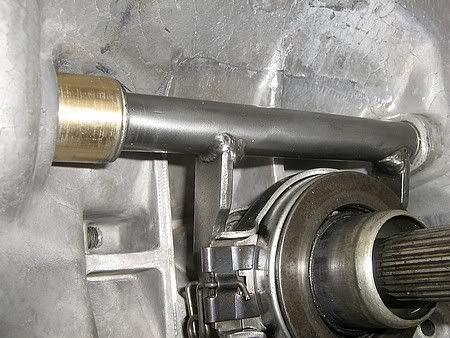
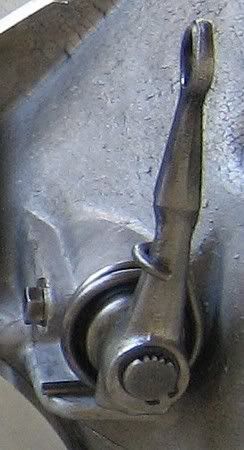
Up the front(back?) the clutch arm assembly is installed with solid bronze bush,
and Westi has made up a long arm.
Here is a side view of some gaskets.
These side covers don't come with those studs,
so I removed 12 from some old side covers.
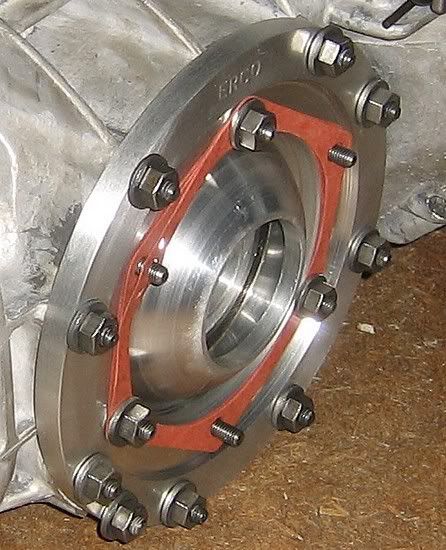
The thickness of these gaskets is varied to give clearance of the axle tube,
without any end play.
The only thing left is the plastic "flower"
that clips onto the side cover before the axles and tubes.
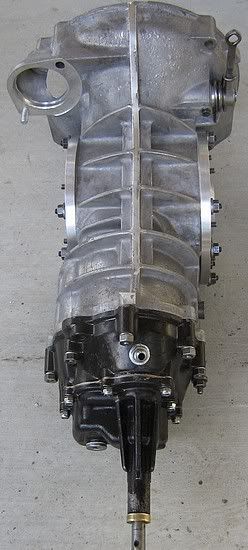
Mega Marathon done!!
Turned out supoib.
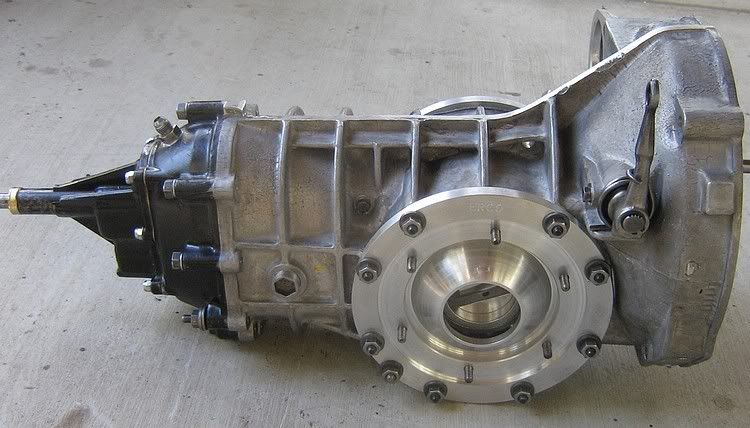
| Quote: | Originally
posted by westi
That's mad Alan.
|
|
|
|
 westi westi
Custom Title Time!
what the
    
Posts: 1610
Threads: 28
Registered: August 30th, 2005
Member Is Offline
Location: milperra
Theme: UltimaBB Pro Blue
Mood: not blue, pink
|
| posted on April 28th, 2008 at 09:09 PM |
|
|
do you need me to organize pick up.or can you do from there.
down sharon.
 |
|
|
 westi westi
Custom Title Time!
what the
    
Posts: 1610
Threads: 28
Registered: August 30th, 2005
Member Is Offline
Location: milperra
Theme: UltimaBB Pro Blue
Mood: not blue, pink
|
| posted on April 28th, 2008 at 09:50 PM |
|
|
just re-flowed the head there was a small leak through the exhaust valve but it still flowed 184 cfm @ 10" of water @ 0.650" lift
down sharon.
 |
|
|
 westi westi
Custom Title Time!
what the
    
Posts: 1610
Threads: 28
Registered: August 30th, 2005
Member Is Offline
Location: milperra
Theme: UltimaBB Pro Blue
Mood: not blue, pink
|
| posted on April 28th, 2008 at 10:00 PM |
|
|
flowed the exhaust port and came up with 163cfm @ 10' at 0.650"
down sharon.
 |
|
|
 dangerous dangerous
A.k.a.: Dave Butler Muffin Man
23 Windows of Awesome
       
Posts: 5901
Threads: 178
Registered: January 6th, 2005
Member Is Offline
Location: Gold Coast
Theme: UltimaBB Pro Blue ( Default )
Mood: 591
|
| posted on April 29th, 2008 at 09:31 AM |
|
|
Gearbox final assembly and commentry updated above.
Typers cramp!
Just for peoples referece, a job like wesi's with all the TLC that I wanted is over 40 hours work.
Luckily, as a hobby I can do all this and not have to charge normal shop rates.
It is nice to be able to do a job the way it should be and not be limited, or make comprimises.
| Quote: | Originally
posted by westi
That's mad Alan.
|
|
|
|
 STOCK STOCK
Wolfsburg Wizard
  
Posts: 446
Threads: 12
Registered: April 29th, 2008
Member Is Offline
Location: NSW
Theme: UltimaBB Pro Blue
Mood: OK
|
| posted on April 29th, 2008 at 10:57 AM |
|
|
HEY THATS A PREETY SWEET LOOKING BOX
HAVE YOU EVER THOUGHT ABOUT PAINTING IT PINK
WHO'S THE SWEAT SHOP WORKER WORKING ON
THE INTERIOR
HE MUST DO PRETTY SWEET WORK I HEARD HE'S REALLY CHEAP
TO


STOCK |
|
|
 westi westi
Custom Title Time!
what the
    
Posts: 1610
Threads: 28
Registered: August 30th, 2005
Member Is Offline
Location: milperra
Theme: UltimaBB Pro Blue
Mood: not blue, pink
|
| posted on April 29th, 2008 at 11:15 AM |
|
|
i think i have some madjenta (pink) laying around somewere.
as for the trim guy he work's for donuts,but as you can tell he eats a few so he is not real cheap.his favourite saying is i have hershy chocolate
kisses.
he is pretty good with a pressure pack can also.he is the only person that is able to get a gloss finish out of mat black.pretty good if you ask me.
down sharon.
 |
|
|
 STOCK STOCK
Wolfsburg Wizard
  
Posts: 446
Threads: 12
Registered: April 29th, 2008
Member Is Offline
Location: NSW
Theme: UltimaBB Pro Blue
Mood: OK
|
| posted on April 29th, 2008 at 11:55 AM |
|
|
WELL JUDGING BY HOW MUCH HE'S GUNNA GET
USED & ABBUSED OVER THE NEXT MONTH
YOU BETTER SEE IF KRISPY KREEME WILL
GIVE YOU AN ACCOUNT
DO YOU NEED ME TO BRING ANY SHIT FOR TONIGHT


STOCK |
|
|
 westi westi
Custom Title Time!
what the
    
Posts: 1610
Threads: 28
Registered: August 30th, 2005
Member Is Offline
Location: milperra
Theme: UltimaBB Pro Blue
Mood: not blue, pink
|
| posted on April 29th, 2008 at 12:58 PM |
|
|
nah
down sharon.
 |
|
|
 matberry matberry
Super Moderator
Go hard or go home
      
Posts: 8114
Threads: 134
Registered: March 7th, 2006
Member Is Offline
Location: Cooroy Qld
Theme: UltimaBB Pro Blue
Mood: enjoying waving at all my Kombi buddies from my T3
|
| posted on April 29th, 2008 at 01:10 PM |
|
|
Westi SACK him.
If he makes Matt Black go gloss he's no good.
Surely you got some o that PINK to spare, you could send it up this way.
I heard some dak dak racer was looking for some.
Matt Berry Motorsports...air cooled advice, repairs and mods Ph 0408 704 662
OFF-ROAD,CIRCUIT,DRAG,STREET,ENDURANCE
 |
|
|
 mactaylor mactaylor
Custom Title Time!
    
Posts: 1005
Threads: 54
Registered: August 14th, 2007
Member Is Offline
Location: Albury
Theme: UltimaBB Pro Blue
Mood: even my dog is german
|
| posted on April 29th, 2008 at 07:00 PM |
|
|
dave you should charge more as it makes me feel bad by charging as much as i do!!!!!! also nice big nuts youve got!!!
EVERLAST CONCRETE TANKS
1800 552 123
|
|
|
 westi westi
Custom Title Time!
what the
    
Posts: 1610
Threads: 28
Registered: August 30th, 2005
Member Is Offline
Location: milperra
Theme: UltimaBB Pro Blue
Mood: not blue, pink
|
| posted on April 29th, 2008 at 09:29 PM |
|
|
thanks to dave i have to know put my arse into second gear to get the car finished.
all my powder coating stuff went today.and cage gets done tommorrow.basic one for now.
list still to go.
pink paint for my box,this is a must.
make front spindles
make pedal assembly
make rear hubs (ali)
finish fitting doors and trims
buy some rear wheels and tyres
then fit every thing.
i am starting with the spindles .here is some rear trims i did tonight
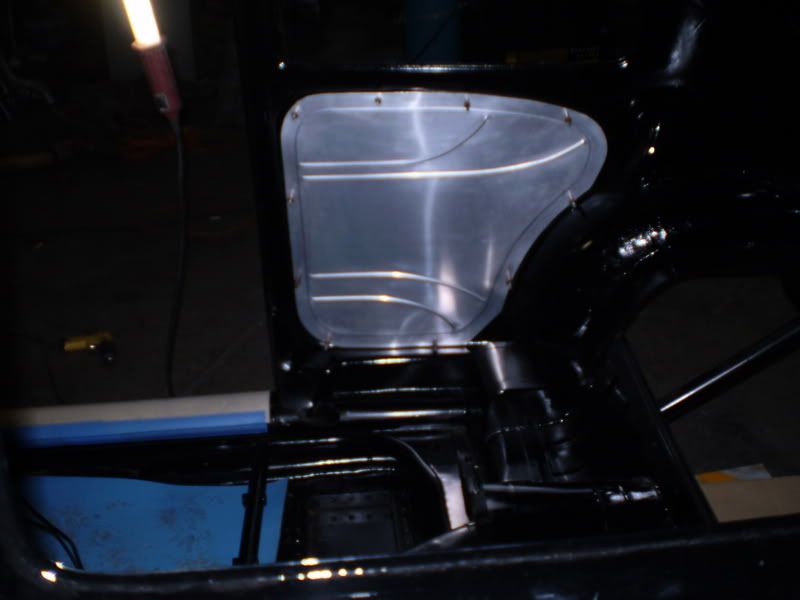
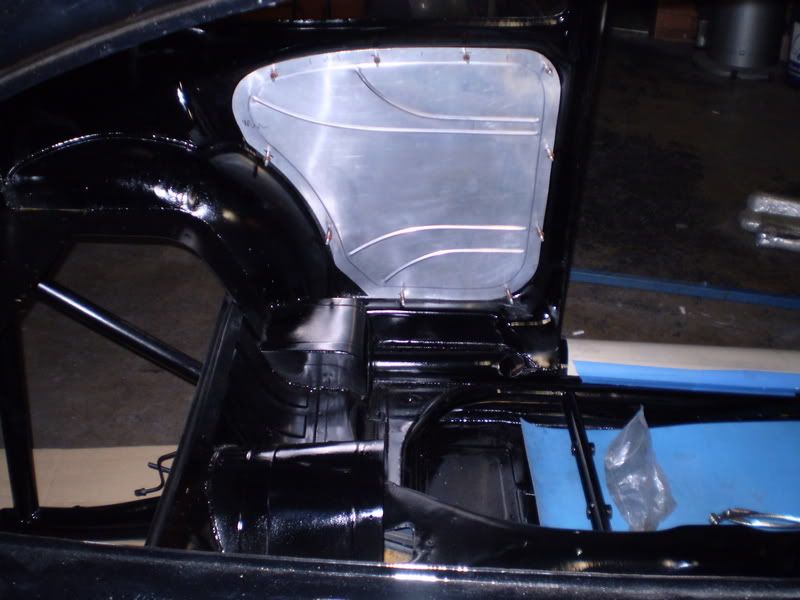
oh i almost forgot.still gota finish my heads.
to many things not enough hours.
story of my life
down sharon.
 |
|
|
| Pages: 1 .. 11 12 13 14 15 .. 43 |