| [ Total Views: 28045 | Total Replies: 197 | Thread Id: 101415 ] |
| Pages: 1 2 3 4 .. 7 |
|
|
 roverv8bay roverv8bay
Officially Full-On Dubber
  
Posts: 250
Threads: 32
Registered: January 30th, 2013
Member Is Offline
Theme: UltimaBB Pro Blue ( Default )
|
| posted on May 27th, 2013 at 07:37 AM |
|
|
G'day all. off to get adapter flanges made to bolt kombi cv's to commodore diff centre this will save getting the axles cut & joined. going to
meet engineer this morning he is at Capalaba for blue tag to see if he will give approval he doesn't seem concerned about the 4x4 aspect so fingers
crossed he seemed easy to talk to on the phone. We will see.
ernie
|
|
|
 roverv8bay roverv8bay
Officially Full-On Dubber
  
Posts: 250
Threads: 32
Registered: January 30th, 2013
Member Is Offline
Theme: UltimaBB Pro Blue ( Default )
|
| posted on May 27th, 2013 at 07:42 PM |
|
|
G'day all. spoke to Engineer today he builds trikes rods & other stuff very switched on & a 1st meeting very helpful . because vw built bay
4x4 even though they were mules for the syncro I'm doing the front drive the same & there are pics of it available he suggested I enclose them
with the application to QLD transport. f the kombi had a removable chassis he could pass I with out going to transport. He is more than happy with
engine location & transmissions I'm using. A mate has just turned up with a spare set of spindles with axles & nearly new cv joints bargain
price. now have all the parts for front drive only have to sort out axles.
ernie
|
|
|
 roverv8bay roverv8bay
Officially Full-On Dubber
  
Posts: 250
Threads: 32
Registered: January 30th, 2013
Member Is Offline
Theme: UltimaBB Pro Blue ( Default )
|
| posted on May 31st, 2013 at 03:40 PM |
|
|
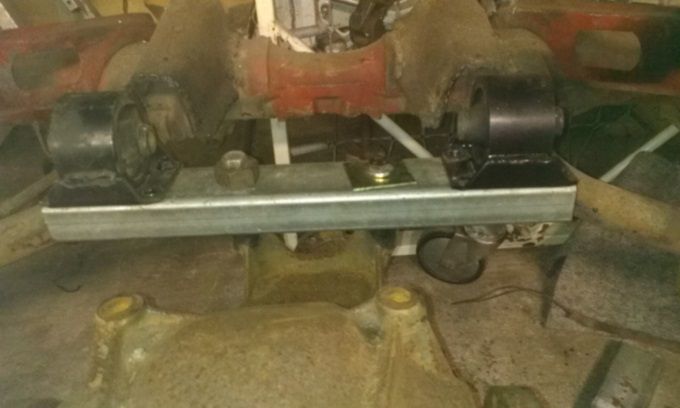
Gday all. been sorting out rear diff rear crossmember this is the shape now to decide on mounting method to the chassis rails. The mount in the pics
is the original commodore unit mounted upside down. pretty simple mounting application easy to repair or replace. Now to build the front mount for
this end again a piece if plate I have drill it of a template I have folded up then take & get it folded at 90 degs x 2 so a bit of searching to
get it done. all for now hope to have it sitting in the tilt on Tuesday pics if I do
ernie


|
|
|
 TheMiniMan TheMiniMan
Insano Dub Head
   
Posts: 849
Threads: 162
Registered: August 5th, 2006
Member Is Offline
Location: Brisbainia
Theme: UltimaBB Pro Blue ( Default )
Mood: swings
|
| posted on June 5th, 2013 at 08:42 PM |
|
|
Ah, you`re going through Earl , Lovely Lovely Lovely fella... tell him "Matt The Mini Man" said hello :-)
he`s helping me out with a couple of projects as well :-)
Lookin good Earnie, keep up the good work mate.
|
|
|
 roverv8bay roverv8bay
Officially Full-On Dubber
  
Posts: 250
Threads: 32
Registered: January 30th, 2013
Member Is Offline
Theme: UltimaBB Pro Blue ( Default )
|
| posted on June 6th, 2013 at 07:46 PM |
|
|
G'day miniman. yes Earl's the man his work is to be seen to be believed. the trike he is building is top work probably the best tube frame set up I
have ever seen in the flesh. what have you got on the go or is it a secret. with our interest we should get together do you work full time. being
retired I have been finishing of an extension on the house plus the 2 bays on the go.
ernie
|
|
|
 TheMiniMan TheMiniMan
Insano Dub Head
   
Posts: 849
Threads: 162
Registered: August 5th, 2006
Member Is Offline
Location: Brisbainia
Theme: UltimaBB Pro Blue ( Default )
Mood: swings
|
| posted on June 10th, 2013 at 09:55 PM |
|
|
work for myself "pretending" to fix morris minis for a living :-)
we`ve had adjustable mini control arms & big disc brake conversions approved by Earl for the minis
& i currently have Earl approving a Monaco Fast-back mini for me-->
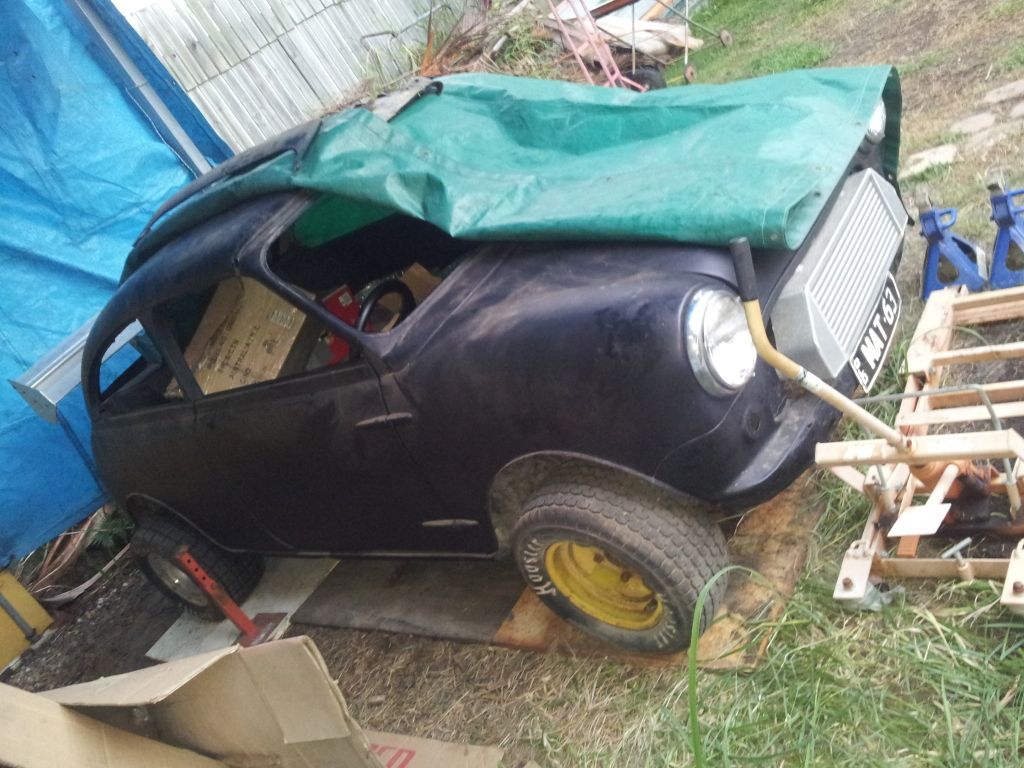
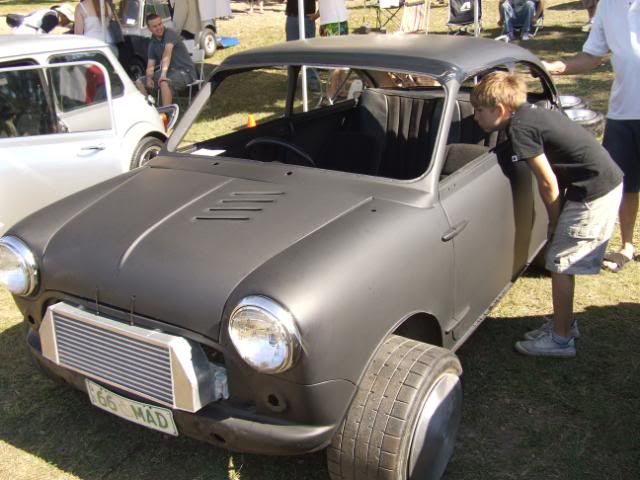
& we are doing a trike for the road similar to this (except only one rear wheel of course)
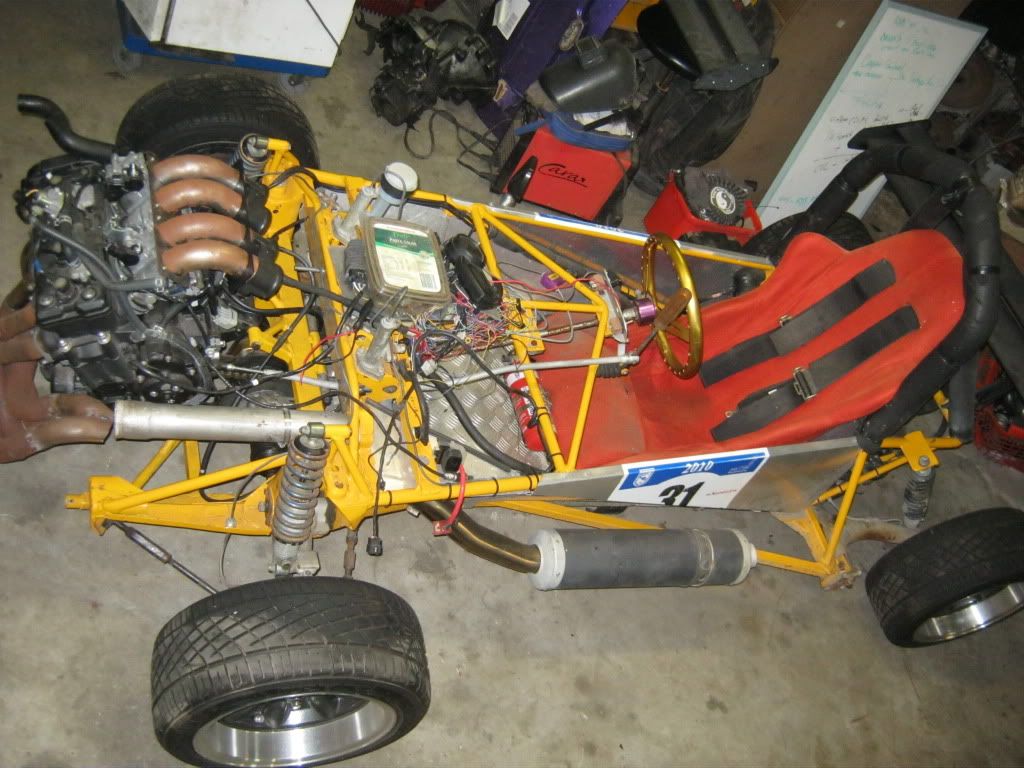
this buggy has Yamaha R1 motor fitted but we will be using all sorts of bike motors like the Suzuki hayabusa & Zx14 etc for the Trikes
2 seaters & single seaters being made :-)
|
|
|
 john1960 john1960
Commited Dubber
 
Posts: 67
Threads: 14
Registered: September 12th, 2006
Member Is Offline
Location: gold coast
Theme: UltimaBB Pro Blue ( Default )
|
| posted on June 10th, 2013 at 09:58 PM |
|
|
more photos please ernie.
|
|
|
 h h
A.k.a.: Towely BuMpEr KING! ILLegal ALIEN on a roadtrip
Scirocco Rare
fractals - an ever changing lifestyle
        
Posts: 7671
Threads: 375
Registered: February 3rd, 2005
Member Is Offline
Location: noosa hillbilly 'yee har'
Theme: XMBX Pro Green
Mood: A T3 is not a Kombi - stop waving at me
|
| posted on June 10th, 2013 at 10:05 PM |
|
|
cool stuff ernie..
great to read and see all the techy stuff 
|
|
|
 TheMiniMan TheMiniMan
Insano Dub Head
   
Posts: 849
Threads: 162
Registered: August 5th, 2006
Member Is Offline
Location: Brisbainia
Theme: UltimaBB Pro Blue ( Default )
Mood: swings
|
| posted on June 10th, 2013 at 10:10 PM |
|
|
i don`t understand why he won`t approve this turbo charged alloy V8 powered mini for me tho :-)
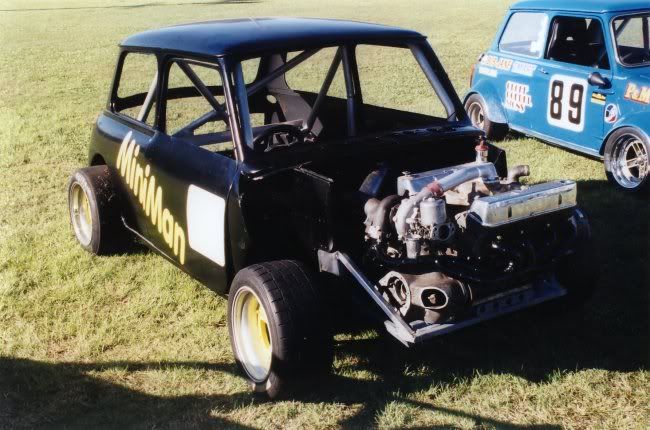
keep up the good work Earnie & i`ll be talking with Earl at Capalaba very shortl;y so i`ll say hello for you :-)
|
|
|
 roverv8bay roverv8bay
Officially Full-On Dubber
  
Posts: 250
Threads: 32
Registered: January 30th, 2013
Member Is Offline
Theme: UltimaBB Pro Blue ( Default )
|
| posted on June 11th, 2013 at 06:18 PM |
|
|
G'day h & miniman. Miniman is that a minor roof on he Monaco lot rounder the the broadspeed. What transmission on the v8 years ago we cut down a
Kimberly & tried 1500 box but time ran out on it so we canned the idea. I spoke to Earl aboyt passing a rover v8 trike I have the basic front
frame motor & plan on using an alfa auto trans axle as the diff is at the rear instead of in front of box giving a longer wheel base. he said he
had passed a few v8 trikes so next project is in the planning stage after my kombi & the son in laws bay ej22. I started the front mounting setup
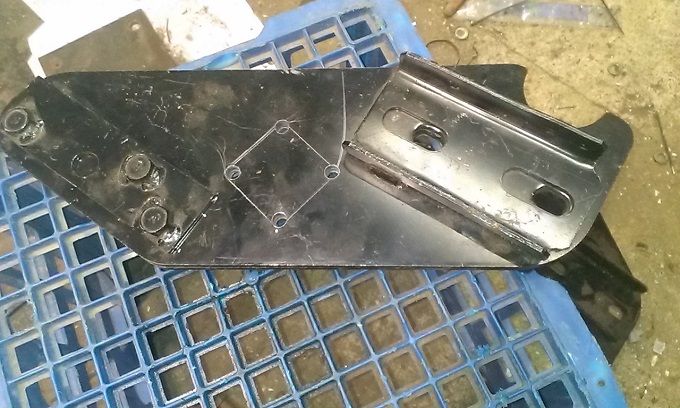
for the rear diff today the brackets will have the marked hole cut out this will slip over the 5cmx5cm tube
[img]
]http://i1273.photobucket.com/albums/y406/roverv8kombi/3002d87e-247b-4cd2-b56a...
ernie.
|
|
|
 roverv8bay roverv8bay
Officially Full-On Dubber
  
Posts: 250
Threads: 32
Registered: January 30th, 2013
Member Is Offline
Theme: UltimaBB Pro Blue ( Default )
|
| posted on June 11th, 2013 at 07:26 PM |
|
|
the brackets they have to be cut down to length. there are 2 bolted together to drill holes the bottom bolt hole will align with the mounting hole.
ernie
|
|
|
 roverv8bay roverv8bay
Officially Full-On Dubber
  
Posts: 250
Threads: 32
Registered: January 30th, 2013
Member Is Offline
Theme: UltimaBB Pro Blue ( Default )
|
| posted on June 12th, 2013 at 10:26 AM |
|
|
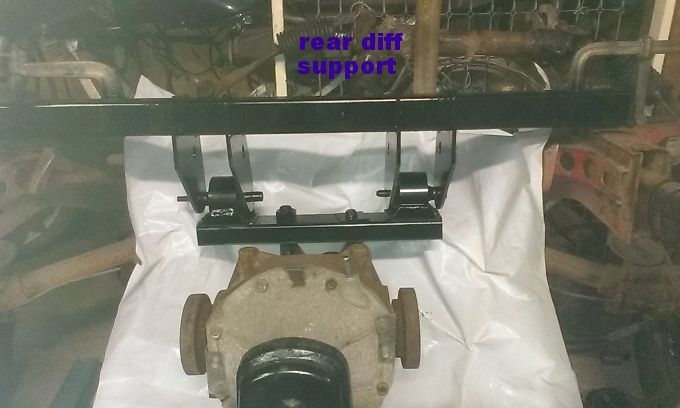
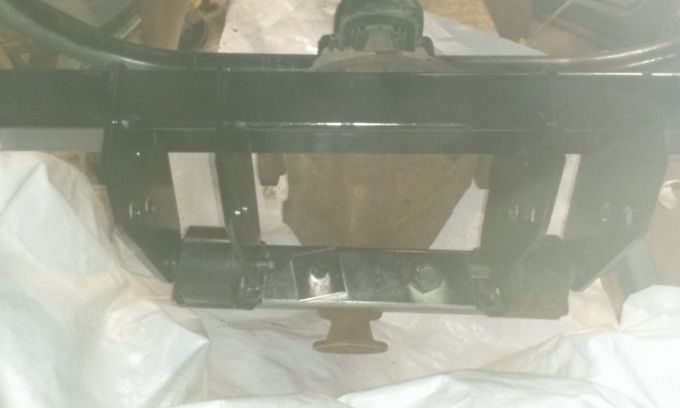
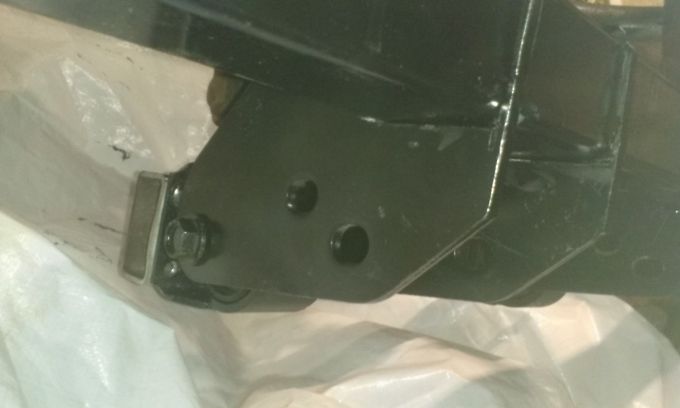
G'day all. cut brackets this morning this it what mount xmember will look like just have to weld brackets to tube. The brackets are bumper brackets
of Nissan patrol.
ernie


[img][/img]
|
|
|
 roverv8bay roverv8bay
Officially Full-On Dubber
  
Posts: 250
Threads: 32
Registered: January 30th, 2013
Member Is Offline
Theme: UltimaBB Pro Blue ( Default )
|
| posted on June 26th, 2013 at 08:22 PM |
|
|
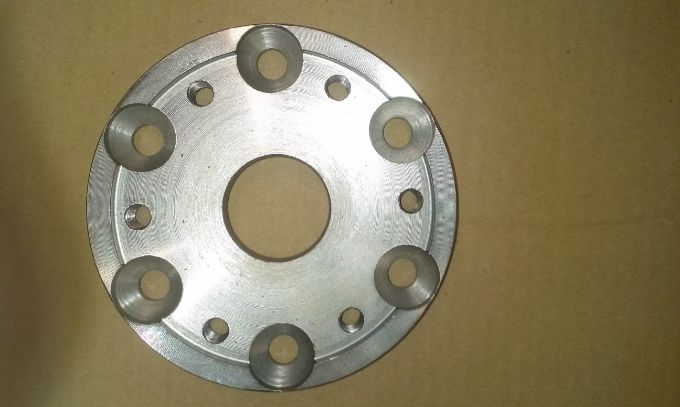
G'day all. picked up kombi cv to commodore diff adapters today. Should have the complete rear assembly fitted up next couple of weeks. Will have get
the centre machined out for movement.
ernie
|
|
|
 roverv8bay roverv8bay
Officially Full-On Dubber
  
Posts: 250
Threads: 32
Registered: January 30th, 2013
Member Is Offline
Theme: UltimaBB Pro Blue ( Default )
|
| posted on July 2nd, 2013 at 12:03 PM |
|
|
G'day all. I made up the ply template this morning for the front beam to spread it 8cm's to allow for spindle's difference between the ball joints
took 1/2 hour to do this I will get them cut out next week with a bit of luck. once they are finished I can sort out the front diff mounts &
decide what type of steering mods to use
ernie

|
|
|
 nils nils
Fahrvergnugen
   
Posts: 971
Threads: 65
Registered: January 11th, 2008
Member Is Offline
Location: central coast
Theme: UltimaBB Pro Blue ( Default )
|
| posted on July 2nd, 2013 at 08:30 PM |
|
|
Looking forward to seeing progress on this front beam
Quit calling rust patina
|
|
|
 roverv8bay roverv8bay
Officially Full-On Dubber
  
Posts: 250
Threads: 32
Registered: January 30th, 2013
Member Is Offline
Theme: UltimaBB Pro Blue ( Default )
|
| posted on July 3rd, 2013 at 08:32 AM |
|
|
G'day nils. I hope to set up the beams tomorrow with sliding tube welded to the inside & I have to make a second ply template that I will cut
thru the center of the holes to form a jig to sit it in to assemble so when I cut the original mounting brackets off it will slide apart but retain
the proper position in regards to angles of arms etc for caster. I will pre drill it so it will slide & lock into place. the biggest hassle is
getting beam down off the wall rack. all for know
ernie
|
|
|
 roverv8bay roverv8bay
Officially Full-On Dubber
  
Posts: 250
Threads: 32
Registered: January 30th, 2013
Member Is Offline
Theme: UltimaBB Pro Blue ( Default )
|
| posted on July 6th, 2013 at 11:57 PM |
|
|
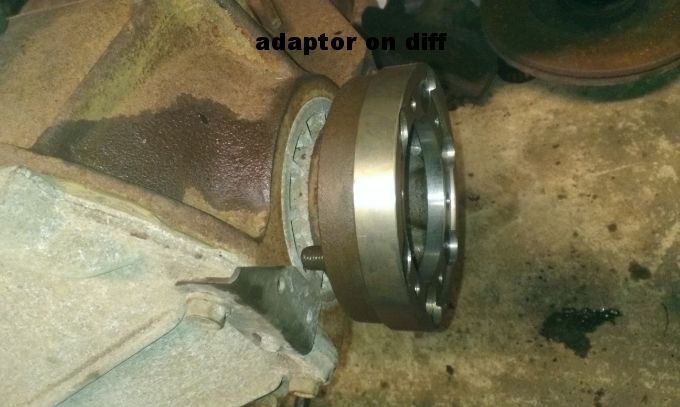
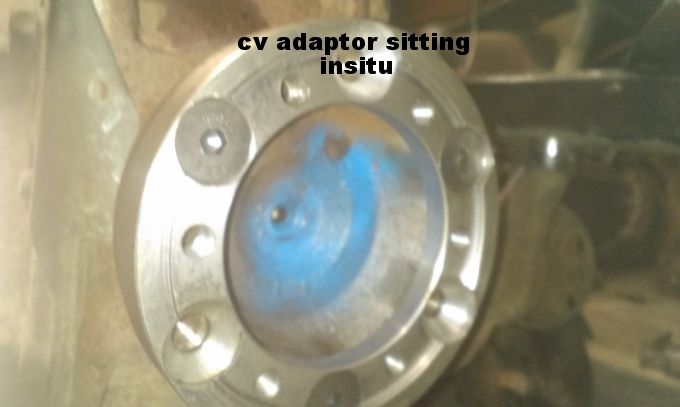
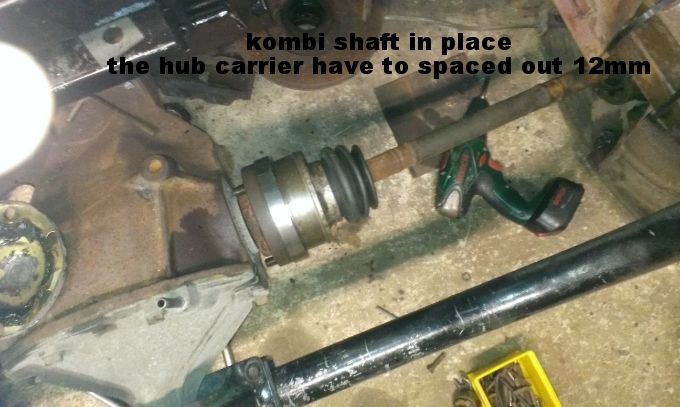
G'day all. I set up the the cv adapters today will need to use a beetle axle on the left side to make up for the diff centre offset. Also picked up
the pajero rear disc assemblies now to sort out fitting them up to kombi hub assembly
ernie



|
|
|
 roverv8bay roverv8bay
Officially Full-On Dubber
  
Posts: 250
Threads: 32
Registered: January 30th, 2013
Member Is Offline
Theme: UltimaBB Pro Blue ( Default )
|
| posted on July 10th, 2013 at 05:20 PM |
|
|
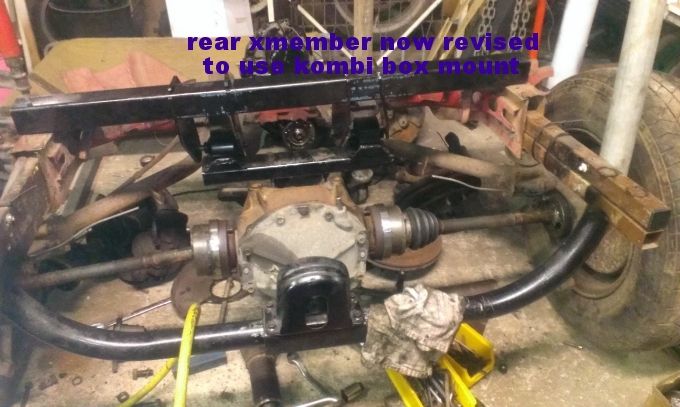
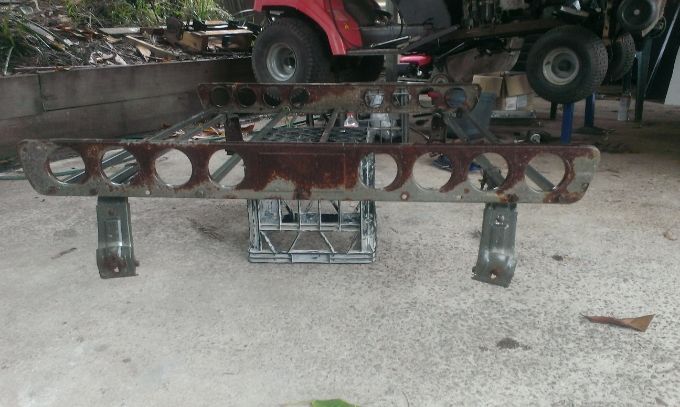
G'day all. picked up this rack for free something different to the usual tube racks. the beetle axle is to short to use so I'm going to space out
hub carriers on both sides by 12mm using steel plate by doing that I can use 2 kombi axles so no cut & shut axles.
ernie

|
|
|
 roverv8bay roverv8bay
Officially Full-On Dubber
  
Posts: 250
Threads: 32
Registered: January 30th, 2013
Member Is Offline
Theme: UltimaBB Pro Blue ( Default )
|
| posted on July 11th, 2013 at 08:17 PM |
|
|
G'day all scored a good running rover motor today. It's an 84 model so no cat or other associated parts needed the other motor is a 86 unleaded so
needs all the bells & whistles to comply will use it to build a 5litre. for later. I swapped the motor for 2 non runner's that have been in the
shed since 1993 so their an unknown. so motor cost me nothing & it's complete with exhaust manifolds & good muffler system which should be
easy to modify to fit the kombi looking at the bends & twist in it. also got the steel plate for the hub spacers for rear. can some tell me the
amount of float in & out in the axles of a kombi. also scored another roof rack for son in laws project love the associates scrap yard not to be
confused with wreckers yard I pay for bit's buy the kilo.
ernie
|
|
|
 lou0060 lou0060
Wolfsburg Wizard
  
Posts: 568
Threads: 30
Registered: December 12th, 2010
Member Is Offline
Location: Brisbane
Theme: UltimaBB Pro Blue ( Default )
|
| posted on July 11th, 2013 at 09:32 PM |
|
|
this thread always brings a smile to my face......
keep up the good work, looking forward to the finished unit.
1971 karmann ghia Cabrio - Cruising 
1963 beetle Sunroof - gathering dust 
1968 race beetle - twin turbo Subaru - stress relief 
1960 beetle - old school low & slow  |
|
|
 matberry matberry
Super Moderator
Go hard or go home
      
Posts: 8114
Threads: 134
Registered: March 7th, 2006
Member Is Offline
Location: Cooroy Qld
Theme: UltimaBB Pro Blue
Mood: enjoying waving at all my Kombi buddies from my T3
|
| posted on July 11th, 2013 at 10:09 PM |
|
|
Good on ya Ernie.
Axle length needs to be set at the suspension height where both cv's are level where the axle length is shortest. At this point you need to have some
play, similarly at full droop there should also be some play in the axle.
Matt Berry Motorsports...air cooled advice, repairs and mods Ph 0408 704 662
OFF-ROAD,CIRCUIT,DRAG,STREET,ENDURANCE
 |
|
|
 roverv8bay roverv8bay
Officially Full-On Dubber
  
Posts: 250
Threads: 32
Registered: January 30th, 2013
Member Is Offline
Theme: UltimaBB Pro Blue ( Default )
|
| posted on July 11th, 2013 at 11:27 PM |
|
|
G'day lou0600 & Matt. Thanks for info Matt. I plan on setting up the rear diff next Wednesday. along with the transfer case & gearbox. to
sort out how much room I have the measurement's add up. but you never know until things are in place. Thinking about flipping the rear hub carriers
so the bottom shock mount doesn't hand up on rock etc just have fiddle with upper mount position & length
|
|
|
 roverv8bay roverv8bay
Officially Full-On Dubber
  
Posts: 250
Threads: 32
Registered: January 30th, 2013
Member Is Offline
Theme: UltimaBB Pro Blue ( Default )
|
| posted on July 17th, 2013 at 05:52 PM |
|
|
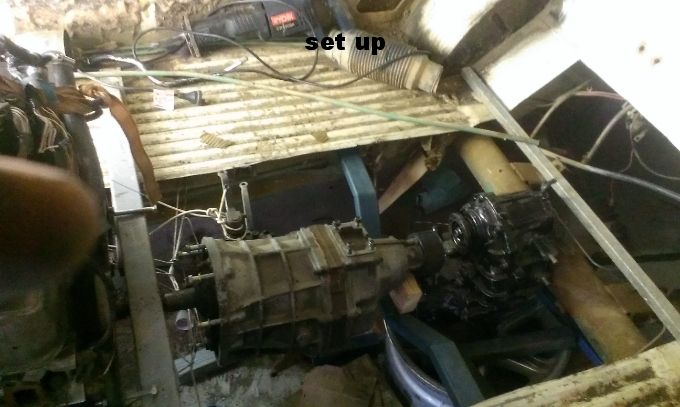
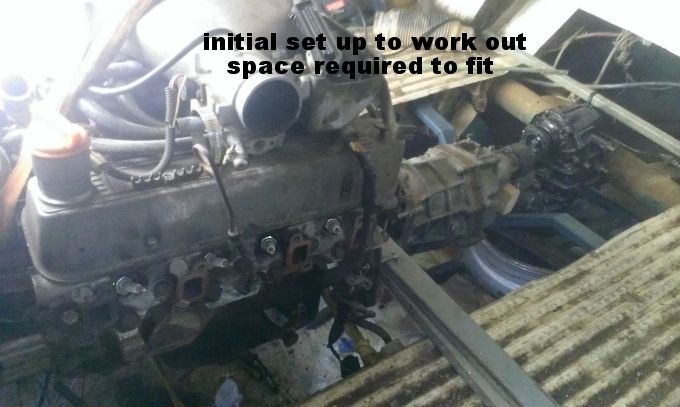
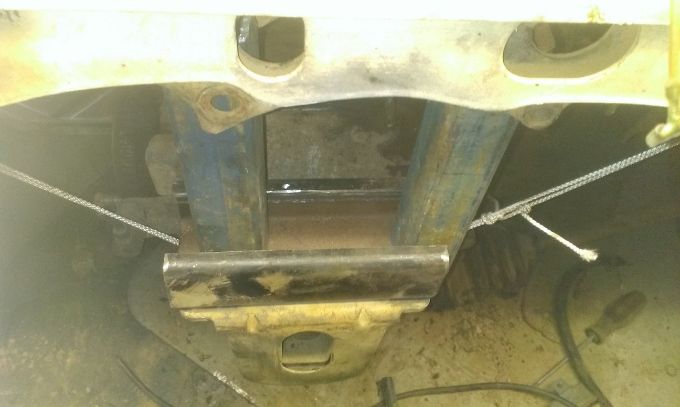
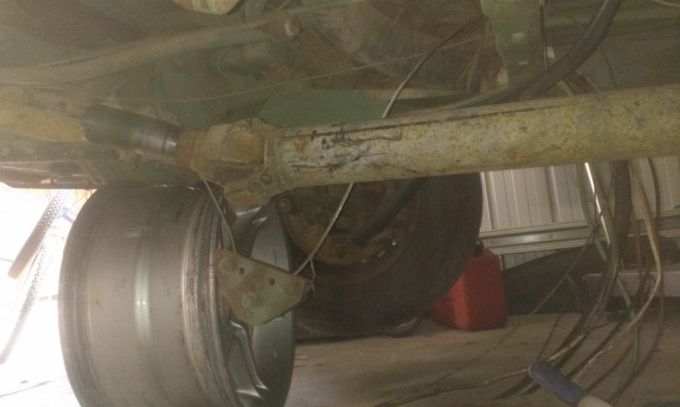
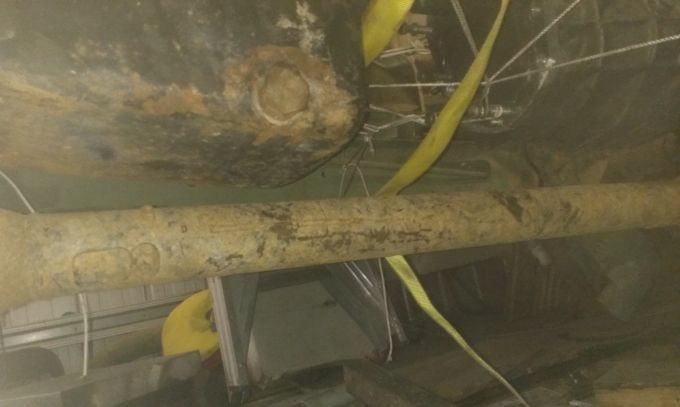
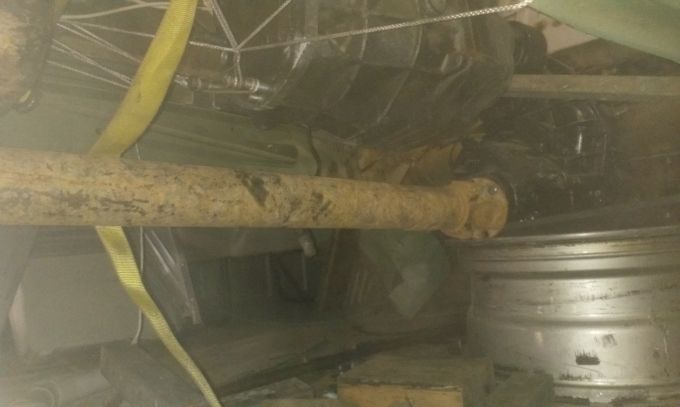
G'day all. spent some time on mounting diff into place the ugly pipe x member has gone in it's place will be a simple mount bolted to original
gearbox mount it 's like it was made to be used for this purpose. placed motor at right height to clear front tailshaft. the length is good just have
to shorten front section & put a rear diff flange on onto it next week I will start on the morse cables for the shifter. After lift I will have to
run to lengths of tube beside the tailshaft same as syncro set up but bit stronger from front beam to torsion bar tube. All for now
ernie

|
|
|
 roverv8bay roverv8bay
Officially Full-On Dubber
  
Posts: 250
Threads: 32
Registered: January 30th, 2013
Member Is Offline
Theme: UltimaBB Pro Blue ( Default )
|
| posted on July 26th, 2013 at 07:30 PM |
|
|
G'day all. picked up a Mitsubishi steering column complete with the angle box along with a deawoo power rack & pinion also the L300 cable shifter
to use on transmission just have to chase up a t bar type shifter for the transfer case. picked up a manual flywheel & good range rover pressure
plate for $40.00. Ordered the dellow bellhousing today approx. 2 weeks wait. having the kombi brake drums & rear hubs drilled to take 6 stud
pattern the hubs have enough in them to cope. building engine frame next week & chassis stiffener's like the syncro they will bolt from the front
beam to the rear torsion bar tube. all for now.
ernie
|
|
|
 roverv8bay roverv8bay
Officially Full-On Dubber
  
Posts: 250
Threads: 32
Registered: January 30th, 2013
Member Is Offline
Theme: UltimaBB Pro Blue ( Default )
|
| posted on August 4th, 2013 at 05:38 PM |
|
|
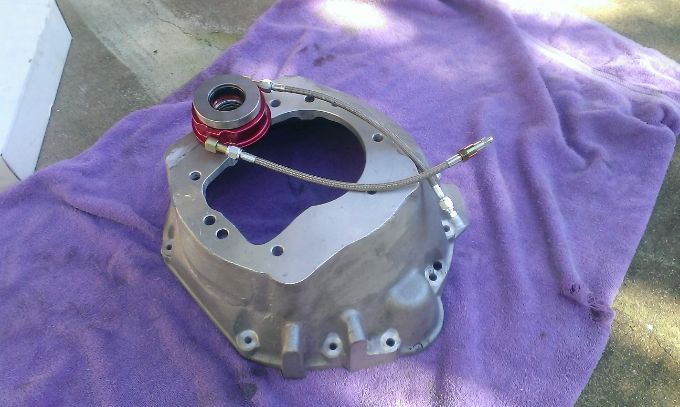
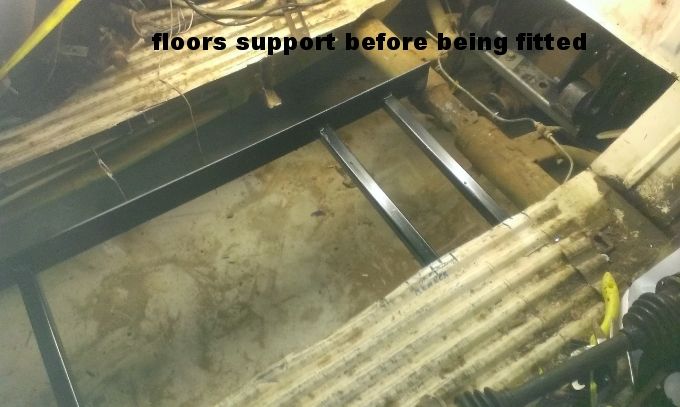
G'day all the Dellow bellhousing & McLeod concentric thrust bearing arrived today so next week will be bolt up & manfacture the mounting
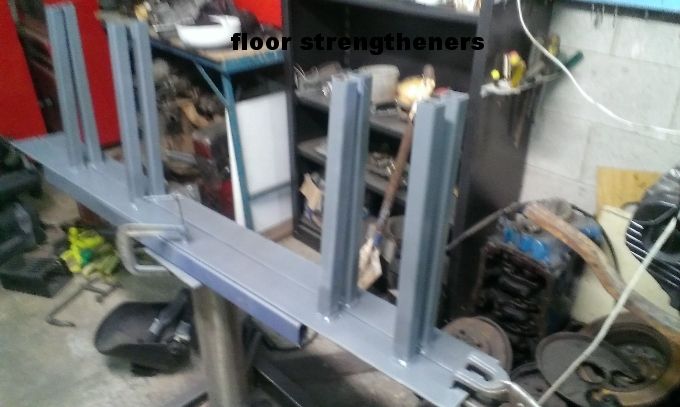
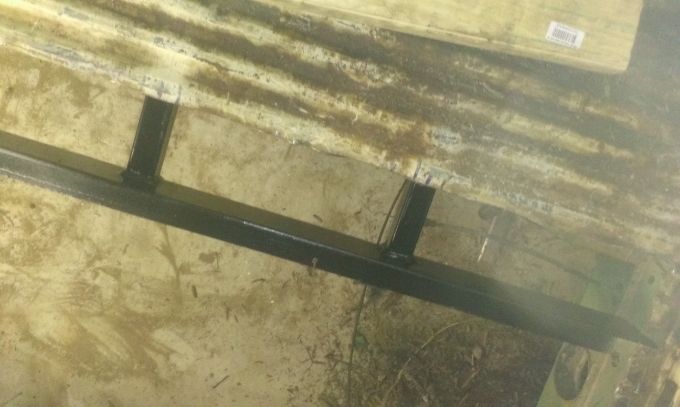
brackets & final location point of drive train. I have had the floor reinforcing for engine cradle welded up ready to go in next week. the 7.5cm x
5cm angle iron welded to 40cm x 3cm tubes will push into the floor supports between the floor & the chassis rails then bolt thru the floor angle
iron ends also sit on the xmember at the front & on top of rear suspension tube the 5cm x 5cm tube frame for the drive train will bolt down on top
of the angle iron
pics tomorrow
ernie
|
|
|
 roverv8bay roverv8bay
Officially Full-On Dubber
  
Posts: 250
Threads: 32
Registered: January 30th, 2013
Member Is Offline
Theme: UltimaBB Pro Blue ( Default )
|
| posted on August 14th, 2013 at 08:01 AM |
|
|
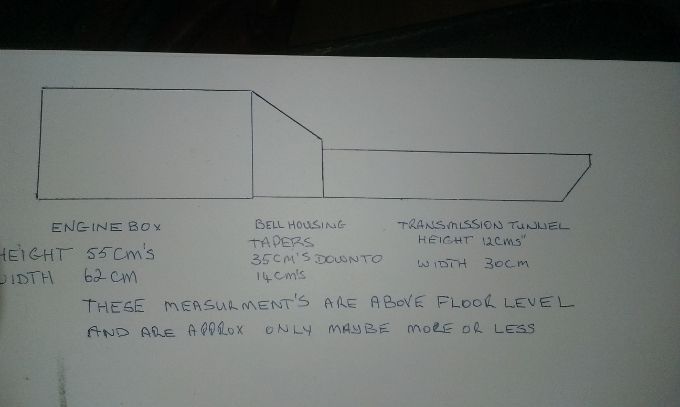
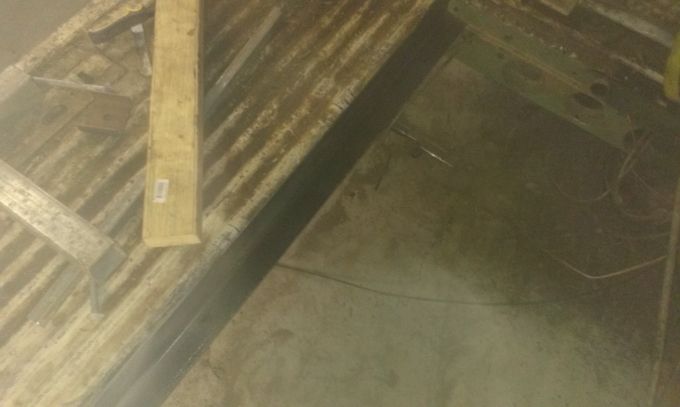
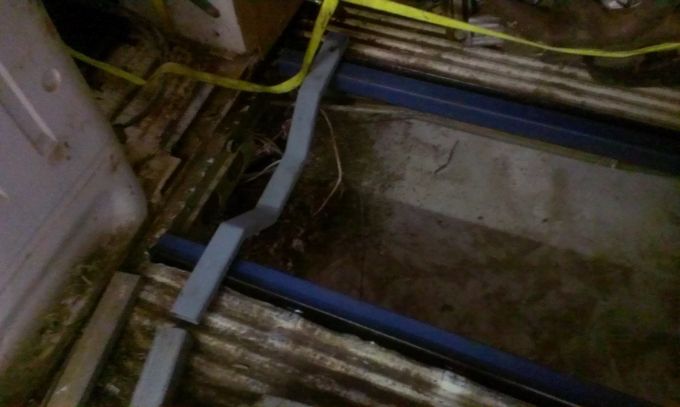
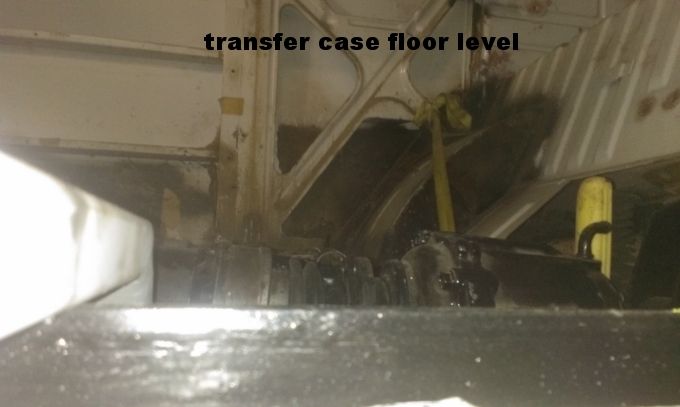
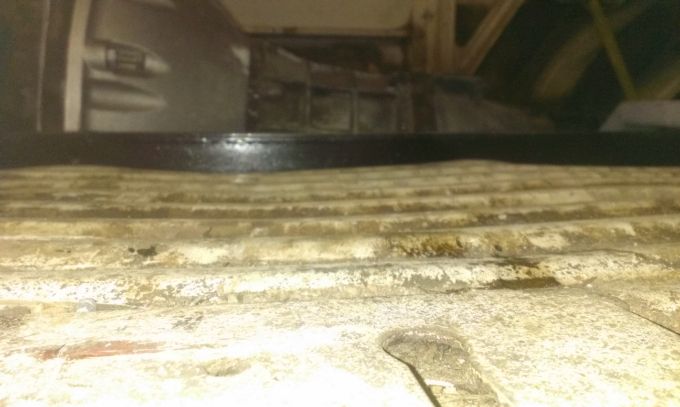
G'day all. spent a couple of hours on ECLECTIC yesterday. fitting up the floor reinforcing & sorting out engine transmission heights they are
governed by the transfer case location in the pics you will get an idea of the intrusion into the load area by everything associated with the
conversion. the drawing is of the shape of the covers & approx heights. So it won't affect rear seat if & when I fit it there should be
enough room for the dicky seats out of the pajero either side of the gear box depending on noise level as to fitting them.
ernie
this is the frame to be fitted into top hats

going into floor
in a bit
all the way home
blue tube will be the engine cradle sides
|
|
|
 nils nils
Fahrvergnugen
   
Posts: 971
Threads: 65
Registered: January 11th, 2008
Member Is Offline
Location: central coast
Theme: UltimaBB Pro Blue ( Default )
|
| posted on August 14th, 2013 at 08:15 AM |
|
|
This is what i imagine ernie looks like when working on his van 

Quit calling rust patina
|
|
|
 matberry matberry
Super Moderator
Go hard or go home
      
Posts: 8114
Threads: 134
Registered: March 7th, 2006
Member Is Offline
Location: Cooroy Qld
Theme: UltimaBB Pro Blue
Mood: enjoying waving at all my Kombi buddies from my T3
|
| posted on August 14th, 2013 at 08:23 AM |
|
|
lol
Matt Berry Motorsports...air cooled advice, repairs and mods Ph 0408 704 662
OFF-ROAD,CIRCUIT,DRAG,STREET,ENDURANCE
 |
|
|
 roverv8bay roverv8bay
Officially Full-On Dubber
  
Posts: 250
Threads: 32
Registered: January 30th, 2013
Member Is Offline
Theme: UltimaBB Pro Blue ( Default )
|
| posted on August 14th, 2013 at 11:55 AM |
|
|
G'day nils & matt my daughter agreed with pic she thinks the same where do I get so much in my head at anyone time. Shame I wasn't smarter at
school might have become something. more pics
ernie
height of transfer case above floor
height of transmission
height of engine before cutting out more floor & trimming down kombi xmember
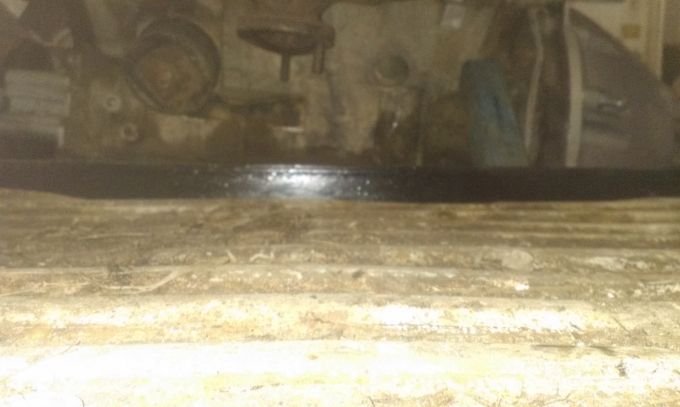
|
|
|
 roverv8bay roverv8bay
Officially Full-On Dubber
  
Posts: 250
Threads: 32
Registered: January 30th, 2013
Member Is Offline
Theme: UltimaBB Pro Blue ( Default )
|
| posted on August 14th, 2013 at 01:49 PM |
|
|
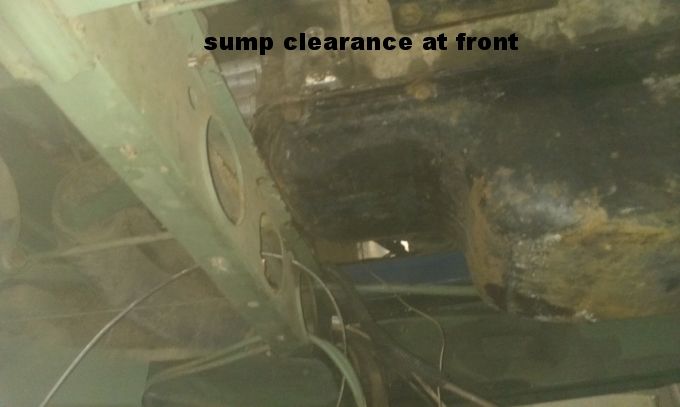
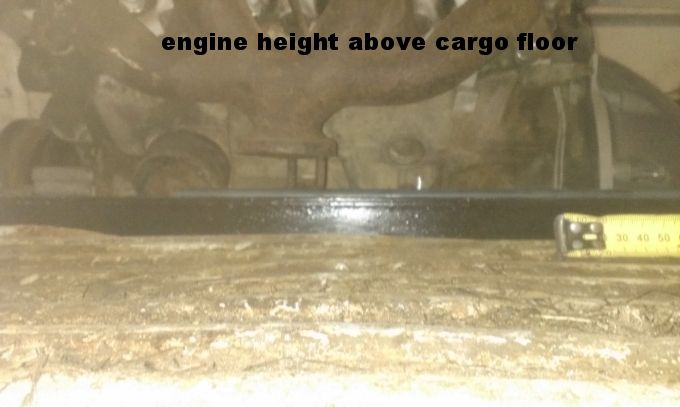
Back from lunch a quick cut on floor between seats & trim down top of x member to allow motor to sit in it's final resting place so here we go
more pics
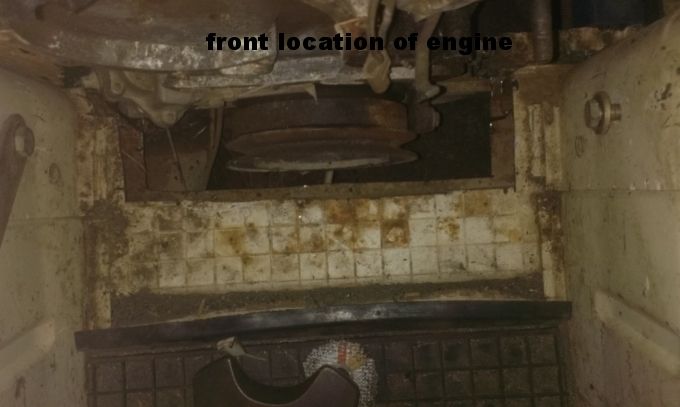
still to be lifted 25mm
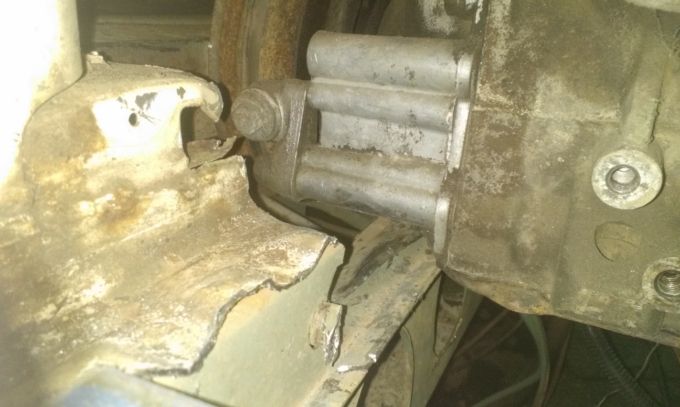
need new manifolds
small mounting bracket to be made up will make some templates to make them at home next week
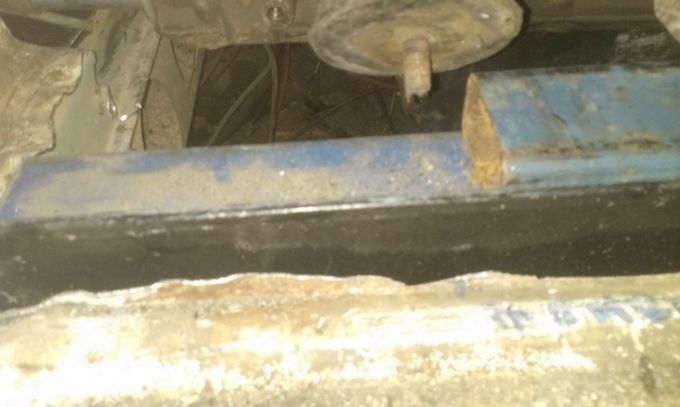
tarago shifter location 2 to choose from think it will be built up to save reaching down
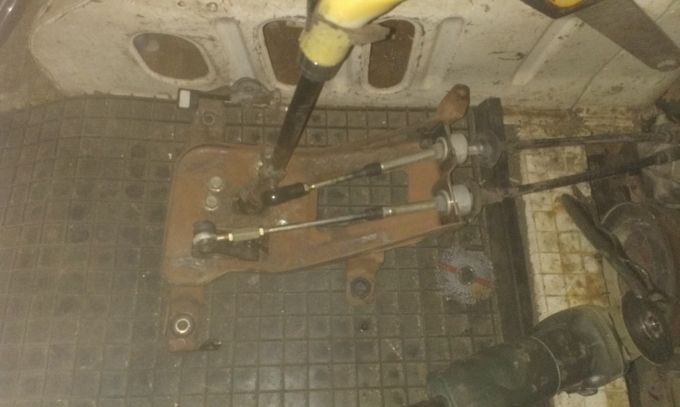
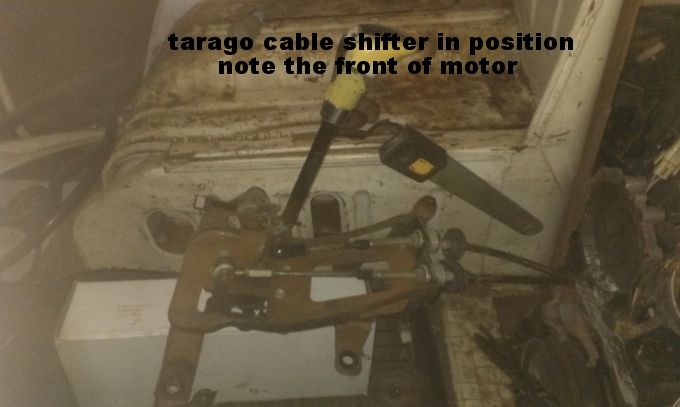
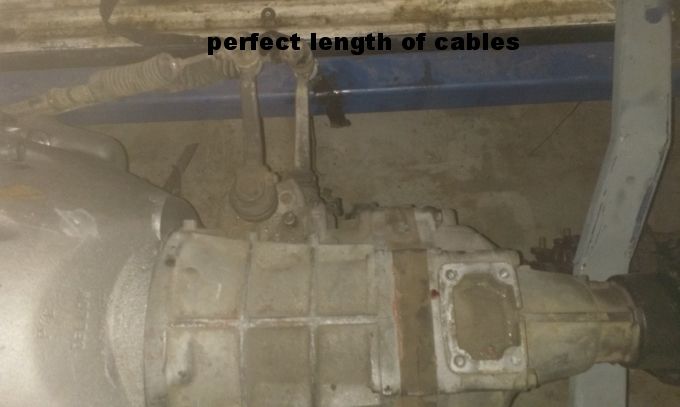
the tarago shifter cables are spot on length
back home tonight so get into small jobs have a hub carrier at engineer's getting machined to accept the pajero diff housing axle flange to be welded
onto carrier & then can bolt on complete backing plate handbrake & caliper mounting bracket's. I will post pics of the process to assemble
them when I get them back. all for now. Thanks for following my build
ernie
|
|
|
| Pages: 1 2 3 4 .. 7 |