| [ Total Views: 8710 | Total Replies: 73 | Thread Id: 71295 ] |
| Pages: 1 2 3 |
|
|
 M16S VW M16S VW
Commited Dubber
 
Posts: 54
Threads: 3
Registered: August 24th, 2008
Member Is Offline
Theme: UltimaBB Pro Blue ( Default )
|
| posted on December 14th, 2008 at 03:04 AM |
|
|
Well I've not done any work on Bella this weekend.... so she decided to go for a swim instead!

Her engine also went for a swim!

Yep - we got flooded  Bella looked a bit shocked to see this strange
liquid stuff around her.... she's not seen water for at least 3.5yrs! Then she had to sit outside in the rain whilst we cleared all the flood water
from the garage and saved our new kitchen which had been in there waiting for us to fit it! Bella looked a bit shocked to see this strange
liquid stuff around her.... she's not seen water for at least 3.5yrs! Then she had to sit outside in the rain whilst we cleared all the flood water
from the garage and saved our new kitchen which had been in there waiting for us to fit it!
I'm hoping I can save the engine - it looks like the water only got into the exhaust.
|
|
|
 M16S VW M16S VW
Commited Dubber
 
Posts: 54
Threads: 3
Registered: August 24th, 2008
Member Is Offline
Theme: UltimaBB Pro Blue ( Default )
|
| posted on April 5th, 2009 at 05:54 AM |
|
|
Oh dear, I haven't updated this for ages!
Here goes then - sitting comfortably?!
I recieved a new gear coupler for Bella today from Heritage and thought I'd get round to replacing it. Now I have the new clutch in, she moves nicely
and doesn't slip - she can also get up the drive under her own power now  But selecting 2nd is a bit hit and miss. Sometimes it goes in, but most of the time I get a horrible grinding noise. But selecting 2nd is a bit hit and miss. Sometimes it goes in, but most of the time I get a horrible grinding noise.
So I went out to the garage to replace it - spent a while trying to get the carpet out of the way so I could undo the 2 13mm bolts holding the
gearstick on. Then that was removed and I noted the location of the lock plate:
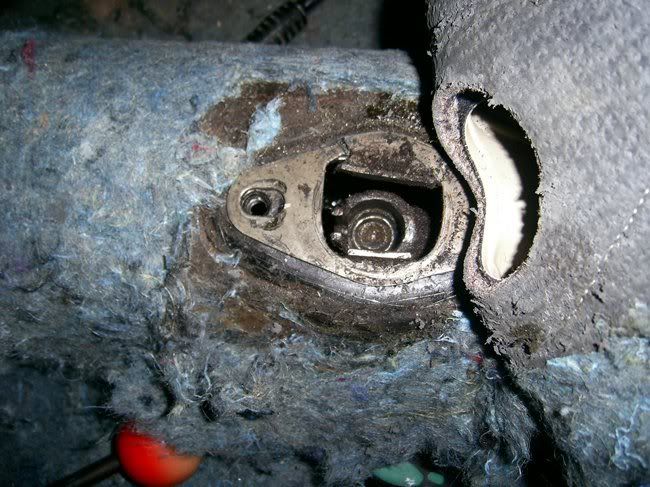
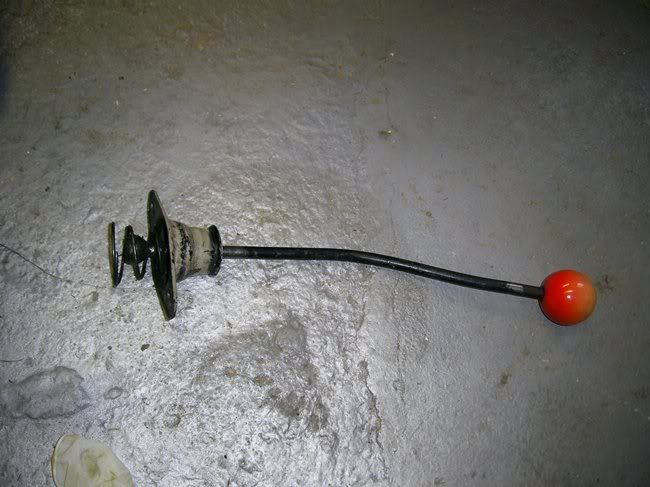
Then went to the coupling:
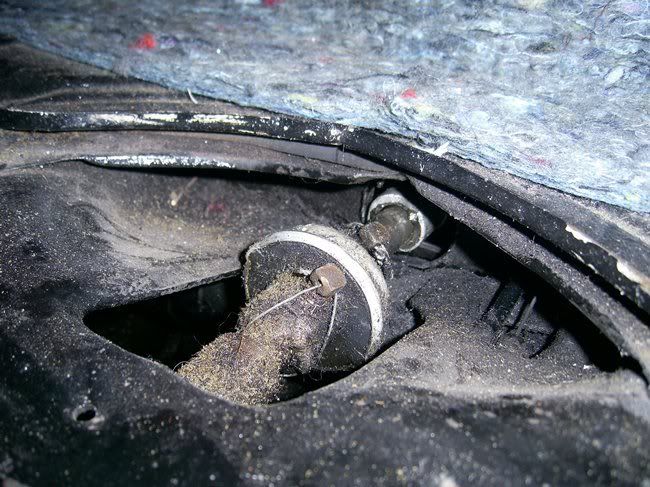
Removed the wire and undid the 2 bolts.... and that's when it all went horribly wrong! The gearbox end came off easily - no suprise as I've had the
gearbox out before so I knew it would be ok. Then set to the other side of the coupling.... it was a bit stiff, so I went and found my trusty hammer
to try and persuade it to come out... that didn't help....
So I cleaned it up and bit and found that a previous owner bodger had got there before me! And welded the rod to the coupling.... if you look hard
enough you can see it:
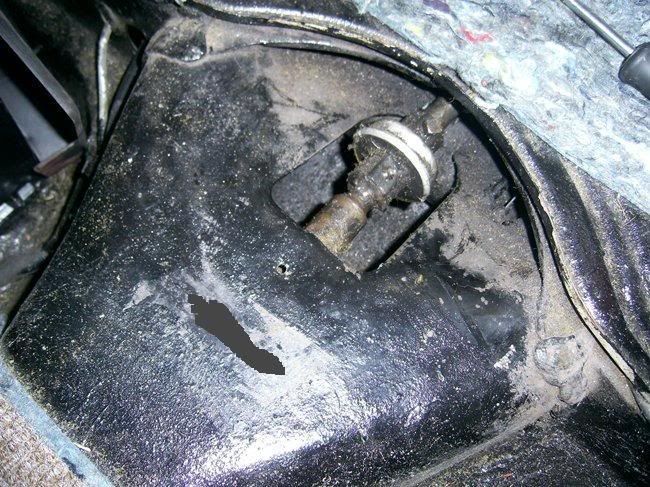
|
|
|
 M16S VW M16S VW
Commited Dubber
 
Posts: 54
Threads: 3
Registered: August 24th, 2008
Member Is Offline
Theme: UltimaBB Pro Blue ( Default )
|
| posted on April 5th, 2009 at 05:55 AM |
|
|
My new gear shift rod thing has arrived!
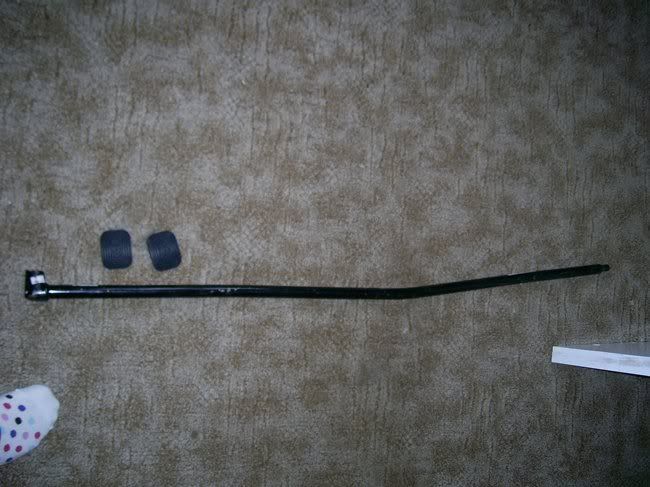
Also got some new rubbers for the pedals. I've bought these before, but the garage pixies have run off with them it seems!
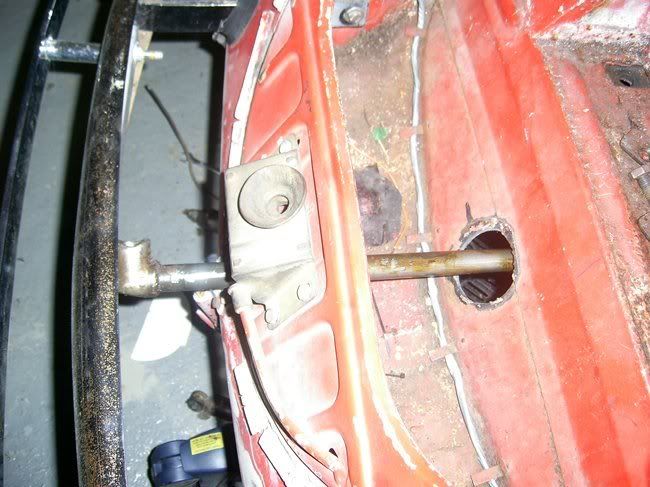
After trying to use a junior hacksaw for what seemed like hours on Friday, I managed to get a small indent into the rod... I couldn't really get the
saw in to cut it properly, so Jim suggested I used a different type of saw, which I got today and set it to work:
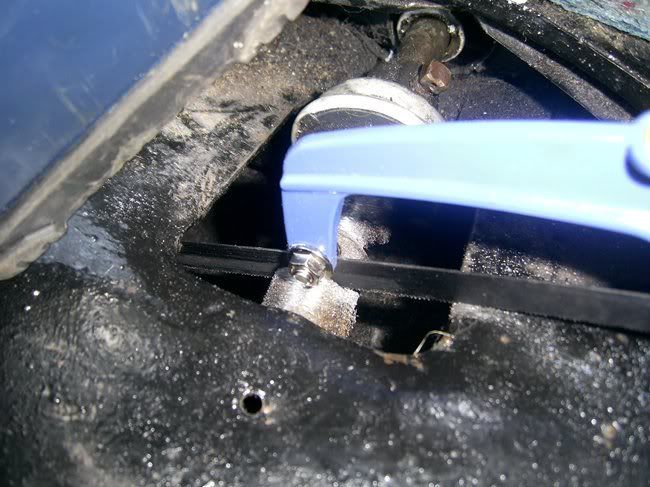
After ages of sawing, I finally cut through it:
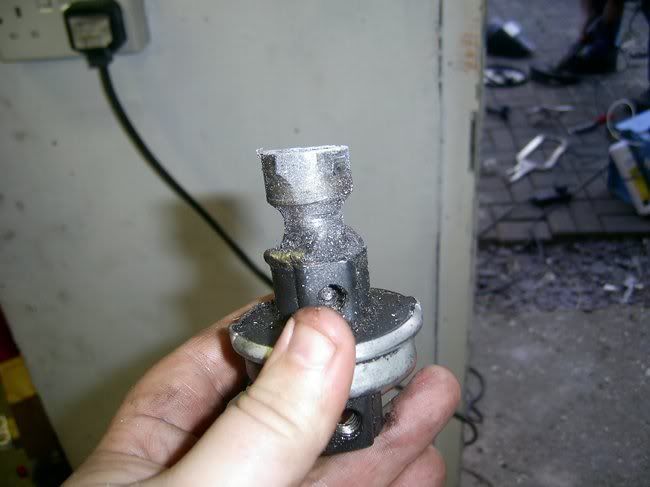
Yep it wasn't going to bend or rust away, was it?!
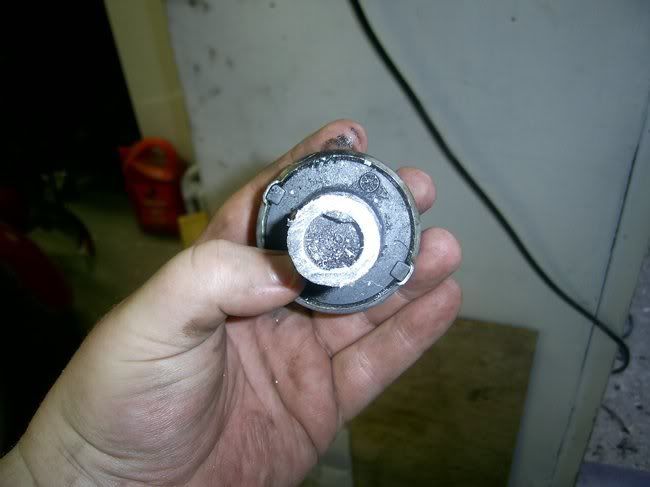
Looks like she's smoking a pipe lol:
|
|
|
 M16S VW M16S VW
Commited Dubber
 
Posts: 54
Threads: 3
Registered: August 24th, 2008
Member Is Offline
Theme: UltimaBB Pro Blue ( Default )
|
| posted on April 5th, 2009 at 05:56 AM |
|
|
Joey Bus went for his MOT retest today so I had the chance to remove the old shift rod (he was in the way before) and get the new one fitted. Steve
helped me fit the new one as it's tricky to do it on your own without 'go go gadget' arms.
Anyway, got that fitted and started looking for the new selector plate that I bought at Dubfreeze...... hmmm looks a little different to the old
one....
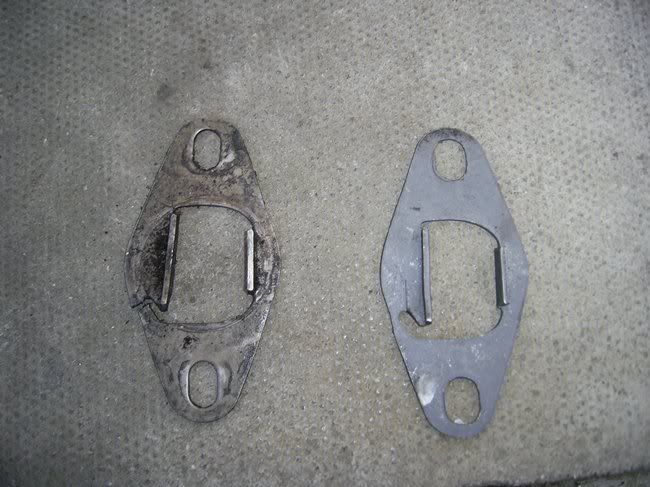
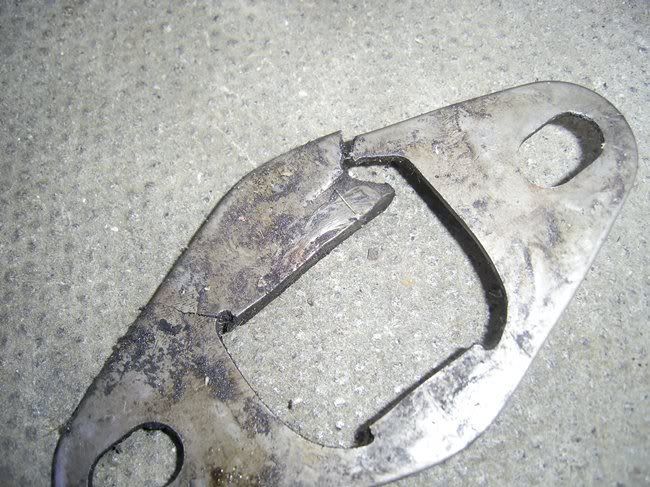
Yep, that's right - there's a chunk missing where it's worn through and there's a massive crack in it, so I could pull it apart with my fingers!
What on earth has happened to this Beetle?! First of all the gearbox was lose and moving around because the threads for the front mount had been
snapped off, then the coupling was welded to the rod and now this plate!
Right, well we fitted the new shift rod, did the coupling up, fitted new shifter plate and..... only managed to get 2 gears  after asking on the tech forum, I came to the conclusion that it was the wrong
year, so pulled it out to check.... you can see the obvious differences! after asking on the tech forum, I came to the conclusion that it was the wrong
year, so pulled it out to check.... you can see the obvious differences!
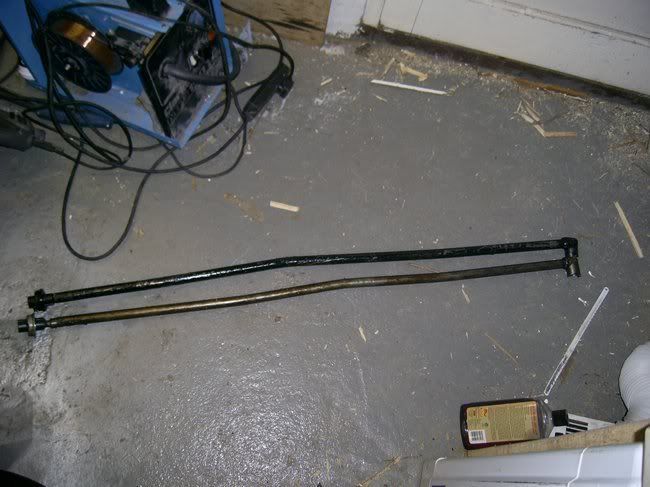
The original one is the one which is in 2 bits lol.
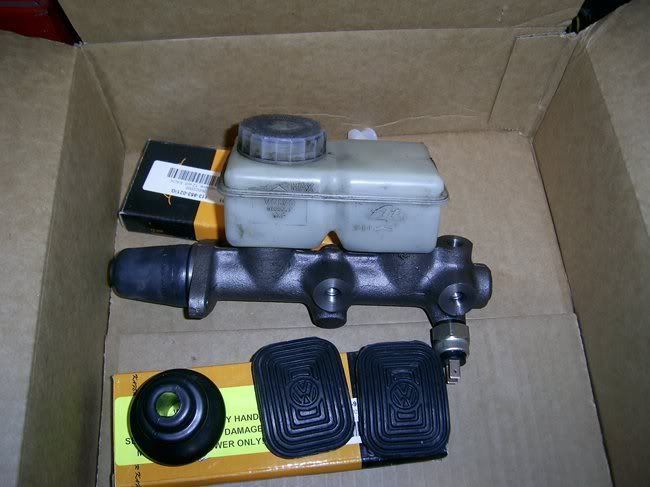
My other parts arrived on Friday - 12v semaphores and new dual circuit master cylinder. I also got a Volvo 240 reservoir.
On my way home from uni today I stopped off at Jim's (Tofufi) house to collect some grub screws for the adjusters (thanks Jim!) and then onto Dirty
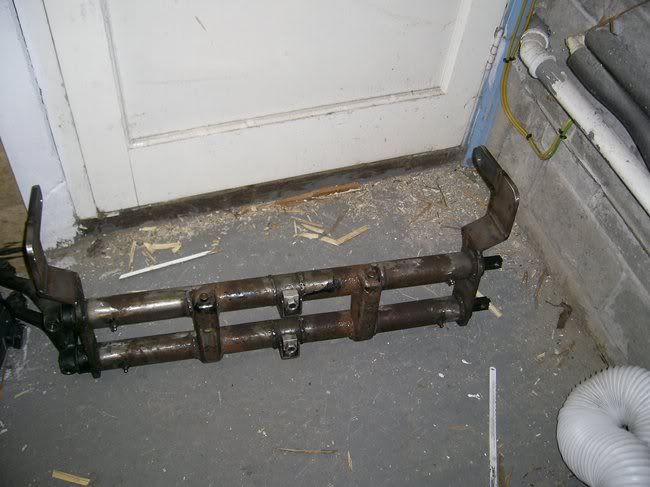
Dave's house to collect her original beam... those of you who've followed this thread for longer know Tom took 3.5in out of it and removed the shock
towers - Dave has narrowed it another 1.5in and fitted shock towers - thanks Dave!
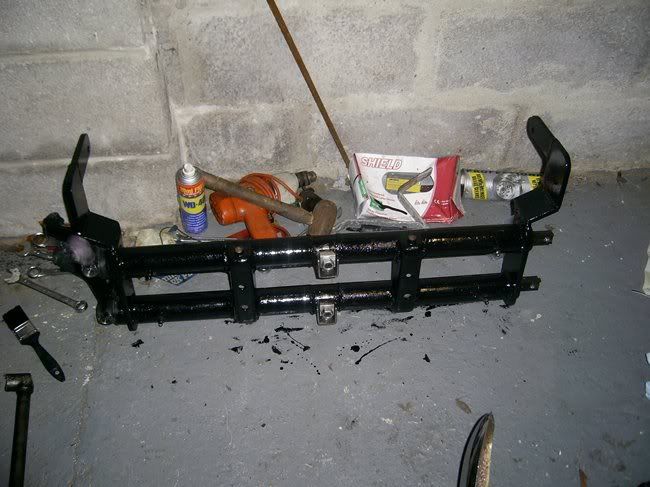
And with a bit of POR-15:
We mocked it up and it appears to fit like a glove! 
|
|
|
 M16S VW M16S VW
Commited Dubber
 
Posts: 54
Threads: 3
Registered: August 24th, 2008
Member Is Offline
Theme: UltimaBB Pro Blue ( Default )
|
| posted on April 5th, 2009 at 05:58 AM |
|
|
New beam is in (sorry for the terrible pic):
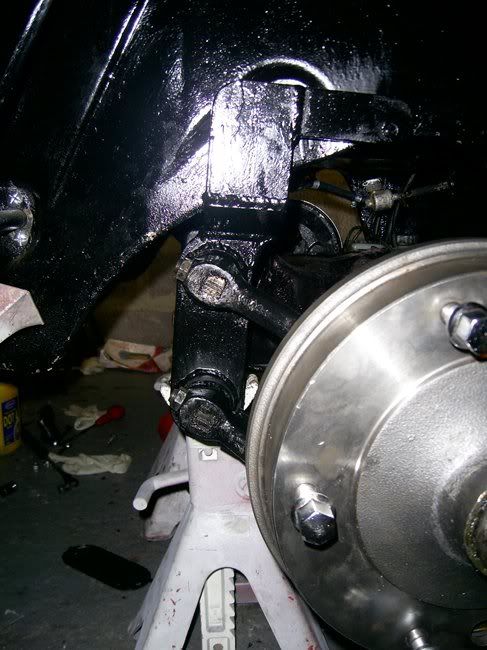
Hubs are on. Dual circuit is plumbed in and bled. Steering box is fitted.
Just gotta connect the track rods, brake light wiring to the mc, wheels and then fiddle about with the gear rod until we have all the gears and she's
good to go! 
|
|
|
 M16S VW M16S VW
Commited Dubber
 
Posts: 54
Threads: 3
Registered: August 24th, 2008
Member Is Offline
Theme: UltimaBB Pro Blue ( Default )
|
| posted on April 5th, 2009 at 06:00 AM |
|
|
As some of you know, Bella went to her first show this weekend - Volksworld! Unfortunatly there wasn't enough time to get her MOTd and registered so
we had to trailer her up with Widget. Friday morning started with Steve going to work for a few hours and then coming home with the trailer. When he
got home we got Bella out of the garage and loaded up ready to go:
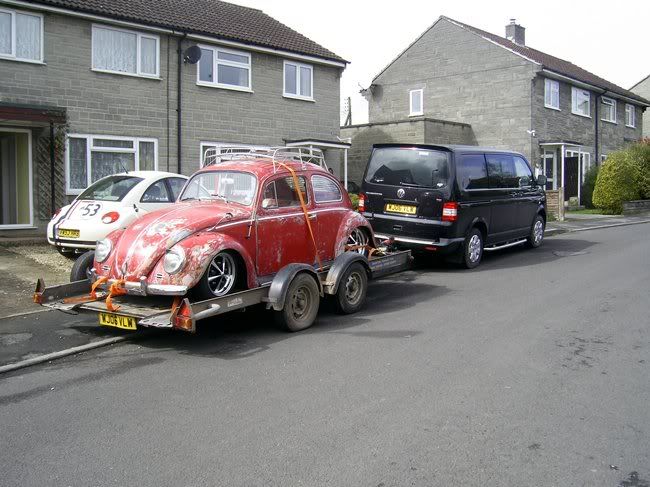
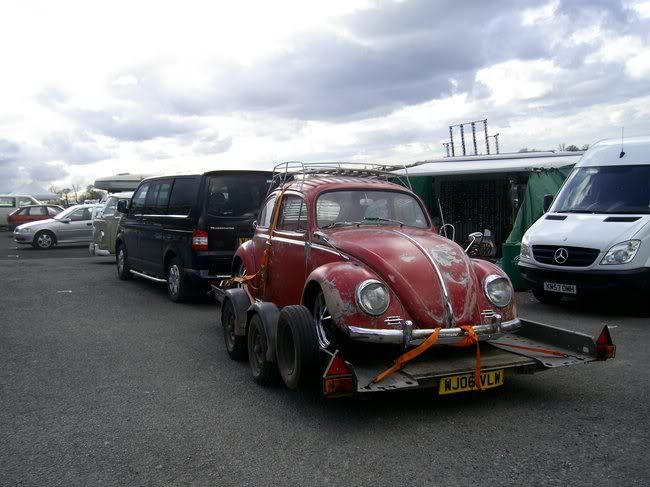
Once she was strapped down and Widget was loaded up, we set off up the A303 to Sandown. We made good time and arrived whilst it was still nice and
light:
Got her off the trailer and gave her a quick bath to remove the spray she'd picked up from the journey. The colour of the sponge made it quite
obvious that we've never washed her - it was black!
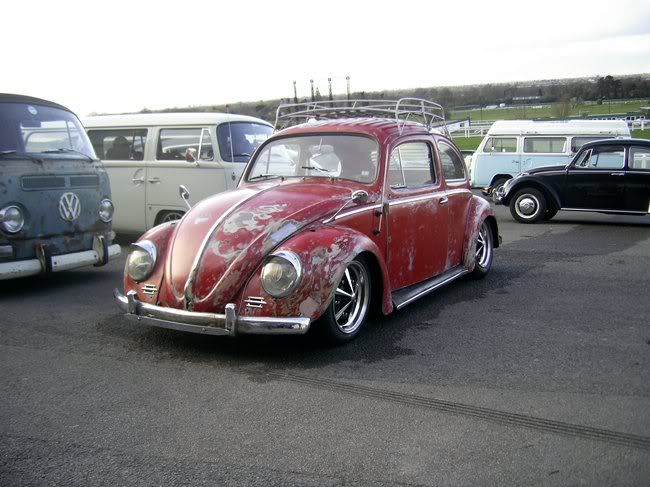
Added a bit of Poorboy's tyre shine and parked her up:
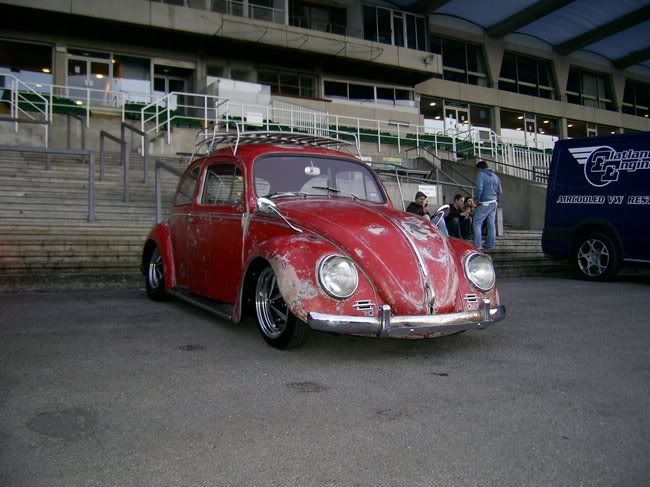
The stand was assembled on Saturday morning, with her sat next to Ben's Country Buggy - wonder if they'd ever met before back in Oz?
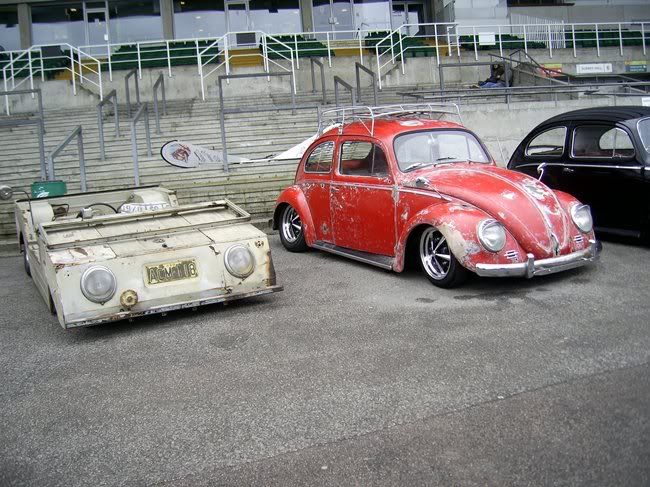
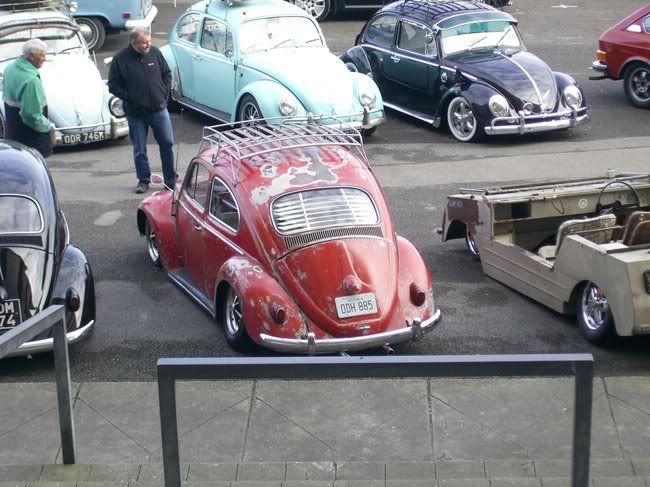
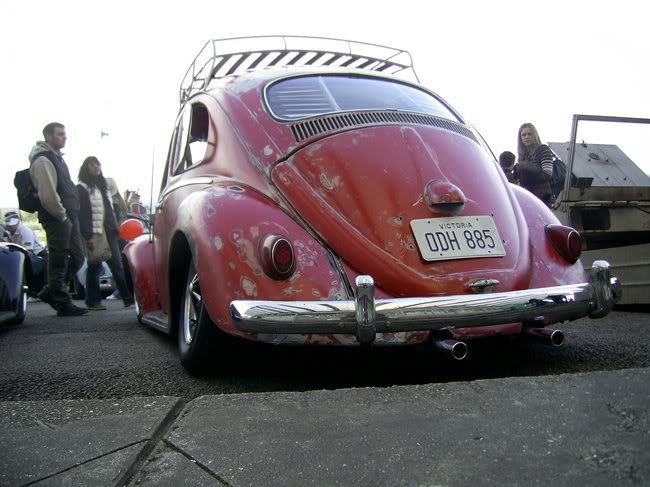
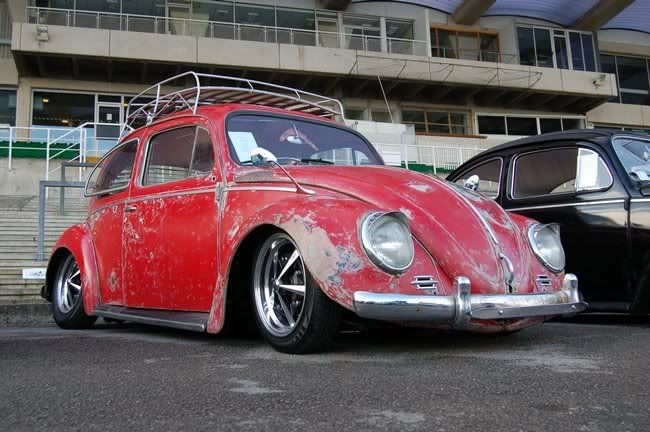
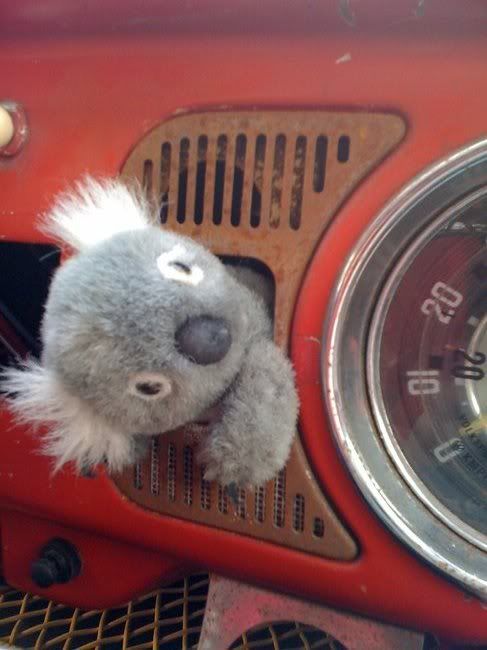
I think she quite enjoyed being at a show - she got lots of people stroking her paint and asking questions about her, and taking pics - which makes a
change from being at home where she's shouted at and kicked!
Still got a few niggles to sort out on her. As anyone who was there when we left on Sunday may have noticed - she won't turn left! Resulting in a 300
point turn trying to get her off the club stand! She also started running quite fast for some reason at this point and wouldn't calm down.... anyway
- a rather hairy ride across the showground, and we were back to the trailer:
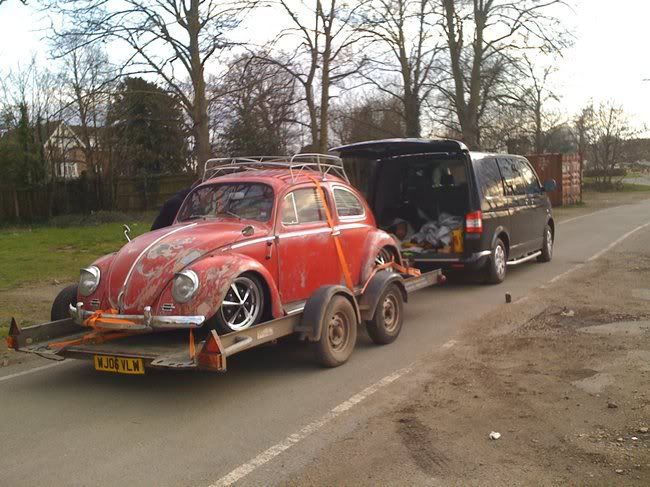
On on our way home. Now, up to this point she'd been very well behaved, and I made the mistake of saying so! So, true to form, when we got home she
decided to act up! Half way through getting her off the trailer she started running very strangely and cut out. She didn't want to start again, so we
ended up having to push her up the road and into the garage. Luckily our neighbour was just getting home at the same time so he helped us push her in.
I'm hoping it's just fuel related, but the weird noise she was making (as if she didn't have an exhaust) is worrying me.
Anyway - thanks to the Restowagen guys for asking us to put her on the stand, we were honoured! Thanks to everyone for their nice comments and hello
to all the new people we met! And thanks to Steve for towing her there and back and putting up with us! 
|
|
|
 M16S VW M16S VW
Commited Dubber
 
Posts: 54
Threads: 3
Registered: August 24th, 2008
Member Is Offline
Theme: UltimaBB Pro Blue ( Default )
|
| posted on April 5th, 2009 at 06:02 AM |
|
|
Righty, running problems she developed coming off the trailer have been sorted!
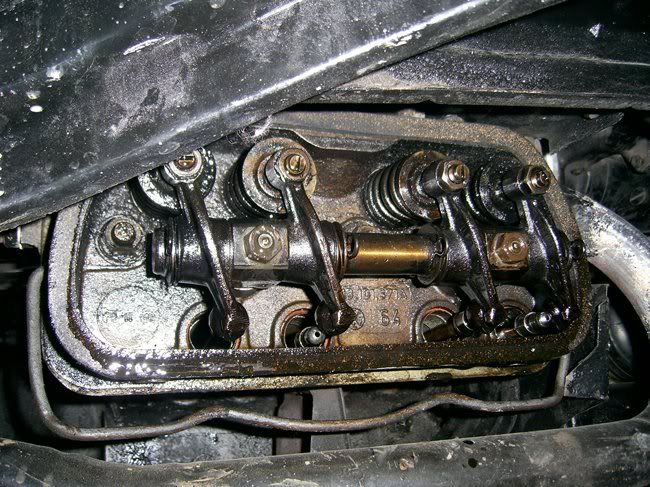
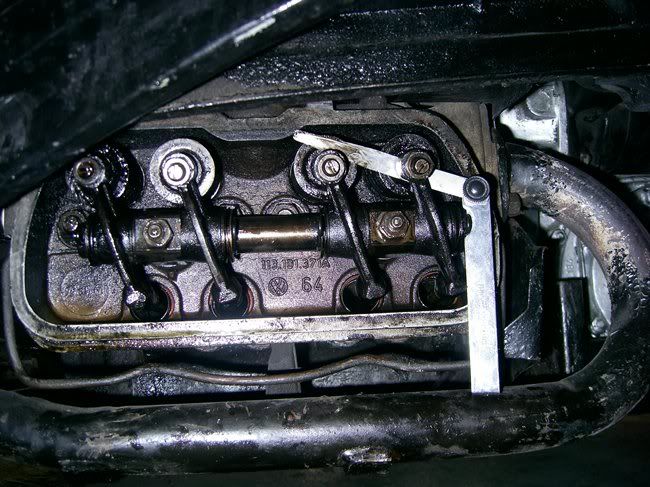
Ooops! The rockers worked loose and 2 of the push rods had escaped. I popped them back in and tightened it all up and hey presto - one fully working
engine again! 
Aaaand..... that's you guys up to date!
|
|
|
 DubbinDan DubbinDan
Officially Full-On Dubber
  
Posts: 211
Threads: 51
Registered: September 6th, 2005
Member Is Offline
Location: Concord NSW
Theme: UltimaBB Pro Blue ( Default )
|
| posted on April 6th, 2009 at 10:56 PM |
|
|
Thanks for the update mate. I saw pics of the car on a thread elsewhere - it's got a real nice stance. Great build up.
|
|
|
 M16S VW M16S VW
Commited Dubber
 
Posts: 54
Threads: 3
Registered: August 24th, 2008
Member Is Offline
Theme: UltimaBB Pro Blue ( Default )
|
| posted on April 7th, 2009 at 06:34 AM |
|
|
Cheers!  yeah she's on quite a few forums lol yeah she's on quite a few forums lol
|
|
|
 twoguns twoguns
Compulsive Aussie Vee Dubber
simply aircooled
      
Posts: 4275
Threads: 226
Registered: November 7th, 2002
Member Is Offline
Location: city, sydney.
Theme: UltimaBB Psyche Grey
Mood: simply cruizin'
|
| posted on April 7th, 2009 at 07:54 AM |
|
|
well saved, and looks like will be well enjoyed! congrats on a job well done.
Simply Cruzin'...
|
|
|
 M16S VW M16S VW
Commited Dubber
 
Posts: 54
Threads: 3
Registered: August 24th, 2008
Member Is Offline
Theme: UltimaBB Pro Blue ( Default )
|
| posted on June 1st, 2009 at 03:43 AM |
|
|
Thanks  I hope I do enjoy her when I finally get her on the road. Last
time I drove her, I got out shaking! I'm hoping my new steering box will fix that though! I hope I do enjoy her when I finally get her on the road. Last
time I drove her, I got out shaking! I'm hoping my new steering box will fix that though!
Given the new box and steering arm a lick of paint. I found some red oxide primer and some VW Tornado Red (I think my old Polo must have been Tornado
Red, otherwise I have no idea where this can of paint came from lol).
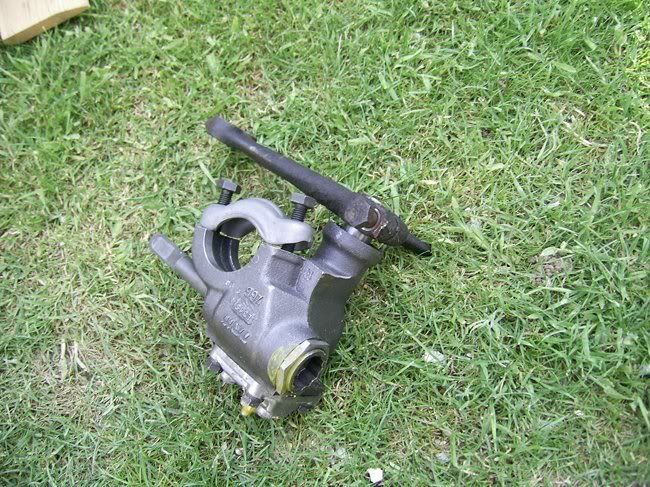
Bit of primer:
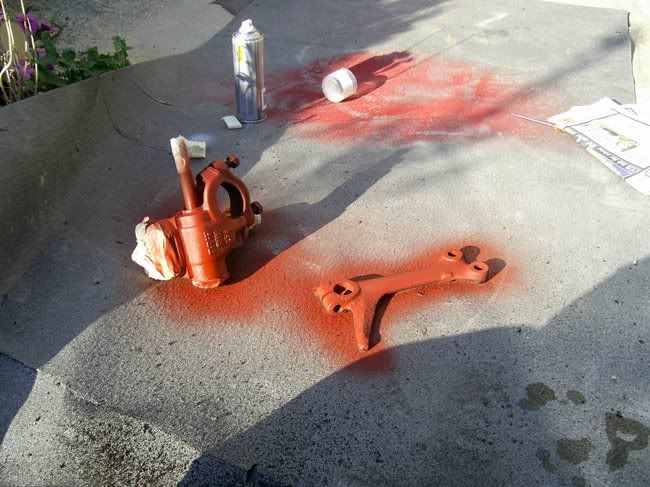
And a bit of paint:
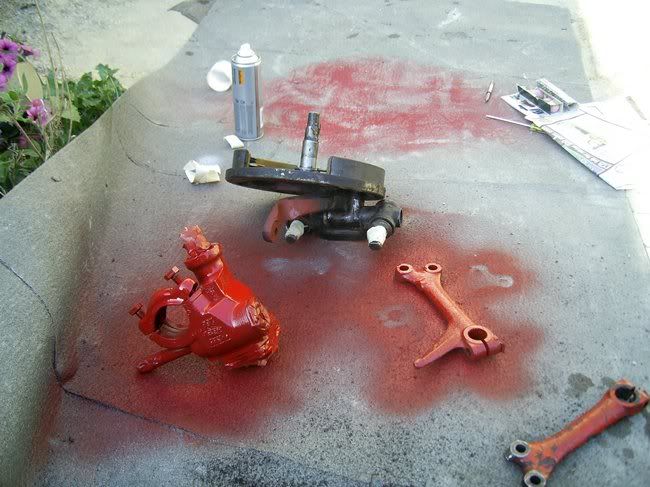
Steve filed down the arm on the dropped spindle whilst I was painting, so I gave that a bit of primer too. Need to find where I've put the black
paint now...
More tomorrow 
|
|
|
 M16S VW M16S VW
Commited Dubber
 
Posts: 54
Threads: 3
Registered: August 24th, 2008
Member Is Offline
Theme: UltimaBB Pro Blue ( Default )
|
| posted on June 5th, 2009 at 09:15 PM |
|
|
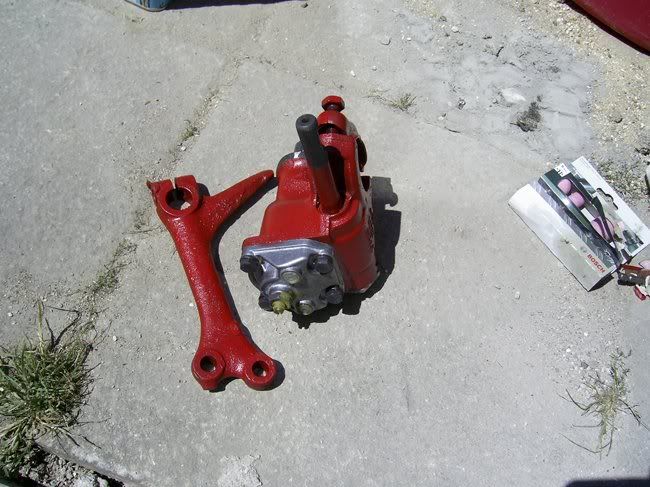
Steering box and arm all painted up and shiny:
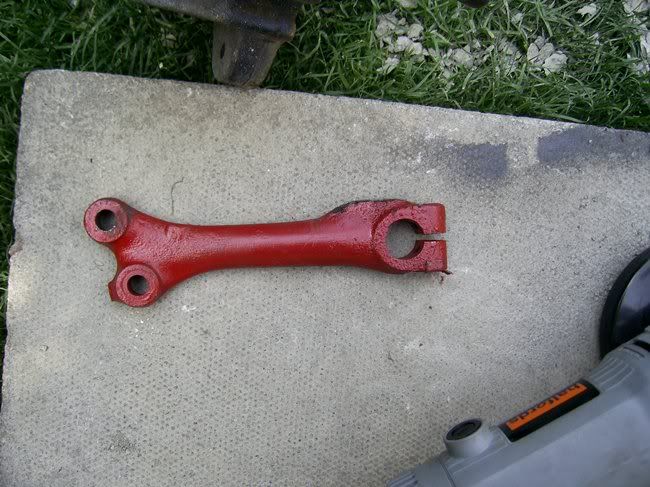
Cut the spike off the arm as it's not needed on a link pin Bug:
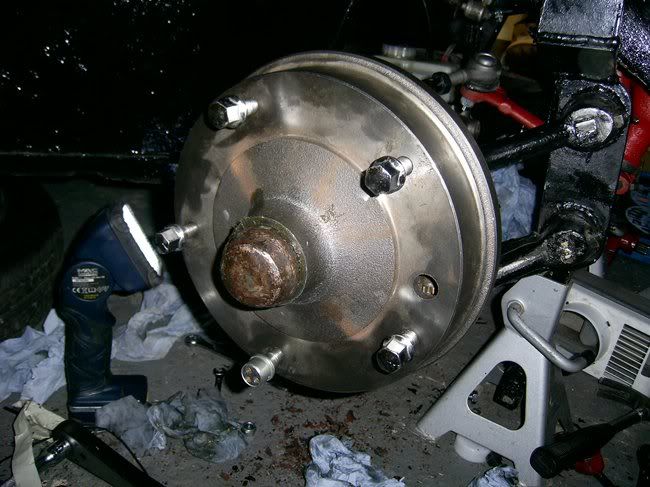
Hub has been refitted:
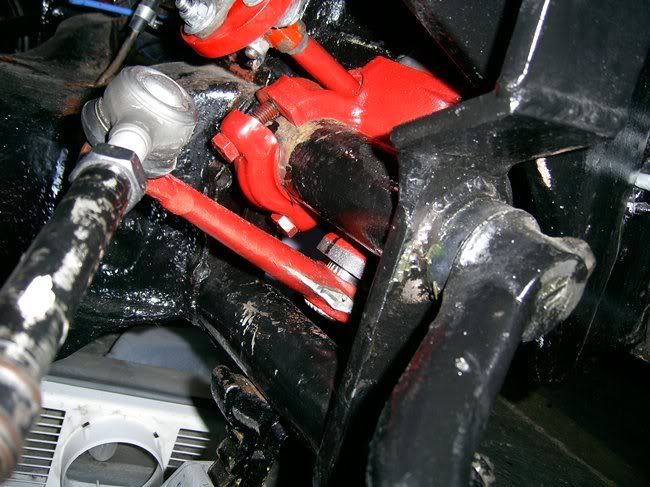
Steering box fitted up:
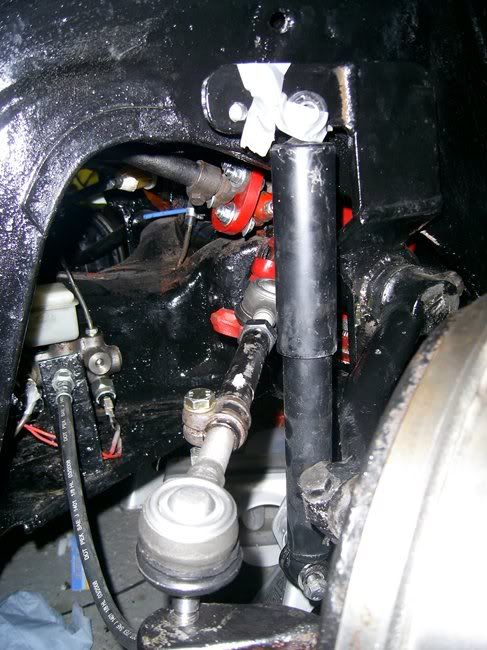
I tried to fit the shock but I noticed that the arm would hit it quite early on. So I need to redrill a hole for the top of the shock. Not a problem.
So I put the steering on full lock and mocked the shock up to where it needs to be - I put it at the point where it just clears the pitman
arm. Then I put some tape on it to show you guys where it would go:
Now need to get some decent drill bits methinks....
|
|
|
 psimitar psimitar
Son of Jim - Creator of Good
     
Posts: 2506
Threads: 148
Registered: January 1st, 2009
Member Is Offline
Location: North East Melbourne, VIC
Theme: UltimaBB Psyche Blue
|
| posted on June 7th, 2009 at 01:02 AM |
|
|
Love her dude 
Surprised I haven't seen her on my old stomping ground of Volkszone. Musta missed her somehow 
madness is in the eye of the beholder  |
|
|
 M16S VW M16S VW
Commited Dubber
 
Posts: 54
Threads: 3
Registered: August 24th, 2008
Member Is Offline
Theme: UltimaBB Pro Blue ( Default )
|
| posted on June 7th, 2009 at 03:32 AM |
|
|
lol, she's had 3 threads on VZi!
|
|
|
 M16S VW M16S VW
Commited Dubber
 
Posts: 54
Threads: 3
Registered: August 24th, 2008
Member Is Offline
Theme: UltimaBB Pro Blue ( Default )
|
| posted on June 22nd, 2009 at 03:31 AM |
|
|
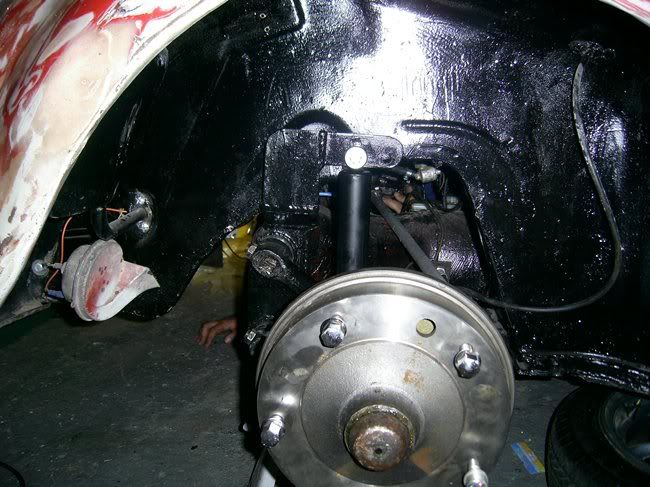
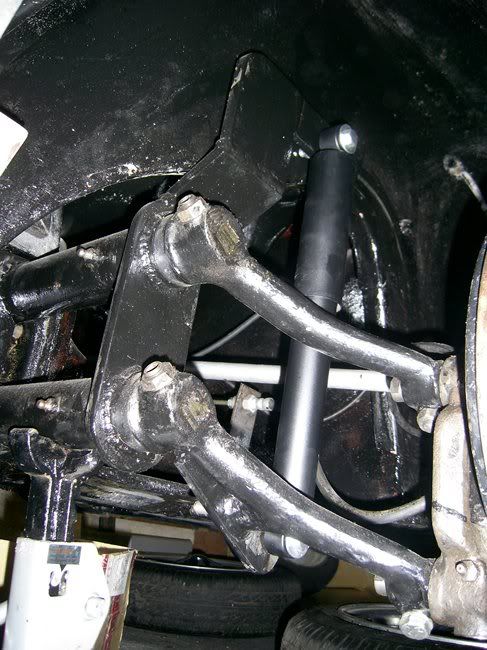
Today we fitted the Mini shocks on Bella. Steve drilled some new holes in the shock tower so that the pitman arm wouldn't hit the shock on full lock.
We were a bit worried about drilling through the tower because it's really thick! But with lots of grinding spray, it wasn't actually too bad!
And I fitted the new pedal rubbers I've had for ages. The brake and the accelerator ones went on easily enough, but I had to soak the one for the
clutch in hot water to get it soft enough to fit!
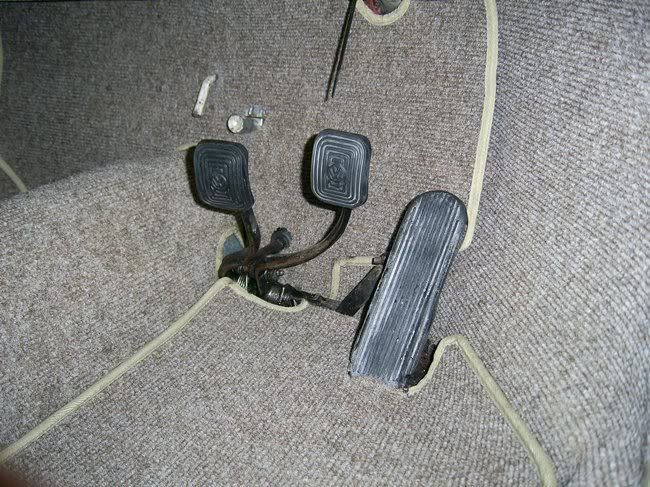
Still, they're on now!
Earlier in the week I attempted to bleed the brakes using my new 'Eezibleed' kit... 3 cartons of brake fluid on the floor later, I admitted defeat!
So a couple of days later Steve gave me a hand and it bled the brakes easily and painlessly. Much easier than the normal way, but you still need 2
people... especially if one of those people, is me! So now they're working and she's pretty much ready to have yet another go at her MOT in a couple
of weeks time. I've just got to check the valves after the Volksworld incident, and get a new positive lead - as the old one looks like this:
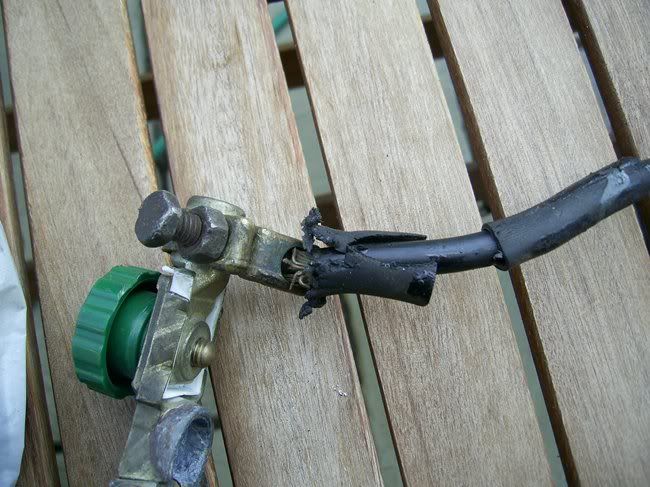
A bit old and broken looking. Plus, it's the last bit of wiring I haven't replaced, so going to be a weak link. I'm also going to wire in a battery
cut off switch as I don't trust her not to spontainiously combust or something.... hopefully I'll get that ordered tomorrow 
|
|
|
 M16S VW M16S VW
Commited Dubber
 
Posts: 54
Threads: 3
Registered: August 24th, 2008
Member Is Offline
Theme: UltimaBB Pro Blue ( Default )
|
| posted on July 6th, 2009 at 04:49 PM |
|
|
New positive cable is now fitted. I also fitted a battery cut off switch for piece of mind as I don't trust her not to spontaniously combust!
Then I adjusted the valves after the Volksworld fiasco...
Due to the badly hacked up rear valance by a previous owner, there's always been a bit of a gap at the back of the rear tinware to the valance in
some places, and no gaps in others. I couldn't fit a normal seal, so I cut down a bay one and shoe horned that in:
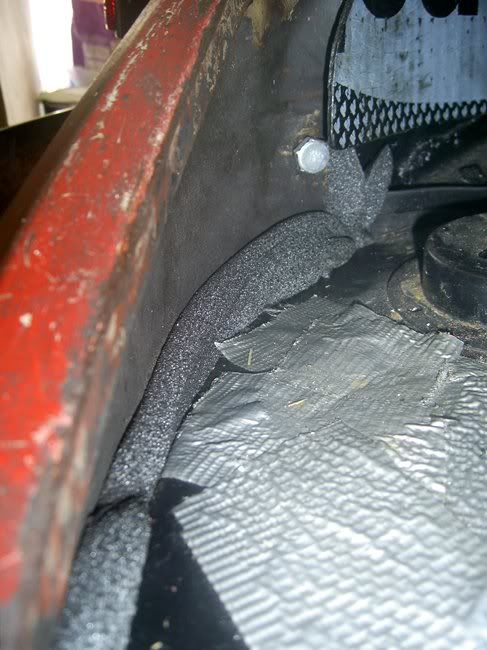
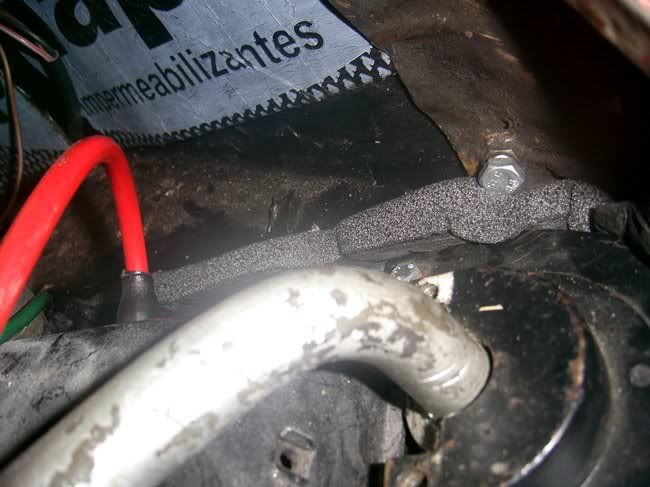
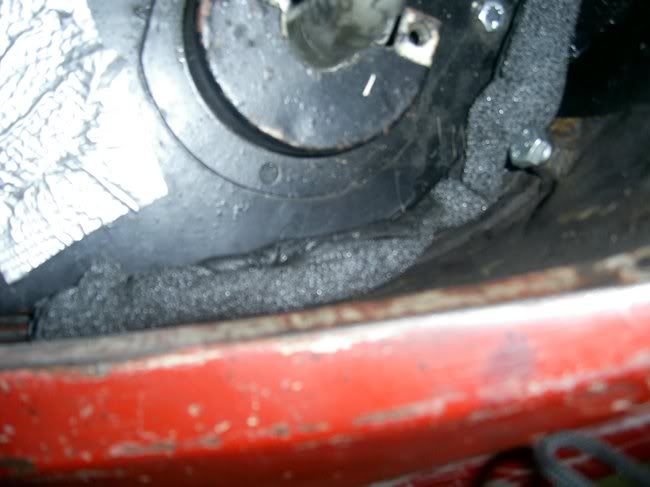
Not ideal, but without fitting a new rear valance, I can't see another way round it.
So then on Thursday, off we trundled to the MOT station. The brakes only seemed to work when you pumped the pedal once, so I asked the garage to give
them a quick bleed, hoping that would solve it, and then MOT her. On the way there she ran fine and drove much better than previous times - new beam
and new steering box have helped a lot! I also managed to get to 4th gear - something I've never done before in her! I'm pleased to say, that it
exists and worked! Woo!
Here she is sat plotting outside the MOT station...
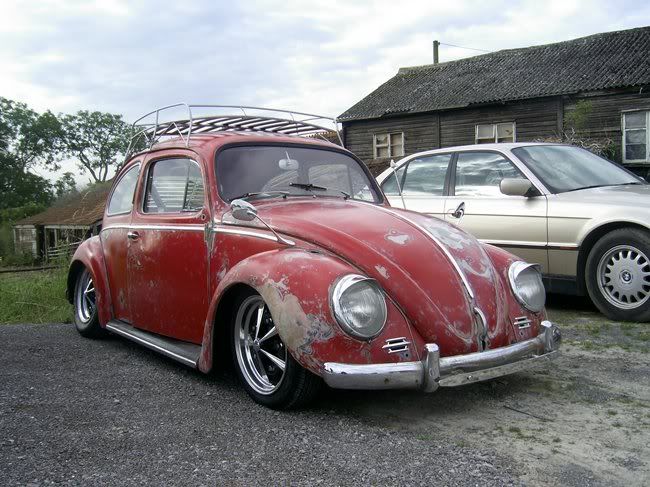
A couple of hours later, the garage rang to say there was a split in the main brake line which goes from the front of the car to the master cylinder,
and back though the interior to the back brakes.... that explains the brake pumping thing then.... so back she came, and we set about the daunting
task of replacing the main line....
Which actually wasn't half as hard as I'd feared! The old one was removed and the new line was fitted..
Front:
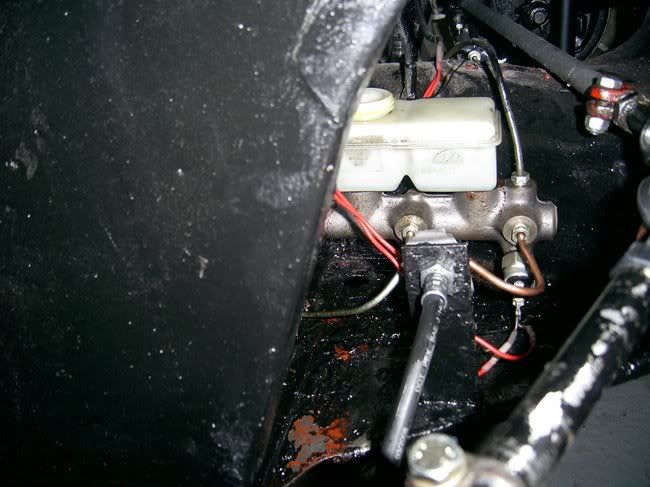
Middle:
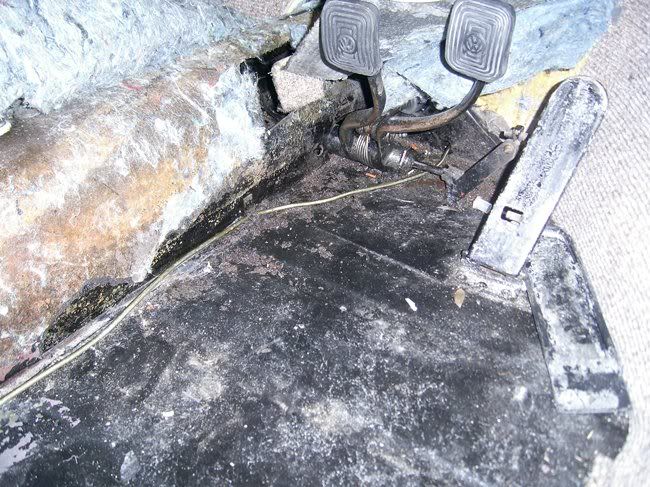
Back:
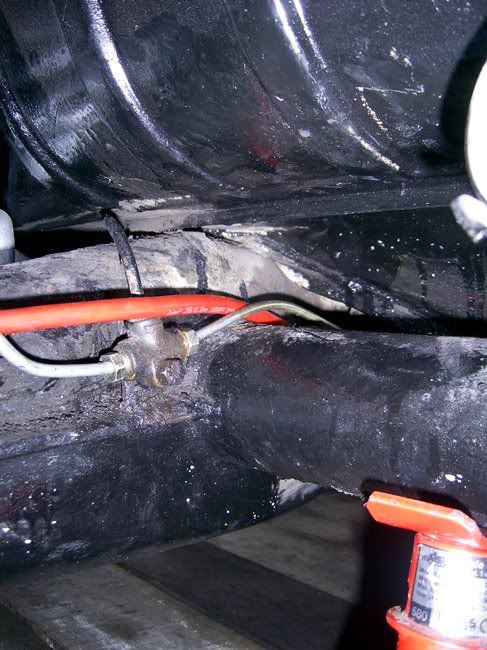
Just need to bleed the brakes again and refit the interior. MOT rebooked for a week on Tues.
|
|
|
 polak polak
A.k.a.: Adam Pawlowski
Fahrvergnugen
Everything is alright with enough Vodka :P
   
Posts: 913
Threads: 49
Registered: May 28th, 2009
Member Is Offline
Location: Campbelltown, NSW
Theme: UltimaBB Pro Blue
Mood: definitely
|
| posted on July 6th, 2009 at 05:14 PM |
|
|
wicked looking car, love the wheels, been thinking about a set of those for a while..... they look brilliant on any style car, but the best me thinks
on a slammed bug...  

VW - helping put oil back into the ground for over 60 years |
|
|
 M16S VW M16S VW
Commited Dubber
 
Posts: 54
Threads: 3
Registered: August 24th, 2008
Member Is Offline
Theme: UltimaBB Pro Blue ( Default )
|
| posted on July 6th, 2009 at 05:16 PM |
|
|
Cheers fella! Go for it - they're ace wheels! They look awesome moving too!
|
|
|
 foxy_fuchsia foxy_fuchsia
Insano Dub Head
   
Posts: 803
Threads: 110
Registered: March 5th, 2005
Member Is Offline
Theme: UltimaBB Pro Blue ( Default )
|
| posted on July 6th, 2009 at 07:11 PM |
|
|
Wow I'm impressed, alot of hard work but it's definately worth it and so rewarding. She's looking awesome!
|
|
|
 M16S VW M16S VW
Commited Dubber
 
Posts: 54
Threads: 3
Registered: August 24th, 2008
Member Is Offline
Theme: UltimaBB Pro Blue ( Default )
|
| posted on July 7th, 2009 at 07:01 AM |
|
|
Thank you 
|
|
|
 cam070 cam070
Custom Title Time!
    
Posts: 1332
Threads: 53
Registered: July 25th, 2009
Member Is Offline
Location: Sydney
Theme: UltimaBB Pro Blue ( Default )
Mood: Getting hands dirty stripping the bug down
|
| posted on August 8th, 2009 at 12:11 AM |
|
|
Epic build, keep it coming. Makes a great read.
|
|
|
 M16S VW M16S VW
Commited Dubber
 
Posts: 54
Threads: 3
Registered: August 24th, 2008
Member Is Offline
Theme: UltimaBB Pro Blue ( Default )
|
| posted on December 5th, 2009 at 04:52 AM |
|
|
A lot has happened with Bella since I last updated this thread... here's what happened!
The news from the MOT I was preparing her for was this:
I have a lovely new list of fails - nothing major though.
Need to look at the brakes again - they work fine, but the pedal has insufficident reserve movement.... I'm gonna try bleeding them again to see if I
can build up more pressure.
The seat belt top bolt has half undone itself between last time (Jan) and now. Dunno how that happened, but easy fix.
Couple of track rod ends need tightening up - easy fix.
Steering retaining device insecure..... I have no idea what this means... I'll ask Steve as he was there when it was explained. Steve seems to think
it's the pitman arm to steering box bolt, so I shall have a looksie at that.
One of the rear brake hose clip things has come off - no idea how this happened! But easy fix.
Also there was brake fluid over the rear backing plates - this is most likely from when we bled them and the pipe kept falling off and the fluid went
everywhere - just a clean up needed.
So nothing major. Few bolts to tighten, stuff to clean and brakes to bleed. Booked in for a week on monday.
A few weeks ago I officially admitted defeat with Bella. I'm sick of her failing MOTs and taking stuff apart over and over again - so I've booked
her into the garage for them to do it instead.
In the meantime, I've been messing about with the pedals. The problems were the brake pedal - it failed the MOT on insufficient reserve movement - so
I wanted to remove it and set the rush rod to factory length as the pedals have been removed in the past and I couldn't be sure if it was the right
length still.
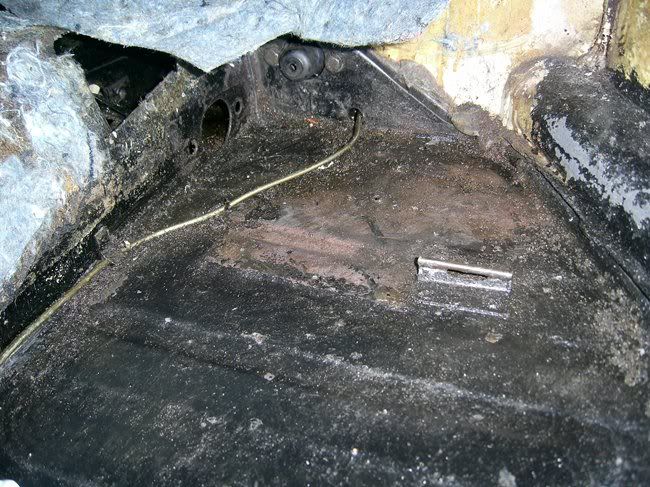
The next problem was that 'Bodger Bruce' had been working his magic on the accelerator pedal. At some point, it appears that the hinge has broken at
some point, so Bruce decided to pop rivet another one on - infront of the original one. He also decided to pop rivet in a brackety thing, and a giant
plate to hold that down.... he popped the bolts which hold the other end of the accelerator linkage from the passenger side tunnel in the glove box
and forgot about them it seems.
So here's how it was:
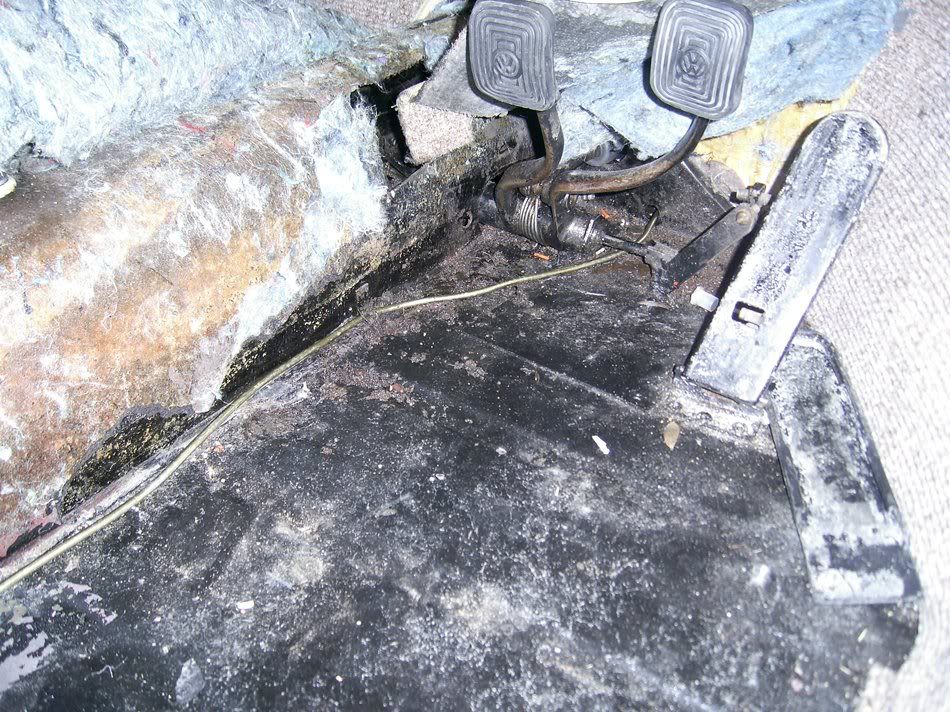
You can just see the brackety thing. All this meant that you could only press the pedal down 1cm - which left you with the choice of leaving the cable
normally at the carb and only getting to 1/2 throttle when you put your foot down, or pulling the cable through the carb and having 1/2 throttle at
idle, and full throttle when you put your foot down. As you can imagine - not ideal.
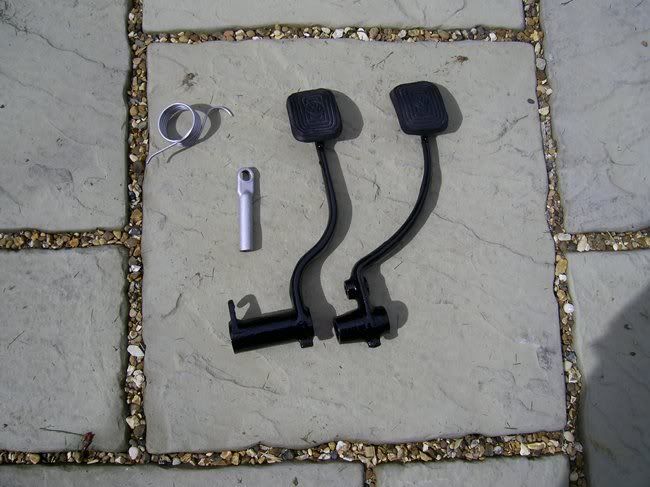
So with the pedals removed, you can see the new hinge plate, brackety thing and plate...
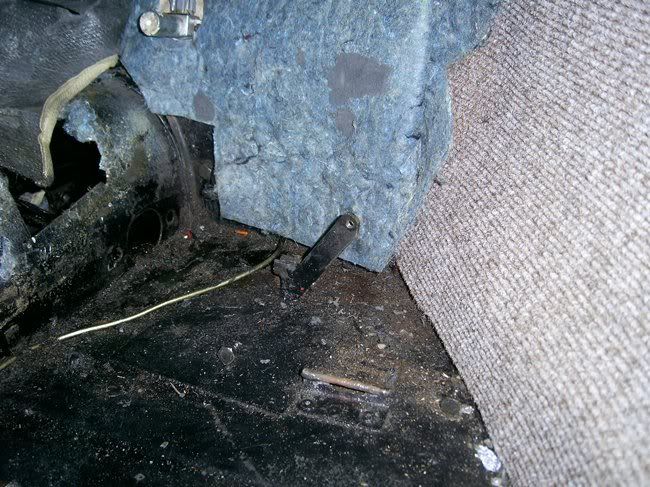
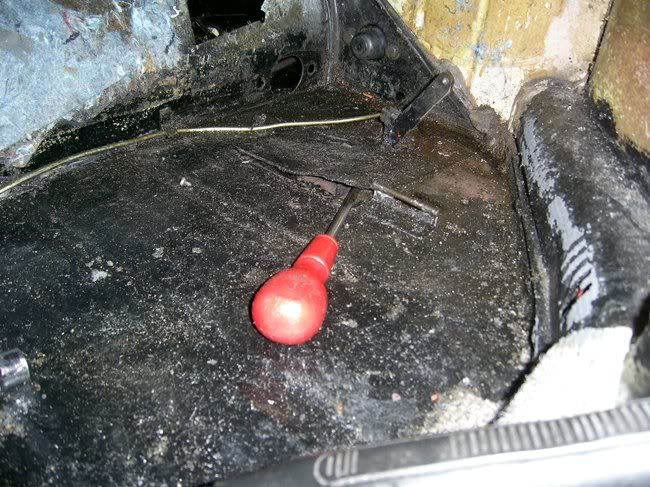
Removed:
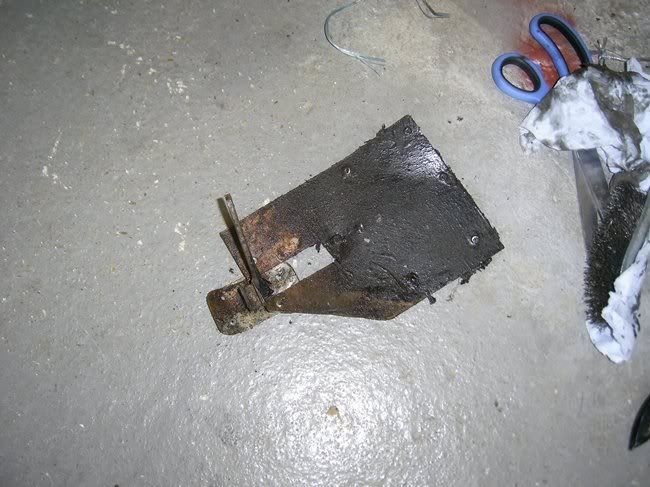
Thankfully no hidden nasties:
Painted - shiny shiny!
So new hinge fitted, new pedal, spring, everything bolted in this time, and volia:
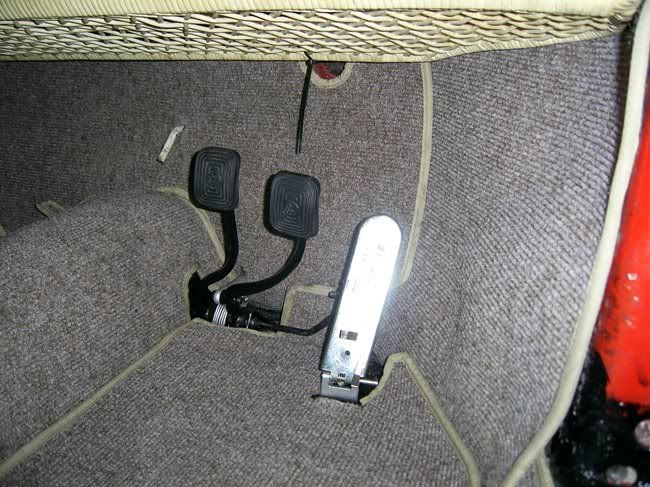
One working accelerator pedal - got lots of lovely movement so I can get full throttle when I want to, then go down to idle at traffic lights etc.
Just got to fix the semaphores - think it's just a fuse, but haven't checked yet as the battery is on charge, before she goes up to the garage
again. Hopefully this time she will come back with a shiny pass certificate!
Not getting my hopes up though, cos I know what she's like....
|
|
|
 M16S VW M16S VW
Commited Dubber
 
Posts: 54
Threads: 3
Registered: August 24th, 2008
Member Is Offline
Theme: UltimaBB Pro Blue ( Default )
|
| posted on December 5th, 2009 at 04:54 AM |
|
|
Semaphores fixed - it was indeed the fuse.
I've also got a new driver's seat base for Bella. The old one had dodgy runners, which meant the only place it locked into place was too far from
the pedals for me to reach them, so I had to sit on the edge of the seat and hold onto the wheel for balance, or risk the seat flying backwards when I
accelerated (keeping in mind she only has a 1200!), which isn't a great experiance..... plus the padding was worn so that I ended up leaning against
the door all the time...
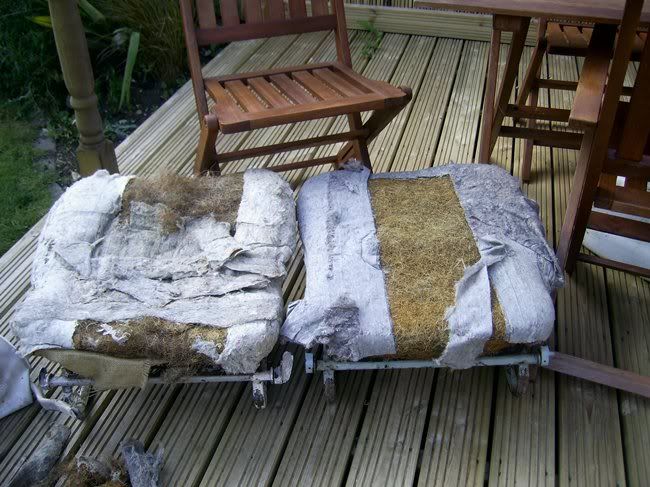
So I got a base from VW Garden in good condition. Today I set about swapping the covers over.
Before:
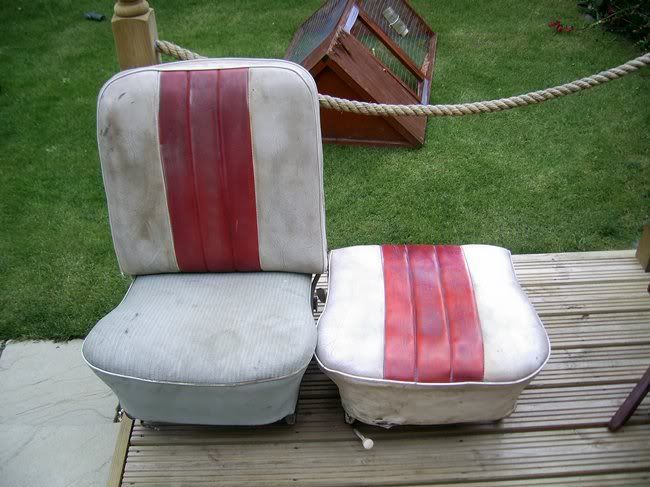
During - guess which is which!
And finished:
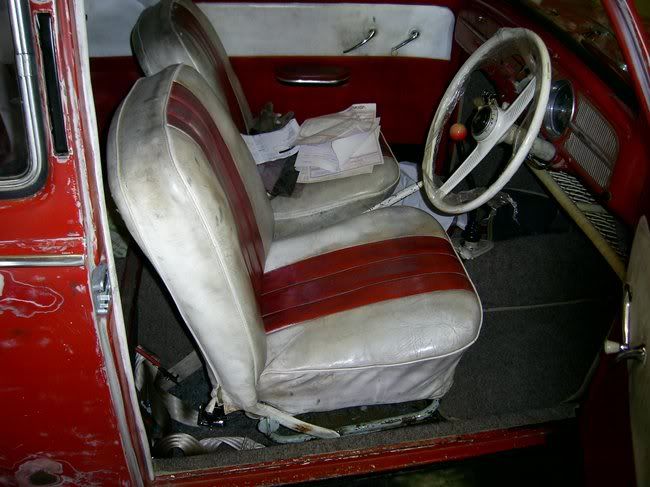
Much more comfortable - I can reach all the pedals easily and I'm not leaning on the door.
Connected her battery and started her up. New accelerator pedal is working lovely - I now have use of the choke and full range of the throttle. Much
better!
A couple weeks ago she went off to the garage for tracking and MOT. They set up the brakes for me as they were unbalanced and the pedal had no reserve
movement. Now her brakes feel pretty sharp and the pedal feels nice and firm. As usual in the world of Bella, she was naughty! This time she decided
she didn't want to turn left. She didn't mind going right, or straight ahead, but when you turned the wheels left, one went to full lock and the
other didn't:
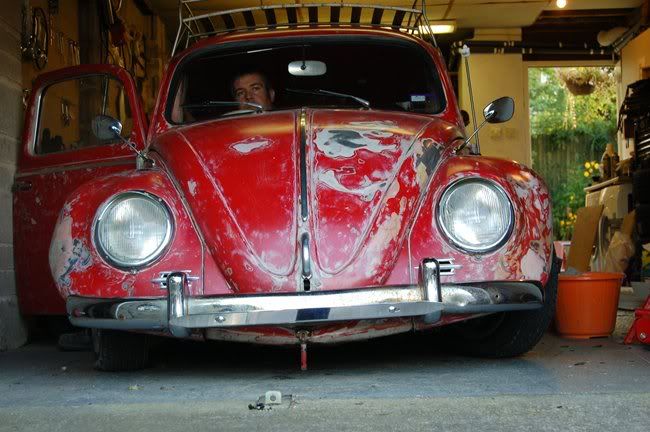
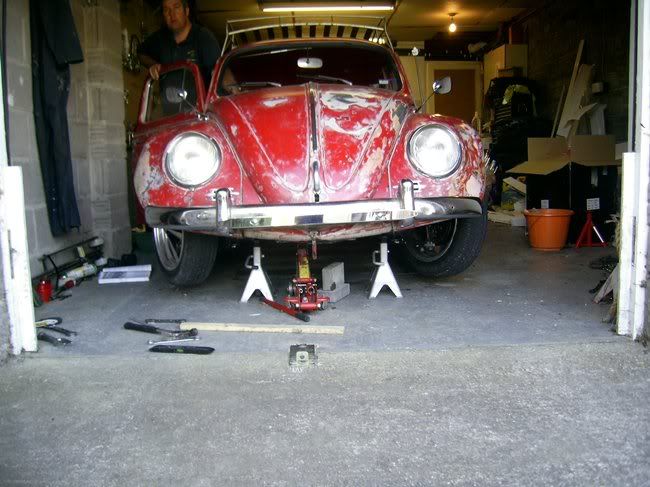
So back home she came and I pulled the track rods apart again - the steering box wasn't quite centered, so the short rod was hitting the shock and
hence not turning all the way. So a bit of fiddling later, and voila!
Much better!
I've had a couple of days off work this week, so I set about doing some 'nice' jobs on her. On Wednesday afternoon I decided to look at why she
wasn't charging. The red light didn't come on, so that was the first thing I looked at. No bulb - that's why!
Now the red light is on constantly - perhaps why the bulb was missing  So
I looked at the wiring on the dynamo - wrong way round - oops! Once that was switched round the red light went out on starting So
I looked at the wiring on the dynamo - wrong way round - oops! Once that was switched round the red light went out on starting  another problem fixed! another problem fixed!
Next I took her outside onto the drive to sit in the sun for a bit whilst I played with the carb tuning - she was idling nicely and then decided to
cut out. I then decided to leave the engine for a while and look at the bonnet.
When I got her she had a random thing to hold down her bonnet:
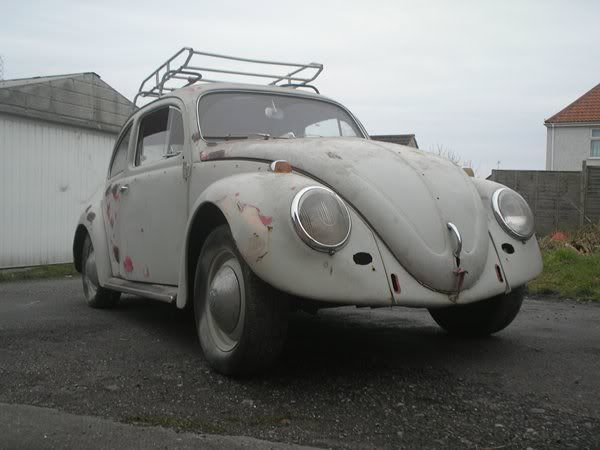
But when I bought her back from the garage last time, I kinda forgot and it kinda got mangled! So I set about getting her bonnet to lock as it should
do. I'd got some 2nd hand lock parts ages ago and they were fitted, but just needed adjustment. A few mins later the bonnet was locking properly and
popping open as it should.
Ever since I've had her, the windows haven't gone up and down very well, or hardly at all. So I removed the door card off the passenger side and
removed the winder mechanism:
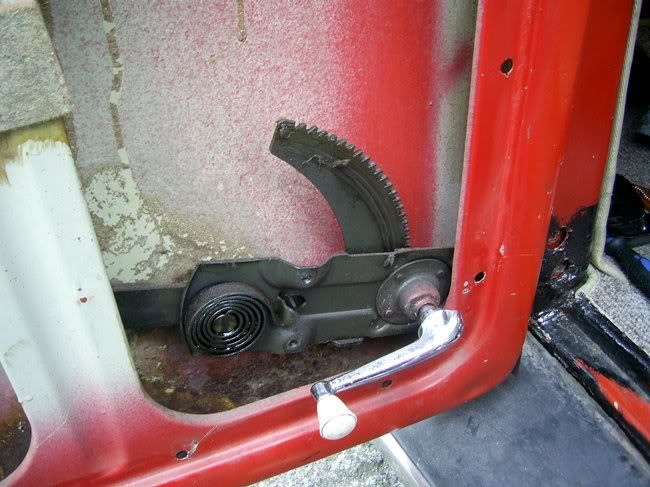
Greased it all up and the runners and put it back together again - goes up and down nicely now!  By this time I'd got bored of playing with her, so just greased the runners on the driver's side (which made that one go
up and down nicely) and hopped in her to reverse her back in the garage. By this time I'd got bored of playing with her, so just greased the runners on the driver's side (which made that one go
up and down nicely) and hopped in her to reverse her back in the garage.
Now, I should have been suspicious that everything had gone really well...... can you guess what happened next? Yep, she didn't want to start  I swapped the fuel tap over to the reserve and she still
didn't want to know. So I had to wait for Steve to come home from work (she likes Steve!). He went to fetch more fuel. Still didn't start... so
jumped her and she did - not suprising really considering she hasn't been charging herself. I swapped the fuel tap over to the reserve and she still
didn't want to know. So I had to wait for Steve to come home from work (she likes Steve!). He went to fetch more fuel. Still didn't start... so
jumped her and she did - not suprising really considering she hasn't been charging herself.
This is a bit of a boring pic.... but here's the window wound down:
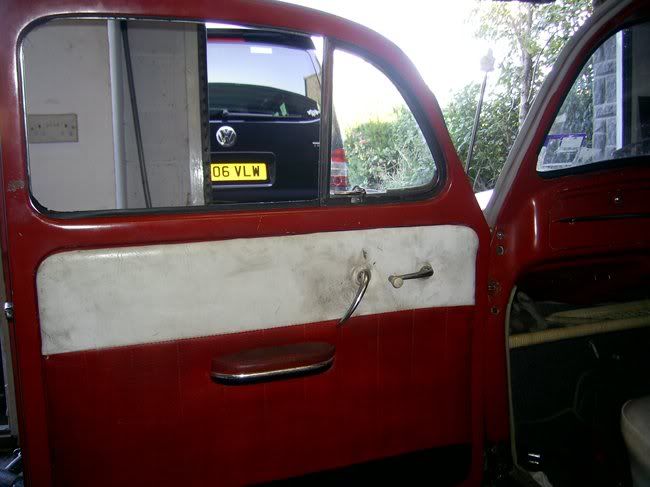
Fast forward to today. Her windscreen washer was always been a bit dodgy. One of the jets washed the screen, whilst the other washed the roof and the
car behind  It wouldn't click into the hole in the scuttle so the
angle was all wrong, meaning you couldn't adjust it to get both jets on the screen. Today in Halfords I picked up some new washer tube and a new twin
jet. It wouldn't click into the hole in the scuttle so the
angle was all wrong, meaning you couldn't adjust it to get both jets on the screen. Today in Halfords I picked up some new washer tube and a new twin
jet.
Old one:
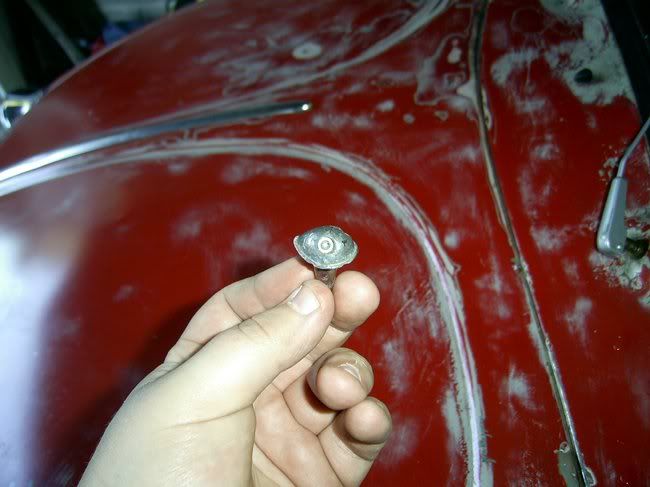
New one:
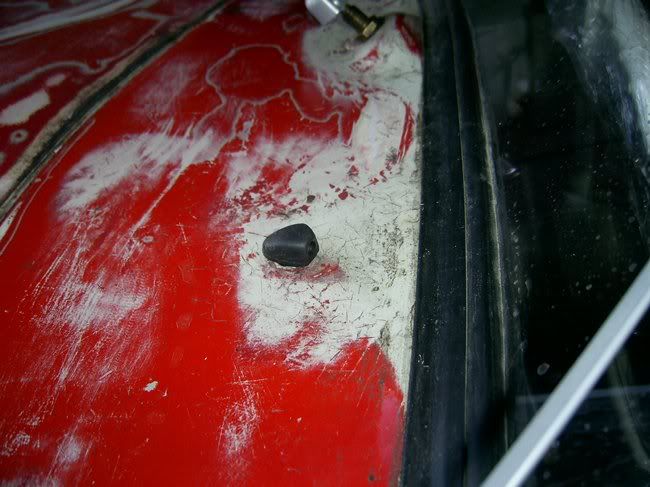
Bolted it into the scuttle and connected the new water pipe I'd bought. Then set about getting it set up correctly so both jets hit the screen.
You can guess what's coming next, can't you? Yep - I put my arm through the window to press the button to wash the screen and got a rather wet face
:o after a few minutes of faffing about with adjusting the jets and getting a wet face a few more times, I finally got them both pointing at the
screen!
I was quite getting into these nice little fiddly jobs, so I thought I'd takle the under bonnet wiring. It's all a bit off a mess because my
supposed RHD loom, was infact a LHD one... but I couldn't be bothered to remove it and send it back, besides I'd already altered a load of wires
anyway.
So, before it looked like this:
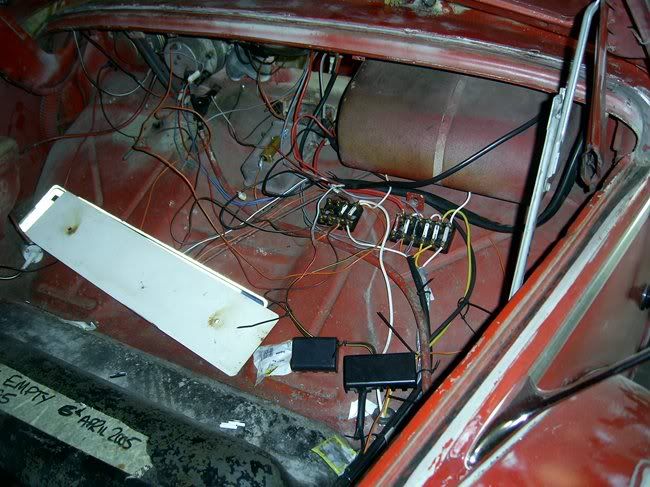
and after:
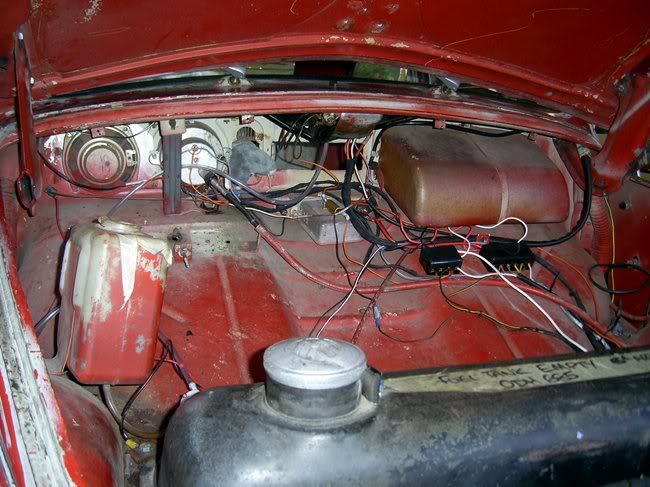
I've still got a load of wires to shorted and tidy up, but it's getting there 
So she's off again to the garage for tracking and yet another MOT attempt - fingers crossed please! Technically all the things she failed on last
time have been fixed - but this is Bella!
|
|
|
 M16S VW M16S VW
Commited Dubber
 
Posts: 54
Threads: 3
Registered: August 24th, 2008
Member Is Offline
Theme: UltimaBB Pro Blue ( Default )
|
| posted on December 5th, 2009 at 04:57 AM |
|
|
*ahem*
.
.
.
.
.
.
.
.
.
.
.
.
.
.
.
.
.
.
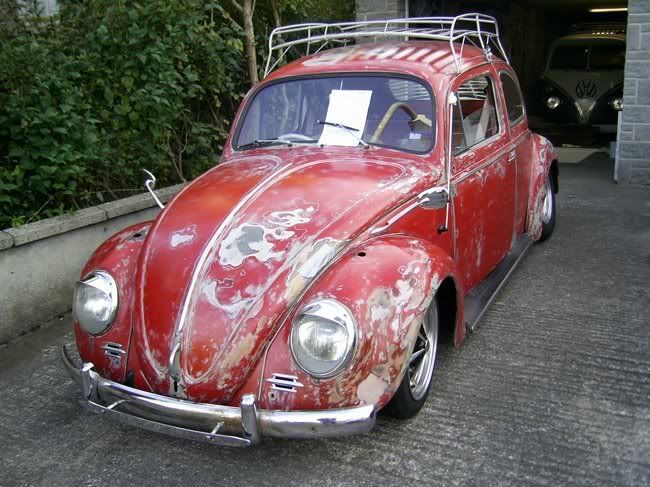
  yep that's a green one - she's finally passed her MOT!!!!! yep that's a green one - she's finally passed her MOT!!!!!   
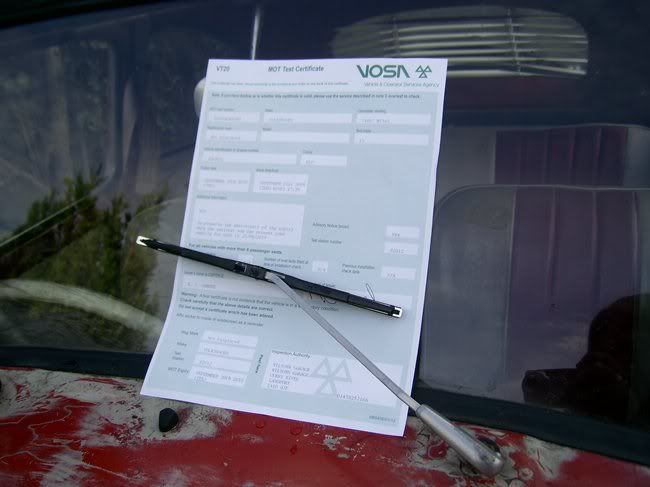
Thanks to the guys at the garage for getting her through and letting me be there with her.
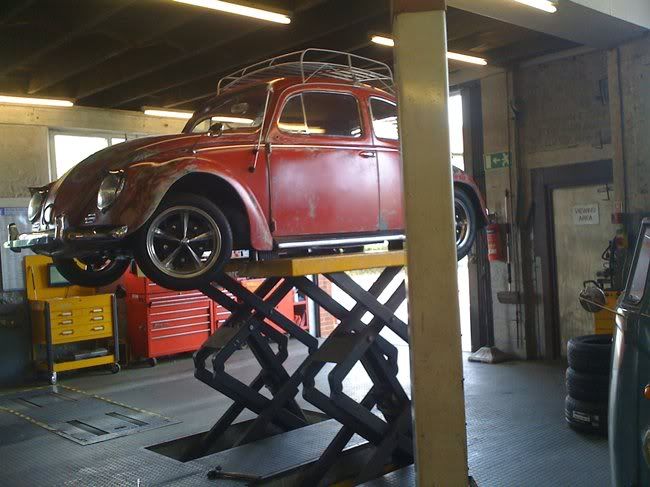
I went down this afternoon to help with her tracking. Sorry for the bad pics - I took my camera but forgot to put batterys in it, so the phone had to
do:
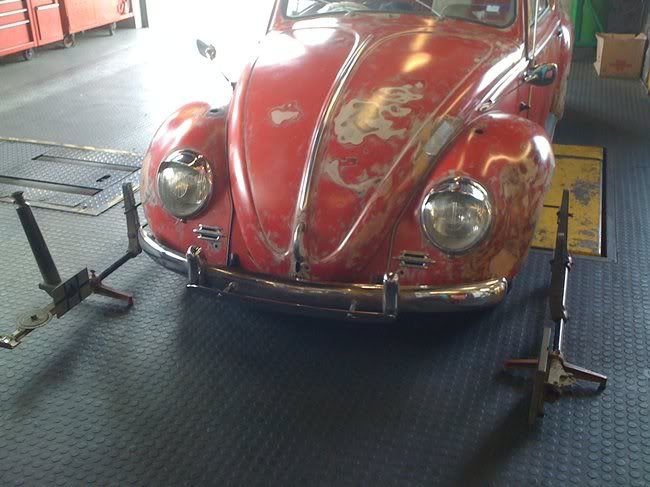
Pretty spot on:
Then she went over to the MOT bay:
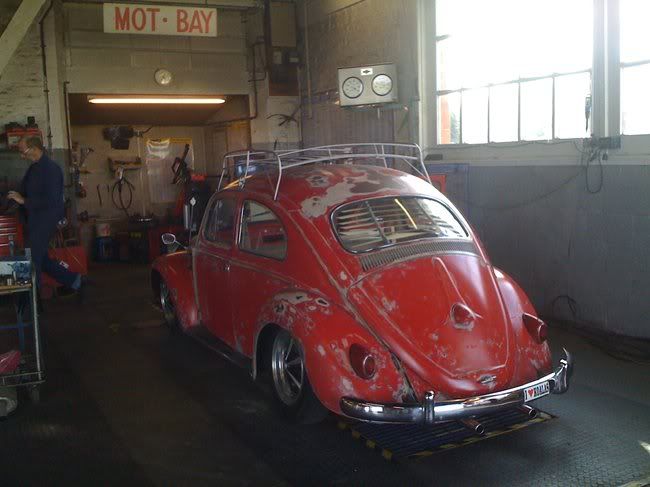
Got poked and prodded, then brake tested:
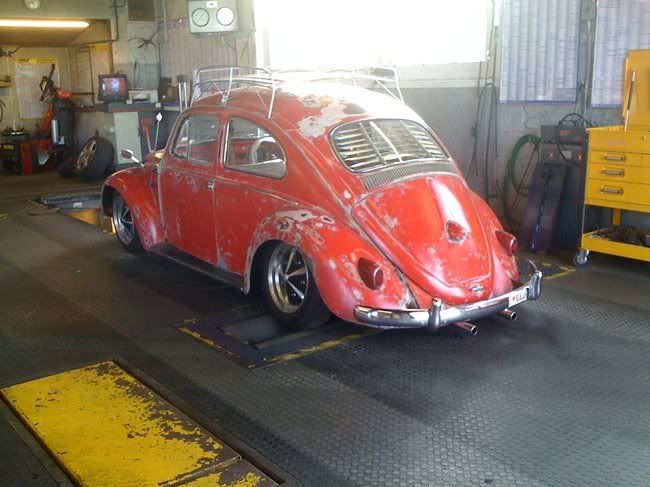
I'm very, very happy! It's not quite sunk in yet I don't think! Going to pop up to Bristol to register her this week. Knowing my luck they'll want
to inspect her and the process will drag on for ages - but never mind, I've got all winter to do that.
|
|
|
 M16S VW M16S VW
Commited Dubber
 
Posts: 54
Threads: 3
Registered: August 24th, 2008
Member Is Offline
Theme: UltimaBB Pro Blue ( Default )
|
| posted on December 5th, 2009 at 04:58 AM |
|
|
Ok, over the last couple of weeks I've been trying to build up my confidence with Bella over a few short runs. The first time I took her out, we did
about 10 miles. I was very impressed with her ride quality. I thought it might be harsh and crashy, but she's actually really
comfortable and smooth! What wasn't comfortable and smooth was the engine! There was a bit of popping and backfiring and a serious lack of power in
4th, especially if there was a slight incline! So Moby advised a change of dizzy.
New dizzy arrived and I fitted it this week. On Friday I thought I'd take her down to the petrol station and pump her tyres all up to the right
pressures. I got about 30 metres down the road and cough, bang, splat.... nothing.... oh goodie.... so I wandered back up to the garage and came back
armed with some tools. Turns out the dizzy wasn't seated down far enough. I was trying to get it seated right (along with a man from over the road
who'd come out to see if I needed help), and for about 20 mins nothing was working. No matter what position the engine was in, or how hard I pushed
on it, it wouldn't go! That was, untill Steve drove up the road on his way home. He put the window down on his T5 and looked at us, and 'clunk' in
it went! That will teach me to try and take her out without Steve being present. She loves Steve!
Anyway - onto today. After I finished work we took her out to take some nice piccys of her 
This time she ran absolutely perfectly. No backfires, popping, or a missed beat. She pulled away out of junctions at the pace of a normal car and on
the hill which I had to go down to 2nd on last time, she flew up in 4th 
Anyways - here's the pics:
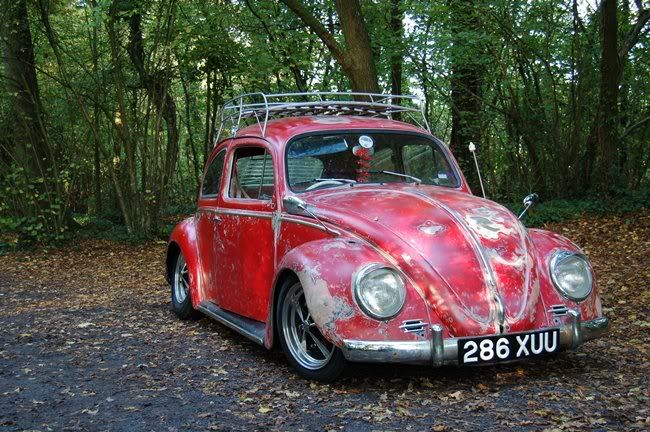
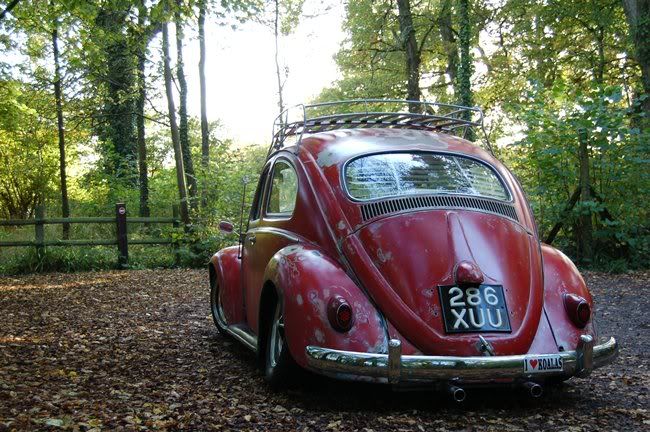
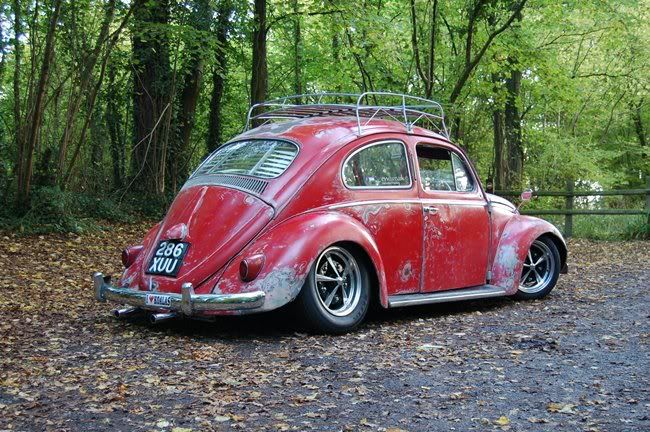
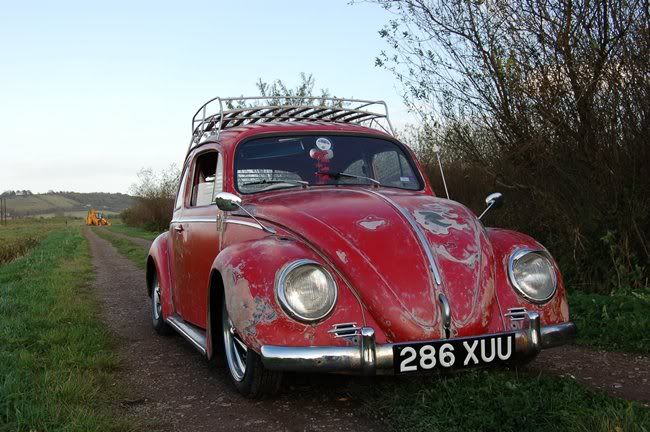
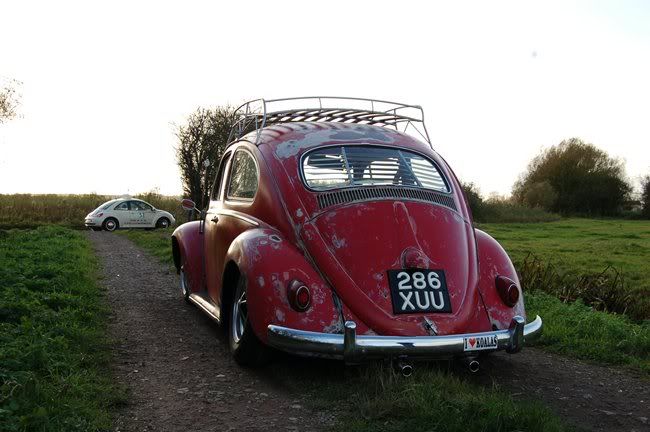
I'm starting to build my confidence with her quite nicely now. I did another 8 or so miles in her today and go up to 55mph with plenty of 'oomph'
left in the tank 
|
|
|
 M16S VW M16S VW
Commited Dubber
 
Posts: 54
Threads: 3
Registered: August 24th, 2008
Member Is Offline
Theme: UltimaBB Pro Blue ( Default )
|
| posted on December 5th, 2009 at 04:59 AM |
|
|
I've driven Bella a few times now (and even without a support vehicle following her!) and she's running very nicely. The longest journey she's been
on so far is to Taunton and back - which is about 12 miles each way. The hole for the stereo has made her quite breezy to be in - so I looked around
for what I could use to fill the gap.... what better but some ratties?!
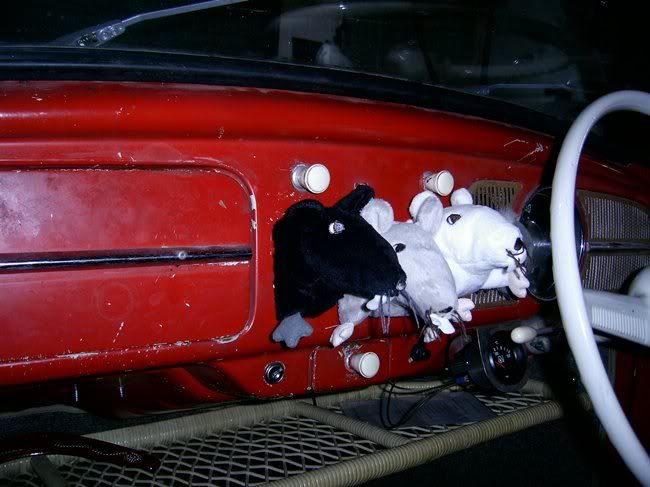

Now that it's got colder and the roads are dirtier, I've tucked her up in the garage. We've managed to get her and Joey in side by side:


Which means there's lots of room to work in at the back.
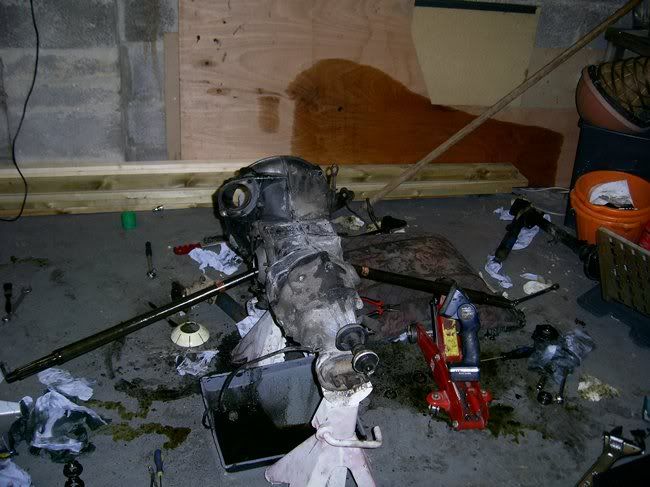
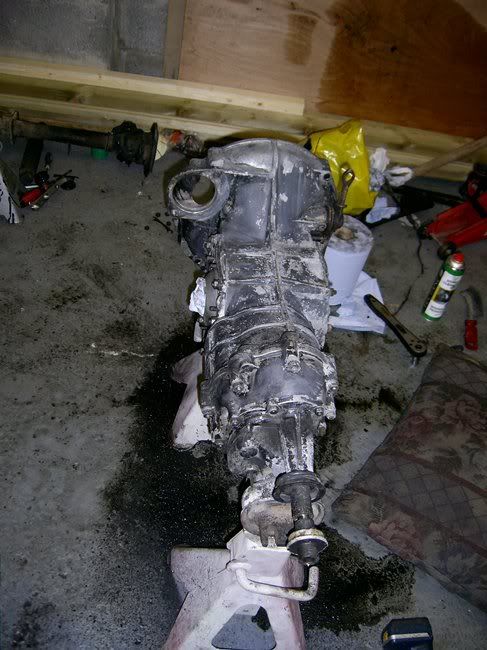
And I've come to the conclusion that a new gearbox was needed. I looked around for an age related one, but couldn't find one within a reasonable
distance. A 72 1300 gearbox came up locally on ebay, and I won it (thanks Opal). To fit it to Bella I need to remove the 'long' axels which are on
it, and fit the 'short' ones she already has. I also need a Splitty nosecone and hockey stick, so I shall be looking for one of those. M7 list them
but they don't have them in stock at the moment and don't know when they're likely to, so I'll probably have to get one from America instead.
Anyway - here is the new box:
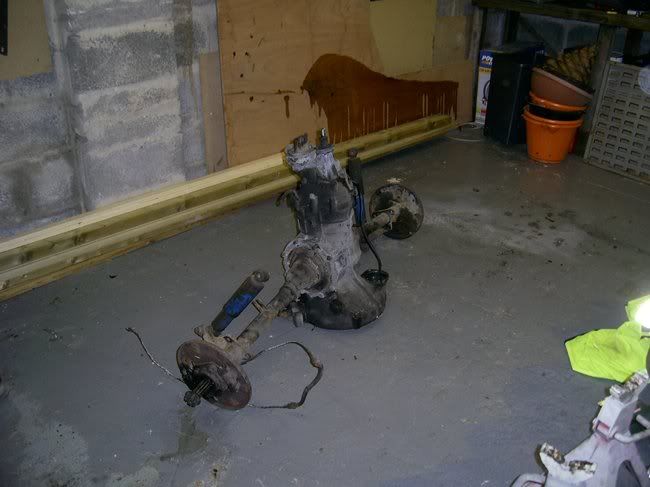
Oil drained and axel tubes removed:
Axels out and cleaned up:
And the top half is now nice and shiny!
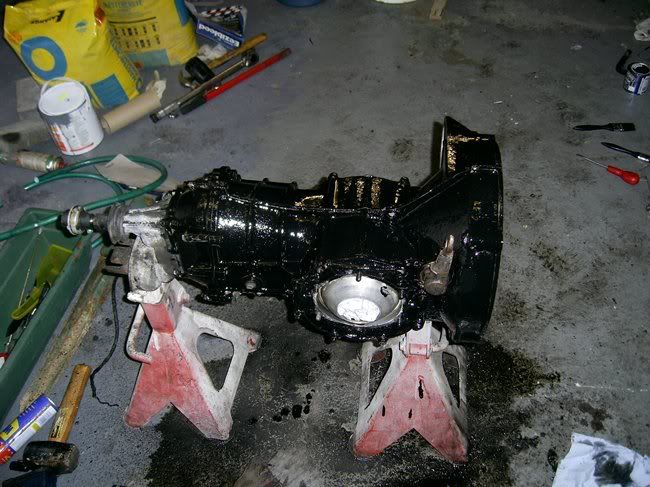
Gotta wait for that to dry, and then I can clean the underside up and give that a coat of paint too.
And that's up to December 2009. Hopefully I'll get time soon to remove the engine and gearbox and get the new one fitted.
|
|
|
 valdur valdur
A.k.a.: Martin
Learner Dubber

Posts: 7
Threads: 2
Registered: December 16th, 2009
Member Is Offline
Theme: UltimaBB Pro Blue ( Default )
|
| posted on December 16th, 2009 at 07:20 AM |
|
|
Very nice!
|
|
|
 M16S VW M16S VW
Commited Dubber
 
Posts: 54
Threads: 3
Registered: August 24th, 2008
Member Is Offline
Theme: UltimaBB Pro Blue ( Default )
|
| posted on January 9th, 2010 at 03:00 AM |
|
|
Thanks!
Bella has mostly been sleeping since I last took her out, but on new year's day we took her and Joey out to the local classic car run near
Bridgwater. It was my longest journey in her (around 40miles for the day) and the longest blast in one go. It was also her first go at the motorway.
So we wrapped up warm and out we went. All was going very well - both vehicles were running perfectly and bopping along the roads nicely - till Bella
found out what ice was.... que brown pants moment as her back end slid around at 40mph! Not an experiance I want to repeat tbh! Joey didn't seem to
even notice the ice, so we've put it down to the extra camber Bella has and possibly the fact that she's not used to ice and he's 'grown up' with
it!
Anyway - at the meet she seemed to confuse a fair few people and got to meet some fellow Dubbers too.
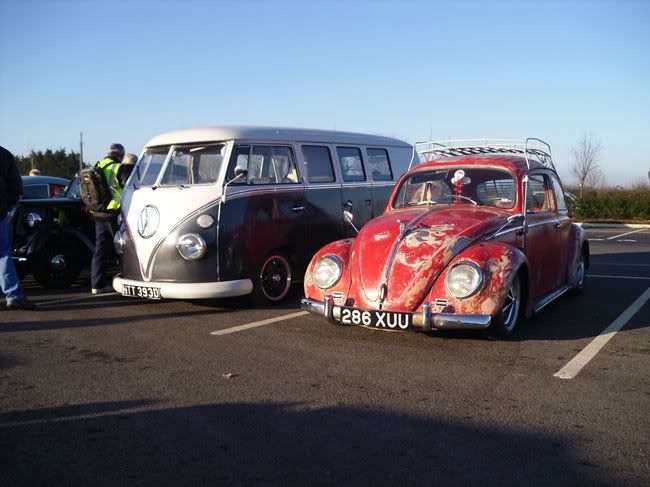
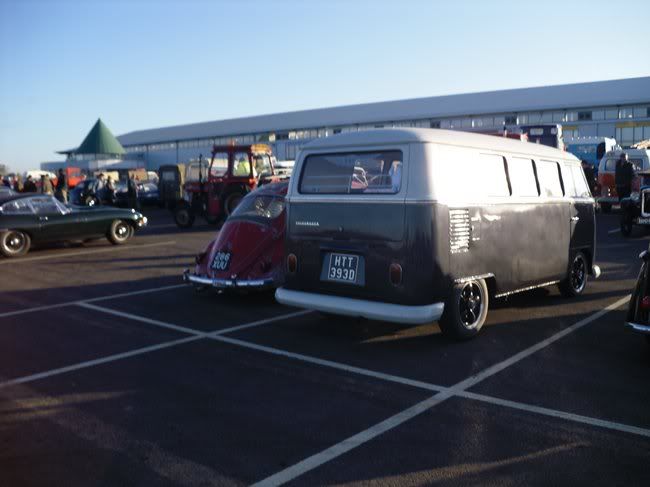
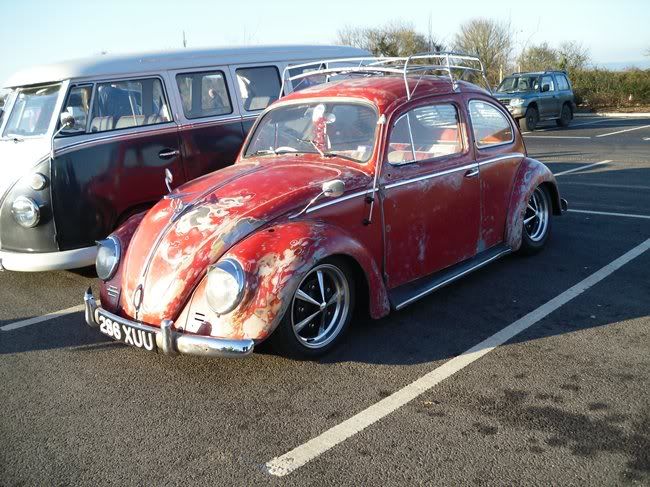
Anyway - I was very pleased with the way she drove (sliding aside) and she didn't have any trouble getting to 60-65mph on the motorway with more
speed left in reserve. But sliding around on the ice at 40mph with one hand on the wheel and one hand on the gearstick wasn't fun - so replacement
gearbox it is!
Today Steve helped me get her engine out, and I'm letting the oil drain out of the gearbox over night.
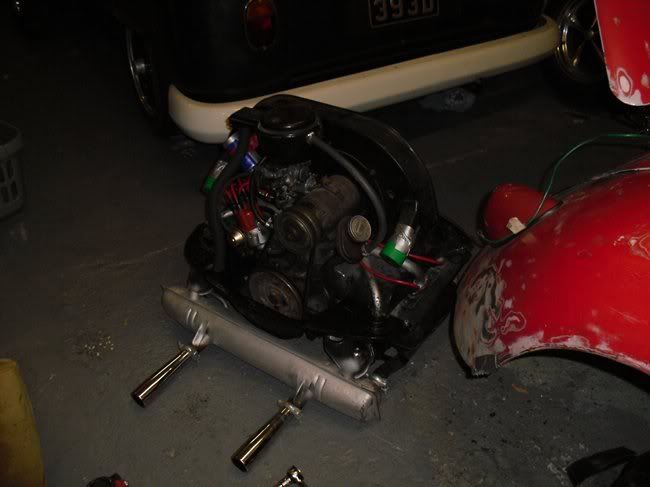
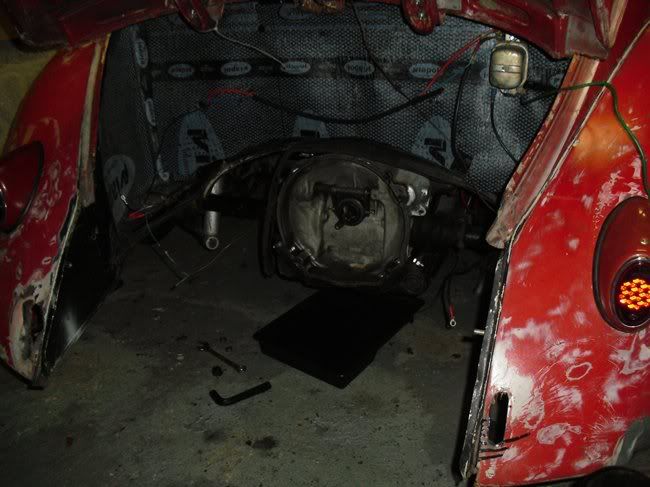
More updates on the gearbox swap when they're done!
|
|
|
 M16S VW M16S VW
Commited Dubber
 
Posts: 54
Threads: 3
Registered: August 24th, 2008
Member Is Offline
Theme: UltimaBB Pro Blue ( Default )
|
| posted on August 29th, 2010 at 09:09 PM |
|
|
Today Steve helped me remove the gearbox and I've started stripping it down.
Out:
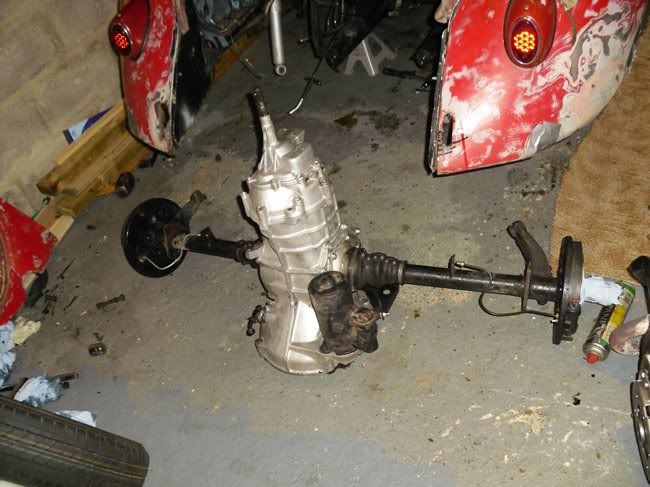
I belive this is a Split nose cone, which makes things easier as I don't have to order another one:
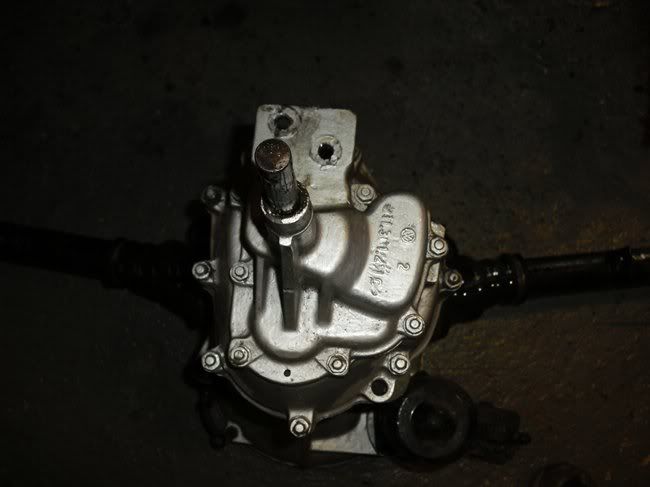
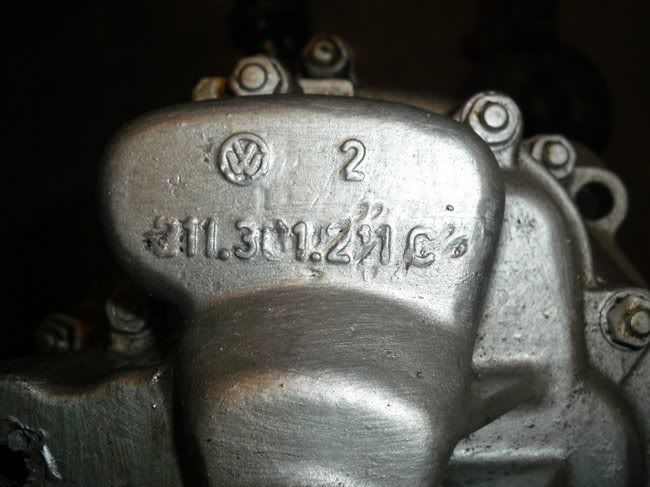
I removed the nose cone and had a looksie at the hockey stick... new one on the right, old one on the left:
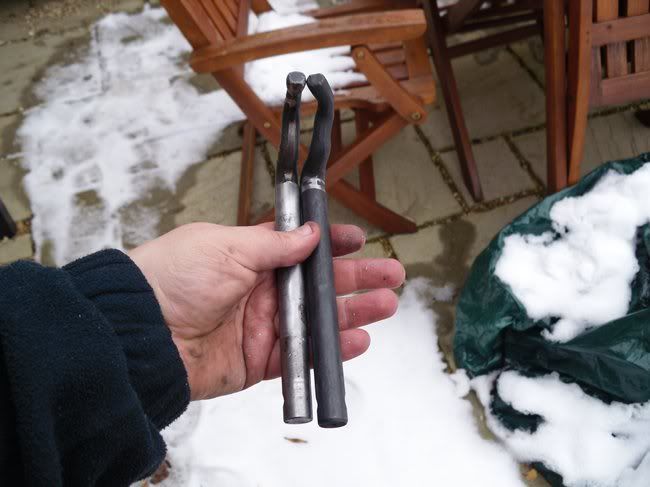
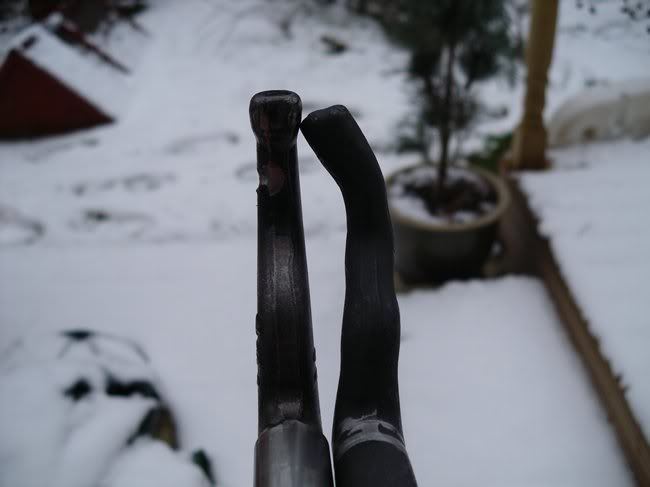
Hopefully the (lack of) bend is the reason she was difficult with the gears?
I don't know if this is normal, but the tops of the gear selectors look a bit burnt?
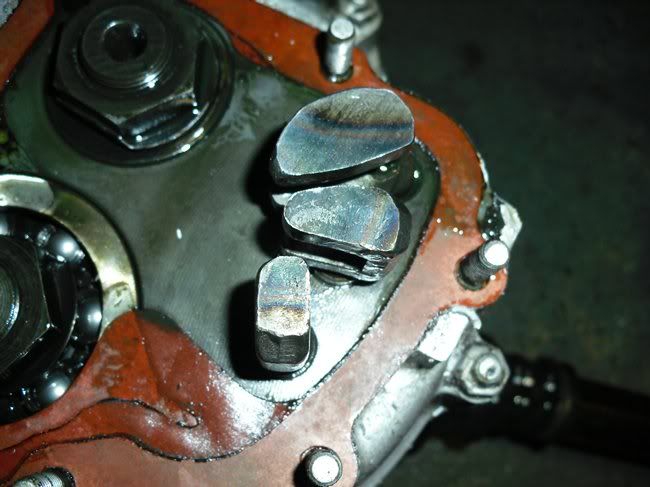
Anyway - onto the gearbox strip down. I know other people have covered this in pics (see Jinx's thread), but I figured the more pics the better to
help anyone else who is about to do the same.
First you have to undo the bolts holding the the bearing cover and backing plate on. Make a note or take a pic of what way up it goes on and the
bearing spacer behind it.
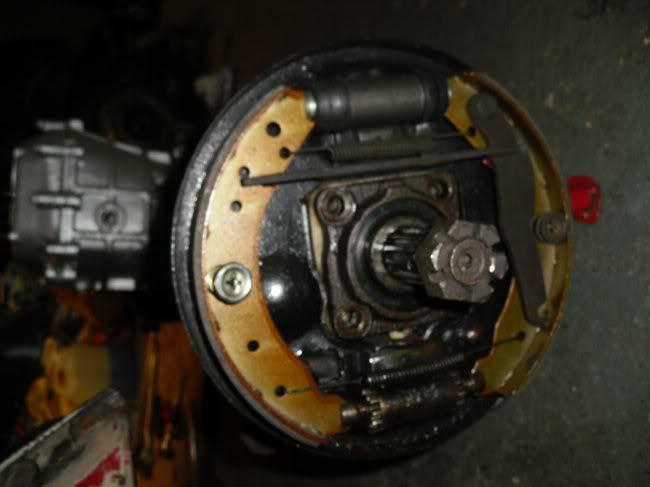
Then you're left with this:
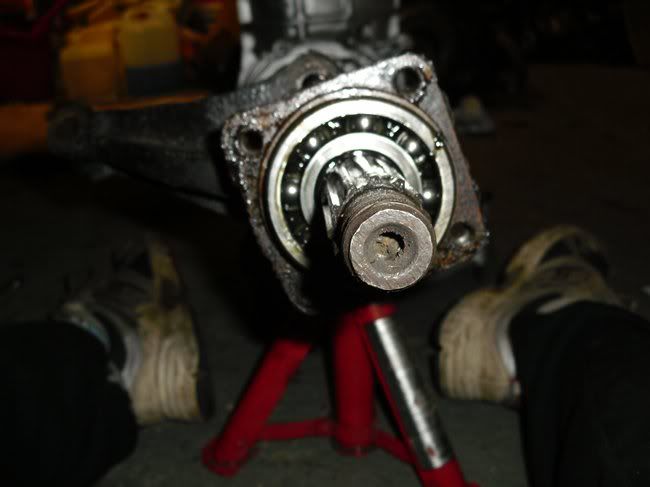
You can now see the rear wheel bearing. You can get internal pullers for this if you're just wanting to replace the bearing, but I wanted to remove
the axels so got a more widely avaliable and significantly cheaper external one (this one is from Halfords. I did get one from Toolstation but bent it
getting the axels off the other box... new one is much stronger). It comes as a 3 or 2 legged puller - I found it fitted better as 2 legs.
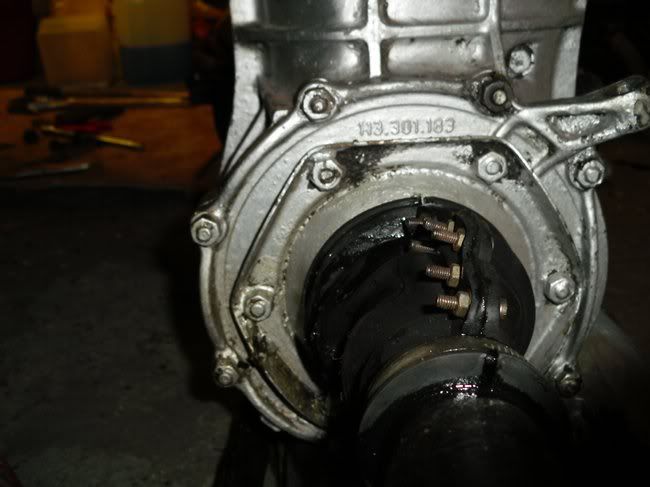
Anyway - before you can pull the bearing off, you need to undo the bolts (13mm) holding the axel tuble to the gearbox:
|
|
|
 M16S VW M16S VW
Commited Dubber
 
Posts: 54
Threads: 3
Registered: August 24th, 2008
Member Is Offline
Theme: UltimaBB Pro Blue ( Default )
|
| posted on August 29th, 2010 at 09:10 PM |
|
|
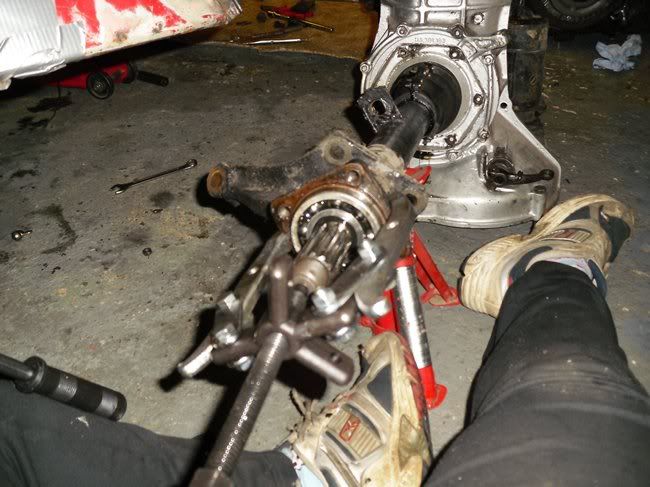
Once they're undone you can fit the puller and start pulling:
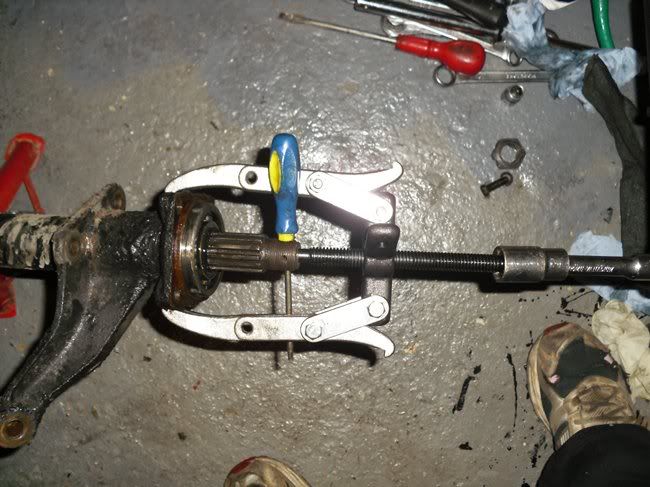
You might find that as you tighten the puller, the axel spins with it - if this happens the puller won't actually do up. I placed a thin screwdriver
through the holes which the split pin normally goes through to keep the hubnut on:
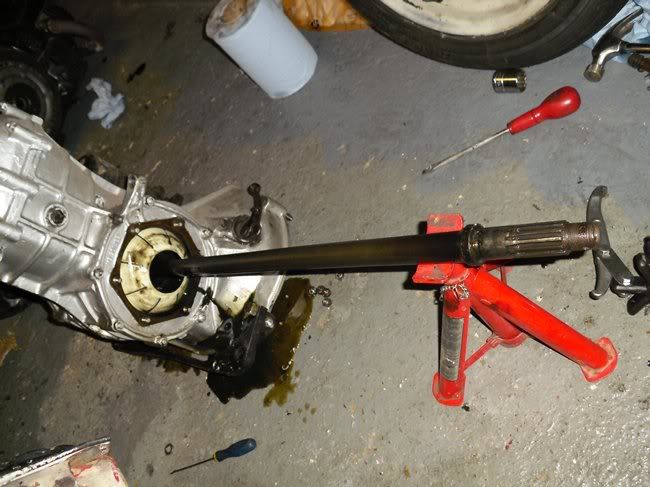
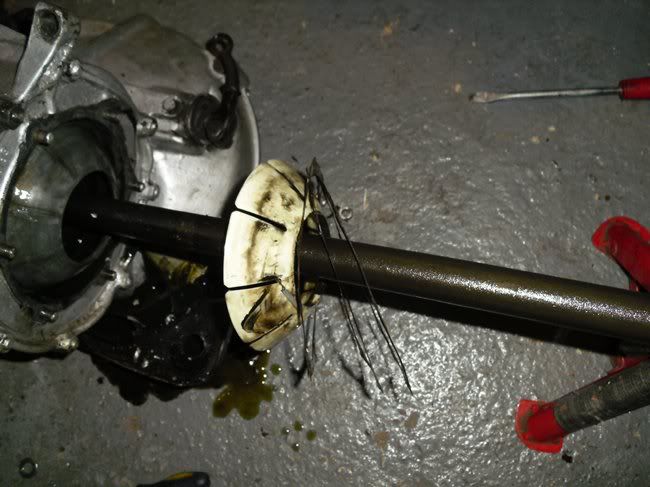
A bit of winding later and you should be able to pull the axel tubes off. You're then left with the axel itself. As you can see, despite me leaving
the gearbox to drain overnight, it still makes quite a mess!
Then you can pull the spacer gaskets off. Make a note of how many. Then the plastic flower comes out:
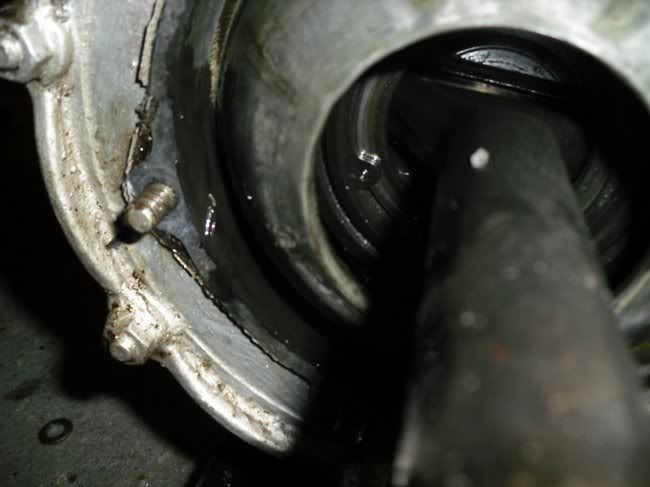
The next job is to remove the circlip which holds the axel in. You can just about see it, hiding in there:
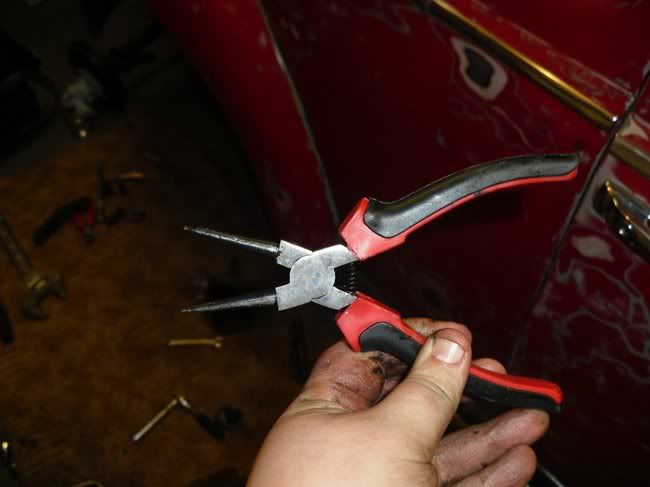
Circlip pliers (Halfords again):
And out:
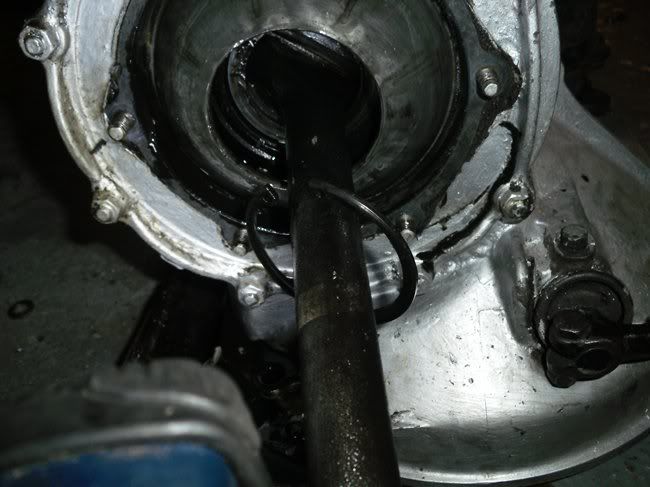
Now - Steve and I spent ages on the other gearbox trying to remove the circlip - I was squeezing the pliers together and he was trying to lever it out
with a screwdriver - this doesn't work! By accident when I was rotating the clirclip round so I could get it in a better position to keep hold of it,
it popped out very easily. I can only assume it was because of this 'layby' in the casting:
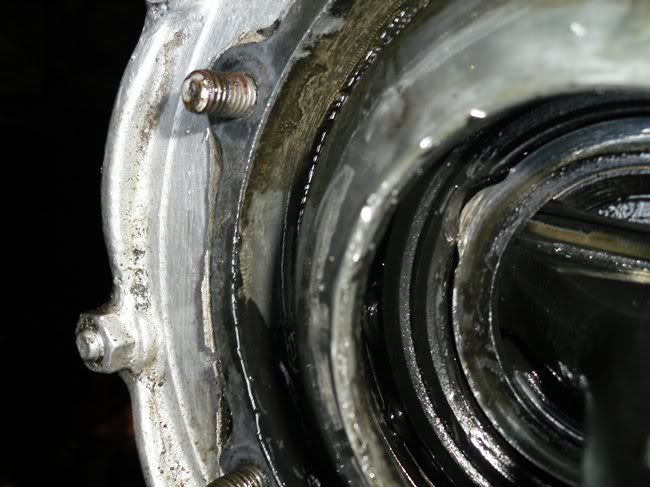
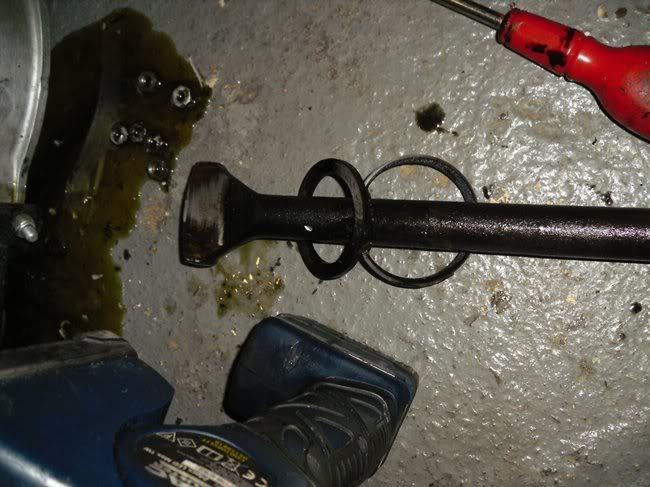
Anyway - once that's out you can pull out the spacer behind it and then the axel will come off:
|
|
|
| Pages: 1 2 3 |