| [ Total Views: 156713 | Total Replies: 204 | Thread Id: 75753 ] |
| Pages: 1 2 3 4 .. 7 |
|
|
 byronmcmanus59 byronmcmanus59
A.k.a.: Jono punton
Seriously Crusin Dubber
 
Posts: 199
Threads: 22
Registered: April 7th, 2008
Member Is Offline
Location: portland
Theme: UltimaBB Pro Black
|
| posted on September 14th, 2009 at 10:07 AM |
|
|
love the oval mate, super clean.. screw the ball joint tool, try using two hammers 
|
|
|
 reub reub
Veteran Volks Folk
VWRX is gone...
    
Posts: 2054
Threads: 160
Registered: September 2nd, 2002
Member Is Offline
Theme: UltimaBB Pro Blue
|
| posted on September 14th, 2009 at 12:08 PM |
|
|
Very envious of your oval!
I look forward to seeing the progression of the build.
Reub
|
|
|
 Aussie Aussie
Officially Full-On Dubber
  
Posts: 296
Threads: 43
Registered: September 15th, 2006
Member Is Offline
Location: Gold Coast
Theme: UltimaBB Pro Blue ( Default )
|
| posted on October 11th, 2009 at 04:04 PM |
|
|
Trial fitted the beam up to make sure there were no issues. All went in easily and there is actually more clearance to the inner wings than on a stock
beam.
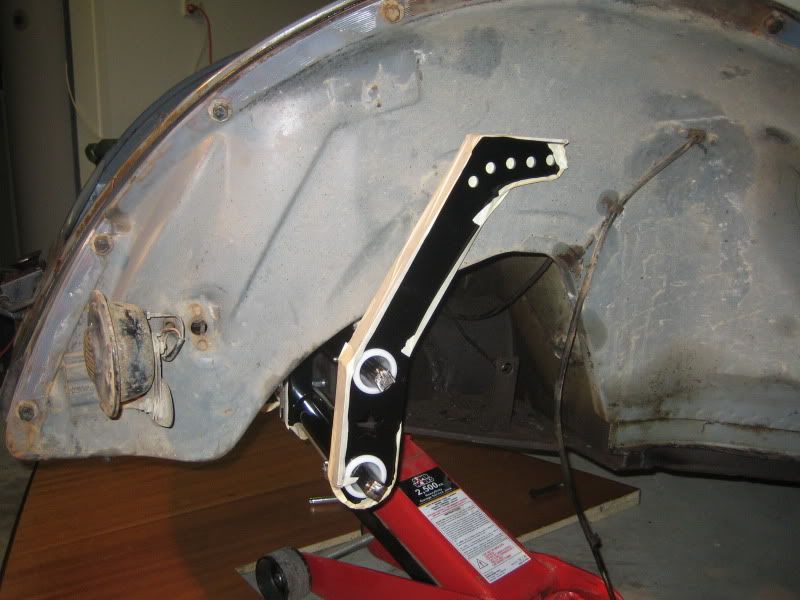
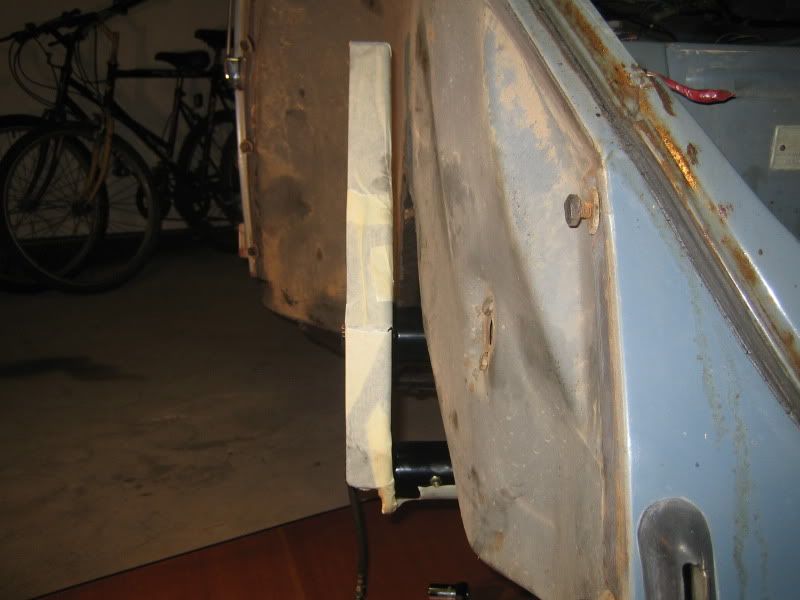
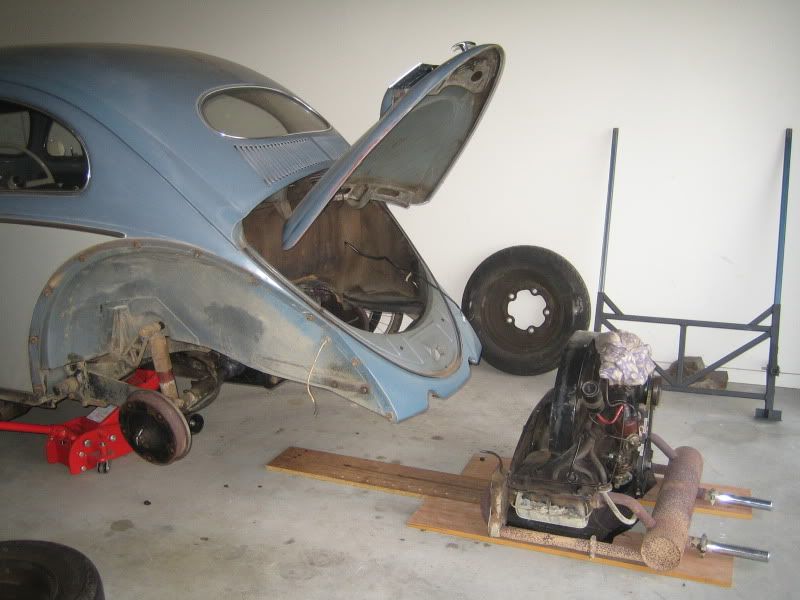
Dropped out the engine also so another step done before splitting the body.
|
|
|
 Airkewld 2010 Airkewld 2010
Learner Dubber

Posts: 5
Threads: 0
Registered: October 24th, 2009
Member Is Offline
Theme: UltimaBB Pro Blue ( Default )
|
| posted on October 24th, 2009 at 01:15 AM |
|
|
Car's coming along great Ian |
|
|
 Aussie Aussie
Officially Full-On Dubber
  
Posts: 296
Threads: 43
Registered: September 15th, 2006
Member Is Offline
Location: Gold Coast
Theme: UltimaBB Pro Blue ( Default )
|
| posted on December 20th, 2009 at 05:54 PM |
|
|
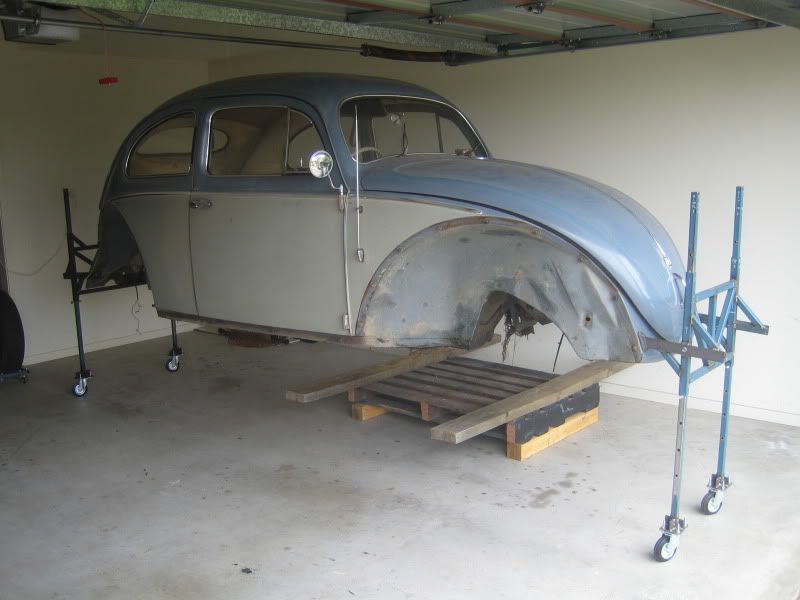
Body off time. Made some lifting frames to help the process. Forks get bolted on to the bumper mounts.
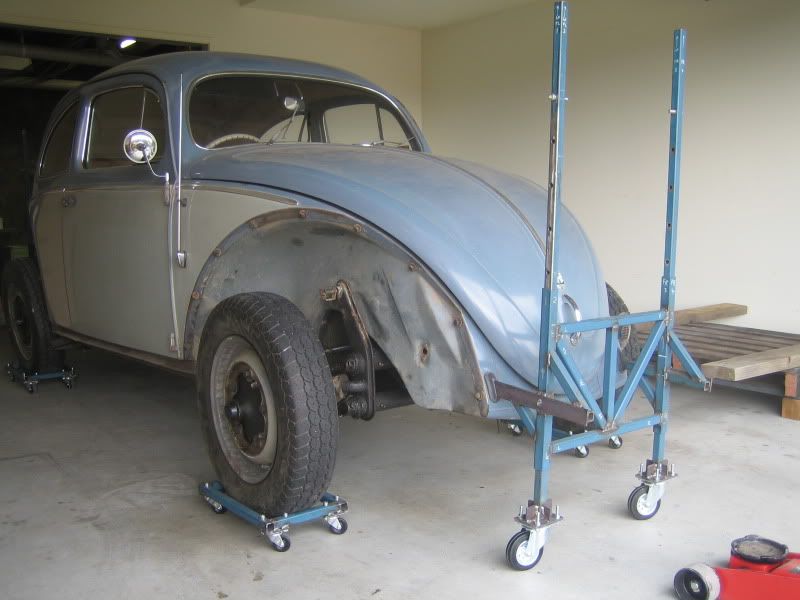
Trolley jack goes under, lift to desired height and lock off with a bolt. Made some wheel trolleys too so that the chassis could be pulled out the
way.

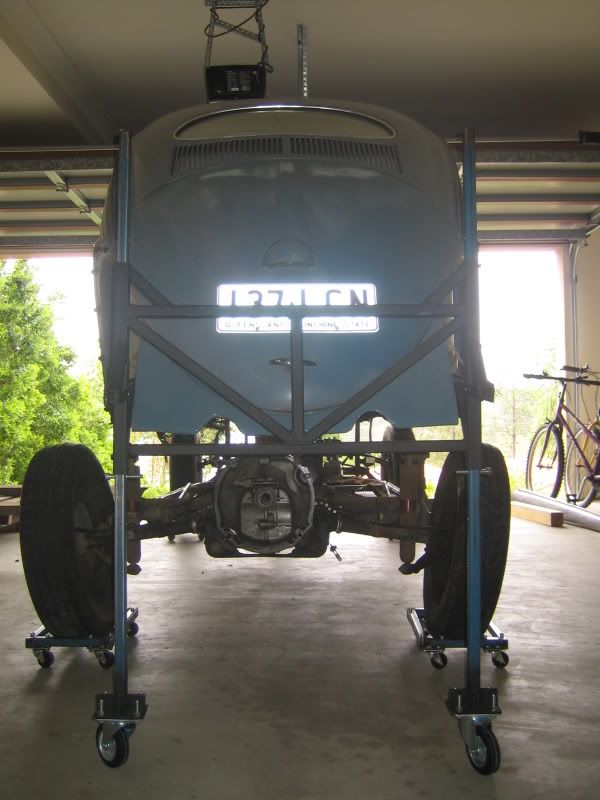
Rolls around easily and ideal to work on the shell.
|
|
|
 FROSTY FROSTY
Insano Dub Head
   
Posts: 744
Threads: 65
Registered: May 11th, 2009
Member Is Offline
Location: Palm Beach Qld
Theme: UltimaBB Pro Blue ( Default )
|
| posted on December 20th, 2009 at 08:07 PM |
|
|
holy shit, that is the best lifting jig I have ever seen....Nice work
|
|
|
 Dasdubber Dasdubber
A.k.a.: Alan Agyik
23 Windows of Awesome
DAS Resto Haus
       
Posts: 5746
Threads: 289
Registered: August 26th, 2002
Member Is Offline
Location: Gold Coast
Theme: UltimaBB Pro Blue
Mood: feeling fine...
|
| posted on December 20th, 2009 at 09:03 PM |
|
|
Nice work Ian, nice setup mate!
Al
|
|
|
 dangerous dangerous
A.k.a.: Dave Butler Muffin Man
23 Windows of Awesome
       
Posts: 5901
Threads: 178
Registered: January 6th, 2005
Member Is Offline
Location: Gold Coast
Theme: UltimaBB Pro Blue ( Default )
Mood: 591
|
| posted on December 21st, 2009 at 05:21 AM |
|
|
Wow, cool jig and trolleys,
almost looks like some kind of engineer designed it!
| Quote: | Originally
posted by westi
That's mad Alan.
|
|
|
|
 type_one type_one
Custom Title Time!
    
Posts: 1161
Threads: 166
Registered: September 10th, 2002
Member Is Offline
Location: Mount Pleasant. QLD
Theme: UltimaBB Pro Blue ( Default )
|
| posted on December 21st, 2009 at 01:30 PM |
|
|
How stable is that Jig? Looks like the legs might fold in a bit. I'd be super keen on plans if available. Space saving when you aren't using them
for sure.
Blank
|
|
|
 Aussie Aussie
Officially Full-On Dubber
  
Posts: 296
Threads: 43
Registered: September 15th, 2006
Member Is Offline
Location: Gold Coast
Theme: UltimaBB Pro Blue ( Default )
|
| posted on December 21st, 2009 at 06:50 PM |
|
|
| Quote: | Originally
posted by type_one
How stable is that Jig? Looks like the legs might fold in a bit. I'd be super keen on plans if available. Space saving when you aren't using them
for sure.
|
Yeah pretty stable. I was a bit worried about this when I built them so I kept the upright outer sleeves long to help stop the legs from flexing. The
legs are quite thick gauge box tube and are a snug fit to the outer sleeves so no movement there.
Really happy with how they turned out - definitely makes this an easy one man job!
|
|
|
 Aussie Aussie
Officially Full-On Dubber
  
Posts: 296
Threads: 43
Registered: September 15th, 2006
Member Is Offline
Location: Gold Coast
Theme: UltimaBB Pro Blue ( Default )
|
| posted on December 27th, 2009 at 06:27 PM |
|
|
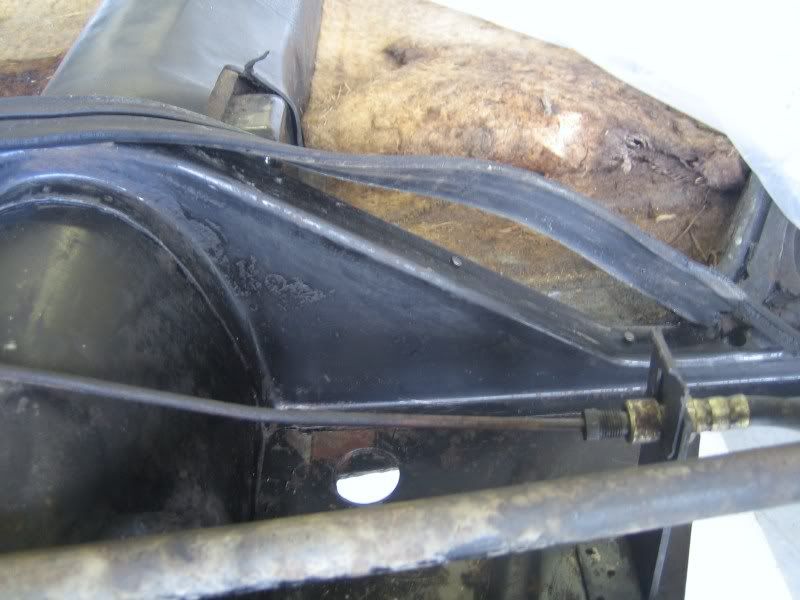
Time to get dirty! Spent the last 2 days up to my neck in grease and oil getting the chassis cleaned up - easily the worst job so far. Still can't
complain - all this crud has kept the rust at bay for a long time. I am still amazed at the condition of this car after the last 2 tea strainers I
restored in the UK 
Here is a pick of the front end after a grease down:
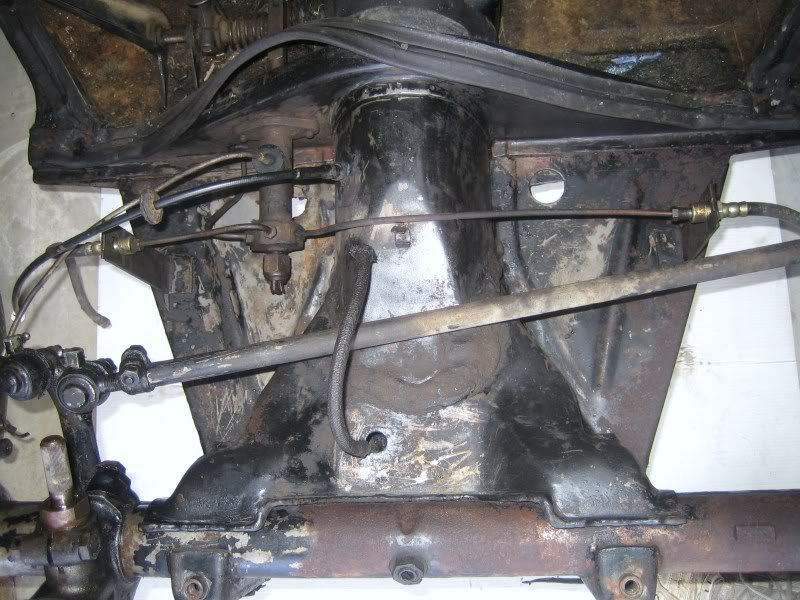
Check out the original chassis paint - not bad for 50+ years.
|
|
|
 Aussie Aussie
Officially Full-On Dubber
  
Posts: 296
Threads: 43
Registered: September 15th, 2006
Member Is Offline
Location: Gold Coast
Theme: UltimaBB Pro Blue ( Default )
|
| posted on December 27th, 2009 at 06:38 PM |
|
|
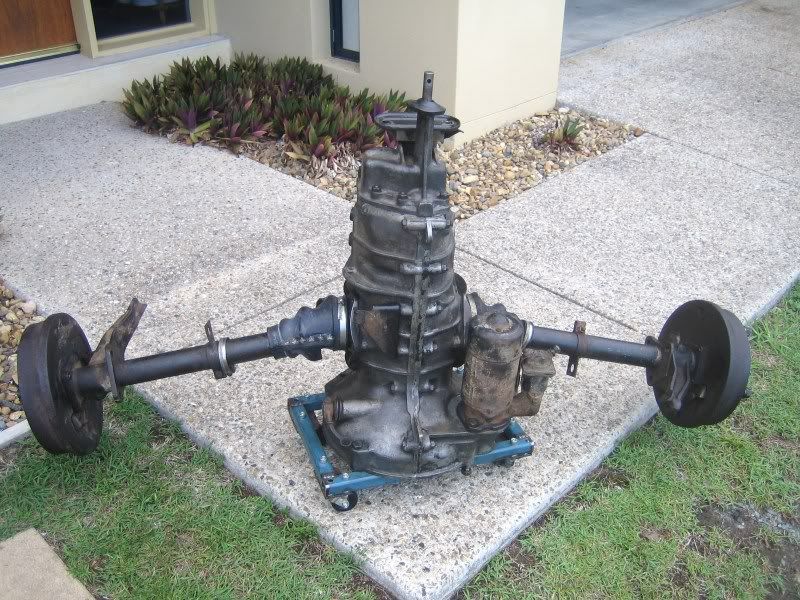
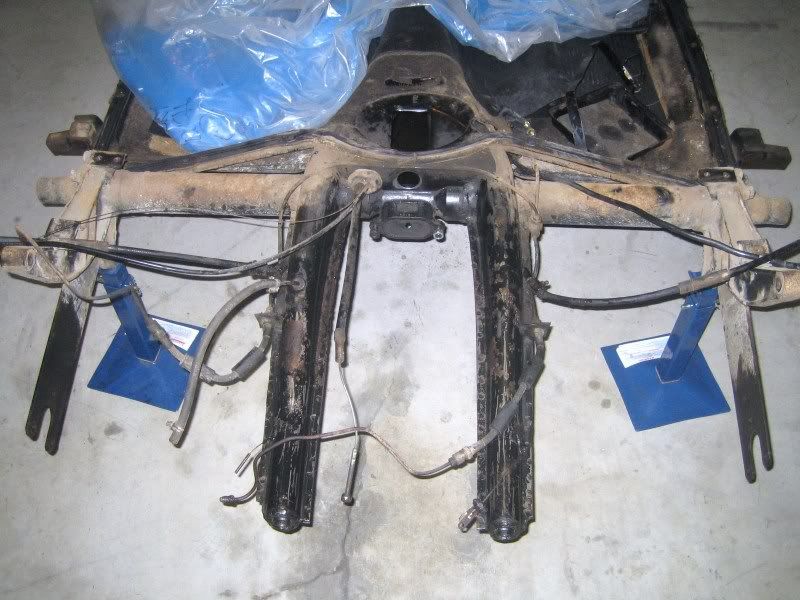
Next the rear end got the same treatment. Dropped out the old split case + axles & tubes.
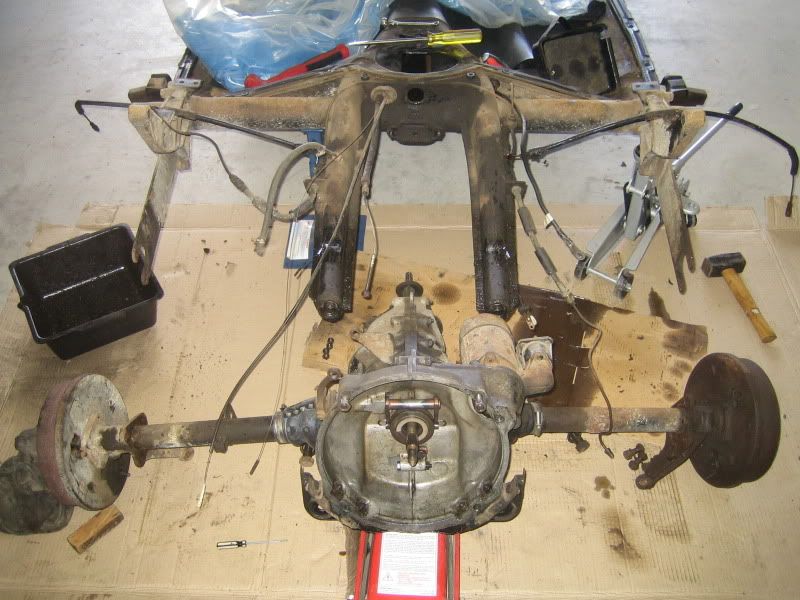
Cleaned up nice. The whole assembly will be stored and can be bolted back in if the car ever goes back to stock. Another handy use for one of the
wheel trolleys has been found.
Next job will be a trial fit of the new gearbox. The jury is still out on what front nose cone will be needed to get it fitted.
|
|
|
 Aussie Aussie
Officially Full-On Dubber
  
Posts: 296
Threads: 43
Registered: September 15th, 2006
Member Is Offline
Location: Gold Coast
Theme: UltimaBB Pro Blue ( Default )
|
| posted on January 25th, 2010 at 04:11 PM |
|
|
Well, I managed to bugger my back over xmas while moving the floorpan around in the garage That will teach me for not bending the knees That will teach me for not bending the knees
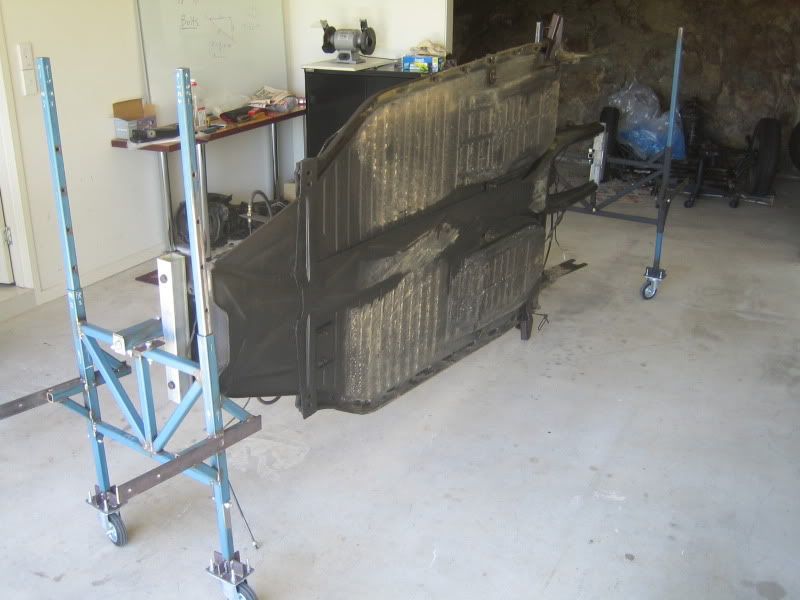
Anyway, to help me out going forward (Doc says I have to take it easy) I decided to modify my lifting frames to work with the floorpan. Using a few
bits of scrap I made some additions to the original frames and now I can raise or lower the pan to whatever height and also spin it 360degrees. The
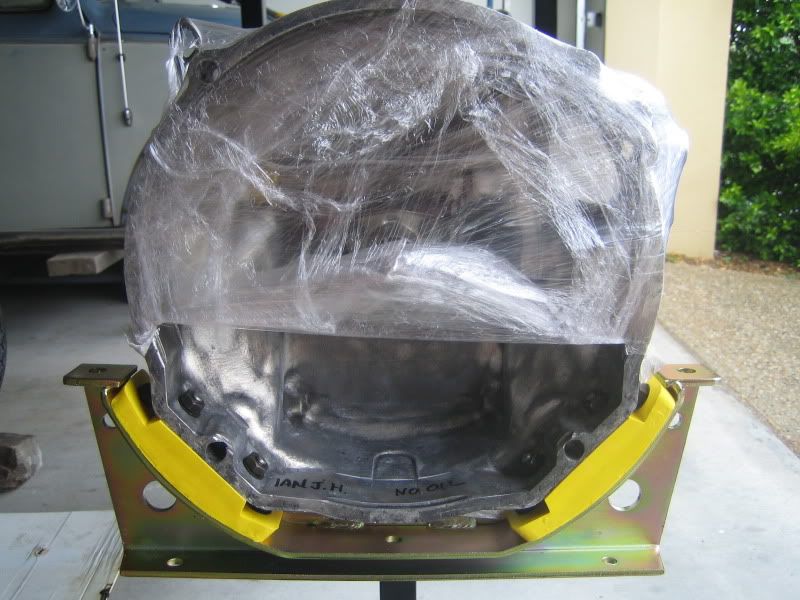
pan can be mounted with or without the gearbox in place to help me weld in mid mount tabs etc.
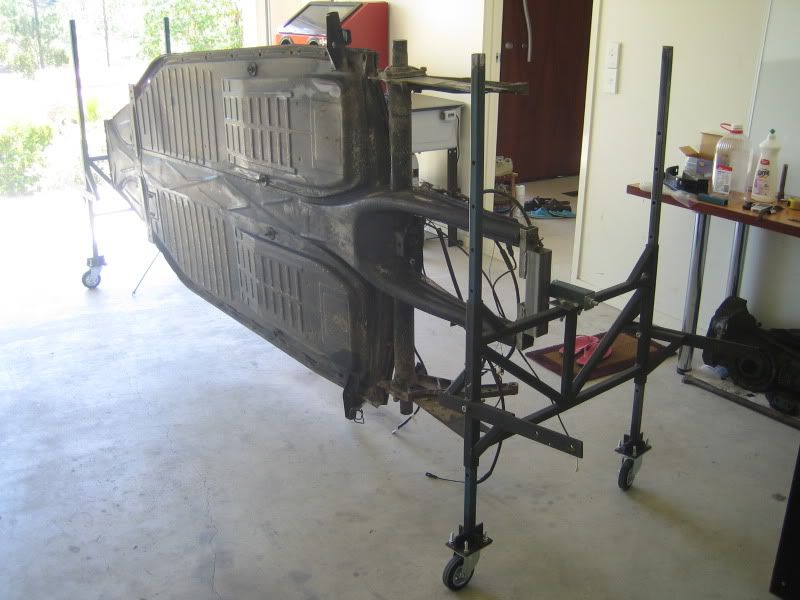
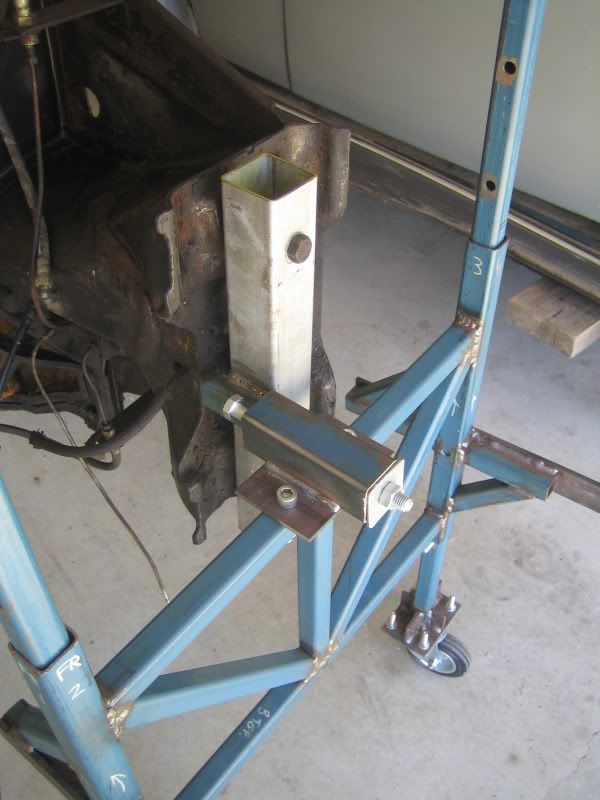
Next job........
|
|
|
 dangerous dangerous
A.k.a.: Dave Butler Muffin Man
23 Windows of Awesome
       
Posts: 5901
Threads: 178
Registered: January 6th, 2005
Member Is Offline
Location: Gold Coast
Theme: UltimaBB Pro Blue ( Default )
Mood: 591
|
| posted on January 26th, 2010 at 09:25 AM |
|
|
Looks awesome Ian.
Hope your back gets better soon,
I cant wait to see you driving this thing around again, even if it is only with a 36hp engine.
Alan drove his oval with 36er,(and now with 40hp) and a tall first gear,(3.33 with 3.88 diff) and it drove fine.
So your 3.444 with 4.125 will be no wuckers.
Still amazed how rust free this car is.
Your not planning to paint it at all? (hope not).
| Quote: | Originally
posted by westi
That's mad Alan.
|
|
|
|
 Aussie Aussie
Officially Full-On Dubber
  
Posts: 296
Threads: 43
Registered: September 15th, 2006
Member Is Offline
Location: Gold Coast
Theme: UltimaBB Pro Blue ( Default )
|
| posted on January 28th, 2010 at 01:25 PM |
|
|
| Quote: | Originally
posted by dangerous
Looks awesome Ian.
Hope your back gets better soon,
I cant wait to see you driving this thing around again, even if it is only with a 36hp engine.
Alan drove his oval with 36er,(and now with 40hp) and a tall first gear,(3.33 with 3.88 diff) and it drove fine.
So your 3.444 with 4.125 will be no wuckers.
Still amazed how rust free this car is.
Your not planning to paint it at all? (hope not).
|
Thanks Dave. Don't worry - not planning to paint anything that will be visible. Will paint the underside of the floorpan + framehead etc, inner
arches body colour, bottom of heater channels for protection and thats probably about it. 
|
|
|
 Euro_67 Euro_67
Wolfsburg Wizard
  
Posts: 690
Threads: 75
Registered: October 14th, 2003
Member Is Offline
Theme: UltimaBB Pro Blue ( Default )
|
| posted on January 30th, 2010 at 10:41 AM |
|
|
Dave,
What is the lowest rpm you would expect at 110km/h in a 'box setup with the tallest 4th gear possible, assuming 195/660/15 tires.
|
|
|
 dangerous dangerous
A.k.a.: Dave Butler Muffin Man
23 Windows of Awesome
       
Posts: 5901
Threads: 178
Registered: January 6th, 2005
Member Is Offline
Location: Gold Coast
Theme: UltimaBB Pro Blue ( Default )
Mood: 591
|
| posted on January 31st, 2010 at 05:25 AM |
|
|
195/60/15 tyre measures 24.21" in height according to google.
If Ian was using such a short tyre his rpm would be 3636rpm at 110km/hr.(4.125 diff with 0.931 fourth).
With Ian's proposed 205/70/15 tyre this would be 3346rpm.
The tallest gears VW make are the 3.875 diff and a 0.821 from an early bus.
This would be 3012rpm with the same speed and 195/60/15 tyre.
Albins DO make a 0.696 fourth gear and this would be 2554rpm, but these are very impractical,
an the huge gap from 3rd to 4th would be bogus.
| Quote: | Originally
posted by westi
That's mad Alan.
|
|
|
|
 Euro_67 Euro_67
Wolfsburg Wizard
  
Posts: 690
Threads: 75
Registered: October 14th, 2003
Member Is Offline
Theme: UltimaBB Pro Blue ( Default )
|
| posted on January 31st, 2010 at 09:40 AM |
|
|
Thanks for the info.
I imagine higher load and lower rpms may also have a negative effect on engine cooling with the fan also dropping rpm.
|
|
|
 66brm 66brm
Seriously Crusin Dubber
 
Posts: 140
Threads: 4
Registered: November 13th, 2009
Member Is Offline
Theme: UltimaBB Pro Blue ( Default )
|
| posted on February 1st, 2010 at 11:11 PM |
|
|
Cant wait to see more progress on this one
|
|
|
 cam070 cam070
Custom Title Time!
    
Posts: 1332
Threads: 53
Registered: July 25th, 2009
Member Is Offline
Location: Sydney
Theme: UltimaBB Pro Blue ( Default )
Mood: Getting hands dirty stripping the bug down
|
| posted on February 2nd, 2010 at 10:59 PM |
|
|
Nice progress on this project. Hope your back gets better soon so you can really get stuck in again. And very envious of those jigs, man they are the
sh*t.
|
|
|
 Aussie Aussie
Officially Full-On Dubber
  
Posts: 296
Threads: 43
Registered: September 15th, 2006
Member Is Offline
Location: Gold Coast
Theme: UltimaBB Pro Blue ( Default )
|
| posted on February 15th, 2010 at 07:35 PM |
|
|
K & L time....... Stripped all the grease and crap off the K&L assembly ready to have new stuff fitted throughout.
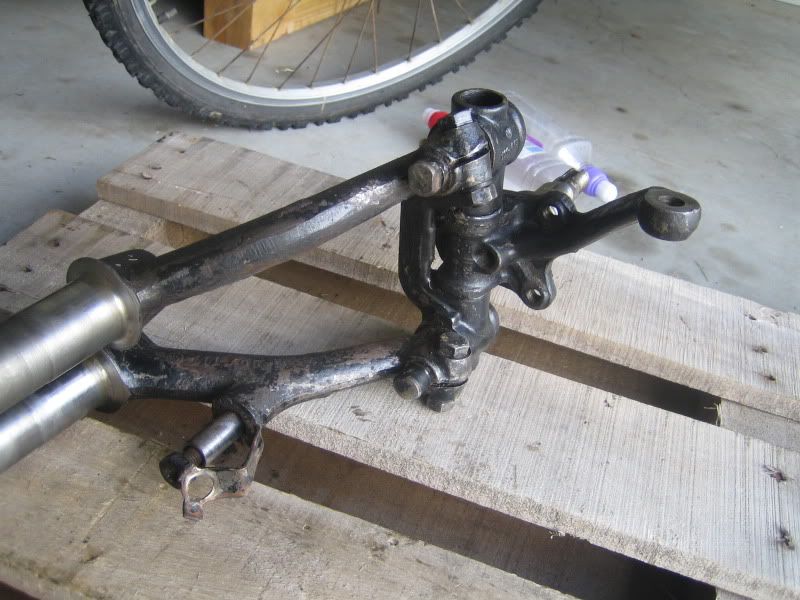
Labelled it all up and packed it ready to have the new pins and bushings put in. So paranoid about mixing up all the bits......its like a chinese
puzzle!
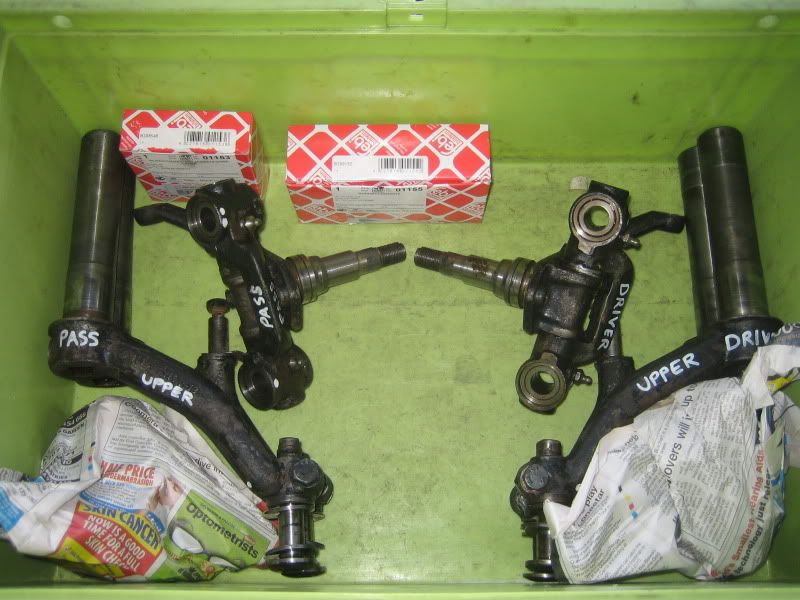
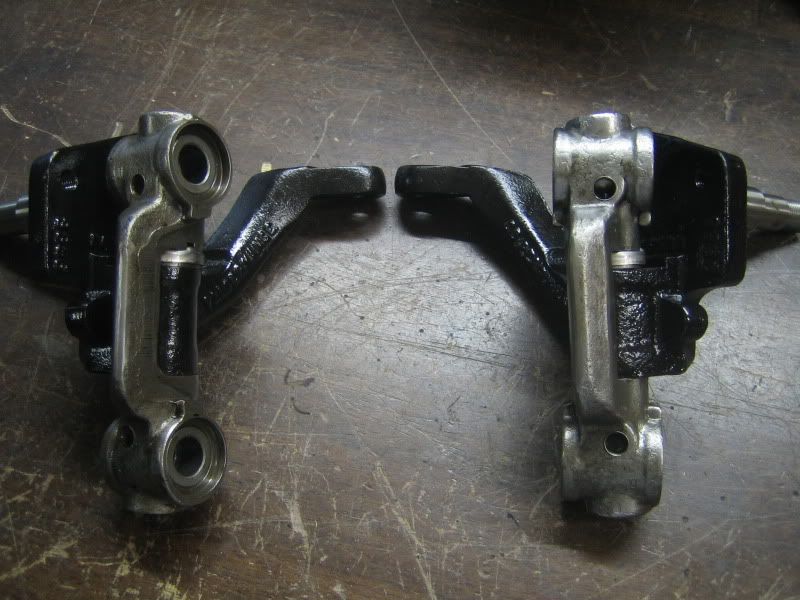
Came back all shiny and nice and ready for a bit of paint. Didnt paint the carriers first as they would likely have got chipped during putting in the
King's. I had painted the CB spindles back over in the UK to protect them from rusting during the boat ride over.

I taped it all up ready for a splash of gloss black. How good are the WD40 lids for masking off the Link pin holes?? 
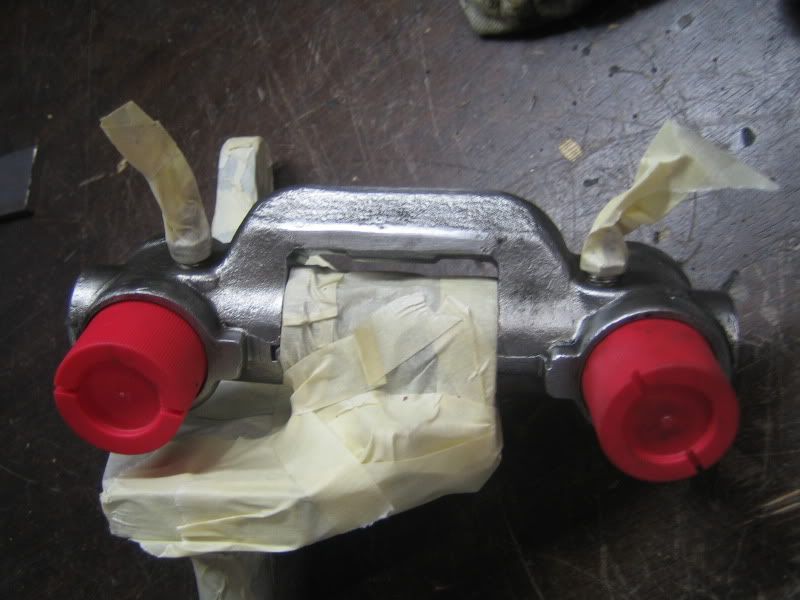
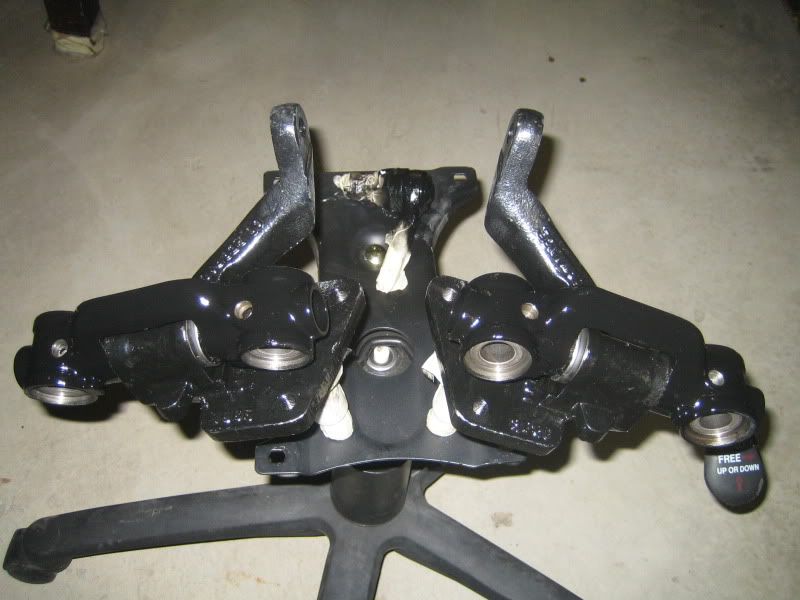
|
|
|
 Scarab Scarab
Wolfsburg Wizard
  
Posts: 646
Threads: 8
Registered: July 26th, 2009
Member Is Offline
Location: Brahma Lodge,South Australia
Theme: UltimaBB Pro Blue
|
| posted on February 15th, 2010 at 09:02 PM |
|
|
nice work!! love your painting trolley!! 
Scarab (aka: Paul)
|
|
|
 Wannavee Wannavee
Insano Dub Head
   
Posts: 729
Threads: 53
Registered: September 7th, 2008
Member Is Offline
Theme: UltimaBB Psyche Blue
|
| posted on February 15th, 2010 at 10:32 PM |
|
|
Ah shit,I just threw one of those 'painting trolleys' out! Coulda used that this week painting my wheels
Damn it
|
|
|
 donn donn
Wolfsburg Elder
      
Posts: 3515
Threads: 428
Registered: November 30th, 2005
Member Is Offline
Location: NEWCASTLE NSW
Theme: UltimaBB Pro Blue
Mood: LAID BACK AND CONFUSED
|
| posted on February 16th, 2010 at 08:18 AM |
|
|
Never throw those painting trolleys away, I've got one withthe seat still intact but without the backrest, great for sitting on while tinkering under
the bonnet of the buggy.
I dream of a day when a chicken can cross a road without being asked for it's motive!
|
|
|
 Aussie Aussie
Officially Full-On Dubber
  
Posts: 296
Threads: 43
Registered: September 15th, 2006
Member Is Offline
Location: Gold Coast
Theme: UltimaBB Pro Blue ( Default )
|
| posted on February 28th, 2010 at 07:48 PM |
|
|
Had a few issues getting the new box to mount into the correct position and finally chased it back to the front mount. I have two brand new front
mounts and both of them are wider than a stock mount which does not allow the box to sit as far into the chassis as it needs to to retain the stock
geometry.  Bloody repro crap Bloody repro crap 
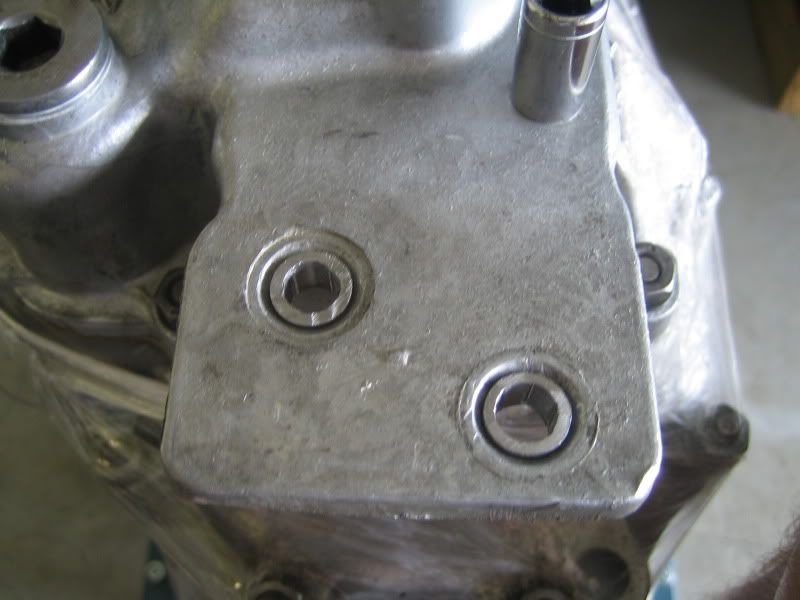
The front mount on the old split box was in pretty good shape so was decided to reuse. Only issue is the new ERCO nosecone has 10mm stud holes and the
old mount has 8mm studs.
To sort this I "machined" up some sleeve's and installed them as a snug fit into the mount holes.
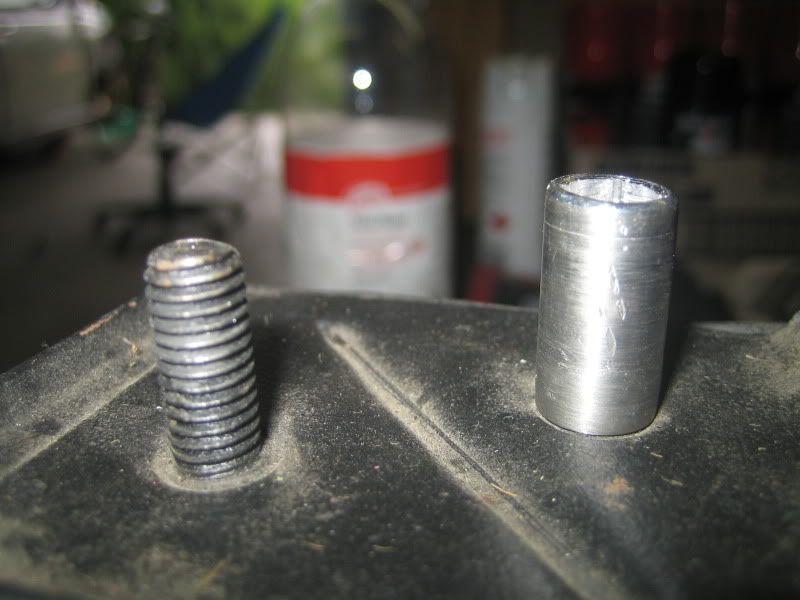
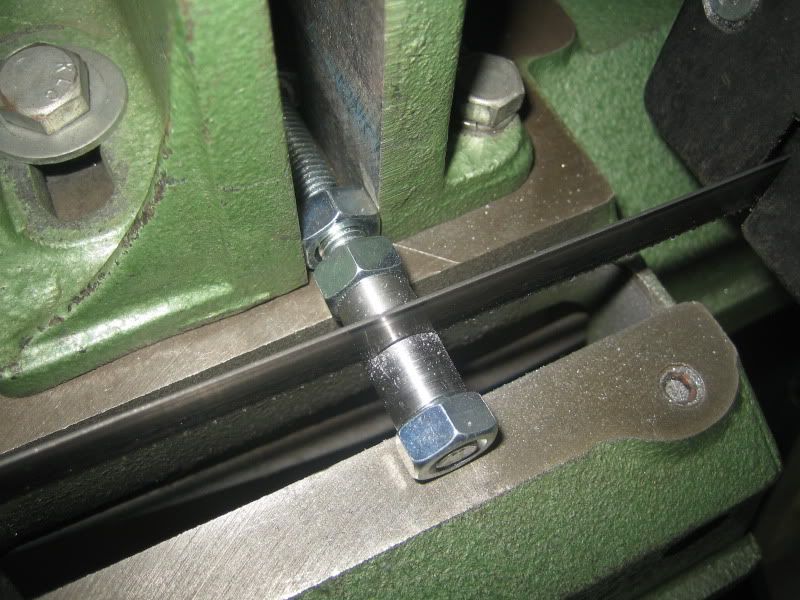
Job done!! 
|
|
|
 Aussie Aussie
Officially Full-On Dubber
  
Posts: 296
Threads: 43
Registered: September 15th, 2006
Member Is Offline
Location: Gold Coast
Theme: UltimaBB Pro Blue ( Default )
|
| posted on March 8th, 2010 at 09:39 PM |
|
|
Really wanted some detailed fuch rims to go on this car so ordered some Flat 4 wheels in 4.5 and 5.5 inch widths. Went over to Das Resto Haus for some
detailing action over the weekend to get things moving along. 
Al was good enough to let me do some of the labour to offset the cost and also see what the process was. Started out masking things up and then
working out where we wanted the paint to cover vs what remains polished.
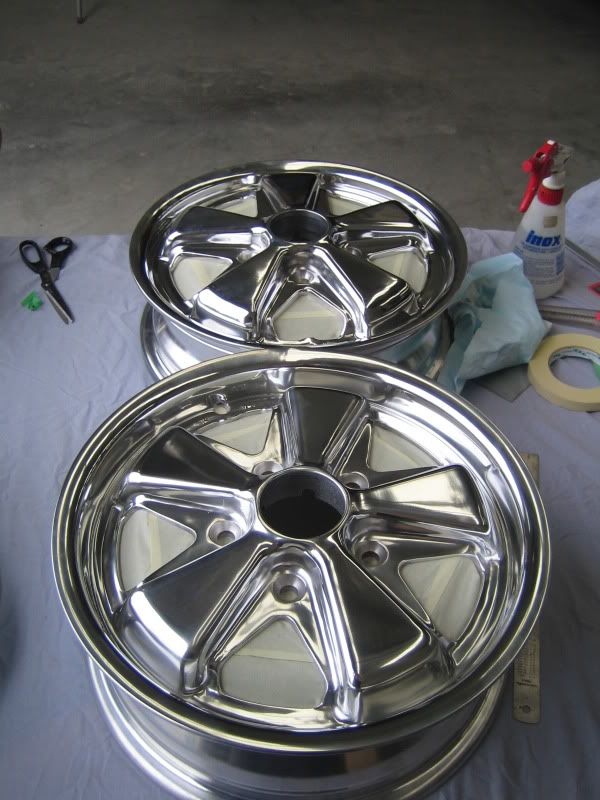
Infill taped all the remaining areas we didnt want the paint. 400 grit wet and dry then keyed in the surface.
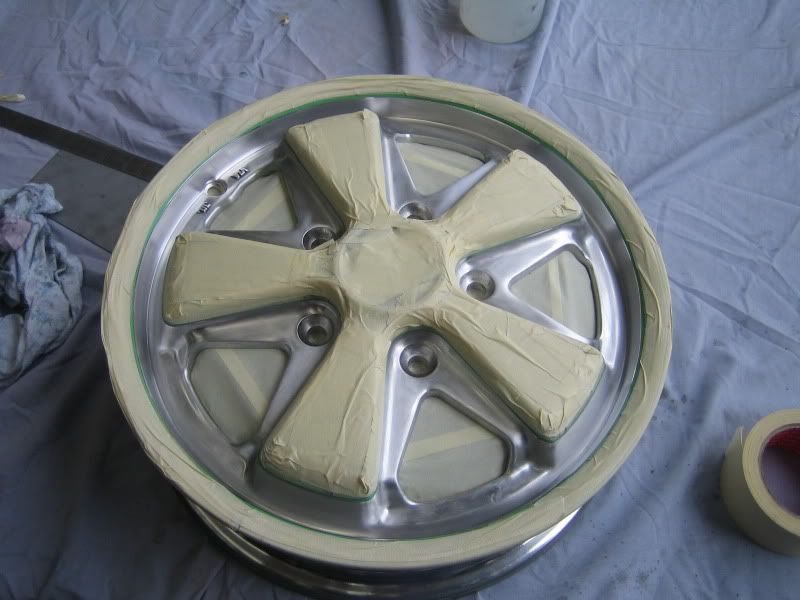
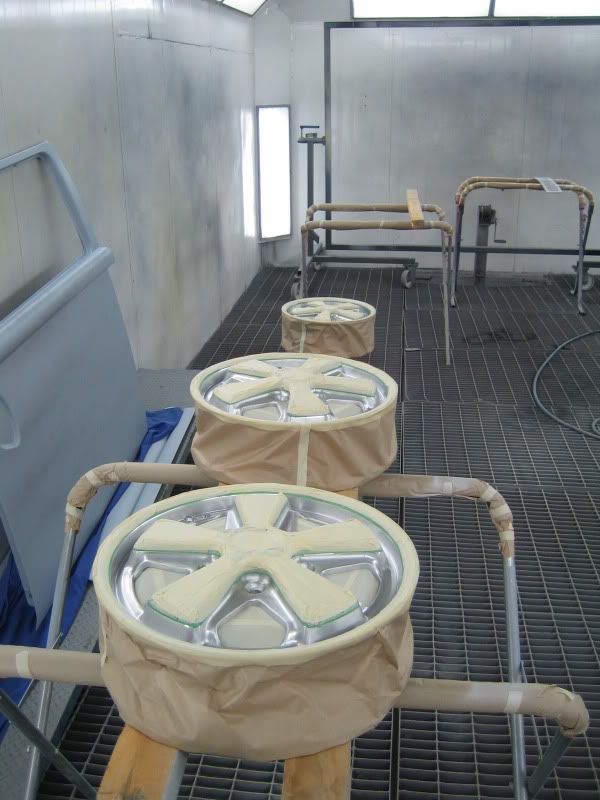
Masked up the rest of the wheels and then lined up ready in the spray booth.
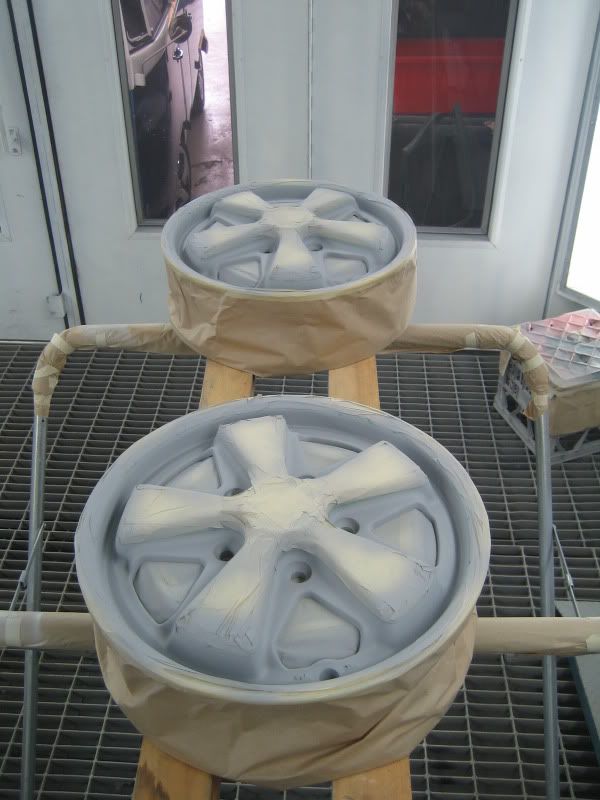
Primer applied then 2 coats of direct gloss black (no clear coat needed).
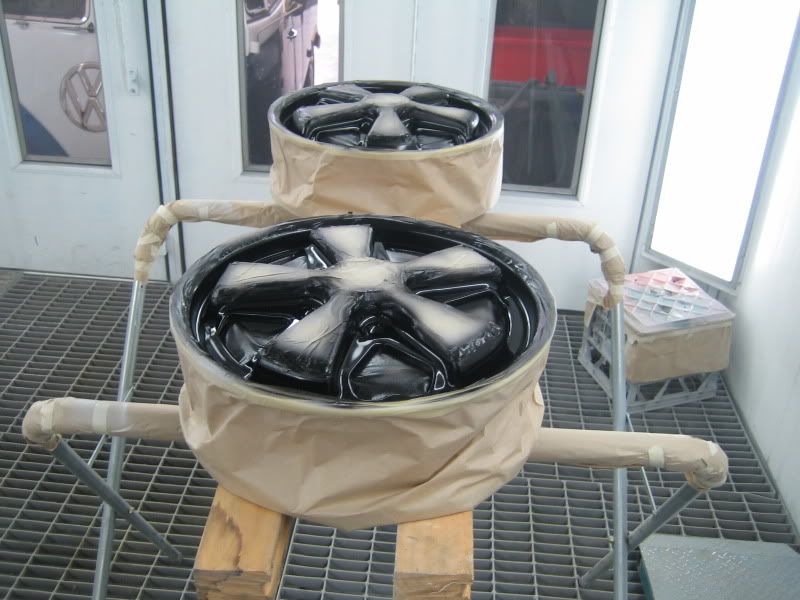
Take off the masking and we're done!!! Look awesome and can't wait to get them fitted up. Will leave for a few weeks now though to fully cure and
harden up. 
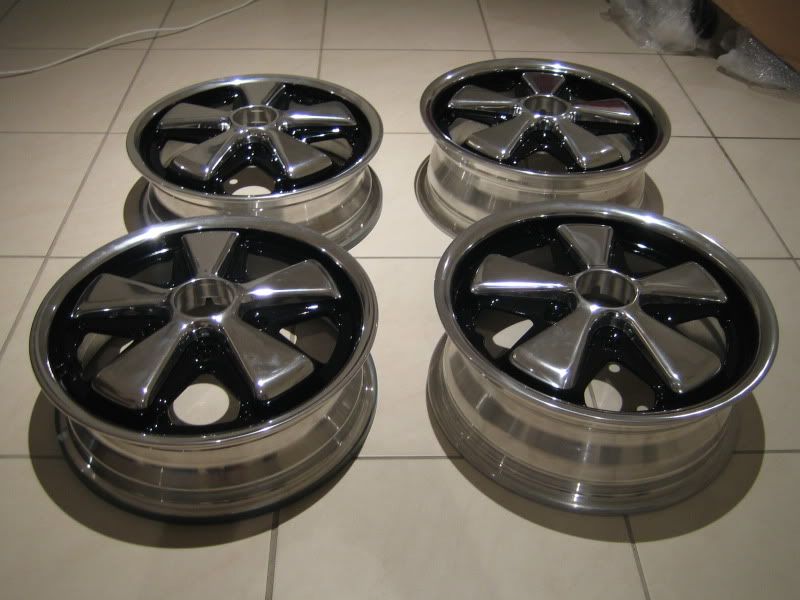
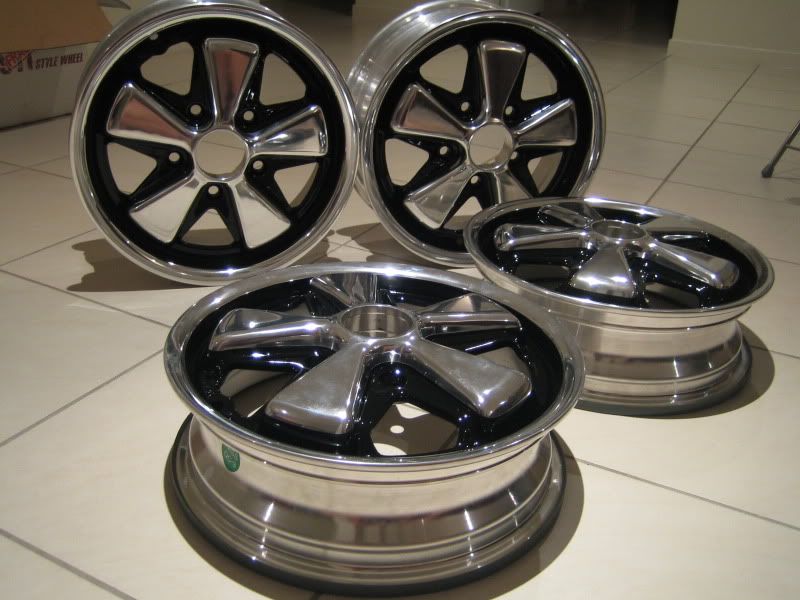
|
|
|
 trickysimon trickysimon
A.k.a.: Simon Azzopardi
Custom Title Time!
100km/h is only 9 seconds away
    
Posts: 1473
Threads: 43
Registered: December 15th, 2007
Member Is Offline
Location: Wagga Wagga
Theme: UltimaBB Pro Blue ( Default )
|
| posted on March 8th, 2010 at 09:53 PM |
|
|
Mmmmm fuchs 
|
|
|
 chippy chippy
Slammed & Awesome Dubber
 
Posts: 94
Threads: 14
Registered: January 9th, 2010
Member Is Offline
Location: Killarney QLD
Theme: UltimaBB Pro Blue ( Default )
Mood: Volksie!
|
| posted on March 9th, 2010 at 05:28 PM |
|
|
They are SEXY AS!!!! I dont know many beetles that wouldnt look good sitting on those!
Cheers Todd 
|
|
|
 Aussie Aussie
Officially Full-On Dubber
  
Posts: 296
Threads: 43
Registered: September 15th, 2006
Member Is Offline
Location: Gold Coast
Theme: UltimaBB Pro Blue ( Default )
|
| posted on April 3rd, 2010 at 06:16 PM |
|
|
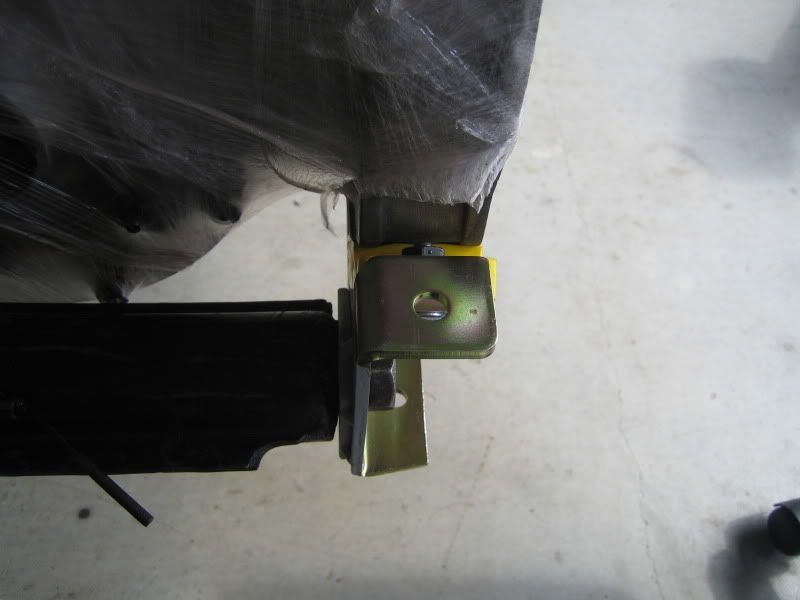
Got back to the Gearbox again and lined things up for a final fit. Didnt like the fit of the rear cradle as when bolted up it did not sit fully under
the rear mounts. To fix this I welded a plate onto the back of the cradle which pushed it out to sit squarely under the bell housing.
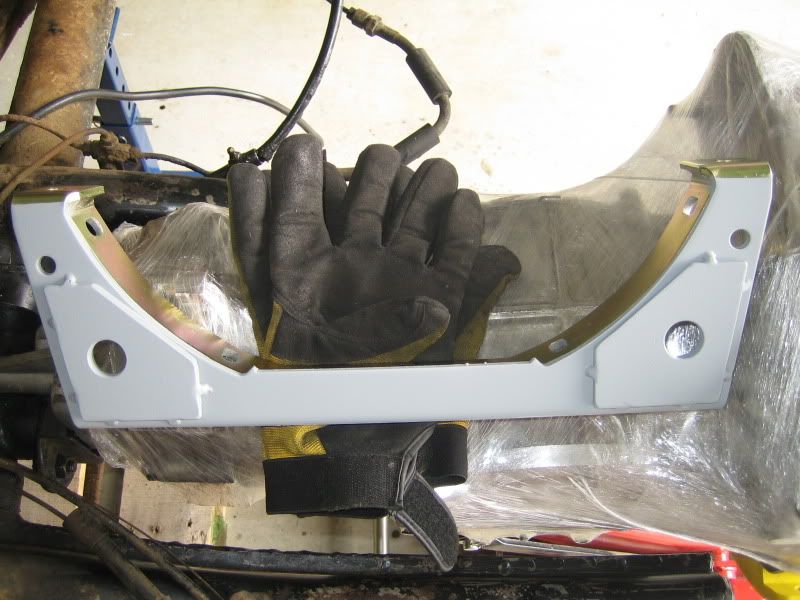
Now bolted up it all seems to line up properly again. Probably not 100% necessary but I just like things to look right.
|
|
|
 Aussie Aussie
Officially Full-On Dubber
  
Posts: 296
Threads: 43
Registered: September 15th, 2006
Member Is Offline
Location: Gold Coast
Theme: UltimaBB Pro Blue ( Default )
|
| posted on April 3rd, 2010 at 06:29 PM |
|
|
Next up was the mid mount which needed brackets welded onto the frame horns.
Here is the kit as supplied:
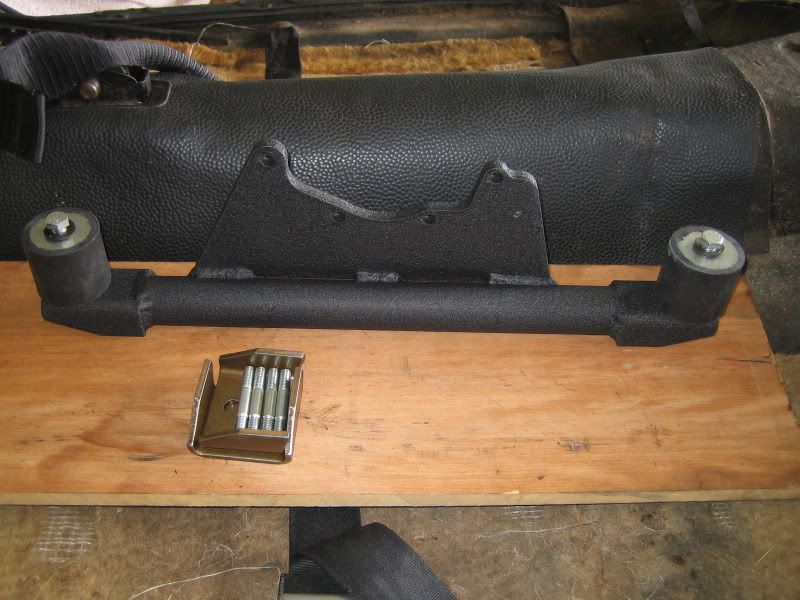
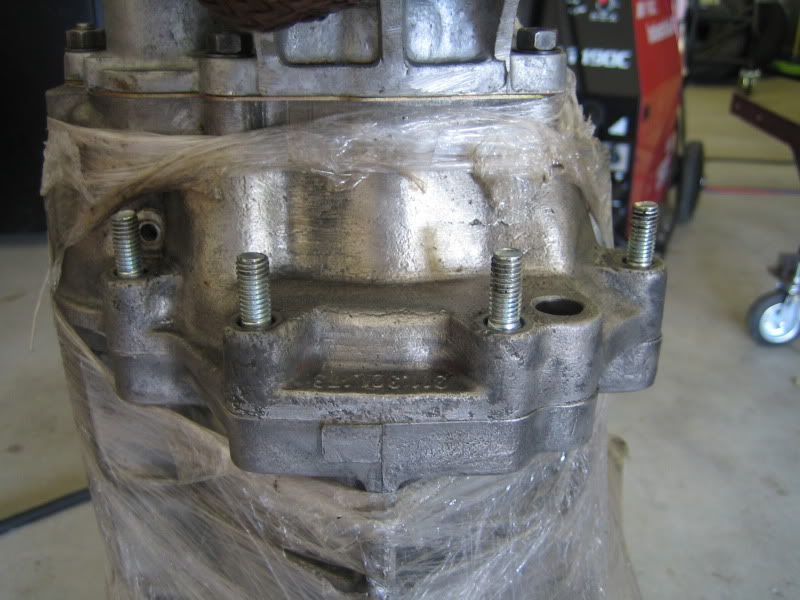
You need to replace the 4 stock length studs under the box with longer versions to allow for the thickness of the mount plate.
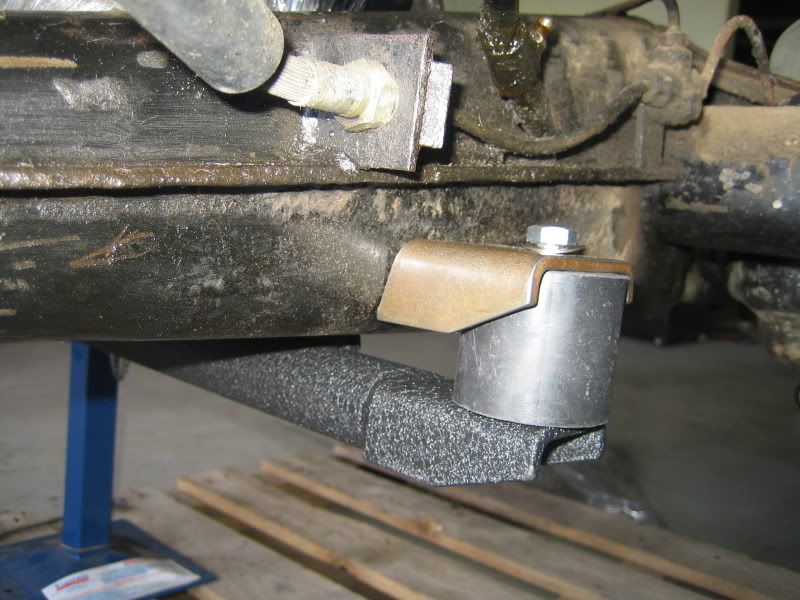
Next a trial fit to make sure there is good clearence to everything. Not sure how much these things flex under load but the design is good with plenty
of room for a bit of movement.

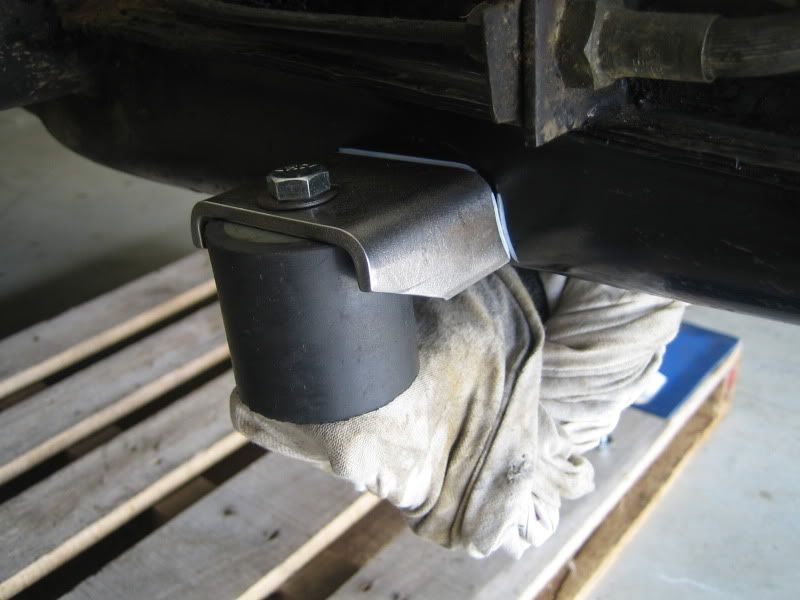
The only thing I didnt like about the kit was the profile of the mounting face where it is welded to the frame horn.
So I grabbed the grinder and file and shaped things a bit for a more snug fit. Should help to make the welds a bit neater at least!
|
|
|
| Pages: 1 2 3 4 .. 7 |