| [ Total Views: 10871 | Total Replies: 99 | Thread Id: 96930 ] |
| Pages: 1 2 3 4 |
|
|
 rickp rickp
Officially Full-On Dubber
  
Posts: 200
Threads: 31
Registered: April 26th, 2010
Member Is Offline
Location: liverpool
Theme: UltimaBB Pro Blue
|
| posted on June 9th, 2012 at 06:16 PM |
|
|
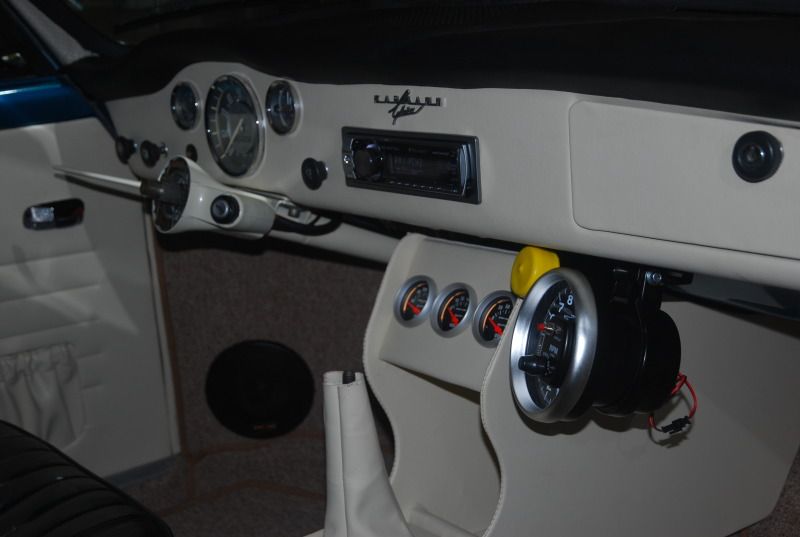
got a little more done today:
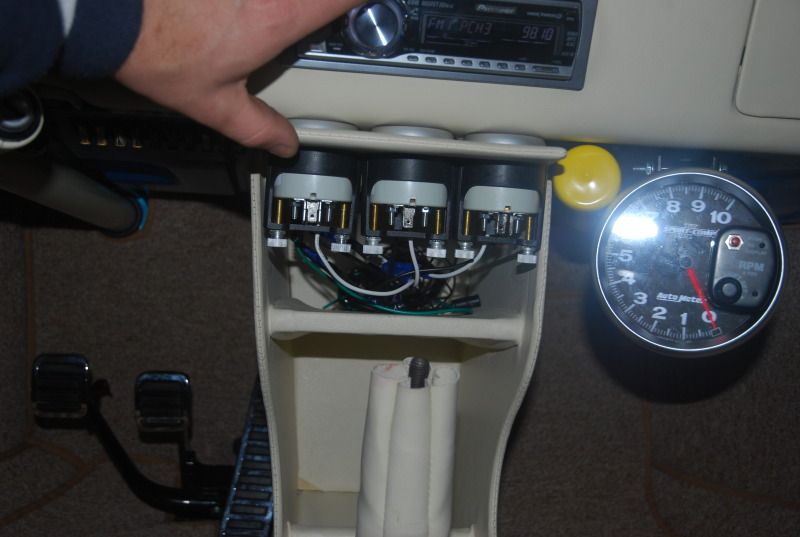
bought some autometer sport-comp gauges
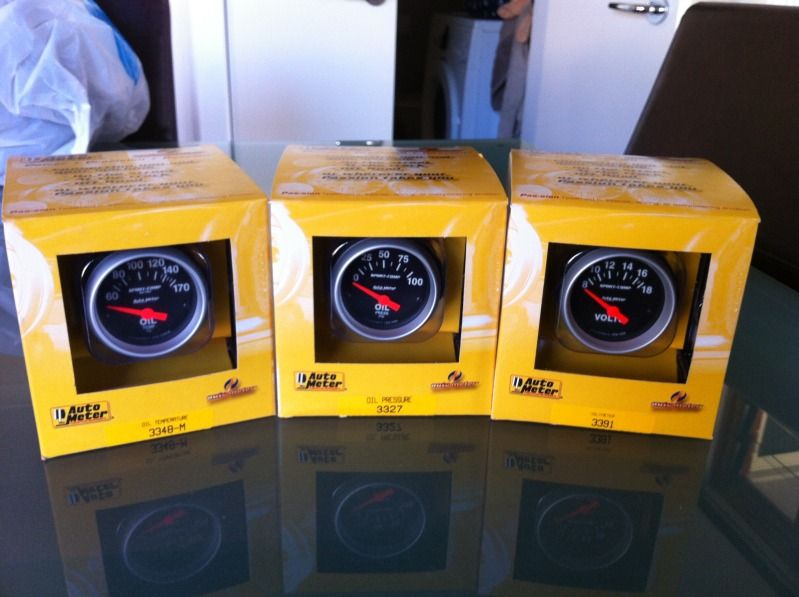
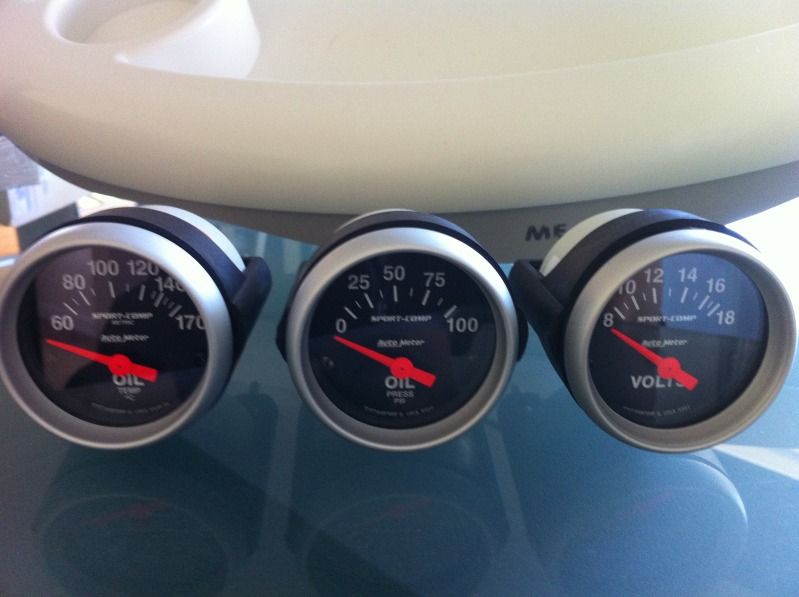
and installed them in the console
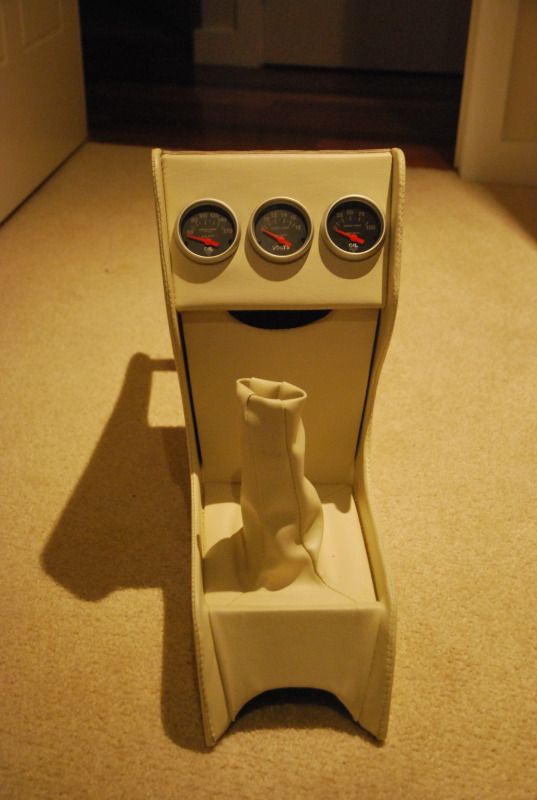
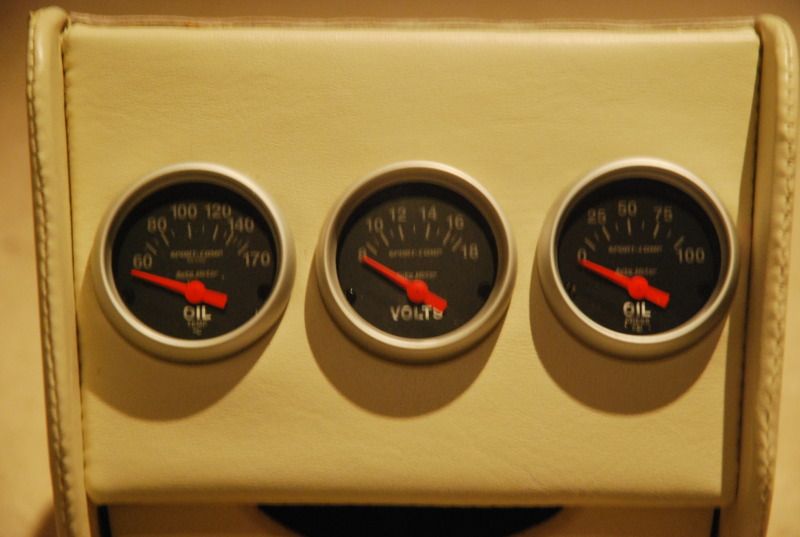
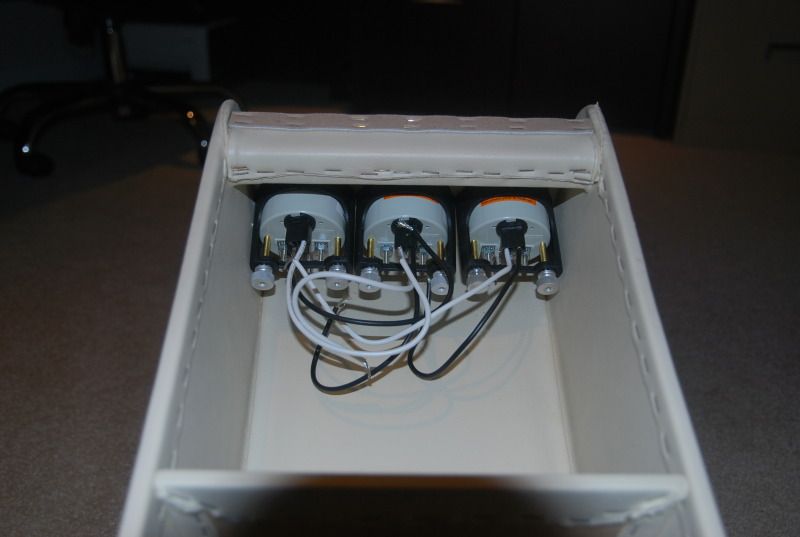
very tight fit in there, but plenty of room for the wiring, i am also thinking of getting rid of that bottom door thinghy.. i think it would look
better open
also made up some plates to close off these areas of the engine bay.
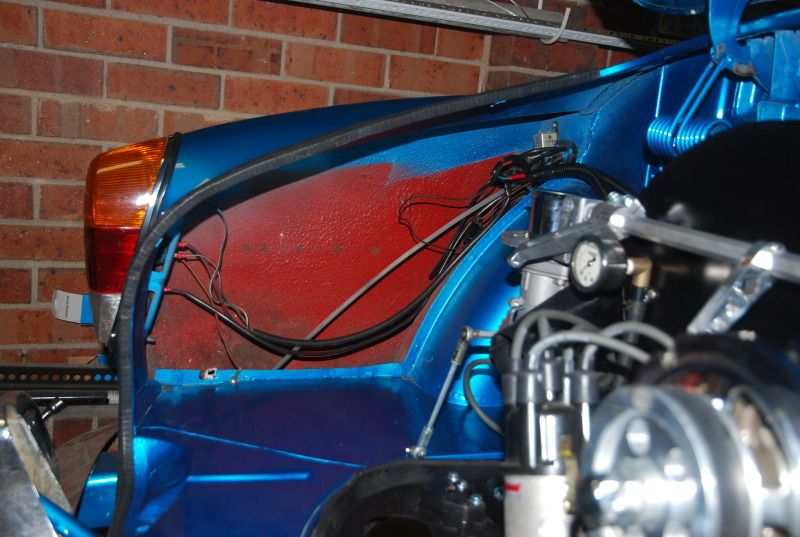
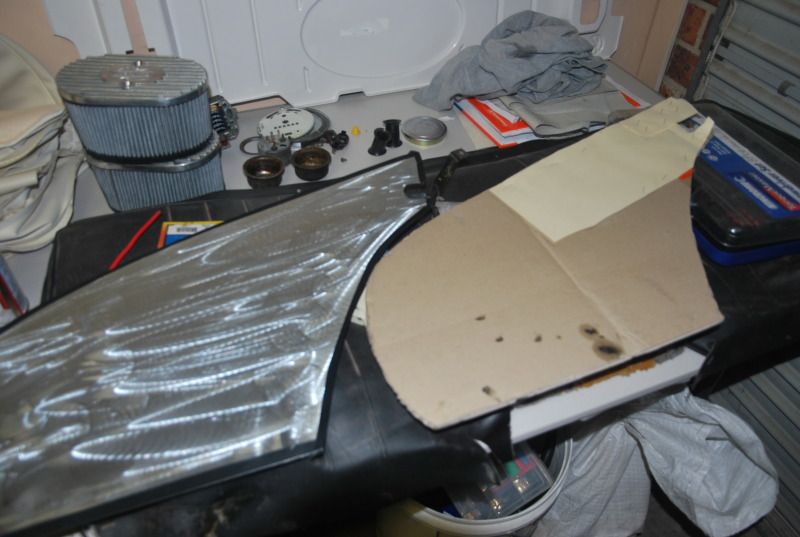
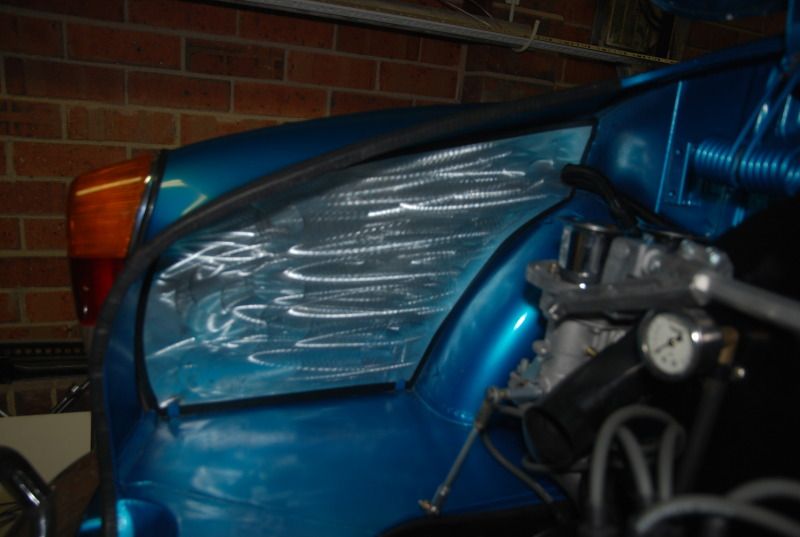
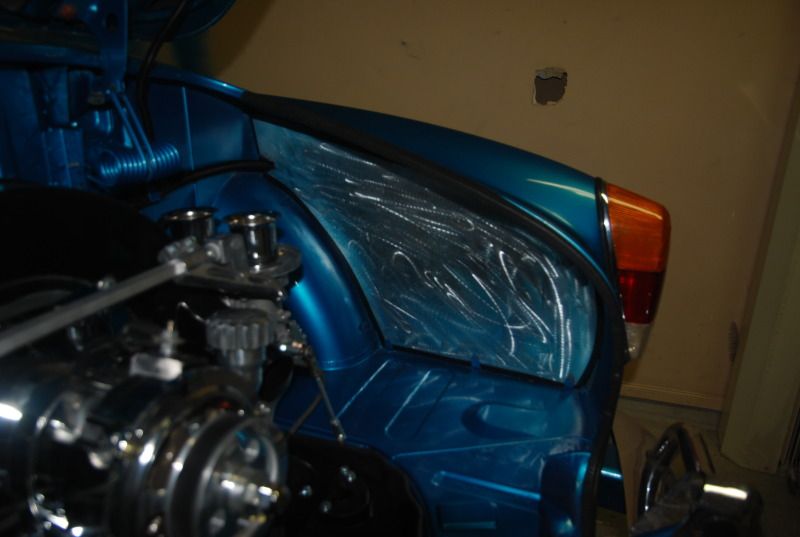
ready for paint 
|
|
|
 rickp rickp
Officially Full-On Dubber
  
Posts: 200
Threads: 31
Registered: April 26th, 2010
Member Is Offline
Location: liverpool
Theme: UltimaBB Pro Blue
|
| posted on June 11th, 2012 at 03:55 PM |
|
|
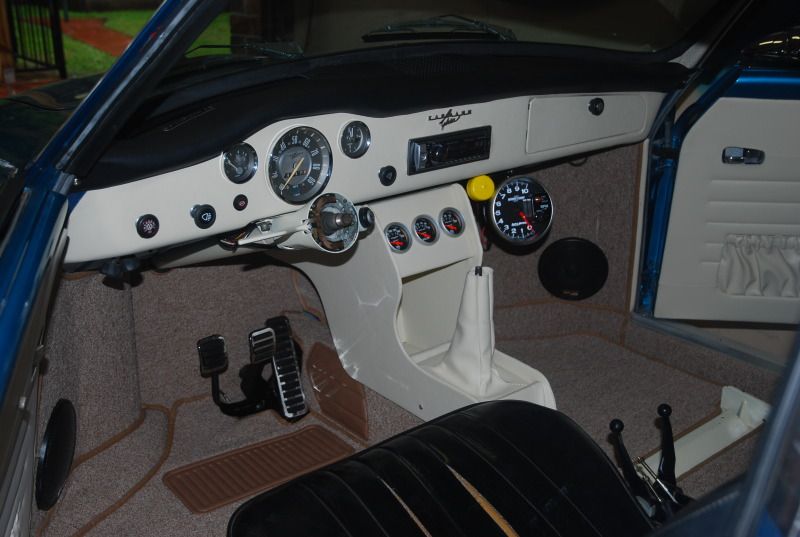
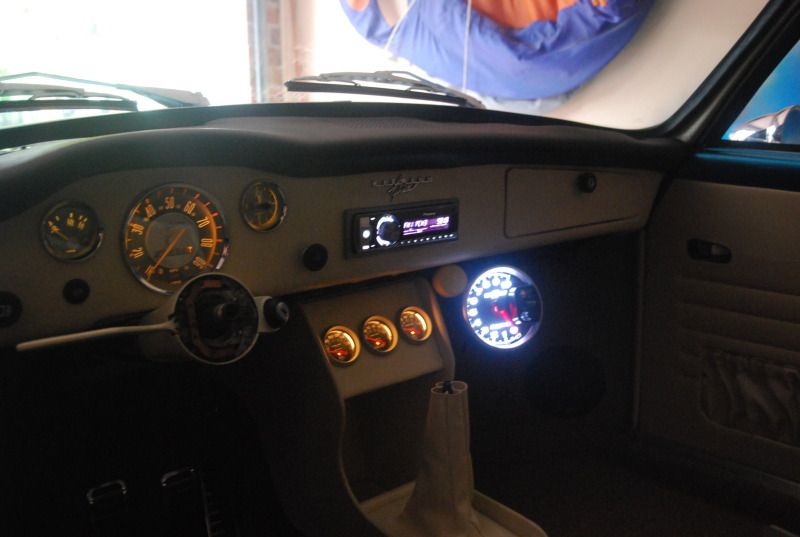
with the crappy weather around at the moment, still managed to get myself motivated and got the console in the car, gauges wired up for lights, ran
wiring to the engine bay for the senders and secured the radio
|
|
|
 rickp rickp
Officially Full-On Dubber
  
Posts: 200
Threads: 31
Registered: April 26th, 2010
Member Is Offline
Location: liverpool
Theme: UltimaBB Pro Blue
|
| posted on July 27th, 2012 at 07:26 PM |
|
|
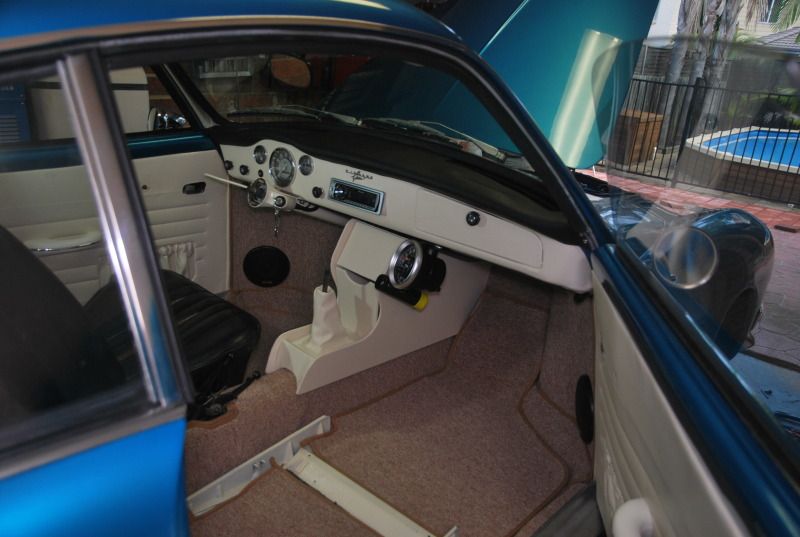
a major update!,, as of now the interior has been finished, the fuel tank has been installed, the brakes have been bled, the steering wheel has been
installed,


there are still a few little things to be done.
work out the horn wiring issue
replace the handbrake and get a boot made for it in vinyl
wire in fuse for reverse lights
ect. im sure there are more little things to be done but i couldnt help myself and......
i have just taken my 1st drive of the little ghia, WOW, it was damn worth it, cannot wait to have it registered and insured.
videos are a bit crap but im having trouble uploading to you tube so these will have to do
http://youtu.be/I2BtJim8a2c
http://youtu.be/pSoAwYR1E9A
http://youtu.be/iOW8n63F0do
|
|
|
 rickp rickp
Officially Full-On Dubber
  
Posts: 200
Threads: 31
Registered: April 26th, 2010
Member Is Offline
Location: liverpool
Theme: UltimaBB Pro Blue
|
| posted on July 27th, 2012 at 07:32 PM |
|
|
actually i just found out that i have to click "change quality" and you can watch in HD
|
|
|
 newghia newghia
A.k.a.: Noddy
Wolfsburg Wizard
stock is for people who cant think outside the square
  
Posts: 679
Threads: 30
Registered: May 29th, 2008
Member Is Offline
Location: western sydney
Theme: UltimaBB Pro Charcoal
Mood: nood !
|
| posted on July 27th, 2012 at 08:18 PM |
|
|
1 week to Valla Rick........will you ?????
looking good,
Nath
Step up to get out !!!
|
|
|
 rickp rickp
Officially Full-On Dubber
  
Posts: 200
Threads: 31
Registered: April 26th, 2010
Member Is Offline
Location: liverpool
Theme: UltimaBB Pro Blue
|
| posted on July 30th, 2012 at 07:34 PM |
|
|
hahaho no... i have to sell the mrs old car before i can register this one. should be cruising around soon though wich will be great once the weather
warms up
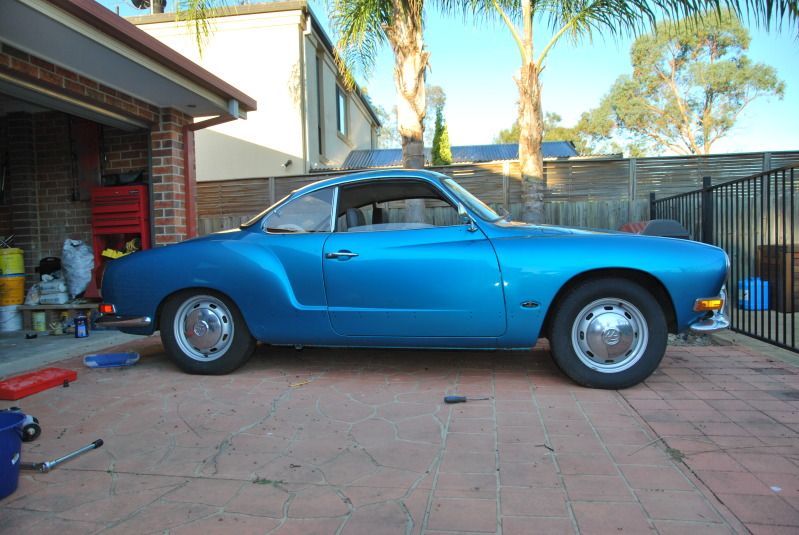
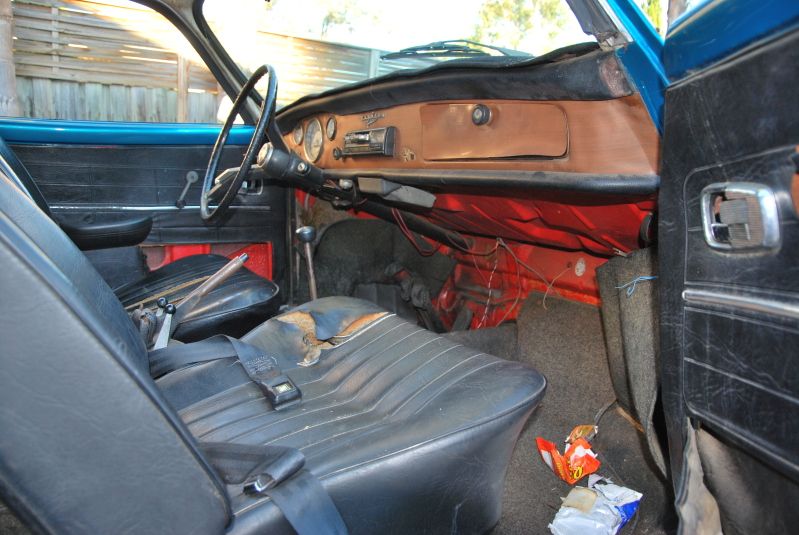
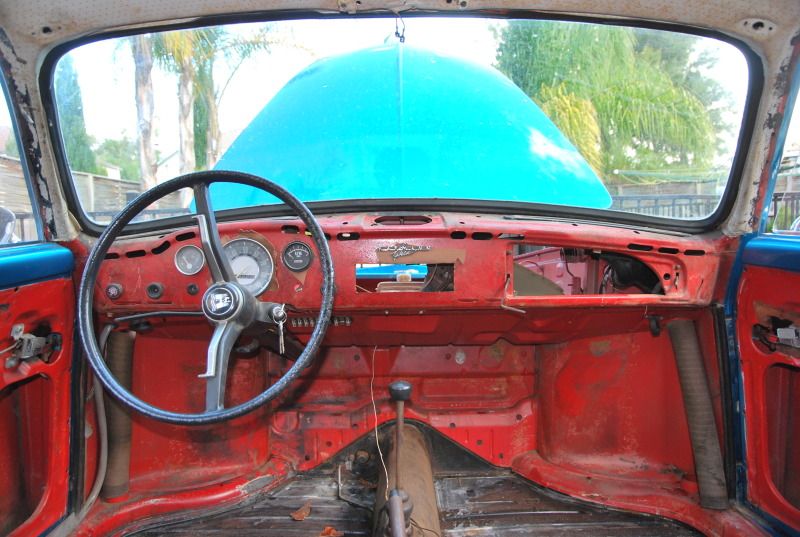
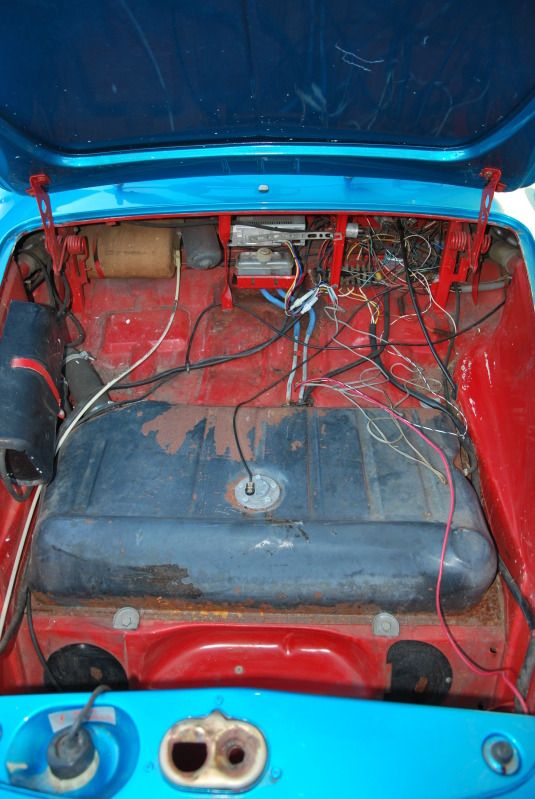
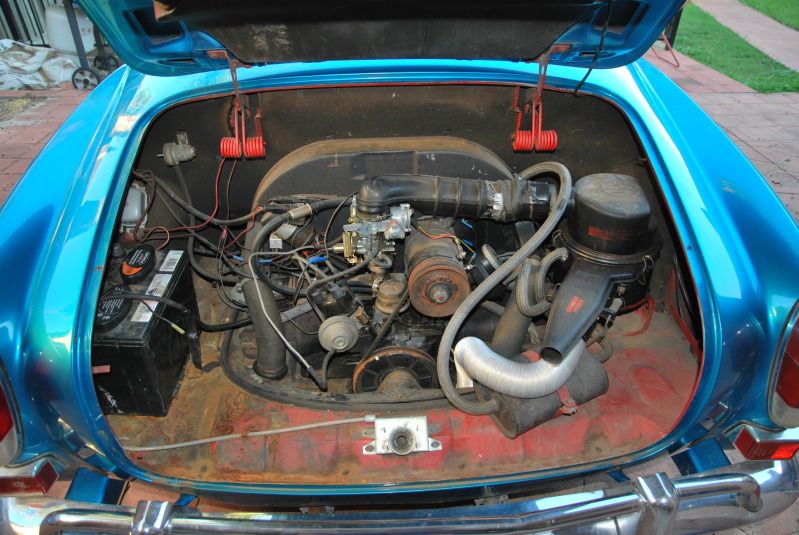
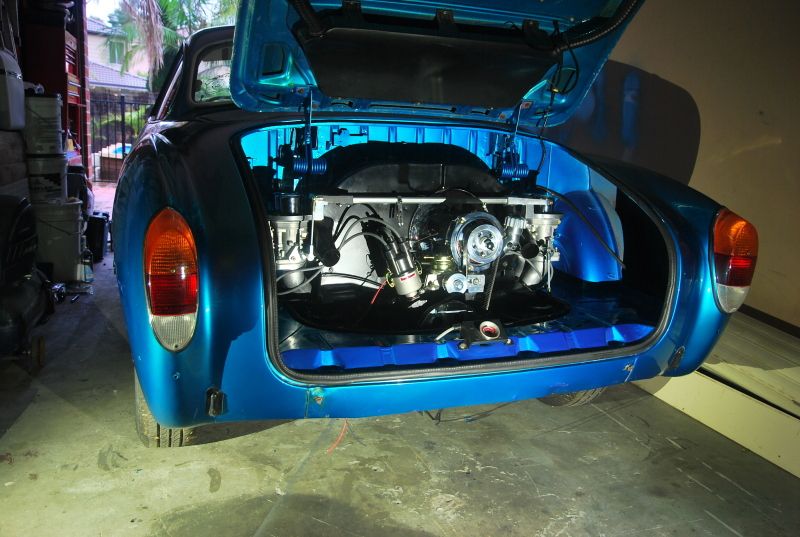
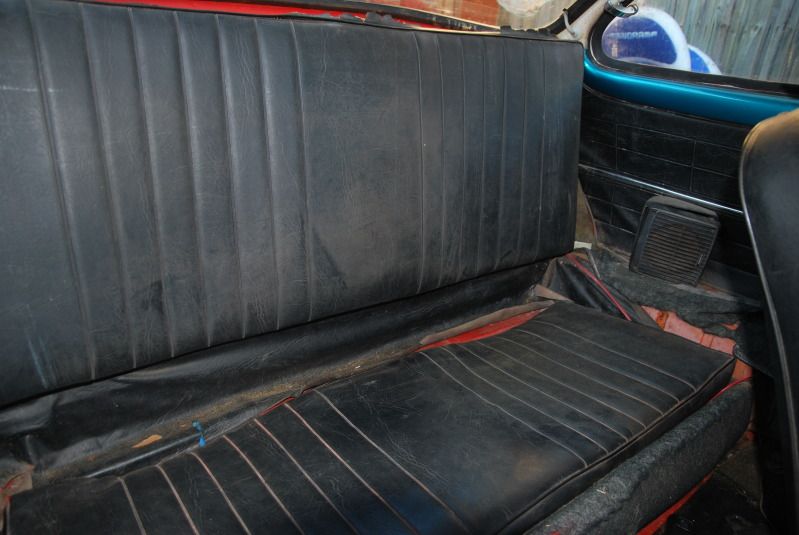
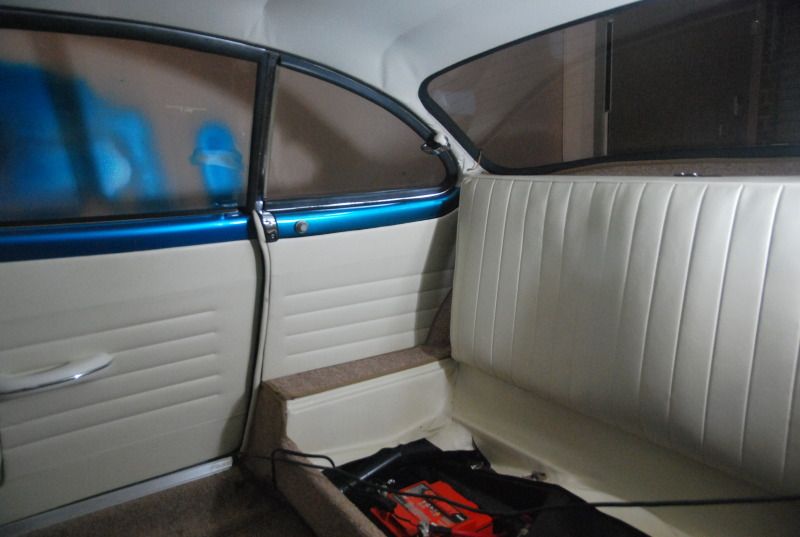
as most of you have guessed right about now, i am a bit of a photo whore ... so here are some before and after shots



|
|
|
 Camo Camo
A.k.a.: Kev
Custom Title Time!
    
Posts: 1936
Threads: 209
Registered: October 29th, 2007
Member Is Offline
Location: Sydney - Liverpool area
Theme: UltimaBB Pro Blue
|
| posted on July 30th, 2012 at 09:26 PM |
|
|
| Quote: | Originally
posted by rickp
as most of you have guessed right about now, i am a bit of a photo whore ... so here are some before and after shots
|
Before and after photos  I couldn't really see any difference I couldn't really see any difference      
Na, top job Rick     
You should come just for a met up this Friday and say hello, even if not in the Ghia.
Kev
|
|
|
 rickp rickp
Officially Full-On Dubber
  
Posts: 200
Threads: 31
Registered: April 26th, 2010
Member Is Offline
Location: liverpool
Theme: UltimaBB Pro Blue
|
| posted on August 2nd, 2012 at 06:05 PM |
|
|
i wont make it out this friday unfortunately, i will definatelly try and be in the next one though thanks camo. 
here is a pic of the little one enjoying the ghia 

|
|
|
 surreyp surreyp
Casual Dubber

Posts: 45
Threads: 16
Registered: January 25th, 2011
Member Is Offline
Theme: UltimaBB Pro Blue ( Default )
|
| posted on August 2nd, 2012 at 08:55 PM |
|
|
sweet man nice job.
you have inspired me to get moving on my car - i am at the other end of my project, hope it turns outs 1/2 as good.
|
|
|
 rickp rickp
Officially Full-On Dubber
  
Posts: 200
Threads: 31
Registered: April 26th, 2010
Member Is Offline
Location: liverpool
Theme: UltimaBB Pro Blue
|
| posted on August 11th, 2012 at 04:24 PM |
|
|
| Quote: | Originally
posted by surreyp
sweet man nice job.
you have inspired me to get moving on my car - i am at the other end of my project, hope it turns outs 1/2 as good.
|
thats awesome,i i often read build ups to get myself motivated to work on my car and it was over 1 year after i bought it that i got a move on. i am
sure your car wil turn out great!
more updates! (lol you guys are probably sick of my photos by now   haha) haha)
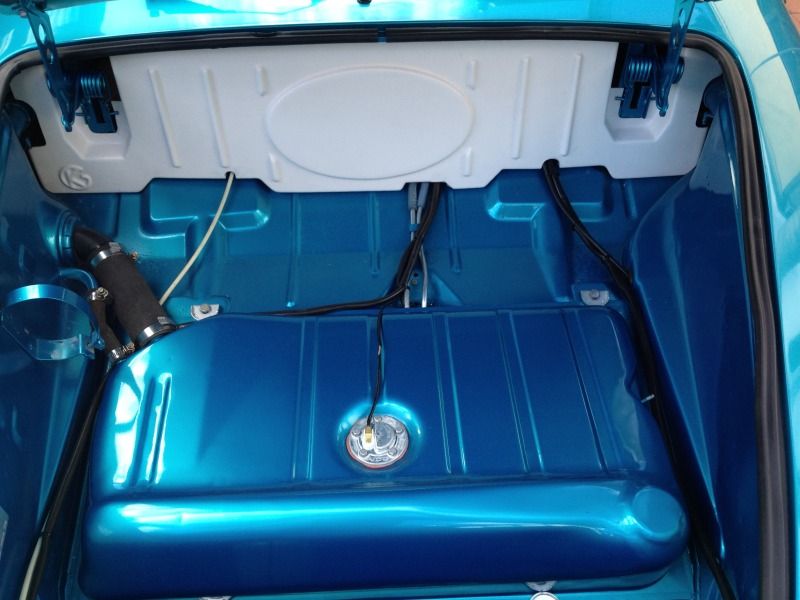
tidied up under the trunk and placed the wire cover with a little modification.
i was thinking of painting the cover the same color as the body, but you have to flex the thing so much to get it in that even plastic primer,
adhesion promoter and any additive i add to the paint doesnt stand a chance. the paint will crack  any way it still looks better than seeing cables everywhere any way it still looks better than seeing cables everywhere
bought a gas strut for the decklid and made my own brackets.

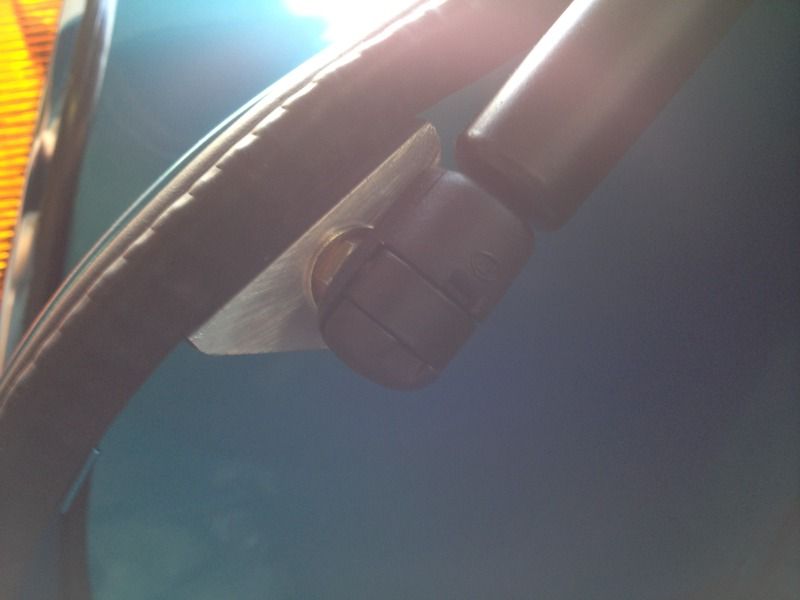
which meant that i was able to remove the decklid springs and install my airfilters for the 1st time.

and to finish off, the engine bay covers were painted and lined with rubber seal to finish off the engine bay.


now i have to pull the carbs as shes running really rich (fouled the plugs) and clean them and order new idle jets
|
|
|
 empi empi
A.k.a.: Empstar
Compulsive Aussie Vee Dubber
      
Posts: 4131
Threads: 178
Registered: August 27th, 2002
Member Is Offline
Location: melbourne
Theme: UltimaBB Pro Blue ( Default )
Mood: thunderous
|
| posted on August 12th, 2012 at 12:17 PM |
|
|
Nice, where did u get the wire cover?
"If at first you don't succeed, skydiving is not for you." - Anonymous  |
|
|
 rickp rickp
Officially Full-On Dubber
  
Posts: 200
Threads: 31
Registered: April 26th, 2010
Member Is Offline
Location: liverpool
Theme: UltimaBB Pro Blue
|
| posted on August 12th, 2012 at 08:08 PM |
|
|
Thanks empi, the wire cover came from kgrp.
|
|
|
 hanktheplank hanktheplank
Casual Dubber

Posts: 41
Threads: 6
Registered: April 23rd, 2005
Member Is Offline
Location: Melbourne
Theme: UltimaBB Pro Blue ( Default )
|
| posted on August 30th, 2012 at 10:54 PM |
|
|
Awesome job mate! That really is a beautiful Ghia.....
61 Karmann Ghia - "Audrey"
76 Kombi, Sopru Conversion - "Bob"
68 Wife - "DS-W"
|
|
|
 chris7 chris7
Seriously Crusin Dubber
 
Posts: 122
Threads: 15
Registered: September 13th, 2010
Member Is Offline
Location: Victoria
Theme: UltimaBB Pro Yellow
|
| posted on September 3rd, 2012 at 09:49 AM |
|
|
Love the car great work 
|
|
|
 RZEDGE RZEDGE
Casual Dubber

Posts: 44
Threads: 13
Registered: May 11th, 2010
Member Is Offline
Location: Brunswick, Melbourne
Theme: UltimaBB Pro Blue ( Default )
|
| posted on November 13th, 2012 at 05:56 PM |
|
|
I'm in love.... amazing work!
Current
'69 Type 34 Ghia
'64 Splitscreen Van
'72 Low Light Single Cab
'73 Bay-Bus Camper (for sale)
Past
'57 Beetle
|
|
|
 whathaveidone whathaveidone
Custom Title Time!
    
Posts: 1559
Threads: 98
Registered: February 24th, 2010
Member Is Offline
Location: Dapto
Theme: UltimaBB Pro Blue ( Default )
Mood: Heading for 10.99
|
| posted on November 13th, 2012 at 06:16 PM |
|
|
Very nice!!!
|
|
|
 vlad01 vlad01
Compulsive Aussie Vee Dubber
      
Posts: 4270
Threads: 109
Registered: June 3rd, 2010
Member Is Offline
Location: Kyneton, VIC
Theme: UltimaBB Pro Blue ( Default )
Mood: Side ways
|
| posted on November 15th, 2012 at 09:03 PM |
|
|
wow that was fast!
71 notchback,
Past owner of, 70 NB, 73 SB and 72 FB TLE |
|
|
 isky isky
Officially Full-On Dubber
  
Posts: 257
Threads: 40
Registered: May 18th, 2009
Member Is Offline
Location: Ferny Hills, Brisbane
Theme: UltimaBB Pro Blue
Mood: awesome....
|
| posted on November 15th, 2012 at 11:30 PM |
|
|
Congrats on the car Rick, it looks great! Just curious about your center console? Mind me asking where you bought it, or if you made it yourself?
I've seen similar ones for sale but they're for bugs... thinking about going the same route for my ride 
|
|
|
 vlad01 vlad01
Compulsive Aussie Vee Dubber
      
Posts: 4270
Threads: 109
Registered: June 3rd, 2010
Member Is Offline
Location: Kyneton, VIC
Theme: UltimaBB Pro Blue ( Default )
Mood: Side ways
|
| posted on November 16th, 2012 at 09:33 PM |
|
|
| Quote: | Originally
posted by rickp
| Quote: | Originally
posted by surreyp
sweet man nice job.
you have inspired me to get moving on my car - i am at the other end of my project, hope it turns outs 1/2 as good.
|
thats awesome,i i often read build ups to get myself motivated to work on my car and it was over 1 year after i bought it that i got a move on. i am
sure your car wil turn out great!
more updates! (lol you guys are probably sick of my photos by now   haha) haha)
tidied up under the trunk and placed the wire cover with a little modification.
i was thinking of painting the cover the same color as the body, but you have to flex the thing so much to get it in that even plastic primer,
adhesion promoter and any additive i add to the paint doesnt stand a chance. the paint will crack  any way it still looks better than seeing cables everywhere any way it still looks better than seeing cables everywhere

bought a gas strut for the decklid and made my own brackets.


which meant that i was able to remove the decklid springs and install my airfilters for the 1st time.

and to finish off, the engine bay covers were painted and lined with rubber seal to finish off the engine bay.


now i have to pull the carbs as shes running really rich (fouled the plugs) and clean them and order new idle jets
|
plastic primer?
you could try flame treatment.

71 notchback,
Past owner of, 70 NB, 73 SB and 72 FB TLE |
|
|
 tothemaxx tothemaxx
Seriously Crusin Dubber
 
Posts: 156
Threads: 56
Registered: January 20th, 2011
Member Is Offline
Theme: UltimaBB Pro Blue ( Default )
|
| posted on November 22nd, 2012 at 10:58 PM |
|
|
wow the car is comming along great. Would love to check it out one day since I'm local. BTW was it an easy swap for the front disk to porsche pattern
or there was alterations done and also the rear did you use pressed studs or just use the lug nuts with the stem built in? Thanks
Pat
1967 Karmann Ghia - Newest addition to the family
2009 VW Passat CC - Sold to make way fo rthe KG = (
2008 VW Passat Wagon- Ride off by a stupid truck driver
2000 Honda S2000 - Great JDM gear
|
|
|
 rickp rickp
Officially Full-On Dubber
  
Posts: 200
Threads: 31
Registered: April 26th, 2010
Member Is Offline
Location: liverpool
Theme: UltimaBB Pro Blue
|
| posted on November 23rd, 2012 at 04:37 PM |
|
|
thanks for all the comments guys, i have been a bit slack with the car after the rta debarcle but i an hopefully back on track as i would love to
enjoy the car as the weather is getting better.
| Quote: | Originally
posted by isky
Congrats on the car Rick, it looks great! Just curious about your center console? Mind me asking where you bought it, or if you made it yourself?
I've seen similar ones for sale but they're for bugs... thinking about going the same route for my ride 
|
Thanks mate,
i bought the console as is from evwparts.com from the us
| Quote: | plastic primer?
you could try flame treatment.
|
flame treatment? never heard of it... ill ask google
| Quote: | wow the car is
comming along great. Would love to check it out one day since I'm local. BTW was it an easy swap for the front disk to porsche pattern or there was
alterations done and also the rear did you use pressed studs or just use the lug nuts with the stem built in? Thanks
Pat
|
thanks pat. where abouts are you from?
to answer your question with the front brakes it was as easy as replacing rotors with the porsche pattern, they fit straight onto the spindle and
bearing. the rear brakes were more involved to replace the complete drum brake set up with the disk set up, in saying that .. it was a complete bolt
on kit so no cutting or welding was necessary and completely reversible.
i used the orignal bolts, i have to find some with the right seat for my wheels as it looks like they are a slightly different contour to the seat in
the wheel
|
|
|
 tothemaxx tothemaxx
Seriously Crusin Dubber
 
Posts: 156
Threads: 56
Registered: January 20th, 2011
Member Is Offline
Theme: UltimaBB Pro Blue ( Default )
|
| posted on November 23rd, 2012 at 11:16 PM |
|
|
thanks for the response. I'm in St Johns Park which is 10 min away from Livo. Is your kit from Classic Veedub? I know that the fuch takes the ball
seat lug not the acorn ones. Do you mind if you can pm me your contact number? Would like to ask a few questions if you dont mind. Cheers
Pat
1967 Karmann Ghia - Newest addition to the family
2009 VW Passat CC - Sold to make way fo rthe KG = (
2008 VW Passat Wagon- Ride off by a stupid truck driver
2000 Honda S2000 - Great JDM gear
|
|
|
 vlad01 vlad01
Compulsive Aussie Vee Dubber
      
Posts: 4270
Threads: 109
Registered: June 3rd, 2010
Member Is Offline
Location: Kyneton, VIC
Theme: UltimaBB Pro Blue ( Default )
Mood: Side ways
|
| posted on November 25th, 2012 at 09:26 AM |
|
|
| Quote: | Originally
posted by rickp
thanks for all the comments guys, i have been a bit slack with the car after the rta debarcle but i an hopefully back on track as i would love to
enjoy the car as the weather is getting better.
| Quote: | Originally
posted by isky
Congrats on the car Rick, it looks great! Just curious about your center console? Mind me asking where you bought it, or if you made it yourself?
I've seen similar ones for sale but they're for bugs... thinking about going the same route for my ride 
|
Thanks mate,
i bought the console as is from evwparts.com from the us
| Quote: | plastic primer?
you could try flame treatment.
|
flame treatment? never heard of it... ill ask google
| Quote: | wow the car is
comming along great. Would love to check it out one day since I'm local. BTW was it an easy swap for the front disk to porsche pattern or there was
alterations done and also the rear did you use pressed studs or just use the lug nuts with the stem built in? Thanks
Pat
|
thanks pat. where abouts are you from?
to answer your question with the front brakes it was as easy as replacing rotors with the porsche pattern, they fit straight onto the spindle and
bearing. the rear brakes were more involved to replace the complete drum brake set up with the disk set up, in saying that .. it was a complete bolt
on kit so no cutting or welding was necessary and completely reversible.
i used the orignal bolts, i have to find some with the right seat for my wheels as it looks like they are a slightly different contour to the seat in
the wheel
|
flame treatment is commonly used through industries to promote paint or ink adhesion to plastics. Normally I beilve its and oxidizing flame is used
and the free oxygen atoms in the flame oxidize the plastic making very receptive to paint, inks, dyes and even water stick to plastic after the
treatment.
I see it on a regular basic with screen printing on plastic bottles, pretty certain thats the same technique used to adhere paint to plastic bumpers
back in the early days when plastic bumpers came about and there wasn't good plastic primers.
coronal treatment is another one, uses high voltage to make ozone which is extremely corrosive, does the same thing to plastic.

71 notchback,
Past owner of, 70 NB, 73 SB and 72 FB TLE |
|
|
 rickp rickp
Officially Full-On Dubber
  
Posts: 200
Threads: 31
Registered: April 26th, 2010
Member Is Offline
Location: liverpool
Theme: UltimaBB Pro Blue
|
| posted on November 25th, 2012 at 06:44 PM |
|
|
| Quote: |
thanks for the response. I'm in St Johns Park which is 10 min away from Livo. Is your kit from Classic Veedub? I know that the fuch takes the ball
seat lug not the acorn ones. Do you mind if you can pm me your contact number? Would like to ask a few questions if you dont mind. Cheers
Pat
|
cool, there are quite a few guys from the area , if you want to check the car out be my guest. catch up for a beer or two and talk VW(pm sent). do you
own a ghia as well? and thank you for the information about the wheel nuts
| Quote: | flame treatment is
commonly used through industries to promote paint or ink adhesion to plastics. Normally I beilve its and oxidizing flame is used and the free oxygen
atoms in the flame oxidize the plastic making very receptive to paint, inks, dyes and even water stick to plastic after the treatment.
I see it on a regular basic with screen printing on plastic bottles, pretty certain thats the same technique used to adhere paint to plastic bumpers
back in the early days when plastic bumpers came about and there wasn't good plastic primers.
coronal treatment is another one, uses high voltage to make ozone which is extremely corrosive, does the same thing to plastic.
|
sounds complicated, LOL,... i don't dislike the way it looks so i might leave it for the time being,
just finished putting together a little crappy video of my ghia, (waiting on some new lenses from the us for my camera)
check it out:----->>>>http://youtu.be/fqnVDxpf6DE
|
|
|
 rickp rickp
Officially Full-On Dubber
  
Posts: 200
Threads: 31
Registered: April 26th, 2010
Member Is Offline
Location: liverpool
Theme: UltimaBB Pro Blue
|
| posted on December 19th, 2012 at 03:13 PM |
|
|
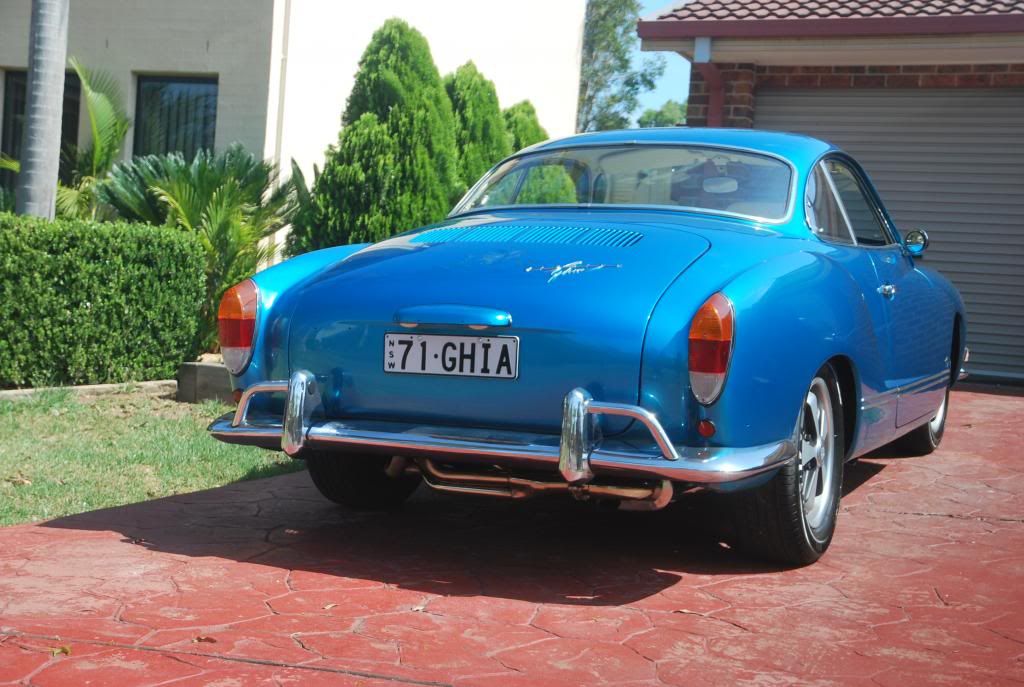
well, she went for the inspection..
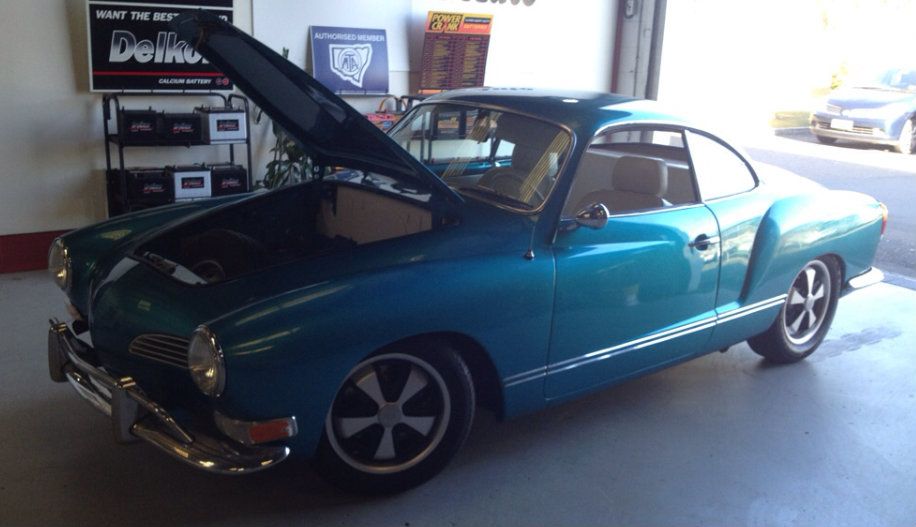
and passed,
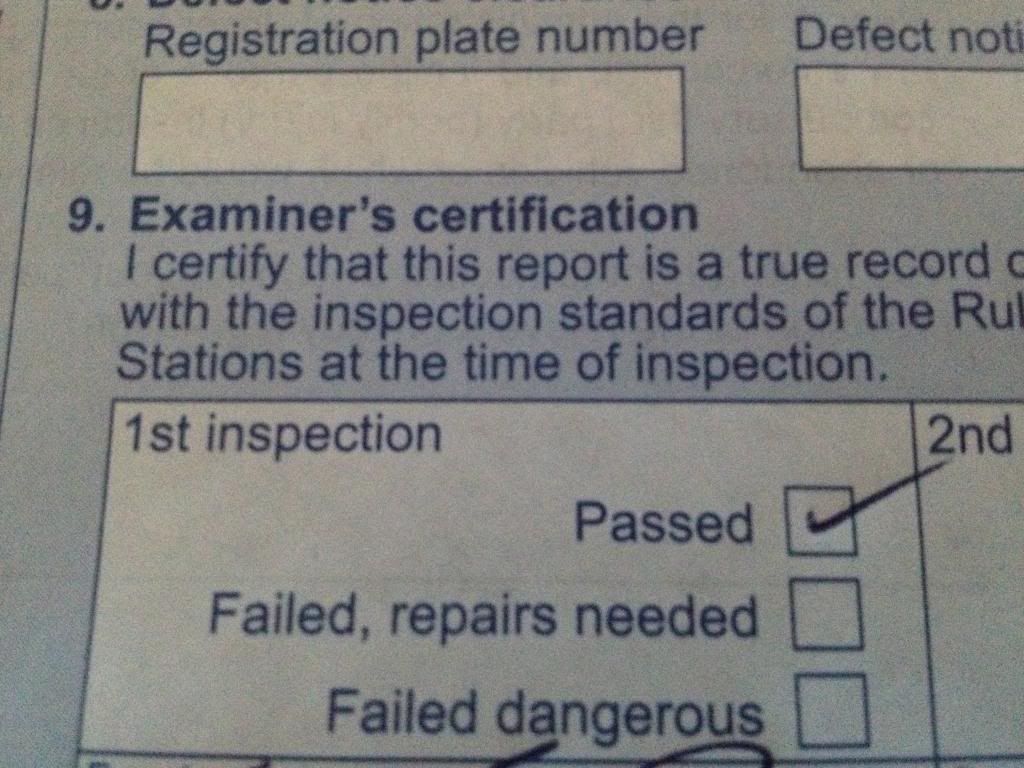
cant wipe the smile off my face. 
now with more rego! 
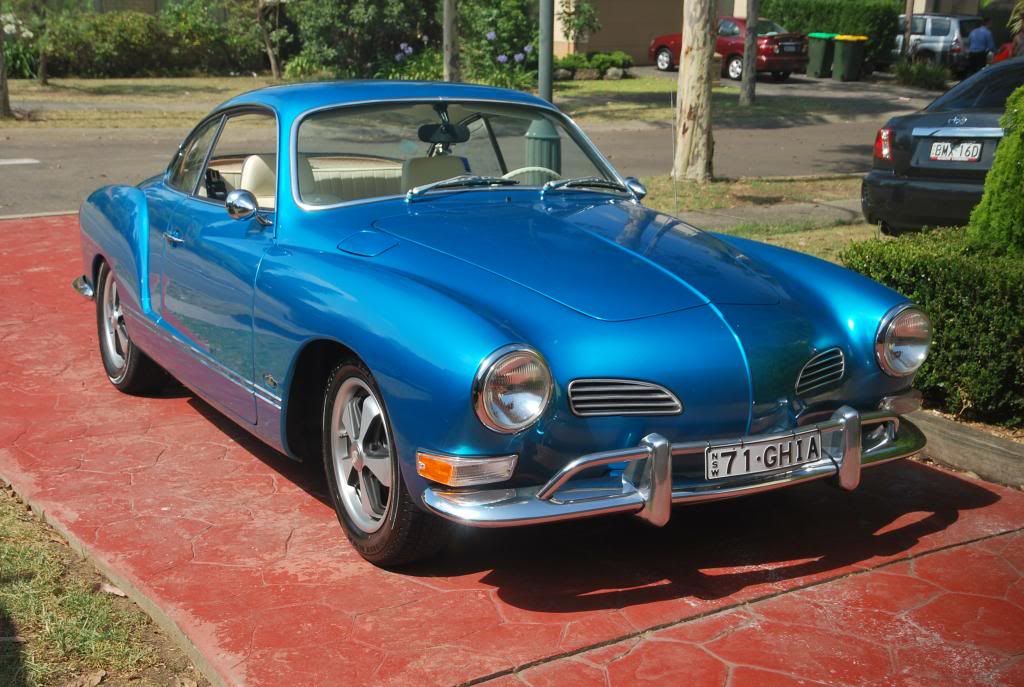
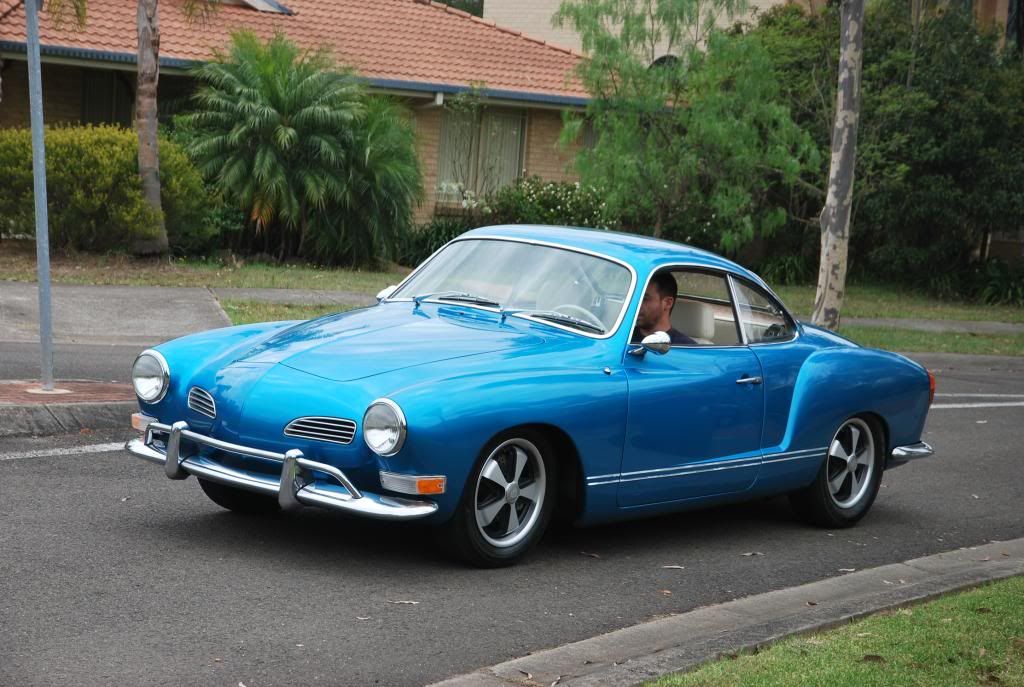
and just one more photo.. (my wife took this one) 
|
|
|
 Bizarre Bizarre
Super Moderator
The artist formerly known as blue74l
      
Posts: 12780
Threads: 734
Registered: August 25th, 2002
Member Is Offline
Location: Abbotsford, Sydney
Theme: UltimaBB Pro Blue ( Default )
|
| posted on December 19th, 2012 at 05:23 PM |
|
|
WOW    
Futue te ipsum!!!
|
|
|
 rickp rickp
Officially Full-On Dubber
  
Posts: 200
Threads: 31
Registered: April 26th, 2010
Member Is Offline
Location: liverpool
Theme: UltimaBB Pro Blue
|
| posted on January 1st, 2013 at 11:58 AM |
|
|
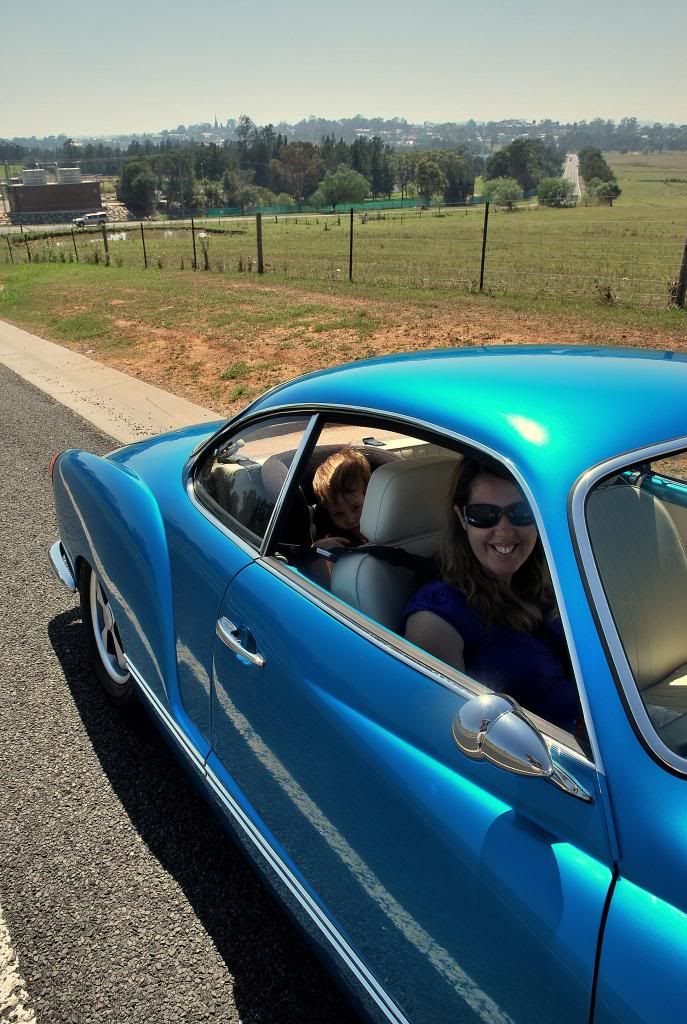
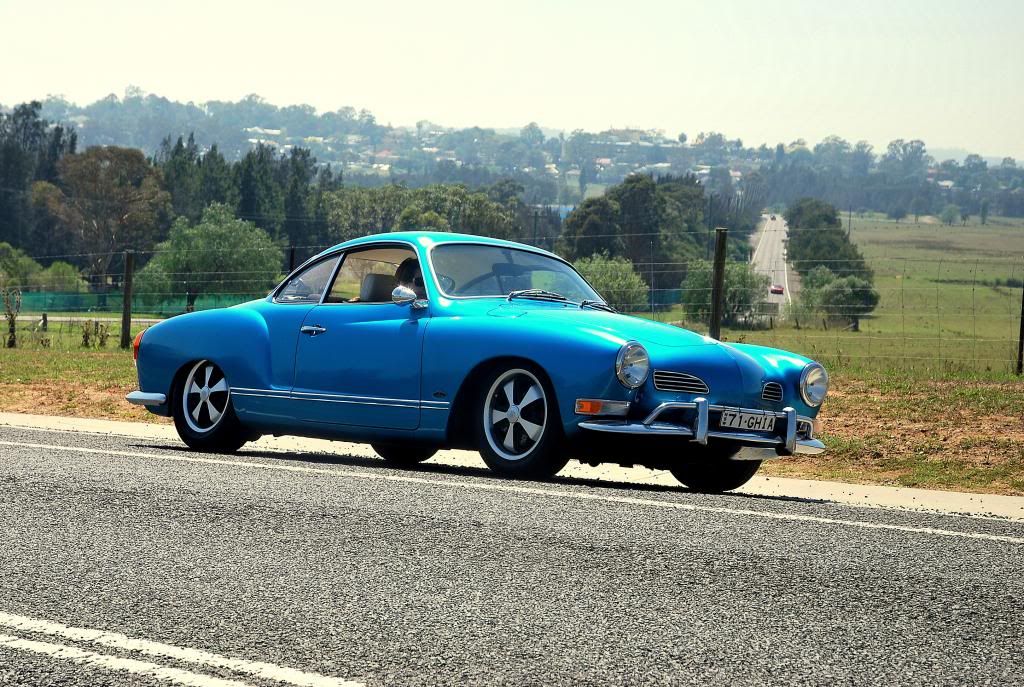
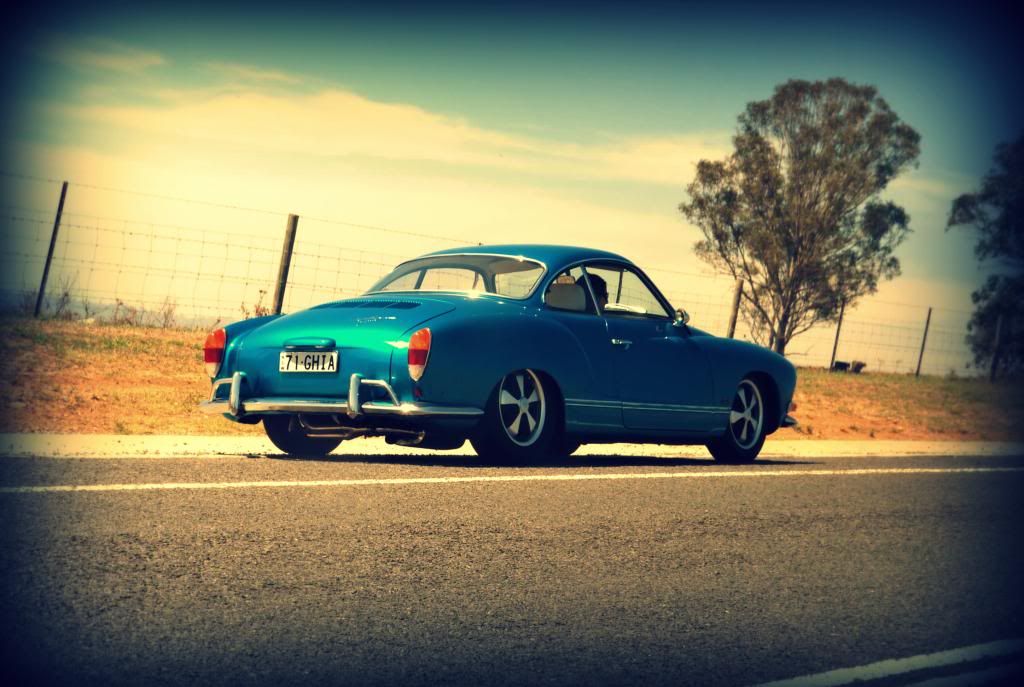
went for a new years cruise with the family today, it was nice to get the car out
|
|
|
 grogy grogy
Custom Title Time!
    
Posts: 1000
Threads: 344
Registered: August 16th, 2007
Member Is Offline
Location: Gold Coast
Theme: UltimaBB Pro Blue ( Default )
|
| posted on January 2nd, 2013 at 02:39 PM |
|
|
nice work, u family looks great riding in the ghia [u have to say that to be able to keep workin on it] i like u strut for the boot lid, i have the
same prob with mine cant fit the filters with the springs there. what type of strut did u use, does it work smoothly, i need to do it to mine. thanks
greg
|
|
|
 Paulc1964au Paulc1964au
Custom Title Time!
    
Posts: 1627
Threads: 59
Registered: March 5th, 2010
Member Is Offline
Location: Sydney, NSW
Theme: UltimaBB Pro Blue ( Default )
|
| posted on January 2nd, 2013 at 04:26 PM |
|
|
Absolutely beautiful how did I ever miss this thread?
where did you source the gauges from ?
Did you have the engine built locally if so where did you get it from and what size did you go with?
Do you ind if I repost some of your pics on my facebook page?
|
|
|
 Bizarre Bizarre
Super Moderator
The artist formerly known as blue74l
      
Posts: 12780
Threads: 734
Registered: August 25th, 2002
Member Is Offline
Location: Abbotsford, Sydney
Theme: UltimaBB Pro Blue ( Default )
|
| posted on January 2nd, 2013 at 05:05 PM |
|
|
that is what it is all about
Enjoy 
Futue te ipsum!!!
|
|
|
| Pages: 1 2 3 4 |