| [ Total Views: 28005 | Total Replies: 197 | Thread Id: 101415 ] |
| Pages: 1 2 3 4 5 .. 7 |
|
|
 roverv8bay roverv8bay
Officially Full-On Dubber
  
Posts: 250
Threads: 32
Registered: January 30th, 2013
Member Is Offline
Theme: UltimaBB Pro Blue ( Default )
|
| posted on August 16th, 2013 at 05:28 PM |
|
|
G'day all picked up 1st carrier hub took a very slight amount of to clean & round of to fit pajero axle flange to slide over it just nave to
determine height thenbolt to hub where the chalk marks are will drill & tap into hub plenty of metal to do that.
hub with with tidy up
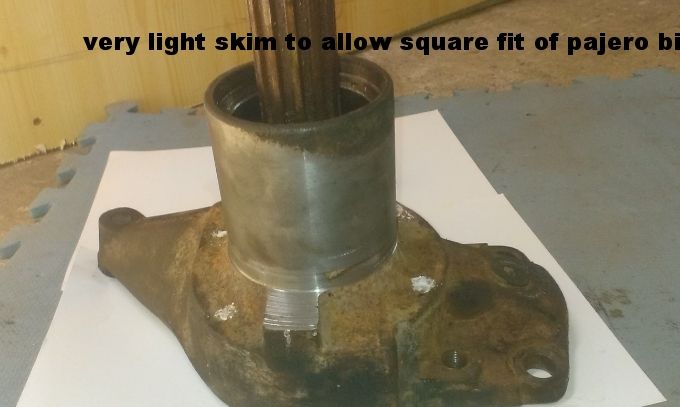
hub & pajero flange
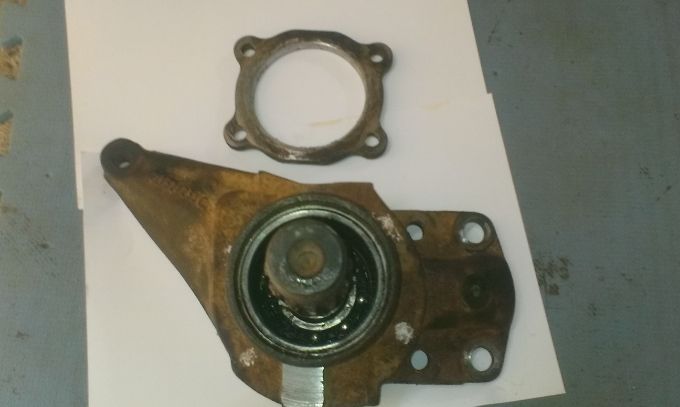
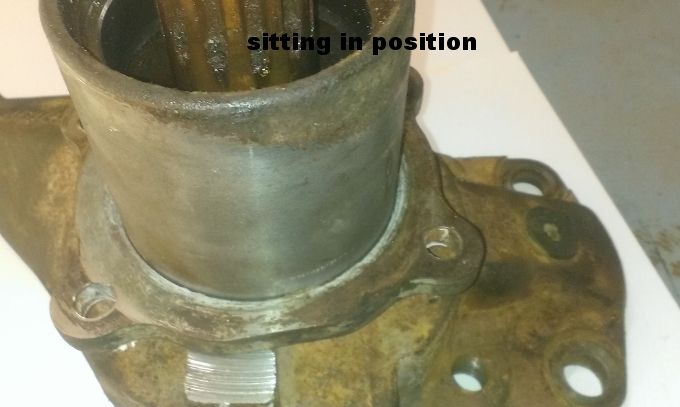
slide on fit just have sort out location
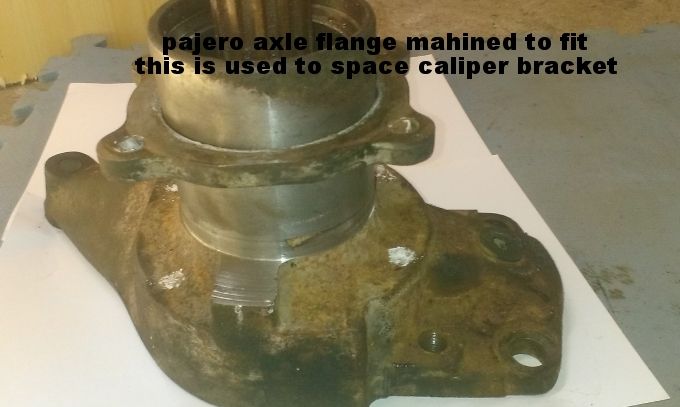
allway home will use spacers to set depth
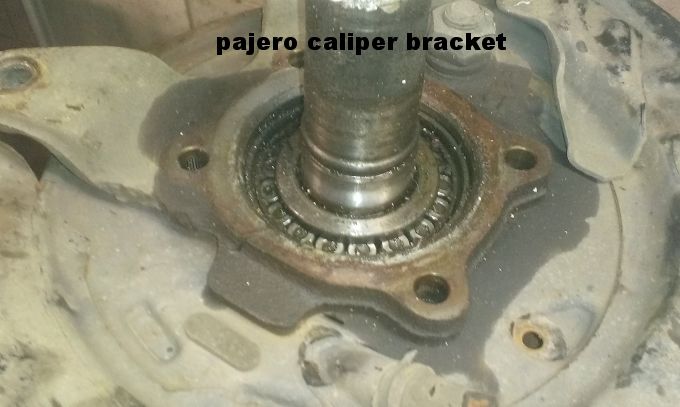
pajero caliper bracket & backing plate
|
|
|
 roverv8bay roverv8bay
Officially Full-On Dubber
  
Posts: 250
Threads: 32
Registered: January 30th, 2013
Member Is Offline
Theme: UltimaBB Pro Blue ( Default )
|
| posted on August 22nd, 2013 at 08:29 AM |
|
|
G'day all sent the caliper bracket off to be machined 1/2mm to slide over carrier. It looks like I will do away with the axle housing bracket &
just bolt the caliper bracket straight onto carrier hub I hope to get it back this afternoon. sorting out the gearbox mount today as well. will post
pics tomorrow.
ernie
|
|
|
 roverv8bay roverv8bay
Officially Full-On Dubber
  
Posts: 250
Threads: 32
Registered: January 30th, 2013
Member Is Offline
Theme: UltimaBB Pro Blue ( Default )
|
| posted on August 23rd, 2013 at 03:28 PM |
|
|
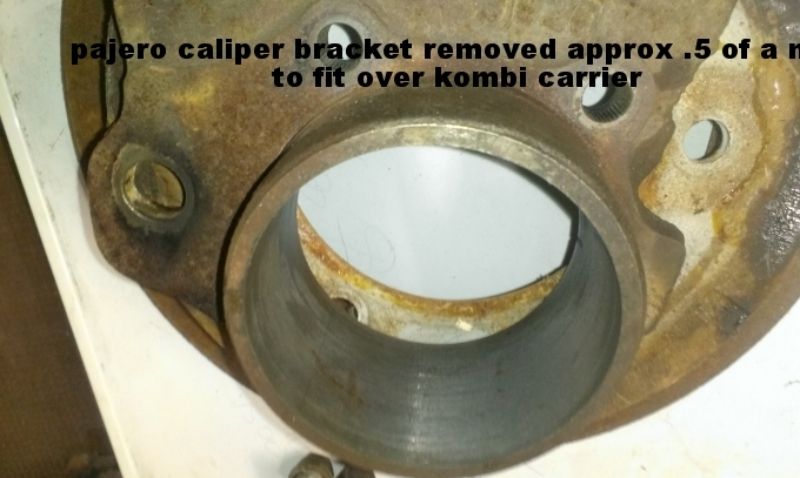
Gday all picked up the brake set up it's simple as the pajero caliper bracket had to have less than a mm taken out of it the engineer is going to
plug the kombi stud holes once everything is sorted. So here are some pics
the pajero caliper bracket
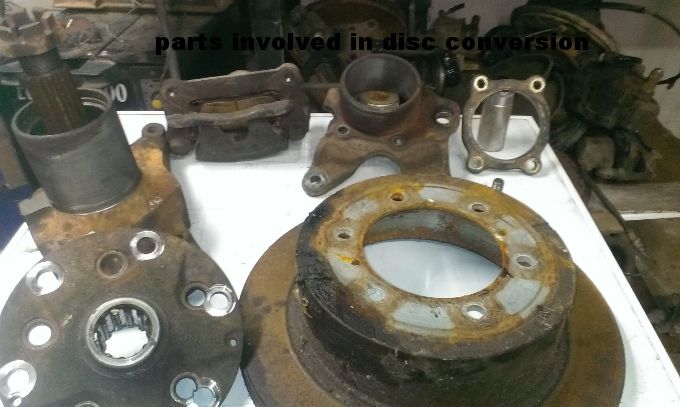
all the bits less the backing plate & hand brake assembly
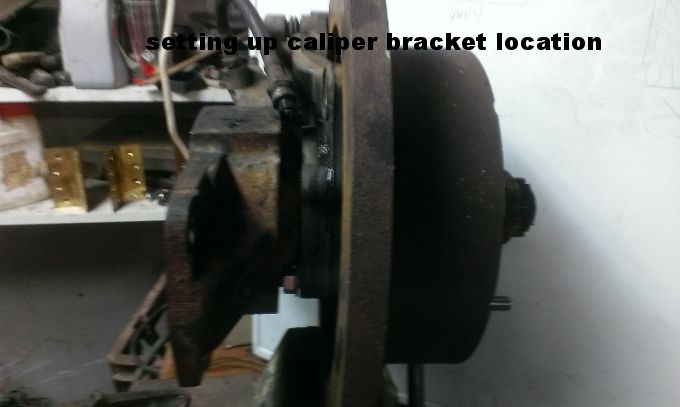
assemble to measure fit & locate space the bracket the engineer is machining up some locator rings to go between the hub centre & the disc to
sit in the taper in the disc
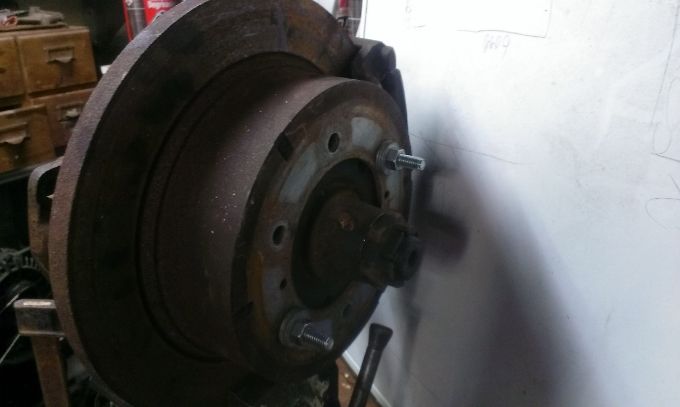
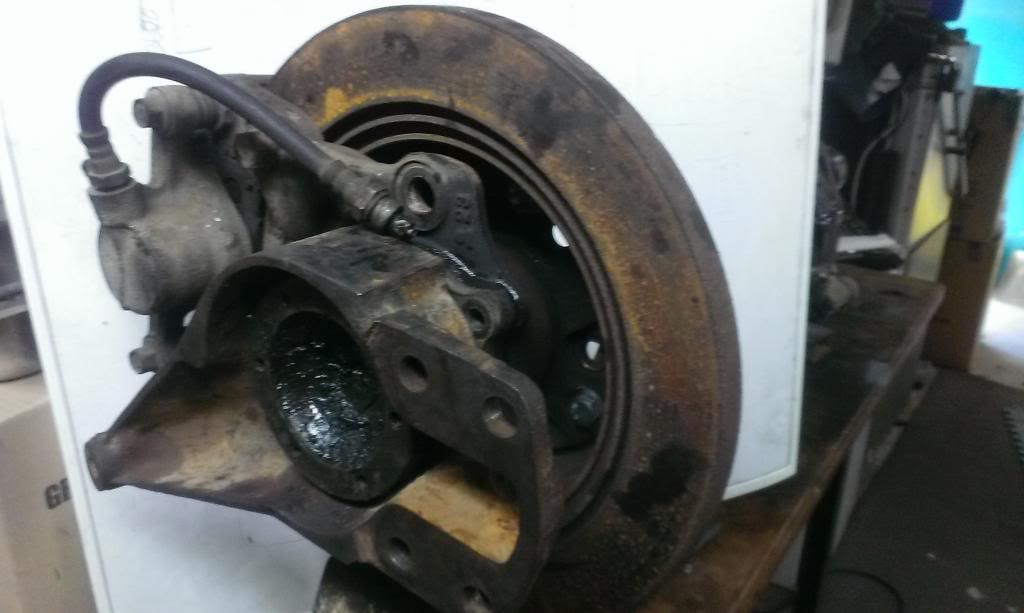
next job to sort out the front diff & power steering mounts so all for now
ernie
|
|
|
 OZ Towdster OZ Towdster
A.k.a.: Andrew Westwood
Custom Title Time!
Keen to finish some projects
    
Posts: 1921
Threads: 132
Registered: December 7th, 2003
Member Is Offline
Location: Alexandra Hills Brisbane QLD
Theme: UltimaBB Pro Yellow
Mood: Having fun in our great land
|
| posted on August 23rd, 2013 at 06:28 PM |
|
|
Ernie , i bet your wrecking yards send you a Christmas card
Don't let body work get in the way of real suspension travel
|
|
|
 roverv8bay roverv8bay
Officially Full-On Dubber
  
Posts: 250
Threads: 32
Registered: January 30th, 2013
Member Is Offline
Theme: UltimaBB Pro Blue ( Default )
|
| posted on August 23rd, 2013 at 08:17 PM |
|
|
G'day Andrew. actually I get some stuff so cheap I sometimes get excited like $30.00 for the complete disc assemblies. The beauty is I just drop him
$50.00 a fortnight so easy to pay for. I haven't been out there this week trying to not come home with more weight to put in ECLECTIC. I'm back down
the goldie on Monday arvo so hope to get the engine cradle spot welded then I can sort mounts. I have just been down & bent up a template to build
the gearbox mount off the box was mounted off the top so I bent up a strip to go around it with a flat length on the bottom to sit on a mount of some
type to be determined.
thanks for looking in on the progress.
ernie
|
|
|
 matberry matberry
Super Moderator
Go hard or go home
      
Posts: 8114
Threads: 134
Registered: March 7th, 2006
Member Is Offline
Location: Cooroy Qld
Theme: UltimaBB Pro Blue
Mood: enjoying waving at all my Kombi buddies from my T3
|
| posted on August 23rd, 2013 at 09:08 PM |
|
|
Ahhh we're all looking Ernie. Keep it up mate, going well.
Matt Berry Motorsports...air cooled advice, repairs and mods Ph 0408 704 662
OFF-ROAD,CIRCUIT,DRAG,STREET,ENDURANCE
 |
|
|
 roverv8bay roverv8bay
Officially Full-On Dubber
  
Posts: 250
Threads: 32
Registered: January 30th, 2013
Member Is Offline
Theme: UltimaBB Pro Blue ( Default )
|
| posted on August 23rd, 2013 at 10:02 PM |
|
|
Good evening matt. found a sliding door to start on electrics so next brain snap coming up. I have to go out to scrappies to get the door switch out
of a tarago slider they have a 3 point spring loaded contact switch in the door & pillar so that will work for the winder motor. all for now
again
ernie
|
|
|
 roverv8bay roverv8bay
Officially Full-On Dubber
  
Posts: 250
Threads: 32
Registered: January 30th, 2013
Member Is Offline
Theme: UltimaBB Pro Blue ( Default )
|
| posted on August 24th, 2013 at 11:19 AM |
|
|
G'day all. been playing with rattle reconditioner pack couple of the assembly with backing plate in place.
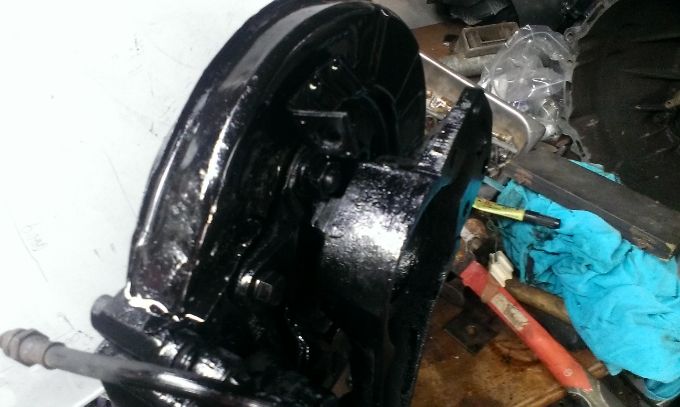
the caliper sit's in a good position
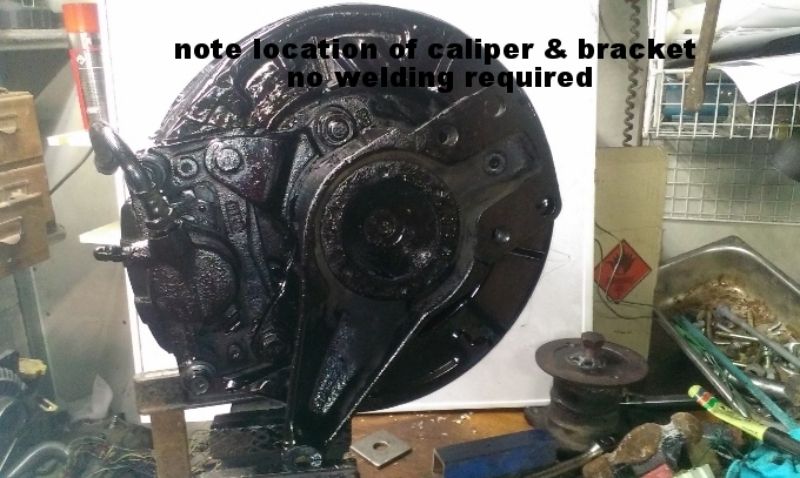
|
|
|
 roverv8bay roverv8bay
Officially Full-On Dubber
  
Posts: 250
Threads: 32
Registered: January 30th, 2013
Member Is Offline
Theme: UltimaBB Pro Blue ( Default )
|
| posted on August 25th, 2013 at 05:40 PM |
|
|
G'day all. been playing with linear actuator for power window motor instead of normal type motor. they are more than strong enough to move the glass
maybe not as fast but not everything has to be fast. I'm looking at using them on the centre windows as well 1 at each end so it doesn't twist in
frame will take door apart on Tuesday to see if it works pics if it does.
ernie
|
|
|
 roverv8bay roverv8bay
Officially Full-On Dubber
  
Posts: 250
Threads: 32
Registered: January 30th, 2013
Member Is Offline
Theme: UltimaBB Pro Blue ( Default )
|
| posted on August 30th, 2013 at 09:15 PM |
|
|
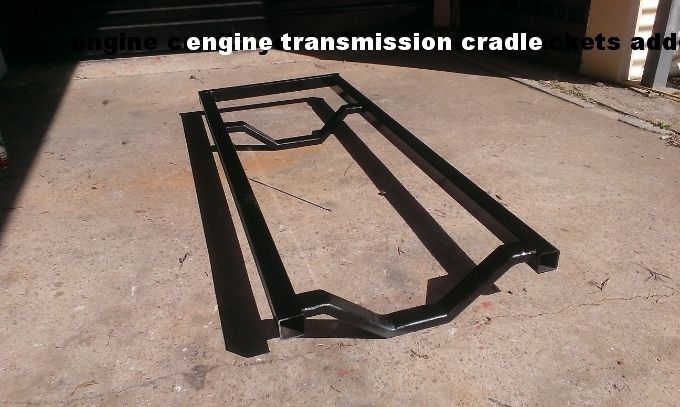
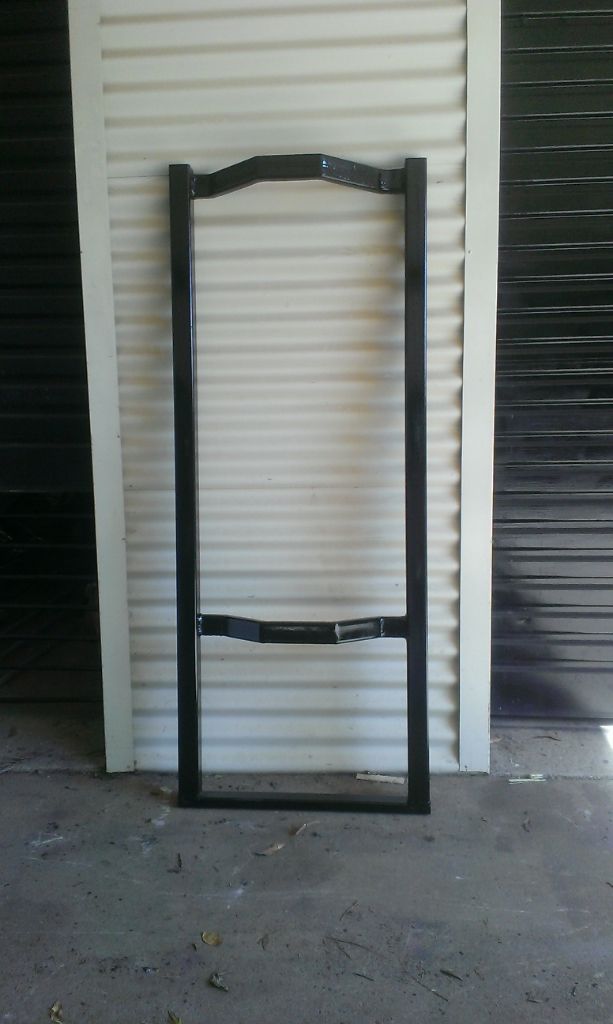
G'day all. Spent an 1/2 hour today welding up the engine cradle bit of paint to protect it until the engine brackets era set up I have to get the
r/h bracket off 1 of my spare engines out of a sedan as the range rover mount bracket is to big to use sand blasted then paint with por15.
|
|
|
 roverv8bay roverv8bay
Officially Full-On Dubber
  
Posts: 250
Threads: 32
Registered: January 30th, 2013
Member Is Offline
Theme: UltimaBB Pro Blue ( Default )
|
| posted on September 12th, 2013 at 05:30 PM |
|
|
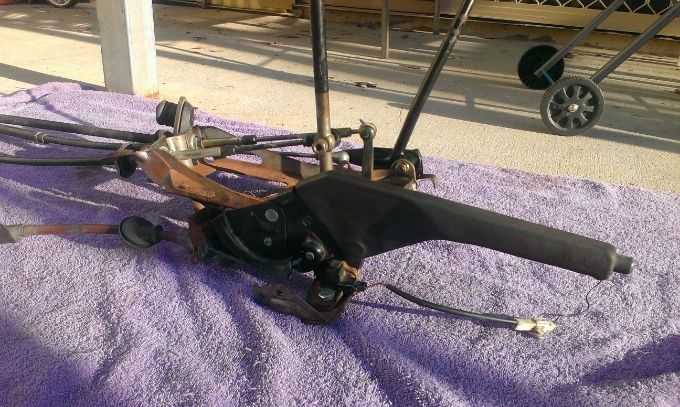
G'day all. spent an hour today sorting out the shifter's the middle 1 is original tarago with it's floor mounting bracket the handbrake lever is hi
ace the other shifter is L300 Mitsubishi removed from it's housing. no holed had to be drilled. It will have to be reinforced where they mount but at
least it' all in 1 piece instead of 3 different bracket's If I can buy a small checker plate tool box I will use that as a console & cover for
them. engineer has been flat out so no bit's to play with this week .
ernie

|
|
|
 roverv8bay roverv8bay
Officially Full-On Dubber
  
Posts: 250
Threads: 32
Registered: January 30th, 2013
Member Is Offline
Theme: UltimaBB Pro Blue ( Default )
|
| posted on September 12th, 2013 at 09:09 PM |
|
|
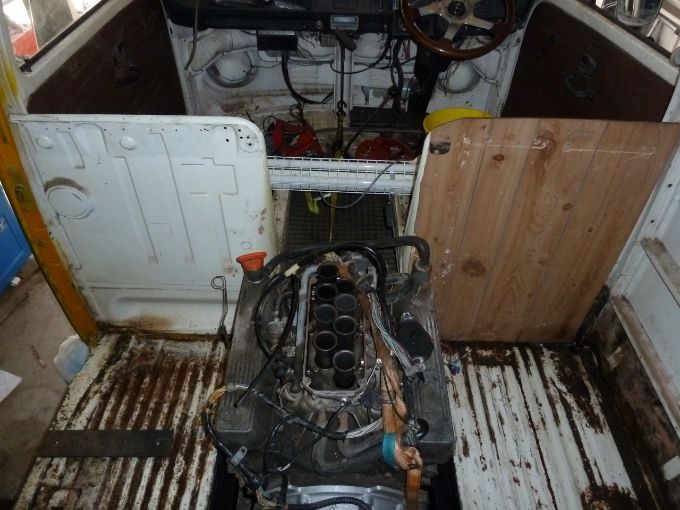
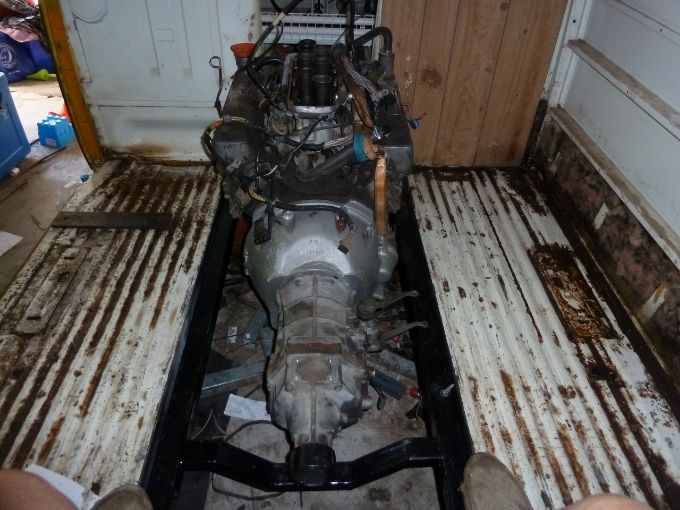
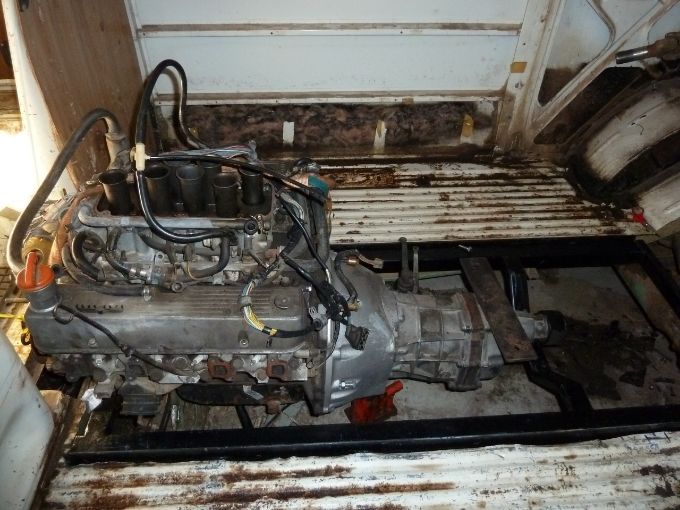
D'day again. Sat engine cradle in to locate & make templates for the engine mounting brackets to weld on will do them tomorrow
ernie
|
|
|
 roverv8bay roverv8bay
Officially Full-On Dubber
  
Posts: 250
Threads: 32
Registered: January 30th, 2013
Member Is Offline
Theme: UltimaBB Pro Blue ( Default )
|
| posted on September 13th, 2013 at 08:12 PM |
|
|
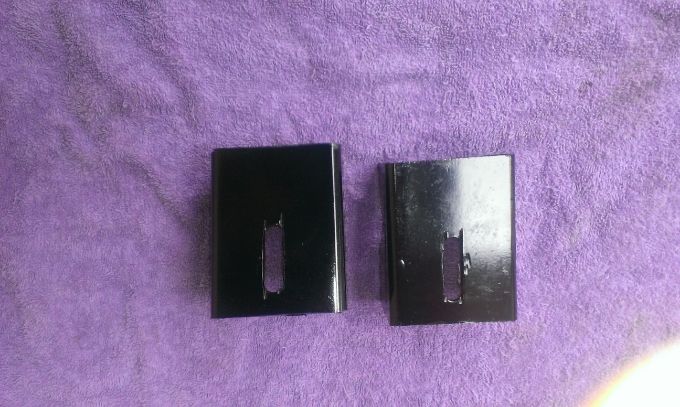
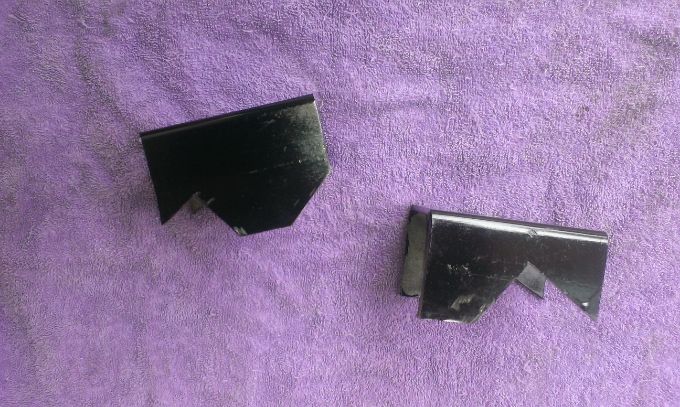
G'day all. made the mount brackets today. Bit rough around the holes but won't see it with the motor sitting on them
ernie
|
|
|
 TheMiniMan TheMiniMan
Insano Dub Head
   
Posts: 849
Threads: 162
Registered: August 5th, 2006
Member Is Offline
Location: Brisbainia
Theme: UltimaBB Pro Blue ( Default )
Mood: swings
|
| posted on September 16th, 2013 at 02:41 PM |
|
|
Goin Good Ernie,,, keep up the good work mate
|
|
|
 roverv8bay roverv8bay
Officially Full-On Dubber
  
Posts: 250
Threads: 32
Registered: January 30th, 2013
Member Is Offline
Theme: UltimaBB Pro Blue ( Default )
|
| posted on September 16th, 2013 at 06:06 PM |
|
|
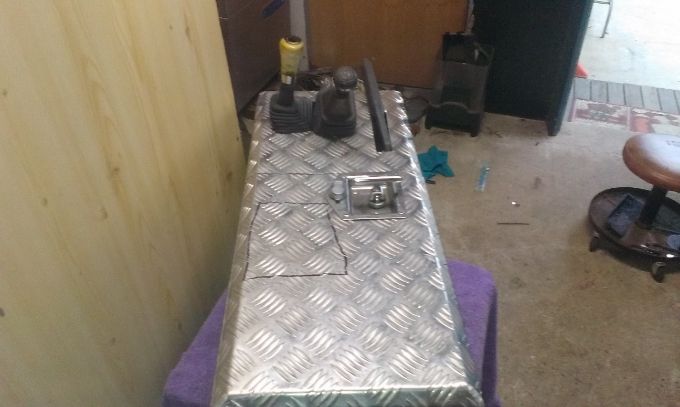
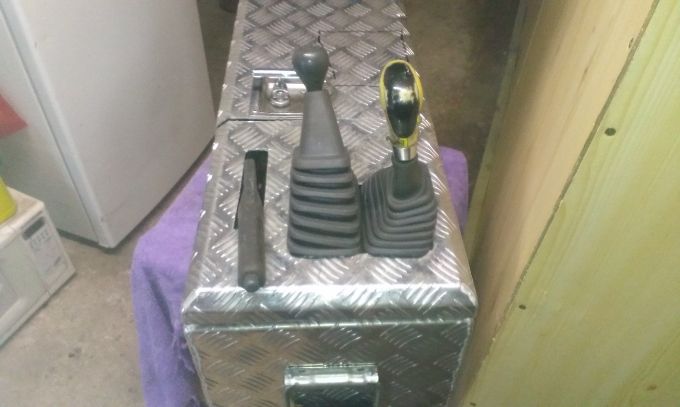
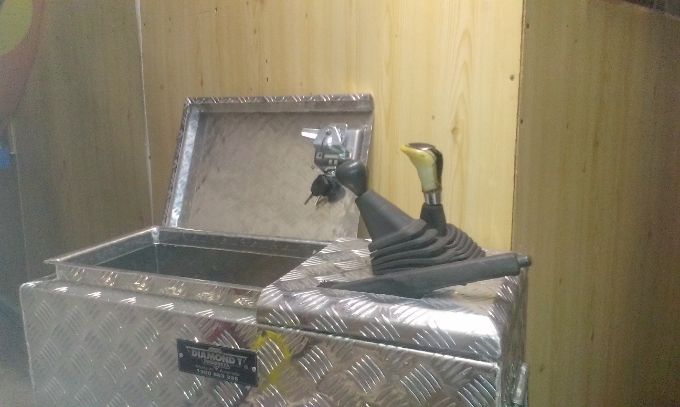
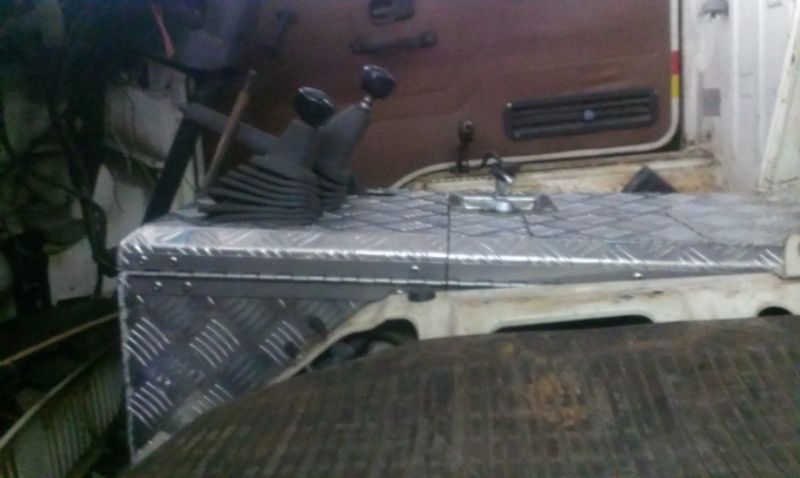
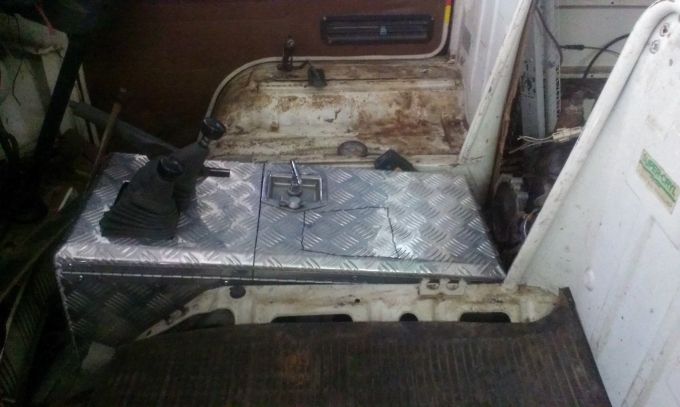
G'day Miniman. Thanks for dropping in. I spent some time today sorting out shifter housing come lockable console. after getting quotes to have one
made this was the easiest & cheapest way to go cut the lid to form a separate section for the levers. I will put a false floor over the cables to
form a console.
the unit sits neat between seats with room to clear seat belt stalks.I will cut the back out to sit over the front of the motor & seal against the
front of the engine cover when its made.
ernie
|
|
|
 roverv8bay roverv8bay
Officially Full-On Dubber
  
Posts: 250
Threads: 32
Registered: January 30th, 2013
Member Is Offline
Theme: UltimaBB Pro Blue ( Default )
|
| posted on September 29th, 2013 at 08:43 AM |
|
|
G'day all. been measuring the spindle for lift if I place the caster nut at top it gives 7cm lift by placing nut at the bottom I gives 9.5cm lift
with out changing the steering arm position by a great deal so will put hub & disc on then take to goldie next week to try it both ways. thinking
about using a linear actuator to shift the transfer case save mucking around with cable set up it's a simple straight forward back motion no side
movement.
ernie
|
|
|
 OZ Towdster OZ Towdster
A.k.a.: Andrew Westwood
Custom Title Time!
Keen to finish some projects
    
Posts: 1921
Threads: 132
Registered: December 7th, 2003
Member Is Offline
Location: Alexandra Hills Brisbane QLD
Theme: UltimaBB Pro Yellow
Mood: Having fun in our great land
|
| posted on September 29th, 2013 at 09:01 AM |
|
|
| Quote: | Originally
posted by roverv8bay
D'day again. Sat engine cradle in to locate & make templates for the engine mounting brackets to weld on will do them tomorrow
ernie


|
Holy cow , this thing will be quicker than your Dunnydore with those 8 throttle bodies on a 4.4
Don't let body work get in the way of real suspension travel
|
|
|
 roverv8bay roverv8bay
Officially Full-On Dubber
  
Posts: 250
Threads: 32
Registered: January 30th, 2013
Member Is Offline
Theme: UltimaBB Pro Blue ( Default )
|
| posted on September 29th, 2013 at 07:35 PM |
|
|
G'day Andrew. I wish they were throttle bodies just factory ram tubes I have the throttle body & plenum of it to get a new plenum made to take a
Holley 4 barrel onto the injection manifold. how's the towd coming on. I hope to get ECLECTIC finished for Valla 14 so have to get going try to get
it up to 8 hours a fortnight.
ernie
|
|
|
 roverv8bay roverv8bay
Officially Full-On Dubber
  
Posts: 250
Threads: 32
Registered: January 30th, 2013
Member Is Offline
Theme: UltimaBB Pro Blue ( Default )
|
| posted on October 4th, 2013 at 01:22 PM |
|
|
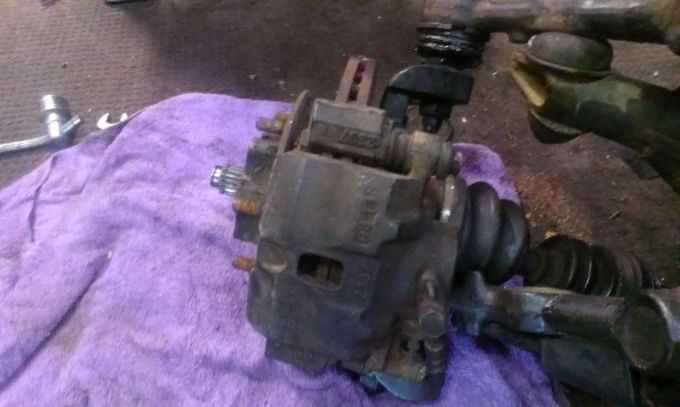
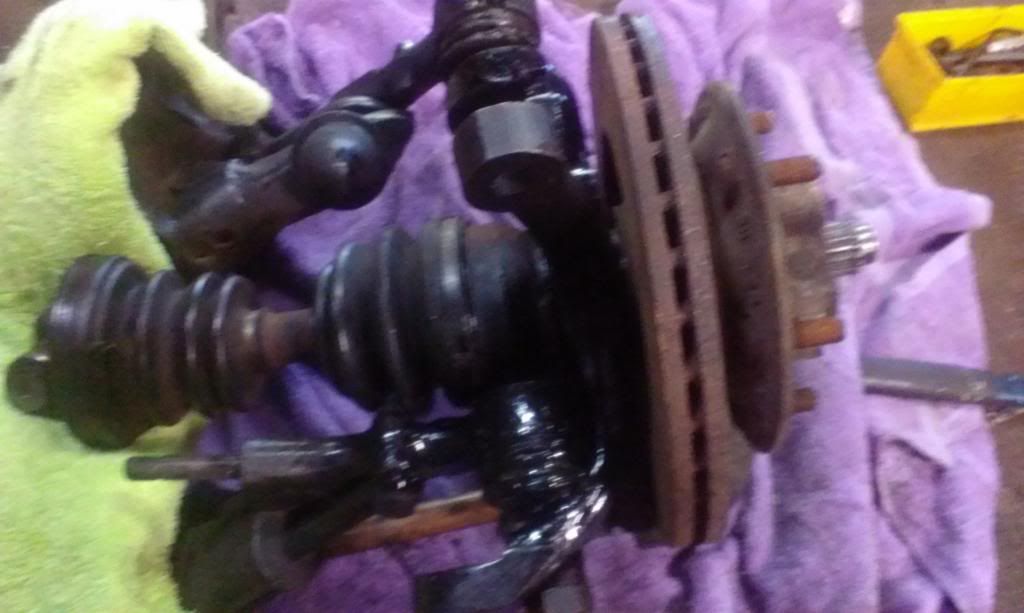
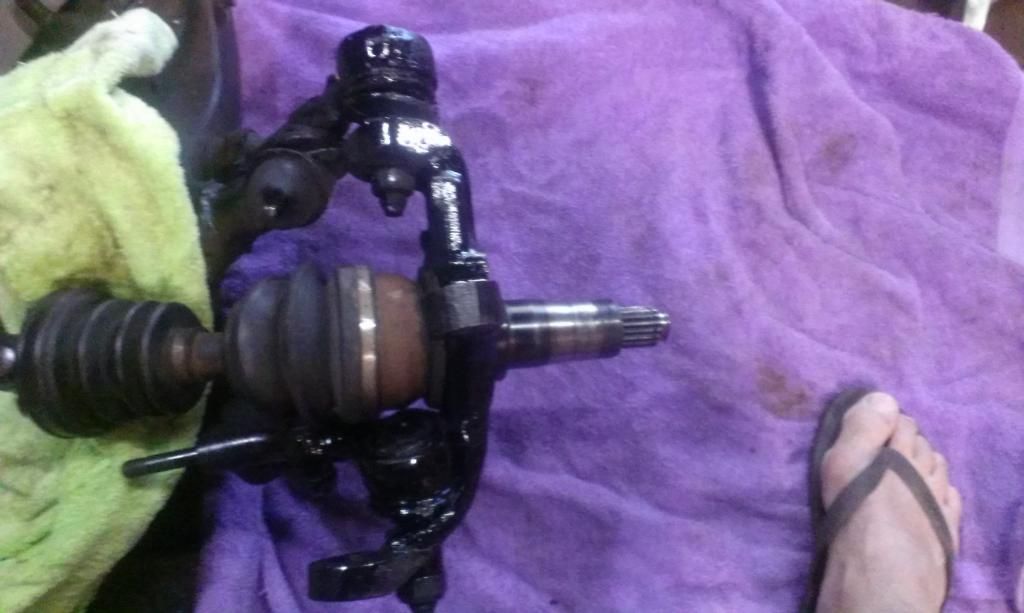
G'day all spent some time with front spindle this morning pics will give the idea of what it should look like when it's assembled
ernie
|
|
|
 nils nils
Fahrvergnugen
   
Posts: 971
Threads: 65
Registered: January 11th, 2008
Member Is Offline
Location: central coast
Theme: UltimaBB Pro Blue ( Default )
|
| posted on October 4th, 2013 at 04:25 PM |
|
|
Nice T bar there ernie, for reaching nut around corners perhaps?
Quit calling rust patina
|
|
|
 roverv8bay roverv8bay
Officially Full-On Dubber
  
Posts: 250
Threads: 32
Registered: January 30th, 2013
Member Is Offline
Theme: UltimaBB Pro Blue ( Default )
|
| posted on October 4th, 2013 at 07:42 PM |
|
|
G'day nils. The tbar is that bent it's been used to undo both beetle & kombi hub nuts to often about 25 years ago I bit the bullet & bought
a 3/4 inch sidchrome bar & socket I have that many t bars in kit but it seems to just get used when I need 1. what do you think about setup
ernie
|
|
|
 nils nils
Fahrvergnugen
   
Posts: 971
Threads: 65
Registered: January 11th, 2008
Member Is Offline
Location: central coast
Theme: UltimaBB Pro Blue ( Default )
|
| posted on October 4th, 2013 at 09:08 PM |
|
|
There is a lot of promis here Ernie, I look forward to seeing the beam fully set up and moving. seeing as how the tubes have been spread
Will there be longer axles? It seems those ones will limit your travel pretty quick
Quit calling rust patina
|
|
|
 roverv8bay roverv8bay
Officially Full-On Dubber
  
Posts: 250
Threads: 32
Registered: January 30th, 2013
Member Is Offline
Theme: UltimaBB Pro Blue ( Default )
|
| posted on October 5th, 2013 at 06:46 AM |
|
|
G'day nils. good to hear from you The beam still has tension on the upper arms & they are separated but not solid to each other hence the angle I
don't plan on rock crawling type activities. it may get to Fraser or double island but that's about my limit of off roading. As I have said before
this has been in my head for so long I just had to bite the bullet & make a start on the damn thing. before I spoke to earl about it I had planned
on it being my final build but after seeing what he builds & the fact that I can build & register a v8 trike that is now to the point of
moving the frame & motor into my Pantech bodied work shop to start the sorting out at least its at home in Nambour not down the goldie. I'm going
to call it HEAPA it will consist of a Yamaha front frame section rover v8 under tank Alfa Romeo auto transaxle di dion rear suspension all the
original Alfa brake full LPG twin carbie set up with the round tank over rear end with a spare wheel cover over it another bastard idea.as far as off
road there's a short track between towen mount & the back of Palmwoods that's not to rough but good for testing on. unfortunately I cant fit
longer arms unlike the beetle that you can use extenders or move the beam mounting point forward to accommodate longer arms the kombi suspension is
pretty well set in place all I can do is lift. I'm not down the goldie now for 3 weeks so this will slow me down as far test fitting spindle so I
will work on sorting out & starting the wiring harness for the dash I have a board set up to run it all on. also give me time to start on the ej22
harness for daughters kombi. I should be nice & mental with the Subaru.
all for now
ernie
|
|
|
 roverv8bay roverv8bay
Officially Full-On Dubber
  
Posts: 250
Threads: 32
Registered: January 30th, 2013
Member Is Offline
Theme: UltimaBB Pro Blue ( Default )
|
| posted on October 9th, 2013 at 05:55 AM |
|
|
G'day all went to Warwick meet on Sunday some very quick vw running especially the rat kombi with Porsche up it's but. had a quick conversation with
the always helpful Matt Berry about spreading the beam to run the arms parallel he thinks I will get away with not spreading them so going to bolt
spindle in to see what happens. the axle is a standard rodeo length you can see why there lift is limited.I have to get axles cut n shut to have
commodore on 1 end for the diff & rodeo on the other they will be spigotted & strengthened with tube over weld. Engineer assures me they will
be strong enough for the light front weight of the kombi. I scored an aluminium ute roll bar freebie that I hope will fit in the front if not I will
mount it in the back for passenger safety you never know. I'm off to the truck wreckers sometime this week to find a throttle cable long enough to
use with the tarago pedal assembly. so 1 more hole in floor to cover up now I have eliminated the pedals handbrake gearshift levers the front will
look empty with all that bulky handbrake on it's own removed this mornig is planned before it gets hot to finish the deking wires then I have to sort
out if I can fit impreza cup holder's into front of the tool box come shifter console this will be a better spot than under the dash. It's 10 to 6
so off to the deck. All for now
ernie
|
|
|
 roverv8bay roverv8bay
Officially Full-On Dubber
  
Posts: 250
Threads: 32
Registered: January 30th, 2013
Member Is Offline
Theme: UltimaBB Pro Blue ( Default )
|
| posted on October 9th, 2013 at 01:30 PM |
|
|
G'day all. Good score today complete vt v8 radiator with fans for the bargain price of &50.00 just have to sort out how to mount it in engine bay
or on the rodeo bull bar I think it will end up on the bull after all its never going to be a show van it will be less noticeable than ordinary kombi
bull bars as far as size & it has a winch mount type bar so a far bit covering the front view. all for now
ernie
|
|
|
 roverv8bay roverv8bay
Officially Full-On Dubber
  
Posts: 250
Threads: 32
Registered: January 30th, 2013
Member Is Offline
Theme: UltimaBB Pro Blue ( Default )
|
| posted on October 17th, 2013 at 07:56 AM |
|
|
G'day all. well it's back to the drawing board for the rear disc set up I had to change the location of the caliper bracket holes in the bearing
carrier. they had to have spacers made anyway so off to the pump house for 2 machined round flanges for irrigation system they will bolt to bearing
carrier from the back & thread the plate for brackets to bolt to pics later on today.
ernie
|
|
|
 roverv8bay roverv8bay
Officially Full-On Dubber
  
Posts: 250
Threads: 32
Registered: January 30th, 2013
Member Is Offline
Theme: UltimaBB Pro Blue ( Default )
|
| posted on October 18th, 2013 at 01:55 PM |
|
|
G'day all. well spent some time on the spindle today looks like the beam can stay in it's position thanks to Matt for his unlimited knowledge of
VW's. I ha to relieve some metal to clear the lower ball joint but nothing to radical still plenty of metal left the bottom arm is a bit tight on the
caliper where the bump stop rubber hits relieved about 5mm of the side hump for it. I plan on mounting the complete spindle assembly next week. Then I
will tie the front diff in to beam to find a sweet spot that will clear steering etc. bought the extractor face flanges today to set up engine pipes I
will use pvc pipe & corners to get a shape then mandrel bends then get them welded up at the muffler shop. found a hotrod company that builds
fibreglass floor tunnels the man is going to get around to the house to see what needs to be done to get 1 to fit. I will sit the console tool box in
as well to check the shifter cable length pics on Friday all for now
ernie
|
|
|
 roverv8bay roverv8bay
Officially Full-On Dubber
  
Posts: 250
Threads: 32
Registered: January 30th, 2013
Member Is Offline
Theme: UltimaBB Pro Blue ( Default )
|
| posted on October 22nd, 2013 at 05:41 PM |
|
|
G'day all. back in the kombi shed after a month off. sat tool box come console in today have cut 10.5cm's off the back & trim the lid behind
& relocate the lock.
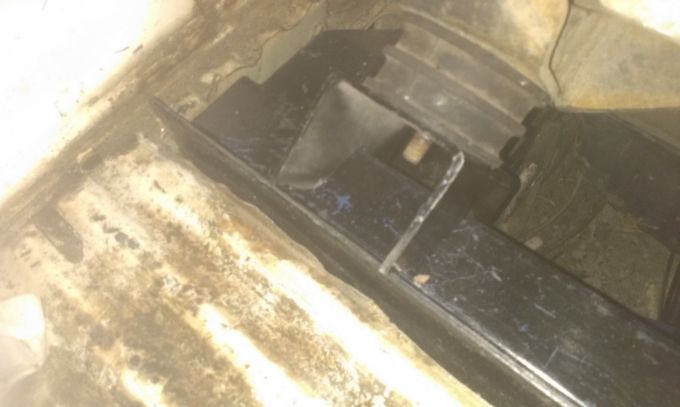
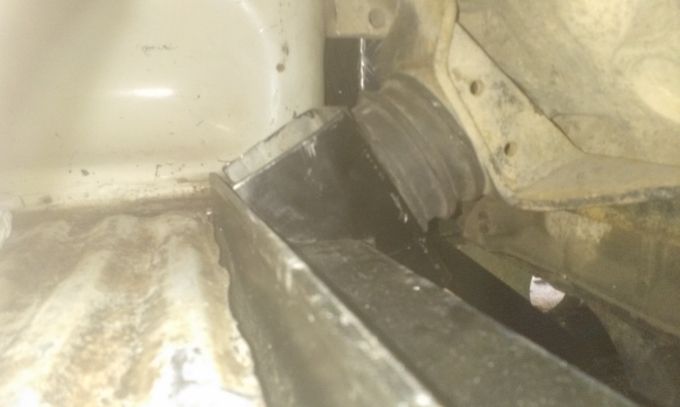
the engine mount bracket's a tidy up then weld 5cm x 5cm angle to it then the angle bolt's down on top of the rail
this is the rodeo spindle insitu I think I will have to spread the beams there's a lot of down force on the lower beam I will bolt up the hub
assembly tomorrow & see how it looks
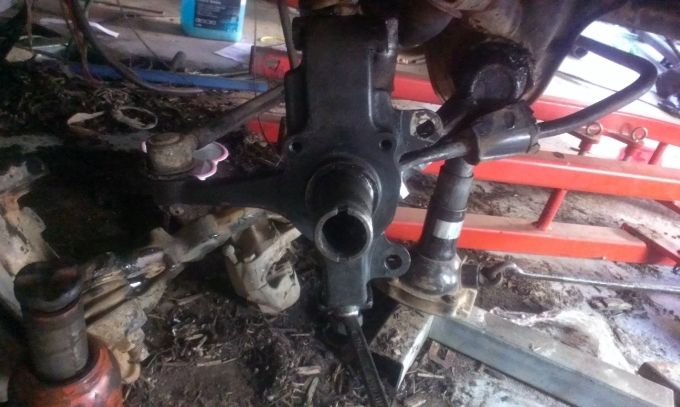
more pic tomorrow of spindle set up
good night
ernie
|
|
|
 roverv8bay roverv8bay
Officially Full-On Dubber
  
Posts: 250
Threads: 32
Registered: January 30th, 2013
Member Is Offline
Theme: UltimaBB Pro Blue ( Default )
|
| posted on October 23rd, 2013 at 12:23 PM |
|
|
G'day all. spindle assembly set up
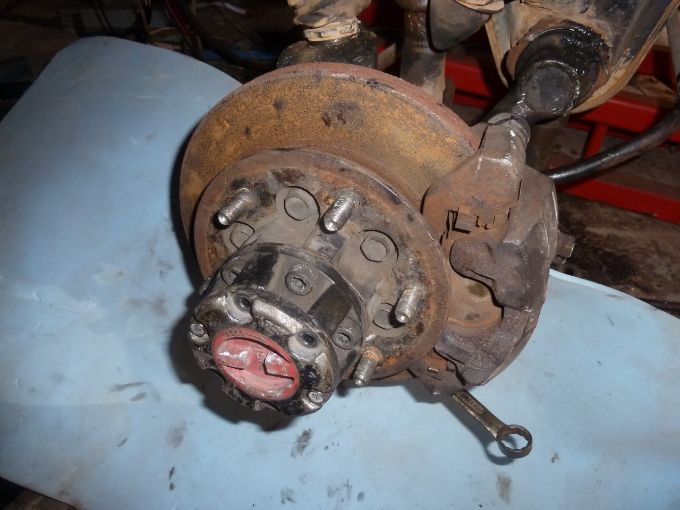
|
|
|
 roverv8bay roverv8bay
Officially Full-On Dubber
  
Posts: 250
Threads: 32
Registered: January 30th, 2013
Member Is Offline
Theme: UltimaBB Pro Blue ( Default )
|
| posted on October 27th, 2013 at 03:28 PM |
|
|
G'da all. spent some time sorting the spindle to beam & have decided to split the beams it's the case of not enough room for balljoints in the
bottom so flipping lower arms as well as have ne beam plates cut to suit new width
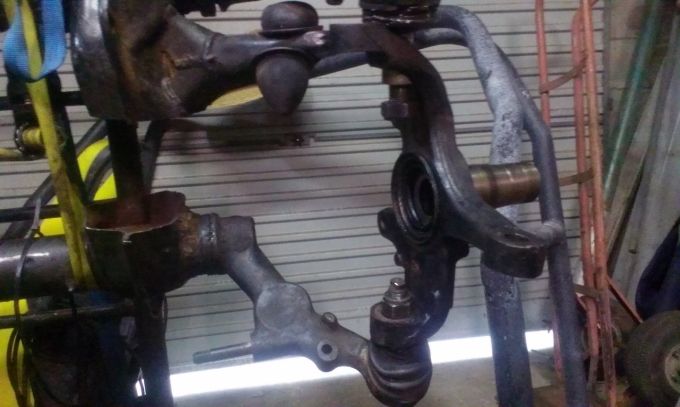
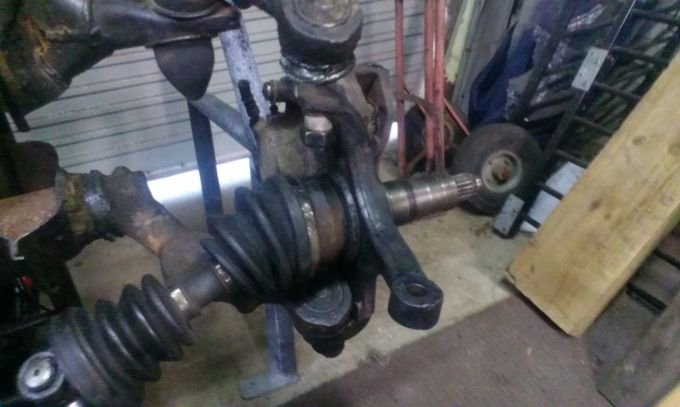
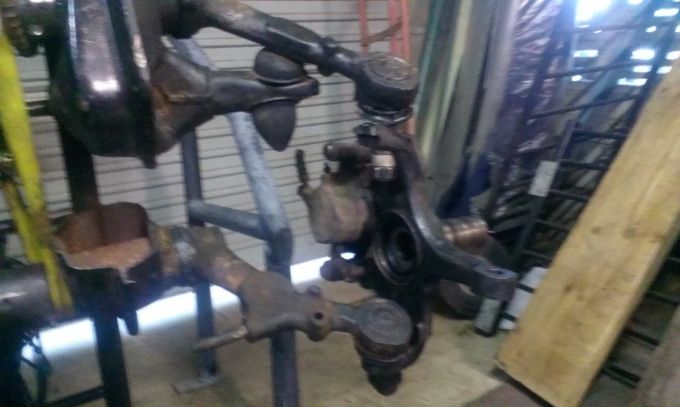
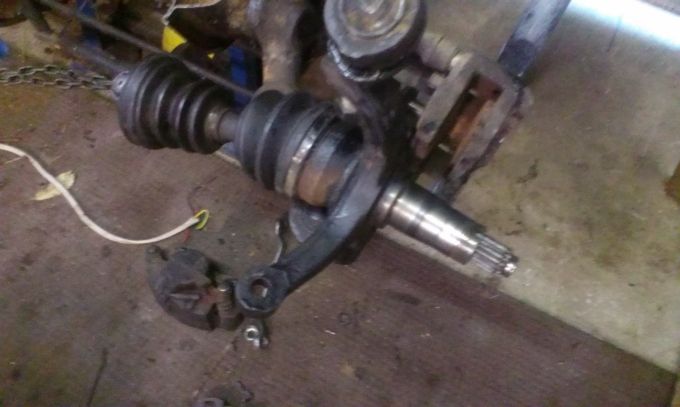
this is the spindle flipped note the arms almost parallel so final position but still need to split beams but not as much
ernie
|
|
|
| Pages: 1 2 3 4 5 .. 7 |