| [ Total Views: 156720 | Total Replies: 204 | Thread Id: 75753 ] |
| Pages: 1 2 3 4 5 .. 7 |
|
|
 Aussie Aussie
Officially Full-On Dubber
  
Posts: 296
Threads: 43
Registered: September 15th, 2006
Member Is Offline
Location: Gold Coast
Theme: UltimaBB Pro Blue ( Default )
|
| posted on April 3rd, 2010 at 06:38 PM |
|
|
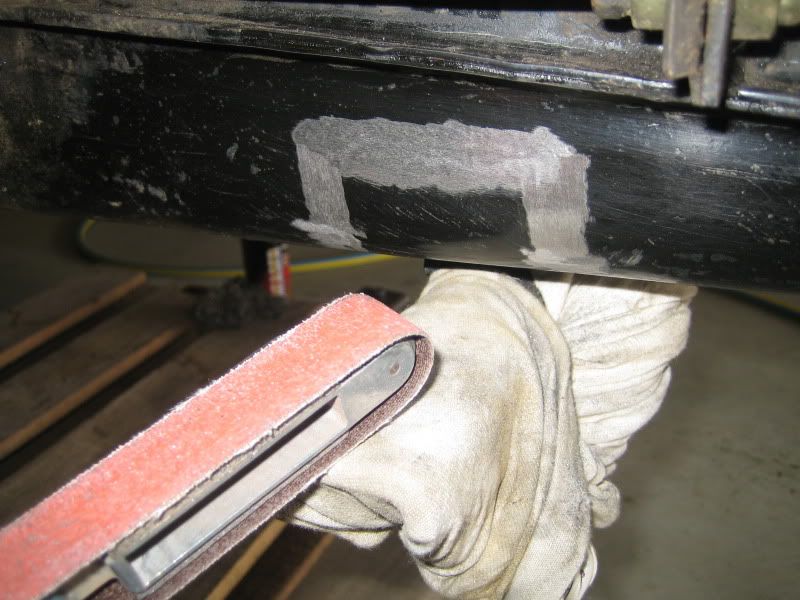
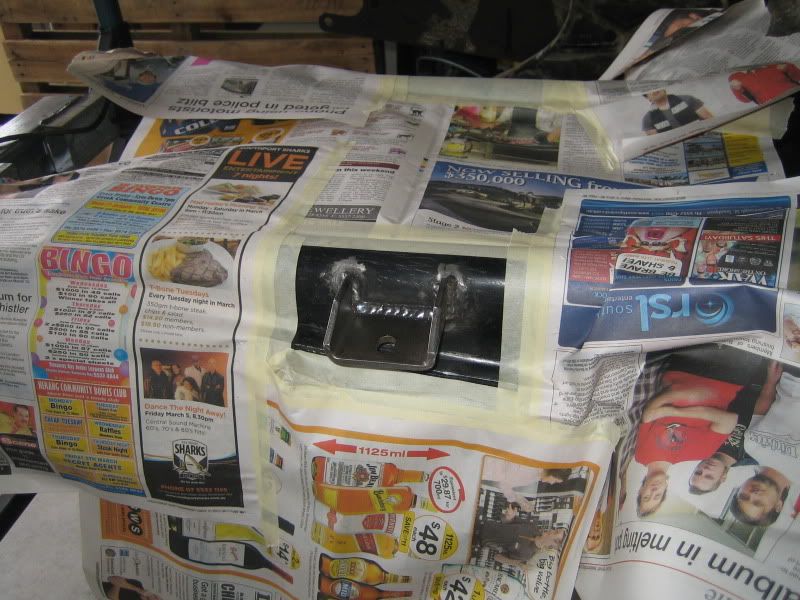
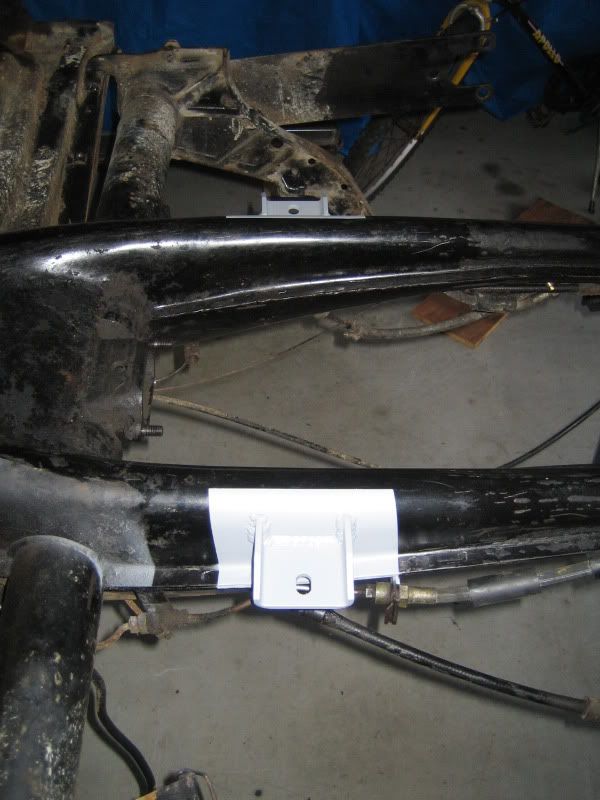
Clean the area up for a blob of weld. How good are the air files - make a neat job so I didnt need to take off any more paint than I had to.
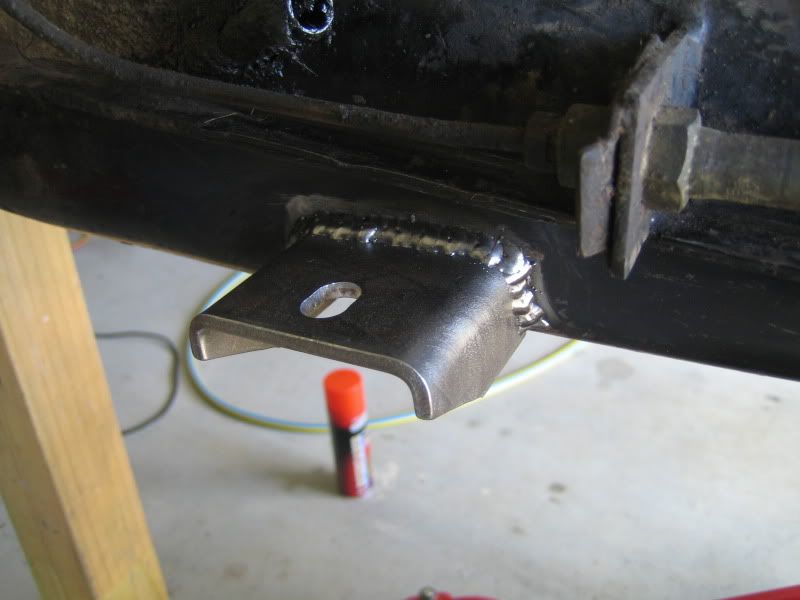
Get some weld around the top...
Spin the pan around and then finish weld around the whole thing for good strength.
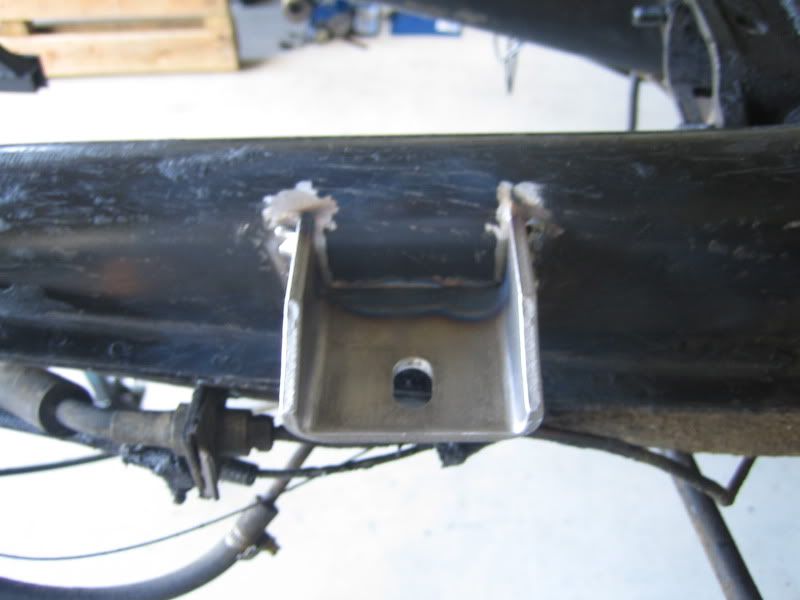
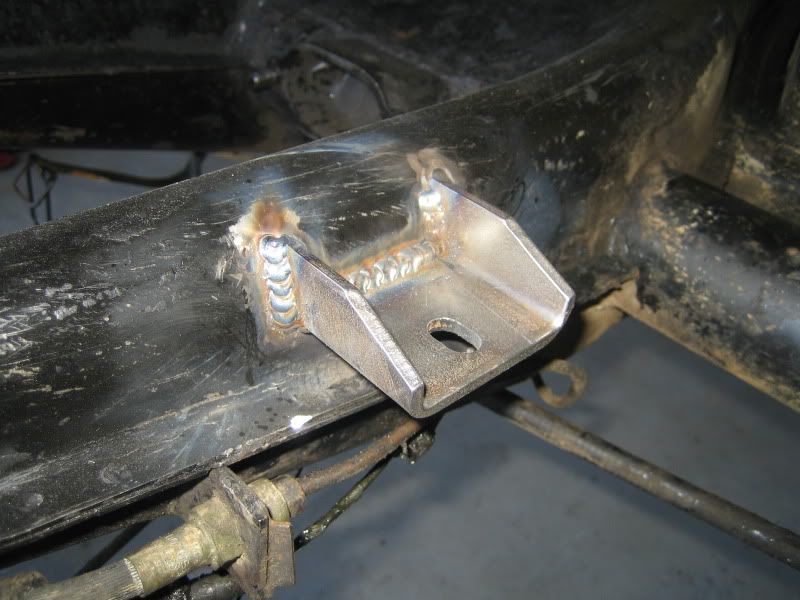
Mask things off for a quick coat of primer and we are done....
|
|
|
 71-BEETLE-SEDAN 71-BEETLE-SEDAN
Custom Title Time!
AKA Josh
    
Posts: 1058
Threads: 108
Registered: March 25th, 2009
Member Is Offline
Location: Mittagong NSW
Theme: UltimaBB Pro White
|
| posted on April 4th, 2010 at 09:21 AM |
|
|
Those mounts should still be fine upside down like they are, just means the tabs will be under compression instead of tension.
|
|
|
 Craig Torrens Craig Torrens
A.k.a.: Craig Torrens
Scirocco Rare
6 times Australian, 7 times State Hillclimb Class Champion
        
Posts: 8040
Threads: 347
Registered: January 10th, 2003
Member Is Offline
Location: Sydney
Theme: UltimaBB Pro Blue ( Default )
Mood: Time to go Salt lake racing, and actually achieve a result.
|
| posted on April 4th, 2010 at 10:01 AM |
|
|
| Quote: | Originally
posted by 71-BEETLE-SEDAN
Those mounts should still be fine upside down like they are, just means the tabs will be under compression instead of tension.
|
other way around miss jane ! 
|
|
|
 Aussie Aussie
Officially Full-On Dubber
  
Posts: 296
Threads: 43
Registered: September 15th, 2006
Member Is Offline
Location: Gold Coast
Theme: UltimaBB Pro Blue ( Default )
|
| posted on April 4th, 2010 at 10:35 AM |
|
|
| Quote: | Originally
posted by Craig Torrens
| Quote: | Originally
posted by 71-BEETLE-SEDAN
Those mounts should still be fine upside down like they are, just means the tabs will be under compression instead of tension.
|
other way around miss jane ! 
|
 Geez guys you made me look! The tabs actually dont fit the other way
round as you would have to notch the frame horn seam and do a whole lot more re-profiling then I did to make them fit!!!!!! Was following fitting
guide so confident they are correct.....I hope Geez guys you made me look! The tabs actually dont fit the other way
round as you would have to notch the frame horn seam and do a whole lot more re-profiling then I did to make them fit!!!!!! Was following fitting
guide so confident they are correct.....I hope 
They support the gearbox under torque so would not one side be in tension and the other under compression anyway???
|
|
|
 71-BEETLE-SEDAN 71-BEETLE-SEDAN
Custom Title Time!
AKA Josh
    
Posts: 1058
Threads: 108
Registered: March 25th, 2009
Member Is Offline
Location: Mittagong NSW
Theme: UltimaBB Pro White
|
| posted on April 4th, 2010 at 12:04 PM |
|
|
I mean the tabs on the sides of the tabs, the verticle bits.
|
|
|
 Aussie Aussie
Officially Full-On Dubber
  
Posts: 296
Threads: 43
Registered: September 15th, 2006
Member Is Offline
Location: Gold Coast
Theme: UltimaBB Pro Blue ( Default )
|
| posted on May 2nd, 2010 at 10:16 PM |
|
|
Fuel Line
Got some 3/8 inch stainless tube for a new fuel line for the car. Wanted to leave the stock line for use until I get the new motor sorted - and can
then be used for a return line if I ever need one. Grabbed the last VMA mag and followed the tech guide for the install.
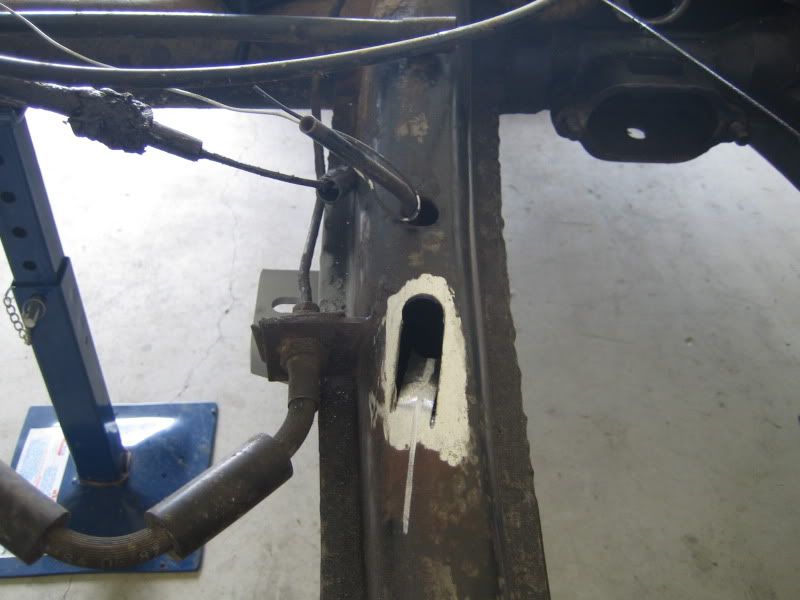
Needed to make a slot in the framehorn to allow the bigger diameter tube to be fed through. Wanted to fit the new line so that it comes out and
mirrors the stock line.
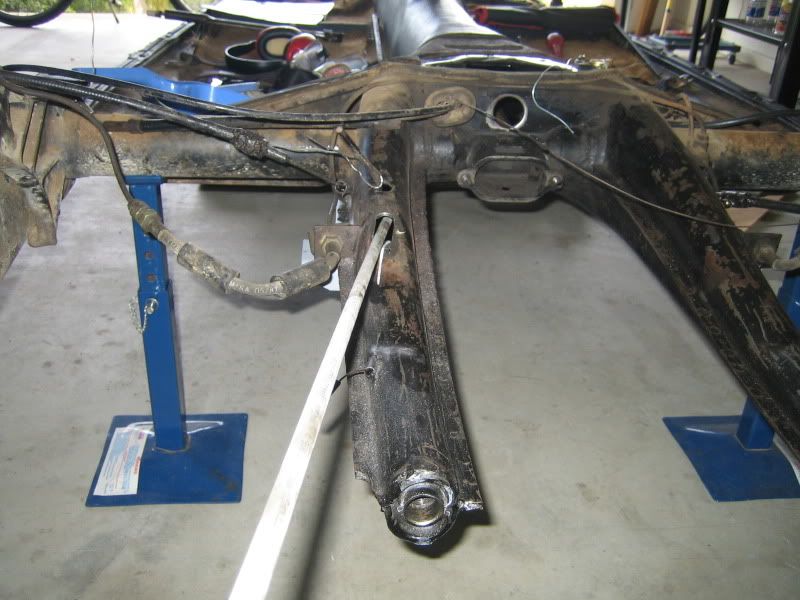
Got it fed through the tunnel without too much hassle and under the pedal cluster.
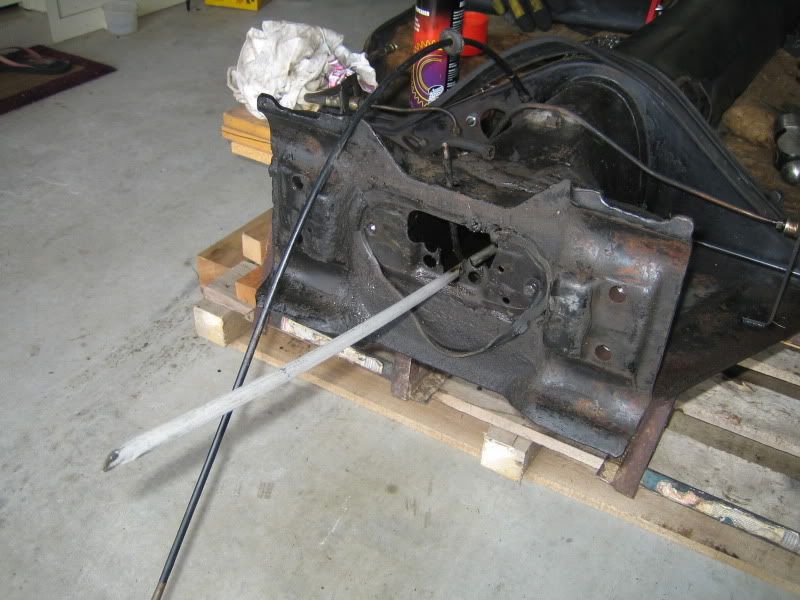
Feed it up through the new hole and give it a final bend. Fit the new bung and we're done at the front.
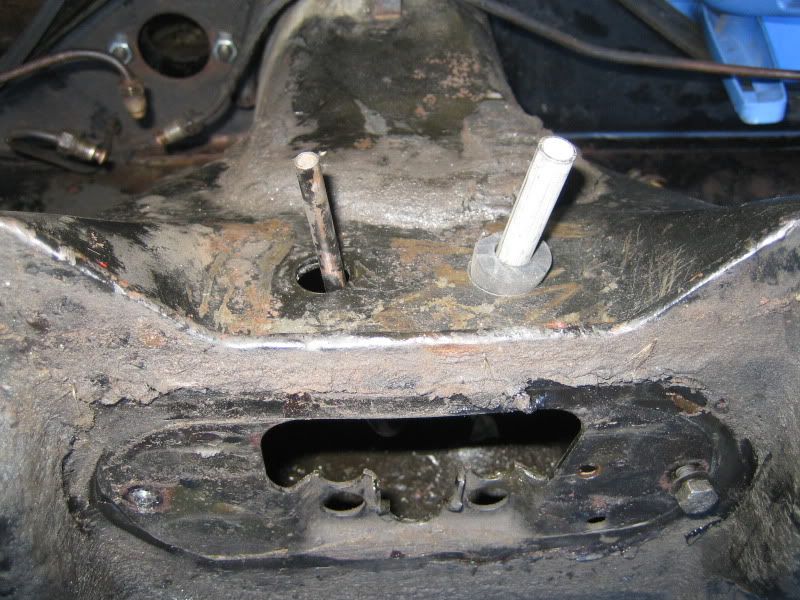
Weld up the slots and grind back for paint.
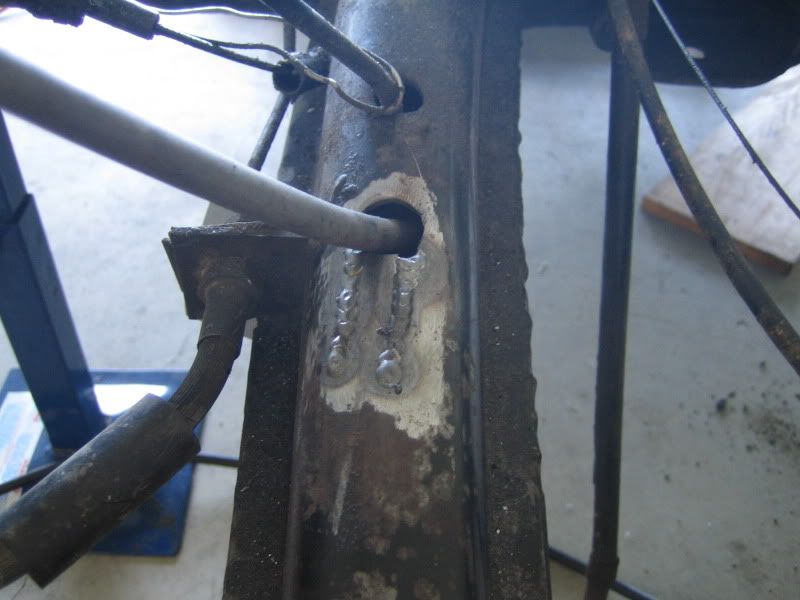
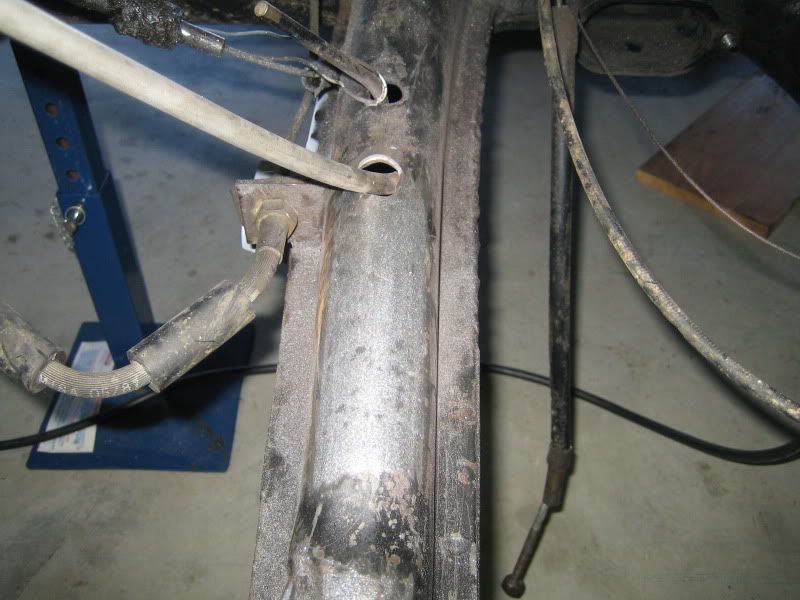
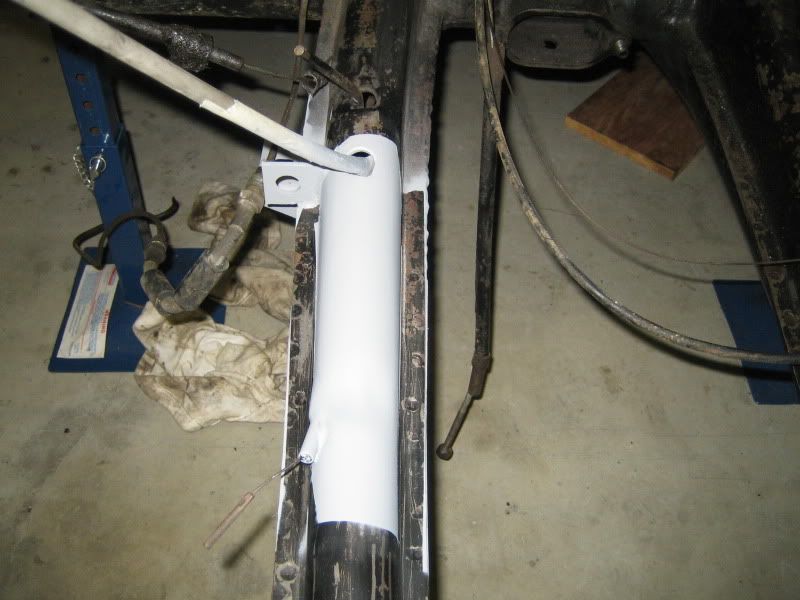
Just need to trim the excess length and fit another bung. 
|
|
|
 reub reub
Veteran Volks Folk
VWRX is gone...
    
Posts: 2054
Threads: 160
Registered: September 2nd, 2002
Member Is Offline
Theme: UltimaBB Pro Blue
|
| posted on May 2nd, 2010 at 10:41 PM |
|
|
Nice work
Reub
|
|
|
 Aussie Aussie
Officially Full-On Dubber
  
Posts: 296
Threads: 43
Registered: September 15th, 2006
Member Is Offline
Location: Gold Coast
Theme: UltimaBB Pro Blue ( Default )
|
| posted on May 23rd, 2010 at 01:07 PM |
|
|
Dropped the body back on so that I could check a few clearences etc before things start getting painted.
Fitted up the new gearbox to check nose cone to boot floor space. Needed to put a couple of very small dishes in the body to clear the top two bolts
on the box. Quite pleased as I thought it would need a lot more to get it to fit. With a clean up and underseal you will never see anything.
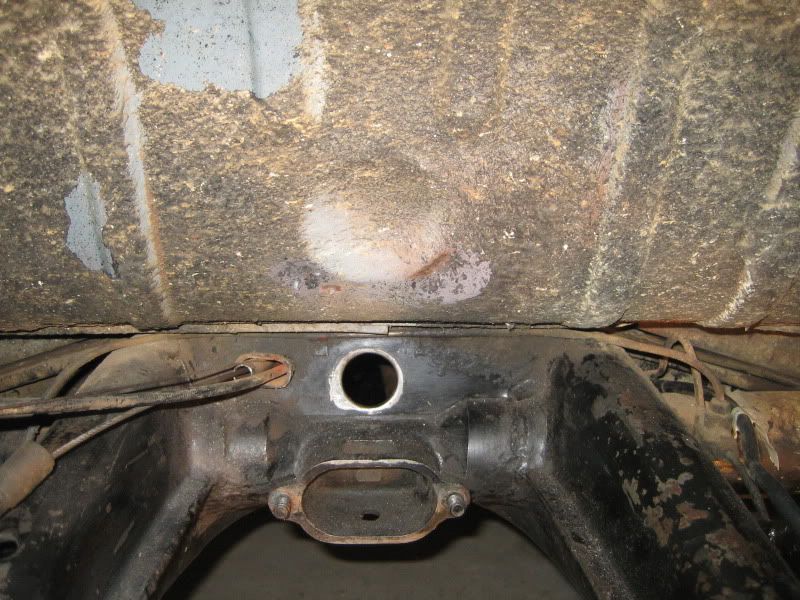
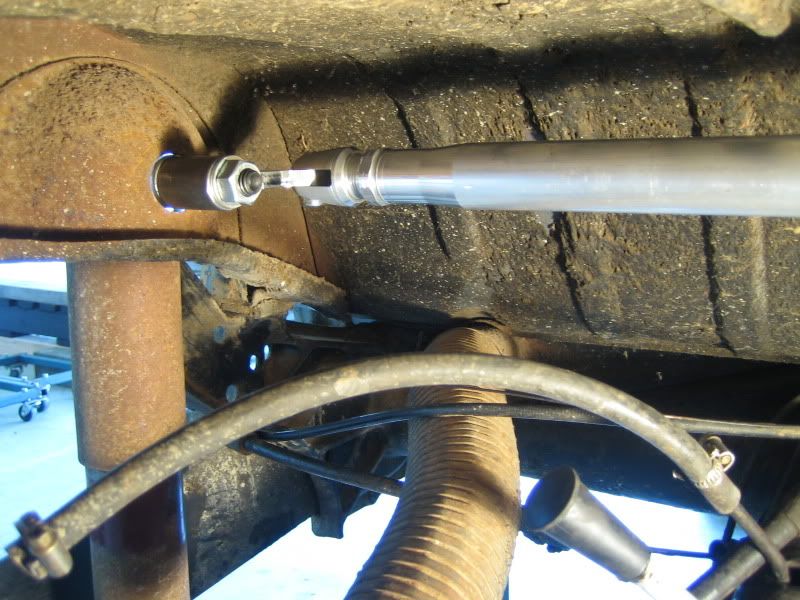
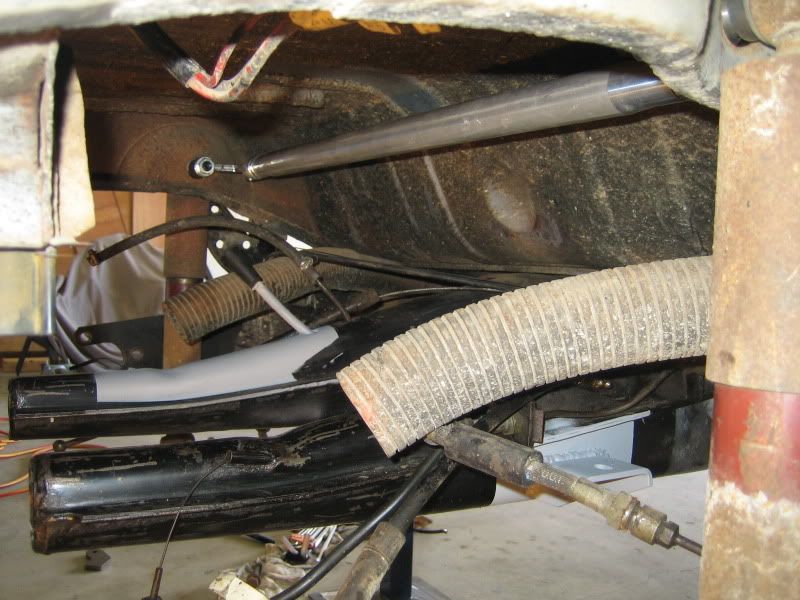
Next up was to trial fit the torque bar between the shock towers. I wont fit the down tubes until the engine/exhaust is fitted to make sure I have
clearence to everything.
Had to modify the the bar and the bracket to get it to fit properly.
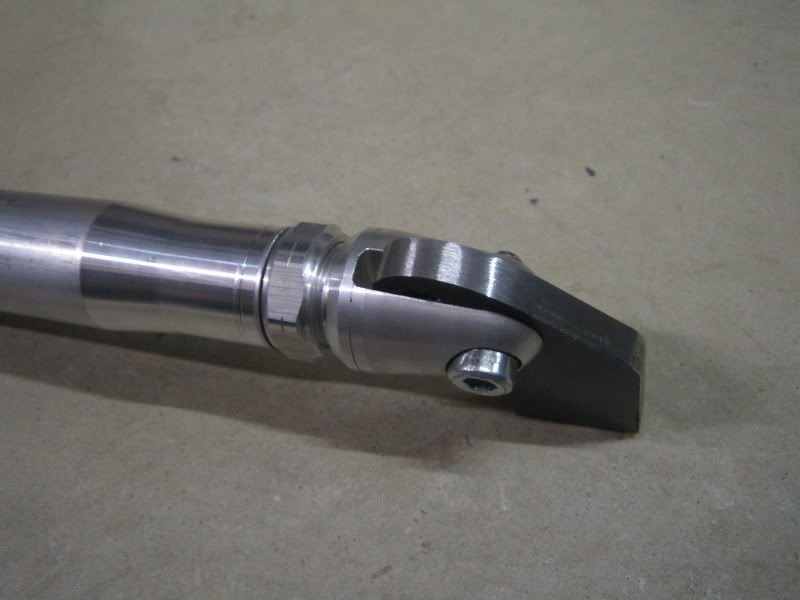
This was so that I could fit some spacers to get through the body without cutting it. Tacked up the first bracket.
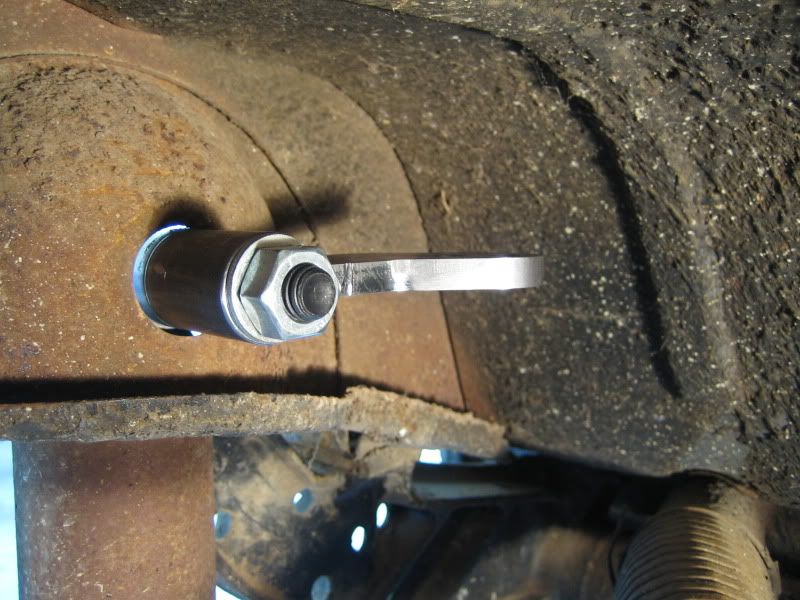
Tacked up the other bracket and all done. Probably will take it all out and not use the bracing until the bigger engine is ready to go - was great to
get in and make a start though while I had easy access to everything..
|
|
|
 oldskl60 oldskl60
Officially Full-On Dubber
  
Posts: 251
Threads: 28
Registered: March 9th, 2008
Member Is Offline
Location: Brisbane
Theme: UltimaBB Pro Blue
|
| posted on September 27th, 2010 at 09:22 AM |
|
|
Hey Ian
Any progress here mate?
Cheers Tom
|
|
|
 Aussie Aussie
Officially Full-On Dubber
  
Posts: 296
Threads: 43
Registered: September 15th, 2006
Member Is Offline
Location: Gold Coast
Theme: UltimaBB Pro Blue ( Default )
|
| posted on September 28th, 2010 at 07:34 PM |
|
|
| Quote: | Originally
posted by oldskl60
Hey Ian
Any progress here mate?
Cheers Tom
|
Hi Tom - progress on the old boy is going well, albeit a bit slow. Still working on the pan - grinding, smoothing, metal finishing and getting into
paint. Taking lots of pics as I go along and planning to have a decent thread update when I have something to show for it all.....
Cheers, Ian
|
|
|
 Aussie Aussie
Officially Full-On Dubber
  
Posts: 296
Threads: 43
Registered: September 15th, 2006
Member Is Offline
Location: Gold Coast
Theme: UltimaBB Pro Blue ( Default )
|
| posted on October 15th, 2010 at 05:56 PM |
|
|
Finally I have an update.  I have been busy working on the floor pan
for what seems like months. I have had to do things in stages rather than the whole thing at once which is not ideal but it seems to have worked out
OK. Still have more to do but thought I would get some pics up of where I am. I have been busy working on the floor pan
for what seems like months. I have had to do things in stages rather than the whole thing at once which is not ideal but it seems to have worked out
OK. Still have more to do but thought I would get some pics up of where I am.
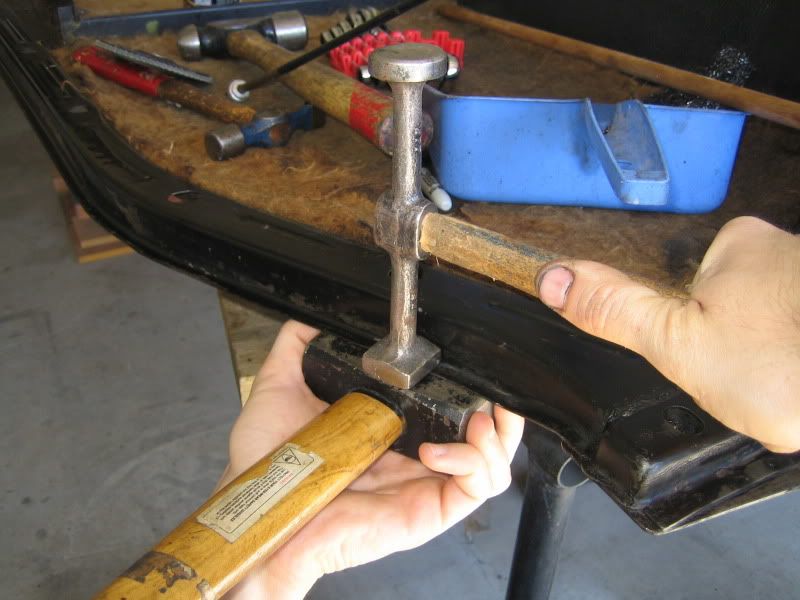
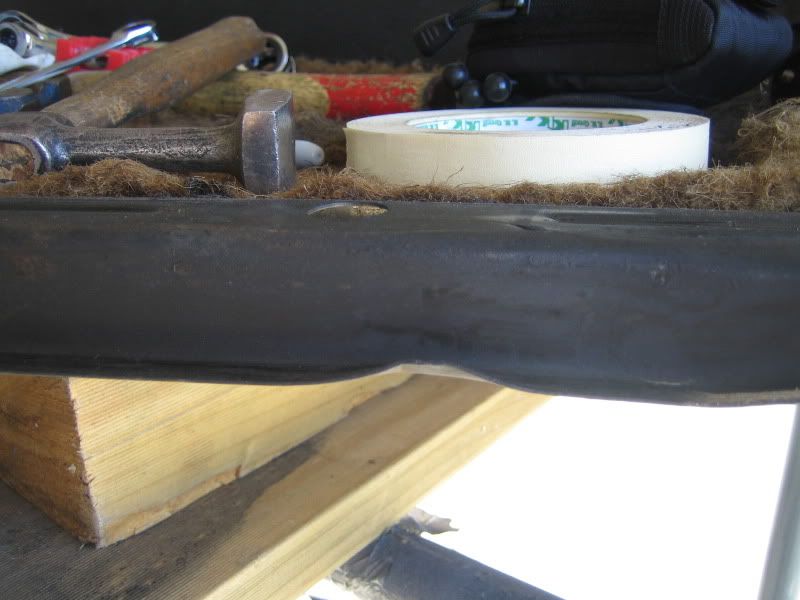
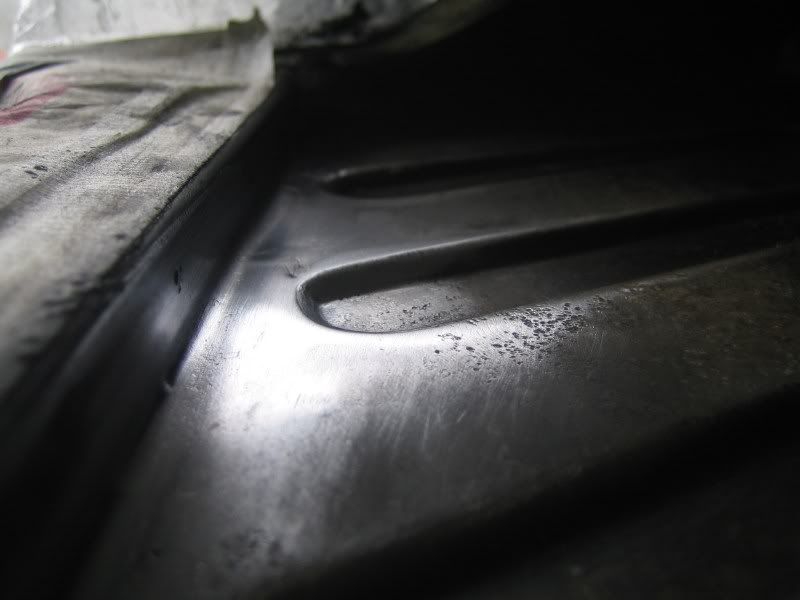
Started out by removing every ding, dent, crease that I could see. I wont show them all but here are a few!
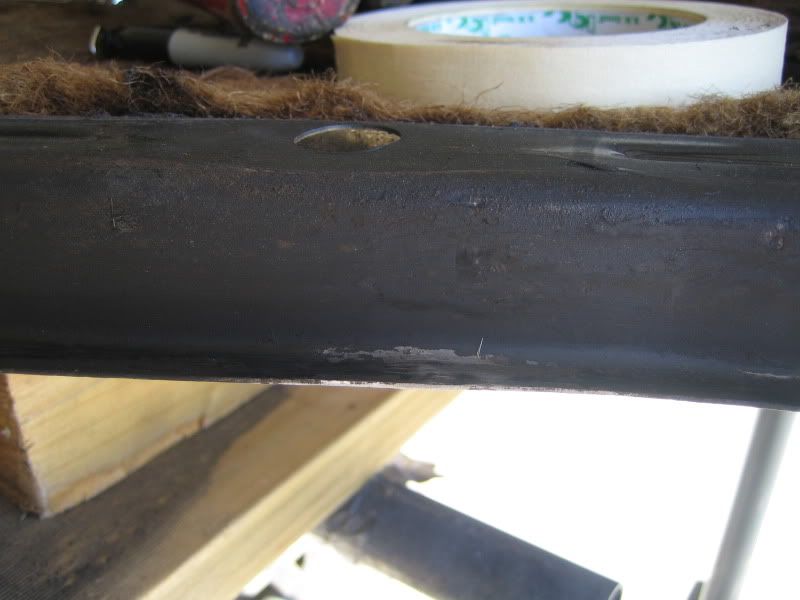
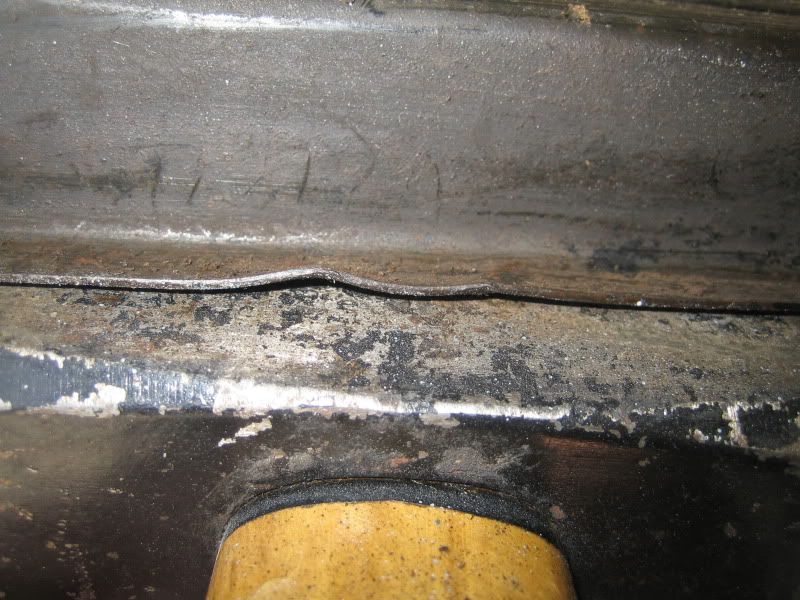
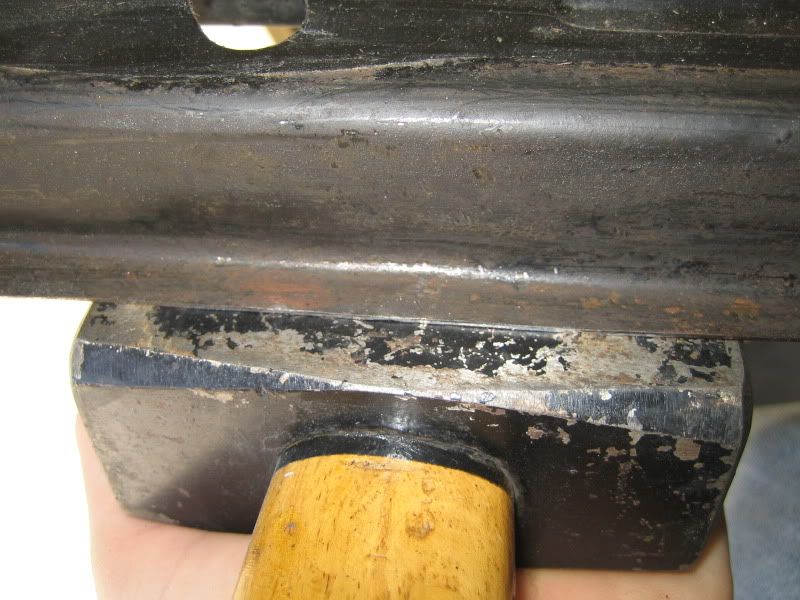
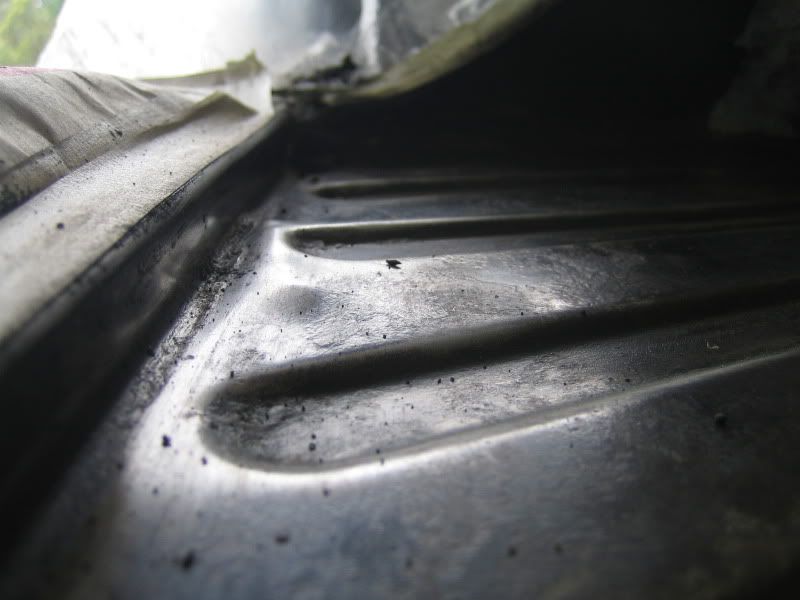
|
|
|
 Aussie Aussie
Officially Full-On Dubber
  
Posts: 296
Threads: 43
Registered: September 15th, 2006
Member Is Offline
Location: Gold Coast
Theme: UltimaBB Pro Blue ( Default )
|
| posted on October 15th, 2010 at 06:04 PM |
|
|
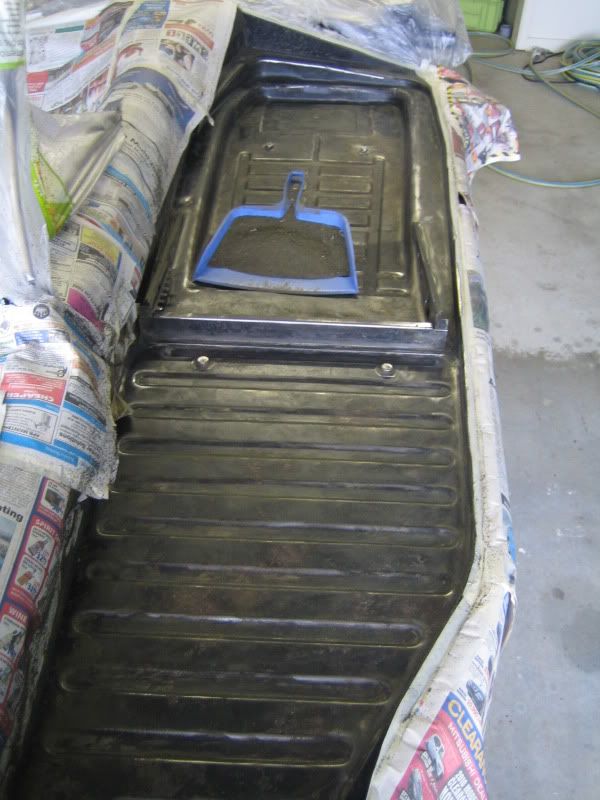
Next I stripped the top side of the pans. Good to see no rust lurking under the tar board!

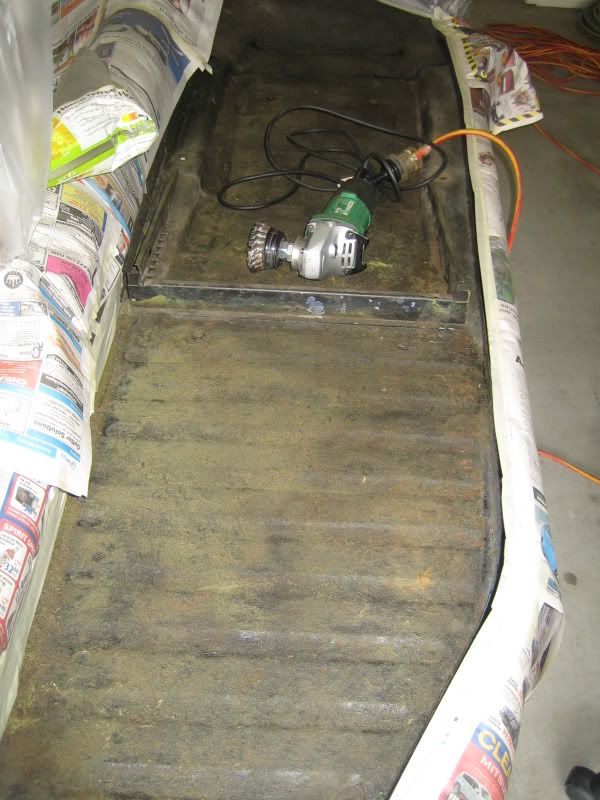
Check out the dustpan full of crud. Most of it is glue from where the sound proof mats where stuck down. What a bi@tch to get off 
|
|
|
 Aussie Aussie
Officially Full-On Dubber
  
Posts: 296
Threads: 43
Registered: September 15th, 2006
Member Is Offline
Location: Gold Coast
Theme: UltimaBB Pro Blue ( Default )
|
| posted on October 15th, 2010 at 06:10 PM |
|
|
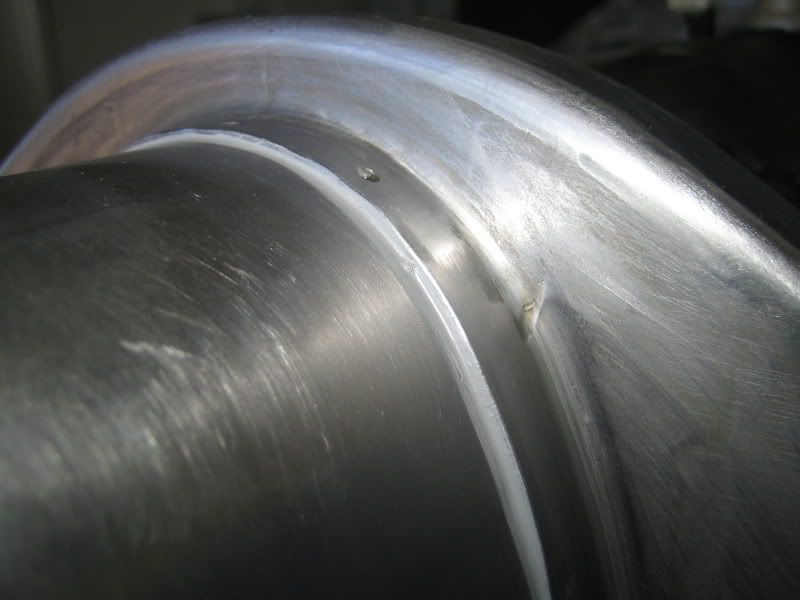
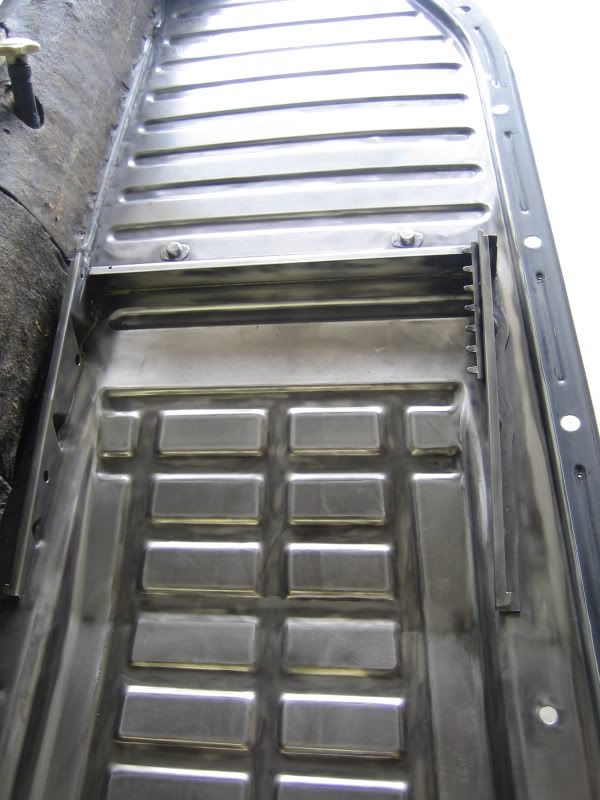
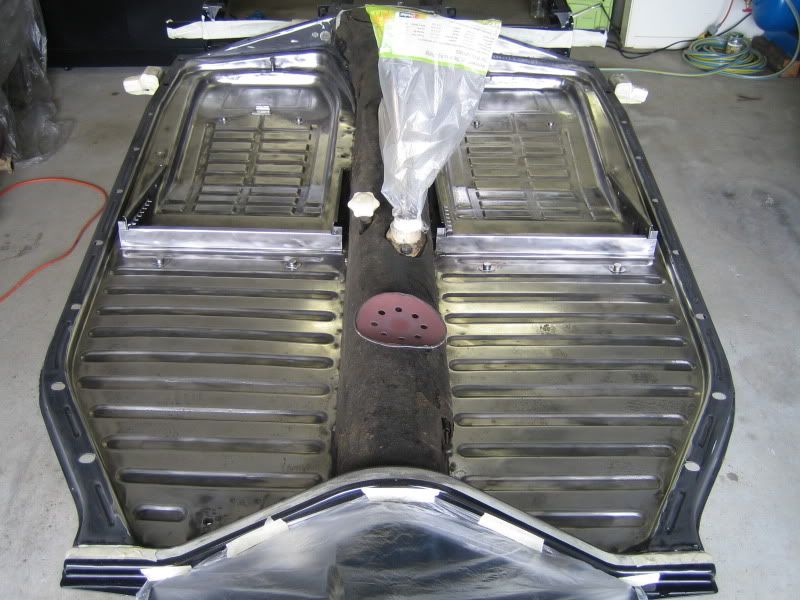
Next up - strip things back to bare metal.
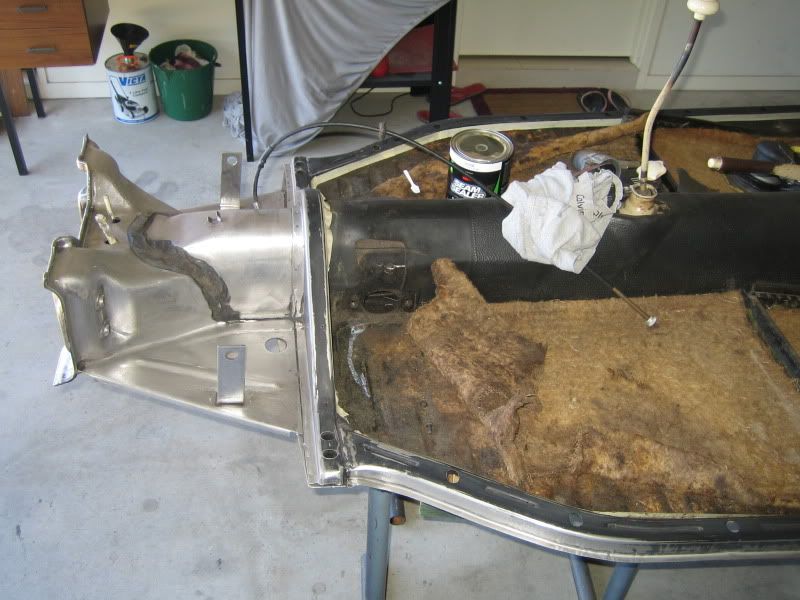
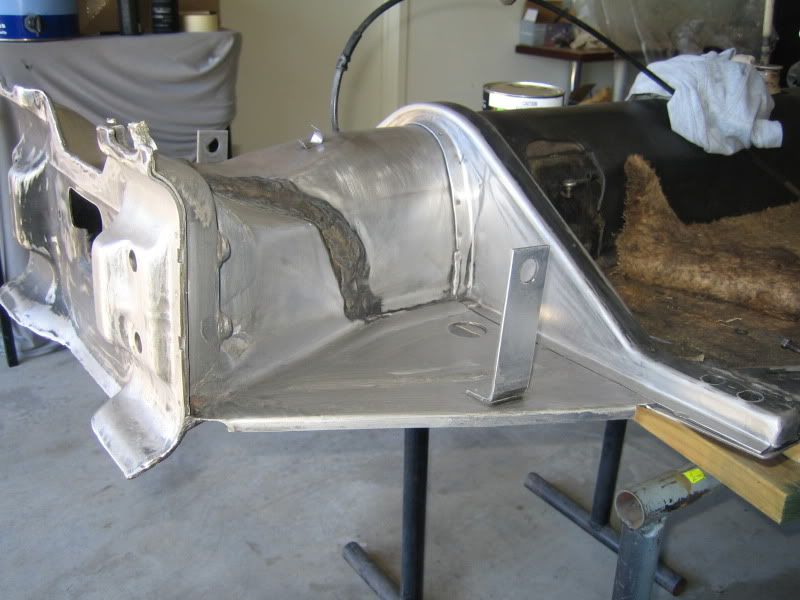
Put seam sealer wherever there were any gaps.
|
|
|
 Aussie Aussie
Officially Full-On Dubber
  
Posts: 296
Threads: 43
Registered: September 15th, 2006
Member Is Offline
Location: Gold Coast
Theme: UltimaBB Pro Blue ( Default )
|
| posted on October 15th, 2010 at 06:34 PM |
|
|
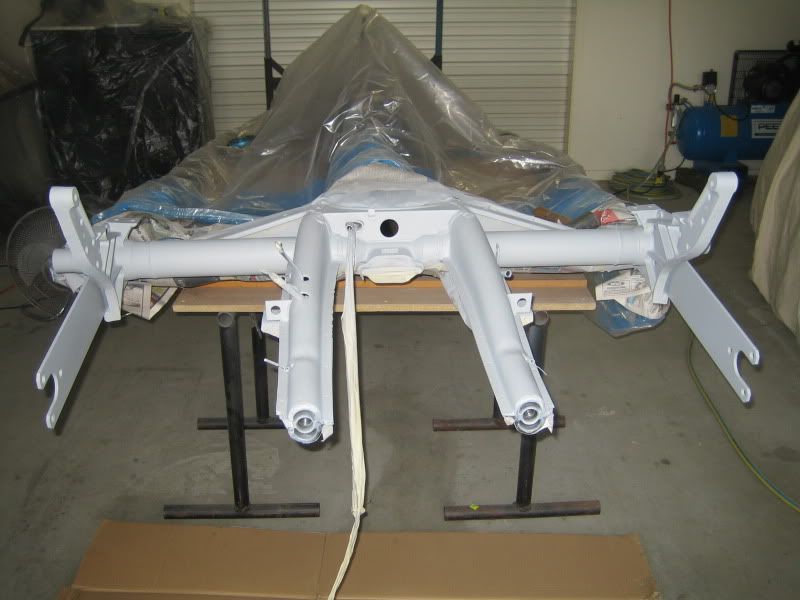
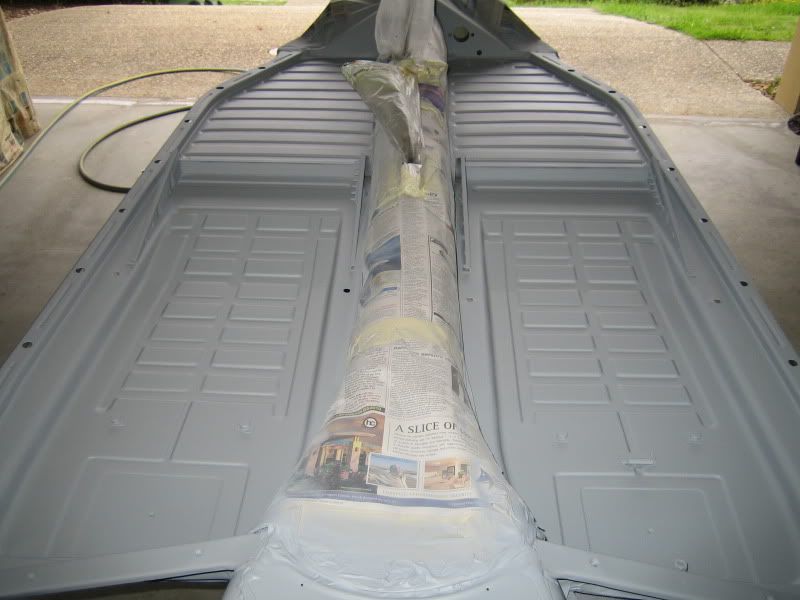
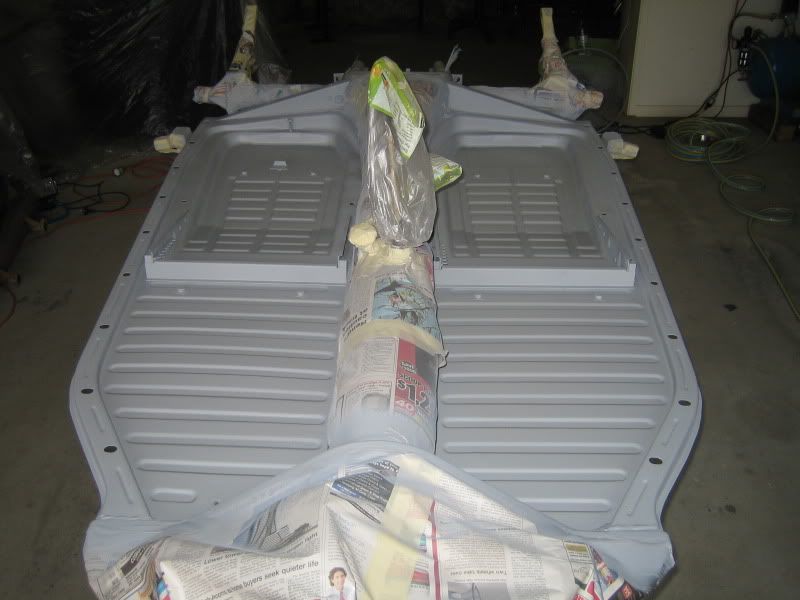
Primer applied. Used some PPG DP40 primer as this was recommended to be good for both existing paint and bare metal (which I have bits of both).
There were some small pitting in the cleaned up surface which I treated with rust remover before painting. I decided not to dress the surface with
filler as the DP40 has a rust preventative in it so will hopefully be better than a layer of filler to keep the rust off. Obvioulsy you can see the
pitting in the final finish but as its going under carpert anyway I would rather that it just had the best protection.
The best bit about the primer is that you dont have to sand or wait till dry before spraying topcoat. Leave for 15mins and then you are good to go
with the colour. How much time does this save! 
|
|
|
 Dasdubber Dasdubber
A.k.a.: Alan Agyik
23 Windows of Awesome
DAS Resto Haus
       
Posts: 5746
Threads: 289
Registered: August 26th, 2002
Member Is Offline
Location: Gold Coast
Theme: UltimaBB Pro Blue
Mood: feeling fine...
|
| posted on October 15th, 2010 at 06:39 PM |
|
|
Good stuff Ian - great to see some primer go on. you certainly are spending some time on prepping that pan - will look great once done.
Al
|
|
|
 Aussie Aussie
Officially Full-On Dubber
  
Posts: 296
Threads: 43
Registered: September 15th, 2006
Member Is Offline
Location: Gold Coast
Theme: UltimaBB Pro Blue ( Default )
|
| posted on October 15th, 2010 at 06:40 PM |
|
|
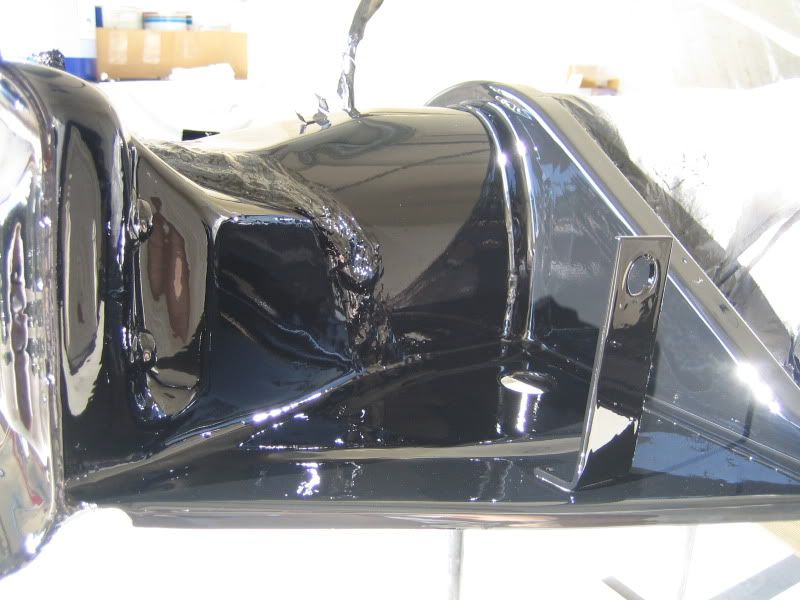
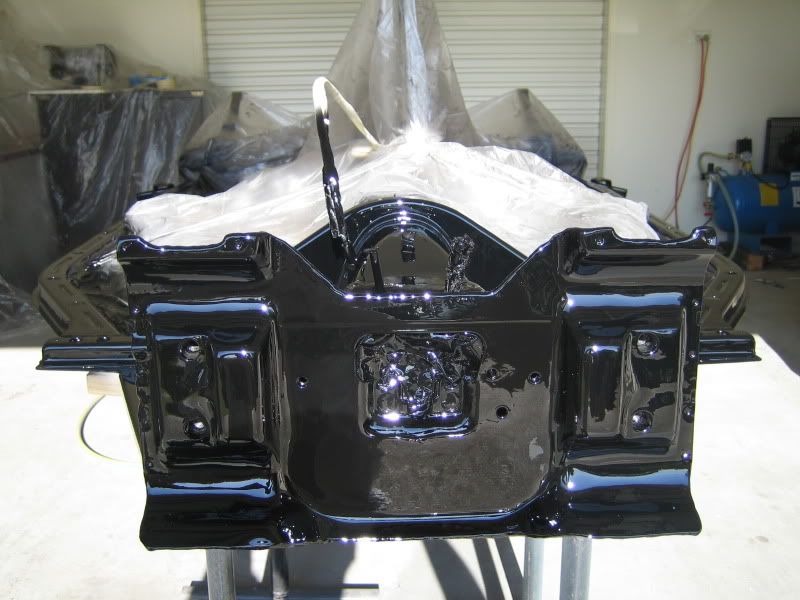
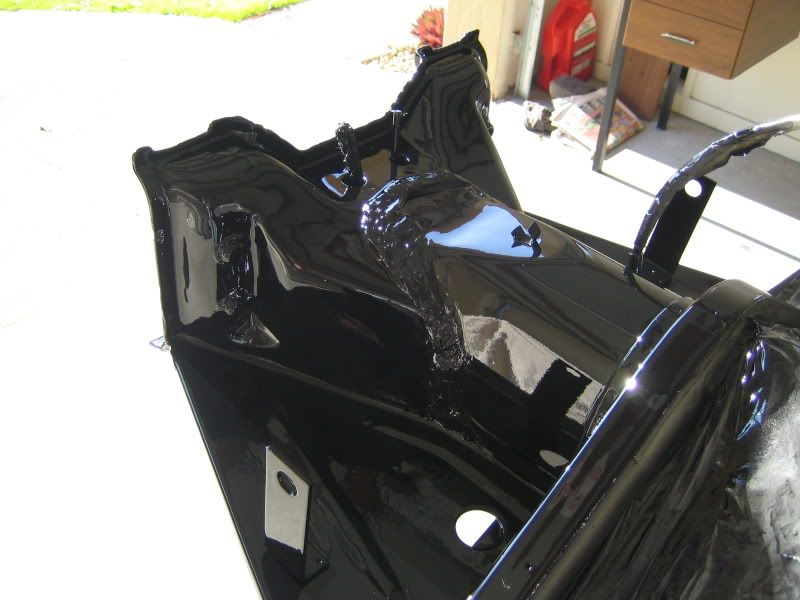
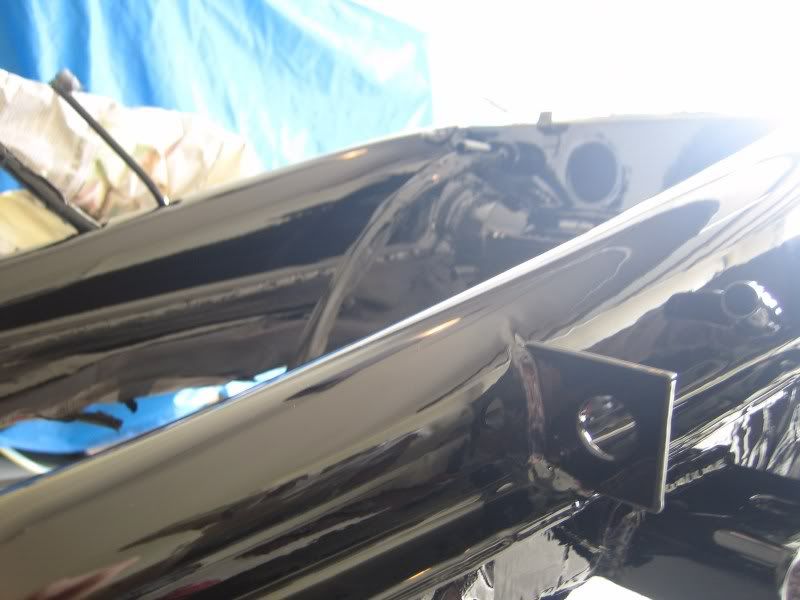
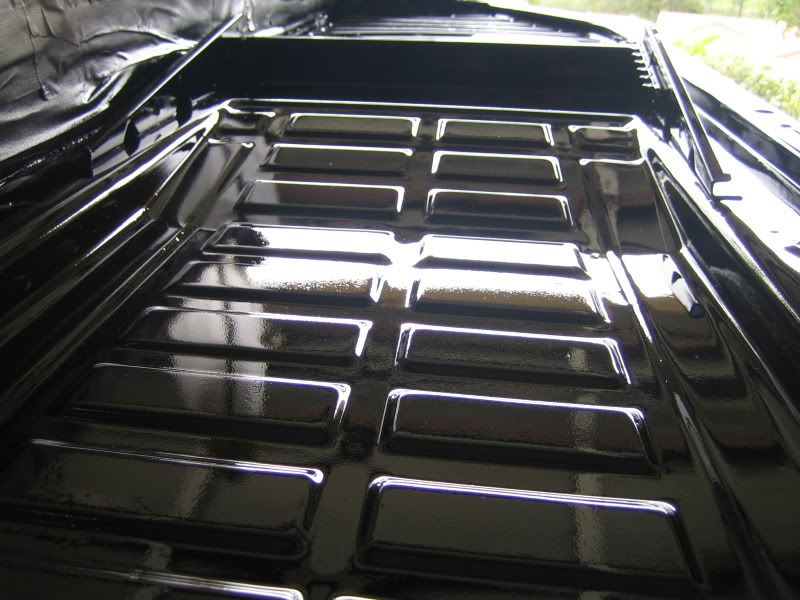
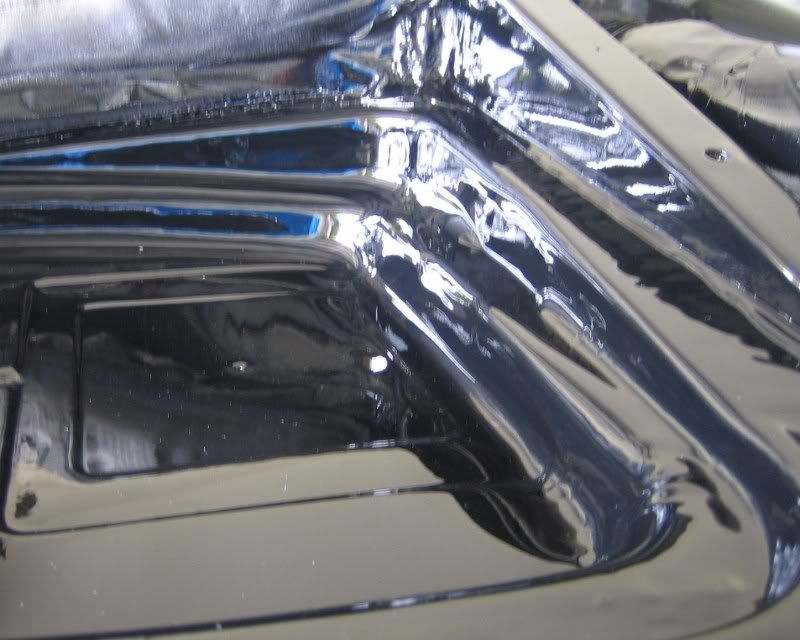
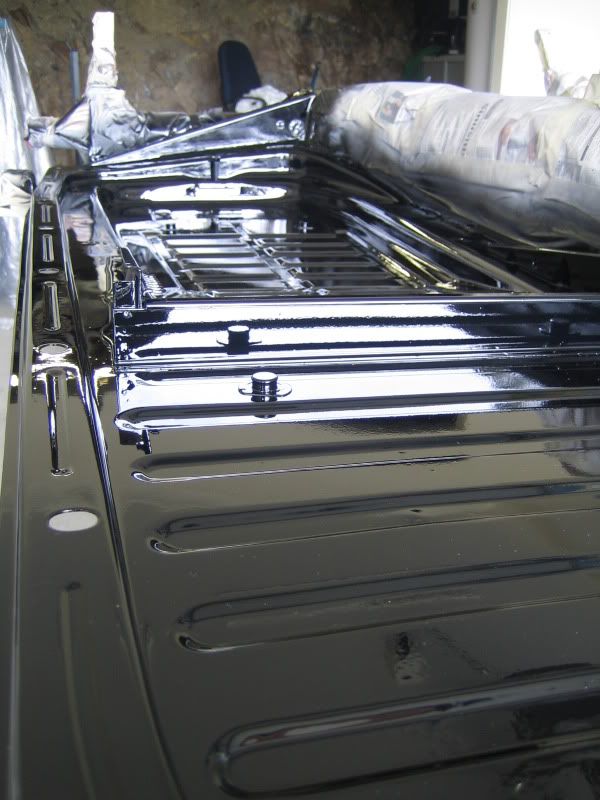
So finally the top coat can go on. Used PPG direct gloss black and put on 4 coats. No buffing or clear coat needed. Came up nice! Next job is flip it
over and do the underside.
|
|
|
 Aussie Aussie
Officially Full-On Dubber
  
Posts: 296
Threads: 43
Registered: September 15th, 2006
Member Is Offline
Location: Gold Coast
Theme: UltimaBB Pro Blue ( Default )
|
| posted on October 15th, 2010 at 06:42 PM |
|
|
| Quote: | Originally
posted by Dasdubber
Good stuff Ian - great to see some primer go on. you certainly are spending some time on prepping that pan - will look great once done.
Al
|
Thanks Al. Think I am getting a bit carried away on the prep but its easy to get a bit obsessed with these things 
Thanks for your advice on the paint - top stuff.
|
|
|
 matberry matberry
Super Moderator
Go hard or go home
      
Posts: 8114
Threads: 134
Registered: March 7th, 2006
Member Is Offline
Location: Cooroy Qld
Theme: UltimaBB Pro Blue
Mood: enjoying waving at all my Kombi buddies from my T3
|
| posted on October 15th, 2010 at 07:37 PM |
|
|
Man, what a great pan that is, great job too  
Matt Berry Motorsports...air cooled advice, repairs and mods Ph 0408 704 662
OFF-ROAD,CIRCUIT,DRAG,STREET,ENDURANCE
 |
|
|
 Scarab Scarab
Wolfsburg Wizard
  
Posts: 646
Threads: 8
Registered: July 26th, 2009
Member Is Offline
Location: Brahma Lodge,South Australia
Theme: UltimaBB Pro Blue
|
| posted on October 16th, 2010 at 08:38 AM |
|
|
nice work!!!! that pan looks AWESOME!!   
Scarab (aka: Paul)
|
|
|
 Luke Luke
Slammed & Awesome Dubber
 
Posts: 78
Threads: 9
Registered: June 21st, 2010
Member Is Offline
Theme: UltimaBB Pro Blue ( Default )
|
| posted on October 16th, 2010 at 07:34 PM |
|
|
Hey nice work. 
|
|
|
 Aussie Aussie
Officially Full-On Dubber
  
Posts: 296
Threads: 43
Registered: September 15th, 2006
Member Is Offline
Location: Gold Coast
Theme: UltimaBB Pro Blue ( Default )
|
| posted on November 5th, 2010 at 09:44 AM |
|
|
Thanks for the comments guys...
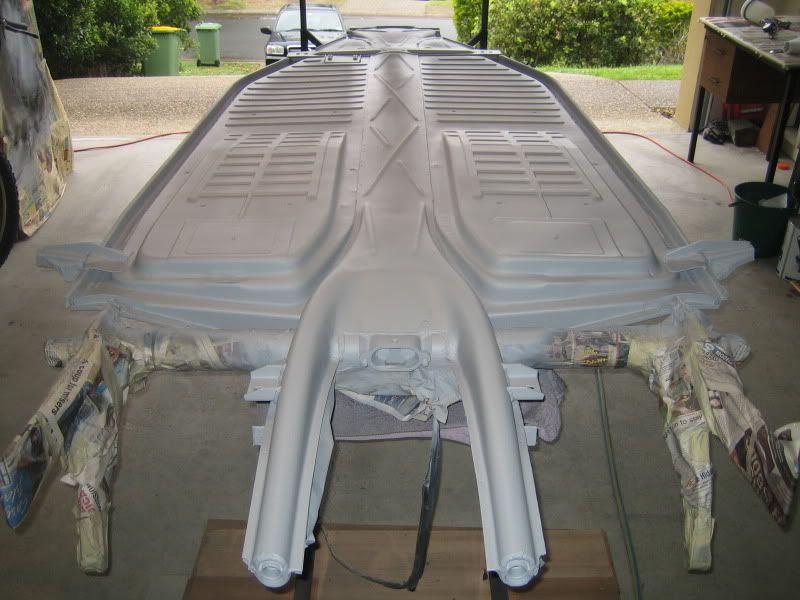
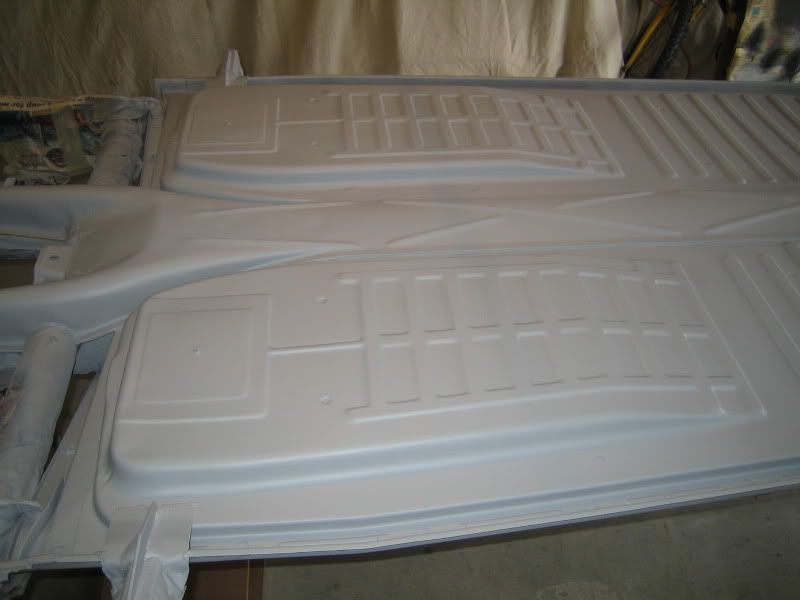
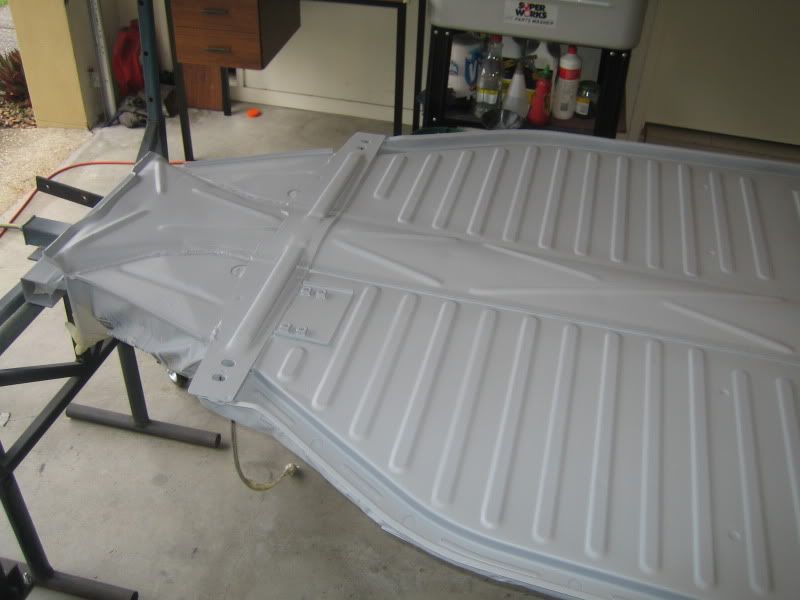
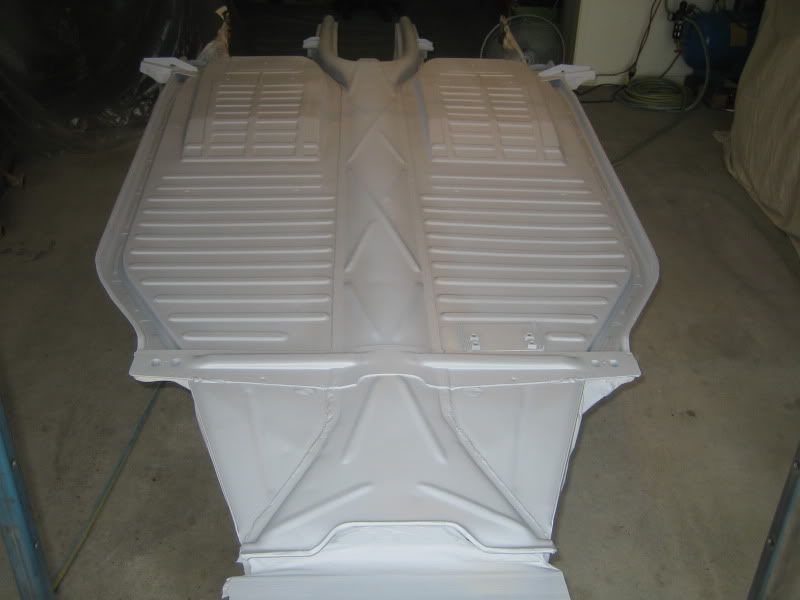
More progress, Pan = Done 
I must have about 40hrs on the underside of the pan. I shudder to think about how many hours overall are in the car already (and how many more to
come)!! Maybe I just work too slow 
Anyway, followed the same process as the top of the pan - got things back to bare metal, straightened + sanded everything I could. The only bugger was
wire brushing a bit too hard in a couple of places which then heated the metal and bubbled the paint on the other side of the pan. Luckily only a
couple of very small bits which I will have to do a bit of touch up at a later stage. It will be under carpet so not visible anyway. I guess this was
a downside for doing things in stages rather than all at once. Came up good with no rust whatsoever.
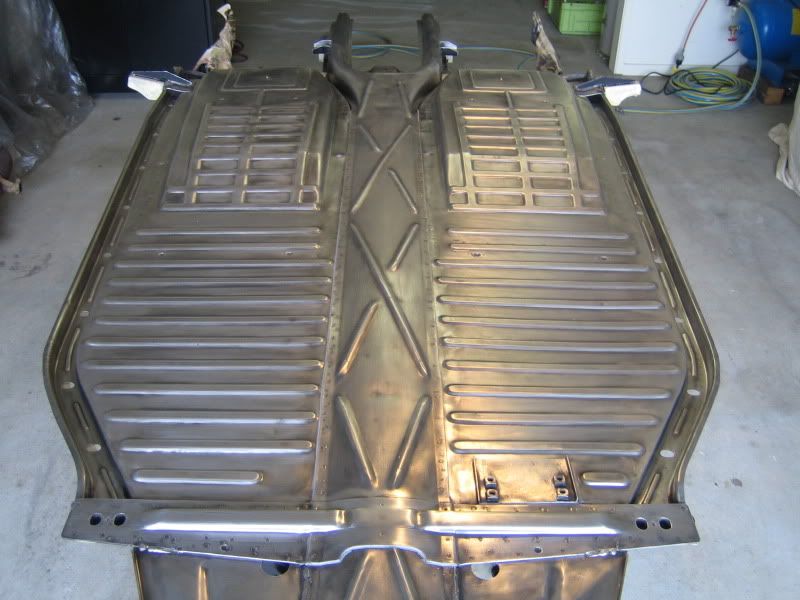
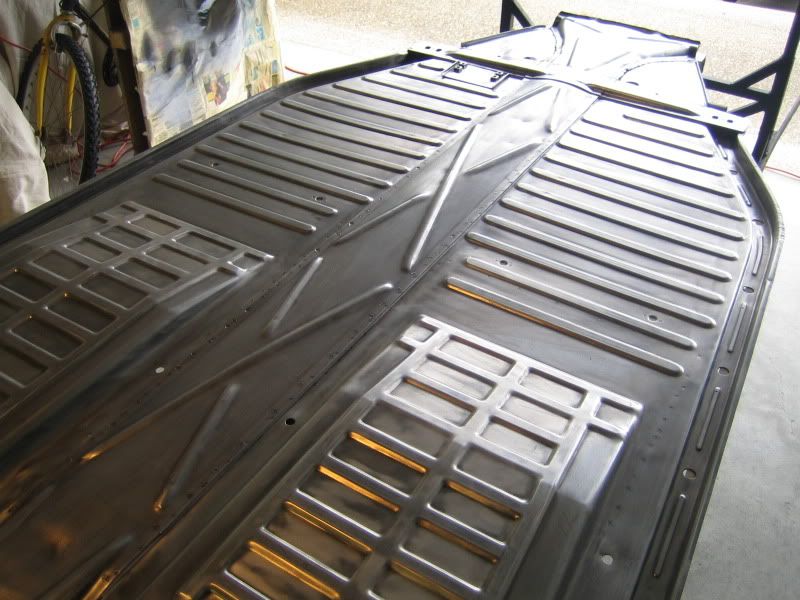
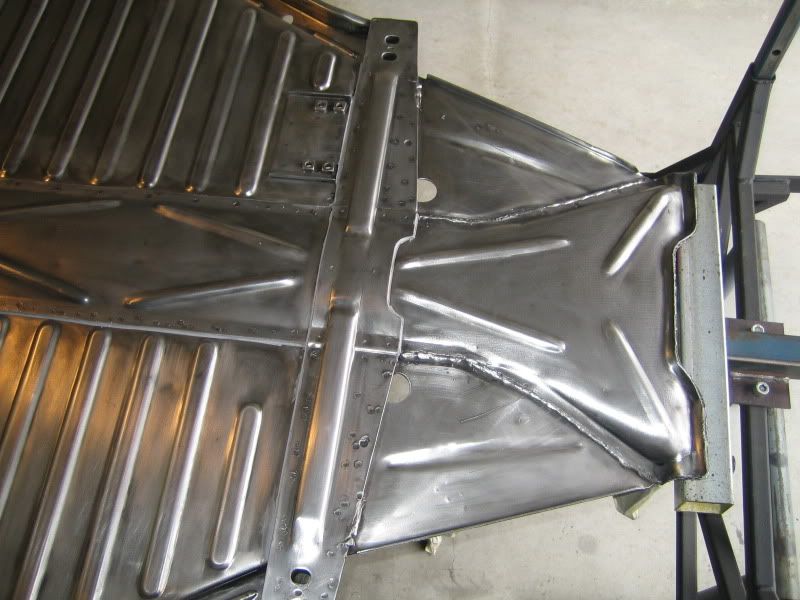
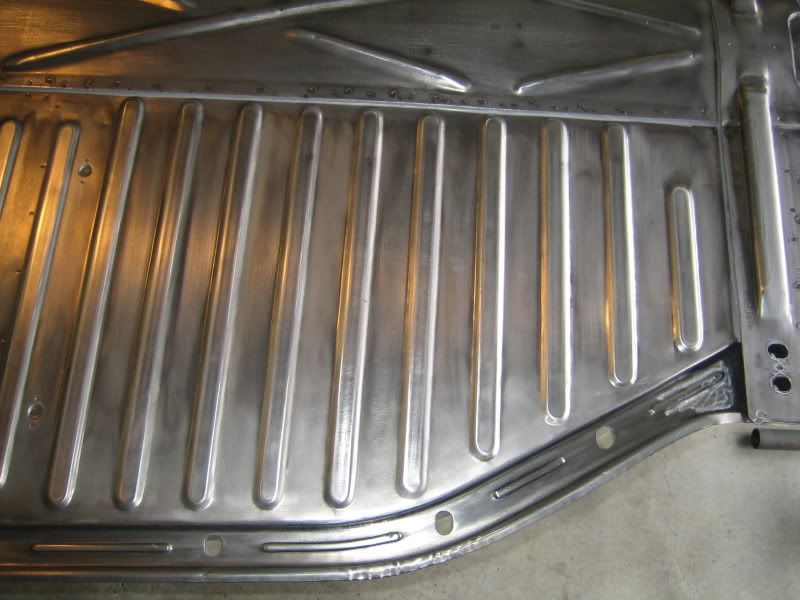
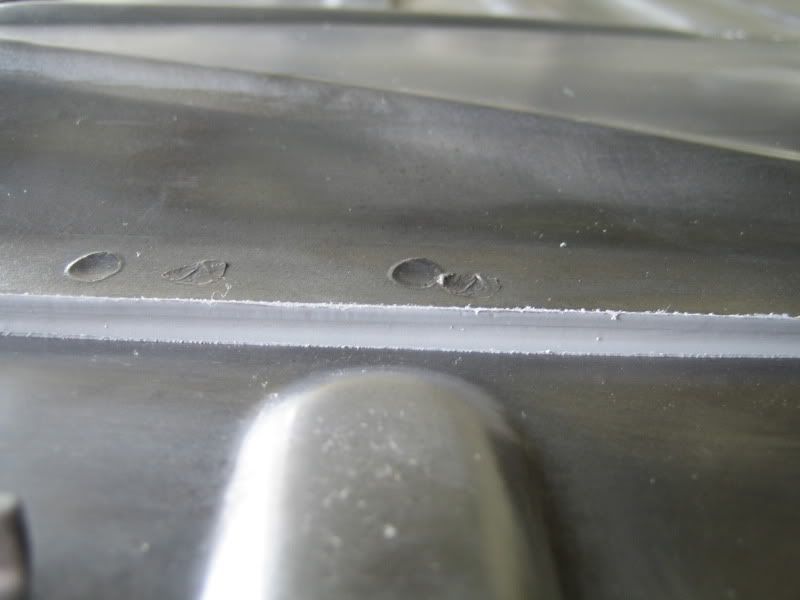
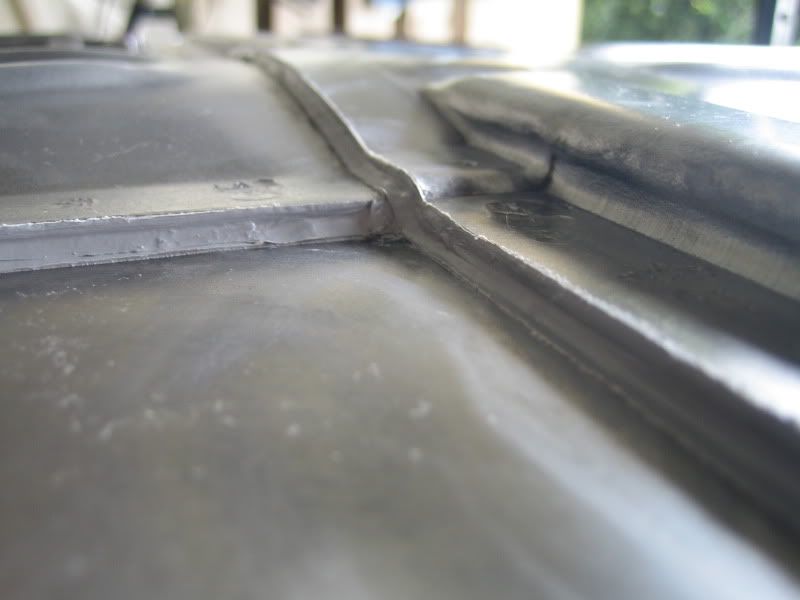
On goes the seam sealer..
|
|
|
 Aussie Aussie
Officially Full-On Dubber
  
Posts: 296
Threads: 43
Registered: September 15th, 2006
Member Is Offline
Location: Gold Coast
Theme: UltimaBB Pro Blue ( Default )
|
| posted on November 5th, 2010 at 09:53 AM |
|
|
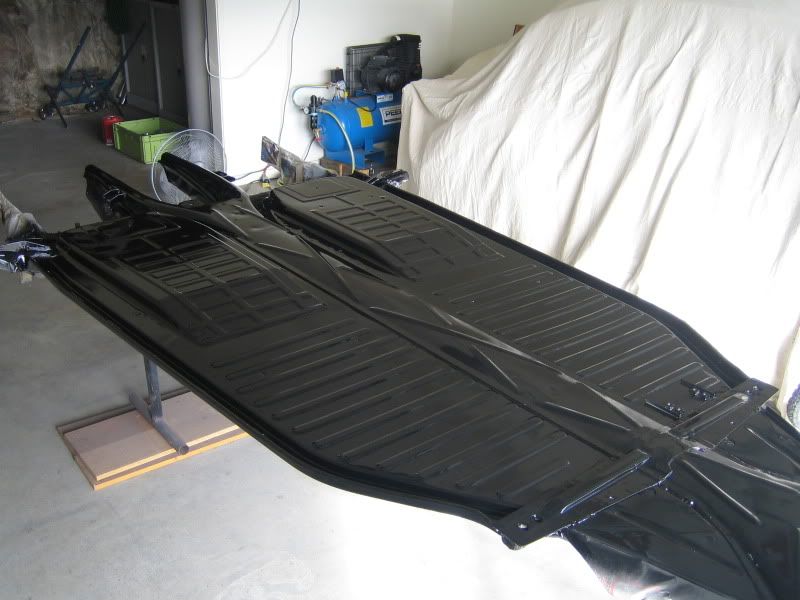
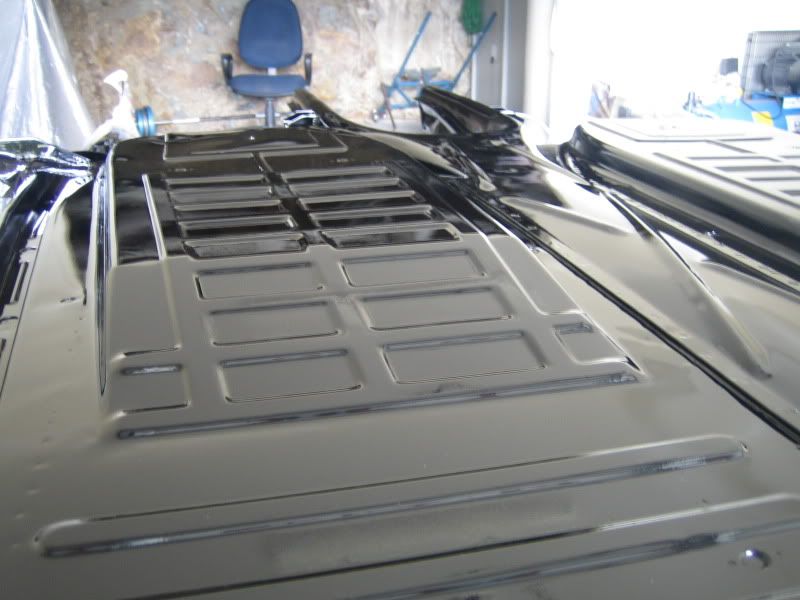
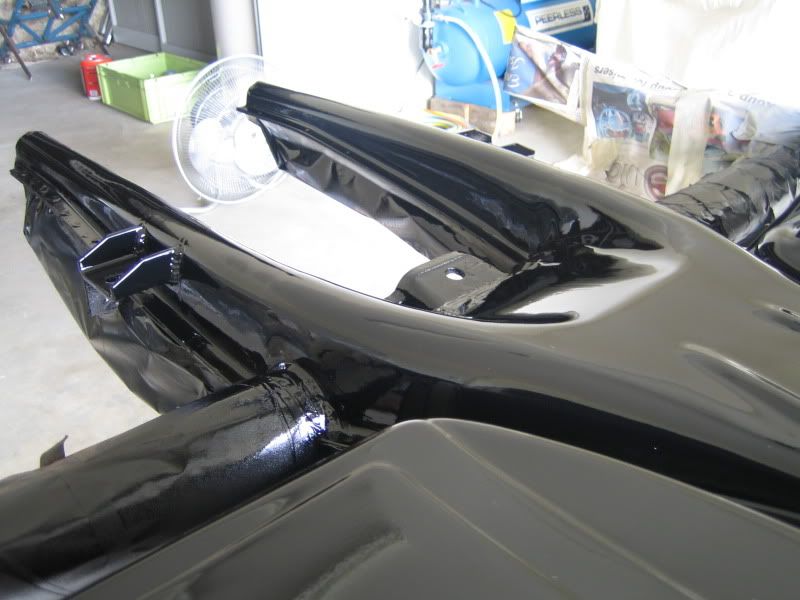
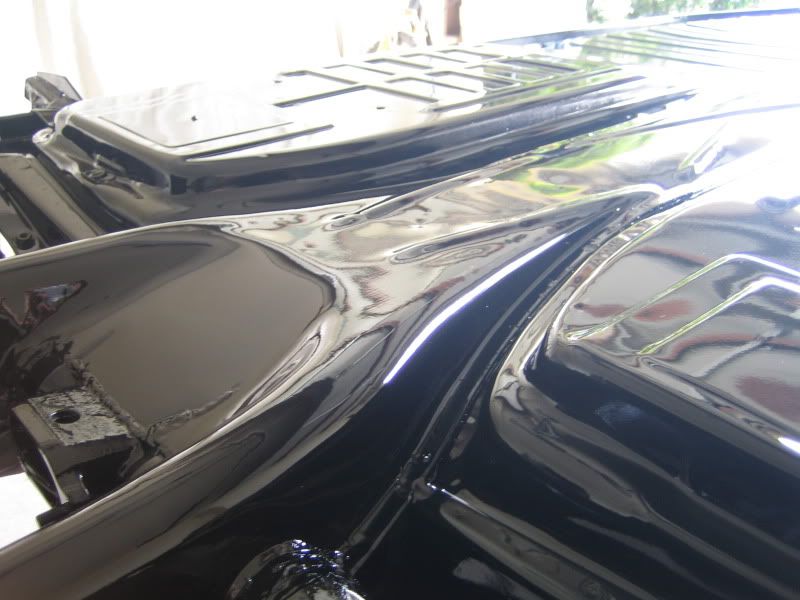
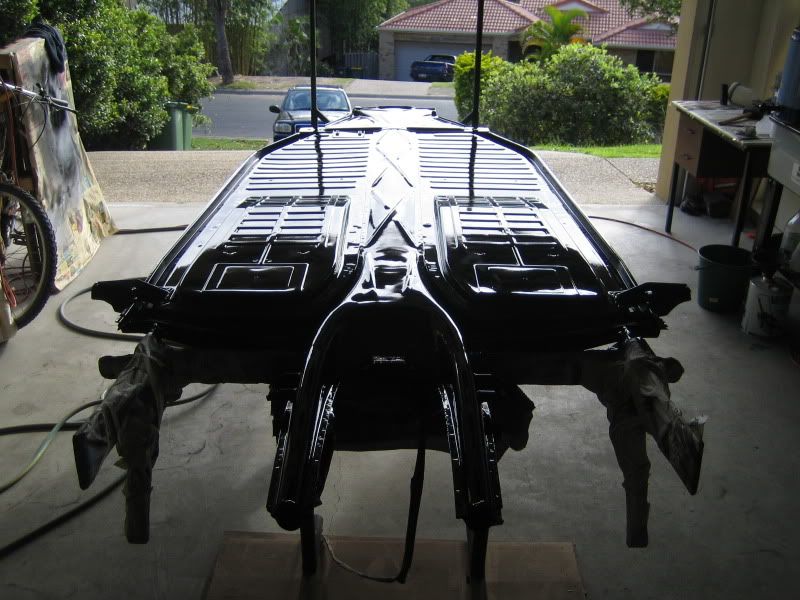
Next up 2 coats of primer and then 4 coats of black. Came up nice. Also glad I can finally move on to something else!!
|
|
|
 Aussie Dubbin Aussie Dubbin
Fahrvergnugen
   
Posts: 895
Threads: 90
Registered: July 21st, 2008
Member Is Offline
Location: Adelaide
Theme: UltimaBB Pro Blue ( Default )
|
| posted on November 5th, 2010 at 01:02 PM |
|
|
Sweet write up man,
Nice job, how did you go stripping that metal so nicely. Did you use pints srtipper, or all scratch and grind?
Keep up the thread. Looks very worthwhile.
|
|
|
 reub reub
Veteran Volks Folk
VWRX is gone...
    
Posts: 2054
Threads: 160
Registered: September 2nd, 2002
Member Is Offline
Theme: UltimaBB Pro Blue
|
| posted on November 5th, 2010 at 01:07 PM |
|
|

Reub
|
|
|
 pete wood pete wood
A.k.a.: figure itout
23 Windows of Awesome
       
Posts: 6828
Threads: 389
Registered: January 15th, 2004
Member Is Offline
Location: Nth Nth StMarys, Sydney
Theme: UltimaBB Pro White
Mood: upgrades = jackstands
|
| posted on November 5th, 2010 at 02:57 PM |
|
|
| Quote: | Originally
posted by Aussie

|
that is gorgeous... just clearcoat it..... no, waxoil it... 
|
|
|
 Aussie Aussie
Officially Full-On Dubber
  
Posts: 296
Threads: 43
Registered: September 15th, 2006
Member Is Offline
Location: Gold Coast
Theme: UltimaBB Pro Blue ( Default )
|
| posted on November 5th, 2010 at 06:04 PM |
|
|
| Quote: | Originally
posted by Aussie Dubbin
Sweet write up man,
Nice job, how did you go stripping that metal so nicely. Did you use pints srtipper, or all scratch and grind?
Keep up the thread. Looks very worthwhile.
|
Started out with a twisted knot wire wheel on the grinder, follow up with standard wire brush wheel on the grinder, then finally go over everything
with 240 grit hand sanding. The results are great but it is a dirty, noisy and long winded process!!! My neighbours must hate me 
|
|
|
 cam070 cam070
Custom Title Time!
    
Posts: 1332
Threads: 53
Registered: July 25th, 2009
Member Is Offline
Location: Sydney
Theme: UltimaBB Pro Blue ( Default )
Mood: Getting hands dirty stripping the bug down
|
| posted on November 6th, 2010 at 12:24 AM |
|
|
Floor pan looks awesome. Can't wait to see what the rest of the car will look like!
|
|
|
 beetlemic beetlemic
Learner Dubber

Posts: 4
Threads: 1
Registered: September 22nd, 2010
Member Is Offline
Location: Åland Islands
Theme: UltimaBB Pro Grey
|
| posted on December 13th, 2010 at 08:00 AM |
|
|
Great inspiration, thanks!
keep up the good job |
|
|
 AJPerkins AJPerkins
Commited Dubber
 
Posts: 54
Threads: 12
Registered: January 9th, 2010
Member Is Offline
Location: Adelaide/Tailem Bend South Australia
Theme: UltimaBB Psyche Red
Mood: Bug-gered
|
| posted on December 13th, 2010 at 07:27 PM |
|
|
Wow you are doing an amazing job! It must make a huge difference starting with such a solid car! I can't wait to see some more progress for some
inspiration!
AJ
|
|
|
 Aussie Aussie
Officially Full-On Dubber
  
Posts: 296
Threads: 43
Registered: September 15th, 2006
Member Is Offline
Location: Gold Coast
Theme: UltimaBB Pro Blue ( Default )
|
| posted on December 14th, 2010 at 01:14 PM |
|
|
| Quote: | Originally
posted by AJPerkins
Wow you are doing an amazing job! It must make a huge difference starting with such a solid car! I can't wait to see some more progress for some
inspiration!
AJ
|
Thanks guys. Progress is a bit stop/start at the moment - I just try and fit in a bit here and there. Painted a few ancilliaries like axle tubes,
trailing arms, gearbox cradle, spring plate covers etc - took some pics but a bit boring to post.
Will carry out the touch up work needed to the top of the pan next and then finally will have it finished.... Will be trying to get some hours in over xmas. In the process of getting a paint match so that I can
move on to the body and start painting inner arches, bottom of heater channels, under boot floor etc. Basically all the bits you won't see.... Will be trying to get some hours in over xmas. In the process of getting a paint match so that I can
move on to the body and start painting inner arches, bottom of heater channels, under boot floor etc. Basically all the bits you won't see....
|
|
|
| Pages: 1 2 3 4 5 .. 7 |