| [ Total Views: 156721 | Total Replies: 204 | Thread Id: 75753 ] |
| Pages: 1 2 3 4 5 6 7 |
|
|
 Aussie Aussie
Officially Full-On Dubber
  
Posts: 296
Threads: 43
Registered: September 15th, 2006
Member Is Offline
Location: Gold Coast
Theme: UltimaBB Pro Blue ( Default )
|
| posted on September 13th, 2011 at 03:16 PM |
|
|
Update Time
It has been a LONG time since my last update....... I have gone through the process of buying a house and moving which has slowed things down for a
while, however now a few things on the build have started to progress once again.
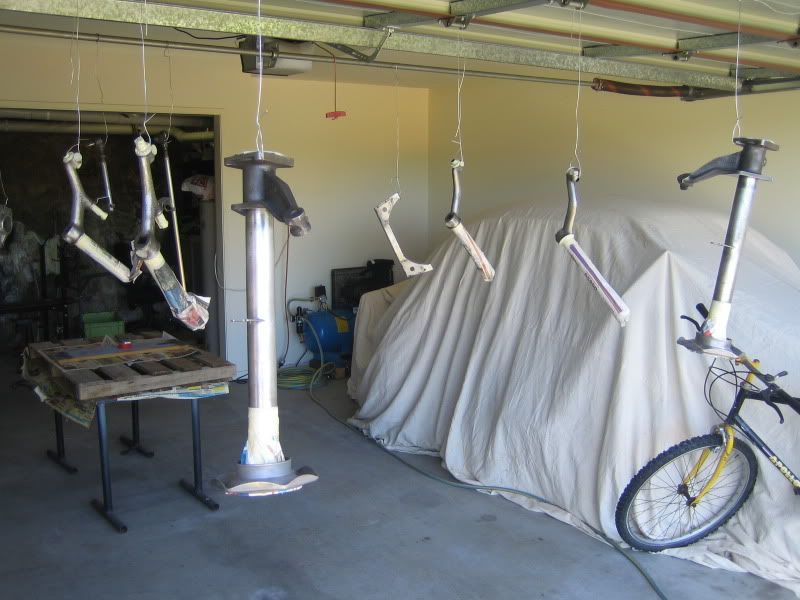
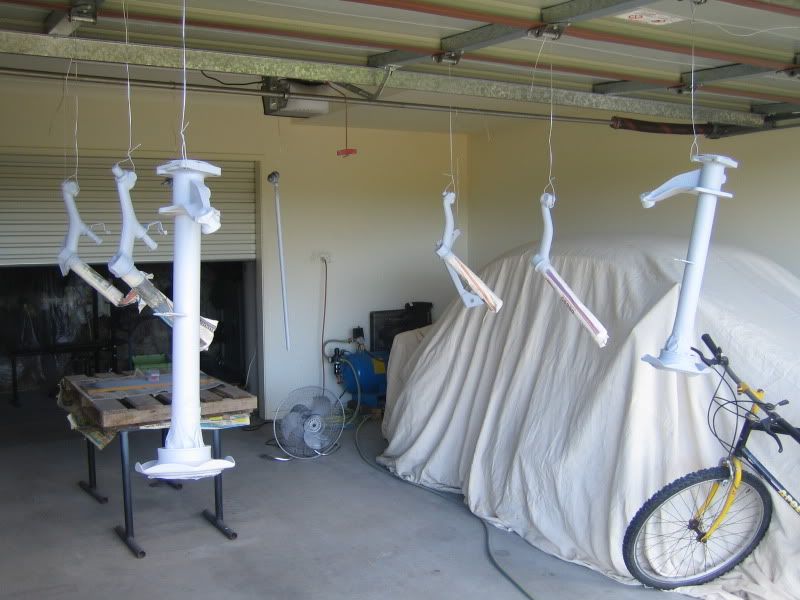
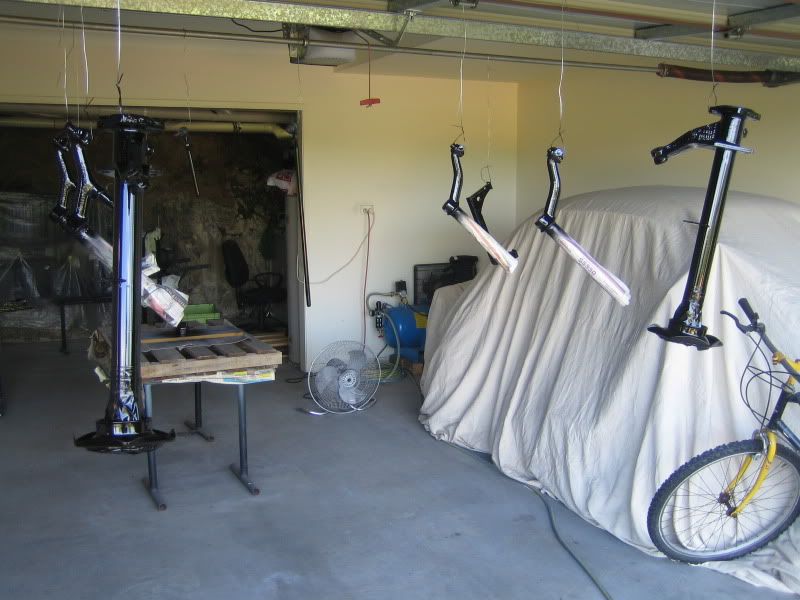
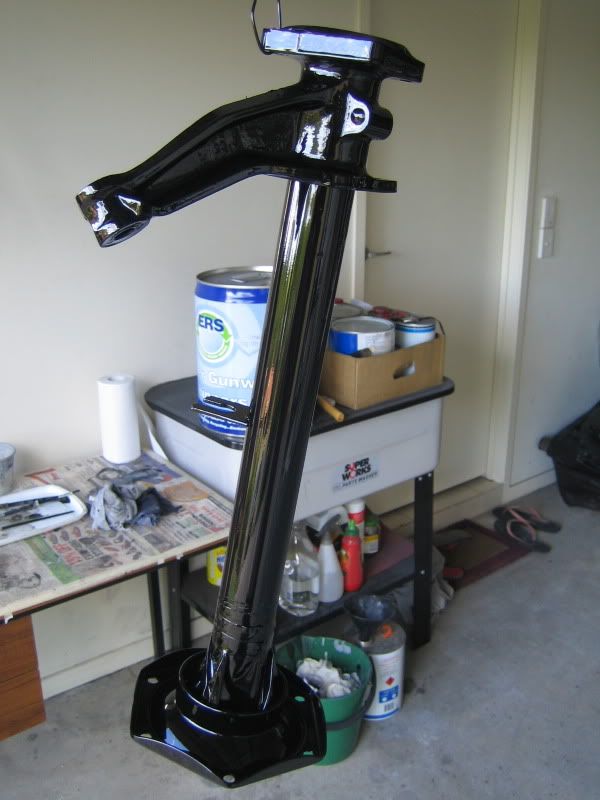
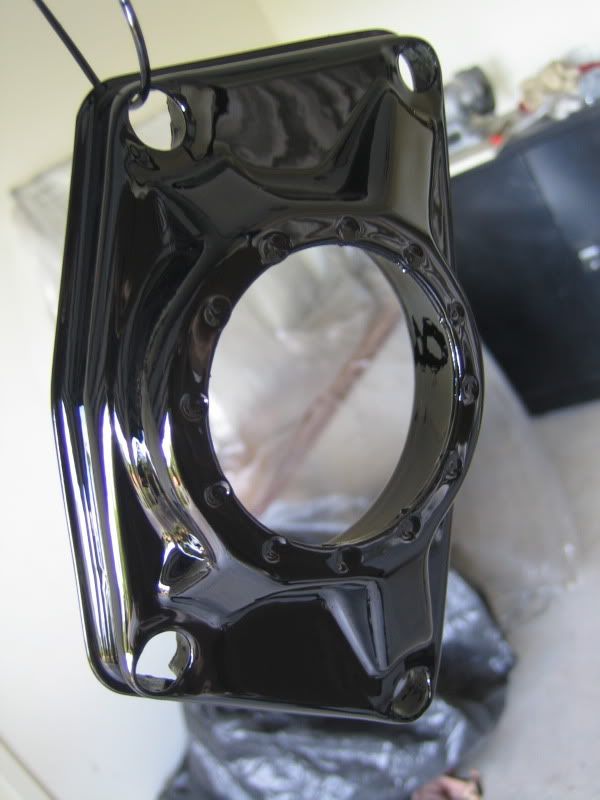
Left off things at the old house with a load of ancillaries painted up.

|
|
|
 Aussie Aussie
Officially Full-On Dubber
  
Posts: 296
Threads: 43
Registered: September 15th, 2006
Member Is Offline
Location: Gold Coast
Theme: UltimaBB Pro Blue ( Default )
|
| posted on September 13th, 2011 at 03:28 PM |
|
|
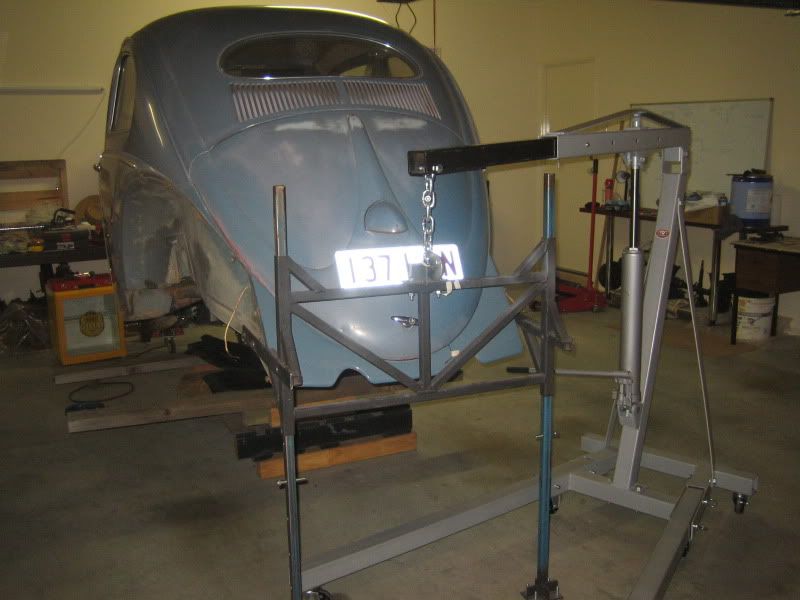
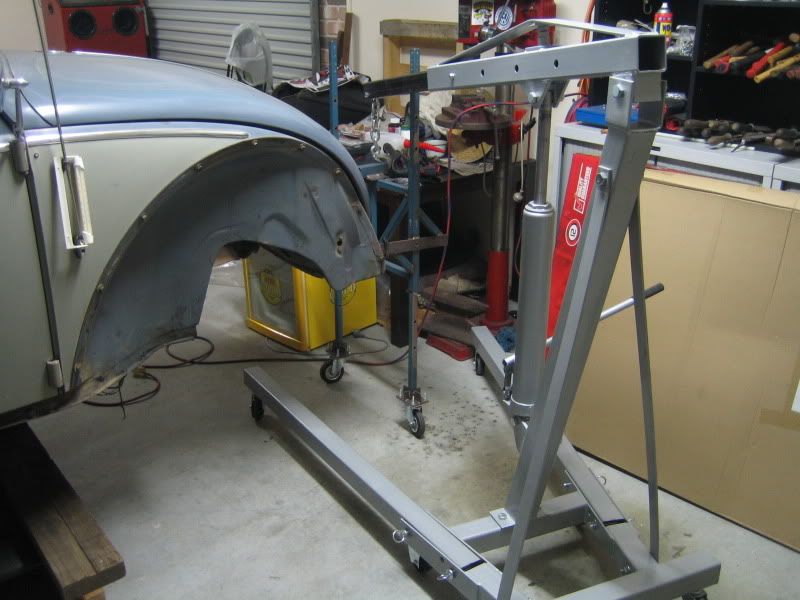
Lifting frames came in very handy when moving things into the new place. Replaced the jack with a crane to make things quicker + easier when adjusting
the height.
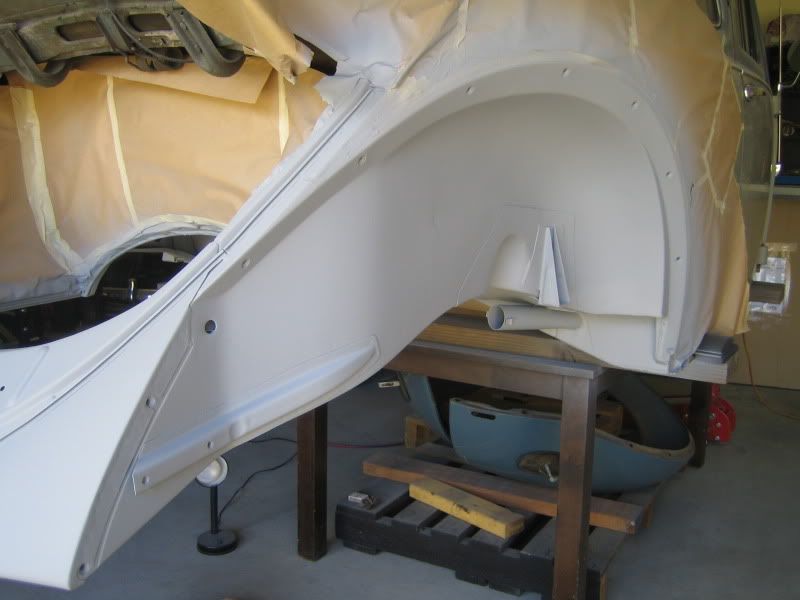
With the chassis now complete, I decided to start things off on the body at the back by cleaning up under the boot floor area and inner rear arches
etc.
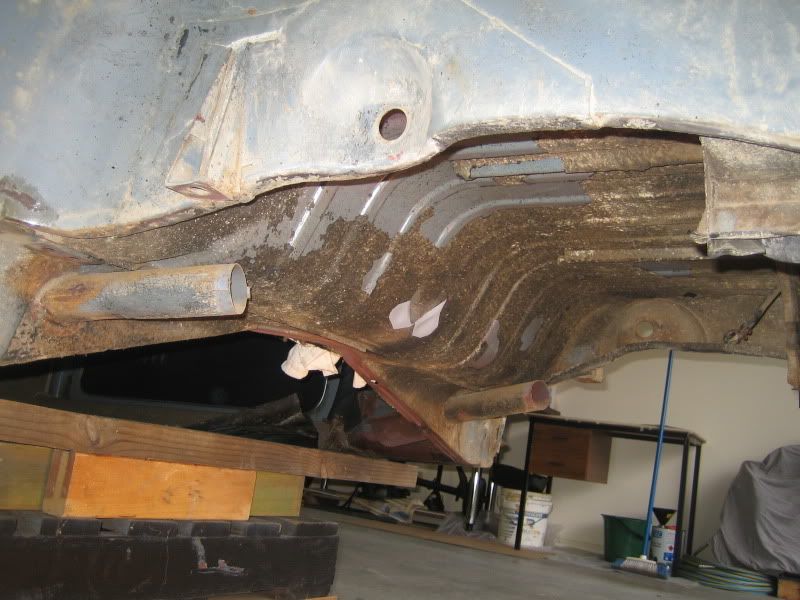
Cleaned up well though will certainly need a lick of paint to keep things protected under here. You can see the primered dimples which were needed to
give clearance to the front of the late gearbox.
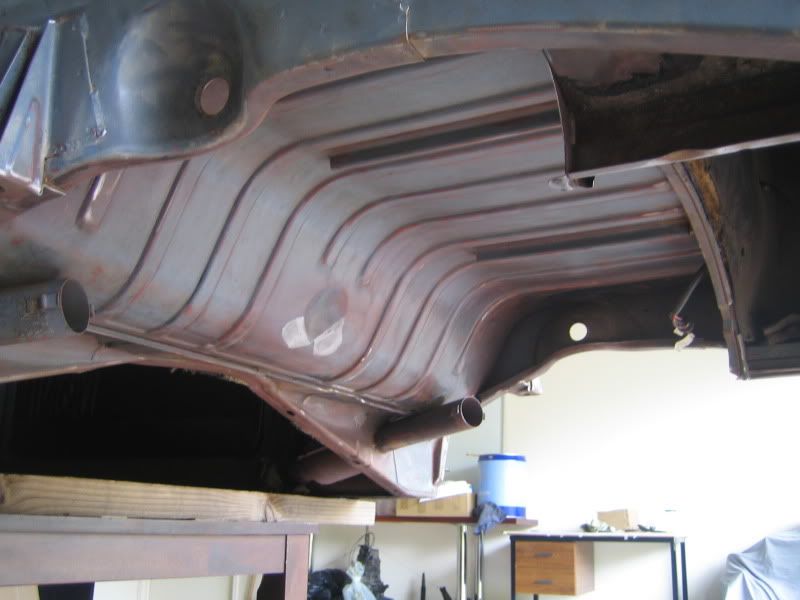
|
|
|
 Aussie Aussie
Officially Full-On Dubber
  
Posts: 296
Threads: 43
Registered: September 15th, 2006
Member Is Offline
Location: Gold Coast
Theme: UltimaBB Pro Blue ( Default )
|
| posted on September 13th, 2011 at 04:41 PM |
|
|
Rust?
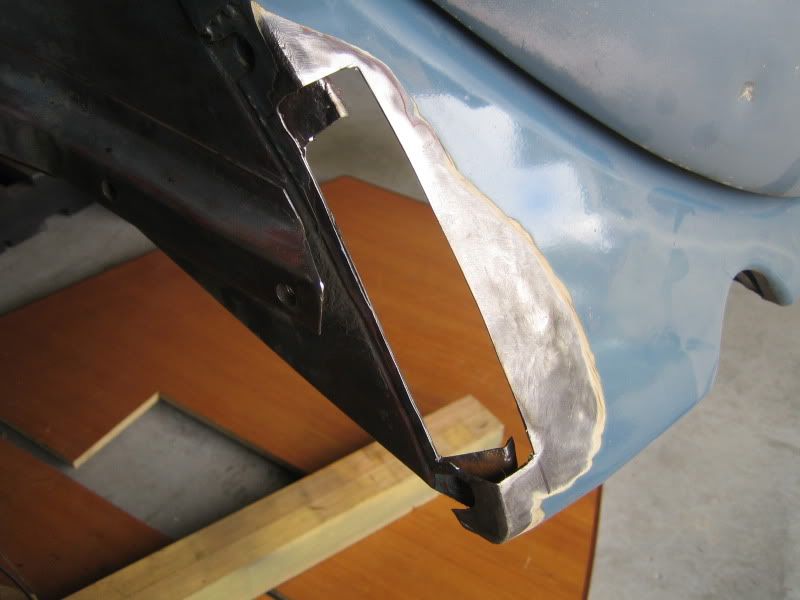
Moving towards the rear and found some rust holes. Nothing too bad but will still need to be sorted.
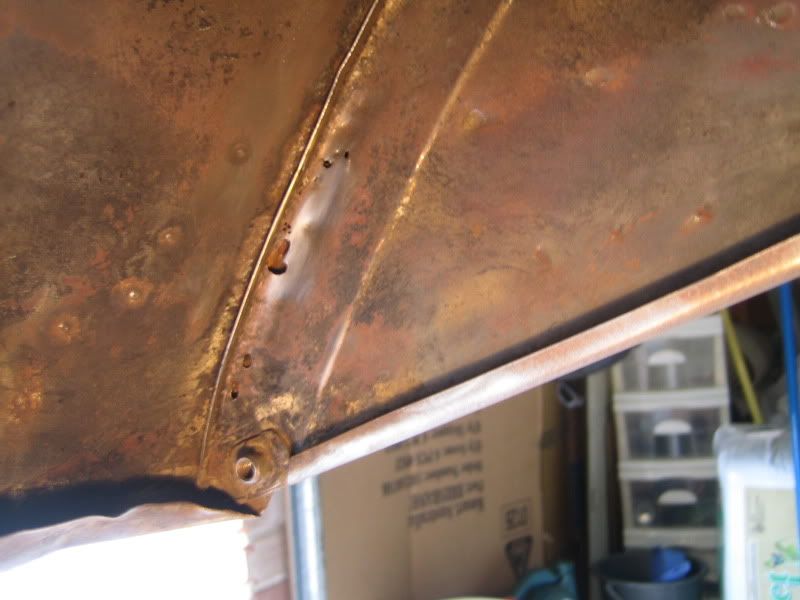
Cleaned back the top side of the valance to see how far things might have gone through and found a previous repair which was not the neatest!!!
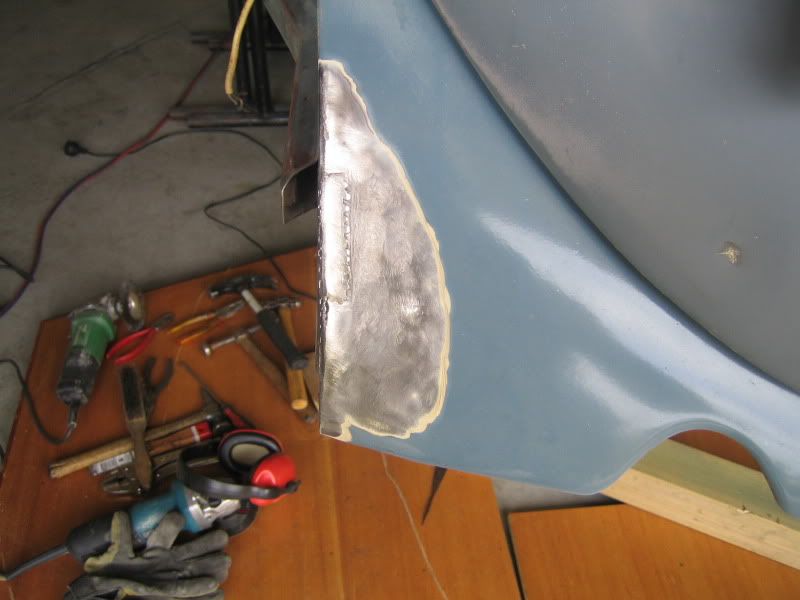
Time to chop out the crap and see what we have left.
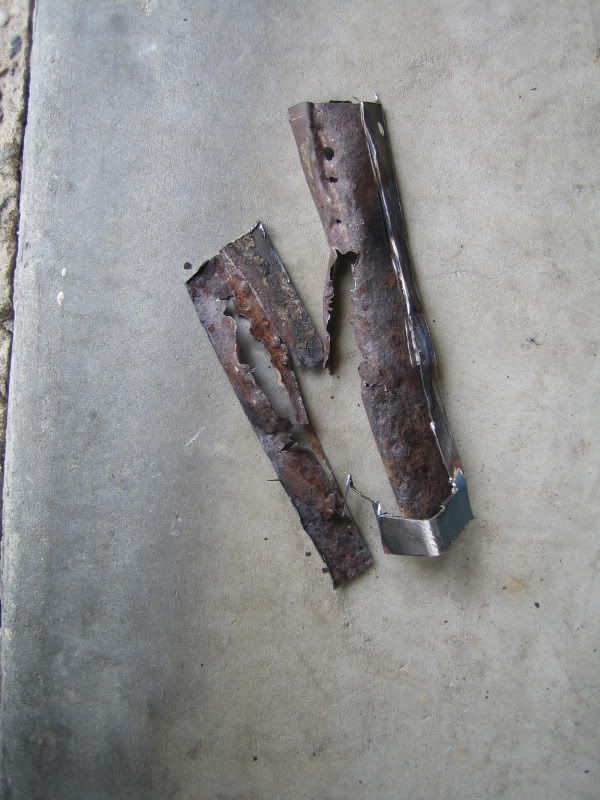
I dont like holes!
|
|
|
 Aussie Aussie
Officially Full-On Dubber
  
Posts: 296
Threads: 43
Registered: September 15th, 2006
Member Is Offline
Location: Gold Coast
Theme: UltimaBB Pro Blue ( Default )
|
| posted on September 13th, 2011 at 04:49 PM |
|
|
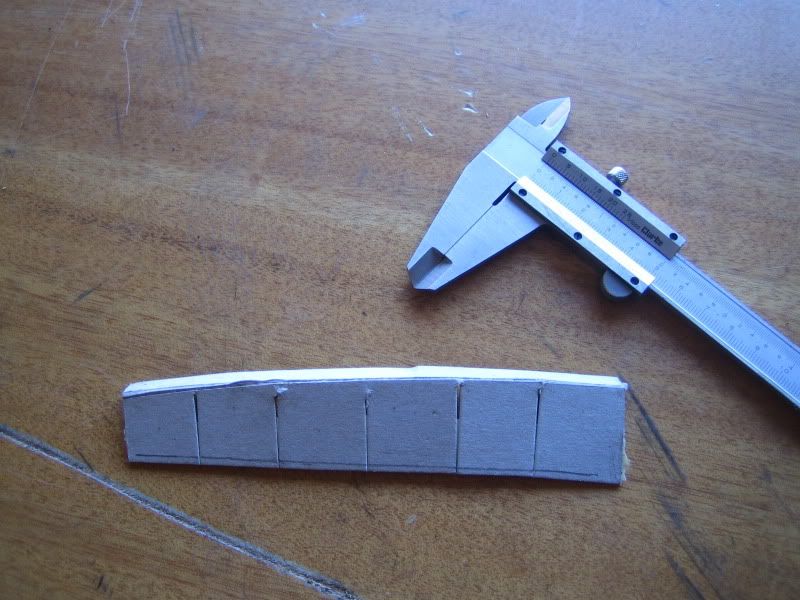
Outer repair piece
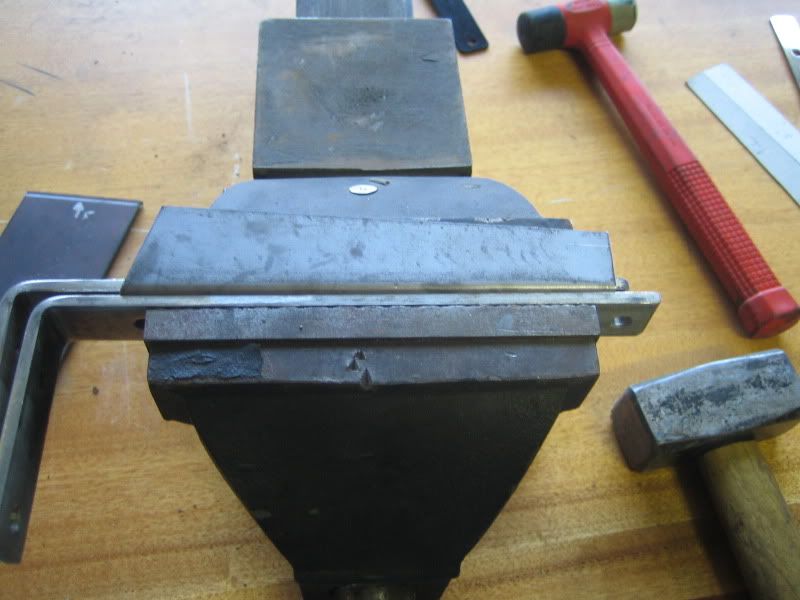
Started to mock up the repair piece needed for the outer skin of the valance. Make in card first and then transfer to metal. The sheet metal supplier
told me that it would not be possible to mig weld this gauge of steel without blowing holes though everything?? I told him I would try anyway 
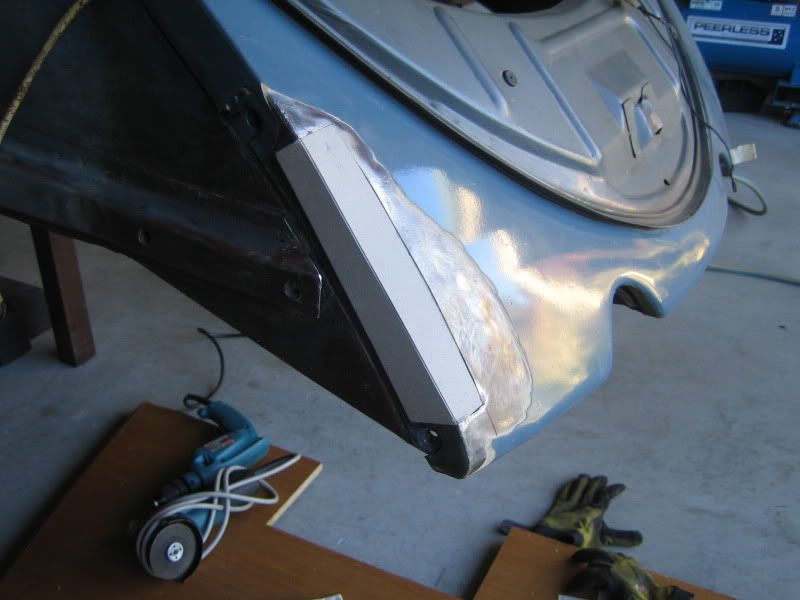
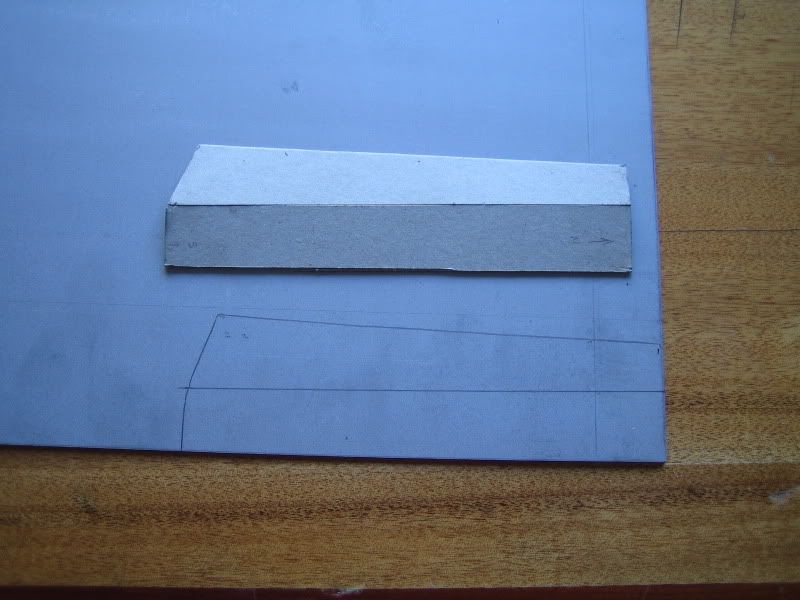
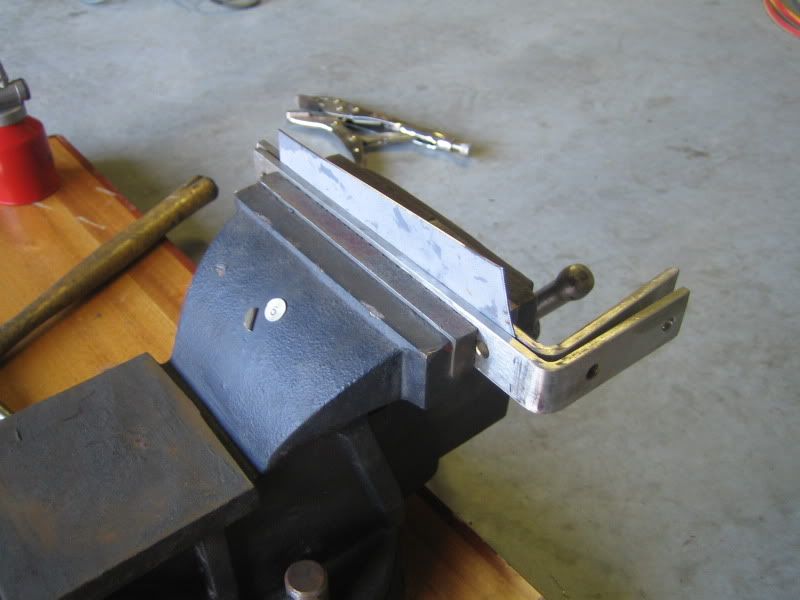
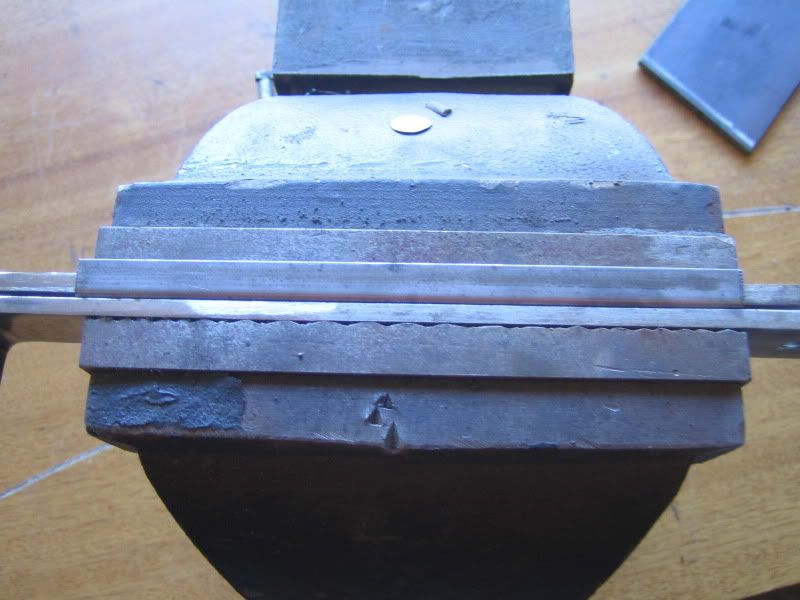
Next I bend the repair piece into shape with the help of a vice.
|
|
|
 vassy66T1 vassy66T1
A.k.a.: Marcus Vass
Veteran Volks Folk
Wow ... are U reading this?
    
Posts: 2120
Threads: 76
Registered: June 4th, 2003
Member Is Offline
Location: Brisvegas
Theme: UltimaBB Streamlined2
Mood: Happy to own a VW
|
| posted on September 13th, 2011 at 04:52 PM |
|
|
Man, your body is in such great nick.
Very neat work too.
|
|
|
 Aussie Aussie
Officially Full-On Dubber
  
Posts: 296
Threads: 43
Registered: September 15th, 2006
Member Is Offline
Location: Gold Coast
Theme: UltimaBB Pro Blue ( Default )
|
| posted on September 13th, 2011 at 04:55 PM |
|
|
Only problem is trying to match the curvature of the rear valance to the straight repair piece that I have so far.
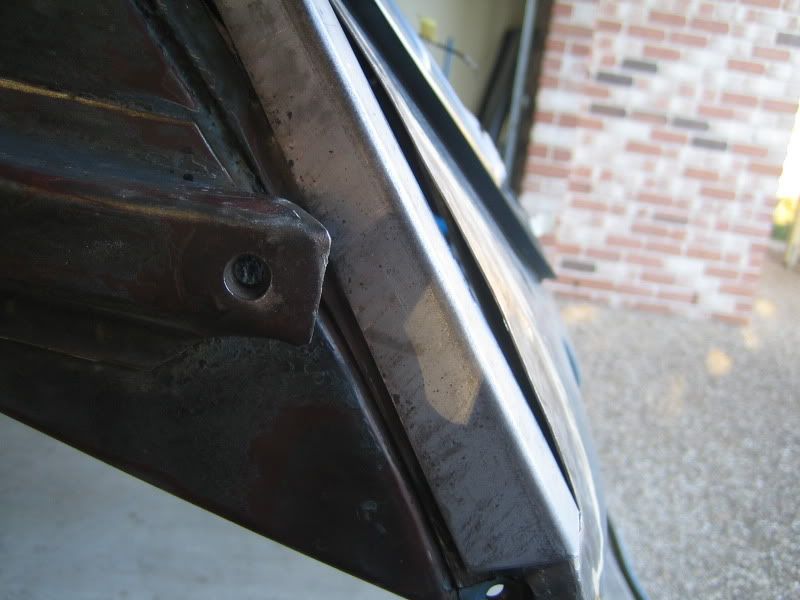
Some pie cuts soon sorted that out.
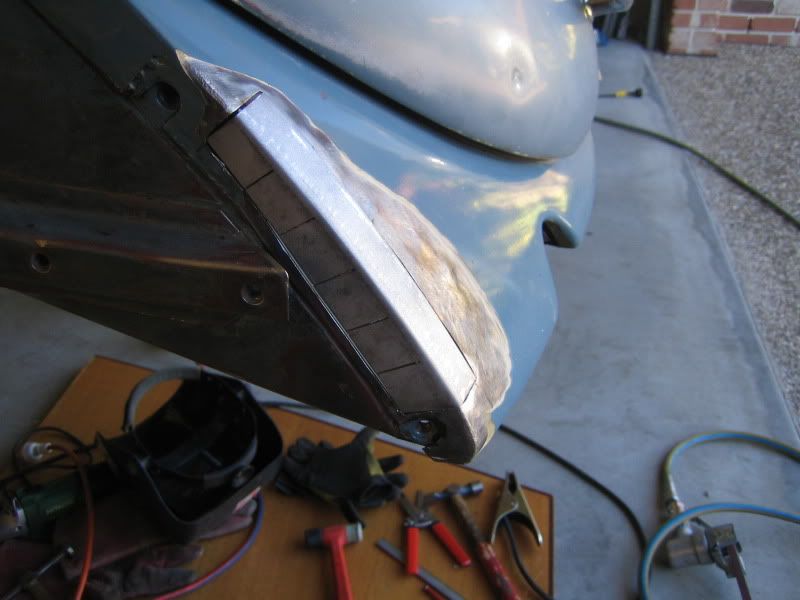
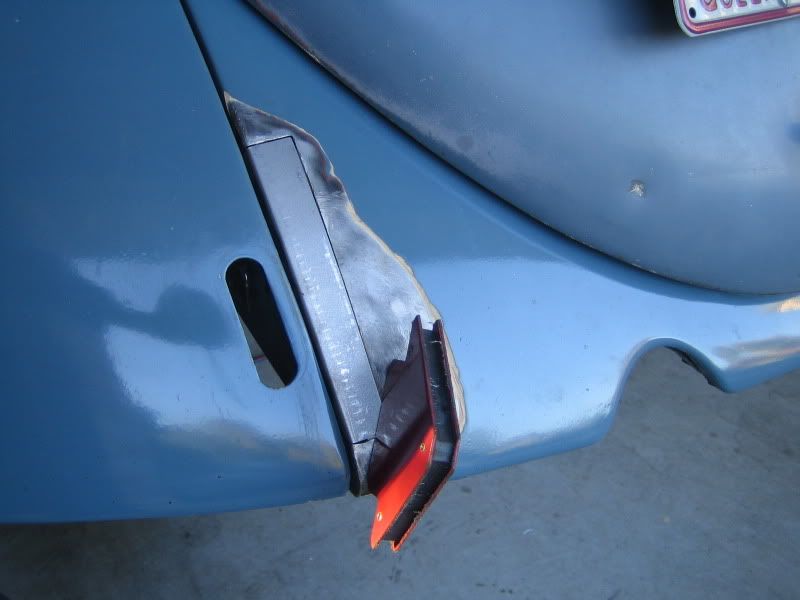
Test the fit and things are starting to look closer 
|
|
|
 Aussie Aussie
Officially Full-On Dubber
  
Posts: 296
Threads: 43
Registered: September 15th, 2006
Member Is Offline
Location: Gold Coast
Theme: UltimaBB Pro Blue ( Default )
|
| posted on September 13th, 2011 at 05:02 PM |
|
|
Next up the inner repair piece. Started things off with a card template as previously.
Bend in the return lip...
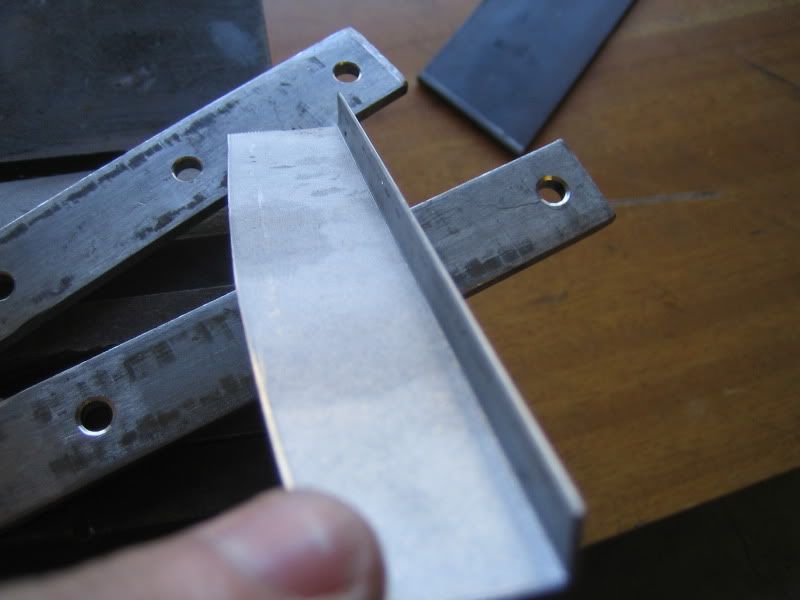
Add the pie cuts for curvature and line up with the other side to test lines prior to welding.
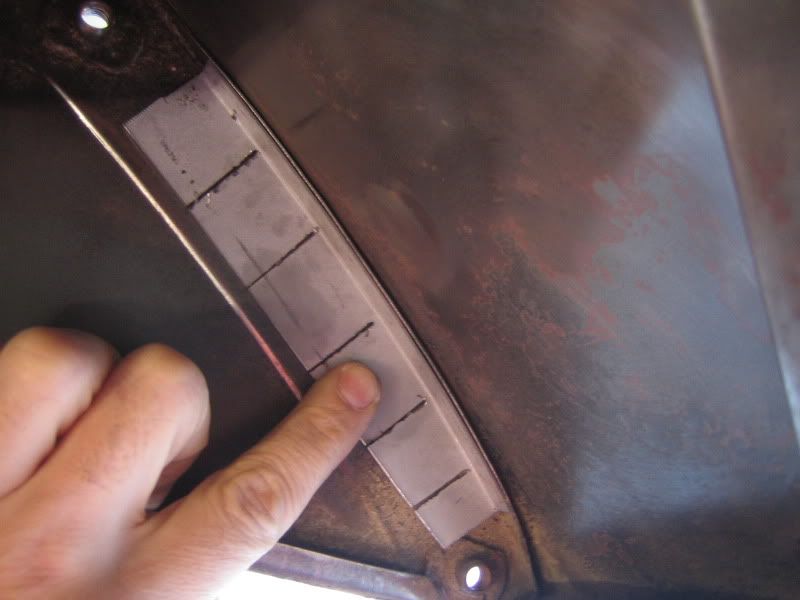
Completed repair section.
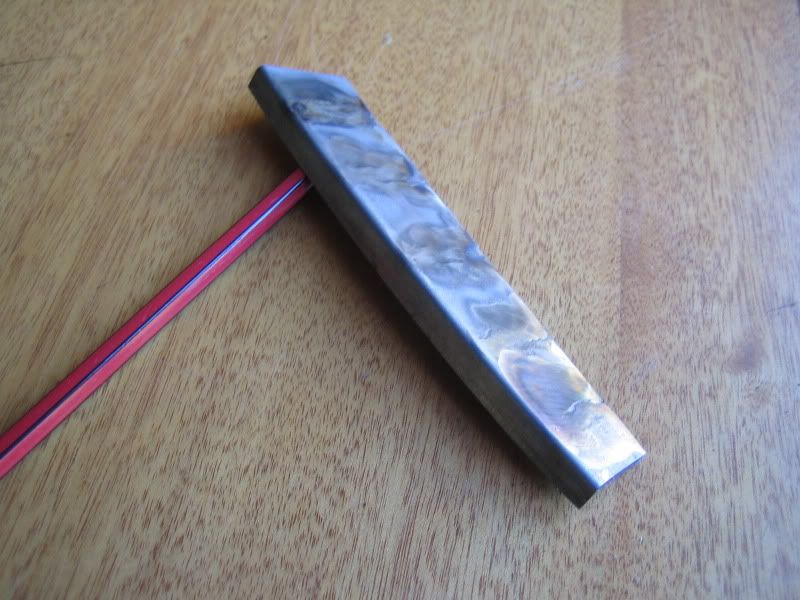
|
|
|
 Aussie Aussie
Officially Full-On Dubber
  
Posts: 296
Threads: 43
Registered: September 15th, 2006
Member Is Offline
Location: Gold Coast
Theme: UltimaBB Pro Blue ( Default )
|
| posted on September 13th, 2011 at 05:13 PM |
|
|
Welding
Inner section is welded in first.
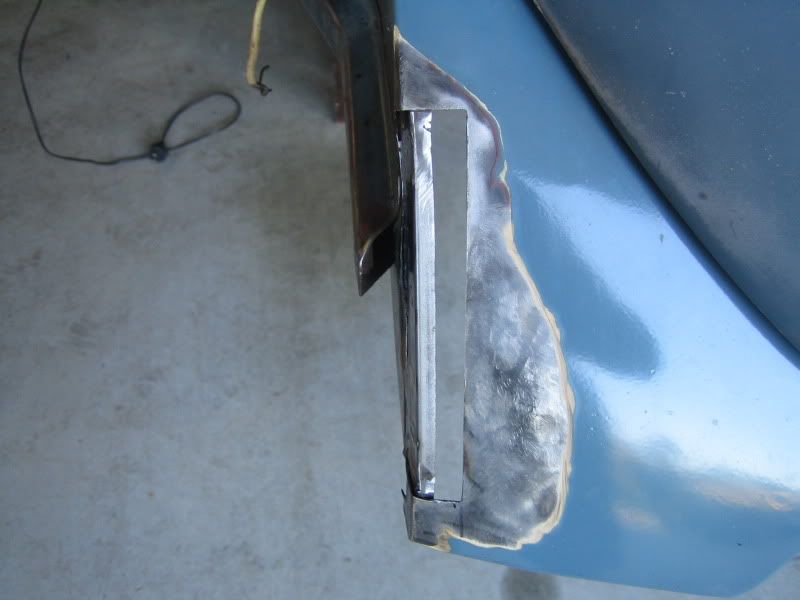
Outer section tacked in to check fit prior to finish welding.
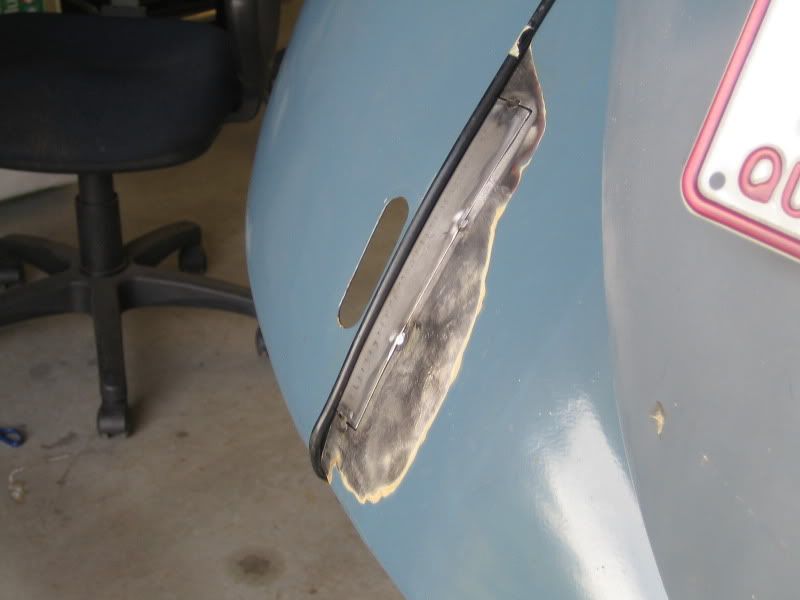
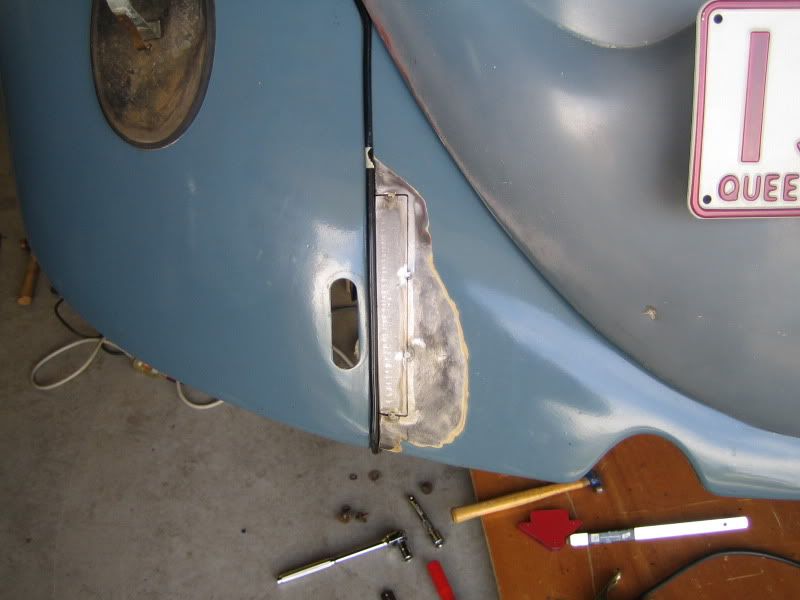
Everything looks good so in she goes...
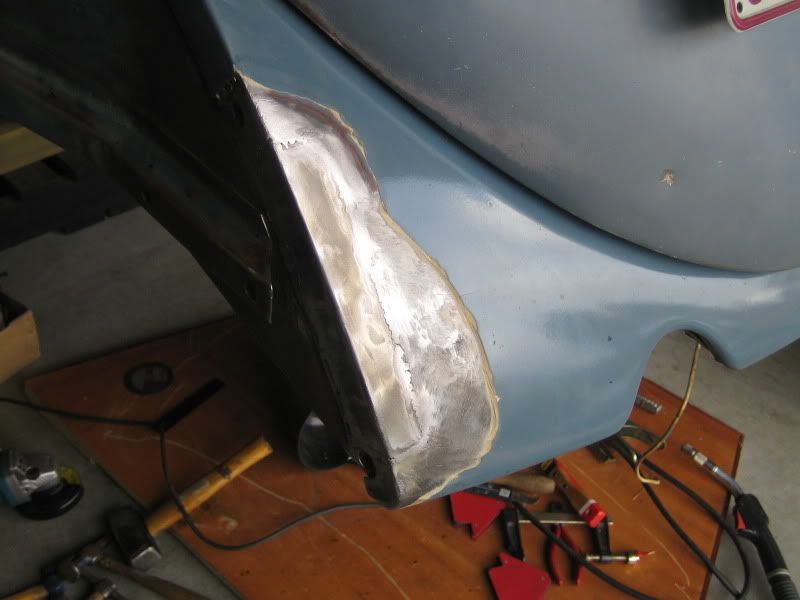
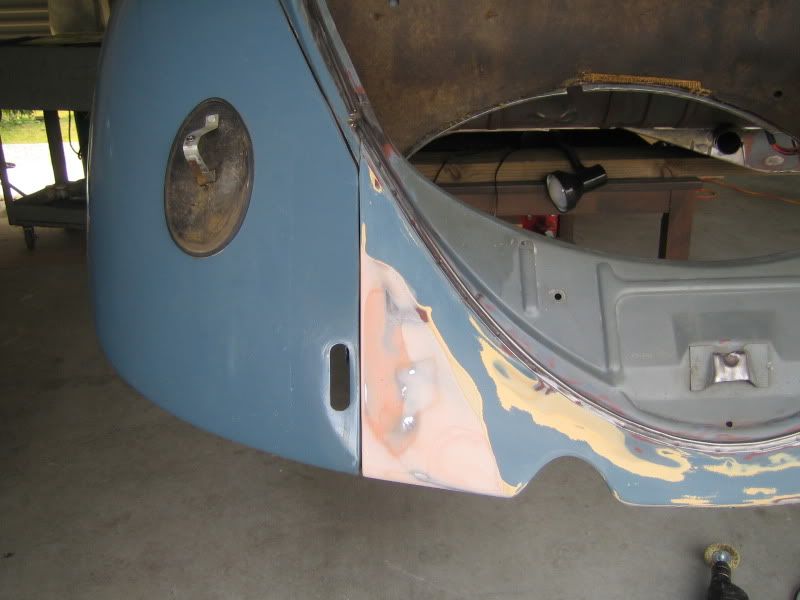
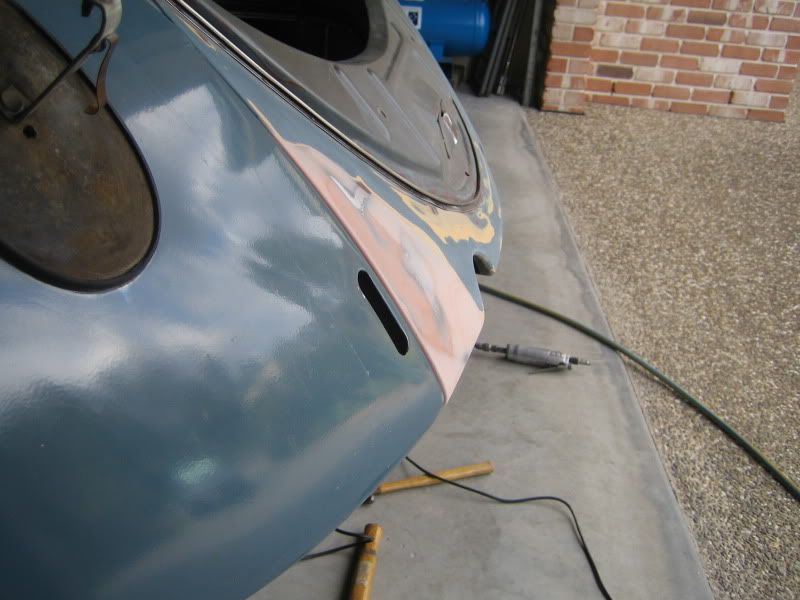
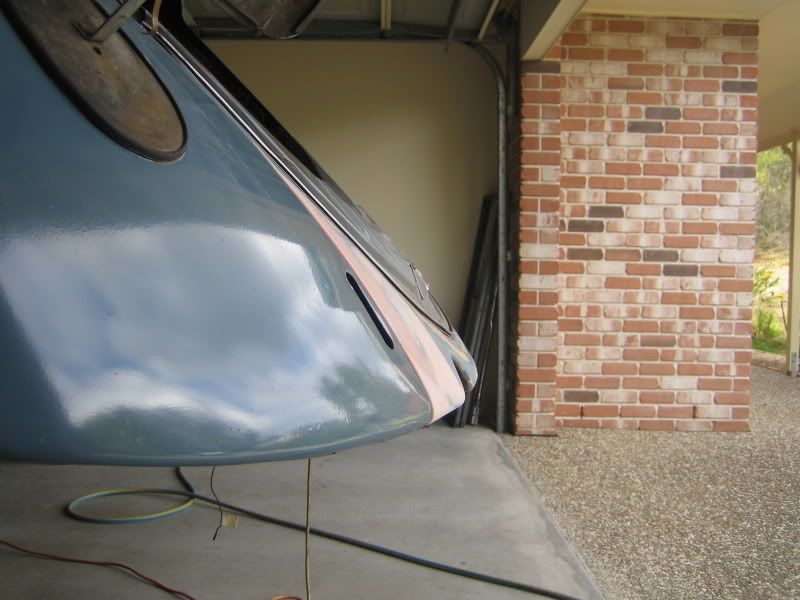
Needs a skim of filler to blend the repair out. Also started to sand out the lower portion of the valance. I am hoping this will be the only visible
painted area on the outside of the car. Matching the paint was very hard as there are a few different shades ranging from faded original to more
recent blow over on the wings and valance. I had to choose a shade of blue which tries to blend with all the different shades that are there.
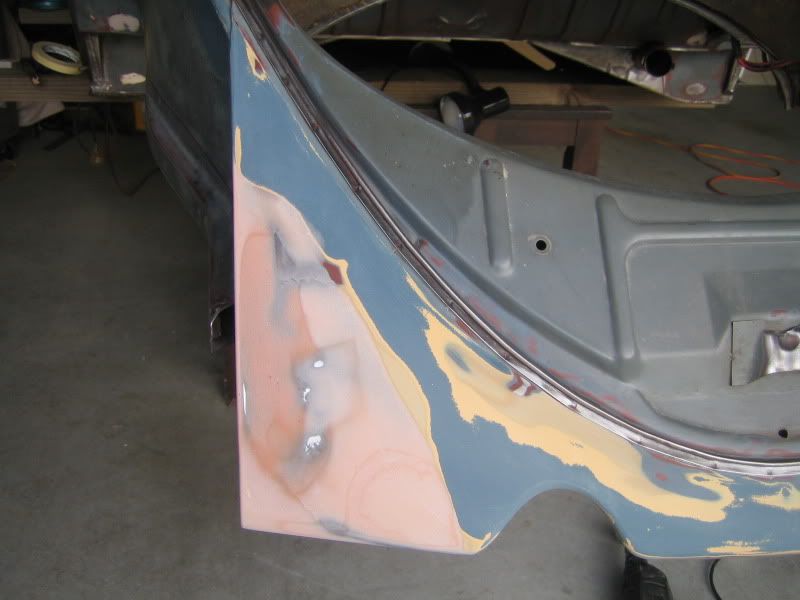
Finished with a panel mock up again to check gaps/lines.
|
|
|
 5lam 5lam
A.k.a.: Dave
Wolfsburg Wizard
AKA: BlackBug
  
Posts: 520
Threads: 38
Registered: March 19th, 2006
Member Is Offline
Location: Gold Coast, QLD
Theme: UltimaBB Pro Blue ( Default )
Mood: Slammed
|
| posted on September 13th, 2011 at 07:36 PM |
|
|
Nice work!! You make it look all too easy!
 [size=5]Custom doesn't come in a Box[/size]
 |
|
|
 Aussie Aussie
Officially Full-On Dubber
  
Posts: 296
Threads: 43
Registered: September 15th, 2006
Member Is Offline
Location: Gold Coast
Theme: UltimaBB Pro Blue ( Default )
|
| posted on September 14th, 2011 at 11:29 AM |
|
|
| Quote: | Originally
posted by BlackBug
Nice work!! You make it look all too easy!
|
Thanks Mate! No specialist skills here - just time and patience to get things looking right. 
|
|
|
 Aussie Aussie
Officially Full-On Dubber
  
Posts: 296
Threads: 43
Registered: September 15th, 2006
Member Is Offline
Location: Gold Coast
Theme: UltimaBB Pro Blue ( Default )
|
| posted on September 15th, 2011 at 07:07 PM |
|
|
Primer
Finally time for some primer to go on. Used the same PPG primer as went onto the floorpan. Great things to say about this stuff - no issues at all on
anything that I have painted with it so far. The only thing I have noted is a tiny bit of cracking if you apply too thick - more of a painter error
though than an issue with the paint itself.
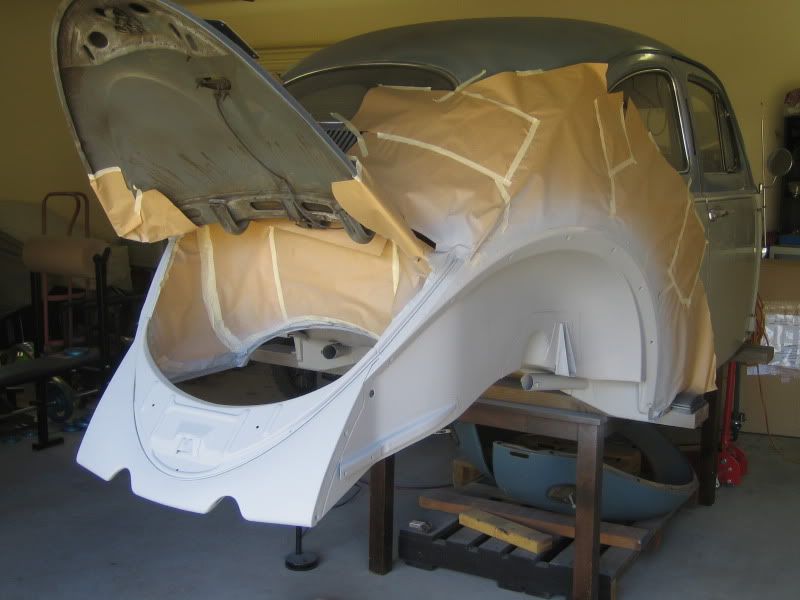
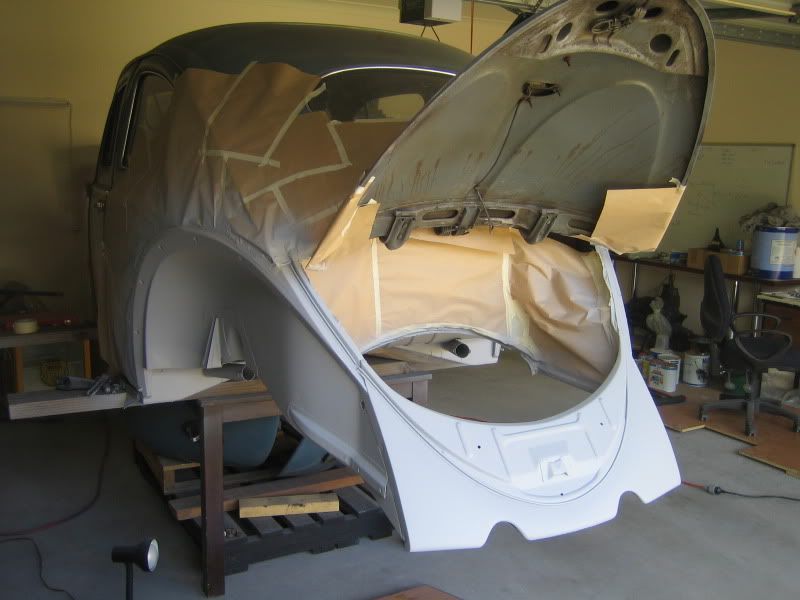
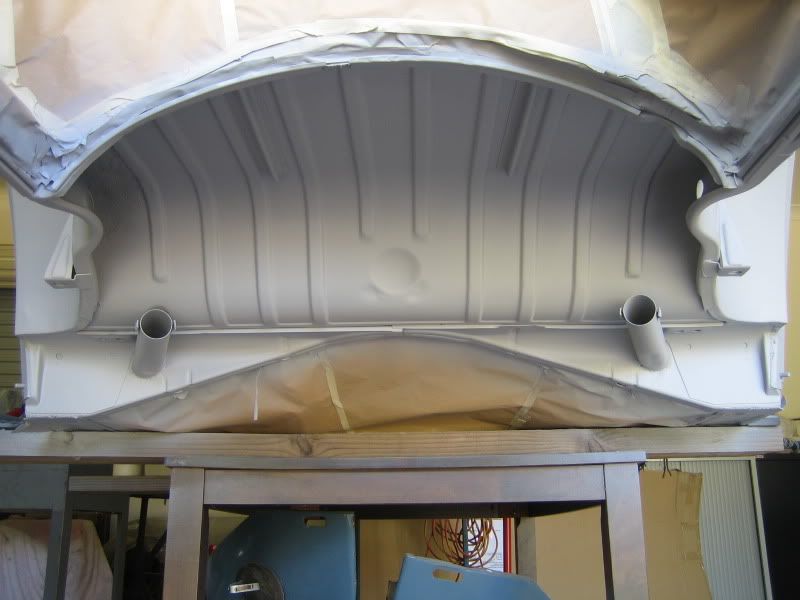
Got it in and around the boot floor. This underneath section is a pain in the arse to spray - upside down with lots of curves, faces and nooks to get
the paint into. Wanted a good even coat for max protection under here. The sanding and prep on this nearly drove me mad!!!
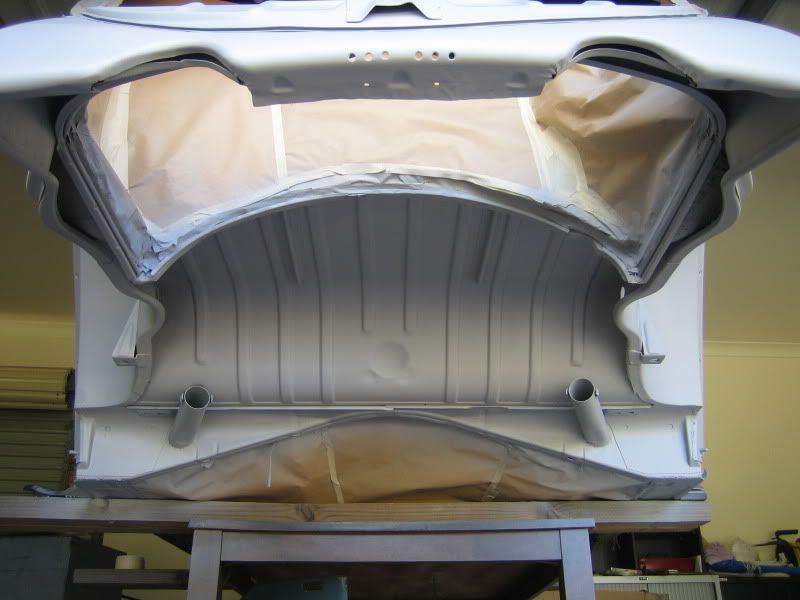
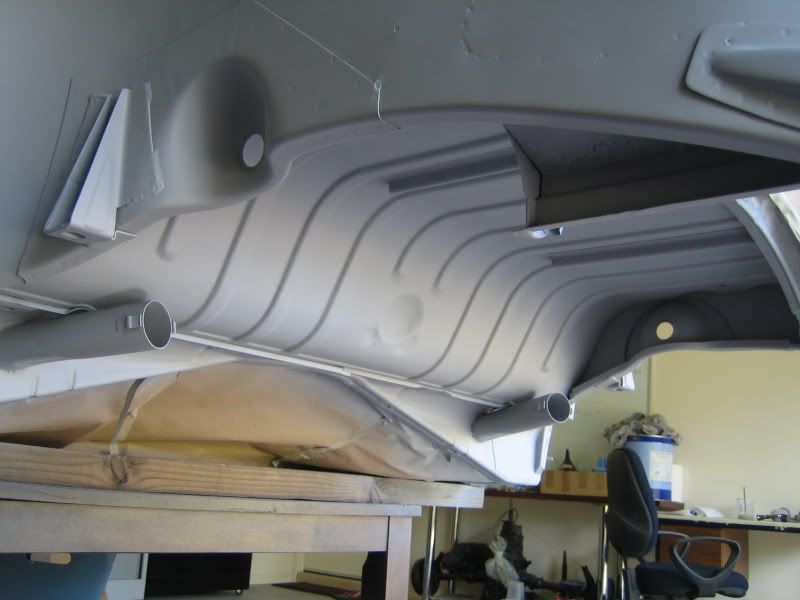
Arches came up real nice.
|
|
|
 Aussie Aussie
Officially Full-On Dubber
  
Posts: 296
Threads: 43
Registered: September 15th, 2006
Member Is Offline
Location: Gold Coast
Theme: UltimaBB Pro Blue ( Default )
|
| posted on September 15th, 2011 at 07:22 PM |
|
|
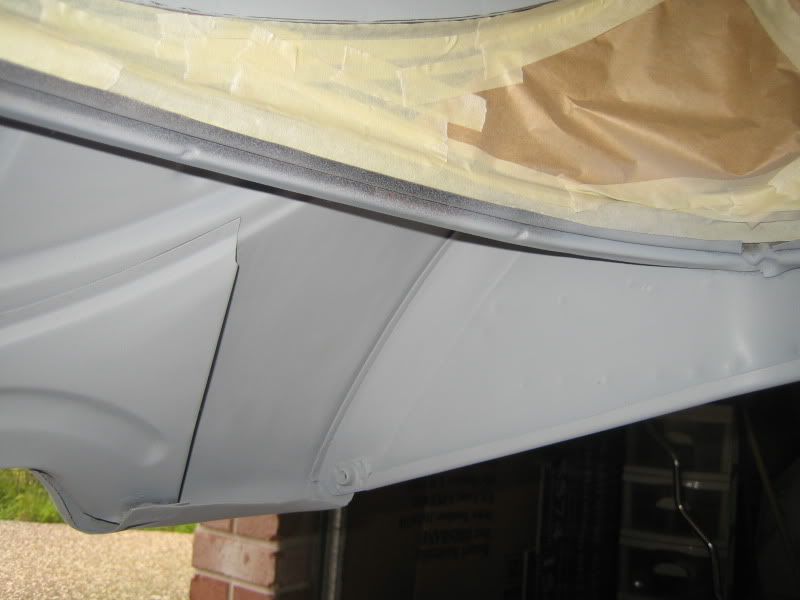
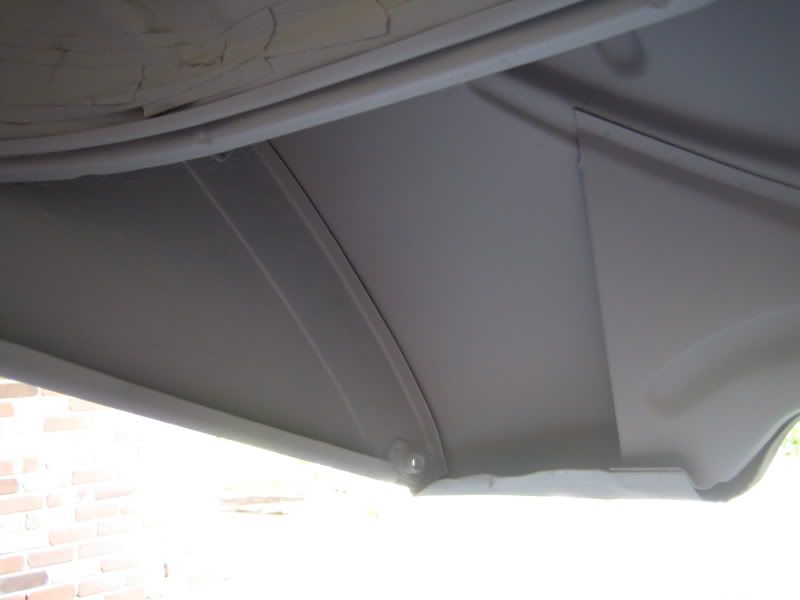
The rear valance repair came up great. Did a couple coats of primer with a bit of sanding and treatment in between to get things to finished standard.
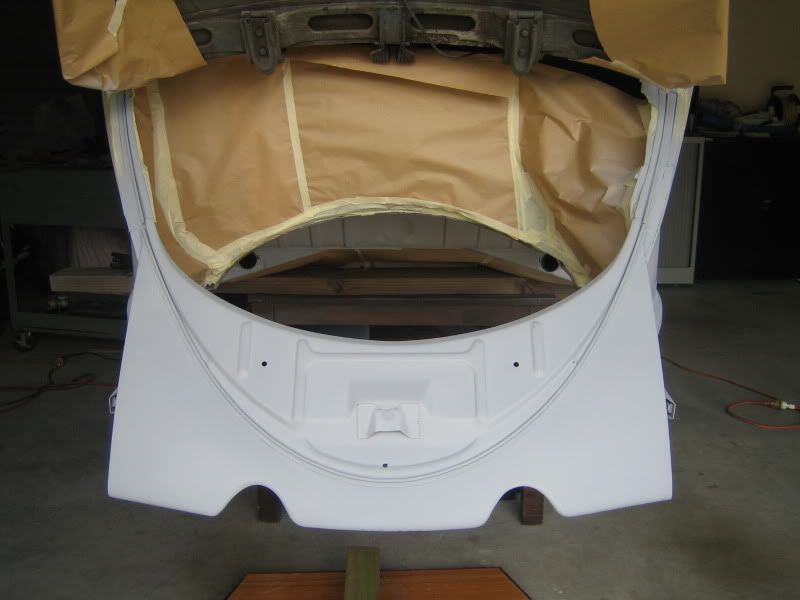
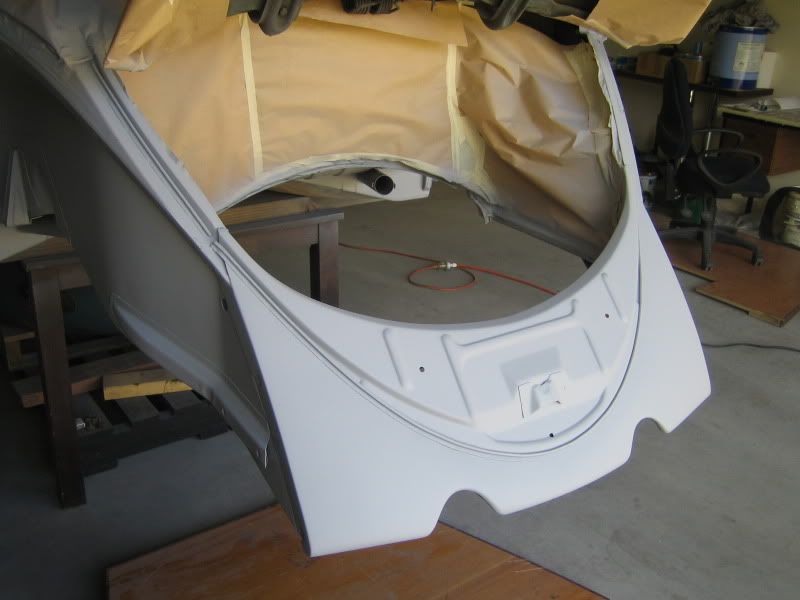
This is the inside of the repair which used the second smaller replacement panel. Bit of smoothing etc prior to paint. Really wanted to have good
lines on the return lip and also retain the original pressing line which runs parallel.
This is the untouched other side for comparison. Getting close for some colour now. 
|
|
|
 Dasdubber Dasdubber
A.k.a.: Alan Agyik
23 Windows of Awesome
DAS Resto Haus
       
Posts: 5746
Threads: 289
Registered: August 26th, 2002
Member Is Offline
Location: Gold Coast
Theme: UltimaBB Pro Blue
Mood: feeling fine...
|
| posted on September 15th, 2011 at 07:35 PM |
|
|
Nice work Ian, you're doing great. Takes a lot of time to take photos as you go, upload and describe everything hey 
The DP40 is good - just be aware of the recoat window - normally it should be followed by either high build primer or top coat colour (base coat or
direct gloss) within 4 hours maximum. After this you have to sand it so the colour has a mechanical adhesion since the chemical bond (withing the
recoat period) has been lost. DP40 sucks to sand sorry to say 
Since the top coat is a little less resilient than the epoxy primer, if I have to leave the DP40 for an extended period, I sand it with around 240
grit on the DA then recoat with DP40 and follow that with colour. You can just sand and paint the colour over the hardened primer but there is a
slight more chance of delamination.
If you want to borrow my Devilbiss gun which has a collapsible bladder let me know - this enables you to paint upside down as the the gun sucks the
bladder down as it goes and forces the paint into the gun rather than relying on gravity feed (until it gets really low on paint).
Cheers
AL
|
|
|
 dangerous dangerous
A.k.a.: Dave Butler Muffin Man
23 Windows of Awesome
       
Posts: 5901
Threads: 178
Registered: January 6th, 2005
Member Is Offline
Location: Gold Coast
Theme: UltimaBB Pro Blue ( Default )
Mood: 591
|
| posted on September 15th, 2011 at 07:46 PM |
|
|
Super-nice work there Ian!
| Quote: | Originally
posted by westi
That's mad Alan.
|
|
|
|
 Aussie Aussie
Officially Full-On Dubber
  
Posts: 296
Threads: 43
Registered: September 15th, 2006
Member Is Offline
Location: Gold Coast
Theme: UltimaBB Pro Blue ( Default )
|
| posted on September 15th, 2011 at 08:16 PM |
|
|
| Quote: | Originally
posted by Dasdubber
Nice work Ian, you're doing great. Takes a lot of time to take photos as you go, upload and describe everything hey 
The DP40 is good - just be aware of the recoat window - normally it should be followed by either high build primer or top coat colour (base coat or
direct gloss) within 4 hours maximum. After this you have to sand it so the colour has a mechanical adhesion since the chemical bond (withing the
recoat period) has been lost. DP40 sucks to sand sorry to say 
Since the top coat is a little less resilient than the epoxy primer, if I have to leave the DP40 for an extended period, I sand it with around 240
grit on the DA then recoat with DP40 and follow that with colour. You can just sand and paint the colour over the hardened primer but there is a
slight more chance of delamination.
If you want to borrow my Devilbiss gun which has a collapsible bladder let me know - this enables you to paint upside down as the the gun sucks the
bladder down as it goes and forces the paint into the gun rather than relying on gravity feed (until it gets really low on paint).
Cheers
AL
|
Thanks Al. Man I could have done with that Devilbiss. Had to keep my gravity feed filled to the brim to enable the upside down stuff. How does the
bladder work - I dont think I have seen one of these?
Your post beat me to my next update..... I hit the recoat window and got colour on about 20 mins after I finished the primer. Where I had to do some
coats of primer with finishing work in between I used 240grit where needed and then used a 3M scuff pad before final primer coat (prior to colour).
You are right about the time it takes to do these updates - uploading photo's is such a pain. I remember reading threads like this one back in the
day and getting some useful tips and motovation to do my own build. Hopefully someone out there gets the same from what I am now posting ?????? 
|
|
|
 Aussie Aussie
Officially Full-On Dubber
  
Posts: 296
Threads: 43
Registered: September 15th, 2006
Member Is Offline
Location: Gold Coast
Theme: UltimaBB Pro Blue ( Default )
|
| posted on September 15th, 2011 at 08:21 PM |
|
|
| Quote: | Originally
posted by dangerous
Super-nice work there Ian!
|
Thanks Dave - its been great to get back into it  Still dreaming of a
motor..... Still dreaming of a
motor.....
|
|
|
 Aussie Aussie
Officially Full-On Dubber
  
Posts: 296
Threads: 43
Registered: September 15th, 2006
Member Is Offline
Location: Gold Coast
Theme: UltimaBB Pro Blue ( Default )
|
| posted on September 15th, 2011 at 08:37 PM |
|
|
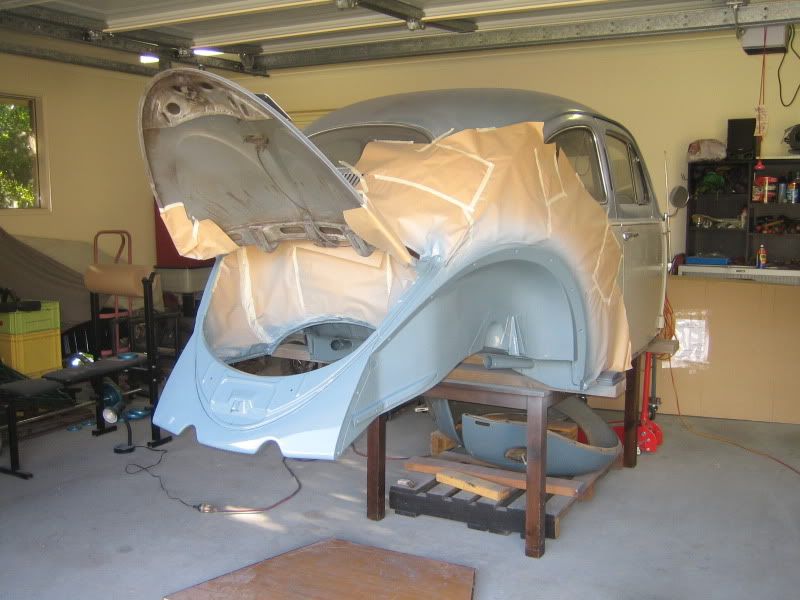
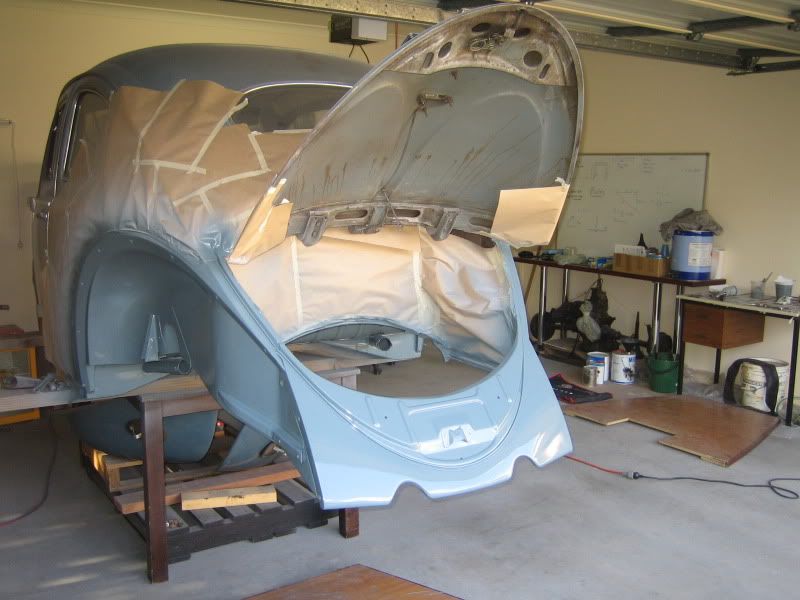
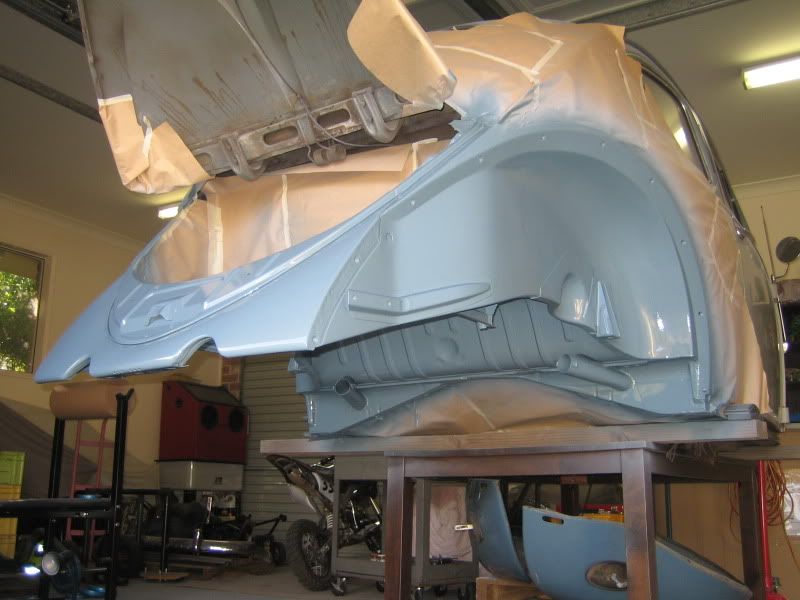
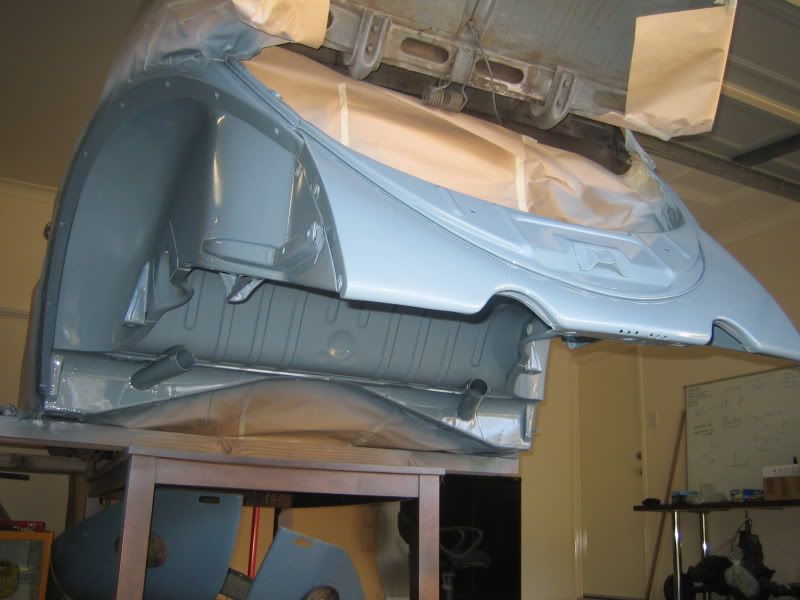
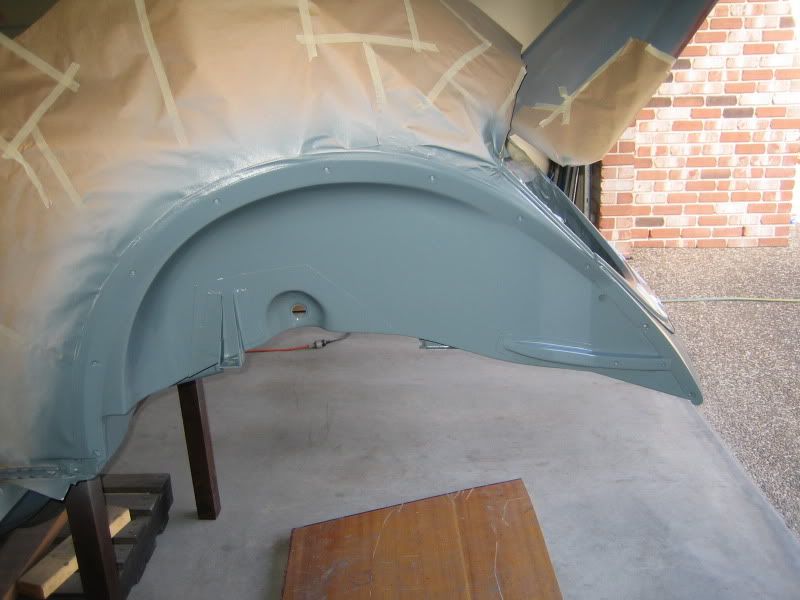
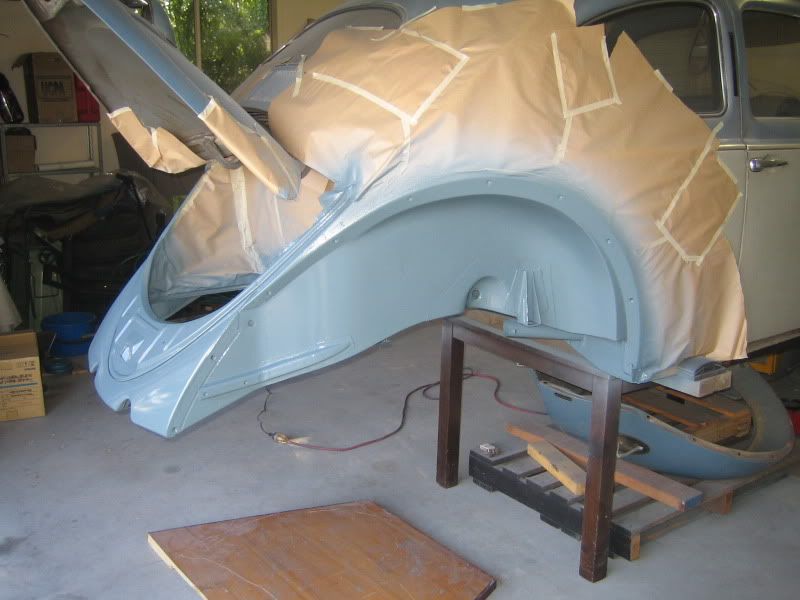
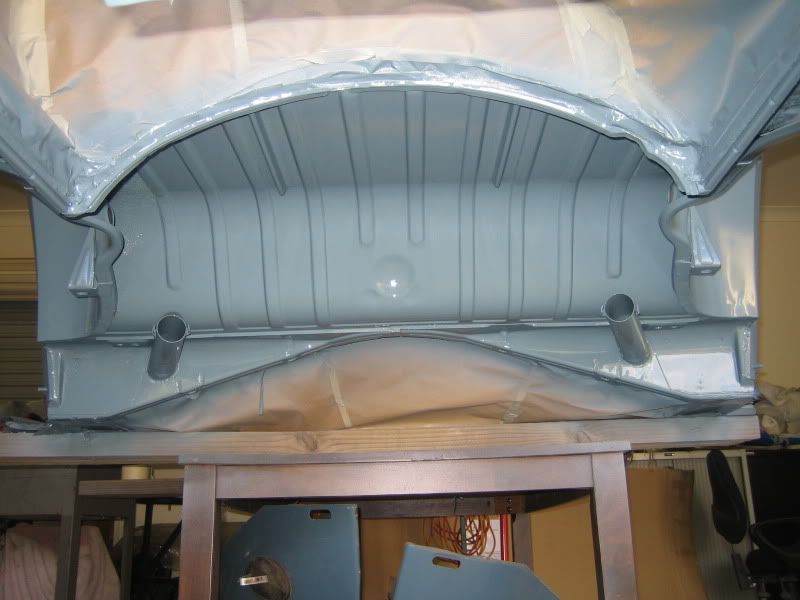
Colour...
We have colour...... Very pleased with how this came out. It is a heap of graft to get to the paint stage but this is really when all that prep work
comes through.
I am liking how this car is coming together. Super clean underneath with original looks from the outside. Looking forward getting paint finished and
getting this thing assembled.
|
|
|
 Aussie Aussie
Officially Full-On Dubber
  
Posts: 296
Threads: 43
Registered: September 15th, 2006
Member Is Offline
Location: Gold Coast
Theme: UltimaBB Pro Blue ( Default )
|
| posted on September 15th, 2011 at 08:49 PM |
|
|
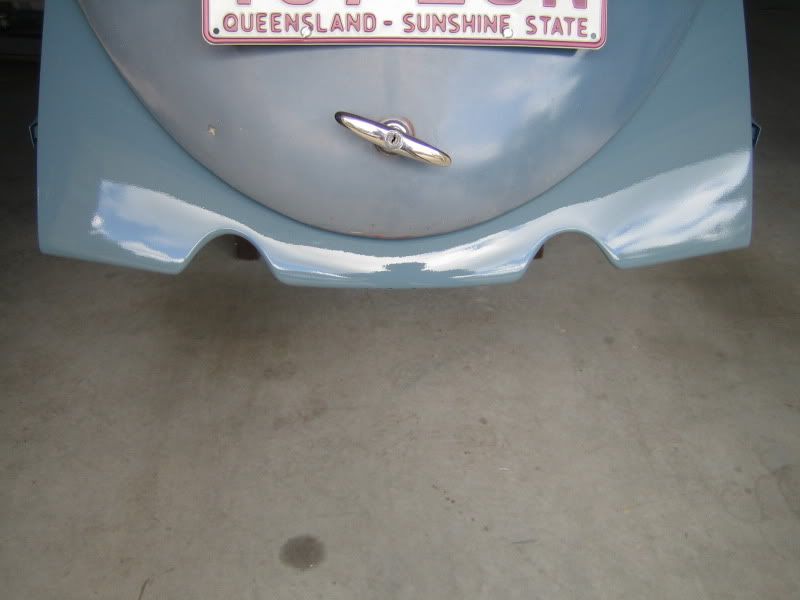
Finished repair
Finished repair came up nice..
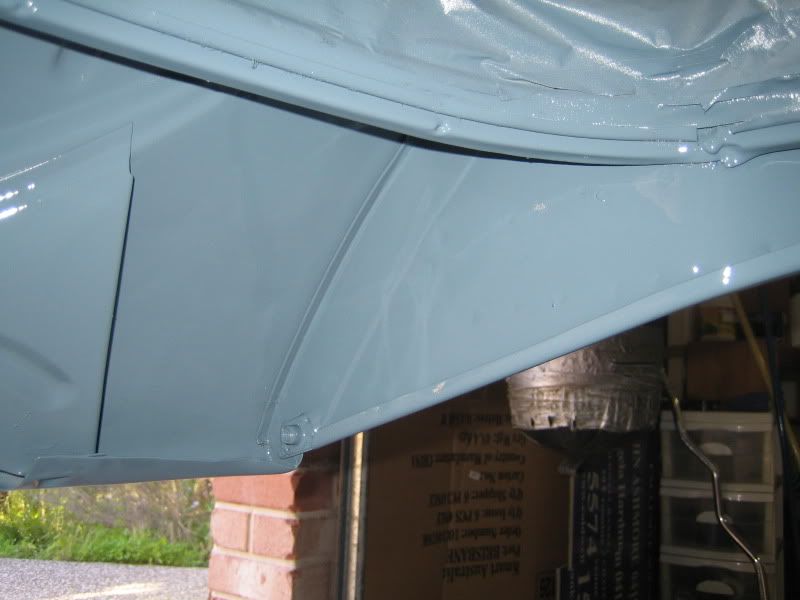
Little bit of orange peel on the valance which is annoying. I am guessing that even though it is direct gloss paint I can still colour sand it as you
would a normal clearcoat??
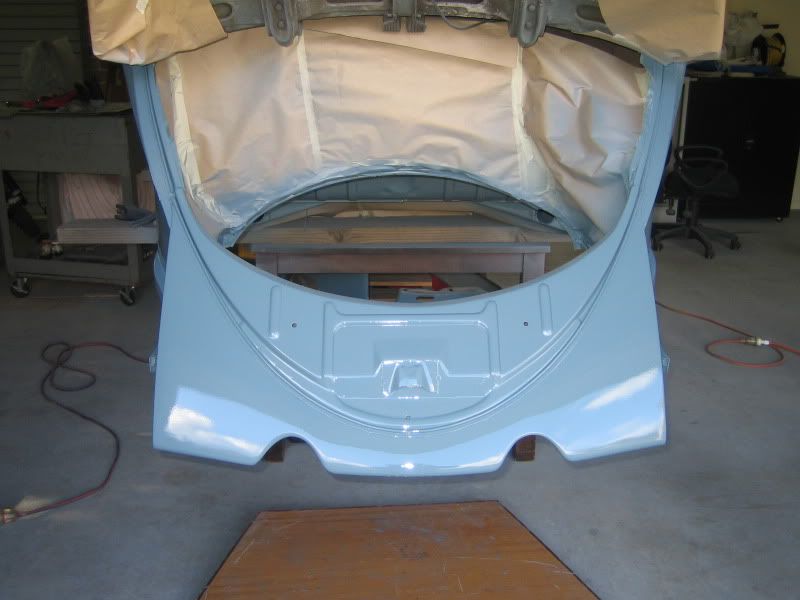
Colour match on RHS is good - this corner of the decklid had a blow over in the past.
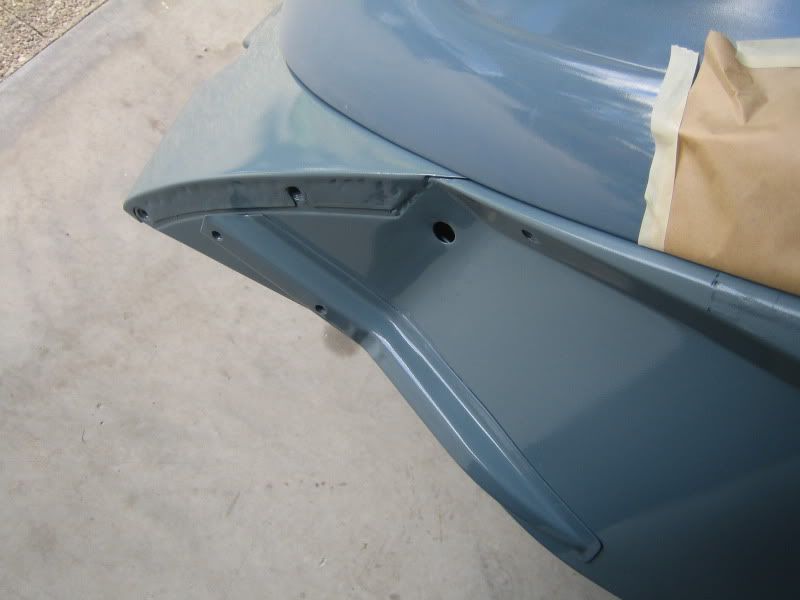
Not so good colour match on LHS as this is original paint on the decklid.
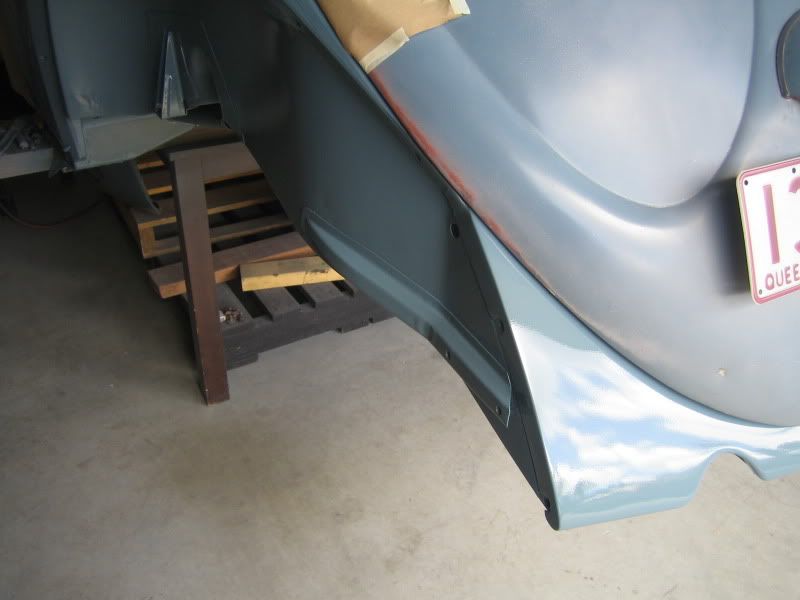
You can see all the different shades of blue here - this is why it was hard to get a paint match that would blend with everything!!! The rear bumper
will help hide the bits that don't match so well 
|
|
|
 dangerous dangerous
A.k.a.: Dave Butler Muffin Man
23 Windows of Awesome
       
Posts: 5901
Threads: 178
Registered: January 6th, 2005
Member Is Offline
Location: Gold Coast
Theme: UltimaBB Pro Blue ( Default )
Mood: 591
|
| posted on September 16th, 2011 at 05:11 AM |
|
|
| Quote: | Originally
posted by Aussie
| Quote: | Originally
posted by dangerous
Super-nice work there Ian!
|
Thanks Dave - its been great to get back into it  Still dreaming of a
motor..... Still dreaming of a
motor.....
|
You will need something that has high compression and short con rods to fit in that oval engine bay!
| Quote: | Originally
posted by westi
That's mad Alan.
|
|
|
|
 reub reub
Veteran Volks Folk
VWRX is gone...
    
Posts: 2054
Threads: 160
Registered: September 2nd, 2002
Member Is Offline
Theme: UltimaBB Pro Blue
|
| posted on September 16th, 2011 at 08:38 AM |
|
|
| Quote: | Originally
posted by dangerous
| Quote: | Originally
posted by Aussie
| Quote: | Originally
posted by dangerous
Super-nice work there Ian!
|
Thanks Dave - its been great to get back into it  Still dreaming of a
motor..... Still dreaming of a
motor.....
|
You will need something that has high compression and short con rods to fit in that oval engine bay!
|
I knew of one too... 
Reub
|
|
|
 Dasdubber Dasdubber
A.k.a.: Alan Agyik
23 Windows of Awesome
DAS Resto Haus
       
Posts: 5746
Threads: 289
Registered: August 26th, 2002
Member Is Offline
Location: Gold Coast
Theme: UltimaBB Pro Blue
Mood: feeling fine...
|
| posted on September 16th, 2011 at 10:22 AM |
|
|
Sorry to jump the gun mate - thought you left the primer over night or something but good to hear you got in on in time.
Direct gloss is okay to colour sand as per clearcoat, just a little messier 
Devilbiss gun (and other brands do them too) looks like a standard gun but instead of a rigid pot, it has a casing that houses a thin plastic bladder
- so instead of filling it from the top like a normal gun, you remove the housing fill the bladder then connect it to the gun....as the paint runs out
the bladder sucks down to the gun so there is never an air pocket regardless of gun position (within reason). Can't find a pic but it makes sense
when you see it - a little late now sorry 
AL
|
|
|
 Aussie Aussie
Officially Full-On Dubber
  
Posts: 296
Threads: 43
Registered: September 15th, 2006
Member Is Offline
Location: Gold Coast
Theme: UltimaBB Pro Blue ( Default )
|
| posted on October 9th, 2011 at 08:57 AM |
|
|
Shell front end
Been busy on the car again and made some more progress. Motivated by seeing some of the cars at Warwick even though I only went on the Saturday which
ended a bit early with the rain...
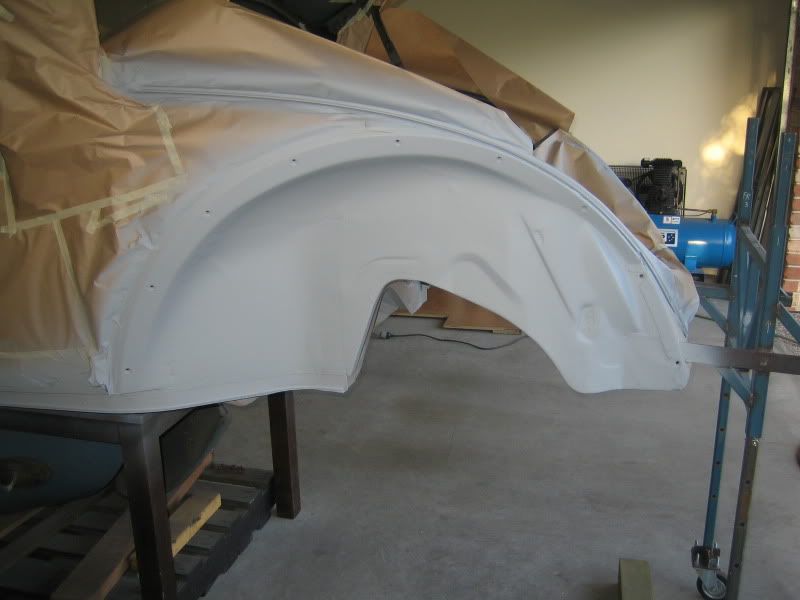
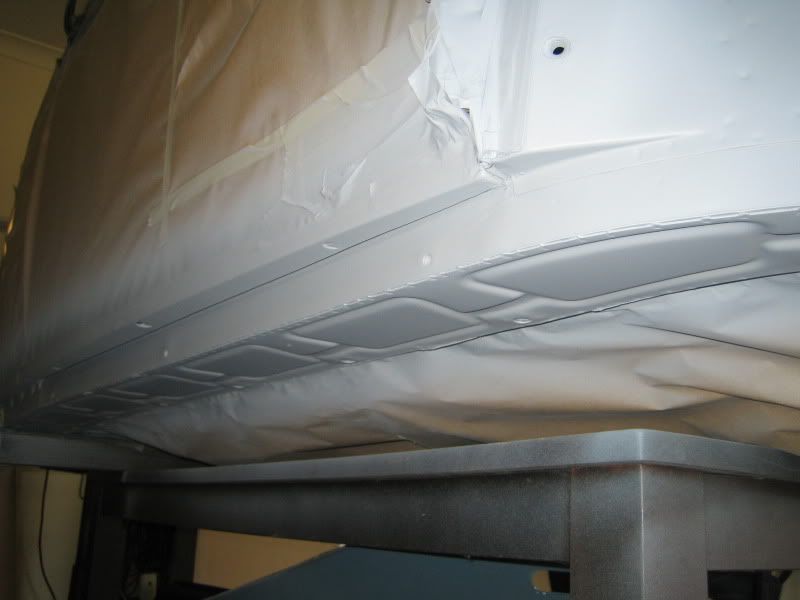
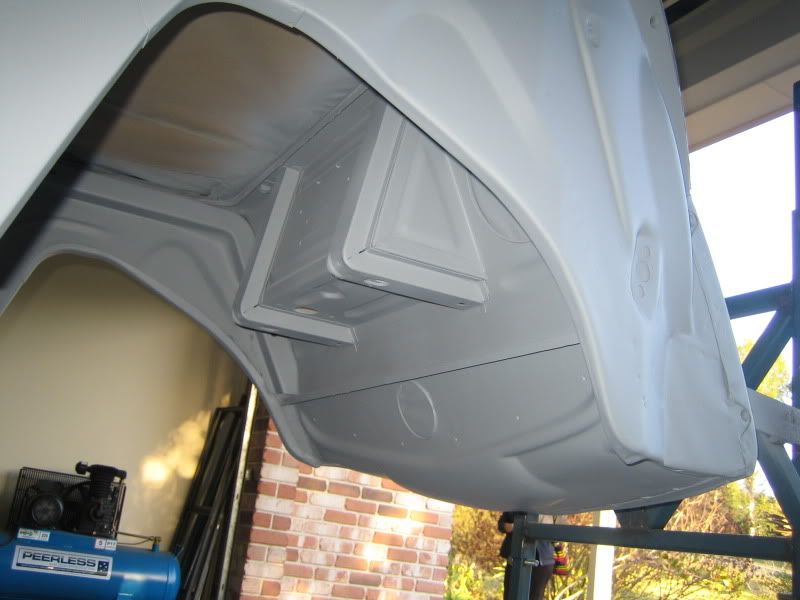
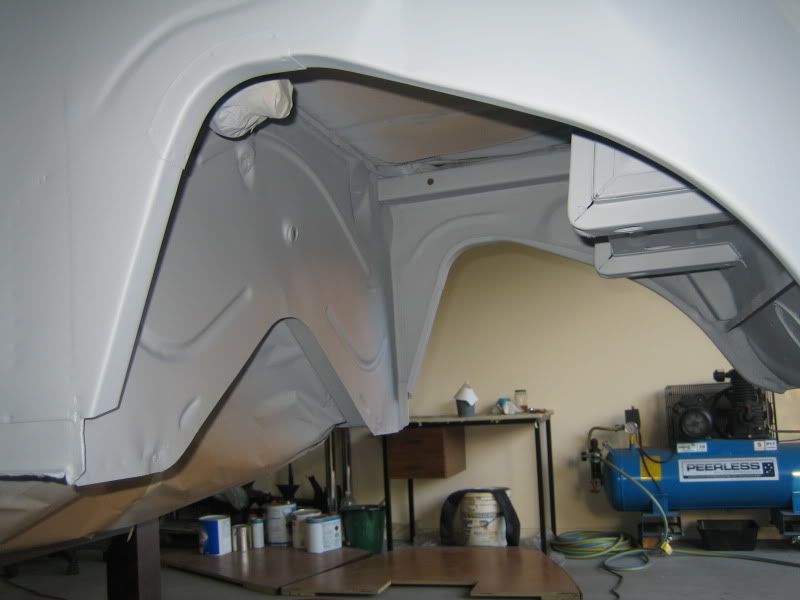
Started the prep work on the front end of the shell in a similiar way to how the rear end was done. Cleaned off the remainder of the flaking underseal
from the front arches and under the valance/front bulkhead area. No nasty surprises again though I did have to go back to bare metal again in some
areas to get things properly clean.
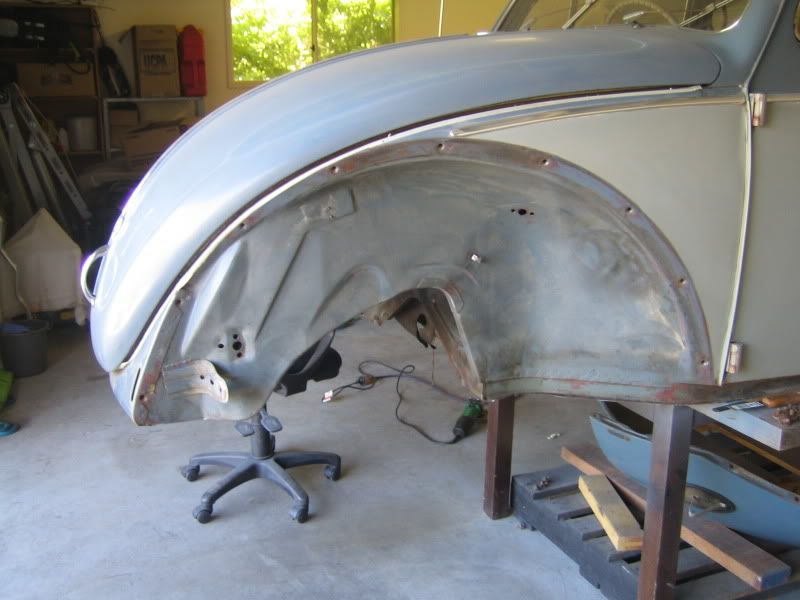
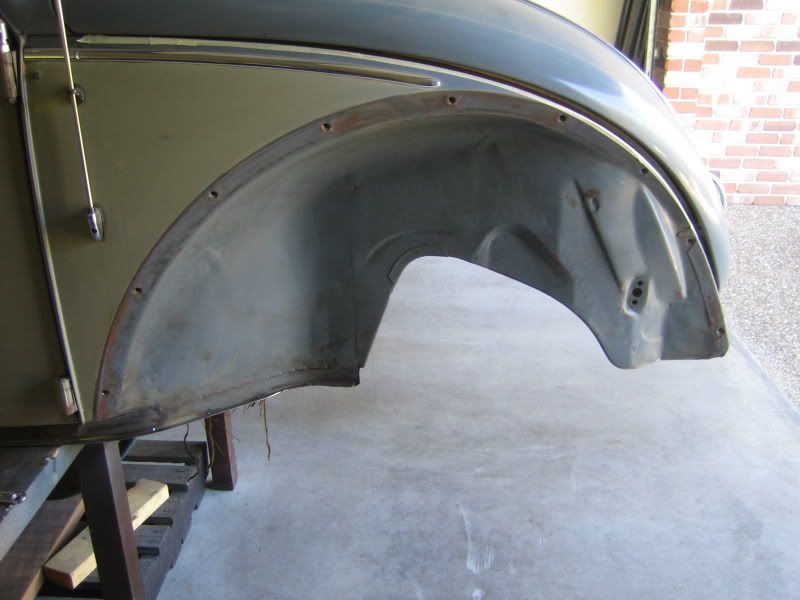
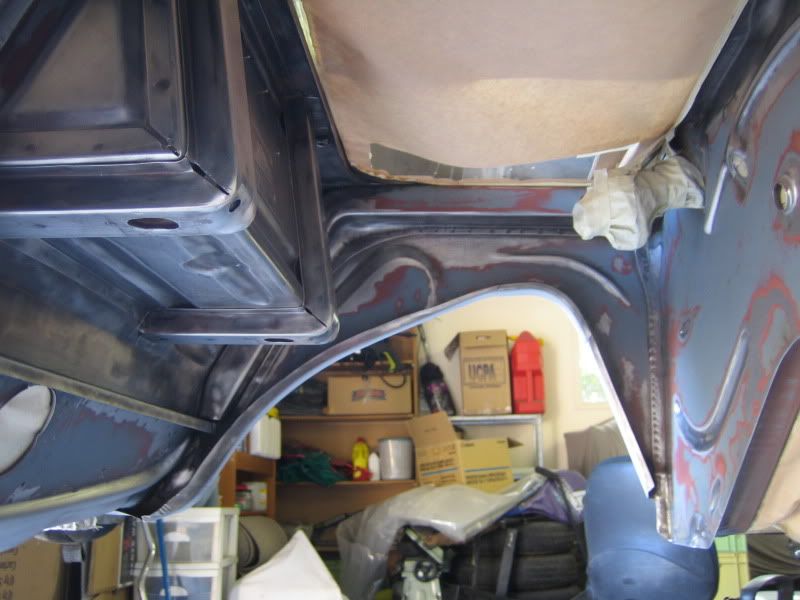
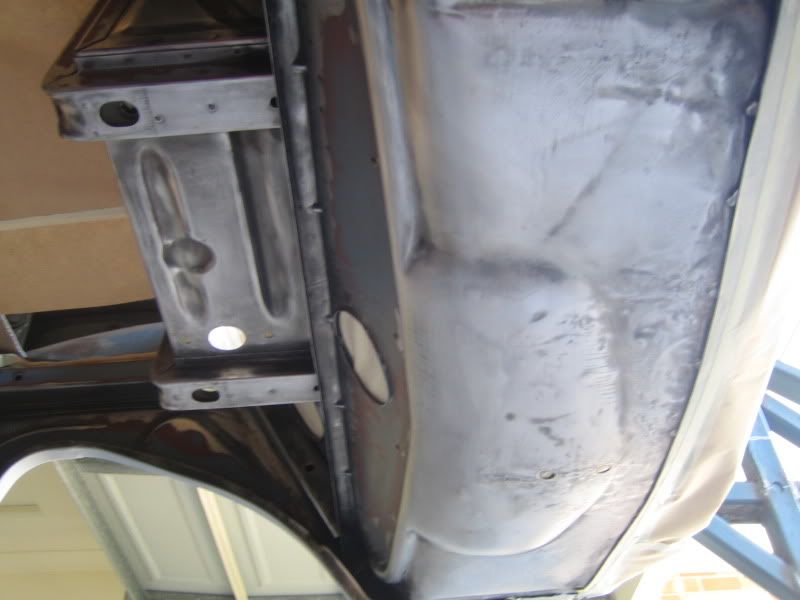
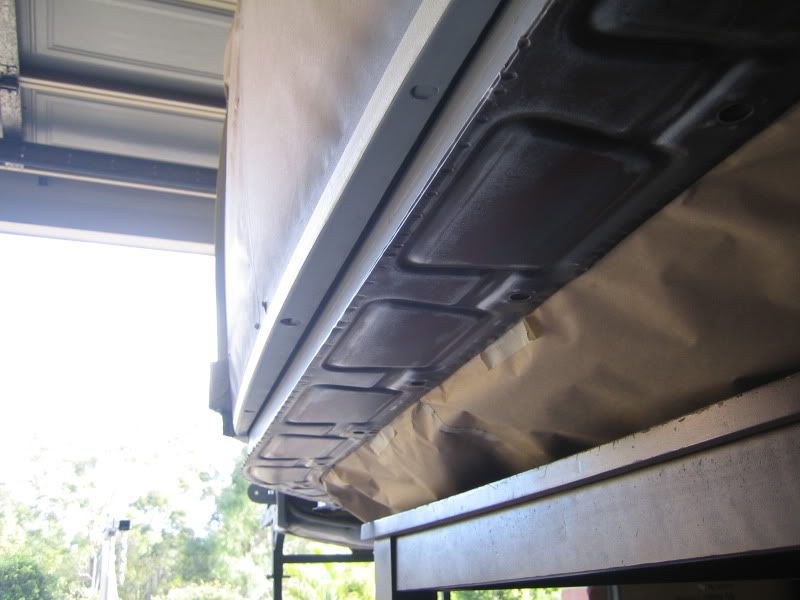
Masked everything for the first coat of primer to show any imperfections/areas which need work.
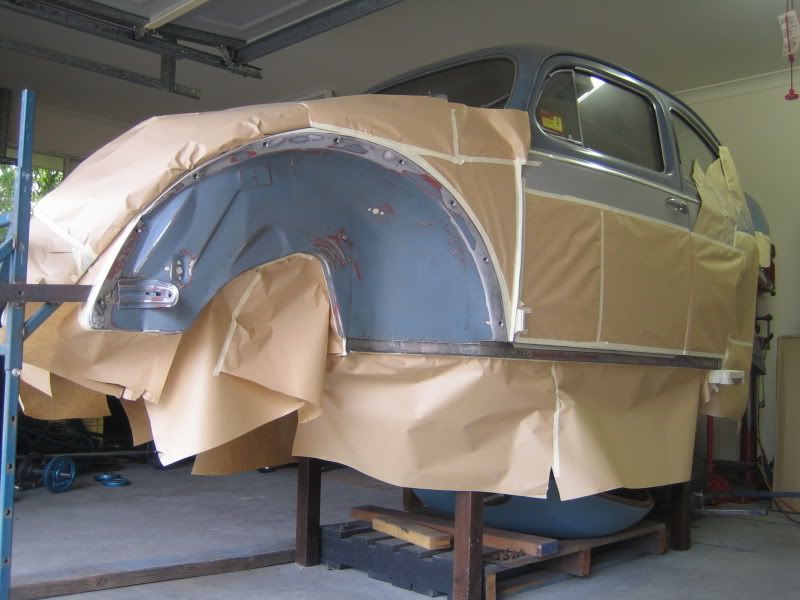
|
|
|
 Aussie Aussie
Officially Full-On Dubber
  
Posts: 296
Threads: 43
Registered: September 15th, 2006
Member Is Offline
Location: Gold Coast
Theme: UltimaBB Pro Blue ( Default )
|
| posted on October 9th, 2011 at 09:06 AM |
|
|
Ended up also having to paint the bonnet seal trim as the old seal had disintergrated after years of fish-oiling and took off the paint when I tried
to remove it. New seals will cover most of the new paint so hopefully wont stand out too much.
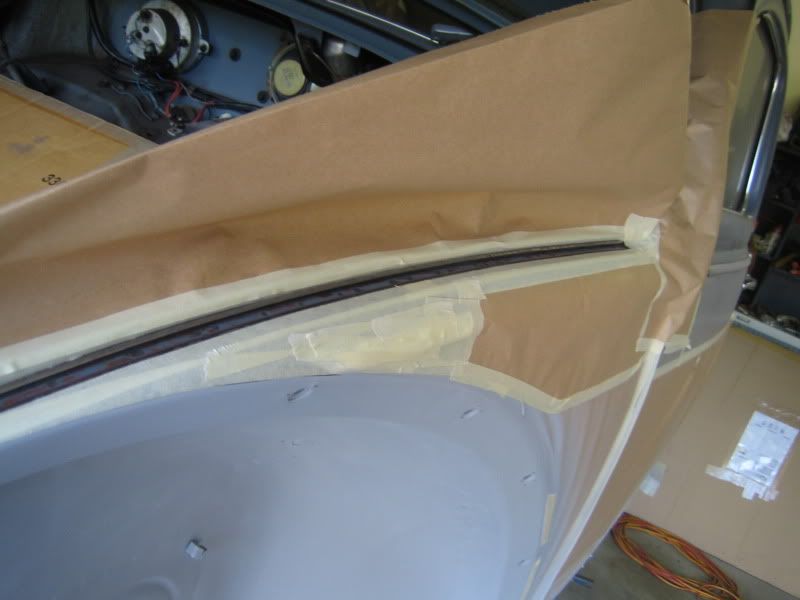
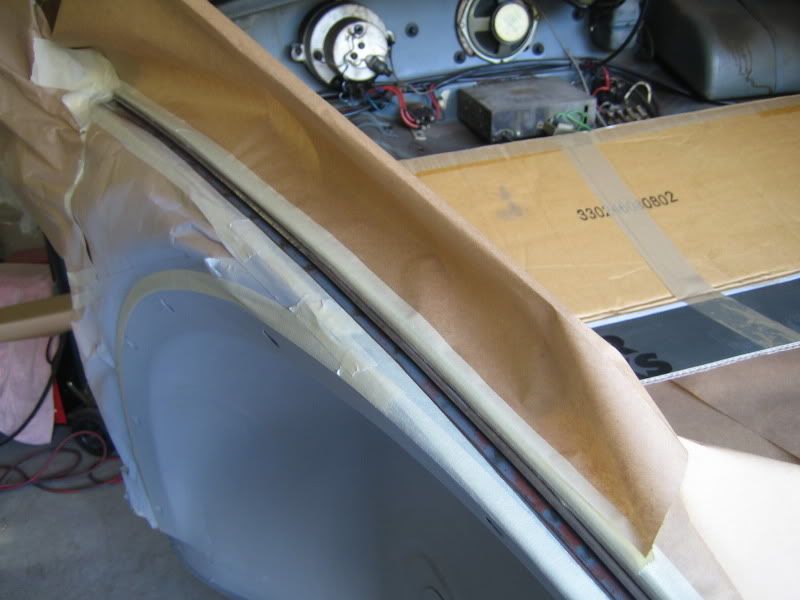
After various bits of prep work, primer goes over everything prior to the colour going on.
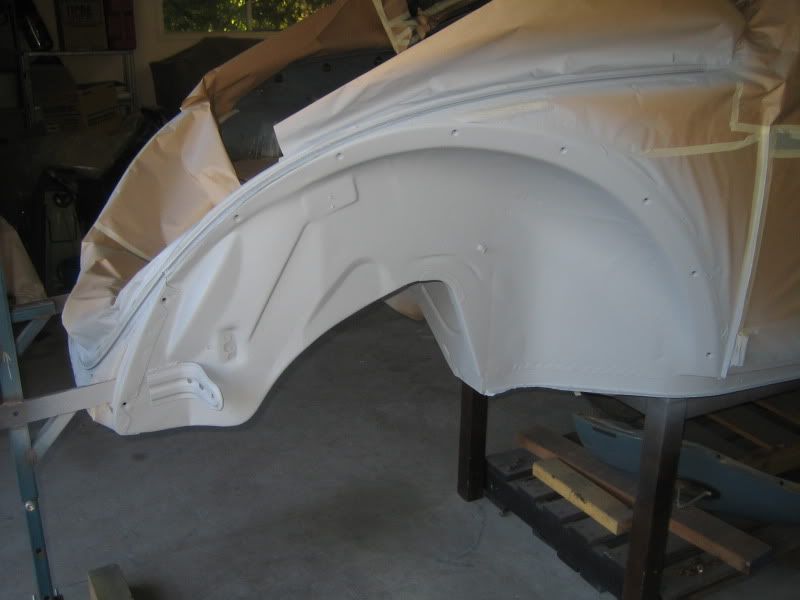
|
|
|
 Aussie Aussie
Officially Full-On Dubber
  
Posts: 296
Threads: 43
Registered: September 15th, 2006
Member Is Offline
Location: Gold Coast
Theme: UltimaBB Pro Blue ( Default )
|
| posted on October 9th, 2011 at 09:11 AM |
|
|
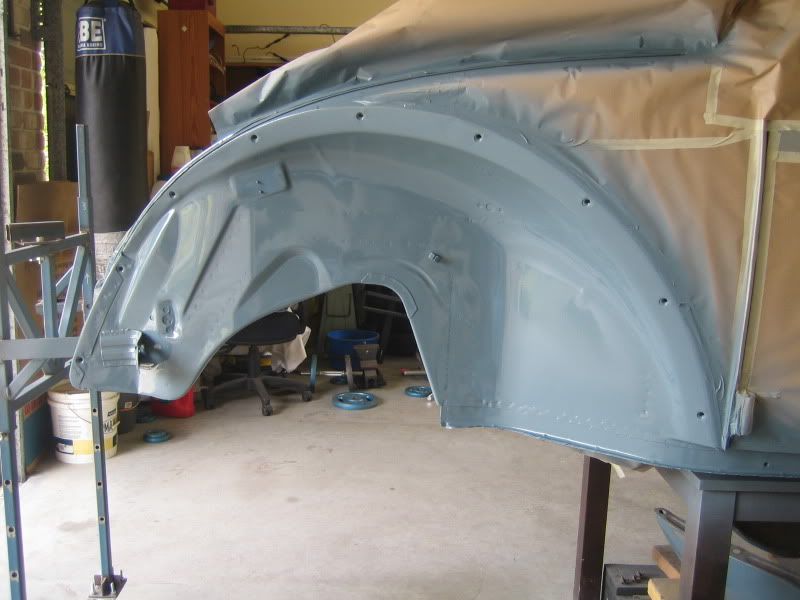
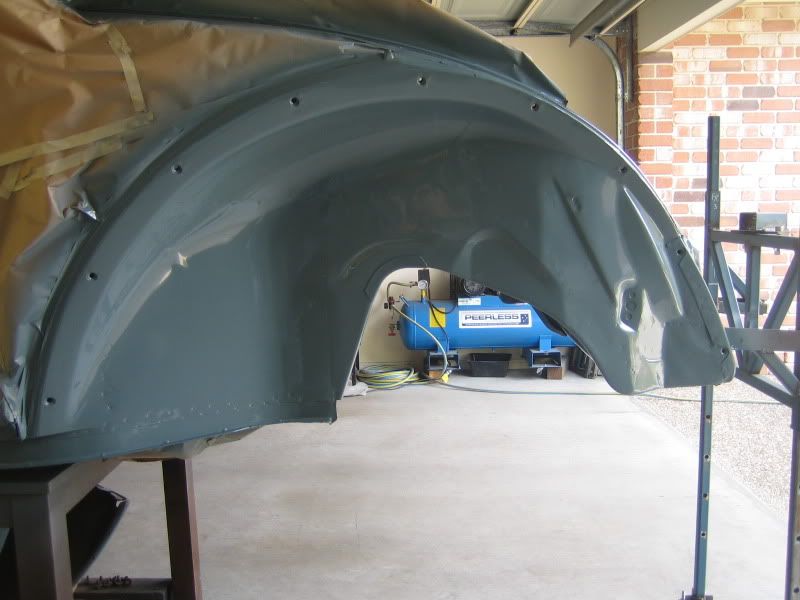
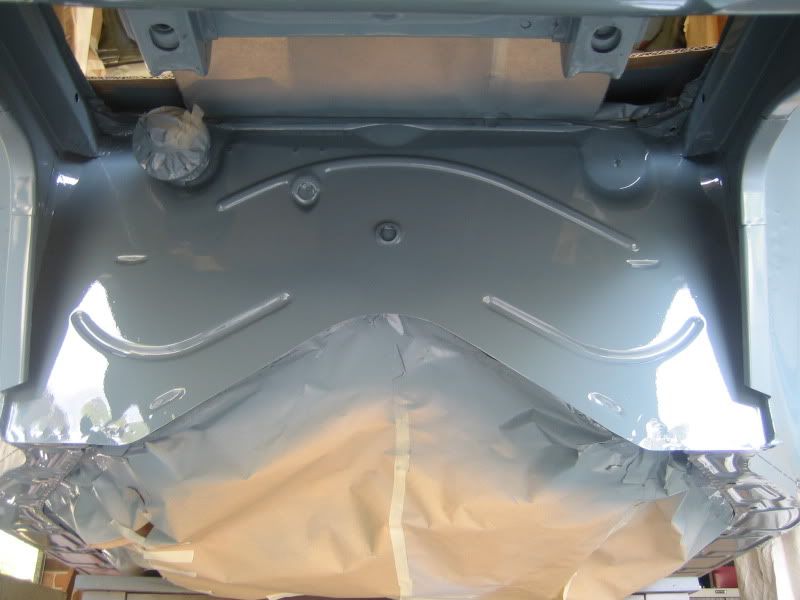
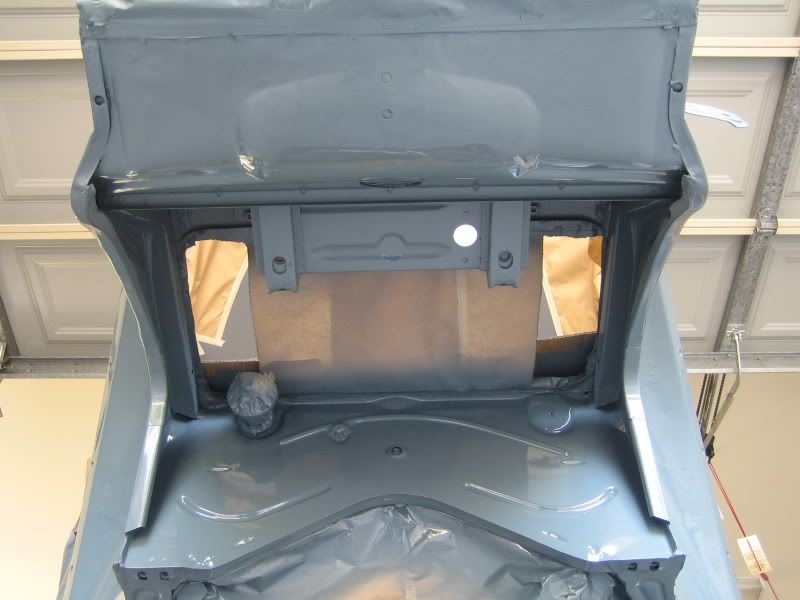
Colour
My favourite part - colour goes on.. 
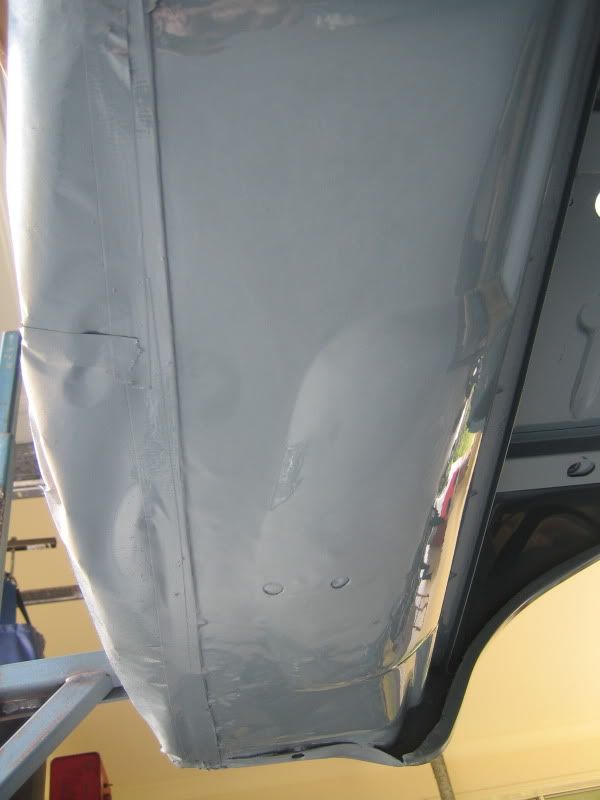
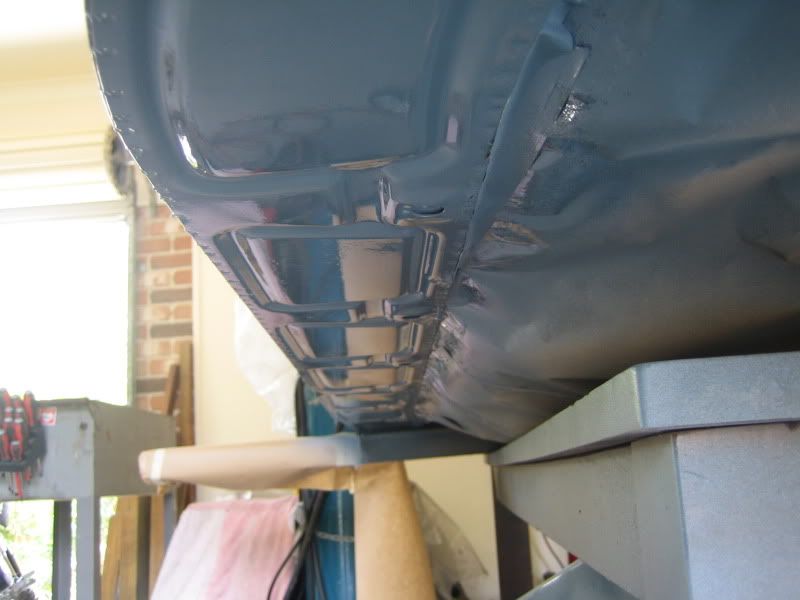
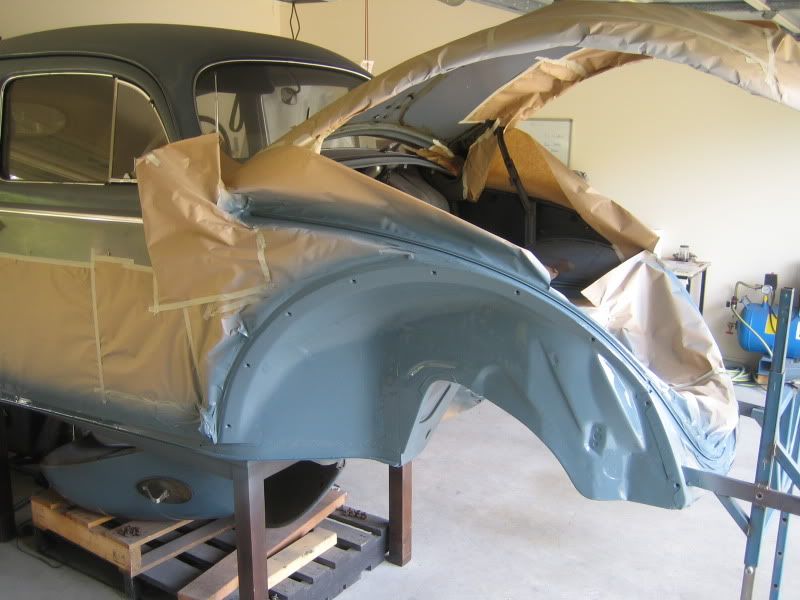
|
|
|
 Aussie Aussie
Officially Full-On Dubber
  
Posts: 296
Threads: 43
Registered: September 15th, 2006
Member Is Offline
Location: Gold Coast
Theme: UltimaBB Pro Blue ( Default )
|
| posted on October 9th, 2011 at 09:20 AM |
|
|
Get rid of all the masking and the shell is now complete. Still need to do a cavity wax treatment and not completely sure what to do with the wiring
yet - apart from these things its ready for assembly. Only the inside of the 4 wings left to paint and then I can finally retire my sanding arm for a
while..... 
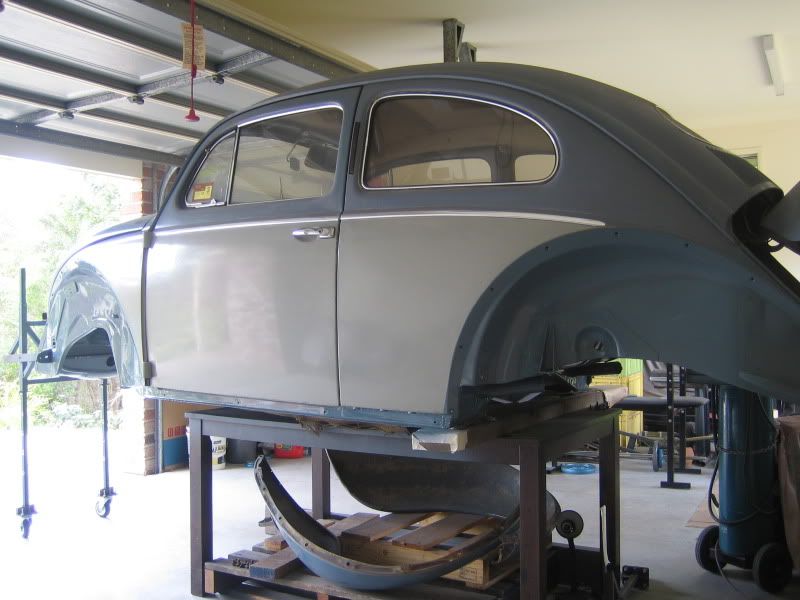
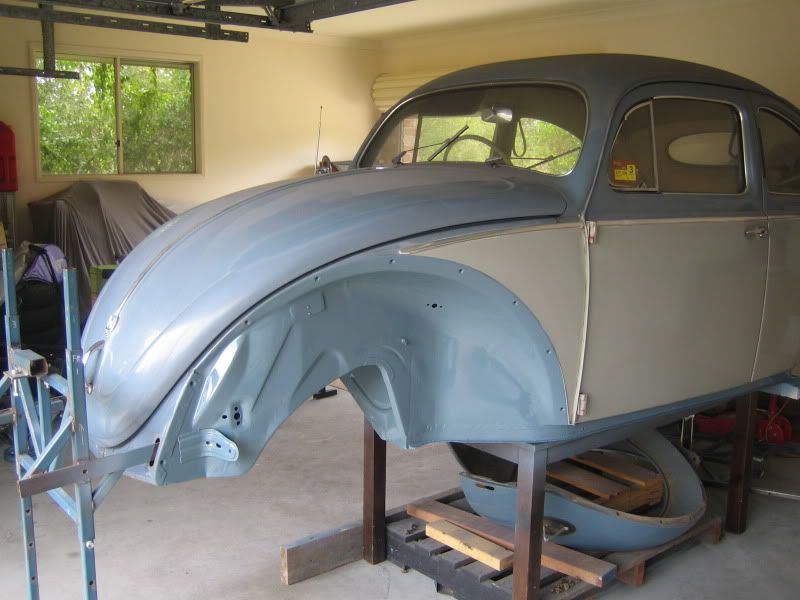
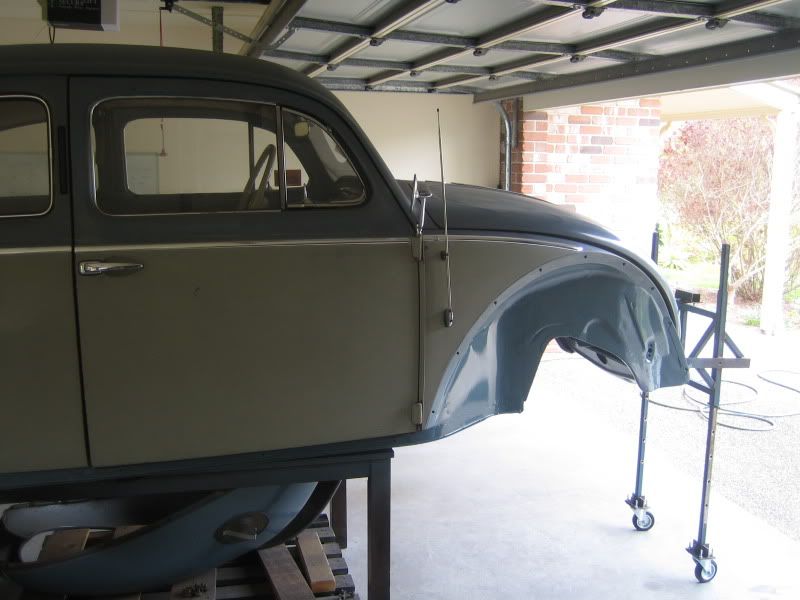
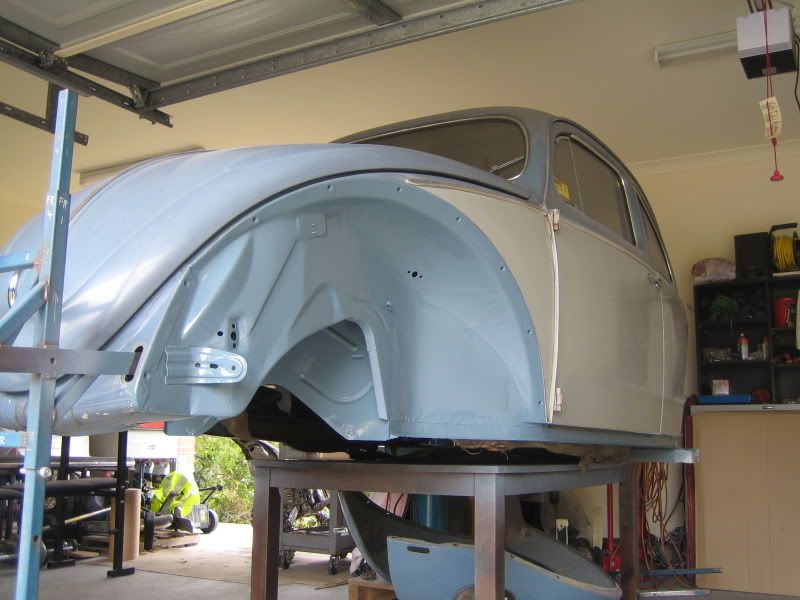
|
|
|
 hellbugged hellbugged
A.k.a.: Daimo Pell
23 Windows of Awesome
48's and straight cuts
       
Posts: 5080
Threads: 116
Registered: April 17th, 2003
Member Is Offline
Location: Nambucca Valley NSW
Theme: UltimaBB Psyche Blue
Mood: Couldn't care less
|
| posted on October 9th, 2011 at 11:51 AM |
|
|
Wow!
|
|
|
 OldTimer OldTimer
Seriously Crusin Dubber
 
Posts: 199
Threads: 30
Registered: May 20th, 2009
Member Is Offline
Location: Brisbane
Theme: UltimaBB Pro White
Mood: In constant awe
|
| posted on October 10th, 2011 at 09:29 AM |
|
|
This is a great build. Excellent work, excellent quality.
Thanks for sharing.
Old Timer
air is cool, but air-cooled is cooler!
1967 Aussie Built Type 1 1915 Deluxe
|
|
|
 Aussie Aussie
Officially Full-On Dubber
  
Posts: 296
Threads: 43
Registered: September 15th, 2006
Member Is Offline
Location: Gold Coast
Theme: UltimaBB Pro Blue ( Default )
|
| posted on October 10th, 2011 at 07:37 PM |
|
|
| Quote: | Originally
posted by hellbugged
Wow!
|
Cheers! How is that 5 speed going? I was going to go for one of these originally but went for the 4 speed in the end. Do you have a stock ratio 5th?
|
|
|
 Aussie Aussie
Officially Full-On Dubber
  
Posts: 296
Threads: 43
Registered: September 15th, 2006
Member Is Offline
Location: Gold Coast
Theme: UltimaBB Pro Blue ( Default )
|
| posted on October 10th, 2011 at 07:39 PM |
|
|
| Quote: | Originally
posted by OldTimer
This is a great build. Excellent work, excellent quality.
Thanks for sharing.
Old Timer
|
Thanks Old Timer. It is moving along nicely now and I am trying to keep the momentum going for a while. More updates to follow shortly.
Cheers, Ian
|
|
|
 hellbugged hellbugged
A.k.a.: Daimo Pell
23 Windows of Awesome
48's and straight cuts
       
Posts: 5080
Threads: 116
Registered: April 17th, 2003
Member Is Offline
Location: Nambucca Valley NSW
Theme: UltimaBB Psyche Blue
Mood: Couldn't care less
|
| posted on October 10th, 2011 at 07:56 PM |
|
|
Hi Ian
luvin the plan here.....clean underneath and original above. few hot rods been to Valla rod run over the years done like that and i love it, dream of
the time and patience to do a car the same. great direction choice!
surprised you didn't make the rear apron detachable whilst working around there. was never a fan of this set up, but now i've done it, for sure can
see major benefits to it.
yeah 5 speed hasn't turned much in the last 18 months........ 0.82 top gear which the torquey lil 1776cc pulls well. (from memory ).......big believer in learning an engines delivery on the
road before choosing ratios as this final drive ratio would not suit loads'a other motors. but yeah i would recommend the conversion as it is
UNBELIEVABLE to have both the close race ratios AND the ability to run freeway touring. ).......big believer in learning an engines delivery on the
road before choosing ratios as this final drive ratio would not suit loads'a other motors. but yeah i would recommend the conversion as it is
UNBELIEVABLE to have both the close race ratios AND the ability to run freeway touring.
will be good when Craigy Torrens' 5 finally arrives for some more input and testing of times at the track from him as he has chosen a more even
spread of ratios throughout all gears
keep up with the progress 
|
|
|
| Pages: 1 2 3 4 5 6 7 |