| [ Total Views: 156727 | Total Replies: 204 | Thread Id: 75753 ] |
| Pages: 1 .. 3 4 5 6 7 |
|
|
 Aussie Aussie
Officially Full-On Dubber
  
Posts: 296
Threads: 43
Registered: September 15th, 2006
Member Is Offline
Location: Gold Coast
Theme: UltimaBB Pro Blue ( Default )
|
| posted on October 14th, 2011 at 06:35 PM |
|
|
Guards
Time to sort out the guards - the last of the body and paint type stuff..
Oh dear - found some rust which will need to be repaired.
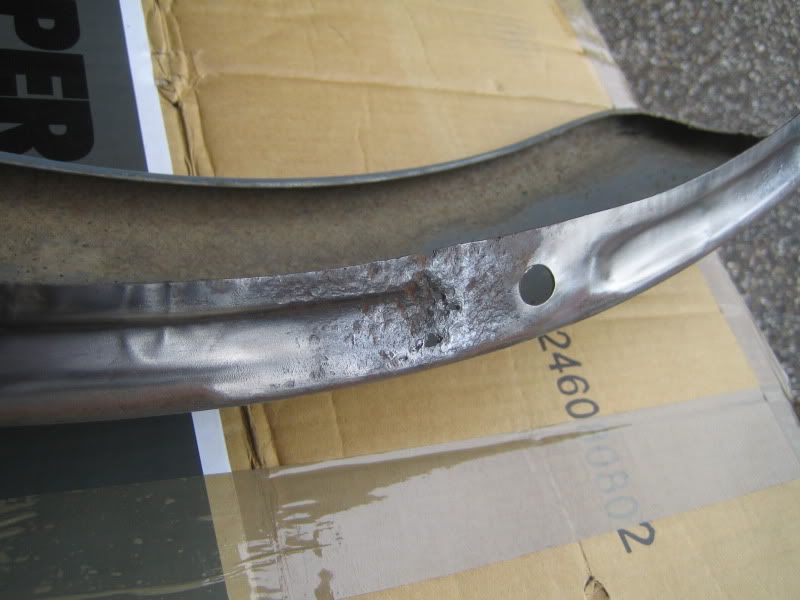
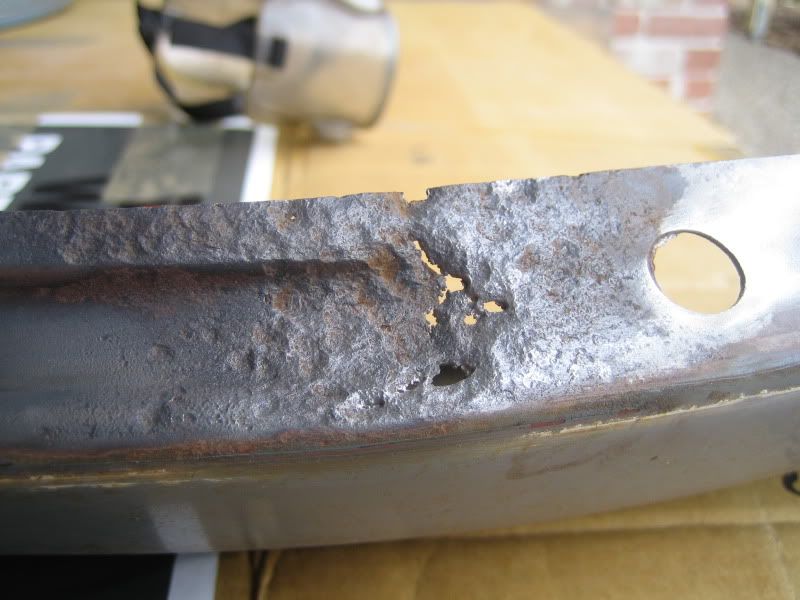
Chop Chop..
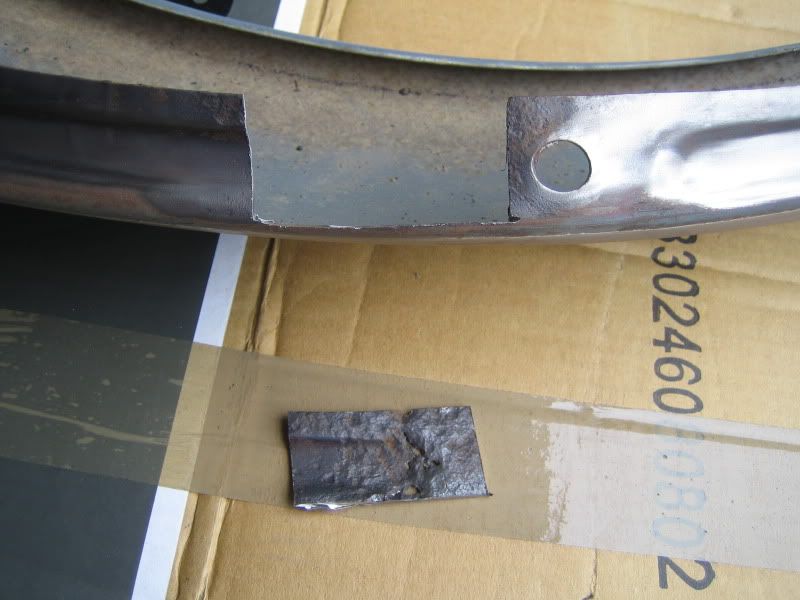
This is actually not an easy repair because of the pressing in the lip. Could have welded a flat repair piece in but did noy really want to do that .
Phoned around to try and get a donor wing to chop out a repair section but no-one had anything at short notice 
So..... had a go at making my own. Started out by shaping a piece of hardwood to match the approximate shape of the pressing channel.
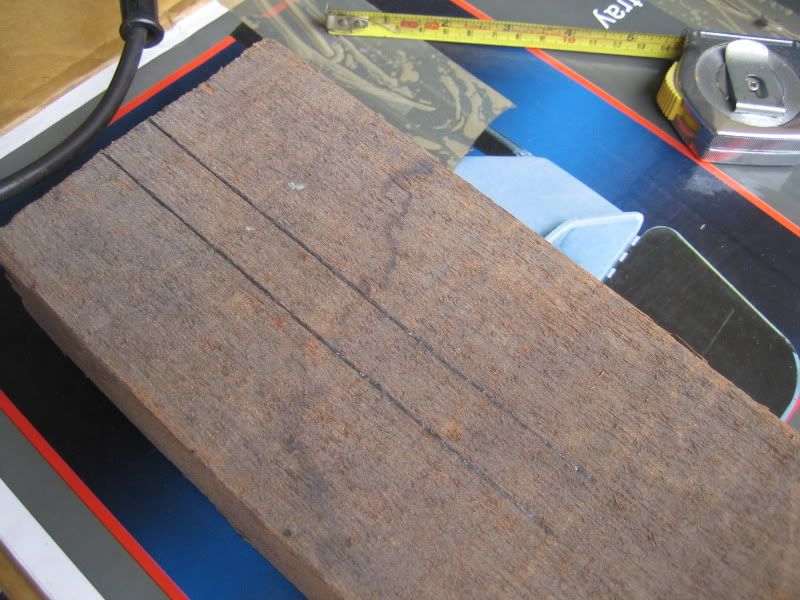
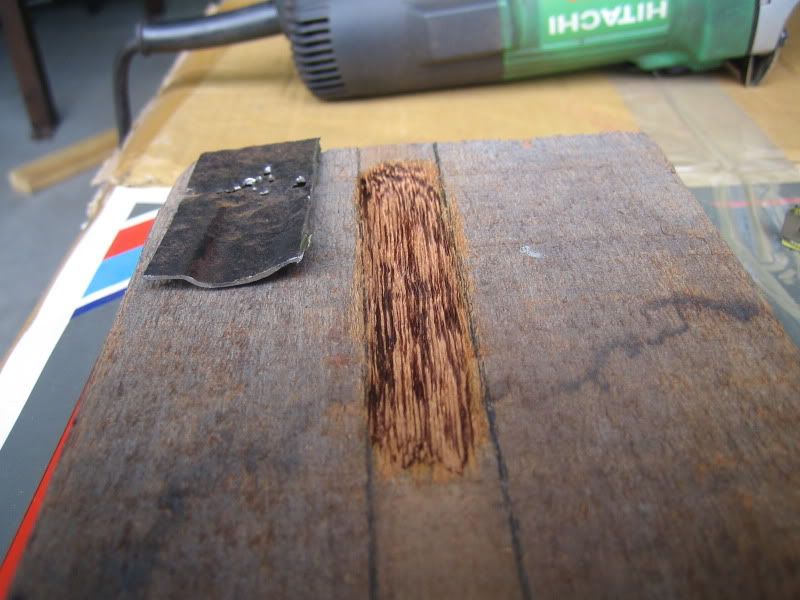
More or less matches the profile I need.
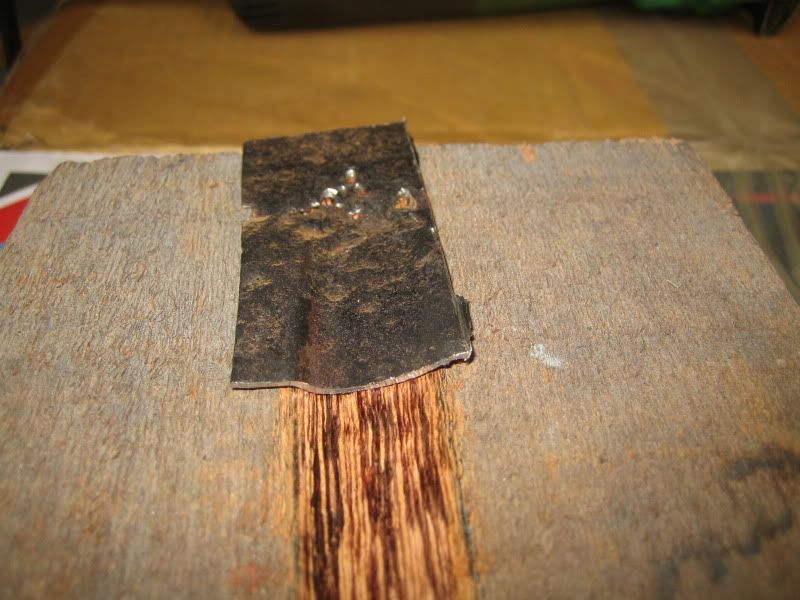
|
|
|
 Aussie Aussie
Officially Full-On Dubber
  
Posts: 296
Threads: 43
Registered: September 15th, 2006
Member Is Offline
Location: Gold Coast
Theme: UltimaBB Pro Blue ( Default )
|
| posted on October 14th, 2011 at 06:47 PM |
|
|
Marked up a bit of flat sheet which would form the basis of the repair panel.
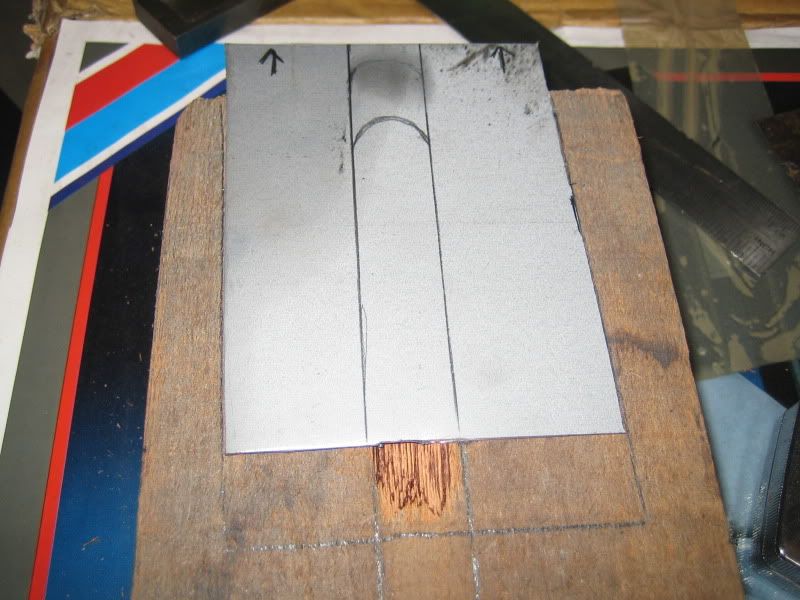
Then proceeded to hit the hell out of it and get some shape going.
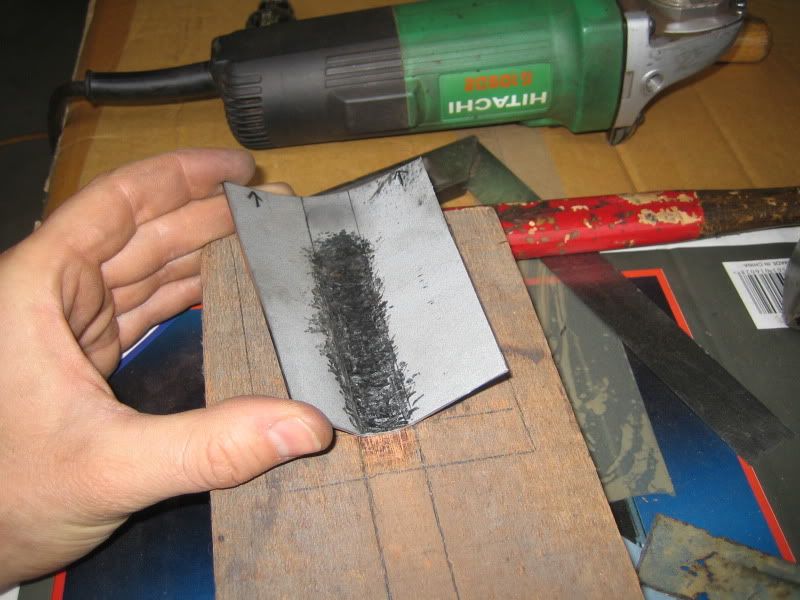
Things starting to get into basic shape.
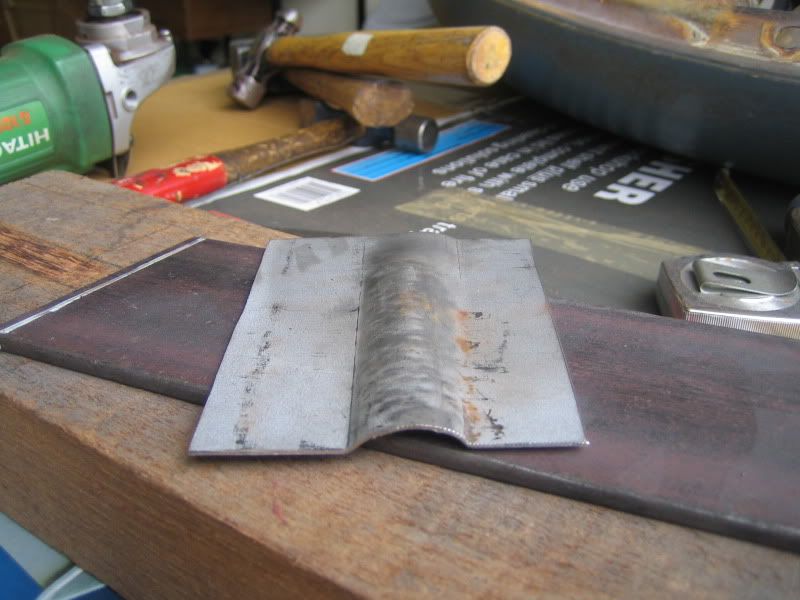
Give a trim down and a bit more hammering and shaping.
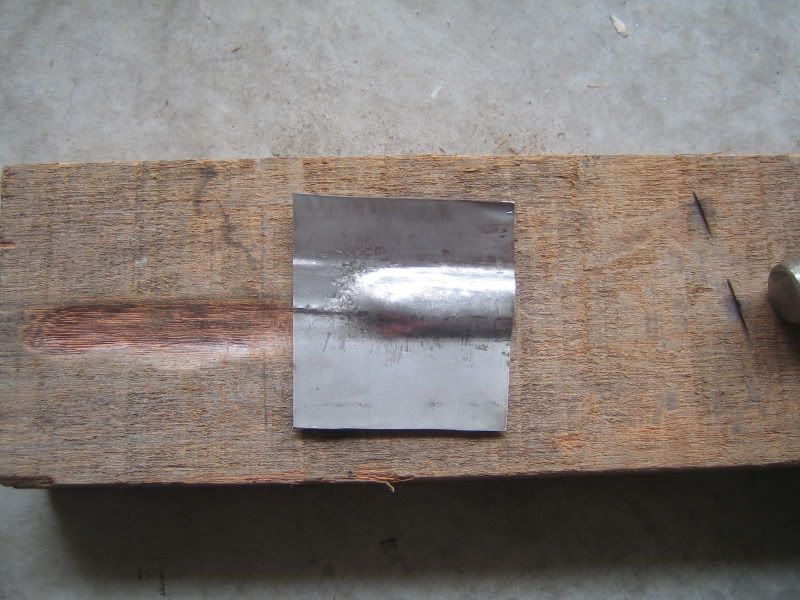
This is basically what I ended up with...
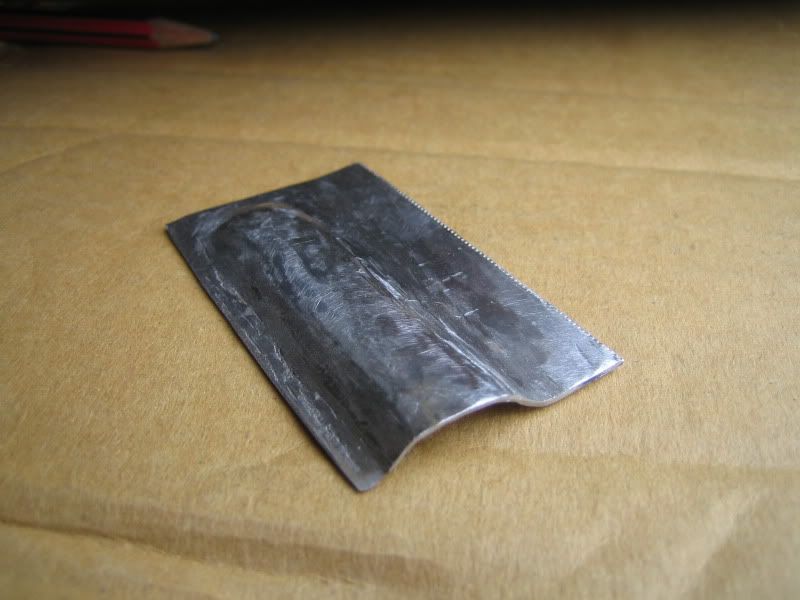
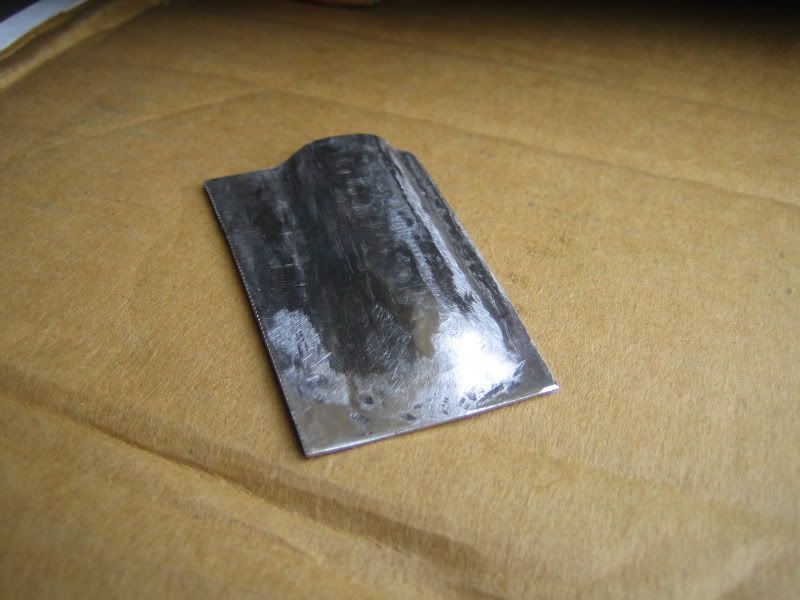
Get things prepped for welding and in she goes... Doesnt come out too bad.
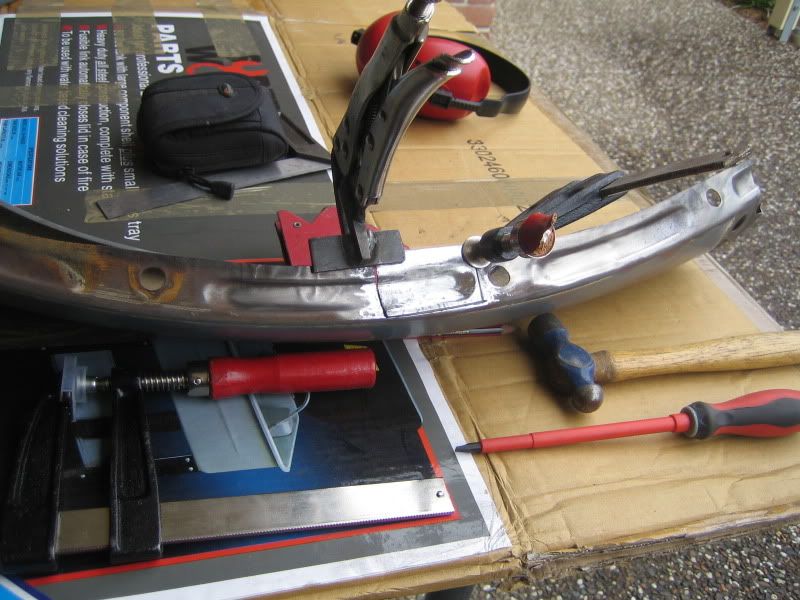
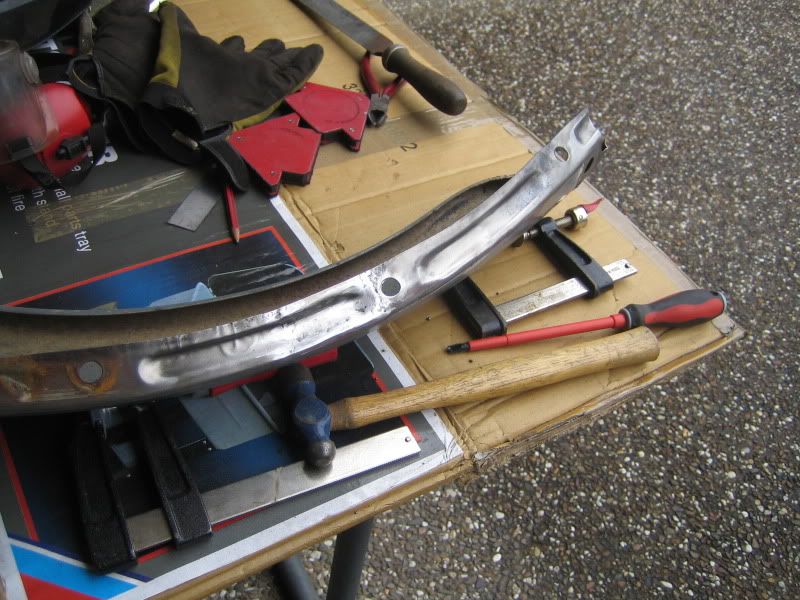
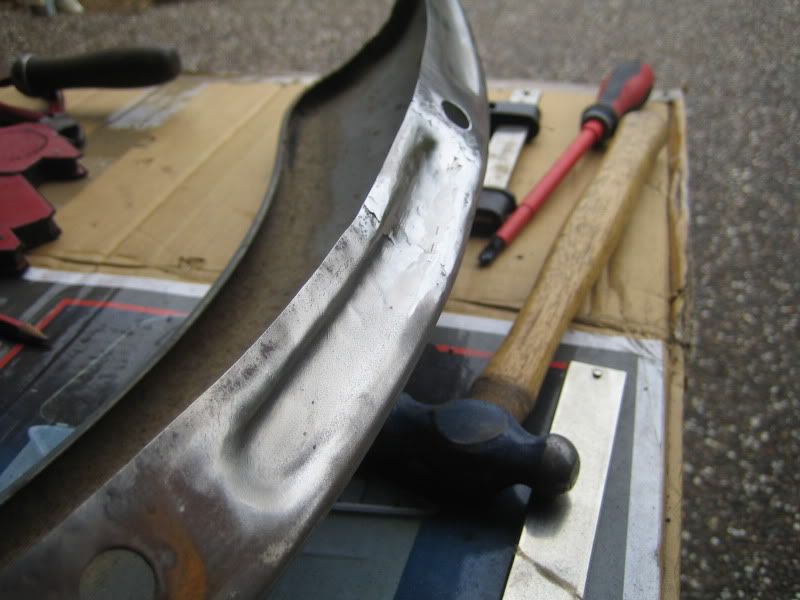
Add a touch of filler to smooth out and this repair is done 
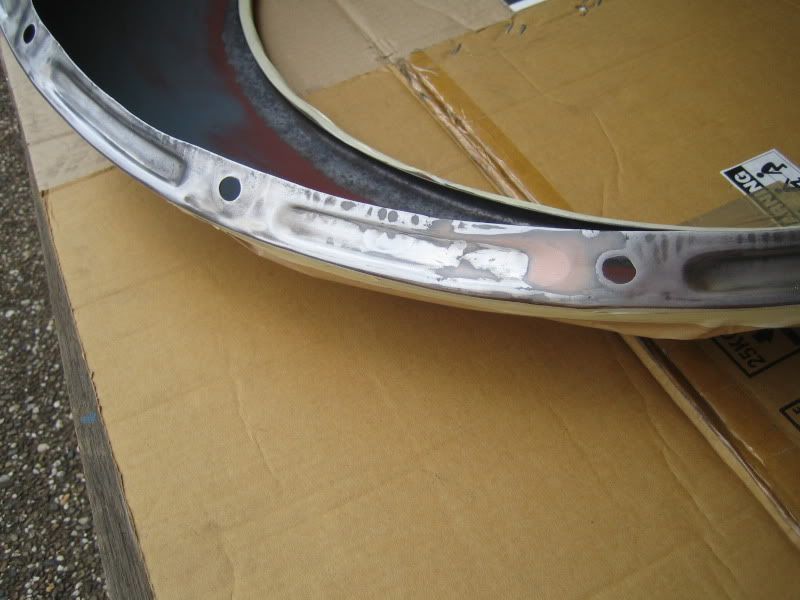
|
|
|
 Aussie Aussie
Officially Full-On Dubber
  
Posts: 296
Threads: 43
Registered: September 15th, 2006
Member Is Offline
Location: Gold Coast
Theme: UltimaBB Pro Blue ( Default )
|
| posted on October 14th, 2011 at 07:01 PM |
|
|
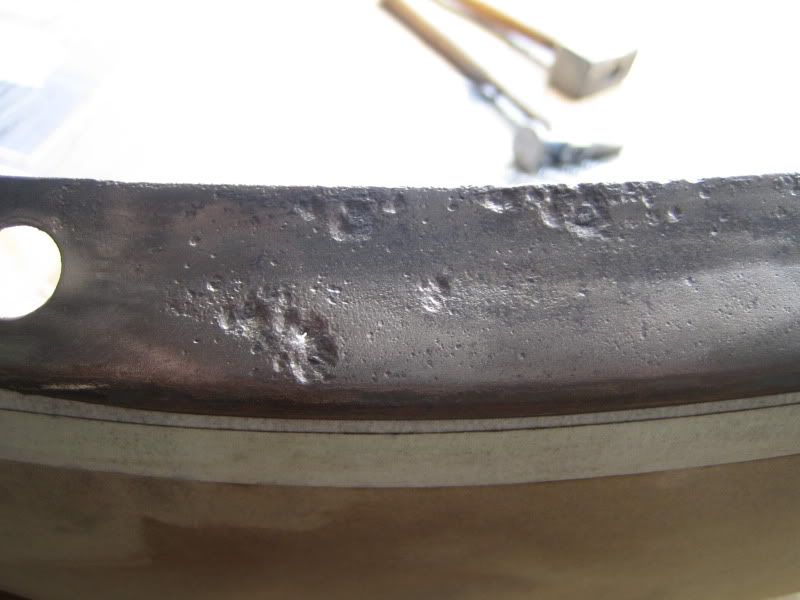
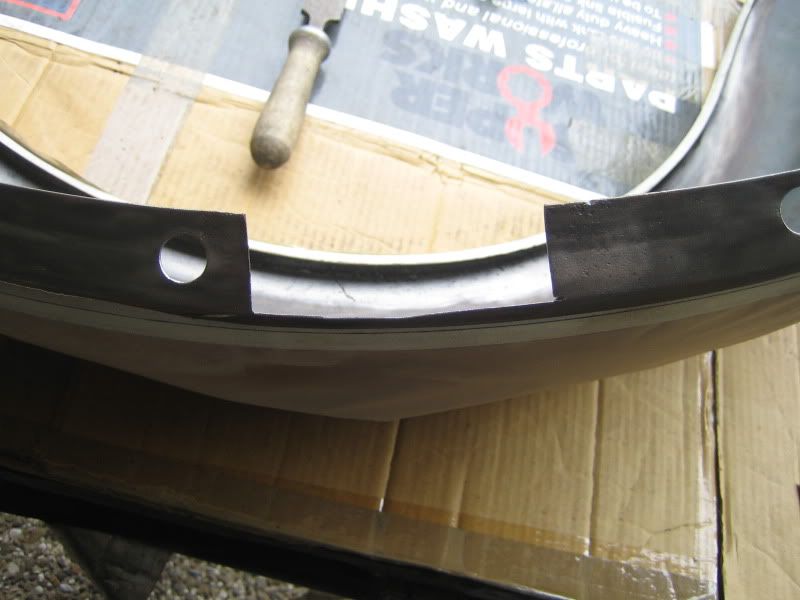
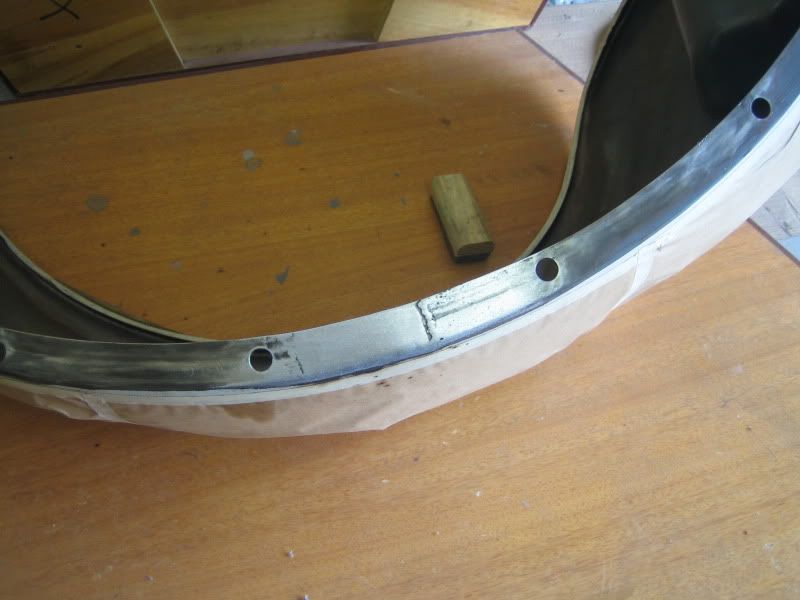
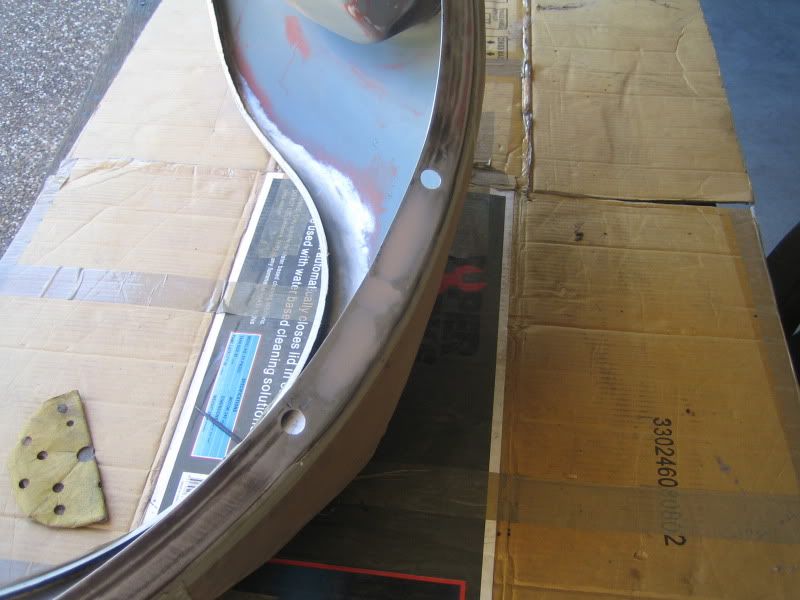
Another smaller repair on a different wing but much easier as flat sheet rather than with a pressing.
|
|
|
 Aussie Aussie
Officially Full-On Dubber
  
Posts: 296
Threads: 43
Registered: September 15th, 2006
Member Is Offline
Location: Gold Coast
Theme: UltimaBB Pro Blue ( Default )
|
| posted on October 14th, 2011 at 07:04 PM |
|
|
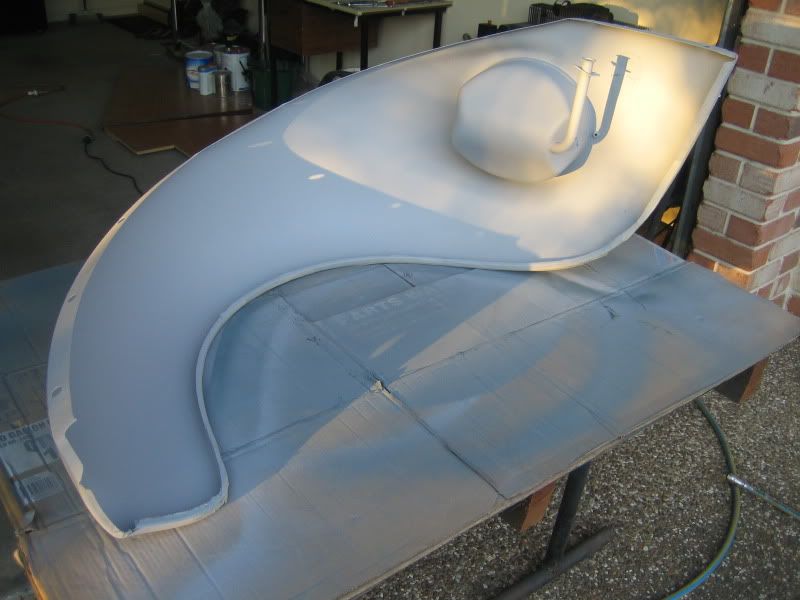
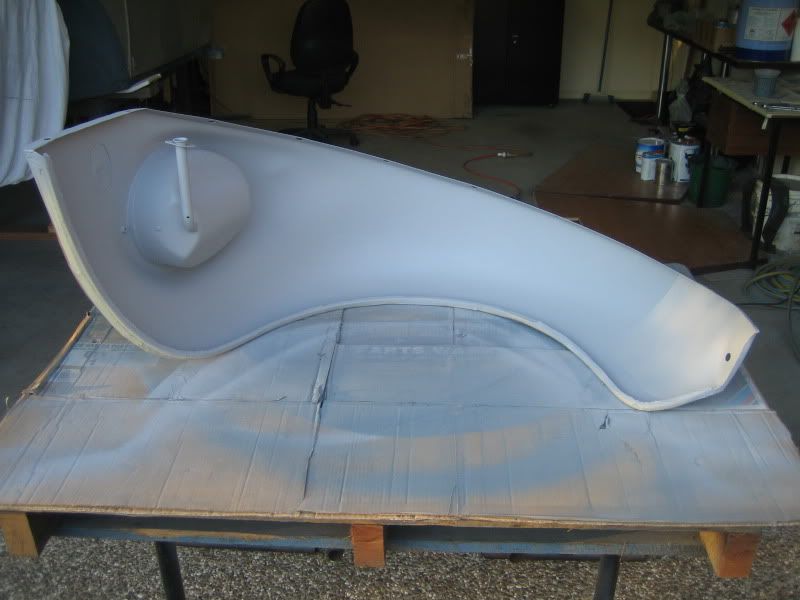
Primer goes on
Final prep...
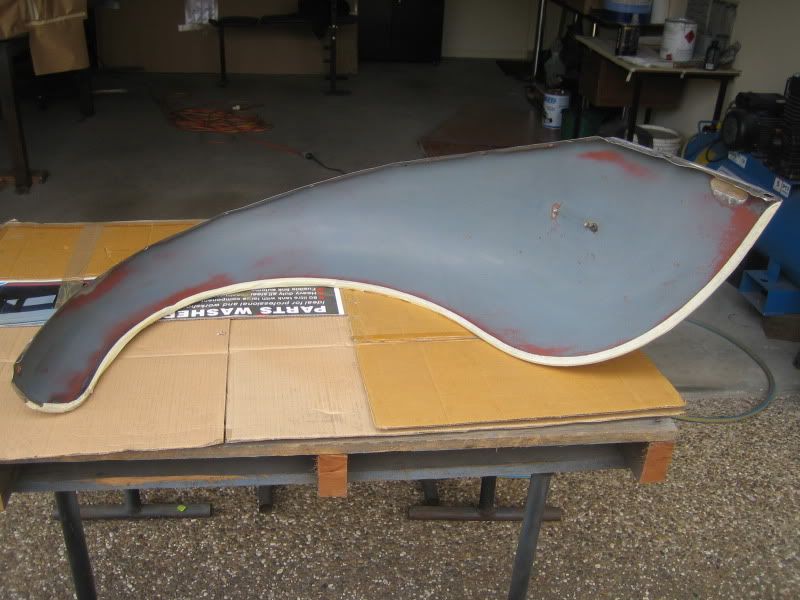
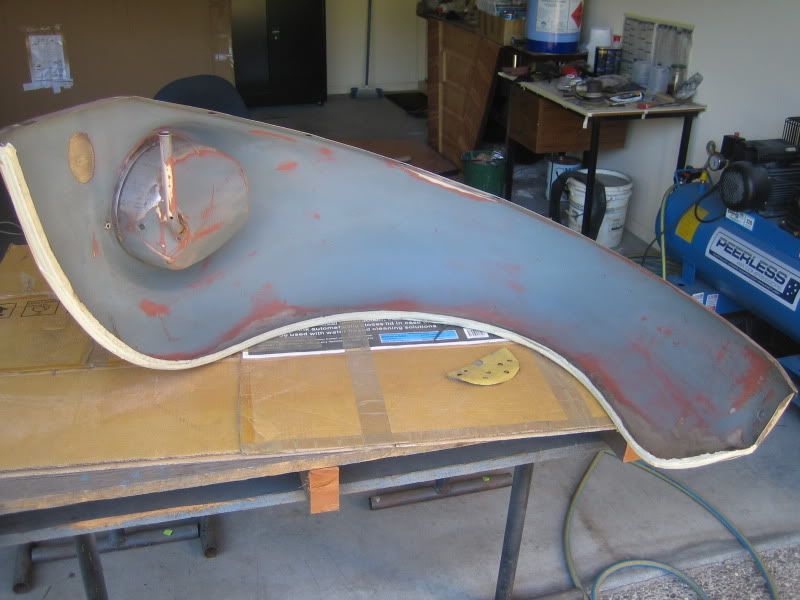
Now some primer
|
|
|
 Aussie Aussie
Officially Full-On Dubber
  
Posts: 296
Threads: 43
Registered: September 15th, 2006
Member Is Offline
Location: Gold Coast
Theme: UltimaBB Pro Blue ( Default )
|
| posted on October 14th, 2011 at 07:09 PM |
|
|
Colour
On goes the blue...
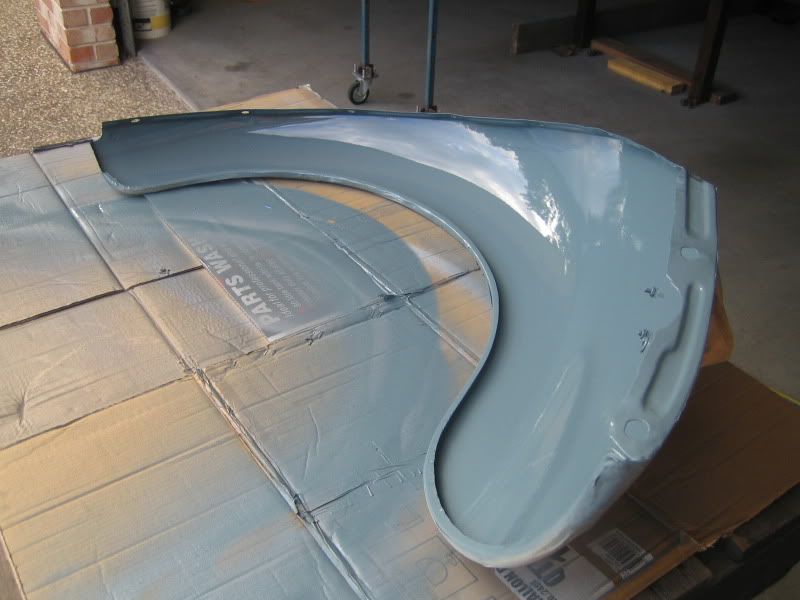
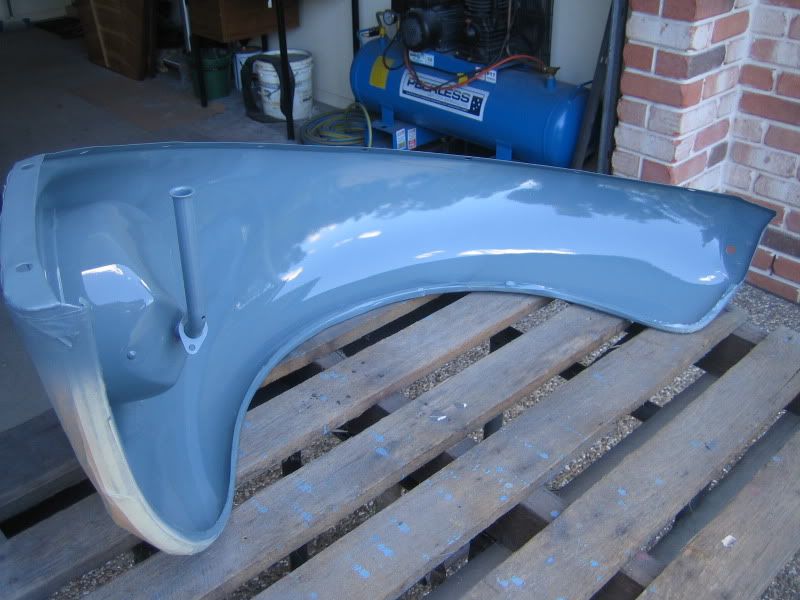
Completed repair
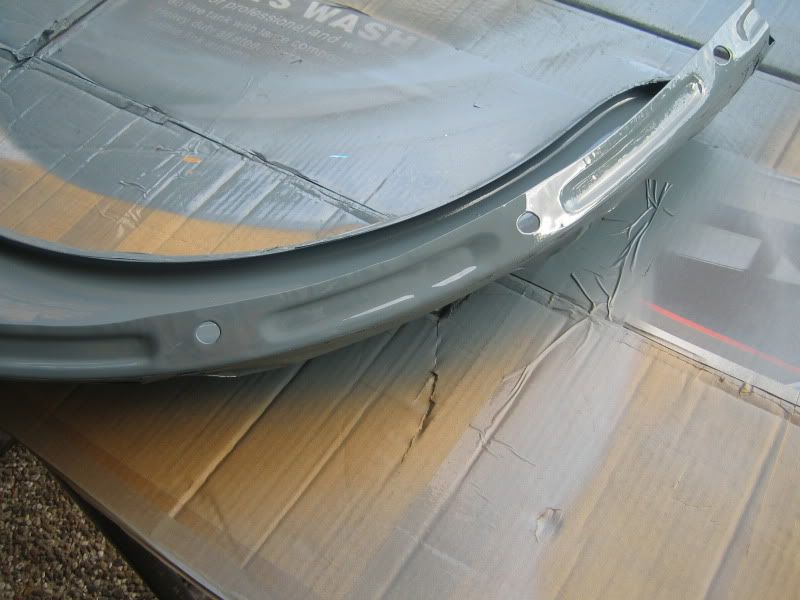
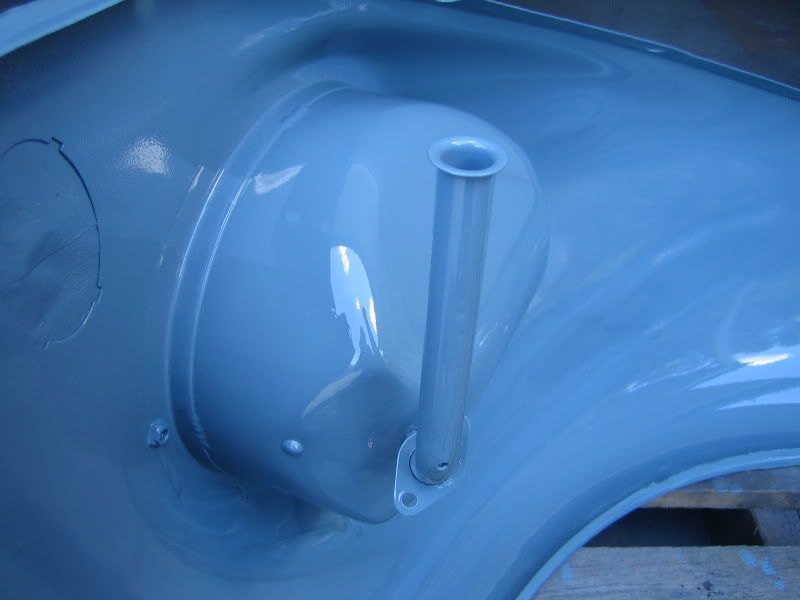
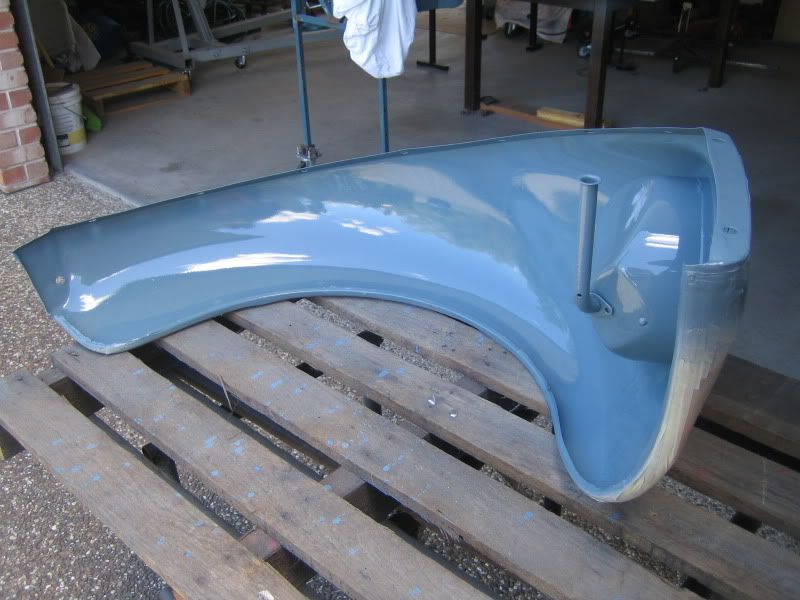
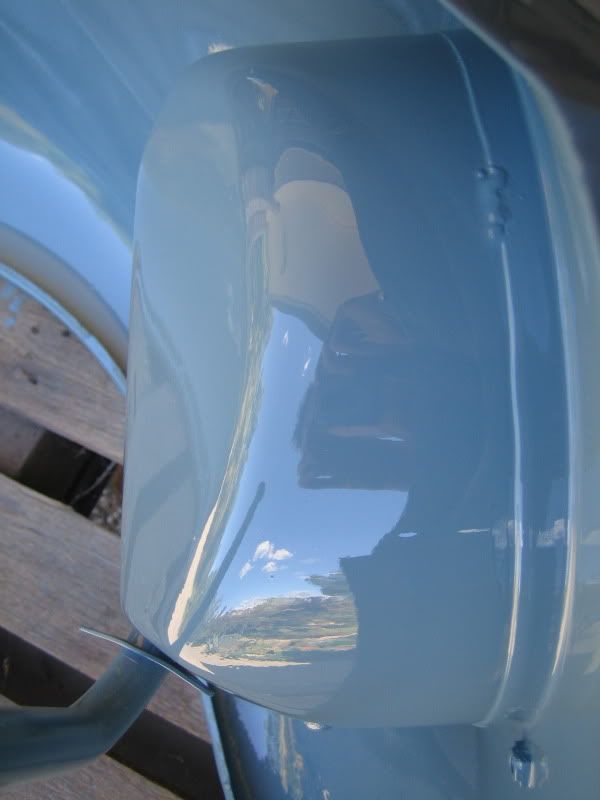
Got a couple of runs on the font wings but not too concerned about these - bit more paint for protection...
At long last this paint phase is over so the next update should include the beginnings of assembly.....
|
|
|
 Dasdubber Dasdubber
A.k.a.: Alan Agyik
23 Windows of Awesome
DAS Resto Haus
       
Posts: 5746
Threads: 289
Registered: August 26th, 2002
Member Is Offline
Location: Gold Coast
Theme: UltimaBB Pro Blue
Mood: feeling fine...
|
| posted on October 14th, 2011 at 09:50 PM |
|
|
Nice work Ian - you're going great guns mate. Its always nice how the paint likes to level itself around the curves hey.....unfortunately doesn't
flatten out quite as easily on large flat panels like the side of a bus!
Looking forward to seeing the beetle in person some time. Let me know if you need that extra primer (by the looks of it you might be okay?)
Al
|
|
|
 Aussie Aussie
Officially Full-On Dubber
  
Posts: 296
Threads: 43
Registered: September 15th, 2006
Member Is Offline
Location: Gold Coast
Theme: UltimaBB Pro Blue ( Default )
|
| posted on October 15th, 2011 at 09:25 AM |
|
|
| Quote: | Originally
posted by Dasdubber
Nice work Ian - you're going great guns mate. Its always nice how the paint likes to level itself around the curves hey.....unfortunately doesn't
flatten out quite as easily on large flat panels like the side of a bus!
Looking forward to seeing the beetle in person some time. Let me know if you need that extra primer (by the looks of it you might be okay?)
Al
|
Thanks Al - agree large flat panels would be a pain to get right. The hardest thing that I have found is getting a consistant finish. Even on small
panels it is very easy to have dry spray, orange peel and runs all at the same time...
I finished with about 50ml of primer left so hopefully should not need any more for the time being - cant believe it was so close.
|
|
|
 Aussie Aussie
Officially Full-On Dubber
  
Posts: 296
Threads: 43
Registered: September 15th, 2006
Member Is Offline
Location: Gold Coast
Theme: UltimaBB Pro Blue ( Default )
|
| posted on October 25th, 2011 at 08:34 PM |
|
|
Gearbox + axles
Pan is back out, dusted off and ready for some assembly. First up is to get the axles, tubes and gearbox bolted together and then fitted back into the
chassis. Everything is cleaned and laid out ready prior to assembly.
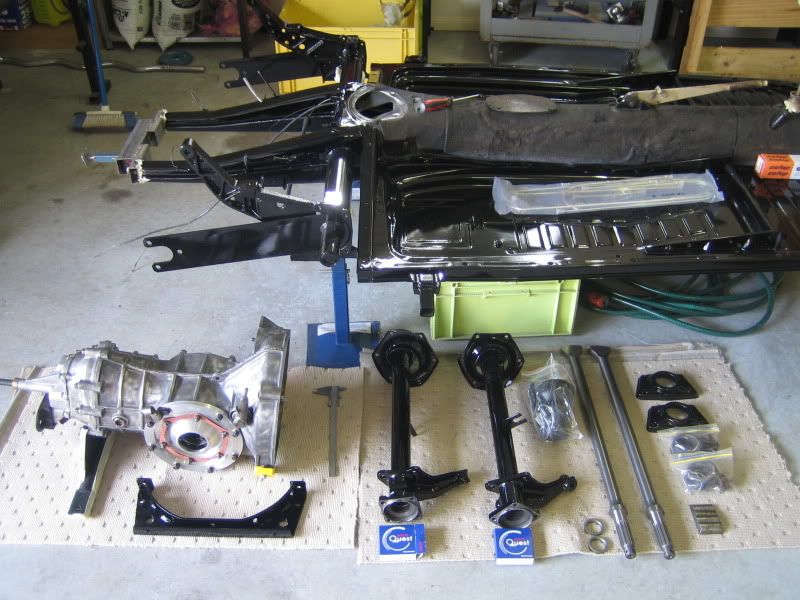
Bolt up the rhino mounts and rear cradle first.
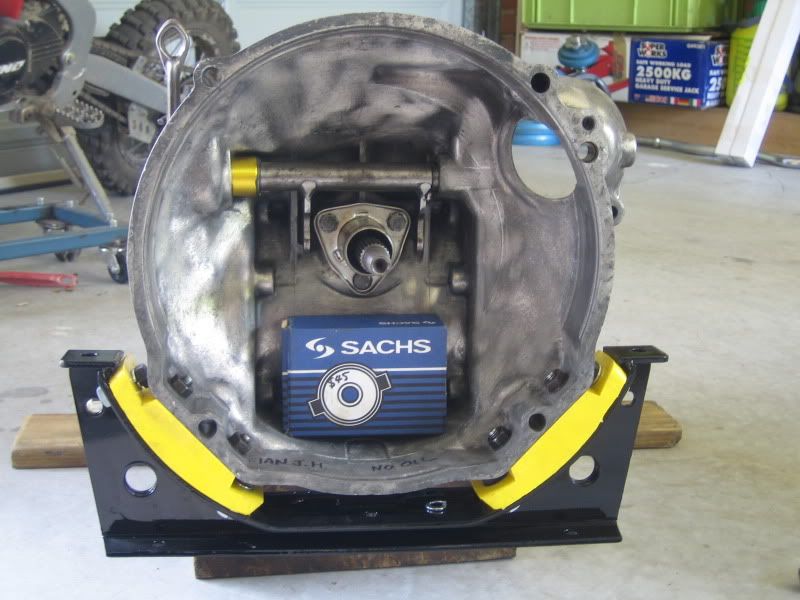
Next I pulled out the side gears/circlips etc so that the axles can be fitted.
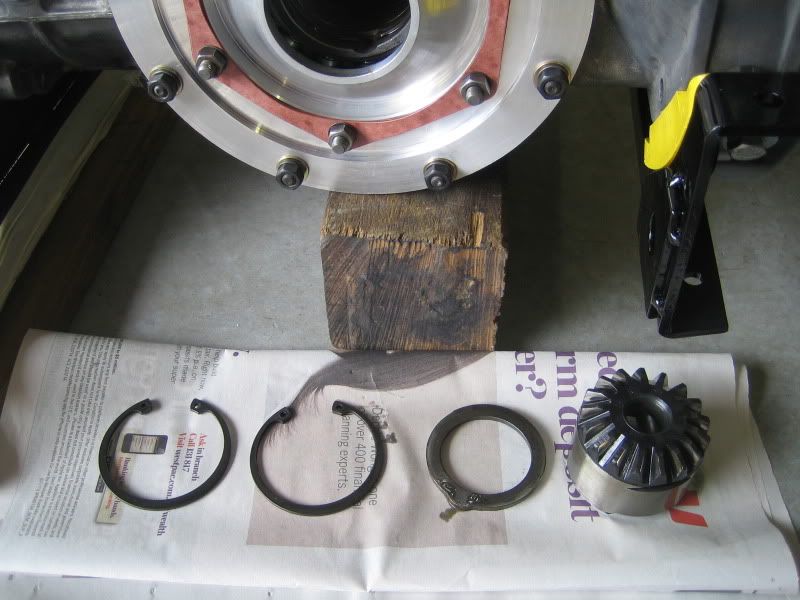
Polished fulcrums and H/D axles ready to be fitted. The axles are EMPI as SAW axles are still not in production.
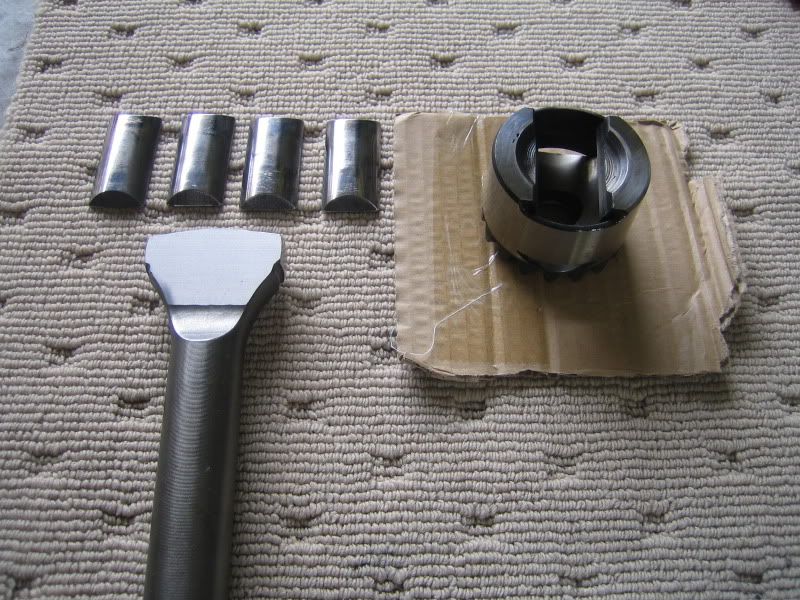
Checked all clearences and made sure there was no binding etc going on. All good so on go the daisies.
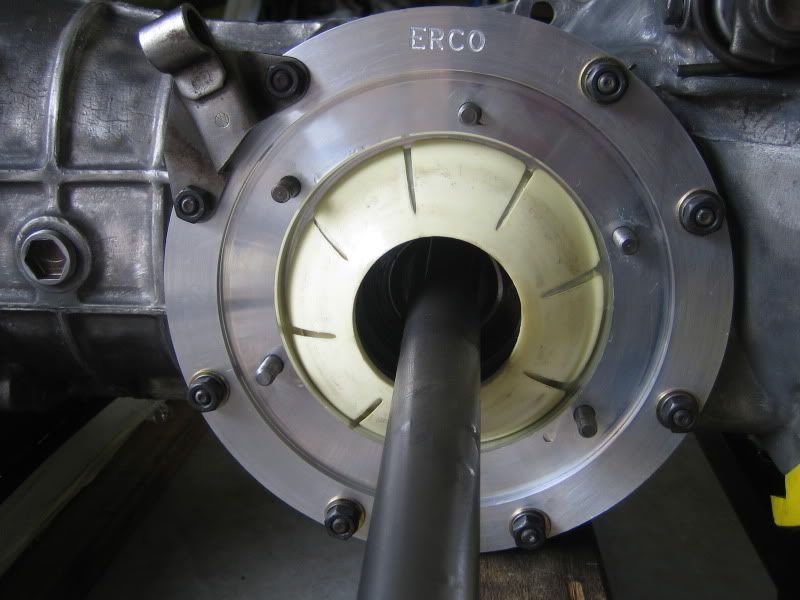
Axle tube fitted and sideplay set by using different gasket combinations. Took me a few goes to get it right.
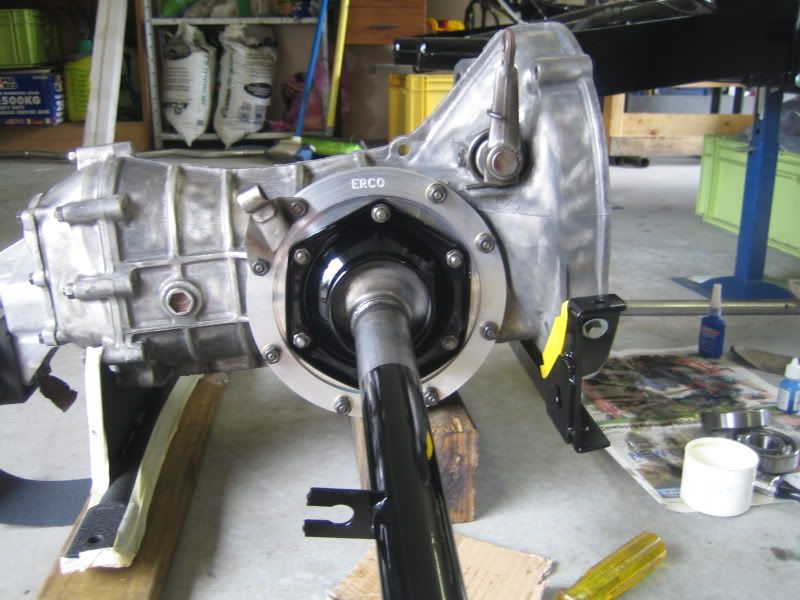
Rubber boot fitted and repeat process on other side.
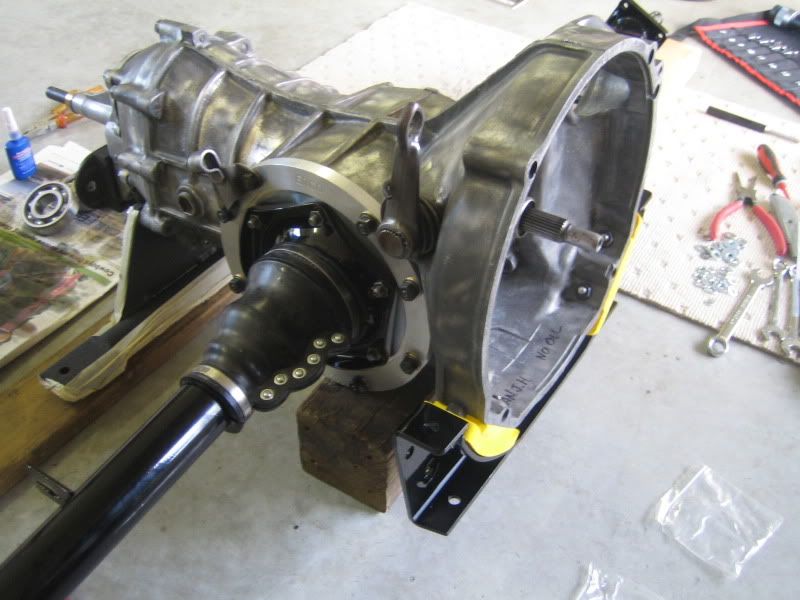
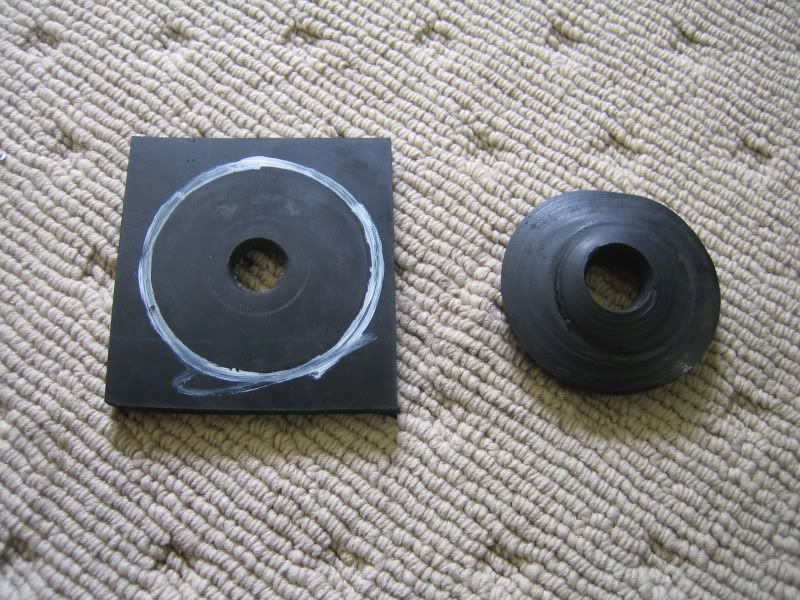
Last thing to do was make new nose cone to chassis seal. Cut one out from a sheet of rubber from Clarke Rubber. Will use this for a few other grommets
and things too.
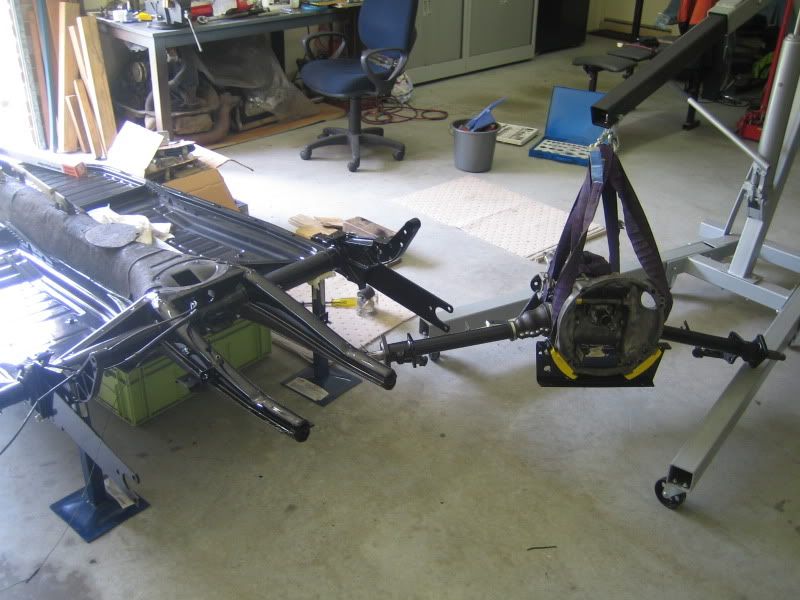
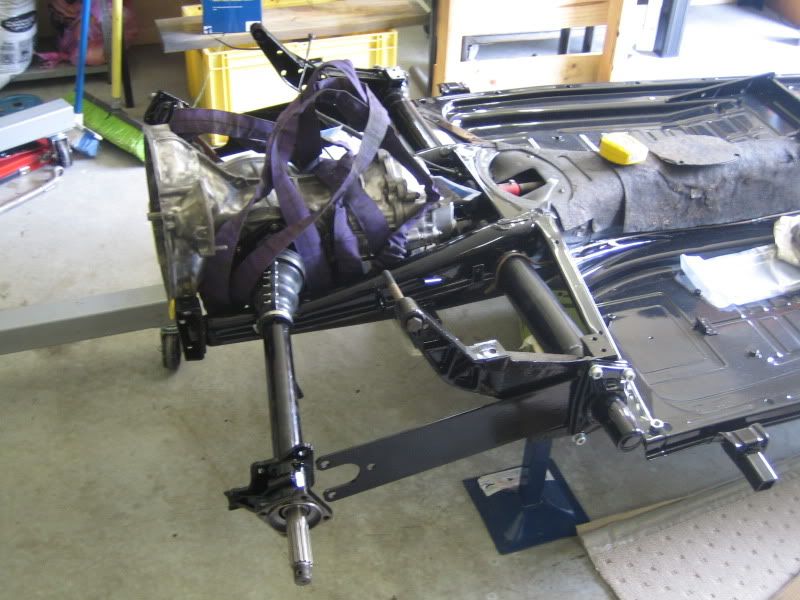
Lift it up and in she goes.... Hooked up the shift rod and made sure all gears can be selected - all good. 
|
|
|
 Aussie Aussie
Officially Full-On Dubber
  
Posts: 296
Threads: 43
Registered: September 15th, 2006
Member Is Offline
Location: Gold Coast
Theme: UltimaBB Pro Blue ( Default )
|
| posted on October 25th, 2011 at 08:46 PM |
|
|
Spring plates
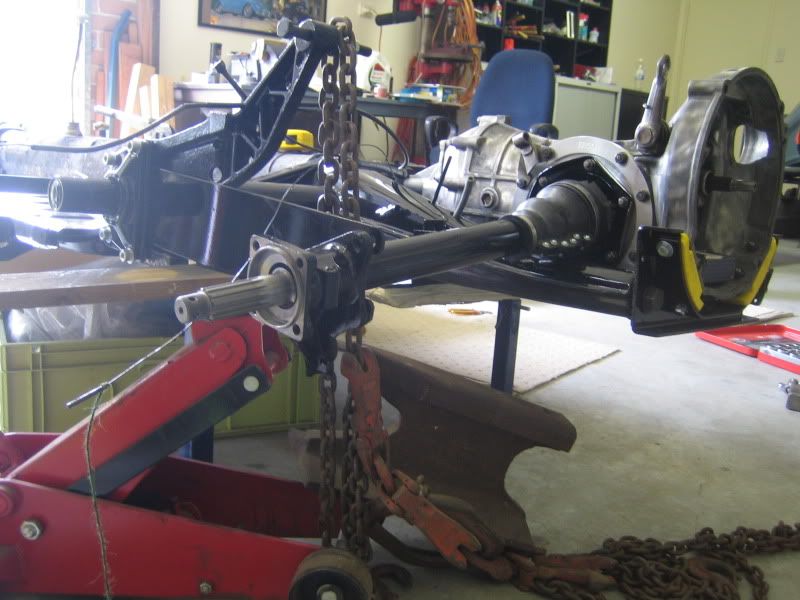
Bolting up the springplates was a nightmare job. How this can be done without scratching or marking fresh paint is something that must take a lot of
practise. Lots of swearing and a few scatches later I got it all fitted. Want to thank the guy doing the "Alyce the Baja" thread as I remembered how
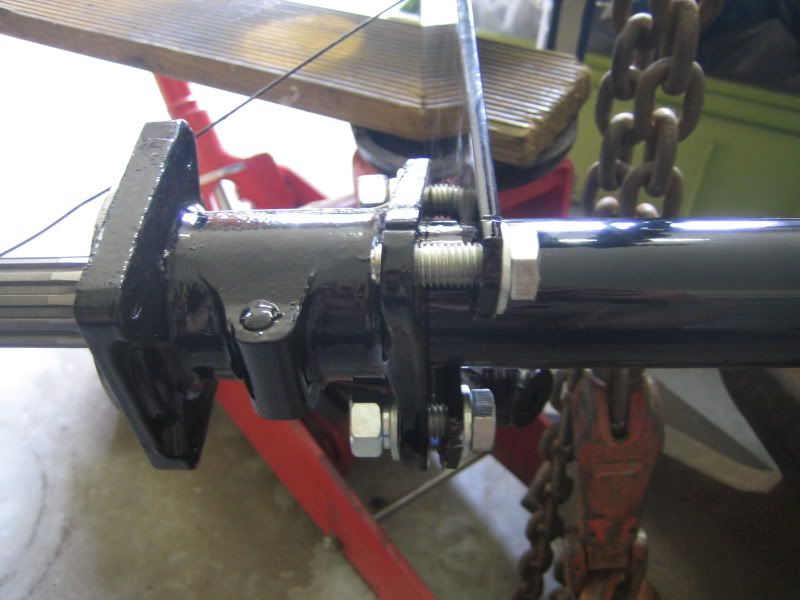
he used a jack and chain to preload the springplates to get them fitted. I used the same method and it worked well.
Preload first.
Then pull up when you can get the bolts started.
Mid mount bolted up and everything else tightened up and we are done. 
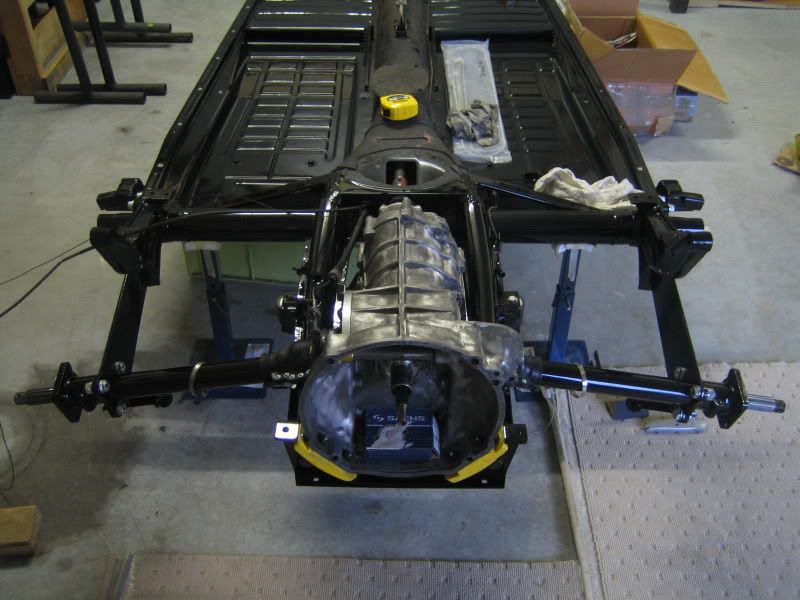
|
|
|
 Dasdubber Dasdubber
A.k.a.: Alan Agyik
23 Windows of Awesome
DAS Resto Haus
       
Posts: 5746
Threads: 289
Registered: August 26th, 2002
Member Is Offline
Location: Gold Coast
Theme: UltimaBB Pro Blue
Mood: feeling fine...
|
| posted on October 25th, 2011 at 11:13 PM |
|
|
Nice work Ian, looking good mate!
|
|
|
 Smiley Smiley
A.k.a.: Daniel Stephens
Veteran Volks Folk
    
Posts: 2125
Threads: 110
Registered: October 29th, 2008
Member Is Offline
Location: Yeppoon, Central Queensland
Theme: UltimaBB Pro Blue
Mood: Synchro'd
|
| posted on October 25th, 2011 at 11:33 PM |
|
|
| Quote: | Originally
posted by Aussie
Want to thank the guy doing the "Alyce the Baja" thread as I remembered how he used a jack and chain to preload the springplates to get them fitted.
I used the same method and it worked well.
|
That'd be me.  Glad to see my ramblings have helped someone else
out. Glad to see my ramblings have helped someone else
out.
One thing you should do is replace your springplate to axle tube bolts with fine thread ones. This helps prevent them from working loose, I would
highly recommend it.
Aside from that what you're doing is amazing. The level of detail and craftsmanship is akin to what you would see on a top show car. Keep up the
fantastic work mate 
Smiley 
If you said I was a Volkswagen man, you'd be right.
|
|
|
 Aussie Aussie
Officially Full-On Dubber
  
Posts: 296
Threads: 43
Registered: September 15th, 2006
Member Is Offline
Location: Gold Coast
Theme: UltimaBB Pro Blue ( Default )
|
| posted on October 26th, 2011 at 08:07 PM |
|
|
M/C and brake lines
Unwrapped the M/C kit laid it out ready for a trial fit up. Comes with everything again though I did paint a couple of things inc. the M/C itself. I
have a line loc which may go on the car at some point. I will not install it before the car gets engineered though - once everything is assembled I
will mock up the install to make it easier if/when it goes on.
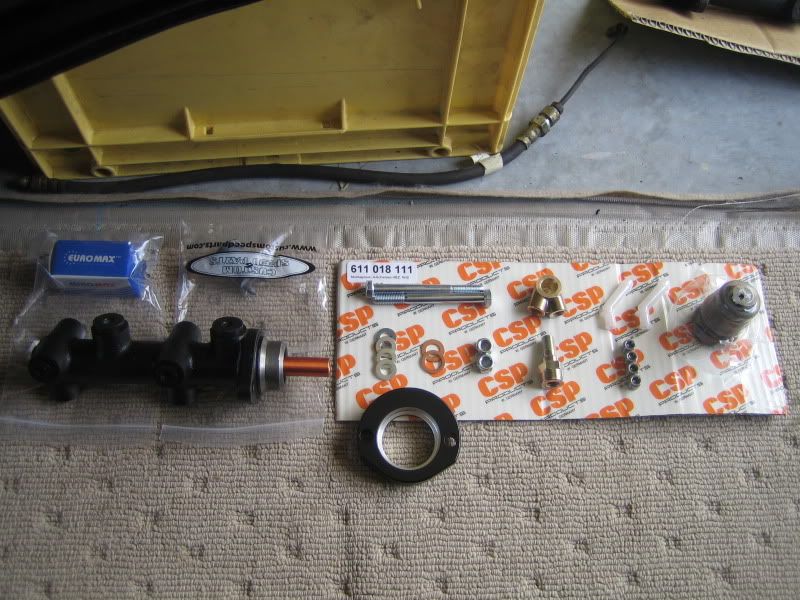
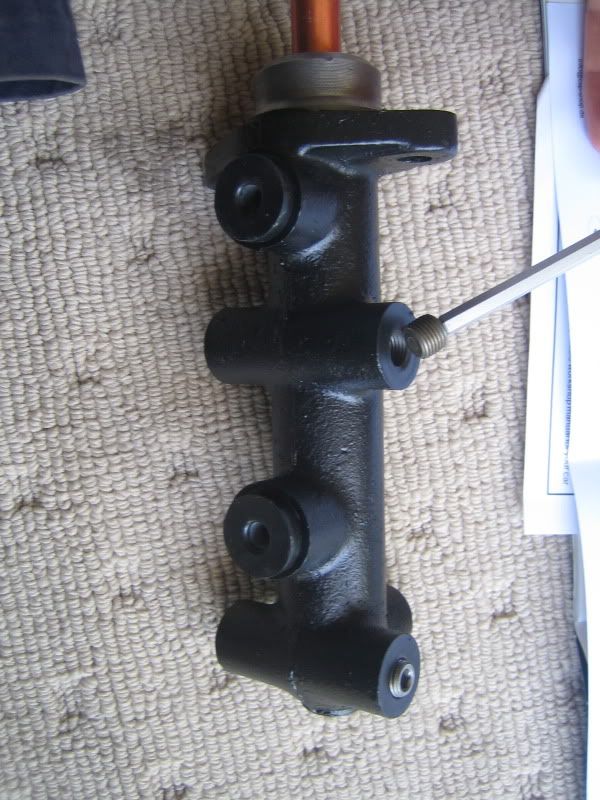
First up is screw in the blanking plugs on side and bottom - this is a universal M/C that can be used for LHD or RHD.
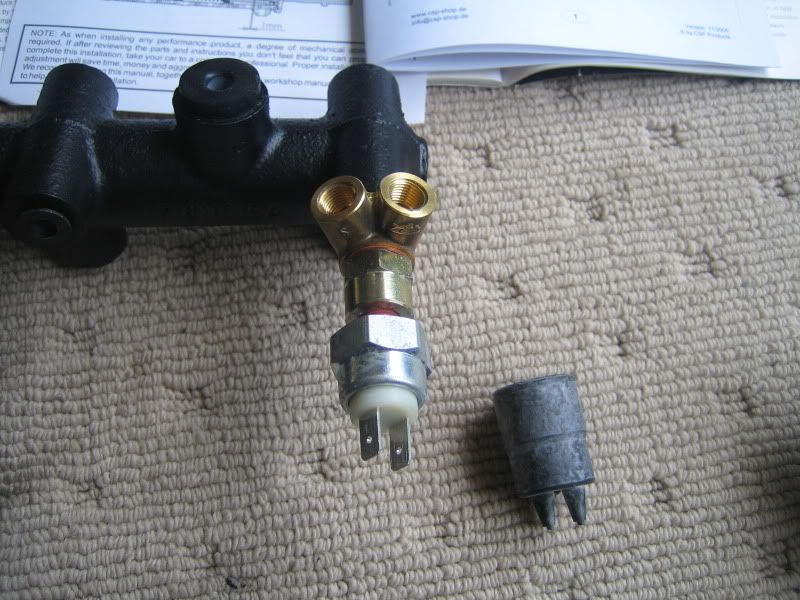
Split brass fitting feeds the fronts - the brake switch then screws on.
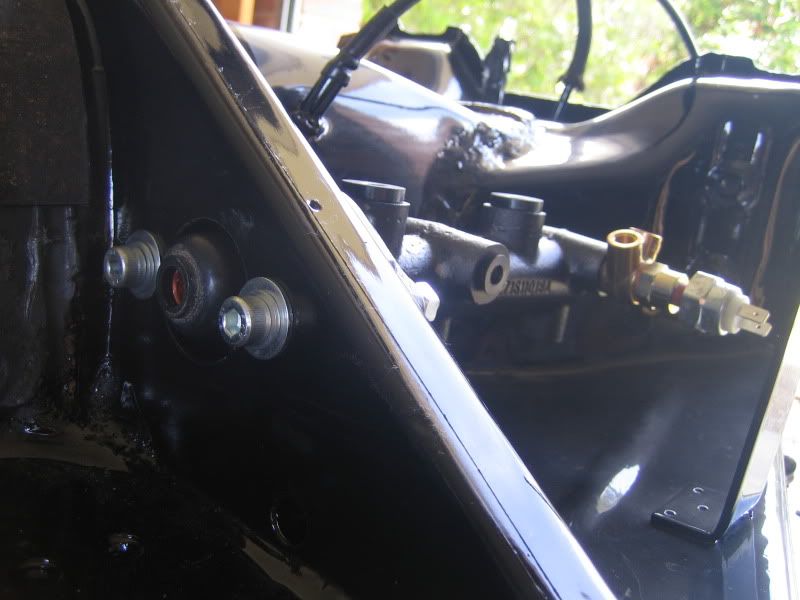
Started on the longest brake pipe first which runs from front to rear.
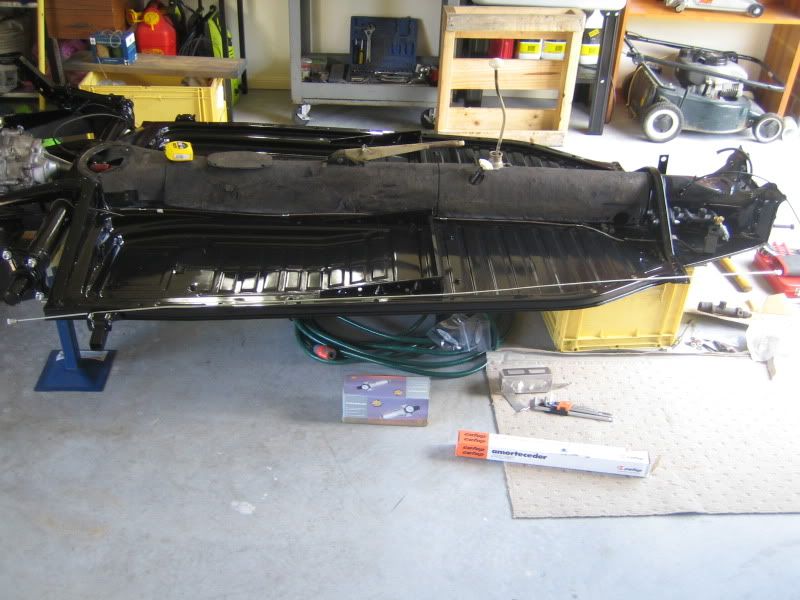
Kept all the old pipes to help guide the shaping of the new lines.
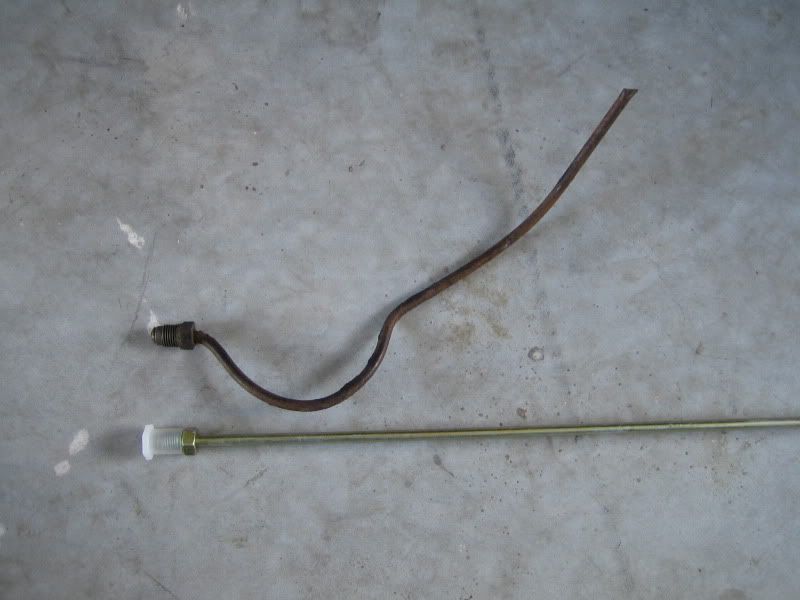
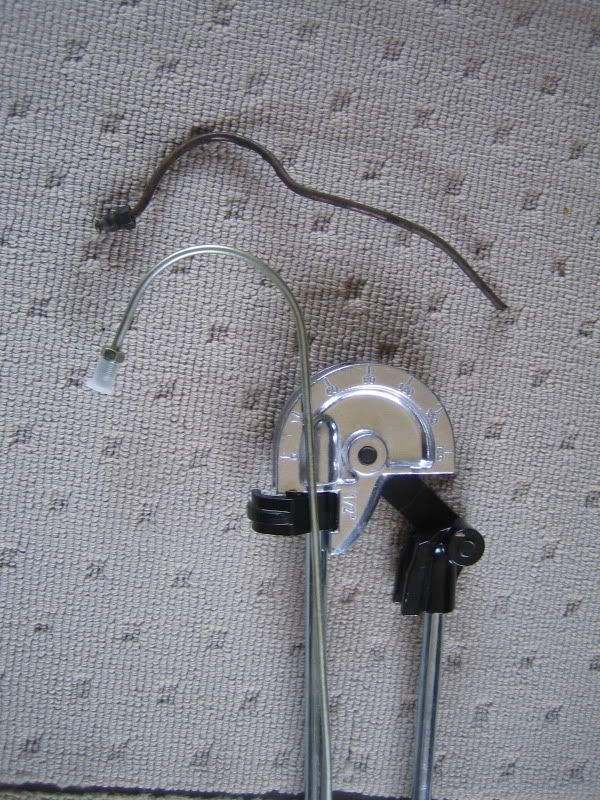
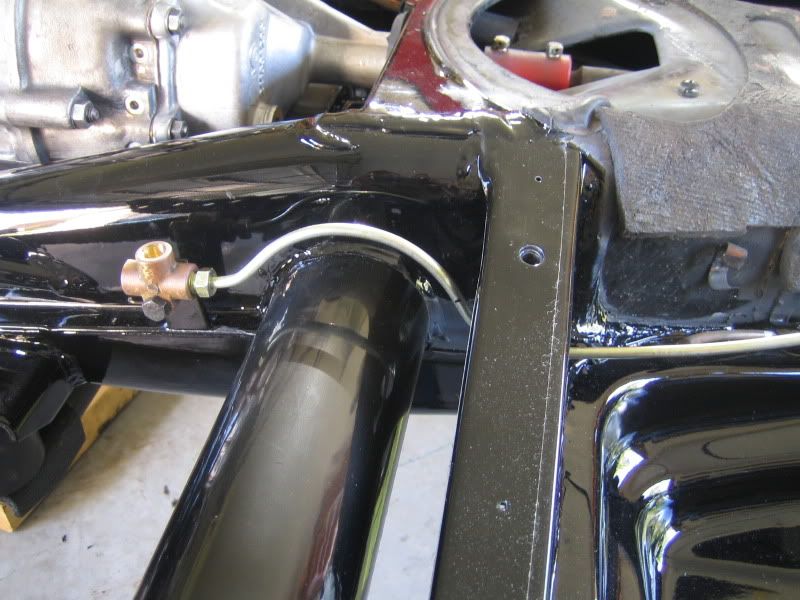
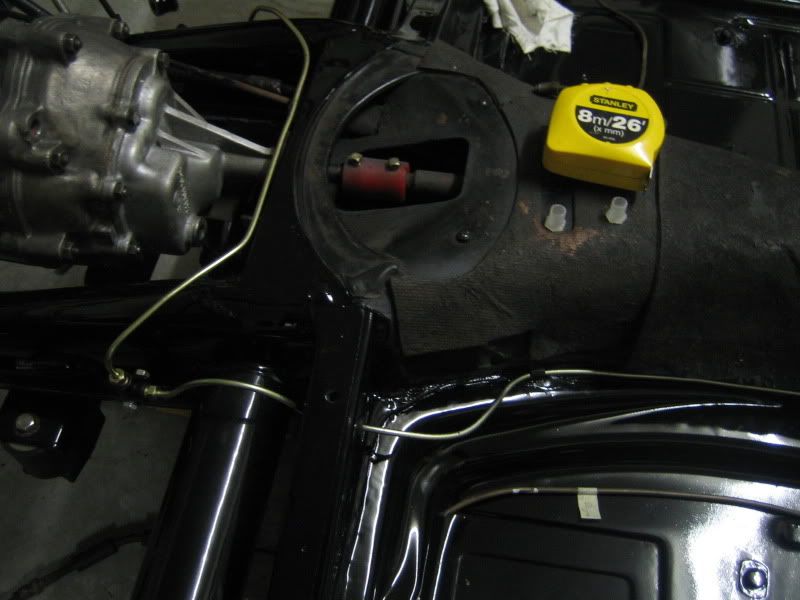
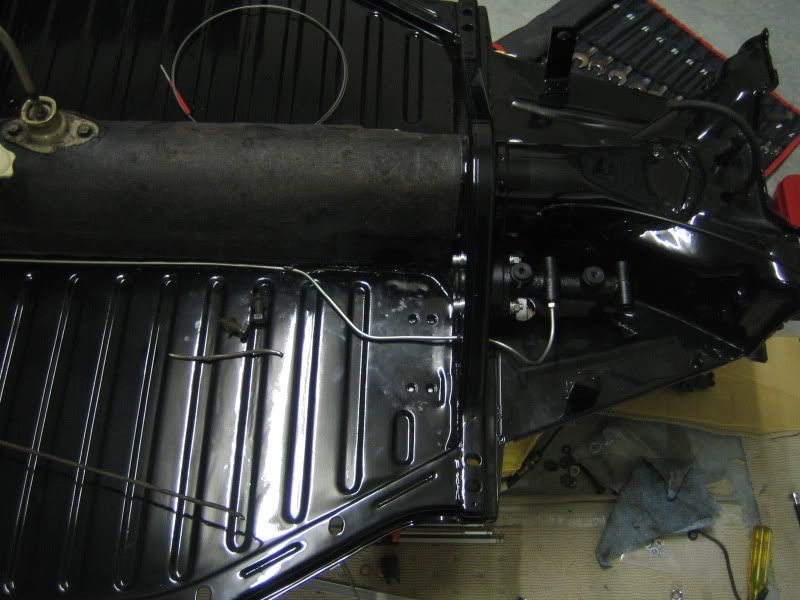
|
|
|
 Aussie Aussie
Officially Full-On Dubber
  
Posts: 296
Threads: 43
Registered: September 15th, 2006
Member Is Offline
Location: Gold Coast
Theme: UltimaBB Pro Blue ( Default )
|
| posted on October 26th, 2011 at 08:16 PM |
|
|
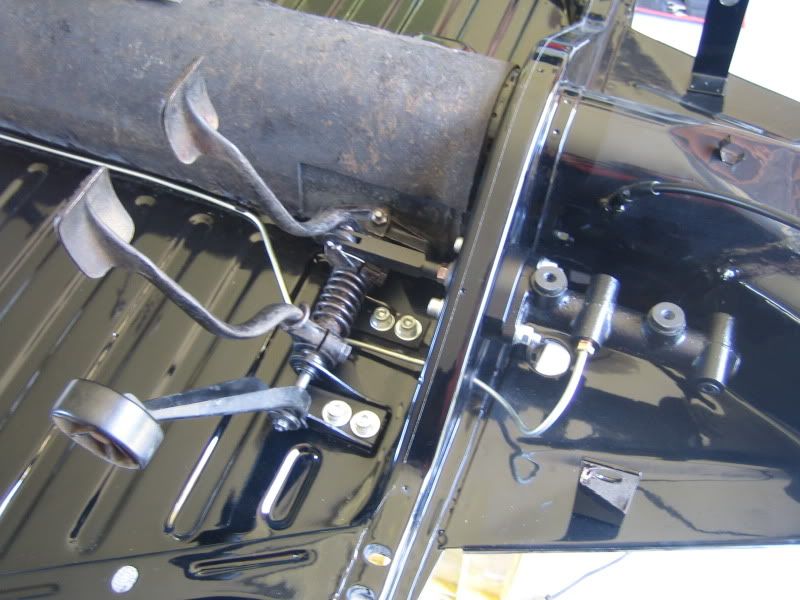
Pedals
Up next is the pedal assembly. I did not want to over restore these and make them too shiny - wanting rather to keep the original look in keeping with
the rest of the interior. I stripped the assembly apart, degreased everything and then put some satin black on a couple of the bits (pedal stops,
floor mount and brake to M/C arm).
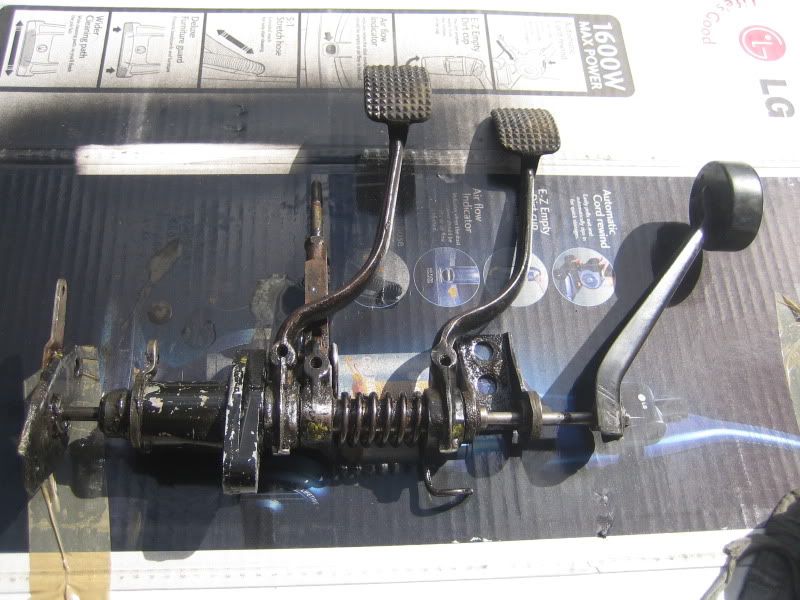
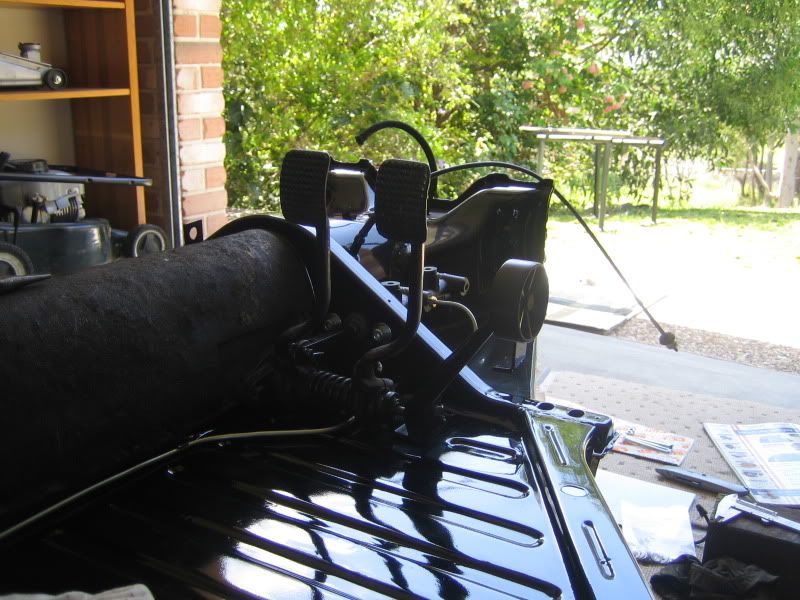
Once the assembly was back in I could set the preload for the brake pedal. I also put in a new accel cable and took out, inspected, greased and re-fit
the clutch cable. Anyone had a clutch cable snap? It would be a pain to replace this with the body back on - hopefully the original one will last.
|
|
|
 Aussie Aussie
Officially Full-On Dubber
  
Posts: 296
Threads: 43
Registered: September 15th, 2006
Member Is Offline
Location: Gold Coast
Theme: UltimaBB Pro Blue ( Default )
|
| posted on October 26th, 2011 at 08:20 PM |
|
|
| Quote: | Originally
posted by Smiley
| Quote: | Originally
posted by Aussie
Want to thank the guy doing the "Alyce the Baja" thread as I remembered how he used a jack and chain to preload the springplates to get them fitted.
I used the same method and it worked well.
|
That'd be me.  Glad to see my ramblings have helped someone else
out. Glad to see my ramblings have helped someone else
out.
One think you should do is replace your springplate to axle tube bolts with fine thread ones. This helps prevent them from working loose, I would
highly recommend it.
Aside from that what you're doing is amazing. The level of detail and craftsmanship is akin to what you would see on a top show car. Keep up the
fantastic work mate 
Smiley 
|
Thanks mate! It starts getting exciting when things are being bolted back together!
|
|
|
 Turbo54 Turbo54
Veteran Volks Folk
    
Posts: 2220
Threads: 268
Registered: July 13th, 2004
Member Is Offline
Theme: UltimaBB Pro Blue ( Default )
Mood: Boost'n
|
| posted on October 27th, 2011 at 01:43 PM |
|
|
Look amazing, nice job with the original rear guards and the indents.
Can you please tell how you went about indenting the frame horns for axle clearance?
Keep up the great work,
T54
C'mon kids gather round,
there's a new sensation hitting town,
It's moving straight, low to the ground,
it'll pick you up when your feeling down.
|
|
|
 Aussie Aussie
Officially Full-On Dubber
  
Posts: 296
Threads: 43
Registered: September 15th, 2006
Member Is Offline
Location: Gold Coast
Theme: UltimaBB Pro Blue ( Default )
|
| posted on October 28th, 2011 at 08:14 AM |
|
|
| Quote: | Originally
posted by Turbo54
Look amazing, nice job with the original rear guards and the indents.
Can you please tell how you went about indenting the frame horns for axle clearance?
Keep up the great work,
T54
|
As far as I know the framehorns are stock - I have not done any clearencing on these. Hey what is the progress on your Oval? I had your thread saved
as a favourite but has been quiet for a while..
Cheers, Ian
|
|
|
 Turbo54 Turbo54
Veteran Volks Folk
    
Posts: 2220
Threads: 268
Registered: July 13th, 2004
Member Is Offline
Theme: UltimaBB Pro Blue ( Default )
Mood: Boost'n
|
| posted on October 28th, 2011 at 08:17 AM |
|
|
Hi Ian,
Progress on oval has been slow as I have been building a house for the last 3-4 years but I am now back on it. Should have it rolling down at the SA
DOVW and will update lots of progress on here shortly.
Heath
T54
C'mon kids gather round,
there's a new sensation hitting town,
It's moving straight, low to the ground,
it'll pick you up when your feeling down.
|
|
|
 Aussie Aussie
Officially Full-On Dubber
  
Posts: 296
Threads: 43
Registered: September 15th, 2006
Member Is Offline
Location: Gold Coast
Theme: UltimaBB Pro Blue ( Default )
|
| posted on October 30th, 2011 at 07:05 PM |
|
|
Rear Brakes
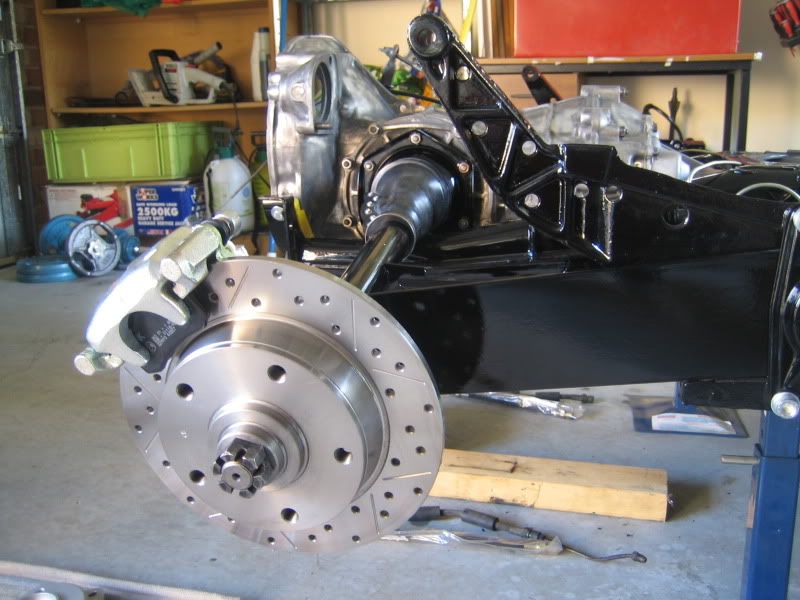
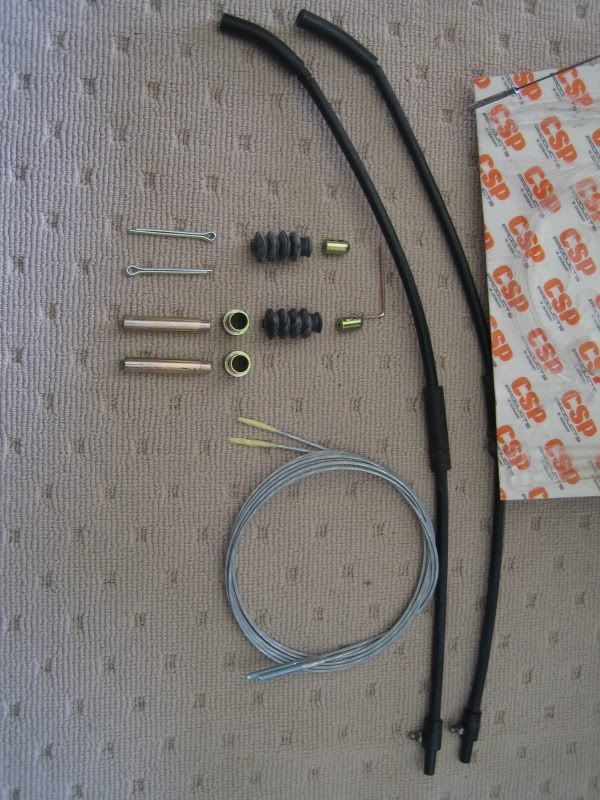
Time to fit the CSP rears. As usual laid everything out prior to assembly. These kits have everything you will need inc. loctite and allen key. Only
things you will need to re-use are the original conduits for the handbrakes that go from the chassis to the calipers.
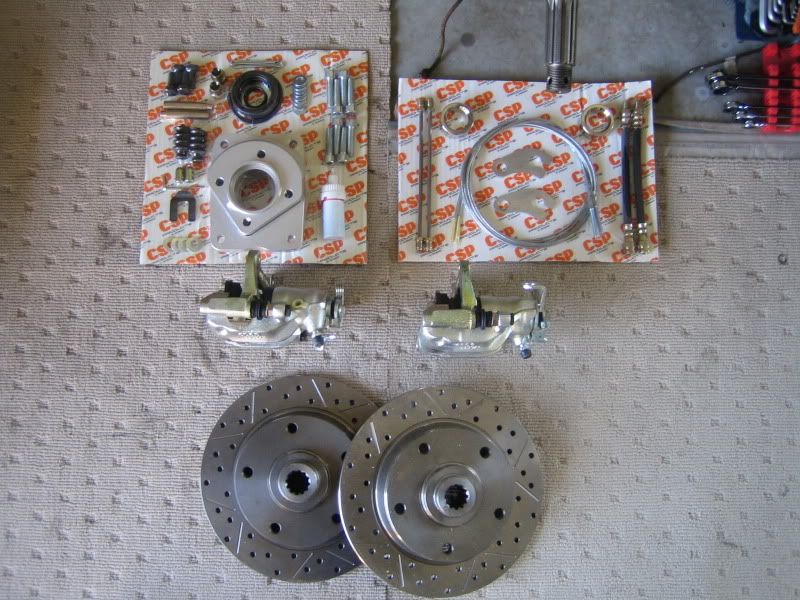
Wheel bearing and seal fit first followed by the mounting bracket.
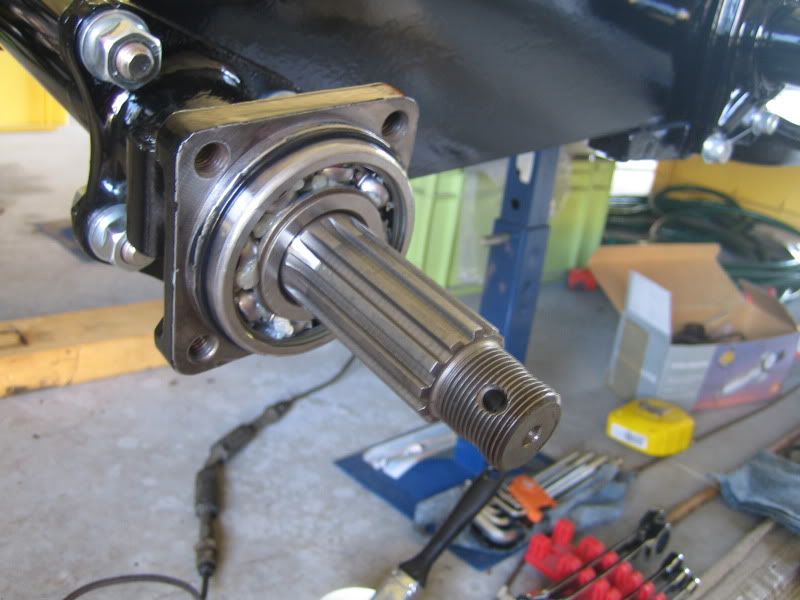
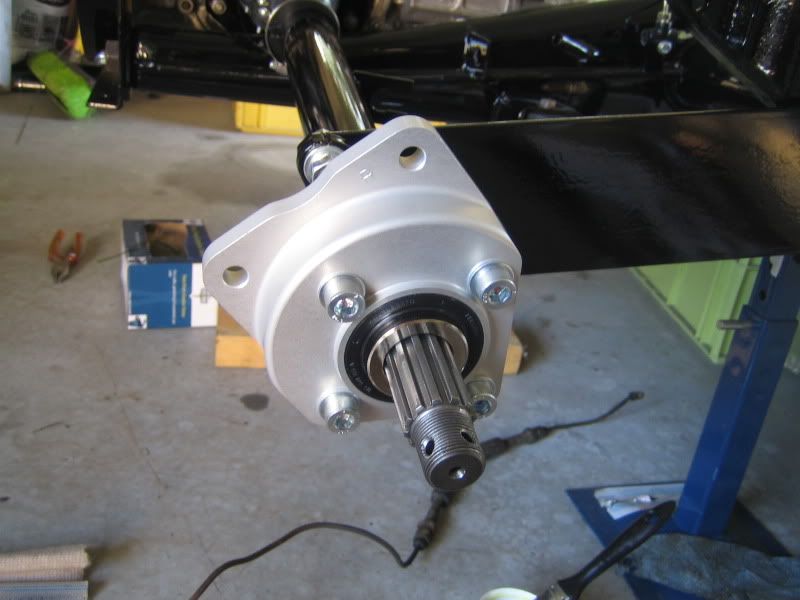
Disc is cleaned and degreased and then fitted.
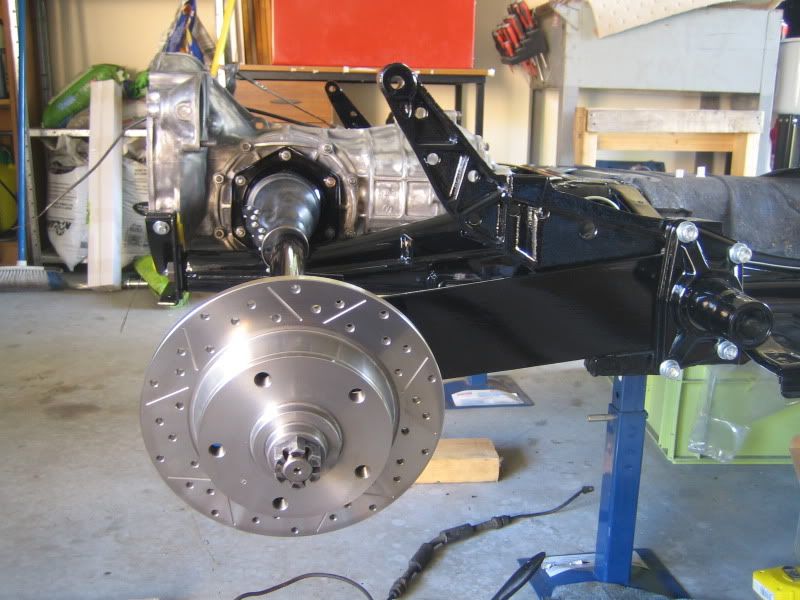
Next up the caliper goes on.
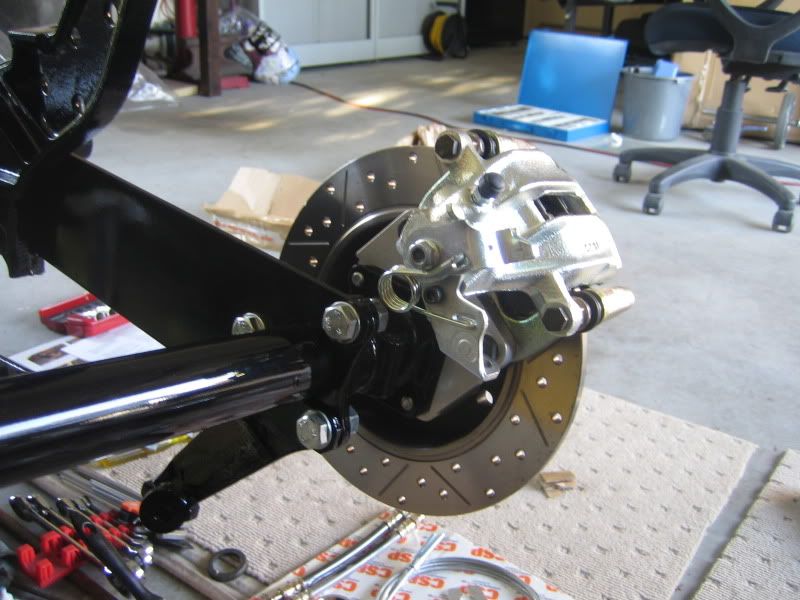
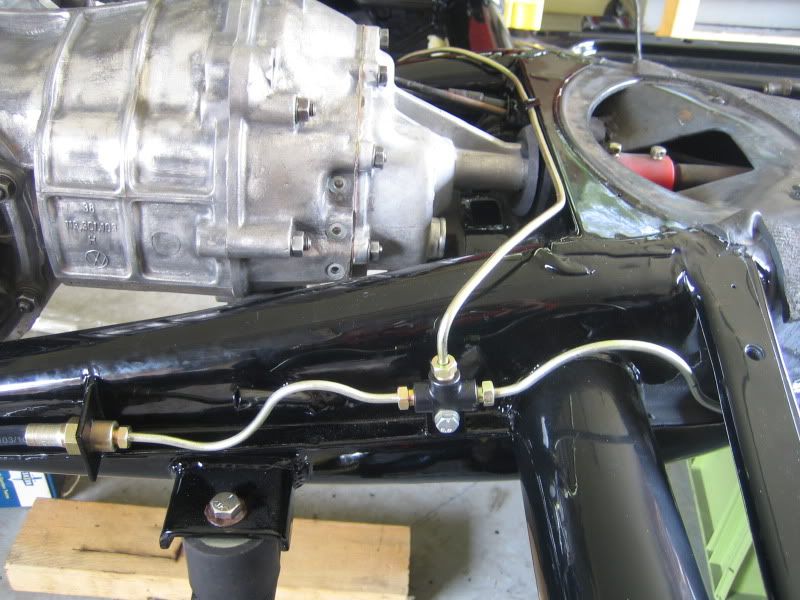
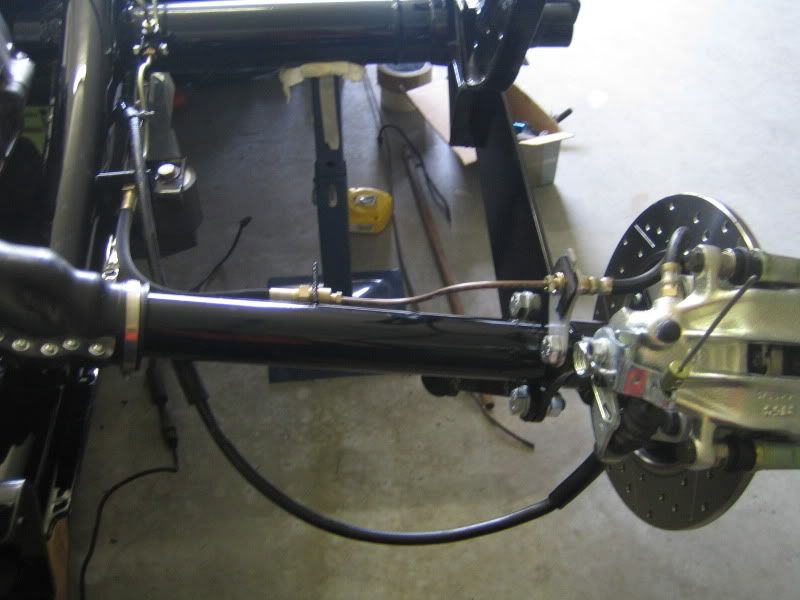
Finished up some of the hard lines at the rear. Tried to keep them nice and neat to the chassis where possible.
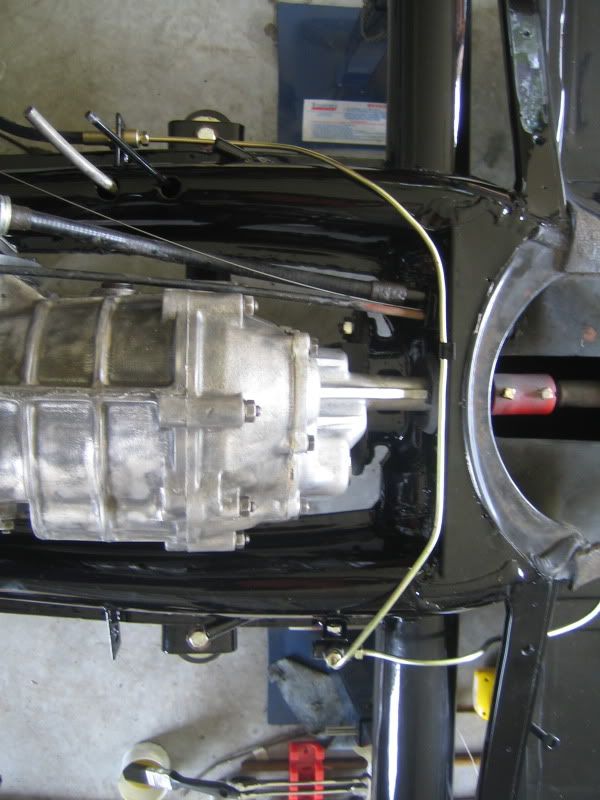
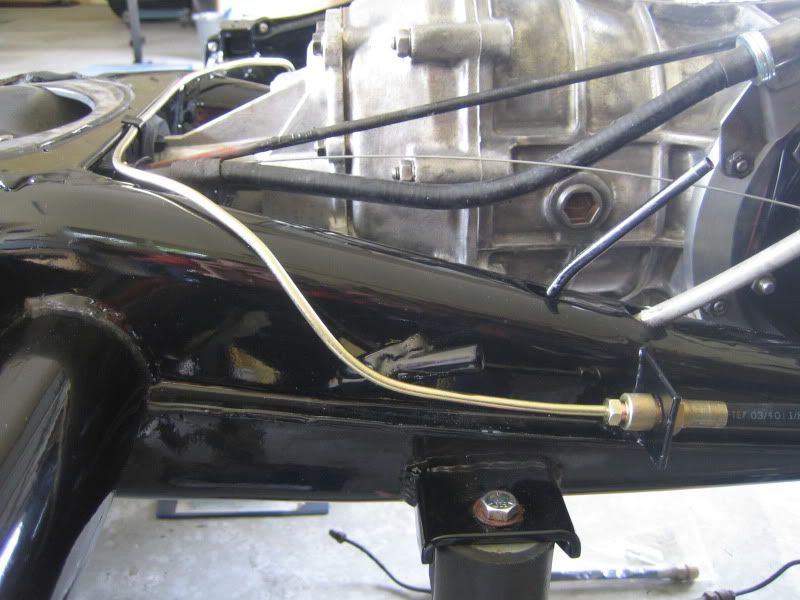
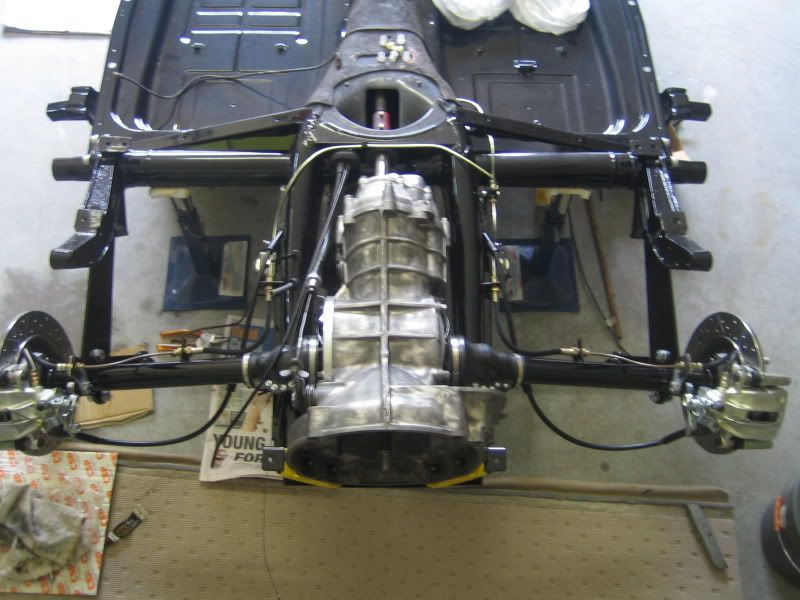
Repeat the disc and caliper install on the opposite side and mount all flexible hoses to close up the system.
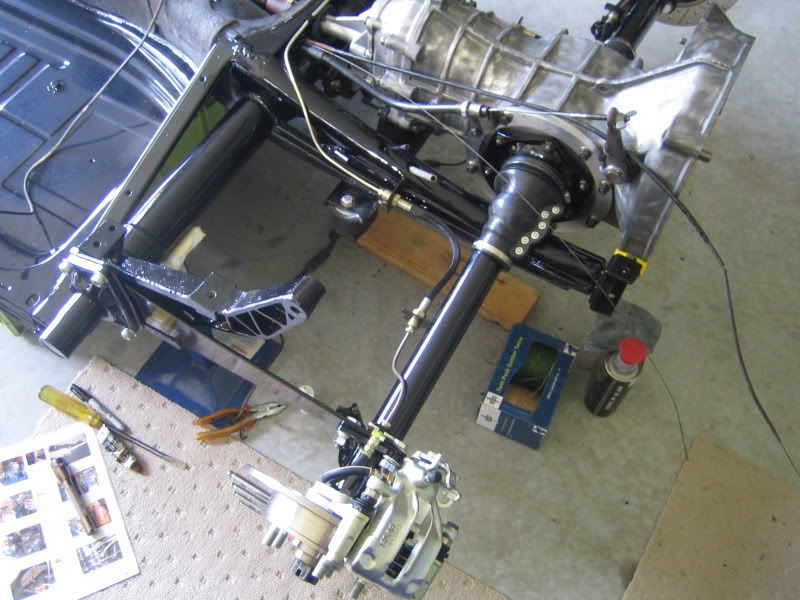
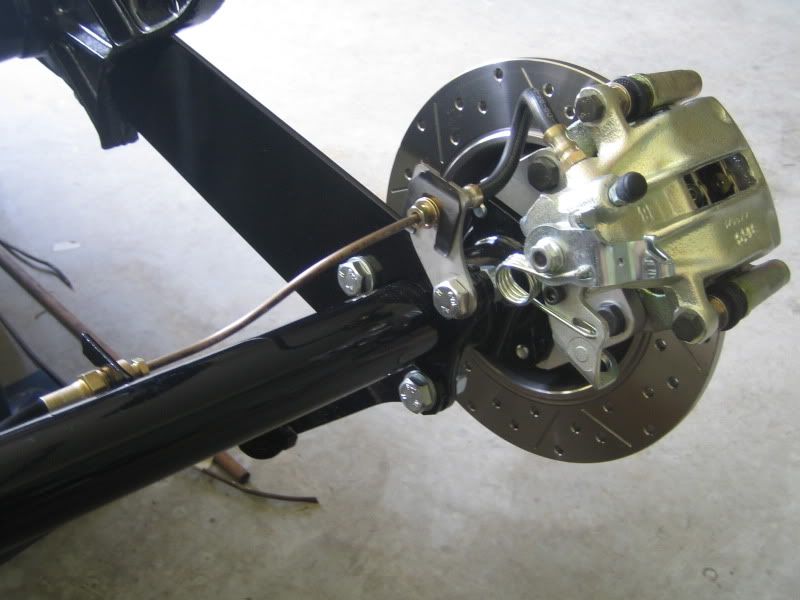
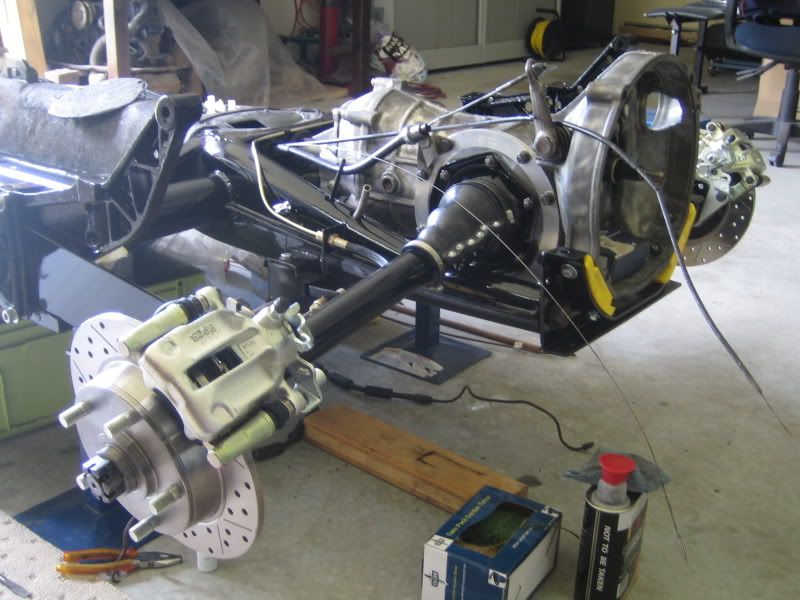
Last job is to fit up the handbrake. New handbrake cables included with the kit. This pretty much finishes up the install. Initial thoughts are very
high quality kit overall, straight forward install. Cant wait to see how they feel. The kit does however reduce the rear track (3mm in this case) so I
will certainly need wheel spacers to run the wheel and tyre combo that I want to. This is a bummer as I am told wheel spacers are a no no in terms of
getting the car engineered but I will just have to see if they will go through as part of the brake conversion.
|
|
|
 Smiley Smiley
A.k.a.: Daniel Stephens
Veteran Volks Folk
    
Posts: 2125
Threads: 110
Registered: October 29th, 2008
Member Is Offline
Location: Yeppoon, Central Queensland
Theme: UltimaBB Pro Blue
Mood: Synchro'd
|
| posted on October 30th, 2011 at 09:05 PM |
|
|
| Quote: | Originally
posted by Aussie
The kit does however reduce the rear track (3mm in this case) so I will certainly need wheel spacers to run the wheel and tyre combo that I want
to.
|
I don't think you really need to panic about 3mm. That won't even be noticeable let alone cause clearance issues.
Smiley 
If you said I was a Volkswagen man, you'd be right.
|
|
|
 Aussie Aussie
Officially Full-On Dubber
  
Posts: 296
Threads: 43
Registered: September 15th, 2006
Member Is Offline
Location: Gold Coast
Theme: UltimaBB Pro Blue ( Default )
|
| posted on October 31st, 2011 at 07:49 AM |
|
|
| Quote: | I don't think you
really need to panic about 3mm. That won't even be noticeable let alone cause clearance issues.
Smiley 
|
Sorry should have expanded - If you have a short axle pan and you want to run the Flat 4 fuch 5.5 with 205/70 then you will need to run around a 10mm
spacer. With this brake conversion I have to take into account the extra 3mm so will need approx 12mm - 15mm spacers to get things to fit.
|
|
|
 Dasdubber Dasdubber
A.k.a.: Alan Agyik
23 Windows of Awesome
DAS Resto Haus
       
Posts: 5746
Threads: 289
Registered: August 26th, 2002
Member Is Offline
Location: Gold Coast
Theme: UltimaBB Pro Blue
Mood: feeling fine...
|
| posted on November 2nd, 2011 at 06:51 PM |
|
|
I had to run around 12mm 5 x 130 pcd spacers on the front of my old ragtop (wtih 17in turbo twists) and from memory close to 30mm in the rear with
short axles (albeit CB Performance discs).....had them made in brissy with the exact centre bores required and studs etc.
the CSP stuff is pretty damn nice hey?
Looking good, Cheers
Al
|
|
|
 Aussie Aussie
Officially Full-On Dubber
  
Posts: 296
Threads: 43
Registered: September 15th, 2006
Member Is Offline
Location: Gold Coast
Theme: UltimaBB Pro Blue ( Default )
|
| posted on November 8th, 2011 at 01:35 PM |
|
|
Front Beam
Time to fit up the front beam. Had this thing for a while now so good to finally get it out for fitting. Would like to say that it all fitted up like
a charm but unfortunately had some issues with it.
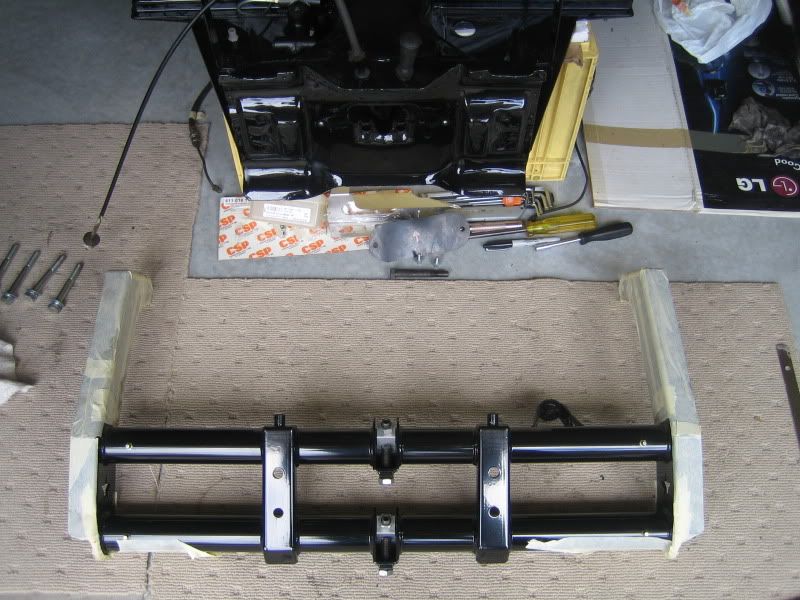
Got my new beam bolts ready, put on one set of caster shims and started to tighten the beam up on the car. Tighening away to a torque well less than
the specified requirement and all four bolts started pulling through and mushrooming.  I dont believe that it would have been possible to tighten these to spec without pulling right through. I dont believe that it would have been possible to tighten these to spec without pulling right through.
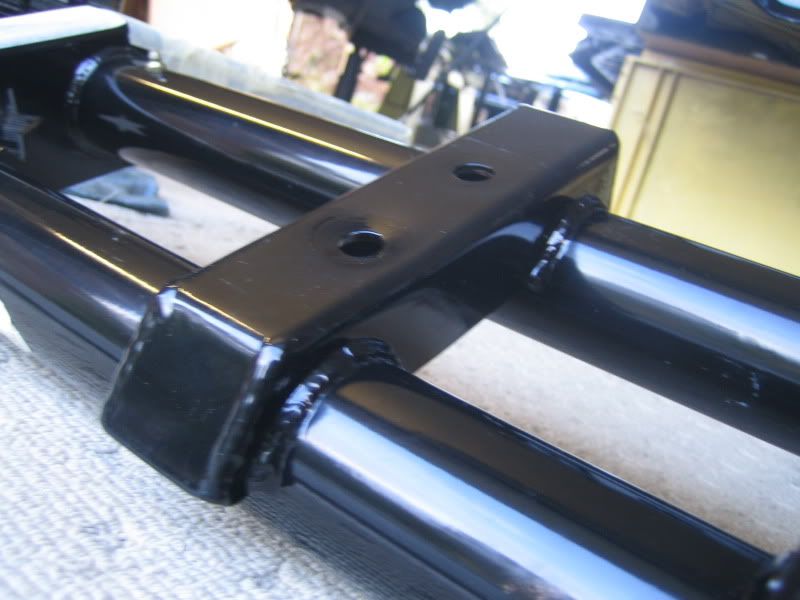
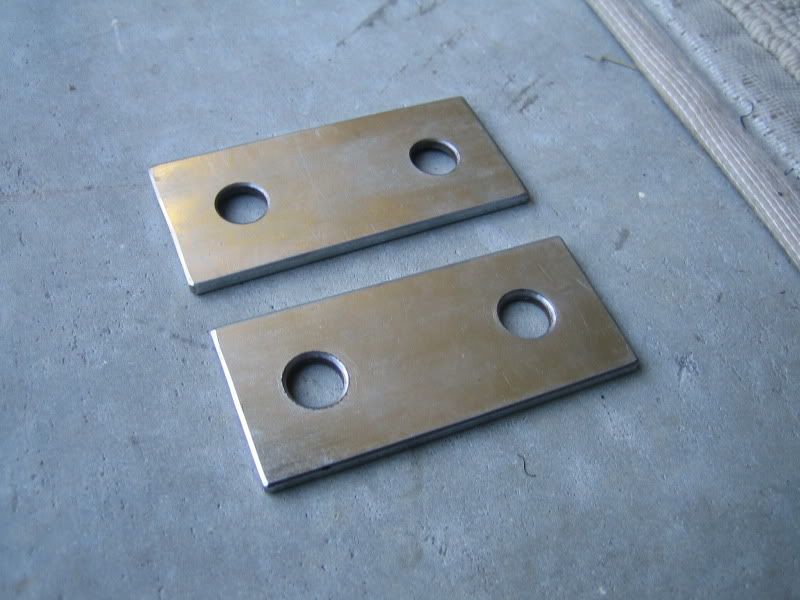
Took some measurements and they have used a 3.5mm gauge sheet metal for the mounts whereas stock german is 4.5mm. Made up some 4mm spreader plates to
get the thing mounted.
When painted and mounted the plates actually look fine so I am happy with this solution. Correct torque now applied to bolts.
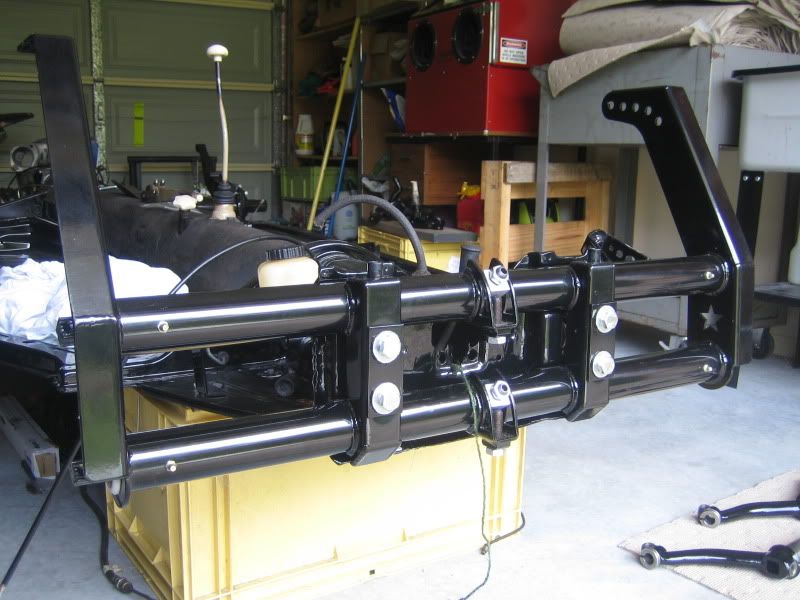
Next up was to fit the supplied torsion leaves and my original torsion arms. What a tw@t of a job. After numerous trial fits and much swearing worked
out that the leaves had been cut too short. The beam itself is bang on 3 inch narrowed but the poly bushes used to replace the normal bearings at both
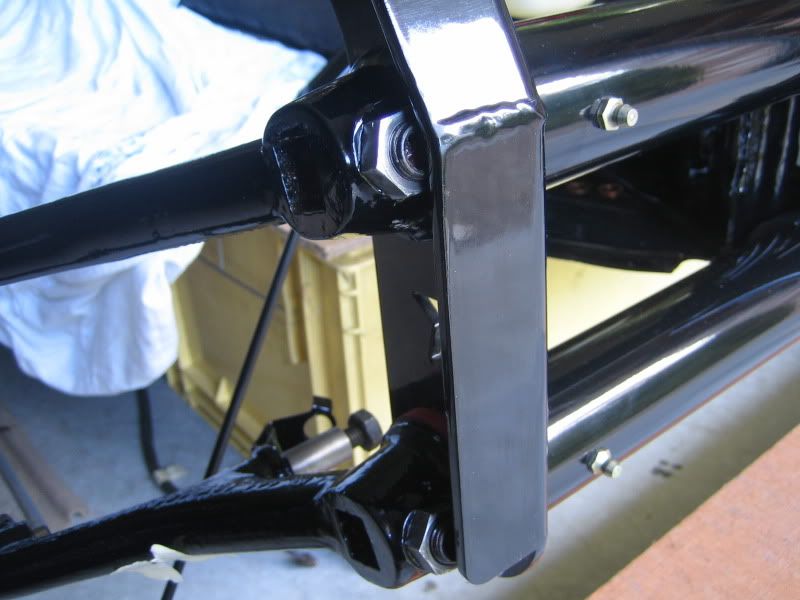
ends sit outside of the mounting face effectively reducing it to an approx 2.75inch narrowed beam (see white plastic looking end in above photo). So
the 3 inch narrrowed torsion leaves were too narrow. I had to cut down all the grease seals to about half their normal width to be able to get the
torsion bars in far enough in to get the grub screws in. One set of leaves didnt have the central grub screw hole drilled exactly in the center which
caused another big pain in the ass to get it fitted properly. Finally got it all in.
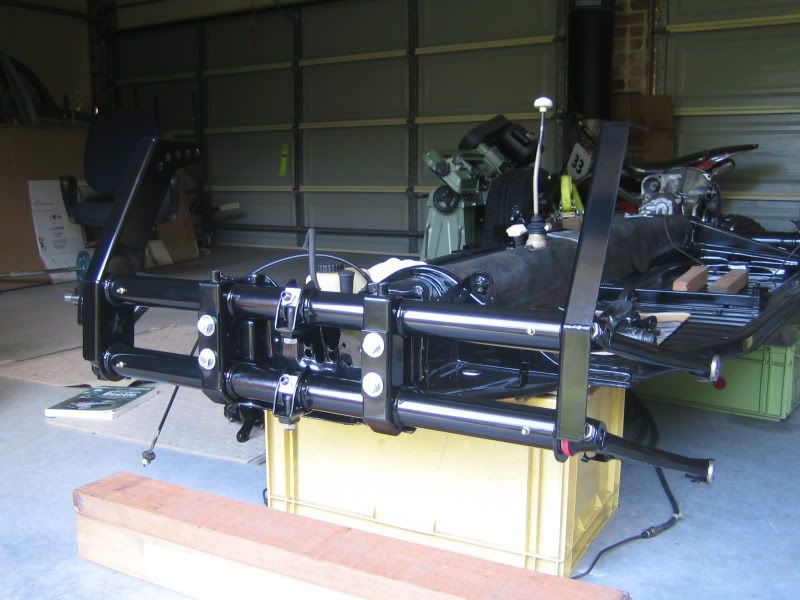
Another thing to note on this beam is that once fitted you cannot adjust or remove the grub screws without first taking everything else off the
trailing arm assembly.
|
|
|
 5lam 5lam
A.k.a.: Dave
Wolfsburg Wizard
AKA: BlackBug
  
Posts: 520
Threads: 38
Registered: March 19th, 2006
Member Is Offline
Location: Gold Coast, QLD
Theme: UltimaBB Pro Blue ( Default )
Mood: Slammed
|
| posted on November 8th, 2011 at 02:56 PM |
|
|
Is that an Airkewld beam??
 [size=5]Custom doesn't come in a Box[/size]
 |
|
|
 Aussie Aussie
Officially Full-On Dubber
  
Posts: 296
Threads: 43
Registered: September 15th, 2006
Member Is Offline
Location: Gold Coast
Theme: UltimaBB Pro Blue ( Default )
|
| posted on November 8th, 2011 at 09:48 PM |
|
|
| Quote: | Originally
posted by BlackBug
Is that an Airkewld beam??
|
Yep bought it a couple of years back.
|
|
|
 5lam 5lam
A.k.a.: Dave
Wolfsburg Wizard
AKA: BlackBug
  
Posts: 520
Threads: 38
Registered: March 19th, 2006
Member Is Offline
Location: Gold Coast, QLD
Theme: UltimaBB Pro Blue ( Default )
Mood: Slammed
|
| posted on November 9th, 2011 at 08:26 AM |
|
|
Well at least I know what I'm in for when mine arrives, then. haha.
Lookin good!
 [size=5]Custom doesn't come in a Box[/size]
 |
|
|
 AndrewB AndrewB
Seriously Crusin Dubber
 
Posts: 141
Threads: 19
Registered: June 18th, 2011
Member Is Offline
Location: Sydney
Theme: UltimaBB Pro Blue ( Default )
Mood: arghhbjfhbejrhfebf
|
| posted on November 9th, 2011 at 08:58 PM |
|
|
Nice work!!!
Love the attention to detail and the fab work.
Dont love that beam though 
|
|
|
 Aussie Aussie
Officially Full-On Dubber
  
Posts: 296
Threads: 43
Registered: September 15th, 2006
Member Is Offline
Location: Gold Coast
Theme: UltimaBB Pro Blue ( Default )
|
| posted on November 10th, 2011 at 07:29 PM |
|
|
More beam woes
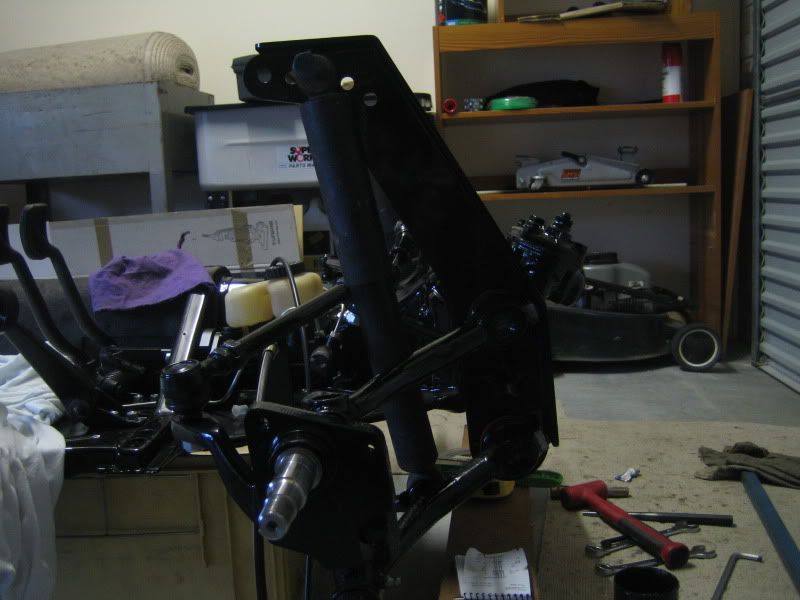
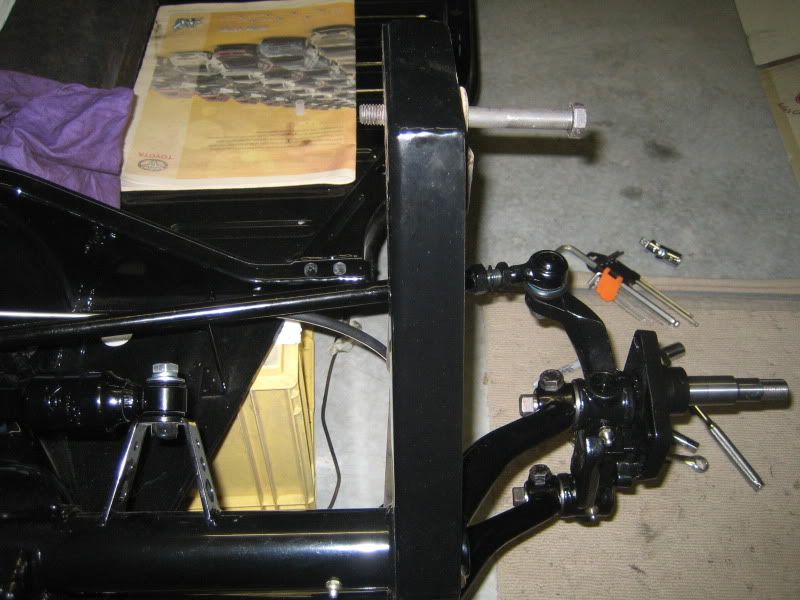
Fitted up steering rods etc to trailing arms and then did a trial fit of the shocks. Not good. In the pic below you can see the top shock mount has a
number of holes for the upper shock bolt. The website instructionals show the hole furthest to the back (far left in picture) being the one to use.
Mounted it here and all good unless you want to turn left (who wants to go left anyway) when the small tie rod will hit the shock. Same happens next
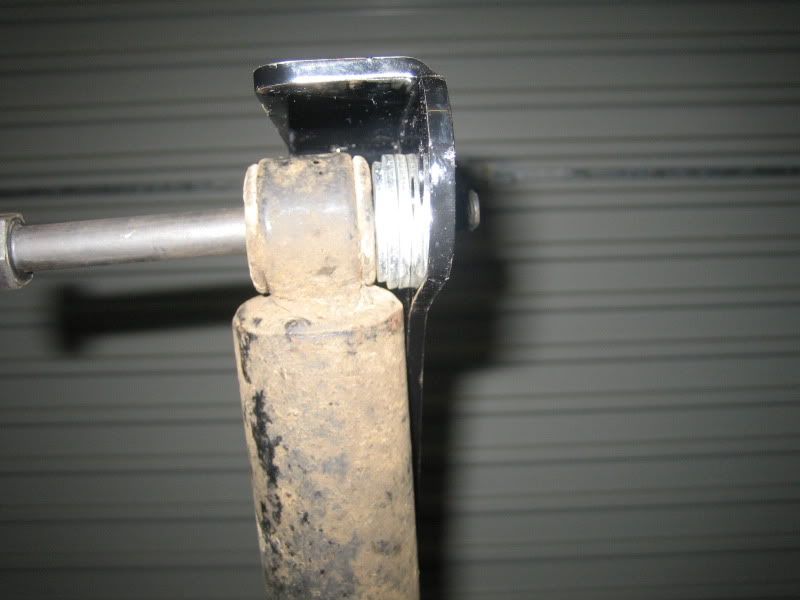
hole in. The first hole you can clear the tie rod is the third one in. Only problem with using this hole is that the shock body hits the beam tower.
Only way to avoid this is to use spacers - see second pic. THis however puts the shock on a diagonal angle. I have two questions:
1. When looking at the first pic, is the shock supposed to be vertical? It leans back away from the front end - this would be even worse if the top
bolt was mounted as the fitting guide on the hole furthest to the left.
2. When looking at the second pic is the diagonal angle of the shock (resulting from spacing) ok at a slight angle or unsafe? The third pic gives
perspective when you can see the top and bottom of the shock either side of the tower.
Any advice welcome.
|
|
|
 Aussie Aussie
Officially Full-On Dubber
  
Posts: 296
Threads: 43
Registered: September 15th, 2006
Member Is Offline
Location: Gold Coast
Theme: UltimaBB Pro Blue ( Default )
|
| posted on November 10th, 2011 at 07:32 PM |
|
|
| Quote: | Originally
posted by AndrewB
Nice work!!!
Love the attention to detail and the fab work.
Dont love that beam though 
|
Thanks dude - I am trying my best to get this beam working!!!
|
|
|
 dangerous dangerous
A.k.a.: Dave Butler Muffin Man
23 Windows of Awesome
       
Posts: 5901
Threads: 178
Registered: January 6th, 2005
Member Is Offline
Location: Gold Coast
Theme: UltimaBB Pro Blue ( Default )
Mood: 591
|
| posted on November 10th, 2011 at 07:55 PM |
|
|
Hi Ian,
I would not have an issue with the shock laying back,
but the spacing washers, and resulting crooked offset is no good.
The best solution is to remove the upper dust cover tube from the shock and use no spacers,
or,
trim the tower to clear the body/tube, if you think that it will not weaken the tower.
If you feel the need to protect the shocker shaft, you can get shorter shocks that use a studed top,
and use a rose joint that screws on the end, thus lowering the dust cover away from the tower.
Do a search on Rod's 48IDA car.
I think Peter did this mod to Rod's car.
| Quote: | Originally
posted by westi
That's mad Alan.
|
|
|
|
 Aussie Aussie
Officially Full-On Dubber
  
Posts: 296
Threads: 43
Registered: September 15th, 2006
Member Is Offline
Location: Gold Coast
Theme: UltimaBB Pro Blue ( Default )
|
| posted on November 10th, 2011 at 09:43 PM |
|
|
| Quote: | Originally
posted by dangerous
Hi Ian,
I would not have an issue with the shock laying back,
but the spacing washers, and resulting crooked offset is no good.
The best solution is to remove the upper dust cover tube from the shock and use no spacers,
or,
trim the tower to clear the body/tube, if you think that it will not weaken the tower.
If you feel the need to protect the shocker shaft, you can get shorter shocks that use a studed top,
and use a rose joint that screws on the end, thus lowering the dust cover away from the tower.
Do a search on Rod's 48IDA car.
I think Peter did this mod to Rod's car.
|
Thanks Dave - I think the tower would need further reinforcement if I clearenced for the shock, but this is what I will do if I cant get a good
alternative solution. Rather than remove the whole upper dust cover I may be able to notch a section out to give the clearence I need. Needs to look
neat as may look bodged and not impress when I am trying to get engineered. Rose joint should also work if I can source a pair and shocks to match.
|
|
|
| Pages: 1 .. 3 4 5 6 7 |