| [ Total Views: 156722 | Total Replies: 204 | Thread Id: 75753 ] |
| Pages: 1 .. 4 5 6 7 |
|
|
 AndrewB AndrewB
Seriously Crusin Dubber
 
Posts: 141
Threads: 19
Registered: June 18th, 2011
Member Is Offline
Location: Sydney
Theme: UltimaBB Pro Blue ( Default )
Mood: arghhbjfhbejrhfebf
|
| posted on November 12th, 2011 at 11:34 PM |
|
|
Too much to trim, maybe a cut towards the base, and a slight bend then reweld?
Once it has some weight on it the tie rod should clear the shock in the position pictured? Or make it worse? haha
|
|
|
 Aussie Aussie
Officially Full-On Dubber
  
Posts: 296
Threads: 43
Registered: September 15th, 2006
Member Is Offline
Location: Gold Coast
Theme: UltimaBB Pro Blue ( Default )
|
| posted on November 17th, 2011 at 07:50 PM |
|
|
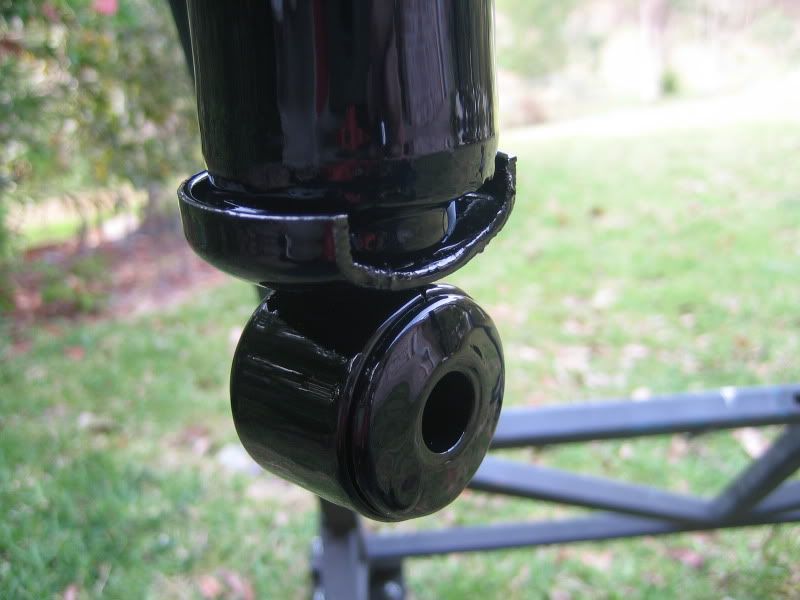
Sorted out the front shocks. Bought a new pair which had a plastic dust cover so was easy to notch for clearance. Started by trimming the metal dust
cover so it can bolt flush with the tower. No loss of strength as this metal flange only supports the plastic cover. Upside down in this pic as just
painted.
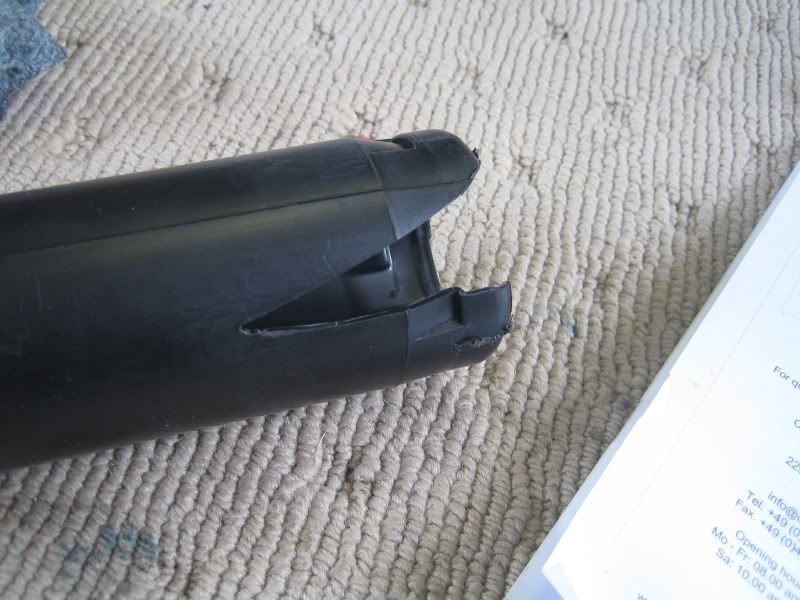
Next I took out a notch from the plastic sleeve.
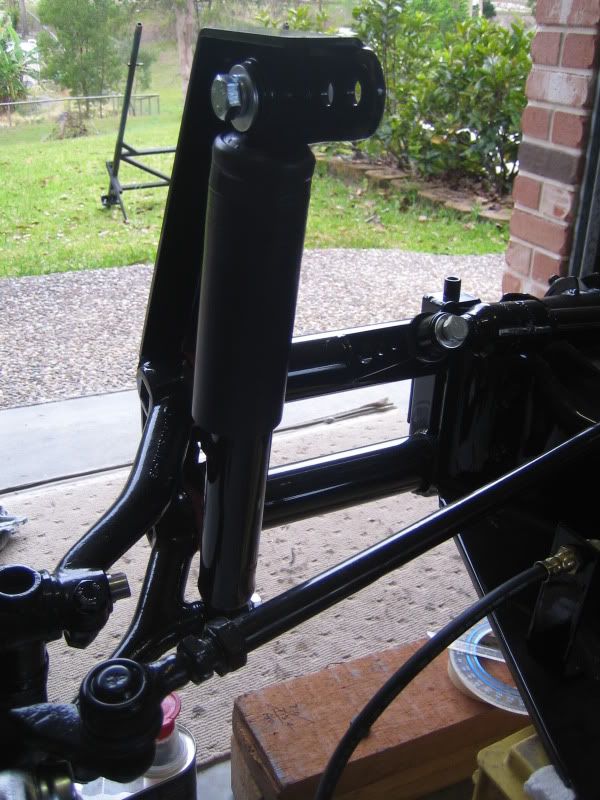
Bolted up straight and true. It is annoying that I had to go to this length to fit the shocks but glad to now be finished so that I can move on and
work on something else. Lets hope that beam doesnt hold any more surprises 
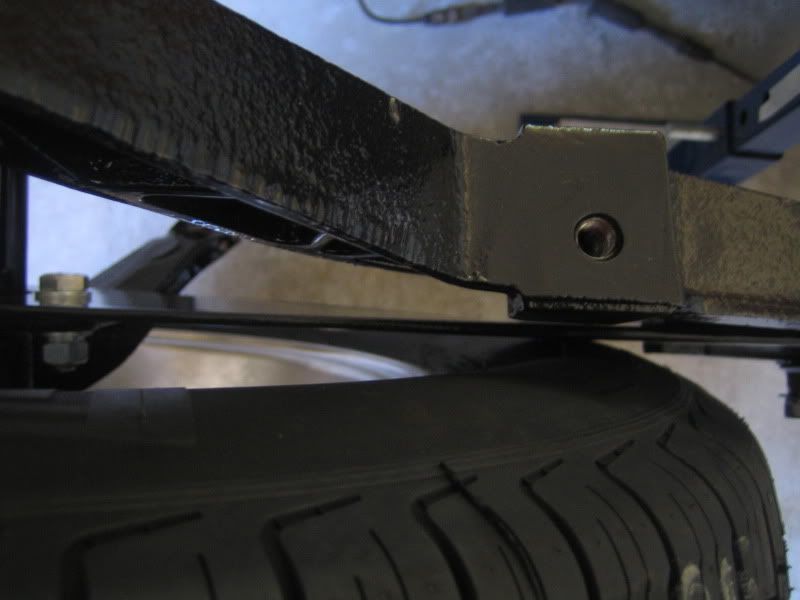
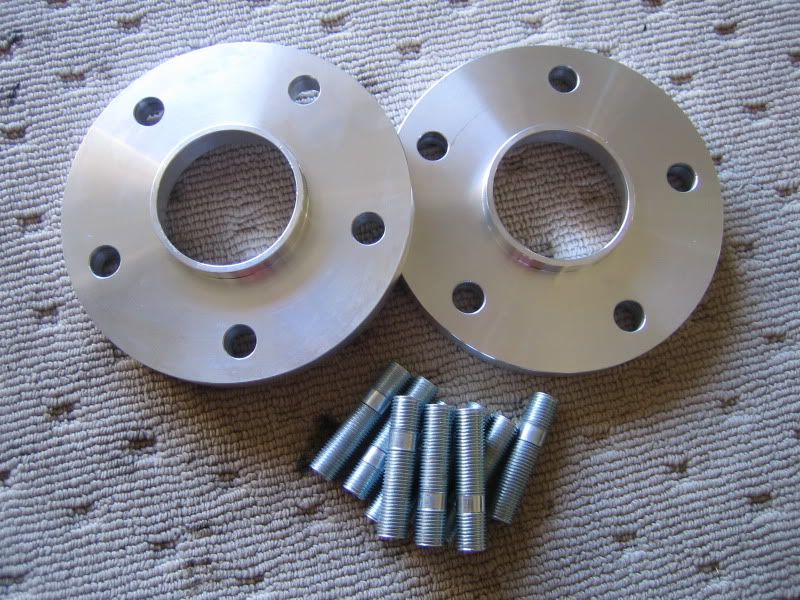
Rear spacers turned up in the post. Arrived from europe 5 days after placing the order - also got longer wheel studs to compensate for the spacers.
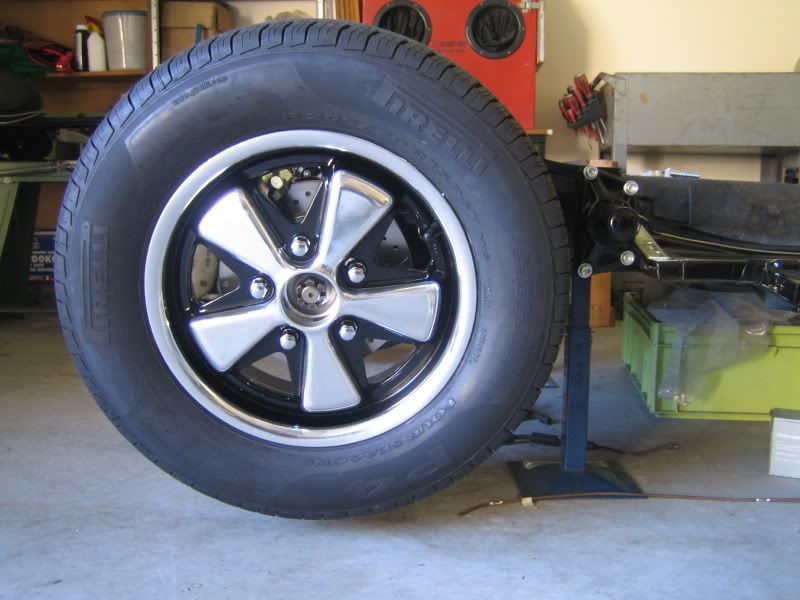
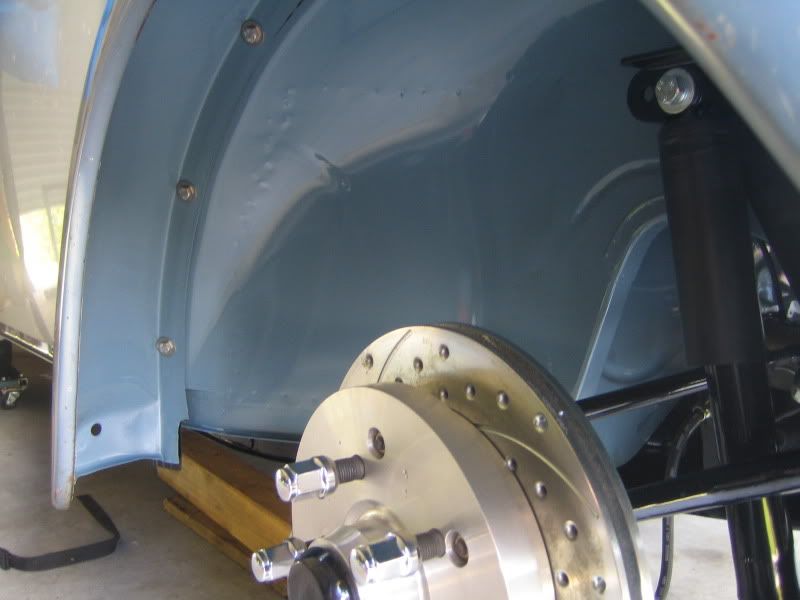
This is the clearence problem with the springplates - could not even tighten the wheel nuts.
Nice - wheels mounted 
|
|
|
 Aussie Aussie
Officially Full-On Dubber
  
Posts: 296
Threads: 43
Registered: September 15th, 2006
Member Is Offline
Location: Gold Coast
Theme: UltimaBB Pro Blue ( Default )
|
| posted on November 17th, 2011 at 07:59 PM |
|
|
Finished up the hard lines at the front in readiness for the brakes to be fitted. Got hold of what I believe is a NOS Mk1 Golf brake fluid reservoir.
Looks quite funky I think  This sits straight on top of the master
cylinder so I dont have to run lines to remote reservior. I will still mount the original reservoir in the spare wheel well though this will not be
connected to anything. This sits straight on top of the master
cylinder so I dont have to run lines to remote reservior. I will still mount the original reservoir in the spare wheel well though this will not be
connected to anything.
Also shortened and fitted tie rods, steering damper and steering box.


|
|
|
 Aussie Aussie
Officially Full-On Dubber
  
Posts: 296
Threads: 43
Registered: September 15th, 2006
Member Is Offline
Location: Gold Coast
Theme: UltimaBB Pro Blue ( Default )
|
| posted on December 7th, 2011 at 04:31 PM |
|
|
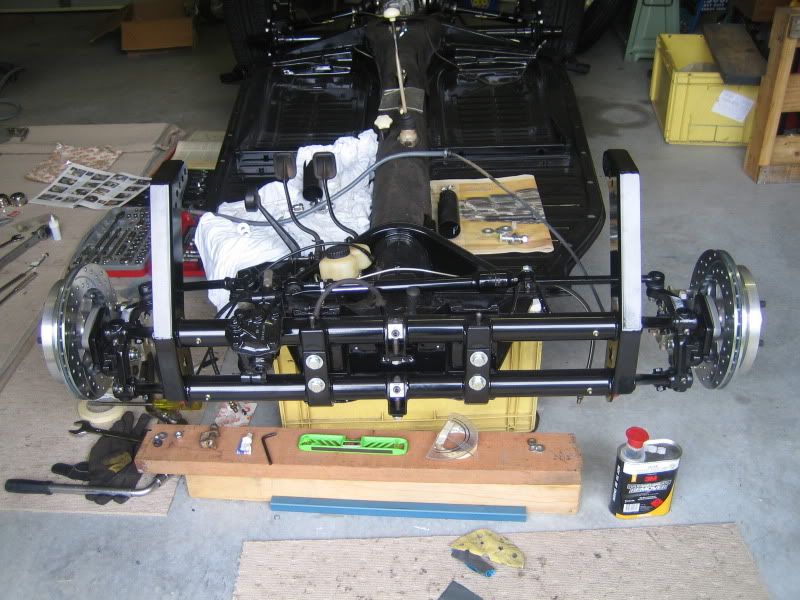
Front Brakes
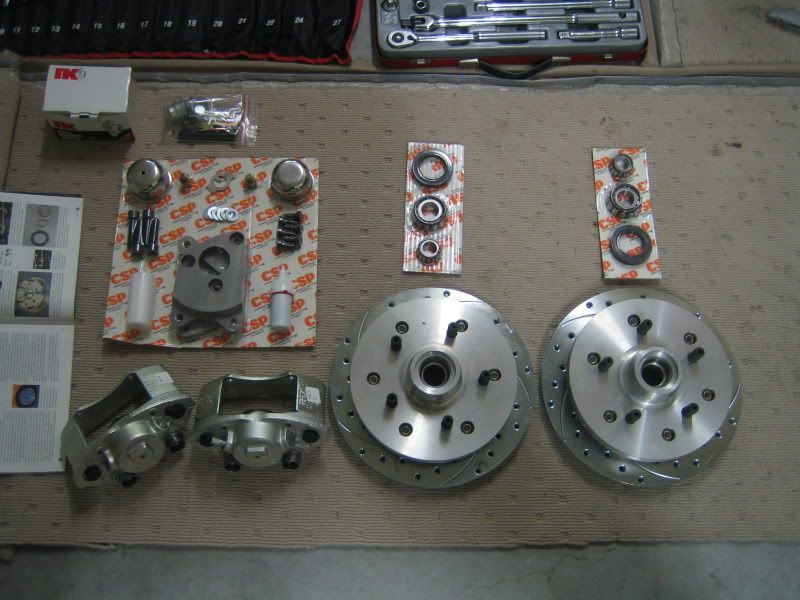
Front brakes next on the list of things to do. This is the matching CSP kit for the system in Porsche pattern. Everything included again with the kit
and nice quality as the rest of it has been.
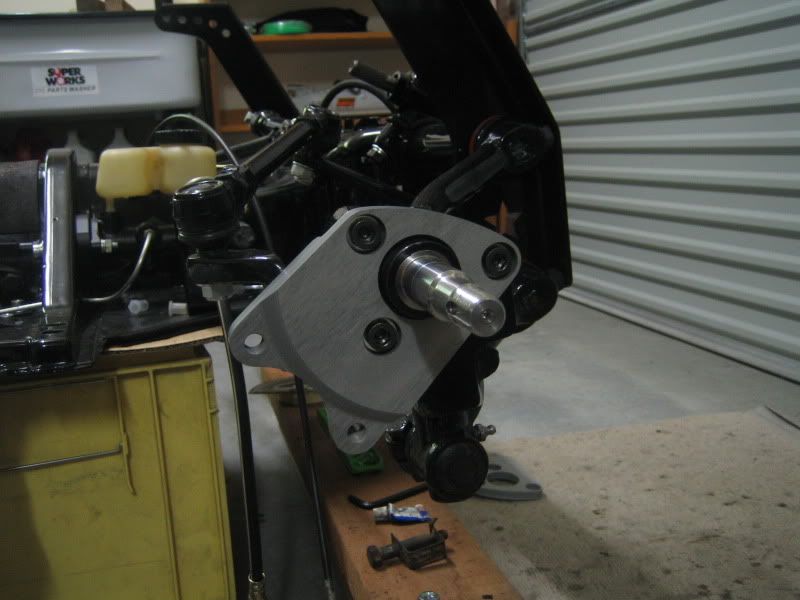
Caliper mounting bracket is bolted to the dropped spindles that I have.
Included bearings are packed with grease and fitted to the hub.
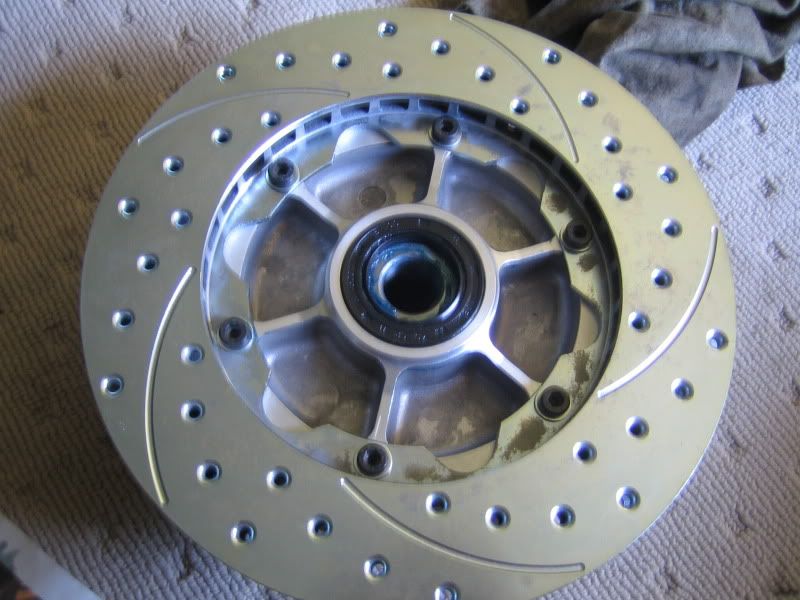
A thread converter is screwed into the back of the caliper which then allows VW hoses and fittings to bolt straight up. Pads then fitted ready for
assembly.
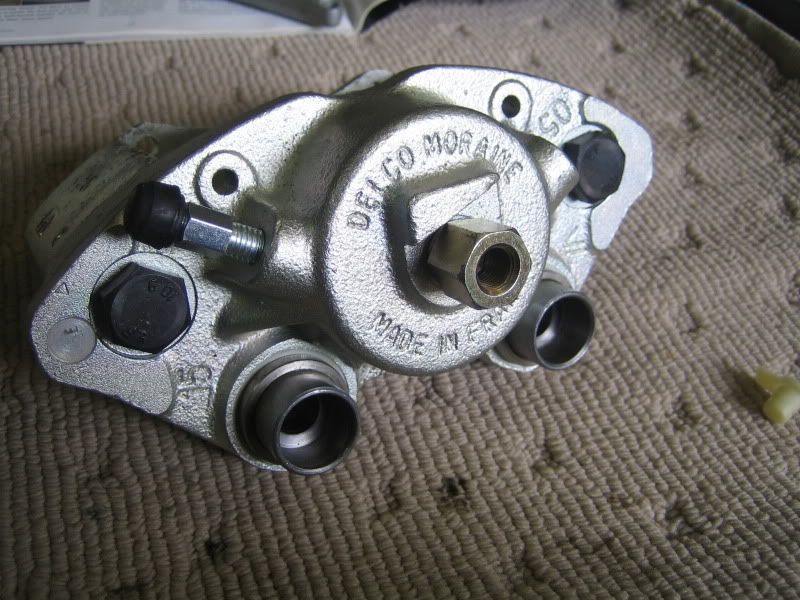
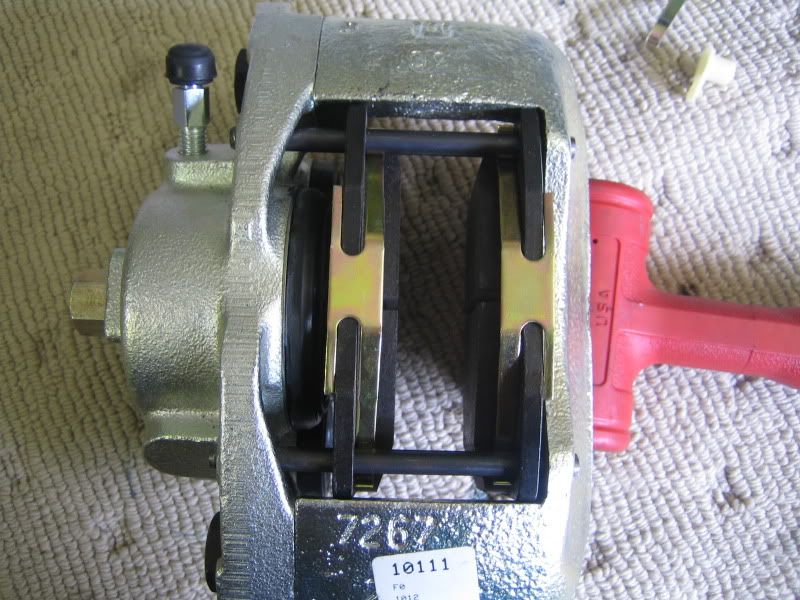
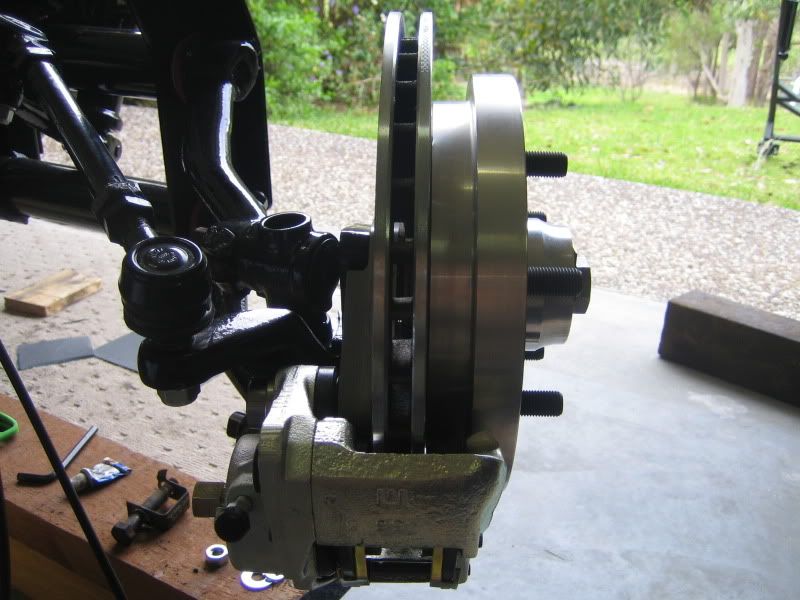
Calipers bolted to the mounts and then repeat process on the other side. My hard lines were already done so all flexible hoses can also be fitted up
to seal the system.
|
|
|
 Aussie Aussie
Officially Full-On Dubber
  
Posts: 296
Threads: 43
Registered: September 15th, 2006
Member Is Offline
Location: Gold Coast
Theme: UltimaBB Pro Blue ( Default )
|
| posted on December 7th, 2011 at 04:50 PM |
|
|
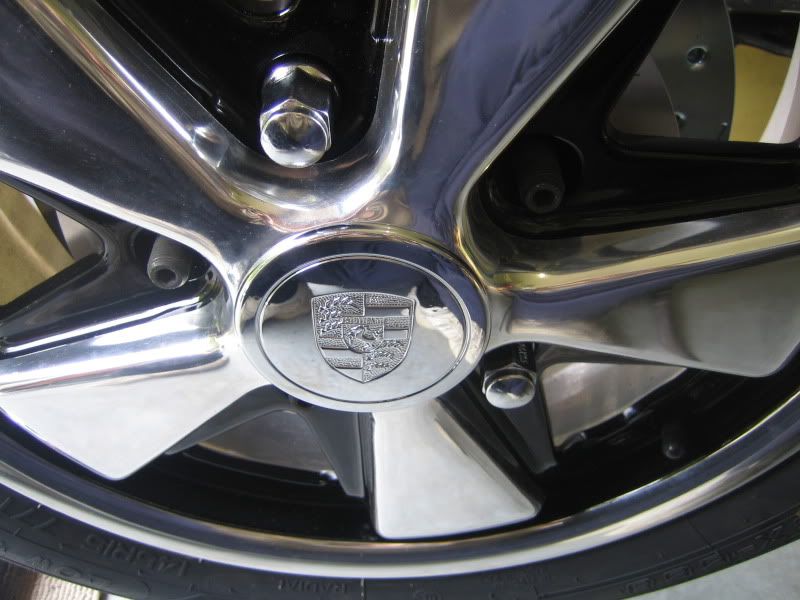
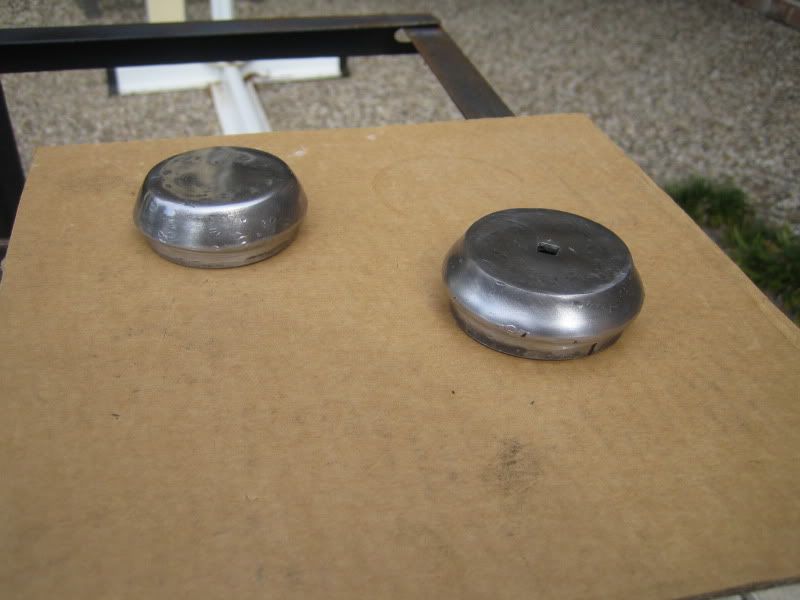
The only things that I had to modify to get things to fit were the dust covers. In standard form when running the Fuchs there is not enough clearence
to allow you to run centre caps. I was told this at the time of purchase so luckily this was not a surprise for me. The solution was to re-profile the
stock dust caps to give more room. See modified and stock in the pic below.
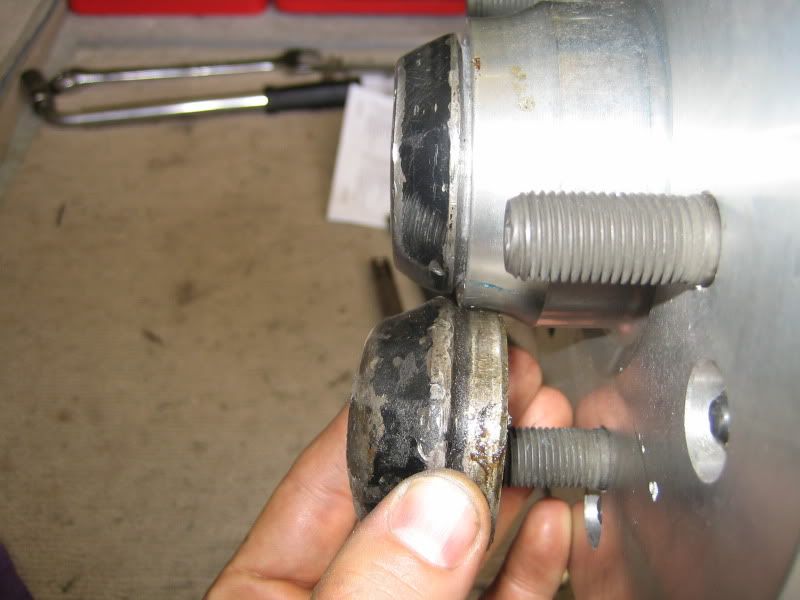
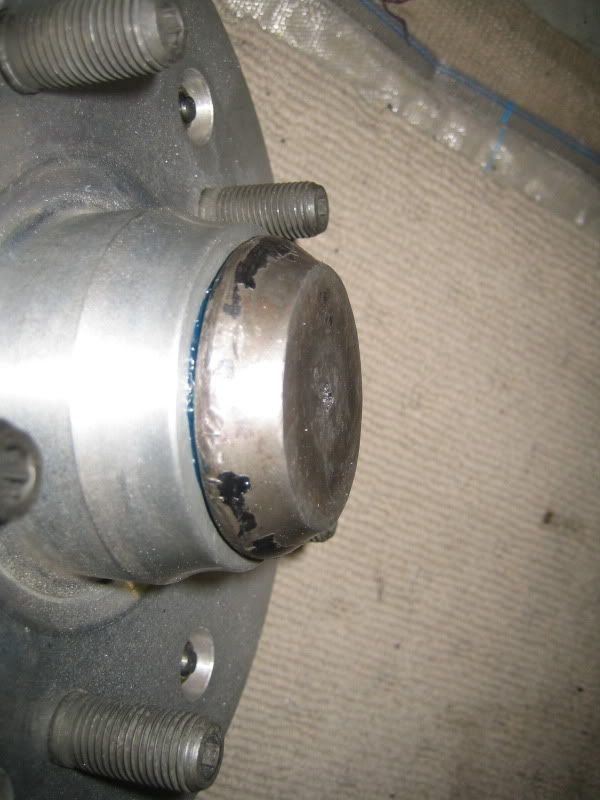
You need a fraction more clearence on the passenger side to allow for the speedo hook up.
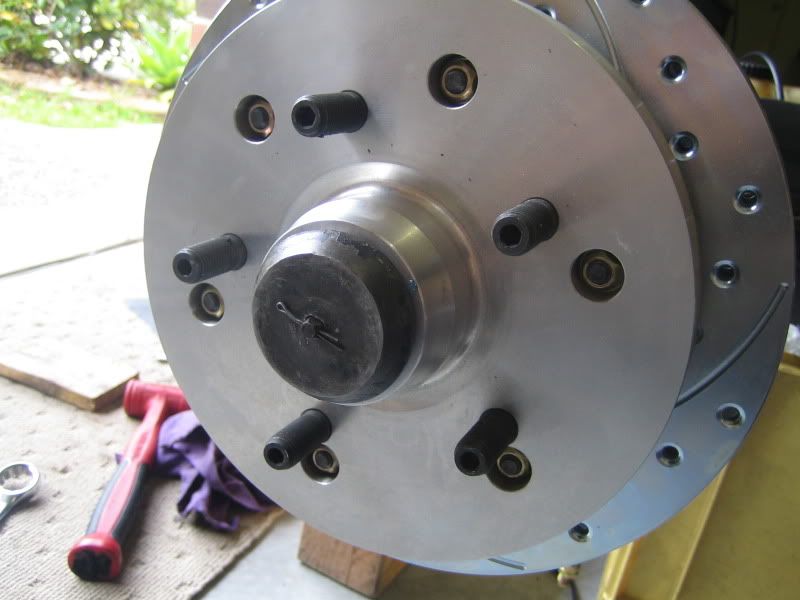
Test fit to make sure everything was good before clean up for paint.
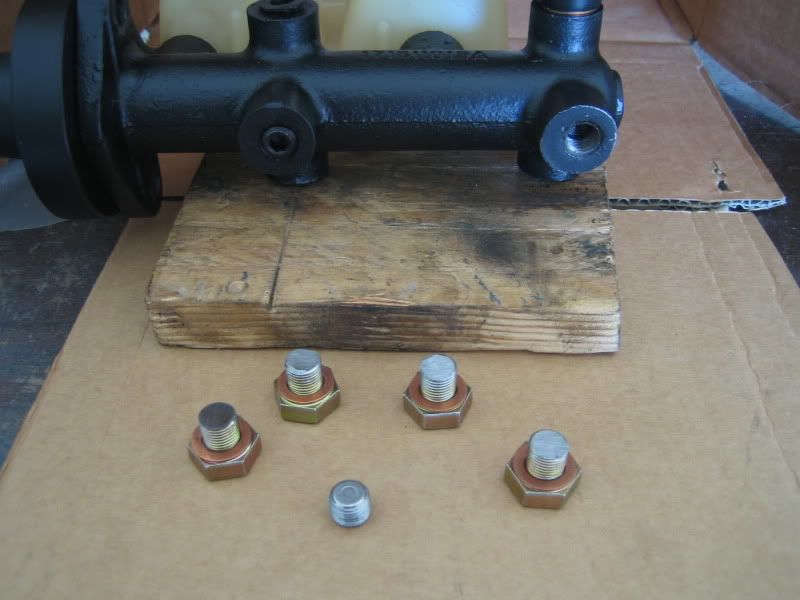
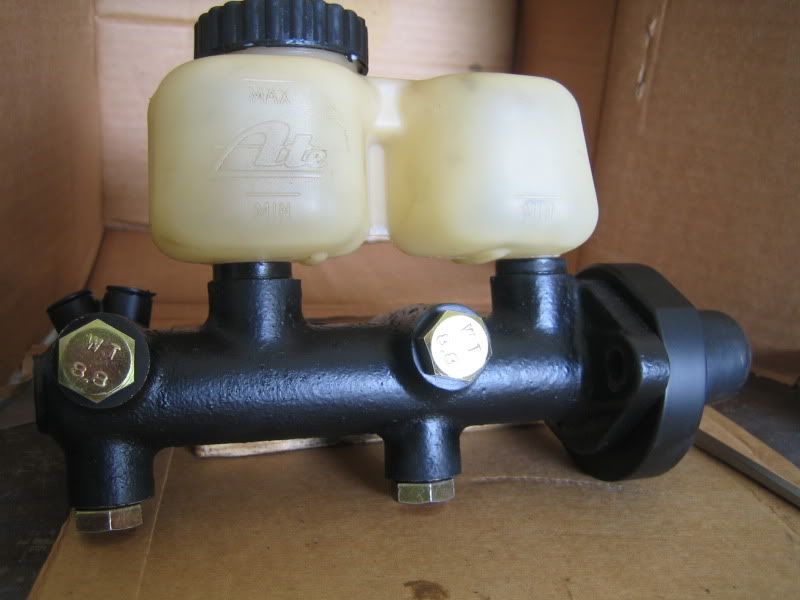
Next I bled the system to get the brakes finished off. The only issue that I had was slight weeping from the M/C blanking screws. I was nervous of
tightening too much and stripping anything so instead I took the M/C off and replaced all the screws with a bolt and copper washer. Bled things
through again and all good. Pedal feels nice and firm. I am looking forward to getting the car on the road to see how these things feel. 
|
|
|
 Aussie Aussie
Officially Full-On Dubber
  
Posts: 296
Threads: 43
Registered: September 15th, 2006
Member Is Offline
Location: Gold Coast
Theme: UltimaBB Pro Blue ( Default )
|
| posted on February 19th, 2012 at 07:22 PM |
|
|
Wow havent posted for a while so probably time for a few updates. Have been making steady progress over the last couple of months and luckily
everything seems to be going smoothly without any issues really.
Last time I posted the pan was getting close to being reunited with the body. Couple of little bits to do to get finished off ready.
I looked at a number of aftermarket body seals but thought that I would be better off repairing the original and using that instead. Nothing like the
original quality. Unfortunately mine needed some repairs before being re-used.
The two bulkhead holes were looking a bit crusty (or missing completely).
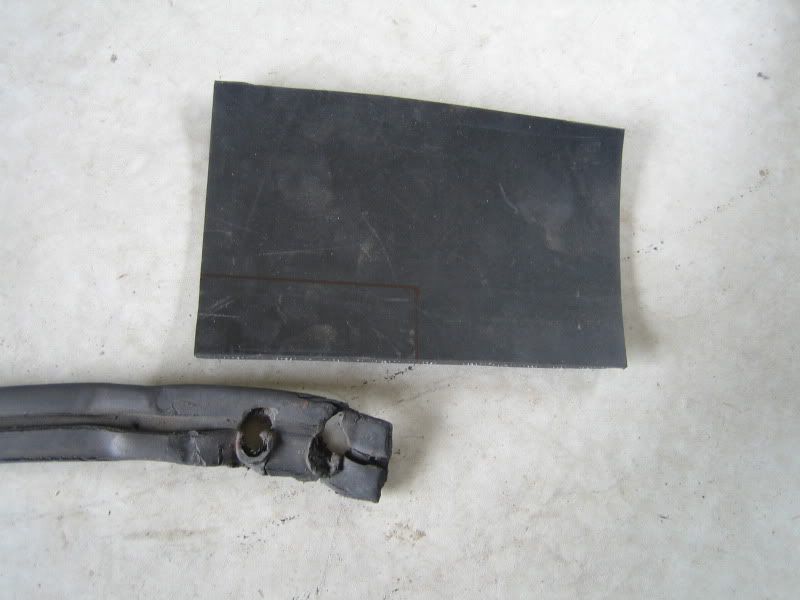
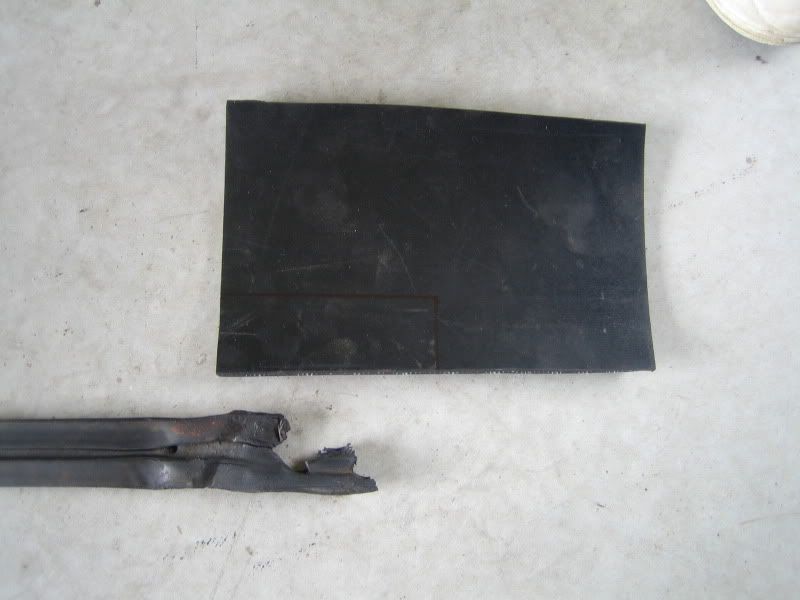
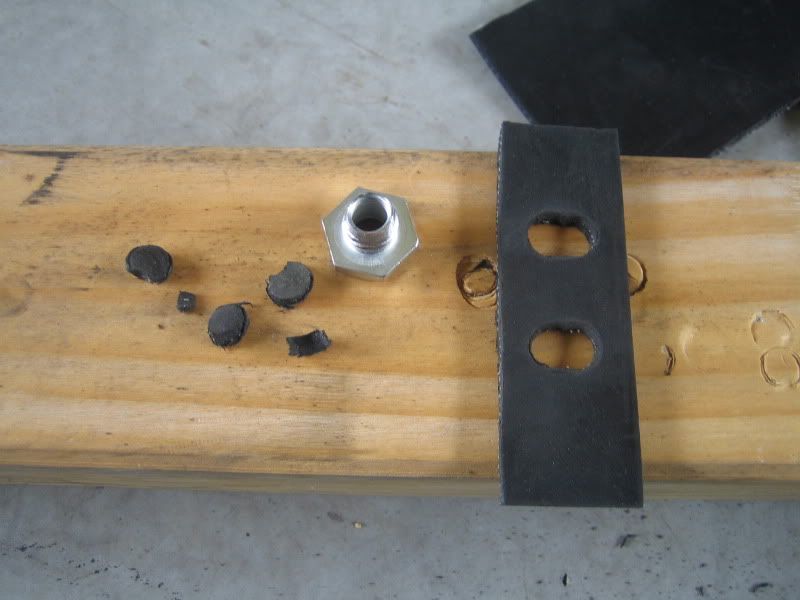
Chopped out some repair pieces from rubber sheet + added the holes to suit.
Trimmed the end off the original bit but left an area to glue and make a continuous seal between old and new.
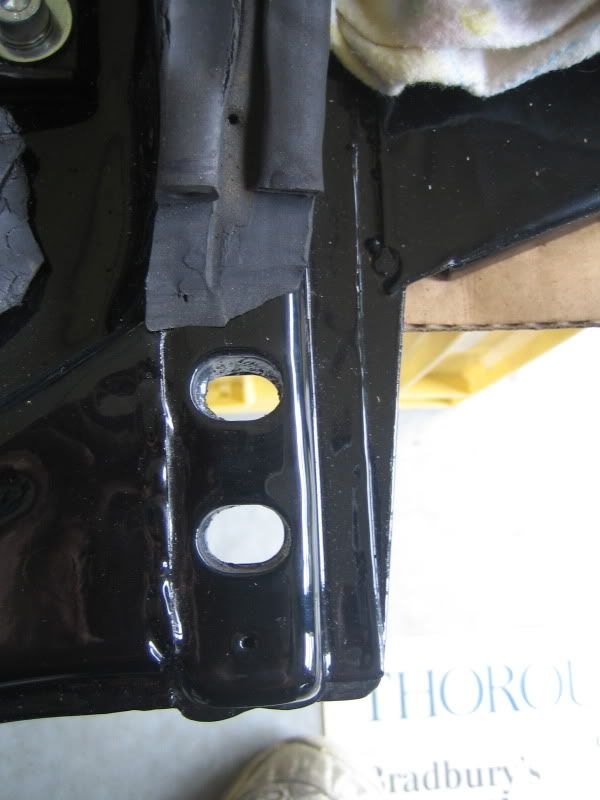
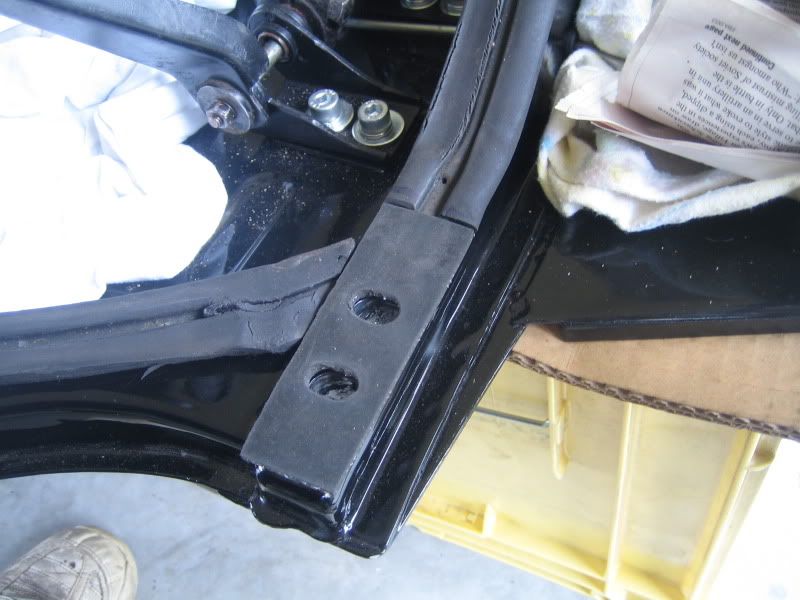
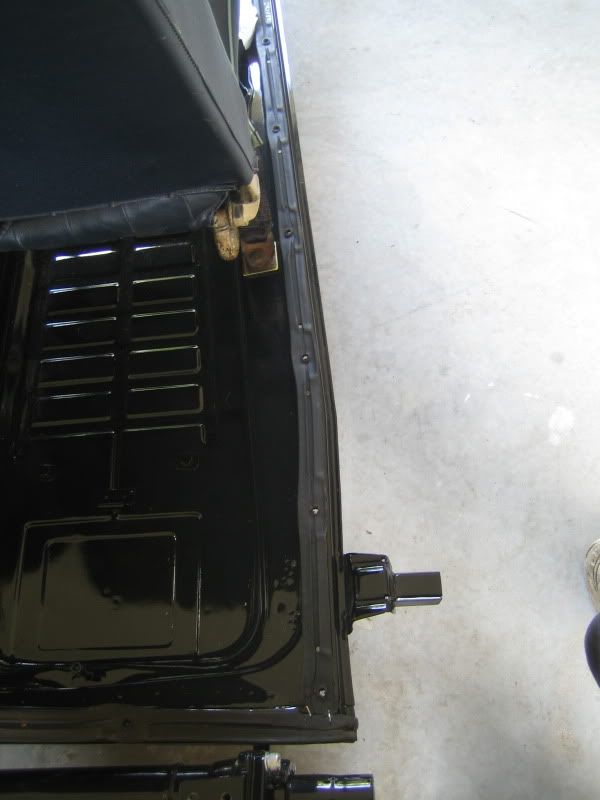
Then I attached the rest of the seal using all the original tacks in their original holes into the floorpan. I knew I saved those things for a reason

|
|
|
 Aussie Aussie
Officially Full-On Dubber
  
Posts: 296
Threads: 43
Registered: September 15th, 2006
Member Is Offline
Location: Gold Coast
Theme: UltimaBB Pro Blue ( Default )
|
| posted on February 19th, 2012 at 07:31 PM |
|
|
Cavity Wax
Something I wanted to do while I had the chance was cavity wax the pan. Bought a simple kit and the stretched the gun hose to the same length as the
tunnel (and heater channels which also got a treatment). Pushed the tube all the way in and then sprayed while pulling out at a slow pace.
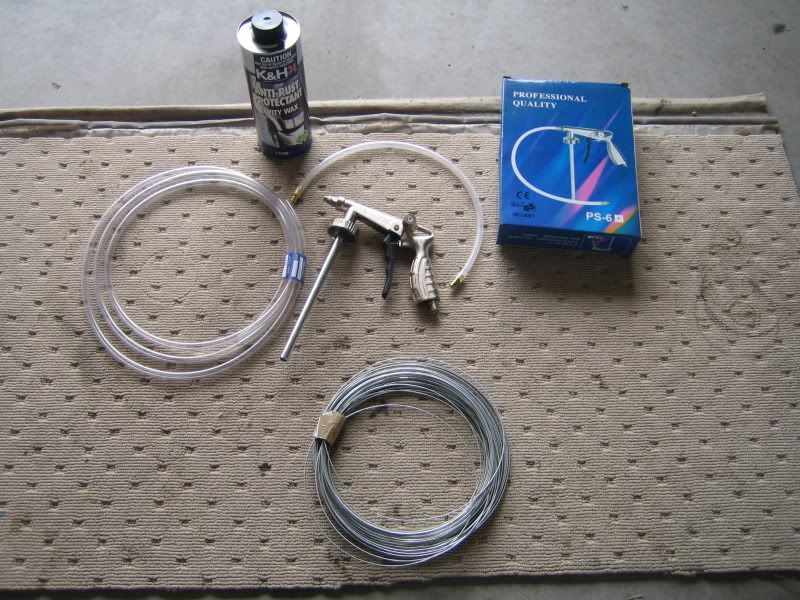
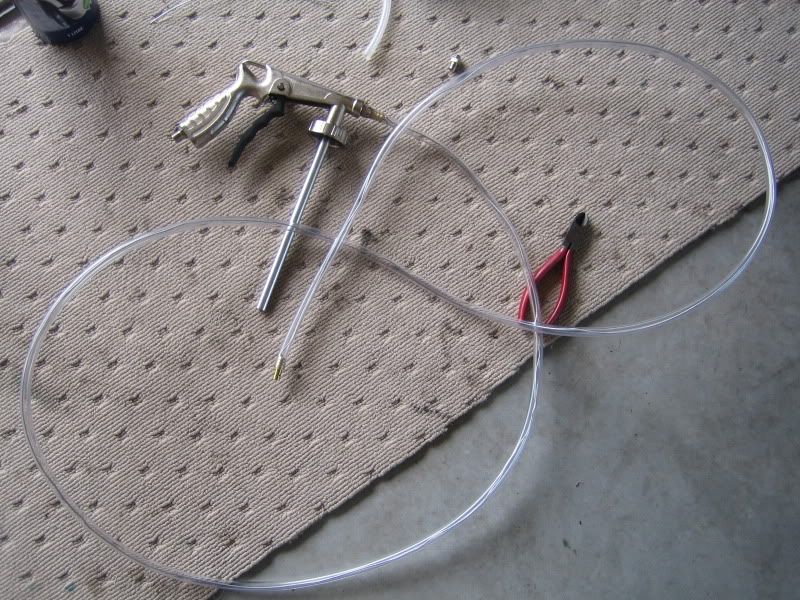
In she goes......
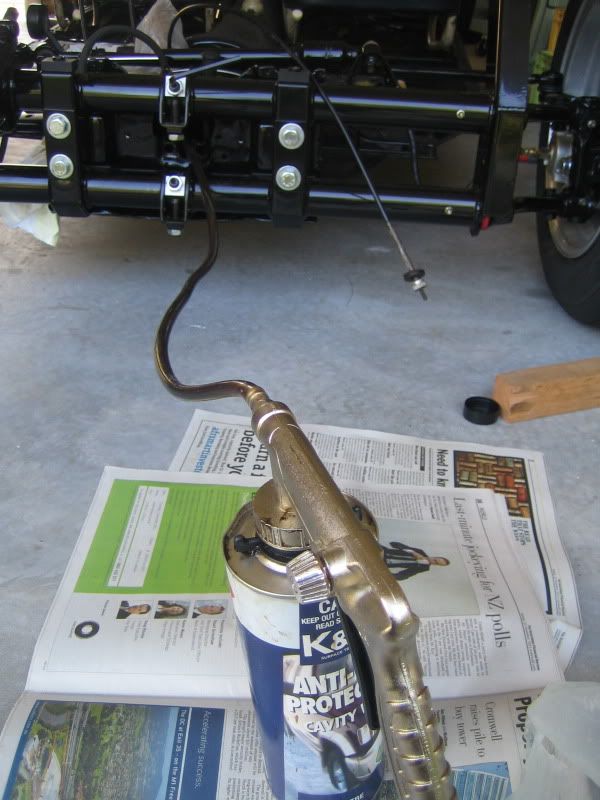
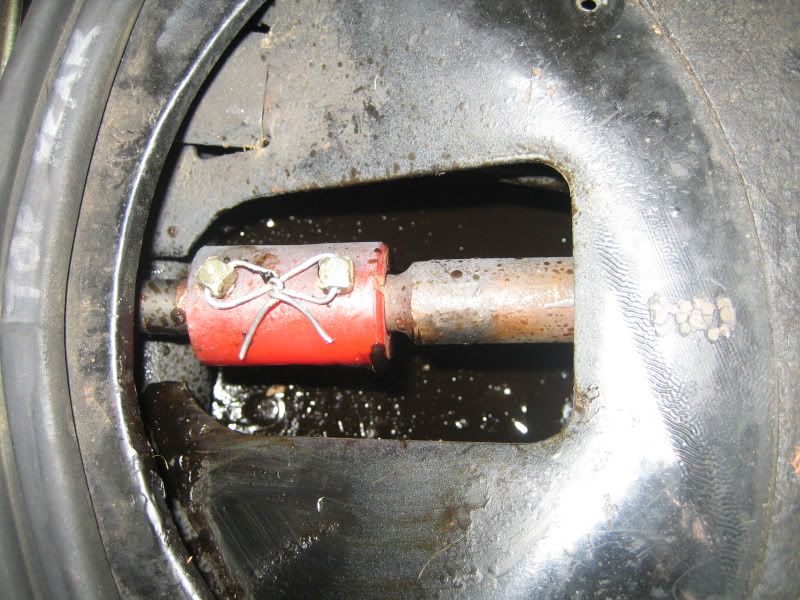
You are left with a sticky looking brown goop which should keep any rust at bay for a while. Sprayed OK but actually ended up using fish oil instead
for the heater channels as it sprayed a bit nicer than the wax to give a more even coating. You can see the wax coating in the inspection hole.
|
|
|
 Aussie Aussie
Officially Full-On Dubber
  
Posts: 296
Threads: 43
Registered: September 15th, 2006
Member Is Offline
Location: Gold Coast
Theme: UltimaBB Pro Blue ( Default )
|
| posted on February 20th, 2012 at 09:31 PM |
|
|
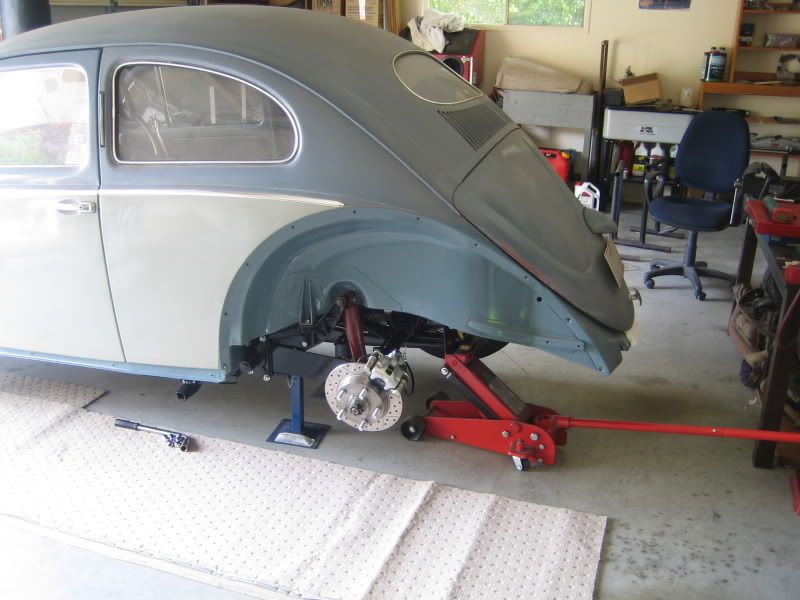
Body goes on
Time for the body to go back on - hard to believe that it has been around 2 years that they have been separated. First had to bolt up the lifting
frames once again and line everything up. Lowered the ends down with an engine crane which was a lot easier than trolley jacks that I used when I was
lifting the body off.
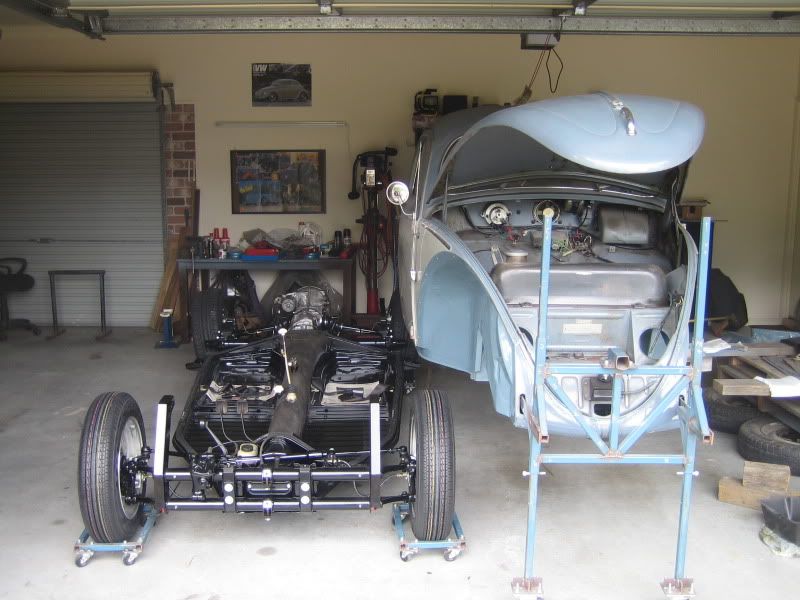
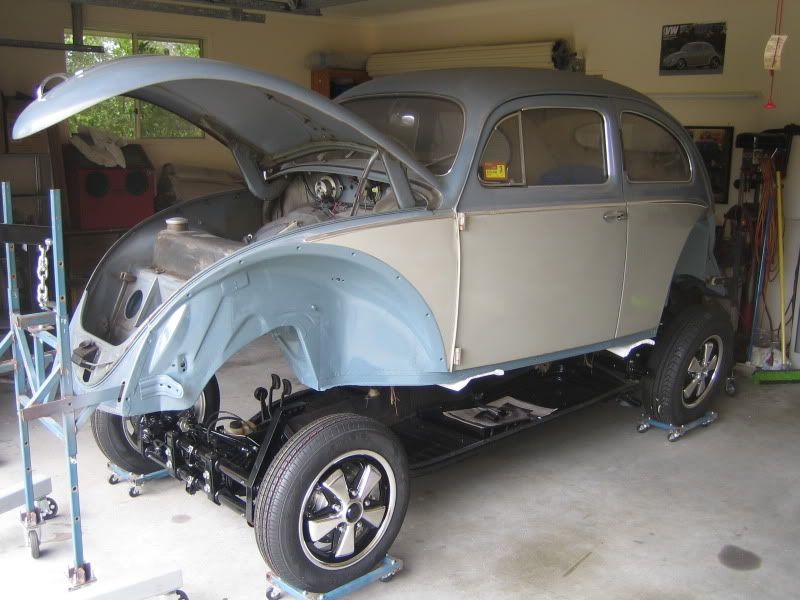
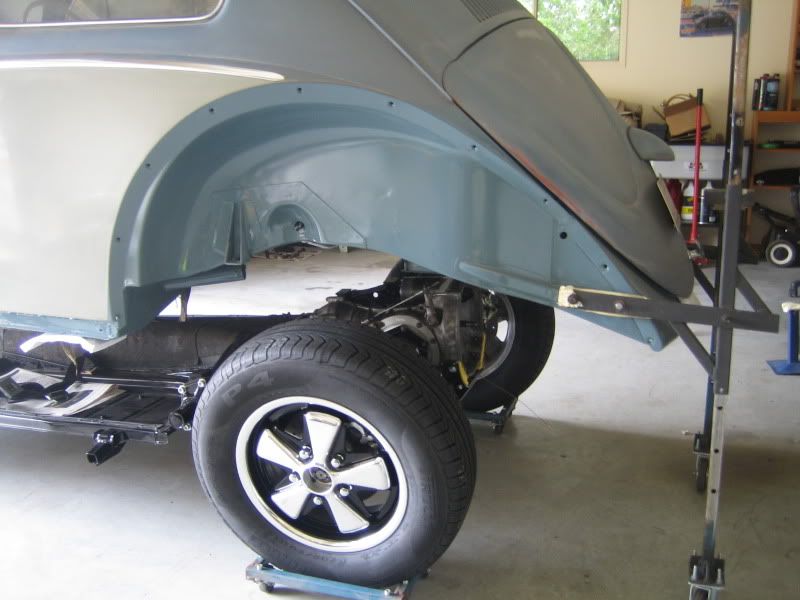
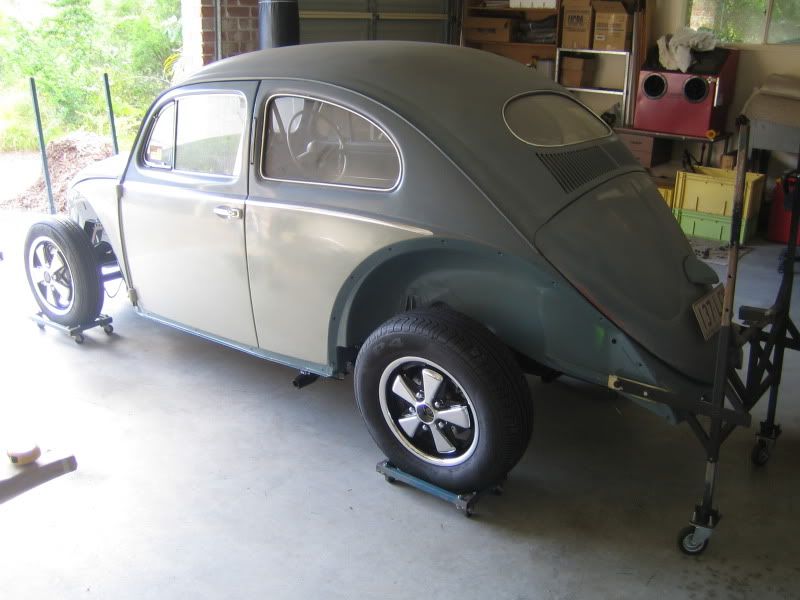
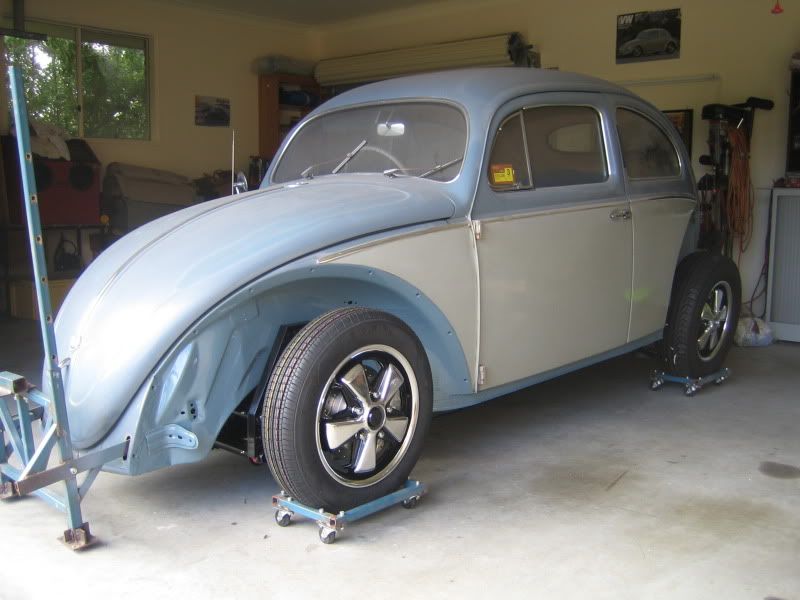
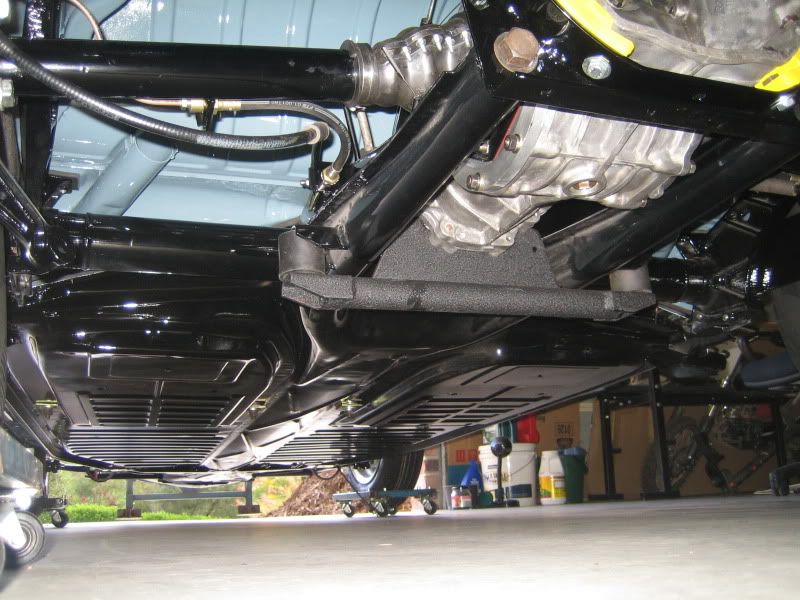
|
|
|
 SebastienPeek SebastienPeek
Custom Title Time!
    
Posts: 1657
Threads: 89
Registered: May 31st, 2011
Member Is Offline
Location: Melbourne
Theme: UltimaBB Pro White
|
| posted on February 20th, 2012 at 09:34 PM |
|
|
Congratulations!
Must have been a huge sigh of relief when it finally matched up together again!
|
|
|
 Aussie Dubbin Aussie Dubbin
Fahrvergnugen
   
Posts: 895
Threads: 90
Registered: July 21st, 2008
Member Is Offline
Location: Adelaide
Theme: UltimaBB Pro Blue ( Default )
|
| posted on February 20th, 2012 at 10:05 PM |
|
|
Wow! Great cheers for the pics
|
|
|
 hellbugged hellbugged
A.k.a.: Daimo Pell
23 Windows of Awesome
48's and straight cuts
       
Posts: 5080
Threads: 116
Registered: April 17th, 2003
Member Is Offline
Location: Nambucca Valley NSW
Theme: UltimaBB Psyche Blue
Mood: Couldn't care less
|
| posted on February 21st, 2012 at 05:20 AM |
|
|
sweet.
what were the engine plans ?
|
|
|
 sikras sikras
Seriously Crusin Dubber
 
Posts: 106
Threads: 18
Registered: February 5th, 2011
Member Is Offline
Theme: UltimaBB Pro Blue ( Default )
|
| posted on February 21st, 2012 at 11:03 PM |
|
|
lookinh very good, can't wait for the next pics
|
|
|
 Aussie Aussie
Officially Full-On Dubber
  
Posts: 296
Threads: 43
Registered: September 15th, 2006
Member Is Offline
Location: Gold Coast
Theme: UltimaBB Pro Blue ( Default )
|
| posted on February 22nd, 2012 at 07:45 PM |
|
|
Yes it was a great to get the body back on. I look into the garage now and there is a car there rather than just a big pile of parts!!
Engine wise I still have plans for a N/A stroker. More focus will be put into this once the car is completed and on the road again. In the meantime
i'll have a 1500 SP to get me around. I am going to try and squeeze 1hp/cc out of it. All I need is a 1460hp NOS kit and we should be cooking 
Next on the list was the interior. My last beetle had a pretty stripped out interior which made the car lighter but was crap in terms of noise level -
especially on longer distances. My goal for this car was to retain a full interior and include some decent sound proofing too.
After some thought and a bit of looking around I decided to go with a felt based sound proofing. I bought 2 different types - 1 with a bitumen layer
and 1 standard without. The car would get a layer of each throughout.
First up was to cut some templates out and start fitting various sections.
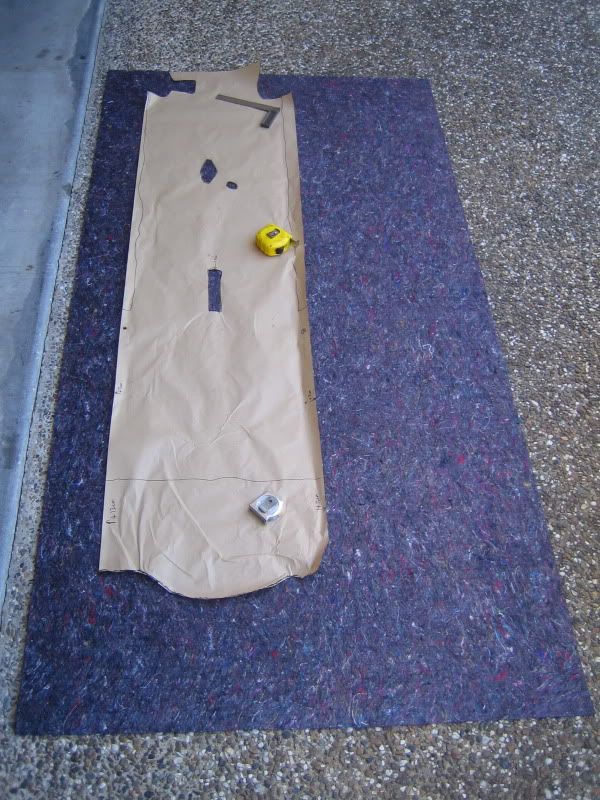
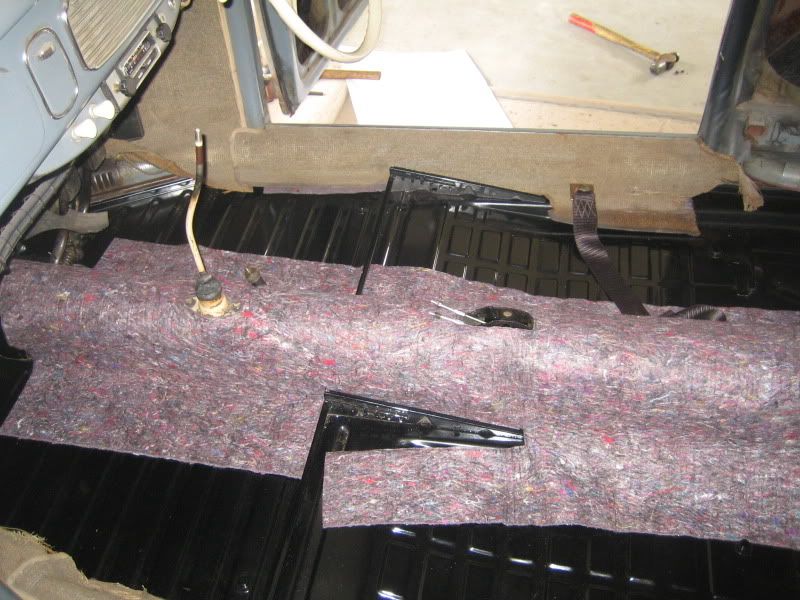
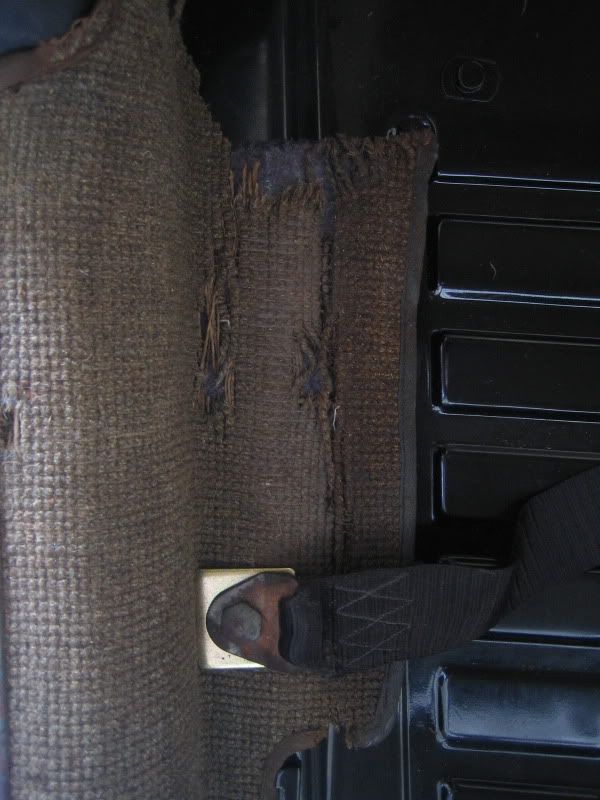
I put a layer under the stock carpet covering the heater channels and used it to repair/hold together some of the more crappy bits of original
carpet.
The top section is the bitumen lined felt which went on the bottom and the standard then went down next.
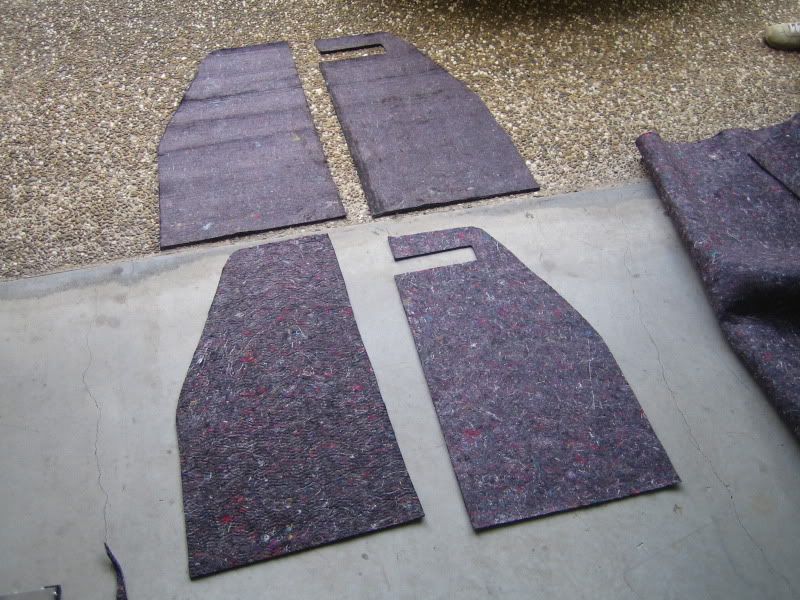
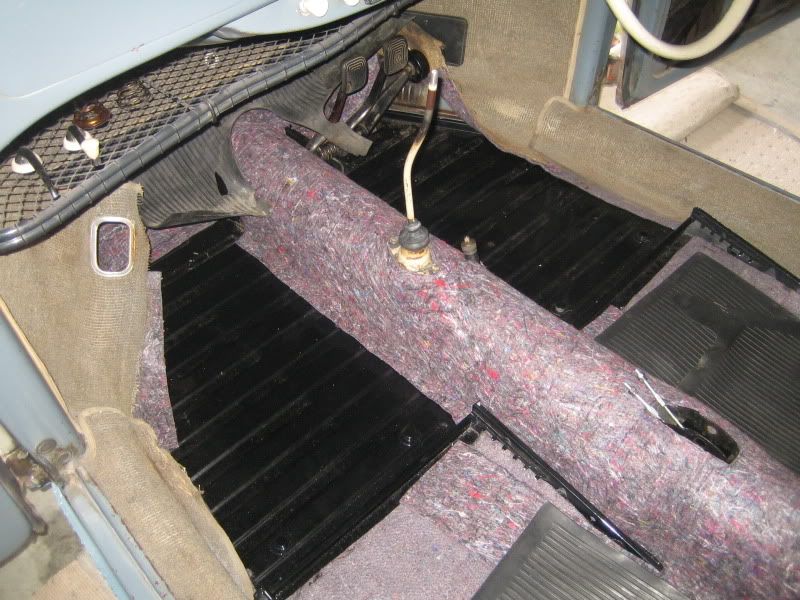
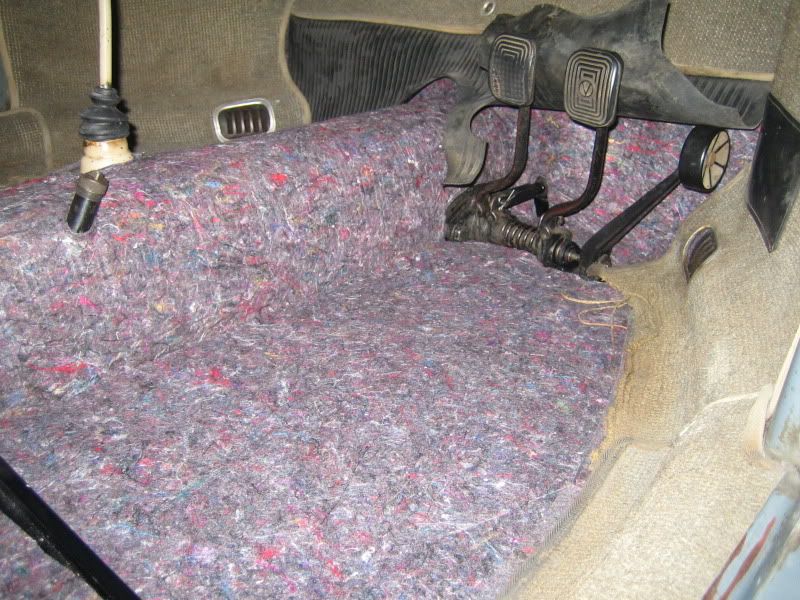
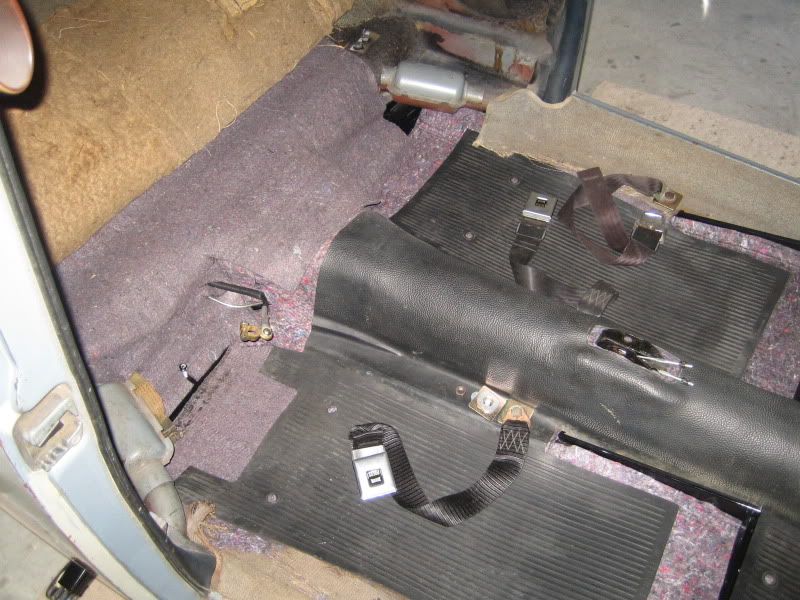
Same layers covered the front bulkhead, channels, pans and boot area. Ran the boot down under the back seat area for a continuous effect. Test fitted
mats, seatbelts etc along the way.
|
|
|
 vassy66T1 vassy66T1
A.k.a.: Marcus Vass
Veteran Volks Folk
Wow ... are U reading this?
    
Posts: 2120
Threads: 76
Registered: June 4th, 2003
Member Is Offline
Location: Brisvegas
Theme: UltimaBB Streamlined2
Mood: Happy to own a VW
|
| posted on February 22nd, 2012 at 08:01 PM |
|
|
Nice!
I am really liking it more now 
|
|
|
 tayloredvw tayloredvw
Seriously Crusin Dubber
 
Posts: 165
Threads: 39
Registered: May 17th, 2006
Member Is Offline
Location: Gold Coast
Theme: UltimaBB Pro Blue ( Default )
Mood: make love not war
|
| posted on February 25th, 2012 at 01:04 PM |
|
|
Wow, i just read through this post and its amazing to see how good of condition this car is for its age. Great car and great workmanship.
I just wanted to know also, what did you use to get the rust repair sections back to bare metal?
|
|
|
 Aussie Aussie
Officially Full-On Dubber
  
Posts: 296
Threads: 43
Registered: September 15th, 2006
Member Is Offline
Location: Gold Coast
Theme: UltimaBB Pro Blue ( Default )
|
| posted on February 28th, 2012 at 06:57 PM |
|
|
| Quote: | Originally
posted by tayloredvw
Wow, i just read through this post and its amazing to see how good of condition this car is for its age. Great car and great workmanship.
I just wanted to know also, what did you use to get the rust repair sections back to bare metal?
|
Thanks mate. Bare metal was done using a angle grinder with twisted knot and then standard wire brush attachment. Finished off with some 240 grit
paper by hand. Lots of labour but comes up clean. 
|
|
|
 Aussie Aussie
Officially Full-On Dubber
  
Posts: 296
Threads: 43
Registered: September 15th, 2006
Member Is Offline
Location: Gold Coast
Theme: UltimaBB Pro Blue ( Default )
|
| posted on February 28th, 2012 at 07:11 PM |
|
|
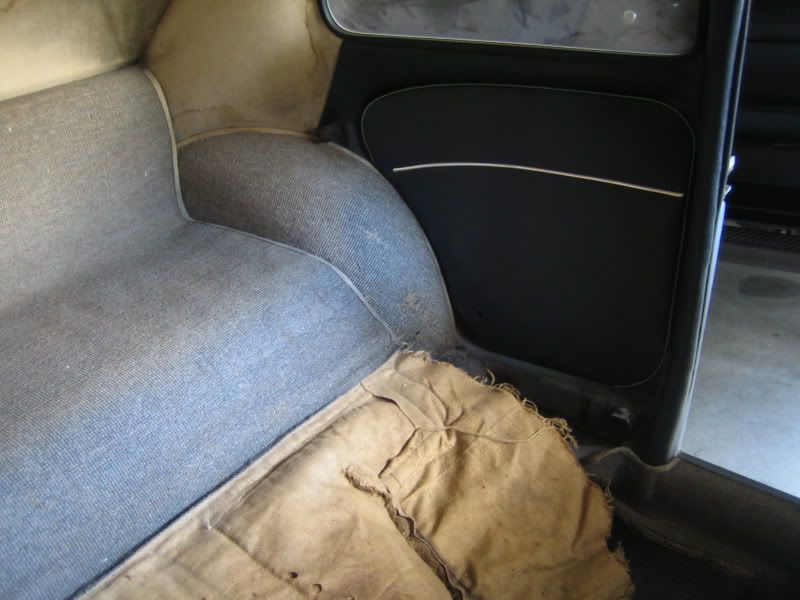
Time to finish off the interior. Fitted up the remaining original carpets in the boot area and added rear panels.
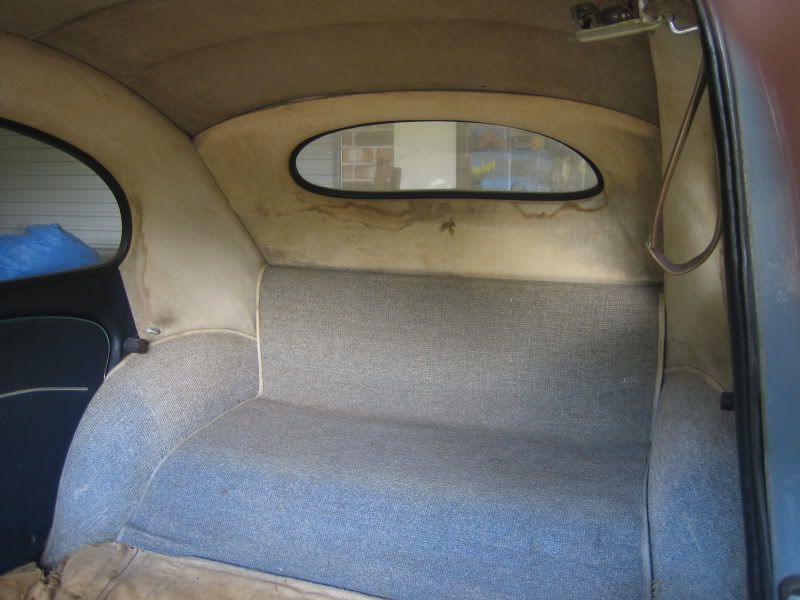
Left some of the original sound proofing that runs through the luggage area and down under the rear seat.
As the orginal floor mats for these things are getting harder and harder to source, I decided to make up some additional floor mats for general wear
and tear (and to protect the originals). Found some sheet ribbed matting that did the job nicely. Started by making rough templates from the original
mats.

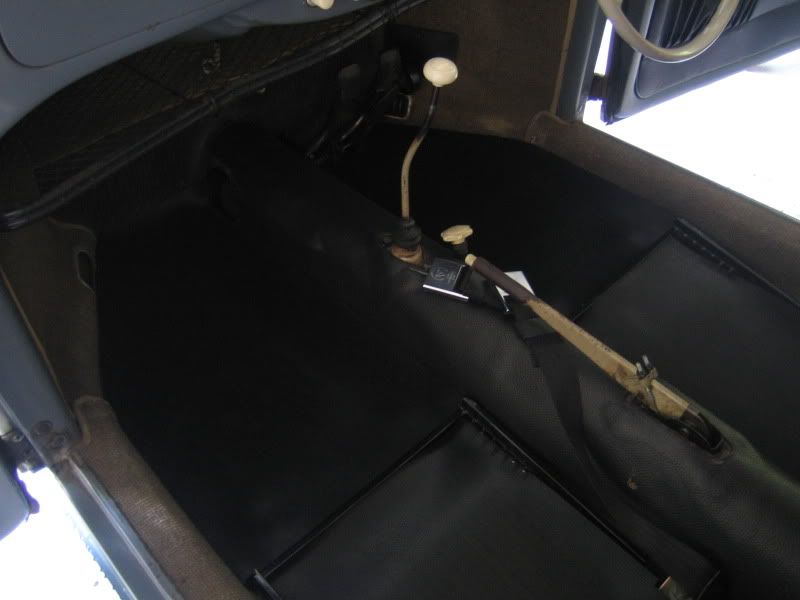
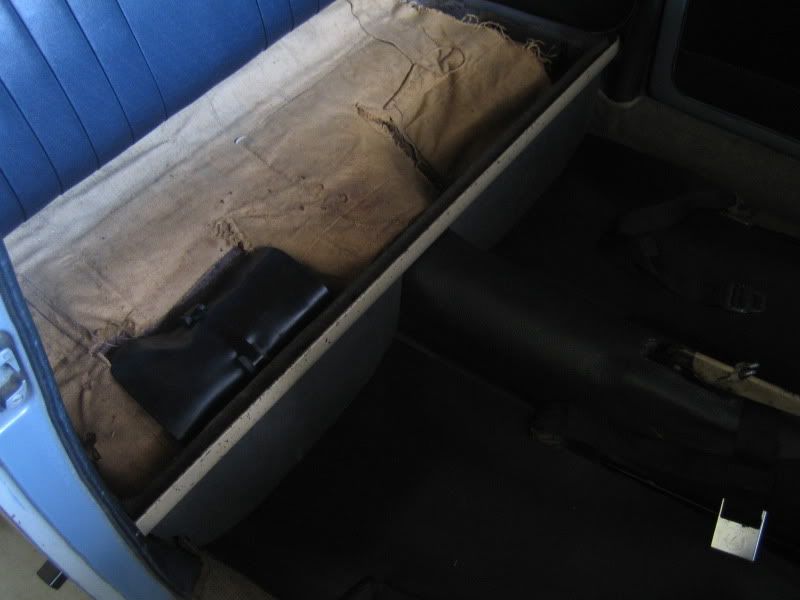
Rear seat cleaned up and then chucked back in along with the from seats and belts etc.
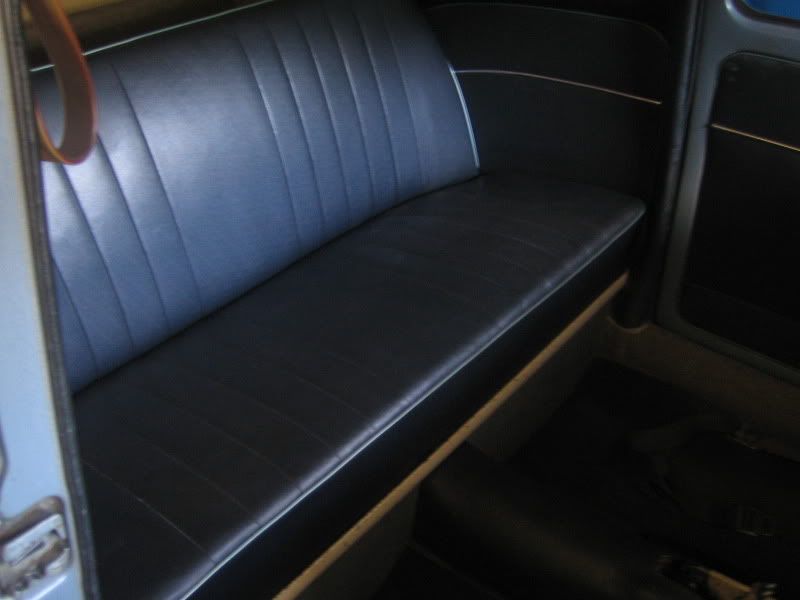
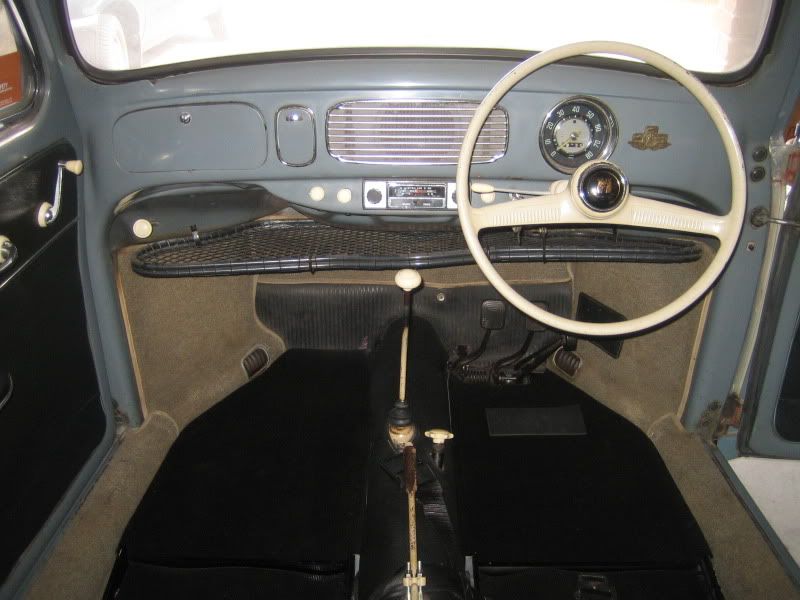
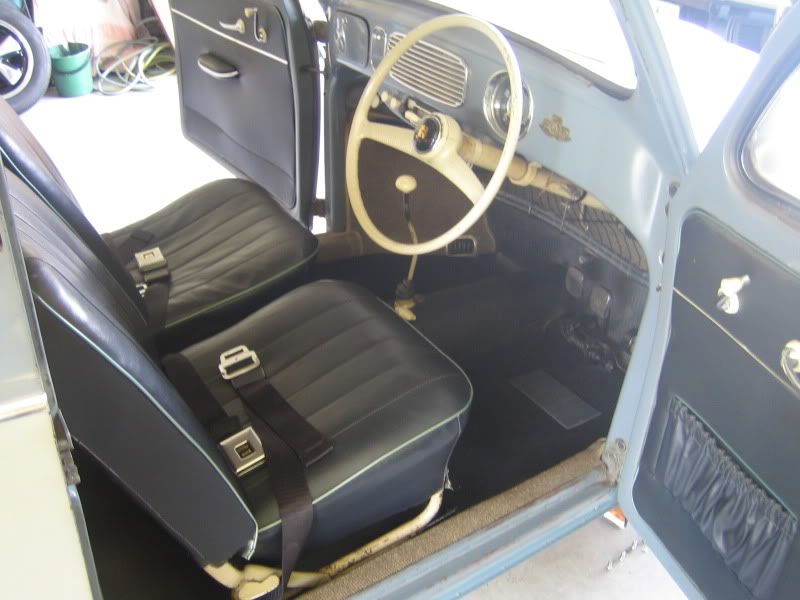
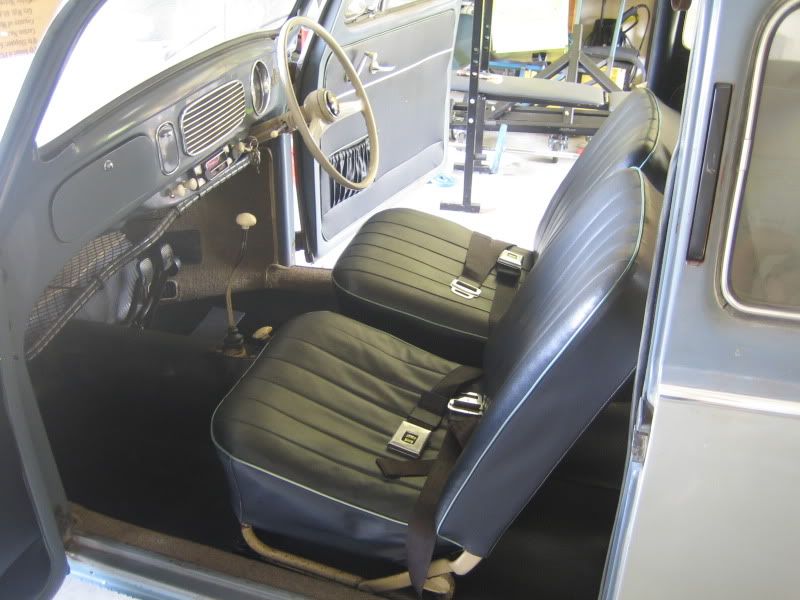
|
|
|
 Dasdubber Dasdubber
A.k.a.: Alan Agyik
23 Windows of Awesome
DAS Resto Haus
       
Posts: 5746
Threads: 289
Registered: August 26th, 2002
Member Is Offline
Location: Gold Coast
Theme: UltimaBB Pro Blue
Mood: feeling fine...
|
| posted on March 1st, 2012 at 07:37 PM |
|
|
Nice work Ian - its really coming together now mate - bet you can't wait for that first cruise! Looking forward to seeing it with guards on 
AL
|
|
|
 Aussie Aussie
Officially Full-On Dubber
  
Posts: 296
Threads: 43
Registered: September 15th, 2006
Member Is Offline
Location: Gold Coast
Theme: UltimaBB Pro Blue ( Default )
|
| posted on March 2nd, 2012 at 06:48 PM |
|
|
| Quote: | Originally
posted by Dasdubber
Nice work Ian - its really coming together now mate - bet you can't wait for that first cruise! Looking forward to seeing it with guards on 
AL
|
Cheers Al - very much looking forward to the first drive...... still dont want to put a date on it yet however slowly but surely things are getting
finished 
Whats the latest on that motor of yours? Have you planned what to put it in yet??
|
|
|
 Dasdubber Dasdubber
A.k.a.: Alan Agyik
23 Windows of Awesome
DAS Resto Haus
       
Posts: 5746
Threads: 289
Registered: August 26th, 2002
Member Is Offline
Location: Gold Coast
Theme: UltimaBB Pro Blue
Mood: feeling fine...
|
| posted on March 3rd, 2012 at 09:22 PM |
|
|
Got some plans mate, but probably nothing in the next 6 months or so whilst the new busienss (DAS Resto Parts) is consuming all our time/money 
Cheers
Al
|
|
|
 bugsandoil bugsandoil
Slammed & Awesome Dubber
 
Posts: 92
Threads: 17
Registered: August 15th, 2010
Member Is Offline
Location: Brisbane
Theme: UltimaBB Pro Blue ( Default )
|
| posted on March 4th, 2012 at 07:50 AM |
|
|
Looks great!
A silly question from someone who doesn't know much about ovals.
Are those seats original? They look fantastic.
And a generally are ovals leather?
|
|
|
 Aussie Aussie
Officially Full-On Dubber
  
Posts: 296
Threads: 43
Registered: September 15th, 2006
Member Is Offline
Location: Gold Coast
Theme: UltimaBB Pro Blue ( Default )
|
| posted on March 4th, 2012 at 10:40 AM |
|
|
| Quote: | Originally
posted by bugsandoil
Looks great!
A silly question from someone who doesn't know much about ovals.
Are those seats original? They look fantastic.
And a generally are ovals leather?
|
The seats are the originals - as far as I know the only work done to them was to remount the drivers side seat bottom. You can see in the photo's
that the passenger side sags/creases slightly while the drivers side is tight. Would guess that this was still done a number of years before I came to
own the car.
|
|
|
 Aussie Aussie
Officially Full-On Dubber
  
Posts: 296
Threads: 43
Registered: September 15th, 2006
Member Is Offline
Location: Gold Coast
Theme: UltimaBB Pro Blue ( Default )
|
| posted on March 12th, 2012 at 07:43 PM |
|
|
Electrics
After doing some reading and looking at various options for the 12v conversion I made a call and decided to have a go myself. Electrics have never
been my strong point but I thought why not give it a shot. Decided to keep the original 6v loom as everything was working when I took it apart and
understand that the original wiring is more than capable of handling the increase in voltage. As it turned out it was all pretty straight forward to
do.
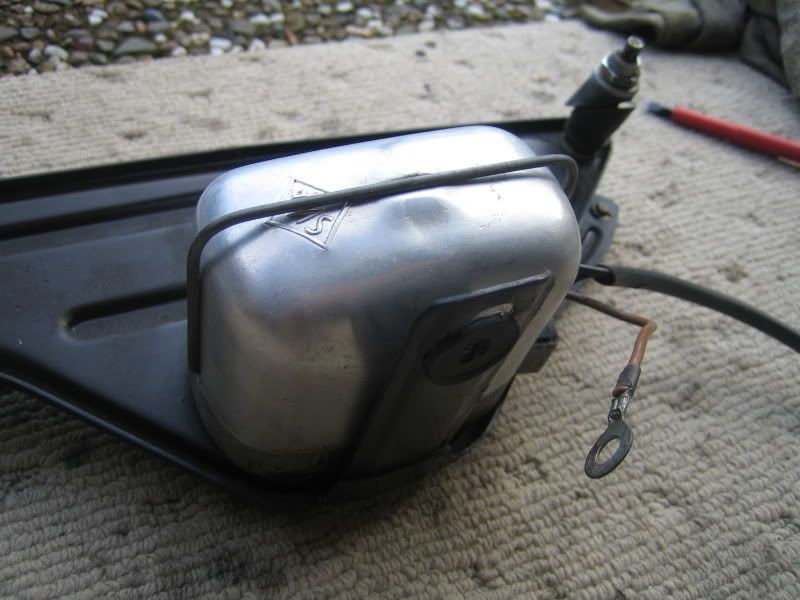
Started with the wiper motor. Started by removing and opening up the old motor assembly.
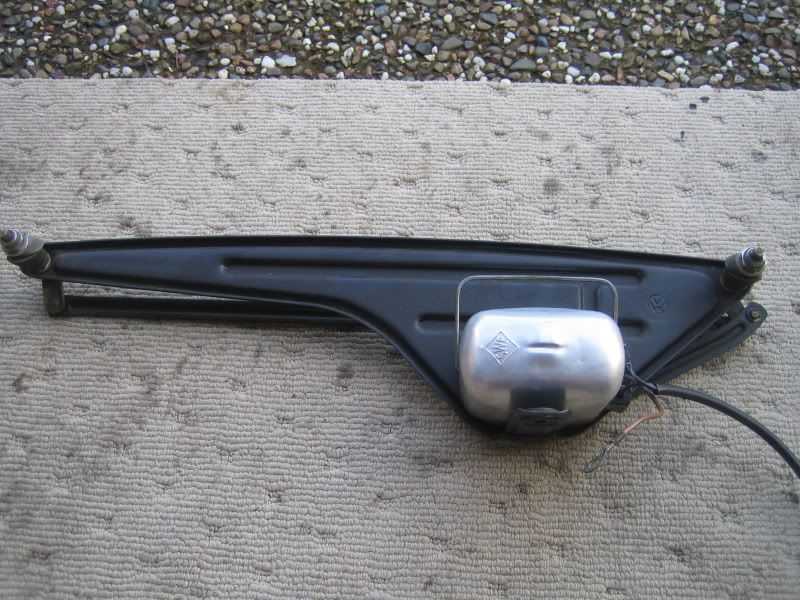
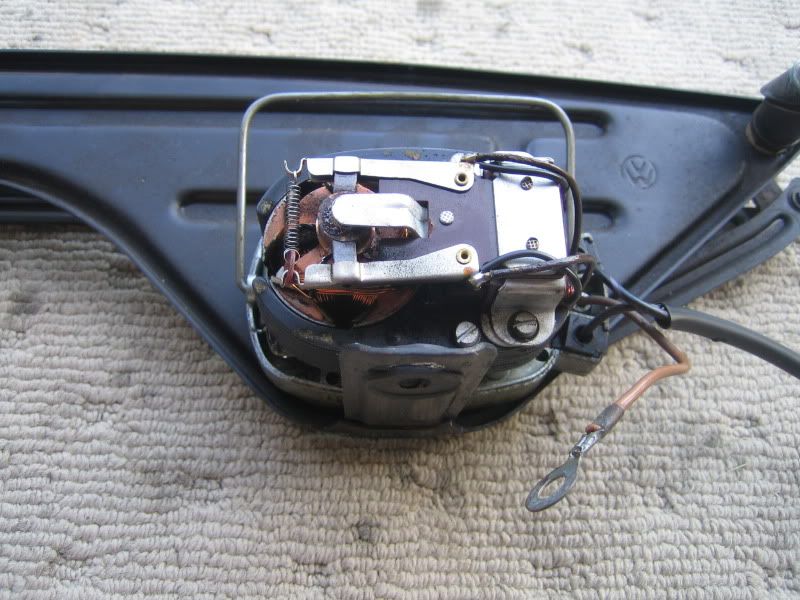
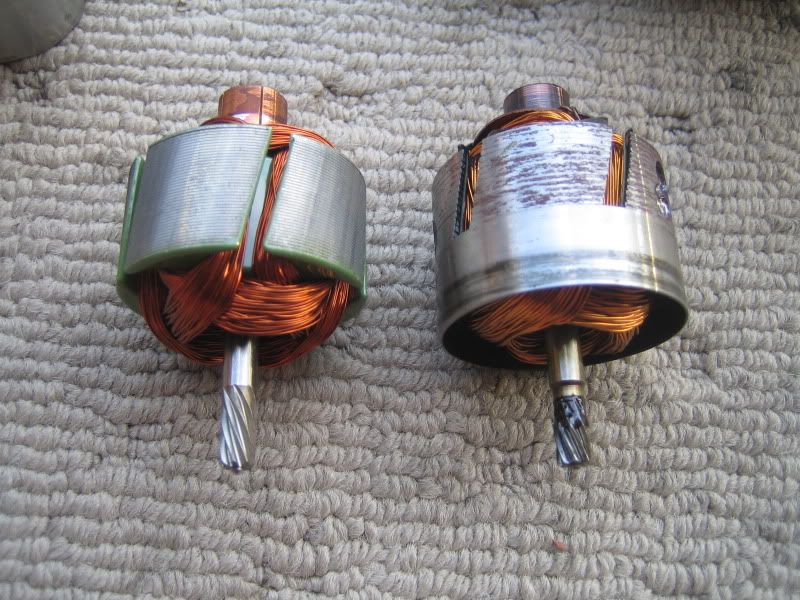
I bought a 12v wiper armature from DAS and it really was as easy as swapping the parts out. 12v on the left and original 6v on the right.
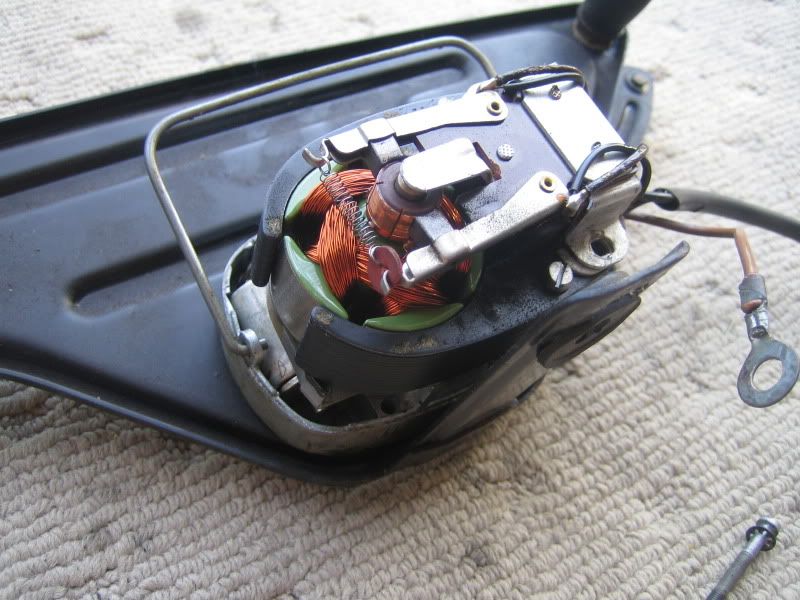
All done. Tested and all works well.
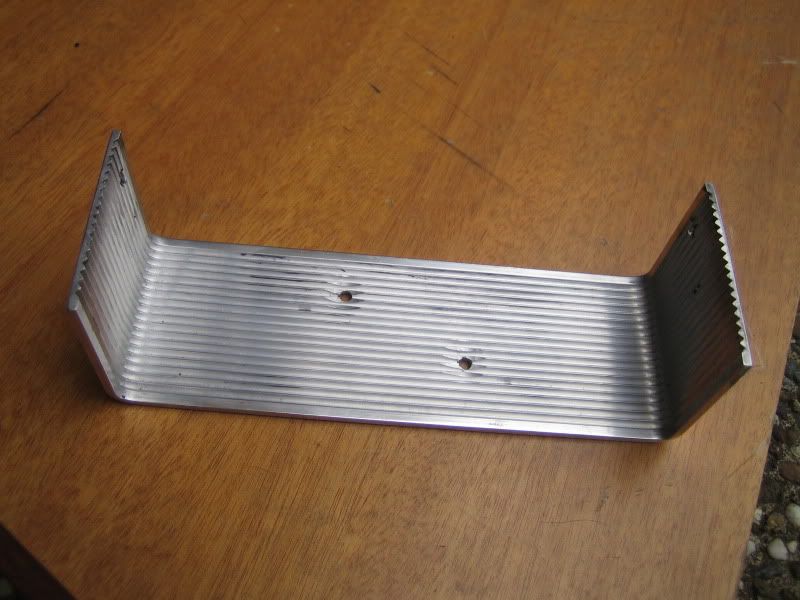
Next up were the semaphores. Seems like lots of options with what people have done with these - I decided to go the voltage dropper route as I found a
supplier who had them for $2.50 each. Not sure on how long the dropper would last so have 1 spare and then I can easily step up and rewire the
originals or buy new 12v ones should all else fail.
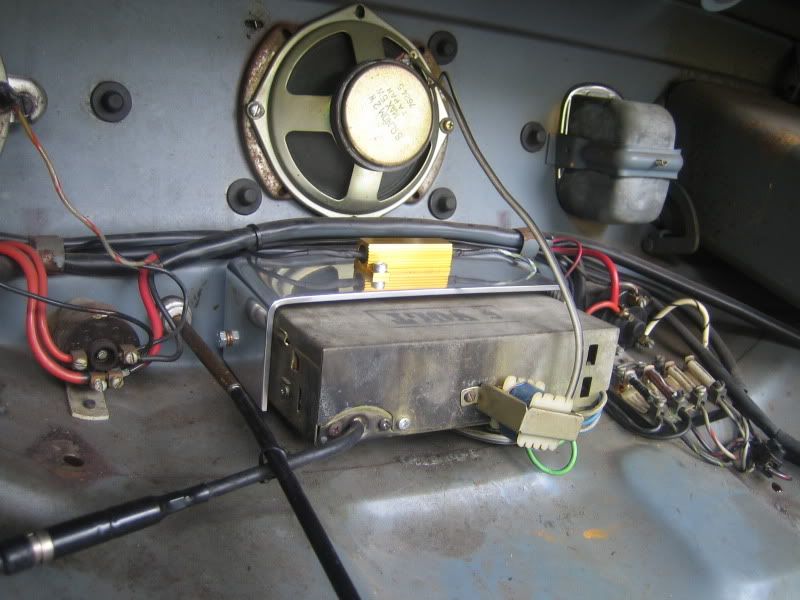
Was told that these things get hot so I made up an alloy bracket to act as a heat sink. The material is actually a door footplate but one side is
corrogated so good to dissipate the heat. Bent it into shape, drilled mounting holes etc and then got polishing.
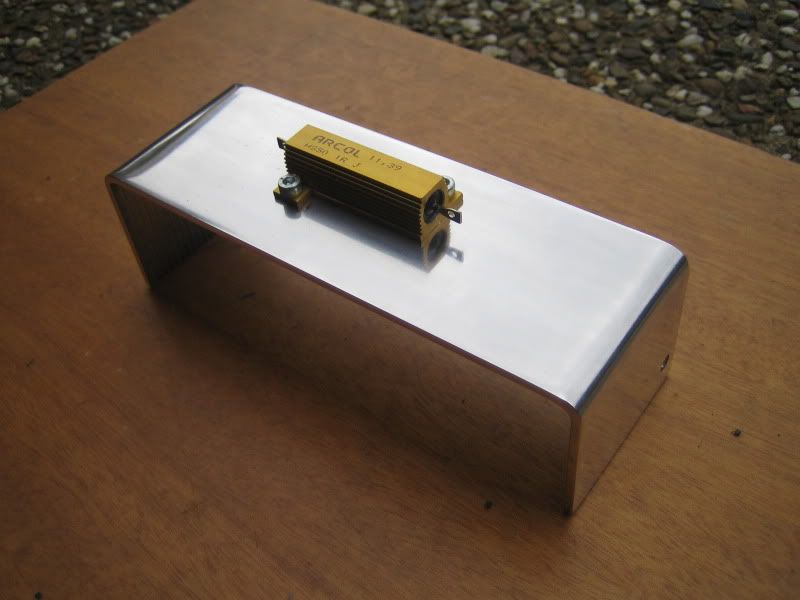
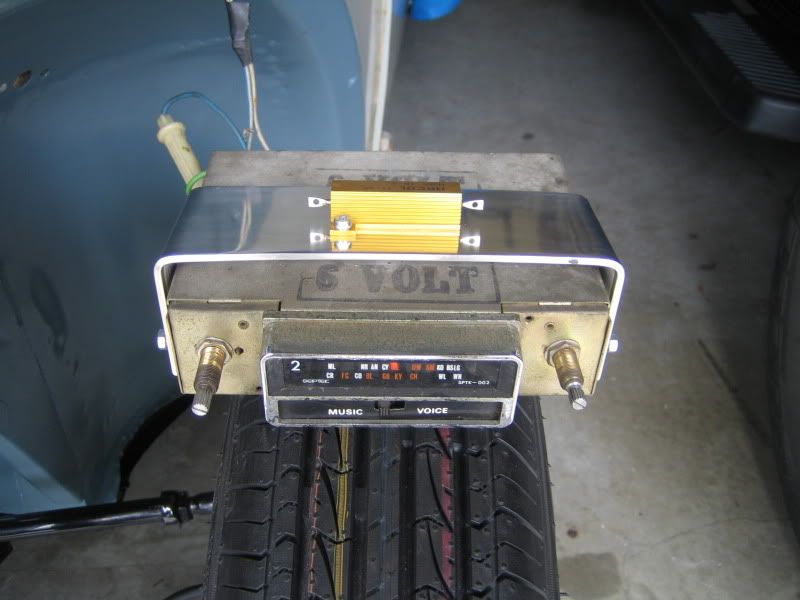
Decided after a few trials that the radio would be a good place to mount this thing. Bolted it through some original threaded holes on the sides of
the radio that were not used. Trial fit first out of the car and then in it goes. Tested it out and it got hot to the touch so know its doing its job.

|
|
|
 Aussie Aussie
Officially Full-On Dubber
  
Posts: 296
Threads: 43
Registered: September 15th, 2006
Member Is Offline
Location: Gold Coast
Theme: UltimaBB Pro Blue ( Default )
|
| posted on March 17th, 2012 at 05:43 PM |
|
|
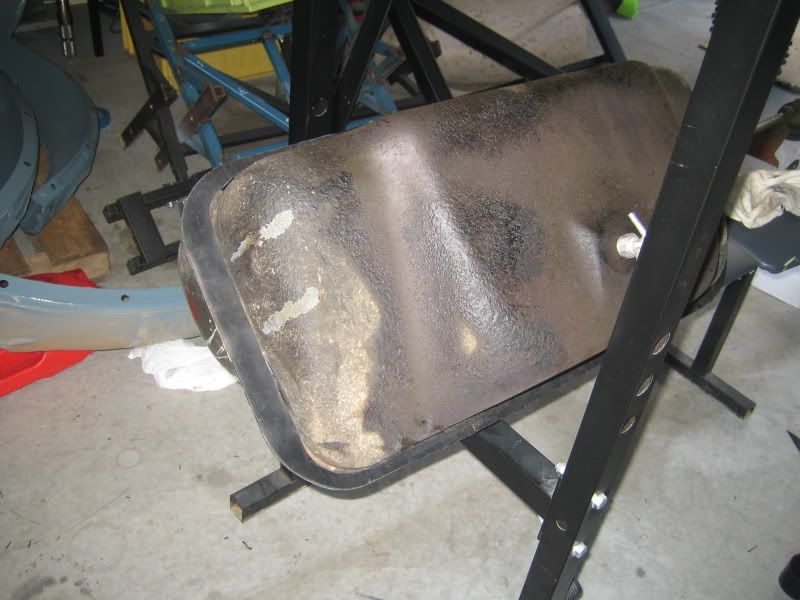
Tank
Time to mount the tank. The original seal more or less fell to pieces so I thought a new rubber seal might be a good idea. Started out with sheet
rubber and started measuring and cutting.
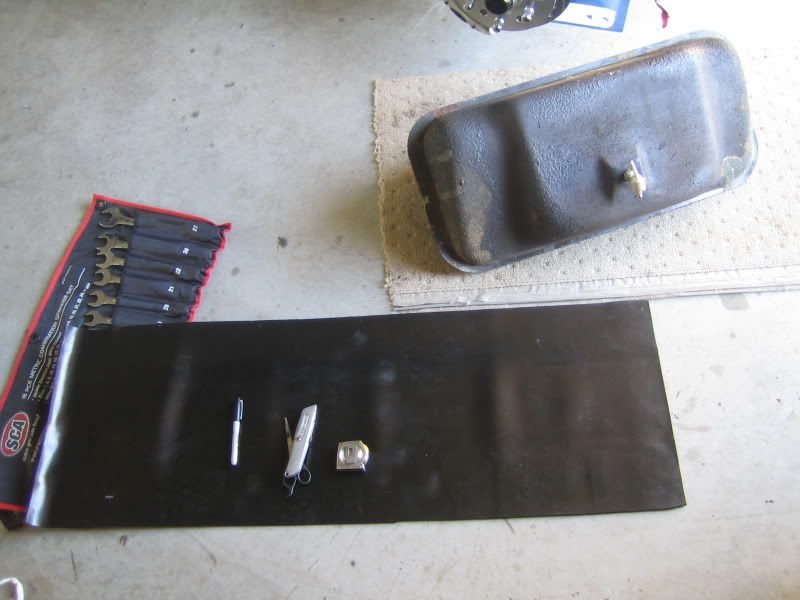
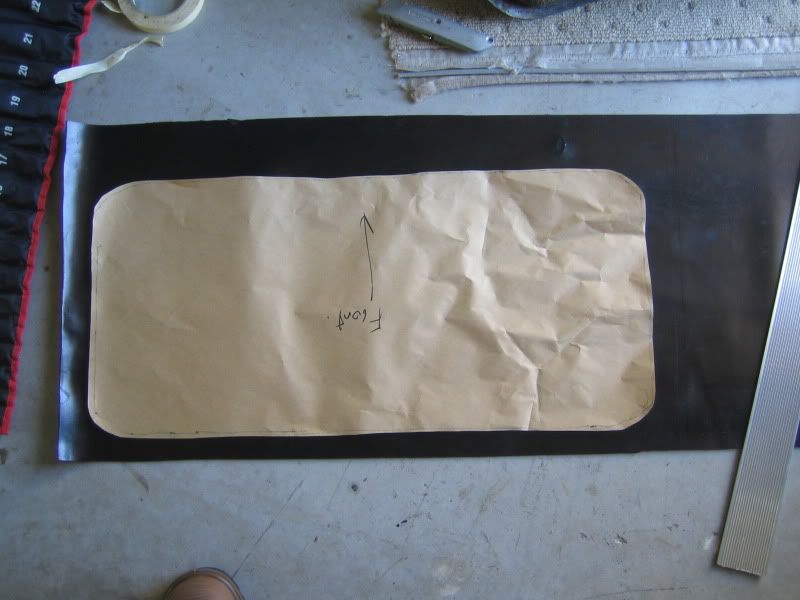
Got it roughed in and then mounted the tank. Once mounted I marked it and then trimmed off all the excess.
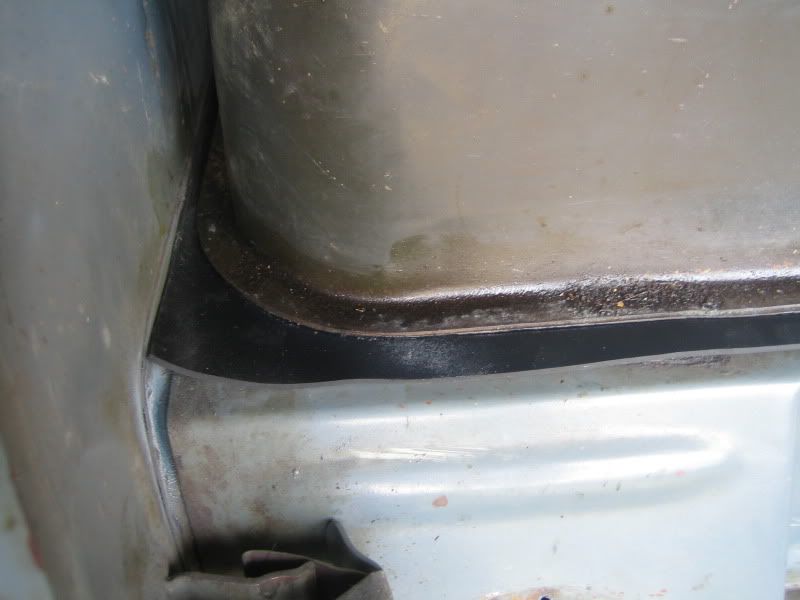
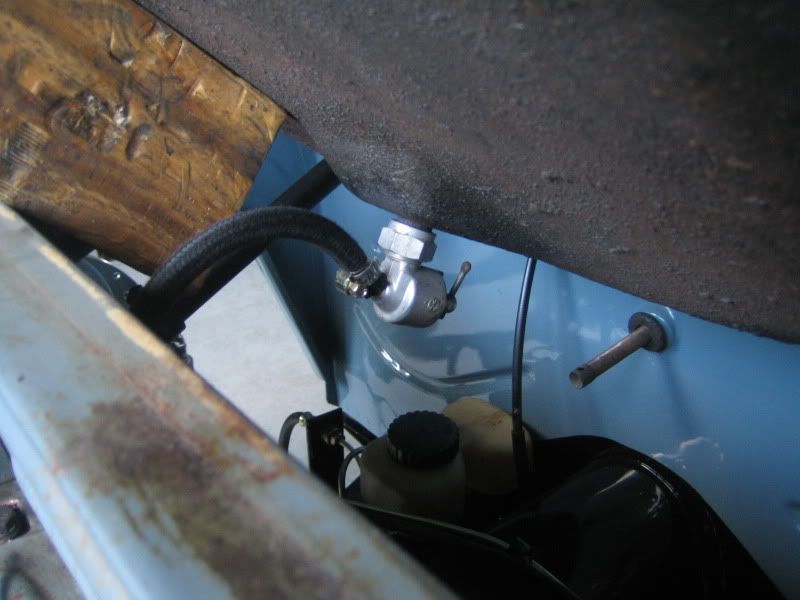
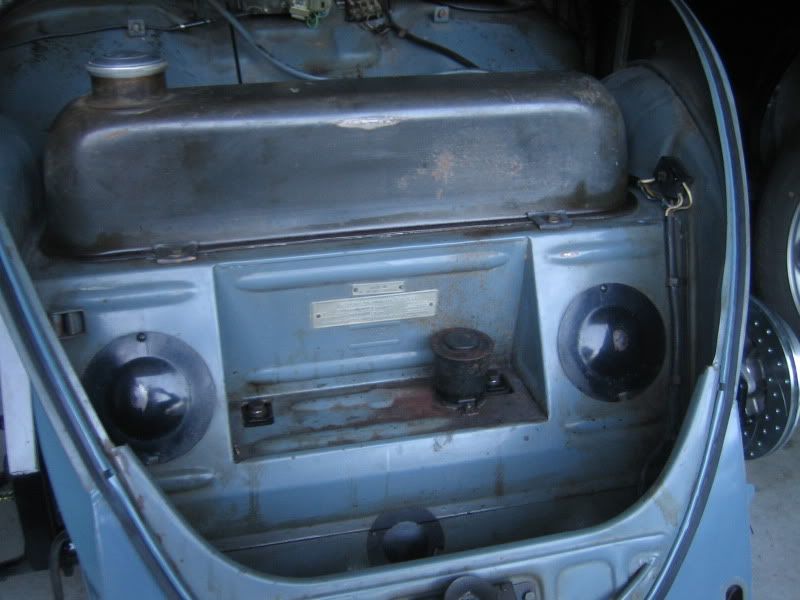
Cleaned up the fuel tap and added new fuel hose to hard line. Also added all the inspection plates etc in the front end and mounted the original brake
fluid reservoir although this wont have anything in it. I mounted it on a rubber seal to keep everything water tight.
|
|
|
 Aussie Aussie
Officially Full-On Dubber
  
Posts: 296
Threads: 43
Registered: September 15th, 2006
Member Is Offline
Location: Gold Coast
Theme: UltimaBB Pro Blue ( Default )
|
| posted on March 17th, 2012 at 05:53 PM |
|
|
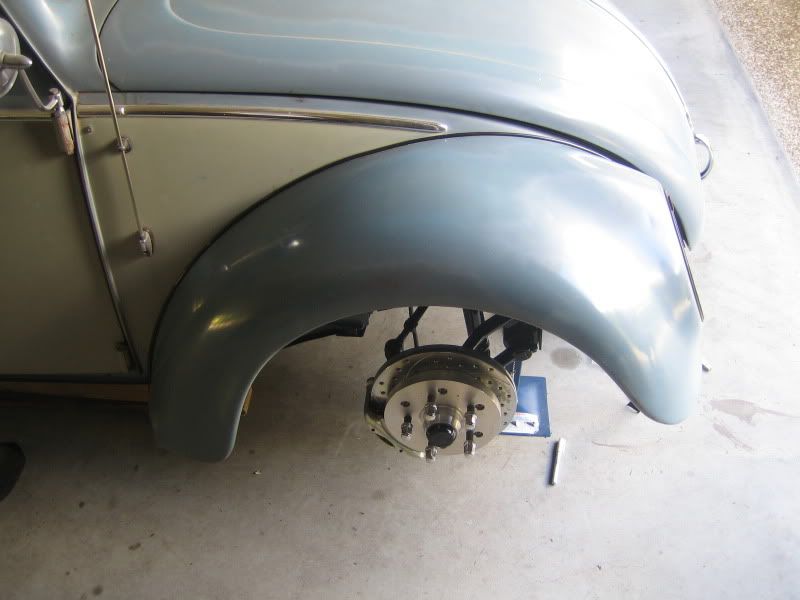
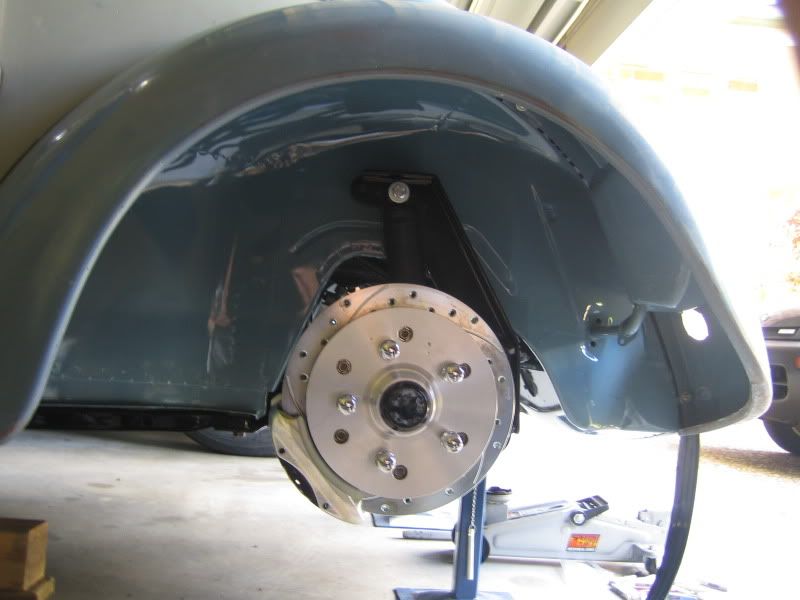
Wings
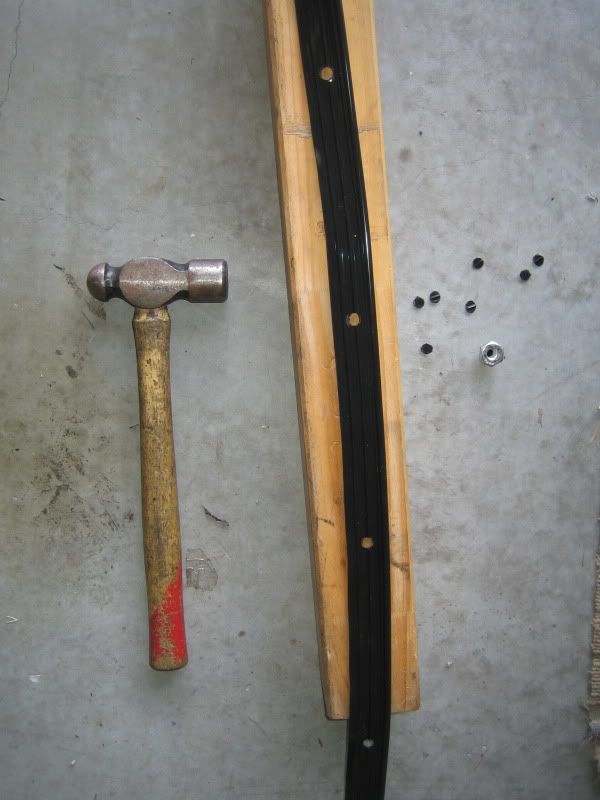
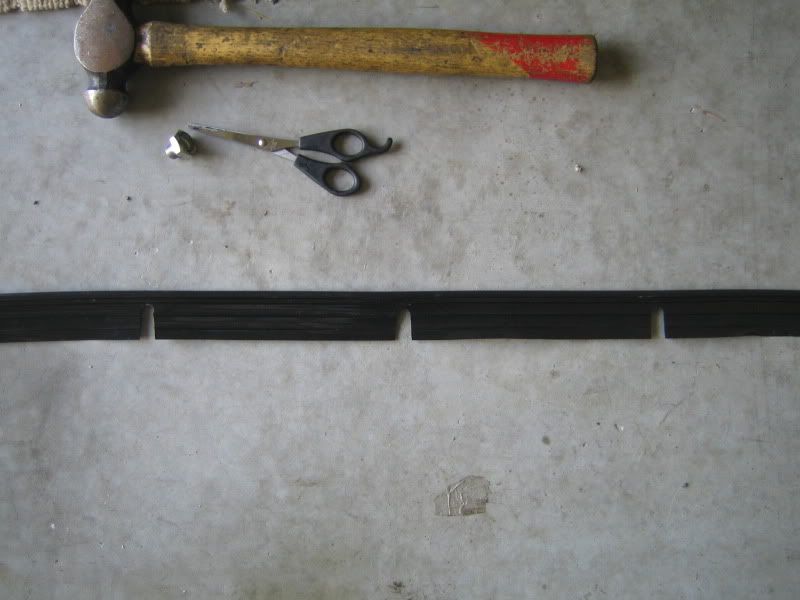
With everything pretty much finished up at the front I finally mounted the front wings. The old beading was very crusty so started with some new
stuff. With the help of my "beading fitting devices" I got it all lined up so I could mark out the bolt holes.
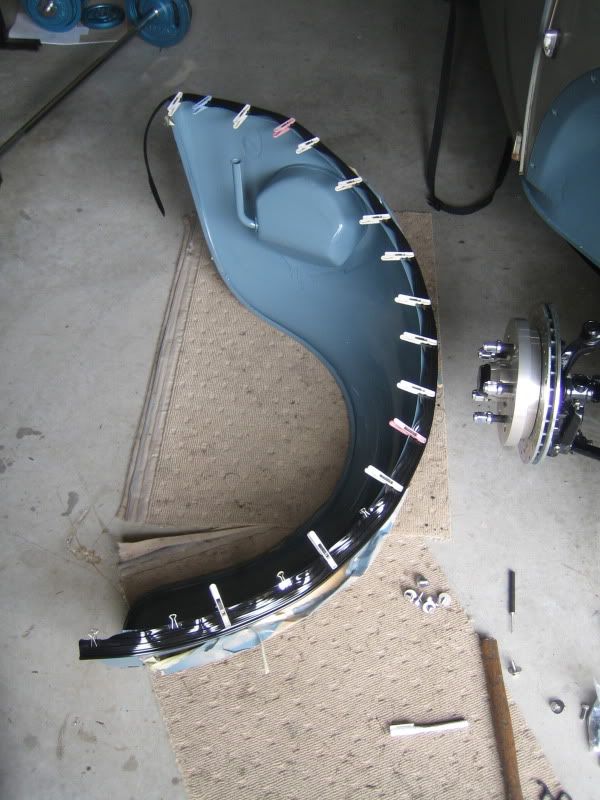
Punched out the bolt holes and then cut the slits ready to mount. Havent tried this method before but was very neat and easy.
New bolts and washers, plenty of copper grease and on they went.
|
|
|
 L469 L469
Officially Full-On Dubber
  
Posts: 288
Threads: 15
Registered: March 5th, 2010
Member Is Offline
Location: nsw
Theme: UltimaBB Pro Blue ( Default )
|
| posted on March 17th, 2012 at 06:46 PM |
|
|
wow great job . the standard of work you have done here is amazing.
love this car truly awesome job.very inspirational . fantastic .very jealous
what more can i say love it.
 
|
|
|
 tar76 tar76
Custom Title Time!
    
Posts: 1622
Threads: 95
Registered: December 18th, 2009
Member Is Offline
Location: Ningi Qld
Theme: UltimaBB Pro Blue
Mood: Rollin with The Dub Collective
|
| posted on March 17th, 2012 at 07:01 PM |
|
|
Excellent stuff mate, i'm also loving this thread
"Obey your Dreams"!
62 Std beetle.
65 11 wnd Split "The Cross".
6? coming very soon!!!!
|
|
|
 tar76 tar76
Custom Title Time!
    
Posts: 1622
Threads: 95
Registered: December 18th, 2009
Member Is Offline
Location: Ningi Qld
Theme: UltimaBB Pro Blue
Mood: Rollin with The Dub Collective
|
| posted on March 22nd, 2012 at 07:13 PM |
|
|
Where did you buy the ribbed black mat?? Is the tunnel down the centre covered in original mat or did you buy this?
cheers
"Obey your Dreams"!
62 Std beetle.
65 11 wnd Split "The Cross".
6? coming very soon!!!!
|
|
|
 Aussie Aussie
Officially Full-On Dubber
  
Posts: 296
Threads: 43
Registered: September 15th, 2006
Member Is Offline
Location: Gold Coast
Theme: UltimaBB Pro Blue ( Default )
|
| posted on March 22nd, 2012 at 07:23 PM |
|
|
| Quote: | Originally
posted by L469
wow great job . the standard of work you have done here is amazing.
love this car truly awesome job.very inspirational . fantastic .very jealous
what more can i say love it.
 
|
Thanks mate - I appreciate the comments. More updates to come soon. I was very lucky to find a car in this condition which has made this process a
whole lot easier!!! Can't wait now to get back on the road.
|
|
|
 Aussie Aussie
Officially Full-On Dubber
  
Posts: 296
Threads: 43
Registered: September 15th, 2006
Member Is Offline
Location: Gold Coast
Theme: UltimaBB Pro Blue ( Default )
|
| posted on March 22nd, 2012 at 07:27 PM |
|
|
| Quote: | Originally
posted by tar76
Where did you buy the ribbed black mat?? Is the tunnel down the centre covered in original mat or did you buy this?
cheers
|
The ribbed mat was from Century Foam and Rubber (Gold Coast) and cost about $70 for enough for all mats and a bit left over. Rubber down the central
tunnel is original - had to make a couple or repairs to some tears but cleaned up well overall.
|
|
|
| Pages: 1 .. 4 5 6 7 |