| [ Total Views: 226526 | Total Replies: 437 | Thread Id: 75812 ] |
| Pages: 1 .. 6 7 8 9 10 .. 15 |
|
|
 gerrelt gerrelt
Slammed & Awesome Dubber
 
Posts: 88
Threads: 3
Registered: May 13th, 2005
Member Is Offline
Theme: UltimaBB Pro Blue ( Default )
|
| posted on May 16th, 2010 at 08:03 PM |
|
|
Damn, that's terrible, I hope it heals fast!
|
|
|
 ElusiveStranger ElusiveStranger
Officially Full-On Dubber
  
Posts: 330
Threads: 30
Registered: May 28th, 2006
Member Is Offline
Location: Kent. England
Theme: UltimaBB Pro Blue ( Default )
|
| posted on May 17th, 2010 at 06:44 AM |
|
|
These are the ones Rich
Bolle:
http://www.screwfix.com/app/sfd/cat/products.jsp?id=80401&ts=42377
Sperian:
http://www.sperian.com/Products/Sperian/Eye_and_Face_Protection/Sperian_DuraM...
(I got mine from Arco via work)
|
|
|
 ricola ricola
Wolfsburg Wizard
  
Posts: 437
Threads: 9
Registered: February 5th, 2003
Member Is Offline
Location: UK
Theme: UltimaBB Pro Blue ( Default )
|
| posted on May 18th, 2010 at 06:42 AM |
|
|
Cheers for the words guys, eye is getting much better with the steroids so went out did some work on the bug!
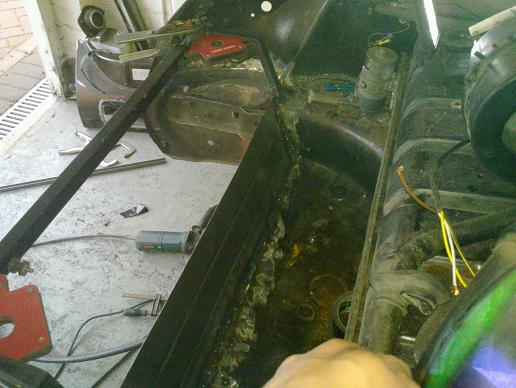
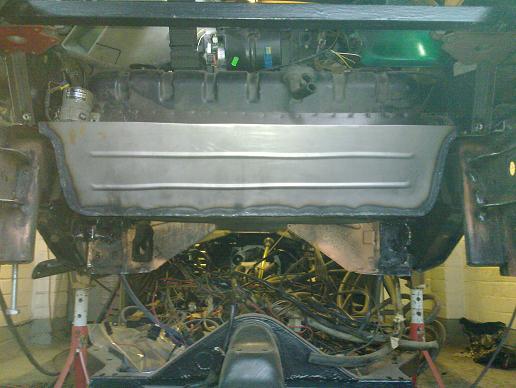
As I was working on the front end I wasn't happy with how I did the new panelwork behind the radiator so I'm redoing it now I have decent access
with the body in the air.
Front section of spare wheel well filled in with new beadrolled panel and framework is being made up with captive nuts so a removable cover can go
over the top.
|
|
|
 ricola ricola
Wolfsburg Wizard
  
Posts: 437
Threads: 9
Registered: February 5th, 2003
Member Is Offline
Location: UK
Theme: UltimaBB Pro Blue ( Default )
|
| posted on May 28th, 2010 at 07:06 AM |
|
|
Finished off the NS bumper mount area:
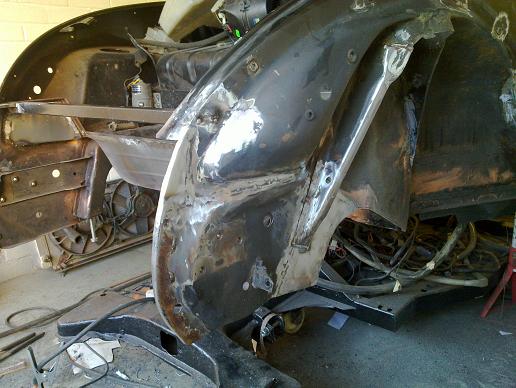
I added some fillet pieces at the top and filled in the sides to seal off the radiator from the underbonnet area.
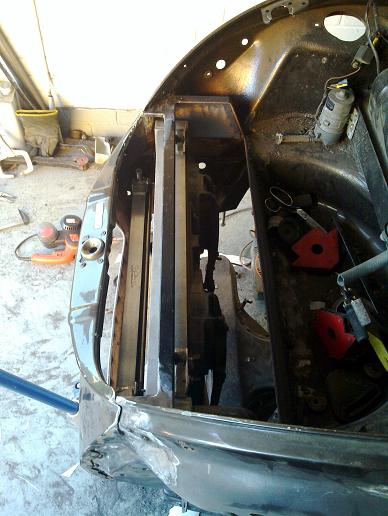
The pace chargecooler radiator only had mounts at the top, so I've welded in a tube with tabs for the top mounts and a Y shaped piece at the bottom
of each side that the radiator drops into. The tube is sleeved with rubber tube to give a nice cushioned mounting.
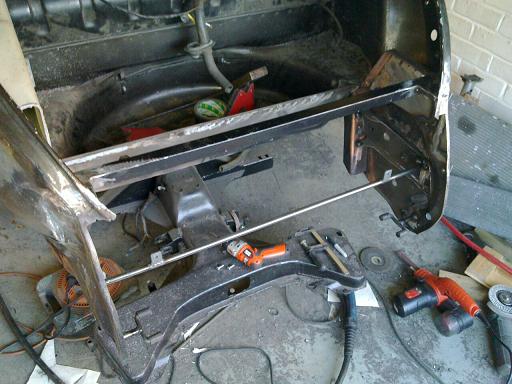
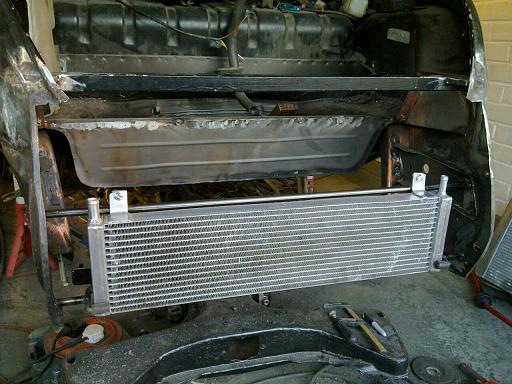
|
|
|
 STIDUB STIDUB
Custom Title Time!
Over it.
    
Posts: 1497
Threads: 57
Registered: June 23rd, 2008
Member Is Offline
Location: Where else but QLD :)
Theme: UltimaBB Pro Blue
Mood: Worn out, for no benefit.
|
| posted on May 28th, 2010 at 06:42 PM |
|
|
that cooler almost looks factory 
wait a sec u never comment on my work!  shall i
blame msn? shall i
blame msn? 
Volkswagen Drivers Club of Queensland - member 
STIDUB - yep its still a work in progress
Vwdcq club car racing/ and crashing while my bug isn't finished.
The above are personal views, no more, no less |
|
|
 colonel mustard colonel mustard
Son of Jim - Creator of Good
     
Posts: 2829
Threads: 51
Registered: February 27th, 2009
Member Is Offline
Theme: UltimaBB Pro Black
|
| posted on May 28th, 2010 at 06:52 PM |
|
|
So much metal work going into this car!!
|
|
|
 ricola ricola
Wolfsburg Wizard
  
Posts: 437
Threads: 9
Registered: February 5th, 2003
Member Is Offline
Location: UK
Theme: UltimaBB Pro Blue ( Default )
|
| posted on May 28th, 2010 at 07:02 PM |
|
|
Definitely blame msn Dave!
I want to get everything done right while the body is off the chassis, makes life so much easier and more satisfying later on...
|
|
|
 ricola ricola
Wolfsburg Wizard
  
Posts: 437
Threads: 9
Registered: February 5th, 2003
Member Is Offline
Location: UK
Theme: UltimaBB Pro Blue ( Default )
|
| posted on May 30th, 2010 at 06:06 AM |
|
|
Had a last play before I go off on holiday for a week...
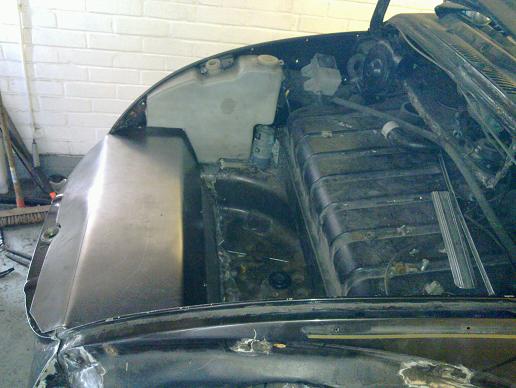
Steel cover to go over the radiators made up and all edges folded back on themselves to avoid sharp edges and scratching the body later on. It also
stiffens up the panel nicely. Once I've welded on the front valance panel I'll add an extra couple of fixing points at the front.
|
|
|
 STIDUB STIDUB
Custom Title Time!
Over it.
    
Posts: 1497
Threads: 57
Registered: June 23rd, 2008
Member Is Offline
Location: Where else but QLD :)
Theme: UltimaBB Pro Blue
Mood: Worn out, for no benefit.
|
| posted on May 30th, 2010 at 12:31 PM |
|
|
will that whole
.._
/.......ignore dots
section be removable?
similar to what im doing, hoping to squeeze battery in a box up front aswell as fuel pump etc, considering an in tank option currently though, will
see how it turns out, whats yours going to be again?
Volkswagen Drivers Club of Queensland - member 
STIDUB - yep its still a work in progress
Vwdcq club car racing/ and crashing while my bug isn't finished.
The above are personal views, no more, no less |
|
|
 ricola ricola
Wolfsburg Wizard
  
Posts: 437
Threads: 9
Registered: February 5th, 2003
Member Is Offline
Location: UK
Theme: UltimaBB Pro Blue ( Default )
|
| posted on May 30th, 2010 at 05:33 PM |
|
|
Yup, that whole new bit is removable. I'm definitely going with an in-tank pump and will be putting in plenty of baffling. It's the tidiest and most
compact option and also nice and quiet...
Rich
|
|
|
 ricola ricola
Wolfsburg Wizard
  
Posts: 437
Threads: 9
Registered: February 5th, 2003
Member Is Offline
Location: UK
Theme: UltimaBB Pro Blue ( Default )
|
| posted on July 12th, 2010 at 06:01 AM |
|
|
Sorry for the lack of posts recently, the biggest job has been stripping the underneath of the whole body to get it all painted in epoxy mastic.
Bloody horrible job!
I took a gamble on a 996/boxster spacesaver wheel fitting and it does with loads of space to spare in a variety of positions! For interest, the tyre
size is 105/95R17.
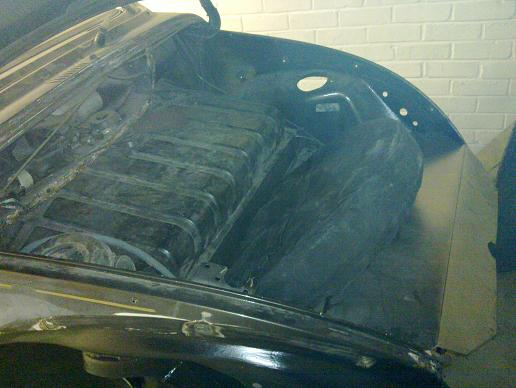
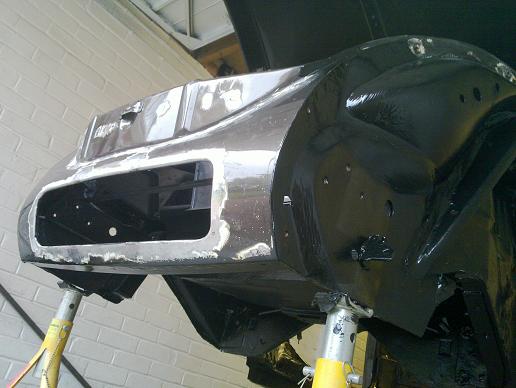
I cleaned up the rear of the front valance and welded on some bolts for the intake mesh, all edges prepped for plug welding on.
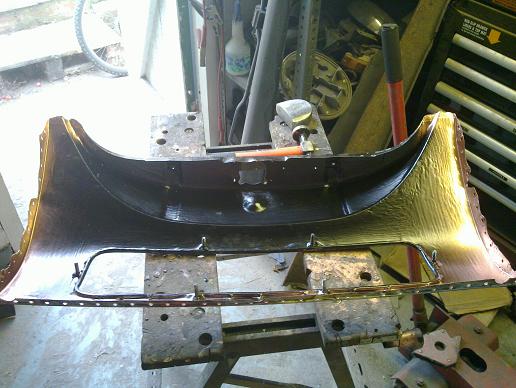
50x3mm strip with captive nuts welded on to the bottom between the inner wings to give a rigid mounting face for the air dam.
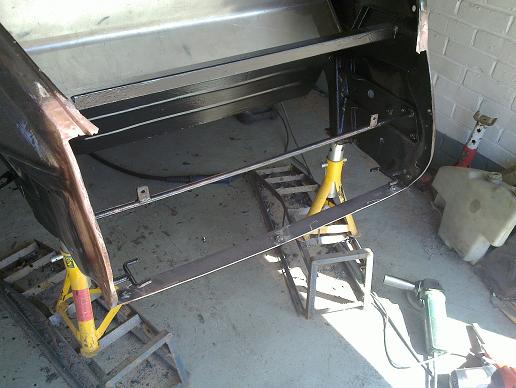
Front valance plug welded back on along the sides and bottom and then painted up in the epoxy. It's made the whole front end incredibly rigid!You can
see I also painted the whole underside of the body in epoxy.
Carpet strip plug welded back on to the top of the heater channel and painted.
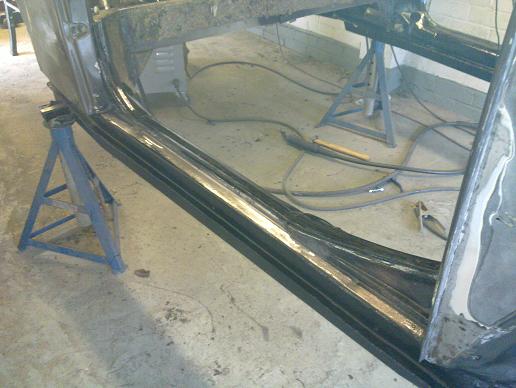
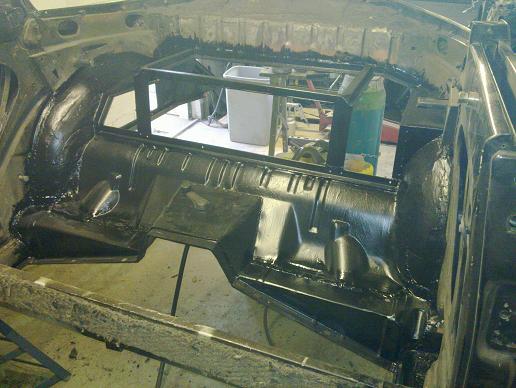
rear interior modified bodywork given a good epoxy coating
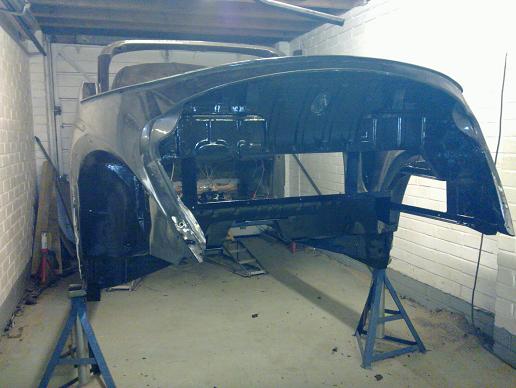
Rear end also got the epoxy treatment. Just about ready to start on the external paint prep now!
|
|
|
 crimson ghost crimson ghost
Casual Dubber

Posts: 22
Threads: 2
Registered: August 14th, 2009
Member Is Offline
Location: Springfield Illinois
Theme: UltimaBB Pro Blue ( Default )
|
| posted on July 22nd, 2010 at 02:16 AM |
|
|
Looking good !!! 
Corrado VR6 turbo
Karmann Ghia EJ20
|
|
|
 ricola ricola
Wolfsburg Wizard
  
Posts: 437
Threads: 9
Registered: February 5th, 2003
Member Is Offline
Location: UK
Theme: UltimaBB Pro Blue ( Default )
|
| posted on July 31st, 2010 at 06:08 AM |
|
|
Bit of an update...
I have done some work recently but not overly exciting for pictures as it's all paint prepwork.
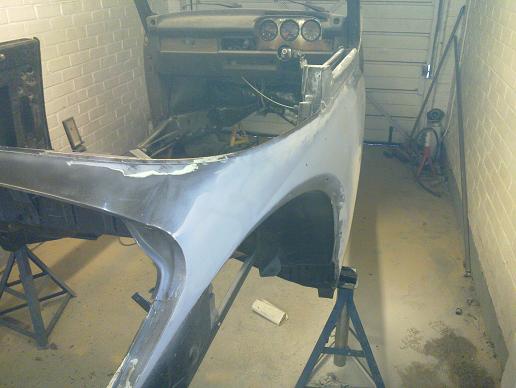
Rear quarter panel skimmed and smoothed...
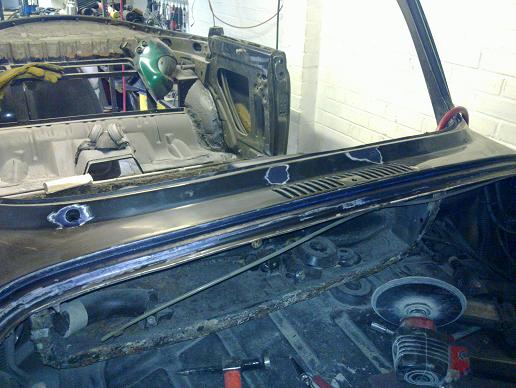
I welded up the LHD wiper holes
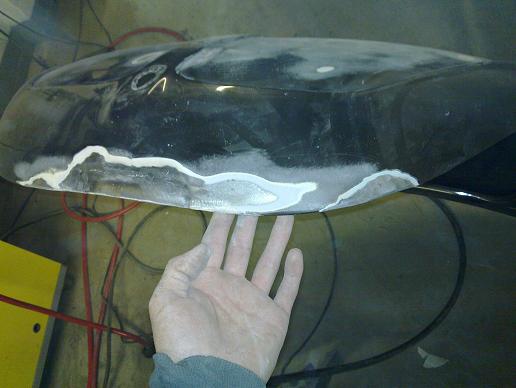
Bonnet needed a few sections replaced due to poor previous repairs rusting
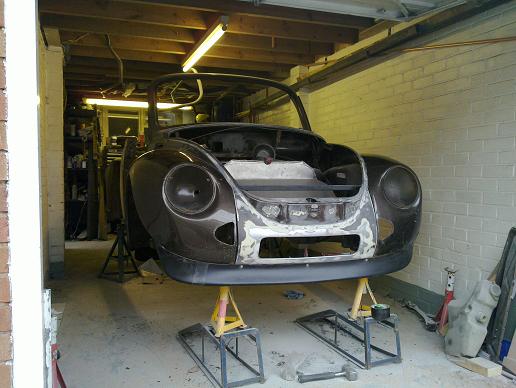
Kamei mocked up again, luckily there is a suitable double bend on the bottom of the front wings to mount to. I plan to make a mould out of the cut
down Kamei piece and a metal strip that will be bolted up on to the body, I'll then make up a fibreglass part.
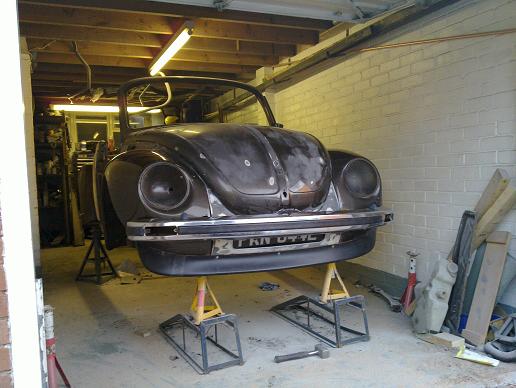
All mocked up to see the final effect. I don't think I'll get away with running the numberplate there unfortunately!
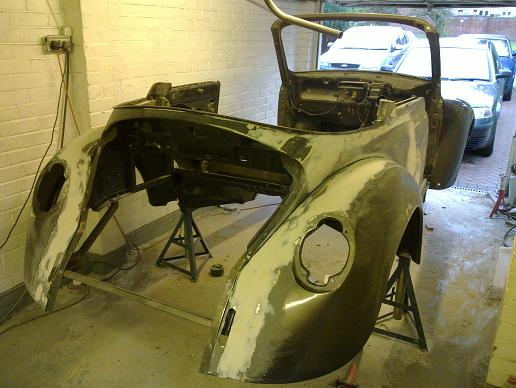
Bodyworking the rear wings now...
I'm changing jobs and have a couple of weeks holiday to use up over the next month so hopefully I might even get it in paint by the end of August!
Rich
|
|
|
 STIDUB STIDUB
Custom Title Time!
Over it.
    
Posts: 1497
Threads: 57
Registered: June 23rd, 2008
Member Is Offline
Location: Where else but QLD :)
Theme: UltimaBB Pro Blue
Mood: Worn out, for no benefit.
|
| posted on July 31st, 2010 at 11:19 AM |
|
|
front end with everything on looks awesome 
if the locals dont like that as your plate perhaps run bumperless for a little bit to get around it, other than the big holes for later bumper mounts
that would look nice 
Volkswagen Drivers Club of Queensland - member 
STIDUB - yep its still a work in progress
Vwdcq club car racing/ and crashing while my bug isn't finished.
The above are personal views, no more, no less |
|
|
 ElusiveStranger ElusiveStranger
Officially Full-On Dubber
  
Posts: 330
Threads: 30
Registered: May 28th, 2006
Member Is Offline
Location: Kent. England
Theme: UltimaBB Pro Blue ( Default )
|
| posted on July 31st, 2010 at 11:52 AM |
|
|
Where's the rest of it gone?
Glad to see you on the "other side" where you don't post 
|
|
|
 ricola ricola
Wolfsburg Wizard
  
Posts: 437
Threads: 9
Registered: February 5th, 2003
Member Is Offline
Location: UK
Theme: UltimaBB Pro Blue ( Default )
|
| posted on August 3rd, 2010 at 12:28 AM |
|
|
The chassis is shifted out of the way under a tarpaulin to give me a bit mroe space in my single garage!
I'm still out there working...
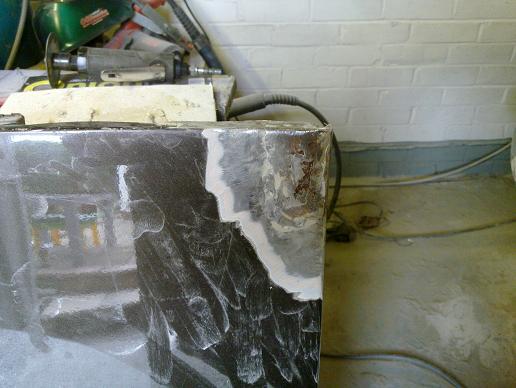
More rust found on the bottom of the door...
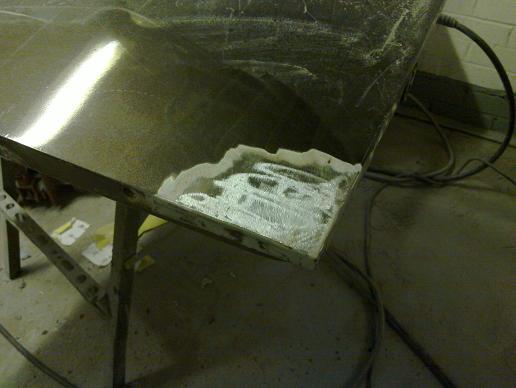
and repaired...
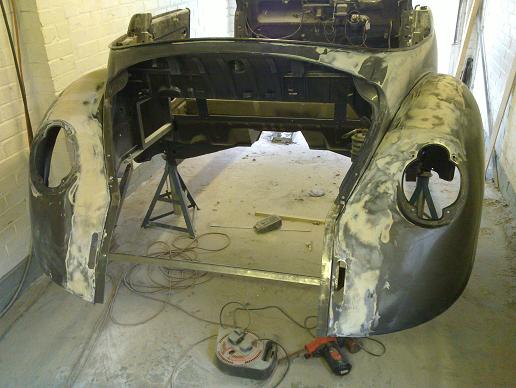
More sanding! I have to give praise to the How to guides on www.mig-welding.co.uk for bodywork, especially the ruler trick and also a tip I found elsewhere of adding a bit of fibreglass
resin to the filler to make it thinner.
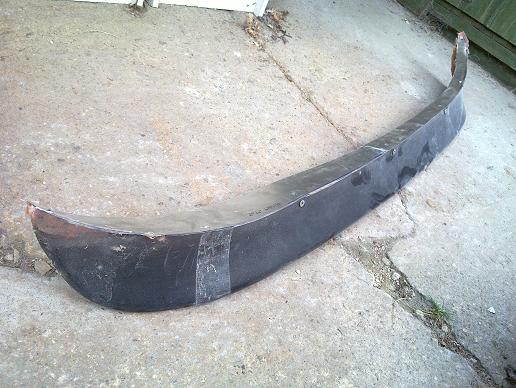
I cut a metal flange piece which was bolted to the body, the remains of the Kamei was then bolted in place and the two bonded together with fibreglass
filler. The ends will be reshaped and the whole thing smoothed before I use it as a master to create a mould for a new fibreglass part.
|
|
|
 Flintstones Flintstones
Custom Title Time!
    
Posts: 1077
Threads: 69
Registered: August 27th, 2002
Member Is Offline
Location: Sydney
Theme: UltimaBB Psyche Blue
|
| posted on August 3rd, 2010 at 10:28 PM |
|
|
it's getting there
Cheers
D
|
|
|
 ricola ricola
Wolfsburg Wizard
  
Posts: 437
Threads: 9
Registered: February 5th, 2003
Member Is Offline
Location: UK
Theme: UltimaBB Pro Blue ( Default )
|
| posted on August 4th, 2010 at 05:38 AM |
|
|
Another good day!
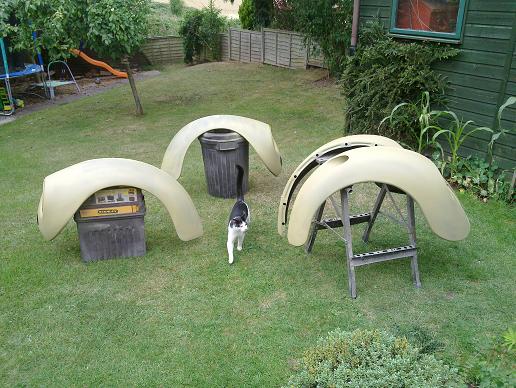
All 4 wings in etch...
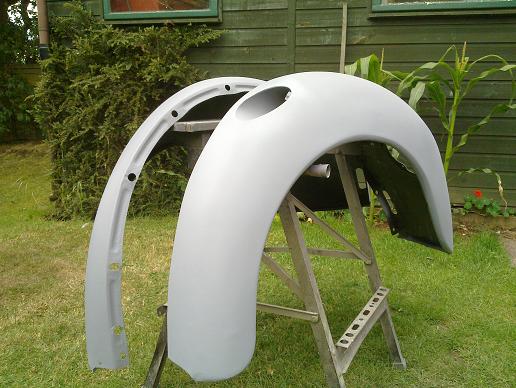
and two coats of high build primer...
|
|
|
 ricola ricola
Wolfsburg Wizard
  
Posts: 437
Threads: 9
Registered: February 5th, 2003
Member Is Offline
Location: UK
Theme: UltimaBB Pro Blue ( Default )
|
| posted on August 6th, 2010 at 01:02 AM |
|
|
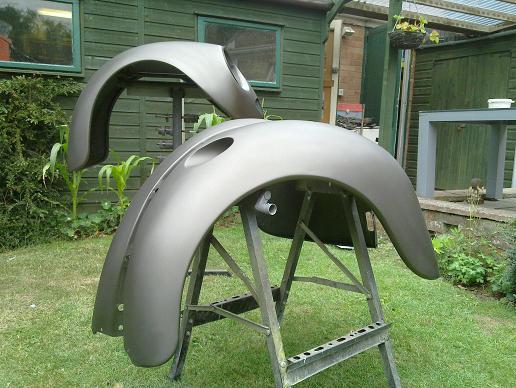
First colour coats! I'll do the final coats and clear with them loosely attached to the body, this is more to just cover the primer so I can put them
out of the way while I do the rest of the prep work...
|
|
|
 STIDUB STIDUB
Custom Title Time!
Over it.
    
Posts: 1497
Threads: 57
Registered: June 23rd, 2008
Member Is Offline
Location: Where else but QLD :)
Theme: UltimaBB Pro Blue
Mood: Worn out, for no benefit.
|
| posted on August 6th, 2010 at 09:16 AM |
|
|
imposter, theres hints of sun in those pics, you cant be in the UK 
hope theres no cat hair in the paint - good to see your using the peaceful week to your advantage 
Volkswagen Drivers Club of Queensland - member 
STIDUB - yep its still a work in progress
Vwdcq club car racing/ and crashing while my bug isn't finished.
The above are personal views, no more, no less |
|
|
 ricola ricola
Wolfsburg Wizard
  
Posts: 437
Threads: 9
Registered: February 5th, 2003
Member Is Offline
Location: UK
Theme: UltimaBB Pro Blue ( Default )
|
| posted on August 7th, 2010 at 01:07 AM |
|
|
We get sun sometimes, unfortunately today we got rain just as I decided to do some more painting!
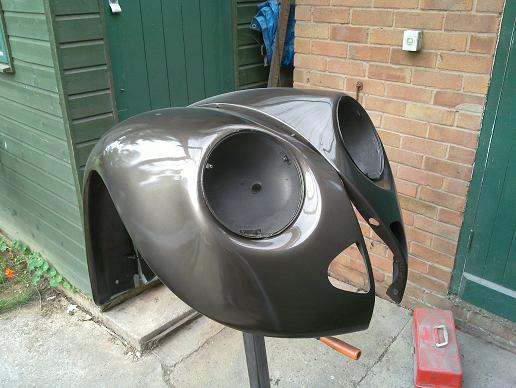
I decided to just finish the wings, the metallic particles are so small I can't see them being painted separately from the body making any
difference. I put on some wetter coats of the cellulose metallic and finished off with 3 coats of 1K acrylic clear.
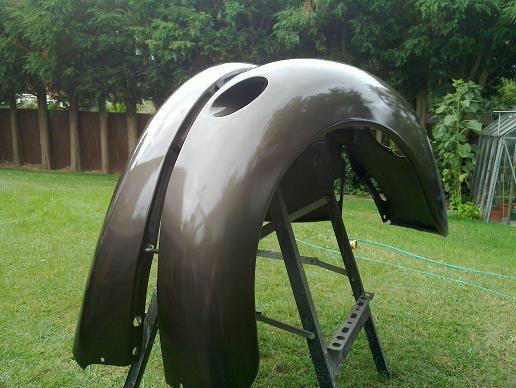
For information, I used a cheapo spray gun for the etch and primer coats, then an Iwata AZ3 HTE2 spray gun with a 1.3mm tip for the colour and clear
coats. This was all running from my 3hp 150l compressor that I made up a short copper section with water drain. It has actually given a really nice
finish out of the gun with not a single run! A couple of small bits of dirt got in one wing but should easily polish out when it has fully cured. I
had to paint the wings in two lots under my workshop porch bit as it was threatening to rain...
|
|
|
 ElusiveStranger ElusiveStranger
Officially Full-On Dubber
  
Posts: 330
Threads: 30
Registered: May 28th, 2006
Member Is Offline
Location: Kent. England
Theme: UltimaBB Pro Blue ( Default )
|
| posted on August 7th, 2010 at 10:25 PM |
|
|
Looking good Rich
|
|
|
 colonel mustard colonel mustard
Son of Jim - Creator of Good
     
Posts: 2829
Threads: 51
Registered: February 27th, 2009
Member Is Offline
Theme: UltimaBB Pro Black
|
| posted on August 7th, 2010 at 10:51 PM |
|
|
Looking fantastic!!! bring it to aus! 
|
|
|
 reub reub
Veteran Volks Folk
VWRX is gone...
    
Posts: 2054
Threads: 160
Registered: September 2nd, 2002
Member Is Offline
Theme: UltimaBB Pro Blue
|
| posted on August 7th, 2010 at 11:49 PM |
|
|
Nice work to date dude!
Reub
|
|
|
 ricola ricola
Wolfsburg Wizard
  
Posts: 437
Threads: 9
Registered: February 5th, 2003
Member Is Offline
Location: UK
Theme: UltimaBB Pro Blue ( Default )
|
| posted on August 18th, 2010 at 06:08 AM |
|
|
OK, small update:
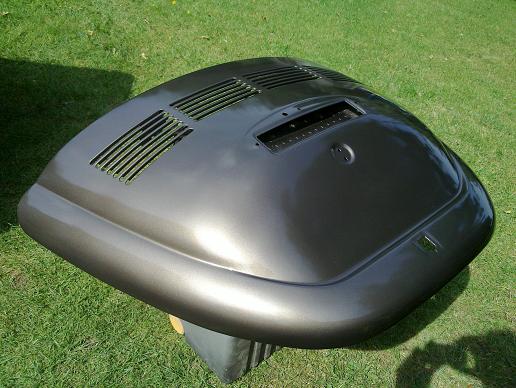
Decklid painted, no real problems, although I did sandblast the slats as they were too fiddly to sand nicely.
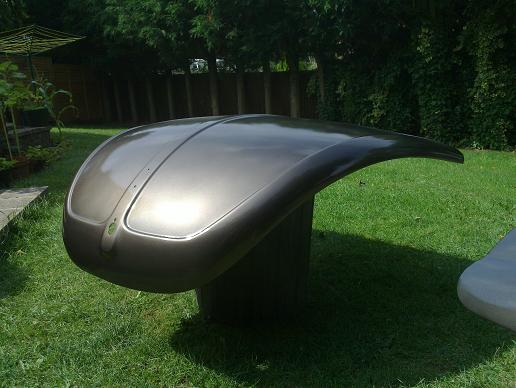
Bonnet finally painted. I've done this 3 times now! First time there was some striping visible in the colour coat as the passes weren't wet enough
to flow into each other nicely. Then I got a really good second colour/clear coat and left it in the sun for a few hours to dry before putting it on
some cushions in the conservatory just to have it out of the way but they left imprints all over the bonnet! I had to wet sand it all back and paint
for a third time, I'm not doing it again!!
I'm working on the doors now and I've found out why somebody had put a gold pinstripe under the normal sidetrim. They had drilled one of the doors
in the wrong place and the stripe was to cover it up! So, filler removed and the extra trim clip holes were welded up. Another useful tip: hold a
piece of copper against the back of the panel and the weld won't blow through. I also had to repair a few local bits of the door bottom and the
copper strip trick also worked well to stop the weld melting away the metal at the edges.
I'm definitely on track for finishing all the paint by the end of the month!
|
|
|
 trickysimon trickysimon
A.k.a.: Simon Azzopardi
Custom Title Time!
100km/h is only 9 seconds away
    
Posts: 1473
Threads: 43
Registered: December 15th, 2007
Member Is Offline
Location: Wagga Wagga
Theme: UltimaBB Pro Blue ( Default )
|
| posted on August 18th, 2010 at 08:28 AM |
|
|
Nice work dude! 
|
|
|
 ricola ricola
Wolfsburg Wizard
  
Posts: 437
Threads: 9
Registered: February 5th, 2003
Member Is Offline
Location: UK
Theme: UltimaBB Pro Blue ( Default )
|
| posted on August 24th, 2010 at 05:29 AM |
|
|
Doors painted...
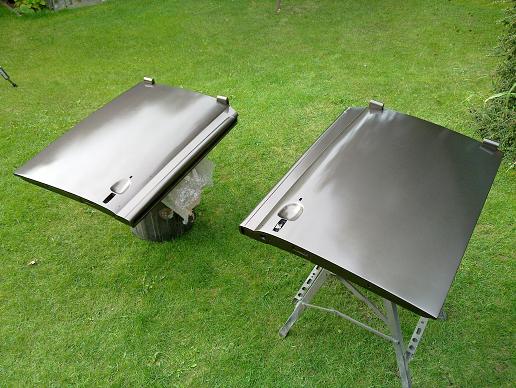
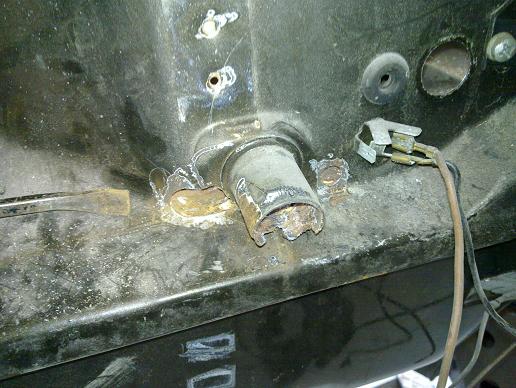
More rust uncovered! This is the drain tube from the scuttle area by the wipers, it's a well known rust trap in 1303s so I wasn't too surprised.
Repair from the inside of the car was the easiest way to go. Here I have opened out the rusty areas ready to weld new sections in.
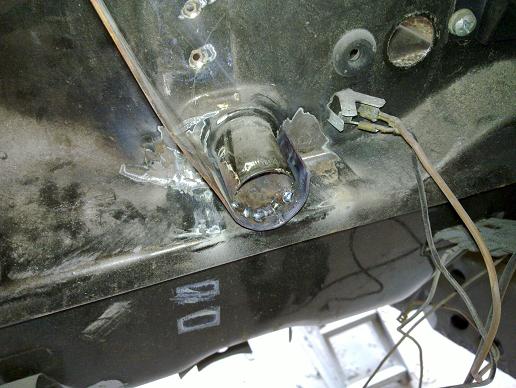
To repair the tube I decided to use another trick I saw, bend some copper strip around the part and weld straight onto the strip creating the new
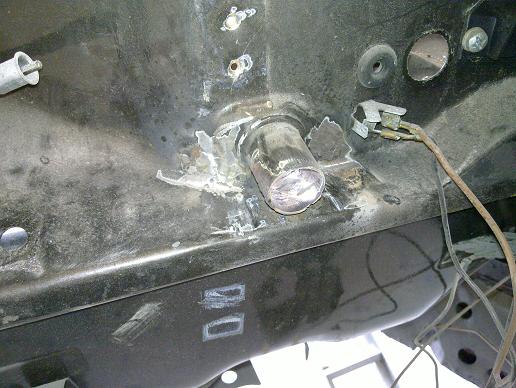
section.
The outside surface is smooth (as it went straight on to the copper surface) but the inside needed some work with the die grinder . All good in the
end though!
I've been busy doing minor bodywork too getting the main shell ready for paint, nearly there!
|
|
|
 ricola ricola
Wolfsburg Wizard
  
Posts: 437
Threads: 9
Registered: February 5th, 2003
Member Is Offline
Location: UK
Theme: UltimaBB Pro Blue ( Default )
|
| posted on August 25th, 2010 at 04:06 AM |
|
|
Another good day today!
Body now etch primed..
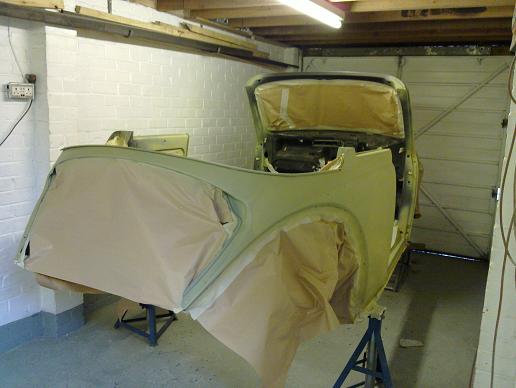 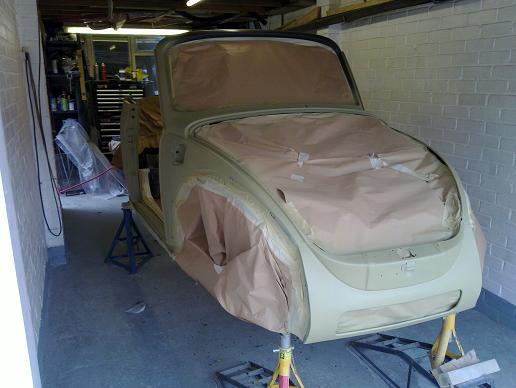
and two coats of high build primer!
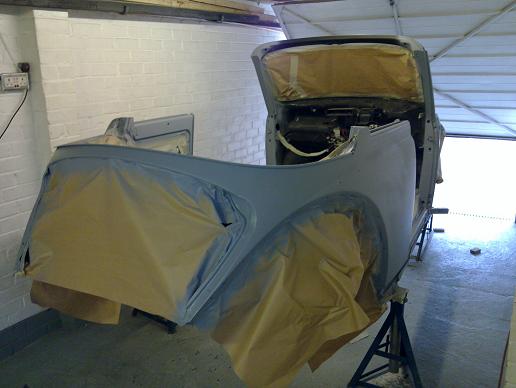 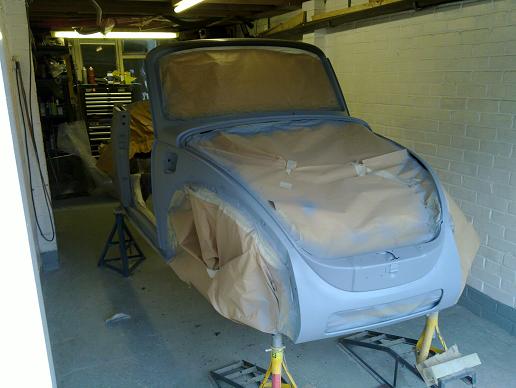
next job to wet sand this back ready for colour...
|
|
|
 Flintstones Flintstones
Custom Title Time!
    
Posts: 1077
Threads: 69
Registered: August 27th, 2002
Member Is Offline
Location: Sydney
Theme: UltimaBB Psyche Blue
|
| posted on August 25th, 2010 at 08:48 PM |
|
|
your almost done!
|
|
|
 ricola ricola
Wolfsburg Wizard
  
Posts: 437
Threads: 9
Registered: February 5th, 2003
Member Is Offline
Location: UK
Theme: UltimaBB Pro Blue ( Default )
|
| posted on August 28th, 2010 at 03:37 AM |
|
|
Got the shell in paint today! 
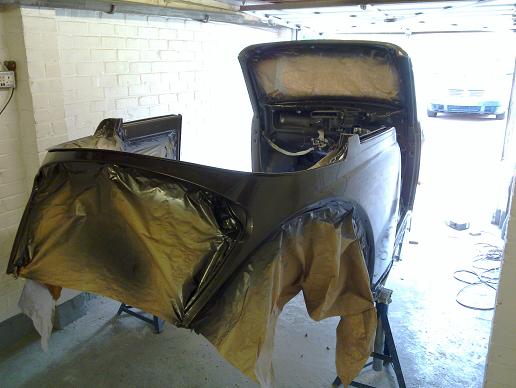 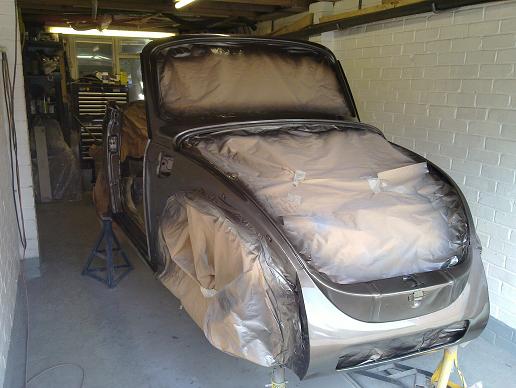
Now I just have to restrain myself for a while to let it fully cure...
|
|
|
| Pages: 1 .. 6 7 8 9 10 .. 15 |