| [ Total Views: 53180 | Total Replies: 909 | Thread Id: 91039 ] |
| Pages: 1 .. 7 8 9 10 11 .. 31 |
|
|
 Smiley Smiley
A.k.a.: Daniel Stephens
Veteran Volks Folk
    
Posts: 2125
Threads: 110
Registered: October 29th, 2008
Member Is Offline
Location: Yeppoon, Central Queensland
Theme: UltimaBB Pro Blue
Mood: Synchro'd
|
| posted on August 15th, 2011 at 08:42 PM |
|
|
| Quote: | Originally
posted by SebastienPeek
I'm hoping that I'll be able to pick up a ventless decklid soon and then she'll look even cleaner at the back.
|
I wouldn't recommend this as the vents are there to supply air for the cooling of the engine.
Smiley 
If you said I was a Volkswagen man, you'd be right.
|
|
|
 waveman1500 waveman1500
Custom Title Time!
Also rides a Honda
    
Posts: 1346
Threads: 13
Registered: December 17th, 2009
Member Is Offline
Location: Adelaide
Theme: UltimaBB Pro Blue ( Default )
|
| posted on August 15th, 2011 at 09:53 PM |
|
|
I have a spare ventless decklid, but as already mentioned, the vents really do help with cooling. If you're keeping the engine stock then a ventless
decklid should be fine, otherwise if you plan on going quickly then I would keep the vents on there.
|
|
|
 SebastienPeek SebastienPeek
Custom Title Time!
    
Posts: 1657
Threads: 89
Registered: May 31st, 2011
Member Is Offline
Location: Melbourne
Theme: UltimaBB Pro White
|
| posted on August 15th, 2011 at 10:29 PM |
|
|
Hmm, very valid points from both of you.
If it weren't for the fact that I will be going to a larger engine some time next year, then I would consider getting a ventless one.
However, because this engine upgrade won't be until later next year, and I won't be here to drive Zelda during the Summer, I don't think installing
a ventless decklid for the time being would be an issue!
Also, before I put the ventless decklid on, I'd definitely replace the old oil bath cleaner for an air filter. We'll see what happens though, just
depends on next paycheck and whether or not I'd be able to afford it after paying for my new laptop and so forth!

|
|
|
 SebastienPeek SebastienPeek
Custom Title Time!
    
Posts: 1657
Threads: 89
Registered: May 31st, 2011
Member Is Offline
Location: Melbourne
Theme: UltimaBB Pro White
|
| posted on August 16th, 2011 at 11:23 AM |
|
|
Looks like tonight I'll be getting a quote on those guards, finally!
Thank God for mates 
Will update here with costs and so forth when I know!
|
|
|
 Turbo54 Turbo54
Veteran Volks Folk
    
Posts: 2220
Threads: 268
Registered: July 13th, 2004
Member Is Offline
Theme: UltimaBB Pro Blue ( Default )
Mood: Boost'n
|
| posted on August 16th, 2011 at 02:03 PM |
|
|
Do it yourself, hire a gun from kennards and go crazy. Or get your colour mixed in a can at crash supplies,
I cant see it happening for $50.
T54
C'mon kids gather round,
there's a new sensation hitting town,
It's moving straight, low to the ground,
it'll pick you up when your feeling down.
|
|
|
 SebastienPeek SebastienPeek
Custom Title Time!
    
Posts: 1657
Threads: 89
Registered: May 31st, 2011
Member Is Offline
Location: Melbourne
Theme: UltimaBB Pro White
|
| posted on August 16th, 2011 at 02:08 PM |
|
|
Well, I have everything ready here, so I'm really tempted to just whip out some cans and go for it.
I can't see it either, but one can dream.
I'm seriously contemplating installing the alternator kit tonight.
|
|
|
 SebastienPeek SebastienPeek
Custom Title Time!
    
Posts: 1657
Threads: 89
Registered: May 31st, 2011
Member Is Offline
Location: Melbourne
Theme: UltimaBB Pro White
|
| posted on August 16th, 2011 at 05:01 PM |
|
|
So, the blokes at Classic Vee-Dub upgraded me to a 75AMP KIT due to the sale, at no extra price!
In all though, that may mean more work for me...
Currently the generator, from what I can tell, is connect to an external regulator which is located underneath the backseat. This one actually...
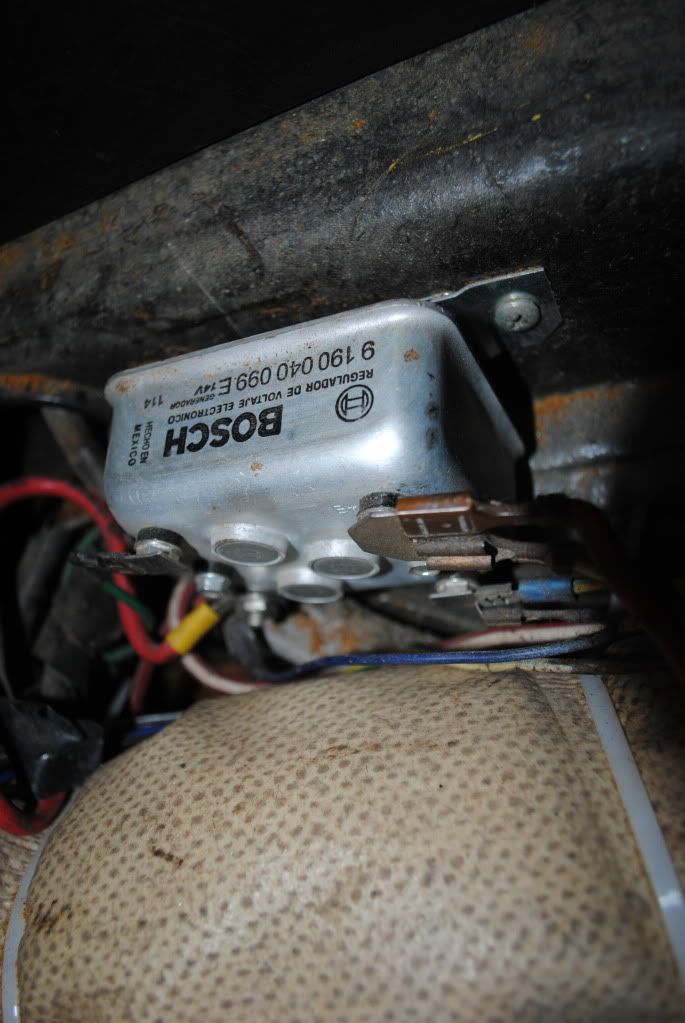
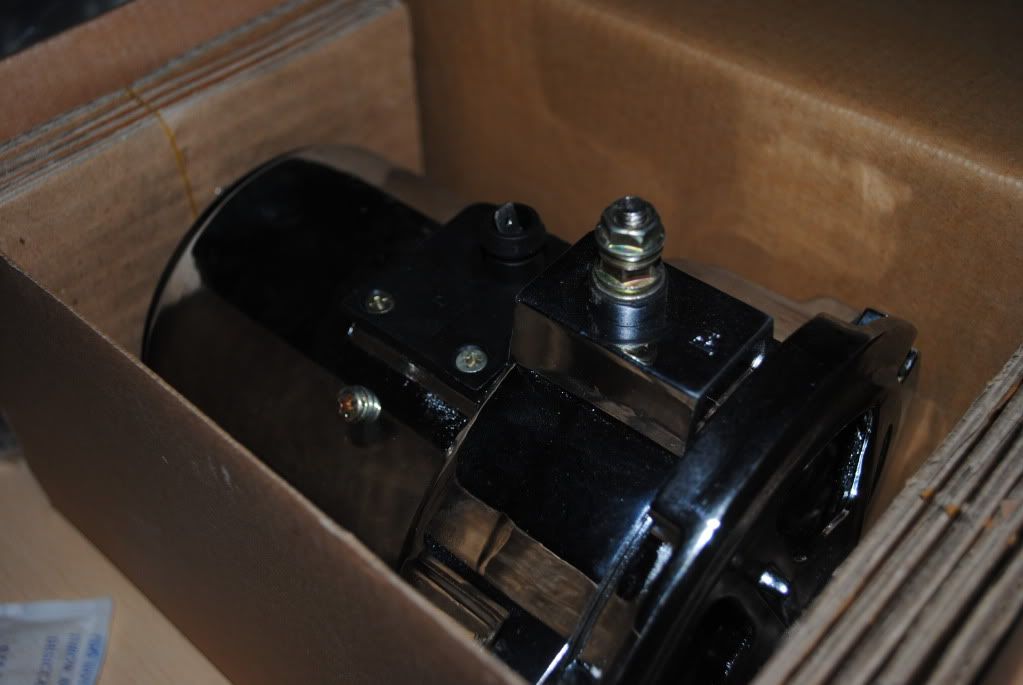
Now, with this new alternator, found below, I am pretty sure that it has an internal regulator. Which may cause issues, right? As now there is no need
for this regulator (shown above), is there anywhere on here that shows the replacement of this/bypassing? I'm just wanting to make sure I have
everything down packed before I continue.
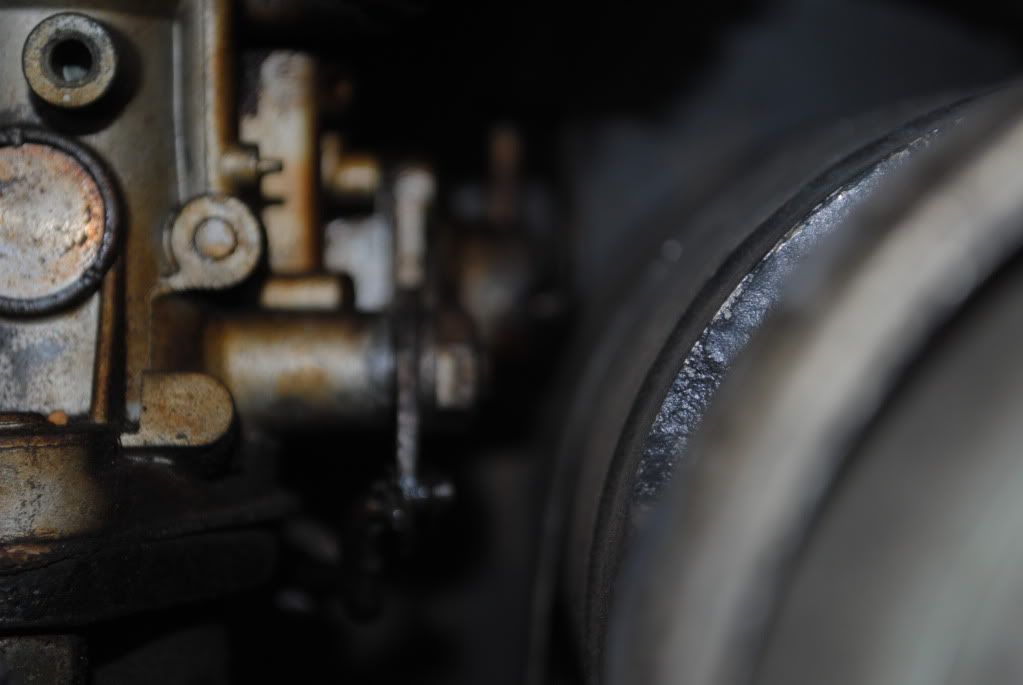
This is my current clearance between the generator and the fuel pump on the carby, it looks very close as it is, so I know for a fact that I may have
issues when it comes to attaching it.
Other than that, I am really thankful that the blokes at Classic Vee-Dub upgraded me at no extra cost. Hopefully it won't be difficult to install the
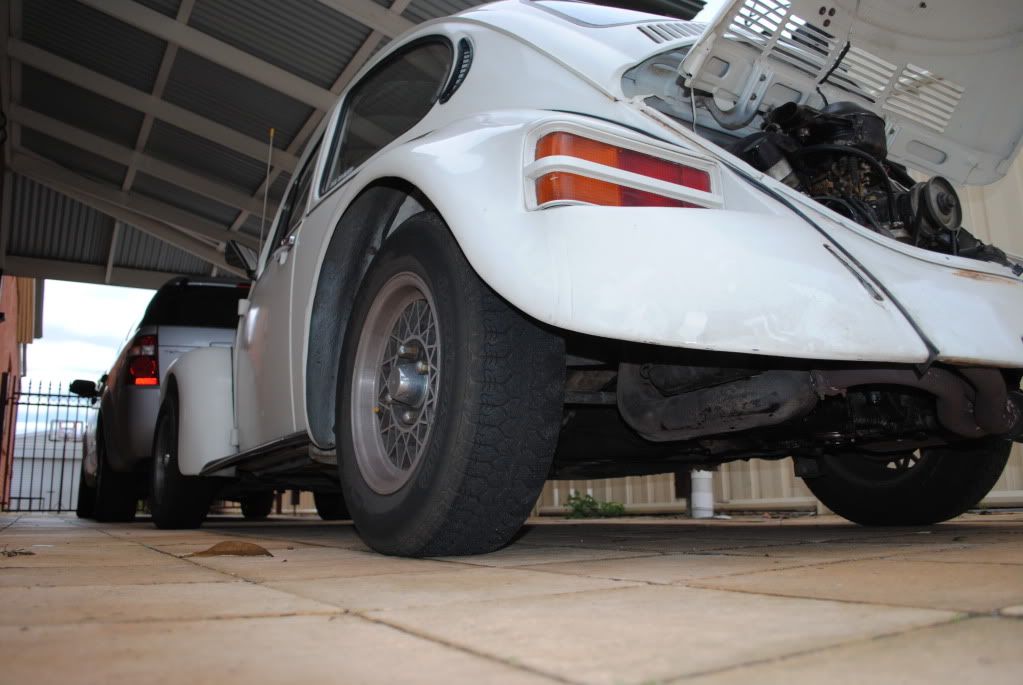
new one this weekend when it comes to the wiring of the car. Also, I have a G on my tacho, shouldn't it really be an A now? :P
Took this artyfarty photo this afternoon too, quite like it myself...
|
|
|
 SebastienPeek SebastienPeek
Custom Title Time!
    
Posts: 1657
Threads: 89
Registered: May 31st, 2011
Member Is Offline
Location: Melbourne
Theme: UltimaBB Pro White
|
| posted on August 16th, 2011 at 05:39 PM |
|
|
Made a quick video of how Zelda idles, enjoy!
http://s1099.photobucket.com/albums/g388/SebastienPeek/?action=view&curre...
With my awesome detective work, I was able to find the exact schematics that I needed to rewire the alternator in. I'm assuming this is all I need to
do, right?
http://www.vw-resource.com/images/handdrawn_schematic.jpg
|
|
|
 SebastienPeek SebastienPeek
Custom Title Time!
    
Posts: 1657
Threads: 89
Registered: May 31st, 2011
Member Is Offline
Location: Melbourne
Theme: UltimaBB Pro White
|
| posted on August 16th, 2011 at 09:20 PM |
|
|
My horn continues to sometimes work and sometimes not.
Where should I be looking when it comes to fixing this? Could it just be loose wires behind the horn button itself or on the actual horn?
Mine sounds like a truck, is this normal of a 12V horn?
I want the meepmeep noise...
|
|
|
 cam070 cam070
Custom Title Time!
    
Posts: 1332
Threads: 53
Registered: July 25th, 2009
Member Is Offline
Location: Sydney
Theme: UltimaBB Pro Blue ( Default )
Mood: Getting hands dirty stripping the bug down
|
| posted on August 17th, 2011 at 09:32 PM |
|
|
I'd say the horn issue is a worn contact on the steering column. The copper contact that meets the back of the steering wheel wears through. It is
part of the indicator stalk assembly that may need to be replaced.
To check it you Need to yank off the horn cover and then undo the large nut, I think it's 19mm. Then just pull off the wheel. Just make sure the
wheels and steering wheel are all pointing straight ahead before you remove anything so it's all easy to line up when you reassemble.
|
|
|
 SebastienPeek SebastienPeek
Custom Title Time!
    
Posts: 1657
Threads: 89
Registered: May 31st, 2011
Member Is Offline
Location: Melbourne
Theme: UltimaBB Pro White
|
| posted on August 18th, 2011 at 12:39 AM |
|
|
Alright Cam, looks like another job for this weekend!
Saturday will be massive, hopefully that a lot of photos of the happenings too.
Aim is to have the alternator installed before 3:30pm. Which means I'll be up bright and early at around 7am to get everything done.
Which means Sunday I'll hopefully be able to get around to picking up these taillight assemblies from waveman1500.
Also, tomorrow night I'll be getting a quote on how much those rear guards would cost to do. I'm really hoping it is like, $200 maximum for both.
Then, I can live with that that is for sure.
Will keep everyone posted. Sometimes I feel like I'm talking to myself on here... :l
|
|
|
 beetleboyjeff beetleboyjeff
A.k.a.: Jeff Walsh
Custom Title Time!
    
Posts: 1782
Threads: 40
Registered: February 13th, 2009
Member Is Offline
Location: Port Macquarie
Theme: UltimaBB Pro Blue ( Default )
Mood: Drive bugs hard
|
| posted on August 18th, 2011 at 06:39 PM |
|
|
Are you kidding? Your enthusiasm and somewhat wide eyed inocence as you learn about you beetle is like an enthusiasm drug for me, and I am sure many
others as well.
Please don't stop, I love it, and am prepared to offer any help I can.
From your ole' mate Jeff
|
|
|
 SebastienPeek SebastienPeek
Custom Title Time!
    
Posts: 1657
Threads: 89
Registered: May 31st, 2011
Member Is Offline
Location: Melbourne
Theme: UltimaBB Pro White
|
| posted on August 18th, 2011 at 06:49 PM |
|
|
Ahaha thanks Jeff, I'll continue to post up on here then! 
I got the guards in to be painted in the next two to three weeks, $200.
Think it is a fair trade, professionally done. Good thing I have friends with Dad's who own shops!
I'm somewhat nervous about Saturday, this alternator conversion should be very fun indeed, but very, confronting as well.
Have to make sure I get a Y connector for spades connections, so that everything is all beautiful and nice when it is done.
|
|
|
 SebastienPeek SebastienPeek
Custom Title Time!
    
Posts: 1657
Threads: 89
Registered: May 31st, 2011
Member Is Offline
Location: Melbourne
Theme: UltimaBB Pro White
|
| posted on August 19th, 2011 at 05:46 PM |
|
|
Boom! This engine business is bloody difficult with the decklid still on and the engine still inside. Unfortunately I don't have the means to get the
engine out, and the decklid was being a pain in the arse to remove. But I digress...
Have finally gotten around to pulling apart the engine of Zelda. Going to give everything a clean, but here is what is currently out...
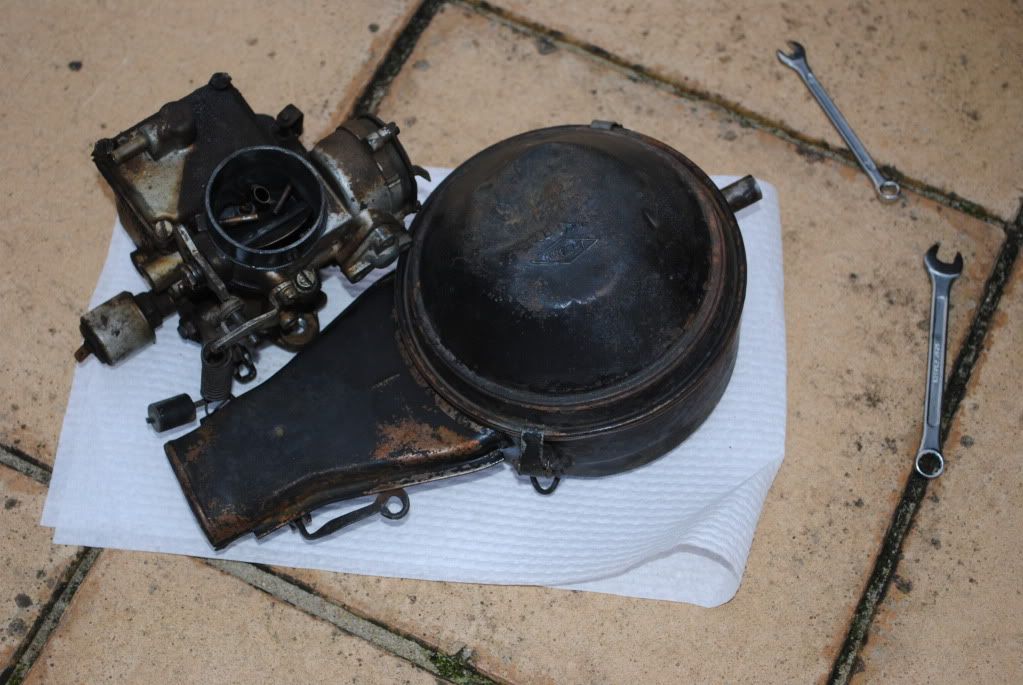
This is what her donker currently looks like...
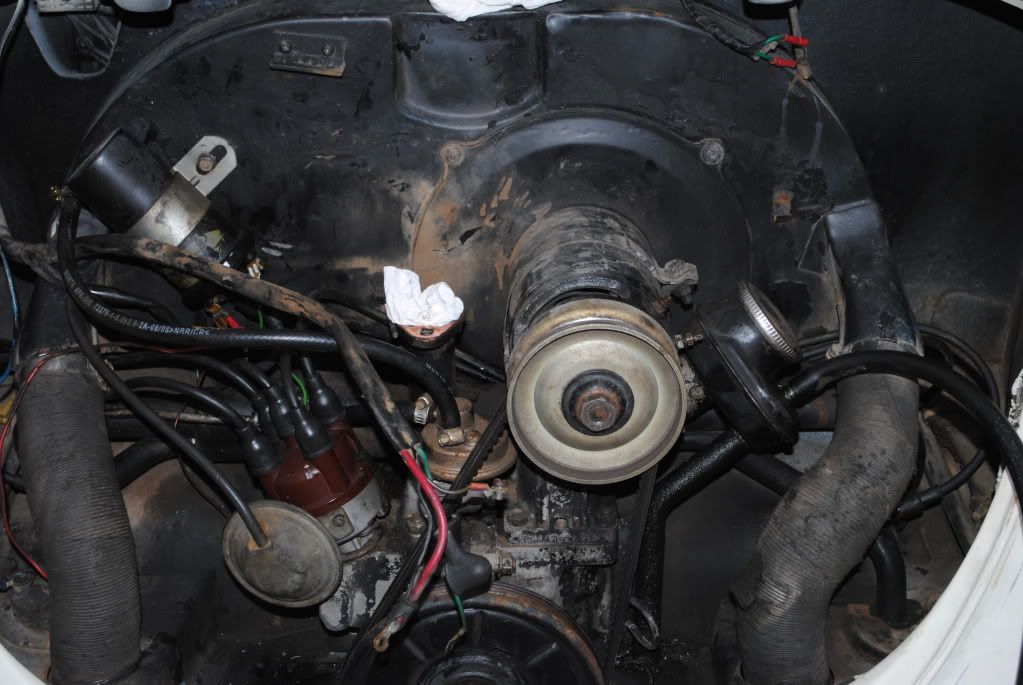
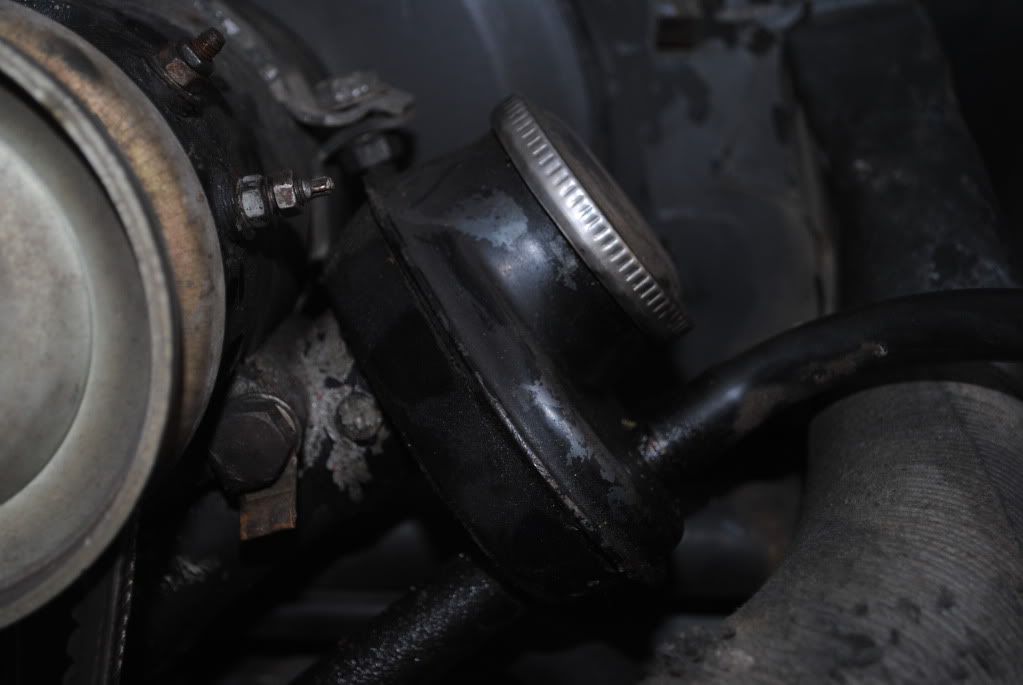
I'm curious, how does one remove the oil filler? This thing here.
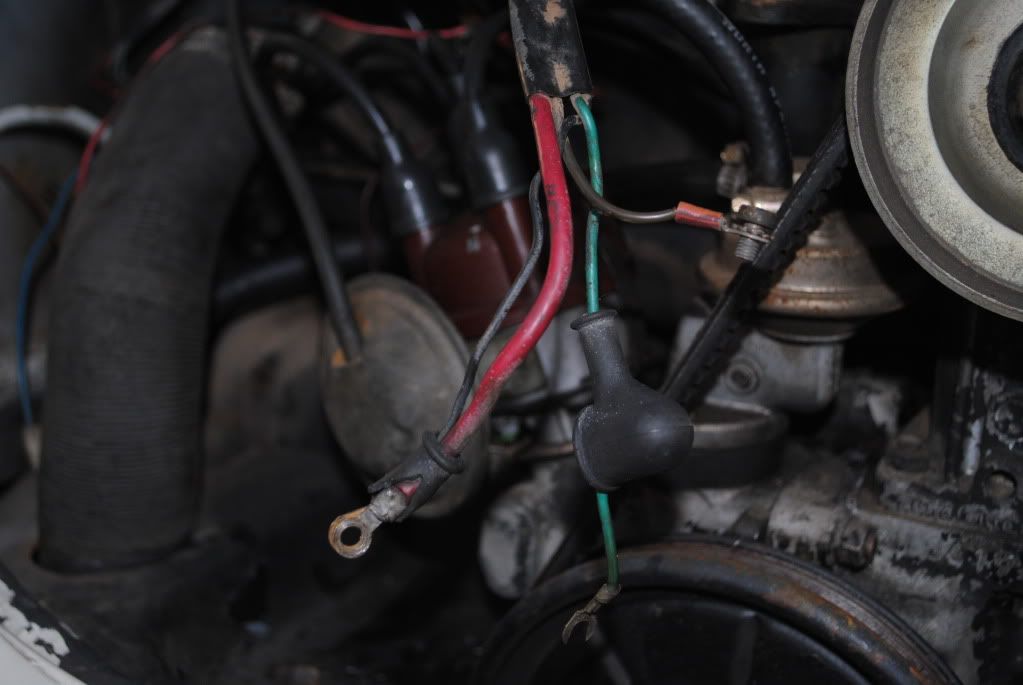
And these are the old wires that I will be using to feed through the new ones, hopefully this will be a very harmless job.
Really hoping that by the end of the night the generator is completely out and that tomorrow, I'll be able to put the alternator back in.
|
|
|
 Brass Munky Brass Munky
Casual Dubber

Posts: 35
Threads: 0
Registered: August 19th, 2011
Member Is Offline
Theme: UltimaBB Pro Orange
|
| posted on August 19th, 2011 at 06:18 PM |
|
|
The oil filler should just twist off... Did you get a new stand in the kit? If you did, the filler will come out when you remove that, when its out,
its easier to take off, A LOT easier... If not and your using the standard stand, leave it in if you dont have any reason to remove it...
|
|
|
 SebastienPeek SebastienPeek
Custom Title Time!
    
Posts: 1657
Threads: 89
Registered: May 31st, 2011
Member Is Offline
Location: Melbourne
Theme: UltimaBB Pro White
|
| posted on August 19th, 2011 at 06:19 PM |
|
|
New kit definitely came with a stand, so I'll leave it in there until I'm taking the stand off and then remove it. Should be a lot simpler as you
just mentioned 
|
|
|
 shokwave2 shokwave2
A.k.a.: Matt Hamilton
Officially Full-On Dubber
  
Posts: 289
Threads: 28
Registered: March 7th, 2010
Member Is Offline
Theme: UltimaBB Psyche Blue
|
| posted on August 19th, 2011 at 06:40 PM |
|
|
To remove the oil filler from the stand, remove the oil cap and you'll see two slots just inside the filler. This is the oil filler nut which usually
needs a special tool to unscrew it. You could probably make your own tool if you don't want to buy one. http://www.justkampersaustralia.com/shop/oil-filler-neck-nut-tool-j11206.html
|
|
|
 SebastienPeek SebastienPeek
Custom Title Time!
    
Posts: 1657
Threads: 89
Registered: May 31st, 2011
Member Is Offline
Location: Melbourne
Theme: UltimaBB Pro White
|
| posted on August 19th, 2011 at 10:57 PM |
|
|
Looks like it'll take a little bit of an effort to remove the oil filler from it's current stand and put it onto the new stand that came with the
kit. But time will tell tomorrow morning.
I need a socket set to get the nut off of the fan at the rear of the fan shroud. Hopefully a mate has one that fits, anyone know the exact dimensions
of the nut?
This is turning out to be a pretty easy install, I'm just really worried about this bloody wiring. Do I need to completely remove the rear seat to
get everything through the firewall?
Looks almost like the current wiring comes through the heater channel, but not 100%. Will take a photo tomorrow morning before starting.
|
|
|
 SebastienPeek SebastienPeek
Custom Title Time!
    
Posts: 1657
Threads: 89
Registered: May 31st, 2011
Member Is Offline
Location: Melbourne
Theme: UltimaBB Pro White
|
| posted on August 19th, 2011 at 11:00 PM |
|
|
Found it!
It needs a 36mm socket to get it off. Really hoping a mates socket set has one that large!

|
|
|
 SebastienPeek SebastienPeek
Custom Title Time!
    
Posts: 1657
Threads: 89
Registered: May 31st, 2011
Member Is Offline
Location: Melbourne
Theme: UltimaBB Pro White
|
| posted on August 20th, 2011 at 02:23 PM |
|
|
Have failed dismally. Hopefully SpLiTmEiStEr will come to the rescue later this afternoon.
Taking her engine out, so that I can get the nut off of the fan at the rear, so that it is so much bloody easier than it currently is.
Battle wounds all over my hands.
Also cleaning up a ventless decklid that may have gotten into my possession somehow... 
|
|
|
 Smiley Smiley
A.k.a.: Daniel Stephens
Veteran Volks Folk
    
Posts: 2125
Threads: 110
Registered: October 29th, 2008
Member Is Offline
Location: Yeppoon, Central Queensland
Theme: UltimaBB Pro Blue
Mood: Synchro'd
|
| posted on August 20th, 2011 at 02:47 PM |
|
|
All the times I've ever done it I just remove the fanhousing and generator as one piece then pull them apart afterwards.
Though I do have a bit more room in the engine compartment with mine being a Baja.
Smiley 
If you said I was a Volkswagen man, you'd be right.
|
|
|
 SebastienPeek SebastienPeek
Custom Title Time!
    
Posts: 1657
Threads: 89
Registered: May 31st, 2011
Member Is Offline
Location: Melbourne
Theme: UltimaBB Pro White
|
| posted on August 20th, 2011 at 03:00 PM |
|
|
Yeah, I was thinking about doing that, but that in itself would have been a task and a half.
The easiest way to do it in my case is to drop the engine and then give it a go.
Hopefully all works!
|
|
|
 beetleboyjeff beetleboyjeff
A.k.a.: Jeff Walsh
Custom Title Time!
    
Posts: 1782
Threads: 40
Registered: February 13th, 2009
Member Is Offline
Location: Port Macquarie
Theme: UltimaBB Pro Blue ( Default )
Mood: Drive bugs hard
|
| posted on August 20th, 2011 at 03:03 PM |
|
|
Seb, try taking your engine lid off, then you can take off the fan housing and generator all in one piece - that is the usual way.
You just undo the 2 small 10mm bolts at each side of the fan housing and the strap that goes around the generator and generator stand (the clamp bolt
is usually down on the drivers side. I assume you have already removed the fan belt.
Having said that, you may have other tight bits if your engine has a doghouse cooler, or if the thermostat is still connected - it is accessed to be
able to disconnect it by removing the small piece of tin on the drivers side below the pushrod tubes. You will also have to remove any wiring or plug
leads attached to the fan housing or coil, as well as the heater tubes.
Maybe send a photo if you have any more questions.
From your ole' mate Jeff
|
|
|
 SebastienPeek SebastienPeek
Custom Title Time!
    
Posts: 1657
Threads: 89
Registered: May 31st, 2011
Member Is Offline
Location: Melbourne
Theme: UltimaBB Pro White
|
| posted on August 20th, 2011 at 10:21 PM |
|
|
Hey there!
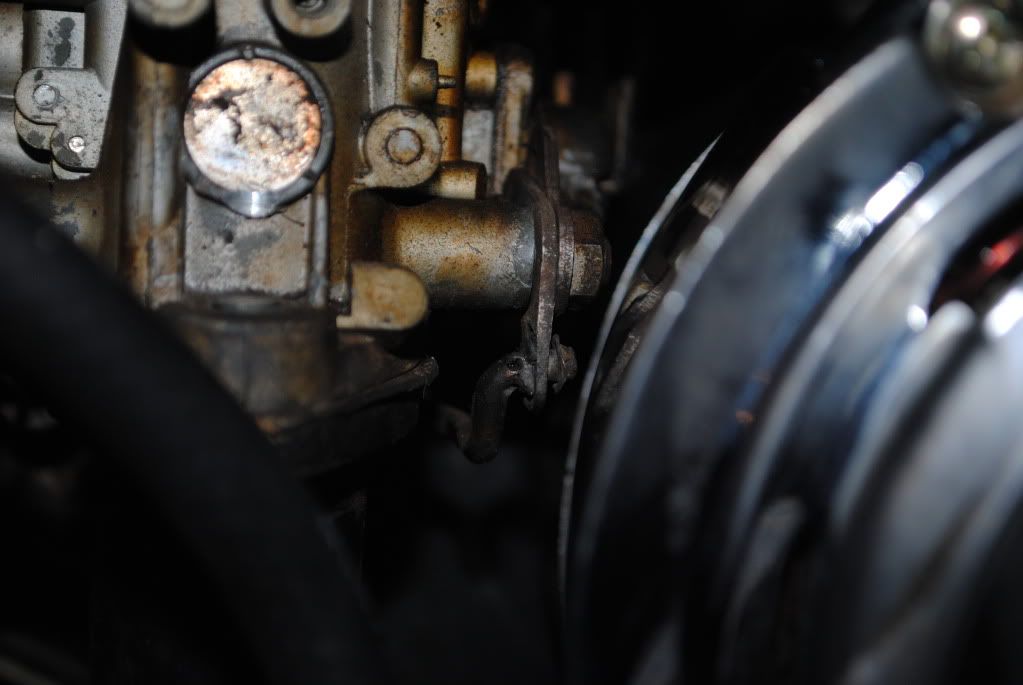
So today was very, well, entertaining to say the least! Looks like, thanks to the help of one SpLiTmEiStEr, I was able to put the alternator on and
damn it looks shiny!
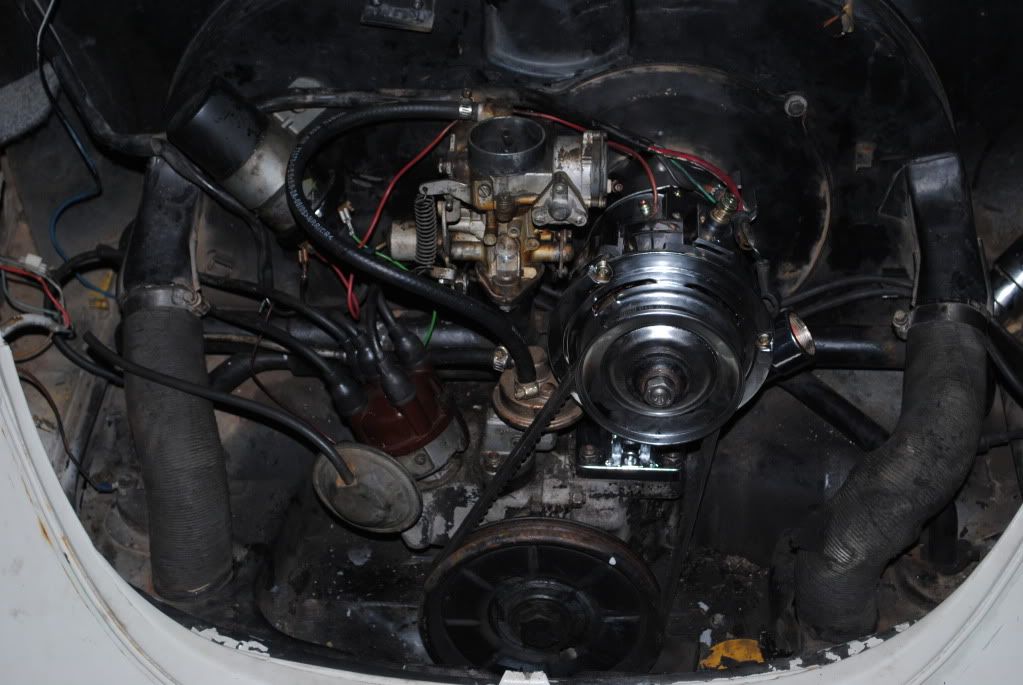
Look! I have clearance, and it doesn't rub or anything.
And even the alternator is shiny!
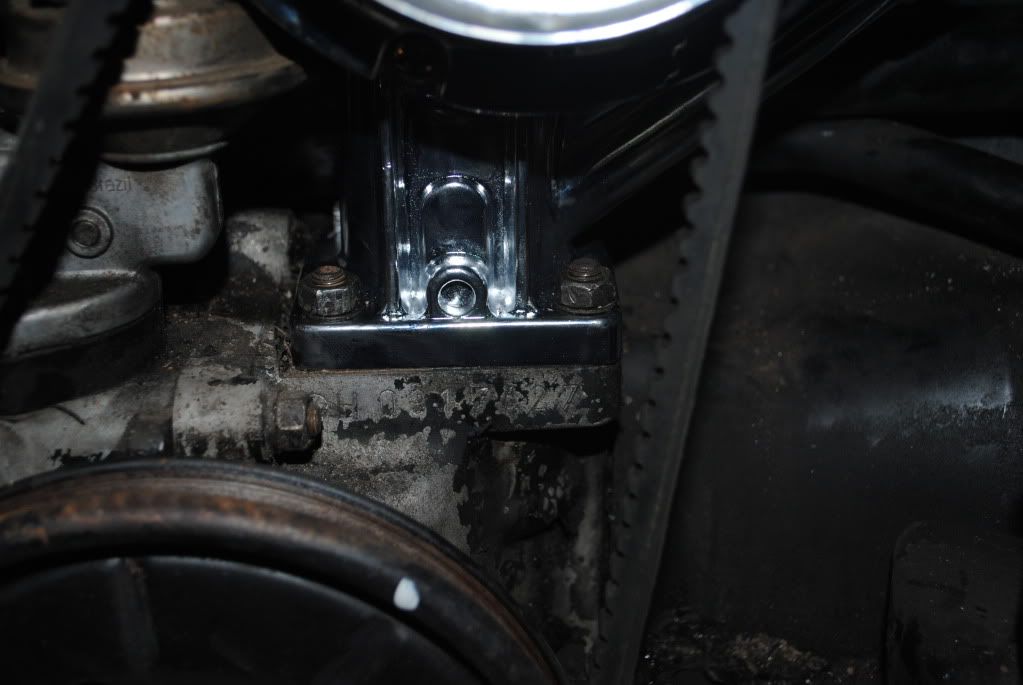
However, like shokwave2 mentioned, I was unable to take off the oil filler. So the aim is to just put some duct tape over this and order something
from Just Kampers Australia!
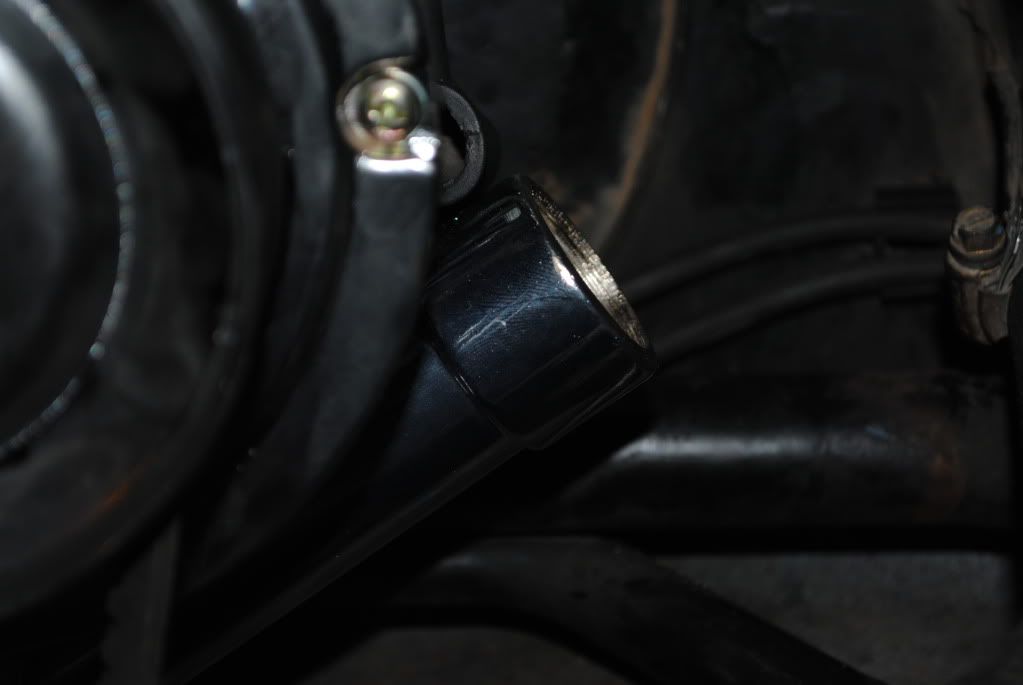
This, to be exact.
http://www.justkampersaustralia.com/shop/oil-filler-tube-vented-polished-j121...
|
|
|
 beetleboyjeff beetleboyjeff
A.k.a.: Jeff Walsh
Custom Title Time!
    
Posts: 1782
Threads: 40
Registered: February 13th, 2009
Member Is Offline
Location: Port Macquarie
Theme: UltimaBB Pro Blue ( Default )
Mood: Drive bugs hard
|
| posted on August 20th, 2011 at 10:25 PM |
|
|
Very swish Seb.
From your ole' mate Jeff
|
|
|
 SebastienPeek SebastienPeek
Custom Title Time!
    
Posts: 1657
Threads: 89
Registered: May 31st, 2011
Member Is Offline
Location: Melbourne
Theme: UltimaBB Pro White
|
| posted on August 20th, 2011 at 10:27 PM |
|
|
Why thank you Jeff!
I did what you said though, we took the bolts off of either side of the fan shroud so we could lift it up enough to pull both the generator and the
fan itself out.
We just needed to clear the manifold and it was smooth sailing.
Although, we had to do something very nifty to get that large nut off the back of the fan. Bloody bastard that nut I tell you, took at least two hours
just to get it off.
|
|
|
 beetleboyjeff beetleboyjeff
A.k.a.: Jeff Walsh
Custom Title Time!
    
Posts: 1782
Threads: 40
Registered: February 13th, 2009
Member Is Offline
Location: Port Macquarie
Theme: UltimaBB Pro Blue ( Default )
Mood: Drive bugs hard
|
| posted on August 20th, 2011 at 10:34 PM |
|
|
So........... it nearly drove you nuts? rofl
From your ole' mate Jeff
|
|
|
 SebastienPeek SebastienPeek
Custom Title Time!
    
Posts: 1657
Threads: 89
Registered: May 31st, 2011
Member Is Offline
Location: Melbourne
Theme: UltimaBB Pro White
|
| posted on August 20th, 2011 at 10:39 PM |
|
|
Baha that is definitely the truth! The next thing is getting myself that oil filler, then everything should be hunky dory.
That and bypassing the external regulator.
|
|
|
 SebastienPeek SebastienPeek
Custom Title Time!
    
Posts: 1657
Threads: 89
Registered: May 31st, 2011
Member Is Offline
Location: Melbourne
Theme: UltimaBB Pro White
|
| posted on August 21st, 2011 at 02:05 PM |
|
|
After all the pain and wiring, everything was done.
So I thought.
Now Zelda won't turn over at all. Something is definitely wrong. But it isn't with my alternator, all the wiring is done correctly and the light
pops up in the dash cluster fine.
On closer inspection, seems my coil is screwed. I reckon water has gotten into it, the connections are covered in water or some form of liquid. Could
even be fuel? :l
Seems my luck has run out, I'm thinking she is going to be garaged for a bit until I find the time to strip her bare and start again.
|
|
|
 SebastienPeek SebastienPeek
Custom Title Time!
    
Posts: 1657
Threads: 89
Registered: May 31st, 2011
Member Is Offline
Location: Melbourne
Theme: UltimaBB Pro White
|
| posted on August 21st, 2011 at 02:51 PM |
|
|
I think I spoke way too soon.
I cleaned up the coil and made sure everything was alright with the distributor cap as well (just in case I had put a lead into the wrong section and
so forth, WHICH I ACTUALLY HAD).*
I got my brother to sit in the car and basically put his foot flat on the accelerator and turn the car on.
Boom, life.
However, thanks to my brother, I am pretty sure something may have blown off the engine. She's now leaking like a bastard.
I'm pretty sure it is from here.

How can one fix this?
Other than that, alternator conversion is done. Now it's time to take her around the block a couple of times and then to get petrol.
She definitely needs to be timed as well, anyone ever timed a 31Pict/3 Solex carb before with a timing light?
*Thanks Mum, as much as you can be a pain, you're most of the time right.
|
|
|
| Pages: 1 .. 7 8 9 10 11 .. 31 |