| [ Total Views: 2715 | Total Replies: 18 | Thread Id: 110945 ] |
|
|
 Backless Backless
Learner Dubber

Posts: 18
Threads: 2
Registered: April 22nd, 2016
Member Is Offline
Theme: UltimaBB Vintage
|
| posted on May 7th, 2016 at 10:01 PM |
|
|
Type 3 - The Bluesmobile, AKA Henrietta
It's been a long time since I last drove a VW - around 15-20 years. I feel in love with that Type 3 that I borrow a few time back then. I really
thought I would love one of my own one day.
My missus and I were looking at buying a second car and selling my bike. There's a lot going on with music down our way at the moment and I just
couldn't get around lugging guitars and amps out of the Suzuki Swift any more.
So a bit of a chat about an older car vs a high Km newer car had us looking at a Type 3 Squareback. I was told that day they were "cute" so that
was all the permission I needed and we were on the hunt.
Within a couple of weeks I had come across this early 70's car. I handed over some cash for her last Saturday.
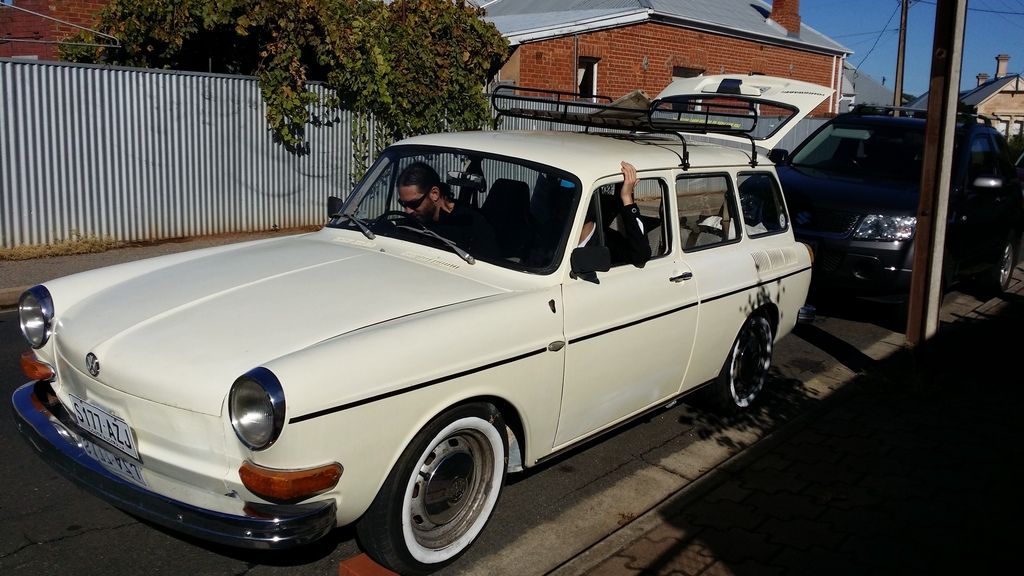
At this point I figure that I may as well say I'll be likely to document a lot of the things I'll be doing with the car over time. A forum like
this is a great place for people to learn from each other. I've already learned a lot before and after buying this car, so why not ad to it?
There'll be pictures of fixing stuff and me blabbering on, but stick around if you're interested.
Anyway, the first job was to deal with the leaking rocker cover gaskets before driving it home as they were allowing oil to drop on the fibreglass
tape wrapped around the exhaust which in turn was creating a trail of smoke.
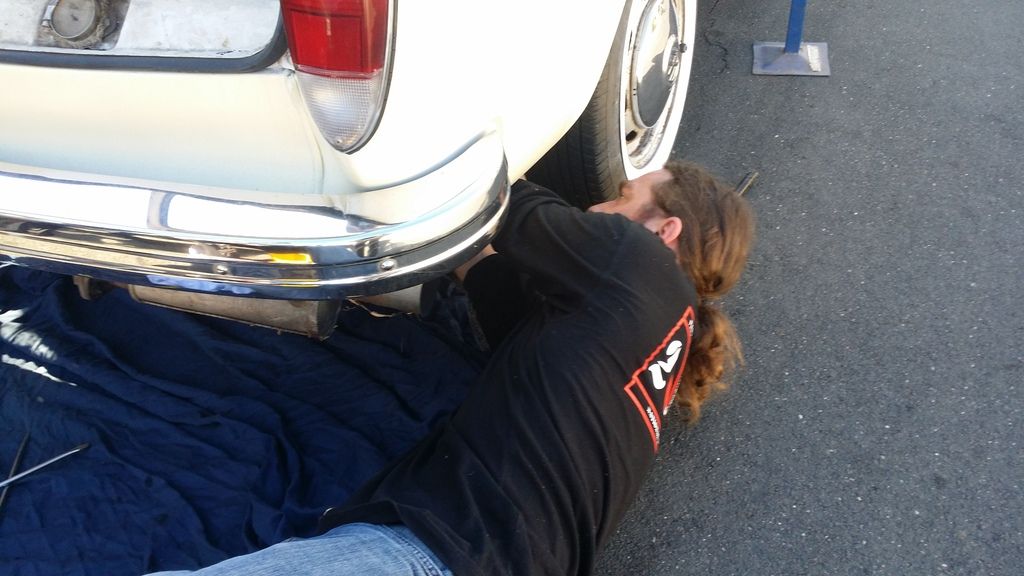
Once both of those were done there was a quick stop off for fuel. Partway home I discovered that not only was the car still smoking, it was now
misfiring and backfiring badly and I could smell fuel.
Of course it was a call for a pitstop and check into things. You can't let that stuff go unchecked.
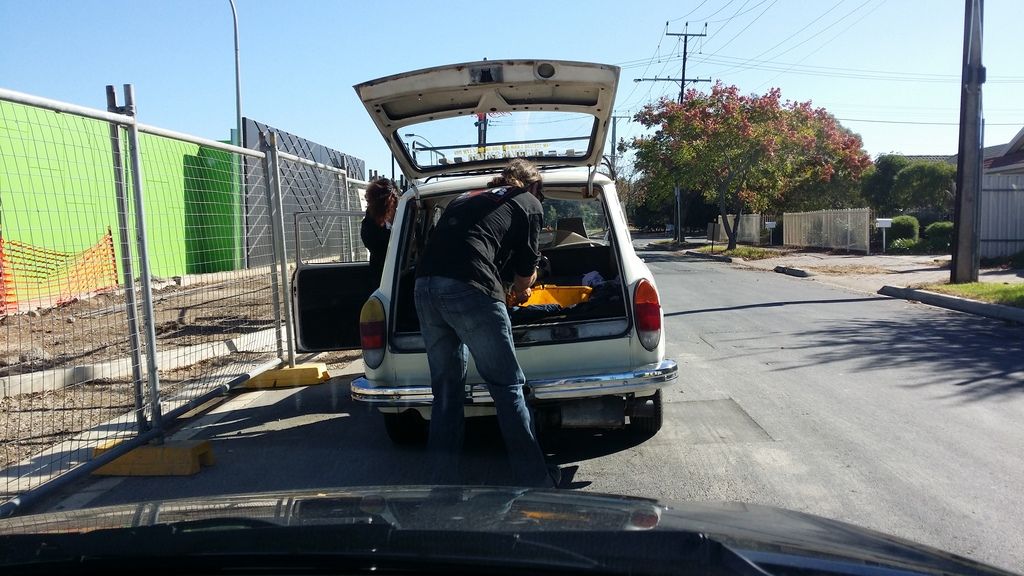
All the hoses were fine and there was no trace of fuel - good. The heat wrap on the exhaust seemed to be smoking from old oil leaks stuck to it, and
there were no new oil leaks from where I had wiped things down before - also good. There was no clear sign of why I was getting backfiring but I
chalked it down to the old air filters which looked fairly blocked so I stripped them off and ran the car the last 5 kms home without them. Things
cheered up a little from there but it was still letting a little pop here and there under a bit of load and smoked all the way home. We kept the
windows right down. 
But we got her home. The family have christened her Henrietta so it's kinda stuck with that now. I had hoped for something else but they've all
gotten so involved with the car I figured that it's gotta be a consensus some of the time....
This was the car parked at a round 11:00 last Saturday morning. By dinner time that evening it became a little clearer what was going to be needed to
get the car ready for daily service.
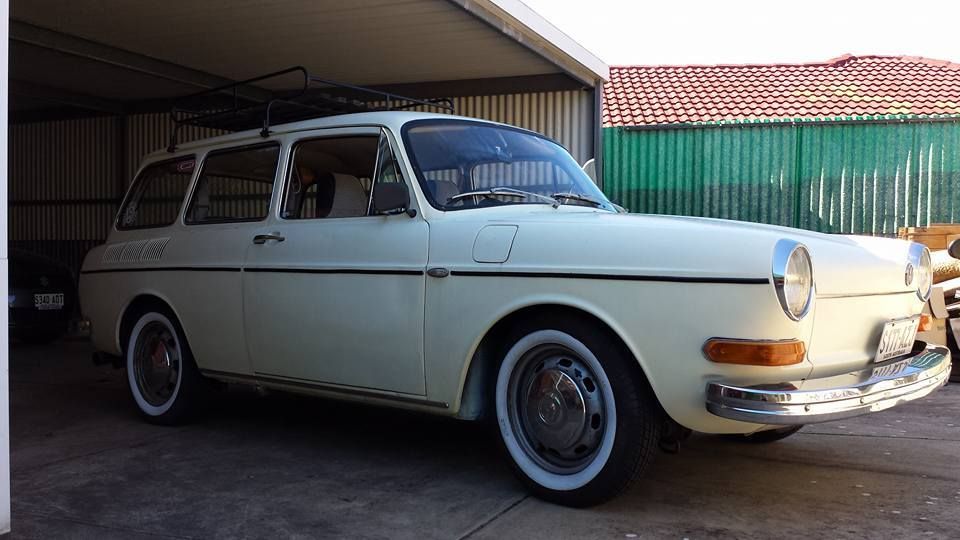
A week later I've learned huge amounts about this car and grown a major respect for their ingenuity, simplicity and the ease of which you can work
with them. This is gonna be a fun ride.
|
|
|
 Backless Backless
Learner Dubber

Posts: 18
Threads: 2
Registered: April 22nd, 2016
Member Is Offline
Theme: UltimaBB Vintage
|
| posted on May 7th, 2016 at 10:20 PM |
|
|
Day one's discoveries
Well it wasn't long before we figured out what was causing the backfiring. In the process of removing all the fibreglass wrap off the exhaust we
discovered that some wrap had been placed over a bend where a small section of steel had been placed under some emergency exhaust bandage - or so that
appeared. The bend was right near cylinder two and we pretty quickly assumed this was causing all the backfiring (we were right, that is now
gone).
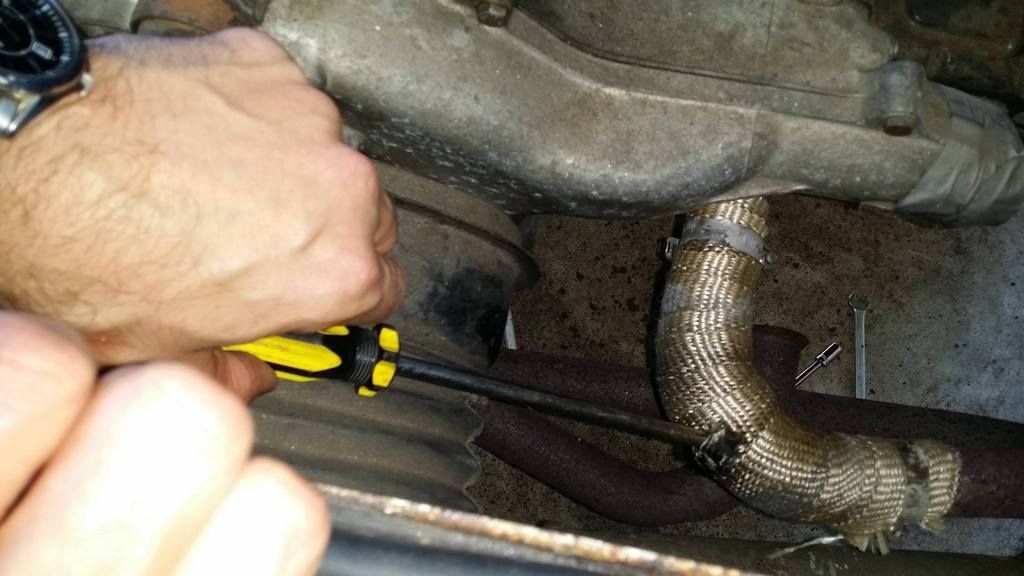
At this point the best plan of action was to drop the exhaust and start hunting for another one. I had a chat with a VW fella I had already order a
few parts through (gaskets, etc) and was priced up a new similar exhaust in stainless for around $700. I figured I go for it if nothing else turned
up but found this one on gumtree only 5 minutes away. So I bought it.
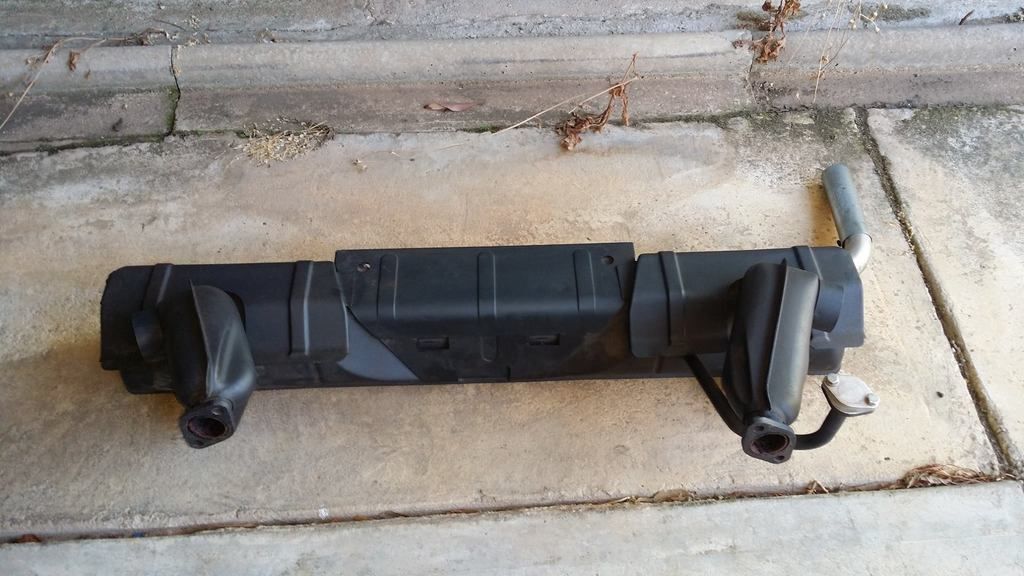
The thing that sold this set is the knowledge that if I collect a few bits such as heat exchangers, some other pipes, clamps, etc, I can then get the
heaters working in this car again.
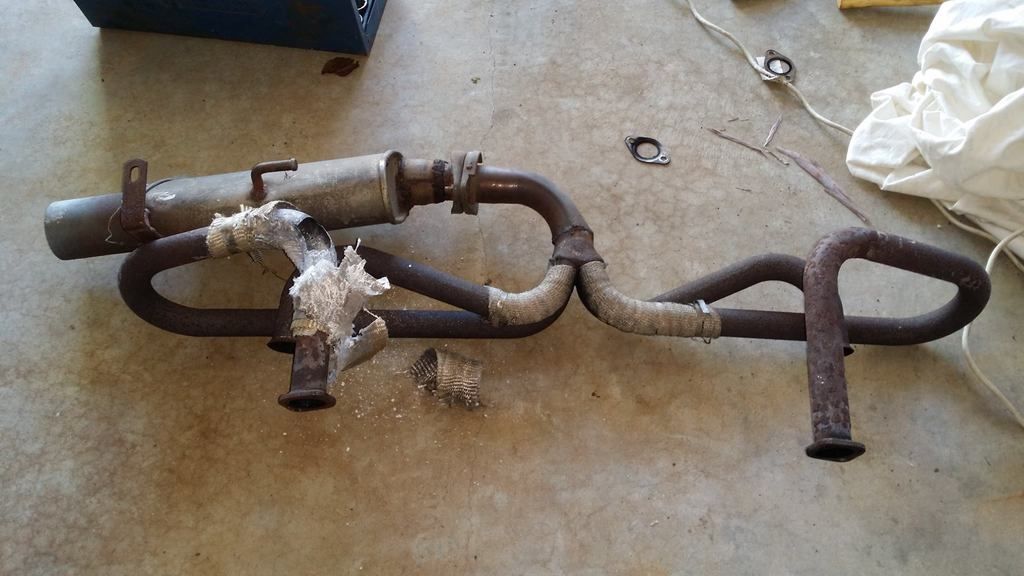
The old set. It also has a major crack near the 4 pipe joint for cylinder 2. It's pretty had it but may be salvageable one day but it's probably
not worth it. You can see the 1 inch by 1.5 inch hole in the left header pipe.
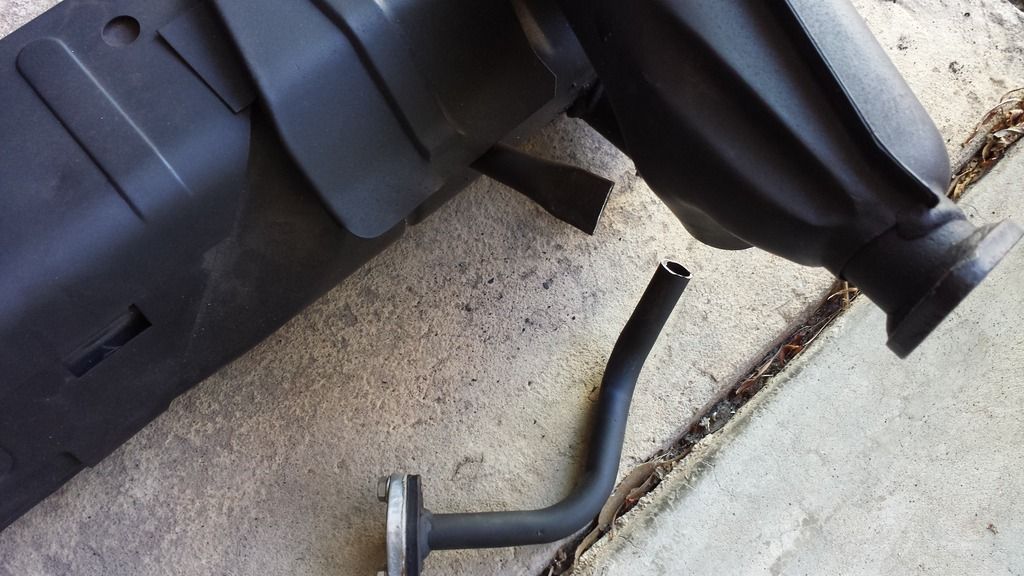
I was told this was to suit a 1500 type 3 so i figured it may be a little different. The only change I needed to make was to cut off this pipe to the
inlet manifold. It was already blanked off and I wasn't running that type of manifold so was no biggy. Crushed off the end and it went in fine.
Previous to that this pipe had fouled on the rear engine hanger so the whole setup was never gonna go in otherwise.
It was getting to around dinner time by the time we had everything together again and the car fired up nicely. The exhaust was quiet, the car seemed
smoother at idle and through the revs (without load). I was pretty happy. Then we tested all the lights to make sure everything was hunky dory in
that department. Man, did I learn some stuff about VW's then!
|
|
|
 hpnotch hpnotch
Seriously Crusin Dubber
 
Posts: 133
Threads: 28
Registered: November 11th, 2012
Member Is Offline
Theme: UltimaBB Pro Blue ( Default )
|
| posted on May 8th, 2016 at 09:10 AM |
|
|
Nice....
|
|
|
 oldskoolguy oldskoolguy
Officially Full-On Dubber
  
Posts: 329
Threads: 13
Registered: September 6th, 2011
Member Is Offline
Location: Coffs Harbour NSW
Theme: UltimaBB Pro Blue ( Default )
Mood: Ticking over nicely.
|
| posted on May 8th, 2016 at 10:32 AM |
|
|
Nice looking wagon there Backless.
I look forward to seeing more photos.
Good luck with it, especially as it seems it will be a working daily driver.
Cheers, Rob.
"The best trophies are stone chips"
1969 1500 Beetle "Otis"
2008 Golf GTI
|
|
|
 Backless Backless
Learner Dubber

Posts: 18
Threads: 2
Registered: April 22nd, 2016
Member Is Offline
Theme: UltimaBB Vintage
|
| posted on May 8th, 2016 at 10:26 PM |
|
|
Thanks Rob. There's a lot more to this story so I'm putting it up a bit at a time where I can (this is not me trying to get the post count up). So
far it's been on the road since Friday and doing well.
I discovered today that old and crusty white wall inserts can self destruct at 90km/h 
I'll drop it in to the tyre shop on the way to work tomorrow and get them to strip them off and bin them.
|
|
|
 Backless Backless
Learner Dubber

Posts: 18
Threads: 2
Registered: April 22nd, 2016
Member Is Offline
Theme: UltimaBB Vintage
|
| posted on May 9th, 2016 at 09:13 PM |
|
|
Air filters and wiring
Having sorted out the exhaust problem I spent the next week trying to figure out the best way to filter the air coming into the twin EMPI 34 ICT's.
Oh and yeah, I know that face you just pulled when you read it has those carbs. I've got the same looks from everyone I've mentioned that to and
they all say the same thing about them - the same thing you're thinking. That said, they work right now so someone's put the effort in and for as
long as they keep working they'll stay there. If it ain't broke, don't fix it.
Anyway, I digress. Where was I? The broken stuff, that's right.
So the filters that came with the car were EMPI (yeah I know) filters that would have come with the carbs at some stage. Judging by the look of them
it'd been a while.
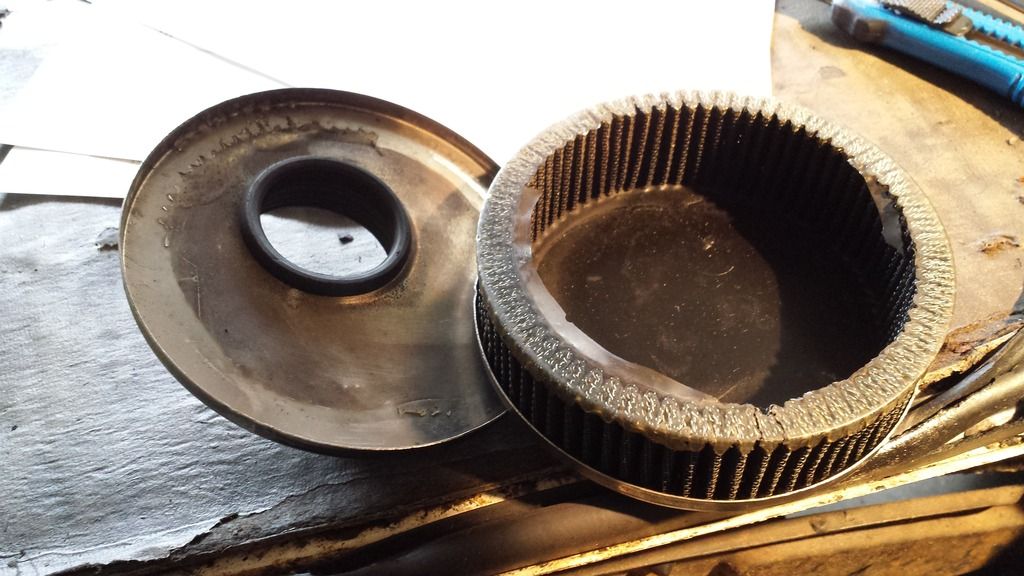
I was cautious about using Ramflo filters but in the end I went for a set for a few reasons:
- They are easy to keep clean compared to some cotton cleanable filters
- They are not overly fuel resistant BUT replacement filters are cheap and it's easy to check them as part of regular servicing
- By going for a colour like greeen I can easily see when there's a build up of dirt
- I've used them on other cars and had good success with them.
So I ordered a set from Weber performance. I stuffed up and didn't order them with an offset so I actually had to wait another day while the offset
baseplates arrived.
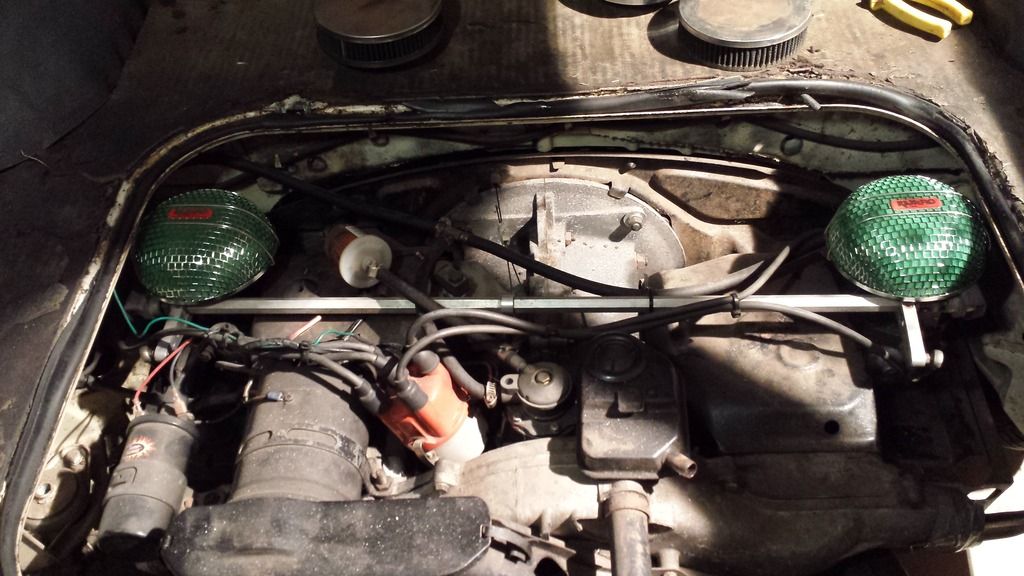
In amongst this I found out I had no tail lights. Of course the logical first step is to check the fuses. Well the light fuse was blown. Ok, why?
Check fuse ratings against what is required and I find out I have a full bank of 16 amp fuses when 90% are supposed to be 8 amp.
I fitted a new run of 8 amp fuses turned the car on, lights on and pop goes the fuse. So I'm thinking if it blows that and it's blown a 16 amp fuse
then we've got a short in the circuit somewhere.
By that afternoon....
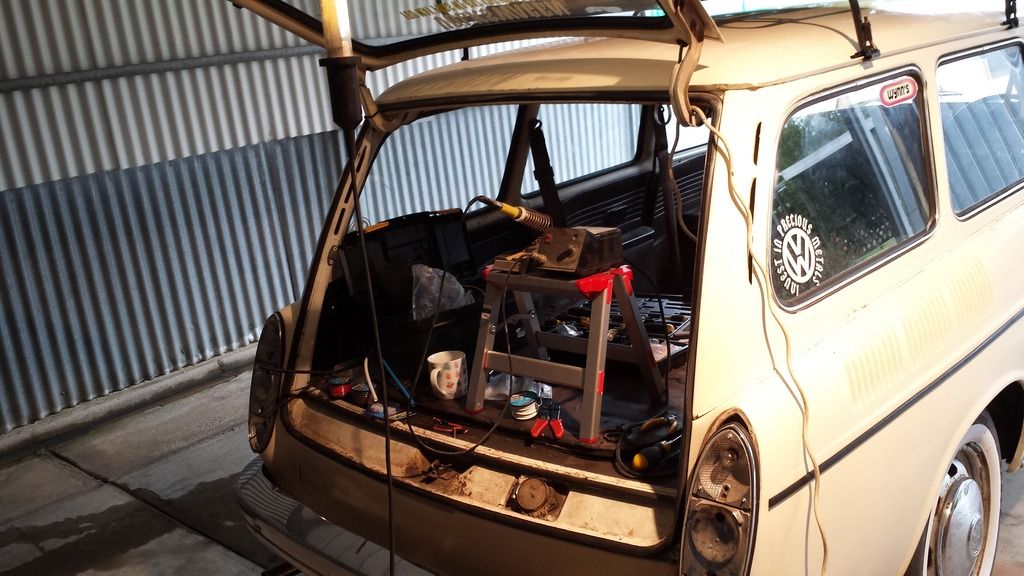
So what I discovered was somewhere along the line someone had a penchant for twisting two bits of wire together and wrapping it in electrical tape. I
also discovered that somehow there was still a bare wire touching metal and shorting to a split in the insulation in the brown earth wire adjacent.
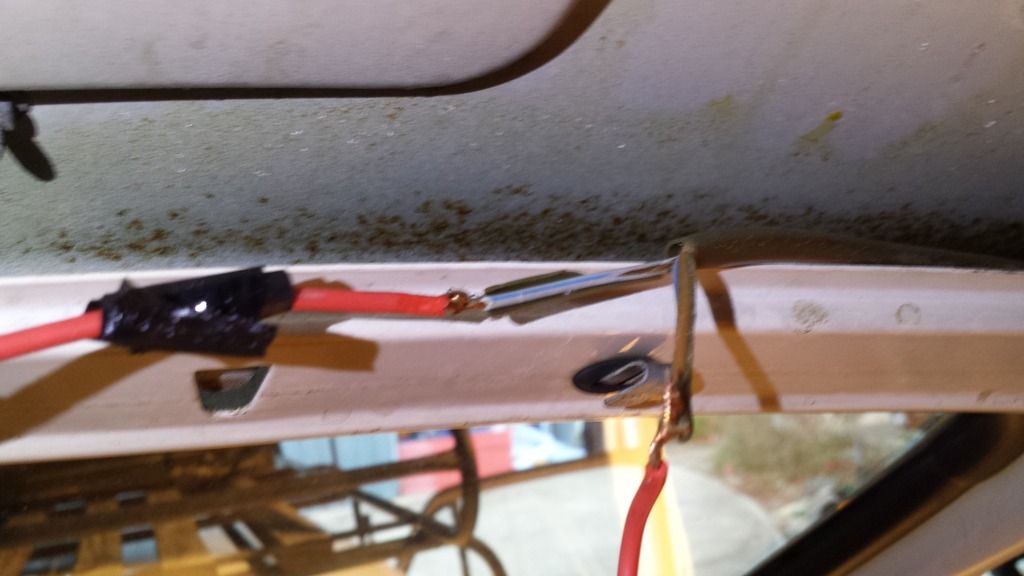
Sorted that out quick smart:
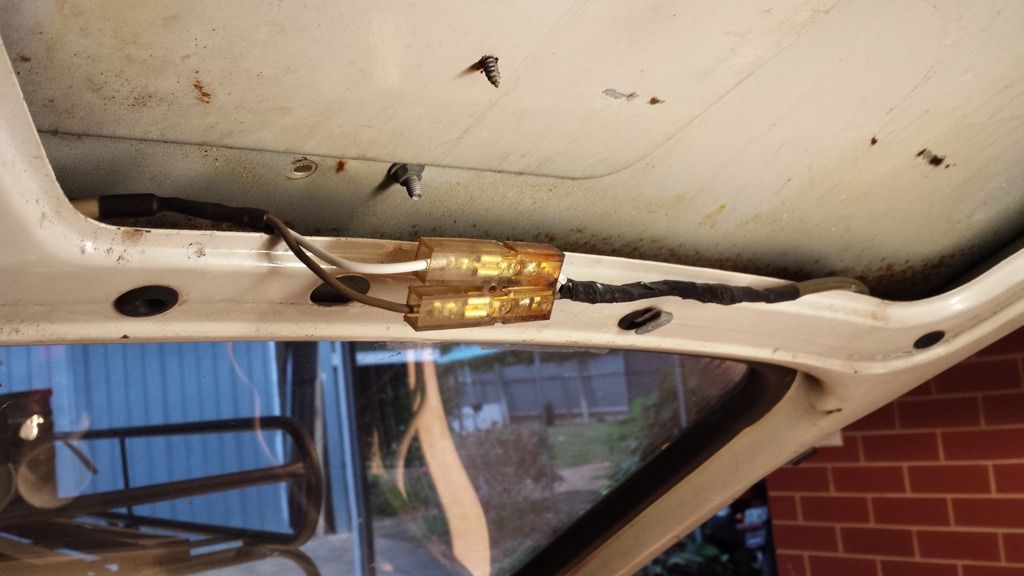
Then there was the trailer plug wiring that was pinched between panels in the body then through the bumper at which point it looked like this:
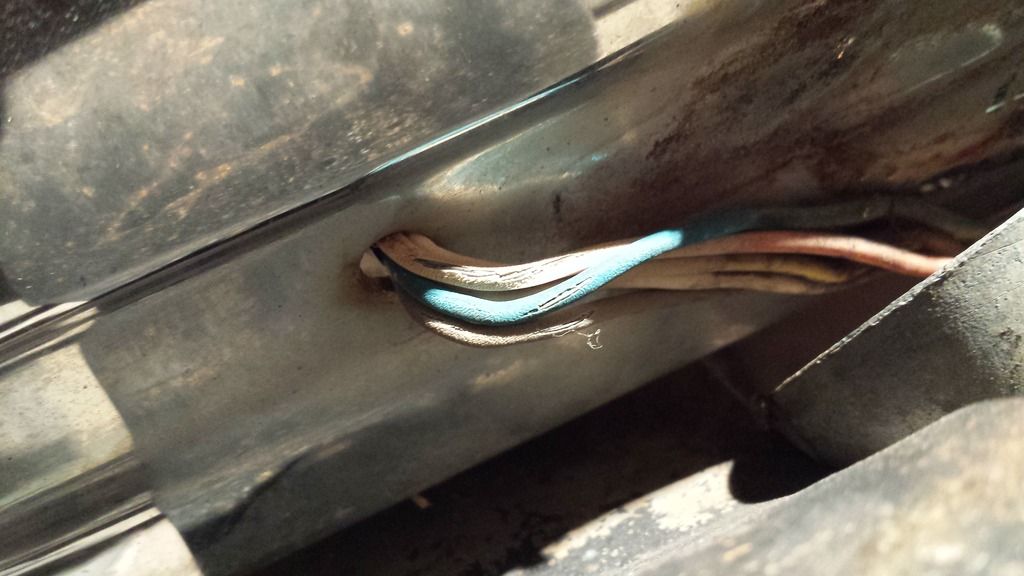
I also stripped out a bunch of wire that went from the battery to a switch on the inside door card in the boot, up to a pair of truck side lights for
interior lighting. There were around six different wires in all, each of which was joined to the next with a twist and a bit of electrical tape.
At the point I discovered that I stripped the seats out as i knew there was a wired pinched under the rear seat running from a temp sensor to a gauge
on the dash. Thankfully that's the only one I found but I thought it would be cheap insurance just to get everything out and check. That wire will
be replaced at some stage but for now I have terminated it at each end.
I've also since found that there are a few of these dodgy wires under the dash too. I will get to them very shortly, but for now they are solid and
working so I'll let them be.
At this point all lights were working well but the fuel tank was still leaking fuel from the sender unit plate and the steering wheel looked like it
was about to disintegrate in my hands.
As an aside, if you have a set of white wall inserts that have some kerb rash and look a bit cracked and worn, this is what can happen to them when
driving at 90 km/h:
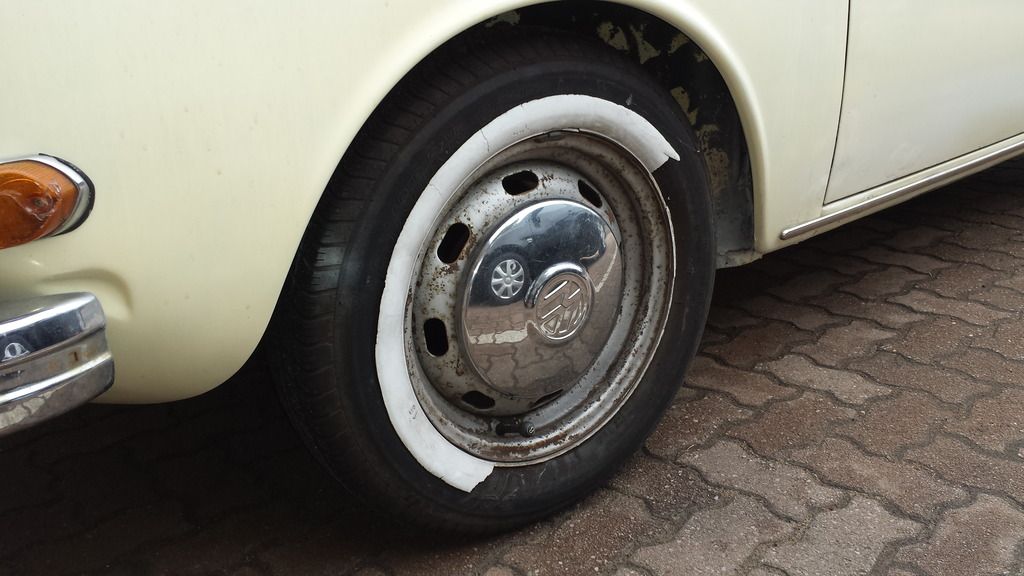
They are now gone and the car is running straight black donuts.
|
|
|
 Backless Backless
Learner Dubber

Posts: 18
Threads: 2
Registered: April 22nd, 2016
Member Is Offline
Theme: UltimaBB Vintage
|
| posted on May 9th, 2016 at 10:32 PM |
|
|
Replacing the broken standard wheel for a sports wheel
There were bits falling off the standard wheel and the hub was cracking (have a look under the left side of the horn). I just wasn't prepared to
risk having it fall apart so in the short term I thought I'd fit an inexpensive SAAS sports steering wheel.
So this is what I started with:
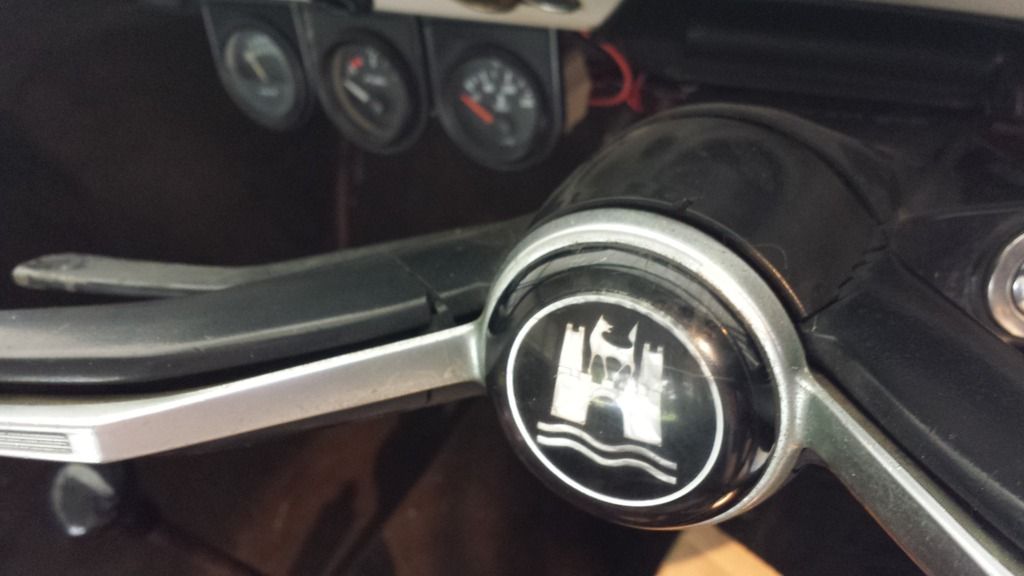
The first step was to tap the threads in the back of the boss with the supplied screws. Once that was done I needed to enlarge the holes for these
screws in the horn ring (pinched off the standard wheel) and also the centre hole so it would fit over the centre hub of the boss. I did these both
carefully with a dremel.
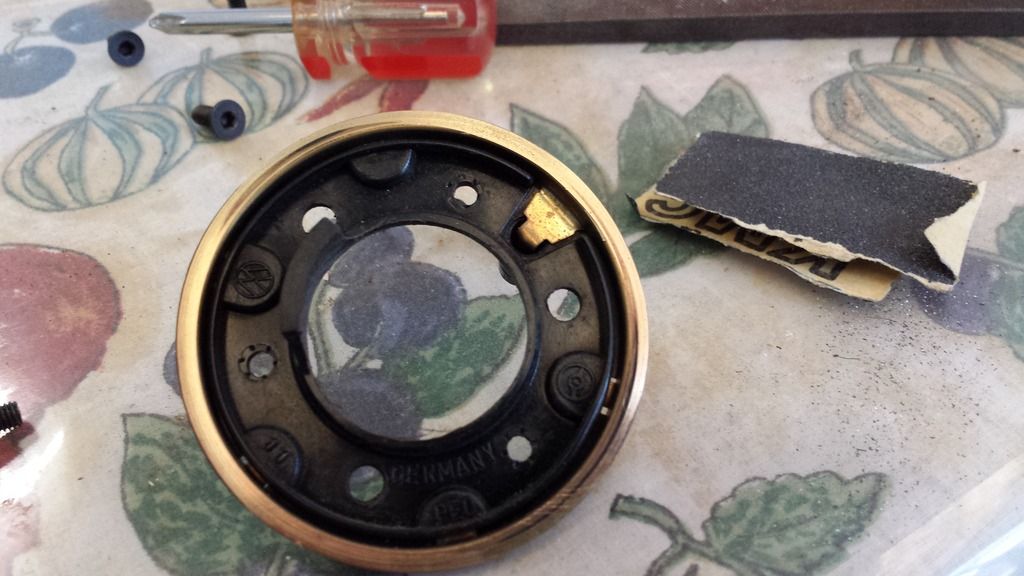
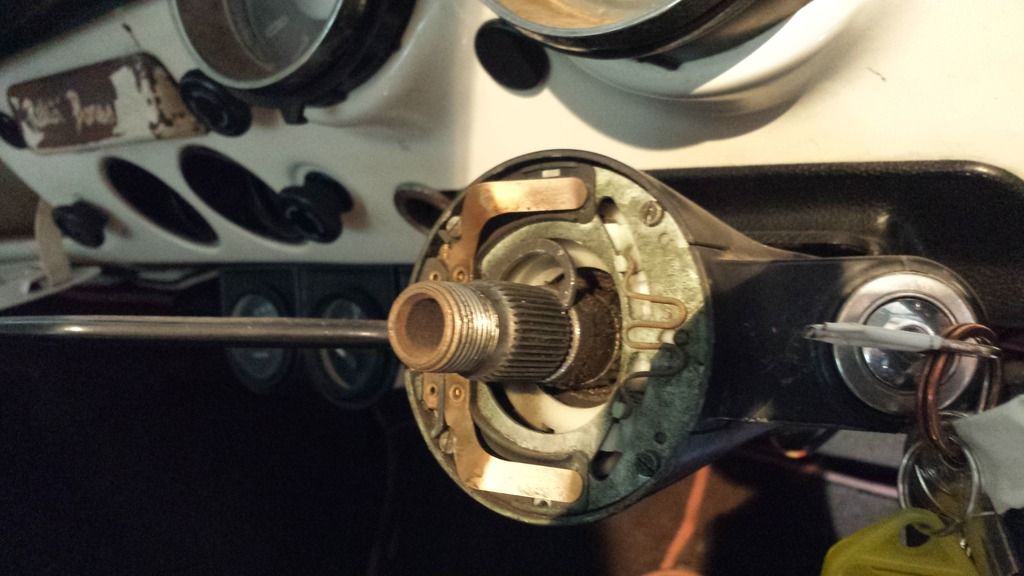
The contacts on the steering column once the steering wheel was fitted started shorting on the hub of the boss. I didn't get a photo of it but I
bent the tabs inward a little to stop them shorting. This weekend I'll go back in and dremel off the outer corners a little to ensure they don't
contact again. Trust me, if it touches the boss the horn is blaring and there are sparks. Don't ask me how I know that. You don't want that.
You can see in this photo a circlip which I've removed. This was a stopper for the standard wheel but the SAAS boss needed this to be removed as the
centre hub was too long which meant the horn contacts wouldn't reach the horn ring at all.
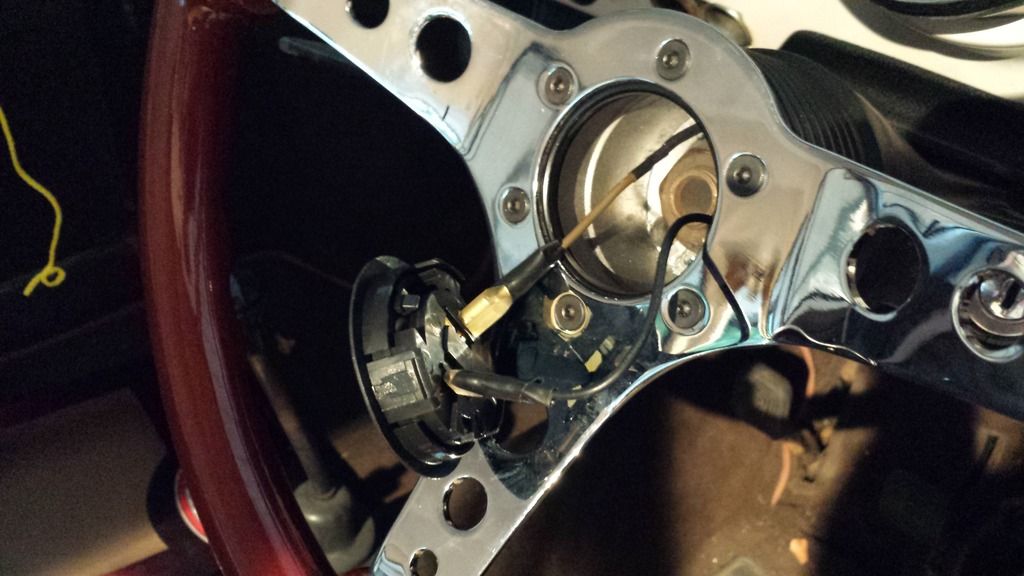
The original contact wire from the horn ring needs to be extended to reach the horn button but it's a simple job with a bit of solder and heat
shrink.
All fitted up:
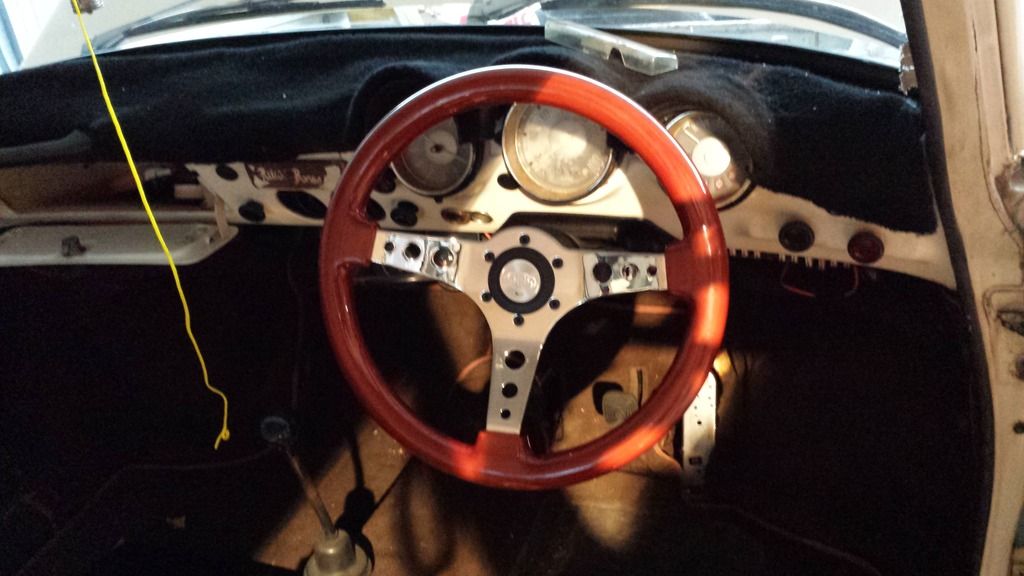
It's a pretty simple job really but it took some figuring out and since I couldn't find anything that talked through how to do it I figured I'd
chuck it up here.
This wheel is small though and I now can't see the gauges properly. I may get something larger or a deep dish at some point.
|
|
|
 pv370 pv370
Officially Full-On Dubber
  
Posts: 272
Threads: 38
Registered: April 7th, 2014
Member Is Offline
Location: Goulburn NSW
Theme: UltimaBB Pro Blue ( Default )
Mood: Southern Comfortably Numb
|
| posted on May 11th, 2016 at 01:43 PM |
|
|
nice............
looks like you have plenty to keep to busy
|
|
|
 Backless Backless
Learner Dubber

Posts: 18
Threads: 2
Registered: April 22nd, 2016
Member Is Offline
Theme: UltimaBB Vintage
|
| posted on May 12th, 2016 at 08:45 PM |
|
|
| Quote: | Originally
posted by pv370
nice............
looks like you have plenty to keep to busy
|
Thanks man, you're not wrong. Door panels hanging off, dash is stuffed, seat backrest that seems to lean back much further than it should, old
tyres, steering that has enough play to make you feel like you're in an episode of playschool "driving in your car" on a straight stretch of road

Yeah, I got plenty to keep me busy 
|
|
|
 Backless Backless
Learner Dubber

Posts: 18
Threads: 2
Registered: April 22nd, 2016
Member Is Offline
Theme: UltimaBB Vintage
|
| posted on May 16th, 2016 at 07:54 PM |
|
|
More wiring woes
I had thought that it was all sorted but I just discovered that the tail light fuse was blown again. So on Saturday I made a start on looking under
the dash to see if there were some issues there. Yes there were....
Somewhere along the line the loom got cooked. You can see the black marks under the dash where the wire must have shorted out on the metal (see in
the last photo near the top). It wouldn't have helped that all the fuses were 16 amp, they're now changed back to 8 amp as necessary.
Problem with what I started was I managed to put a knife through my thumb yesterday and wound up in hospital getting it all taken care of.
So today I kept working on it all with only 9 active fingers.
Here's some of the joy that I found:
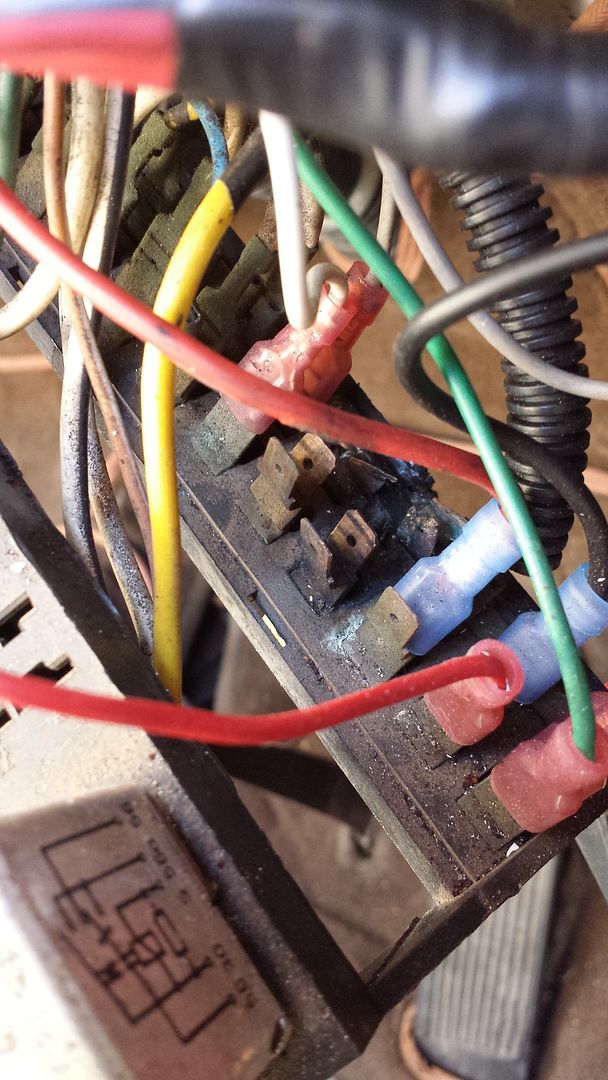
Two fuse connections melted:
Numerous cooked wires:
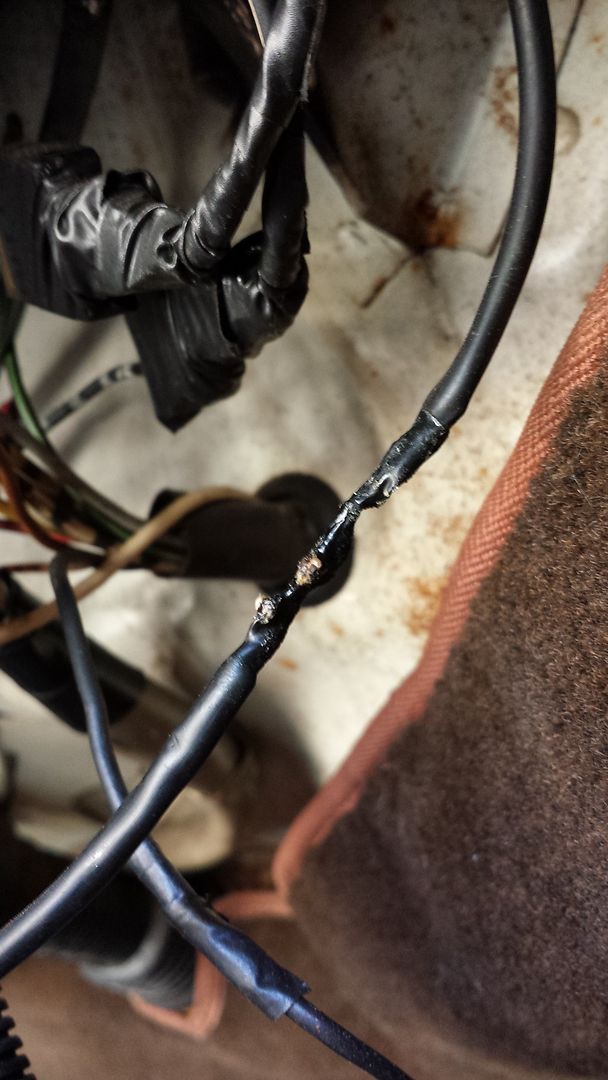
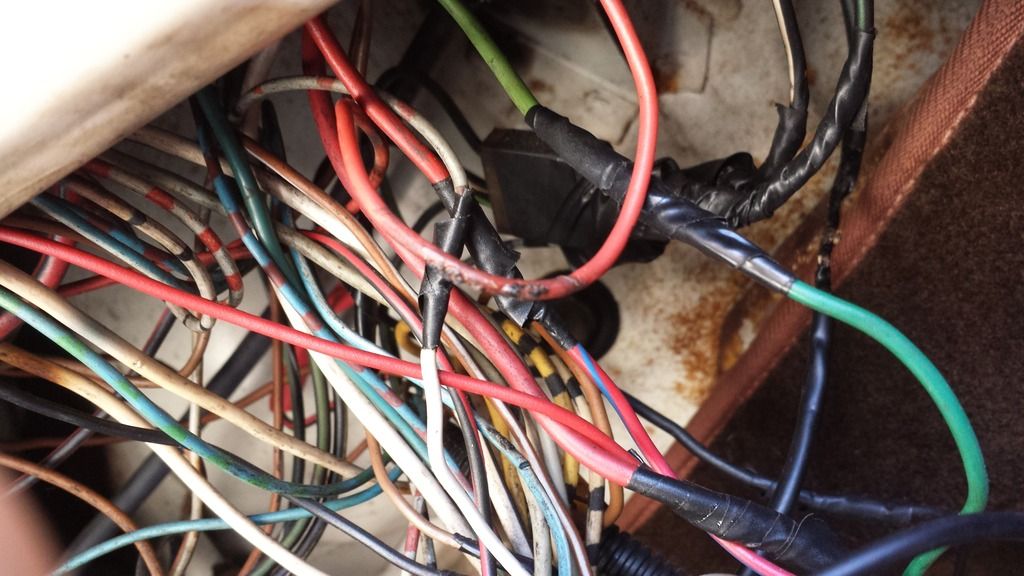
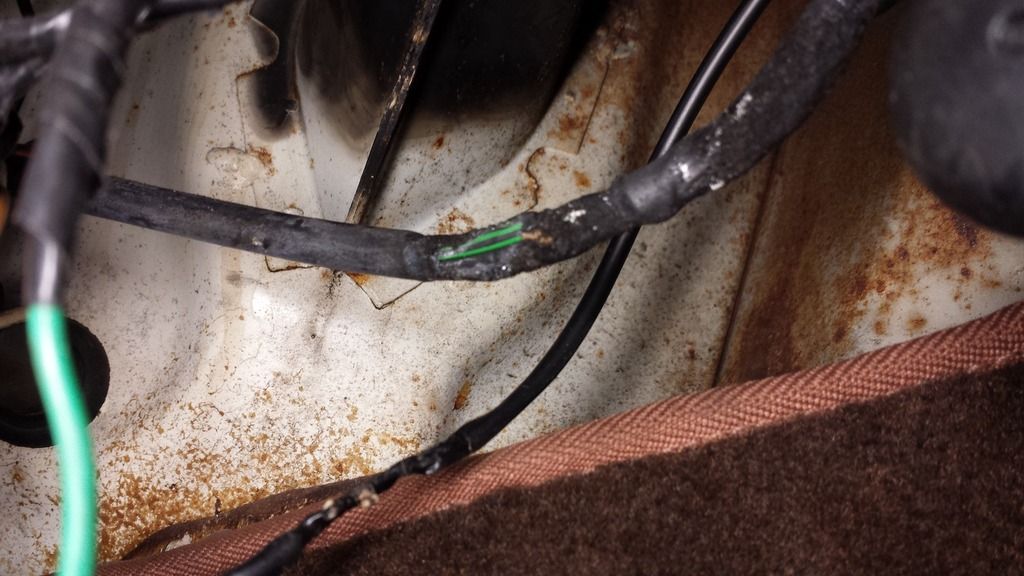
I went through and soldered in new sections and added heatshrink - a wire at a time. There's a whole bunch of extra wiring in this so I'm just
trying to get it all to the point where fuses down't blow.
Having said that as I headed in for dinner earlier I noticed a couple more. Job for tomorrow.
|
|
|
 Backless Backless
Learner Dubber

Posts: 18
Threads: 2
Registered: April 22nd, 2016
Member Is Offline
Theme: UltimaBB Vintage
|
| posted on May 16th, 2016 at 08:02 PM |
|
|
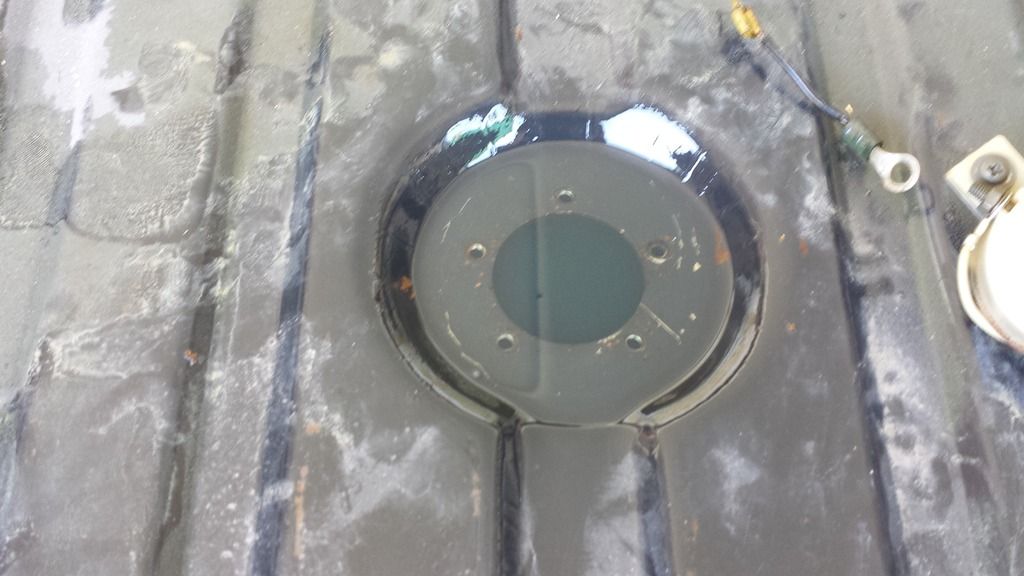
Fixing a fuel leak (or so I thought)
Right from day one there's been a fuel leak from the tank.
Simple job really:
Remove float and sender where the leak is coming from (and remember to fix up wire connection before reinstalling)
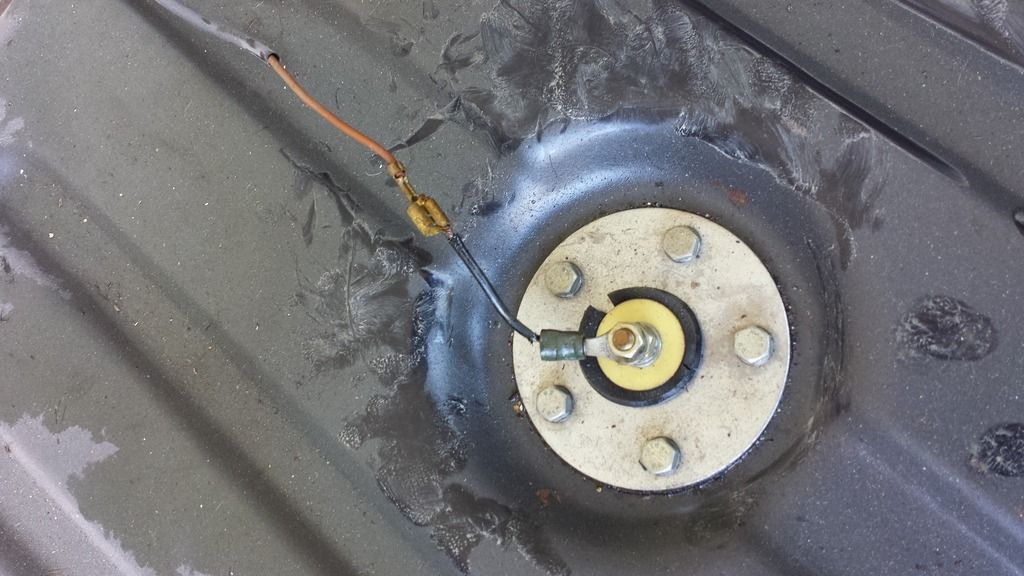
The old gasket was a waste of space
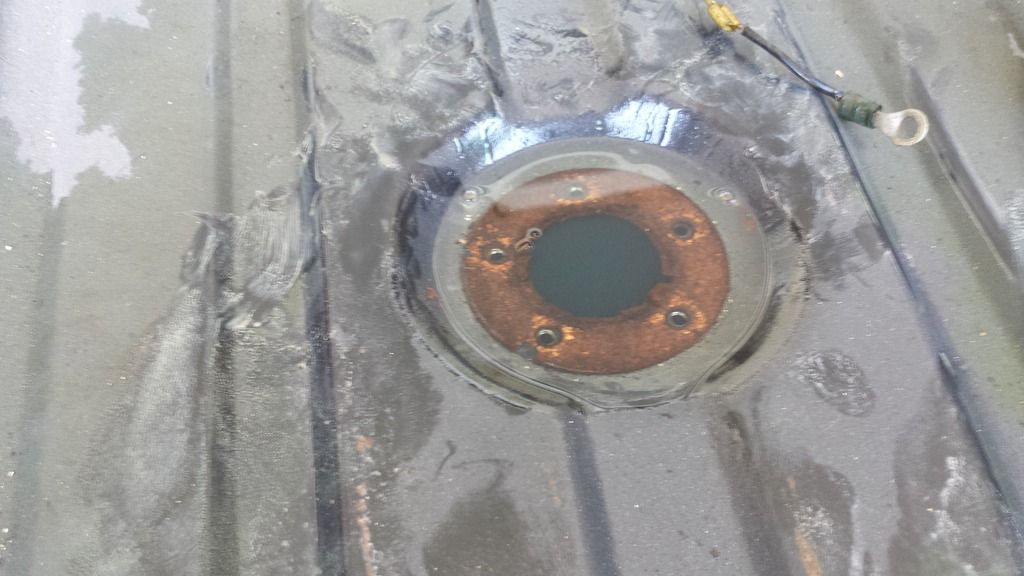
All taken care of
Made up the new gaskets out of some 3mm rubber from Clark Rubber (make sure its not the one with cotton running through it as that will wick fuel out
and it'll leak)
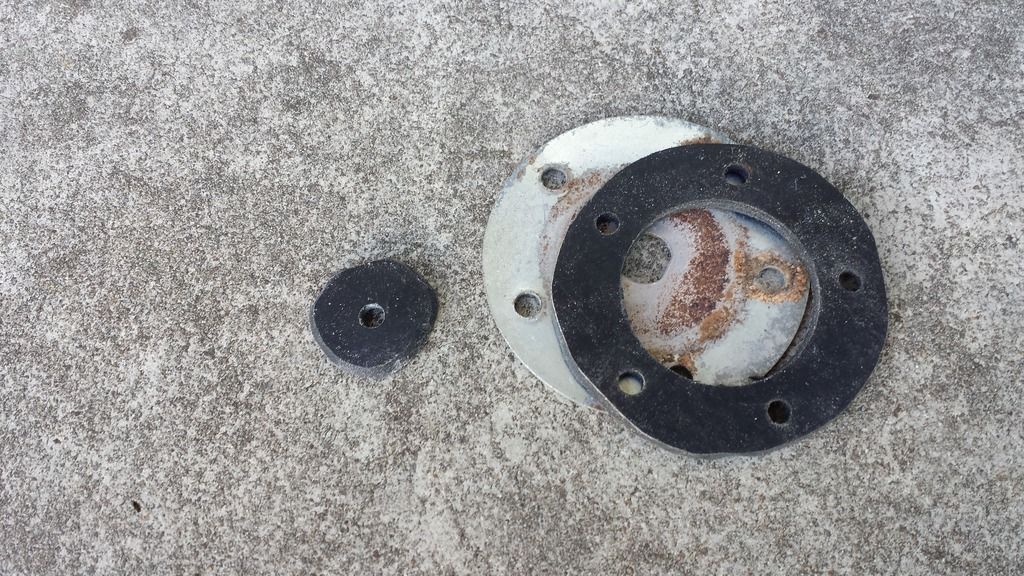
...and I really thought that would fix the fuel smell but it didn't. It turns out the overflow return from the filler to the tank is split. That
means as long as I don't fill the tank past half way it won't leak. Any more than that and I drop fuel on left hand turns.
I'll get to it.
|
|
|
 oldskoolguy oldskoolguy
Officially Full-On Dubber
  
Posts: 329
Threads: 13
Registered: September 6th, 2011
Member Is Offline
Location: Coffs Harbour NSW
Theme: UltimaBB Pro Blue ( Default )
Mood: Ticking over nicely.
|
| posted on May 16th, 2016 at 08:22 PM |
|
|
One step at a time  
"The best trophies are stone chips"
1969 1500 Beetle "Otis"
2008 Golf GTI
|
|
|
 Backless Backless
Learner Dubber

Posts: 18
Threads: 2
Registered: April 22nd, 2016
Member Is Offline
Theme: UltimaBB Vintage
|
| posted on May 16th, 2016 at 08:31 PM |
|
|
| Quote: | Originally
posted by oldskoolguy
One step at a time  
|
That's it. Can't go any faster than that 
|
|
|
 oldskoolguy oldskoolguy
Officially Full-On Dubber
  
Posts: 329
Threads: 13
Registered: September 6th, 2011
Member Is Offline
Location: Coffs Harbour NSW
Theme: UltimaBB Pro Blue ( Default )
Mood: Ticking over nicely.
|
| posted on May 17th, 2016 at 10:04 AM |
|
|
When there were fuel smells in my Beetle I made a rubber gauge sender gasket from Clark Rubber material like you, and it was better than a bought one!
The other thing was I made a separate earth wire for the sender so that it was sealed and didn't rely on a fixing screw to earth it. The breather
hose still does its job, I find that out every time I over fill the tank and park in the sun!
Also I bought a new fuel cap.
Cheers, Rob.
"The best trophies are stone chips"
1969 1500 Beetle "Otis"
2008 Golf GTI
|
|
|
 Backless Backless
Learner Dubber

Posts: 18
Threads: 2
Registered: April 22nd, 2016
Member Is Offline
Theme: UltimaBB Vintage
|
| posted on May 17th, 2016 at 10:22 AM |
|
|
Yeah I've bought a fuel cap too. The problem is the breather hose has a split near the body in the wheel well so it leaks pretty easily on turns.
There's a straight replacement EMPI hose that matches the part number available on ebay US but the price is a bit rich. For now I'll have a go at
finding a grommet and hose combination to do the same job.
Do you have any photos of the earth wire mod on the sender? I'm having trouble picturing it.
|
|
|
 oldskoolguy oldskoolguy
Officially Full-On Dubber
  
Posts: 329
Threads: 13
Registered: September 6th, 2011
Member Is Offline
Location: Coffs Harbour NSW
Theme: UltimaBB Pro Blue ( Default )
Mood: Ticking over nicely.
|
| posted on May 17th, 2016 at 11:27 AM |
|
|
I don't have a picture and I am not near the car unfortunately, but as you would understand the earthing of the sender would occur - through the
sender - through a screw - the tank - to the car body. The fuel was seeping ever so slightly from one of the sender screws, which didn't appear to
seal as good as the others, I assumed this was to earth it. I just made a better seal for the leaky mounting screw from the rubber, a separate earth
wire with circular terminals at each end, used one end as a washer for the mounting screw and attached the other end to the car body. I am sure I saw
something similar on these forums, somebody may post the link.
"The best trophies are stone chips"
1969 1500 Beetle "Otis"
2008 Golf GTI
|
|
|
 Backless Backless
Learner Dubber

Posts: 18
Threads: 2
Registered: April 22nd, 2016
Member Is Offline
Theme: UltimaBB Vintage
|
| posted on May 17th, 2016 at 12:04 PM |
|
|
| Quote: | Originally
posted by oldskoolguy
I don't have a picture and I am not near the car unfortunately, but as you would understand the earthing of the sender would occur - through the
sender - through a screw - the tank - to the car body. The fuel was seeping ever so slightly from one of the sender screws, which didn't appear to
seal as good as the others, I assumed this was to earth it. I just made a better seal for the leaky mounting screw from the rubber, a separate earth
wire with circular terminals at each end, used one end as a washer for the mounting screw and attached the other end to the car body. I am sure I saw
something similar on these forums, somebody may post the link.
|
Thanks for that. Makes sense.
I'll need to backtrack how this is normally set up though as the dash gauge is not working and an aftermarket fuel gauge is installed. It may be the
gauge or some of this wiring that is an issue.
|
|
|
 oldskoolguy oldskoolguy
Officially Full-On Dubber
  
Posts: 329
Threads: 13
Registered: September 6th, 2011
Member Is Offline
Location: Coffs Harbour NSW
Theme: UltimaBB Pro Blue ( Default )
Mood: Ticking over nicely.
|
| posted on May 17th, 2016 at 12:51 PM |
|
|
http://forums.aussieveedubbers.com/viewtopic.php?tid=97392
"The best trophies are stone chips"
1969 1500 Beetle "Otis"
2008 Golf GTI
|
|
|
 Backless Backless
Learner Dubber

Posts: 18
Threads: 2
Registered: April 22nd, 2016
Member Is Offline
Theme: UltimaBB Vintage
|
| posted on May 17th, 2016 at 12:53 PM |
|
|
Thanks bud. I'll save that one.
|
|
|