| [ Total Views: 5919 | Total Replies: 56 | Thread Id: 111180 ] |
| Pages: 1 2 |
|
|
 beetleboyjeff beetleboyjeff
A.k.a.: Jeff Walsh
Custom Title Time!
    
Posts: 1783
Threads: 40
Registered: February 13th, 2009
Member Is Online
Location: Port Macquarie
Theme: UltimaBB Pro Blue ( Default )
Mood: Drive bugs hard
|
| posted on June 25th, 2016 at 03:25 PM |
|
|
69 Beetle pan/Greased Lightning
I am a member of the set construction crew at the Players Theatre at Port Macquarie, and we have to build 'Greased Lightning' for our upcoming
production of Grease.
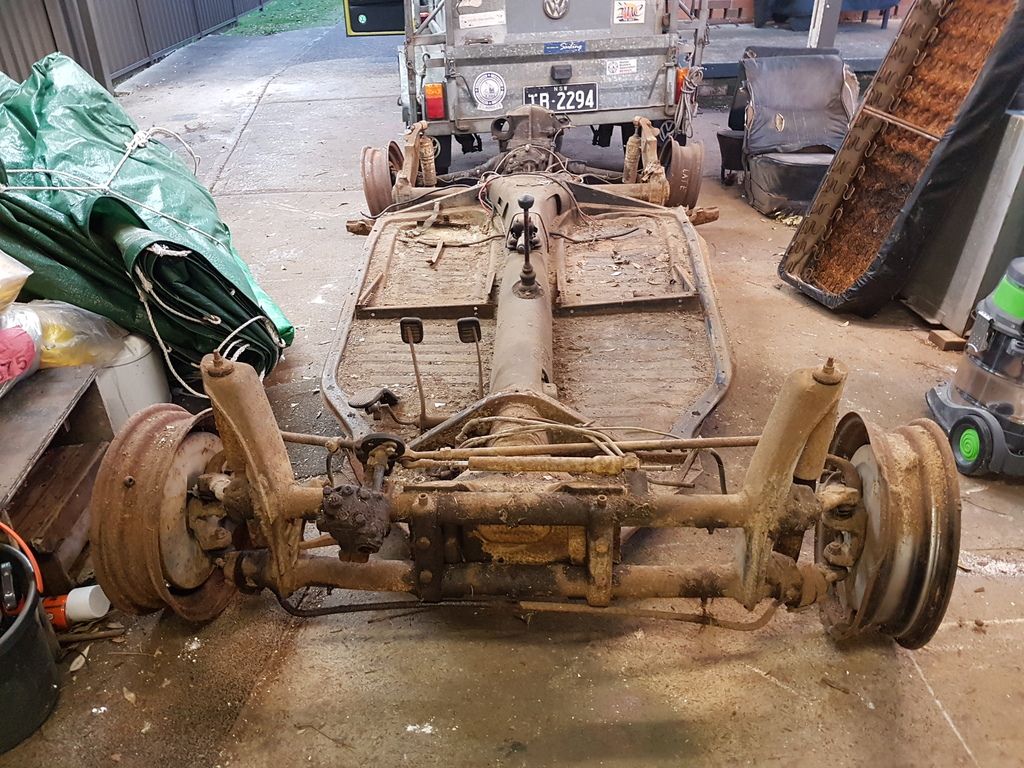
Our plan is to use the floorpan of my 69 beetle that has been in storage since I took the body off to do a re-build as a baja - about 37 years ago,
and build a 'Greased Lightning' body for it.
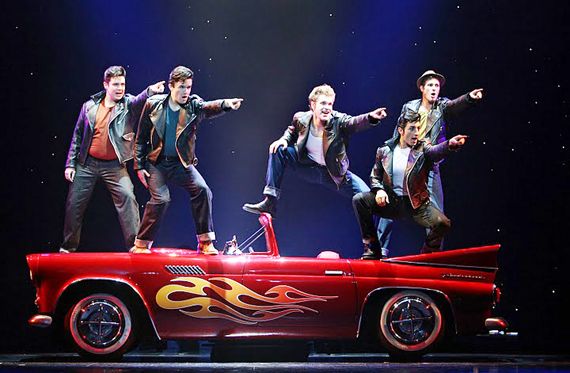
So, this is what we have to end up with:

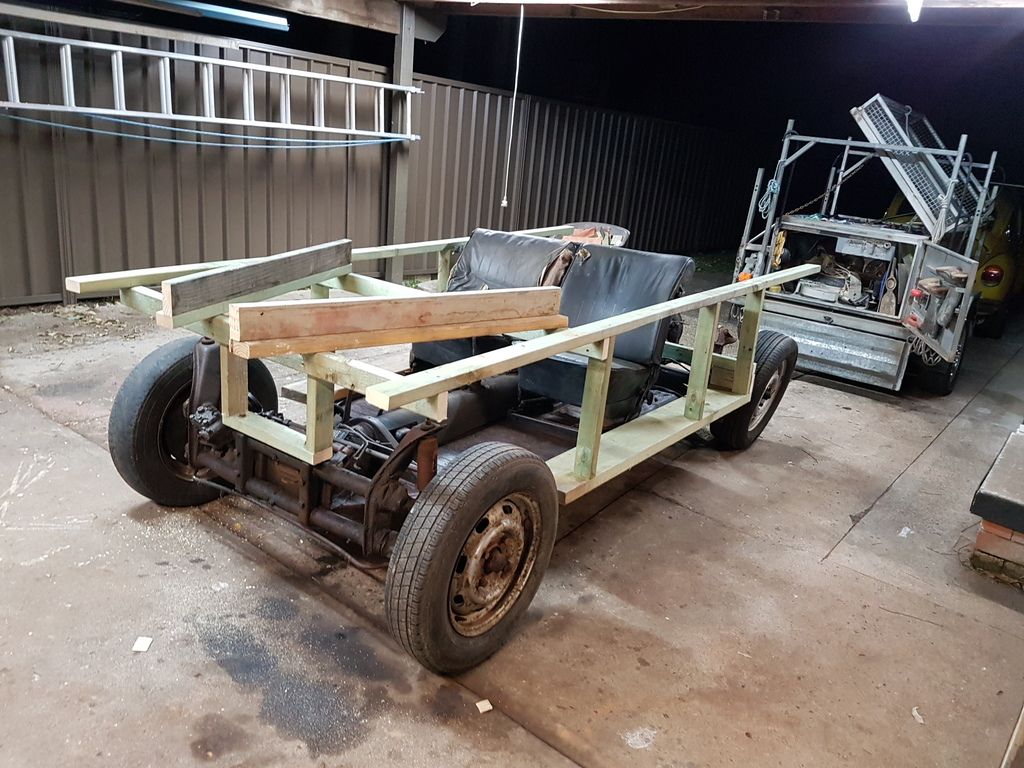
And this is my floopan as I have un-buried it and dragged it out of the garage
If anyone has any ideas or info, I would be happy to hear
From your ole' mate Jeff
|
|
|
 modnrod modnrod
Fahrvergnugen
   
Posts: 978
Threads: 50
Registered: March 17th, 2011
Member Is Offline
Location: Midwest, Westoz.
Theme: UltimaBB Pro Blue
Mood: Old School Volksies!
|
| posted on June 25th, 2016 at 09:12 PM |
|
|
oh dear, i think i can hear the song in my head even now..........dammit.
I have what may be an alternative plan, but it doesn't involve VW floorpans unfortunately. It would probably be much better suited to a Playschool
(sorry, Theatre.... ) set though. ) set though.
Make a really basic tube/rhs chassis, build the body of your dreams out of paper mache/fibreglass/etc for it, but then for drive units find some cheap
250W/500W electric bicycle or scooter hubs to drive the thing around on stage. Bugger all weight comparatively, electric though so still appears to
"jump" a bit for effect, and WAY cheaper than rebuilding a VW chassis.
Have fun, sounds like a cool deal. 
|
|
|
 beetleboyjeff beetleboyjeff
A.k.a.: Jeff Walsh
Custom Title Time!
    
Posts: 1783
Threads: 40
Registered: February 13th, 2009
Member Is Online
Location: Port Macquarie
Theme: UltimaBB Pro Blue ( Default )
Mood: Drive bugs hard
|
| posted on June 25th, 2016 at 11:27 PM |
|
|
Not a bad idea, but we don't have time to source those parts & start from scratch.
The VW floopan gives us a rolling, steering base & seats that we can build a body on.
I am going to try and put a clutch & flywheel (no crankshaft) on a bracket bolted to the bellhousing, and a starter motor & a battery so we
can drive it on & off the stage.
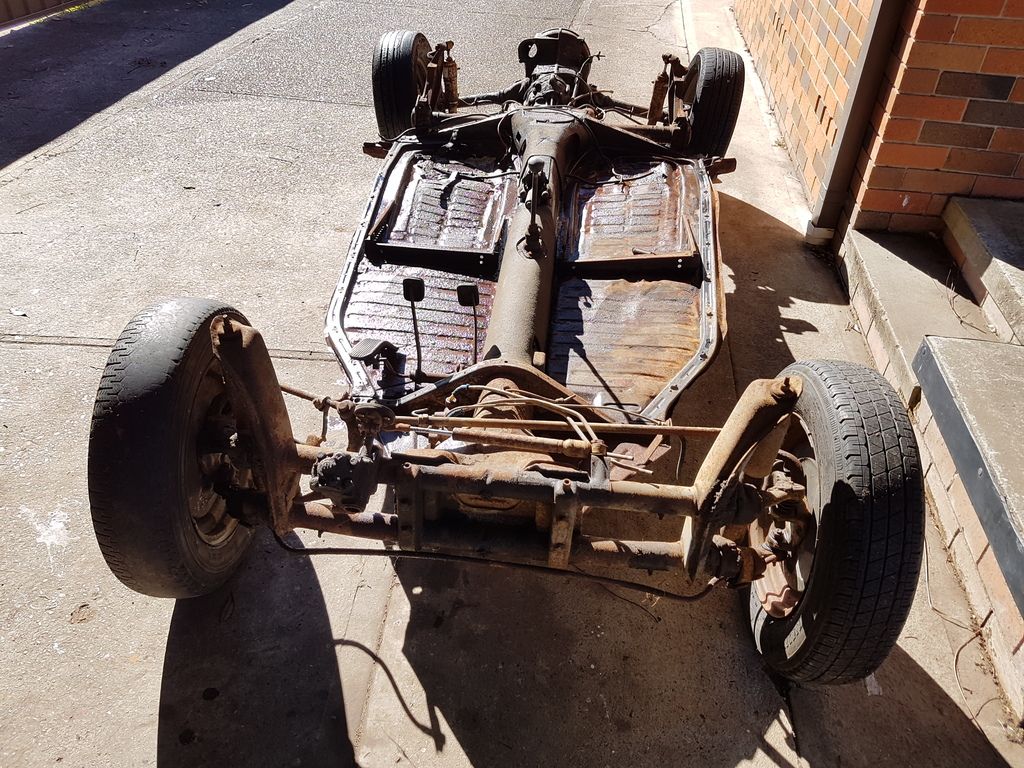
I put some wheels with tyres on it today and cleaned off the floorpan.
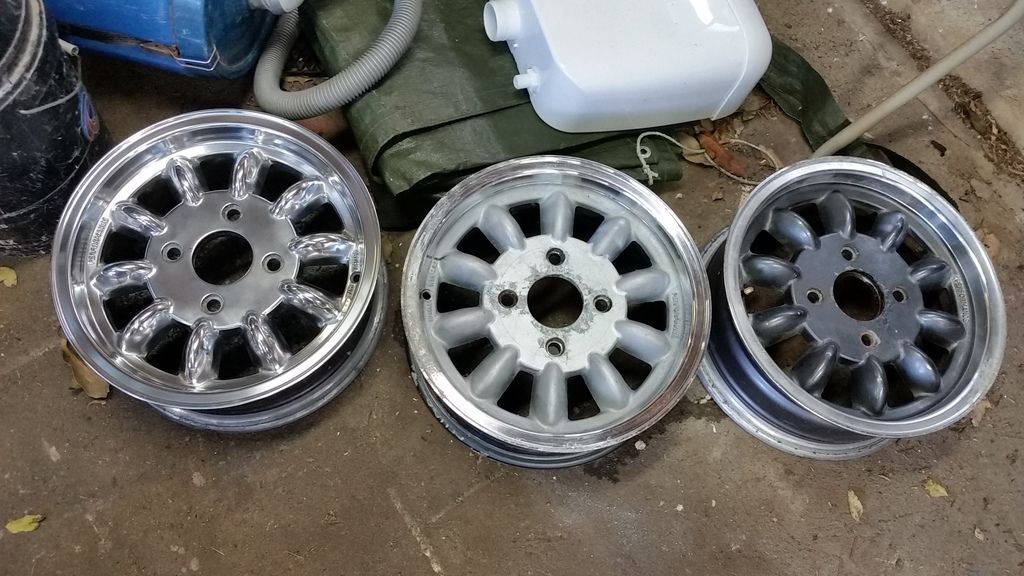
Later on, I put the seats on the pan. For the show, I will put my spare set of mag wheels on it, but not until we have finished painting etc. These
were a painted set of wheels, quite marked and with some surface corrosion, but I have polished them the same as the ones I already have on my car, so
I can run a pair on my trailer.
From your ole' mate Jeff
|
|
|
 beetleboyjeff beetleboyjeff
A.k.a.: Jeff Walsh
Custom Title Time!
    
Posts: 1783
Threads: 40
Registered: February 13th, 2009
Member Is Online
Location: Port Macquarie
Theme: UltimaBB Pro Blue ( Default )
Mood: Drive bugs hard
|
| posted on June 26th, 2016 at 11:50 PM |
|
|
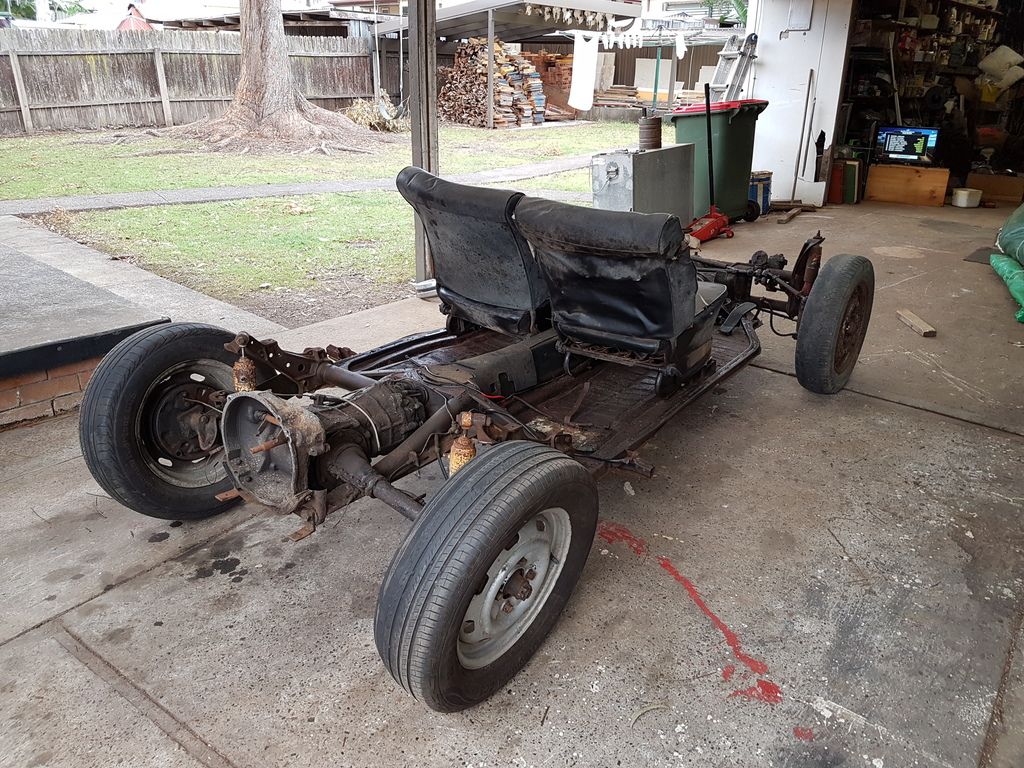
Ok, so I set up the seats on the pan so we could make sure the body wouldn't interfere with anything there, and it would look correct with people
sitting in it.
Talking to the director, he want a bit flatter sort of Greased Lightning so it is easier to dance on
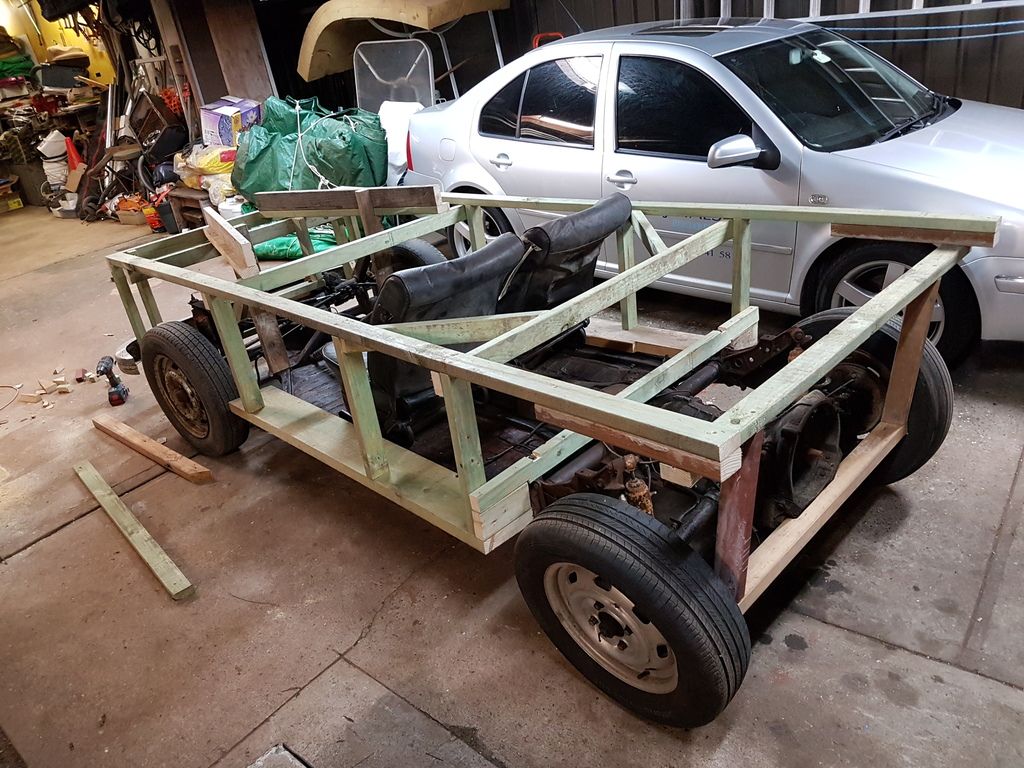
So, this afternoon, I started to make up the frame and attach it to the pan. I was thinking of re-setting the torsion bars so it didn't sit so high,
but wasn't sure what to do with the front, then hit on the idea, I only need to compress the suspension and wire/strap/clamp it down. I don't need
suspension travel on the stage, and it would be better to dance on if it isn't bouncing all over the place.
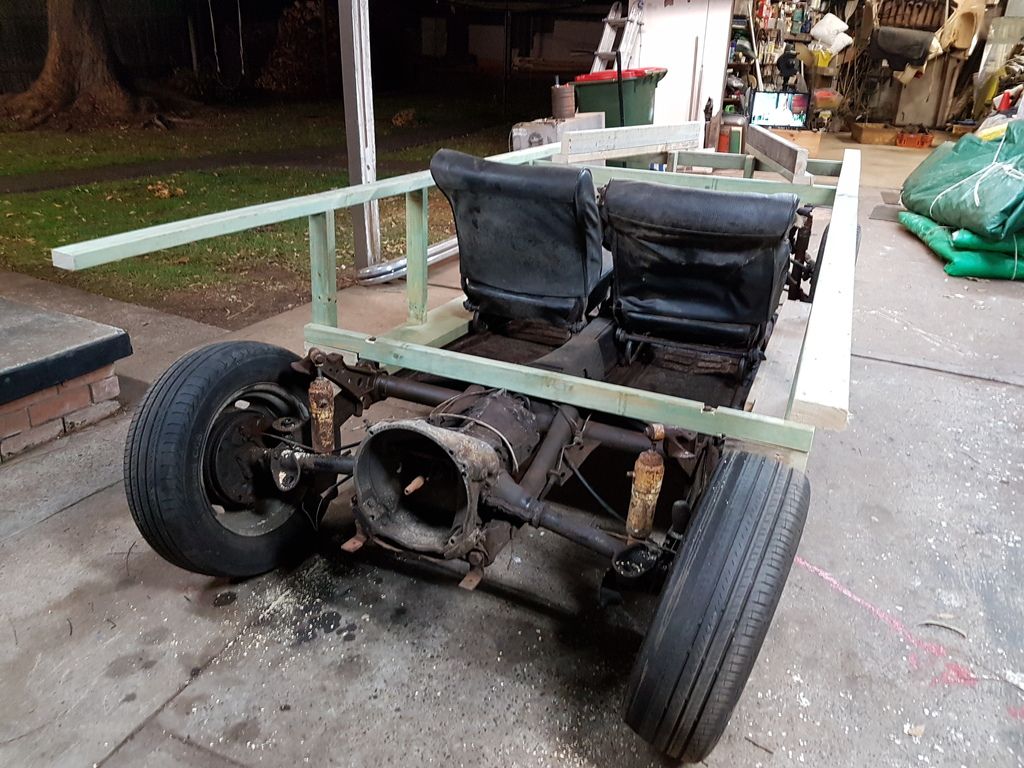
I had a type 111 bumper bar that will look good on one end - need to find another one - I will ask around locally. Looked the the headlights from the
69, and we can get them to work fine on this body I am sure. I will see how I go in the next few afternoons.
From your ole' mate Jeff
|
|
|
 retroresto retroresto
Wolfsburg Wizard
A.K.A Paul
  
Posts: 455
Threads: 147
Registered: November 28th, 2005
Member Is Offline
Location: Adelaide
Theme: UltimaBB Psyche Green
Mood: Depends on how my VW is running
|
| posted on June 27th, 2016 at 10:00 AM |
|
|
Interesting Project, looking forward to seeing the final product!
|
|
|
 beetleboyjeff beetleboyjeff
A.k.a.: Jeff Walsh
Custom Title Time!
    
Posts: 1783
Threads: 40
Registered: February 13th, 2009
Member Is Online
Location: Port Macquarie
Theme: UltimaBB Pro Blue ( Default )
Mood: Drive bugs hard
|
| posted on June 28th, 2016 at 12:04 AM |
|
|
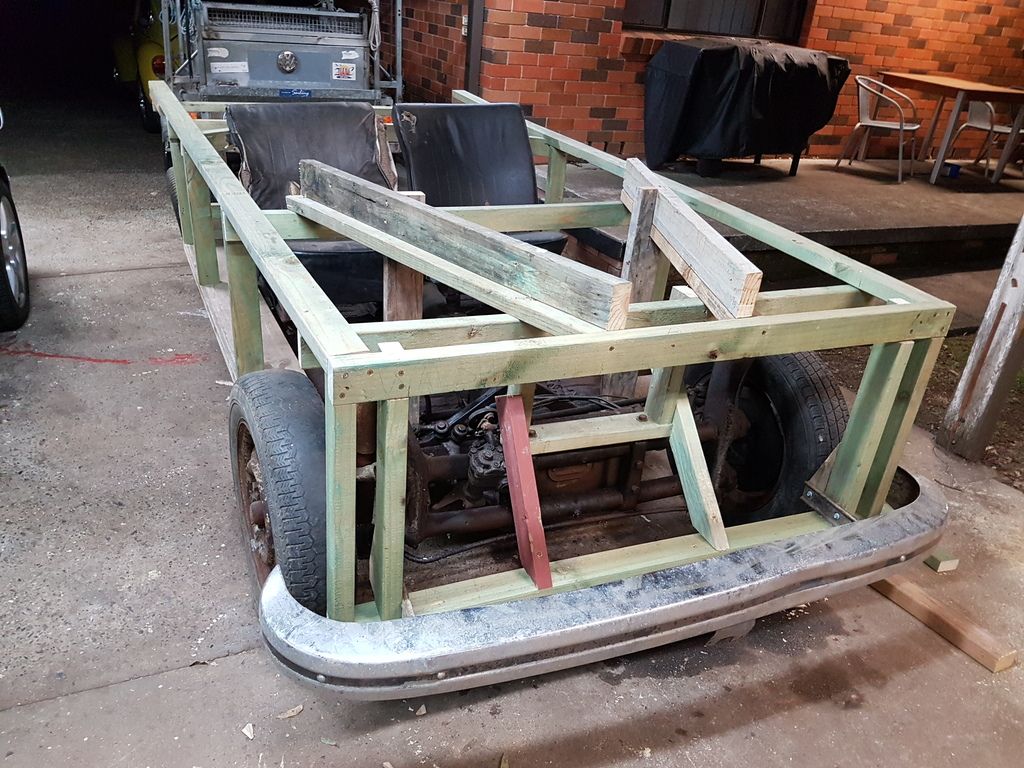
Tonight I framed up the 'boot lid' area so it is supported off the pan. Lucky enough, I had 2 brackets on the 2 big bolts in the end of the tuning
forks which used to hold a skid plate - I did a lot of off road driving. This should make the boot lid strong enough to dance on.
I also framed up the front a bit more to take the 'grill' and the bumper bar, which fitted on a treat. I put 2 more struts down to the frame head at
the ends of the Napolean's hat to give the bonnet and the front more support, especially when we cut the doors out.
Tomorrow afternoon, I am hoping to 'lower' the suspension with chains if I finish work early enough. I have a mate coming over for tea, so If I work
too late, I will run out of time. The director also mentioned that he would like the steering wheel on the left - Grease is an American show, and they
will all talk with Yank accents. It doesn't have to be terribly reliable steering as it will only travel at a push speed, so we are thinking of using
2 pulleys and a belt. Will have to think on this one.
From your ole' mate Jeff
|
|
|
 modnrod modnrod
Fahrvergnugen
   
Posts: 978
Threads: 50
Registered: March 17th, 2011
Member Is Offline
Location: Midwest, Westoz.
Theme: UltimaBB Pro Blue
Mood: Old School Volksies!
|
| posted on June 28th, 2016 at 10:30 AM |
|
|
Steering.........
solid rod across between stub axles, join the steering tube to it with an offset bit of pipe on the end of it. Sorta like a hill trolley for big
boys!
I rekn belts would slip and cause the wheels to angle independantly.
|
|
|
 beetleboyjeff beetleboyjeff
A.k.a.: Jeff Walsh
Custom Title Time!
    
Posts: 1783
Threads: 40
Registered: February 13th, 2009
Member Is Online
Location: Port Macquarie
Theme: UltimaBB Pro Blue ( Default )
Mood: Drive bugs hard
|
| posted on June 28th, 2016 at 11:56 AM |
|
|
It has all the steering rods, the steering box, and the coupler for the steering column to go in on the RHS, so both wheels turn as usual. I was
hoping to put a pulley on the coupler rather than bolting the steering column to it, so then we could put the column on the LHS and 'Americanise'
it.
From your ole' mate Jeff
|
|
|
 grazza7755 grazza7755
Wolfsburg Wizard
  
Posts: 458
Threads: 49
Registered: December 4th, 2010
Member Is Offline
Location: Palmers Island
Theme: UltimaBB Pro Blue ( Default )
Mood: relaxed
|
| posted on June 28th, 2016 at 01:23 PM |
|
|
solution, perhaps!
Hey Jeff,
Would the steering box just bolt on the other side and swap sides with the tie rods?
Quicker and neater if it does.
|
|
|
 beetleboyjeff beetleboyjeff
A.k.a.: Jeff Walsh
Custom Title Time!
    
Posts: 1783
Threads: 40
Registered: February 13th, 2009
Member Is Online
Location: Port Macquarie
Theme: UltimaBB Pro Blue ( Default )
Mood: Drive bugs hard
|
| posted on June 28th, 2016 at 10:25 PM |
|
|
| Quote: | Originally
posted by grazza7755
Hey Jeff,
Would the steering box just bolt on the other side and swap sides with the tie rods?
Quicker and neater if it does. [/quote
Just looking at the top 2 photos, it could be possible, but the stop for side to side is welded on the RHS side, and the steering damper mount would
be on the wrong side. Neither of these things would matter for the small amount of movement & turning it will be doing.
|
From your ole' mate Jeff
|
|
|
 beetleboyjeff beetleboyjeff
A.k.a.: Jeff Walsh
Custom Title Time!
    
Posts: 1783
Threads: 40
Registered: February 13th, 2009
Member Is Online
Location: Port Macquarie
Theme: UltimaBB Pro Blue ( Default )
Mood: Drive bugs hard
|
| posted on June 29th, 2016 at 12:47 AM |
|
|
Well, I got the suspension lowered. It looks better now, and will be a lot easier to get onto it to dance. The actual lowering only took a bit over an
hour to do all 4 corners - I don't know what everyone makes such a fuss about it for. lol ........ mind you, I wouldn't like to drive it like
this :-)
All I did was parked it under the big beam across my carport (that I use to winch my bug up to remove the engine or work under it), put a prop from
the top of the shock tower to the beam, jack the suspension up, put a chain around it, shackle the chain, then lower the jack & remove the
prop.
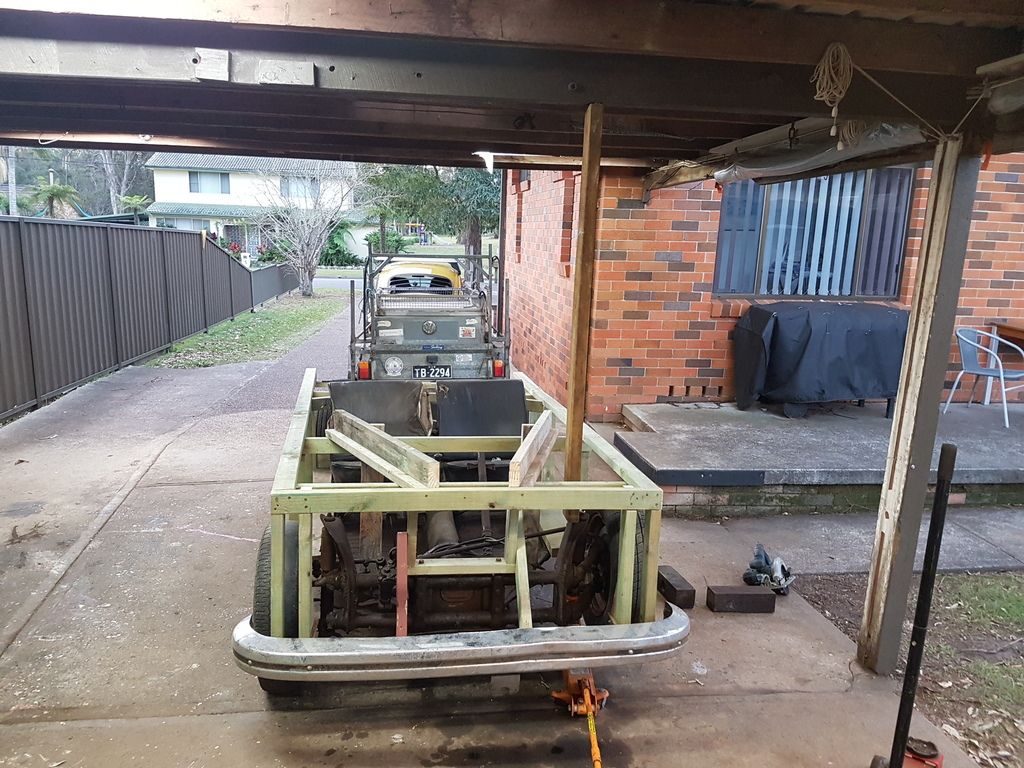
So this is the rear:
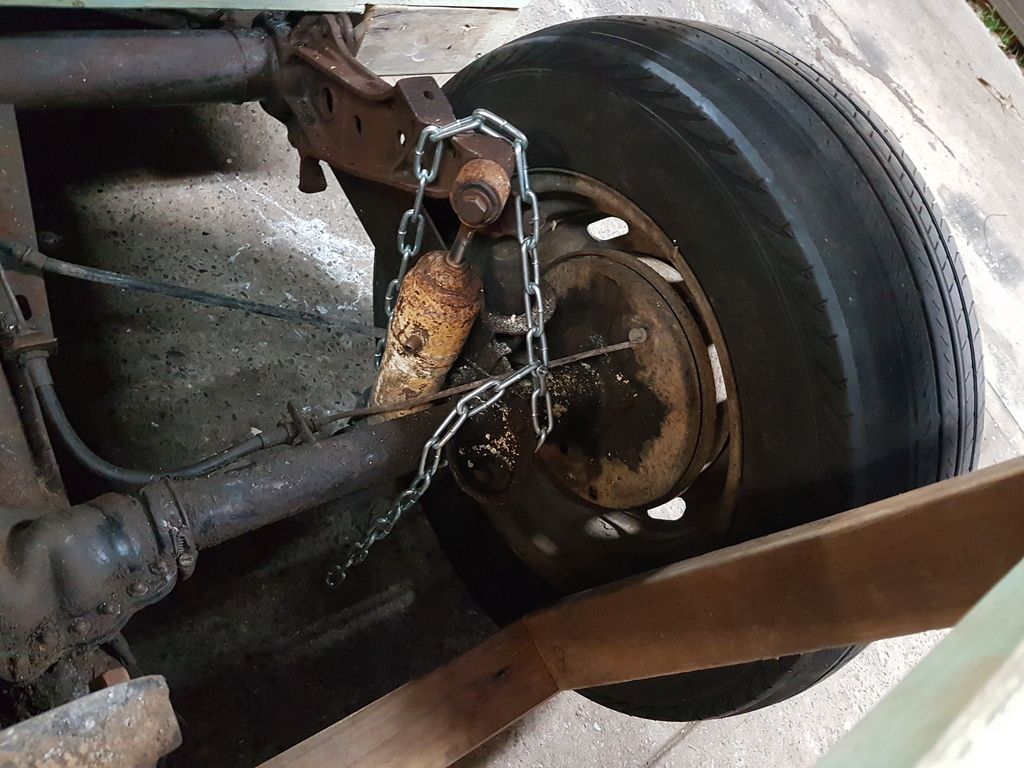
and this is the front:
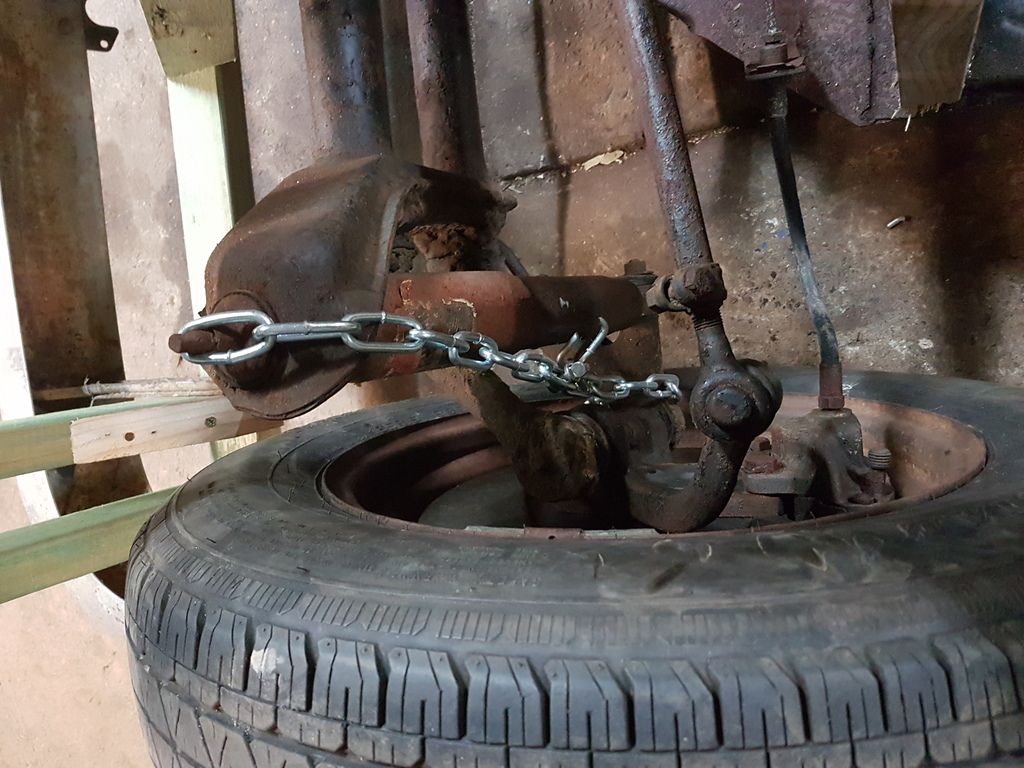
and this is the result
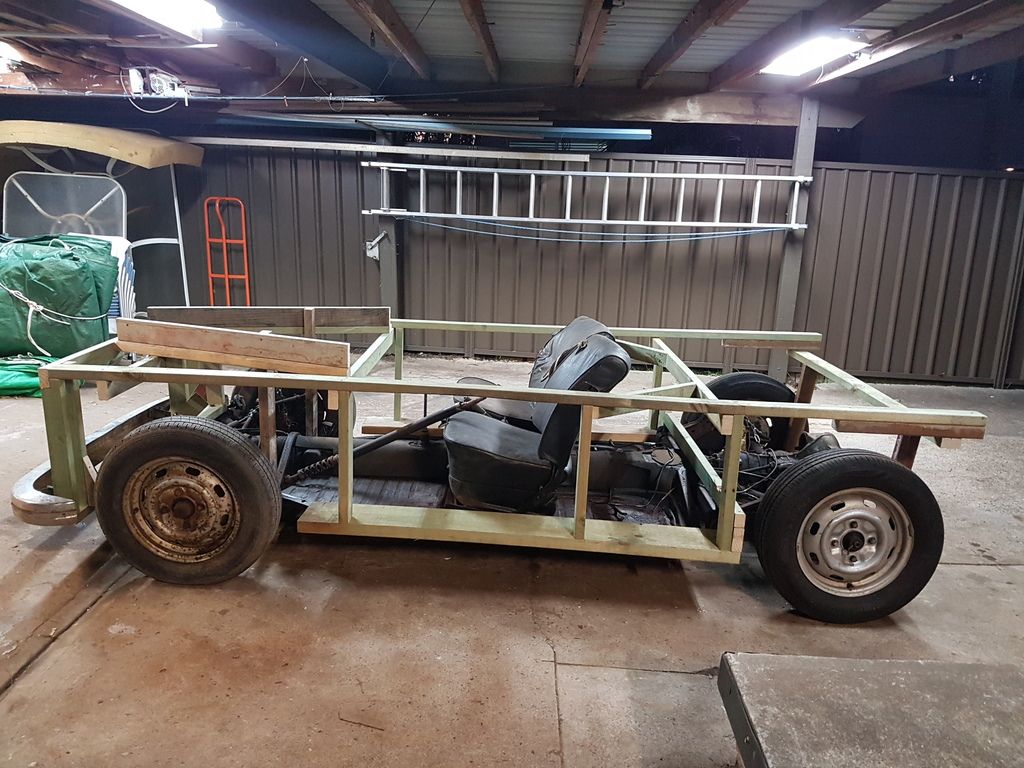
I will see if I can frame up the back of the 'boot' tomorrow evening, and maybe look at framing the doors
From your ole' mate Jeff
|
|
|
 HappyDaze HappyDaze
A.k.a.: Greg Mackie
Son of Jim - Creator of Good
Superannuated
     
Posts: 2887
Threads: 141
Registered: June 13th, 2009
Member Is Offline
Location: Southern Highlands NSW
Theme: UltimaBB Pro Blue ( Default )
Mood: Happy enough
|
| posted on June 29th, 2016 at 08:26 AM |
|
|
Jeff, did you used to work at the Morgan factory ?
Dunno about Greased Lightning...Chain Lightning could be a worry, though. 
I'd rather wear a Beetle out by racing it than by polishing it!
|
|
|
 beetleboyjeff beetleboyjeff
A.k.a.: Jeff Walsh
Custom Title Time!
    
Posts: 1783
Threads: 40
Registered: February 13th, 2009
Member Is Online
Location: Port Macquarie
Theme: UltimaBB Pro Blue ( Default )
Mood: Drive bugs hard
|
| posted on June 29th, 2016 at 09:06 AM |
|
|
| Quote: | Originally
posted by HappyDaze
Jeff, did you used to work at the Morgan factory ?
|
Not the Morgan factory, but I used to make billy carts out of timber when I was a kid. :-)
From your ole' mate Jeff
|
|
|
 HappyDaze HappyDaze
A.k.a.: Greg Mackie
Son of Jim - Creator of Good
Superannuated
     
Posts: 2887
Threads: 141
Registered: June 13th, 2009
Member Is Offline
Location: Southern Highlands NSW
Theme: UltimaBB Pro Blue ( Default )
Mood: Happy enough
|
| posted on June 29th, 2016 at 09:30 AM |
|
|
So did I...that is, until I discovered STEEL. 
I'd rather wear a Beetle out by racing it than by polishing it!
|
|
|
 beetleboyjeff beetleboyjeff
A.k.a.: Jeff Walsh
Custom Title Time!
    
Posts: 1783
Threads: 40
Registered: February 13th, 2009
Member Is Online
Location: Port Macquarie
Theme: UltimaBB Pro Blue ( Default )
Mood: Drive bugs hard
|
| posted on June 29th, 2016 at 01:05 PM |
|
|
I am a carpenter though - I do what I know. It only has to last about 4 weeks. Sets are all an illusion.
They say I am delusional, so I guess that is close. :-)
From your ole' mate Jeff
|
|
|
 beetleboyjeff beetleboyjeff
A.k.a.: Jeff Walsh
Custom Title Time!
    
Posts: 1783
Threads: 40
Registered: February 13th, 2009
Member Is Online
Location: Port Macquarie
Theme: UltimaBB Pro Blue ( Default )
Mood: Drive bugs hard
|
| posted on June 30th, 2016 at 01:14 AM |
|
|
This evening I framed up the back
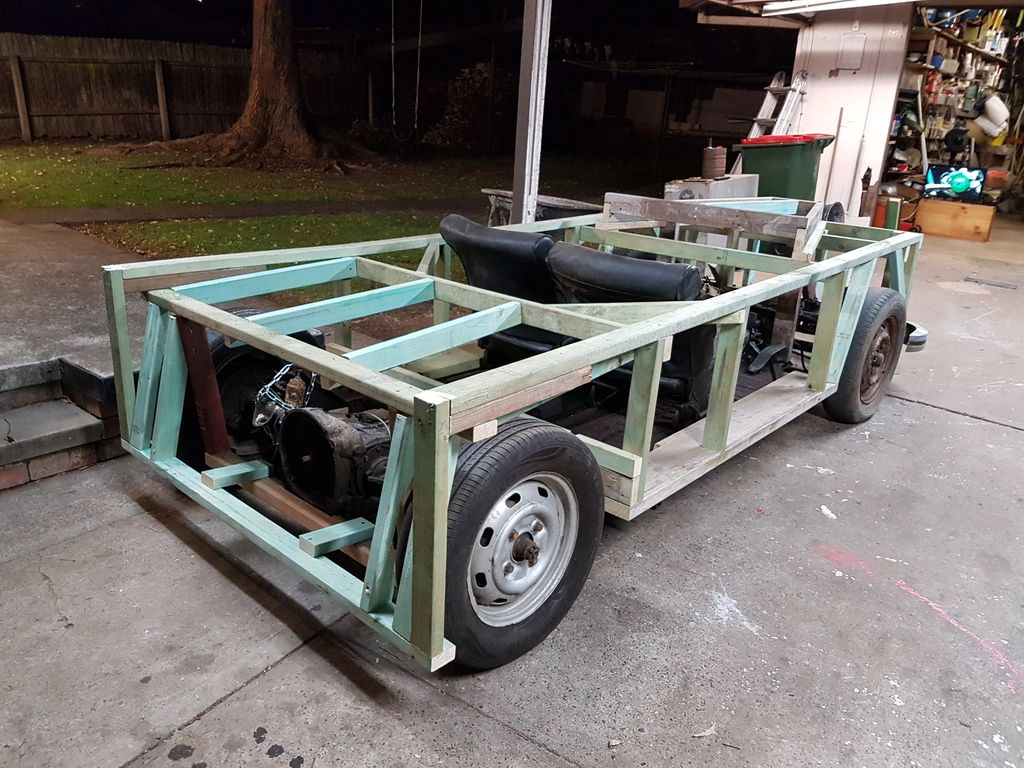
and did more framing on the front & the bonnet - it sure looks square & boxy in this photo. Once it's sheeted and the foam goes on & gets
shaped it should look a whole lot better
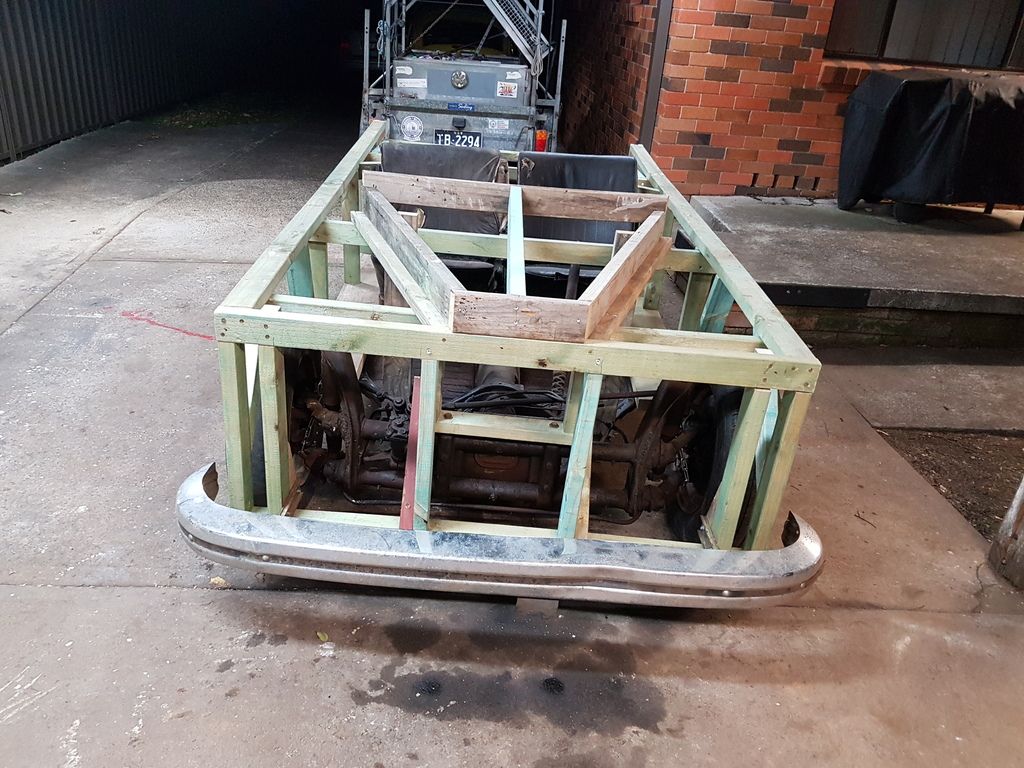
I was hoping to start on the doors, but ran out of time - I was late finishing work. I will try & do them tomorrow night
From your ole' mate Jeff
|
|
|
 beetleboyjeff beetleboyjeff
A.k.a.: Jeff Walsh
Custom Title Time!
    
Posts: 1783
Threads: 40
Registered: February 13th, 2009
Member Is Online
Location: Port Macquarie
Theme: UltimaBB Pro Blue ( Default )
Mood: Drive bugs hard
|
| posted on July 1st, 2016 at 12:08 AM |
|
|
This evening I got the doors cut out, framed up, & hinged. Sandy has to jamb Danny's hand in the door at the drive-in, so the doors have to
open.
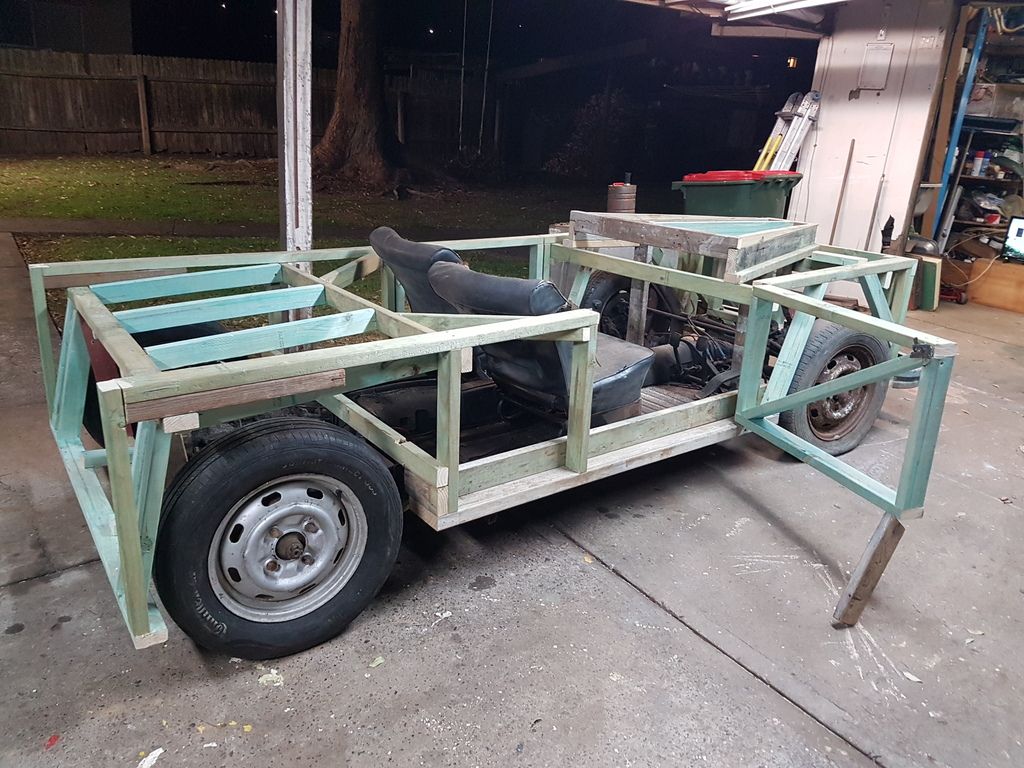
Now if only I could get the bodywork to appear like VW do with the Amarok in the ad. lol
Tomorrow we are spending the day working on it (except I have to duck off for a short while for a mate's funeral - he fought cancer for 9 years -
plucky bugger), so hope to get the sheeting on, a lot of the foam on, and start shaping it.
From your ole' mate Jeff
|
|
|
 beetleboyjeff beetleboyjeff
A.k.a.: Jeff Walsh
Custom Title Time!
    
Posts: 1783
Threads: 40
Registered: February 13th, 2009
Member Is Online
Location: Port Macquarie
Theme: UltimaBB Pro Blue ( Default )
Mood: Drive bugs hard
|
| posted on July 2nd, 2016 at 01:16 AM |
|
|
Started cutting & fitting MDF sheeting & foam today. Starting to get a bit of an idea of what it will look like now.
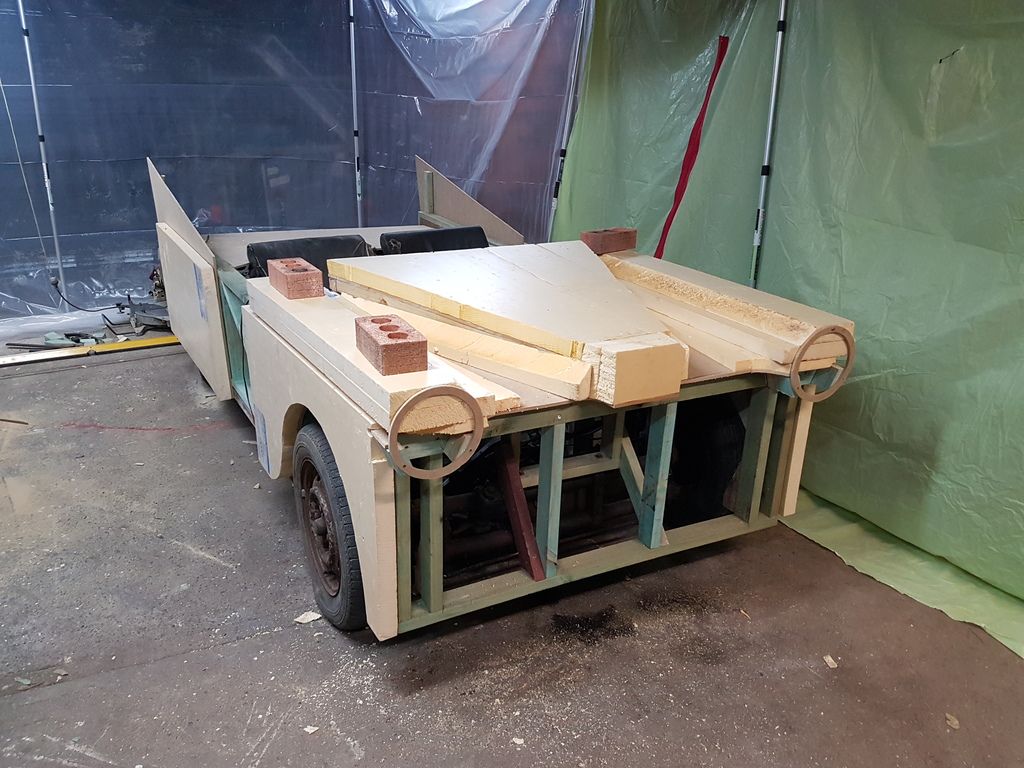
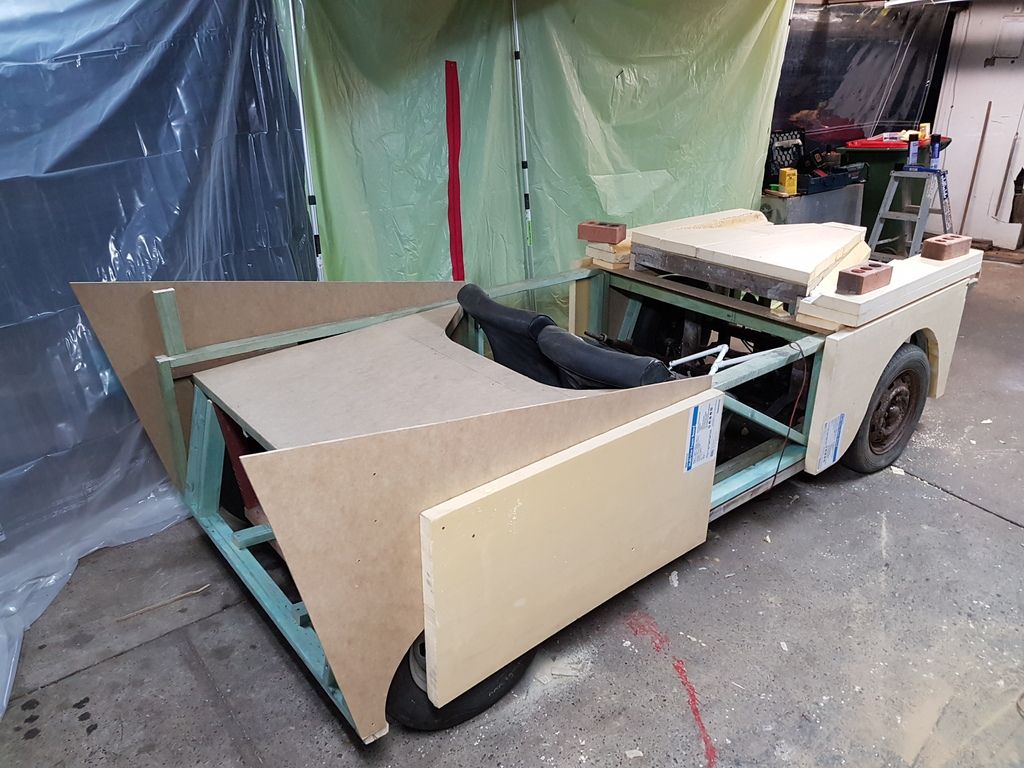
Just have to keep working on the panels & foam now.
From your ole' mate Jeff
|
|
|
 oldskoolguy oldskoolguy
Officially Full-On Dubber
  
Posts: 329
Threads: 13
Registered: September 6th, 2011
Member Is Offline
Location: Coffs Harbour NSW
Theme: UltimaBB Pro Blue ( Default )
Mood: Ticking over nicely.
|
| posted on July 2nd, 2016 at 11:02 AM |
|
|
The Australian car manufacturing industry is alive and well and operating in Port Macquarie!
Nice work Jeff, you'll have SsangYong nicking your design ideas if you are not careful. 
All the best, Rob.
"The best trophies are stone chips"
1969 1500 Beetle "Otis"
2008 Golf GTI
|
|
|
 beetleboyjeff beetleboyjeff
A.k.a.: Jeff Walsh
Custom Title Time!
    
Posts: 1783
Threads: 40
Registered: February 13th, 2009
Member Is Online
Location: Port Macquarie
Theme: UltimaBB Pro Blue ( Default )
Mood: Drive bugs hard
|
| posted on July 2nd, 2016 at 11:46 PM |
|
|
Cut & fitted the last of the MDF panels today, and started shaping the foam on the bonnet & front guards.
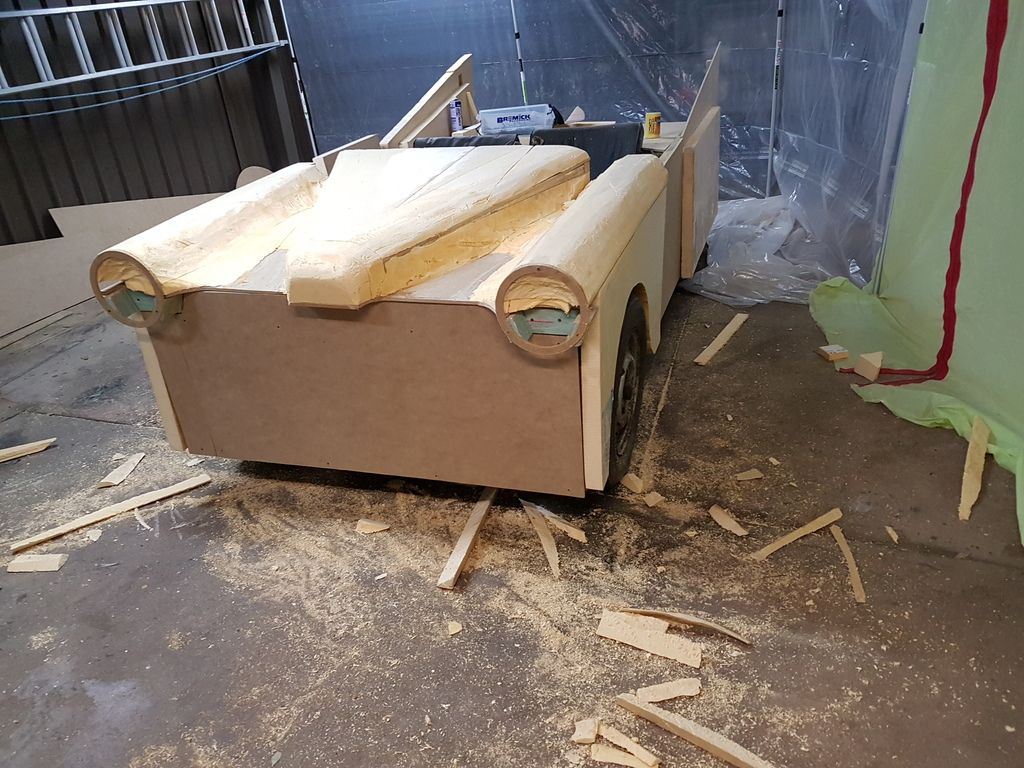
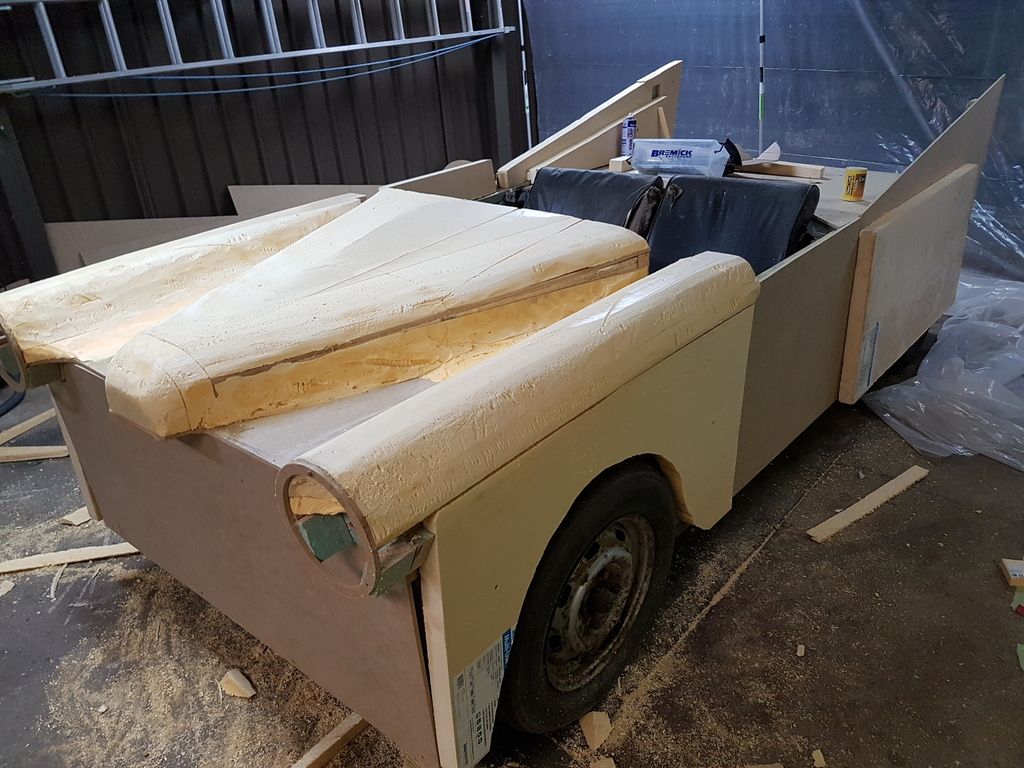
I hope to get the windscreen in tomorrow, and hope to get more sheets of foam fixed on ready to shape.
From your ole' mate Jeff
|
|
|
 beetleboyjeff beetleboyjeff
A.k.a.: Jeff Walsh
Custom Title Time!
    
Posts: 1783
Threads: 40
Registered: February 13th, 2009
Member Is Online
Location: Port Macquarie
Theme: UltimaBB Pro Blue ( Default )
Mood: Drive bugs hard
|
| posted on July 3rd, 2016 at 11:48 PM |
|
|
This evening, I made up the windscreen surround and fitted the windscreen - an old sheet of perspex I have had for .......... I don't know - a lot of
years. Could be over 30. The problem is, the glue holding the protective paper on it is well & truly dried out, so I will have to get tome stuff
tomorrow to clean it off.
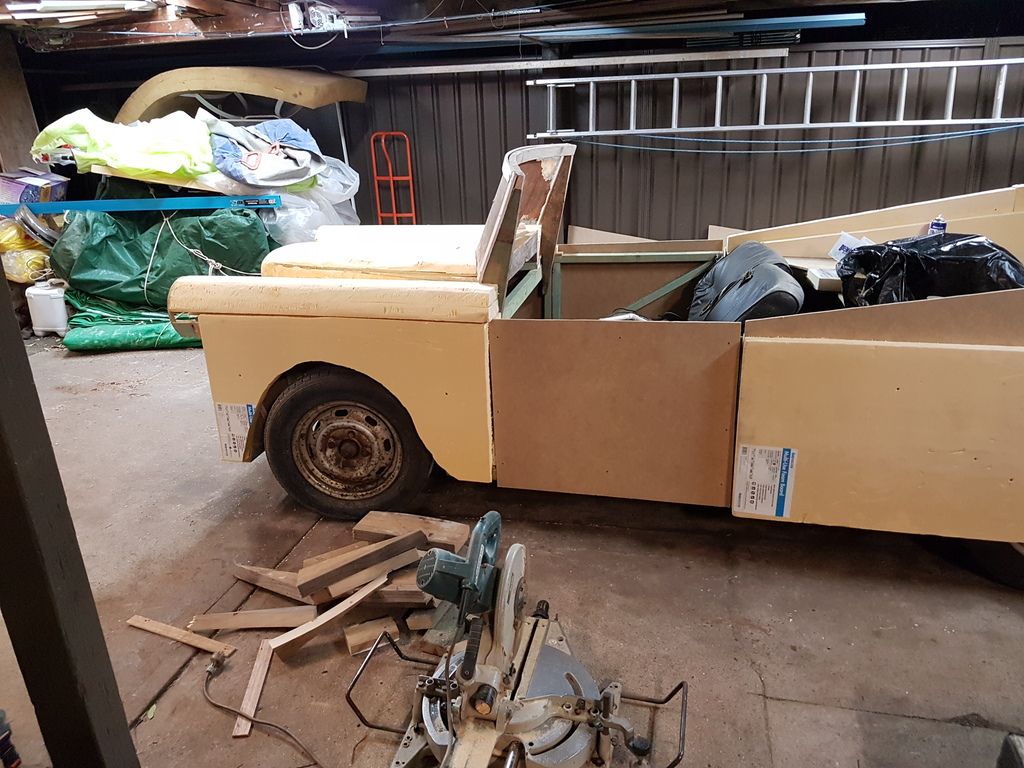
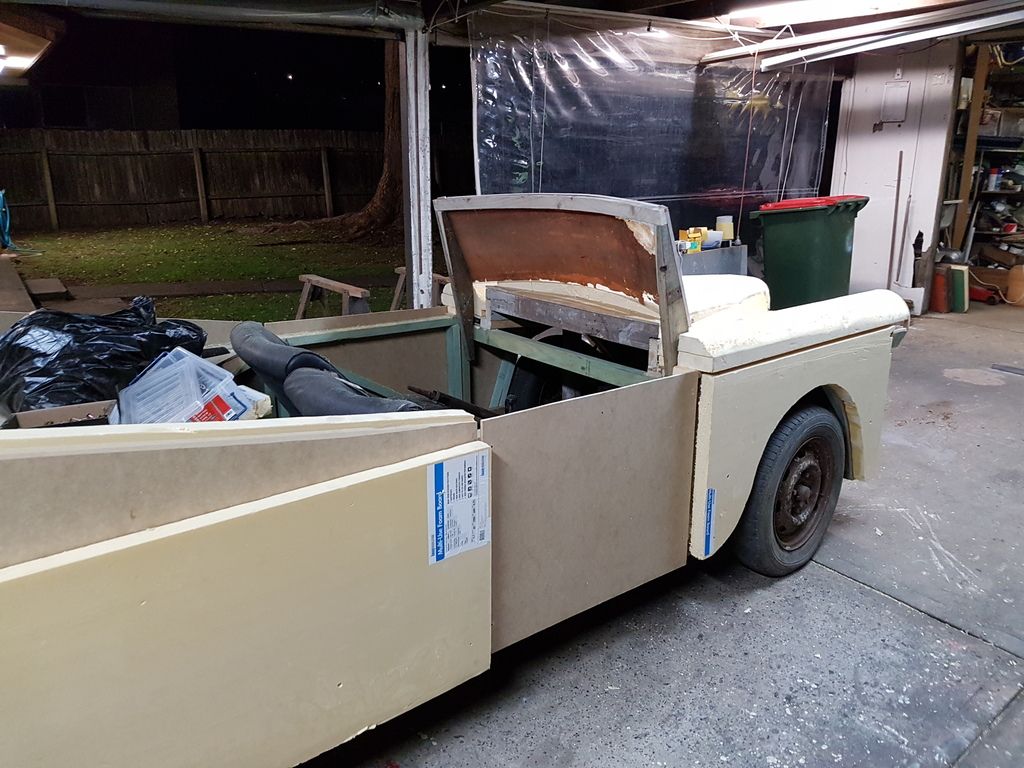
Tomorrow the plan is to glue a lot more foam on ready to shape, and maybe clean the paper off the windscreen.
From your ole' mate Jeff
|
|
|
 bugmaniaar bugmaniaar
Officially Full-On Dubber
  
Posts: 295
Threads: 18
Registered: June 6th, 2011
Member Is Offline
Theme: UltimaBB Pro Blue ( Default )
|
| posted on July 4th, 2016 at 06:49 AM |
|
|
One of the best builds yet...Maybe some Torana tail lights?......
|
|
|
 beetleboyjeff beetleboyjeff
A.k.a.: Jeff Walsh
Custom Title Time!
    
Posts: 1783
Threads: 40
Registered: February 13th, 2009
Member Is Online
Location: Port Macquarie
Theme: UltimaBB Pro Blue ( Default )
Mood: Drive bugs hard
|
| posted on July 4th, 2016 at 07:17 AM |
|
|
| Quote: | Originally
posted by bugmaniaar
One of the best builds yet...Maybe some Torana tail lights?......
|
Tim, the bloke who is working on it with me, has some tail lights off some classic car that he is restoring (I can't remember what he said it was -
not a VW).
From your ole' mate Jeff
|
|
|
 HappyDaze HappyDaze
A.k.a.: Greg Mackie
Son of Jim - Creator of Good
Superannuated
     
Posts: 2887
Threads: 141
Registered: June 13th, 2009
Member Is Offline
Location: Southern Highlands NSW
Theme: UltimaBB Pro Blue ( Default )
Mood: Happy enough
|
| posted on July 4th, 2016 at 08:09 AM |
|
|
Jeff, I find it hard to believe you have got so much done, in such a short time...Amazing !
Pity you're so far away. I would love to help out  It'd have to be
metal-work though, as wood is NOT my medium It'd have to be
metal-work though, as wood is NOT my medium 
And thanks for taking the time to show us the progress, as time must be quite valuable to you.  
I'd rather wear a Beetle out by racing it than by polishing it!
|
|
|
 landfall landfall
Officially Full-On Dubber
  
Posts: 290
Threads: 36
Registered: June 4th, 2014
Member Is Offline
Location: Hobart Tassie
Theme: UltimaBB Pro Blue ( Default )
|
 posted on July 4th, 2016 at 03:32 PM posted on July 4th, 2016 at 03:32 PM |
|
|
Hi Jeff, I am fascinated by this project and your skills. A truly worthwhile enterprise.
Will you be driving it to Valla?? 
|
|
|
 HotRodMatt HotRodMatt
Wolfsburg Elder
If it's old or rare - cut it!
      
Posts: 3616
Threads: 361
Registered: September 3rd, 2002
Member Is Offline
Location: West of Sydney
Theme: UltimaBB Pro Blue ( Default )
|
| posted on July 4th, 2016 at 03:37 PM |
|
|
Paint it black and tell everyone it's a replica. Put it on club rego.
It's better looking (and built) than one that has gone that route...
|
|
|
 beetleboyjeff beetleboyjeff
A.k.a.: Jeff Walsh
Custom Title Time!
    
Posts: 1783
Threads: 40
Registered: February 13th, 2009
Member Is Online
Location: Port Macquarie
Theme: UltimaBB Pro Blue ( Default )
Mood: Drive bugs hard
|
| posted on July 5th, 2016 at 12:37 AM |
|
|
Thanks for the comments fellas. While it would be good to do it in metal, we just don't have the time - only have about 3 weeks to build it - show
opens on the 22nd, and they need to practice on it before then. You can call in on your way to or from Valla and see it. lol
I don't know that I would particularly like to drive a car that shape for any amount of time - I am a beetleboy. I particularly wouldn't like to
drive that car anywhere - if you have any sort of a close look at it, it isn't really very well built. It is just an illusion to be viewed from the
seating area in the theatre. Good fun to do though. Time is a problem, I started late today after trying to finish preparing a contract for a job -
will try and finish it & send it off shortly, otherwise first thing in the morning before the office dwellers start work.
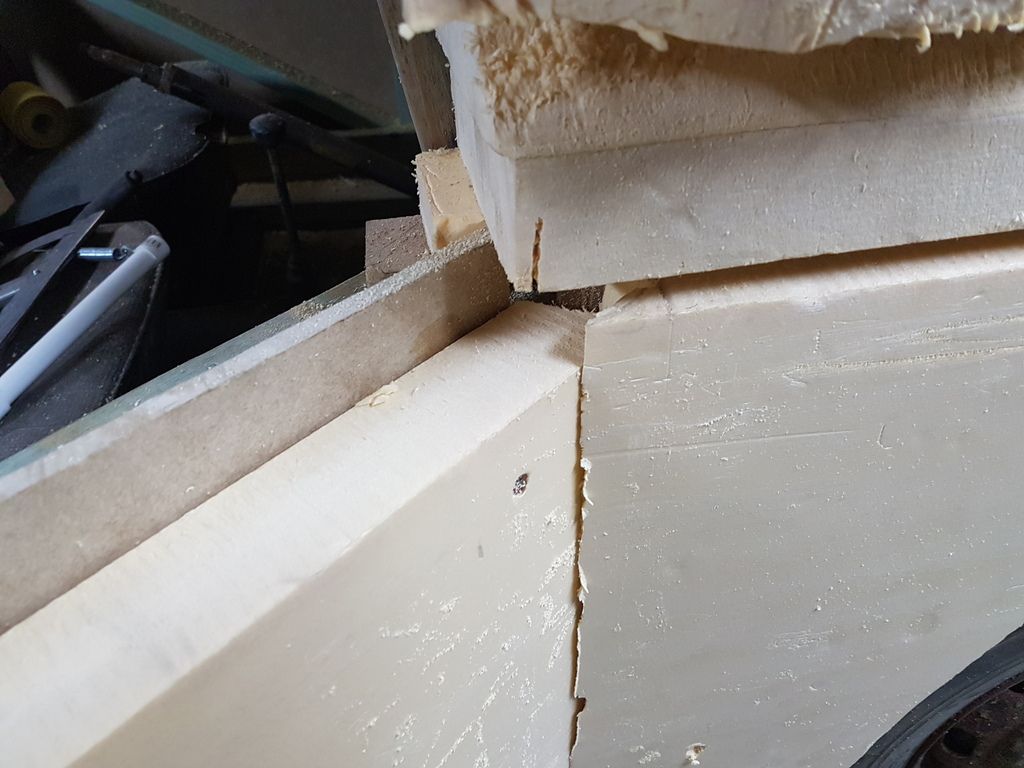
So today's job was to fit the foam to the doors. The hard part here is trying not to get too big a gap in the foam to allow the doors to open when
they are only a crappy timber frame on house door hinges, and the foam is 50mm thick.
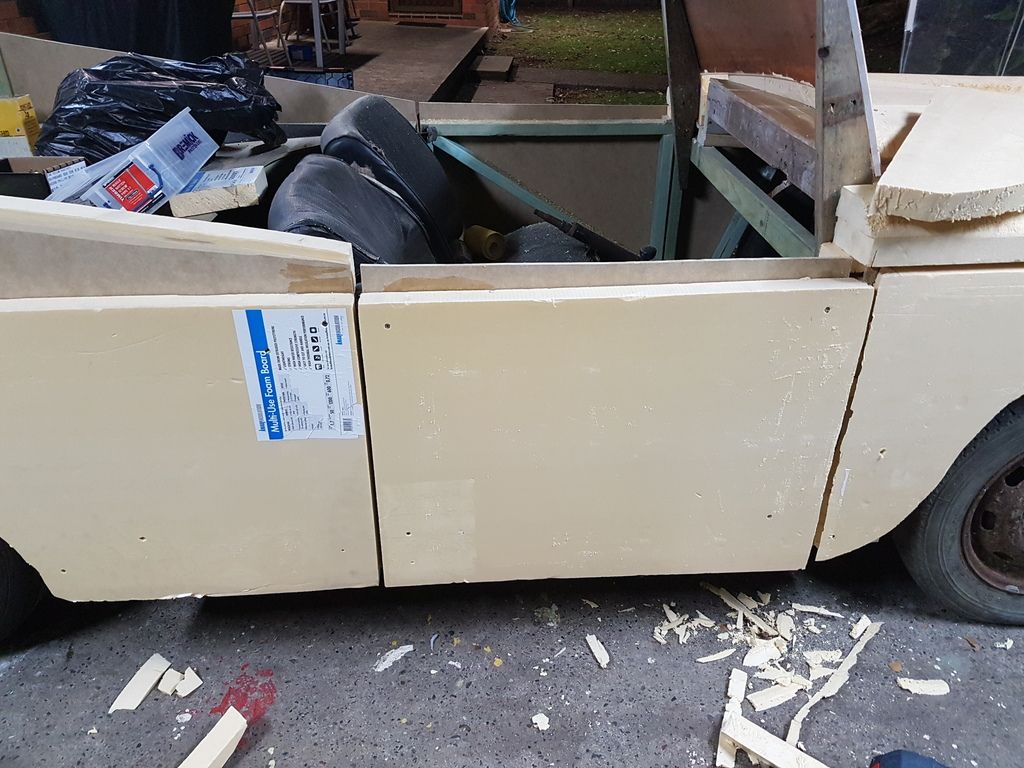
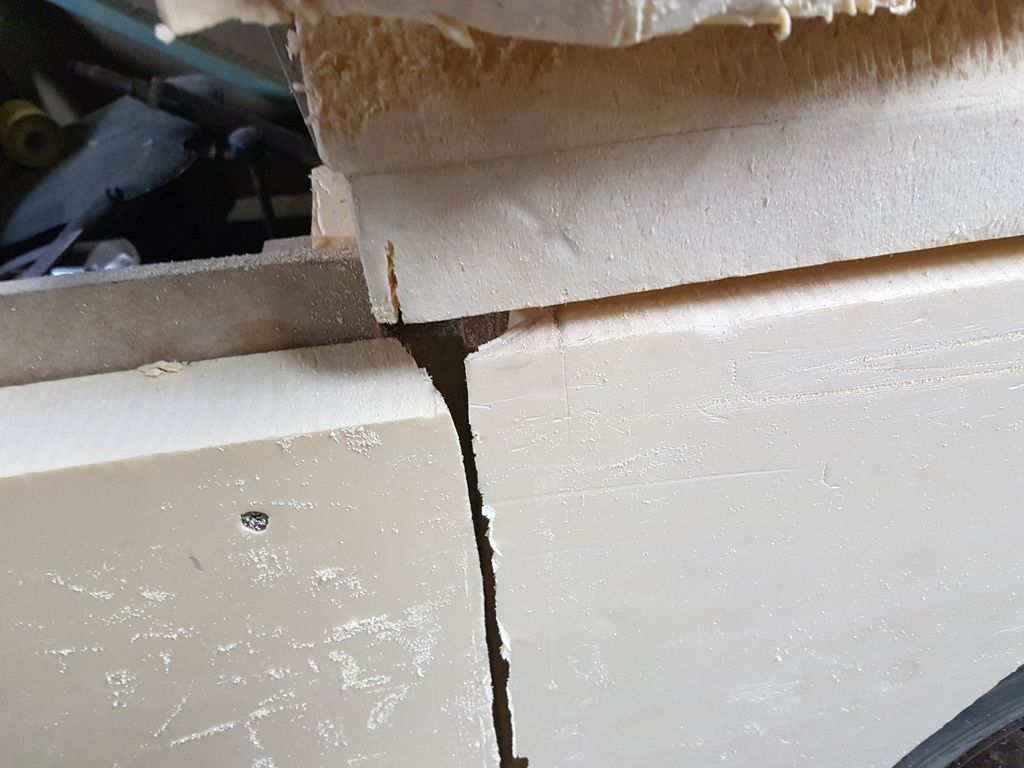
I did the best I could by undercutting the back of the front guard, and then having the front of the door skin extend forward so it could open into
the gap in the front guard.
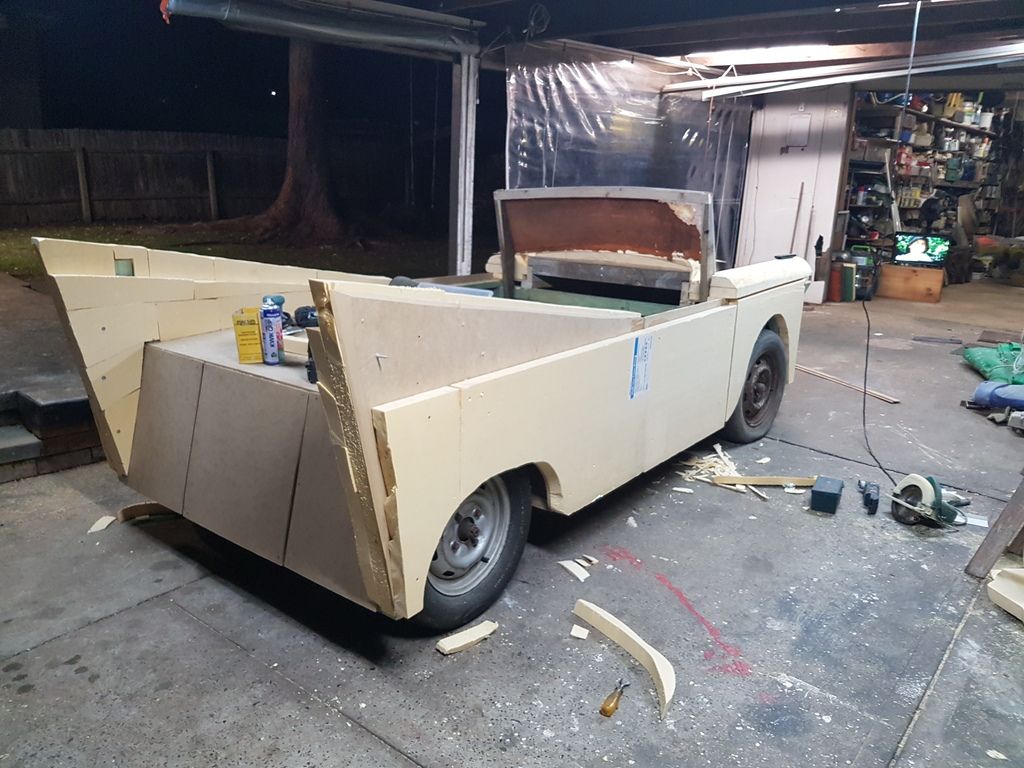
I have thin PVC angles to silicone into the backs of the front guards so we can get clean edges that won't fall apart, and I was really hoping to
get them done tonight so the silicone would dry so we could shape the foam tomorrow afternoon, but I ran out of silicone. I will get some in the
morning as soon as I get the contract away and do it then. Hopefully it will be dry enough tomorrow afternoon.
I also got a heap of foam on the back guards and built the wings out to thickness ready to shape.
If I can get the angles in front of the doors done in the morning, Tim & I should get a heap of the sides shaped tomorrow evening (I hope).
From your ole' mate Jeff
|
|
|
 modnrod modnrod
Fahrvergnugen
   
Posts: 978
Threads: 50
Registered: March 17th, 2011
Member Is Offline
Location: Midwest, Westoz.
Theme: UltimaBB Pro Blue
Mood: Old School Volksies!
|
| posted on July 5th, 2016 at 08:56 AM |
|
|
I'm getting itchy 
Looking good man
|
|
|
 beetleboyjeff beetleboyjeff
A.k.a.: Jeff Walsh
Custom Title Time!
    
Posts: 1783
Threads: 40
Registered: February 13th, 2009
Member Is Online
Location: Port Macquarie
Theme: UltimaBB Pro Blue ( Default )
Mood: Drive bugs hard
|
| posted on July 6th, 2016 at 01:13 AM |
|
|
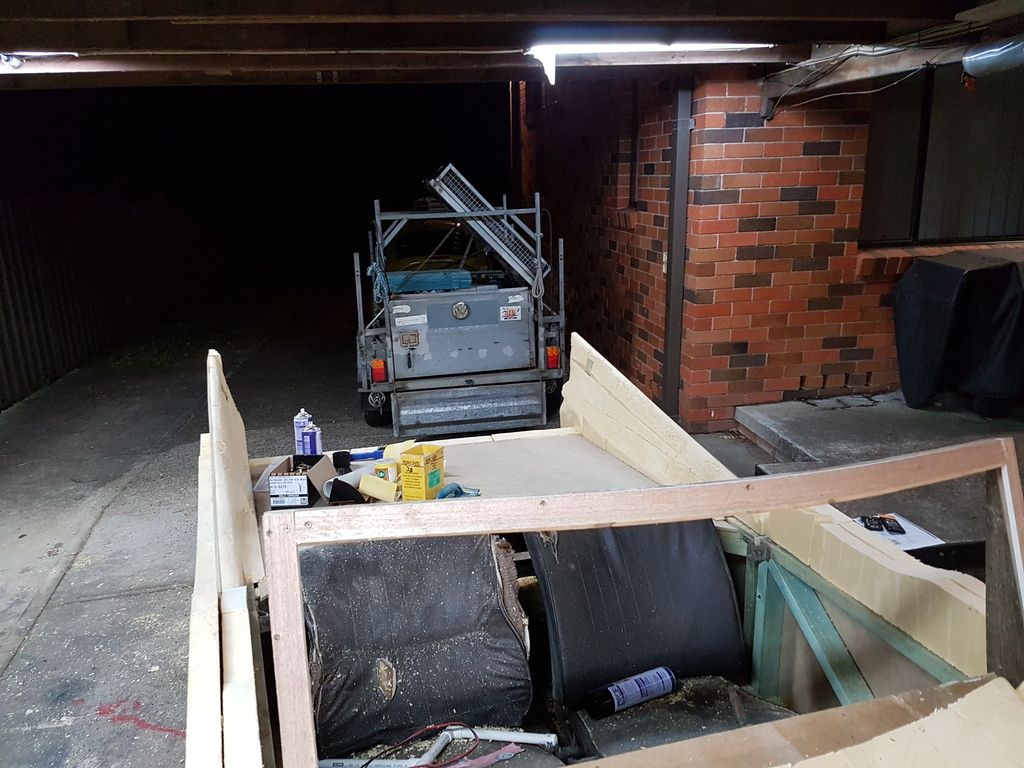
I put the foam on the back of the boot this evening, as well as on the top of the doors. I also started getting the 30 year old protective paper off
the perspex windscreen - what a job.....
Tim did a lot of the shaping of the foam to the top of the fins,
and did a lot of the LHS foam shaping.
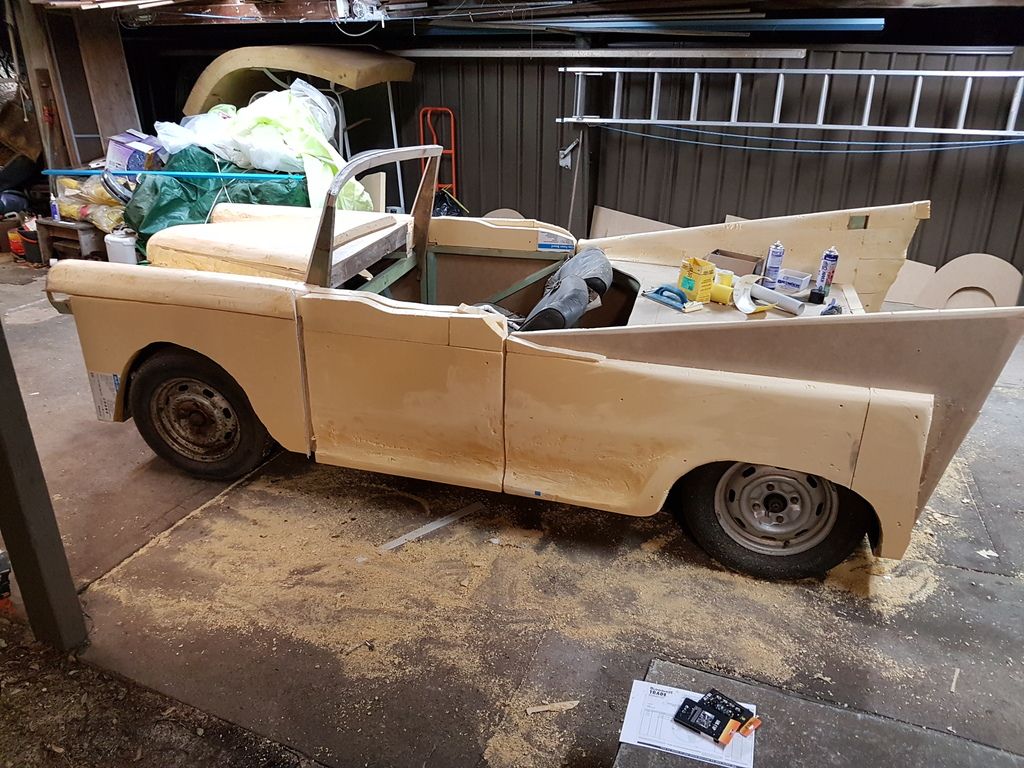
Tomorrow I hope to finish cleaning the paper off the windscreen & re-fit it, and maybe do the dash and cut out for the bumper brackets, but it
will be a late start as I have a Master Builders Association committee meeting as soon as I finish work - I am the treasurer.
From your ole' mate Jeff
|
|
|
 beetleboyjeff beetleboyjeff
A.k.a.: Jeff Walsh
Custom Title Time!
    
Posts: 1783
Threads: 40
Registered: February 13th, 2009
Member Is Online
Location: Port Macquarie
Theme: UltimaBB Pro Blue ( Default )
Mood: Drive bugs hard
|
| posted on July 7th, 2016 at 02:36 AM |
|
|
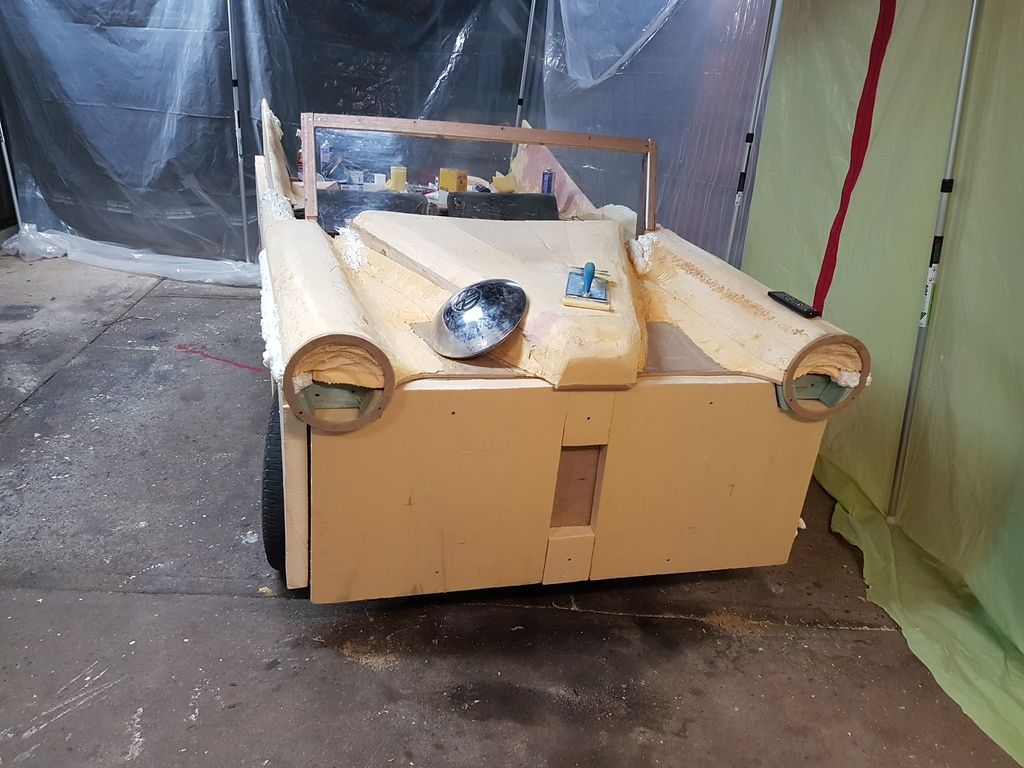
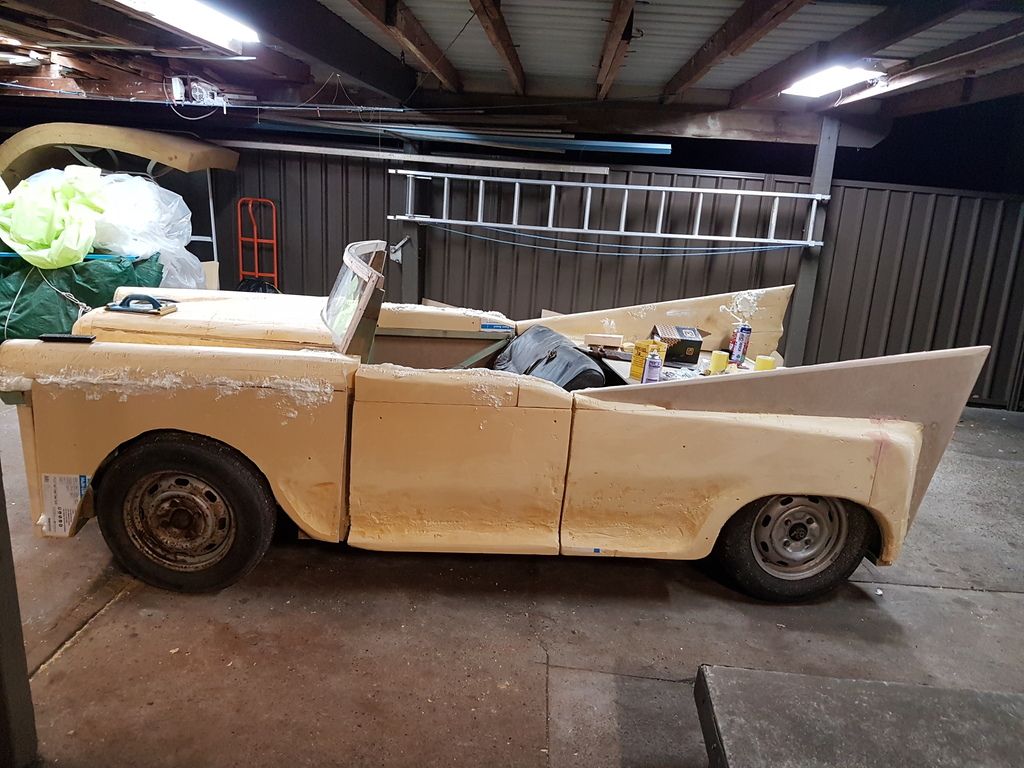
Tonight, Tim did a lot of shaping to the top of the doors and did some filling with builders bog & with expanda foam while I was at my MBA
Committee meeting. When I got back, he did more shaping to the foam on the LHS. I got the perspex for the windscreen pretty clean, and Tim was saying
the thought the windscreen looked too high as I had built it. After some discussion, I cut down the perspex & the windscreen frame and re-fitted
it. I think he was correct. I then fitted foam to the front ready for shaping.
Tomorrow afternoon I have arranged to pick up a starter motor and a few things from 'Toey's' father ready for the car. I then have to save 27 lives
(donate blood plasma at the Blood Bank) while Tim is shaping more foam, and when I get home I hope to start either fitting the steering column or
fitting the clutch & pressure plate.
From your ole' mate Jeff
|
|
|
| Pages: 1 2 |