| [ Total Views: 28245 | Total Replies: 232 | Thread Id: 74776 ] |
| Pages: 1 .. 6 7 8 |
|
|
 psimitar psimitar
Son of Jim - Creator of Good
     
Posts: 2506
Threads: 148
Registered: January 1st, 2009
Member Is Offline
Location: North East Melbourne, VIC
Theme: UltimaBB Psyche Blue
|
| posted on April 4th, 2013 at 10:38 PM |
|
|
DIY Running boards
So after the stupid gardener threw my orig Running Boards out as trash, he's fired now  , and the fact that repro ones are either shite quality and expensive or bloody expensive I decided to have a bash at making them
myself. , and the fact that repro ones are either shite quality and expensive or bloody expensive I decided to have a bash at making them
myself.
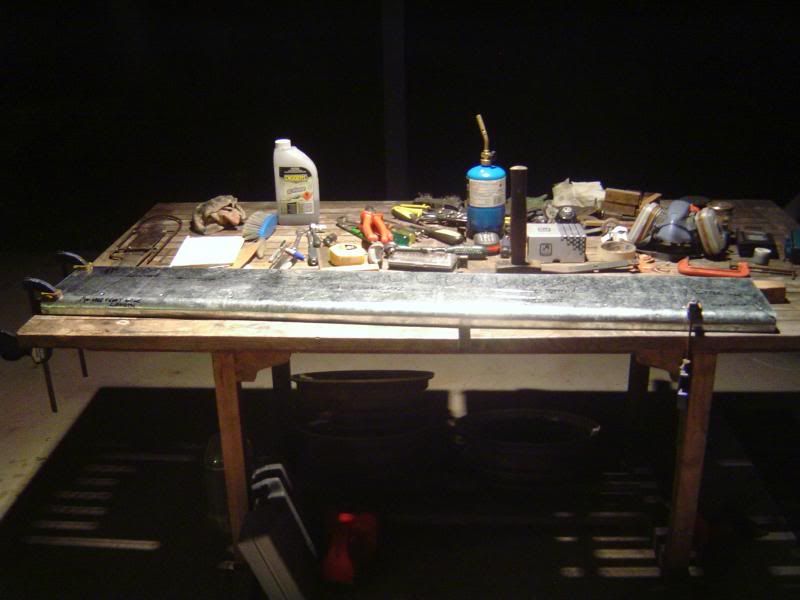
So far I have got as far as folding the outer edge back on itself ready for the outer curve to be bent into it.
Bending a 10mm lip over to 90 degrees
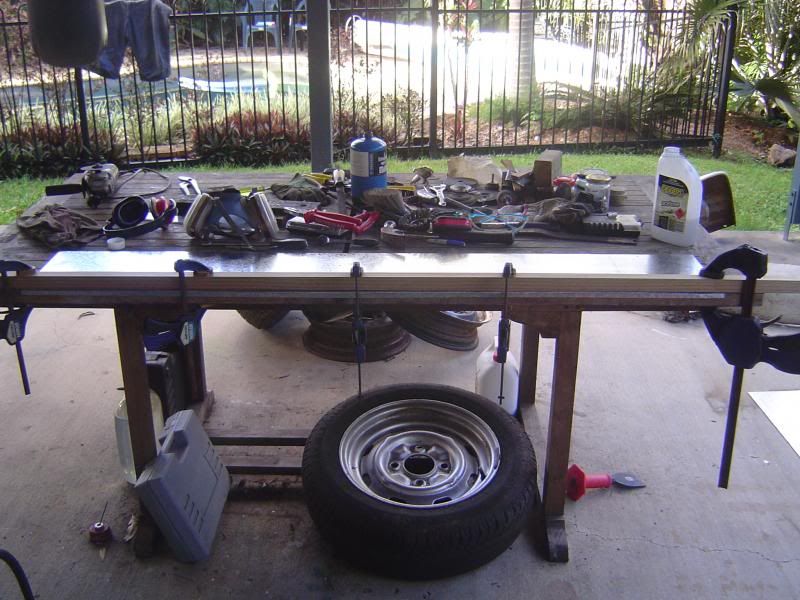
Flattening it back on itself
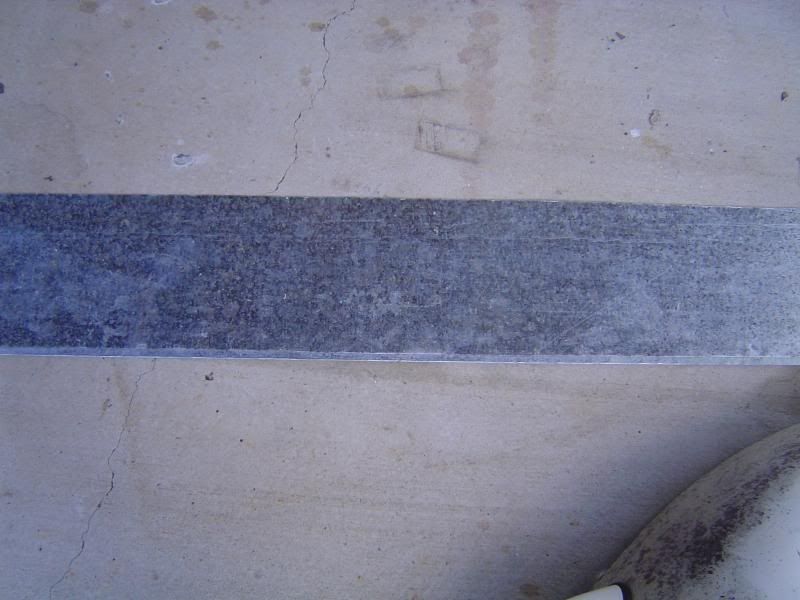
Just need to glue and screw the clamping wood strip to the hardwood curved strip ready for some radius bending 
Radius bent into the steel
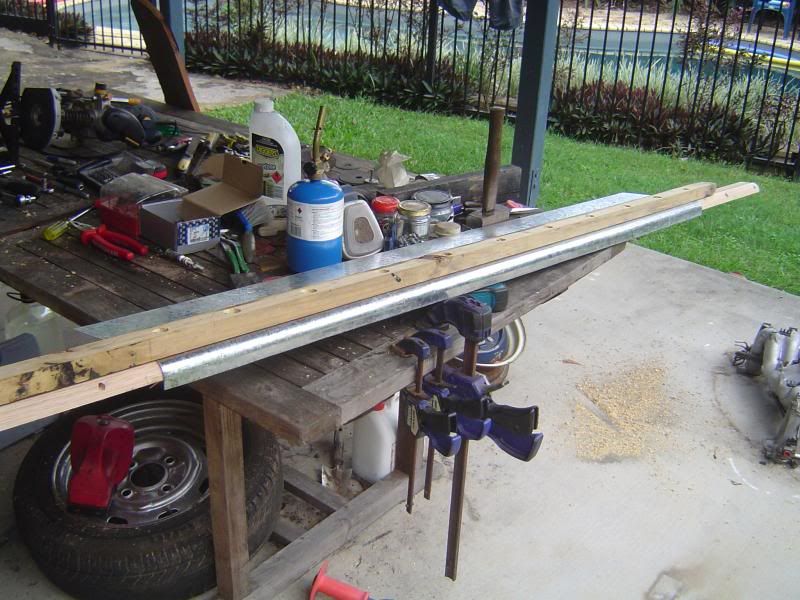
This is the hardwood former I used and glued n screwed it to an additional piece of wood for a flat area to clamp too.
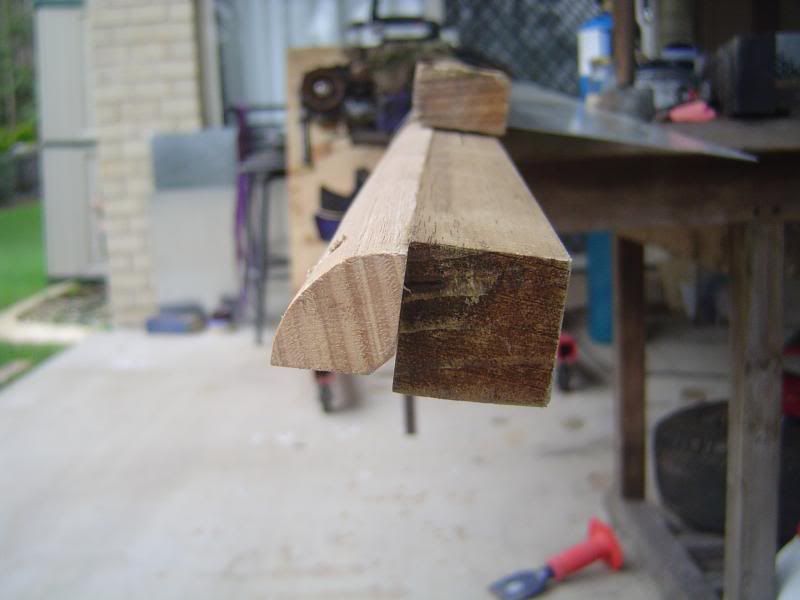
And this is how it looks after laying all the measurements on it
Oh, and here is my Birthday present
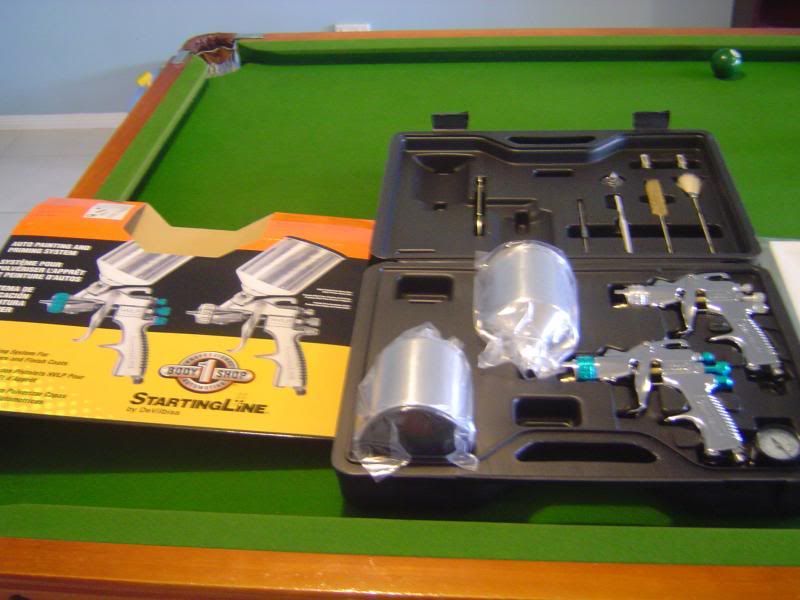
It's a Devilbiss Professional HVLP spray gun kit. Even with postage from USA it was a half the price of what I could buy it here 
Now I just need to source a liquidation industrial compressor for the 13CFM required cos DIY compressors are very low in FAD CFM and being reasonably
priced 
madness is in the eye of the beholder  |
|
|
 psimitar psimitar
Son of Jim - Creator of Good
     
Posts: 2506
Threads: 148
Registered: January 1st, 2009
Member Is Offline
Location: North East Melbourne, VIC
Theme: UltimaBB Psyche Blue
|
| posted on April 4th, 2013 at 10:41 PM |
|
|
So found the time to bend the mounting flange over Easter inbetween having to wire the in-laws new display cabinets 
Trial fitted to me Bug
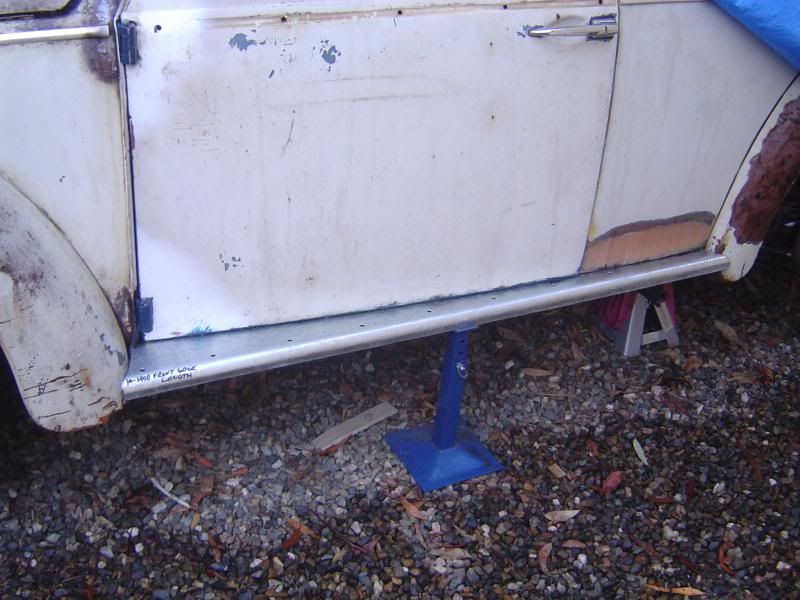
Front fit
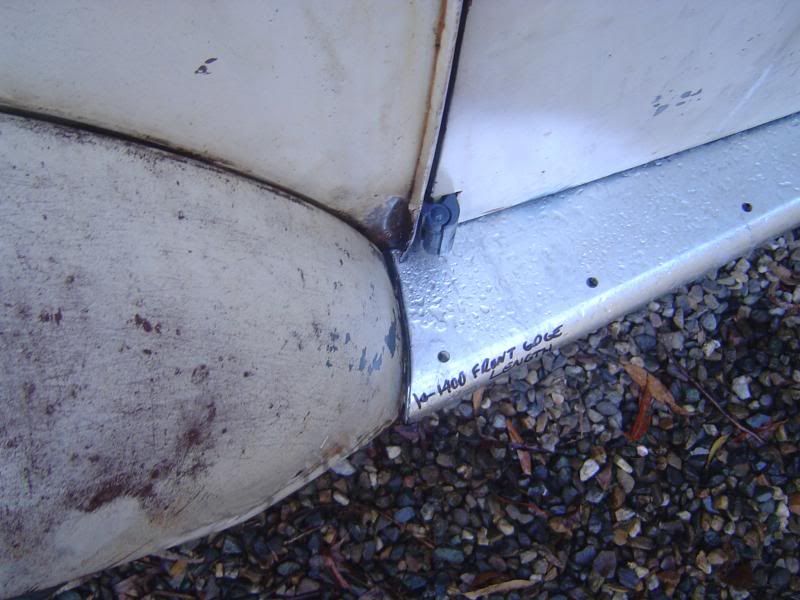
Rear fit
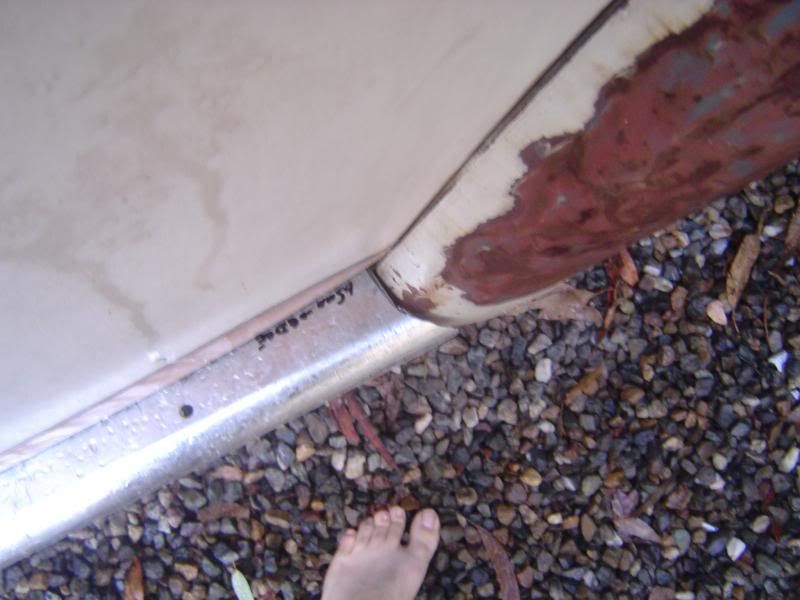
Overall shape of it
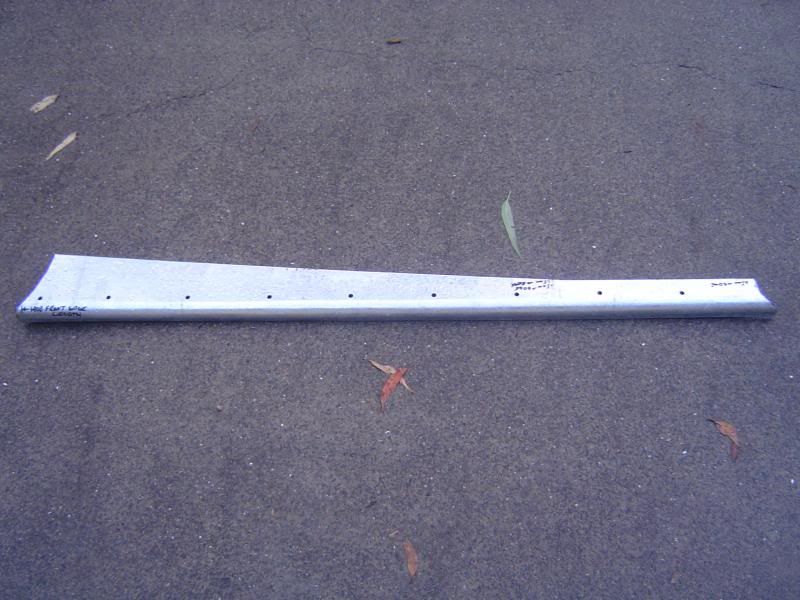
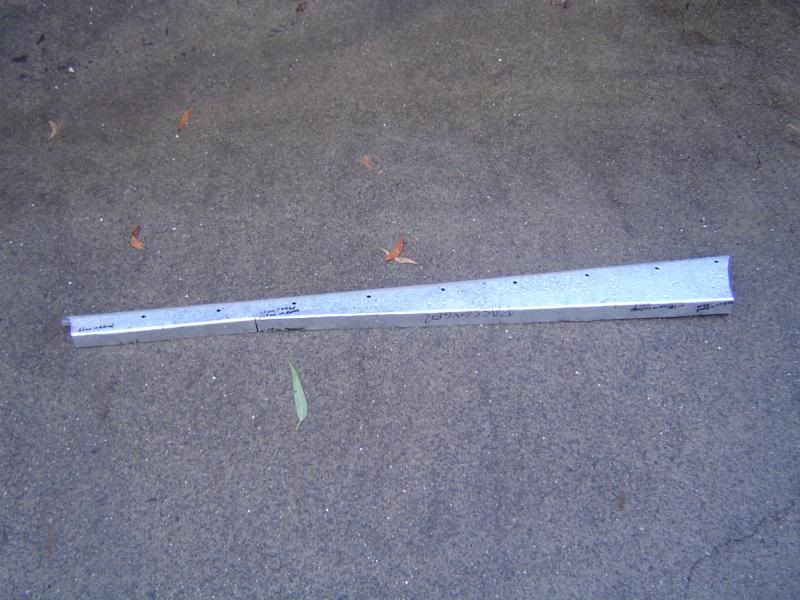
Few welds here and there but very pleased with this 
Today I got the passengers running board finished off 
So made up some C channel strengtheners for the board
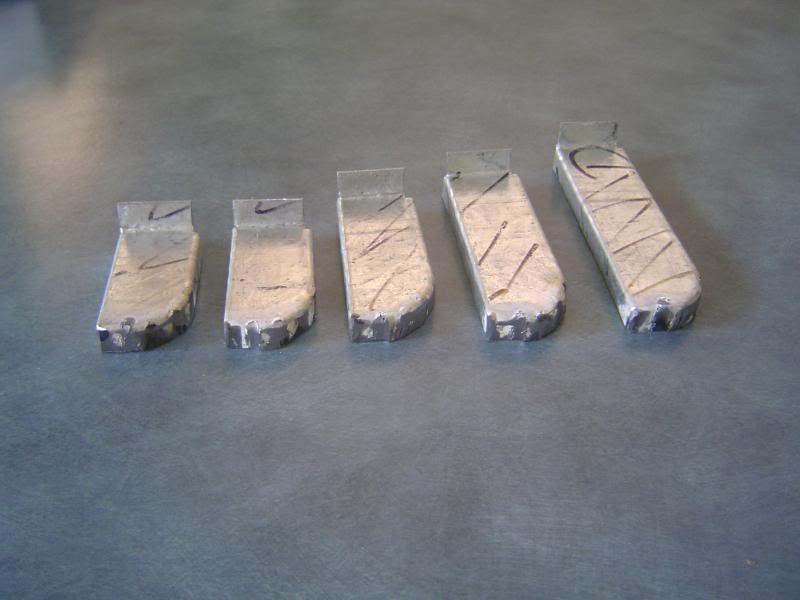
And how they look plug welded in
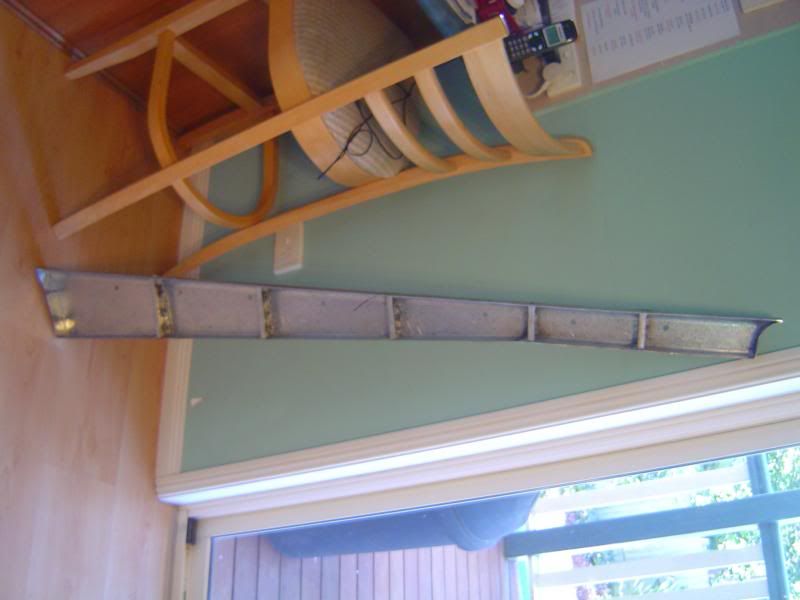
Closer view of the strengtheners
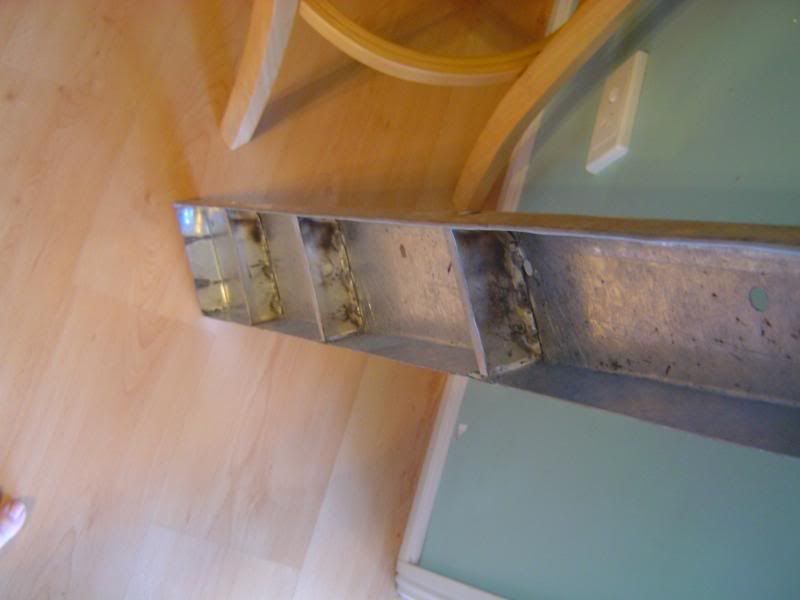
didn't get a photo of the holes for clamping the former all welded up and ground back.
Best get on with the drivers one then 
madness is in the eye of the beholder  |
|
|
 psimitar psimitar
Son of Jim - Creator of Good
     
Posts: 2506
Threads: 148
Registered: January 1st, 2009
Member Is Offline
Location: North East Melbourne, VIC
Theme: UltimaBB Psyche Blue
|
 posted on April 13th, 2013 at 12:36 AM posted on April 13th, 2013 at 12:36 AM |
|
|
DIY Running Boards are finished
So got the drivers running board finished yesterday. Both fit well and here's a pic of them all done
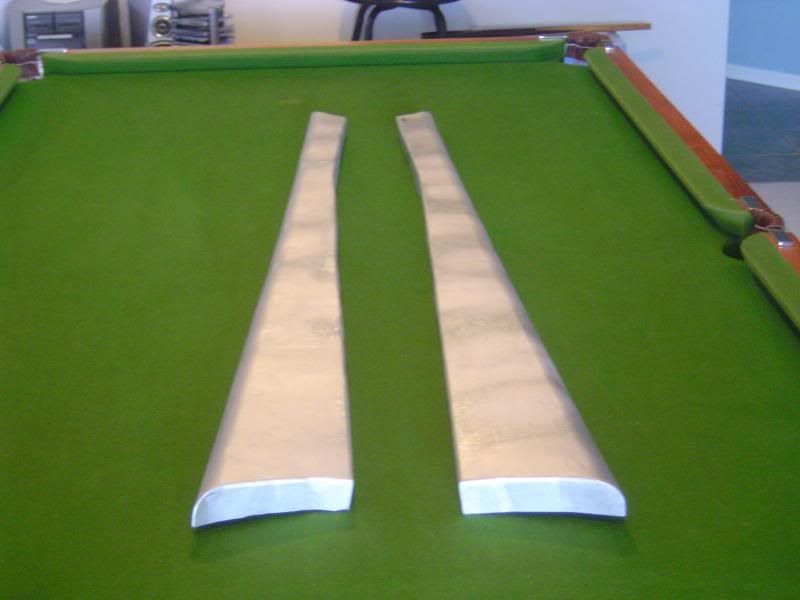
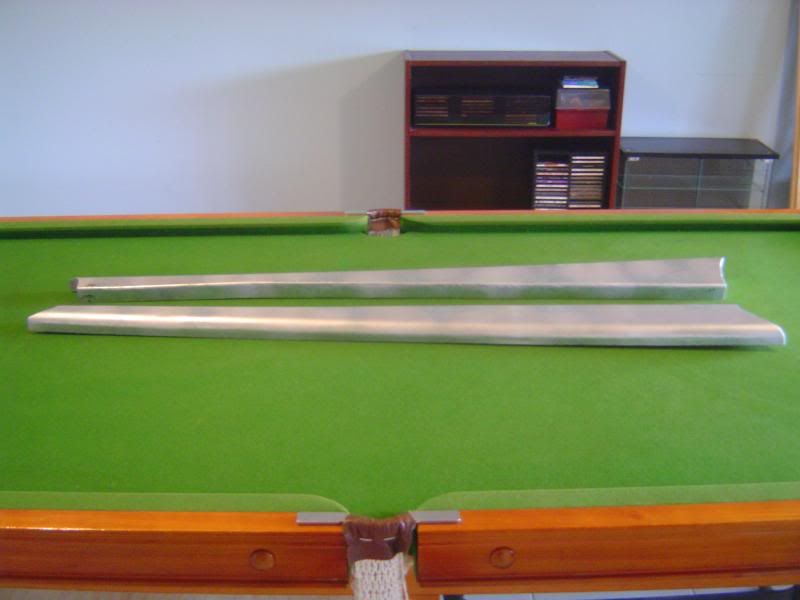
And just to think that these only cost me $17 in metal, few bucks in welding wire n gas and 12 hrs of my time including making formers and templates.
Made from 0.9mm hot rolled galv bond so should last a fair while after some KBS paint too.
Just need some rubber mats from Wolfburg now to finsh em off and the postage will be more than the fricking mats :eek:
madness is in the eye of the beholder  |
|
|
 psimitar psimitar
Son of Jim - Creator of Good
     
Posts: 2506
Threads: 148
Registered: January 1st, 2009
Member Is Offline
Location: North East Melbourne, VIC
Theme: UltimaBB Psyche Blue
|
| posted on June 10th, 2013 at 11:01 PM |
|
|
So completely didn't manage to get the painting etc done for wings etc on last weekend but I am not far away.
Unfortunately, rain with an outdoors vehicle does not mix well for painting and rust prep 
Anyway, got the passenger rear panel all painted up today so the wings can go on now.
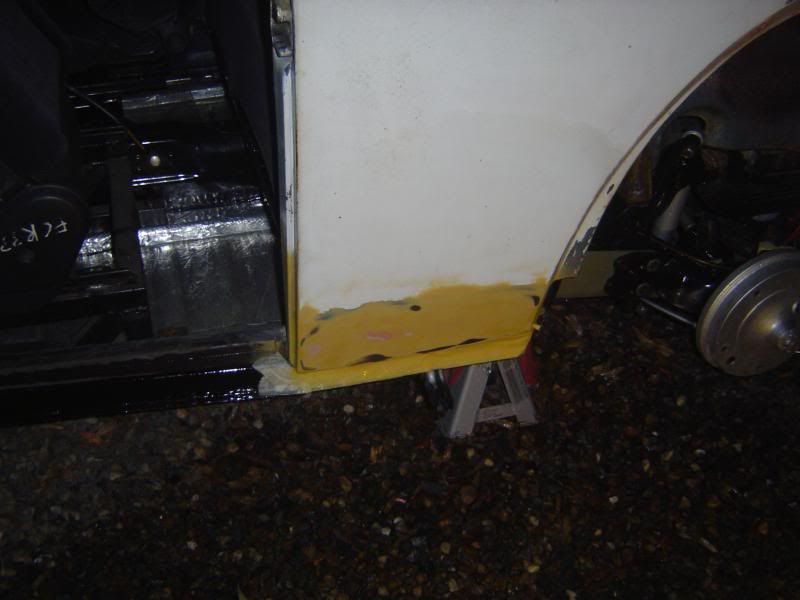
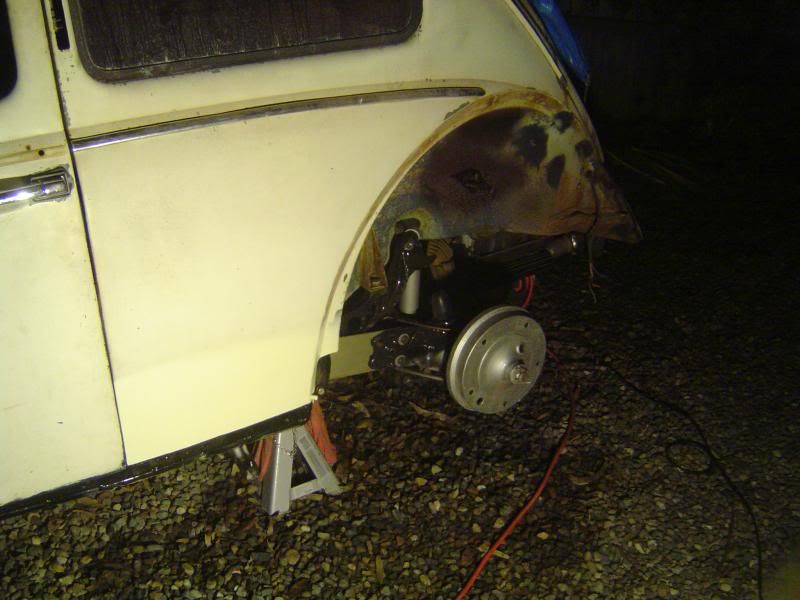
and as you can see from the pic the drums are painted and so are the board mounting panels
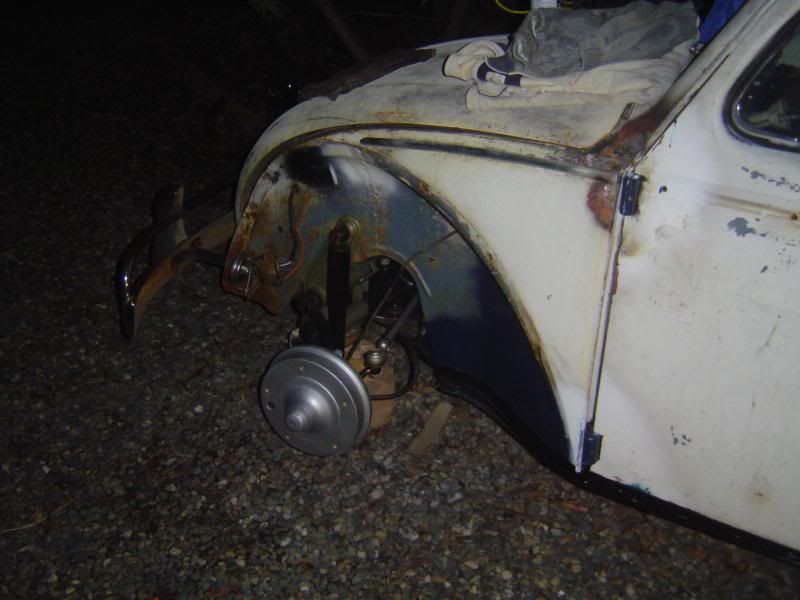
Boards themselves are painted so defo this weekend the wings, wheels n boards will all be on 
madness is in the eye of the beholder  |
|
|
 psimitar psimitar
Son of Jim - Creator of Good
     
Posts: 2506
Threads: 148
Registered: January 1st, 2009
Member Is Offline
Location: North East Melbourne, VIC
Theme: UltimaBB Psyche Blue
|
| posted on June 10th, 2013 at 11:03 PM |
|
|
So after giving the battery a good charging I got her started and turned her round. Whilst up on the drive I took these
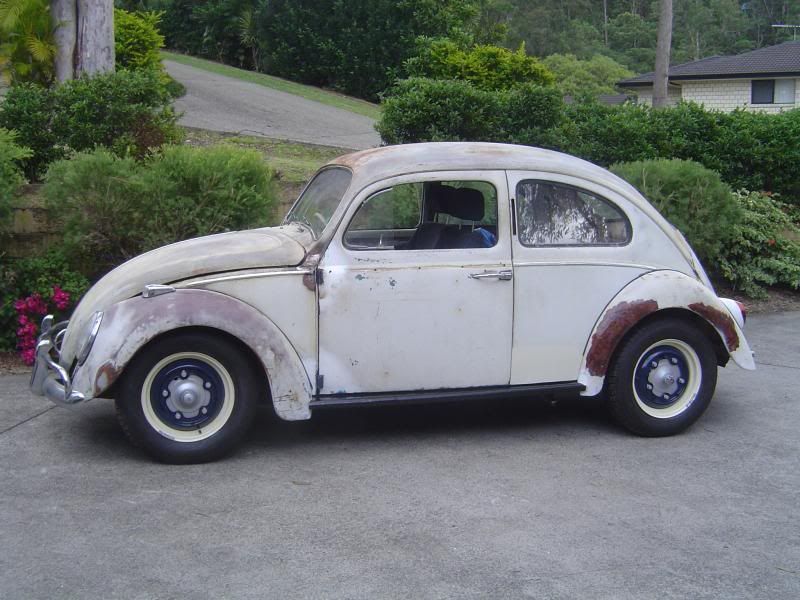
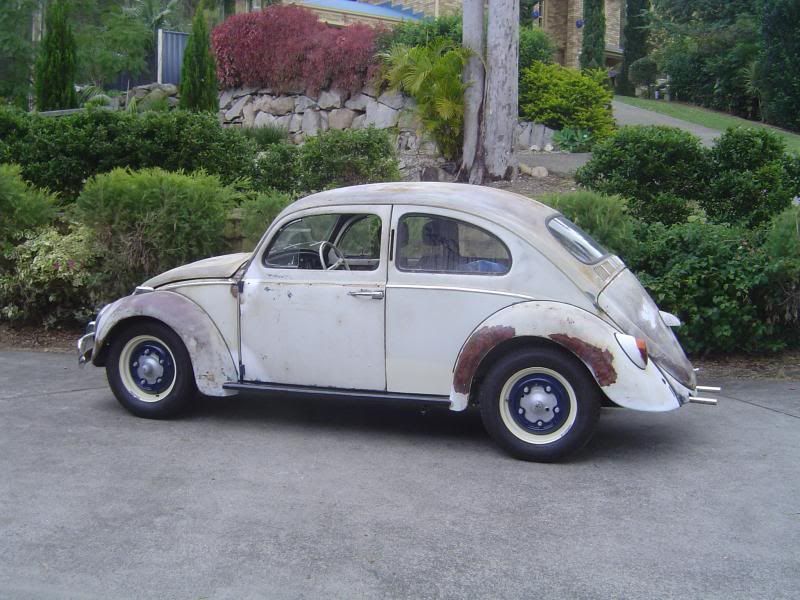
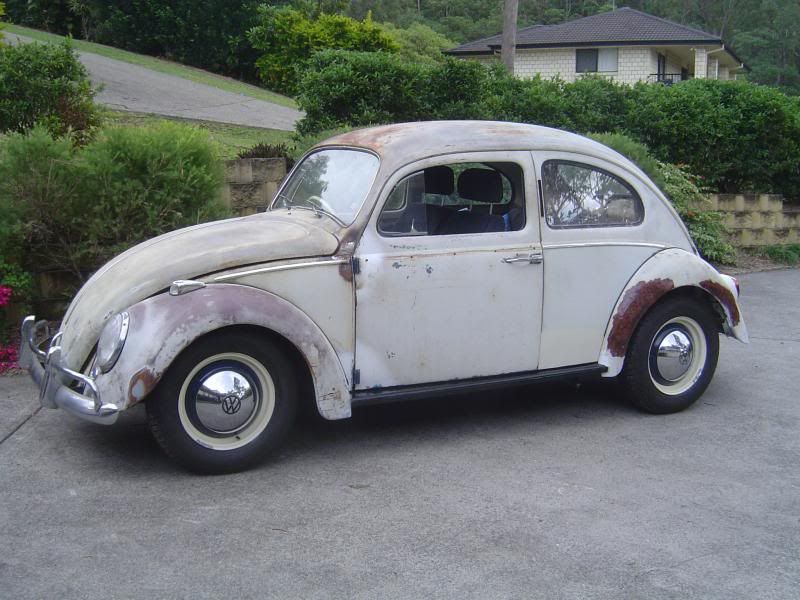
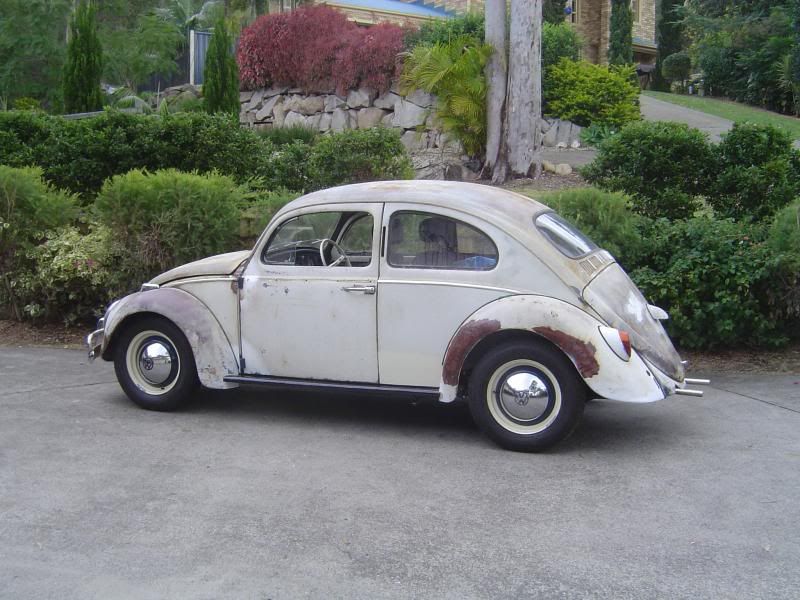
Running board needs marking up for the wing bolt holes and some M14 bolts to go in them plus some penny washers for the M6 bolts
madness is in the eye of the beholder  |
|
|
 psimitar psimitar
Son of Jim - Creator of Good
     
Posts: 2506
Threads: 148
Registered: January 1st, 2009
Member Is Offline
Location: North East Melbourne, VIC
Theme: UltimaBB Psyche Blue
|
| posted on June 10th, 2013 at 11:04 PM |
|
|
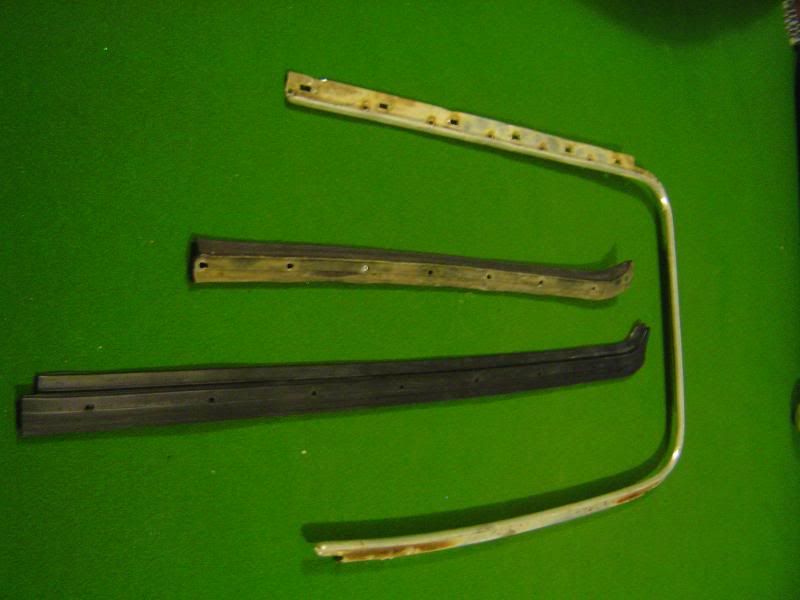
Also got some T2 Bay scrapper rubbers last week. Useful if your scrapper trims are in good nick or orig Ali ones like mine.
Just cut em down and re-rivet to the scrapper trims. This I will do once I've cleaned up the orig trims and hammered a few dents from them 
madness is in the eye of the beholder  |
|
|
 TOPCAT69 TOPCAT69
Officially Full-On Dubber
  
Posts: 205
Threads: 19
Registered: June 7th, 2009
Member Is Offline
Location: REDLANDS-QLD
Theme: UltimaBB Pro Blue ( Default )
Mood: HAPPY DAYS
|
| posted on June 11th, 2013 at 07:10 PM |
|
|
Great read and build, nice work cheers TC
You got nothing I want - COLD CHISEL 
thread killer  |
|
|
 psimitar psimitar
Son of Jim - Creator of Good
     
Posts: 2506
Threads: 148
Registered: January 1st, 2009
Member Is Offline
Location: North East Melbourne, VIC
Theme: UltimaBB Psyche Blue
|
| posted on June 11th, 2013 at 08:09 PM |
|
|
much obliged sir 
As me Dad always says, 'Do it once and do it right'. Hallowed words of wisdom 
madness is in the eye of the beholder  |
|
|
 cam070 cam070
Custom Title Time!
    
Posts: 1332
Threads: 53
Registered: July 25th, 2009
Member Is Offline
Location: Sydney
Theme: UltimaBB Pro Blue ( Default )
Mood: Getting hands dirty stripping the bug down
|
| posted on June 11th, 2013 at 08:26 PM |
|
|
Love the DIY running boards. Top job!
|
|
|
 TOPCAT69 TOPCAT69
Officially Full-On Dubber
  
Posts: 205
Threads: 19
Registered: June 7th, 2009
Member Is Offline
Location: REDLANDS-QLD
Theme: UltimaBB Pro Blue ( Default )
Mood: HAPPY DAYS
|
| posted on June 11th, 2013 at 08:36 PM |
|
|
| Quote: | Originally
posted by psimitar
much obliged sir 
As me Dad always says, 'Do it once and do it right'. Hallowed words of wisdom 
|
My old man told me " to whip it in , whip it out and wipe it off" but I'm not sure that helps here.....
unless it's the dipstick ...
You got nothing I want - COLD CHISEL 
thread killer  |
|
|
 psimitar psimitar
Son of Jim - Creator of Good
     
Posts: 2506
Threads: 148
Registered: January 1st, 2009
Member Is Offline
Location: North East Melbourne, VIC
Theme: UltimaBB Psyche Blue
|
| posted on June 12th, 2013 at 12:56 AM |
|
|
| Quote: | Originally
posted by cam070
Love the DIY running boards. Top job!
|
Cheers dude. Pretty easy to do tho does require a welder for the clamp holes n welding the corners together otherwise rest is everyday tools n a few
bucks on wood formers 
| Quote: | Originally
posted by TOPCAT69
My old man told me " to whip it in , whip it out and wipe it off" but I'm not sure that helps here.....
unless it's the dipstick ...
|
Yea, I like to do that with the wife when I'm allowed 
madness is in the eye of the beholder  |
|
|
 psimitar psimitar
Son of Jim - Creator of Good
     
Posts: 2506
Threads: 148
Registered: January 1st, 2009
Member Is Offline
Location: North East Melbourne, VIC
Theme: UltimaBB Psyche Blue
|
| posted on July 28th, 2013 at 06:46 PM |
|
|
So I haven't been lazy people. Just it's all little things that take a while, like new hubcap clips need spraying as do the mount points on the
wheels, making spacers for the upper front shox mount, scrapper inner rivet clamping strip de-rusted n painted etc.
However, here is a picture of the passenger scrapper trim all polished up. Took a bloody long time sanding scratch marks out n then buffing it back to
a shine.
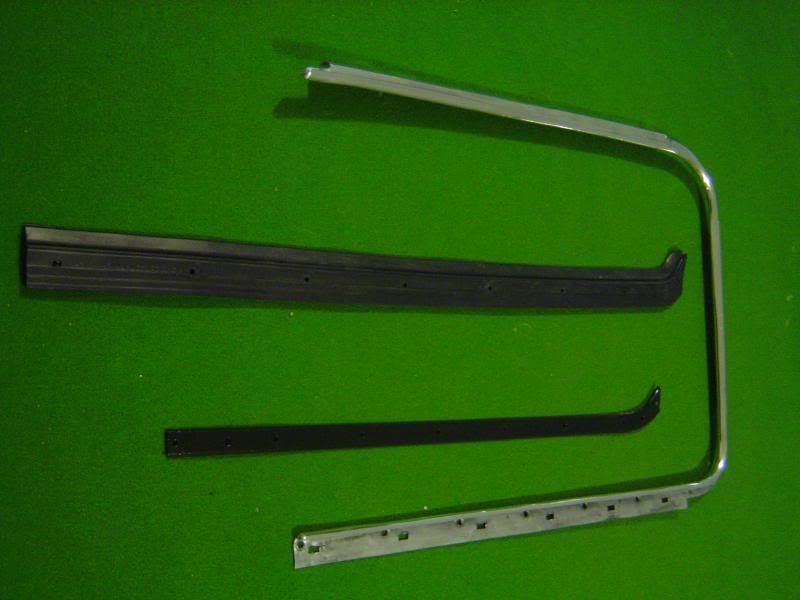
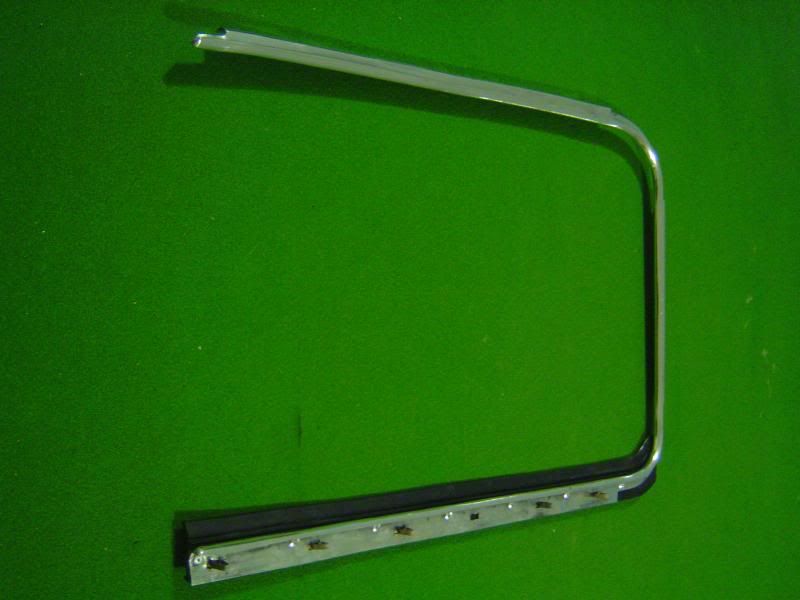
Take a look at the pic further up this page n see the difference in shine 
Also had a bit of a play with a sample piece of faux suede I came across in a textiles store. Cut it to fit down the B pillar.
What do people think? Kinda works for headliner material me thinks
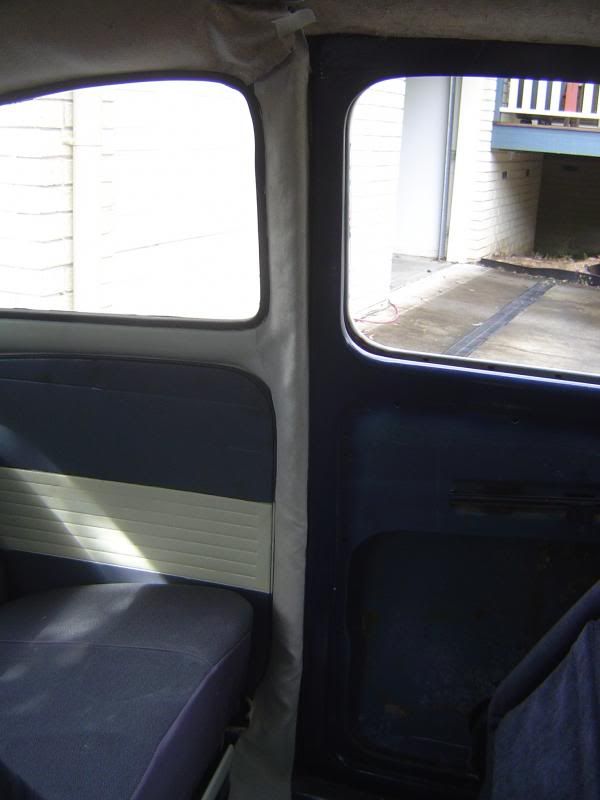
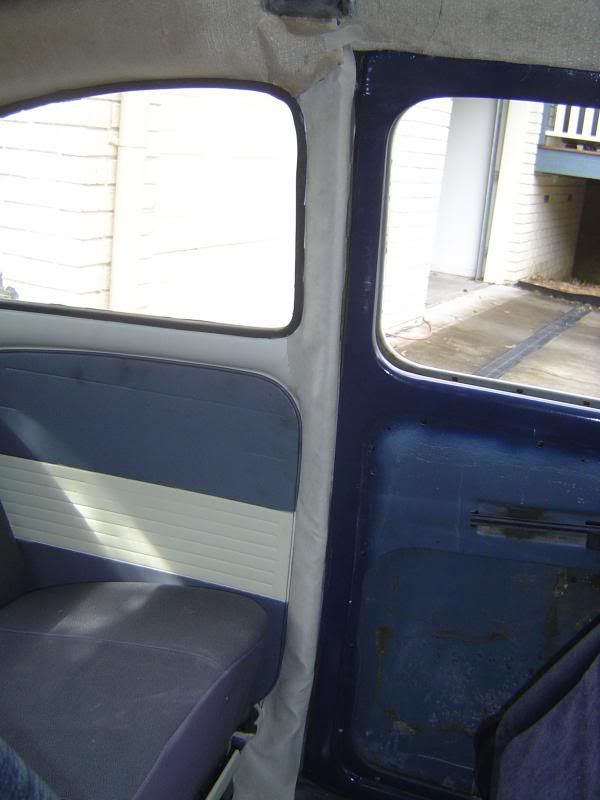
Still not sure if grey would be better just below the window and on the B pillar
Thoughts anyone?
And then here's what's left on my list for getting it roadworthied:
Rear View Mirror Glass
Steering Wheel cracks - already filled just needs sanding and painting
Door window rubber - got most but Wolfsburg were outta the upright felt so getting from C&C now
Door Check strap Cotter pins
Spare Wheel - de-rust, paint and get tyre fitted
Semaphores - one to rewind for 12V and then make the circuit to make it stay up off the indicator flasher.
Getting closer 
madness is in the eye of the beholder  |
|
|
 psimitar psimitar
Son of Jim - Creator of Good
     
Posts: 2506
Threads: 148
Registered: January 1st, 2009
Member Is Offline
Location: North East Melbourne, VIC
Theme: UltimaBB Psyche Blue
|
| posted on July 31st, 2013 at 08:14 PM |
|
|
Well as I've been struggling for time, money and enthusiasm lately I decided to clean up the Golf VR6 calipers I'm hoping to use on my front disc
conversion. The new seals are sitting in a box in the UK but I got all the labour intensive stuff done ready for the seals.
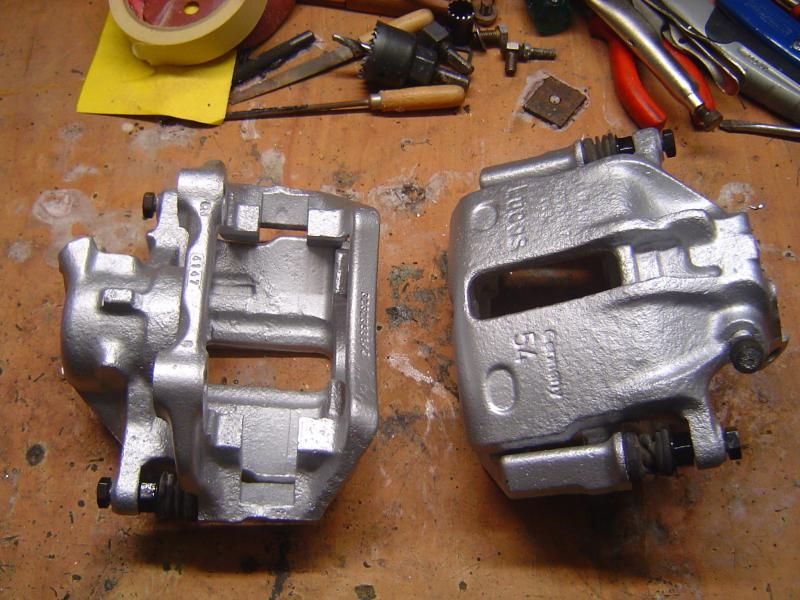
Also got me door stay rods stainless cotter pins. $16 inc postage for 2 little pins is rather excessive but that's the way they roll here 
Just tarting the stay rods up and then cut new rubber door sections that the rods slide thru and I'll be one job less towards the roadworthy 
madness is in the eye of the beholder  |
|
|
 psimitar psimitar
Son of Jim - Creator of Good
     
Posts: 2506
Threads: 148
Registered: January 1st, 2009
Member Is Offline
Location: North East Melbourne, VIC
Theme: UltimaBB Psyche Blue
|
| posted on August 29th, 2013 at 08:59 PM |
|
|
I have been working on the old girl, promise.
I finished the steering wheel but dopey here thought he'd taken a pic when he hasn't, so shall get that done tomoro.
In the meantime, I bought a sandblasting gun and cleaned up the spare wheel.
Before
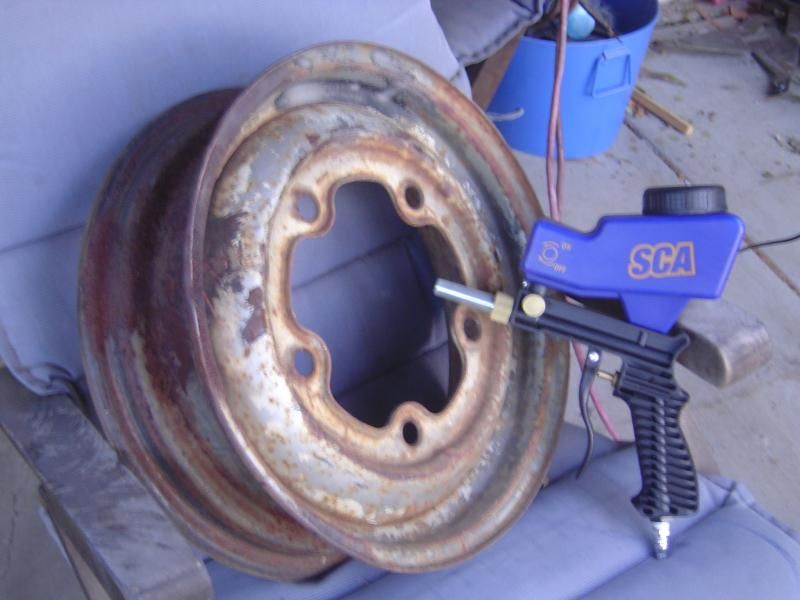
Makeshift blasting booth
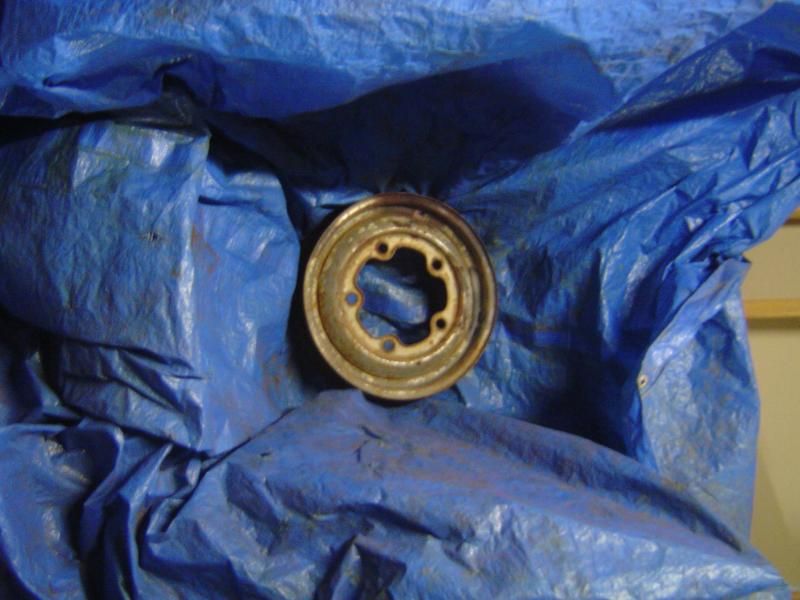
Stripped
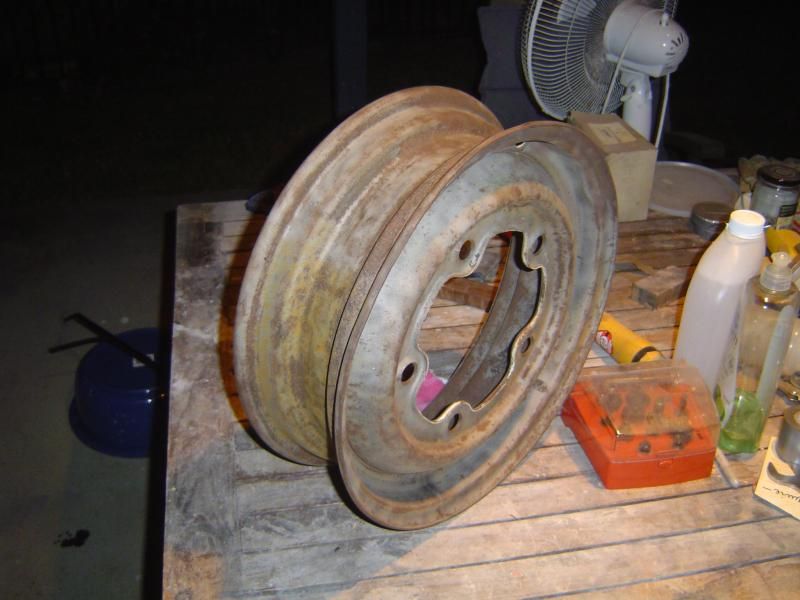
Apart from the amount of times the little gun hopper needs refilling it worked pretty well. Bit of surface rust here and there as did it over a few
days. No worries as shall whack some curing agent on there. Then paint and get a tyre on it 
Started to put the passenger door back together but alas the qtr upright strangely didn't have enough adjustment in it so had to file the upper
mounting slots bigger and then having to wait for paint to cure. Quick half hr job stretches into a few days. I mean these kinda things
never happen when working on old vehicles 
madness is in the eye of the beholder  |
|
|
 t_tuffnut t_tuffnut
Wolfsburg Wizard
  
Posts: 425
Threads: 70
Registered: June 14th, 2009
Member Is Offline
Location: NSW Central Coast
Theme: UltimaBB Streamlined2
Mood: Rust free for 12 months
|
| posted on September 10th, 2013 at 09:57 PM |
|
|
I used the same gun on my wheels. It did a fairly decent job and I was stoked when I found the date stamp on the back of the rim. Mine were from the
same year of manufacture as my car - so they could be the orignials. It's amazing what you can uncover with a sand blaster!
I think yours came out better than mine. I just used building sand - could have been the issue.
|
|
|
 psimitar psimitar
Son of Jim - Creator of Good
     
Posts: 2506
Threads: 148
Registered: January 1st, 2009
Member Is Offline
Location: North East Melbourne, VIC
Theme: UltimaBB Psyche Blue
|
| posted on September 11th, 2013 at 01:49 PM |
|
|
| Quote: | Originally
posted by t_tuffnut
I used the same gun on my wheels. It did a fairly decent job and I was stoked when I found the date stamp on the back of the rim. Mine were from the
same year of manufacture as my car - so they could be the orignials. It's amazing what you can uncover with a sand blaster!
I think yours came out better than mine. I just used building sand - could have been the issue.
|
oh, never use sand dude. The dust produced can cause silicosis of the lungs. Even with proper breathing gear it's not recommended.
But you're right. The grit works better than sand as is much sharper than the sand particles.  I used medium but probably coulda used coarse for a quicker job. I used medium but probably coulda used coarse for a quicker job.
madness is in the eye of the beholder  |
|
|
 psimitar psimitar
Son of Jim - Creator of Good
     
Posts: 2506
Threads: 148
Registered: January 1st, 2009
Member Is Offline
Location: North East Melbourne, VIC
Theme: UltimaBB Psyche Blue
|
| posted on September 30th, 2013 at 06:30 PM |
|
|
So I have been doing things on the Bug. And so here we have the steering wheel and spare wheel all painted up.
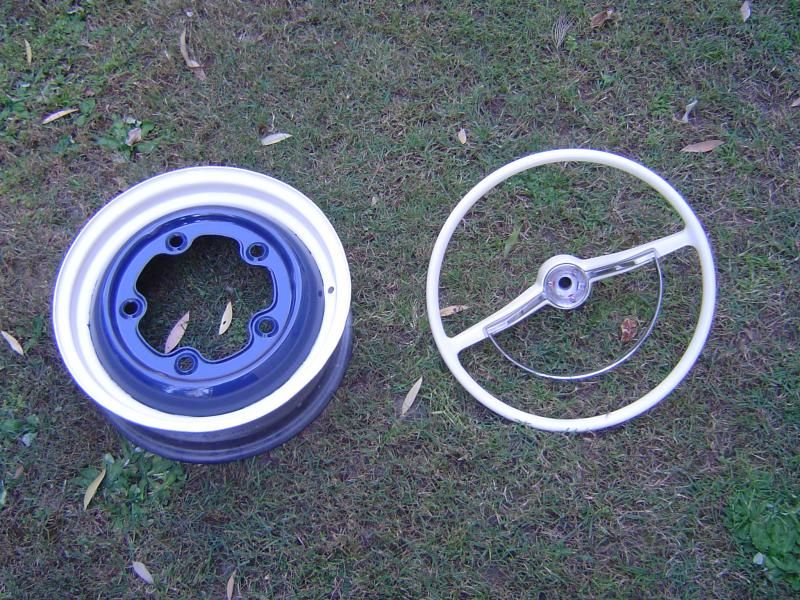
Spare just needs a week or so for the paint to harden properly before popping a tyre on it and the little red bits you may notice on the boss of the
steer wheel are fibre washers to space the brass contact ring of the horn ring closer to the brass ring in the wheels boss. Had to make a bigger
wiring contact tab but I now get continuity so horn should work 
Also got an annoying dent outta the gearstick gaitor using material memory resetting technique i.e. make a former to make rubber desired shape and
then place in boiling hot water until water is cold. Remove former and hey presto the rubbers memory has been reset and no more dent visible 
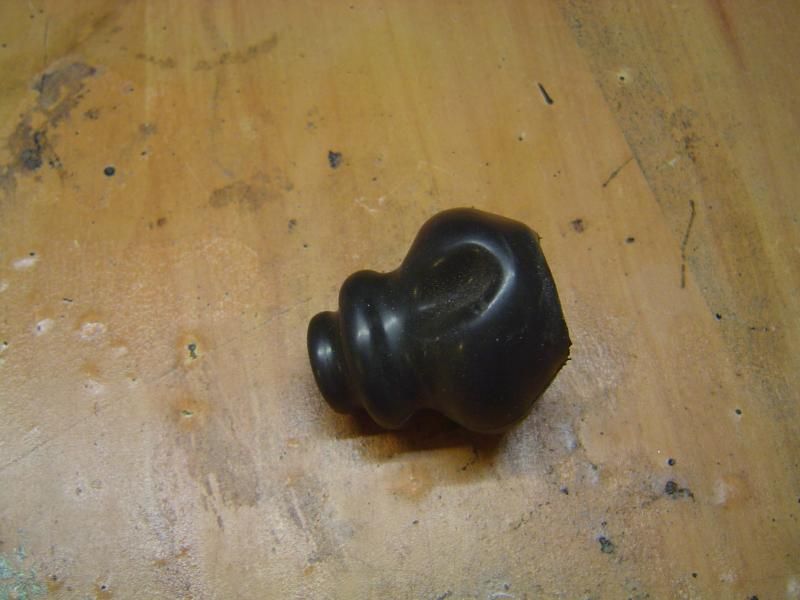
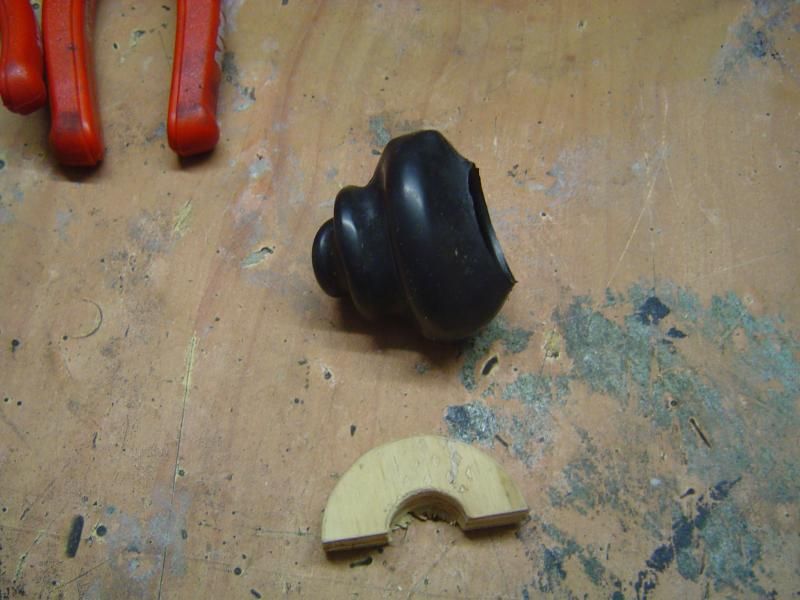
Then as was a bit bored of circuit designing I decided to take the heads off the EJ22 to make sure it's worth using.
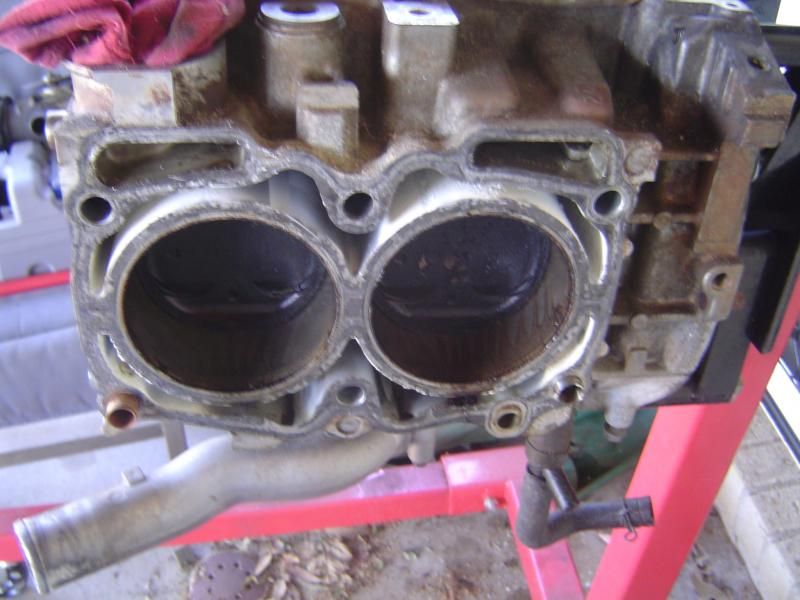
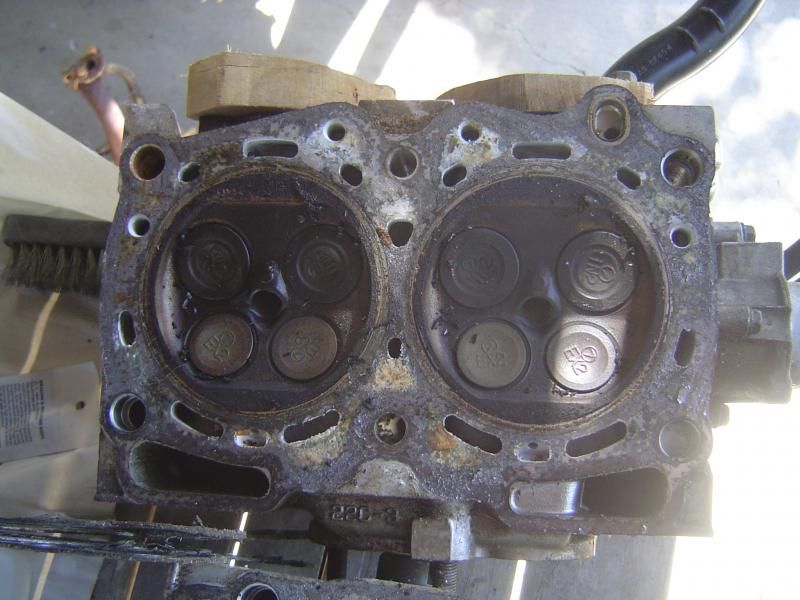
As you can see there is no corrosion in the water jacket and bores are in good nick. Heads just need a clean b4 I make a DIY flowbench to play with
them a bit 
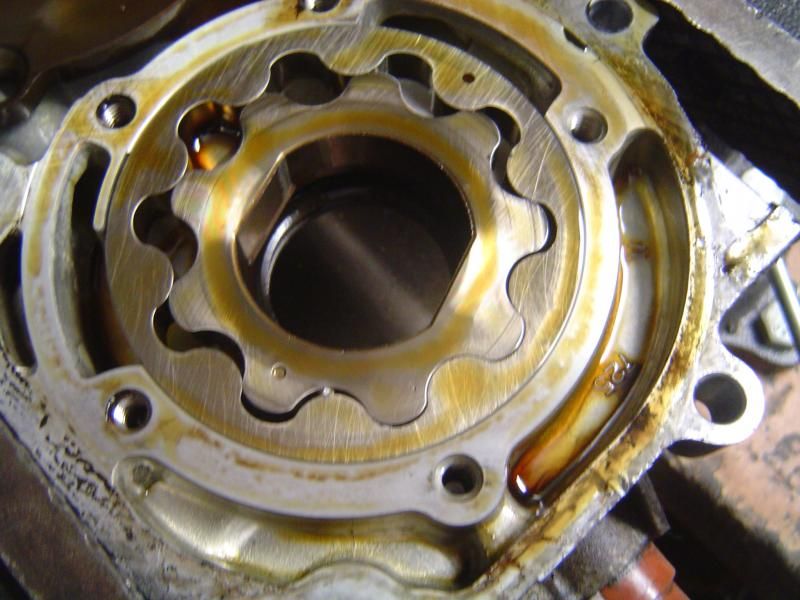
However, from when I shortened the sump the engine wouldn't turn 360degrees so eventually took the oil pump off and found a little blob of weld stuck
between 2 teeth (down near bottom of gears)
With that removed it's happy days. Apart from a new water pump, as old one sounds rough when spun, but that's no biggie.
madness is in the eye of the beholder  |
|
|
 psimitar psimitar
Son of Jim - Creator of Good
     
Posts: 2506
Threads: 148
Registered: January 1st, 2009
Member Is Offline
Location: North East Melbourne, VIC
Theme: UltimaBB Psyche Blue
|
| posted on October 3rd, 2013 at 07:32 PM |
|
|
She is now water tight. Fitted the drivers window and seals after finishing the scrapper polishing.
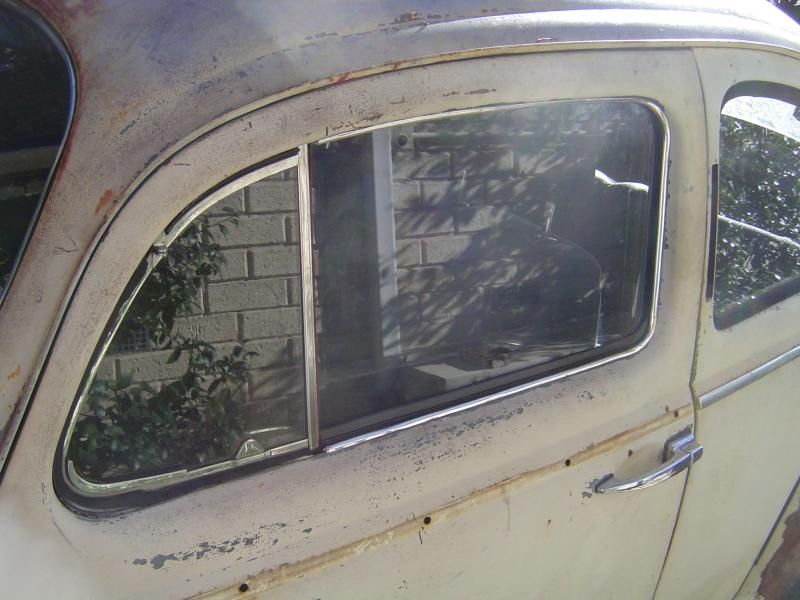
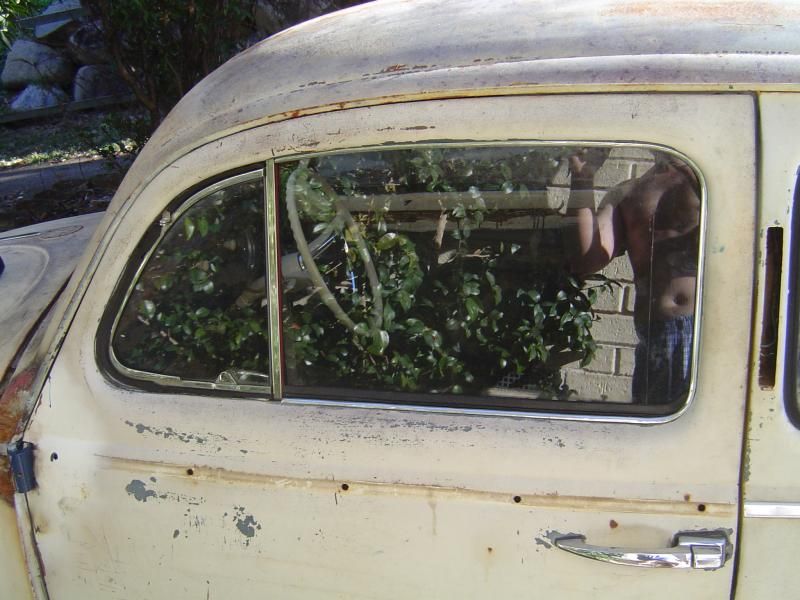
So this means this is all that's left:
Rear View Mirror Glass Tho I've sent the stem for re-chroming
Spare Wheel - de-rust, paint and get tyre fitted
Semaphores - one to rewind for 12V and then make the circuit to make it stay up off the indicator flasher.
Semaphore circuit all designed, just a few bias resistor values to calculate and turn the PCB into a vector file for manufacture.
Downside is money is tight as still looking for permenant work and the revenue collecting gestapo gave me a $330 fine the other month. Wankers!!!!!
Still almost there 
madness is in the eye of the beholder  |
|
|
 psimitar psimitar
Son of Jim - Creator of Good
     
Posts: 2506
Threads: 148
Registered: January 1st, 2009
Member Is Offline
Location: North East Melbourne, VIC
Theme: UltimaBB Psyche Blue
|
| posted on January 22nd, 2014 at 09:27 PM |
|
|
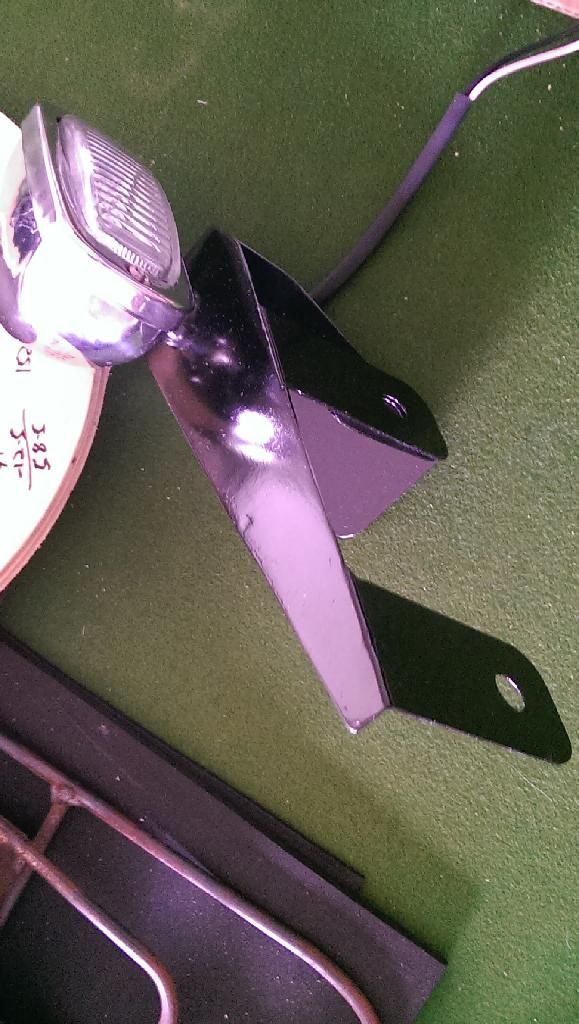
Decided to make a bracket for the reverse light I bought a few years back whilst gather money for PCB parts. Minor bitch but the wife costs a frickin
arm and a leg lately esp when we have no money. Bitch over 
Anyway, Bracket
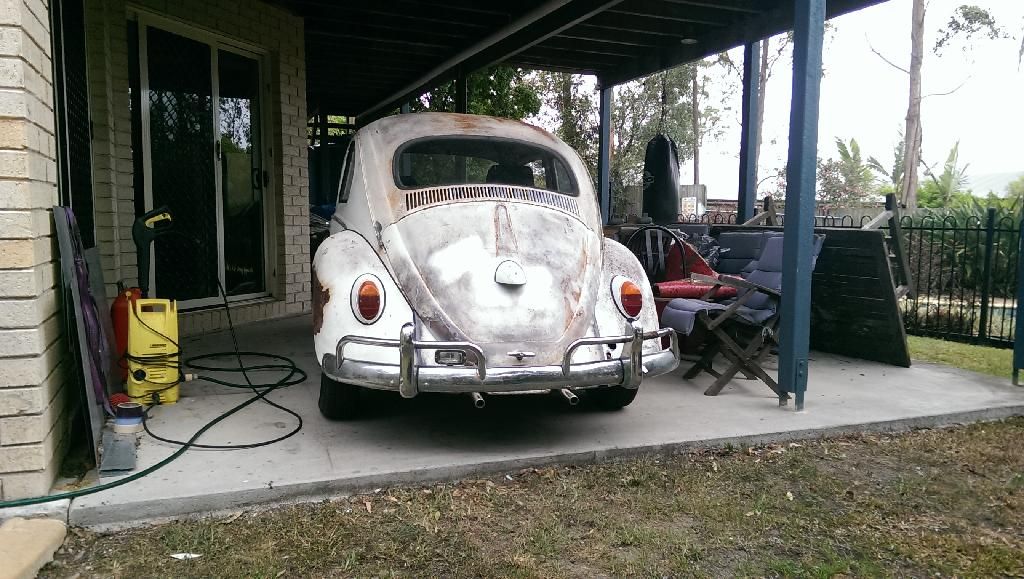
On the Bug
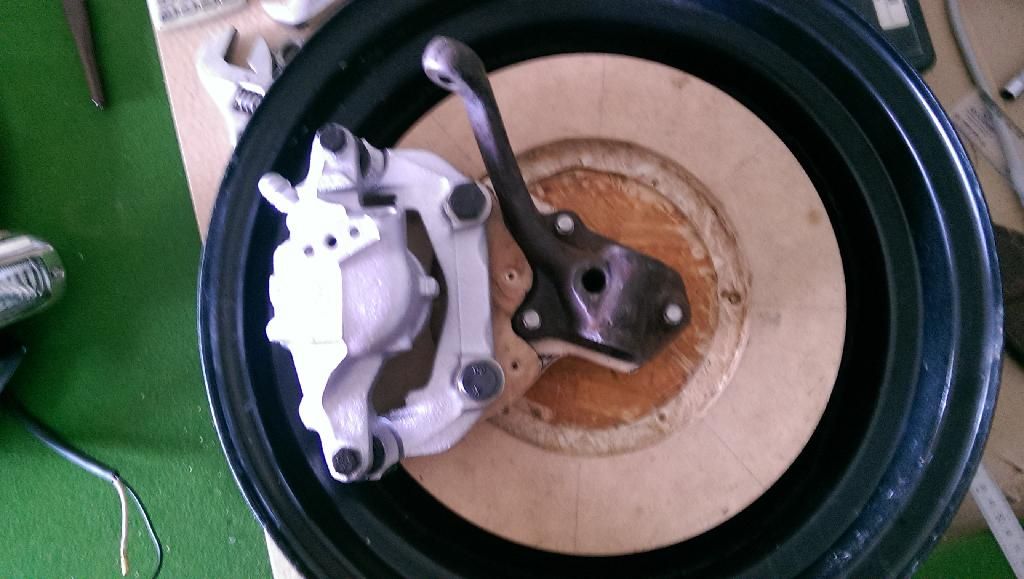
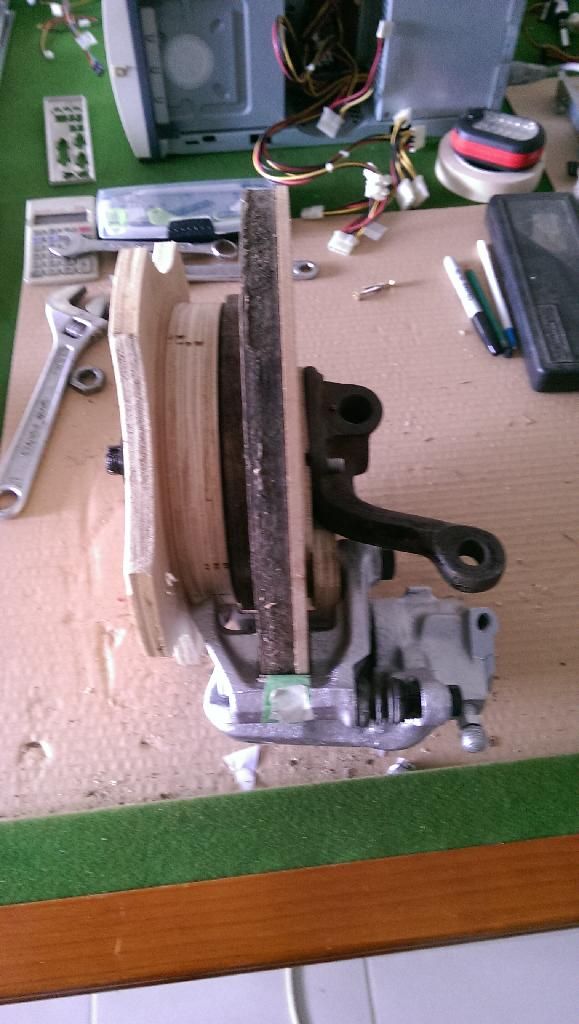
And as I got my spare spindles b4 xmas I've been able to finish the R&D of the front brake conversion
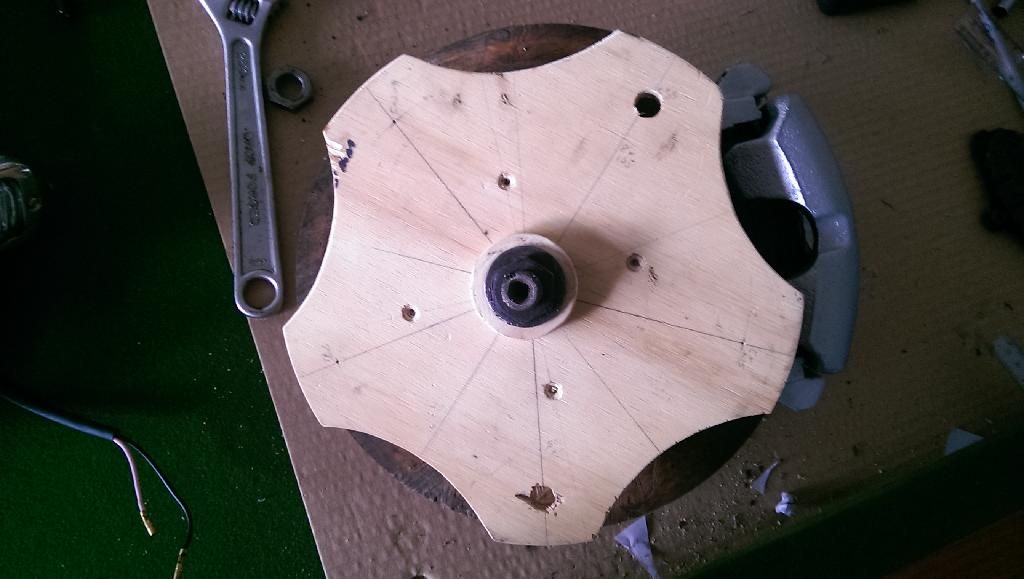
Semaphore circuit now up and running with final check connected to flasher relay to be done. If the wifes expenses allow I may actually get the Bug
RWC'd by the end of the month 
madness is in the eye of the beholder  |
|
|
 psimitar psimitar
Son of Jim - Creator of Good
     
Posts: 2506
Threads: 148
Registered: January 1st, 2009
Member Is Offline
Location: North East Melbourne, VIC
Theme: UltimaBB Psyche Blue
|
| posted on March 28th, 2014 at 01:37 AM |
|
|
Semaphore circuit is a go, finally
So after much fannying around I rigged up my semaphore circuit to one side of the bugs electrics (can't do both as require more supplies that I
can't afford at present)
Anyhow, here's a vid of it working. Pardon my non-professional video skills and narration 
Semaphore video
madness is in the eye of the beholder  |
|
|
 Boozo Boozo
Officially Full-On Dubber
Back in the bug
  
Posts: 359
Threads: 34
Registered: September 9th, 2007
Member Is Offline
Location: Morayfield Queensland
Theme: UltimaBB Pro Black
Mood: cruisy
|
| posted on March 28th, 2014 at 09:11 AM |
|
|
loooks great, love the flashing Semaphore.
Did you get them rebuilt? Ive got a few sets with my '59, 2 were already lazy and the other pair I ran 12 volt for a while (also lazy 6v, but ran
nicely on 12v for a while....assumingly because they were already knackered)
[size=4] '59 or Kombi?....feeling confused [/size]
'59 bug
'68 bug
'82 import T3 BUS. aircooled
|
|
|
 psimitar psimitar
Son of Jim - Creator of Good
     
Posts: 2506
Threads: 148
Registered: January 1st, 2009
Member Is Offline
Location: North East Melbourne, VIC
Theme: UltimaBB Psyche Blue
|
| posted on March 28th, 2014 at 09:45 PM |
|
|
| Quote: | Originally
posted by Boozo
loooks great, love the flashing Semaphore.
Did you get them rebuilt? Ive got a few sets with my '59, 2 were already lazy and the other pair I ran 12 volt for a while (also lazy 6v, but ran
nicely on 12v for a while....assumingly because they were already knackered)
|
Re-built them meself  they're very simple and trickiest part is finding
eyelets deep enough to hold everything together. they're very simple and trickiest part is finding
eyelets deep enough to hold everything together.
Lazy is probably the joints need a clean and lube but old wiring can cause issues too.
madness is in the eye of the beholder  |
|
|
 psimitar psimitar
Son of Jim - Creator of Good
     
Posts: 2506
Threads: 148
Registered: January 1st, 2009
Member Is Offline
Location: North East Melbourne, VIC
Theme: UltimaBB Psyche Blue
|
| posted on February 13th, 2017 at 10:34 PM |
|
|
So after nearly 3 years I'm back onto the 59 and getting it ready for being registered.
The Oval took way longer to complete than I'd hoped but now that it's sold I just have to scrounge the funds to finish what's needed on the 59 to
make it pass a roadworthy test.
It already drive n what not but needs door cards and other bits to make in 'safe' for Oz roadworthiness.
However, the 59 did give up a few vital parts to the 56 as emergency items that suddenly failed on the Oval. Starter motor has now been rebuilt so
should be OK. Fuel reserve tap to be replaced with just a 6mm union and wiper arms need replacing.
Also, as part of trying to fault find the Ovals stalling issue I tried to fit the 59's 40hp inlet manifold. Twas too wide but whilst off I've cut
the pre-heat pipe so better gain access for cleaning the blockage out. It was only the entire length of the centre section that was blocked. Anyhow,
all cleaned out and now welding back together.
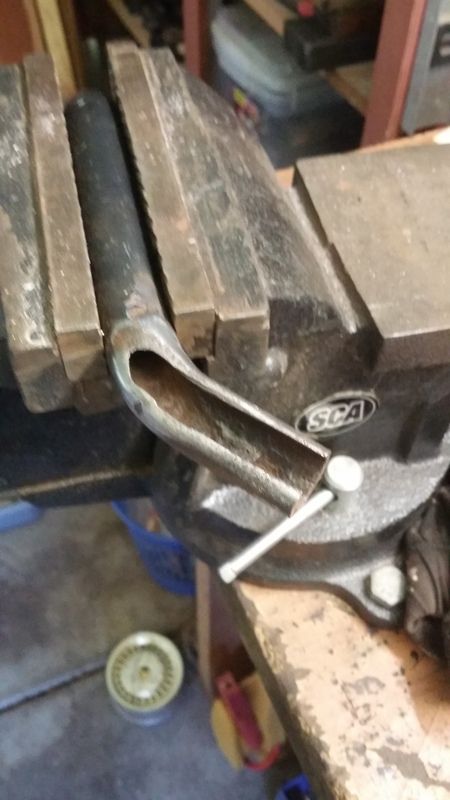
bead rolled a curve into the repair section to keep a close fit to the inlet tract.
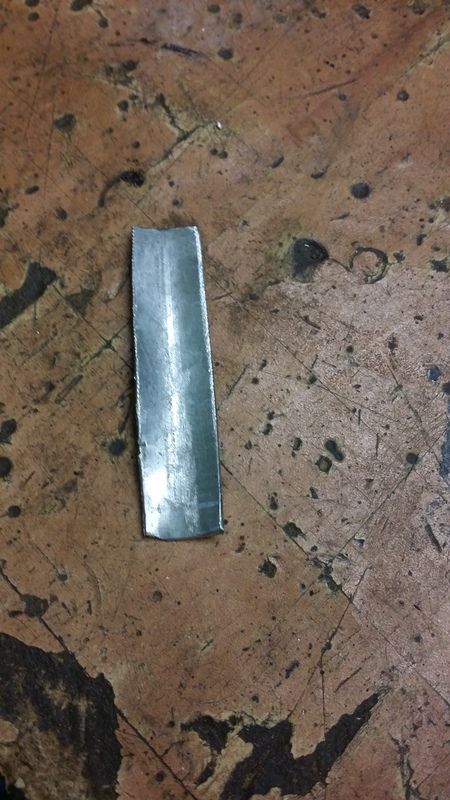
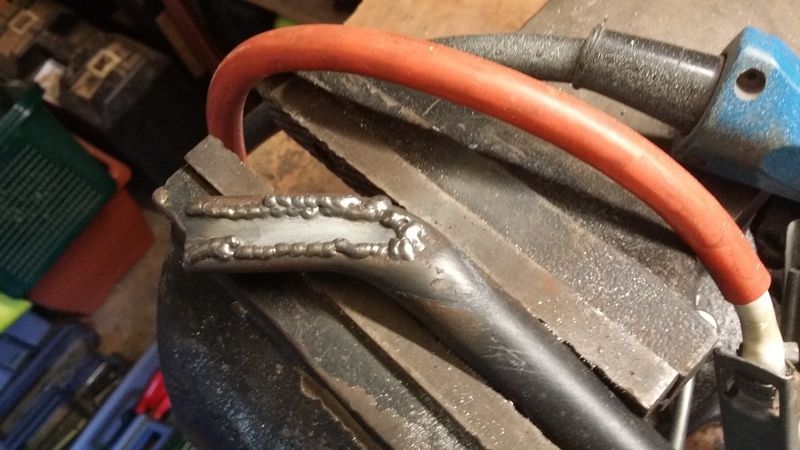
Welded and dressed
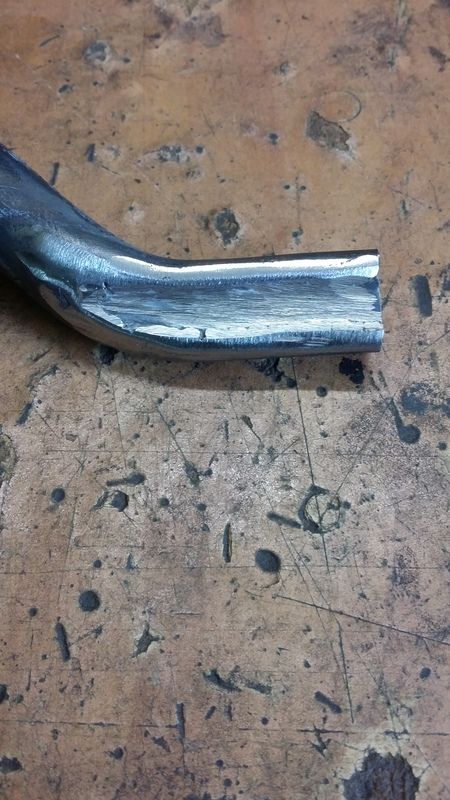
And then a pie cut to allow the top section of the tube to be exhaust gas tight.
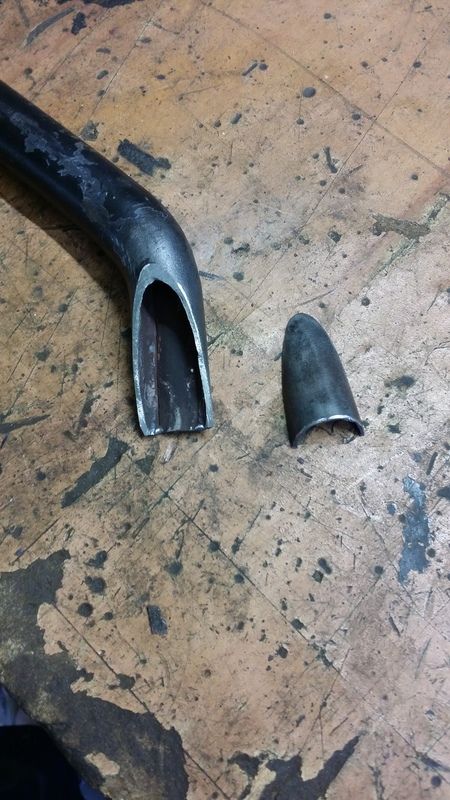
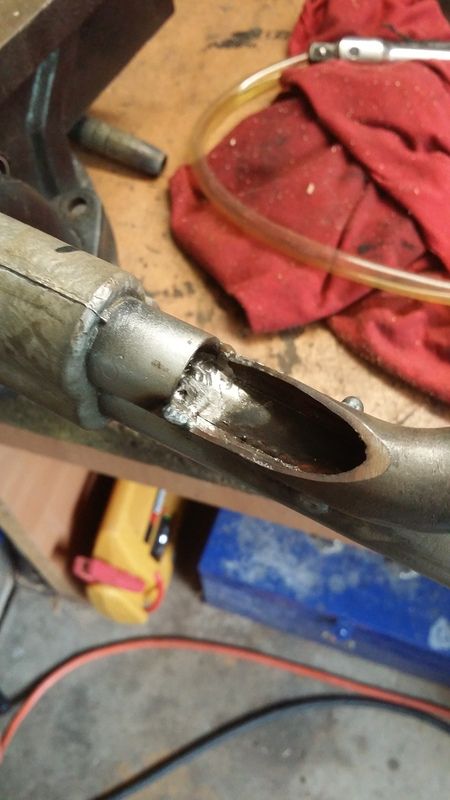
Just gotta pop the pie cut back on and dress it up. then onto the fuel tank and a T2 style tube sender so I can fit a fuel gauge.
madness is in the eye of the beholder  |
|
|
| Pages: 1 .. 6 7 8 |