| [ Total Views: 902 | Total Replies: 9 | Thread Id: 85089 ] |
|
|
 Arpspasm Arpspasm
Seriously Crusin Dubber
 
Posts: 112
Threads: 14
Registered: November 14th, 2009
Member Is Offline
Location: Maleny QLD
Theme: UltimaBB Pro Blue ( Default )
|
| posted on July 30th, 2010 at 11:02 PM |
|
|
As a matter of course?
Hey there I am going to remove my superbugs engine in a week or two to try to persuade it to stop painting my garage floor black so I am guessing that
asides from changing the gaskets is there anything I should replace as a matter of course while I have the engine out?
|
|
|
 waveman1500 waveman1500
Custom Title Time!
Also rides a Honda
    
Posts: 1346
Threads: 13
Registered: December 17th, 2009
Member Is Offline
Location: Adelaide
Theme: UltimaBB Pro Blue ( Default )
|
| posted on July 31st, 2010 at 12:04 AM |
|
|
It doesn't really matter that much because removing the engine is so easy! Check the amount of clutch material left if you want. Also check all of
your exhaust seals and gaskets.
|
|
|
 Arpspasm Arpspasm
Seriously Crusin Dubber
 
Posts: 112
Threads: 14
Registered: November 14th, 2009
Member Is Offline
Location: Maleny QLD
Theme: UltimaBB Pro Blue ( Default )
|
| posted on July 31st, 2010 at 10:58 PM |
|
|
Thanks, Should I weld up some sort of braket to drop then engine with do you think?
|
|
|
 pod pod
A.k.a.: paul mrvw061
Compulsive Aussie Vee Dubber
i`ve got to finish this thing one day
      
Posts: 4980
Threads: 145
Registered: December 28th, 2003
Member Is Offline
Location: campbelltown,nsw
Theme: UltimaBB Pro Yellow
Mood: could be better
|
| posted on July 31st, 2010 at 11:08 PM |
|
|
usually all you need is a set of ramps and a good reaching trolley jack and your spanners etc
|
|
|
 waveman1500 waveman1500
Custom Title Time!
Also rides a Honda
    
Posts: 1346
Threads: 13
Registered: December 17th, 2009
Member Is Offline
Location: Adelaide
Theme: UltimaBB Pro Blue ( Default )
|
| posted on July 31st, 2010 at 11:51 PM |
|
|
The engine in/out job on a Beetle is extremely easy. You just get the rear end up high enough, roll a trolley jack under the engine, unbolt it, then
slide the engine back out of engagement and lower it down using the trolley jack. To get the engine out you usually only need to unbolt the rear
tinware piece, four engine mount bolts, air cleaner, throttle cable, fuel line and wiring. For the wiring there is usually only generator wires,
ignition live, oil pressure sensor and perhaps something else I've forgotten. Very easy. My mate and I can get the engine out in about 15 minutes
taking it easy, and we've only done 2 or 3 engine swaps.
Here's some experts, as seen on the Guinness World Records show (second link).
http://www.youtube.com/watch?v=P9Du5atasfQ
http://www.youtube.com/watch?v=gKF6dcKjLJo
|
|
|
 Arpspasm Arpspasm
Seriously Crusin Dubber
 
Posts: 112
Threads: 14
Registered: November 14th, 2009
Member Is Offline
Location: Maleny QLD
Theme: UltimaBB Pro Blue ( Default )
|
| posted on August 1st, 2010 at 09:20 AM |
|
|
Great thanks for the advice I feel a lot more confidant now.
|
|
|
 waveman1500 waveman1500
Custom Title Time!
Also rides a Honda
    
Posts: 1346
Threads: 13
Registered: December 17th, 2009
Member Is Offline
Location: Adelaide
Theme: UltimaBB Pro Blue ( Default )
|
| posted on August 1st, 2010 at 11:18 AM |
|
|
Be aware that you do have to get the back end up VERY high in order to slide the engine out from underneath. Here's some photos from the first time I
did mine.
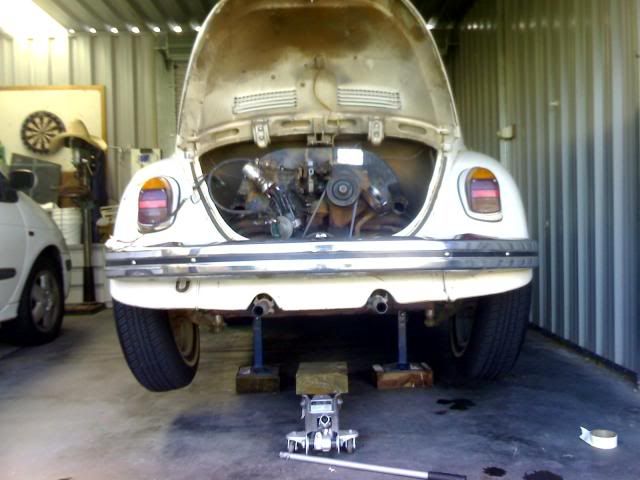
This isn't high enough. This was with normal pin-type jackstands on top of wooden sleeper blocks.
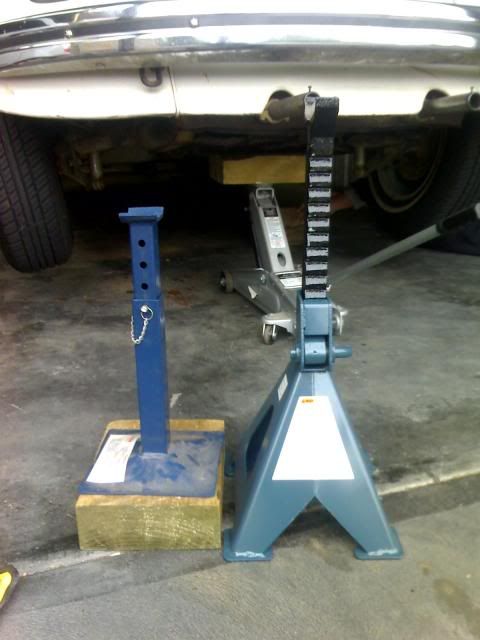
I had to buy some new jackstands to get it up tall enough, and use a couple of sleeper blocks between my jack and the body to get it up there!
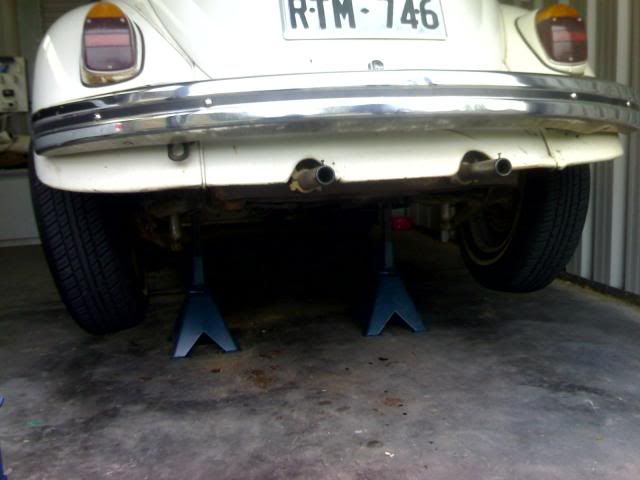
And we're there!
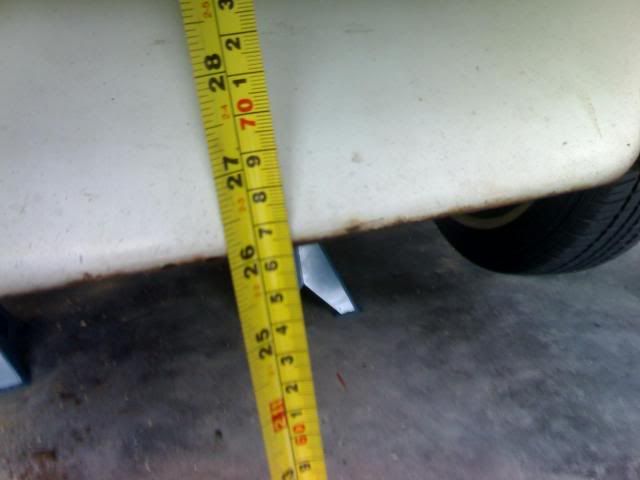
66cm from the ground to the rear lip of the body, and I didn't have much clearance to spare. You do need to get it up that high.
Also, some other tips from doing mine:
It's much easier to disconnect the engine from the studs and input shaft when the car is approximately level, so do this before you put the car up to
maximum height. So, the procedure is to raise the car a little bit, then remove the engine, then put some big wooden blocks under the heater boxes
either side of the engine and lower it down onto those. This allows you to slide the jack out. Then, take the jack around in front of the rear wheel
and use it to raise the rear of the body up high enough to slide the engine out from underneath.
Here's me sliding the engine out, on my second engine swap:
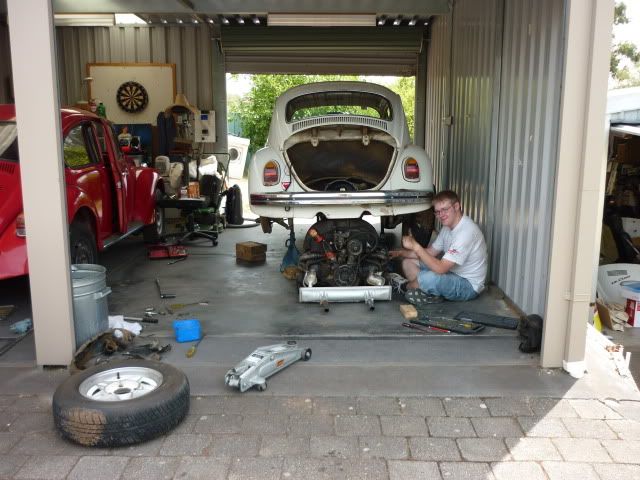
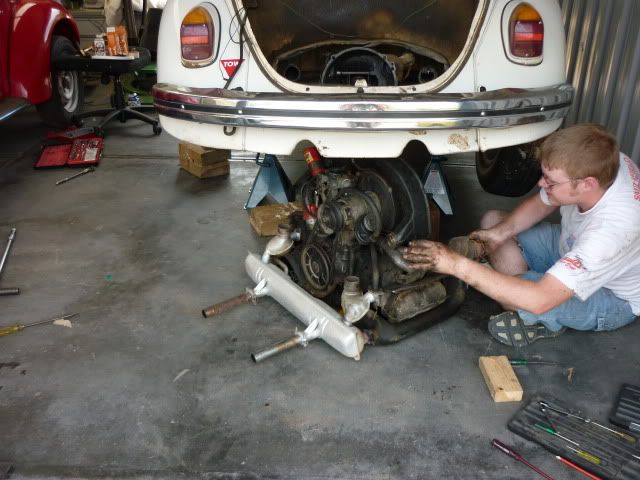
Good luck! You will learn plenty of little details from actually doing it yourself, and the second time is so much quicker!
|
|
|
 71-BEETLE-SEDAN 71-BEETLE-SEDAN
Custom Title Time!
AKA Josh
    
Posts: 1058
Threads: 108
Registered: March 25th, 2009
Member Is Offline
Location: Mittagong NSW
Theme: UltimaBB Pro White
|
| posted on August 1st, 2010 at 11:23 AM |
|
|
Or i learnt that if you remove a wheel you can manouver it out the wheel well instead of going so hi.
|
|
|
 modulus modulus
A.k.a.: Peter Hill
Veteran Volks Folk
    
Posts: 2009
Threads: 76
Registered: July 1st, 2003
Member Is Offline
Location: Melbourne
Theme: UltimaBB Pro White
Mood: modular
|
| posted on August 1st, 2010 at 05:10 PM |
|
|
Hi Arpspasm,
I'm no expert (ask anyone here) but there are some "matter of course" items you should consider that are more convenient with the engine out.
1. Clutch and throwout bearing examination and replacement if in doubt.
2. I'm not sure about superbugs, but on some models it is only possible to replace the rear gear selector bushing with the engine out, but I could be
confused with the Type 2s. Anyone?
3. Check your gerabox mounts. If they are split or persihed, now's the time to do them.
4. Replace all of the flexible fuel hose and ensure you haven't any fuel filters in the engine bay. Check the solid fuel lines where they pass
through into the tunnel for rubbing/wear. Preferably safety-wire the fuel lines to the carburettor.
5. Take the opportunity to safety-wire your sump plug to be sure of avoidng unpleasant and expensive surprises.
6. Carefully (no steel scrapers!) clean up and true the valve cover mating surfaces to ensure a good seal after you reset your valve clearances.
7. Mark up your engine pulley with a protractor at 25, 30, 35, degrees before TDC to facilitate distributor advance setting.
8. Check that all tinware is in place and sealing properly - heat kills engines.
That's all I can think of for the moment; I know it seems like a lot of futsy detail, but most of it is just way easier with the engine out.
hth
|
|
|
 Arpspasm Arpspasm
Seriously Crusin Dubber
 
Posts: 112
Threads: 14
Registered: November 14th, 2009
Member Is Offline
Location: Maleny QLD
Theme: UltimaBB Pro Blue ( Default )
|
| posted on September 6th, 2010 at 02:41 PM |
|
|
Got the engine out. I hadn't raised the car enough (even though it had been mentioned.) I fixed this by winching the rear of the car up a little
higher. Thanks for all the posts. Now for disassembly and inspection.
|
|
|