| [ Total Views: 1470 | Total Replies: 21 | Thread Id: 90243 ] |
|
|
 Dirtbag Dirtbag
Wolfsburg Wizard
What the hell does standard mean?
  
Posts: 407
Threads: 22
Registered: August 2nd, 2009
Member Is Offline
Location: Sunshine Coast Queensland
Theme: UltimaBB Pro Blue ( Default )
Mood: boobtastic
|
| posted on May 3rd, 2011 at 09:08 PM |
|
|
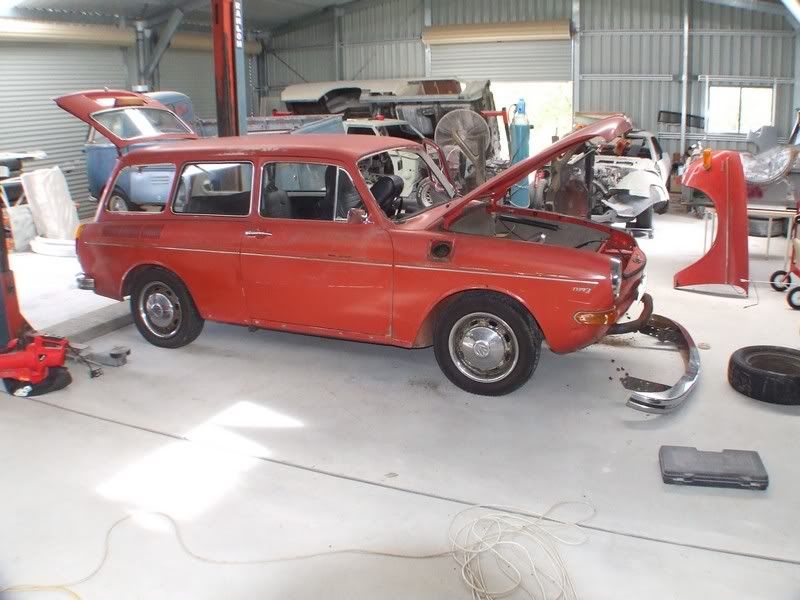
De-rusting Nanna Hugo the square back
I was called in by a good friend to do a bit of rust repair and touch up on their type 3 wagon.
It's faded radar red, but I think it looks a bit like off meat : )
Here it is getting a bit of disassembly by the owner.
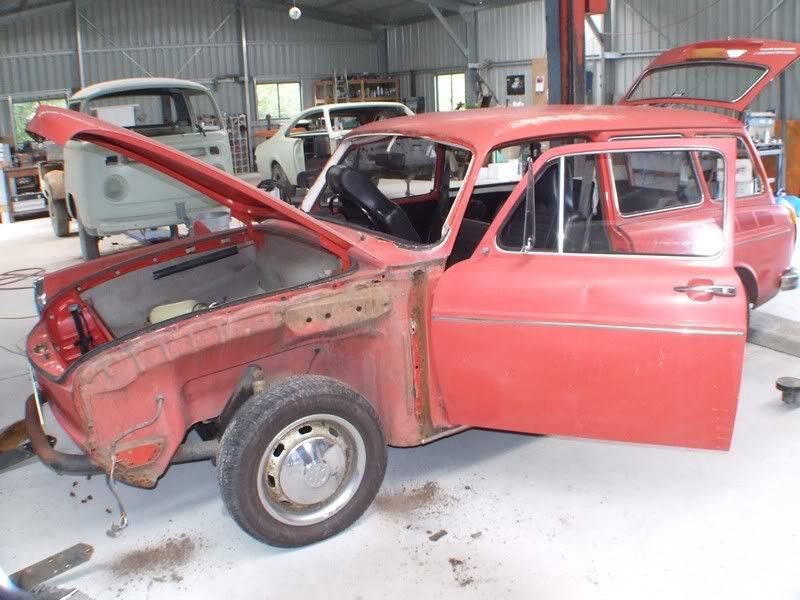
It's got all the usual rust, but none of it is particularly bad.
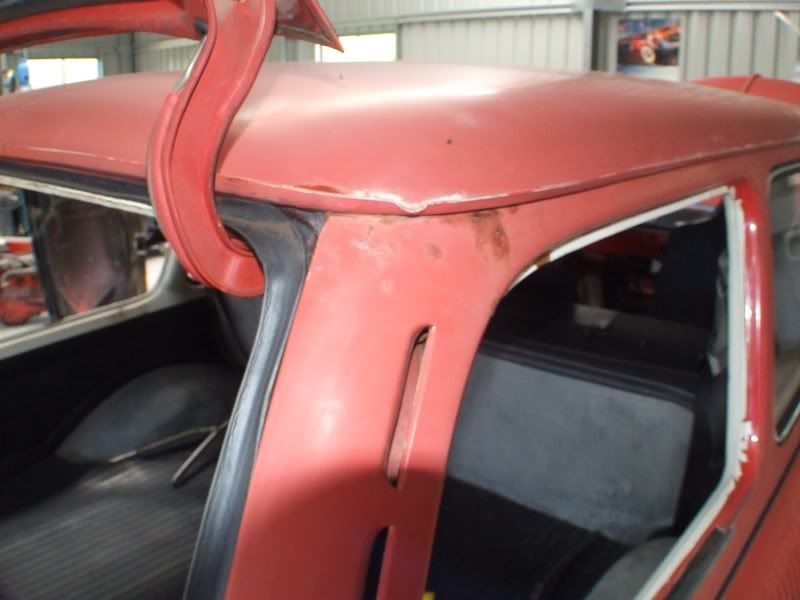
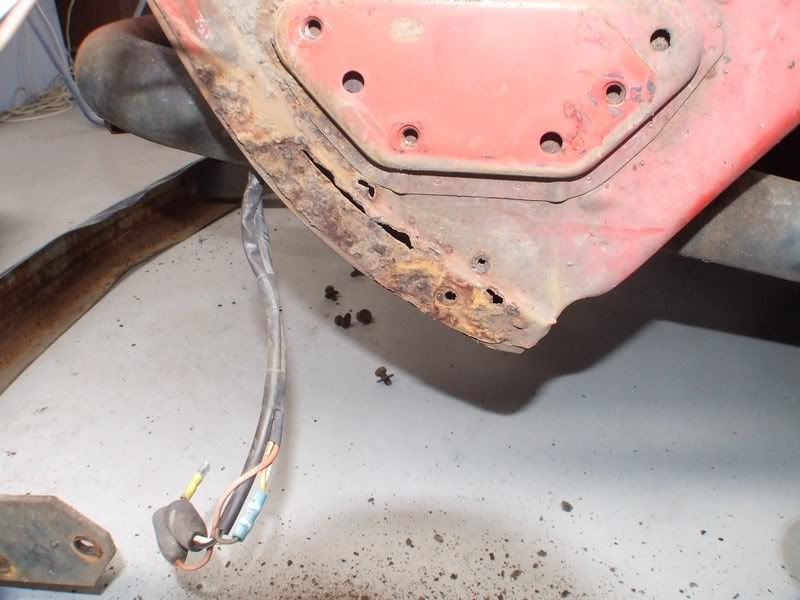
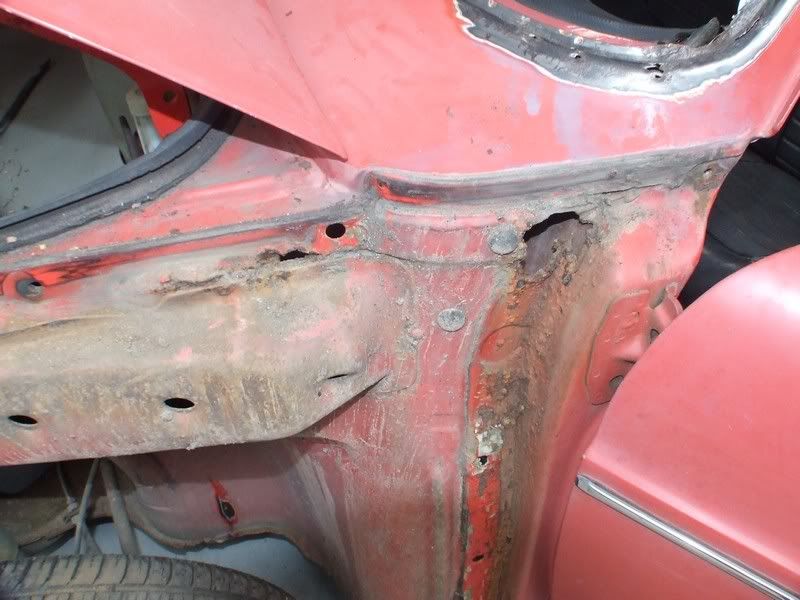
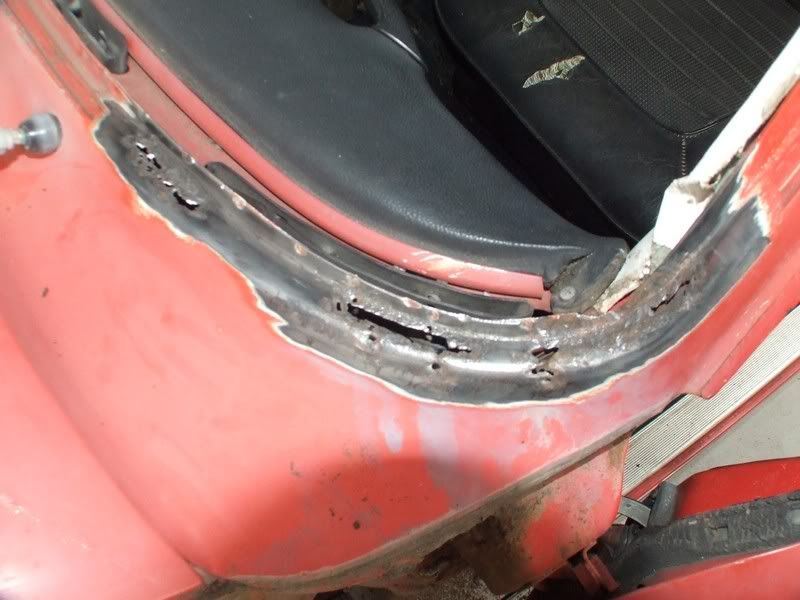

And here's that section all repaired.

|
|
|
 OLLY OLLY
Slammed & Awesome Dubber
 
Posts: 78
Threads: 25
Registered: May 22nd, 2009
Member Is Offline
Location: coffs harbour
Theme: UltimaBB Pro Blue ( Default )
|
| posted on May 3rd, 2011 at 09:13 PM |
|
|
yea thats about right ,more to find .have seen worse.
|
|
|
 Dirtbag Dirtbag
Wolfsburg Wizard
What the hell does standard mean?
  
Posts: 407
Threads: 22
Registered: August 2nd, 2009
Member Is Offline
Location: Sunshine Coast Queensland
Theme: UltimaBB Pro Blue ( Default )
Mood: boobtastic
|
| posted on May 3rd, 2011 at 09:20 PM |
|
|
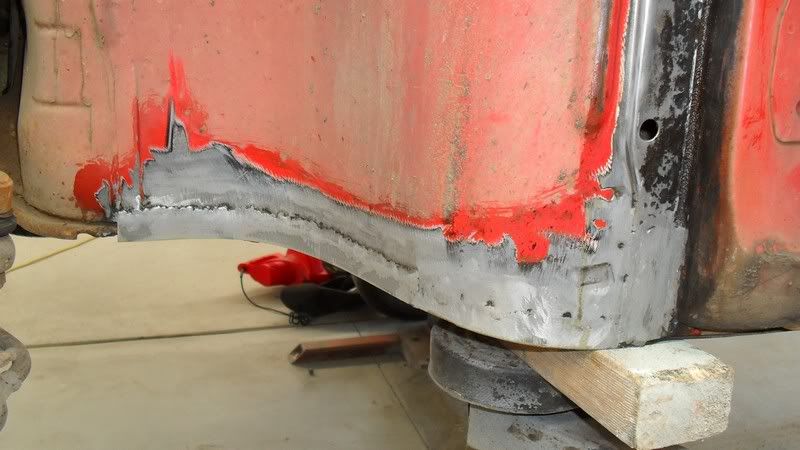
The lower edge of the inner guard needs replacing too. I'll do it in two pieces as the pad for the hoist is in the way : )


Nice!

Next was the top of the A pillar.

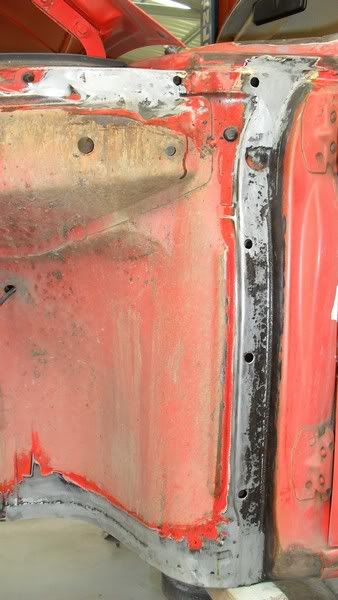
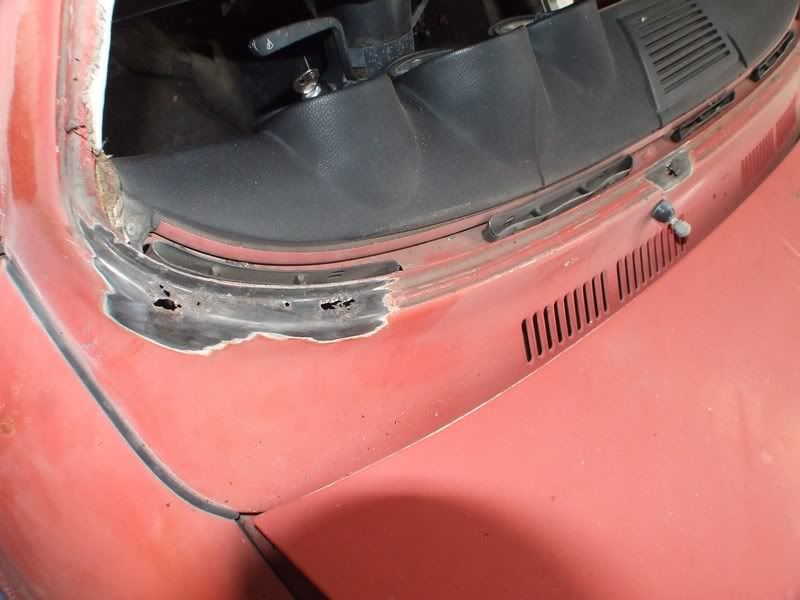
Then it was time for the windscreen surround.
I cut an old panel up to make a shield so the weld spatter didn't go over the dashboard.
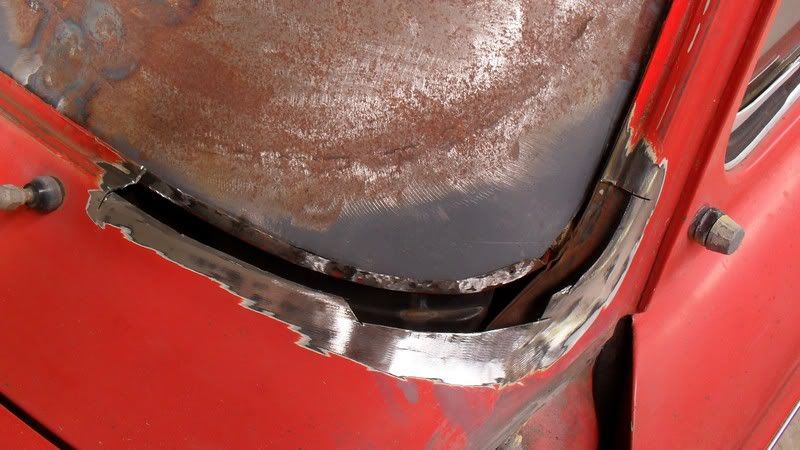
Here's the new piece I made welded into place.
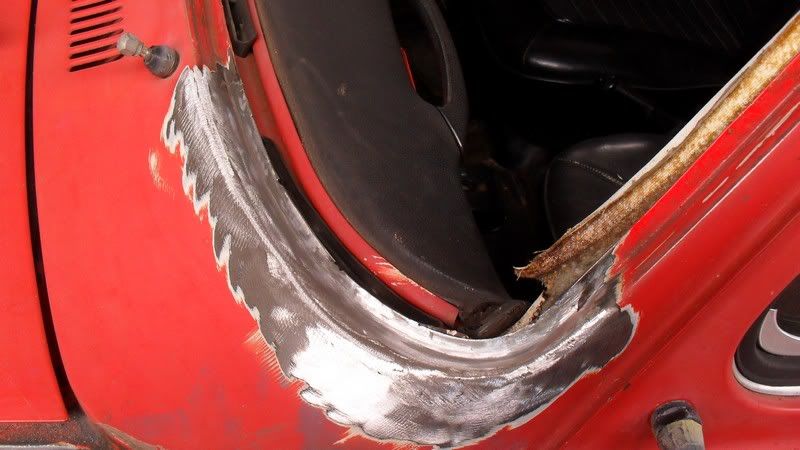
Here's the new bits welded into the other side too.
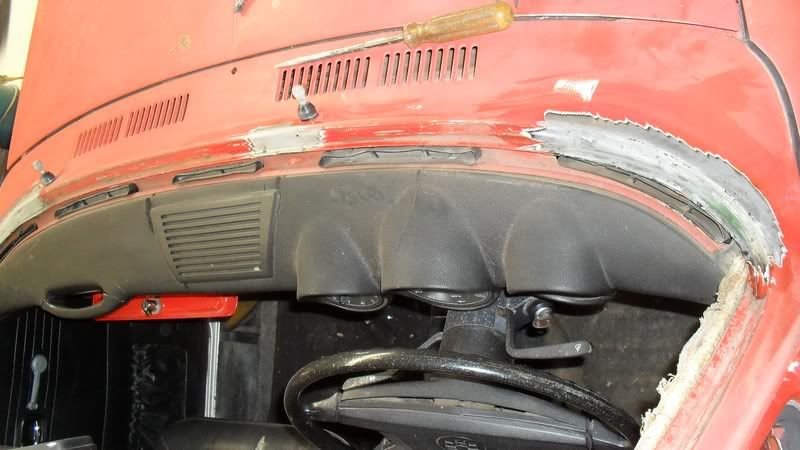
|
|
|
 Dirtbag Dirtbag
Wolfsburg Wizard
What the hell does standard mean?
  
Posts: 407
Threads: 22
Registered: August 2nd, 2009
Member Is Offline
Location: Sunshine Coast Queensland
Theme: UltimaBB Pro Blue ( Default )
Mood: boobtastic
|
| posted on May 3rd, 2011 at 09:32 PM |
|
|
Both rear side window sills needed a little bit of work but nothing too exciting.
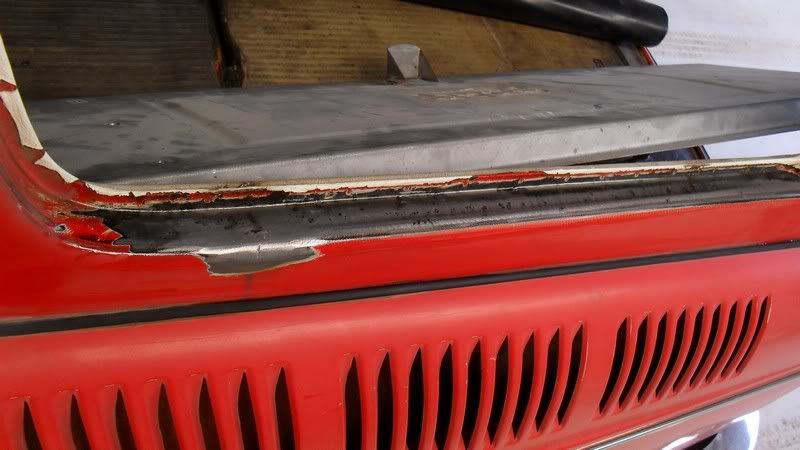
Next job was the top of the right hand rear roof pillar.
No wonder it's rusted out. It's full of expanding foam!
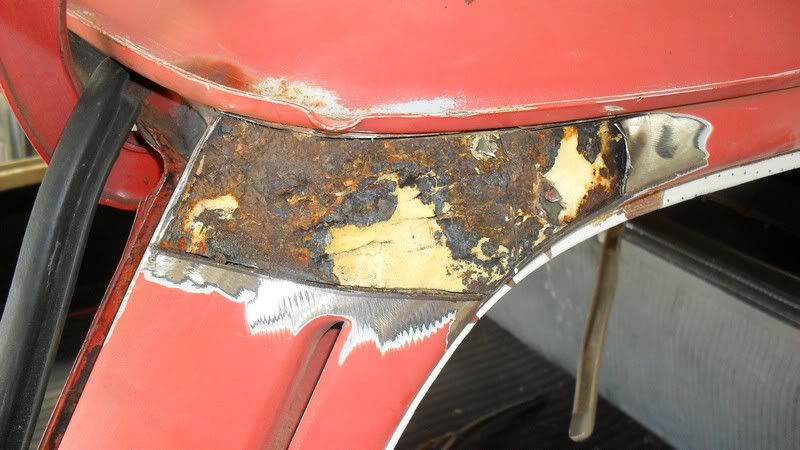
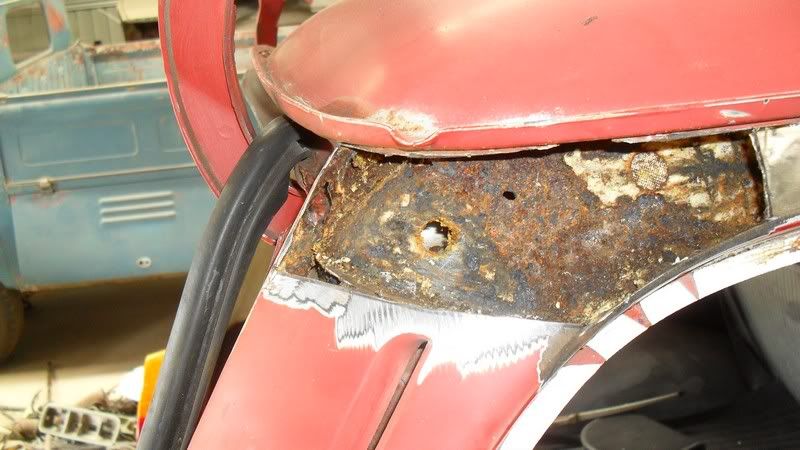
So after I dug all the foam out I could see how the rust was inside the panel.
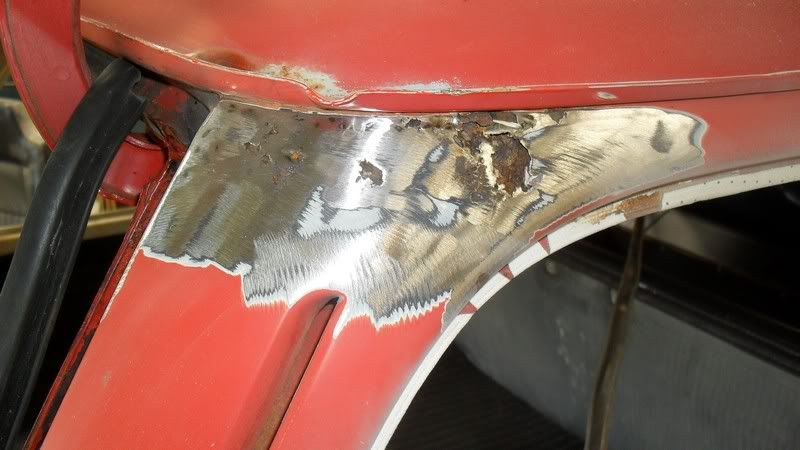
I cut out the bad bits and welded in some new metal.
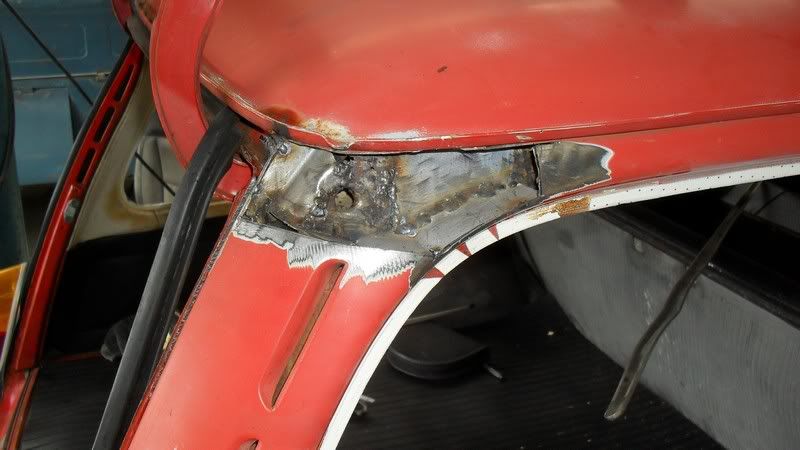
After a clean up it looked a bit like this.
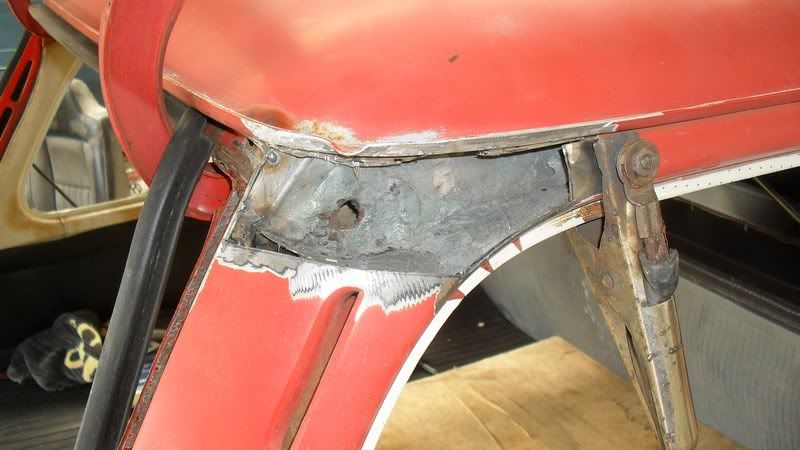
With that done and rust converted I could make a new outer skin and weld it on.
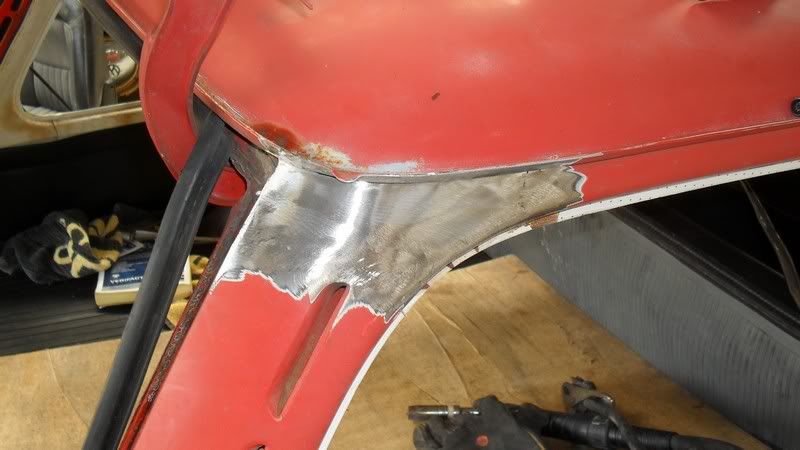
The front left guard had a couple of little rust holes too.
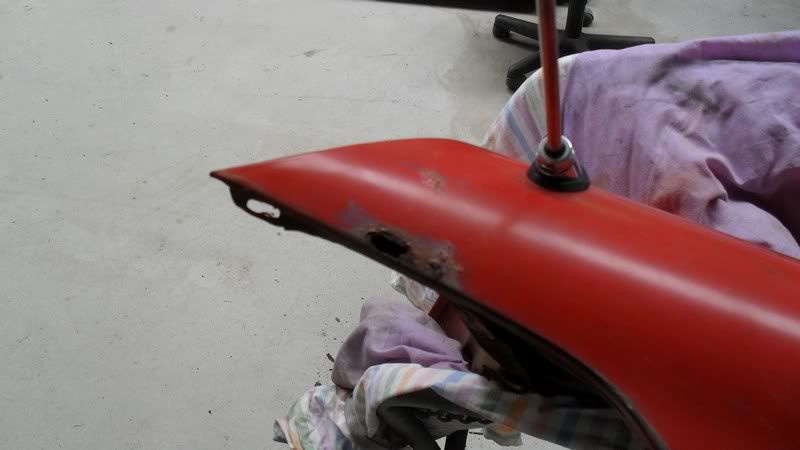
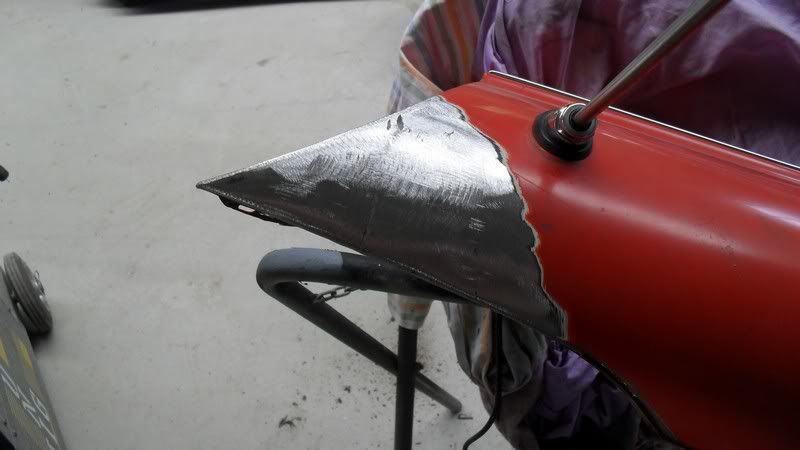
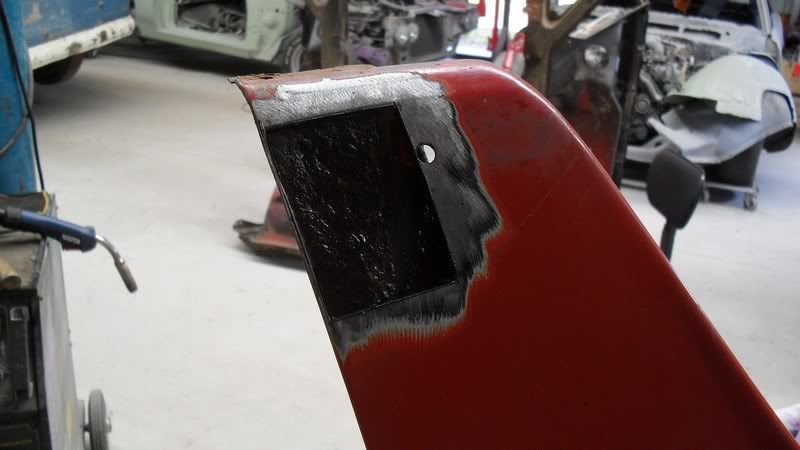
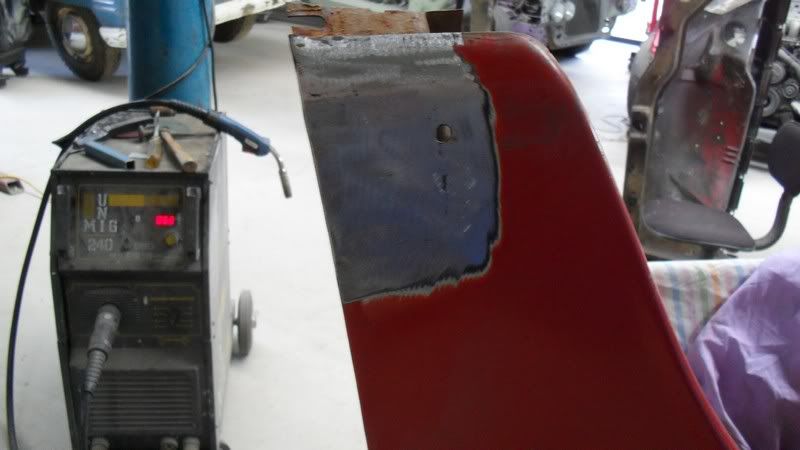
That pretty much covers the metal work.
|
|
|
 zocstar zocstar
Officially Full-On Dubber
  
Posts: 279
Threads: 21
Registered: May 3rd, 2010
Member Is Offline
Location: Wollongong NSW
Theme: UltimaBB Pro Blue
|
| posted on May 3rd, 2011 at 09:45 PM |
|
|
Wow you are a good friend. Have fun.
|
|
|
 Dirtbag Dirtbag
Wolfsburg Wizard
What the hell does standard mean?
  
Posts: 407
Threads: 22
Registered: August 2nd, 2009
Member Is Offline
Location: Sunshine Coast Queensland
Theme: UltimaBB Pro Blue ( Default )
Mood: boobtastic
|
| posted on May 3rd, 2011 at 09:46 PM |
|
|
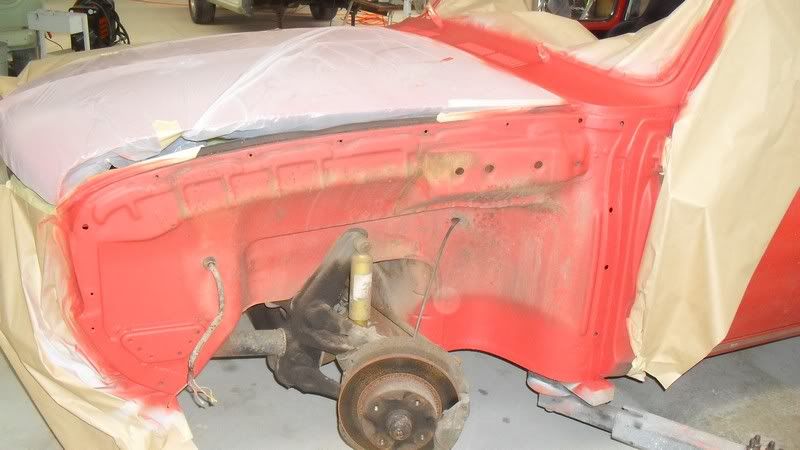
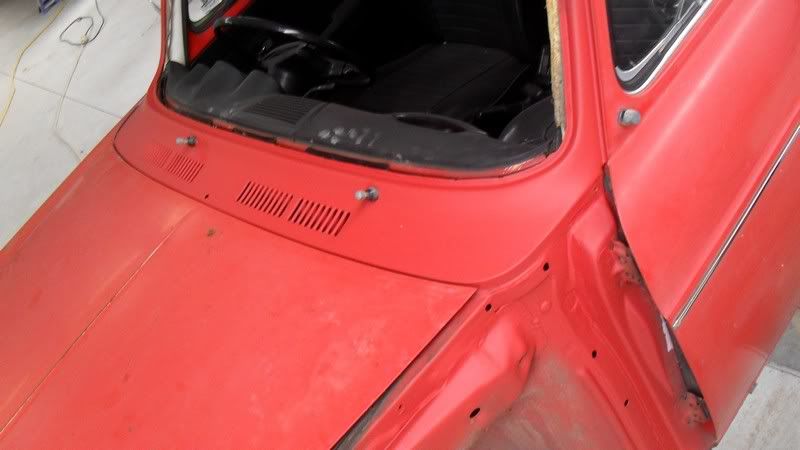
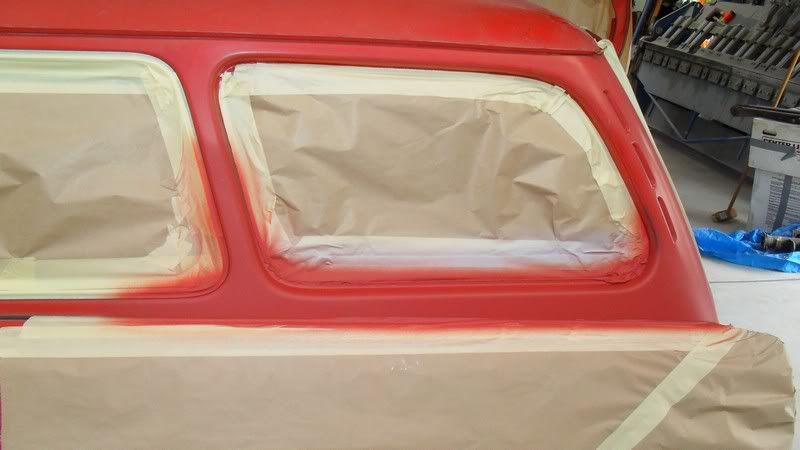
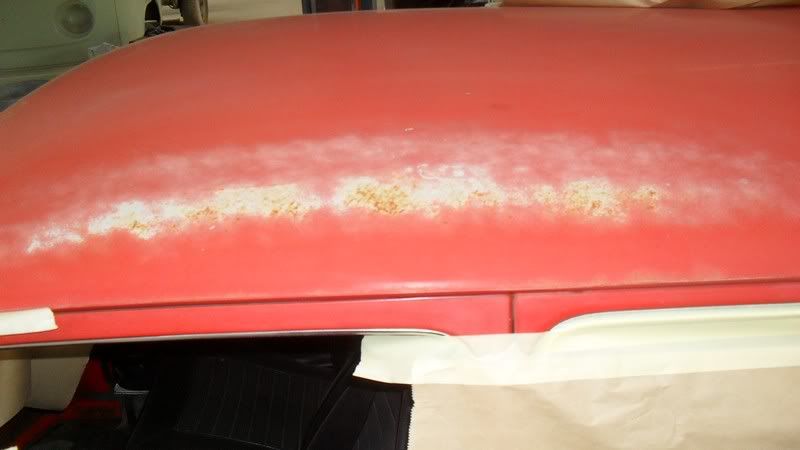
Next step was to put a little bit of filler where needed and mask it up for primer and top coat.
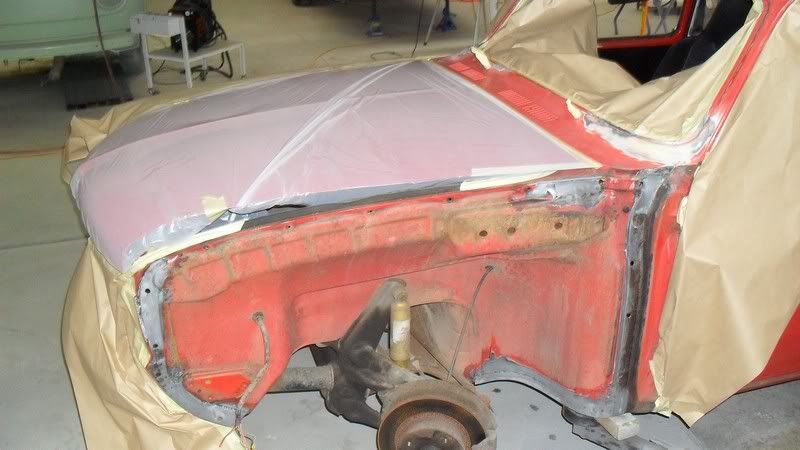
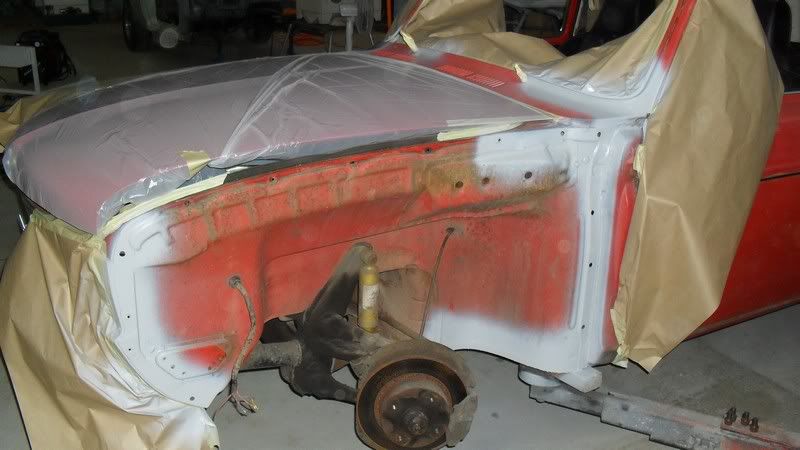
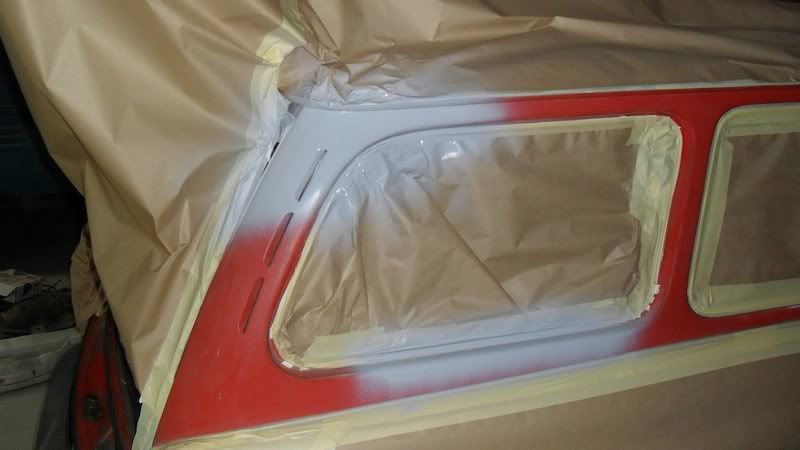
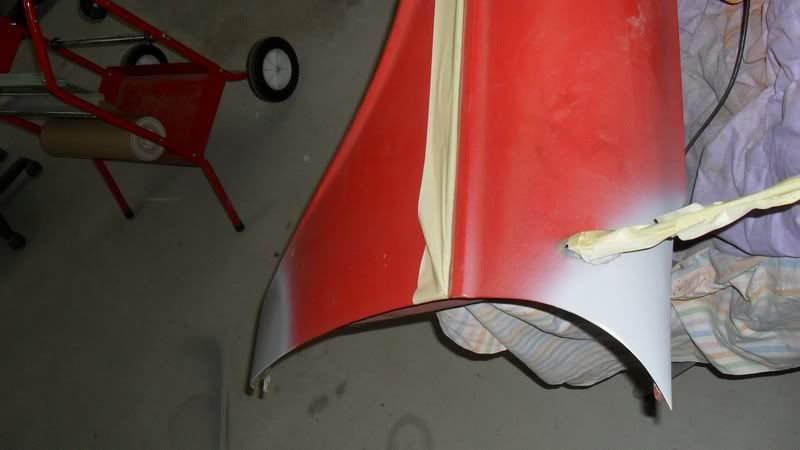
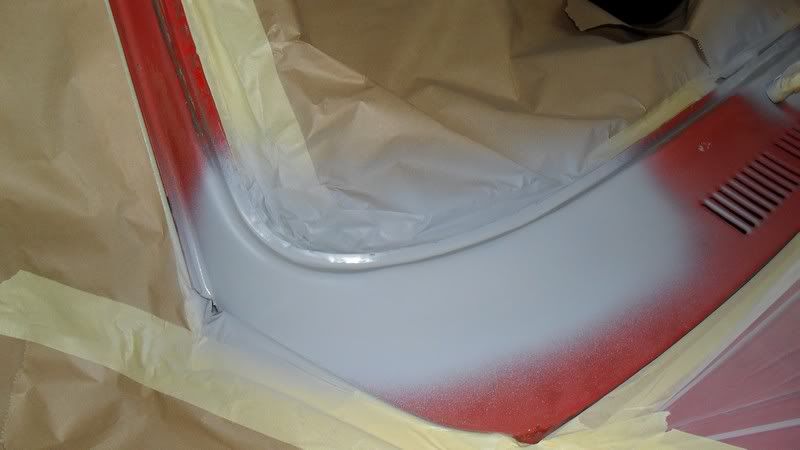
The colour match isn't 100% but it's pretty good. It stands out more in the pics as the flash is highlighting it.
[img]http://s567.photobucket.com/albums/ss112/pur308/Type%203%20wagon%20rust%20repair/?action=view¤t=SDC11546.jpg[/img]
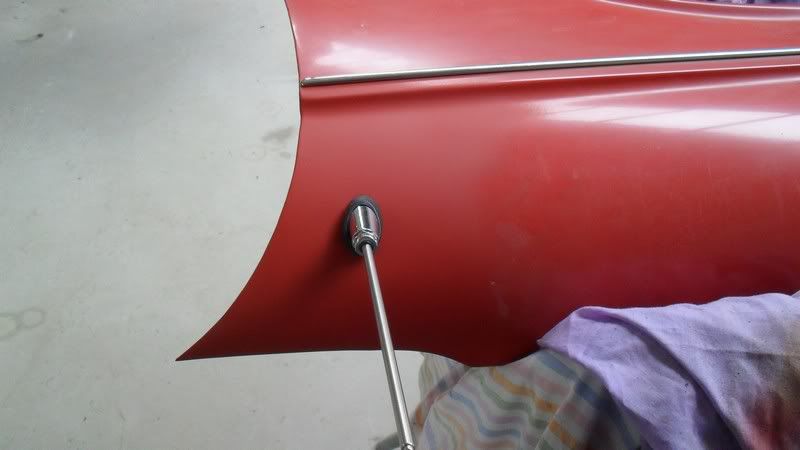
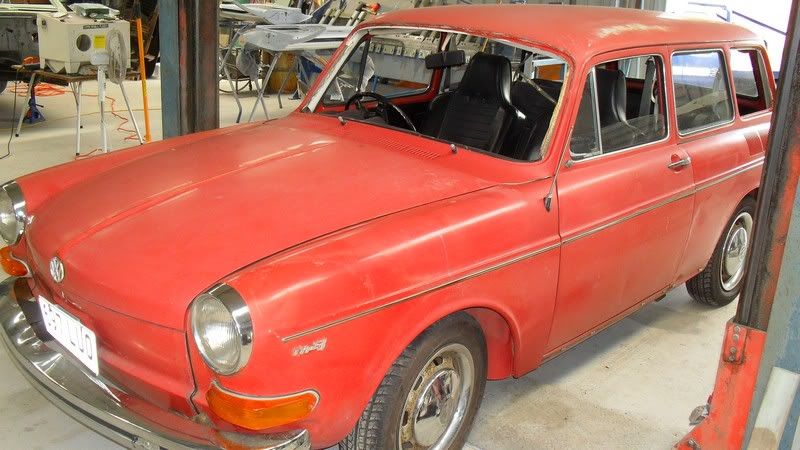
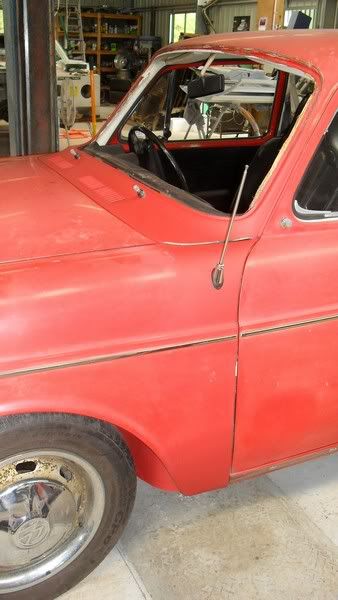
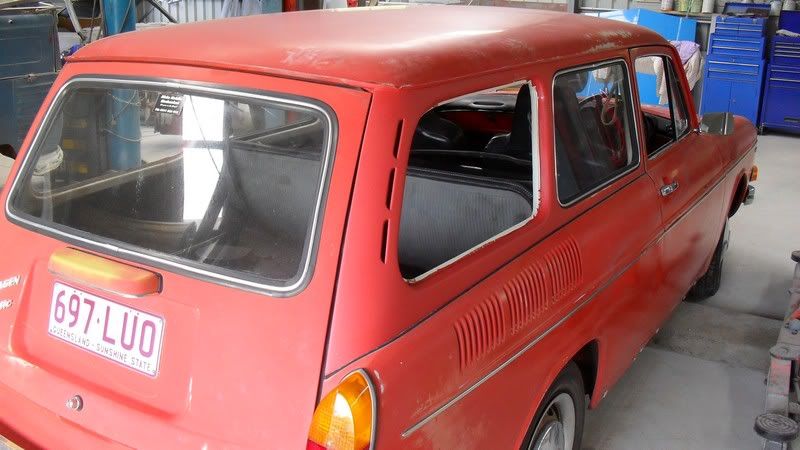
The reason for just touching up the paint is time, money and the fact it has such great patina on it already.
And here it is back together ready for the glass to go back in.
|
|
|
 cam070 cam070
Custom Title Time!
    
Posts: 1332
Threads: 53
Registered: July 25th, 2009
Member Is Offline
Location: Sydney
Theme: UltimaBB Pro Blue ( Default )
Mood: Getting hands dirty stripping the bug down
|
| posted on May 3rd, 2011 at 10:30 PM |
|
|
I wish you were near me. I'd happily pay you to fix my car.
Nice work!
|
|
|
 azzatron azzatron
Seriously Crusin Dubber
 
Posts: 152
Threads: 21
Registered: February 11th, 2011
Member Is Offline
Location: Sydney
Theme: UltimaBB Pro Blue ( Default )
|
| posted on May 4th, 2011 at 12:03 AM |
|
|
| Quote: | Originally
posted by cam070
I wish you were near me. I'd happily pay you to fix my car.
Nice work!
|
I agree. Wish I knew someone local who could help with body work.
Nice work indeed
|
|
|
 vlad01 vlad01
Compulsive Aussie Vee Dubber
      
Posts: 4270
Threads: 109
Registered: June 3rd, 2010
Member Is Offline
Location: Kyneton, VIC
Theme: UltimaBB Pro Blue ( Default )
Mood: Side ways
|
| posted on May 4th, 2011 at 01:53 AM |
|
|
Dude! you should make a few replacement sections for me you should make a few replacement sections for me 
But seriously I would pay to get some small sections made.

71 notchback,
Past owner of, 70 NB, 73 SB and 72 FB TLE |
|
|
 dubnbass dubnbass
A.k.a.: Aaron Morris
Commited Dubber
 
Posts: 66
Threads: 12
Registered: March 31st, 2011
Member Is Offline
Location: brassall, ipswich, queensland
Theme: UltimaBB Psyche Grey
|
| posted on May 4th, 2011 at 05:01 AM |
|
|
i think i own that car' blue twin brother, my one is rusted in exactly the same places and about the same condition :P
|
|
|
 vlad01 vlad01
Compulsive Aussie Vee Dubber
      
Posts: 4270
Threads: 109
Registered: June 3rd, 2010
Member Is Offline
Location: Kyneton, VIC
Theme: UltimaBB Pro Blue ( Default )
Mood: Side ways
|
| posted on May 4th, 2011 at 05:39 AM |
|
|
Mine has far less but few different spots than that there.
I have all the NOS sheet metal to fix mine except I need the firewall hump section (few pin holes) and left C pillar has a match head sized hole in
it. Also the bottom section of the spare wheel panel and next to the heater vents on the heater channel.

71 notchback,
Past owner of, 70 NB, 73 SB and 72 FB TLE |
|
|
 donovan donovan
Seriously Crusin Dubber
 
Posts: 136
Threads: 37
Registered: April 7th, 2009
Member Is Offline
Location: sunshine coast
Theme: UltimaBB Pro Blue ( Default )
|
| posted on May 4th, 2011 at 06:32 AM |
|
|
thanks again mr dirtbag for the work on nanna hugo.
could be a new sideline making type three sections
|
|
|
 vlad01 vlad01
Compulsive Aussie Vee Dubber
      
Posts: 4270
Threads: 109
Registered: June 3rd, 2010
Member Is Offline
Location: Kyneton, VIC
Theme: UltimaBB Pro Blue ( Default )
Mood: Side ways
|
| posted on May 4th, 2011 at 03:11 PM |
|
|
yes do it so many people need small contoured sections for type 3, yet
so many panel beaters do a poor job. Your work is quite exceptional. so many people need small contoured sections for type 3, yet
so many panel beaters do a poor job. Your work is quite exceptional.

71 notchback,
Past owner of, 70 NB, 73 SB and 72 FB TLE |
|
|
 Franke Franke
Casual Dubber

Posts: 41
Threads: 7
Registered: May 4th, 2011
Member Is Offline
Theme: UltimaBB Pro Blue ( Default )
|
| posted on May 5th, 2011 at 08:34 PM |
|
|
Wouldn't mind some of this help myself!  newbie at welding and this
if my first vw, first type 3, and first resto job hahaha newbie at welding and this
if my first vw, first type 3, and first resto job hahaha
|
|
|
 donovan donovan
Seriously Crusin Dubber
 
Posts: 136
Threads: 37
Registered: April 7th, 2009
Member Is Offline
Location: sunshine coast
Theme: UltimaBB Pro Blue ( Default )
|
| posted on May 6th, 2011 at 06:17 AM |
|
|
if you want to see some more of dirtbags work, check out "spud the single cab ute"
in the resto corner of the kombi club website. mindblowing stuff!!!
|
|
|
 vlad01 vlad01
Compulsive Aussie Vee Dubber
      
Posts: 4270
Threads: 109
Registered: June 3rd, 2010
Member Is Offline
Location: Kyneton, VIC
Theme: UltimaBB Pro Blue ( Default )
Mood: Side ways
|
| posted on May 6th, 2011 at 03:54 PM |
|
|
my skills are lacking in the panel beating and sheet metal fabrication. I also have no panel beating tools what so ever and have only used them once
before.
welding is something I am good at. I bought my self a tig last year but haven't found a mask for the right price yet. Nor have I rent a argon bottle
yet.
I have to get concrete in my shed first

71 notchback,
Past owner of, 70 NB, 73 SB and 72 FB TLE |
|
|
 L469 L469
Officially Full-On Dubber
  
Posts: 288
Threads: 15
Registered: March 5th, 2010
Member Is Offline
Location: nsw
Theme: UltimaBB Pro Blue ( Default )
|
| posted on May 6th, 2011 at 08:10 PM |
|
|
nice job + keeping that patina lost all that when i fixed mine but decided on changing the colour in the end anyway good tip for people wanting repair
patches use cardboard such as cornflakes gauge that is the box not contents therein place card over the area that requires replacing so it can form to the contours of the panel cut the patch slightly bigger than you
require you can always trim it down to fit once you have the shape you are after just give it a go on something small first you will get better the
more you do it a bit of trial and error place card over the area that requires replacing so it can form to the contours of the panel cut the patch slightly bigger than you
require you can always trim it down to fit once you have the shape you are after just give it a go on something small first you will get better the
more you do it a bit of trial and error  not to mention
frustration and skinned knuckles not to mention
frustration and skinned knuckles 
|
|
|
 RATAFIED RATAFIED
Seriously Crusin Dubber
 
Posts: 158
Threads: 50
Registered: January 17th, 2009
Member Is Offline
Location: sydney
Theme: UltimaBB Psyche Green
Mood: LOL
|
| posted on May 7th, 2011 at 05:39 PM |
|
|
awsome work dirt bag

[size=6]RUST IN PEACE[/size] |
|
|
 Dirtbag Dirtbag
Wolfsburg Wizard
What the hell does standard mean?
  
Posts: 407
Threads: 22
Registered: August 2nd, 2009
Member Is Offline
Location: Sunshine Coast Queensland
Theme: UltimaBB Pro Blue ( Default )
Mood: boobtastic
|
| posted on May 16th, 2011 at 04:12 AM |
|
|
Thanks for the kind words guys.
So what pieces are you chaps wanting made?
|
|
|
 vlad01 vlad01
Compulsive Aussie Vee Dubber
      
Posts: 4270
Threads: 109
Registered: June 3rd, 2010
Member Is Offline
Location: Kyneton, VIC
Theme: UltimaBB Pro Blue ( Default )
Mood: Side ways
|
| posted on May 17th, 2011 at 12:30 PM |
|
|
umm? notch rear pillar bottoms?
leaf mulched 
those 3 inch pesky heater channel sections just before the vent starts. Ill take pic of this piece when I get home.
they are the most complicated rust damaged parts on my notch. All other parts I either have NOS sheet metal or are just tinny section on already dead
flat metal.

71 notchback,
Past owner of, 70 NB, 73 SB and 72 FB TLE |
|
|
 Franke Franke
Casual Dubber

Posts: 41
Threads: 7
Registered: May 4th, 2011
Member Is Offline
Theme: UltimaBB Pro Blue ( Default )
|
| posted on June 3rd, 2011 at 06:02 PM |
|
|
not really sure :P... anything that may be required for my fix:
http://forums.aussieveedubbers.com/viewtopic.php?tid=90286&page=1#pid840299
just discovered a few holes just under the drivers seat too.. but shouldnt be too big.
|
|
|
 Sunset Garage Sunset Garage
Officially Full-On Dubber
  
Posts: 213
Threads: 18
Registered: February 3rd, 2010
Member Is Offline
Theme: UltimaBB Pro Blue ( Default )
|
| posted on June 12th, 2011 at 04:36 AM |
|
|
Really (Really!) nice rust repairs. As good as, if not better than most panel shops would do. Even better are the facilities to do it in. Nice
shed/warehouse/blimp hangar you got there! I'm ultra jealous 
|
|
|