| [ Total Views: 5942 | Total Replies: 72 | Thread Id: 98531 ] |
| Pages: 1 2 3 |
|
|
 NUG637 NUG637
Officially Full-On Dubber
  
Posts: 372
Threads: 24
Registered: November 2nd, 2009
Member Is Offline
Theme: UltimaBB Pro Blue ( Default )
|
| posted on March 12th, 2014 at 07:53 AM |
|
|
finished piecing the steering together.... making sure i had a good earth.


adjusted a few things, fitted my axle boots... did a big clean and that's yet another 50's pan resto done at QLD HQ


holy shit!!!! im getting vertigo from up here!

|
|
|
 NUG637 NUG637
Officially Full-On Dubber
  
Posts: 372
Threads: 24
Registered: November 2nd, 2009
Member Is Offline
Theme: UltimaBB Pro Blue ( Default )
|
| posted on March 12th, 2014 at 07:54 AM |
|
|
befor...

After....


think thats about 10inches of lift, still to put 165's on the front yet
|
|
|
 NUG637 NUG637
Officially Full-On Dubber
  
Posts: 372
Threads: 24
Registered: November 2nd, 2009
Member Is Offline
Theme: UltimaBB Pro Blue ( Default )
|
| posted on March 12th, 2014 at 07:56 AM |
|
|
well after bolting the body to the pan this thing has really been put on the back burner until now as we are in need of a nice strong 6v engine 8)
i pulled down a shit load of 36ers earlier in the piece and with a few good cases i got the nicest one lined bored.....

crank is still within spec so its just the first over on the O.D. and standard on I.D.
Thrust was all good to....
no fucking nylocks or bunnings washers.... all og german spring washers and nuts


|
|
|
 NUG637 NUG637
Officially Full-On Dubber
  
Posts: 372
Threads: 24
Registered: November 2nd, 2009
Member Is Offline
Theme: UltimaBB Pro Blue ( Default )
|
| posted on March 12th, 2014 at 07:58 AM |
|
|
cleaned the case with stale fuel tonight.... that stuff is a great degreaser 8) makes you smell like shit tho... then i did a final washout with
shellite and it came out as clear as it did when i poured it in 8) ended up getting the oil relief valve undone to. i find with engine assembly it
all about the cleanliness, my ovals 36er oil change is still fairly clear 8)
next was crank assembley.... gave the journals a once over with some 1000grit wet and dry to clean them up and then pressed on the
gears/bearings/spacers and cir-clips.

checked the gudgeon pin on the rods that were on that crank originally and only one was useable :roll: had abit of an epiphany and remembered one of
the other cases i pulled down had alot of nice bearings in it other then the oil galleries being covered with glue... so pulled the rods off them and
the small end bushes were perfect on the new AA pistion gudgeon pins 8) cleaned them all up and started balancing them... the book says within 5
grams of the lightest one.... on the oval i got them within 1 gram but that was alot of fucking around.... 2 were really close then the other 2 were
20 grams apart :roll: but got that sorted ok...


you can see where the meat was removed from....

then it was bearing scoring time.... i do this to help locate the bearing "seat" at final matting stage.... sit the bearing in place located on the
dowels and score it flush with the case half...

this will leave a mark so when you lay the crank in with the bearings attached you can see if it seated properly


next was rod assembly.... place the crank so number 3 piston throw (1st one back from the flywheel) is to your right then attach all the rods with
the numbers facing up.... i use a far bit of assembly lube as with acts as your oil while turning your engine over the first time, pumping the oil
through all those clean oil galleries....

first i get them on all finger tight and make sure they fall under there own weight, then i get them as tight as one hand will get them with the
socket, then torque to 25lb and finish off with 36lb. i re-checked them for "free fall" after each interval of tightening.
crank is ready to trial fitting into case.....

was gonna put a cam in this thing but the more i think about it the more i wanna do a el-stocko 8)
one thing i have learn about this on clunkers is they are one hell of an engine if looked after.... so i wanted to keep it simple.
|
|
|
 NUG637 NUG637
Officially Full-On Dubber
  
Posts: 372
Threads: 24
Registered: November 2nd, 2009
Member Is Offline
Theme: UltimaBB Pro Blue ( Default )
|
| posted on March 12th, 2014 at 08:02 AM |
|
|
ill start by explaining that stock 36 cam gears come in a range of sizes as the cam and crank bore could change a little between cases and there for
having bigger and smaller cam gears to compensate for backlash etc...
when i pulled this case down the lifter had worn away by 10mm and absolutly destroy the cam lobe but the cam gear to suit this case was a +1

they arent always that easy to spot either..... some are just drawn on with a dremel.... not stamped.... like on some below...


-1

thats why its a much easier route to go straight cuts if you dont have the gear to suit your case/cam
with having pulled down 8 36ers and only rebuilding 2 so far and both using aftermarket cams... we have quite a range to choose from....

i found a nice cam with a +1 cam gear to suit my case so i was over the moon.... it was then time to test fit the crank and cam into the engine
case....
to test this theory i layed another 36hp crank in my fresh bearing and lined everything up and spun the crank and cam assembly..... smooth as a babies
butt!

got onto the cam followers.... these need to be test fitted and adjusted befor the case is put together... they can go in later but it is critical to
make sure they fit and move freely.... i test this by adjusting them so they are firm with very little movement but still fall out (slowly) under
there own weight. and if you have to adjust them.... make sure you peen over the nut lock.... otherwise ive seen it gets ugly!

once they are falling out under their own weight i mark which one goes into which hole.... might be a little over board but this makes assembly much
easier then having to sort through which one moves better in which hole etc....


next i lap the oil relied valve into the case.... i saw KCW did this on one of there previous builds as they once had a abit of drama with one (cant
remember the exact problem) so for the little time it takes... i do it too.... Note the full shiney circle on the valve where it has be lapped into
the case...

it started getting abit late by this stage and i was getting too tired to think about matting the 2 halves.... so i got a sharp blade out and cleaned
off any old gasket or glue etc they has stuck to the mounting surfaces....
|
|
|
 NUG637 NUG637
Officially Full-On Dubber
  
Posts: 372
Threads: 24
Registered: November 2nd, 2009
Member Is Offline
Theme: UltimaBB Pro Blue ( Default )
|
| posted on March 12th, 2014 at 08:04 AM |
|
|
well got the bottom end all buttoned up, thanks for the extra hands while matting the case dibba 8) assembly lube on all shiny/moving parts befor the
reunion 8) tighten it as much as one hand on the rachet will get it, test everything turns freely then its 20 pound torque on the centre studs and 10
pound on the perimeter bolts... check everything turns freely then 25 pound on the centre studs and 14 pound on the perimeter bolts


once that was done it was refacing oil pump and cover time....

i go through a number of wet and dry grits till the face is fully polished... i also put the gears in and lay a ruler over the housing and there
should be no clearance.... the paper gasket that goes between the housing and the cover should be all the clearance you need.

then its piston and barrels time 8) make sure all the arrows face the flywheel and dont forget the paper gasket between the barrel and the case....
make sure all the circlips are seated properly and be careful with the piston skirts 8)
gotta clean up a set of recoed heads that were on a 36er for less the 1000mile befor the crank broke.... a little dirty from sitting so will get them
clean and on tomoro

|
|
|
 NUG637 NUG637
Officially Full-On Dubber
  
Posts: 372
Threads: 24
Registered: November 2nd, 2009
Member Is Offline
Theme: UltimaBB Pro Blue ( Default )
|
| posted on March 12th, 2014 at 08:05 AM |
|
|
the oil cooler needed a hell of a clean so first was hit with the waterblaster... then washed out with shellite about 30 times till it was coming out
as clean as i was putting it in....
then the rocker gear.... pulled them all down... cleaned out all the oil galleries and oiled and assembled them, put em on and torqued to 14ft pound.
then i adjusted my valves ready for run in.
i then cleaned up all my tinware with a good water blasting after being soaked in the parts cleaner.... most the paint blew off so i gave them a quick
rattle can job to be presentable...
then onto fuel pump.... mmmm clean and rebuilt.... and pretentioned on the engine block...

by this stage I'm finally getting somewhere and then it was home time to make it in time for a dinner reservation :roll:

ready for tinware and exhaust.... 8) this is when it gets exciting!
|
|
|
 NUG637 NUG637
Officially Full-On Dubber
  
Posts: 372
Threads: 24
Registered: November 2nd, 2009
Member Is Offline
Theme: UltimaBB Pro Blue ( Default )
|
| posted on March 12th, 2014 at 08:07 AM |
|
|
shana wanted to watch a disney movie today... be dammed if i was having a part of that.... so i did my chores and got an hour and a half in the shed
8)
its awesome having torn down a few 36ers in the past... found heater boxes, fuel lines, dizzy vac line in the shed.... thought i was gonna have to
purchase these items 8)
got my tinware all on, my manifold all cleaned up.... even unblocked the heat riser with a burred balustrade wire and the waterblaster "clean as a
whistle".
bolted on a 36hp muffler i picked up at the towoomber swap a while back 8)
just got to rebuild a carb, bolt on my clutch, connect fuel lines, and dizzy, sort out the genny, and fill it with oil
8)


i love these old clunkers!!!
|
|
|
 NUG637 NUG637
Officially Full-On Dubber
  
Posts: 372
Threads: 24
Registered: November 2nd, 2009
Member Is Offline
Theme: UltimaBB Pro Blue ( Default )
|
| posted on March 12th, 2014 at 08:08 AM |
|
|
pulled down a 28 pci carb tonight (first time)... nice and simple.
was filthy even after a thinners bath... so blasted it with mums bi-card soda out of a homemade blasting nozel dib made years ago 8)
befor....


After....

if your do the same... blow it out with compressed air rather then bathing it out with liquid.... i learnt the hard way last time....
everything else is on other then fan belt and ignition wires 8)
gotta build a run in stand tomorrow night and if dib can wire it up in the next night or so we will have it run in and ready to be put in the car for
the weekend 8)

|
|
|
 NUG637 NUG637
Officially Full-On Dubber
  
Posts: 372
Threads: 24
Registered: November 2nd, 2009
Member Is Offline
Theme: UltimaBB Pro Blue ( Default )
|
| posted on March 12th, 2014 at 08:10 AM |
|
|
and she runs!
http://youtu.be/Ly6dTaK-sPs
one nice new fresh 36hp to matt to that crash box for the real 50's era feel of driving 8)
|
|
|
 NUG637 NUG637
Officially Full-On Dubber
  
Posts: 372
Threads: 24
Registered: November 2nd, 2009
Member Is Offline
Theme: UltimaBB Pro Blue ( Default )
|
| posted on March 12th, 2014 at 08:14 AM |
|
|
How it always should of been.... But didn't have the money or the knowledge back then 8)
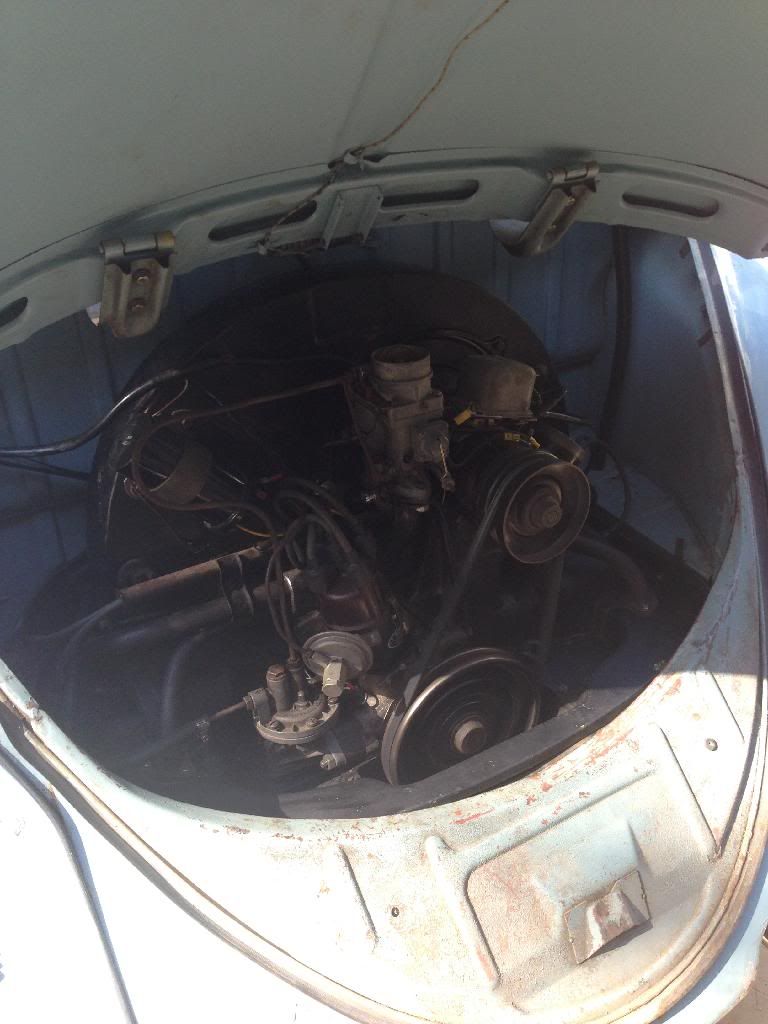
here it is looking really high and ready for some bush bashing
http://youtu.be/ph3lyz93xuw
This old thing was toast both the outer skin and the inner reinforcement...
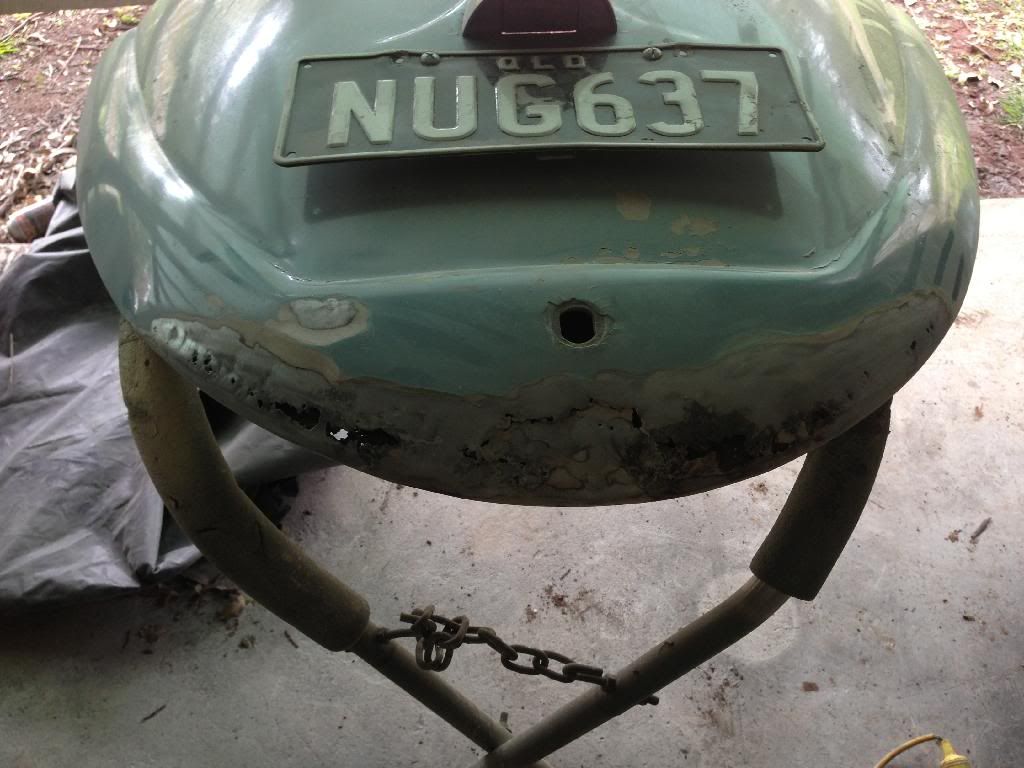
Dion donated this beauty (was yellow) no rust and reasonably straight.
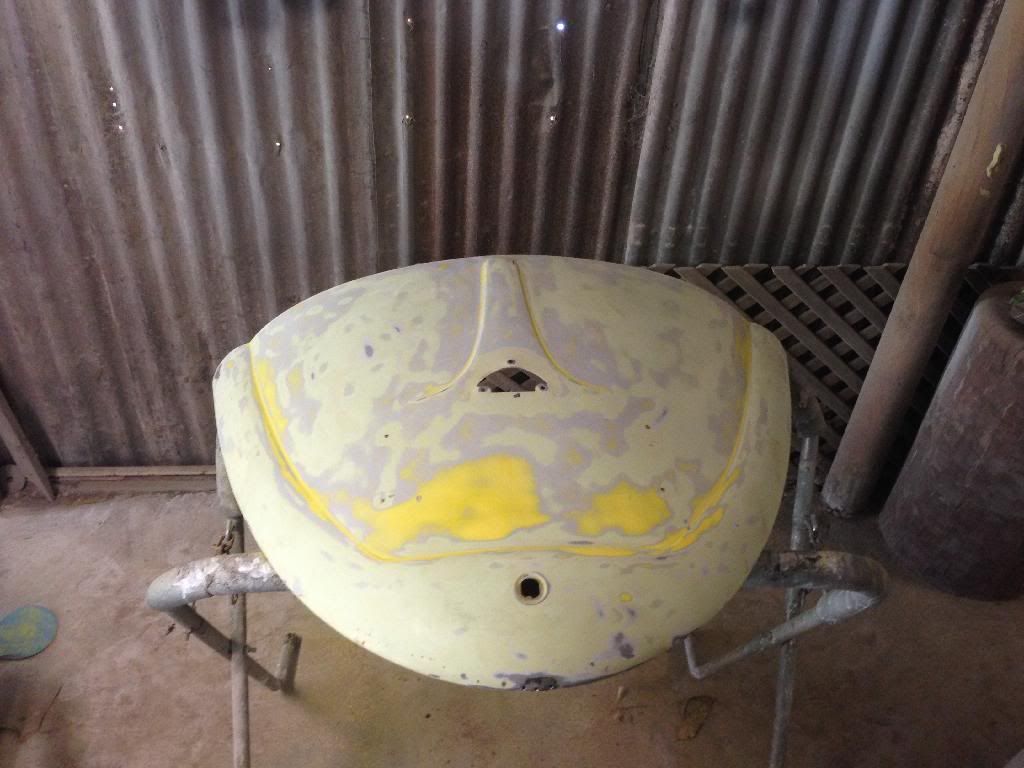
sanded it back last night and blew some paint over it this morning....
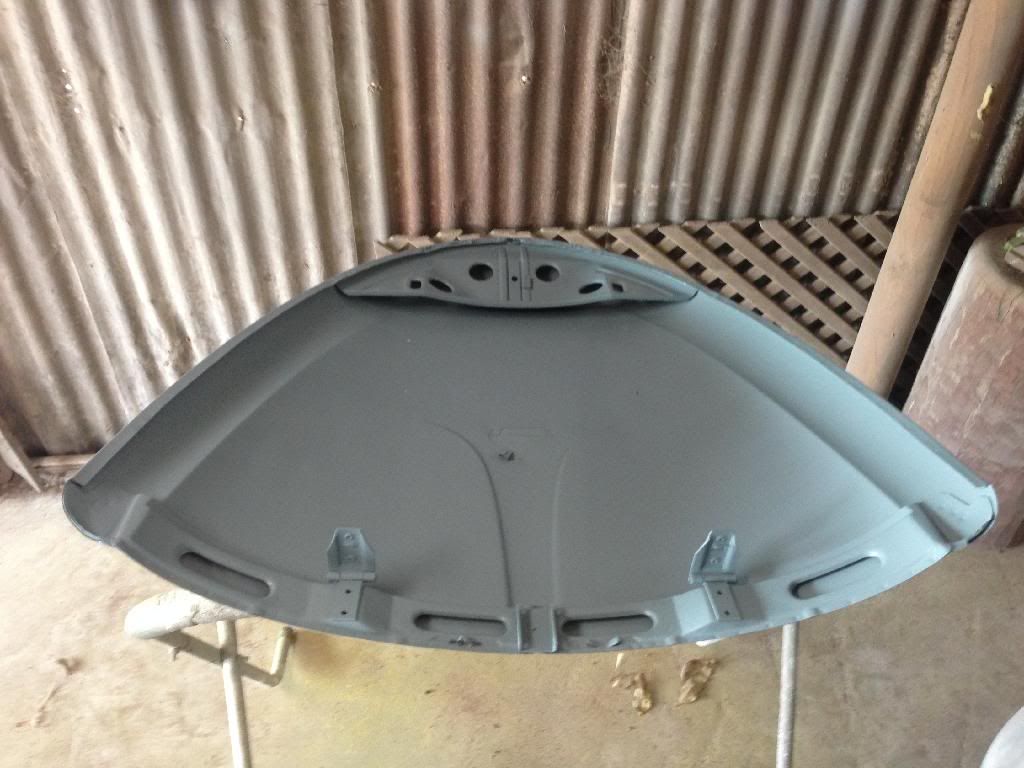
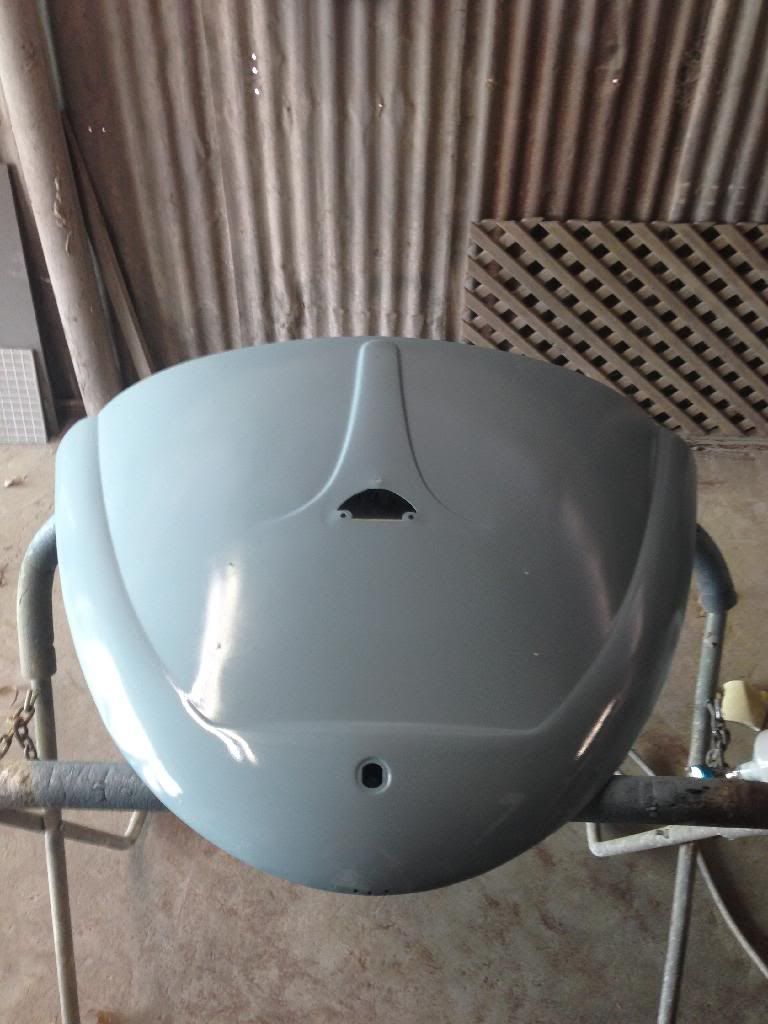
pretty close on the colour match! didn't want to paint it's original popes nose as its the only thing from stopping it looking "too good"
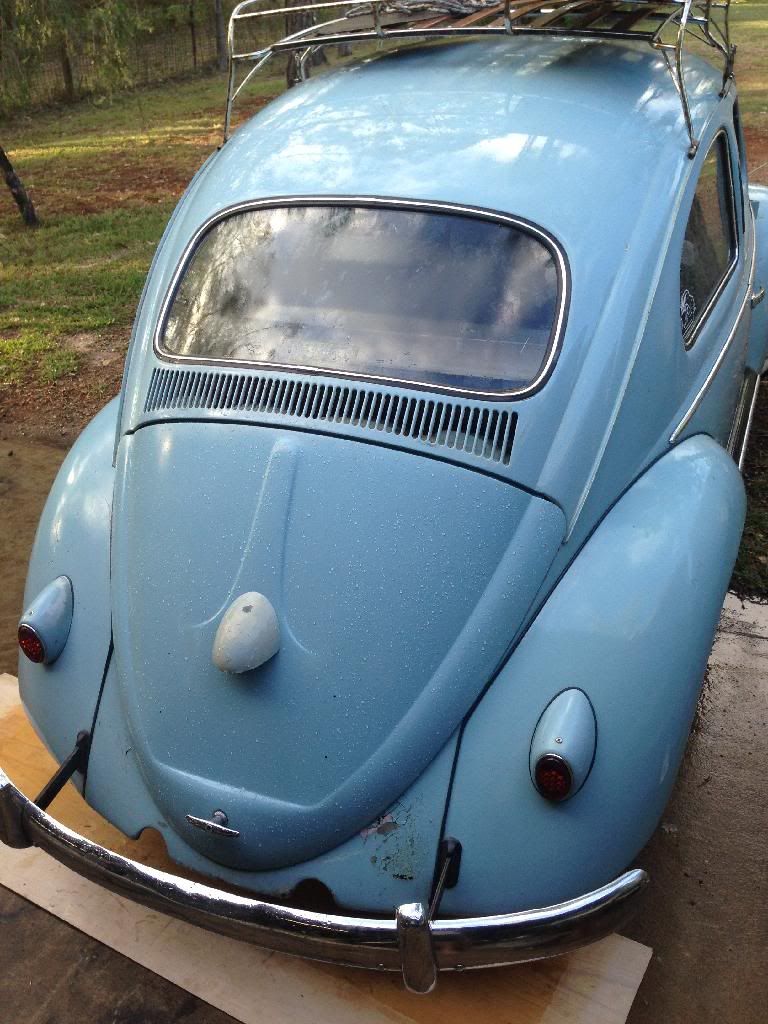
and there you have it.... this thing has had every bit of running gear worked on or replaced.... as i said i had then sold it back to the previous
owner who is now moving over seas and is looking to move it on himself..... if you would like a nice old honest car send me a pm for his details 
|
|
|
 oldturtle22 oldturtle22
Officially Full-On Dubber
  
Posts: 267
Threads: 57
Registered: November 26th, 2011
Member Is Offline
Location: Brisbane
Theme: UltimaBB Pro Blue ( Default )
|
| posted on March 12th, 2014 at 04:27 PM |
|
|
Bug
Enjoyable read mate. Ive got one the same. Thanx for the tips and inspiration!!
|
|
|
 Boozo Boozo
Officially Full-On Dubber
Back in the bug
  
Posts: 359
Threads: 34
Registered: September 9th, 2007
Member Is Offline
Location: Morayfield Queensland
Theme: UltimaBB Pro Black
Mood: cruisy
|
| posted on March 13th, 2014 at 11:48 PM |
|
|
Blue '59s rock 
[size=4] '59 or Kombi?....feeling confused [/size]
'59 bug
'68 bug
'82 import T3 BUS. aircooled
|
|
|
| Pages: 1 2 3 |