
My 1958 Beetle - Bella
M16S VW - August 24th, 2008 at 08:17 AM
Hey guys - thought I'd show you some pics of my Beetle. I bought her off a chap in Dandenong, Melbourne in April 2005 for $400 - bargain!
Back then she looked like this:

She was then shipped over here (sorry!) and arrived at my house:


She was in a light grey primer over red, which appeared to be a respray from a very long time ago. I assume her interior were part of her 'revamp'
and wouldn't have come as standard in a (possibly alabaster) Beetle?
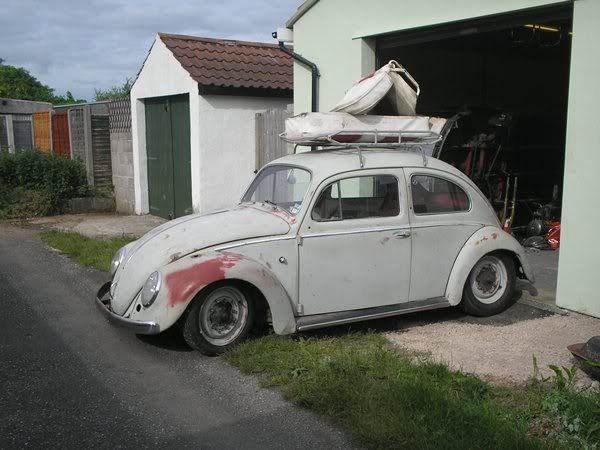
After replacing the rear bumper mounts due to light accident damage, she was brought down nearer the floor:
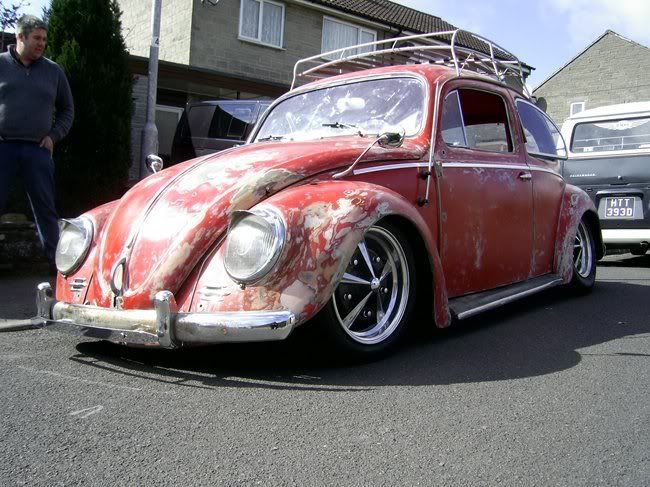
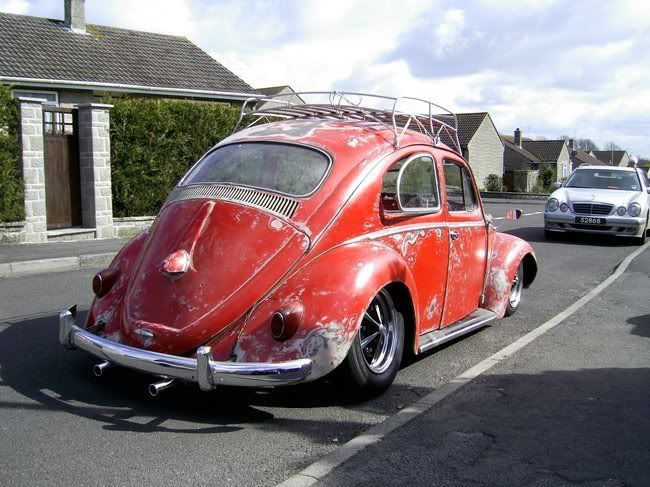
Then I removed the pourous primer to reveal the red respray underneath, and now she looks like this:
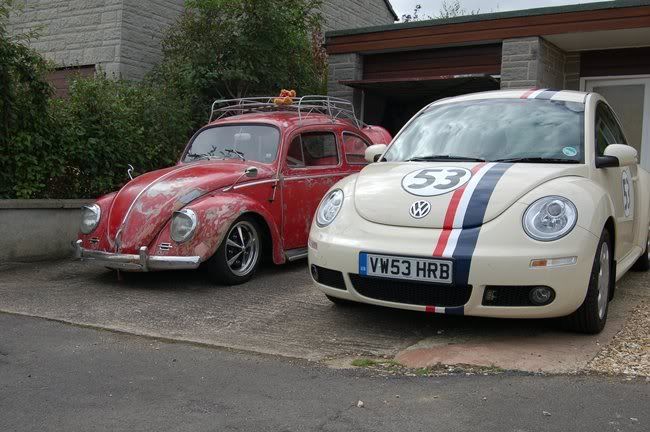
And it was her 50th birthday last weekend, so we made her a cake! 
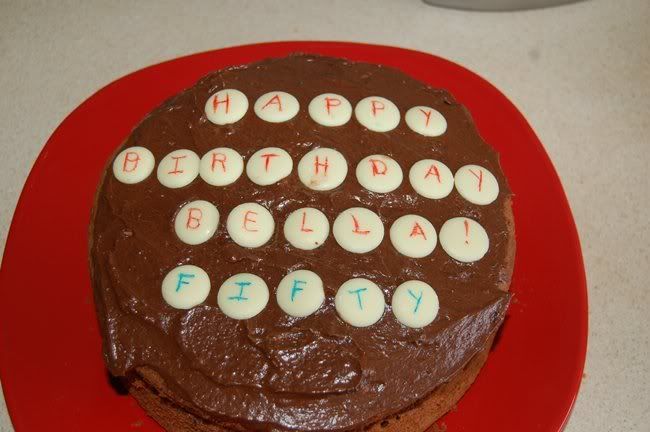
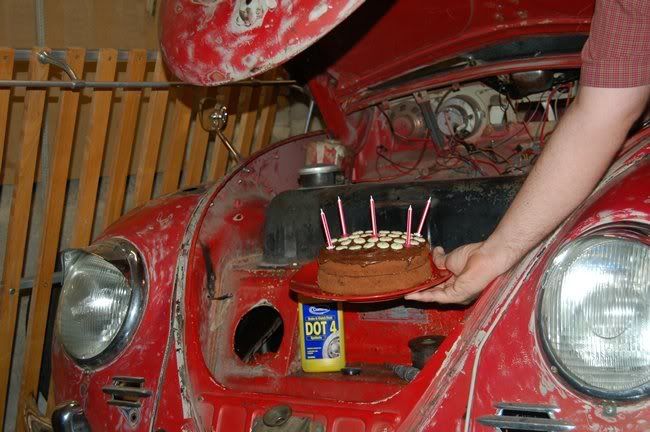
Hope you like her. I know very little history of her - I did find some L plates and an empty box of Fosters in the back of her, so that might explain
the light accident damage.... but if anyone knows her or recognises her, I'd love to know more!
Cheers
Lucy.
M16S VW - August 24th, 2008 at 08:46 AM
hehehe I've done some searching and the chap I bought her off was registered on here! I've found when he joined and put some pics up of her - shame
the links are now broken! 
http://forums.aussieveedubbers.com/viewtopic.php?tid=29192
trickysimon - August 24th, 2008 at 10:14 AM
Geez, I hope when I'm 50 I get a cake as good as that 
Car looks awesome, Well Done.
Simon
vwkg - August 24th, 2008 at 12:58 PM
Thats pretty cool. 
bond - August 24th, 2008 at 06:28 PM
have done well.
M16S VW - August 24th, 2008 at 07:08 PM
Cheers guys!  She liked her cake very much!
In the 3yrs I've had her I've done quite a bit to her.
I've completely rewired her as when she was painted red, the wiring wasn't masked up so every wire was red - making it somewhat difficult to fault
find!
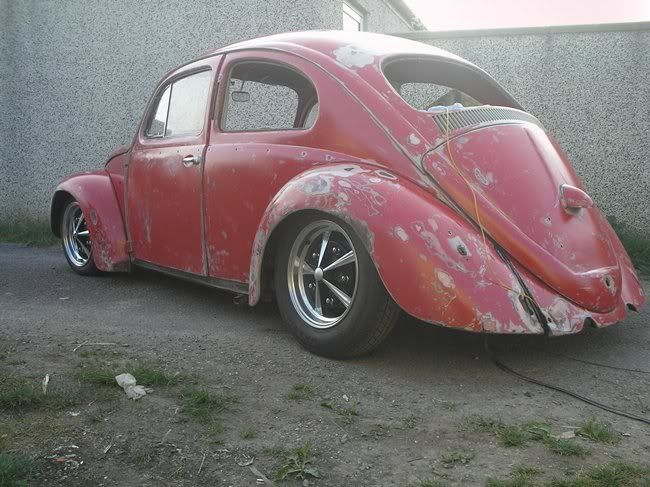
I've lowered her quite a bit on a 5in narrowed adjustable beam with dropped spindles and 2 spines at the back.
When I got her the front gearbox mount was trashed - the bolts had sheered off and it was welded to the pan - so we put in new studs and a new mount.
While the 'box was out I cleaned it up and painted it.
Fitted some 15in polished and detailed Radar alloy wheels.
Painted the pan and channels etc with POR-15 to protect them
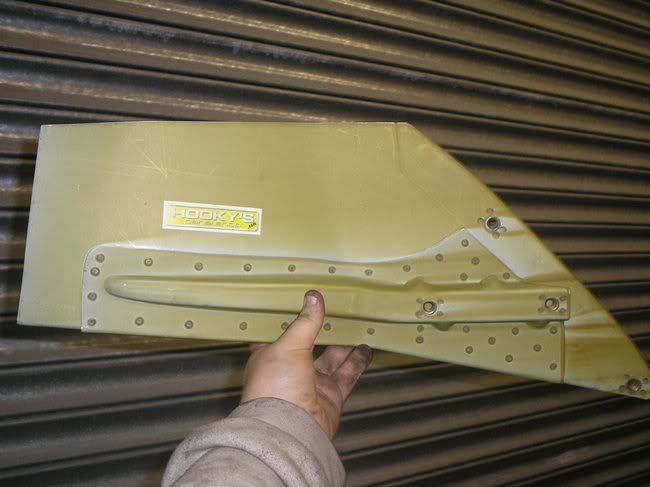
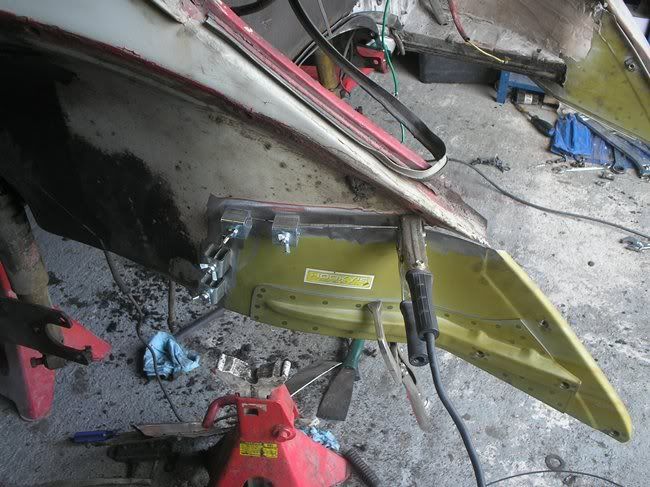
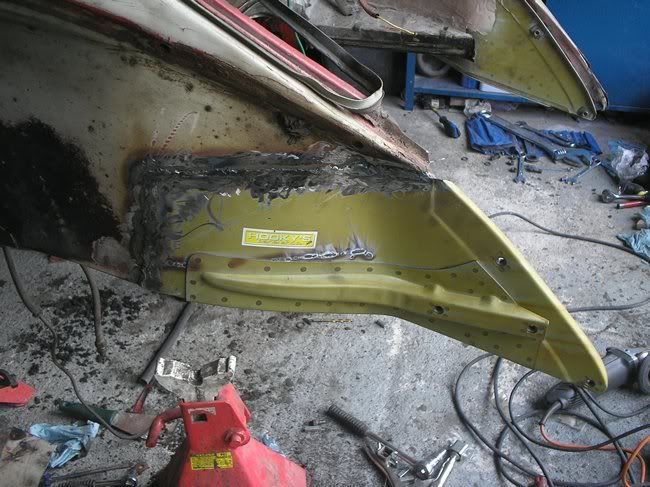
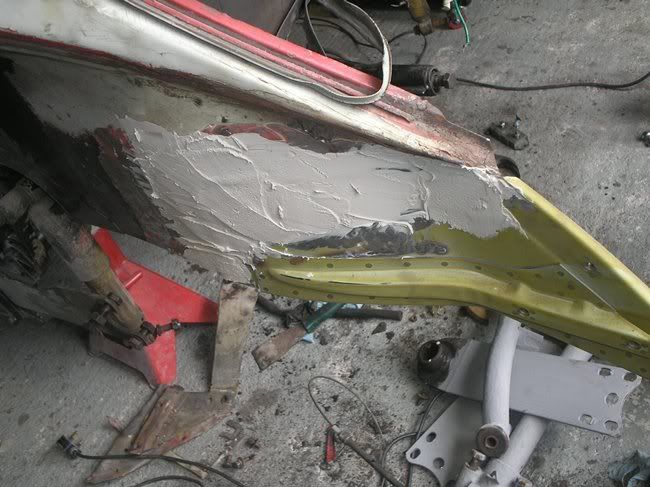
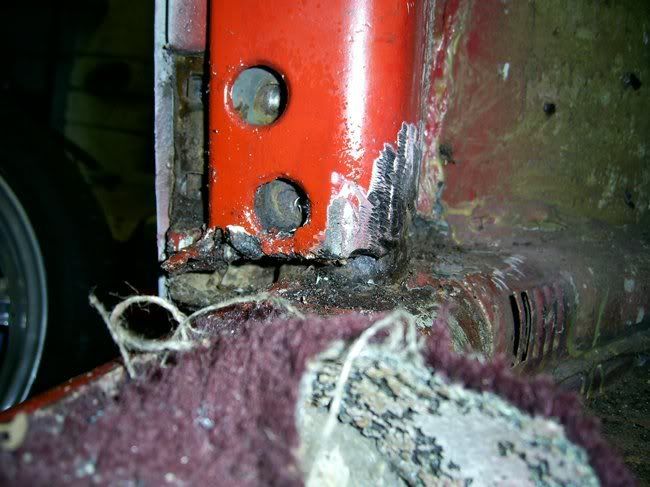
Welded in new rear bumper mounts and repaired the bottom of the A pillars
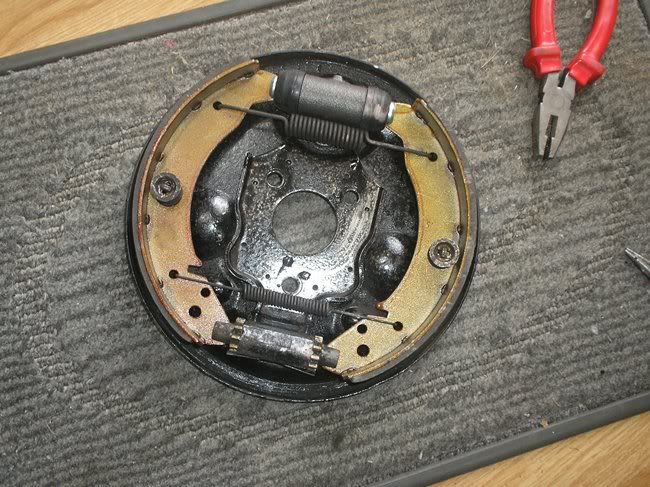
Rebuilt the brakes - new shoes, lines, hubs, cylinders etc all round
New front wheel bearings
Got her semaphores working again
Fitted the correct rear lights
New king and link pins
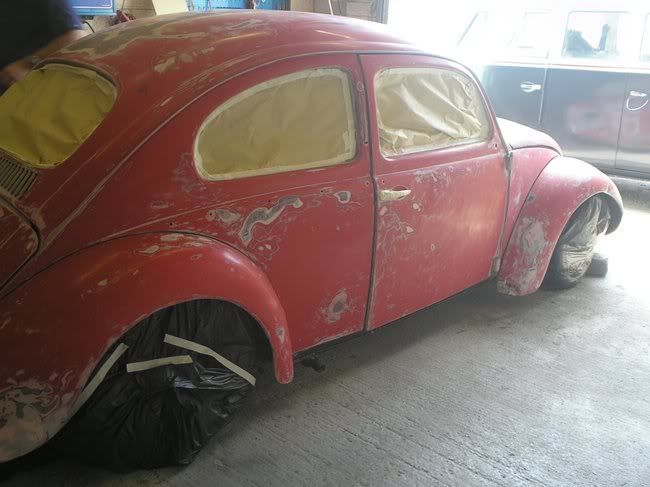
And removed the white primer she was in to reveal the red underneath. Once I did this I sprayed her in a matt laquer to protect her.
Fitted an oatmeal carpet set
She's got new window rubbers all round and I've added pop out rear windows.
I've also added some accessories - roof rack, kosh horn grills, albert replica wing mirrorr - and a few other to be added soon!
Here's a few pics of the above:
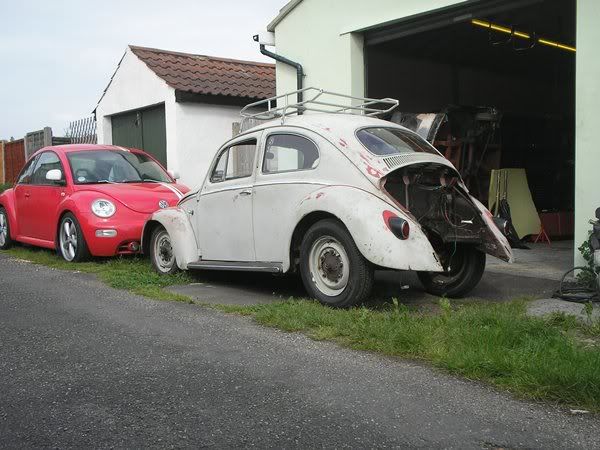
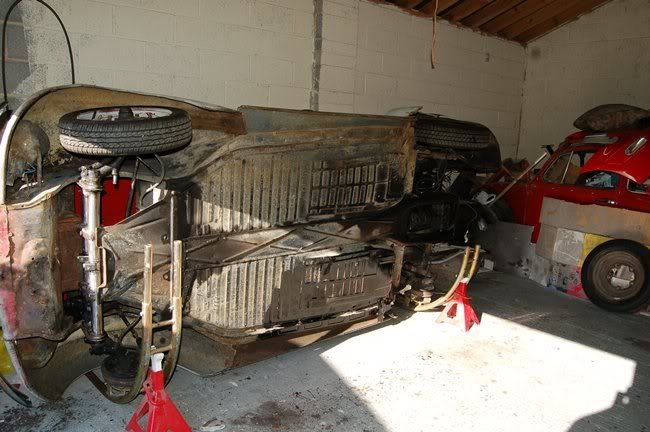
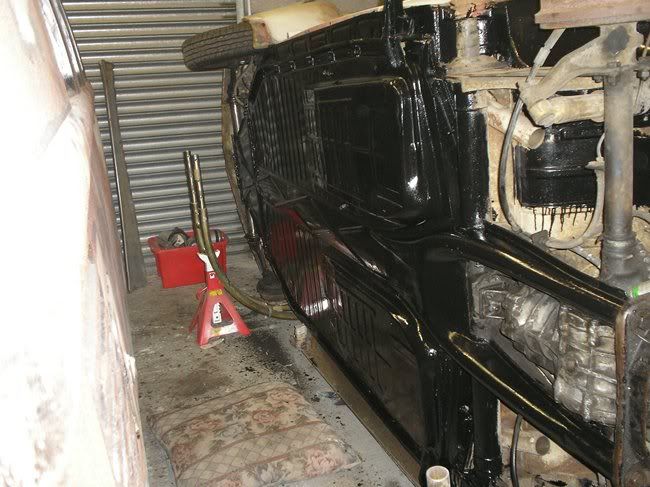

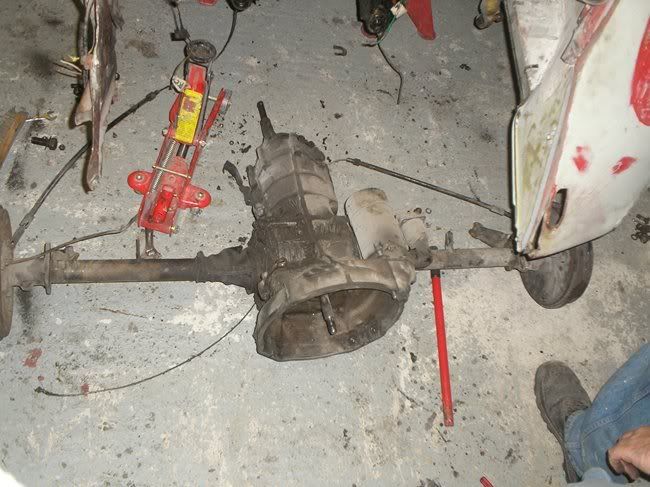
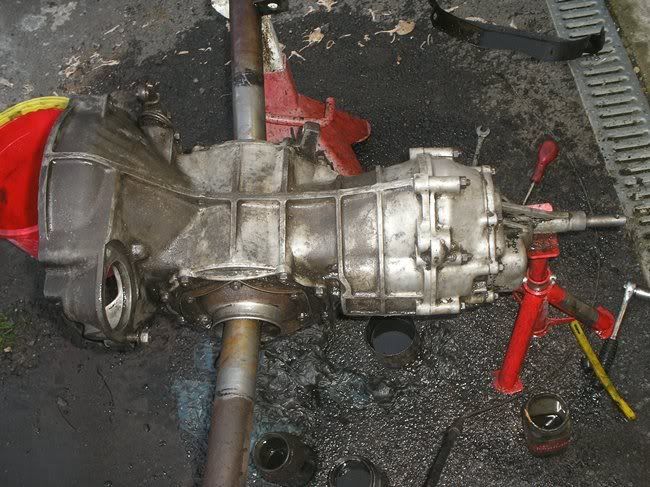

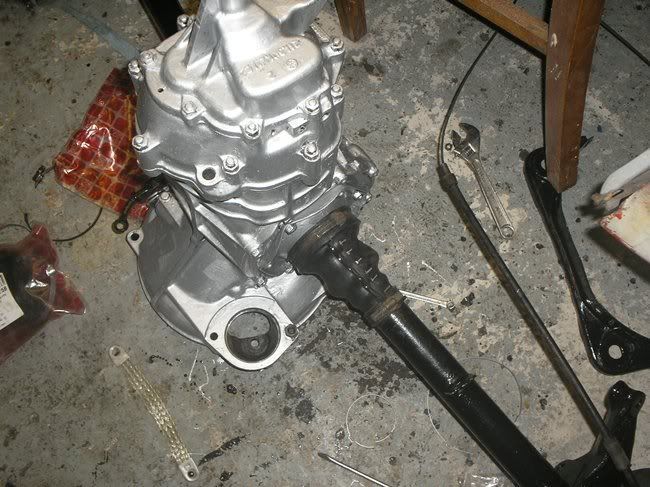
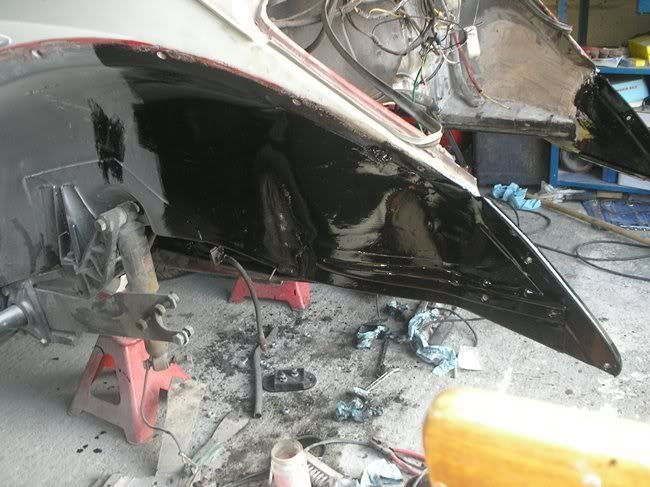
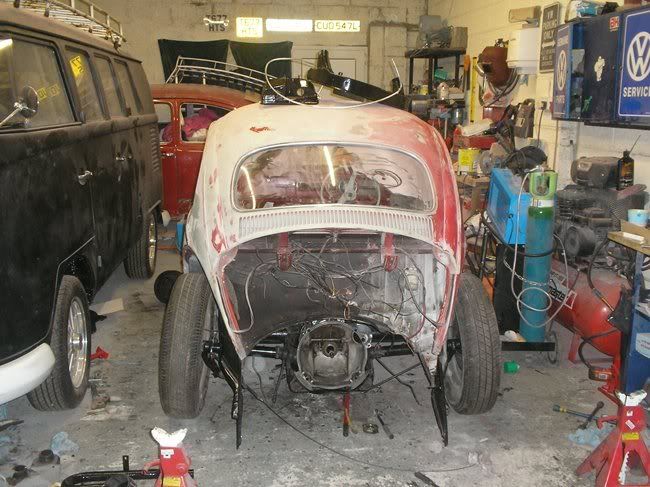
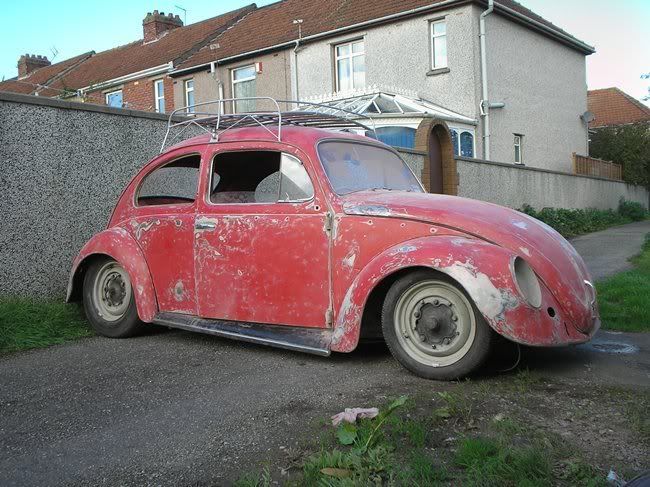
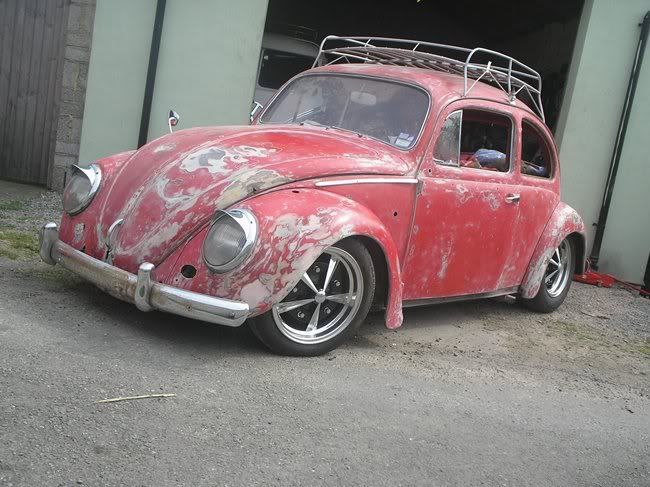
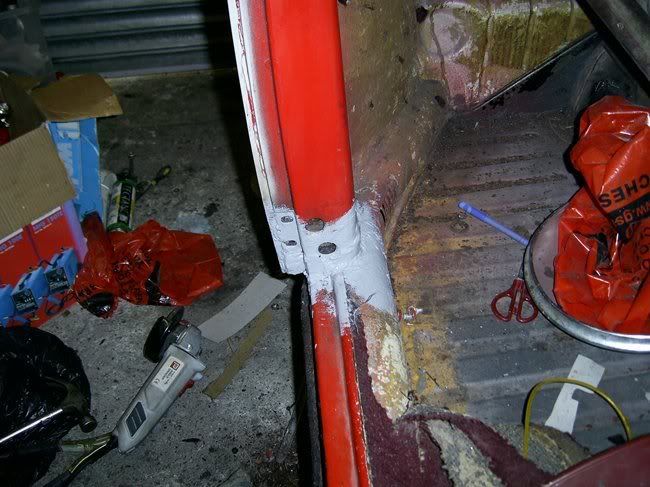
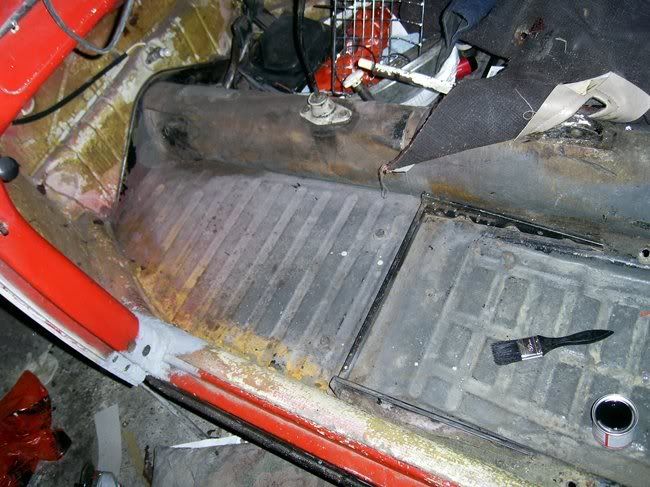
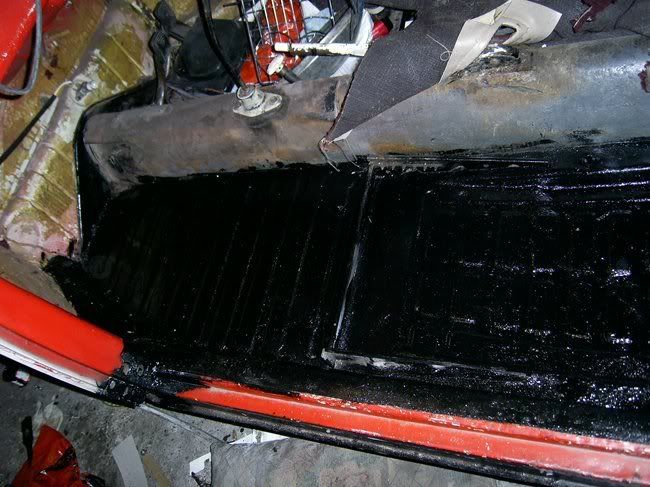
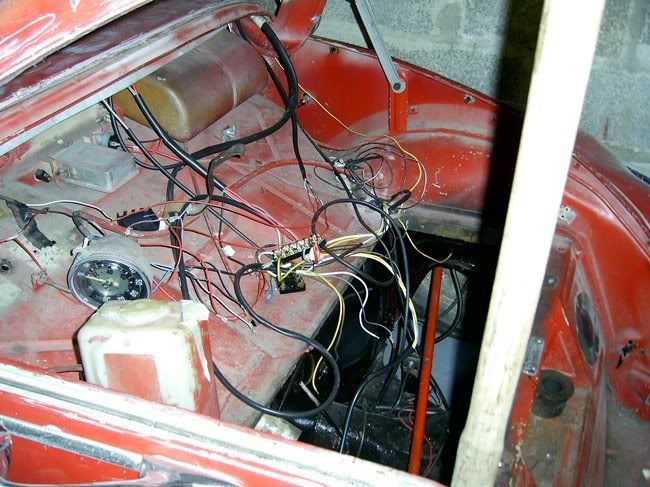
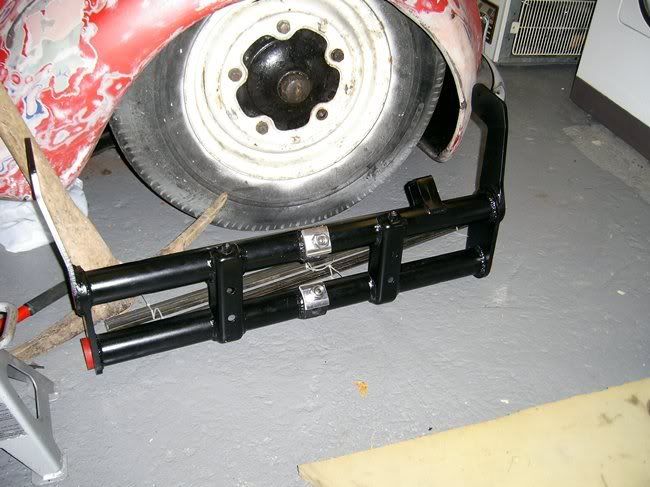
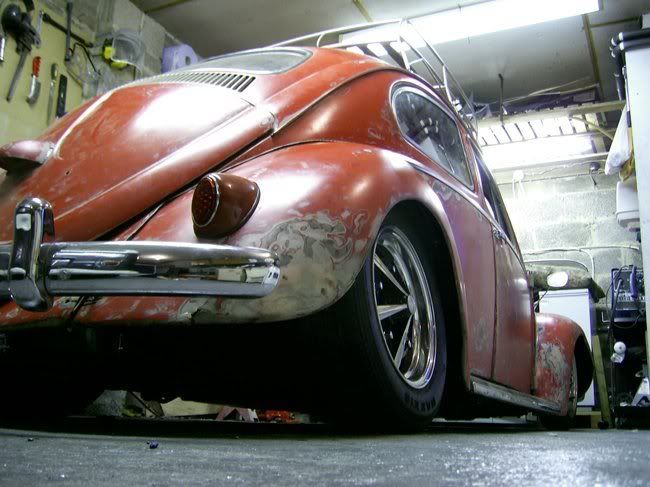
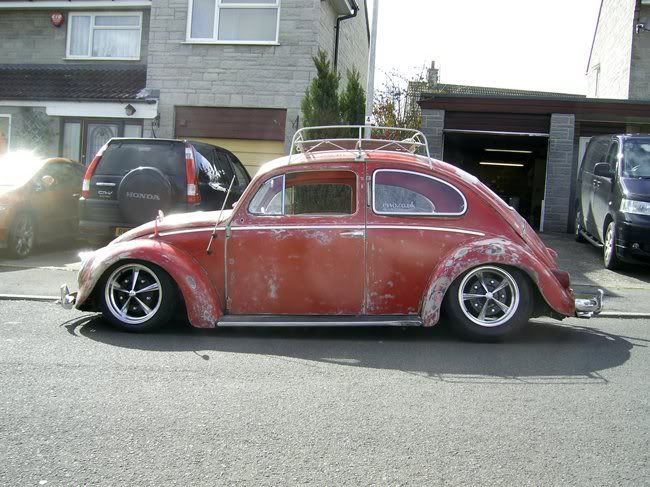
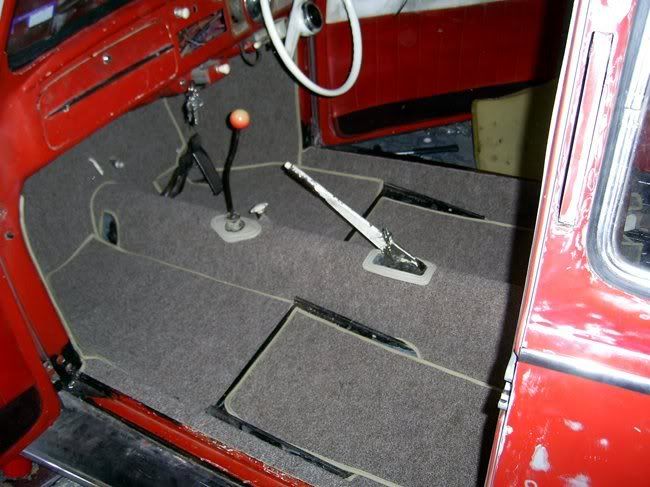
And after all that, hopefully she'll be ready for the MOT test soon (our version of your roadworthy test).
If you want to see more pics, there's tonnes here:
http://s14.photobucket.com/albums/a309/Shamrockez7/Bella2/
foxy_fuchsia - August 24th, 2008 at 07:47 PM
Wow!! Bella surely is beautiful!
M16S VW - August 24th, 2008 at 10:26 PM
thank you 
vwpizza - August 24th, 2008 at 11:43 PM
Gday Mate,
Nice Beetle I like Her ... I also like your half Rotisserie,is that a purchased item or have you made it ????
cheers Dean...
M16S VW - August 25th, 2008 at 01:46 AM
the roll over frame? We bought that from a company here in the UK to roll our Splitty over to do the welding on him - being a UK bus he needed a lot

The same can be achieved with some matresses though.
I must say - it is a pleasure to work on Bella after being used to working on UK VWs! I don't think I found one siezed bolt/nut and I wasn't worried
about finding 'nasty suprises' when i removed any panels.
Aussie - August 25th, 2008 at 01:31 PM
Have you got any details on the narrowed beam you have there? Who made it, how narrow, does it clear the body with no other mods???
bugboymatt - August 25th, 2008 at 02:29 PM
Yep looks great.
Like this picture

izac - August 25th, 2008 at 04:05 PM
awesome! love the look....
byronmcmanus59 - August 25th, 2008 at 04:10 PM
yeah looks great.. iv followed the work you've done on this somewhere else..
where might that have been.. it was on another forum..
anyway love the look good job 
bags - August 27th, 2008 at 08:36 PM
i'm dign it,detailed raiders set it off 
did you make those clamps you used on the rear valance repair,interested to see how they hold the other side of the metal,can you post a few pictures
of diferent angles of the clamp that would be sweet
68AutoBug - August 27th, 2008 at 11:19 PM
Yes, the rear valnce panels were great looking bits..
Did you make the rear valance removeable??
it makes doing anything to the engine [including taking it out] Much much easier...
Thats an Australian made Beetle with the RHS Wipers..
it should have the made in Australia plate in the front.
although many CKD units didn't..
it looks Excellent - love the carpets and the car roller overer - would make painting the underside of the chassis with POR 15 Much easier.. lol
I really don't know How You guys handle the rust problem over there....
My car has multiple coats of stonegard - anti rust paint - spray paint - and closed cell polyurethane foam under the fenders/guards/wings to stop any
stone chips... lol
Not forgetting the many coats of Fish oil before and after the paint.. lol
Lee
sander288 - August 28th, 2008 at 09:05 PM
this was on restowagen.co.uk been following this one for a little while now, but good to see it on an aussie forum!
M16S VW - August 29th, 2008 at 03:20 AM
Cheers for the nice replys everyone 
The beam is a 5in narrowed on by the Bus Station with different shock towers. It needed NO body mods - I was insistent that the beam I got wouldn't
need body mods as her inner wings are as the VW God intended!
These are the clamps: http://www.frost.co.uk/item_Detail.asp?productID=8351&frostProductName=In...
Basically they work by holding a bar on the other side of the metal you're welding. I'll see if I can find one in the mess that is the garage and
take some decent pics of it.
The rear valance was already removable when I got her. Naturally I've kept it that way 
I thought the wipers were like that on all ealy Beetles? They are on my friend's Swedish import (lhd) Beetle... altho my 71 RHD has wipers which go
the other way.
We mostly handle rust by cutting it out and welding in a LOT of new metal lol. Most UK old VWs are covered in POR-15, Hammerite and then smothered in
Waxoyl to keep the rust cancer away!
And yep she's on Restowagen, Volkszone etc etc 
M16S VW - October 31st, 2008 at 09:51 PM
Ok since my last update on here i've taken Bella for an MOT (our version of your roadworthy test, but yearly)... she failed...  but not on too much!
  Mostly stupid things that were my fault - like not doing the bolts on the shocls up tight (doh). Otherwise it's just
adjusting the link pins, playing with the steering and fitting the dubber bushes in the rear suspension.
Got a nice pic of her waiting:
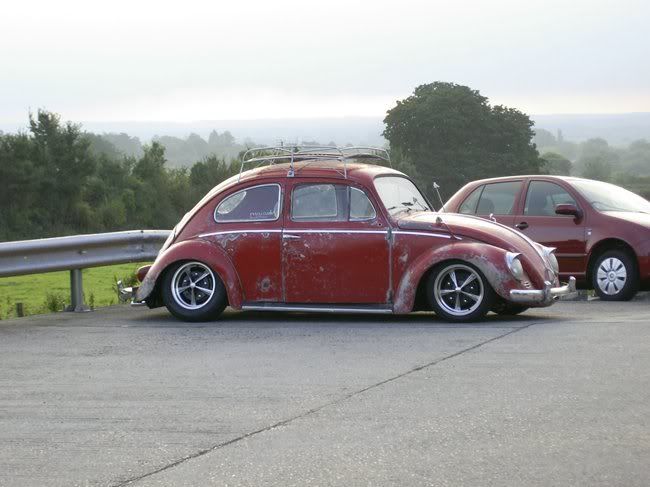
Only a couple hours work to sort out what's wrong, but need to find the time to do it!
Birch Green - November 1st, 2008 at 06:45 AM
AWESOME!
oj ozzy - November 11th, 2008 at 08:59 PM
this is so tuff mann i love it .....bella is so sexc...
tinman - November 12th, 2008 at 05:59 PM
Nice work, love the paint when it was rubbed back. You just can't paint that kind of look. Awesome looking ride.
M16S VW - November 13th, 2008 at 04:31 AM
Cheers fellas  nope you certainly can't paint her like this
  I'm not the biggest rat look fan myself, I like my cars shiny, but I
have to admit that i'm really enjoying having a car I don't have to worry about scratching! Plus the 'worse' I make her look, the more people like
her - ace!
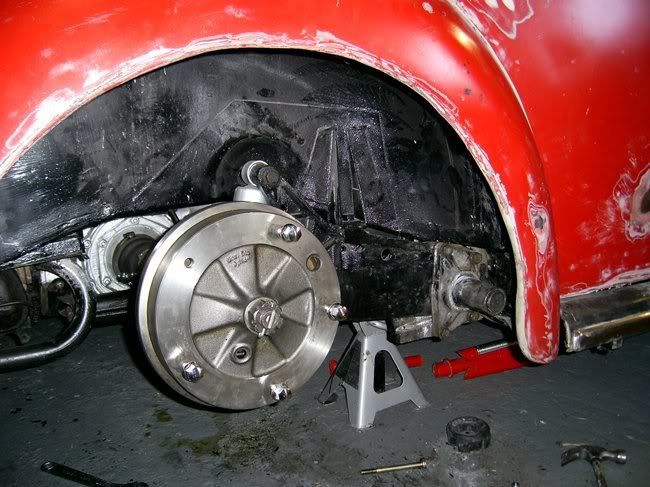
Been replacing the rear suspension bushes this week as they were somewhat worn!
Drivers side done:
Old vs new:
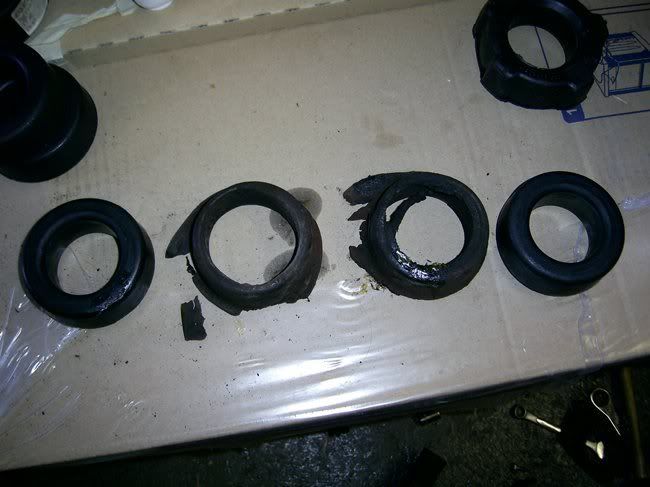
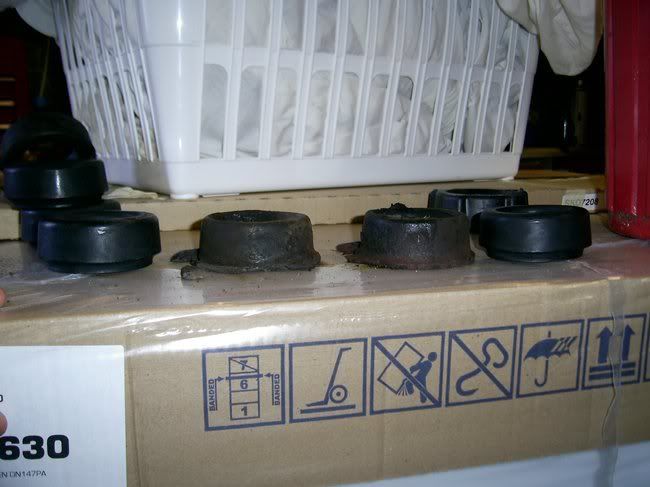
Then we turned her round....
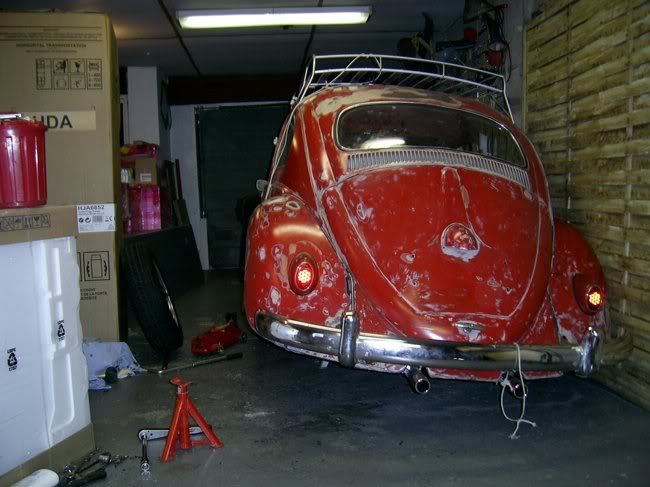
Started on the other side...
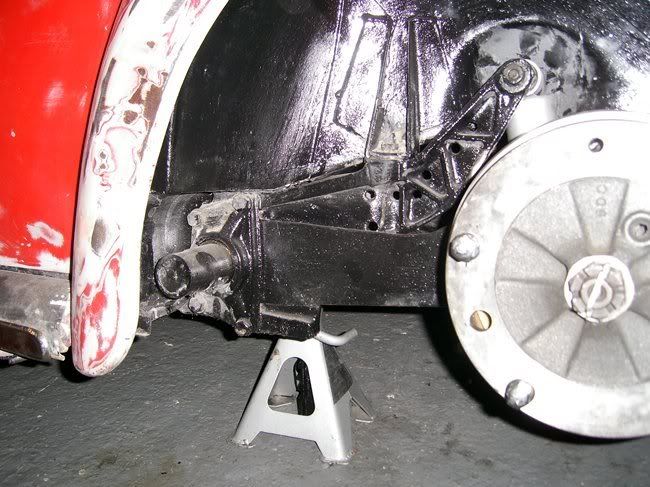
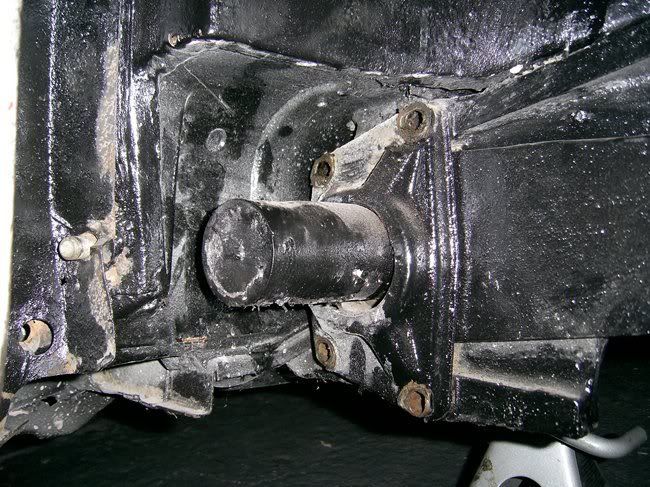
Old vs new:
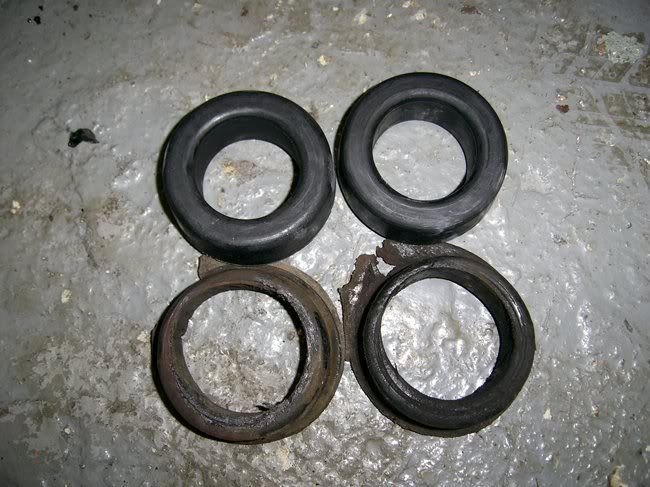
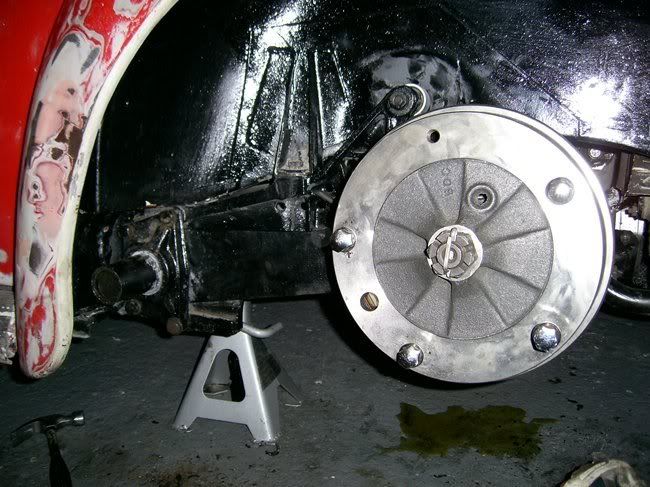
All done - except she thought it would be fun to leak a load of gearbox fluid....
M16S VW - November 18th, 2008 at 04:14 AM
Today I decided to take Bella's engine out to change the clutch and the flywheel oil seal. The clutch has always been dodgy, so waaaay back in about
April I bought a new kit.
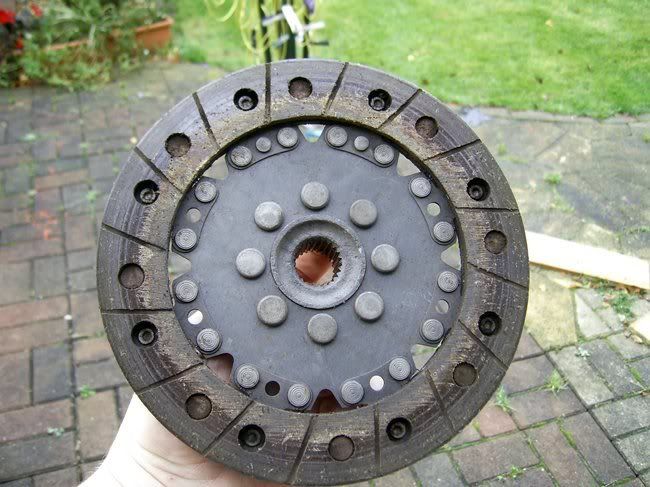
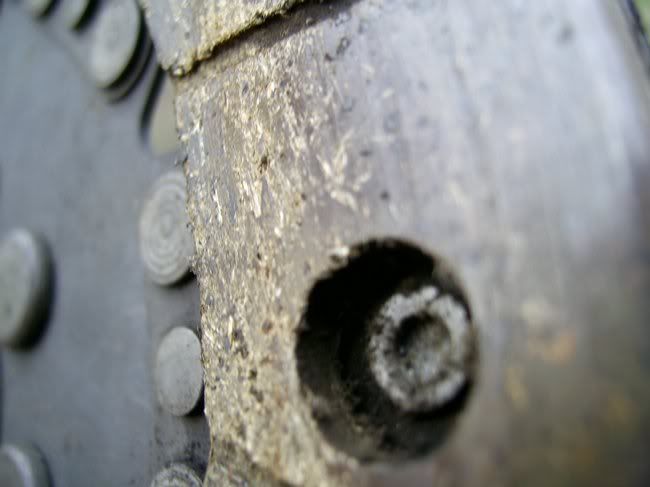
Once the engine was oil and the clutch was out, it was obvious that it had been wearing oddly:
Once the flywheel was off, I found a lot of oil!
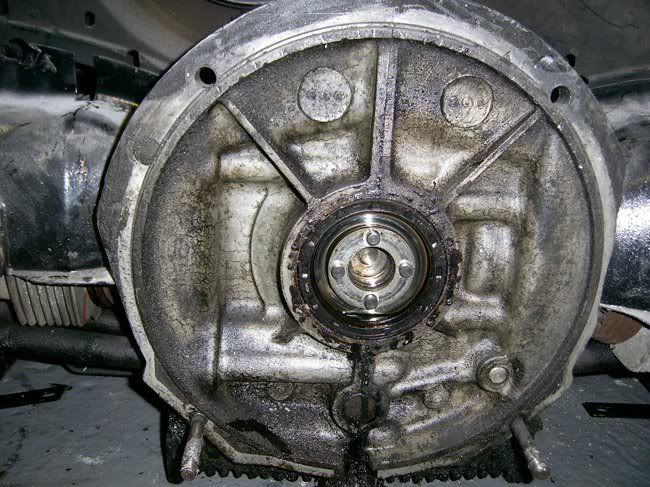
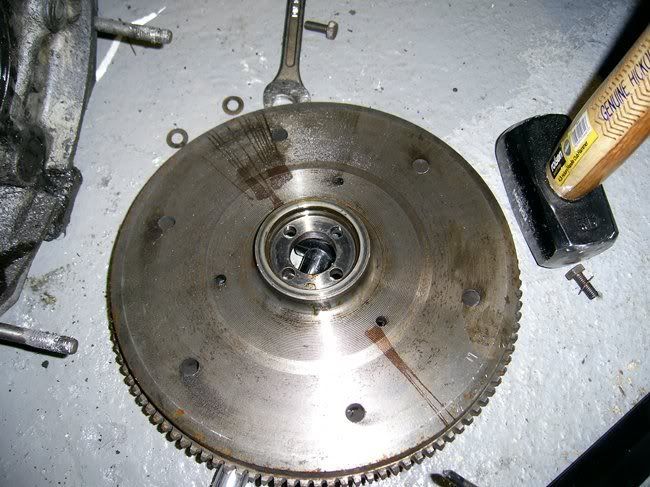
But looked much better once all cleaned up:
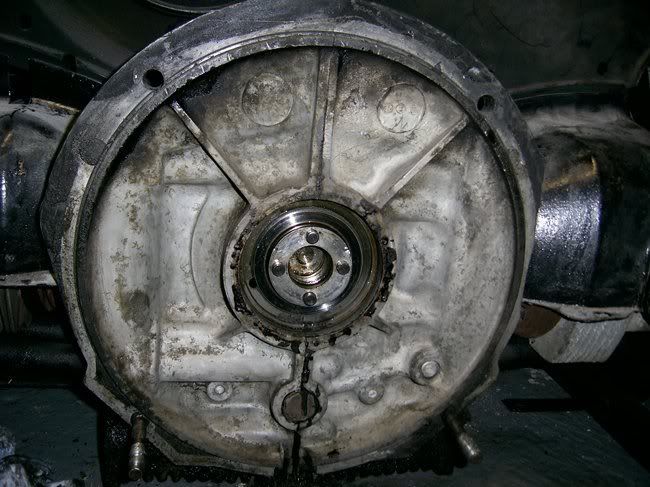
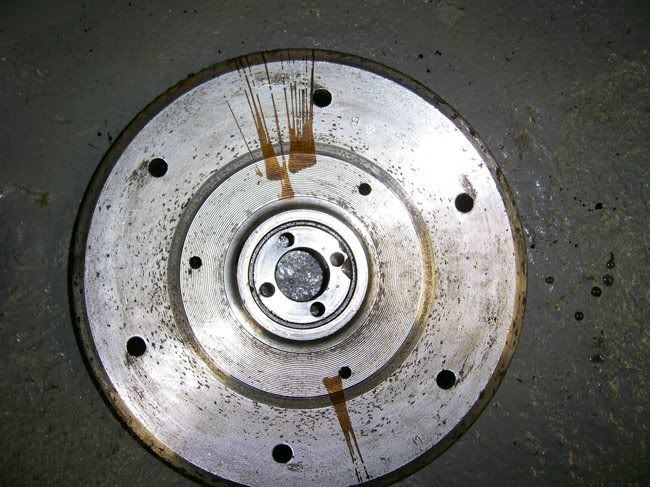
Not sure what the brown stuff is tho?
M16S VW - November 30th, 2008 at 08:10 AM
Not the most interesting update... but here we go anway lol.
I decided to replace the whole clutch assembly - including the release bearing - when I took that off I realised it was quite oily under there, so
decided to replace thew gearbox seal too:
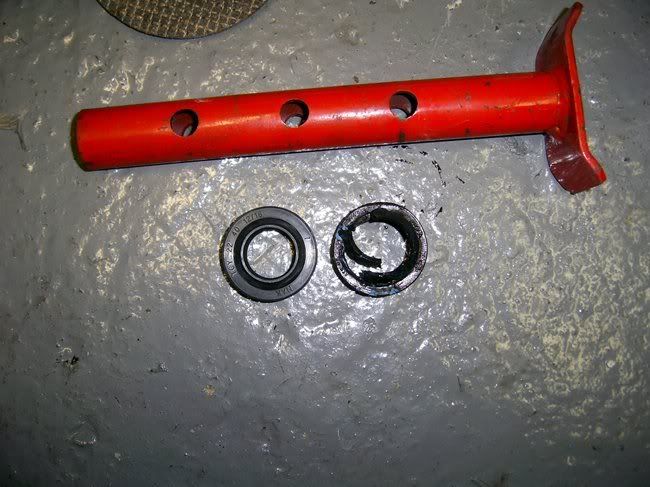
Ok, the old one didn't look that mullered to begin with - but it appears to be impossible to get them out without killing them lol.
So I fitted it, then gave the gearbox a clean up:
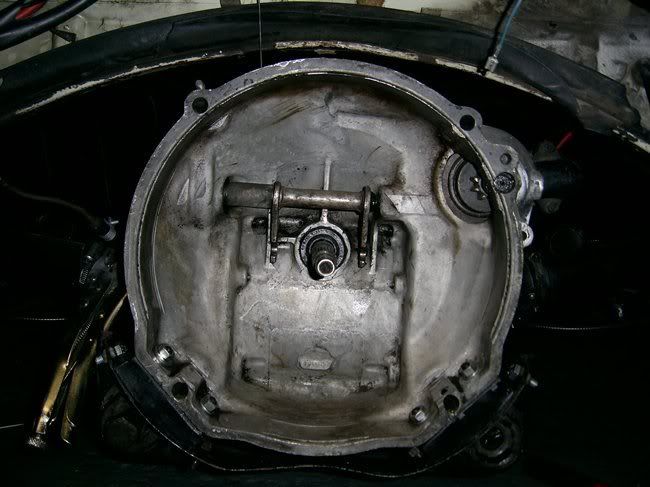
And as I was on a role, I thought it would be wise to fit the flywheel and clutch to the engine... flywheel went on fine, but disaster struck when
tightening up the bolts which hold the clutch to the flywheel.... poo  so
off it came again! In case you can't see, it's the ones at about 2o'clock and 7o'clock:
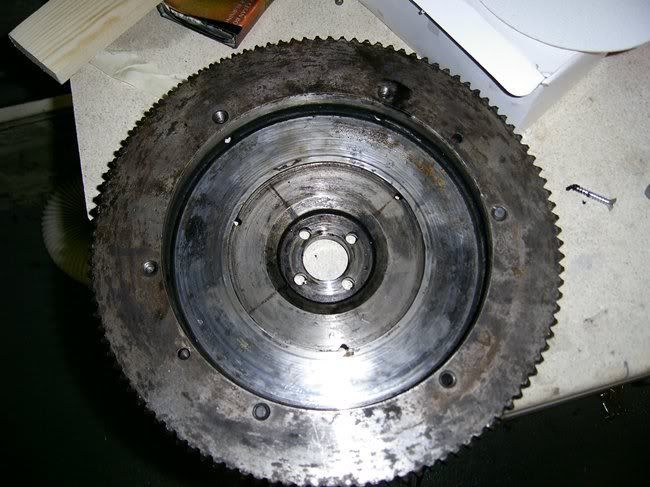
I also tried to fit the new release bearing, but it didn't go on instantly so I gave up lol.
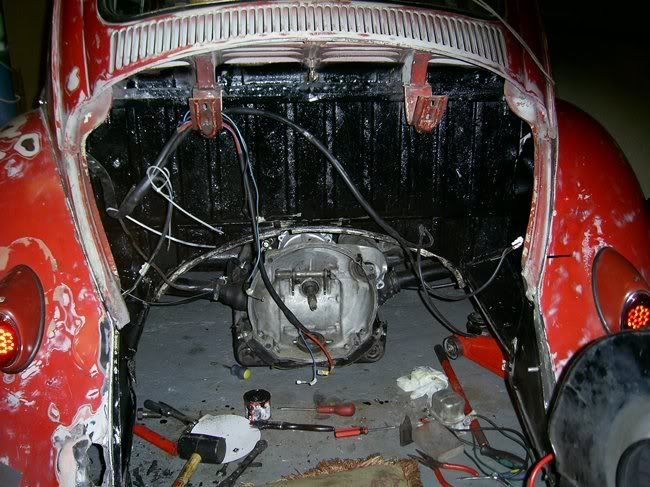
Anyways - today I decided to give the engine bay a lick of POR-15 whilst the engine was out. I know it's 'normal' to have this body coloured, but
I'd rather have it protected as I've seen people have to replace this panel, and no one's said it was fun lol.
68AutoBug - November 30th, 2008 at 04:06 PM
Hi Lucy
excellent photos...
Did you change the front Engine oil seal??
[front of engine behind the flywheel]
when clutches are usually replaced the two seals are usually changed.. as its not worth the trouble to pull it apart a few months later if one
leaks..
Your clutch disc had plenty of lining left..
there must have been a problem for it to wear like that...
nice brake drums...
I always replace the pins and clips that hold the brake shoes in place and the springs... plus the handbrake pin and clip...
I haven't pulled My rear torsion bar pivot rubbers off as yet
I know I have to renew them at some time... lol
cheers
LEE
http://community.webshots.com/user/vw68autobug
M16S VW - November 30th, 2008 at 09:25 PM
Hiya. Yes I've changed the flywheel seal - dunno why I haven't take a pic of it fitted lol. I think the clutch plate must have been siezed on or
something to have worn like that. I was planning on changing the pins and clips etc on the brakes - but you can't get the right length ones for early
brakes - hence having to reuse the old ones - thankfully they were in good condition.
The rubbers weren't the most fun job to do, to be honest - I had to pull everything together using a combination of bolts - starting from long ones
and working down to get it to fit. If you need to do this - I found that the top (normal one, not D shaped) engine bolt was ideal!
M16S VW - December 1st, 2008 at 03:02 AM
I managed to get the broken bolts out of the flywheel worryingly easily after advice from Moby:
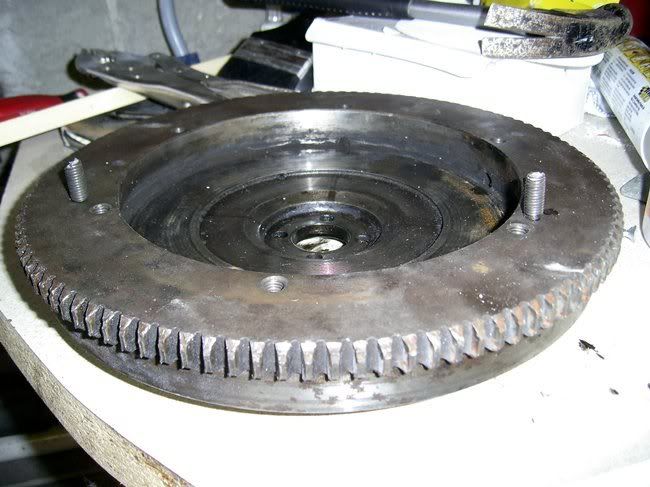
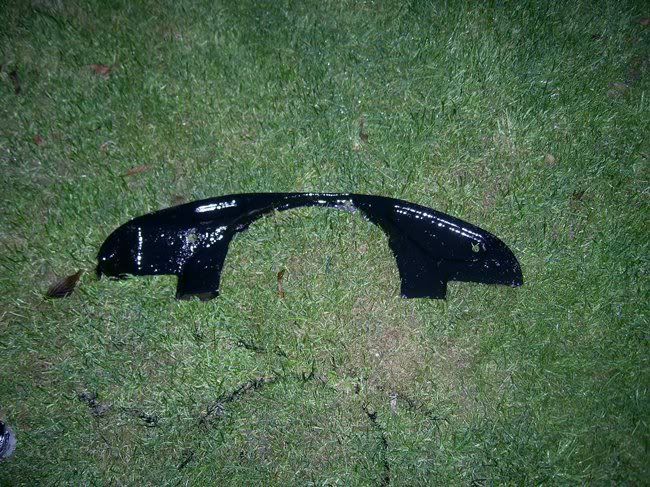
Painted the rear tinware:
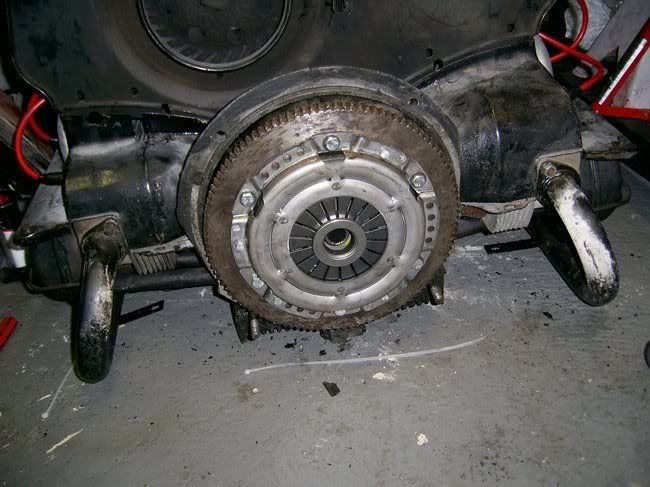
Refitted the flywheel and clutch:
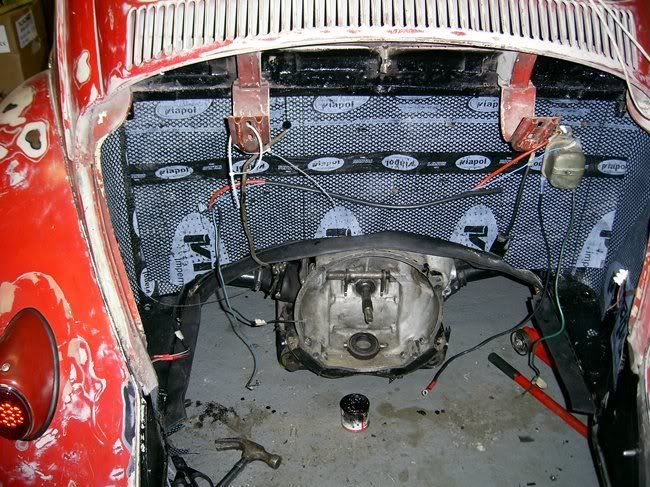
And fitted the firewall, engine bay seal and routed the wires so they were in the right places:
M16S VW - December 8th, 2008 at 05:01 AM
Thankfully the clutch bolts came out really easily when tapped with a screw driver - so the flywheel went back on and the new clutch was refitted -
this time without breaking any bolts!


Then I put some POR-15 on the over gearbox tin:

Fitted the firewall and engine seals, and tidied up all the wiring.... went from this ('scuse the crap pic):
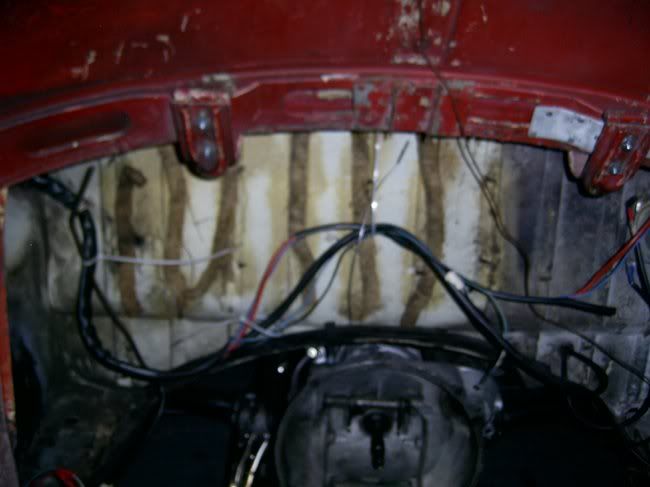
To this:

Bolted the rear tin on:
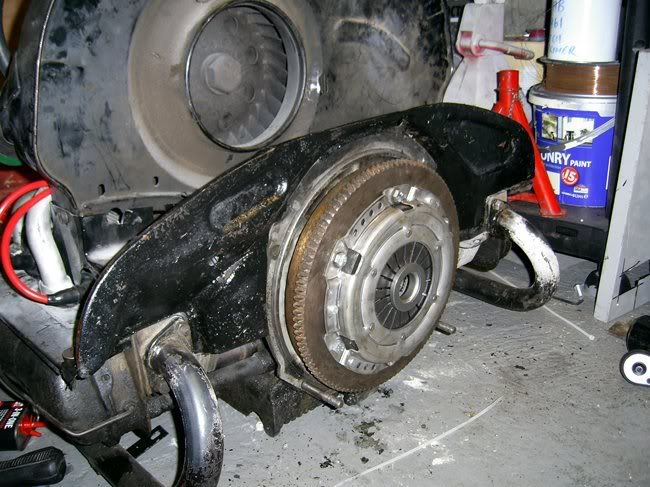
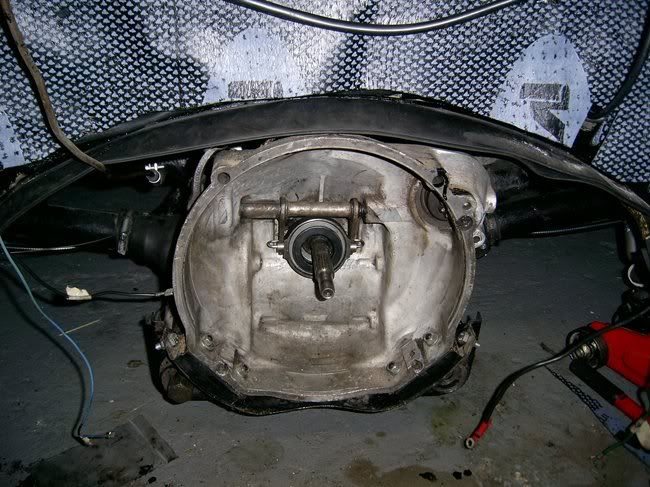
Finally got the release bearing on, and fitted new rear mounts:
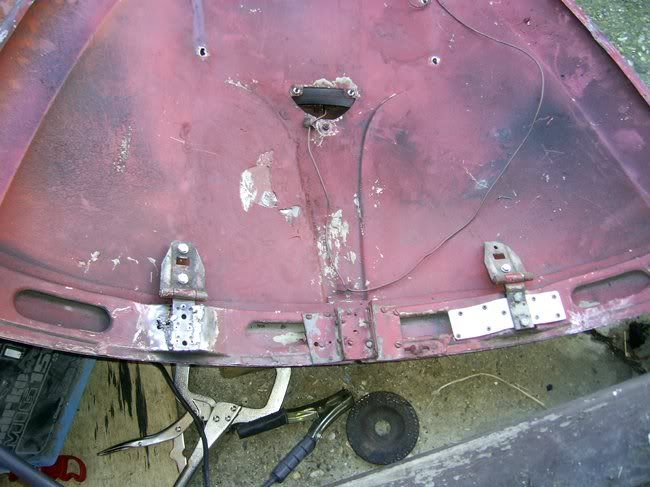
Next I looked at the decklid. It's never shut very well, and always been a bit wobbly.... and now I know why!
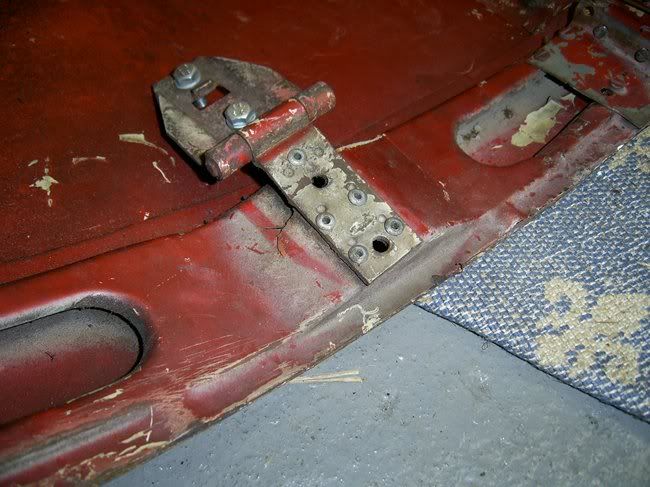
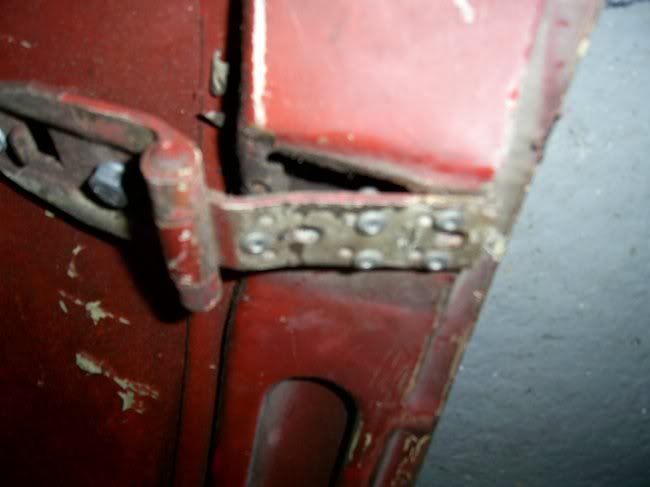
Not quite sure how this happened, as the rest of the decklid is straight and rust free... odd! The other side was the same, except it has a long late
pop rivited over it.
So I welded the hinge on - not the best of jobs, and I couldn't finish welding up the stress crack because it was heating up the lid and burning the
paint on the outside, which I didn't really want to do - but it's now it's not all wobbly!
Then with Steve's help we refitted the decklid complete with spring which I haven't refitted since I took it off not long after I bought her, so the
decklid has been held up with a broom or some string tied from the roofrack!..... however, Bella didn't want it and took a chunk out of my thumb in
anger!  so we gave up for a while, then when I (stupidly) went back for
more, she took another chunk!
  there was some crying, things got thrown (at
her), ebay was threatened.... at which point Steve came in to help and we managed to fight her and win!
  I'm never taking the decklid off again, and now my thumb really hurts! But still - look at how pretty it
looks holding itself up!
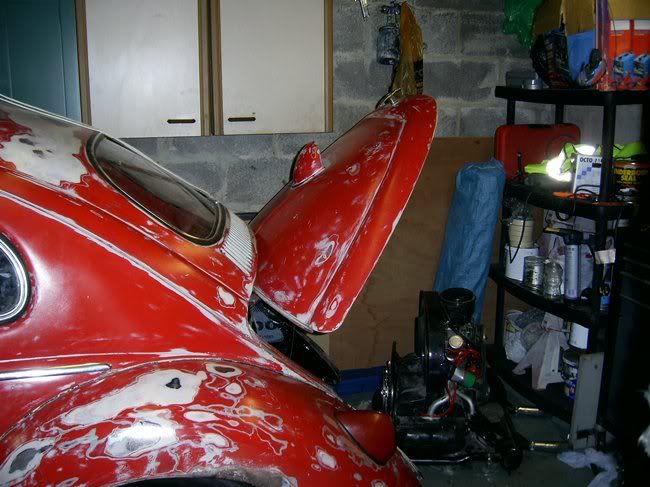
I'm a little worried that she likes the taste of my blood... I always seem to end up bleeding when I work on her... devil car!
Anyway - she's ready for me to fit the engine back in once Steve is feeling better (man flu!). I daren't attempt this on my own - if she can eat my
thumb with her decklid, I don't want to think about what she can do with an engine! :shock:
M16S VW - December 10th, 2008 at 11:59 PM
Ever since I've owned Bella, she's had 'issues' with closing her doors. They would only ever do the first click, and refuse to do the second one
needed to secure them properly. Infact, it was so bad when I first got her than when I took her for a drive around the lanes where the garage was at
the old house, the passenger door would actually fly open each time I selected second gear! As you can imagine, this wasn't ideal!
After a lot of faffing around with the help of friends adjusting the hinges and catches, the driver's door gave in and started to go to the second
click, but the passenger door remained defiant. We could get it to go to the second click after adjusting the catch, but if you opened the door and
tried again, you'd be back to square one, and unless I wanted to carry screwdrivers around with me and adjust the door each time someone got in or
out, or wanted to keep it permanently locked, something needed to be done!
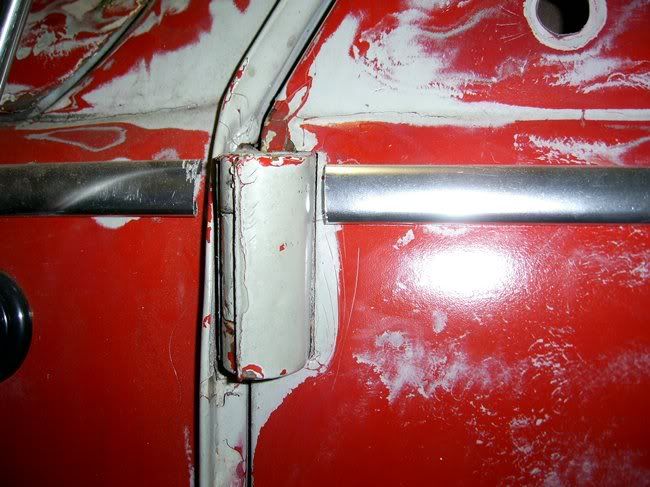
When trying to adjust the door we noticed that the gaps were.... well... you could see though them into the inside! And the hinges had some damage
which indicated that at some point the door had swung open too far and bent the area around the hinges.
How on earth was I going to get round this? My door was too short! Tugging on it didn't make any difference, and I didn't want to get a replacement
door because otherwise this door is good, and I'd never be able to match the paint on the new door!
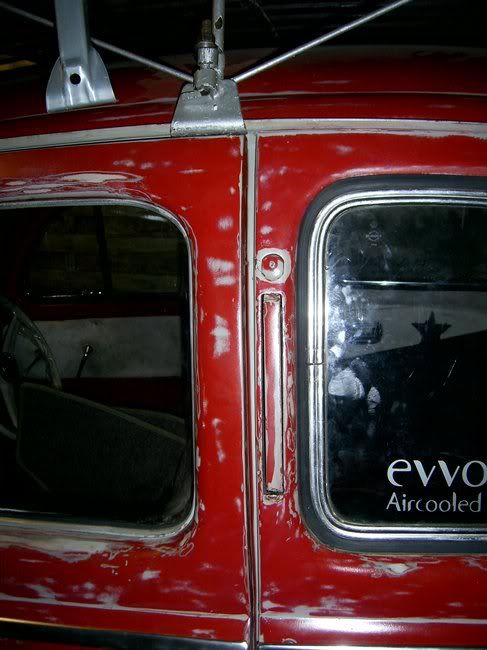
At the bottom the gap was fine, but there was a large gap at the top:
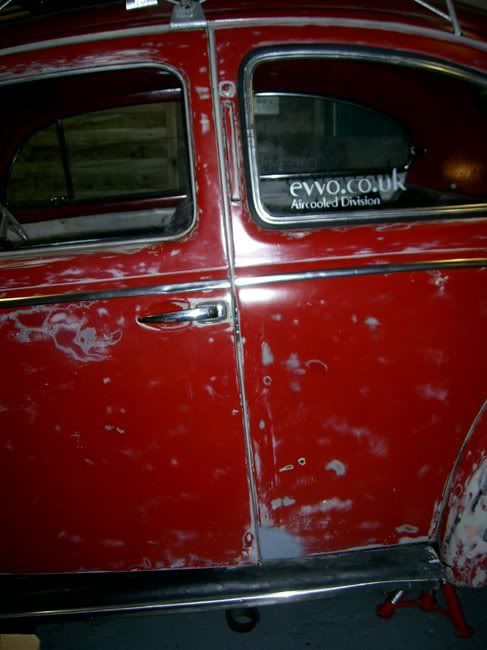
I measured this gap at 10mm!
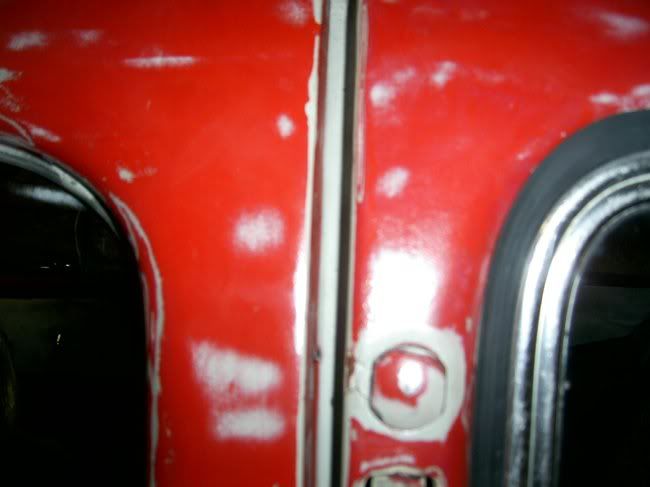
Here you can see the metal behind the bent hinge is creased:
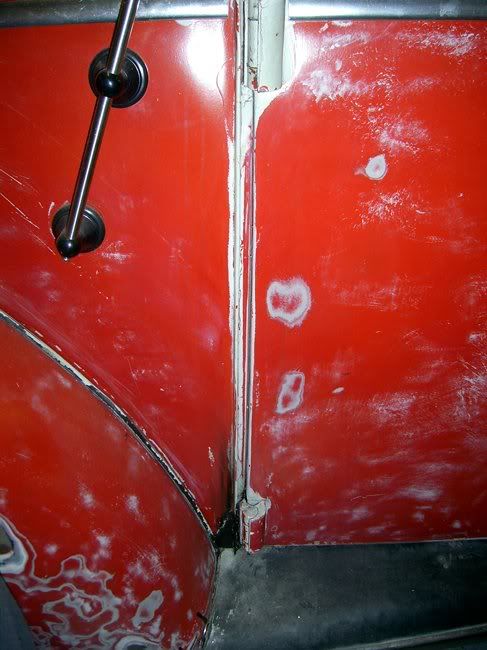
And a close gap all the way down:
So I asked in tech, and Moby came to the rescue with what sounded like the scariest plan in the world - I had to trap some wood in the top hinge, then
shut the door with it in there.... *gulp* this would then bend the hinges back in the right direction and pull the door closer to the B pillar.
I left it a day or so to build up some 'brave' and went out armed with my block of 20mm wood.... took off the catch on the body and took a deep
breath..... closed my eyes and slammed the door.... there was a big crunch from the block of wood... or at least, I hoped it was the block of wood!
Opening one eye at a time I peered at the door gap... and it was smaller! It had worked! Another couple of slams of the door and the gap was about
right:
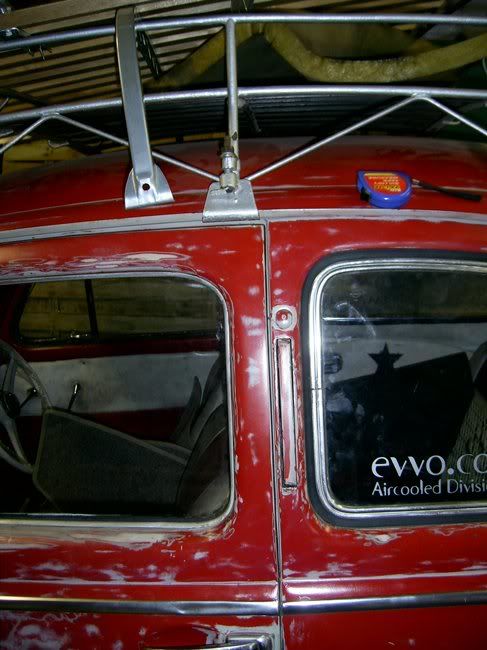
Remember this was a 10mm gap before?
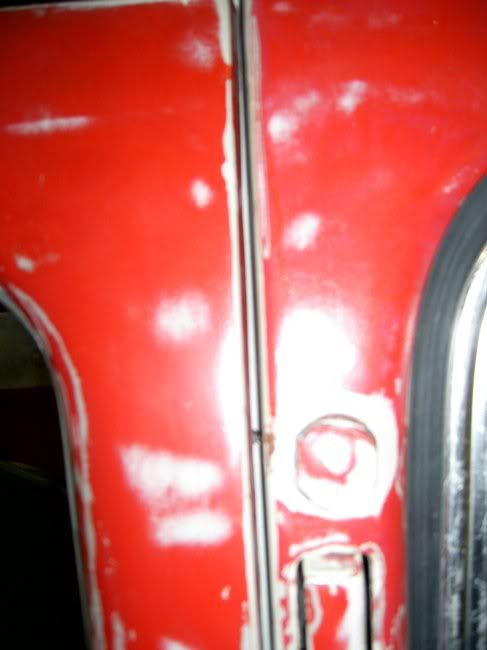
That's more like it!
Gap's a little bigger at this end now, but I can live with that as the 'lesser' of 2 evils.
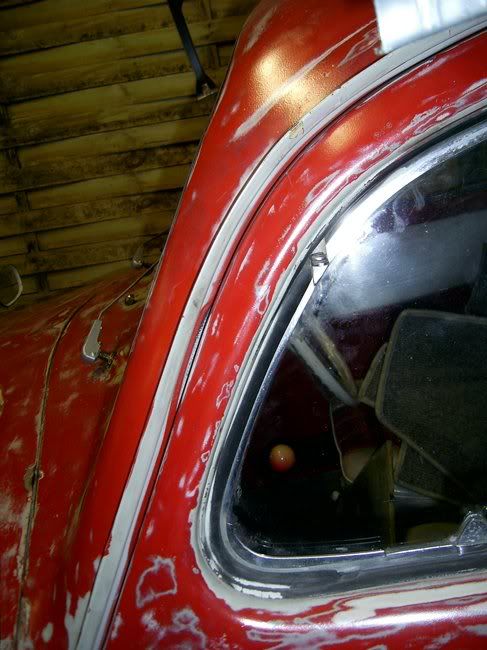
And for the first time since I've had her, both doors now shut to the second click! 


