| [ Total Views: 6353 | Total Replies: 63 | Thread Id: 77899 ] |
| Pages: 1 2 3 |
|
|
 Smiley Smiley
A.k.a.: Daniel Stephens
Veteran Volks Folk
    
Posts: 2125
Threads: 110
Registered: October 29th, 2008
Member Is Offline
Location: Yeppoon, Central Queensland
Theme: UltimaBB Pro Blue
Mood: Synchro'd
|
| posted on July 19th, 2009 at 09:24 PM |
|
|
Alex the Beach Buggy
Picked her up today.
As well as an entire uteload of parts.
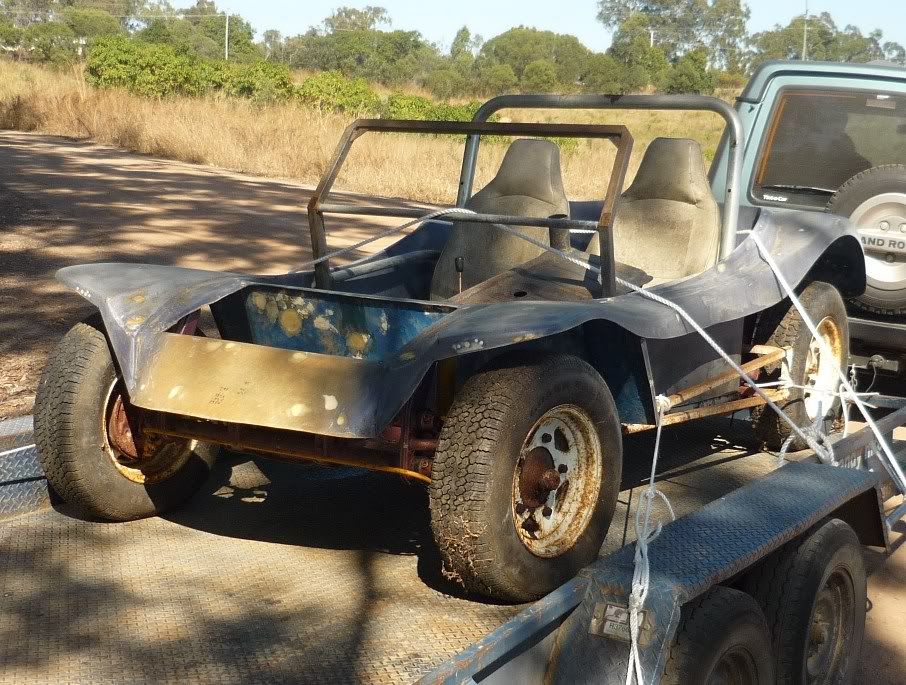
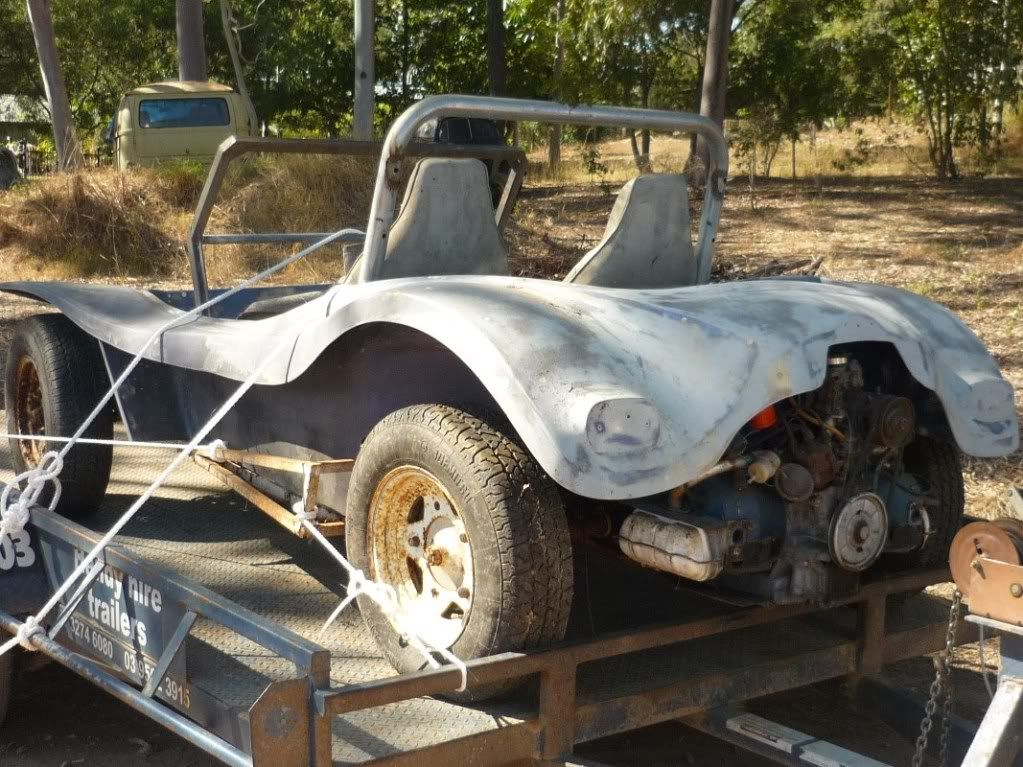
Let the fun commence!!
Smiley 
If you said I was a Volkswagen man, you'd be right.
|
|
|
 Smiley Smiley
A.k.a.: Daniel Stephens
Veteran Volks Folk
    
Posts: 2125
Threads: 110
Registered: October 29th, 2008
Member Is Offline
Location: Yeppoon, Central Queensland
Theme: UltimaBB Pro Blue
Mood: Synchro'd
|
| posted on July 19th, 2009 at 09:30 PM |
|
|
It's going to end up electric green in colour. 1600 twinport with twin carbs, Kombi box, two inch body lift, raised suspension, redo the cage and
nerf bars. I can't wait to start stripping her for sandblasting.
Smiley 
If you said I was a Volkswagen man, you'd be right.
|
|
|
 pod pod
A.k.a.: paul mrvw061
Compulsive Aussie Vee Dubber
i`ve got to finish this thing one day
      
Posts: 4980
Threads: 145
Registered: December 28th, 2003
Member Is Offline
Location: campbelltown,nsw
Theme: UltimaBB Pro Yellow
Mood: could be better
|
| posted on July 19th, 2009 at 09:48 PM |
|
|
looks like a good score,does it have previous rego history?
|
|
|
 VDUBXTC VDUBXTC
A.k.a.: Jace
Wolfsburg Elder
Tea Bag
      
Posts: 3587
Threads: 678
Registered: February 21st, 2003
Member Is Offline
Location: Somewhere on the South side Brissy QLD
Theme: UltimaBB Pro Navy
Mood: swept off my feet by an Ang3l
|
| posted on July 20th, 2009 at 12:13 AM |
|
|
You didn't happen to get a pick of that green bug in the second pic did you?
Looks similar to a bug i had which was on carsales recently.
|
|
|
 Smiley Smiley
A.k.a.: Daniel Stephens
Veteran Volks Folk
    
Posts: 2125
Threads: 110
Registered: October 29th, 2008
Member Is Offline
Location: Yeppoon, Central Queensland
Theme: UltimaBB Pro Blue
Mood: Synchro'd
|
| posted on July 20th, 2009 at 08:17 PM |
|
|
It does have pervious rego history. Came with a massive folder of paperwork I've been sorting though. There's a letter from the transport department
approving the change to a buggy.
VDUBXTC - Green bug? You mean the navy one that can be seen in the background of the buggies rollcage hoop?
Smiley 
If you said I was a Volkswagen man, you'd be right.
|
|
|
 Smiley Smiley
A.k.a.: Daniel Stephens
Veteran Volks Folk
    
Posts: 2125
Threads: 110
Registered: October 29th, 2008
Member Is Offline
Location: Yeppoon, Central Queensland
Theme: UltimaBB Pro Blue
Mood: Synchro'd
|
| posted on July 28th, 2009 at 10:09 PM |
|
|
Made some good headway on the buggy on Sunday afternoon.
Brought all the spare parts and junk down from up the top that came with it and stacked it all in the carport ready to be sorted this week.
Rolled the buggy down the hill and began disassembly.
Seats, rollcage and, bonnet and body were all lifted off as none of these parts were bolted down.
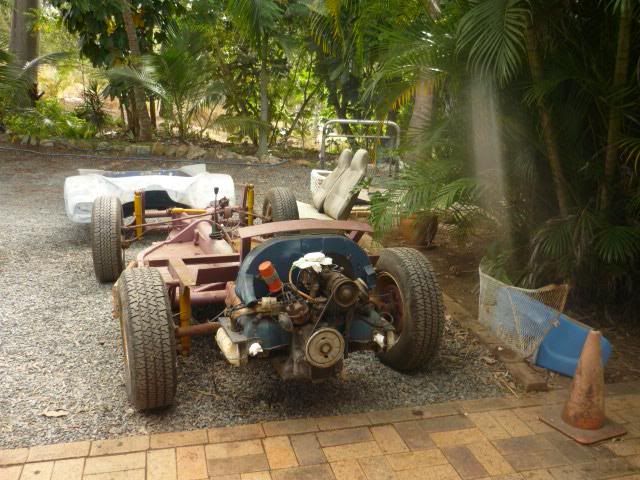
Pulled the engine, then removed the rear body support frame and rear shocks.
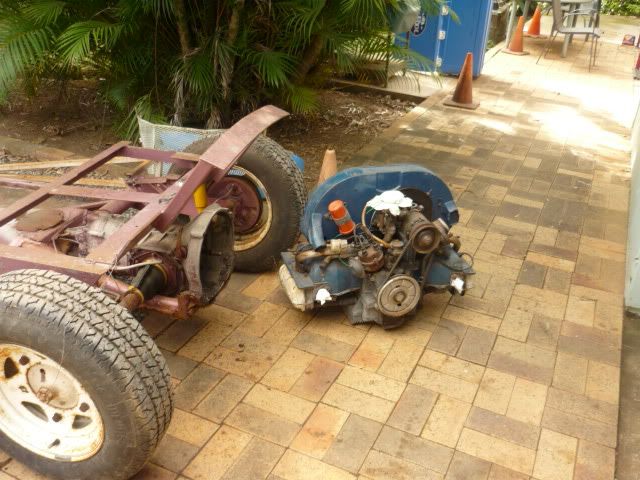
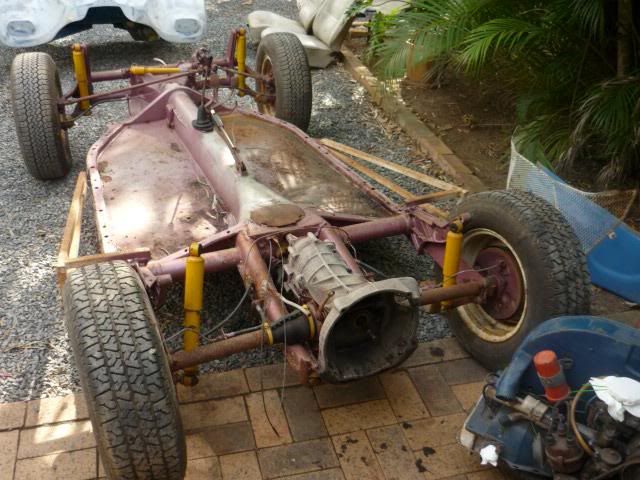
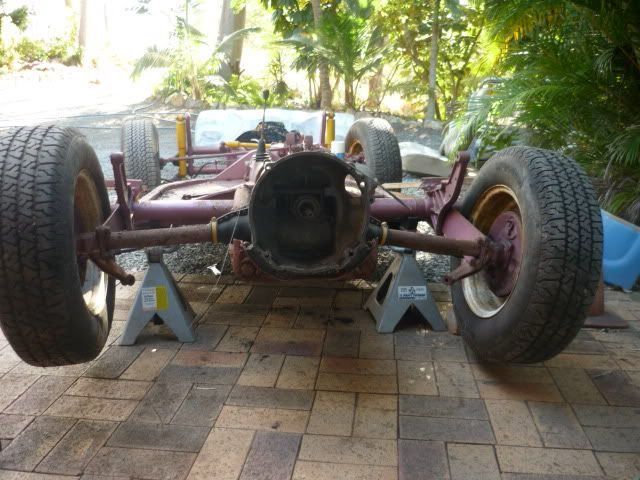
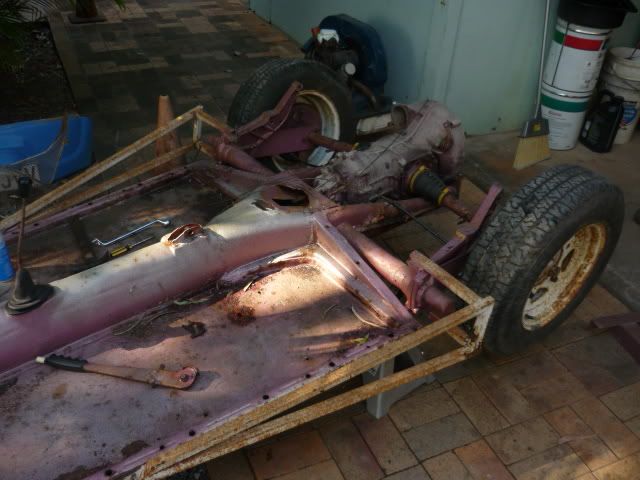
Removed all the rear brake hoses and disconnected the handbrake and removed the lever. Undid gearbox mounts and spring plate bolts and pulled out the
entire rear end, everything between the rear wheels.
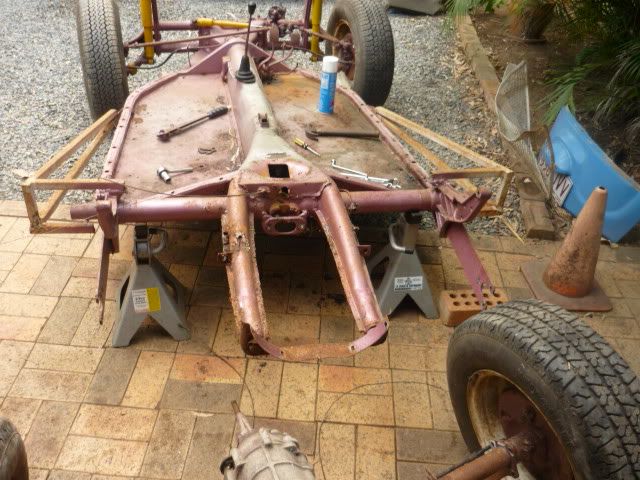
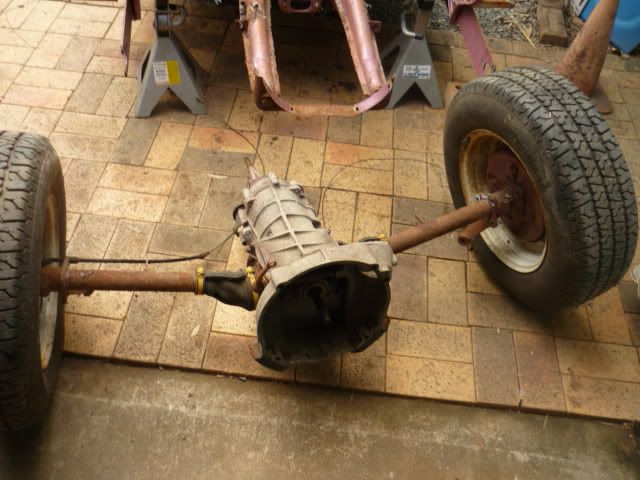
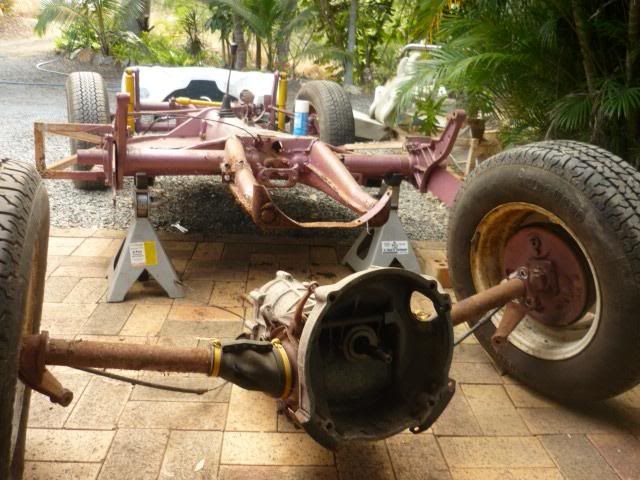
Four bolts and two brake lines later and the frontend was separated.
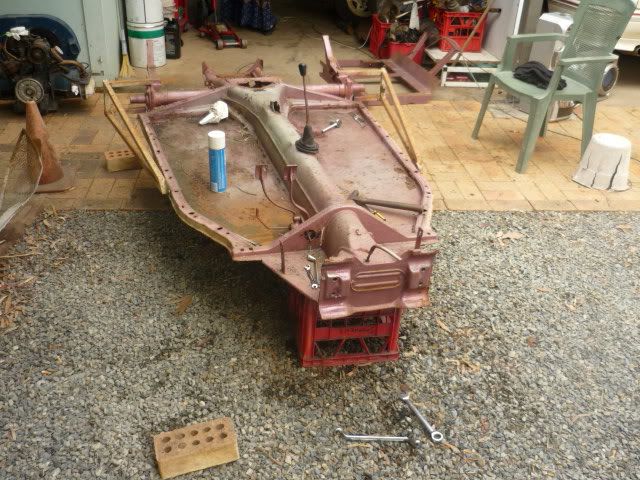
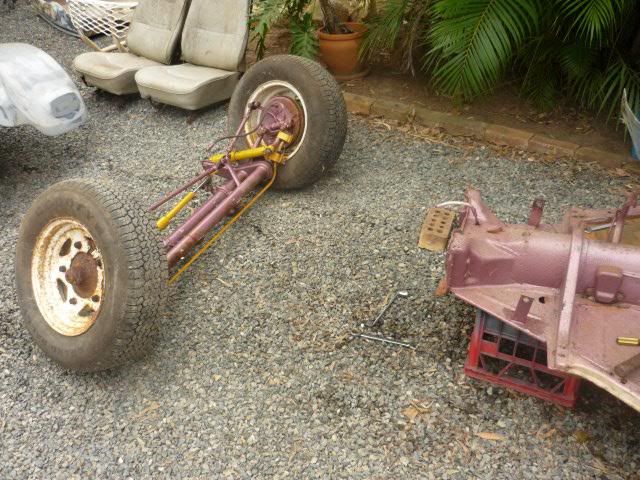
Then proceeded to remove all the little things that were left. Remaining brake lines, master cylinder, pedal assembly, clutch and accelerator cables,
gearstick and shifter rod, gearbox mount.
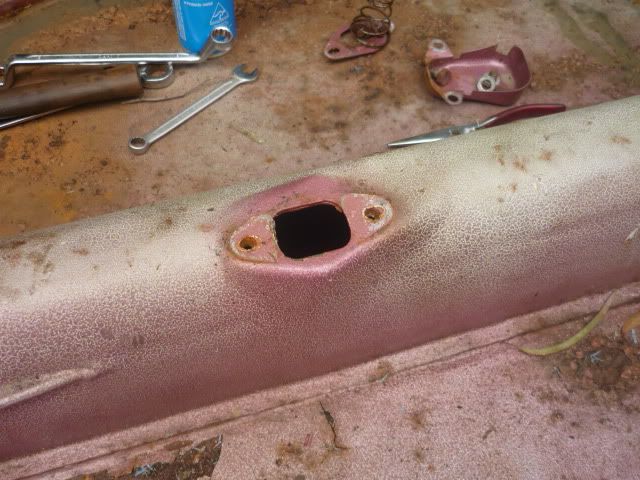
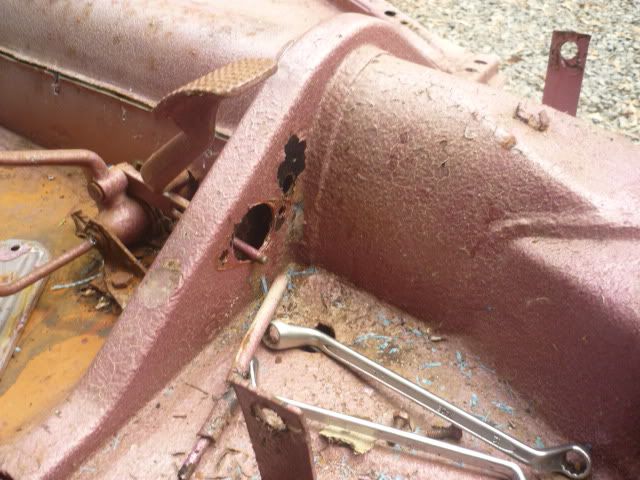
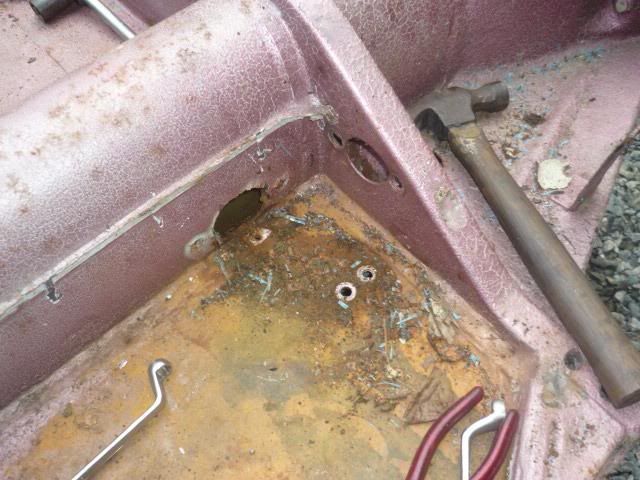
There was a bit of water in the tunnel cause it rained Saturday night plus heaps of dirt and scale and gunk. So I stood the pan on its end and flushed
the tunnel out with a hose for a while, in both directions and with the pan both ways up.
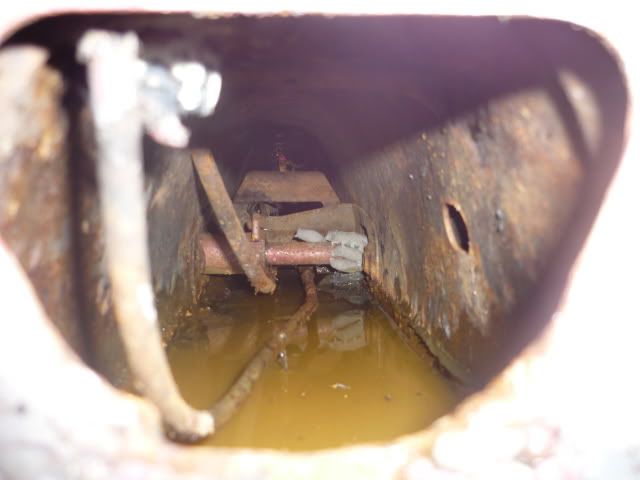
Floorpan is now on stands waiting to go to blasters on Thursday, was meant to go tomorrow but the trailer I borrowed has no lights working so I'll
have to fix that tomorrow afternoon.
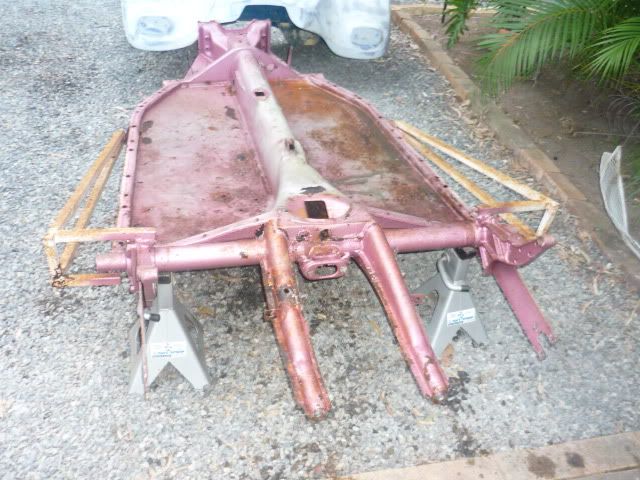
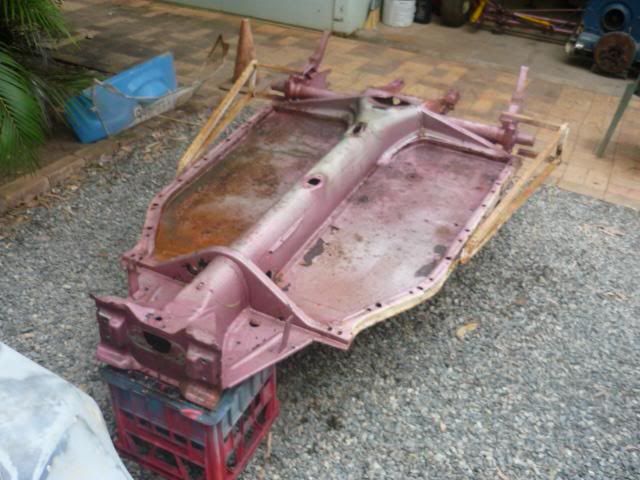
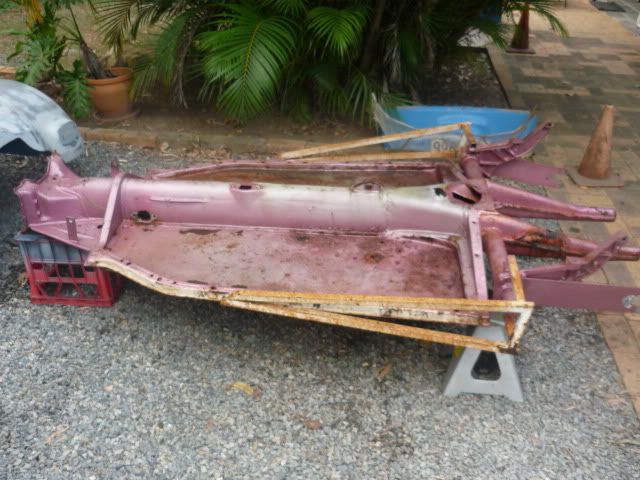
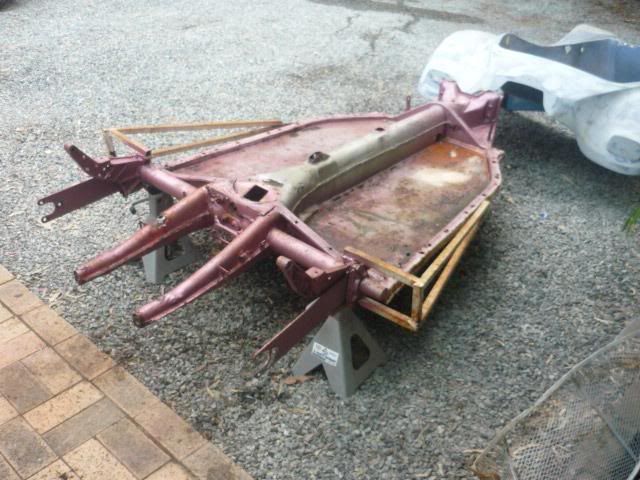
I also spent about 4 hours sorting through all the parts last night, separated them into junk to throw away, stuff for the buggy and other parts to
box and store. I also cut the nerf bars from the floorpan yesterday afternoon.
I am looking to buy my first welder this week so I can begin mods to the floorpan once I get it back from blasters.
Thanks for reading.
Smiley 
If you said I was a Volkswagen man, you'd be right.
|
|
|
 Smiley Smiley
A.k.a.: Daniel Stephens
Veteran Volks Folk
    
Posts: 2125
Threads: 110
Registered: October 29th, 2008
Member Is Offline
Location: Yeppoon, Central Queensland
Theme: UltimaBB Pro Blue
Mood: Synchro'd
|
| posted on July 29th, 2009 at 08:26 PM |
|
|
Some before pictures of the buggy assembled before strip down began.
| Error |
| Sorry, you must be a registered user in order to download attachments. |
|
| Error |
| Sorry, you must be a registered user in order to download attachments. |
|
| Error |
| Sorry, you must be a registered user in order to download attachments. |
|
If you said I was a Volkswagen man, you'd be right.
|
|
|
 Smiley Smiley
A.k.a.: Daniel Stephens
Veteran Volks Folk
    
Posts: 2125
Threads: 110
Registered: October 29th, 2008
Member Is Offline
Location: Yeppoon, Central Queensland
Theme: UltimaBB Pro Blue
Mood: Synchro'd
|
| posted on July 29th, 2009 at 08:40 PM |
|
|
On the trailer and ready to head to sandblasters tomorrow. Note the powerhouse tow vehicle. 
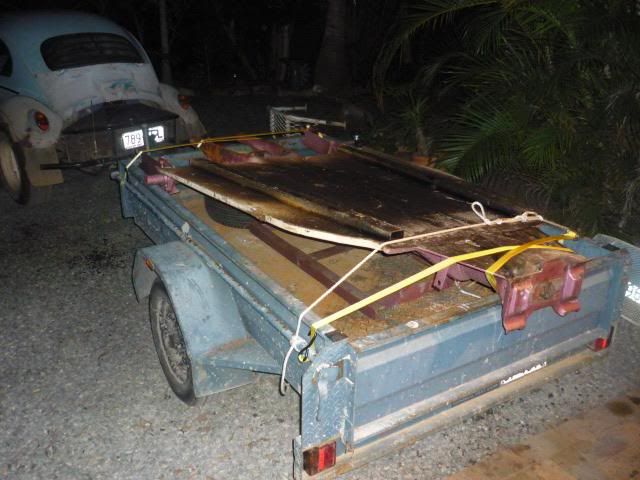
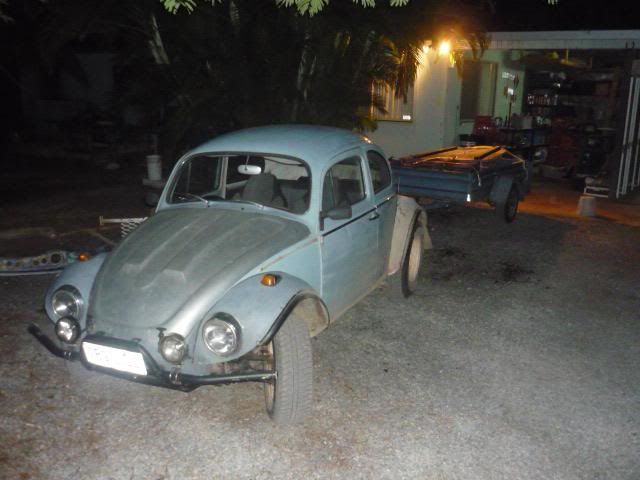
Smiley 
If you said I was a Volkswagen man, you'd be right.
|
|
|
 BlueV2 BlueV2
A.k.a.: Mark
Seriously Crusin Dubber
 
Posts: 193
Threads: 15
Registered: April 22nd, 2008
Member Is Offline
Location: Blacktown - Sydney
Theme: UltimaBB Pro Blue
|
| posted on July 29th, 2009 at 09:54 PM |
|
|
Looks like a nice project. What mods do you have planned for the chassis ?
Sharpbuilt V2, EJ25, Subaru 5 Speed, Falcon rear discs, Heater & A/C, Rack Steering
|
|
|
 Smiley Smiley
A.k.a.: Daniel Stephens
Veteran Volks Folk
    
Posts: 2125
Threads: 110
Registered: October 29th, 2008
Member Is Offline
Location: Yeppoon, Central Queensland
Theme: UltimaBB Pro Blue
Mood: Synchro'd
|
| posted on July 29th, 2009 at 10:09 PM |
|
|
Depending on the condition of the floorhalves it might be getting two new checkerplate ones. Welded 2" lift kit, IRS conversion on the back, Kombi
gearbox, framehead clearance for the long tie rod end. And seam weld all the spot welded joins.
Smiley 
If you said I was a Volkswagen man, you'd be right.
|
|
|
 Lovebuggy Lovebuggy
Seriously Crusin Dubber
 
Posts: 156
Threads: 21
Registered: December 29th, 2008
Member Is Offline
Location: Ipswich
Theme: UltimaBB Pro Blue ( Default )
Mood: Making it happen
|
| posted on July 30th, 2009 at 07:23 PM |
|
|
If you are going to do new checkerplate floors, then you will want a 3 inch c hannel lift kit.
You may also want to consider a clutch access hole and moving the gearstick back 3 inches.
|
|
|
 Smiley Smiley
A.k.a.: Daniel Stephens
Veteran Volks Folk
    
Posts: 2125
Threads: 110
Registered: October 29th, 2008
Member Is Offline
Location: Yeppoon, Central Queensland
Theme: UltimaBB Pro Blue
Mood: Synchro'd
|
| posted on July 30th, 2009 at 10:18 PM |
|
|
Why would you need to move the gearstick back?
It's not that hard to reach is it?
And what do you mean when you say 3 inch channel?
Can you put up a description? Or pictures would be great. Could someone please let me know if I have to get a welded 2 inch lift kit engineer
approved? Or do I chalk it down to floorpan stiffening as per the buggy manufacturers recommendations?
Smiley 
If you said I was a Volkswagen man, you'd be right.
|
|
|
 Lovebuggy Lovebuggy
Seriously Crusin Dubber
 
Posts: 156
Threads: 21
Registered: December 29th, 2008
Member Is Offline
Location: Ipswich
Theme: UltimaBB Pro Blue ( Default )
Mood: Making it happen
|
| posted on July 31st, 2009 at 12:37 PM |
|
|
On the K&L pans, lots of people like to move it back 3 inchs as it feels more comfortable to reach.
You don't have to do it, but when you talk to people that hadn't, they wish they had.
If you are going to do new checker plate floors, you can but weld them up to the c Channel. This has the added advantage of allowing all your bolts to
remain inside the car away from the elements.
You use a 3 inch Channel in this scenario which is equivalent to putting a 2inch lift on to your standard pan that needs to be bolted down.
I don't think you need to get an engineer report for stiffening and reinforcing the pan (which is what you will be doing).
This work was done by CVD.

Another shot with a Galv coat.

For heaps of info and ideas on building buggies - WWW.MANXCLUB.ORG
|
|
|
 Smiley Smiley
A.k.a.: Daniel Stephens
Veteran Volks Folk
    
Posts: 2125
Threads: 110
Registered: October 29th, 2008
Member Is Offline
Location: Yeppoon, Central Queensland
Theme: UltimaBB Pro Blue
Mood: Synchro'd
|
| posted on August 1st, 2009 at 09:37 PM |
|
|
Time for an update, I've been a bit slack getting photos up over the last few days. I managed to get the floorpan on the trailer Wednesday night and
up to the sandblasters at work Thursday morning. And they exceeded all my expectations by having it done before lunch!! I though I was going to have
to wait till next week.
So I got the pan home Thursday night and got it coated in fish oil to keep the gremlins at bay.
A few things I noticed, the major one is that whoever did the pan last went crazy with silicone sealer on every seam, weld, hole and everywhere.
Sandblasting couldn't remove all of this so I been doing a bit with a scraper and wheel-wheel on the 4" over the last two days.
It has one large rust hole in one of the floorhalves as well as heaps of other holes that must have been for seat mounts, seat belts, cage and other
stuff.
I'm still not sure whether to replace the floorhalves or repair the existing ones. They are flat steel, not checkerplate, so has gotten a bit wavy.
Plus having it stripped back this far I think I should probably build it right the first time. Dad seems to think that the old ones are good enough,
but I think I should go the whole hog now so I don't have annoying little things nagging at me down the track.
Feel free to post your thoughts after you have a look at the pictures.
Smiley 
If you said I was a Volkswagen man, you'd be right.
|
|
|
 Smiley Smiley
A.k.a.: Daniel Stephens
Veteran Volks Folk
    
Posts: 2125
Threads: 110
Registered: October 29th, 2008
Member Is Offline
Location: Yeppoon, Central Queensland
Theme: UltimaBB Pro Blue
Mood: Synchro'd
|
| posted on August 1st, 2009 at 09:47 PM |
|
|
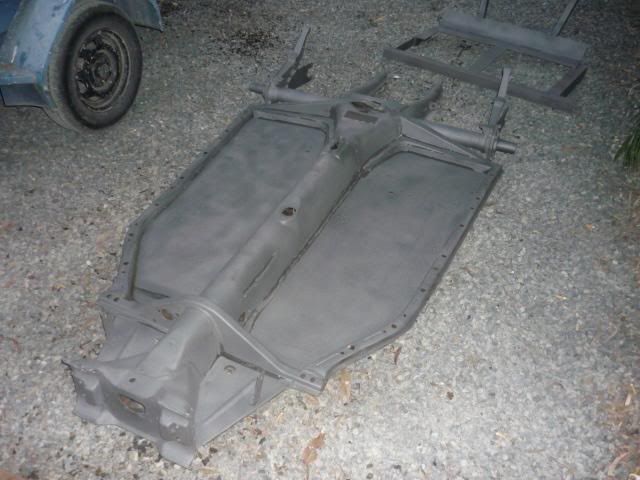
The bare pan getting back to my place from the blasters.
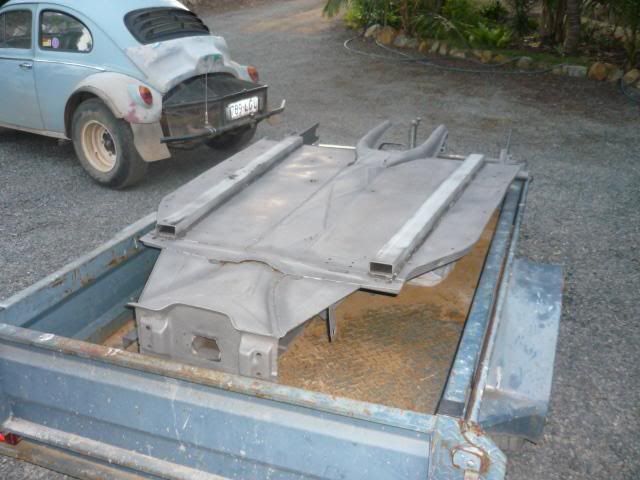
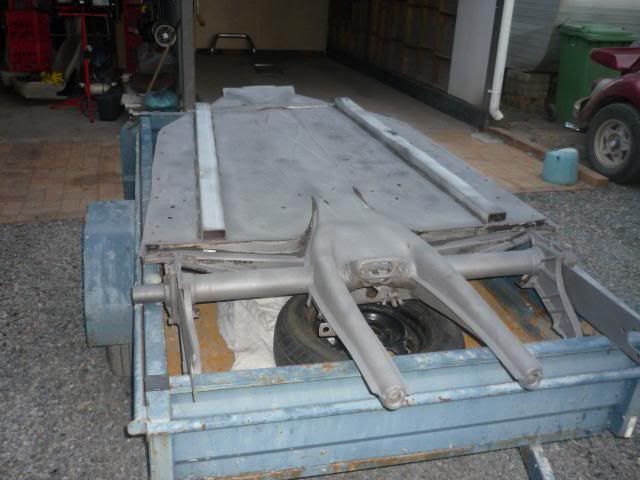
Smiley 
If you said I was a Volkswagen man, you'd be right.
|
|
|
 Smiley Smiley
A.k.a.: Daniel Stephens
Veteran Volks Folk
    
Posts: 2125
Threads: 110
Registered: October 29th, 2008
Member Is Offline
Location: Yeppoon, Central Queensland
Theme: UltimaBB Pro Blue
Mood: Synchro'd
|
| posted on August 1st, 2009 at 09:53 PM |
|
|
What wall thickness C-channel did you use? Is it strong enough? You don't need to put additional bracing anywhere else?
Smiley 
If you said I was a Volkswagen man, you'd be right.
|
|
|
 Lovebuggy Lovebuggy
Seriously Crusin Dubber
 
Posts: 156
Threads: 21
Registered: December 29th, 2008
Member Is Offline
Location: Ipswich
Theme: UltimaBB Pro Blue ( Default )
Mood: Making it happen
|
| posted on August 1st, 2009 at 10:22 PM |
|
|
Get rid of those box section pieces underneath. They will just hit stuff if you are offroading. Or if you do keep them - angle them so they don't
catch on things and weld some plate on the ends to seal them.
If you remove the box sections and the pans aren't thick enough to support your weight, I would replace them with some 2mm checker plate. If they
are, then they will probably be fine once you fix the rust and plug the holes. Then you can just do your 2inch lift kit.
Make sure you weld/seal up your outside rails at the back, as they will be a major rust spot.
The other thing to consider is your bolt and nuts will hang below the floor pan and could be damaged. You may need to push the bolt up from the bottom
and put the nut on from the top, so you will be able to undo them if you ever need to. You will also need to ensure they seal well, so no moisture
gets up into the side rail.
Also you could add extra gussets from the rear torsion tubes to the pan, but be aware of how your engine cage attaches that you won't impede it.
|
|
|
 Smiley Smiley
A.k.a.: Daniel Stephens
Veteran Volks Folk
    
Posts: 2125
Threads: 110
Registered: October 29th, 2008
Member Is Offline
Location: Yeppoon, Central Queensland
Theme: UltimaBB Pro Blue
Mood: Synchro'd
|
| posted on August 1st, 2009 at 11:17 PM |
|
|
It's hard to see in the pictures but both pan halves are slightly rippled, which is why I'm leaning towards new checkerplate floorpans. And what
thickness C-channel?
Smiley 
If you said I was a Volkswagen man, you'd be right.
|
|
|
 Smiley Smiley
A.k.a.: Daniel Stephens
Veteran Volks Folk
    
Posts: 2125
Threads: 110
Registered: October 29th, 2008
Member Is Offline
Location: Yeppoon, Central Queensland
Theme: UltimaBB Pro Blue
Mood: Synchro'd
|
| posted on August 2nd, 2009 at 05:20 PM |
|
|
On another note, does anyone know what kind of buggy mine is? I don't think I've seen one like this before. If you need pictures of specific areas
let me know and I'll throw them up.
Smiley 
If you said I was a Volkswagen man, you'd be right.
|
|
|
 OZ Towdster OZ Towdster
A.k.a.: Andrew Westwood
Custom Title Time!
Keen to finish some projects
    
Posts: 1921
Threads: 132
Registered: December 7th, 2003
Member Is Offline
Location: Alexandra Hills Brisbane QLD
Theme: UltimaBB Pro Yellow
Mood: Having fun in our great land
|
| posted on August 2nd, 2009 at 06:11 PM |
|
|
Smiley the C channel we use is 5mm and as stated by Lovebuggy is 75mm high, although as your body is a J&S you will also benefit greatly from
lifting the body to 100mm body lift as they are reknown for having quite a low front guard and as such without the 75mm lift you will be forever
trying to reduce the front wheels from hitting the inside of the guards .
I personally would probabley lean towards redoing the floors now as from the photos i would say you have quite a lot of area's which have been
modified by the previos owner and are lapped joints etc ( ie the box over the bottom of the floor ), all of which your sandblasting won't of been
able to get at and are more than likley already rusty.
Just my two bobs worth but as you will quickly learn in the buggy world , build it well once and it will never let you down .
Don't let body work get in the way of real suspension travel
|
|
|
 OZ Towdster OZ Towdster
A.k.a.: Andrew Westwood
Custom Title Time!
Keen to finish some projects
    
Posts: 1921
Threads: 132
Registered: December 7th, 2003
Member Is Offline
Location: Alexandra Hills Brisbane QLD
Theme: UltimaBB Pro Yellow
Mood: Having fun in our great land
|
| posted on August 2nd, 2009 at 06:14 PM |
|
|
| Quote: | Originally
posted by smileyman3000
On another note, does anyone know what kind of buggy mine is? I don't think I've seen one like this before. If you need pictures of specific areas
let me know and I'll throw them up.
Smiley
|
As noted in my post above your body is a J & S and if you have the side pods these should have raised lettering just foward of the rear end in a
diamond shaped border
Don't let body work get in the way of real suspension travel
|
|
|
 MR930 MR930
Wolfsburg Wizard
  
Posts: 666
Threads: 73
Registered: August 27th, 2002
Member Is Offline
Location: Nabiac. NSW
Theme: UltimaBB Pro Blue ( Default )
Mood: VW crazy.
|
| posted on August 2nd, 2009 at 06:55 PM |
|
|
Theres one on ebay the same. Low nose J&S. http://cgi.ebay.com.au/ws/eBayISAPI.dll?ViewItem&item=320404119215&ss...
|
|
|
 Smiley Smiley
A.k.a.: Daniel Stephens
Veteran Volks Folk
    
Posts: 2125
Threads: 110
Registered: October 29th, 2008
Member Is Offline
Location: Yeppoon, Central Queensland
Theme: UltimaBB Pro Blue
Mood: Synchro'd
|
| posted on August 2nd, 2009 at 09:09 PM |
|
|
I have no sidepods. But that doesn't really bother me.
I've been thinking quite a bit about it over the last few days and I've decided to go the whole hog now so I don't have to worry about things later
on.
- Kombi gearbox mounts and IRS conversion rear
- new 2mm checker plate floorhalves
- move gearstick back 3"
- add clutch access hole
- seam weld entire pan
- weld seat mounts between the lift kit and tunnel
- frame head clearance for long tie rod
- welded lift kit : would you guys recommend C-channel or Box section? and 3" or 4" if I understand what you were saying above?
Is there anything that I've missed?
Also, do people have links to tech/how to articles on how to do a lot of these things? I'm confident and willing to do them myself, I just really
don't want to stuff anything up.
More specifically clearancing the framehead, moving the gearstick and the clutch hole. But info on everything would be good. You can never have to
much information.
Thanks to everyone so far for their input.
Smiley 
If you said I was a Volkswagen man, you'd be right.
|
|
|
 Smiley Smiley
A.k.a.: Daniel Stephens
Veteran Volks Folk
    
Posts: 2125
Threads: 110
Registered: October 29th, 2008
Member Is Offline
Location: Yeppoon, Central Queensland
Theme: UltimaBB Pro Blue
Mood: Synchro'd
|
| posted on August 2nd, 2009 at 09:15 PM |
|
|
Also, when you say it's a J&S Buggy, is there somewhere I can get more info on it? Eg, production numbers, where it was produced, etc.
Smiley 
If you said I was a Volkswagen man, you'd be right.
|
|
|
 Smiley Smiley
A.k.a.: Daniel Stephens
Veteran Volks Folk
    
Posts: 2125
Threads: 110
Registered: October 29th, 2008
Member Is Offline
Location: Yeppoon, Central Queensland
Theme: UltimaBB Pro Blue
Mood: Synchro'd
|
| posted on August 5th, 2009 at 09:04 PM |
|
|
The front end before I began stripping it down.
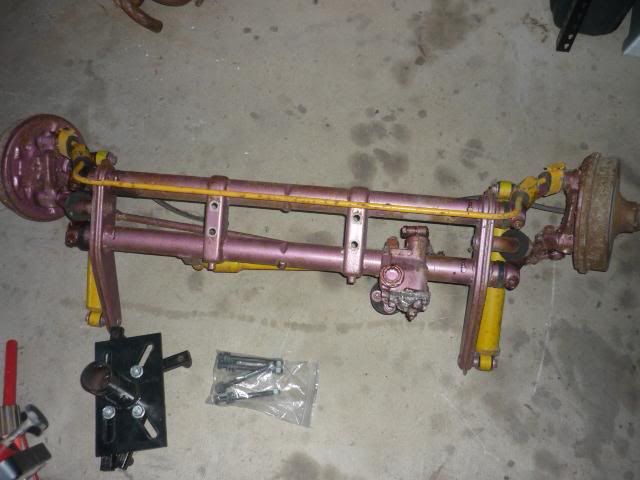
The beam mounted on the engine stand.
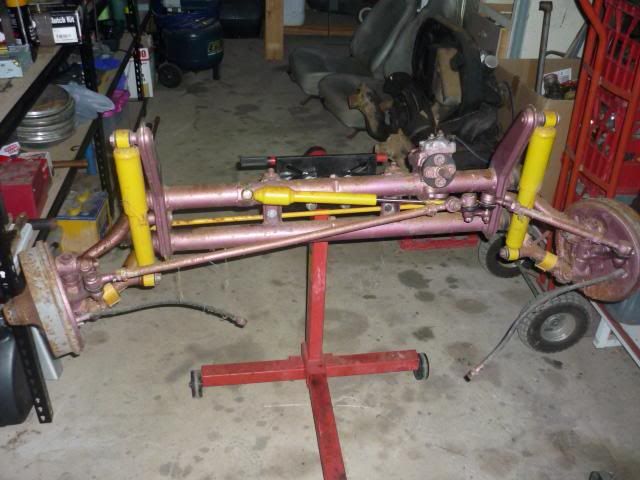
All the yellow bits gone. Shocks, steering damper and sway bar removed.
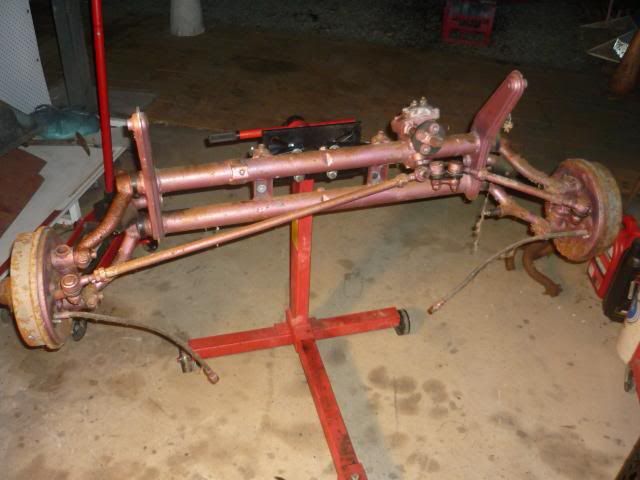
All the brakes and hubs removed.
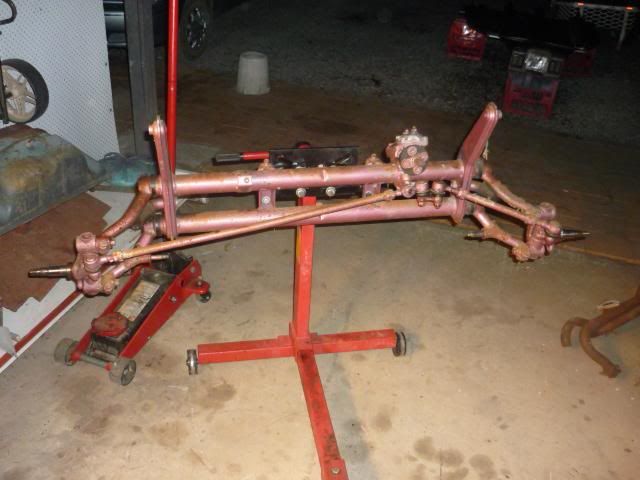
This is as far as I managed to get.
Could someone please tell me how the hell do you remove the tie rods?
I tried hitting them out with a soft hammer but they didn't budge one bit. Are they pressed in? Or is there some sort of circlip or addition to the
nut that holds them down?
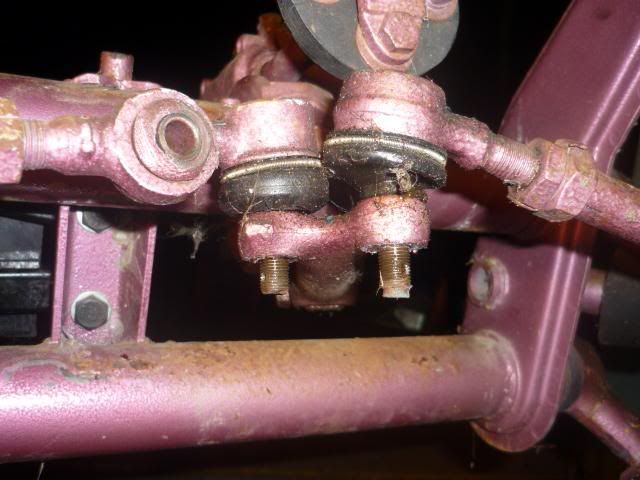
Smiley 
If you said I was a Volkswagen man, you'd be right.
|
|
|
 chunks54 chunks54
Slammed & Awesome Dubber
 
Posts: 84
Threads: 7
Registered: August 3rd, 2009
Member Is Offline
Location: UK
Theme: UltimaBB Pro Blue ( Default )
|
| posted on August 5th, 2009 at 10:24 PM |
|
|
They aren't pressed in but are an interference fit - when you nip up the nuts in kind of presses them in place. But you will get them out with a
hammer if you don't have a splitter (a tool that looks like a tuning fork).
First off though, don't hit the threaded sections with a hammer without putting the nuts back on to protect those threads! You'll have a mare
getting the nuts back on otherwise....
Once you've put them back on to protect the threads, try hitting the side of the round section of the joint - they should pop out after a good few
hits.
Impact engineering all the way!
Happiness is a Hot VW.
1954 Bug, 2276/Turbo
Turbo lag - that split second when the other guy thinks he has a chance
|
|
|
 Lovebuggy Lovebuggy
Seriously Crusin Dubber
 
Posts: 156
Threads: 21
Registered: December 29th, 2008
Member Is Offline
Location: Ipswich
Theme: UltimaBB Pro Blue ( Default )
Mood: Making it happen
|
| posted on August 6th, 2009 at 02:18 PM |
|
|
Buy a $40 ball joint/tie-rod popping tool from your local auto supplier. It will make life easier in the future and you wont risk damaging threads or
seals by mis aimed blows.
|
|
|
 Smiley Smiley
A.k.a.: Daniel Stephens
Veteran Volks Folk
    
Posts: 2125
Threads: 110
Registered: October 29th, 2008
Member Is Offline
Location: Yeppoon, Central Queensland
Theme: UltimaBB Pro Blue
Mood: Synchro'd
|
| posted on September 18th, 2009 at 08:54 PM |
|
|
It's been quite a while since I last updated this post so i thought I had better get round to it. I've been spending my time slowly working on the
floorpan and sorting it out. I've bought a welder which I have yet to try out. And got some checkerplate and C-channel to repair the floorpan
with.
Smiley 
If you said I was a Volkswagen man, you'd be right.
|
|
|
 Smiley Smiley
A.k.a.: Daniel Stephens
Veteran Volks Folk
    
Posts: 2125
Threads: 110
Registered: October 29th, 2008
Member Is Offline
Location: Yeppoon, Central Queensland
Theme: UltimaBB Pro Blue
Mood: Synchro'd
|
| posted on September 18th, 2009 at 09:01 PM |
|
|
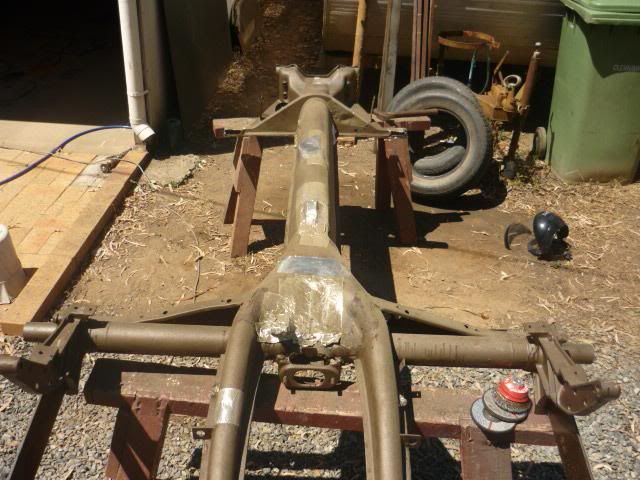
The first picture shows the pan before I started cutting. and the next two and the bare tunnel with both halves cut off.
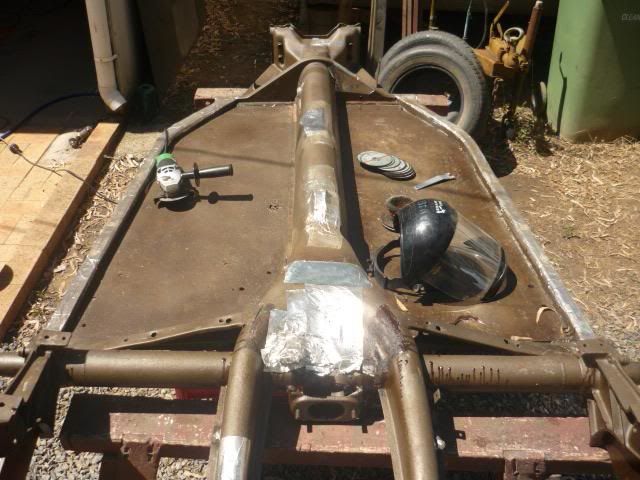
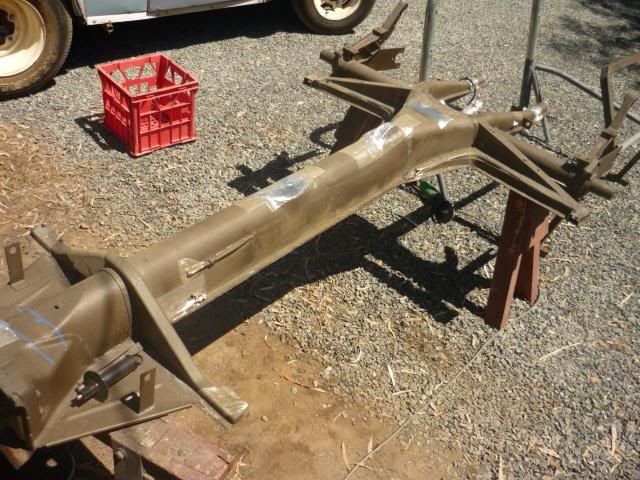
Smiley 
If you said I was a Volkswagen man, you'd be right.
|
|
|
 Smiley Smiley
A.k.a.: Daniel Stephens
Veteran Volks Folk
    
Posts: 2125
Threads: 110
Registered: October 29th, 2008
Member Is Offline
Location: Yeppoon, Central Queensland
Theme: UltimaBB Pro Blue
Mood: Synchro'd
|
| posted on September 18th, 2009 at 09:39 PM |
|
|
I chiseled the breast plate off from underneath the bottom of the framehead at the front of the car. The metal on the bottom of the tunnel was quite
rusted underneath so I decided to cut this piece out and replace it with new metal. I can see two lines inside the tunnel heading to the front of the
car.
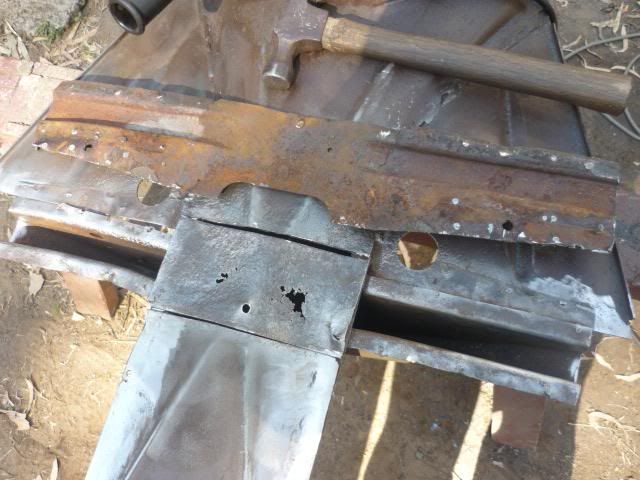
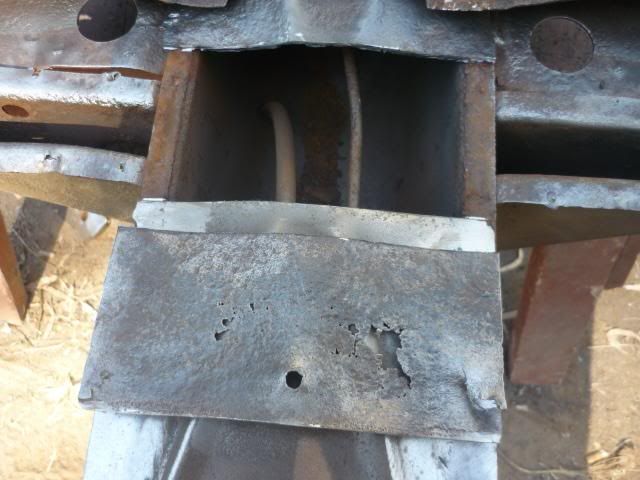
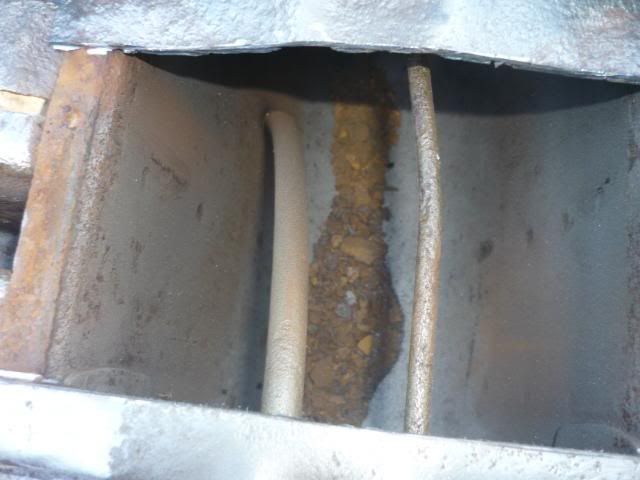
One is the old fuel line and the other appears to be a brake line? It exits on the RHS right next to the master cylinder. Can anyone confirm that this
is a brake line? I thought all beetles had them run past the pedal assembly and up the inside of the car next to the tunnel on the drivers side. When
I stripped the pan down the rear brake lind was run along the side of the tunnel inside the car, but you could tell it wasn't a factory line.
On another note, if I have the floorpan number will I be able to tell what year the car was? Or do you need the body number for that?
Smiley 
If you said I was a Volkswagen man, you'd be right.
|
|
|
| Pages: 1 2 3 |