| [ Total Views: 3681 | Total Replies: 32 | Thread Id: 85098 ] |
| Pages: 1 2 |
|
|
 phoenix_dr phoenix_dr
Commited Dubber
 
Posts: 64
Threads: 13
Registered: July 23rd, 2010
Member Is Offline
Location: sydney
Theme: UltimaBB Pro Black
Mood: relaxed
|
| posted on July 31st, 2010 at 08:36 PM |
|
|
my 65' rebuild
[size=4]As the title suggests I 've finally succumbed to rebuilding my 1965 beetle...gasp.
I say 'finally' because she has been staring at me from the backyard for over two years now and it breaks my heart to see her going to waste.
I thought I'd start a rebuild log here (hope nobody minds) to try and keep myself on track, and sane, with updates and photos that build up that
"sense of achivement" feeling from the trials and mishaps that are certain to come from this adventure. [/size]
A little history first:
The beetle was passed on to me from my sister who loved this little car more anything;
more than baileys,
more than a good cigarette after a meal,
more than jokes about ex-American presidents,
more even than finding $50 in a jacket you haven't worn in while.
It was a deep affection.
I grew up around beetles since a young age (my first car was white 69') but sadly this is the last of that era.
I've taken it upon myself to build up this beetle to the best of my abilities (or lack thereof) and would greatly appreciate the advice, thoughts and
expertise that people on this forum have.
Today was day 1, and I can firmly say that "Rust... you are not my friend!"   
Photos to come.
[size=5]"So... when will the bug be finished?"[/size]
[size=4]HA, better question: "will it ever be finished?"..[/size]
|
|
|
 jamiec jamiec
Seriously Crusin Dubber
 
Posts: 112
Threads: 7
Registered: April 23rd, 2009
Member Is Offline
Location: Tasmania
Theme: UltimaBB Pro Blue ( Default )
|
| posted on July 31st, 2010 at 09:02 PM |
|
|
looking forward to your progress. Hope it works out well for you.
|
|
|
 roundtoit roundtoit
Commited Dubber
 
Posts: 64
Threads: 21
Registered: July 5th, 2008
Member Is Offline
Location: Perth
Theme: UltimaBB Pro Blue ( Default )
Mood: Fair to average
|
| posted on August 1st, 2010 at 06:29 PM |
|
|
I am having a play with a 68, all good fun, trying to do everything myself so should be interesting will be far from immaculate but hopefully will make a tidy daily. will be far from immaculate but hopefully will make a tidy daily.
cheers
Hurry up and wait
|
|
|
 phoenix_dr phoenix_dr
Commited Dubber
 
Posts: 64
Threads: 13
Registered: July 23rd, 2010
Member Is Offline
Location: sydney
Theme: UltimaBB Pro Black
Mood: relaxed
|
| posted on August 5th, 2010 at 06:38 PM |
|
|
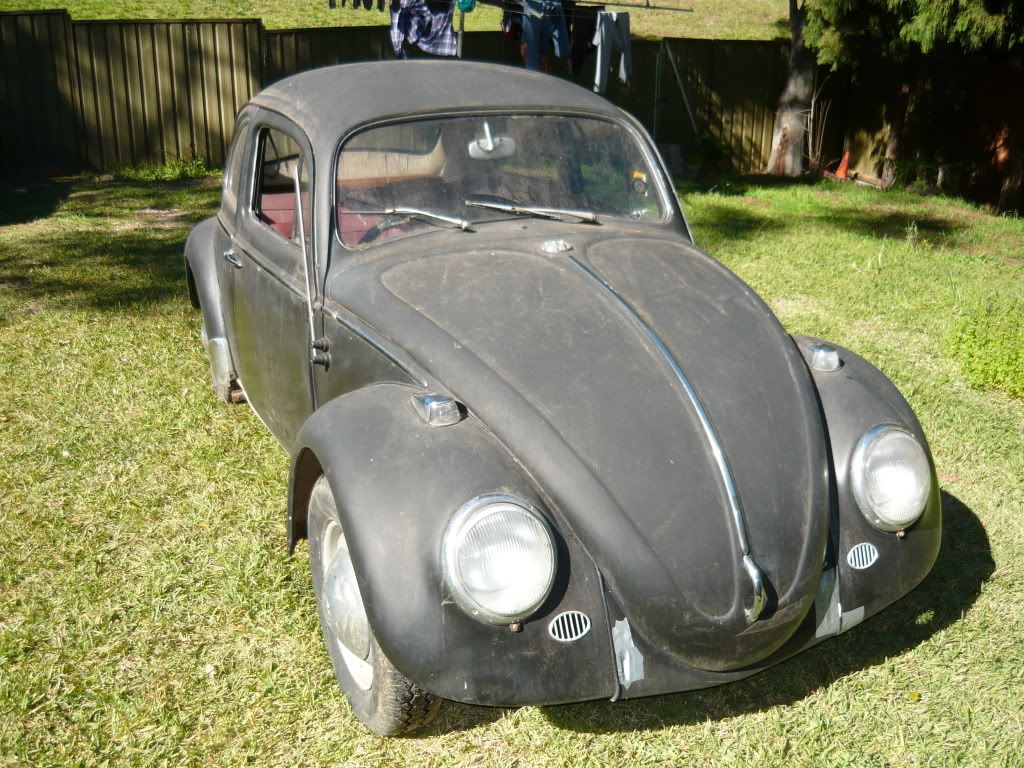
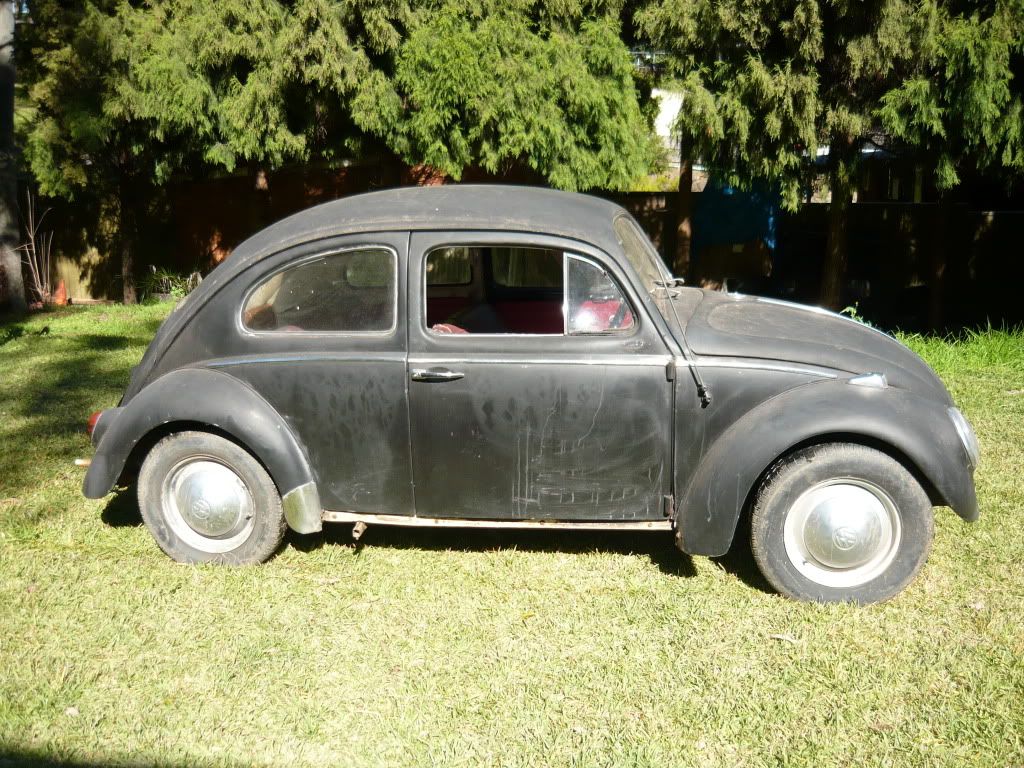
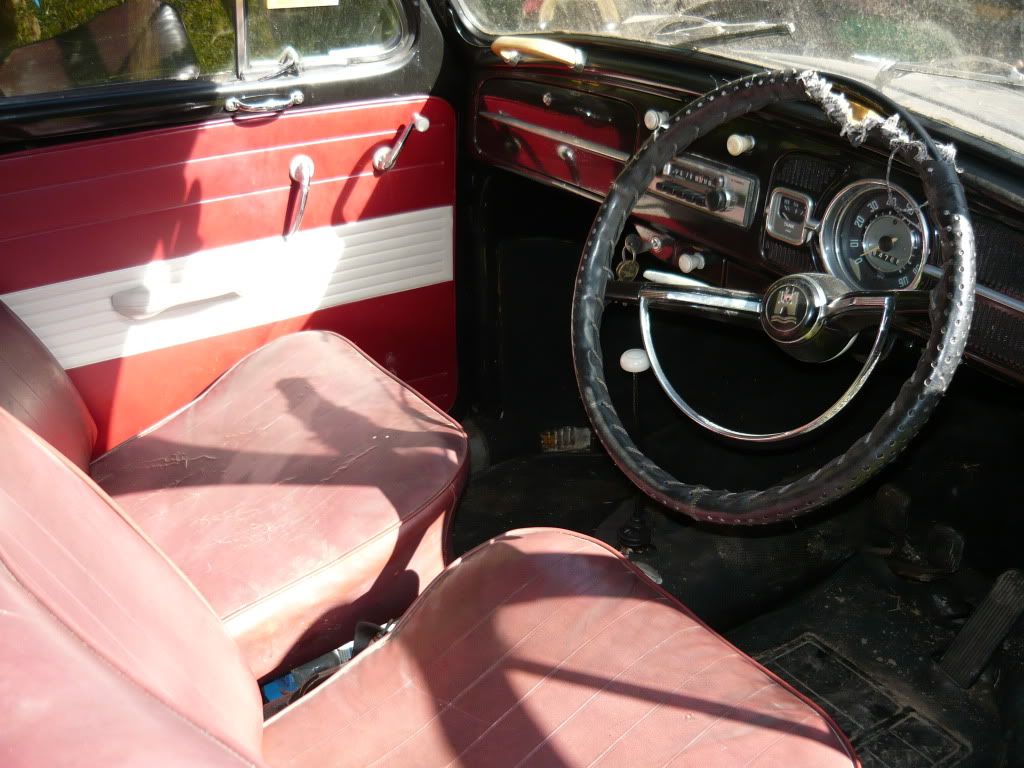
here she is. When she was given to me I thought
"this is to good to be true."
Yep, and we all know how that usually turns out...
I'd already pulled the running boards and bumpers off by this stage (and boy did I get a shock)
[size=5]"So... when will the bug be finished?"[/size]
[size=4]HA, better question: "will it ever be finished?"..[/size]
|
|
|
 phoenix_dr phoenix_dr
Commited Dubber
 
Posts: 64
Threads: 13
Registered: July 23rd, 2010
Member Is Offline
Location: sydney
Theme: UltimaBB Pro Black
Mood: relaxed
|
| posted on August 5th, 2010 at 06:58 PM |
|
|
[size=5]"So... when will the bug be finished?"[/size]
[size=4]HA, better question: "will it ever be finished?"..[/size]
|
|
|
 phoenix_dr phoenix_dr
Commited Dubber
 
Posts: 64
Threads: 13
Registered: July 23rd, 2010
Member Is Offline
Location: sydney
Theme: UltimaBB Pro Black
Mood: relaxed
|
| posted on August 5th, 2010 at 07:03 PM |
|
|
ohhh dear... I've posted some photos of the rust that has formed here;
http://aussieveedubbers.com/viewtopic.php?tid=85194
Won't know the full extent until the body's off the floor and both are stripped back. exciting times!
[size=5]"So... when will the bug be finished?"[/size]
[size=4]HA, better question: "will it ever be finished?"..[/size]
|
|
|
 zayus zayus
A.k.a.: Bryce
Wolfsburg Wizard
  
Posts: 437
Threads: 26
Registered: September 8th, 2002
Member Is Offline
Location: North of the Bridge
Theme: UltimaBB Pro Blue ( Default )
|
| posted on August 5th, 2010 at 10:32 PM |
|
|
An original black Beetle with a red interior.
What is a killer combo!
Look forward to seeing pictures of the restoration.
|
|
|
 Barnabie Barnabie
Officially Full-On Dubber
  
Posts: 257
Threads: 17
Registered: June 28th, 2010
Member Is Offline
Theme: UltimaBB Psyche Red
|
| posted on August 6th, 2010 at 11:00 AM |
|
|
Chin up Phoenix. I hope I look that well when I hit 45 years of age! I think it'll make a fantastic project, and its not like it has to be finished
overnight. Sounds like you're on the right track anyway, and keeping another old dub from the scrapyard which has to be a good thing - especially one
with family history. Best of luck with it and keep us updated. 
Kris.
|
|
|
 phoenix_dr phoenix_dr
Commited Dubber
 
Posts: 64
Threads: 13
Registered: July 23rd, 2010
Member Is Offline
Location: sydney
Theme: UltimaBB Pro Black
Mood: relaxed
|
| posted on August 6th, 2010 at 10:01 PM |
|
|
| Quote: | I hope I look
that well when I hit 45 years of age!
Kris.
|
Hahahahahahahaha!!!! yeah I'll second that 
cheers
[size=5]"So... when will the bug be finished?"[/size]
[size=4]HA, better question: "will it ever be finished?"..[/size]
|
|
|
 phoenix_dr phoenix_dr
Commited Dubber
 
Posts: 64
Threads: 13
Registered: July 23rd, 2010
Member Is Offline
Location: sydney
Theme: UltimaBB Pro Black
Mood: relaxed
|
| posted on August 6th, 2010 at 10:40 PM |
|
|
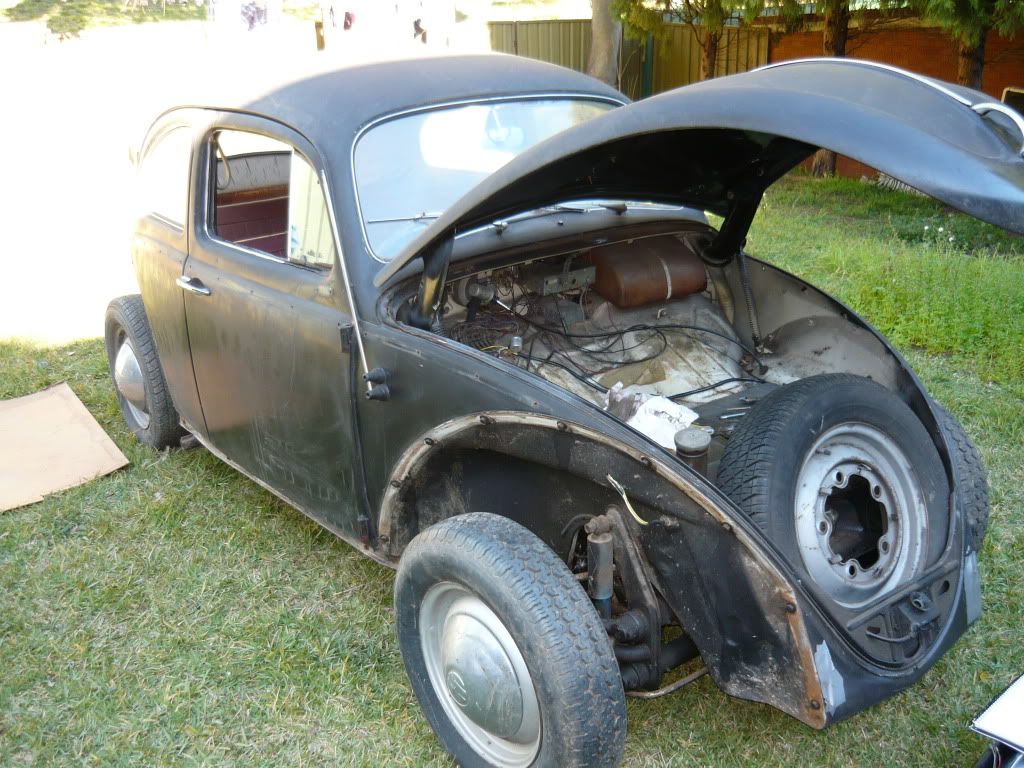
And now, with the interior stripped showing some mild rust on the floor and the unfortunate rear quarter.
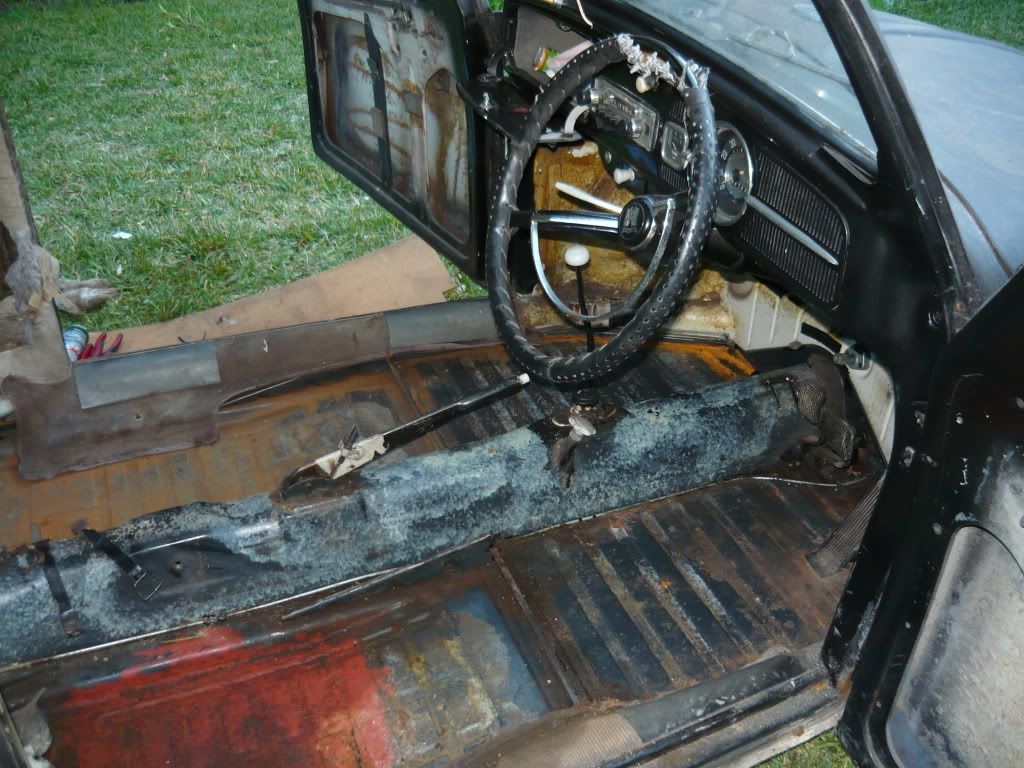
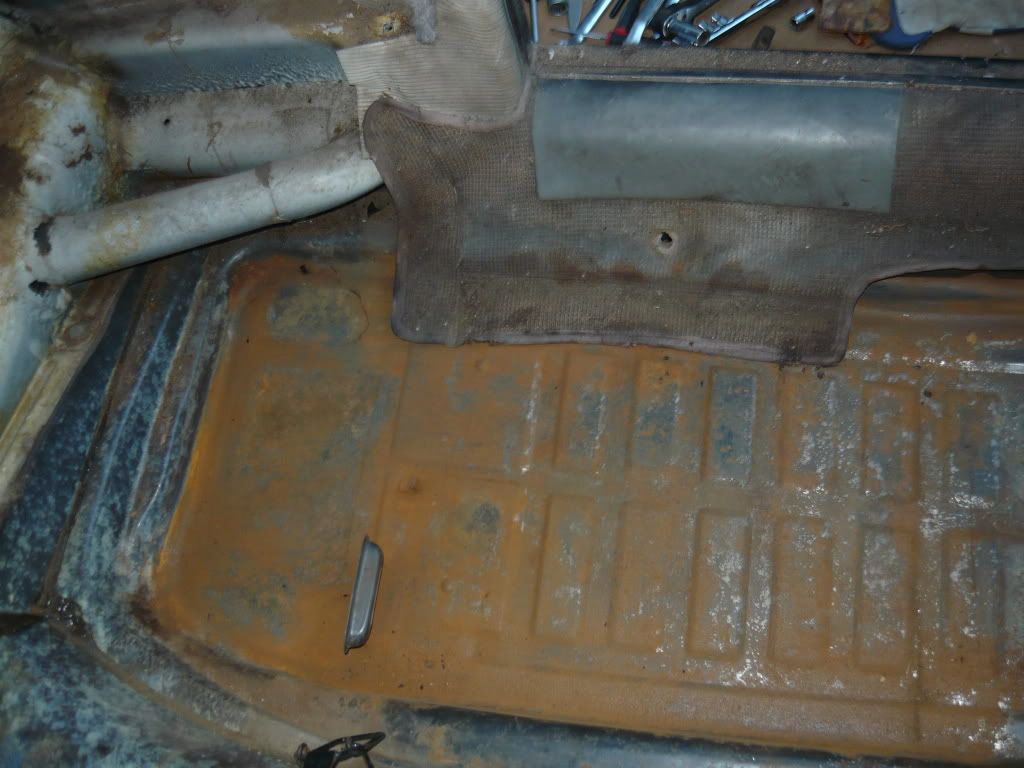
I was expecting this but its not so bad... so far
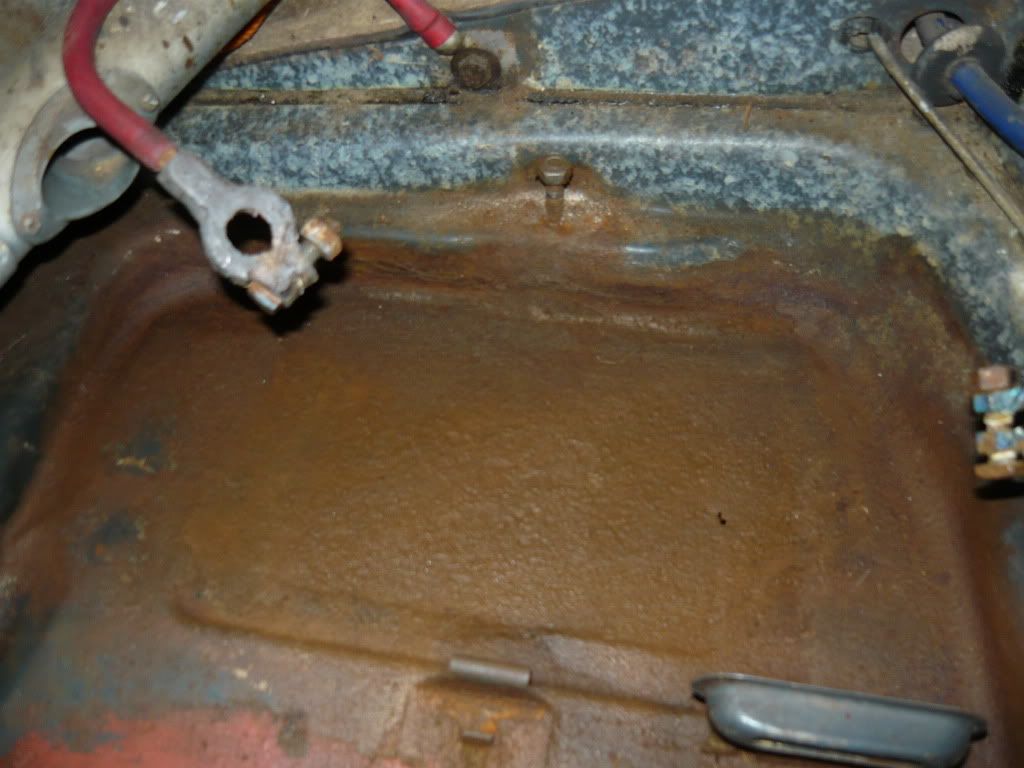
this unfortunate section of the car was patch up a few years back after some little @#%#&*@$ decided it would be funny to put a burning 'For
Sale' sign on the veedub in the middle of the night.... What I would of given to of caught them doing it.. expecting more rust under here. Phooey!
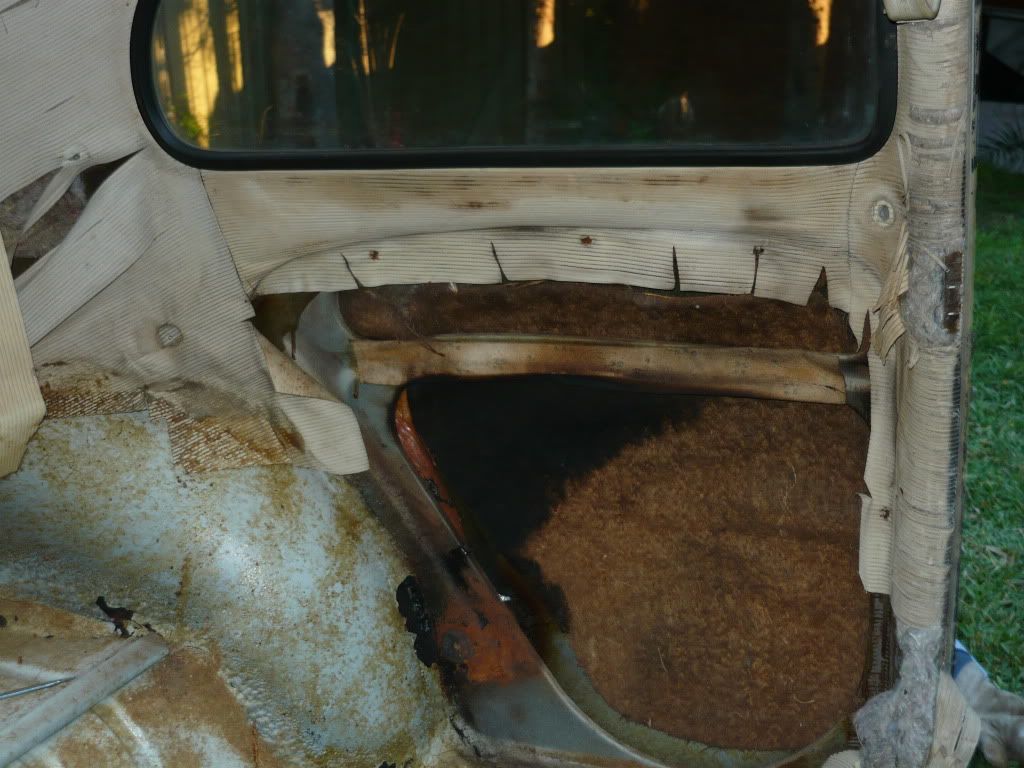
[size=5]"So... when will the bug be finished?"[/size]
[size=4]HA, better question: "will it ever be finished?"..[/size]
|
|
|
 t_tuffnut t_tuffnut
Wolfsburg Wizard
  
Posts: 425
Threads: 70
Registered: June 14th, 2009
Member Is Offline
Location: NSW Central Coast
Theme: UltimaBB Streamlined2
Mood: Rust free for 12 months
|
| posted on August 18th, 2010 at 04:54 PM |
|
|
Looks better than my 66 did once I stripped it out! I had similar rust, but with pin prick holes in the passenger foot well and where the wings bolt
onto the body.
I also had a dodgy hole that had been bogged, about the size of a deck of cards. Not welded, just covered in crappy bog and left like that.
All you need is a wire brush and a good treatment - I used the KBS system (similar to POR 15) and it is pretty good.
It is the same colour as mine on the inside - was the black a respray?
Keep up the updates and pictures, it's coming along nicely!
|
|
|
 Phil74Camper Phil74Camper
Son of Jim - Creator of Good
Head in the Clouds
     
Posts: 2703
Threads: 193
Registered: August 28th, 2002
Member Is Offline
Location: Sydney
Theme: UltimaBB Pro Blue ( Default )
|
| posted on August 19th, 2010 at 07:43 AM |
|
|
Gosh these photos bring back memories of when I rebuilt my '64 back in the '80s.
Don't forget to buy plastic sealable bags from Woolies, and place all components in the bags WITH LABELS so you don't lose parts. Disassemble in an
orderly fashion. Take plenty of photos as you take things apart; keep a notepad handy to take notes. Use little stickers to mark wire ends to show
where they reconnect, or make detailed notes.
The car looks pretty straight and not too rusty; a good candidate for a nice restoration. Don't rush the job, take your time and enjoy it.
By the looks of the inside of the front boot, inside the doors and under the front footwell with the carpet removed, it was white originally and has
been resprayed black.
One final tip - as mentioned before, if you order new parts and rubbers from overseas, order for a '63-'64. DON'T order for a '65 - US-spec '65s
were different in many ways - the windows were bigger for a start.
|
|
|
 phoenix_dr phoenix_dr
Commited Dubber
 
Posts: 64
Threads: 13
Registered: July 23rd, 2010
Member Is Offline
Location: sydney
Theme: UltimaBB Pro Black
Mood: relaxed
|
| posted on August 27th, 2010 at 10:51 PM |
|
|
time for an update of photos
windows out
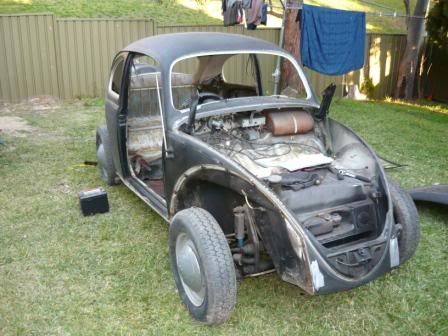
any bare metal areas are hit with some etch primer to hold off surface rust... thats the theory anyway
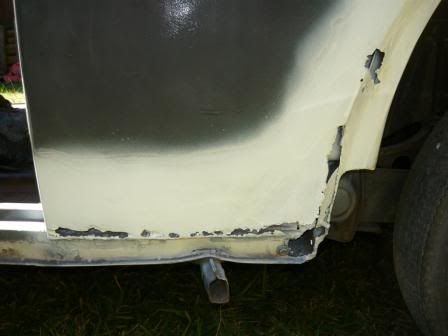
before
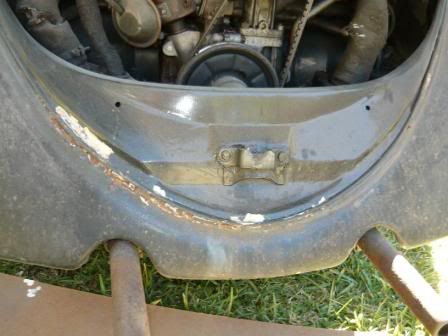
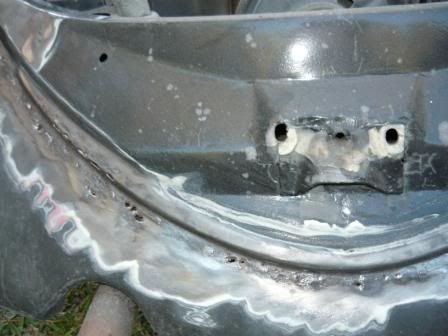
after
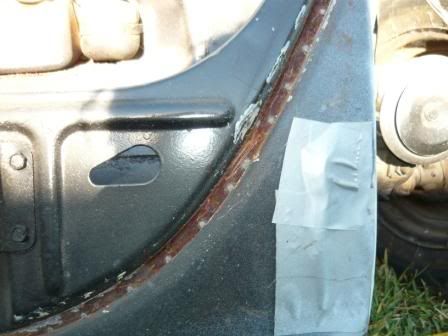
Rear drivers side ( "oh dear!")
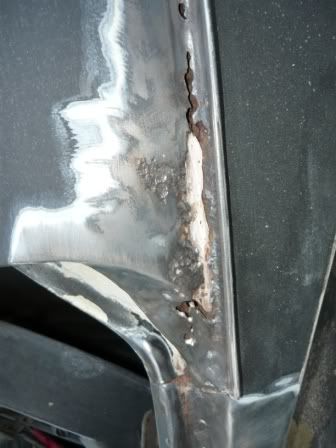
front drivers side (more "oh dears!")
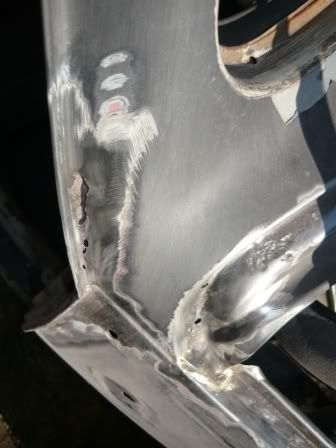
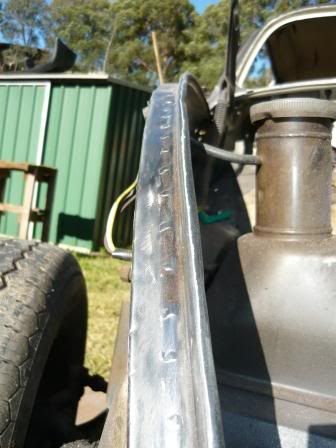
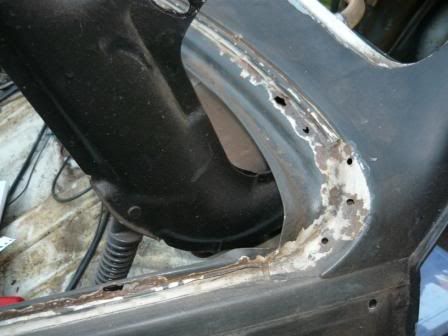
[size=5]"So... when will the bug be finished?"[/size]
[size=4]HA, better question: "will it ever be finished?"..[/size]
|
|
|
 phoenix_dr phoenix_dr
Commited Dubber
 
Posts: 64
Threads: 13
Registered: July 23rd, 2010
Member Is Offline
Location: sydney
Theme: UltimaBB Pro Black
Mood: relaxed
|
| posted on August 27th, 2010 at 10:55 PM |
|
|
so there's some more problem areas surfacing..
Ie, the front and rear sill areas;
Anyone done these before, any tips?
Almost time to brake out the welder... I mean learn to weld...
THEN brake out the welder and fix the body... FUN!
Also, after speaking with peoples on here I've decided to not bother puting the original seals back on the bonnet and engine.
as she will be driven in all weathers and (probably) live out side, Mexican ones and some glue sound like a better option... this is of course
waaaaaaaaaaaaaaay down the track.
[size=5]"So... when will the bug be finished?"[/size]
[size=4]HA, better question: "will it ever be finished?"..[/size]
|
|
|
 Luke Luke
Slammed & Awesome Dubber
 
Posts: 78
Threads: 9
Registered: June 21st, 2010
Member Is Offline
Theme: UltimaBB Pro Blue ( Default )
|
| posted on August 28th, 2010 at 09:38 AM |
|
|
Nice going. You work out the original colour? Looks white or light blue. Nit sure what colour the blue was for 65. 69 is diamond blue. I'll be going
back to original colour.
|
|
|
 jacky_moo jacky_moo
Seriously Crusin Dubber
 
Posts: 115
Threads: 9
Registered: February 4th, 2010
Member Is Offline
Location: Melbourne
Theme: UltimaBB Pro Black
Mood: Mir geht's gut!
|
| posted on September 2nd, 2010 at 10:42 AM |
|
|
excellent work so far!! cant wait to see how it looks when its done!
schnell!! schnell!! schnell!! schnell!!
 |
|
|
 phoenix_dr phoenix_dr
Commited Dubber
 
Posts: 64
Threads: 13
Registered: July 23rd, 2010
Member Is Offline
Location: sydney
Theme: UltimaBB Pro Black
Mood: relaxed
|
| posted on November 4th, 2010 at 09:37 PM |
|
|
SO..... It's been awhile since I've uploaded anything here, and plenty has been done my little dak dak.
Mostly I have been either working or practicing my welding so I can FINALLY finsh the body off and prep it for painting.
Here's what's happened recently:
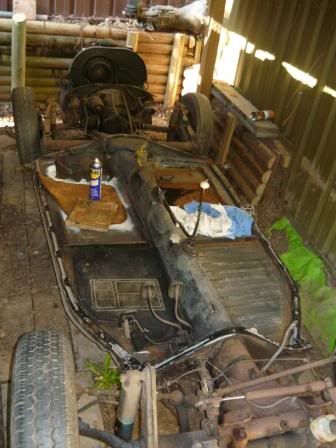
Freshly off the pan
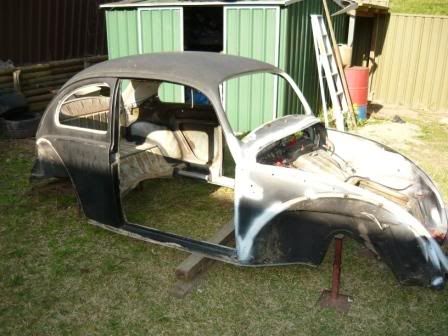
the easy way to take the body off; engine stand on the front, jack at the back, lift the back and place on stands... done
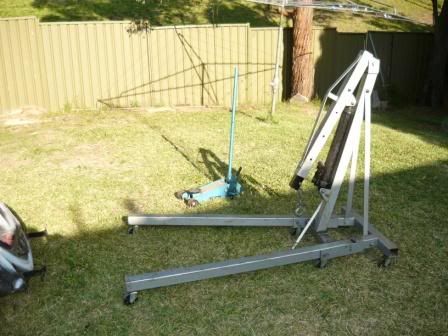
the pan. where it will sit until I finish the body
Welding up the old holes (the first time I touch the car with the welder; was very tentative at the this point)
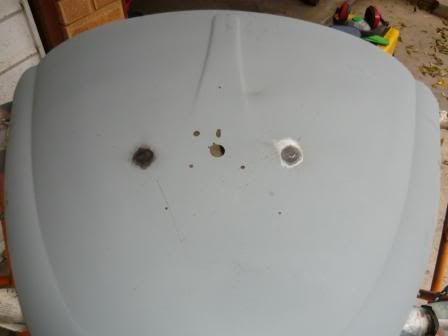
not to bad I think
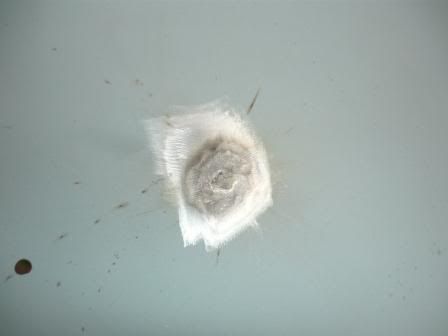
this part came away and had to touched up
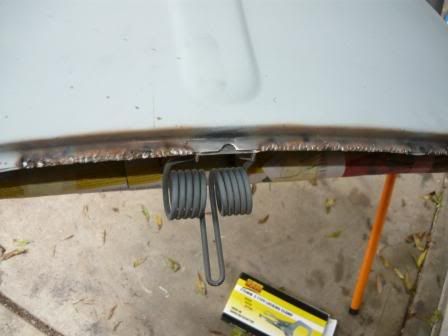
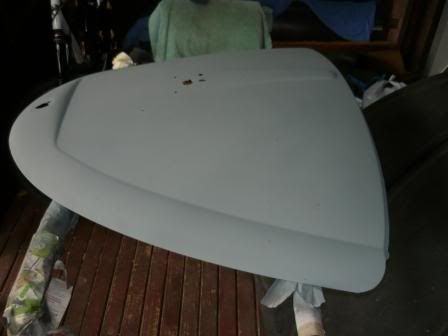
what do you do when you don't have space in your garage?
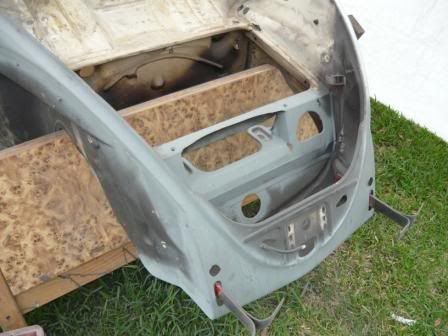
Had to remove the shelf for the overflow bottle... haven't gotten round to fitting the new one
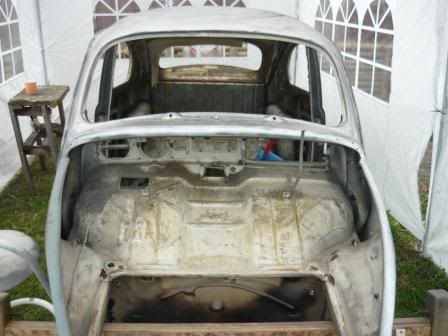
almost all electrics removed... time to strip the paint!
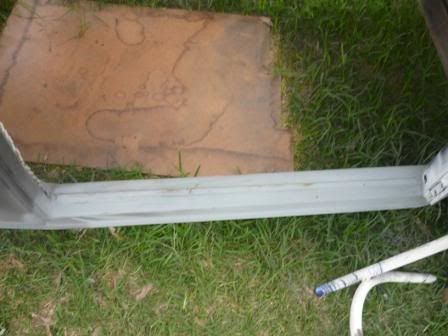
Heater channels are ok  sort of... well, there's a
little hole.... still, considering it's history of living outside I'm very, very suprised sort of... well, there's a
little hole.... still, considering it's history of living outside I'm very, very suprised
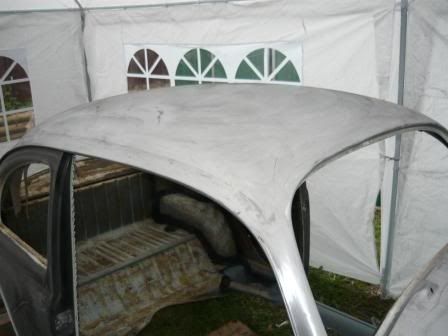
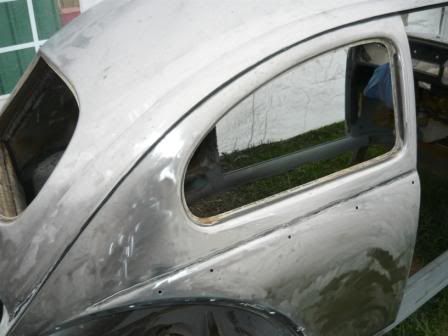
Roof done!
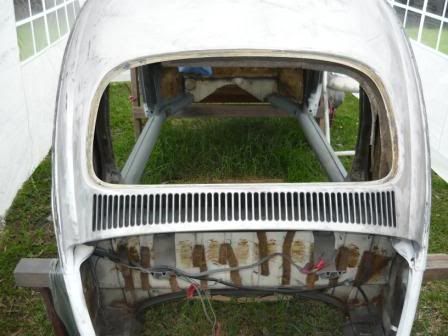
back done (looking at it like this made me think of the movie Iron man when he builds the first shinny metel suit)
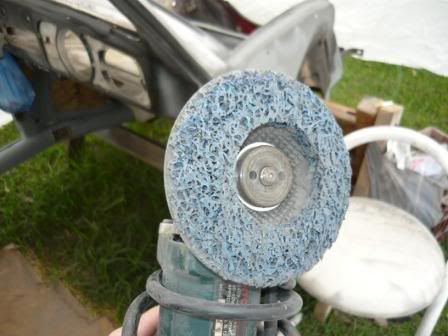
My new best friend!!! strip discs
Side down
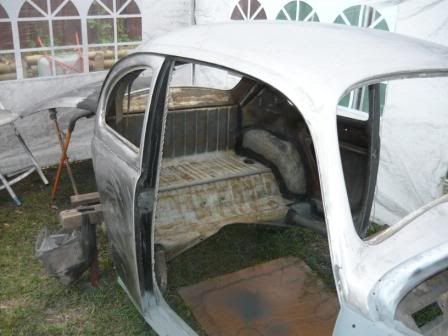
Once again, the iron man shot
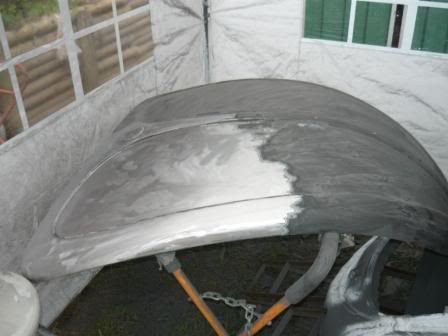
bonnet... started
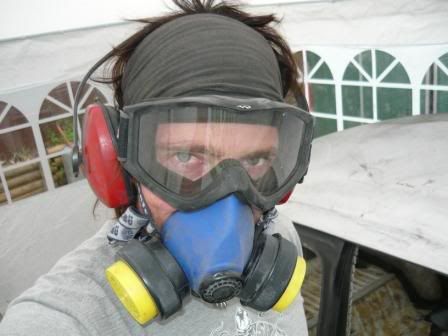
I realise that all this gear protects me, but, I can't help it, I feel like a NINJA
[size=5]"So... when will the bug be finished?"[/size]
[size=4]HA, better question: "will it ever be finished?"..[/size]
|
|
|
 aaustin92 aaustin92
A.k.a.: adam austin
Casual Dubber

Posts: 44
Threads: 12
Registered: October 26th, 2010
Member Is Offline
Location: Nowra,NSW
Theme: UltimaBB Pro Blue ( Default )
|
| posted on November 4th, 2010 at 11:24 PM |
|
|
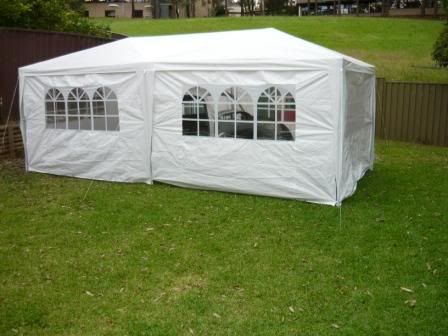
love the gazebo/spray booth haha dam good idea....i may just copy haha 
|
|
|
 t_tuffnut t_tuffnut
Wolfsburg Wizard
  
Posts: 425
Threads: 70
Registered: June 14th, 2009
Member Is Offline
Location: NSW Central Coast
Theme: UltimaBB Streamlined2
Mood: Rust free for 12 months
|
| posted on November 10th, 2010 at 04:28 PM |
|
|
Sams warehouse has a gazebo 6m x 3m for $80, but it is not as flash as the one in the pics. You would need to hang tarps as it doesn't have walls.
I'm considering it for the exact same use.
Car is looking great! Any hints to what colour it is going to be? Or are you just going to clear coat it (Which would be AWESOME!).
|
|
|
 pancake pancake
Casual Dubber

Posts: 46
Threads: 11
Registered: October 4th, 2008
Member Is Offline
Theme: UltimaBB Pro Blue ( Default )
Mood: ummm, almost there
|
 posted on November 12th, 2010 at 08:10 PM posted on November 12th, 2010 at 08:10 PM |
|
|
good work!
|
|
|
 phoenix_dr phoenix_dr
Commited Dubber
 
Posts: 64
Threads: 13
Registered: July 23rd, 2010
Member Is Offline
Location: sydney
Theme: UltimaBB Pro Black
Mood: relaxed
|
| posted on November 12th, 2010 at 11:45 PM |
|
|
Thanks for the feedback guys, it's getting there slowly but surely 
as for the gazebo; I bought this one from bunnings for a hundred and something dollars... its the best investment so far!!
no more car covers that leek water.
and, when your done sanding you take the walls off, wash them with a hose, wipe down the rest and she's ready for painting. I would recommend puting
some plastic down on the ground when painting to stop any contaminents flying up.
Two down sides to this gazebo;
water does pool on the edges after heavy rain, and
it's not very stable in times of high wind (its blew over one night and my garden shed tore a hole in the roof of it. But that was fixed by ' The
Almighty Duct Tape')
I'm on to welding in all my replacement panels at the moment... finding some more areas of rust  but she'll be awesome when its done. but she'll be awesome when its done.
As for the colour, I'm really torn between options at the moment.. and 'bugselecta' is make my choice even more confusiing.... soooooo many
options!
If you're building a bug and haven't check out this site, It's a MUST
http://shop.volkswarenhaus.de/media/content/bugselecta.htm
I think I'm going with the classic Black / Cream look - with a fewextra ideas too make it a little different
more photos to come
[size=5]"So... when will the bug be finished?"[/size]
[size=4]HA, better question: "will it ever be finished?"..[/size]
|
|
|
 vw54 vw54
Super Administrator
Always Waiting 4 Friday
        
Posts: 16723
Threads: 378
Registered: August 26th, 2002
Member Is Offline
Location: Sunny Sydney
Theme: UltimaBB Pro Blue ( Default )
Mood: Oval resto ongoing
|
| posted on November 13th, 2010 at 06:26 AM |
|
|
thats looking great dont be in a hurry my 65 resto took 15 years on n off
good use of the tent
are you going totally origional ???
|
|
|
 phoenix_dr phoenix_dr
Commited Dubber
 
Posts: 64
Threads: 13
Registered: July 23rd, 2010
Member Is Offline
Location: sydney
Theme: UltimaBB Pro Black
Mood: relaxed
|
| posted on January 30th, 2011 at 09:29 PM |
|
|
Well it's been a while since I've posted on here so I thought I'd throw up some photos of whats been happening with ze bug. I'm slowly plugging
away at all the repairs to the body, actually the only things left that have to be done on the repair side are minor impurfections in the welding and
the heater channel... (which I hoped not to do but it's for the best)
Then it's on to the modifactions... the fun part 
here's a quick run down of whats been happening;
grind
weld
grind
weld
scratch head and say: "#$%^ how did that happen?"
Grind. grind, grind
hammer hammer
Grind, burn out grinder "ahh #$%^"
etch prime 
and now, some photos:
heater channel... sad face 
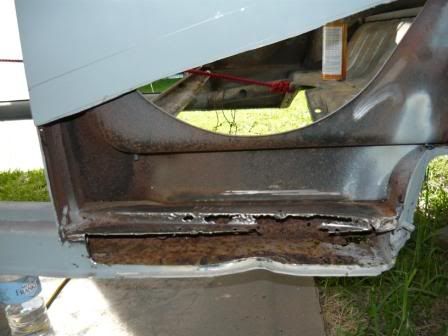
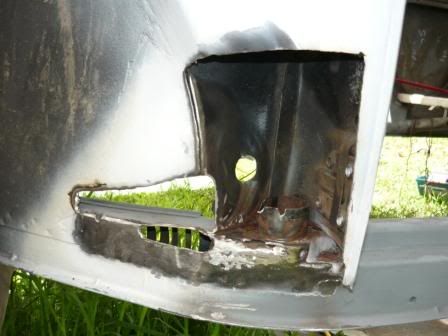
C pillar
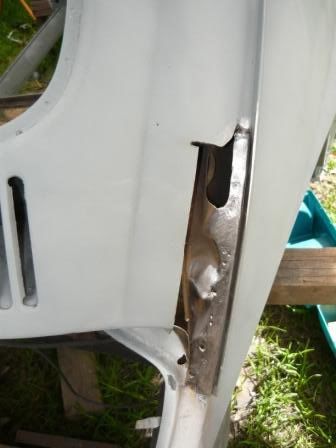
A pillar
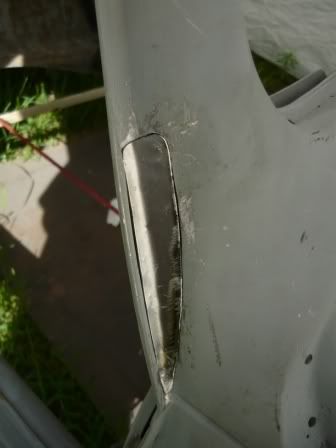
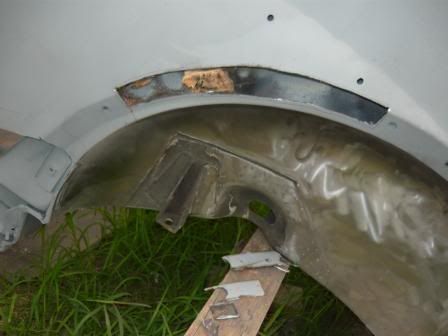
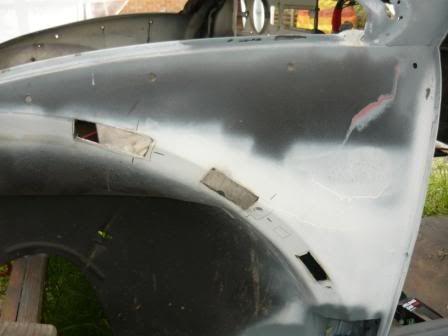
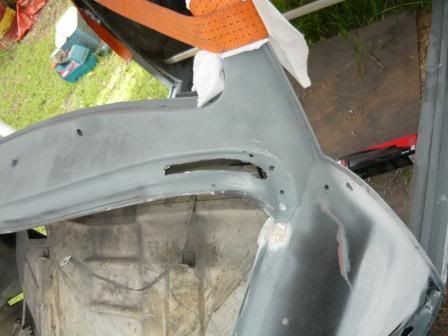
rear apron (going to make this removable... If I can)
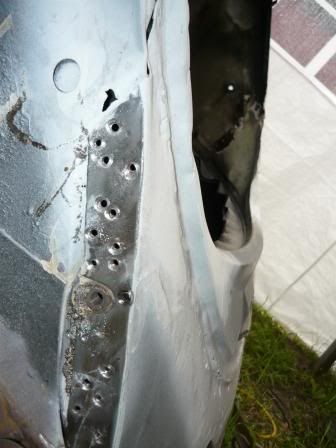
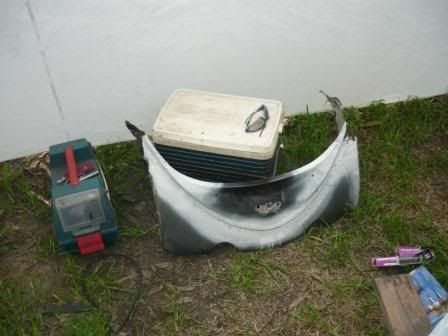
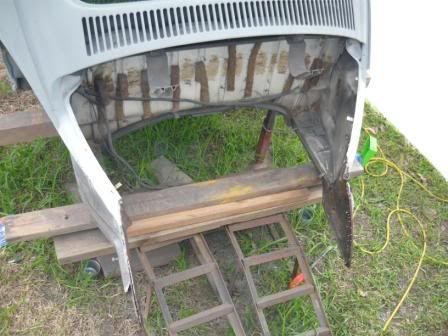
The second hand one I pick up off ebay... (only slightly better, oh well)
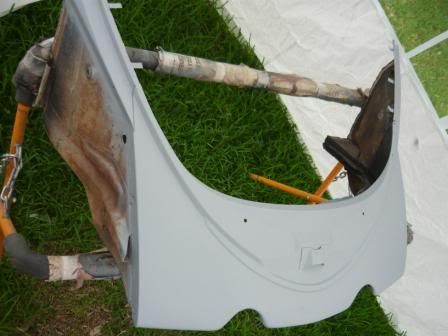
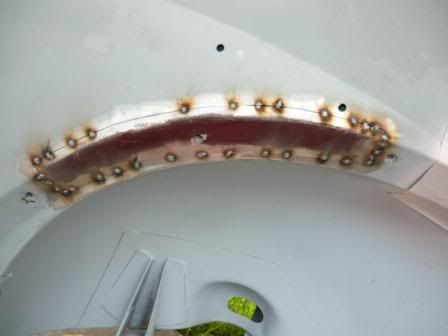
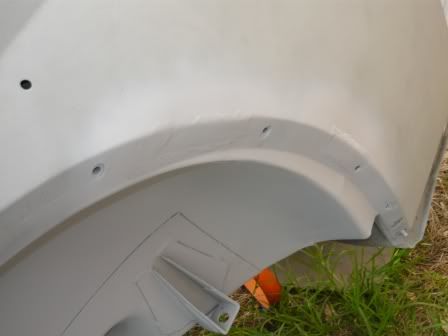
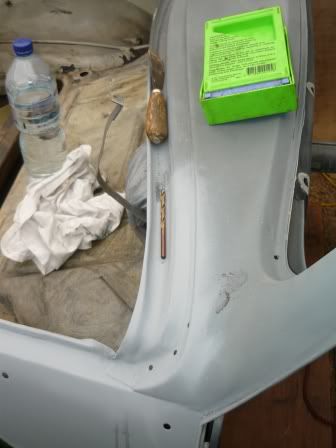
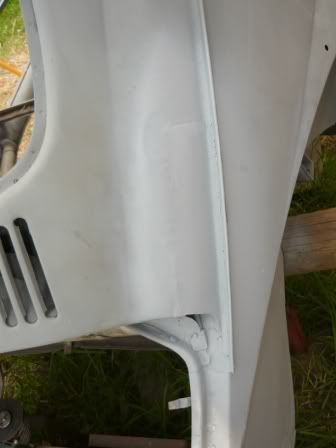
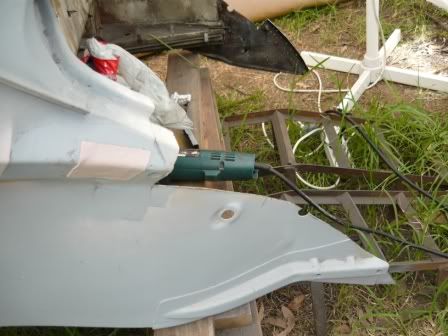
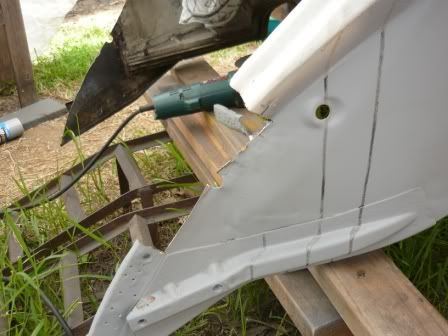
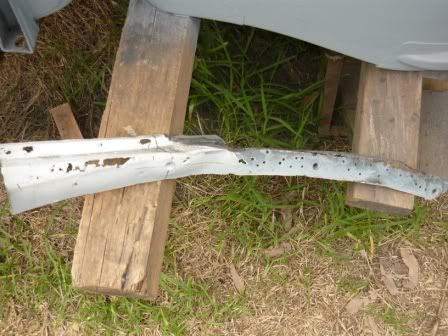
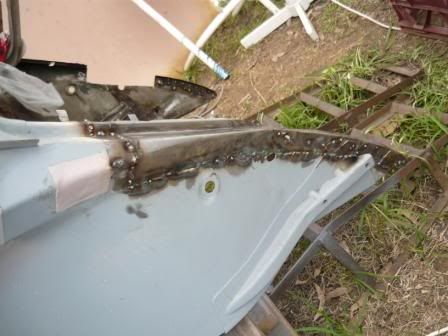
If I had my time again I would of brace this part... it seems to have stretched a little (will be a fun job to fix, yeeh!)
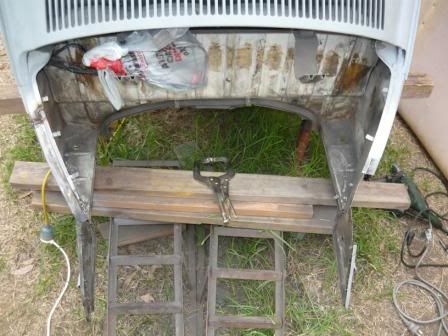
I'm really happy with how the welding has gone with this side... take no notcie the bird shit weld I haven't cleaned up yet. It's partly the welder
and partly me that's causing it.
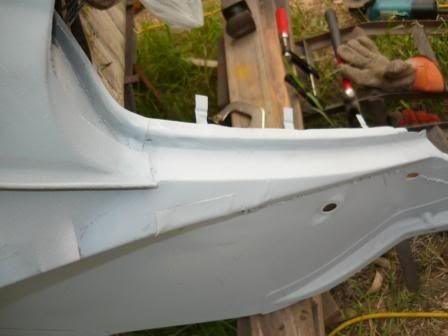
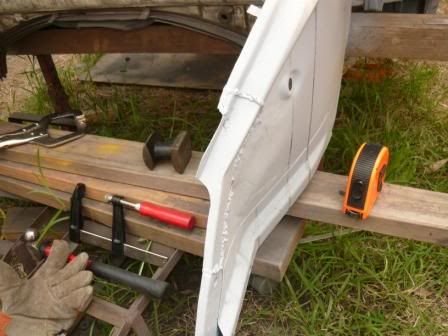
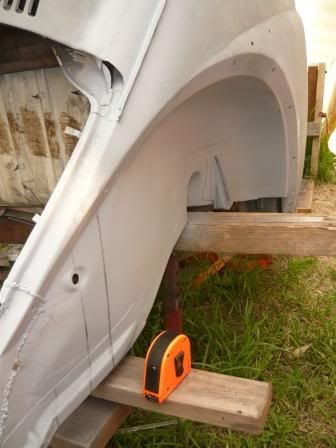
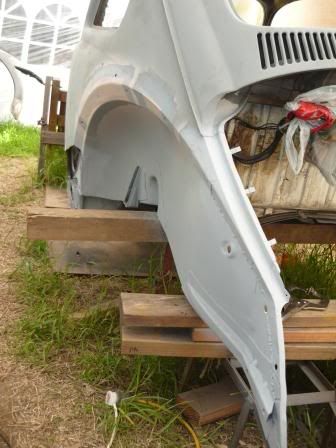
some of the patch panels (from George at classic veedub);
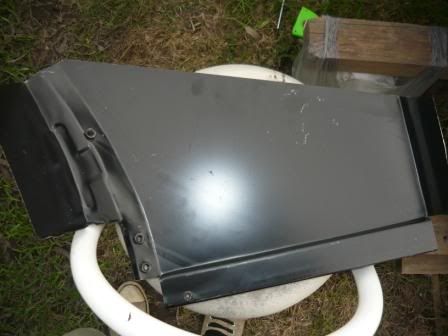
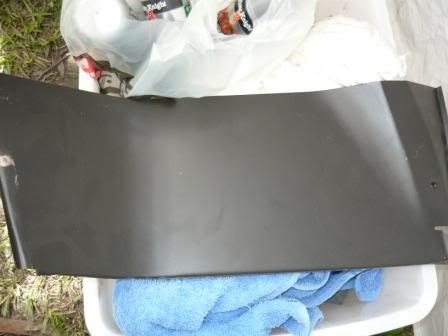
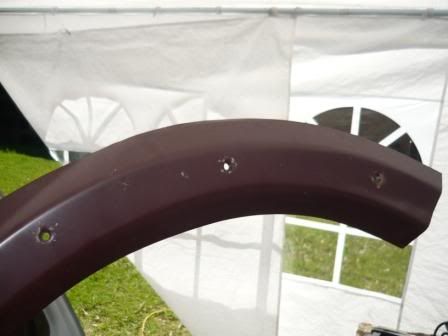
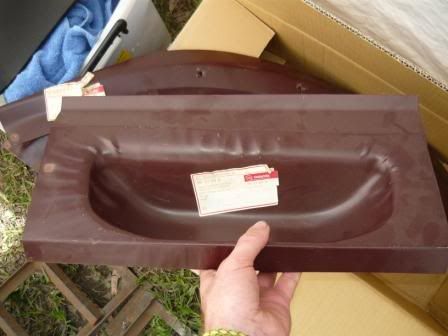
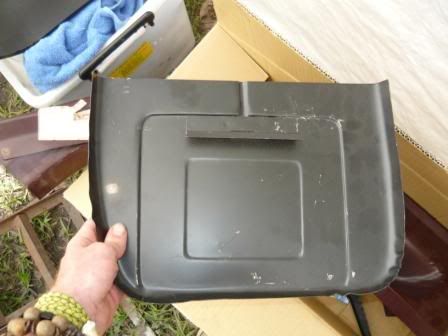
This last one is off a kombi but it works really well for the curved stuff. will also be used for the extended dash and flush indicators
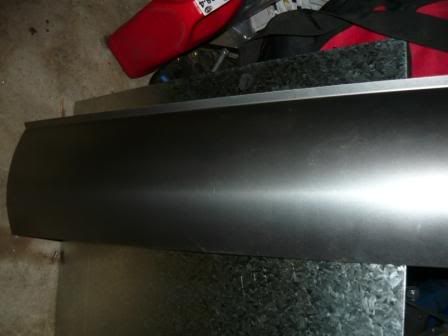
[size=5]"So... when will the bug be finished?"[/size]
[size=4]HA, better question: "will it ever be finished?"..[/size]
|
|
|
 phoenix_dr phoenix_dr
Commited Dubber
 
Posts: 64
Threads: 13
Registered: July 23rd, 2010
Member Is Offline
Location: sydney
Theme: UltimaBB Pro Black
Mood: relaxed
|
| posted on January 30th, 2011 at 09:37 PM |
|
|
And one final one, the bracing for the heater channel job
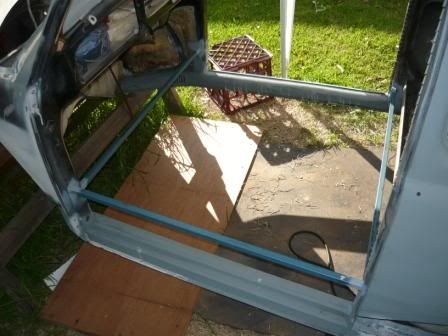
Thanks vw54, It's getting there bit by bit.
Not sure of the full specifics yet, but it won't be a resto. I was going to do that and then the ideas started coming;
Extended dash
removable rear apron
remove indicators
side mount indicators
bigger motor
you know the usual thing that happens when rebuilding a car
".. I'll just change this one thing and that'll be it... maybe two things"
etc, etc, etc.
[size=5]"So... when will the bug be finished?"[/size]
[size=4]HA, better question: "will it ever be finished?"..[/size]
|
|
|
 t_tuffnut t_tuffnut
Wolfsburg Wizard
  
Posts: 425
Threads: 70
Registered: June 14th, 2009
Member Is Offline
Location: NSW Central Coast
Theme: UltimaBB Streamlined2
Mood: Rust free for 12 months
|
| posted on February 15th, 2011 at 07:34 PM |
|
|
Awesome work so far!
Enjoy it while you can - Sounds weird, but I miss that bit of the rebuild.
|
|
|
 Stinkbug Stinkbug
Officially Full-On Dubber
  
Posts: 250
Threads: 11
Registered: January 25th, 2011
Member Is Offline
Location: south brisbane
Theme: UltimaBB Pro Blue ( Default )
Mood: unpredictable
|
| posted on February 15th, 2011 at 07:49 PM |
|
|
love your work mate ,very inspiring!
|
|
|
 68cam 68cam
Learner Dubber

Posts: 16
Threads: 7
Registered: January 23rd, 2011
Member Is Offline
Location: Gold Coast
Theme: UltimaBB Pro Blue ( Default )
|
| posted on February 23rd, 2011 at 08:26 PM |
|
|
Good luck with it all looking great but keep it up
|
|
|
 phoenix_dr phoenix_dr
Commited Dubber
 
Posts: 64
Threads: 13
Registered: July 23rd, 2010
Member Is Offline
Location: sydney
Theme: UltimaBB Pro Black
Mood: relaxed
|
| posted on June 25th, 2011 at 11:43 PM |
|
|
Seriously, Has it been nearly 6 months since I added to this post??
Wow, ok...
Well I was planning on starting to paint by now (my original plan is shot to shit, hahahah ahaha) but sadly life and work have gotten in the way a
little, as it always does, but at least I'm almost there.
When I started this project I thought it would be something I could do here and there, a bit of fun, learn some new skills and just cruise with it...
How quickly this type of thing performs a hostile take over of every spare moment you might have.
In saying that, it is AWESOME to look back and see how far I've come (and not think about how far is left to go)
I haven't been taking as many photos as before because who really wants to see lists and lists of photos showing sequences shots of;
rusty piece of metal
rusty peice of metal removed
big hole where metal was
new metal welded in hole
etch primed new metal
a rejoicing owner giving two thunmbs
then,
another rusty piece of metal.... and on and on and on and on and on and so forth.
Last time I posted I was up to the heater channel
This was a big heart in mouth moment (that little voice in your head saying "don't stuff this up"
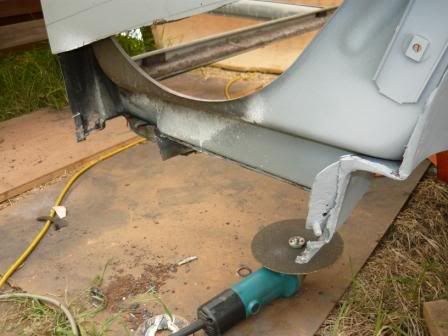
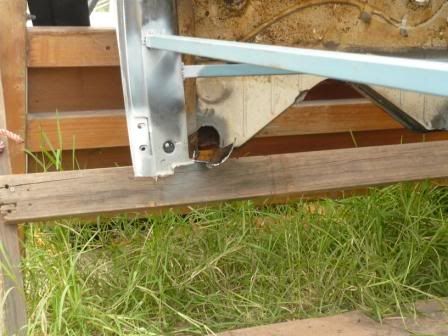
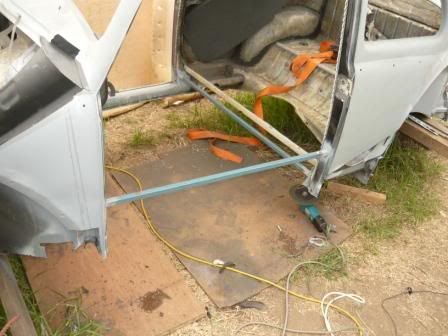
and I didn't, score!
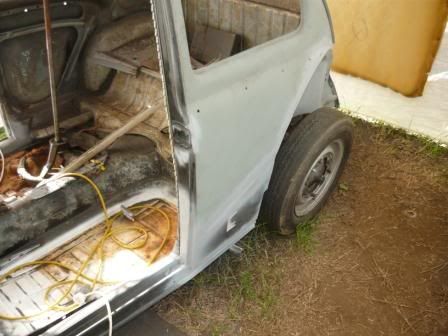
After that mammoth job I felt I need some jobs that where modications of my own... I was geeting sick of fixing rust at this point.
So it was time to section the dash, add a second speedo hole for the tacho
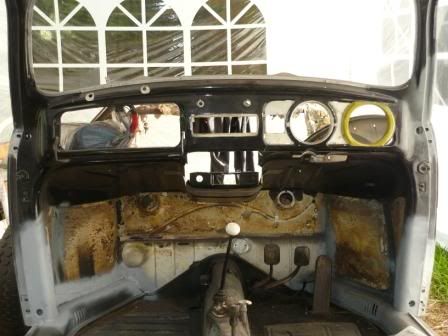
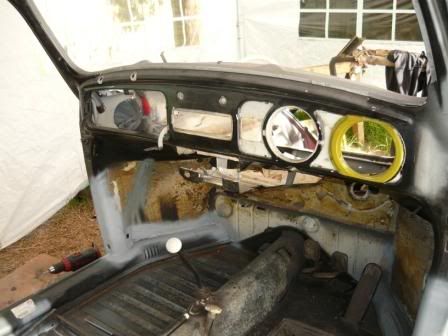
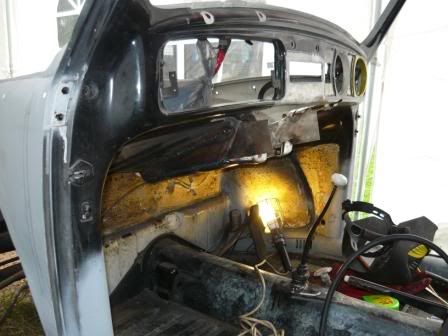
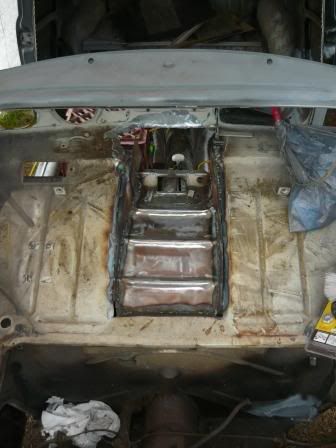
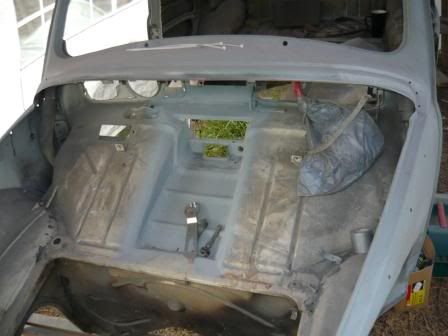
I'm really happy with how it turned out, there was alot of hand fabrication to get the shape right and the lines og the the dash to line up but so
worth it in the end
I removed the front indicators while I was at it, got so cool plans where I'm going to mount the new ones
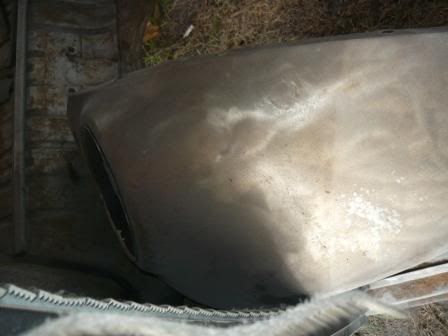
And then back to the rust, errrgh....
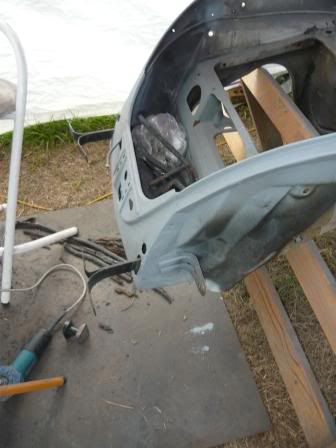
the front apron look solid, how wrong I was, both side strips under the fender beeding were rusted out... so some more hand fabrication and;
Taa DAAA!!!
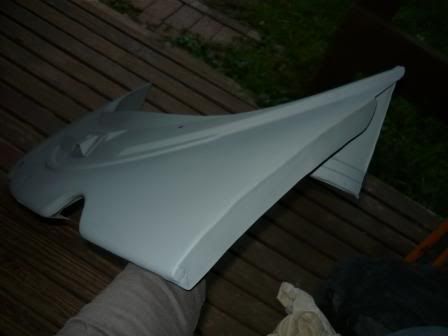
The removeable rear apron is about 90% done also, just have to drill some holes and finish the brackets
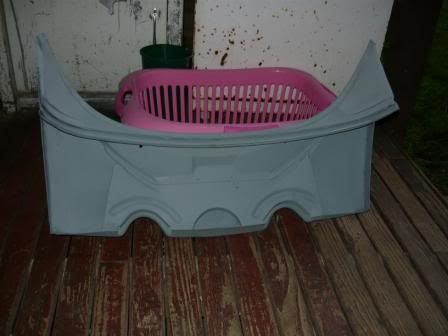
It was at this point that I thought that I was about 90% done on the body work, strip the rest back, etch prime it, finish the radio hole the dash,
LAUGHING "I can start filling soon!"
And then this happen;
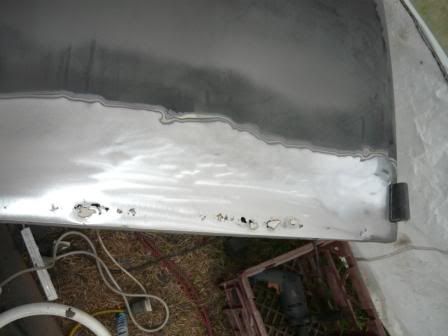
The bottom of both doors = wreaked!
Some smart person decided not to fix the doors properly, And you can almost imagine what was going through there head:
OHHH some holes in the doors... what will I do? fix it?
NAHHHH... just through some bondo on it..... Lovely that'll pass rego...
Butt face!
at least everything else is done... untill another surprise jumps out at me
[size=5]"So... when will the bug be finished?"[/size]
[size=4]HA, better question: "will it ever be finished?"..[/size]
|
|
|
 phoenix_dr phoenix_dr
Commited Dubber
 
Posts: 64
Threads: 13
Registered: July 23rd, 2010
Member Is Offline
Location: sydney
Theme: UltimaBB Pro Black
Mood: relaxed
|
| posted on June 25th, 2011 at 11:49 PM |
|
|
Thanks for the comments guys, hope your projects are going well.
t_tuffnut - I kinda know what mean, the fabrication is kicking my arse at the moment but it's going to feel weird not cutting up the body and welding
... something .
Also, looking back at this post, it seems like not much has actually happened but there have been literally hundreds of little 'fix it' jobs on
this body.
[size=5]"So... when will the bug be finished?"[/size]
[size=4]HA, better question: "will it ever be finished?"..[/size]
|
|
|
 phoenix_dr phoenix_dr
Commited Dubber
 
Posts: 64
Threads: 13
Registered: July 23rd, 2010
Member Is Offline
Location: sydney
Theme: UltimaBB Pro Black
Mood: relaxed
|
| posted on June 26th, 2011 at 12:08 AM |
|
|
A little side note
I just want to give some credit to "dasdubber"
In researching ideas for this car I came across "dasdubbers" site on a manx forum (turns out he's on here too)
I drew alot of inspiration from what he did to his ragtop a while ago, and his step by step process really helped me nail down my ideas.
My dash is a little different from his as I moved the face back about 2 inches so I could use the standard gear shift, meaning the dash lines slant on
a 45` angle.
But his rear apron idea is bang on, haven't changed a Thing about it
When I owned my first bug these two things always stood out as the things I would change if I ever built one from the ground up .
Here's a link to his site:
rear apron
http://www.manxgallery.org/gallery/album572?page=1
Dash
http://www.manxgallery.org/gallery/album103
full props to the him... If anyone knows him please pass on my thanks. Cheers
[size=5]"So... when will the bug be finished?"[/size]
[size=4]HA, better question: "will it ever be finished?"..[/size]
|
|
|
| Pages: 1 2 |