| [ Total Views: 15475 | Total Replies: 154 | Thread Id: 85938 ] |
| Pages: 1 2 3 4 5 6 |
|
|
 ElusiveStranger ElusiveStranger
Officially Full-On Dubber
  
Posts: 330
Threads: 30
Registered: May 28th, 2006
Member Is Offline
Location: Kent. England
Theme: UltimaBB Pro Blue ( Default )
|
| posted on January 28th, 2011 at 08:34 AM |
|
|
Well I'm a Pom living in Pomland. Never had an excessive heat build up in the engine bay, the water carries it away nicely
|
|
|
 Joel Joel
Scirocco Rare
Now containing 100% E-Wang
        
Posts: 9368
Threads: 211
Registered: February 14th, 2006
Member Is Offline
Location: Northern Rivers NSW
Theme: UltimaBB Pro Purple
Mood: Tact Level 0.00
|
| posted on January 28th, 2011 at 09:02 AM |
|
|
I think you're worrying over nothing.
TBH I think the engine is probably cooler in the kombi engine bay than the original subi.
In the kombi it's got that fresh air coming in through the pillar vents.
The only air entering the subi engine bay is carrying the heatload from the radiator and possibly an A/C condenser as well.
All you have to worry about is getting cool air to the carby.
Wouldnt be hard to rig up a cold air intake system.
|
|
|
 General_Failure General_Failure
A.k.a.: Tristan
Custom Title Time!
Use your head, don't abuse it!
    
Posts: 1036
Threads: 107
Registered: June 15th, 2004
Member Is Offline
Location: Peaceful Finley, NSW
Theme: UltimaBB Streamlined2
Mood: Not too bad. Thanks for asking!
|
| posted on January 28th, 2011 at 01:22 PM |
|
|
Well that's good. i would still like some vague facsimile of the front engine tin though to stop all the crap from the road being flung up all over
the motor. Considering using the original as a rough template to make something.
It's the exhaust heat which has me concerned. the entire system is underneath the hole. A rough description of my exhaust:
Front is front.
The exhaust comes out of the right head and around in front of the sump where it turns back to run parallel with the exhaust from the left head where
it combines in a sort of 2>1 collector attached to the muffler which points rearward and is situated under the moustache bar.
Moving doesn't bother me much. but it's when it's running but not moving that concerns me. All that exhaust heat will radiate up past the engine
and heat up the floor around the inspection hatch and the fuel tank.
Maybe exhaust wrapping? I dunno.
Anyhow I bit the bullet and ordered a ferd holesaw and arbour. It'll be at the store on Monday. Shame the only time I've really had when I can use
power tools is on this Sunday. I just want to get the radiator installed properly and out of the way, or at least as much as it can be. I still need
another thermo fan.
Don't think I said but the coolant hose just next to where it attaches to the block on the top pipe split. I hacked a chunk off one of the rad hoses
for the magna, clamped it down tight and called it good.
the stone guard / cowling for the radiator I think I'll attach with tek screws through the side bits of the rad. It seems like overkill doing it any
other way. the poor rad is looking worse and worse. I need to cut another chunk out of it for the LH hand brake cable. better to have a mangled rad
than mess with all the stock tubes I guess. If you missed it it's just the metal on the sides I'm cutting up. not any of the water flowy bits.
Cold air intake would be dead easy. It still has the original subie air cleaner with the manual summer / winter switch. Just need to put something on
the winter inlet and shove it up one of the scoops. With something on top of course so it can't take a drink when it rains.
I'm still kind of ticked about the carburettor adapter being the wrong one.
Unrelated: I have some bits missing from the rear window sill lip. Only a few mm deep, ie not all the way to the sill. I tried building it up but
it's a fools errand. Would I be better welding a chunk of metal 2x width in because of the two layers of sheet, or two thin bits together? I'm sick
of it not having a back window. The sill is repairs, it's just part of the lip that hasn't been.
If at first you don't succeed. Build, build again.
Vehicle: 1975 Special order delivery walkthrough panel based LCA pop-top camper. Motor: Nippon 1.8L Single port Wasserboxer, Transmission: 3 rib 002.
|
|
|
 General_Failure General_Failure
A.k.a.: Tristan
Custom Title Time!
Use your head, don't abuse it!
    
Posts: 1036
Threads: 107
Registered: June 15th, 2004
Member Is Offline
Location: Peaceful Finley, NSW
Theme: UltimaBB Streamlined2
Mood: Not too bad. Thanks for asking!
|
| posted on January 29th, 2011 at 08:43 AM |
|
|
I finally got around to testing the thermo fan thermostat. Would you believe it actually works? It surprised me because just about everything else
needs to be / has been repaired / replaced.
Since I can't do much else actually mounting it somewhere seems like an idea. Suggestions?
I figure if it's on the firewall the tube will be flexing from engine movement but if it's on the motor it cops lots of vibration. This is assuming
it's been shoved in at the top motor pipe / rad hose join.
If at first you don't succeed. Build, build again.
Vehicle: 1975 Special order delivery walkthrough panel based LCA pop-top camper. Motor: Nippon 1.8L Single port Wasserboxer, Transmission: 3 rib 002.
|
|
|
 ian.mezz ian.mezz
Wolfsburg Elder
I never said, I could write or spell
      
Posts: 3913
Threads: 280
Registered: September 11th, 2004
Member Is Offline
Location: Newcastle
Theme: UltimaBB Pro Blue ( Default )
Mood: Happy
|
| posted on January 29th, 2011 at 09:18 AM |
|
|
Dont you watch Beer adds on Tv, the engine should be hot enough to
cook a chicken on. the engine should be hot enough to
cook a chicken on.
|
|
|
 General_Failure General_Failure
A.k.a.: Tristan
Custom Title Time!
Use your head, don't abuse it!
    
Posts: 1036
Threads: 107
Registered: June 15th, 2004
Member Is Offline
Location: Peaceful Finley, NSW
Theme: UltimaBB Streamlined2
Mood: Not too bad. Thanks for asking!
|
| posted on January 29th, 2011 at 12:39 PM |
|
|
Reckon i could cook a chook as is today. Pretty toasty out.
Every time I look in that engine bay there is more I want to do. Really need someone around to say "Stop!" I think. I keep rewiring and rerouting
the fuel and just rearranging bits. I think the fuel reg is going to be shifted soon and the thermo fan wiring changed. I also have to try to shoehorn
some extra wires into my corrugated loom. Don't want to go up yet another size 
Electrical conduit brackets with a screw in them work really well for securing wiring. I have a couple where the engine seal used to be on the
firewall panel and have a loom running that way around the engine bay. Did that when it was still aircooled. Now there's stray wires again.
I had an idea today. I might use one of the gal plates with all the holes in it from the hardware store put across a couple of ribs on the firewall to
mount stuff to. That way I have more choices in location.
I still need to pick up a couple more of those relay holders which connect together because I have a couple of strays still. It seems like the right
side of my firewall is electrical. There's a fusebox and three relays there so far.
If at first you don't succeed. Build, build again.
Vehicle: 1975 Special order delivery walkthrough panel based LCA pop-top camper. Motor: Nippon 1.8L Single port Wasserboxer, Transmission: 3 rib 002.
|
|
|
 General_Failure General_Failure
A.k.a.: Tristan
Custom Title Time!
Use your head, don't abuse it!
    
Posts: 1036
Threads: 107
Registered: June 15th, 2004
Member Is Offline
Location: Peaceful Finley, NSW
Theme: UltimaBB Streamlined2
Mood: Not too bad. Thanks for asking!
|
| posted on February 10th, 2011 at 10:29 PM |
|
|
I didn't know there was a VSI update last month. Damnit! There are a few more hoops to jump through but things should be okay. The big pain is a
heater. It hasn't had a functional heating system since it was made. The VSI bulletin actually made mention of aircooled vehicles failing to comply
with ADRs with an engine swap.
Other things are probably needing a catalytic converter. Ahh! Not too bad I guess. And a few slightly iffy things on cooling system placement which
are vague as.
The closest things to frame / body mods are this 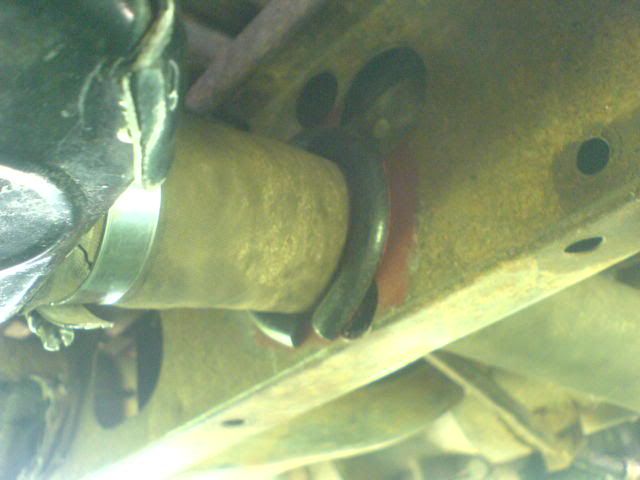 and the tek screws on the brackets for the radiator and
cowling. VW screwed the stone guard to the frame, so what's the diff? and the tek screws on the brackets for the radiator and
cowling. VW screwed the stone guard to the frame, so what's the diff?
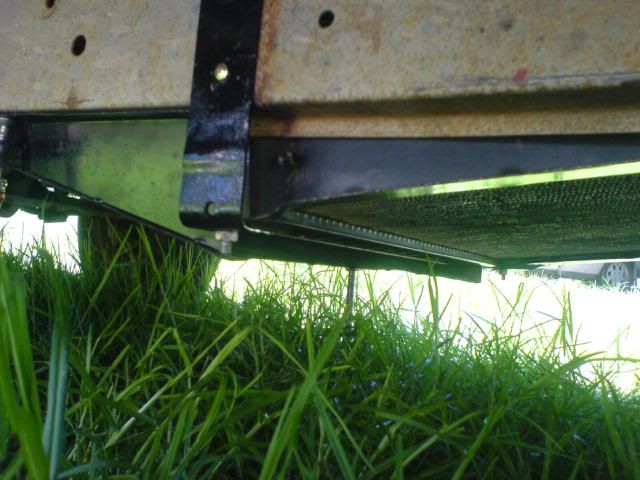
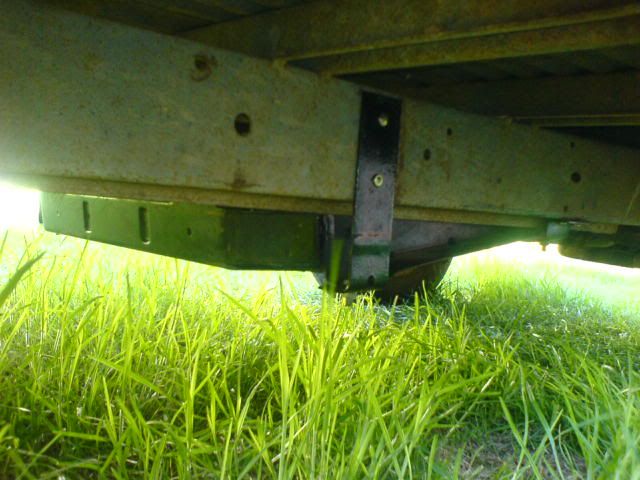
It's on there solid. Anyway even if somehow every single screw failed it can't possibly escape. It has two radiator hoses holding it captive and
it's slotted in between the frame rails.
Not worried about much else as it seems reasonably compliant. Figuring out a heater seems to be my big issue.
If at first you don't succeed. Build, build again.
Vehicle: 1975 Special order delivery walkthrough panel based LCA pop-top camper. Motor: Nippon 1.8L Single port Wasserboxer, Transmission: 3 rib 002.
|
|
|
 General_Failure General_Failure
A.k.a.: Tristan
Custom Title Time!
Use your head, don't abuse it!
    
Posts: 1036
Threads: 107
Registered: June 15th, 2004
Member Is Offline
Location: Peaceful Finley, NSW
Theme: UltimaBB Streamlined2
Mood: Not too bad. Thanks for asking!
|
| posted on February 12th, 2011 at 02:32 PM |
|
|
I know I'm crazy but I'm starting to look for parts for an EDIS setup. this motor might be a mess but parts are transferable and damnit i really
want to mess with the advance map on a computer. It also opens the door for not terrible dual fuel.
If at first you don't succeed. Build, build again.
Vehicle: 1975 Special order delivery walkthrough panel based LCA pop-top camper. Motor: Nippon 1.8L Single port Wasserboxer, Transmission: 3 rib 002.
|
|
|
 General_Failure General_Failure
A.k.a.: Tristan
Custom Title Time!
Use your head, don't abuse it!
    
Posts: 1036
Threads: 107
Registered: June 15th, 2004
Member Is Offline
Location: Peaceful Finley, NSW
Theme: UltimaBB Streamlined2
Mood: Not too bad. Thanks for asking!
|
| posted on February 16th, 2011 at 07:59 AM |
|
|
Finally put some coolant in. It'll be a while before I revisit the cooling system so it seemed pertinent.
I picked up some trailer loom today to use as gauge sensor wiring. Would I have any problems with the authorities if it's ran along beside the
underbody wiring tube with a whole lot 'o' zip ties? My tach cable runs along like that and no-one has ever said boo. The tach wire will of course
be eliminated.
When I get a chance I'm going to pull the heater core out of the magna and see what i can do with that.
I have asked this countless times in many places. Put up classifieds etc. but no luck. I'll try again. Does anyone have a spare cable holder clip
that goes on the back of the heater controls behind the dash? the heater was removed from mine when the original camper conversion was done to fit the
water tank. To make sure no-one played with the controls the clip was also removed so the cables just bent when the levers were moved. Yes of course
they are seized solid. I'd like to reuse the controls with a different cable. probably attach the heat exhanger flap to a mech. heater valve.
the heater setup will be seriously budget because i couldn't care less about it and just built from scavenged parts.
One thing I'm stumped on is what sort of hard lines I can run. Putting hose all the way would be messy as. Before it is said I'm aware of the
problem with the heater loop controlling the thermostat. Would doing a restricted H of sorts near the inlet / outlet on the case work to provide a bit
of flow?
If at first you don't succeed. Build, build again.
Vehicle: 1975 Special order delivery walkthrough panel based LCA pop-top camper. Motor: Nippon 1.8L Single port Wasserboxer, Transmission: 3 rib 002.
|
|
|
 Joel Joel
Scirocco Rare
Now containing 100% E-Wang
        
Posts: 9368
Threads: 211
Registered: February 14th, 2006
Member Is Offline
Location: Northern Rivers NSW
Theme: UltimaBB Pro Purple
Mood: Tact Level 0.00
|
| posted on February 16th, 2011 at 08:54 AM |
|
|
Been ages since I clapped eyes closely on an EA but I'm pretty sure the thermostat is on the hotside, not the cold side like EJs so the heater loop
isn't critical
|
|
|
 General_Failure General_Failure
A.k.a.: Tristan
Custom Title Time!
Use your head, don't abuse it!
    
Posts: 1036
Threads: 107
Registered: June 15th, 2004
Member Is Offline
Location: Peaceful Finley, NSW
Theme: UltimaBB Streamlined2
Mood: Not too bad. Thanks for asking!
|
| posted on February 17th, 2011 at 04:26 PM |
|
|
I've got a manifold coming in the mail in the next week or so. I'll check it out on that. I'm sick again atm and couldn't be stuffed.
I actually get a chance to go to a wreckers tomorrow but can't for the life of me think of what useful bits I'm after. ideas? Short on cash so it's
bits and bobs i can get.
If at first you don't succeed. Build, build again.
Vehicle: 1975 Special order delivery walkthrough panel based LCA pop-top camper. Motor: Nippon 1.8L Single port Wasserboxer, Transmission: 3 rib 002.
|
|
|
 General_Failure General_Failure
A.k.a.: Tristan
Custom Title Time!
Use your head, don't abuse it!
    
Posts: 1036
Threads: 107
Registered: June 15th, 2004
Member Is Offline
Location: Peaceful Finley, NSW
Theme: UltimaBB Streamlined2
Mood: Not too bad. Thanks for asking!
|
| posted on February 19th, 2011 at 07:47 AM |
|
|
I had a brief visit to the wreckers and picked up a charcoal canister purge valve from an early carbd magna and a thermo fan from a Pajero because it
was almost the same as the broken Davies Craig fan. Fitting the second fan may be possible if I bring it / them forward / down a little. Unfortunately
it's a very hard theory to test, beyond pulling out the cowling and gently putting the fan in up above the rad and seeing how far back it goes.
Now I have the purge valve I can finish the emission system. So it's not all Subaru, but the mitsubishi canister works a little better with the VW
design I think.
If at first you don't succeed. Build, build again.
Vehicle: 1975 Special order delivery walkthrough panel based LCA pop-top camper. Motor: Nippon 1.8L Single port Wasserboxer, Transmission: 3 rib 002.
|
|
|
 General_Failure General_Failure
A.k.a.: Tristan
Custom Title Time!
Use your head, don't abuse it!
    
Posts: 1036
Threads: 107
Registered: June 15th, 2004
Member Is Offline
Location: Peaceful Finley, NSW
Theme: UltimaBB Streamlined2
Mood: Not too bad. Thanks for asking!
|
| posted on February 25th, 2011 at 08:20 AM |
|
|
Hopefully the manifold will be here today. It'll probably be late next week / not at all. What is wrong with Aussie post recently?
I sort of finished running the gauge wiring. I had to shuffle it all back a bit because my length estimate was a little conservative apparently so
every cm counted.
The temperature gauge is wired up but still untested. I removed the old digital tach from the cluster so I can fit the temp gauge there. I still have
to shift the wires over from the analog tach to the new trailer loom so I can rip out the old, mysteriously growing single wire I ran years ago.
Seriously it hangs down in loops now, but when I installed it I needed to extend it with another piece of wire.because it came up short.
The temperature gauge is going to be a bodge mount unfortunately. It's the sort of gauge that has a threaded sleeve over the outside and an O ring to
lock it in place. i don't have the threaded bit or the backlight for it. It has a thicker plastic housing too so my other backlight trick won't
work. What i did was pop a grommet into the backlight hole. The ID of the grommet fits an LED nice and snugly,
The gauge will probably be held in place with something fun like a strip of mattress foam and a ziptie. No-one knows what's behind the dash but me.
that is such a good thijng for so many reasons!
You'll all probably think I'm a bit special for this, but when it still had the type4 motor I extended a lot of the engine bay wiring so as little
as possible was resting on the engine. I think the oil light sender and maybe the coil wire still go over the top. The rest goes around the firewall
and comes across to the left of the coil.
The extra wiring is all following this theme. I'll get around to tidying up the alternator wiring eventually.
On the subject of the alternator. I really have to give the engine a good rev now before it kicks in. Once it does it's all good. The VW alternator
did the same thing. i wonder what the deal is.
If at first you don't succeed. Build, build again.
Vehicle: 1975 Special order delivery walkthrough panel based LCA pop-top camper. Motor: Nippon 1.8L Single port Wasserboxer, Transmission: 3 rib 002.
|
|
|
 General_Failure General_Failure
A.k.a.: Tristan
Custom Title Time!
Use your head, don't abuse it!
    
Posts: 1036
Threads: 107
Registered: June 15th, 2004
Member Is Offline
Location: Peaceful Finley, NSW
Theme: UltimaBB Streamlined2
Mood: Not too bad. Thanks for asking!
|
| posted on March 11th, 2011 at 08:56 PM |
|
|
Today I learned:
VSI 06 Jan 2011 revision was pulled for review.
I can legally use the Holley progressive without issue.
I don't need a heater.
Cold air demist is fine.
Why? Well because the vehicle is pre 1976 and the motor is such a crusty relic that it doesn't matter if I use the Holley because it doesn't
interfere with any emissions gear and it is more advanced than the primitive POS Hitachi.
Today is a good day.
I still want to add a heater but it's not such a concern now. It means I can chuck one under the rock-n-roll bed or something.
Now I don't need to try to get someone 100km away to make me a choke cable of undefined length which I'd have to route and sheathe.
It means I can use this once I get a spacer: 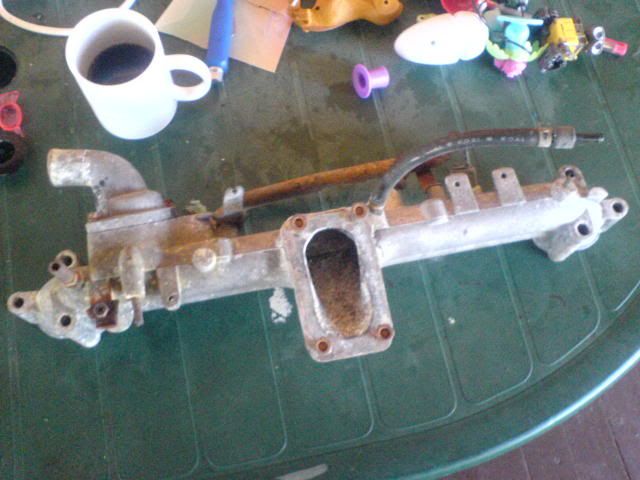
Someone please tell me is there a rule for distance of things mounted in the engine bay from the motor? Where I want to put the charcoal canister is
maybe
If at first you don't succeed. Build, build again.
Vehicle: 1975 Special order delivery walkthrough panel based LCA pop-top camper. Motor: Nippon 1.8L Single port Wasserboxer, Transmission: 3 rib 002.
|
|
|
 General_Failure General_Failure
A.k.a.: Tristan
Custom Title Time!
Use your head, don't abuse it!
    
Posts: 1036
Threads: 107
Registered: June 15th, 2004
Member Is Offline
Location: Peaceful Finley, NSW
Theme: UltimaBB Streamlined2
Mood: Not too bad. Thanks for asking!
|
| posted on March 11th, 2011 at 09:00 PM |
|
|
^^^^^ < 10mm away from the right rocker cover. I figure the drive train will be on the road before it gets enough wiggle to hit the charcoal
canister.
I typed out the end of the last post two times and it disappeared for some reason. Sorry about that.
If at first you don't succeed. Build, build again.
Vehicle: 1975 Special order delivery walkthrough panel based LCA pop-top camper. Motor: Nippon 1.8L Single port Wasserboxer, Transmission: 3 rib 002.
|
|
|
 pete wood pete wood
A.k.a.: figure itout
23 Windows of Awesome
       
Posts: 6828
Threads: 389
Registered: January 15th, 2004
Member Is Offline
Location: Nth Nth StMarys, Sydney
Theme: UltimaBB Pro White
Mood: upgrades = jackstands
|
| posted on March 12th, 2011 at 02:49 PM |
|
|
I hope you're gonna use a 4 barrell 
|
|
|
 Joel Joel
Scirocco Rare
Now containing 100% E-Wang
        
Posts: 9368
Threads: 211
Registered: February 14th, 2006
Member Is Offline
Location: Northern Rivers NSW
Theme: UltimaBB Pro Purple
Mood: Tact Level 0.00
|
| posted on March 12th, 2011 at 07:44 PM |
|
|
Most of the watercooled converted vws out there don't even have heaters.
Luckily we live in Oz not Alaska so hardly anyone needs them.
I got one of those hotrod-air heatercores for mine but never bothered fitting it.
|
|
|
 General_Failure General_Failure
A.k.a.: Tristan
Custom Title Time!
Use your head, don't abuse it!
    
Posts: 1036
Threads: 107
Registered: June 15th, 2004
Member Is Offline
Location: Peaceful Finley, NSW
Theme: UltimaBB Streamlined2
Mood: Not too bad. Thanks for asking!
|
| posted on March 12th, 2011 at 07:59 PM |
|
|
Yeah I need a four barrel to cope with the fury of an EA81  My
google-fu was strong today and I figured out it's a Holley Economizer. As an added bonus the mystery hose connector I plugged is a decel line, so I
can easily plumb it into the decel valve ...I think. My
google-fu was strong today and I figured out it's a Holley Economizer. As an added bonus the mystery hose connector I plugged is a decel line, so I
can easily plumb it into the decel valve ...I think.
There's a heater lump from a bus I have my eye on It recirculates the air and has a fan in it. Do that central heating thermostat idea and it's set
and forget.
man i want to try it with the Holley on, but I need some manifold gaskets, a massive carb spacer, a little imagination and something big to put the
coolant in. It's only got about fifty meters on it. hardly ready for replacement. It would mean I could fix up my buggered routing of the rad bleeder
hose. It goes halfway to Antarctica and back to get to the header tank, plus it has a pointless adapter. Now I think of it while the coolant is out I
can fit the pajero thermo fan I picked up. I really think Davies Craig makes them as an OEM part.
In other news I'm nearly ready to reinstall the rear window finally. Sure the sill paint is hand brushed epoxy enamel, but all the paint is wrecked
so who cares. I'd rather not have rust or leaks.
Getting there slowly.
If at first you don't succeed. Build, build again.
Vehicle: 1975 Special order delivery walkthrough panel based LCA pop-top camper. Motor: Nippon 1.8L Single port Wasserboxer, Transmission: 3 rib 002.
|
|
|
 General_Failure General_Failure
A.k.a.: Tristan
Custom Title Time!
Use your head, don't abuse it!
    
Posts: 1036
Threads: 107
Registered: June 15th, 2004
Member Is Offline
Location: Peaceful Finley, NSW
Theme: UltimaBB Streamlined2
Mood: Not too bad. Thanks for asking!
|
| posted on March 13th, 2011 at 10:35 AM |
|
|
I just noticed while I was cleaning up the manifold that it has been ported. Would this have a negative effect if I bolt it straight up to the heads
without port matching? I really don't want to pull the heads off. Pandora's Box should stay closed.
If at first you don't succeed. Build, build again.
Vehicle: 1975 Special order delivery walkthrough panel based LCA pop-top camper. Motor: Nippon 1.8L Single port Wasserboxer, Transmission: 3 rib 002.
|
|
|
 General_Failure General_Failure
A.k.a.: Tristan
Custom Title Time!
Use your head, don't abuse it!
    
Posts: 1036
Threads: 107
Registered: June 15th, 2004
Member Is Offline
Location: Peaceful Finley, NSW
Theme: UltimaBB Streamlined2
Mood: Not too bad. Thanks for asking!
|
| posted on March 19th, 2011 at 11:42 AM |
|
|
Been out of commission again. bad tooth this time. Anyway the tooth is gone and I'm feeling relatively better for it. Good enough today that I went
to a garage sale. got a few cheap goodies like a GT40R, some sparky leads, a huge mikuni carb which by fluke I have a matching air cleaner for, and
the main item was an unused EA81 sump gasket which i have been needing. What are the odds?
I had to let the bus heater go because of lack of $. Maybe the truck wrecker has that sort of thing?
The rear window is reinstalled. I'm really happy with the window rubber. I accidentally tore it slightly in a few places on the inside but it's not
too bad. those awful jags ion the frame near where the lip was spot welded together didn't help things.
Hopefully soonish the rather nice looking second-hand aluminium weber spacer i bought will be arriving. I didn't want phenolic because I actually
want the carburettor to be warmed. If having the progressive on the type 4 taught me anything it is that fuel dropout and icing is a major PITA.
i know compared to most conversions this one is going slow and is kind of simplistic. Remember this one is being done with the added challenges of
being done within the guidelines for owner modifications and is being done on a non-existent budget. When I succeed in re-registering it (optimism) it
will mean another VW back on the road and also be an example that a conversion can be done for under $1000 total. I hope.
If at first you don't succeed. Build, build again.
Vehicle: 1975 Special order delivery walkthrough panel based LCA pop-top camper. Motor: Nippon 1.8L Single port Wasserboxer, Transmission: 3 rib 002.
|
|
|
 General_Failure General_Failure
A.k.a.: Tristan
Custom Title Time!
Use your head, don't abuse it!
    
Posts: 1036
Threads: 107
Registered: June 15th, 2004
Member Is Offline
Location: Peaceful Finley, NSW
Theme: UltimaBB Streamlined2
Mood: Not too bad. Thanks for asking!
|
| posted on March 20th, 2011 at 10:21 AM |
|
|
I found an EA81 sump gasket at a garage sale yesterday. Got that and a bag of misc. parts including what seems to be a big mikuni prog, and a GT40R
coil for the princely sum of $7. Awesome. I also realised that the really nice Magnecor spark pug leads I got from Richard Holzl for my type 4 are a
pretty good fit for the subie motor. They actually fit better than the leads that were on there, which while were Bosch leads they had the wrong
connector on them so they pushed against the air cleaner. That's fixed now with the SS leads.
Now about all I can do is stuff around on bits and pieces until i get the aluminium spacer for the carburettor and the manifold to head gaskets. I'll
make the carb base gaskets myself because they are so damned expensive for what is really just a paper gasket.
Does anyone have one of those towbars that replace the rear bumper lying around? My towbar interferes with the muffler. I have half a wood clothes peg
jammed in between for now so the rattling doesn't drive me bonkers but I need a real solution.
If at first you don't succeed. Build, build again.
Vehicle: 1975 Special order delivery walkthrough panel based LCA pop-top camper. Motor: Nippon 1.8L Single port Wasserboxer, Transmission: 3 rib 002.
|
|
|
 General_Failure General_Failure
A.k.a.: Tristan
Custom Title Time!
Use your head, don't abuse it!
    
Posts: 1036
Threads: 107
Registered: June 15th, 2004
Member Is Offline
Location: Peaceful Finley, NSW
Theme: UltimaBB Streamlined2
Mood: Not too bad. Thanks for asking!
|
| posted on March 23rd, 2011 at 03:29 PM |
|
|
Going well. Got the Holley sorted out more or less. Here's the thread about the studs http://forums.aussieveedubbers.com/viewtopic.php?tid=89395&page=1. Anyhow I test assembled it today. Fits more or less. I
need a thermostat and gasket which will have to wait until next week before I proceed.
I put some stickers on the rear window too.
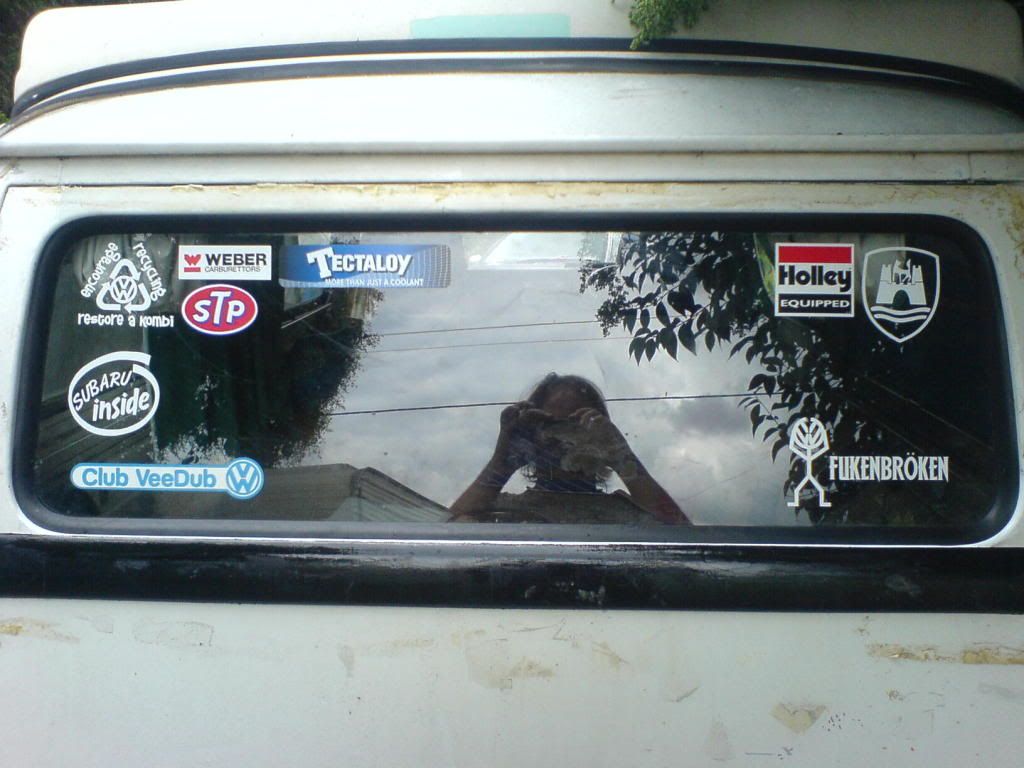
If at first you don't succeed. Build, build again.
Vehicle: 1975 Special order delivery walkthrough panel based LCA pop-top camper. Motor: Nippon 1.8L Single port Wasserboxer, Transmission: 3 rib 002.
|
|
|
 bevelhead bevelhead
Seriously Crusin Dubber
 
Posts: 161
Threads: 40
Registered: August 18th, 2008
Member Is Offline
Location: Cremorne TAS
Theme: UltimaBB Pro Blue
|
| posted on April 13th, 2011 at 11:47 PM |
|
|
Just come across your thread man, good to see another ea alive, here are a couple of pic of mine if your interested, feel free to remove them if you
dont want them here. I mounted my mufflers up under the trays on isolation mounts....man what a headf@#k that was, i have my rad in the back but only
temporary...it just so happened i was stuffing about one day with the rad just to get motor going..had it held in there with occy straps and thought about a bar across back to hold it...only bolts i found
were the ones on the end of early bay mounts...so screwed them in bottom of chassis rail and put bar across them. EAs are a great little motor, simple
and reliable, but i HATE my sump....its getting the chop shortly and thought about a bar across back to hold it...only bolts i found
were the ones on the end of early bay mounts...so screwed them in bottom of chassis rail and put bar across them. EAs are a great little motor, simple
and reliable, but i HATE my sump....its getting the chop shortly


|
|
|
 General_Failure General_Failure
A.k.a.: Tristan
Custom Title Time!
Use your head, don't abuse it!
    
Posts: 1036
Threads: 107
Registered: June 15th, 2004
Member Is Offline
Location: Peaceful Finley, NSW
Theme: UltimaBB Streamlined2
Mood: Not too bad. Thanks for asking!
|
| posted on April 17th, 2011 at 01:02 PM |
|
|
I see what you did there. Wow that's pretty impressive. Do you have any heat problems with your battery? The EA81 sump is pretty low, but I realised
the exhaust is just as low on mine, so whatever.
Slowly making a little progress. I did this:
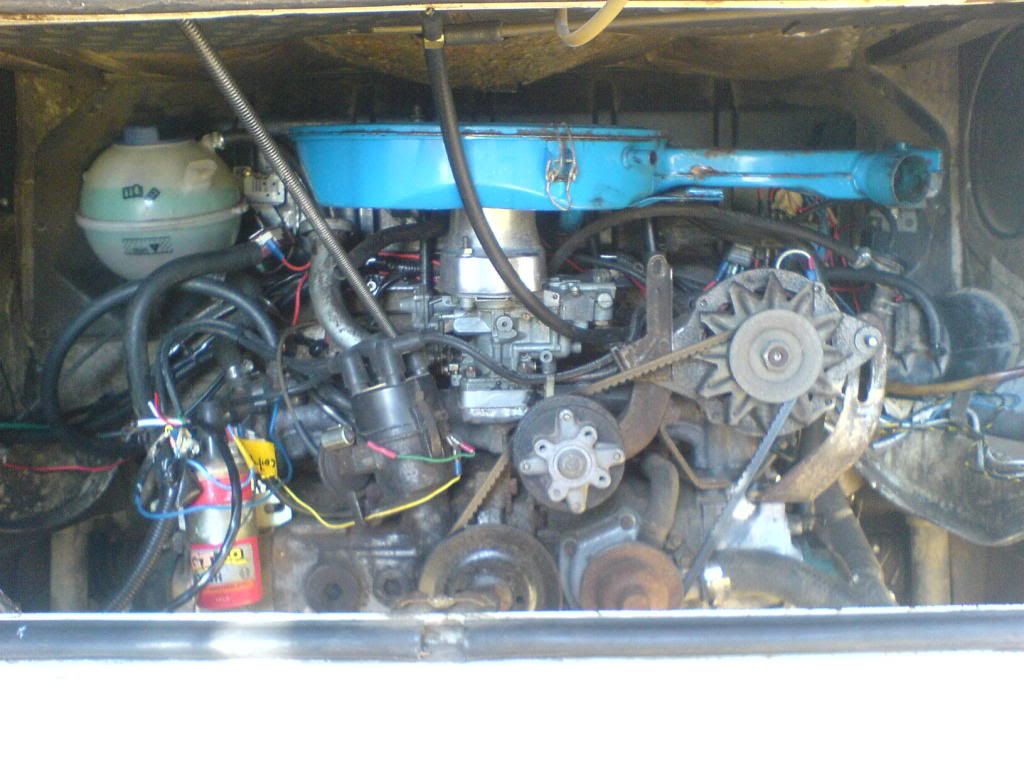
That's the manifold I got on eBay. Cleaned it up a bit, replaced the thermostat. Big aluminium spacer with tapered holes from ??? under the Holley. I
had to turn the Holley around because bits of it were way too close to the distributor. then on top of that is an air cleaner adapter I got from
somewhere in the US. Finally at the top is a Mazda air cleaner.
My throttle linkage is one of those arc ones, set up underslung and flipped backwards. I had to file off the casting flash on the manifold so it could
fit, even with that huge spacer.
I also fitted longer studs with a short unthreaded bit so it could take the aluminium spacer.
It all went really well after I stopped a coolant leak from a small hose I idiotically plugged with a screw headed bolt and gave the carb a quick
tweak so it idled right.
I was worried that the air cleaner I got yesterday wouldn't fit. But it did, with centimeters to spare before the top and the front of the engine
bay.
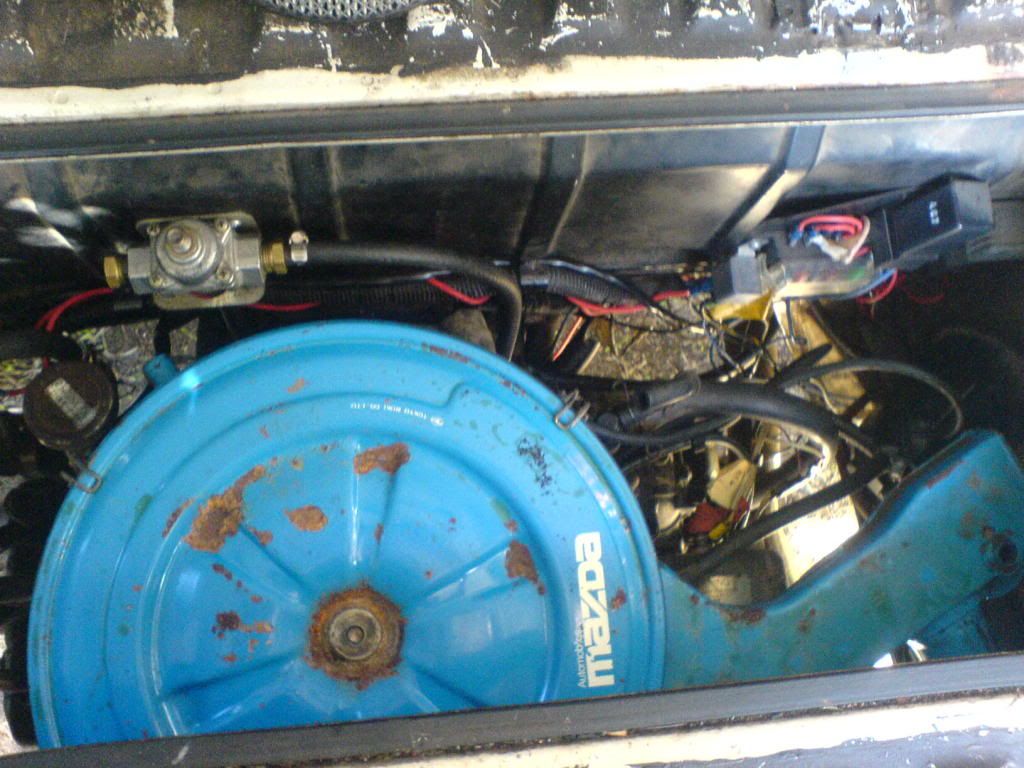
The spark leads are the really nice Magnecor ones that Richard Holzl made up for my type 4. I don't know how to do accent characters on this
computer. Sorry Richard! Anyway I know it's a little hard to believe but there was a perceivable difference as soon as I swapped the leads even with
idling. The leads are connected to NGK BP5ES plugs. I went up a temperature range because the motor isn't fantastic and was oil fouling the plugs a
little.
With all my current alterations in spice of the wear it is essentially smoke free now. Yay!
Still lots to do as you can see in the photo. I really need some band steel to make brackets but I can't get any around here. Or any kind of metal
bits for that matter. Argh!
The engine is noticeably better running now. Has more low down torque. After i fitted the Holley I went to move it to make sure it could actually move
itself (intermittently the Hitachi was that lousy it couldn't). just as I got it moving from a standstill the revs kept surging like a slipping
clutch. many sad and angry thoughts filled my mind. But glancing at the rear view mirror explained it. It was breaking traction at part throttle on
the compacted dirt. Wasn't entirely expecting that.
If at first you don't succeed. Build, build again.
Vehicle: 1975 Special order delivery walkthrough panel based LCA pop-top camper. Motor: Nippon 1.8L Single port Wasserboxer, Transmission: 3 rib 002.
|
|
|
 bevelhead bevelhead
Seriously Crusin Dubber
 
Posts: 161
Threads: 40
Registered: August 18th, 2008
Member Is Offline
Location: Cremorne TAS
Theme: UltimaBB Pro Blue
|
| posted on April 17th, 2011 at 06:20 PM |
|
|
Losing traction! haha good stuff go the subie. No i dont have any heat problems with the battery....the mufflers are sitting under galvanised plate
come mounts, even though there is only about a 1 cm air gap it works ok. I was more concerned thinking the heat might stuff up the paint but it doesnt
really get that hot, not that i have had it working that hard, its really a reconditioned motor, only thing is i had it reco in 1988 and have carted
it round all over the place and have only just put in kombi in last year or so, i originally had it a beetle project but never got it on the road.
|
|
|
 General_Failure General_Failure
A.k.a.: Tristan
Custom Title Time!
Use your head, don't abuse it!
    
Posts: 1036
Threads: 107
Registered: June 15th, 2004
Member Is Offline
Location: Peaceful Finley, NSW
Theme: UltimaBB Streamlined2
Mood: Not too bad. Thanks for asking!
|
| posted on April 17th, 2011 at 09:51 PM |
|
|
Nice. At least you're working with a recon motor. So is your van on the road or still in testing?
I attached the hoses, mounted the cleaner using a damping bracket from the Magna, and reused an intake adapter rubber thing as the crush rubber gasket
for the air cleaner. The old one was damaged and too thin to tighten down properly.
Engine bay:
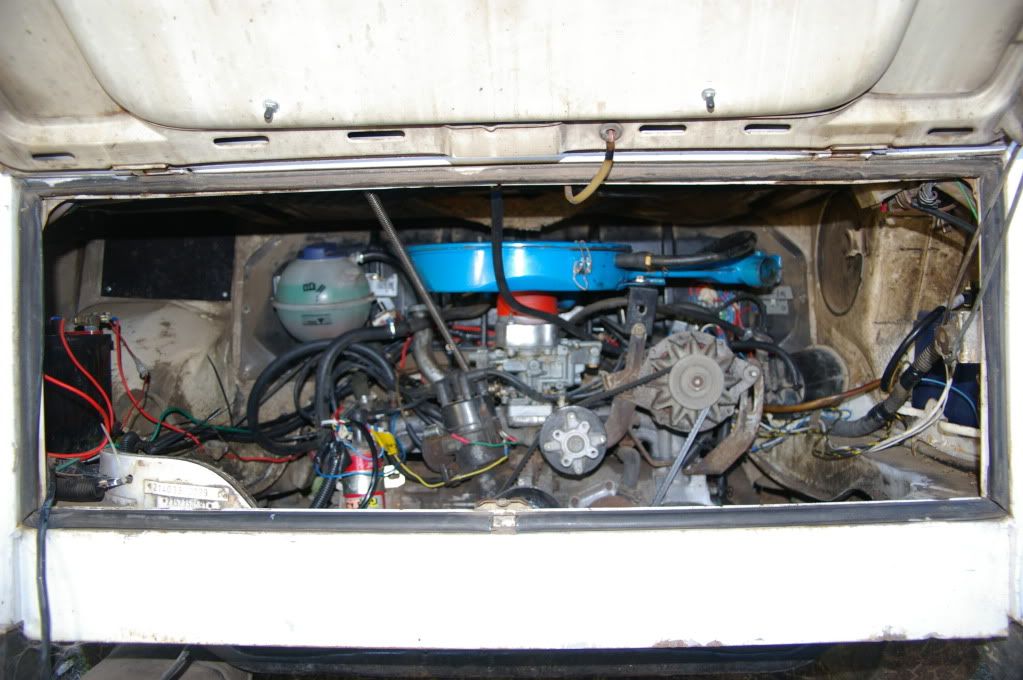
The motor. See the red adapter thing, and the rubber mount? Worked out alright I think.
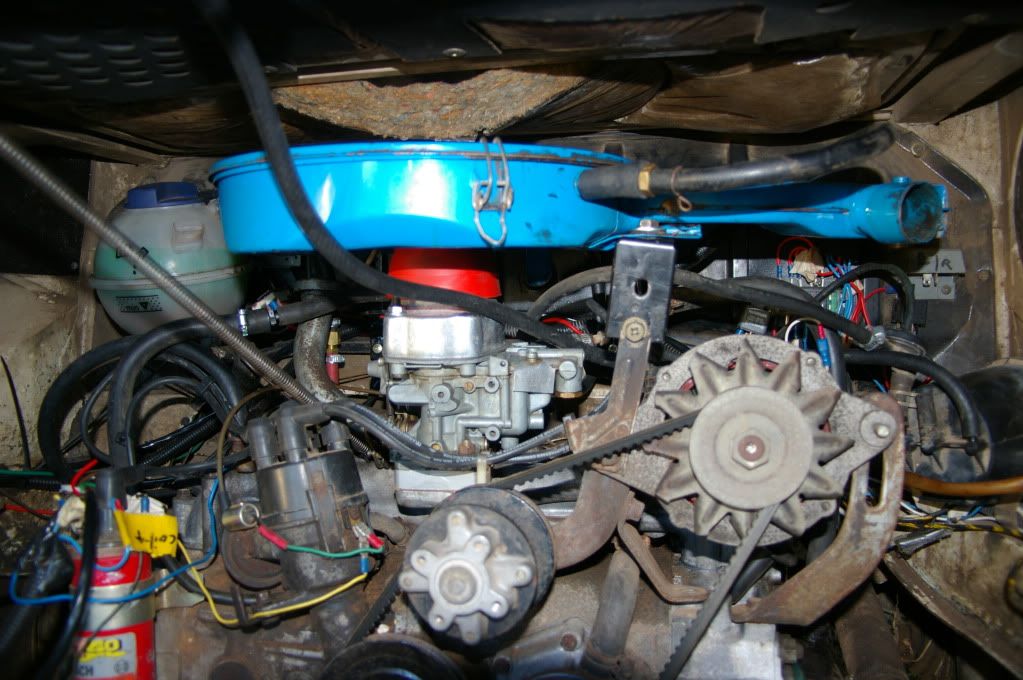
If at first you don't succeed. Build, build again.
Vehicle: 1975 Special order delivery walkthrough panel based LCA pop-top camper. Motor: Nippon 1.8L Single port Wasserboxer, Transmission: 3 rib 002.
|
|
|
 bevelhead bevelhead
Seriously Crusin Dubber
 
Posts: 161
Threads: 40
Registered: August 18th, 2008
Member Is Offline
Location: Cremorne TAS
Theme: UltimaBB Pro Blue
|
| posted on April 17th, 2011 at 11:01 PM |
|
|
"So is your van on the road or still in testing?"
Still in testing....style wise anyway, the reason i made everything with good clearance as it was going to be off road style.....but change of
direction, it has more or less been ready to go for engineering cert for a while now....but i keep getting sidetracked 
|
|
|
 General_Failure General_Failure
A.k.a.: Tristan
Custom Title Time!
Use your head, don't abuse it!
    
Posts: 1036
Threads: 107
Registered: June 15th, 2004
Member Is Offline
Location: Peaceful Finley, NSW
Theme: UltimaBB Streamlined2
Mood: Not too bad. Thanks for asking!
|
| posted on April 18th, 2011 at 09:44 AM |
|
|
My goal was off road style too, as I have always used every millimeter of ground clearance any vehicle has to offer me. But because of the way this
pre-made conversion was done I decided to stick with it for now and just repair / modify what wasn't right and what was broken. So far I've replaced
an awful lot of parts. The exhaust on this hangs pretty low, but it is still higher than the sump so whatever. It's no big issue for now. The right
exhaust pipe goes around in front of the sump across to the other side before it comes back and meets with the other pipe in a 2->1 collector at
the back of the muffler. It's not a bad idea. It only really has one issue. The right exhaust lines up perfectly with the bellhousing split which is
where any leaking fluids like to run down from the top of the motor. Gets pretty stinky. I'm really hoping the oil leak is from the edge of the sump
as it looks to be dripping off one side. I don't want to pull the motor to do a main seal.
If at first you don't succeed. Build, build again.
Vehicle: 1975 Special order delivery walkthrough panel based LCA pop-top camper. Motor: Nippon 1.8L Single port Wasserboxer, Transmission: 3 rib 002.
|
|
|
 bevelhead bevelhead
Seriously Crusin Dubber
 
Posts: 161
Threads: 40
Registered: August 18th, 2008
Member Is Offline
Location: Cremorne TAS
Theme: UltimaBB Pro Blue
|
| posted on April 21st, 2011 at 09:16 PM |
|
|
There is some good info on ausubaru forums regards to ea stuff, they run these things with shit loads of advance and get away with it, also good carby
jet sizing etc
|
|
|
 General_Failure General_Failure
A.k.a.: Tristan
Custom Title Time!
Use your head, don't abuse it!
    
Posts: 1036
Threads: 107
Registered: June 15th, 2004
Member Is Offline
Location: Peaceful Finley, NSW
Theme: UltimaBB Streamlined2
Mood: Not too bad. Thanks for asking!
|
| posted on May 8th, 2011 at 10:58 PM |
|
|
I've done a bit of work on the throttle linkage and started making a charcoal canister bracket. Still more to go.
Absolutely defeated on getting the heater I'm after and a replacement towbar though.
If at first you don't succeed. Build, build again.
Vehicle: 1975 Special order delivery walkthrough panel based LCA pop-top camper. Motor: Nippon 1.8L Single port Wasserboxer, Transmission: 3 rib 002.
|
|
|
| Pages: 1 2 3 4 5 6 |