| [ Total Views: 222516 | Total Replies: 708 | Thread Id: 38560 ] |
| Pages: 1 .. 6 7 8 9 10 .. 24 |
|
|
 hellbugged hellbugged
A.k.a.: Daimo Pell
23 Windows of Awesome
48's and straight cuts
       
Posts: 5080
Threads: 116
Registered: April 17th, 2003
Member Is Offline
Location: Nambucca Valley NSW
Theme: UltimaBB Psyche Blue
Mood: Couldn't care less
|
| posted on August 14th, 2007 at 12:13 PM |
|
|
:blah
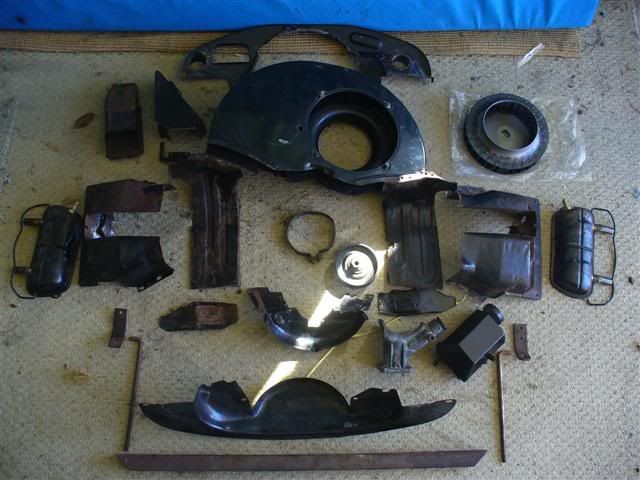
:blah
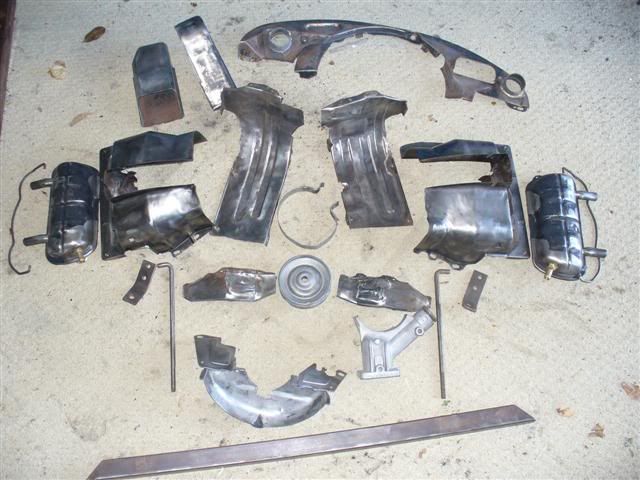
 ....2 pac black.......... ....2 pac black..........
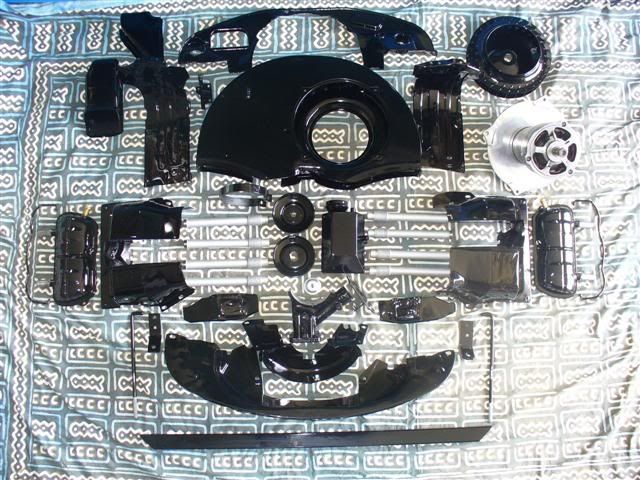
:blah
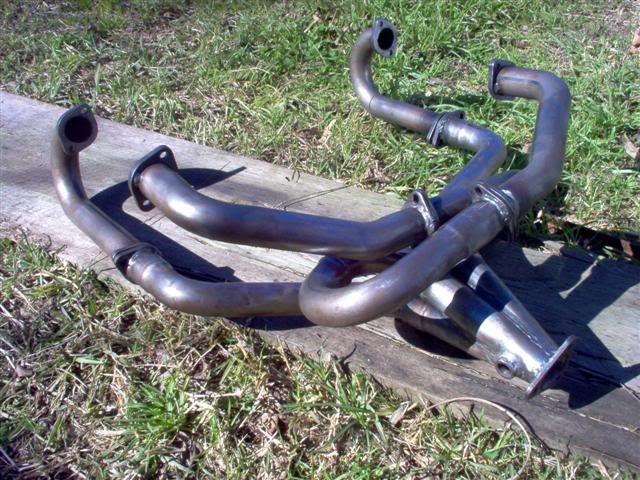
:blah
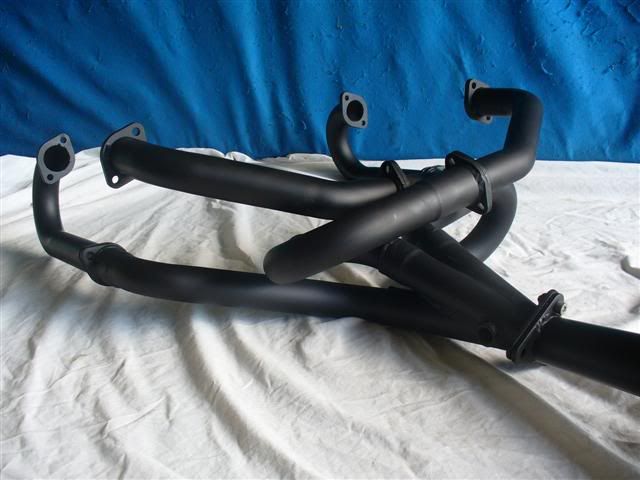
.. ....ceramic coated inside and out......thanx to Wayne Penrose
for the quick turnaround time:thumb ....ceramic coated inside and out......thanx to Wayne Penrose
for the quick turnaround time:thumb
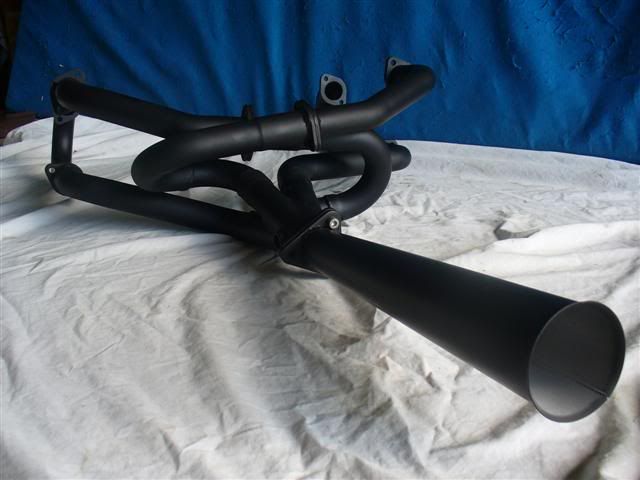
:blah:blah:blah
|
|
|
 Dasdubber Dasdubber
A.k.a.: Alan Agyik
23 Windows of Awesome
DAS Resto Haus
       
Posts: 5746
Threads: 289
Registered: August 26th, 2002
Member Is Offline
Location: Gold Coast
Theme: UltimaBB Pro Blue
Mood: feeling fine...
|
| posted on August 14th, 2007 at 01:00 PM |
|
|
Very shmick mate! well done
|
|
|
 dangerous dangerous
A.k.a.: Dave Butler Muffin Man
23 Windows of Awesome
       
Posts: 5901
Threads: 178
Registered: January 6th, 2005
Member Is Offline
Location: Gold Coast
Theme: UltimaBB Pro Blue ( Default )
Mood: 591
|
| posted on August 14th, 2007 at 02:34 PM |
|
|
SALUBRIOUS!
| Quote: | Originally
posted by westi
That's mad Alan.
|
|
|
|
 OZ Towdster OZ Towdster
A.k.a.: Andrew Westwood
Custom Title Time!
Keen to finish some projects
    
Posts: 1921
Threads: 132
Registered: December 7th, 2003
Member Is Offline
Location: Alexandra Hills Brisbane QLD
Theme: UltimaBB Pro Yellow
Mood: Having fun in our great land
|
| posted on August 14th, 2007 at 07:36 PM |
|
|
So Damo are we going to see the finished product at Warwick ?? oh and tell the missus that they help clean the oven and it'll all be good HEHEHE
Don't let body work get in the way of real suspension travel
|
|
|
 hellbugged hellbugged
A.k.a.: Daimo Pell
23 Windows of Awesome
48's and straight cuts
       
Posts: 5080
Threads: 116
Registered: April 17th, 2003
Member Is Offline
Location: Nambucca Valley NSW
Theme: UltimaBB Psyche Blue
Mood: Couldn't care less
|
| posted on August 14th, 2007 at 10:05 PM |
|
|
| Quote: | Originally
posted by A Westwood
So Damo are we going to see the finished product at Warwick ?? oh and tell the missus that they help clean the oven and it'll all be good HEHEHE
|
i hope to be at Warrick yes. that would be two years since i really started the build in earnest.... long enough ! !
...i tried your excuse, but copped a slap up the side of the head......didn't wash i guess
|
|
|
 555bug 555bug
Custom Title Time!
WRX Bug Boy
    
Posts: 1123
Threads: 79
Registered: August 26th, 2002
Member Is Offline
Location: Brisbane
Theme: UltimaBB Vintage
Mood: turbo charged
|
| posted on August 14th, 2007 at 10:11 PM |
|
|
should be interesting to see her run  cheers for Jeff's contact details,
you're right he likes a chat. cheers for Jeff's contact details,
you're right he likes a chat.
Cheers Stephen |
|
|
 matberry matberry
Super Moderator
Go hard or go home
      
Posts: 8114
Threads: 134
Registered: March 7th, 2006
Member Is Offline
Location: Cooroy Qld
Theme: UltimaBB Pro Blue
Mood: enjoying waving at all my Kombi buddies from my T3
|
| posted on August 15th, 2007 at 07:32 AM |
|
|
Good luck on the engine build Daimo.
Berg bits are something else! All looks shit hot!!!
Matt
Matt Berry Motorsports...air cooled advice, repairs and mods Ph 0408 704 662
OFF-ROAD,CIRCUIT,DRAG,STREET,ENDURANCE
 |
|
|
 pete wood pete wood
A.k.a.: figure itout
23 Windows of Awesome
       
Posts: 6828
Threads: 389
Registered: January 15th, 2004
Member Is Offline
Location: Nth Nth StMarys, Sydney
Theme: UltimaBB Pro White
Mood: upgrades = jackstands
|
| posted on August 15th, 2007 at 03:40 PM |
|
|
c'mon daimo! put the freakin thing in and drive like you stole it!!! the suspense it killing me. 
|
|
|
 hellbugged hellbugged
A.k.a.: Daimo Pell
23 Windows of Awesome
48's and straight cuts
       
Posts: 5080
Threads: 116
Registered: April 17th, 2003
Member Is Offline
Location: Nambucca Valley NSW
Theme: UltimaBB Psyche Blue
Mood: Couldn't care less
|
| posted on August 26th, 2007 at 12:14 AM |
|
|
yes, well Pete...............oh nevermind
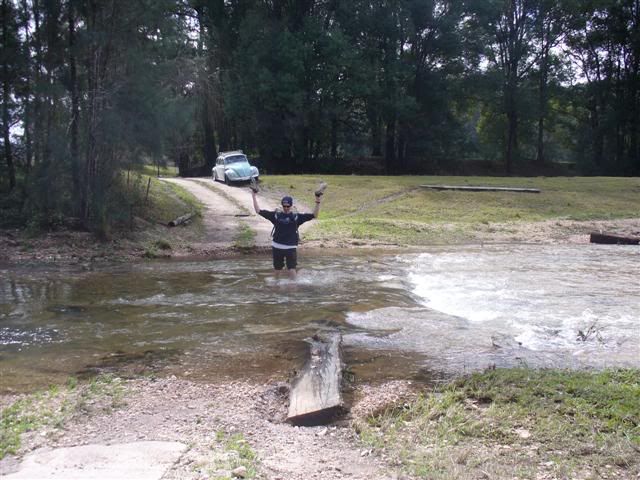
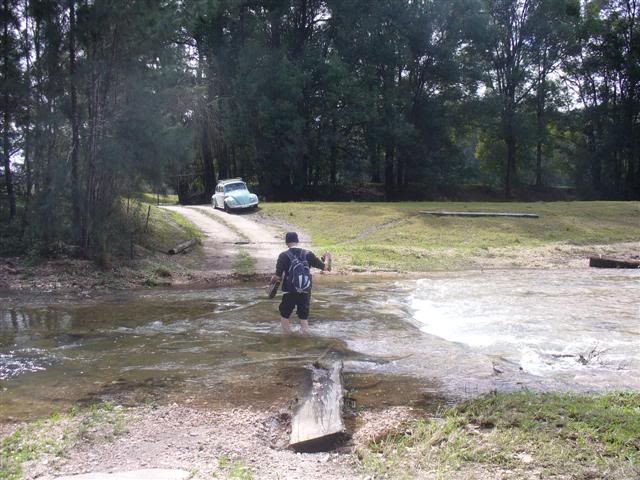
Jeff and i have had this running joke going for a while now, that when i finally got this motor assembled, the creek would go over with me on one side
and the engine on the other............hmmmmmmmm
it's been very wet, but good for a laugh, as when i arrive i am greeted by a shower of lobbed rocks in the freezing water:kiss
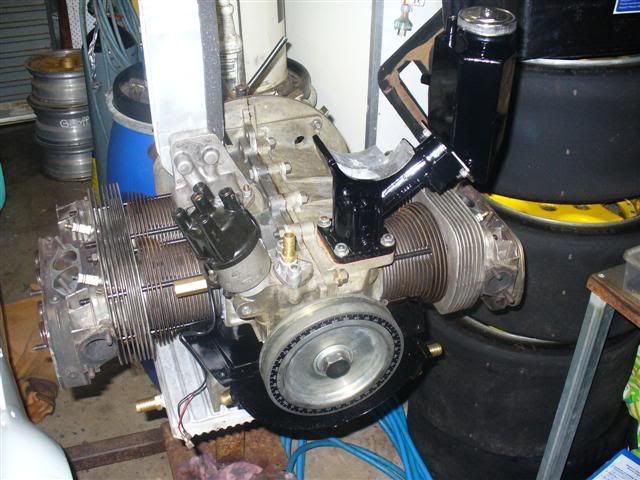
managed to get a few things sealed up, filler/breather, sumps good to go. unfortunately they're not my good heads on there
basically i've been waiting for the heads again, we found some lash caps that were over 1mm thicker over the end of the valve. this would be enough
to correct the geometry problems without milling the pedastals:thumb
with the heads off, i may as well take the inner spring out in readiness for "break in". much easier in the bench spring compressor, it's one tough
mother. (to load the 650 pounds of chevy springs for the race motor)
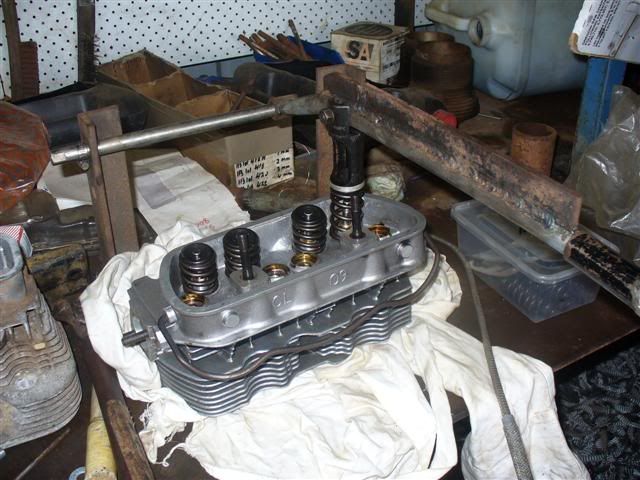
my mate wandered past saying i was being a pussy loading the keepers in, "just let it go, they will grab"
that worked well.......
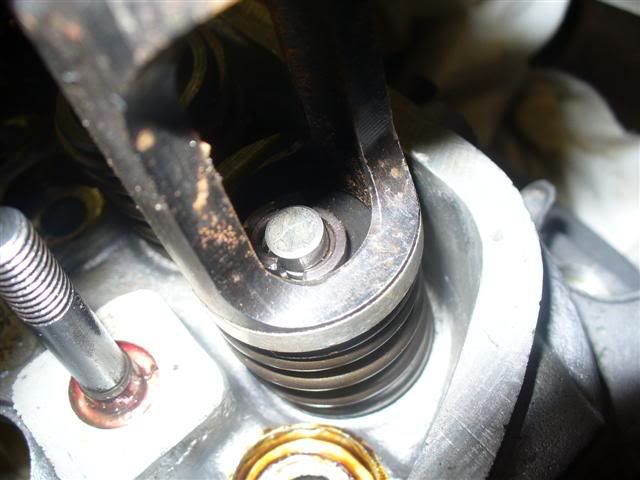
.........well, right up to the last spring.........ping, ting, "SHIT!!", patang, doink........silence.
"landed over there didn't it?"........
"yep, just over there........"
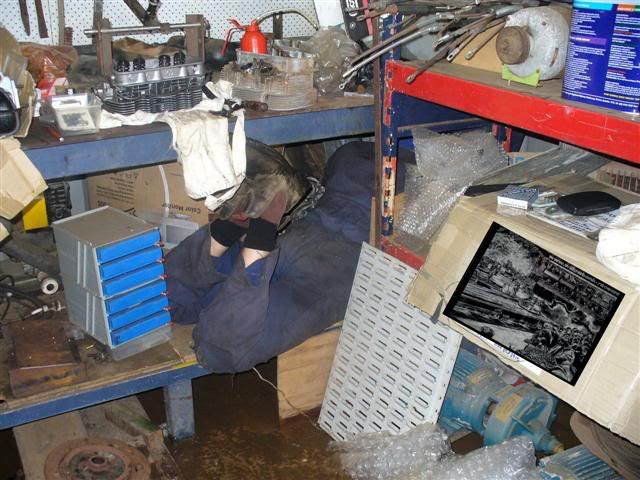
couldn't find it..........there is a new set in stock tho
but different batches see different heights in the retainers, check out the one on the left, completely different...........
back to the corner with magnet and torch!!!!!! found the single flying keeper, close to two hours later
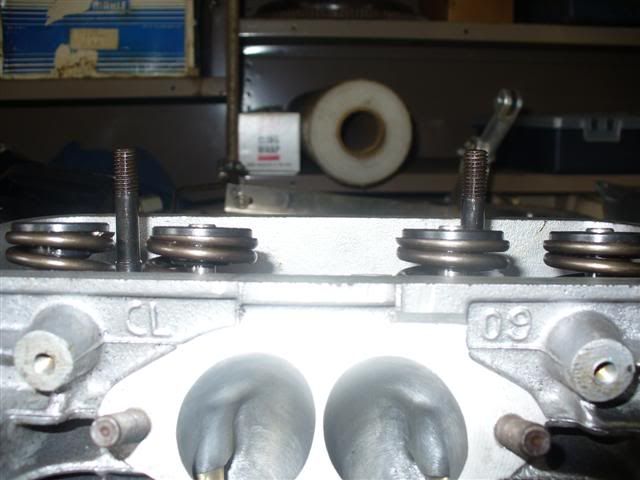
i'm an inqusitive little bugger............
originally, the heads were set up for 1.4 rockers.
we now know,having done a not so dry build, that accurately measuring lift at the valve is 13.00mm accross ALL the valves.
between the guide and retainer i will need 3mm over lift if i am to set the spring heights using the following method......
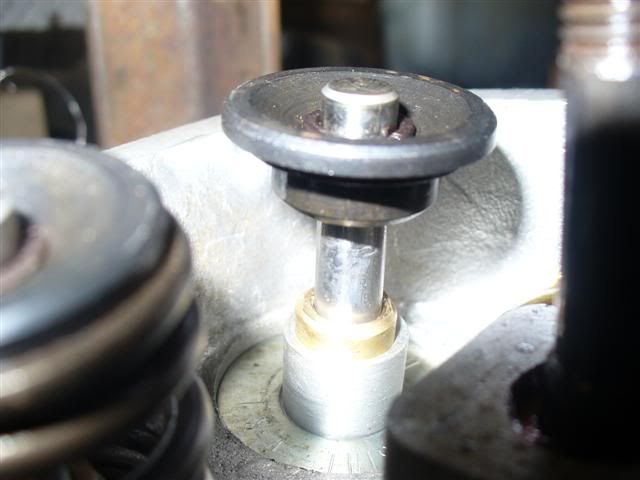
i want to have the spring with 1.5mm travel left in it, after the cam lifts it to the 13mm. this will give me close to 300pounds of spring pressure
over the nose of the cam, preventing the lifters from getting flung off the nose and consequently jarring everything when they return to tracking the
cam profile correctly. as D.B says "valve control reigns supreme"...........spring pressure is how to get it
using the shimms under the spring's butt, this can be done!!........i will need the spring to reach bind at 14.5mm total travel
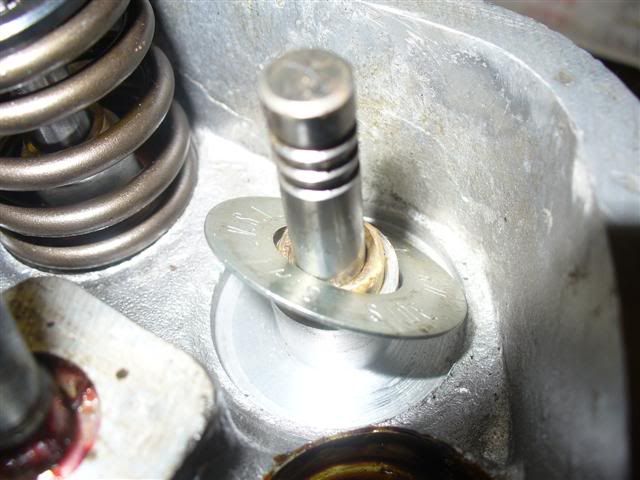
using my big phat angled plate under the drill press, i can bottom the springs out and see if i have the needed travel
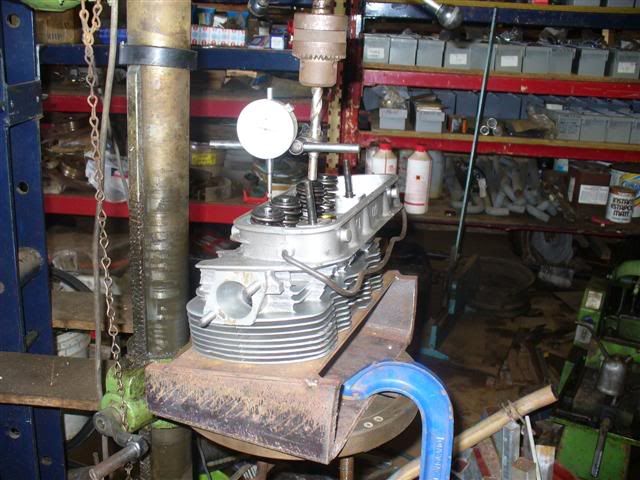
works a treat!!..........but unfortunately the retainers bottom before the 14.5mm, so i STILL CAN"T TELL!!! where the springs are at.
soooooooo the heads need a good scrub after all this messing about anyways, i might just shave some more off the valve guides before the scrub and
really do my brain in trying to get this stuff right
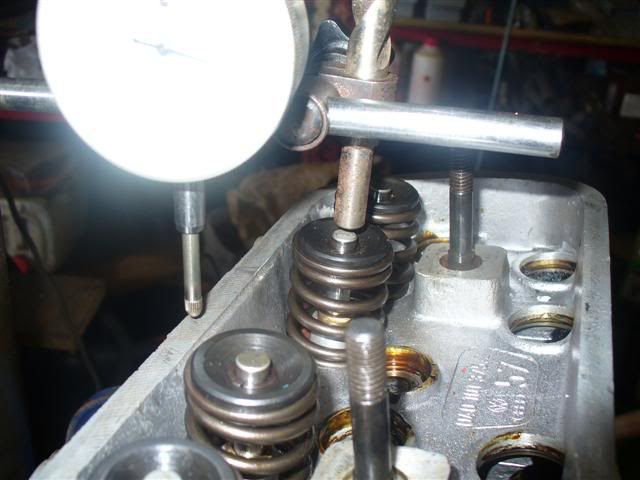
times up again.............still can't walk on water either
[ Edited on 31-8-07 by dumone ]
|
|
|
 dangerous dangerous
A.k.a.: Dave Butler Muffin Man
23 Windows of Awesome
       
Posts: 5901
Threads: 178
Registered: January 6th, 2005
Member Is Offline
Location: Gold Coast
Theme: UltimaBB Pro Blue ( Default )
Mood: 591
|
| posted on August 26th, 2007 at 05:31 AM |
|
|
| Quote: | Originally
posted by dumone


|
"Smart thinking 99"
| Quote: | Originally
posted by westi
That's mad Alan.
|
|
|
|
 koolkarmakombi koolkarmakombi
Veteran Volks Folk
enkarmarising
    
Posts: 2078
Threads: 158
Registered: June 16th, 2003
Member Is Offline
Location: viva brisvegas
Theme: UltimaBB Pro Blue ( Default )
Mood: do you see the bats?
|
| posted on August 26th, 2007 at 01:13 PM |
|
|
| Quote: | Originally
posted by dumone

[ Edited on 25-8-07 by dumone ]
|
Is that how you wash the heads? :blush
This disclaimer does not reflect the thoughts or opinions of either myself, my company, my friends, or my dog: don't quote me on that; don't
quote me on anything; this disclaimer is subject to change without notice; text is slightly enlarged to show detail; resemblance to actual persons,
living or dead, is unintentional and coincidental; dry clean only; do not bend, fold, or mutilate; anchovies or jalapenos added to this disclaimer
upon request; your mileage may vary; no substitutions are allowed; for a limited time only while supplies last; offer void where prohibited; this
disclaimer is provided "as is" without any warranties expressed or implied
|
|
|
 hellbugged hellbugged
A.k.a.: Daimo Pell
23 Windows of Awesome
48's and straight cuts
       
Posts: 5080
Threads: 116
Registered: April 17th, 2003
Member Is Offline
Location: Nambucca Valley NSW
Theme: UltimaBB Psyche Blue
Mood: Couldn't care less
|
| posted on August 26th, 2007 at 08:37 PM |
|
|
hey D.B, how much variance in "from bind" measurments is acceptable?
.......feeling for you not being able to race today ..... .....
|
|
|
 dangerous dangerous
A.k.a.: Dave Butler Muffin Man
23 Windows of Awesome
       
Posts: 5901
Threads: 178
Registered: January 6th, 2005
Member Is Offline
Location: Gold Coast
Theme: UltimaBB Pro Blue ( Default )
Mood: 591
|
| posted on August 27th, 2007 at 07:04 AM |
|
|
If you are confident it IS bind and not retainer to guide interference,
less than one .015" shim.
| Quote: | Originally
posted by westi
That's mad Alan.
|
|
|
|
 hellbugged hellbugged
A.k.a.: Daimo Pell
23 Windows of Awesome
48's and straight cuts
       
Posts: 5080
Threads: 116
Registered: April 17th, 2003
Member Is Offline
Location: Nambucca Valley NSW
Theme: UltimaBB Psyche Blue
Mood: Couldn't care less
|
| posted on August 27th, 2007 at 07:05 PM |
|
|
yes, of course Dave.........silly question hey.
oooorkay, so i might relax those springs a little more, out to 2mm over lift. i will need 15.5mm from retainer to guide end to use my drill press
checking method.......
i've been told as little as 1mm over lift (retainer on guide!) is safe for running the motor, don't have much idea how to measure the spring
heights other than what i've shown above tho..........
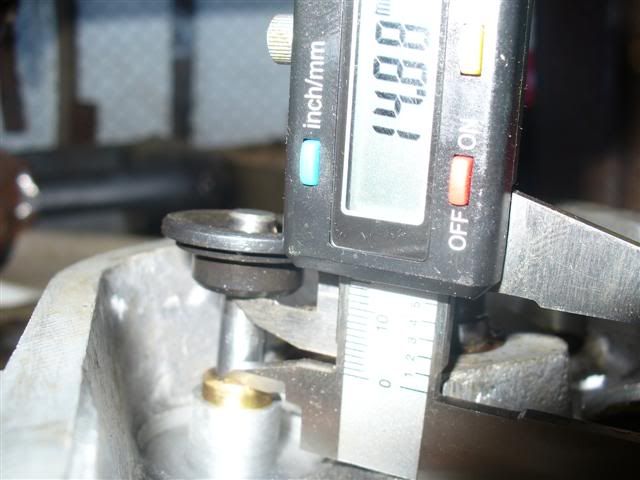
not the 15.5mm i need, but that's ok, we have the technology to address that problem
another one of those berg tools..........
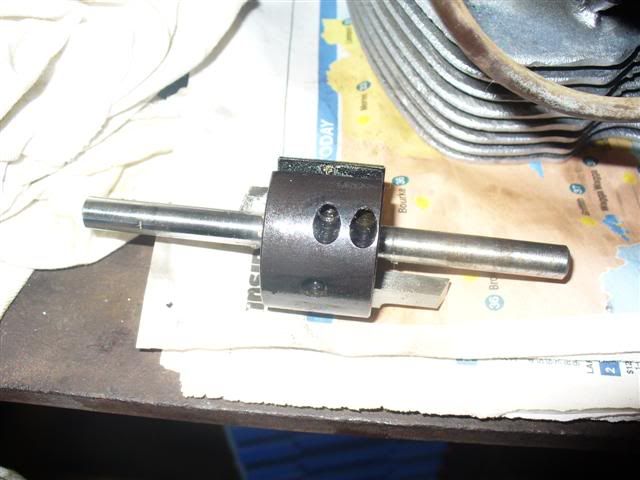
one end will cut the end of the guide down, the other will cut the guide boss for the inner spring of the duals!!:thumb.........rather than simply
turn the whole assembly round in the drill press, the bit holding part is reversed on the shaft, this will keep one end of the pilot shaft without the
burring of the press jaws and as such be the clean end that is always inserted into your good valve guides:blah..........the heads need to be set
under the drill press on an angled plate like the one in yesterdays post, to use this tool
it happened to be set up for the boss cutting, sooooo i had a play on the test head ...........this cut would run right down to the spring seat for the inner springs (my heads have allready
been done) ...........this cut would run right down to the spring seat for the inner springs (my heads have allready
been done)
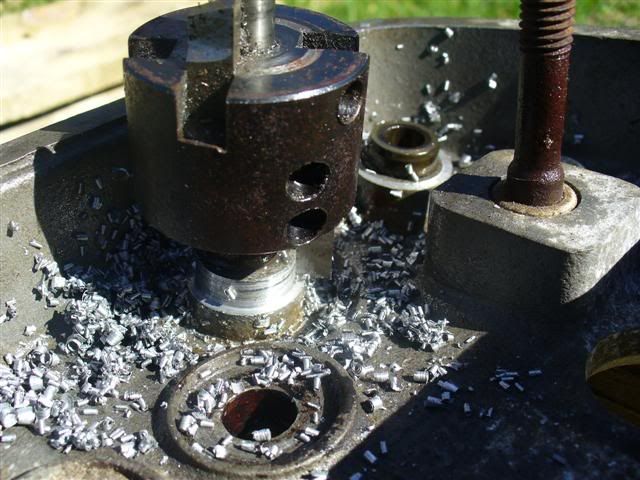
it's the guide itself i need to face down some more........
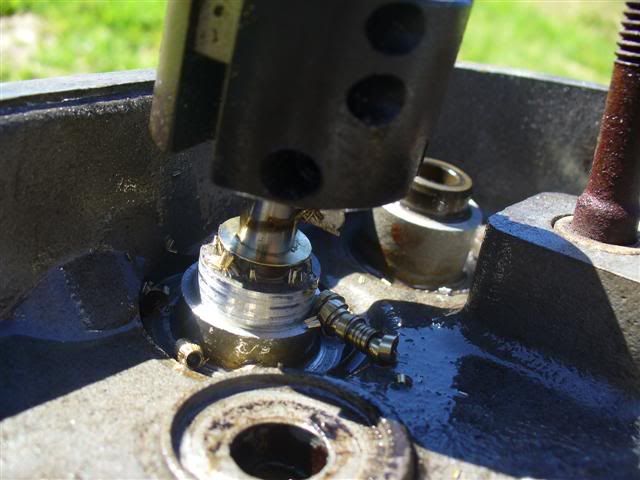
it's actually a very simple operation. the tool can also cut a cam gear for a three bolt arrangement
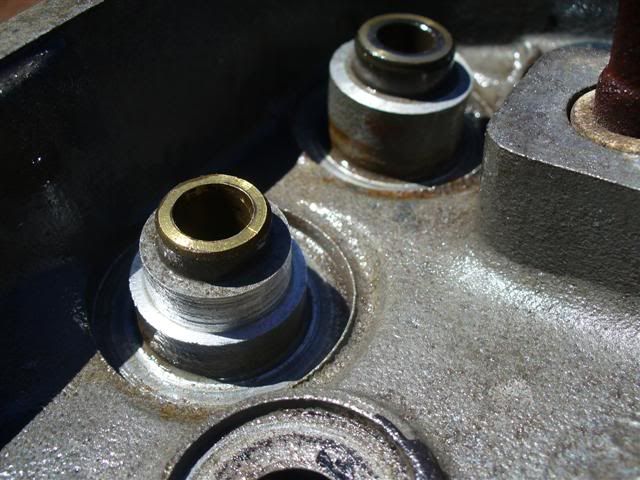
anyways, back to the job at hand........
i shaved the guides on my heads another 1.2mm, giving me 16mm (3mm above lift) travel between the retainer and guide end. this is plenty for running
the motor, but also enough so i can bottom the springs and get a clean go at setting the 2mm from bind........
job done.......:thumb
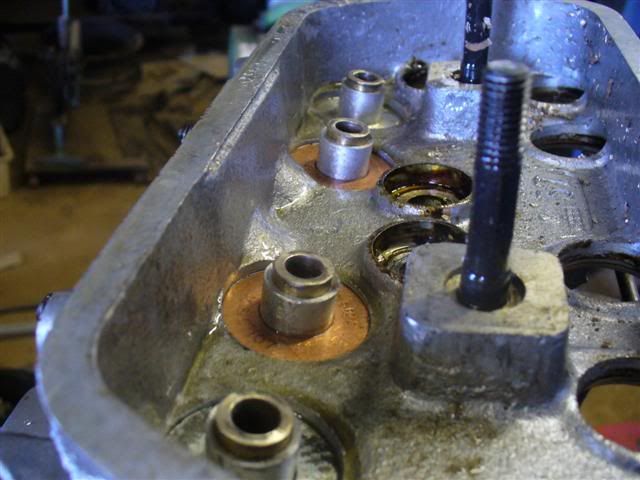
just a couple of things i didn't cover here before.........
the cro molly retainer is an "interference" fit in both springs. it really needs some pressure to pop it into the inner spring
especially..............this helps stop harmonics during operation by not allowing the spring to float around the center line..........the other end
is captivated by the spring seatcastings (to an extent on the outer)
the two springs are also an interference set (touch/rub each other) the inner not only adds pressure, but as importantly has the job of keeping the
outer spring from going into the harmonics horrors too (death wobbles ) )
you could pick this assembly up, as is, with either the outer spring or retainer only, and no parts would separate.
.........interference fits..........spring control!
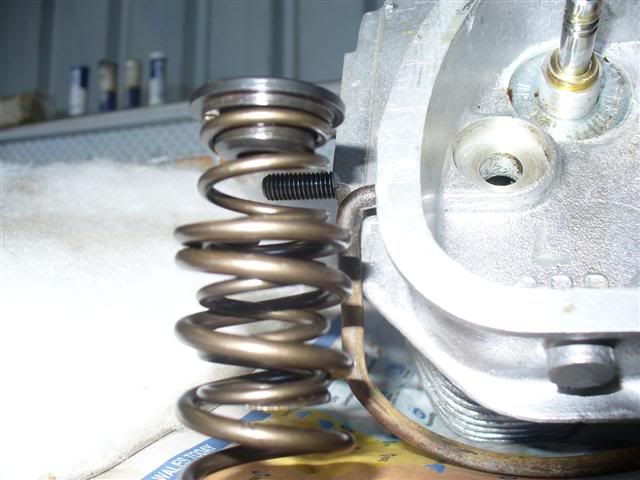
a quick look at the 4 angled valve seat job after cleaning.......
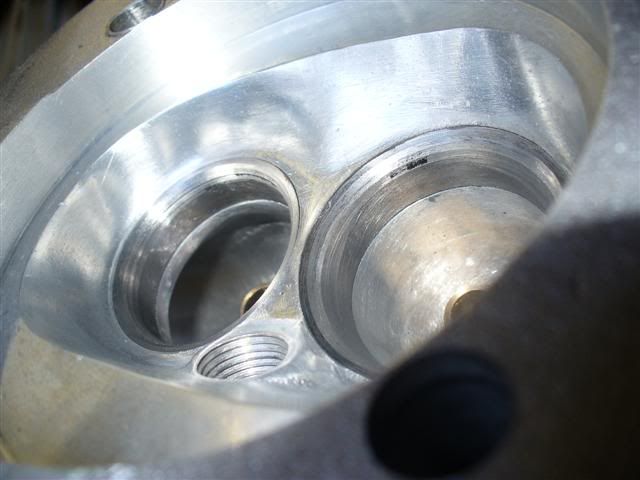
anyways, all that explained  , i've decided to put both springs back before working the binds
out.......it's plain to see how different readings occur when measuring one spring without the other..........i'll be using both for checking
thanx......... , i've decided to put both springs back before working the binds
out.......it's plain to see how different readings occur when measuring one spring without the other..........i'll be using both for checking
thanx.........
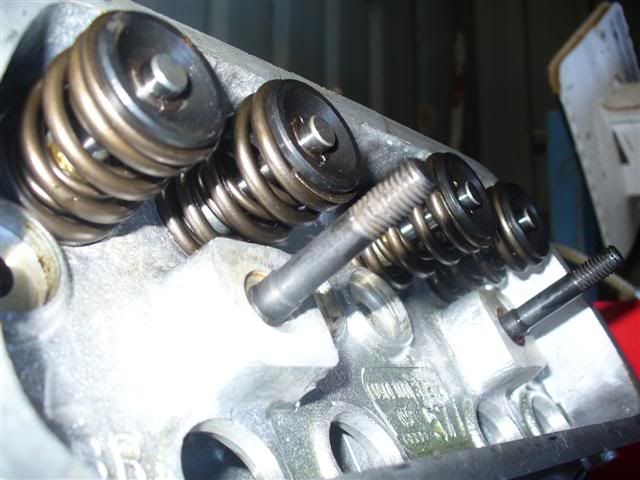
i had a ball today, and have two extra sessions (3.5 hours) to play this week too...............bring it on!
[ Edited on 27-8-07 by dumone ]
|
|
|
 dangerous dangerous
A.k.a.: Dave Butler Muffin Man
23 Windows of Awesome
       
Posts: 5901
Threads: 178
Registered: January 6th, 2005
Member Is Offline
Location: Gold Coast
Theme: UltimaBB Pro Blue ( Default )
Mood: 591
|
| posted on August 27th, 2007 at 08:41 PM |
|
|
NO, that is not a silly question!
Silly is a dude that has too much pride to ask.
I ask questions all the time, some are stupid, but answers always come!!
| Quote: | Originally
posted by westi
That's mad Alan.
|
|
|
|
 hellbugged hellbugged
A.k.a.: Daimo Pell
23 Windows of Awesome
48's and straight cuts
       
Posts: 5080
Threads: 116
Registered: April 17th, 2003
Member Is Offline
Location: Nambucca Valley NSW
Theme: UltimaBB Psyche Blue
Mood: Couldn't care less
|
| posted on August 30th, 2007 at 10:53 PM |
|
|
greetings from the funny farm............my head aches
pretty much decided first point of call was (like it or not ) to get some
new actual lift numbers with the new lash caps and pushrod length...........there was no point trying to set spring binds with lift numbers that had
became out dated..................... and that they were!. lift at the valve had increased by 0.15mm. ) to get some
new actual lift numbers with the new lash caps and pushrod length...........there was no point trying to set spring binds with lift numbers that had
became out dated..................... and that they were!. lift at the valve had increased by 0.15mm.
new caps are actually the berg ones designed for titanium valves........much higher!
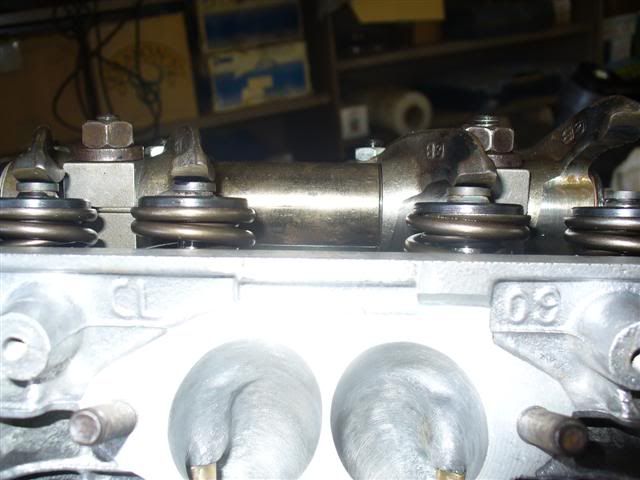
the caps improved the geometry as expected..........rocker "swipe" is lower on the cap center....PHEWWwww
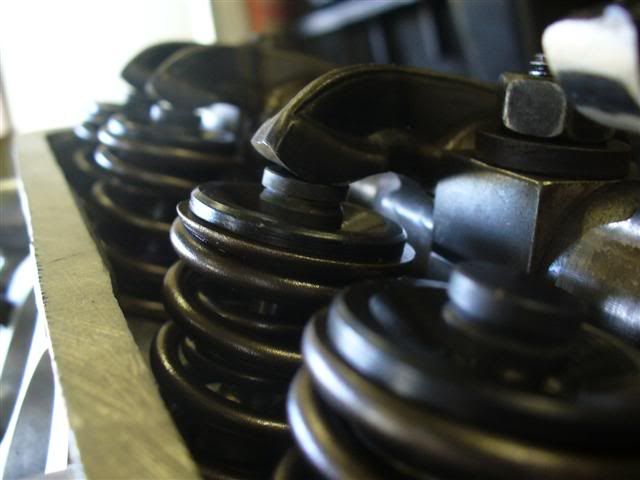
working out pushrod length was much simpler this time roun.................
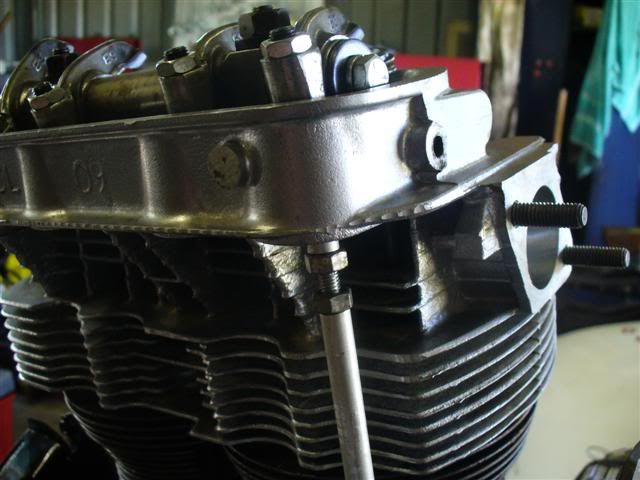
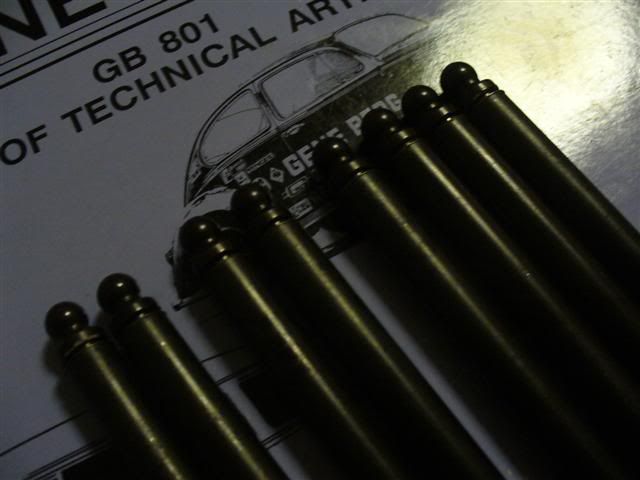
of course, they were never going to be the same length as i had already made. having already assembled my set, they had to be parted under the ball
tip this time. i had to lathe this from the previously uncut end as i had taken the maximum length out of the other already........all 1.5mm:blah
dual springs and pushrods back in and measuring lift at the valve again....
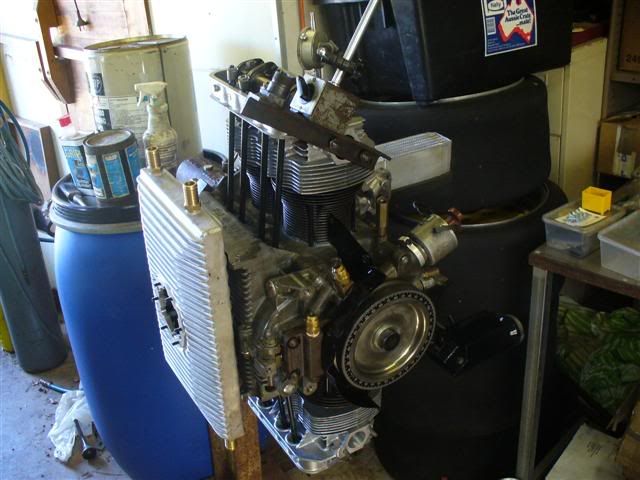
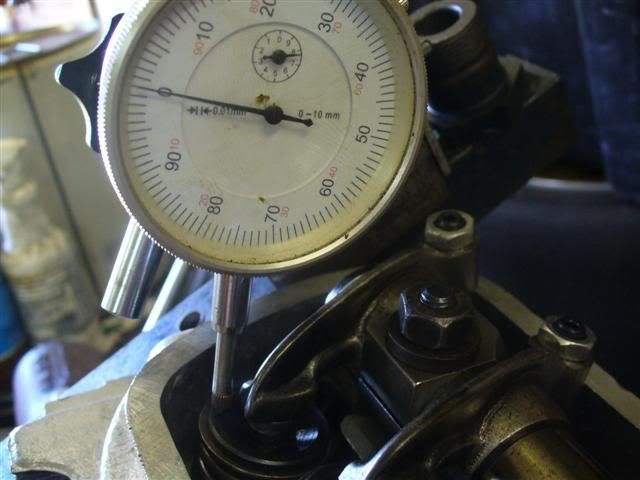
heads on..............heads off
springs on .............springs off
lash caps on...........caps off
springs in............. springs out
shimms in.............shimms out
springs in.............springs out
yes Mr Miaggi san.............
it took a few hours, but my measurements/checks are now consistant and coming quickly. i know what clearences i need and how to do
them...............
....... but for now i'm off to the chiropractor, i can barely walk at the mo, yet will HAVE TO! work until September 10th, Warrick feels
like..........oh nevermind..:duh
[ Edited on 30-8-07 by dumone ]
|
|
|
 dangerous dangerous
A.k.a.: Dave Butler Muffin Man
23 Windows of Awesome
       
Posts: 5901
Threads: 178
Registered: January 6th, 2005
Member Is Offline
Location: Gold Coast
Theme: UltimaBB Pro Blue ( Default )
Mood: 591
|
| posted on August 31st, 2007 at 06:13 AM |
|
|
Keep your chin up Daimo,
You can do it!
Doing things the right way is very satisfying when it is all said and done.
Good to see someone taking the time.
| Quote: | Originally
posted by westi
That's mad Alan.
|
|
|
|
 koolkarmakombi koolkarmakombi
Veteran Volks Folk
enkarmarising
    
Posts: 2078
Threads: 158
Registered: June 16th, 2003
Member Is Offline
Location: viva brisvegas
Theme: UltimaBB Pro Blue ( Default )
Mood: do you see the bats?
|
| posted on August 31st, 2007 at 10:14 AM |
|
|
What is awesome is I have bought the berg articles and read the theory behind what you are doing. Loving all the pics, keep them coming.
Berg articles are a dis-jointed read though.
This disclaimer does not reflect the thoughts or opinions of either myself, my company, my friends, or my dog: don't quote me on that; don't
quote me on anything; this disclaimer is subject to change without notice; text is slightly enlarged to show detail; resemblance to actual persons,
living or dead, is unintentional and coincidental; dry clean only; do not bend, fold, or mutilate; anchovies or jalapenos added to this disclaimer
upon request; your mileage may vary; no substitutions are allowed; for a limited time only while supplies last; offer void where prohibited; this
disclaimer is provided "as is" without any warranties expressed or implied
|
|
|
 matberry matberry
Super Moderator
Go hard or go home
      
Posts: 8114
Threads: 134
Registered: March 7th, 2006
Member Is Offline
Location: Cooroy Qld
Theme: UltimaBB Pro Blue
Mood: enjoying waving at all my Kombi buddies from my T3
|
| posted on August 31st, 2007 at 10:36 PM |
|
|
Good job now is definately worth it later. Check recheck assemble check reassemble recheck arrgggg!!! Fantastic fun. Keep up the goog work
mate. :thumb
Matt Berry Motorsports...air cooled advice, repairs and mods Ph 0408 704 662
OFF-ROAD,CIRCUIT,DRAG,STREET,ENDURANCE
 |
|
|
 063bug 063bug
A.k.a.: Alan
Posts: -4
Threads: 0
Registered: February 25th, 2005
Member Is Offline
Theme: UltimaBB Streamlined2
Mood: just crusin'
|
| posted on September 7th, 2007 at 08:08 AM |
|
|
I am impressed with how you are taking so many photos...... have you got a bracket fastened to your head to hold the camera and when you blink you
take a photo.....
.... really good reading, photos and attention to detail.... don't loose sight of what you are achieving... a damn good motor |
|
|
 hellbugged hellbugged
A.k.a.: Daimo Pell
23 Windows of Awesome
48's and straight cuts
       
Posts: 5080
Threads: 116
Registered: April 17th, 2003
Member Is Offline
Location: Nambucca Valley NSW
Theme: UltimaBB Psyche Blue
Mood: Couldn't care less
|
| posted on September 15th, 2007 at 04:28 PM |
|
|
back again.........
thanx everyone......
gland nut was finally swapped from the standard one there for mock up, to my good forged one.
here is the standard one next to the berg modified one and big washer...mines the next step up being forged longer so the head does not need cutting
to accomodate the thickness of the washer.......
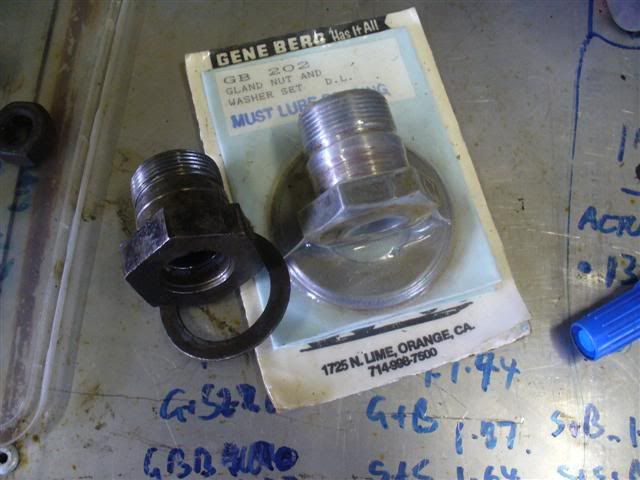
standard.......
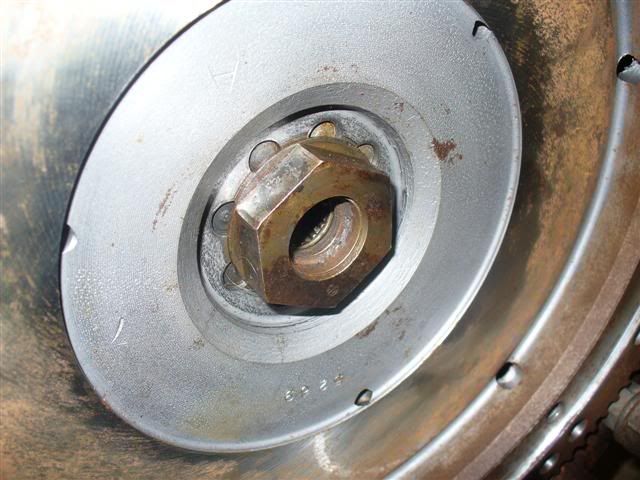
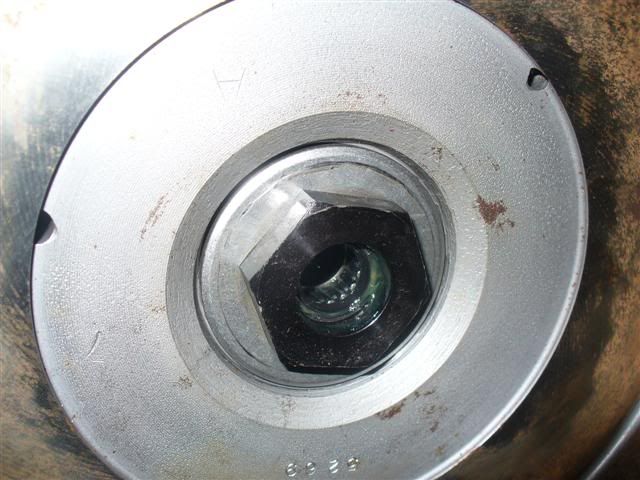
berg forged cro-molly......pulls the flywheel right over the dowels:thumb. naturally the bearing is greased and the nut loctited at 250ft/pds!
sooooooooo with that done, its time to build a motor.:duh
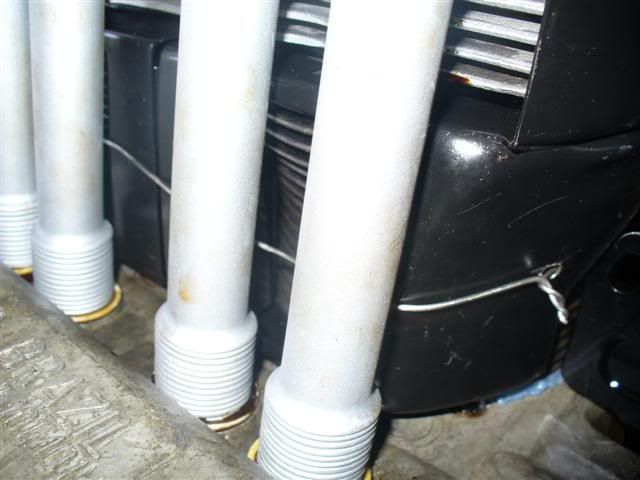
not sure if others do this, but my offroading background has led to making this habit. wiring the cool tins to the cylinders to save them unclipping
from the headstuds, falling and cutting thru the pushrod tubes.
heads sorted and installed with single (outer) valve springs, torqued to 20ft/pd........
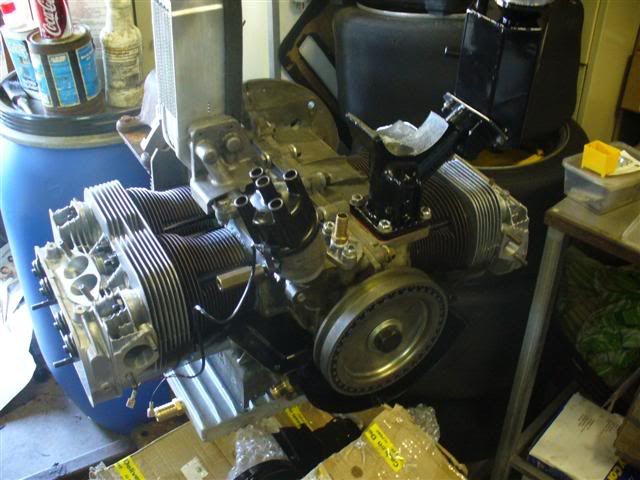
rockers and pushrods are finally a simple "install and that's it" deal.........chucked 'em in there 18ft/pd
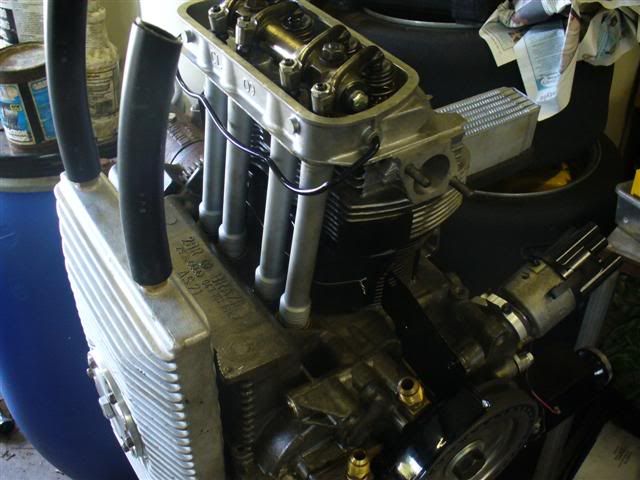
tappet covers have had more braisng done after paint, but the gaskets are now behind all those tabs and good to go..throw em on
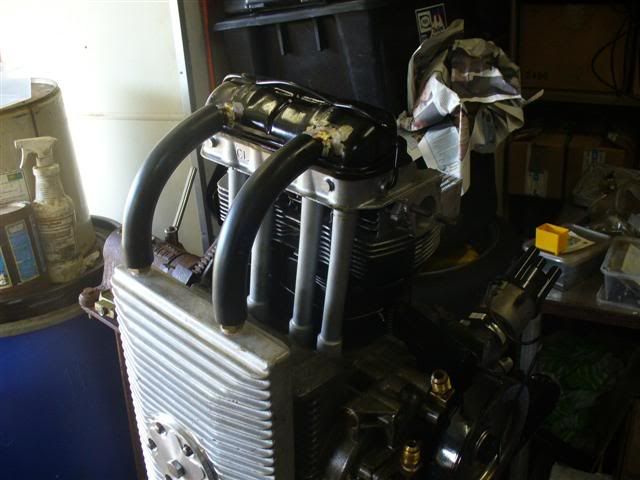
a few screws and some loctite here and there for the tins.........i will silicon ALL the gaps later........pulley is back at 110ft/pds with loctite........... with loctite...........
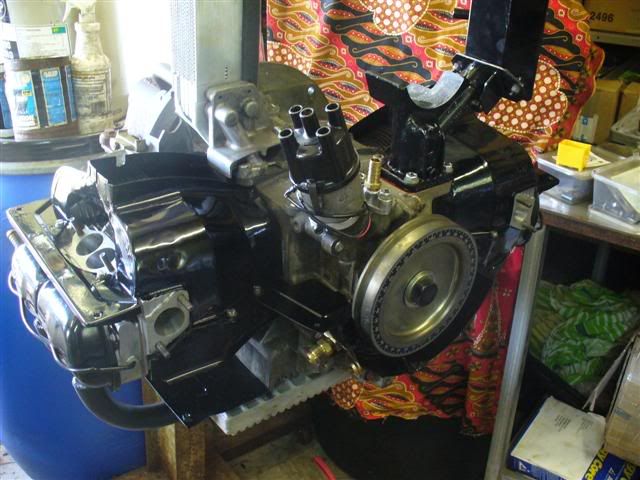
copper gaskets and coated nuts for the exhaust
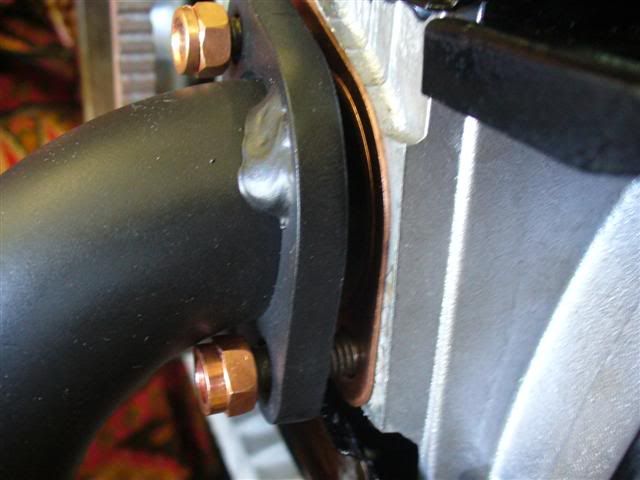
exhaust snuggly buggly  ...... ......
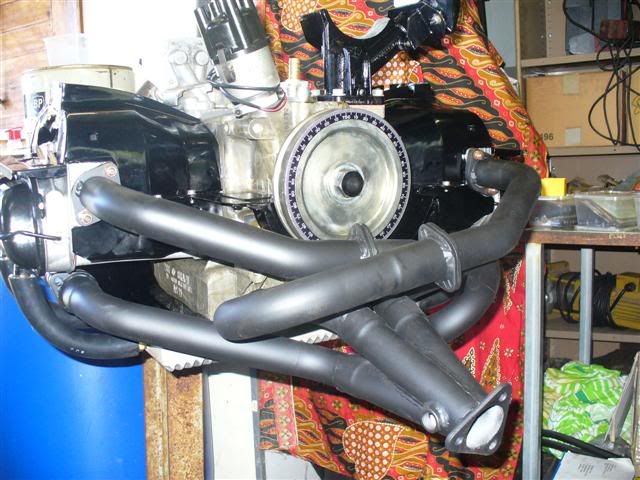
[ Edited on 15-9-07 by dumone ]
|
|
|
 bond bond
Veteran Volks Folk
    
Posts: 2456
Threads: 166
Registered: July 11th, 2003
Member Is Offline
Location: brisbane
Theme: UltimaBB Pro Blue ( Default )
|
| posted on September 15th, 2007 at 04:36 PM |
|
|
the exhaust nuts you had copper coated also? is it the heat or condensation that always seems to rust up these nuts? is stainless as good an
option?
nick
|
|
|
 hellbugged hellbugged
A.k.a.: Daimo Pell
23 Windows of Awesome
48's and straight cuts
       
Posts: 5080
Threads: 116
Registered: April 17th, 2003
Member Is Offline
Location: Nambucca Valley NSW
Theme: UltimaBB Psyche Blue
Mood: Couldn't care less
|
| posted on September 15th, 2007 at 04:44 PM |
|
|
heat........coppers won't sieze, break/pull studs or loosen
just don't ask where they came from, my knuckles are already sore enough
|
|
|
 OZ Towdster OZ Towdster
A.k.a.: Andrew Westwood
Custom Title Time!
Keen to finish some projects
    
Posts: 1921
Threads: 132
Registered: December 7th, 2003
Member Is Offline
Location: Alexandra Hills Brisbane QLD
Theme: UltimaBB Pro Yellow
Mood: Having fun in our great land
|
| posted on September 15th, 2007 at 06:26 PM |
|
|
Looking good Damo so is it going to be at Warwick ??
Nick DO NOT USE Stainless Steel as they will seize onto your studs even if you use cooper coat or never seize
Don't let body work get in the way of real suspension travel
|
|
|
 hellbugged hellbugged
A.k.a.: Daimo Pell
23 Windows of Awesome
48's and straight cuts
       
Posts: 5080
Threads: 116
Registered: April 17th, 2003
Member Is Offline
Location: Nambucca Valley NSW
Theme: UltimaBB Psyche Blue
Mood: Couldn't care less
|
| posted on September 16th, 2007 at 11:52 AM |
|
|
forgot to mention that the motor in my beetle went KAPUT, sooooo it's become essential to get this motor running. Warrick????............i'm gonna
give it a nudge,i'm down to just a few days/hours to play with, we will see in the next seven days.
gearbox mounts need attention and the bellhousing needs clearing for the 12 volt flywheel, mount and plumb the holley fuel pump, oil filter,
thermostsat and cooler. ignition and guages are already set up. time time time
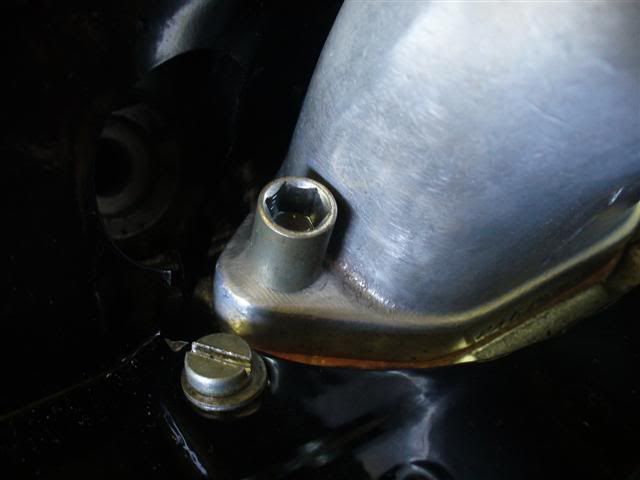
fan housing went on O.K
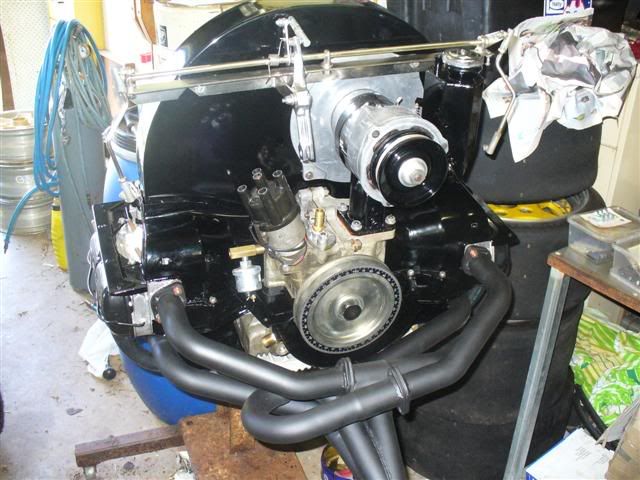
add some 48's..........
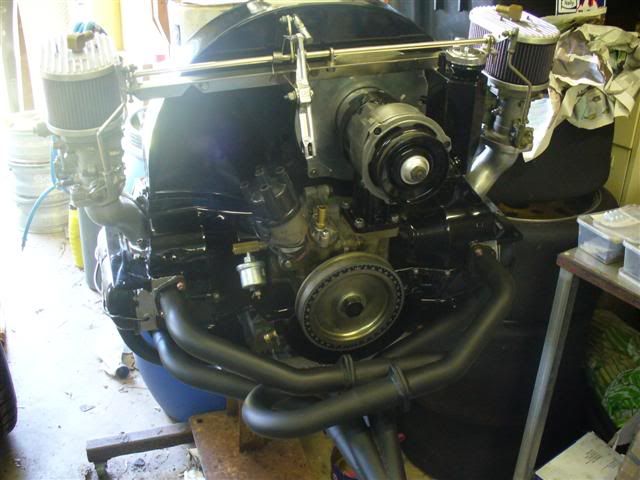
|
|
|
 Volksaddict Volksaddict
Wolfsburg Wizard
  
Posts: 533
Threads: 102
Registered: December 25th, 2004
Member Is Offline
Location: Sawtell Mid North NSW
Theme: UltimaBB Pro Blue ( Default )
Mood: hooked
|
| posted on September 16th, 2007 at 12:23 PM |
|
|
Great read !!!...talk about patience ..sure it will pay off!!!
Cheers&Beers
Ray V
|
|
|
 1303Steve 1303Steve
A.k.a.: Steve Carter
Scirocco Rare
        
Posts: 8650
Threads: 564
Registered: August 27th, 2002
Member Is Offline
Location: Sydney, NSW
Theme: UltimaBB Pro Blue ( Default )
Mood: Parrot Heading
|
| posted on September 16th, 2007 at 02:52 PM |
|
|
Hi
Very interesting.
Regarding stainless steel nuts. I used 8 & 10 mm Glenloc stainless lock nuts on my wasser boxer 1302 on the NA headers and later on the turbo system
with no problems. Some of the nuts were nearly 20 years old and still looked as good as the day I bought them.
Steve
| Error |
| Sorry, you must be a registered user in order to download attachments. |
|
|
|
|
 hellbugged hellbugged
A.k.a.: Daimo Pell
23 Windows of Awesome
48's and straight cuts
       
Posts: 5080
Threads: 116
Registered: April 17th, 2003
Member Is Offline
Location: Nambucca Valley NSW
Theme: UltimaBB Psyche Blue
Mood: Couldn't care less
|
| posted on September 16th, 2007 at 06:24 PM |
|
|
hi Steve ...your beetle is one of my favourites, eva, world wide..........as is Jurgo's, Leighs and of course Jeffs, your cars have been an
inspiration for me any many others i'm sure
ooorkay, not too much today........... Raleigh raceway now hold open drift days for all comers, so i went to check that out .......think it's time to put a bigger clutch in the HELLvWRX and have some
fun after this saga is finished. .......think it's time to put a bigger clutch in the HELLvWRX and have some
fun after this saga is finished.
a familiar sight at the moment (hi Allan and D.B:P) motor is out.......
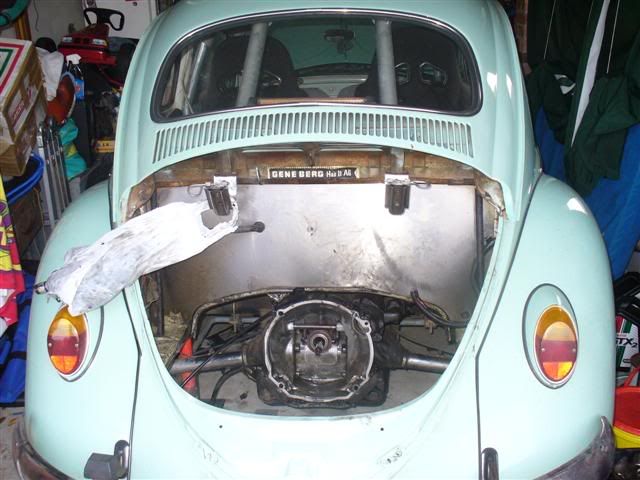
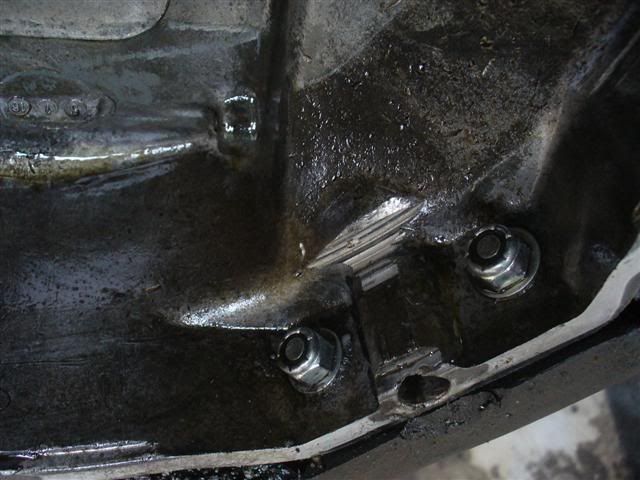
looks like the bell housing is already half way clearenced. with end play measurable in centimeters, no prizes for guessing what failed on the good
'ol 1640.....
|
|
|
 1303Steve 1303Steve
A.k.a.: Steve Carter
Scirocco Rare
        
Posts: 8650
Threads: 564
Registered: August 27th, 2002
Member Is Offline
Location: Sydney, NSW
Theme: UltimaBB Pro Blue ( Default )
Mood: Parrot Heading
|
| posted on September 16th, 2007 at 09:39 PM |
|
|
Hi
Thanks for the kind words. Your cars pretty cool as well, its going to be a monster when you get this thing in there. I saw you at Macksville in a
servo when we were on our way home from Sawtell, you drive it no matter what the weather is like.
Raleighs a cool track, any car would fun fun around there but the HellVWRX would be awesome, maybe a drift session next Valla?
Steve
|
|
|
 hellbugged hellbugged
A.k.a.: Daimo Pell
23 Windows of Awesome
48's and straight cuts
       
Posts: 5080
Threads: 116
Registered: April 17th, 2003
Member Is Offline
Location: Nambucca Valley NSW
Theme: UltimaBB Psyche Blue
Mood: Couldn't care less
|
| posted on September 17th, 2007 at 09:25 PM |
|
|
yeah Steve, it's a daily, for sure.......
the grand plan for today was to shift the motor accross the creek and home. yet another head on crash blocking our wonderful pacific highway put an
end to that.......how many have to R.I.P before these upgrades actually happen? 
so a few of the lttle jobs wre done once and for all.
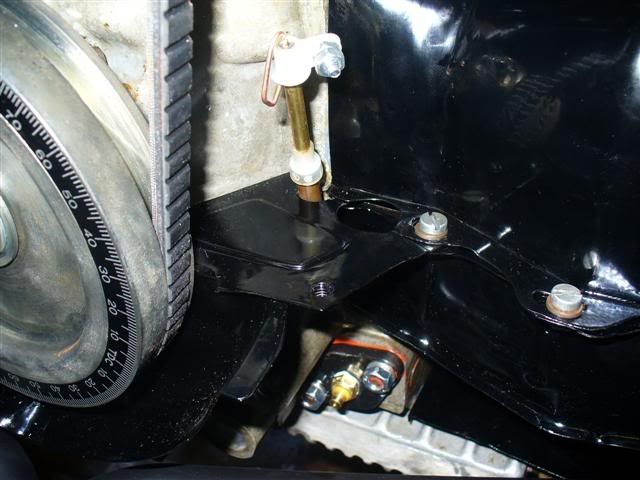
pressure sender locked in.....fan belt on
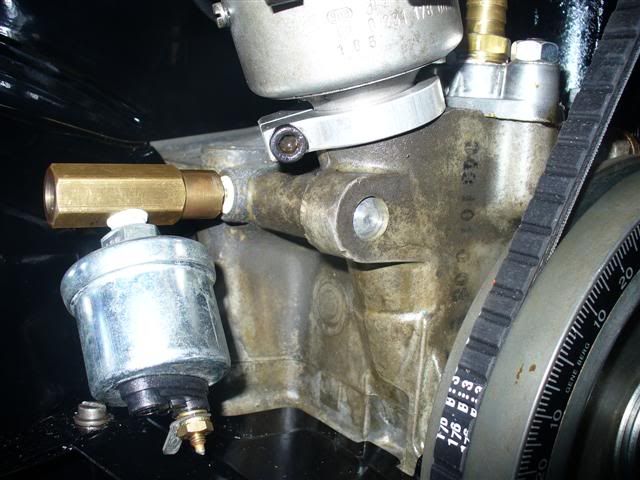
temp sender set in the type 3 block off. unwrapped the temp dip stick ready for wiring
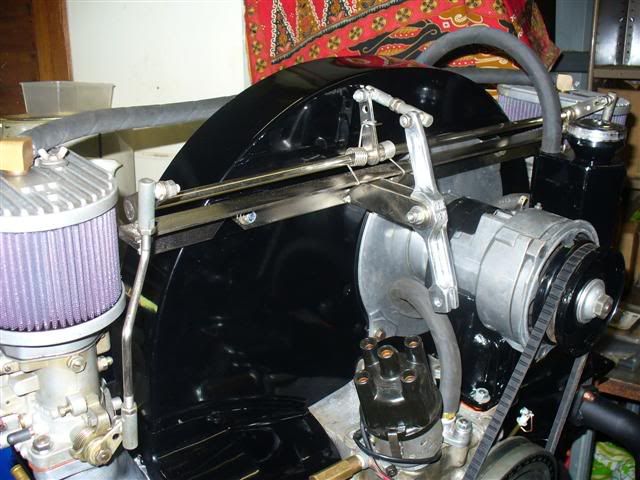
played with all the adjustabilities of the linkage to get the carbs in sync and sorted breather lines to cleaner tops.......
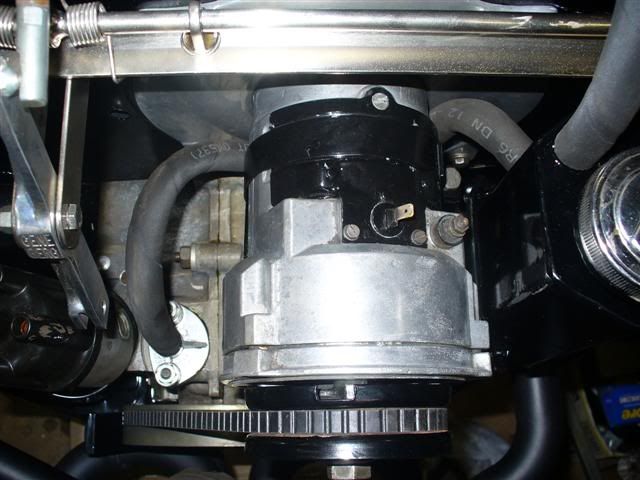
another breather line sorted.
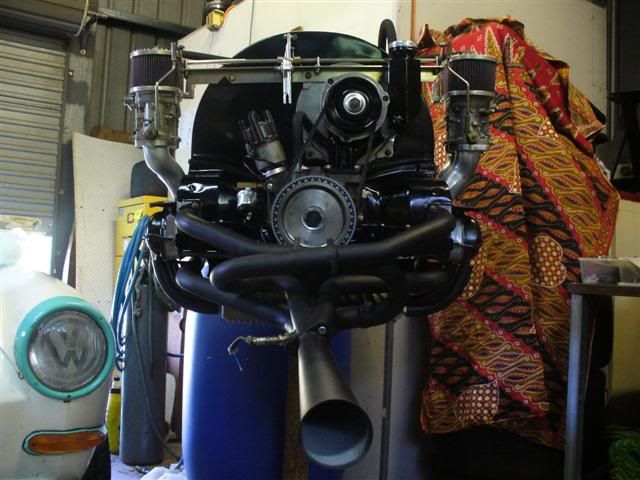
it's hard not to take piccies when there's a stinger strapped on:blush
|
|
|
| Pages: 1 .. 6 7 8 9 10 .. 24 |