| [ Total Views: 34502 | Total Replies: 295 | Thread Id: 104364 ] |
| Pages: 1 .. 4 5 6 7 8 .. 10 |
|
|
 lunar_c lunar_c
Seriously Crusin Dubber
 
Posts: 155
Threads: 16
Registered: August 31st, 2006
Member Is Offline
Location: Perth, WA
Theme: UltimaBB Pro Blue ( Default )
Mood: Excellent
|
| posted on May 21st, 2014 at 09:34 PM |
|
|
The pics aren't working! Fix it fix it fix it fix it!

6 Dubs in and counting..
1966 1300 Deluxe Beetle in polar white.
|
|
|
 lunar_c lunar_c
Seriously Crusin Dubber
 
Posts: 155
Threads: 16
Registered: August 31st, 2006
Member Is Offline
Location: Perth, WA
Theme: UltimaBB Pro Blue ( Default )
Mood: Excellent
|
| posted on May 28th, 2014 at 12:45 PM |
|
|
Now I've seen it, it's a credit to you mate.
Got hub caps for those wheels? That'd make it just right.
6 Dubs in and counting..
1966 1300 Deluxe Beetle in polar white.
|
|
|
 NUG637 NUG637
Officially Full-On Dubber
  
Posts: 372
Threads: 24
Registered: November 2nd, 2009
Member Is Offline
Theme: UltimaBB Pro Blue ( Default )
|
| posted on May 29th, 2014 at 08:50 AM |
|
|
Awning on....

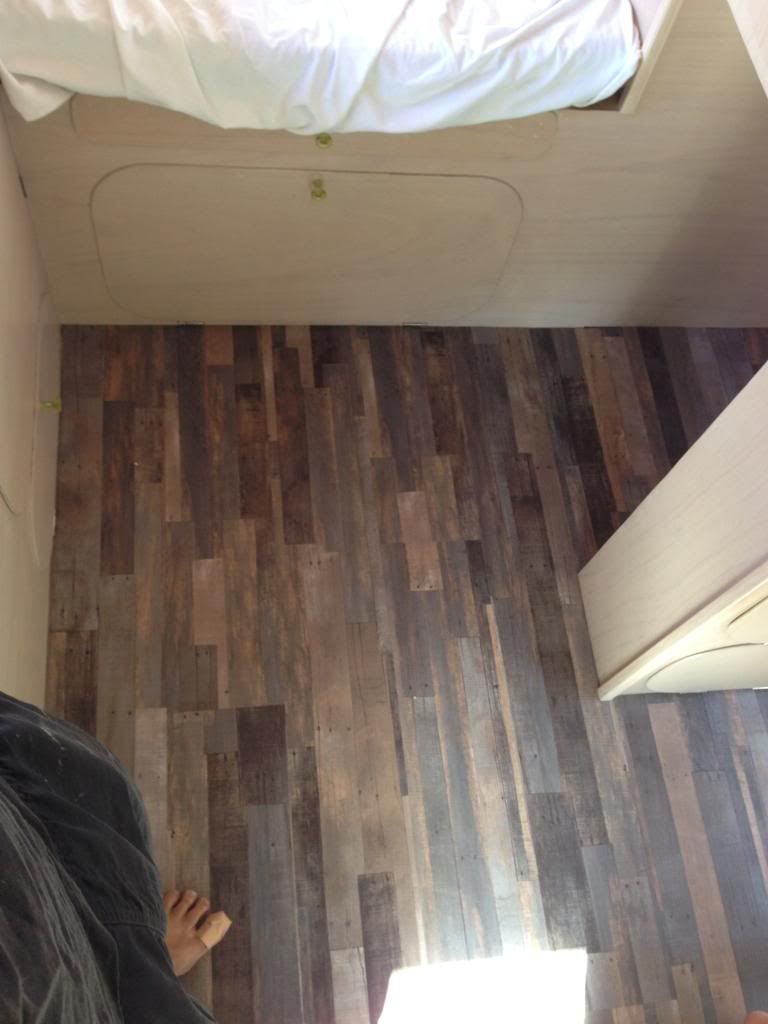
cut out the floor then glues it down…

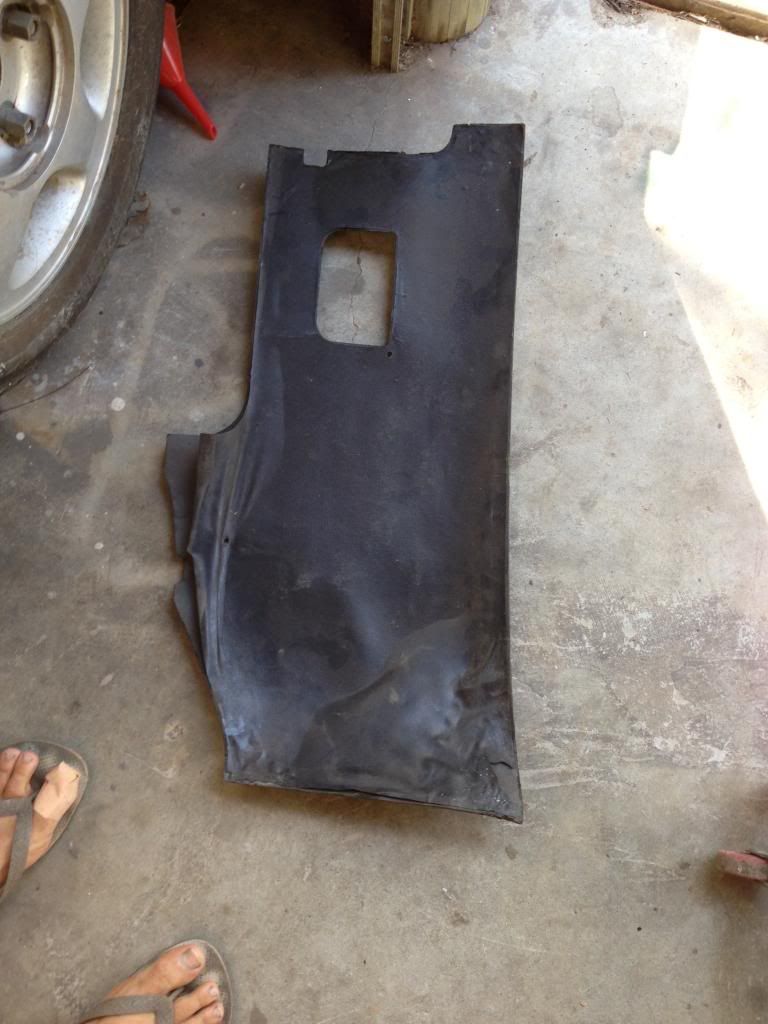
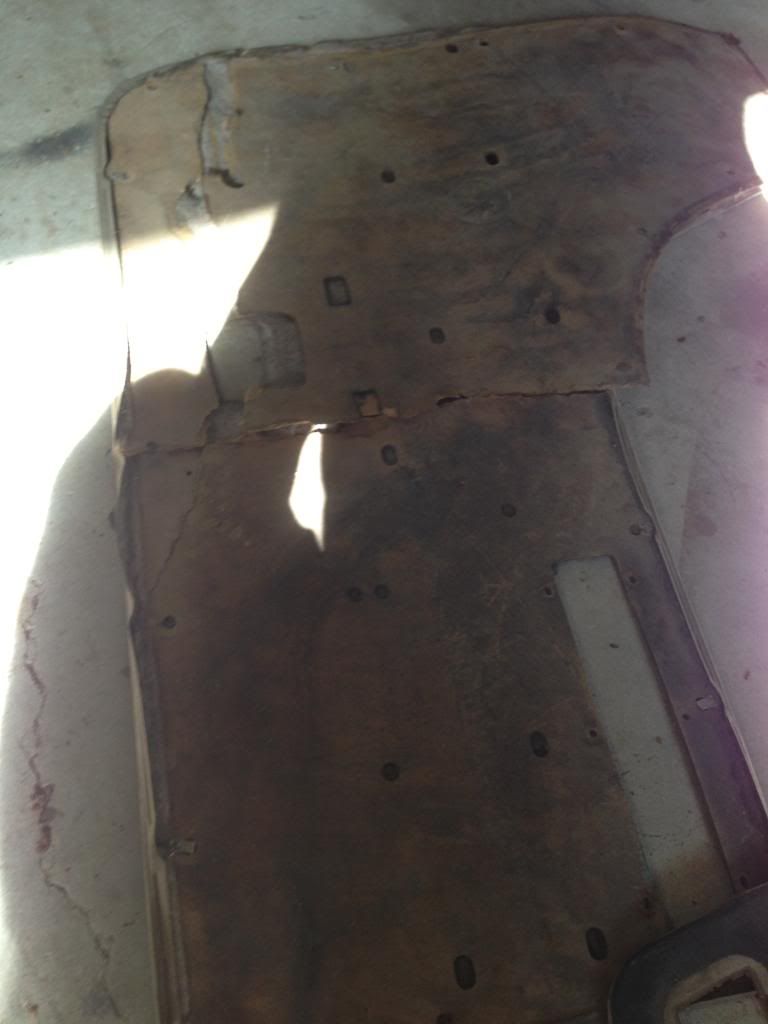
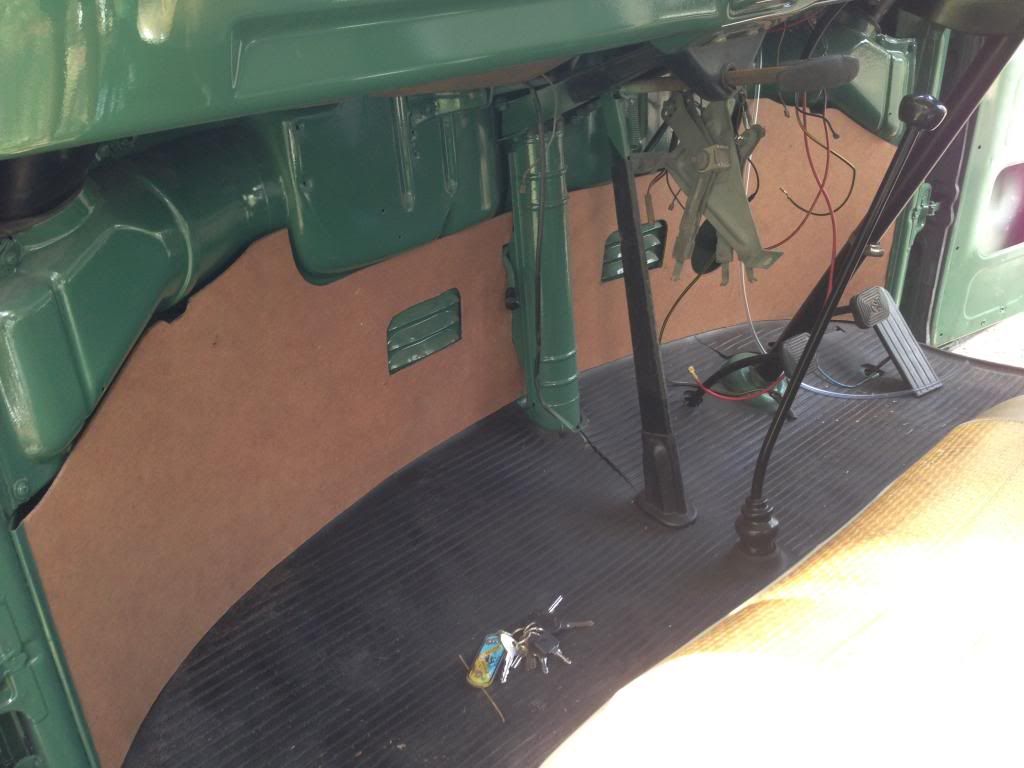
as all of our door cards and kick panels were badly water damaged i thought i would make some new ones with the left over masonite from the oval….
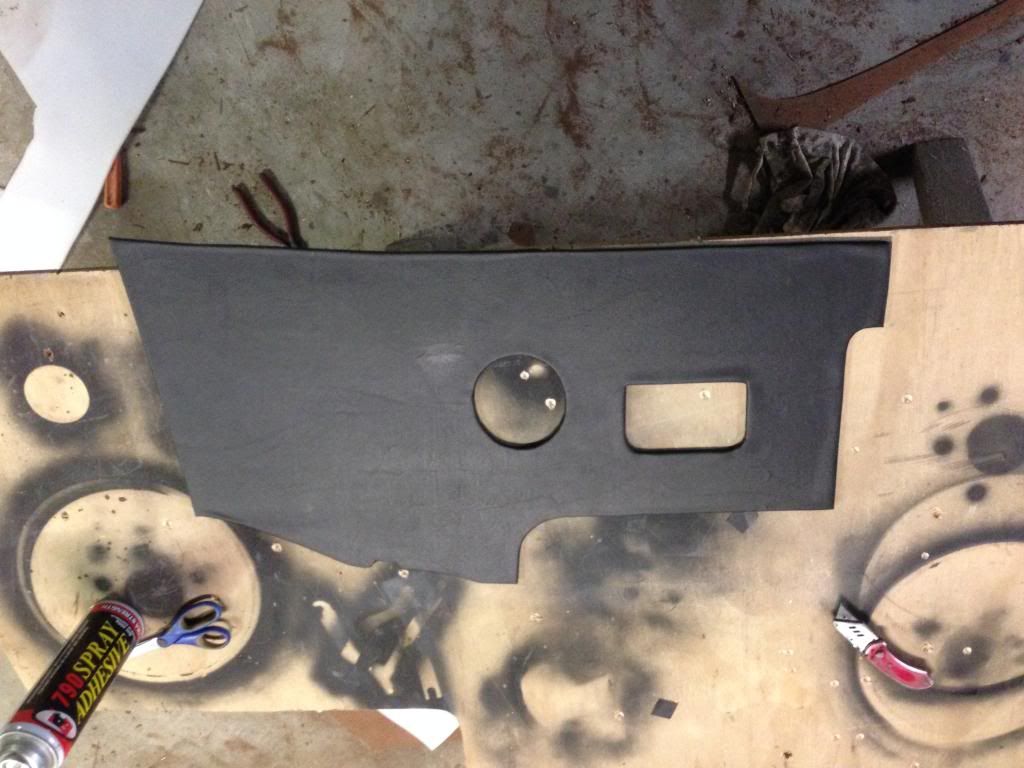
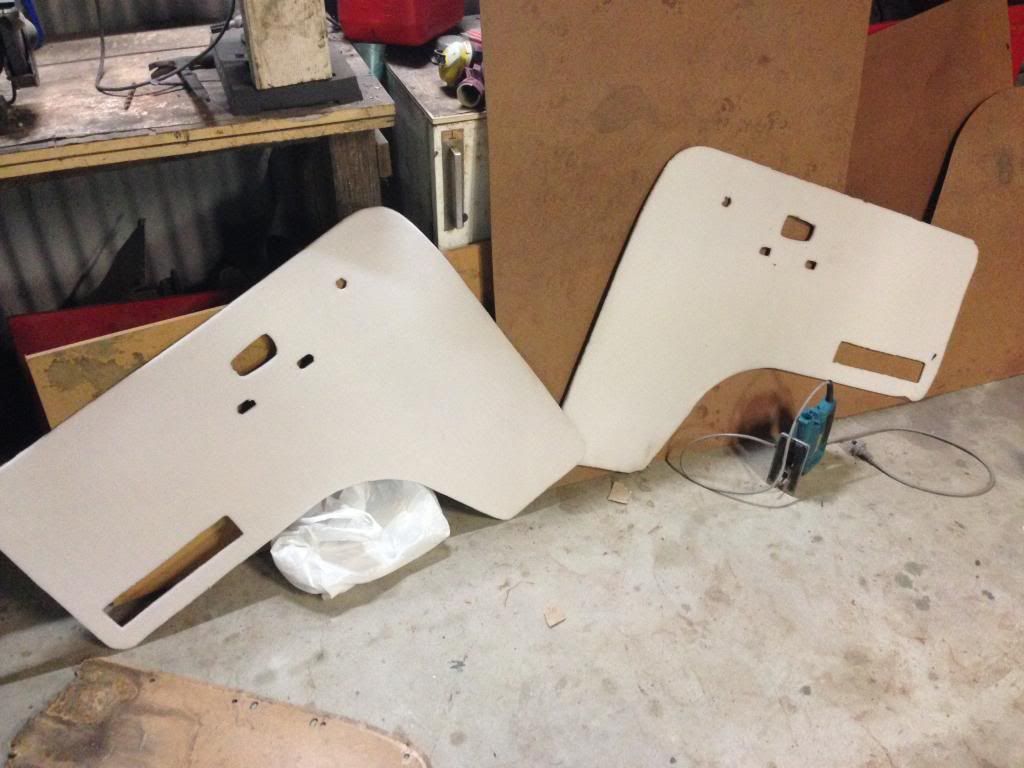
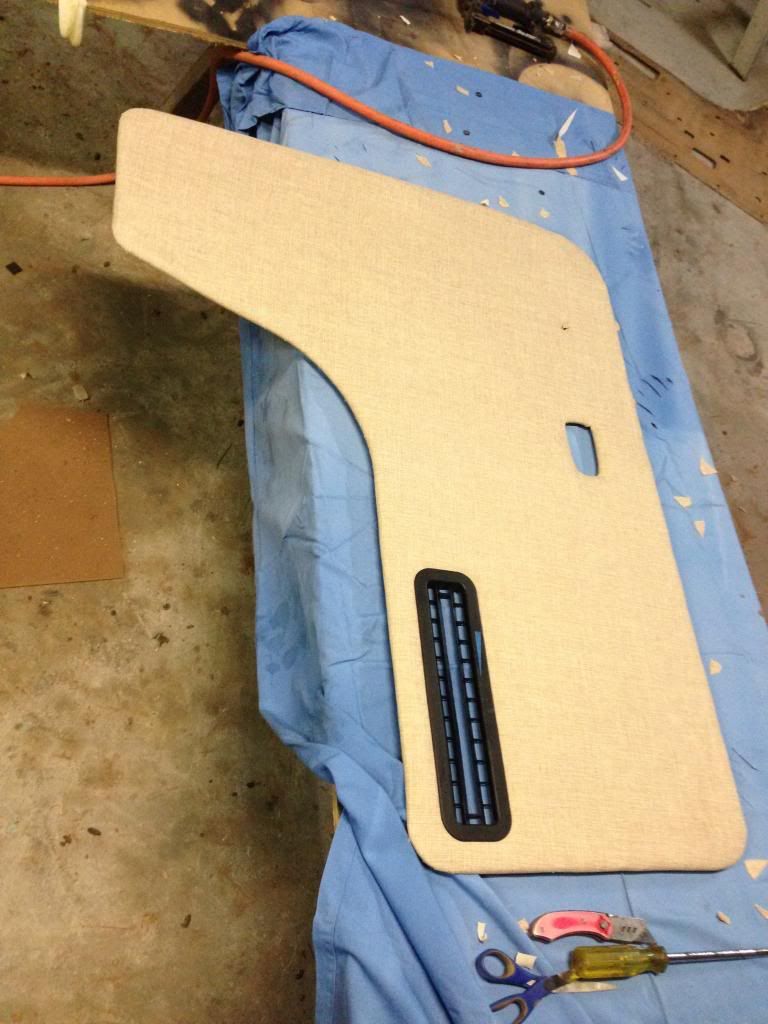
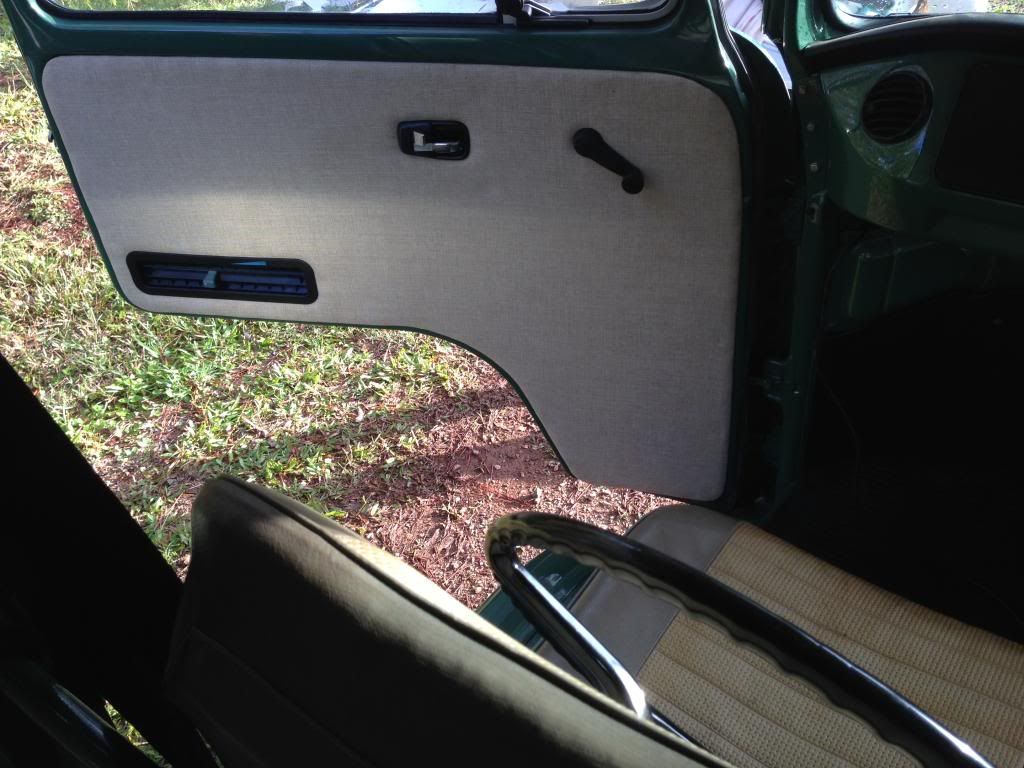
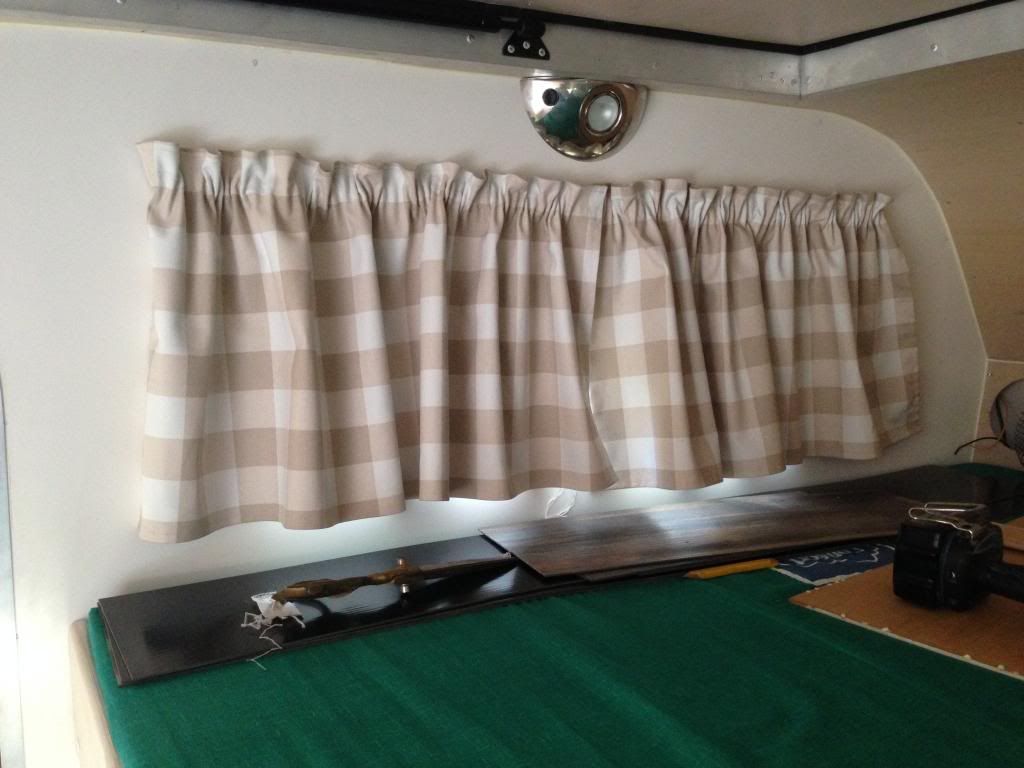
shana has been sewing curtains 8)
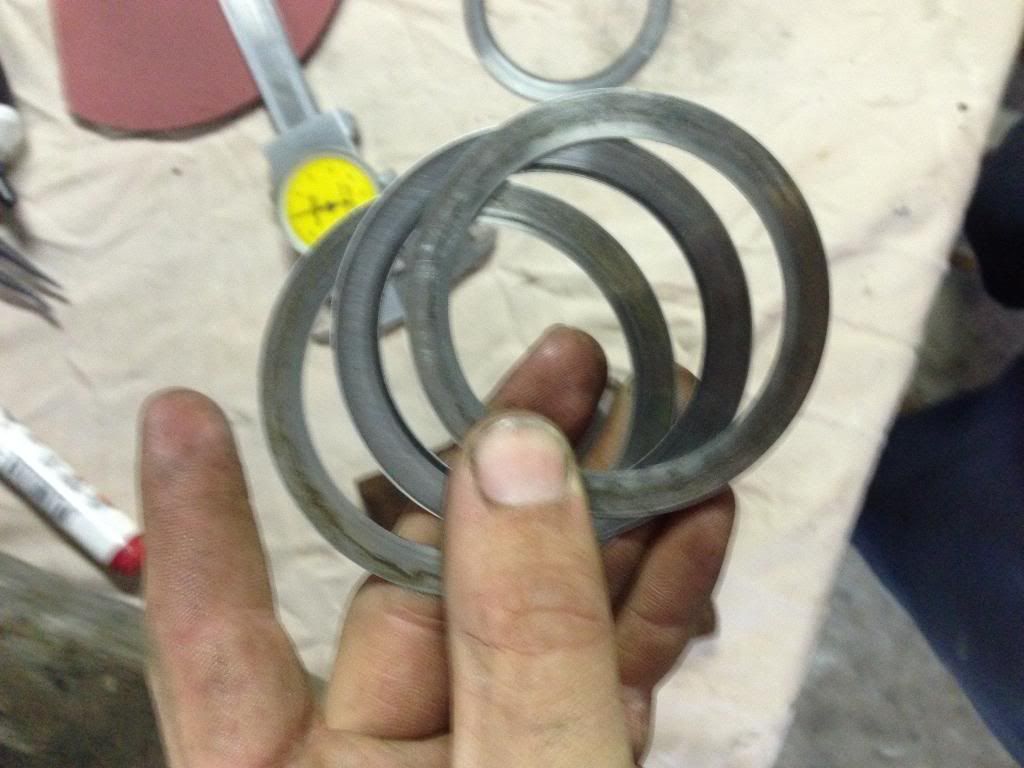
now the not so fun part…. dib came across a thread on the samba about installing lobro cv's…. when i did mine i noticed the 3 rings on one side and a
slight chamfer on the inner cage… did a slight search but nothing came up so i took a 50/50 chance and put the three rings towards the
shafts….WRONG!!!!
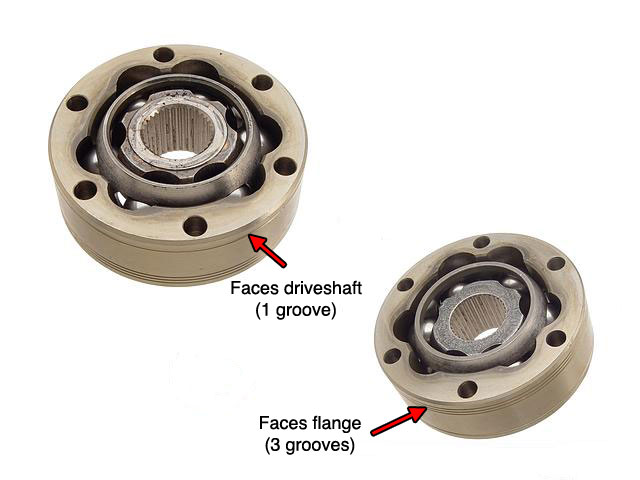
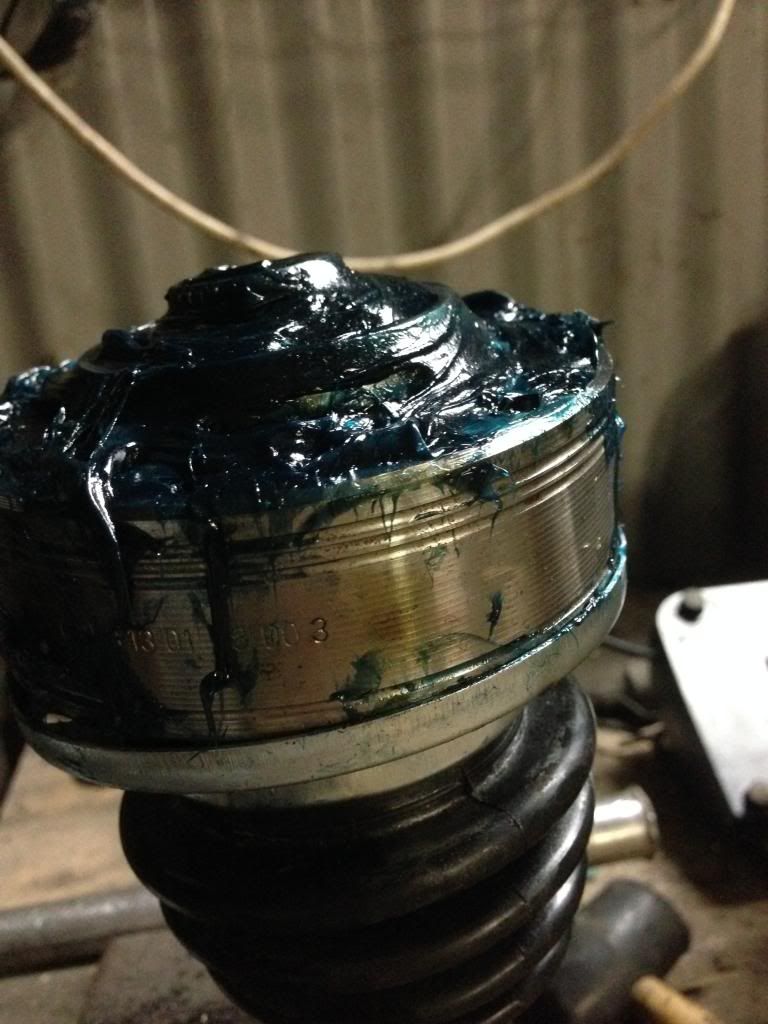
so i pulled them out and flipped them over and got them all back in…. i hate doing things twice but i will never forget now….
|
|
|
 NUG637 NUG637
Officially Full-On Dubber
  
Posts: 372
Threads: 24
Registered: November 2nd, 2009
Member Is Offline
Theme: UltimaBB Pro Blue ( Default )
|
| posted on May 29th, 2014 at 08:52 AM |
|
|
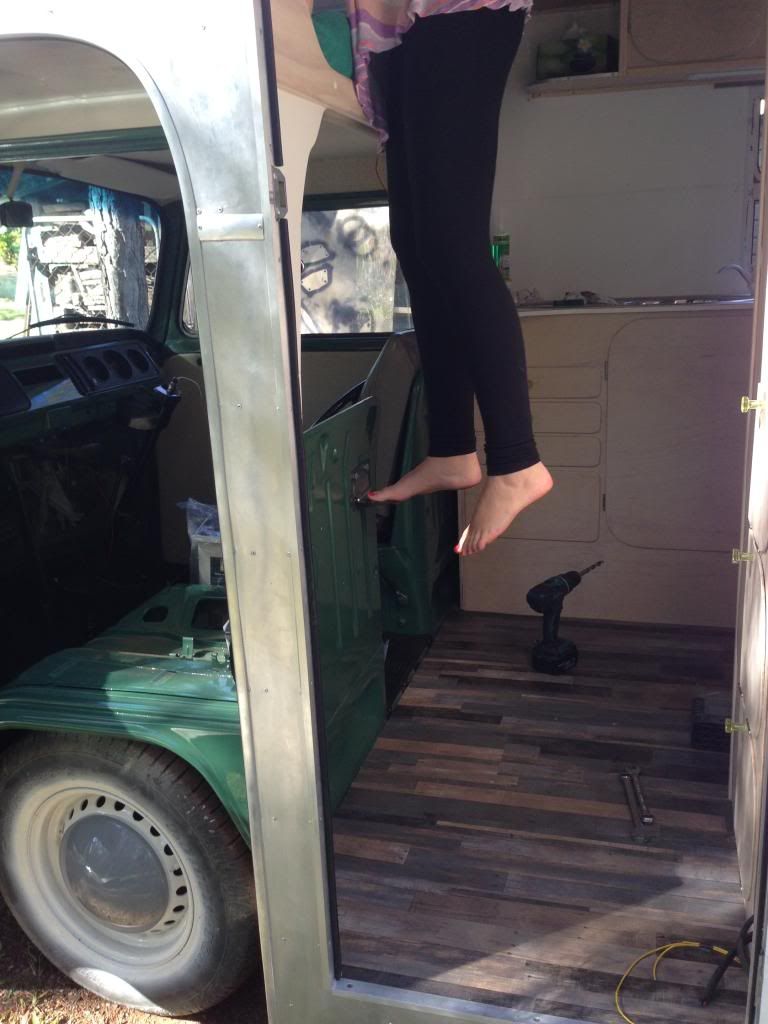
Made a nifty little step to make getting into bed a little easier as i don't like the idea of a ladder that we have to find a place for…. Yes its
small but its holds my 90kg and functions exactly how i wanted… and its not a huge eye sore….
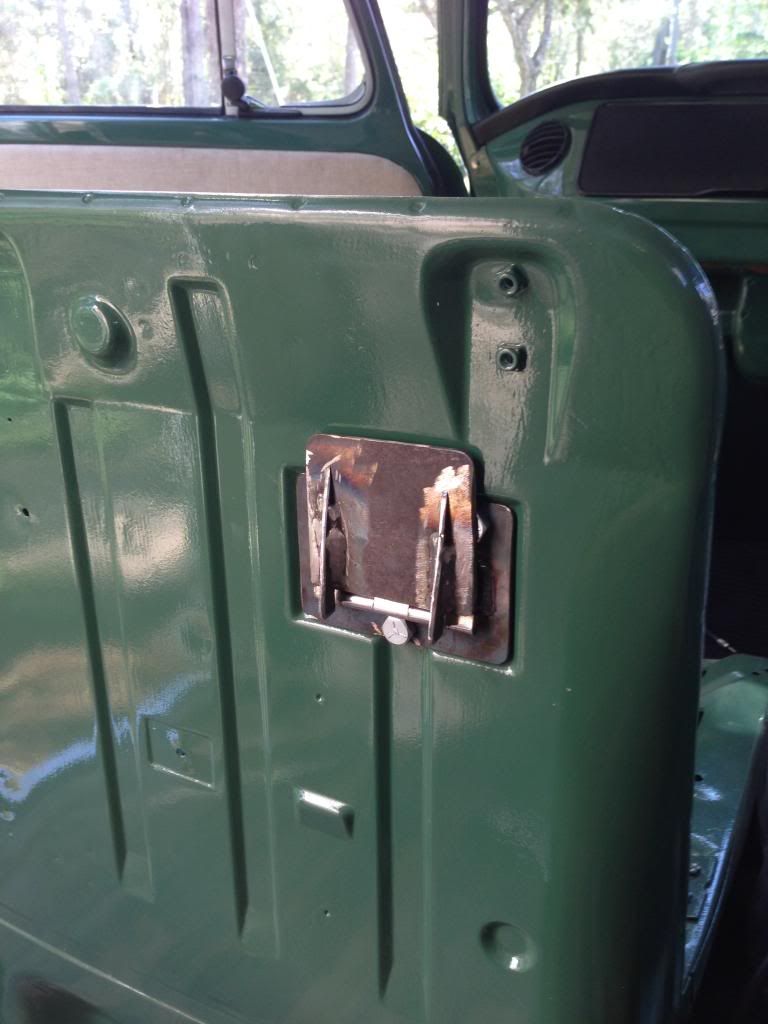
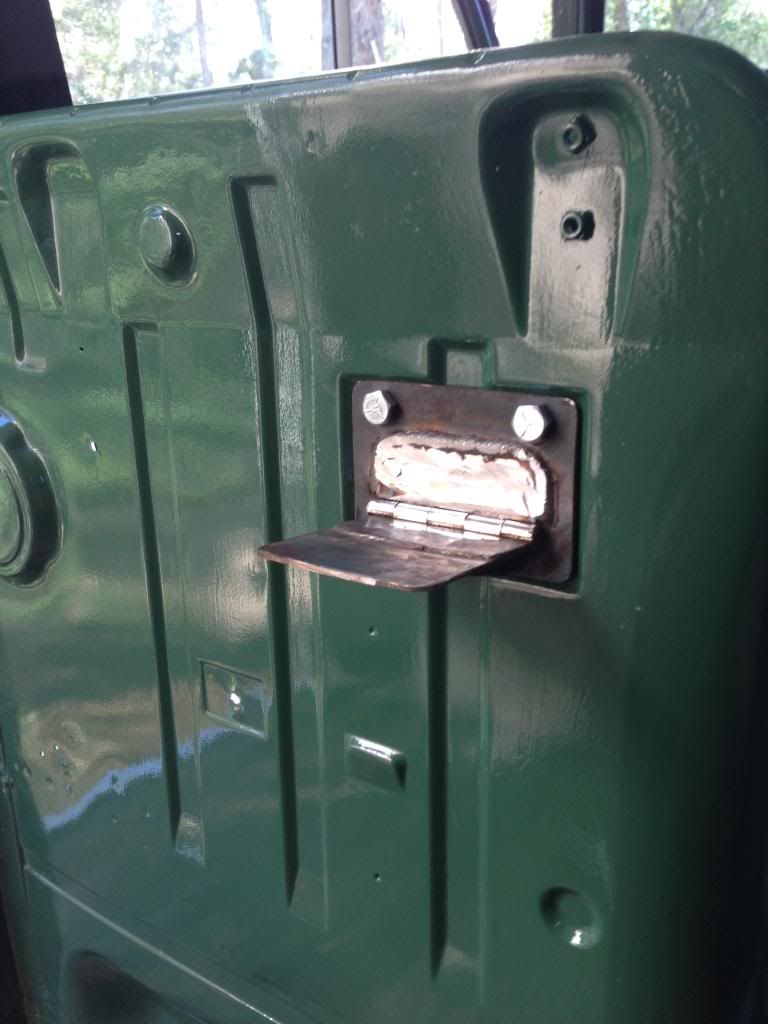
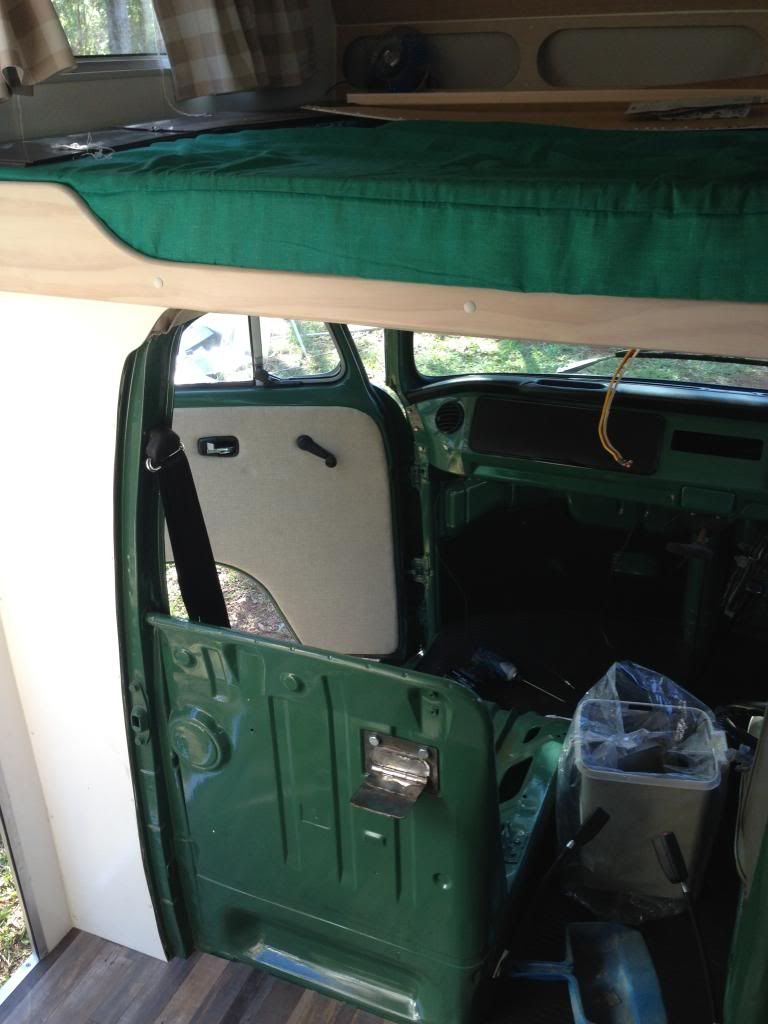
forgot to take pictures but it has three 60mm washers that were supplied with my retractable seat belts stoping the bolts from pulling through the
back side…
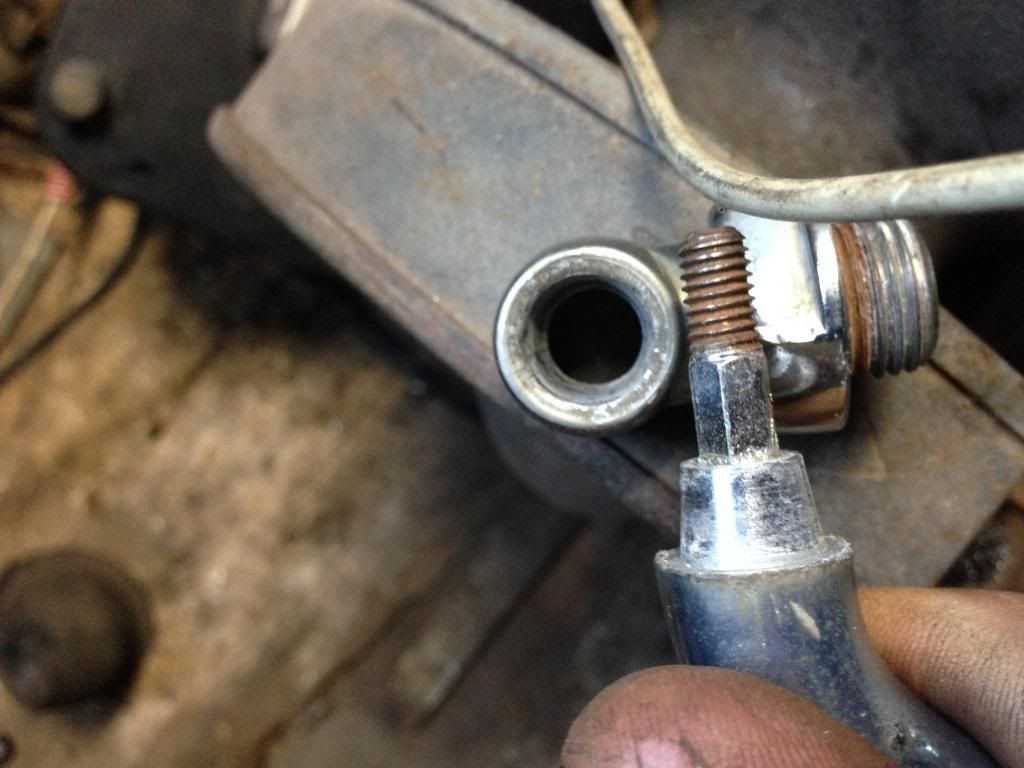
after taking the step off and painting it i started making some mirror mounts for the mirrors i bought off ebay over the weekend. They look similar to
the elephant ear mirrors but half the price. Just waiting for them to arrive before i cut the rods to proper length.
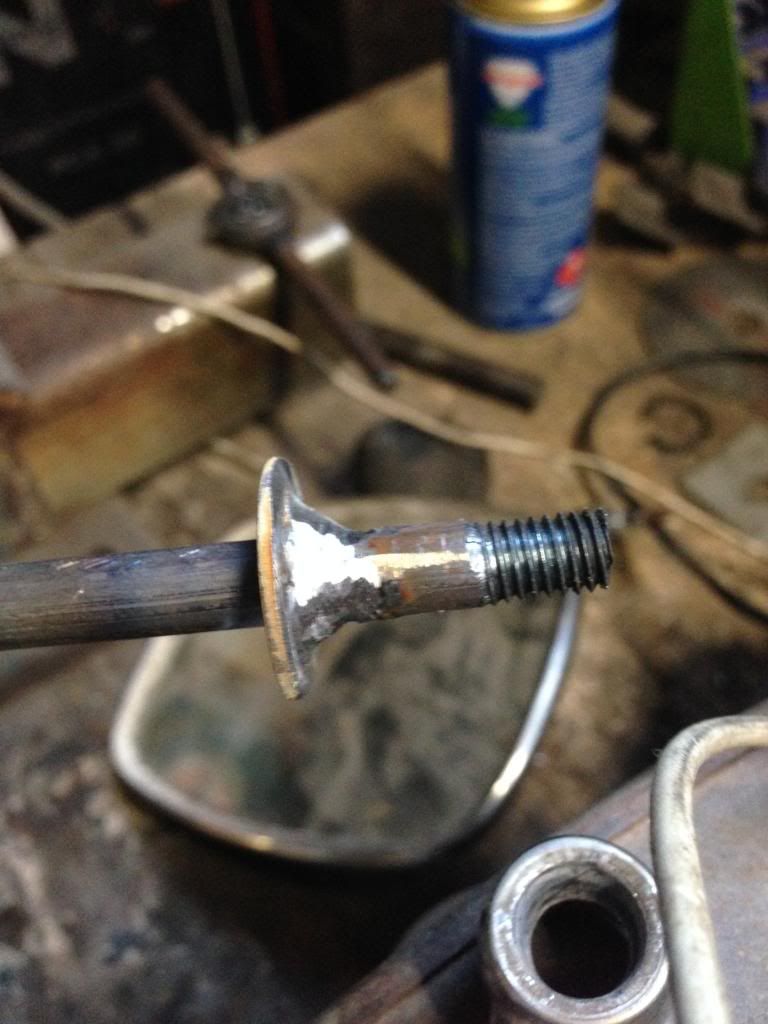
bent some 8mm rod and cut a thread on one of the ends
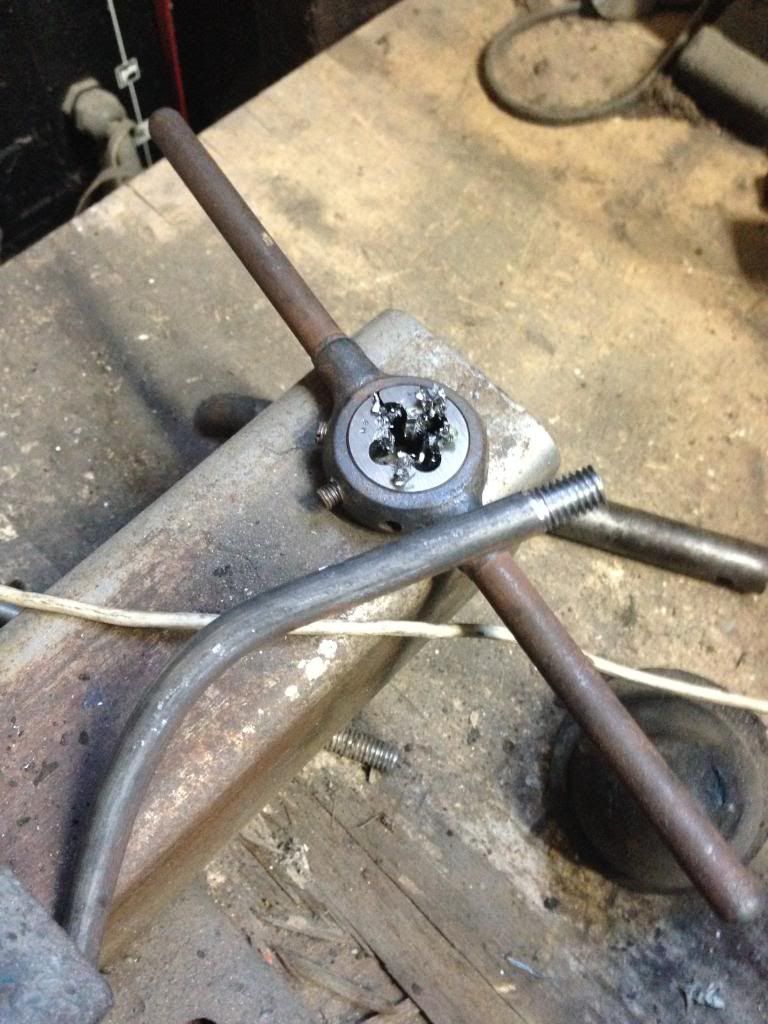
tried to duplicate the original tapper of the mirror arm
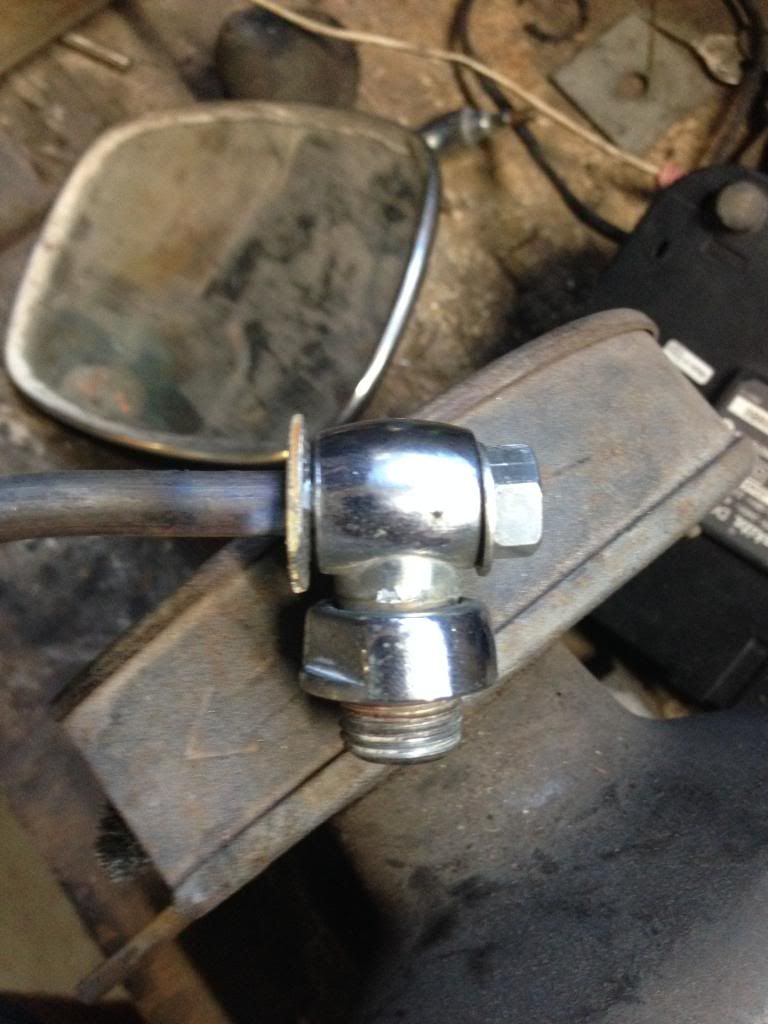
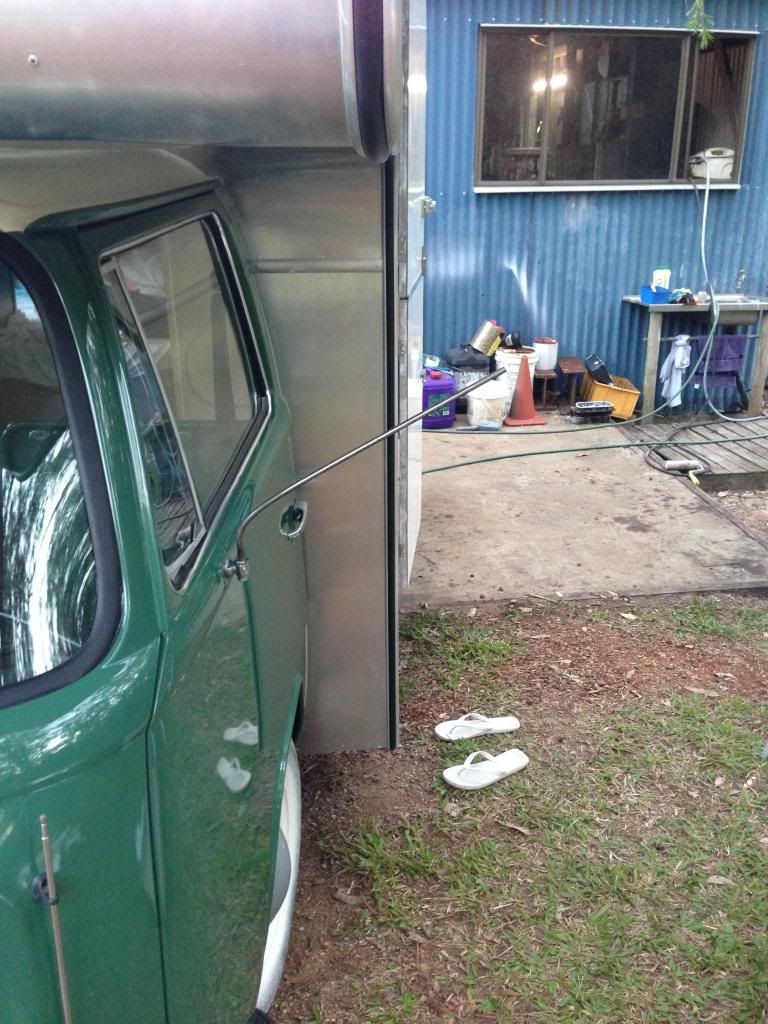
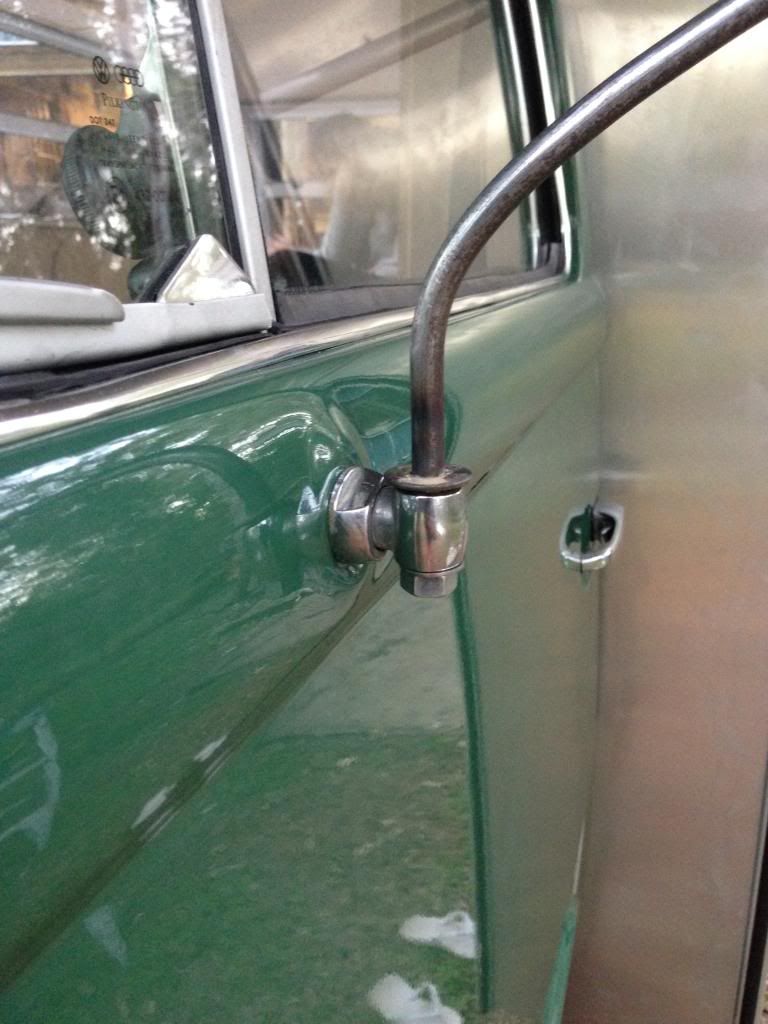
really happy with how the turned out holding out for them to arrive now 8)
The only thing that might be a problem is if they wobble but i think i can easily fix that. Once the mirrors arrive i will cut them to the shortest
usable length 
|
|
|
 vassy66T1 vassy66T1
A.k.a.: Marcus Vass
Veteran Volks Folk
Wow ... are U reading this?
    
Posts: 2120
Threads: 76
Registered: June 4th, 2003
Member Is Offline
Location: Brisvegas
Theme: UltimaBB Streamlined2
Mood: Happy to own a VW
|
| posted on May 29th, 2014 at 09:52 AM |
|
|
That pink toenail polish looks great on you Miles 
Coming along nicely mate
|
|
|
 NUG637 NUG637
Officially Full-On Dubber
  
Posts: 372
Threads: 24
Registered: November 2nd, 2009
Member Is Offline
Theme: UltimaBB Pro Blue ( Default )
|
| posted on May 29th, 2014 at 11:41 AM |
|
|
Thanks mate  had to brighten up my black leggings some how had to brighten up my black leggings some how 
|
|
|
 NUG637 NUG637
Officially Full-On Dubber
  
Posts: 372
Threads: 24
Registered: November 2nd, 2009
Member Is Offline
Theme: UltimaBB Pro Blue ( Default )
|
| posted on May 30th, 2014 at 10:48 PM |
|
|
shana finished sewing the curtains… she has really impressed me for someone who didn't know how to sew…
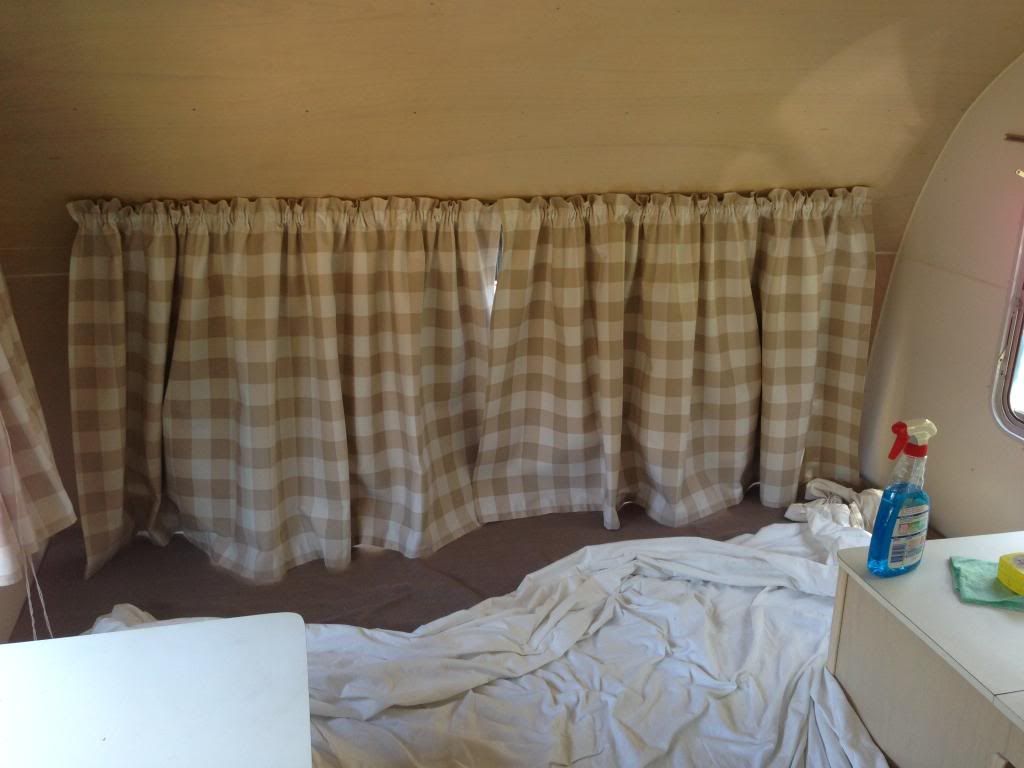
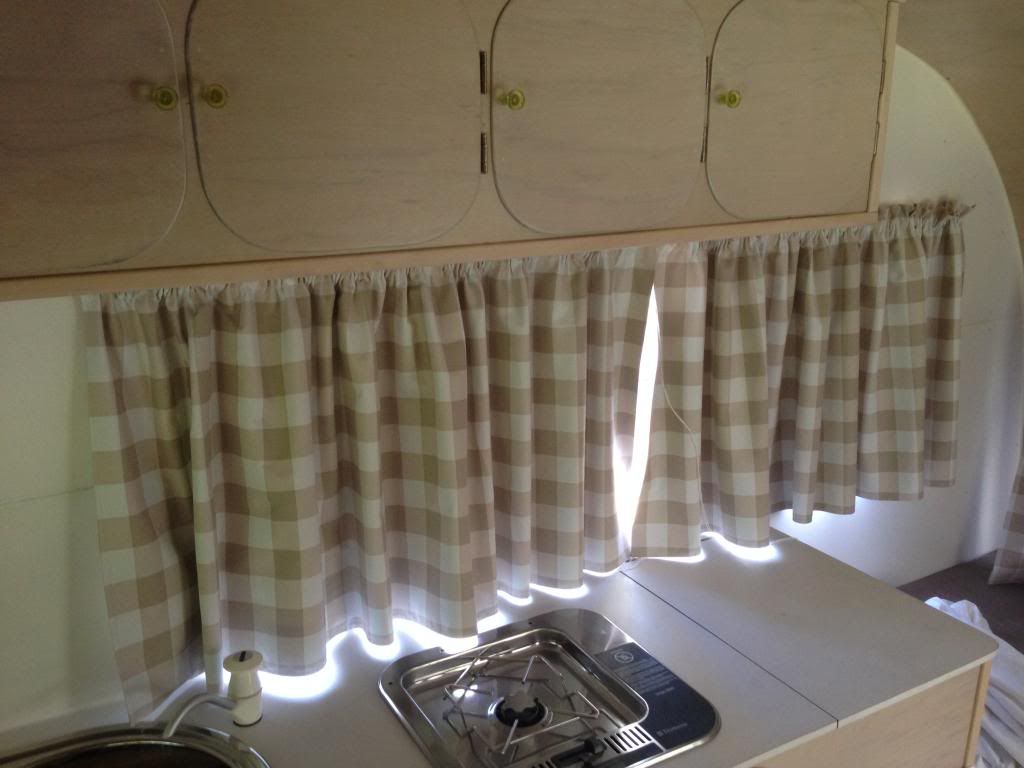
received the mirrors in the mail…
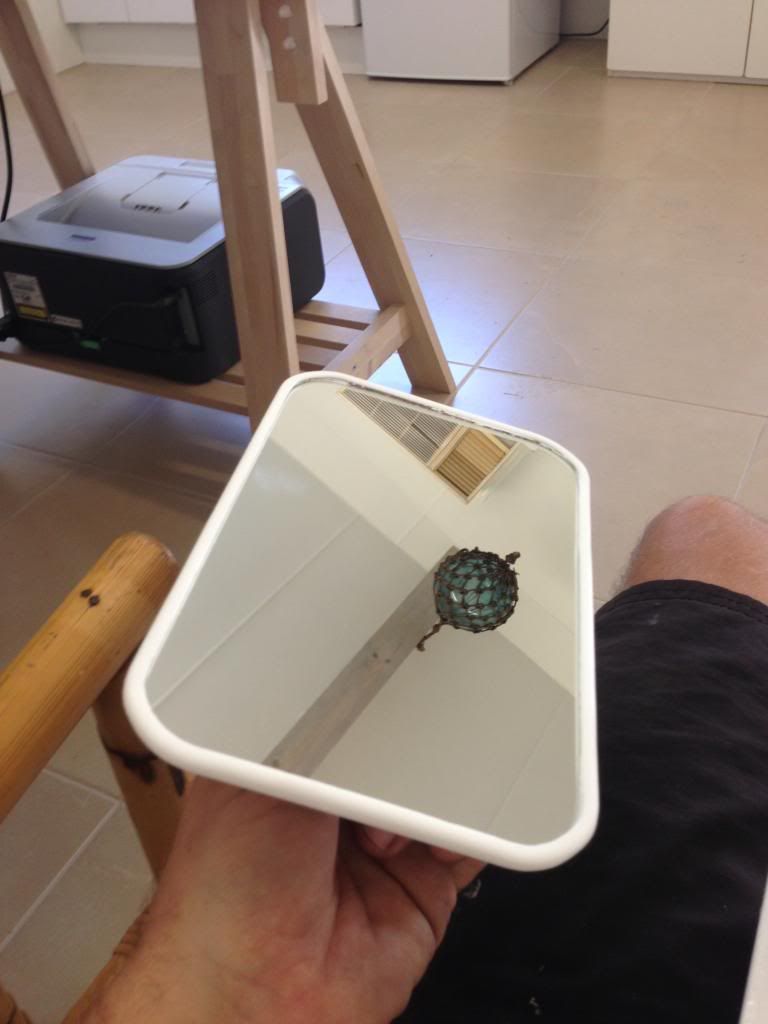
after trimming 150mm off the length off the mirror arms… i still think they would of wobbled… should be ok now…
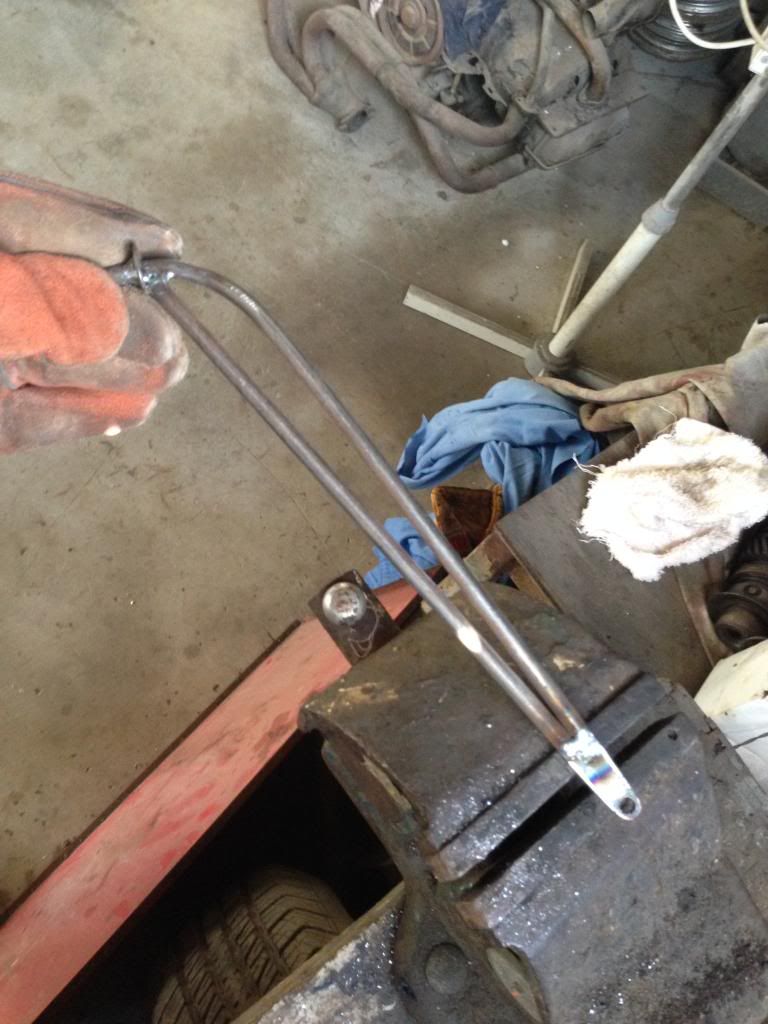
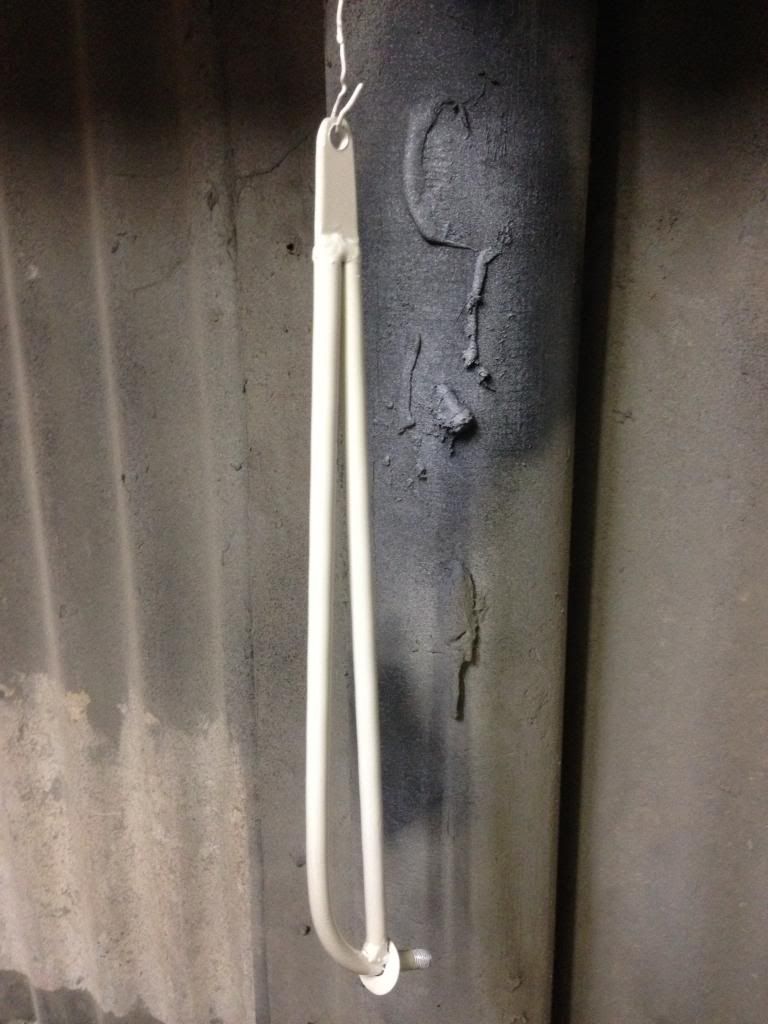
After welding in the adjusters to the beam i wasn't aware it would cause trouble if i ever wanted to raise it with the shift rod clearance being a
problem…. Although it looks much nicer at this height it was only 10mm off the bump-stop with no-one in it…. might end up loosing the stops down the
track anyway but for now i want it to pass the engineering and roady with flying colours….
so had to chop up my shift road…. given myself 20mm clearance now which should allow the adjuster to move back to its stock position
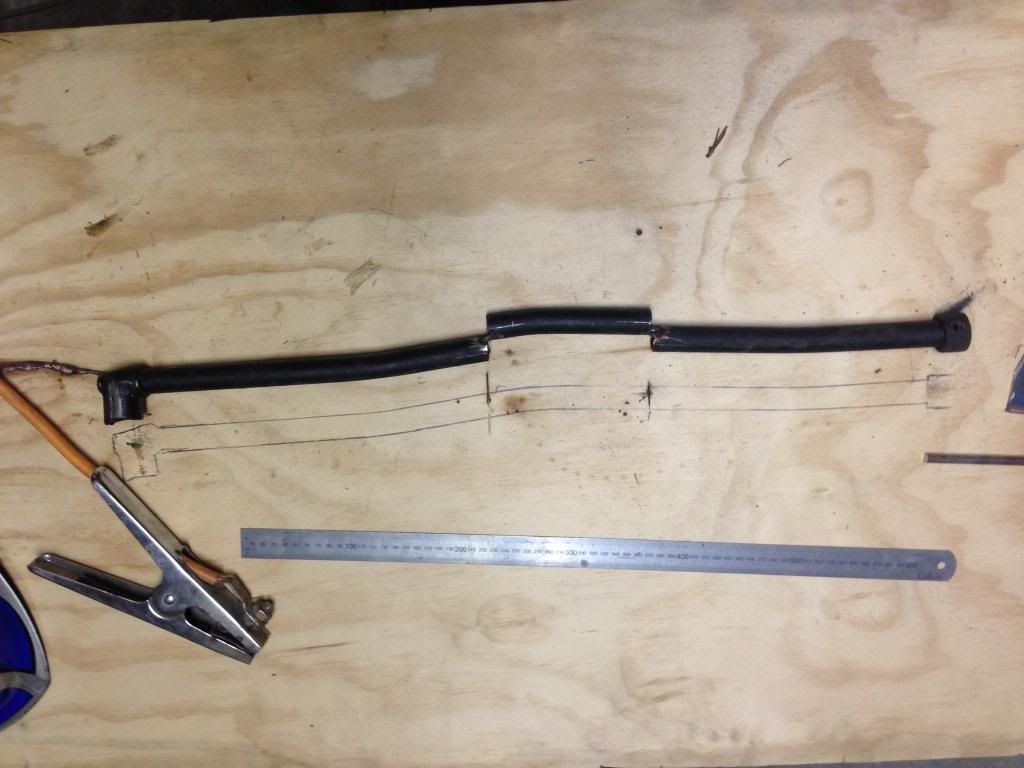
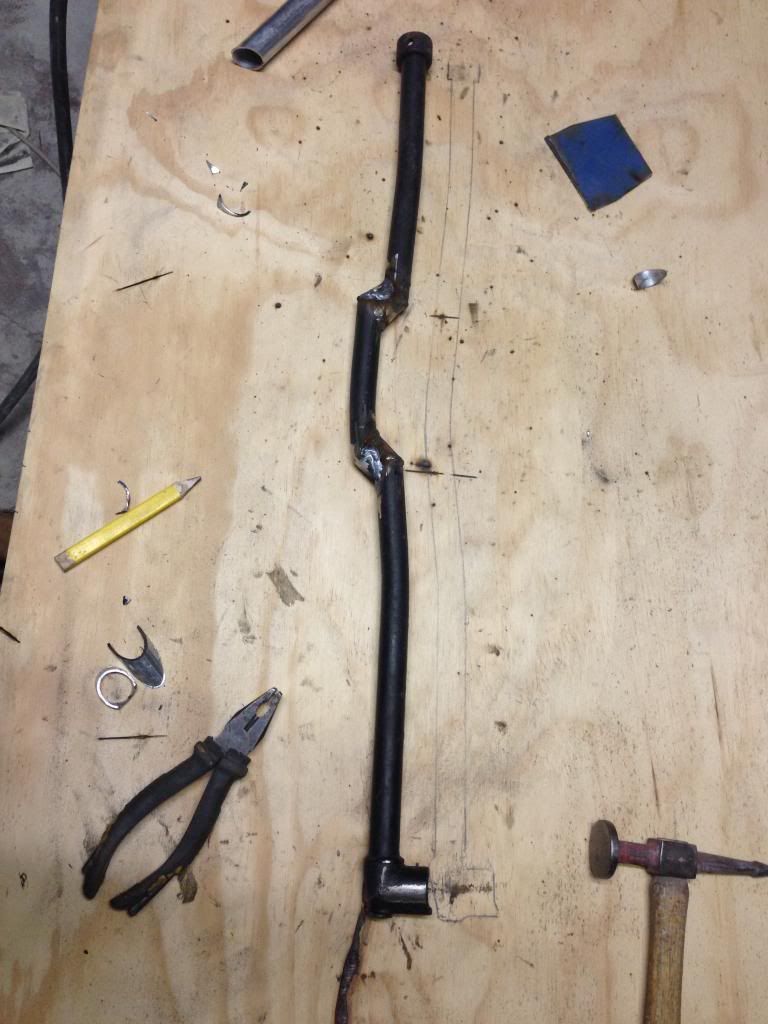
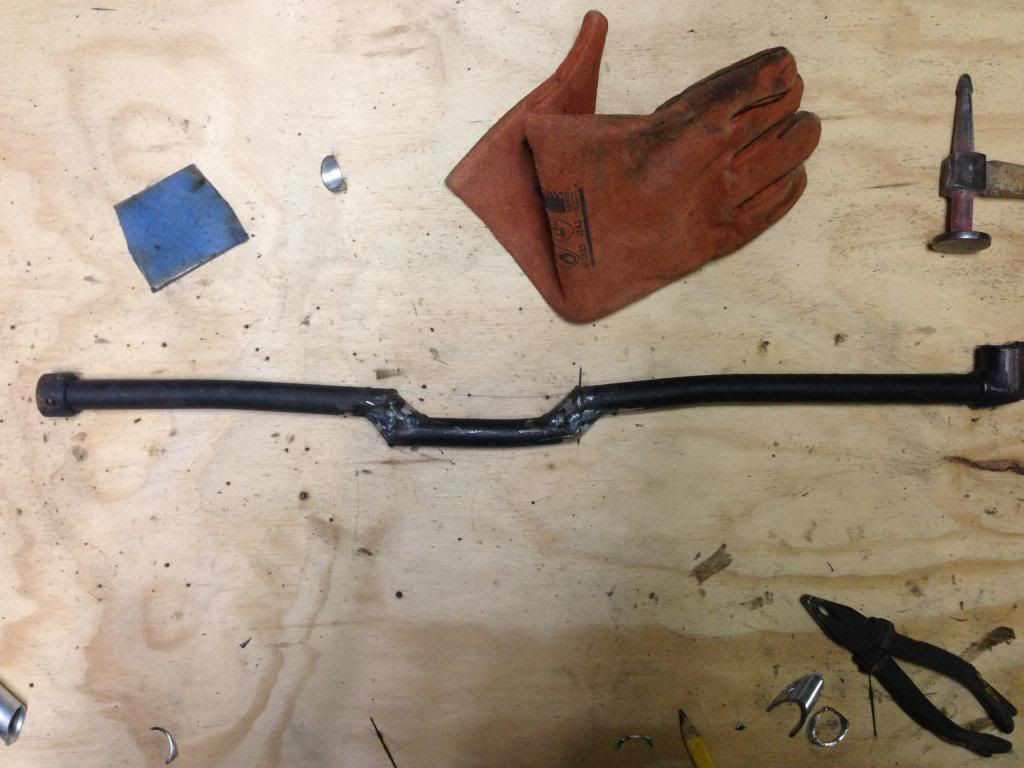
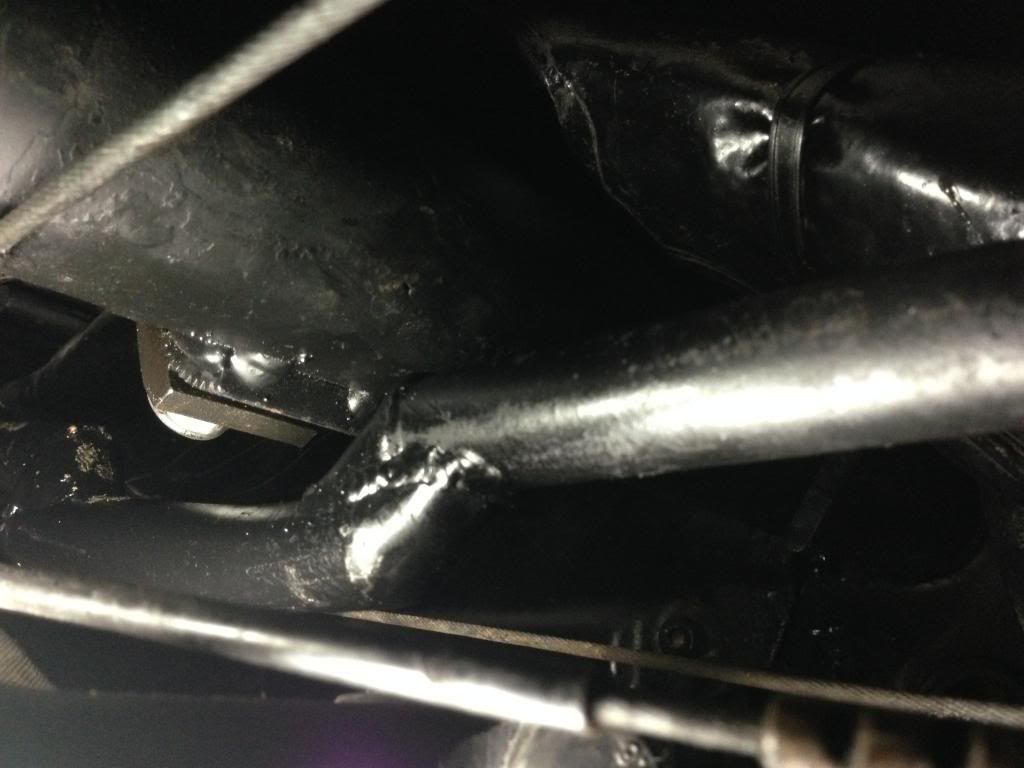
although after doing this mod i sat and thought i could of done it a much neater way…. just part of the learning curve… will serve its purpose just
fine for now tho
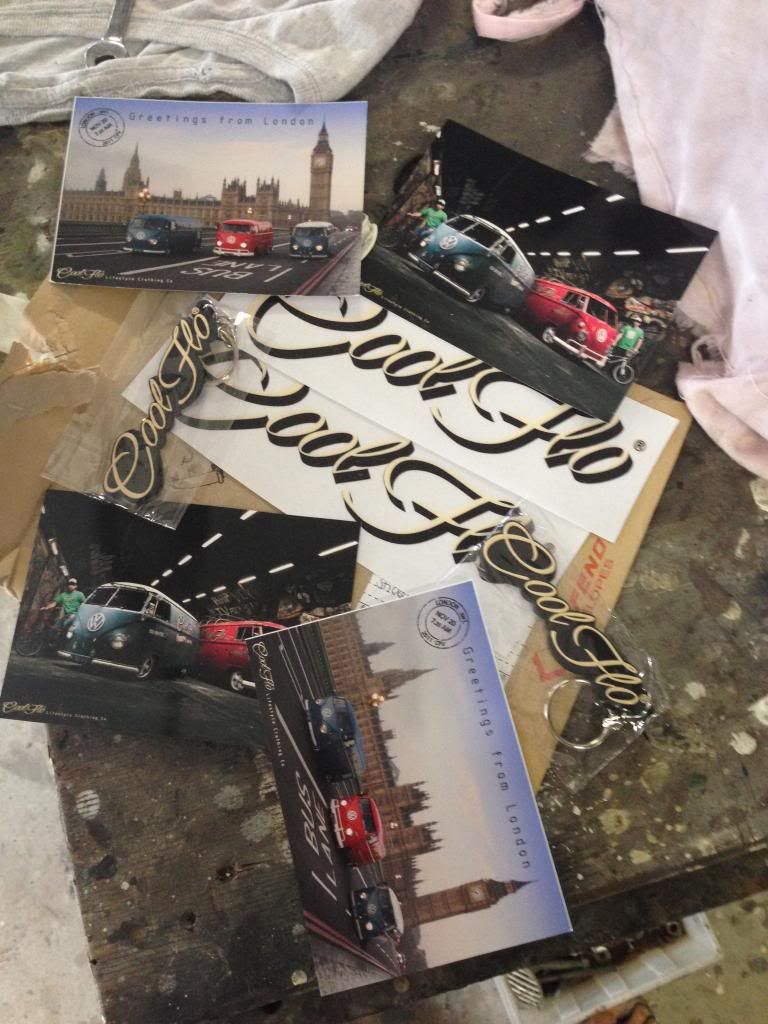
also been talking to the cool flo boys abit lately who sent me an awesome package in the mail…. muchly appreciated guys 8)
|
|
|
 urban_myth urban_myth
A.k.a.: Jason
Officially Full-On Dubber
  
Posts: 354
Threads: 60
Registered: January 6th, 2005
Member Is Offline
Location: Sydney
Theme: UltimaBB Pro Blue ( Default )
|
| posted on May 31st, 2014 at 09:17 AM |
|
|
drop spindals are the way to go.no need to adjust the beam.
|
|
|
 NUG637 NUG637
Officially Full-On Dubber
  
Posts: 372
Threads: 24
Registered: November 2nd, 2009
Member Is Offline
Theme: UltimaBB Pro Blue ( Default )
|
| posted on May 31st, 2014 at 09:33 AM |
|
|
They will come down the track but for the trip I have better use for that $700 then on some drop spindles... And for $60, adjuster have got me where I
want to be... But I wasn't aware of the hassels if I wanted to raise it more....fixed now 
|
|
|
 Dasdubber Dasdubber
A.k.a.: Alan Agyik
23 Windows of Awesome
DAS Resto Haus
       
Posts: 5746
Threads: 289
Registered: August 26th, 2002
Member Is Offline
Location: Gold Coast
Theme: UltimaBB Pro Blue
Mood: feeling fine...
|
| posted on June 3rd, 2014 at 02:07 PM |
|
|
Nice work Nug, you are doing an absolutely cracking job mate.
|
|
|
 NUG637 NUG637
Officially Full-On Dubber
  
Posts: 372
Threads: 24
Registered: November 2nd, 2009
Member Is Offline
Theme: UltimaBB Pro Blue ( Default )
|
| posted on June 3rd, 2014 at 08:08 PM |
|
|
funny your should use that word CRACKing Al…. my day has been nothing but CRACKing….
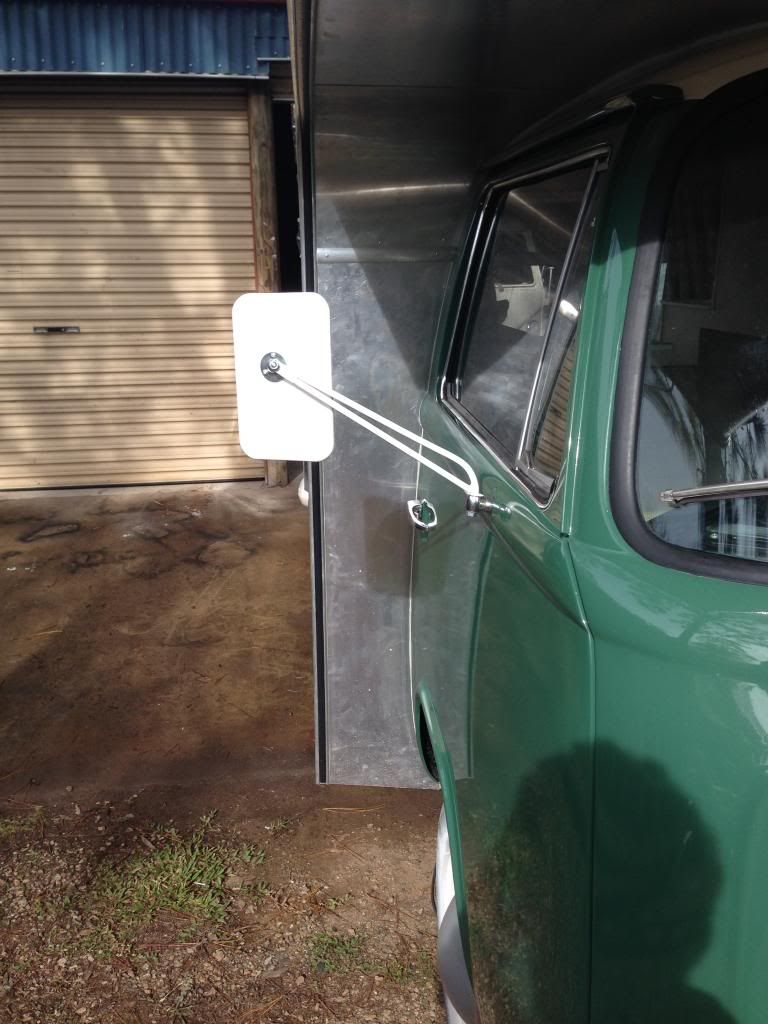
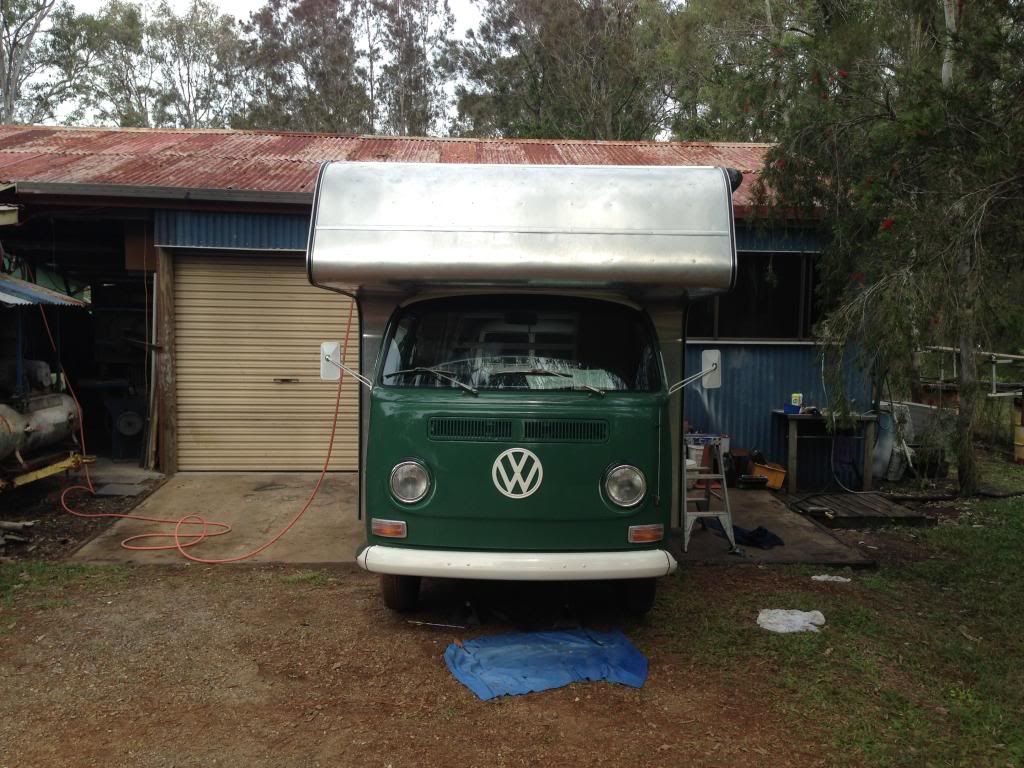
mirrors on…
had abit of time on my hands over the weekend so made a start on some slip on seat covers….
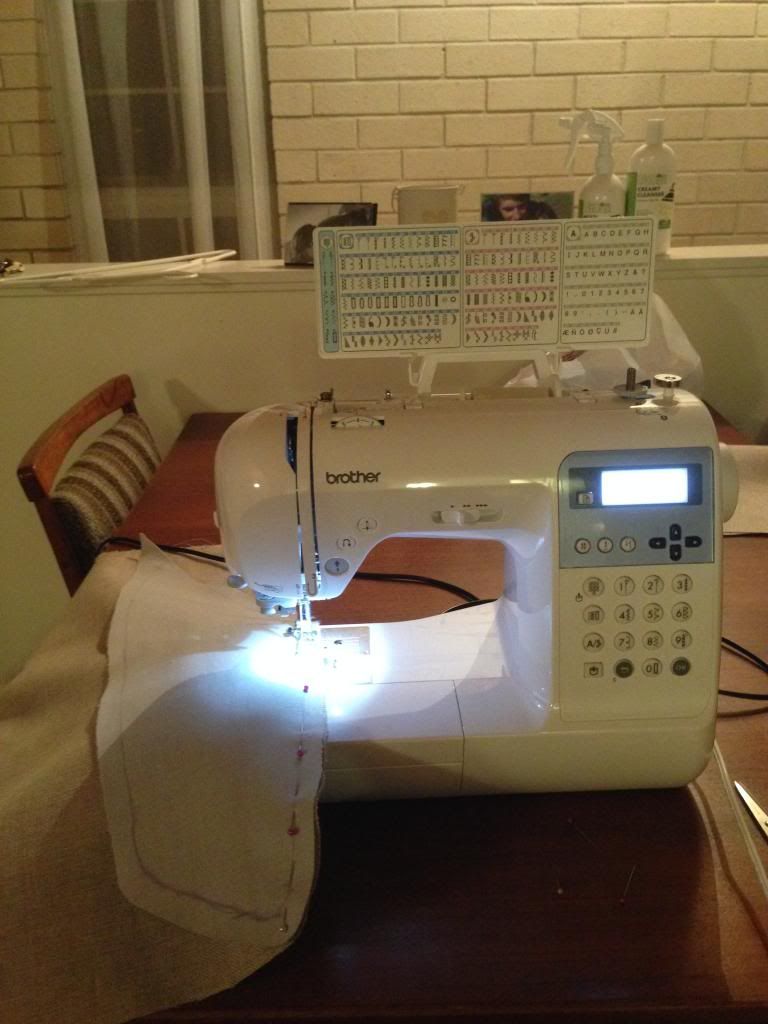
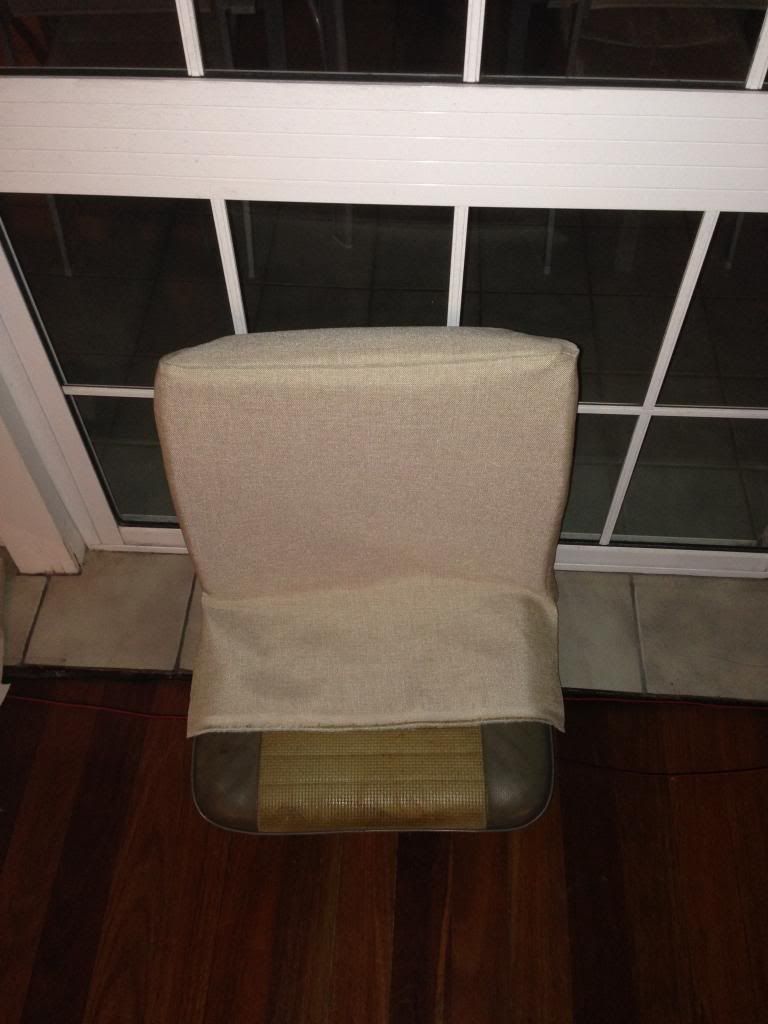
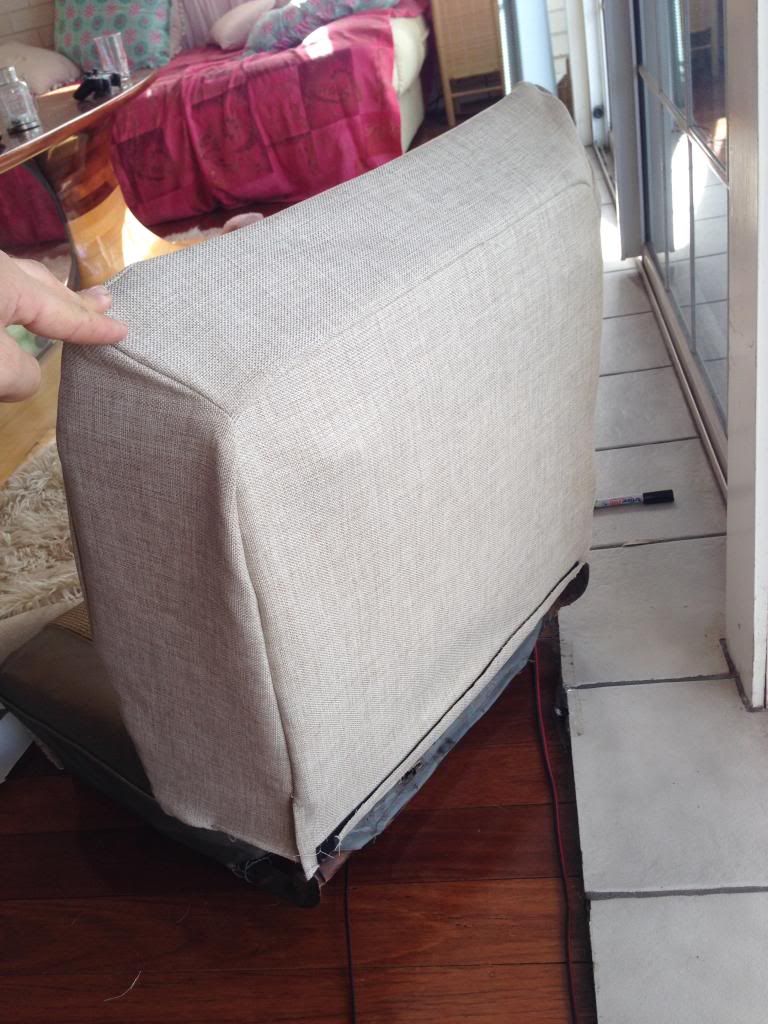
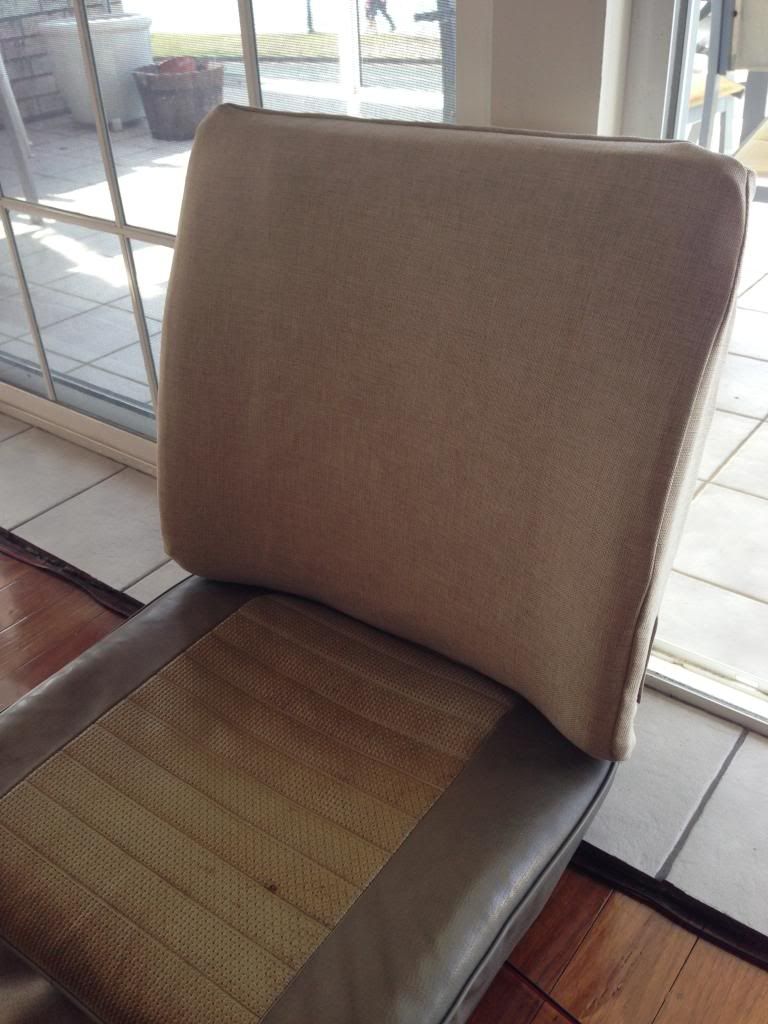
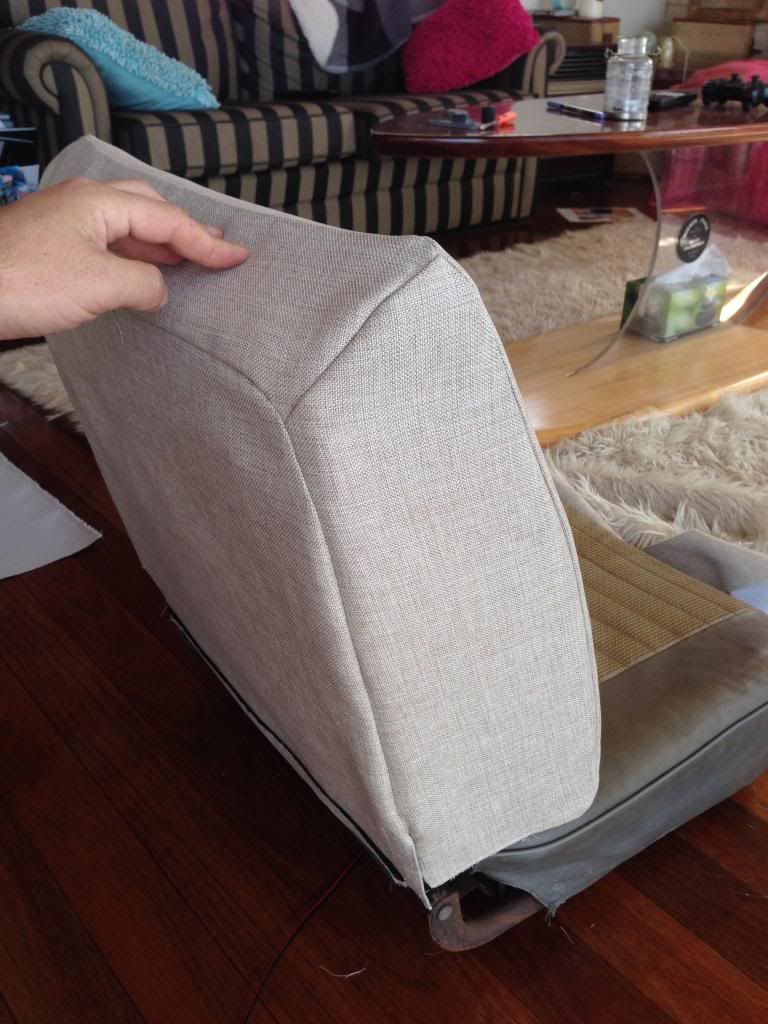
got 3/4 of the way through the bottom until i ran out of thread and haven't had time to finish it since….
whilst water blasting my tinware today i gave the case a quick blast to get all the machine shavings out of it so i could lay the 74mm crank in to
check for clearance…. until i found this while drying it off…. (look for the wet stripe)
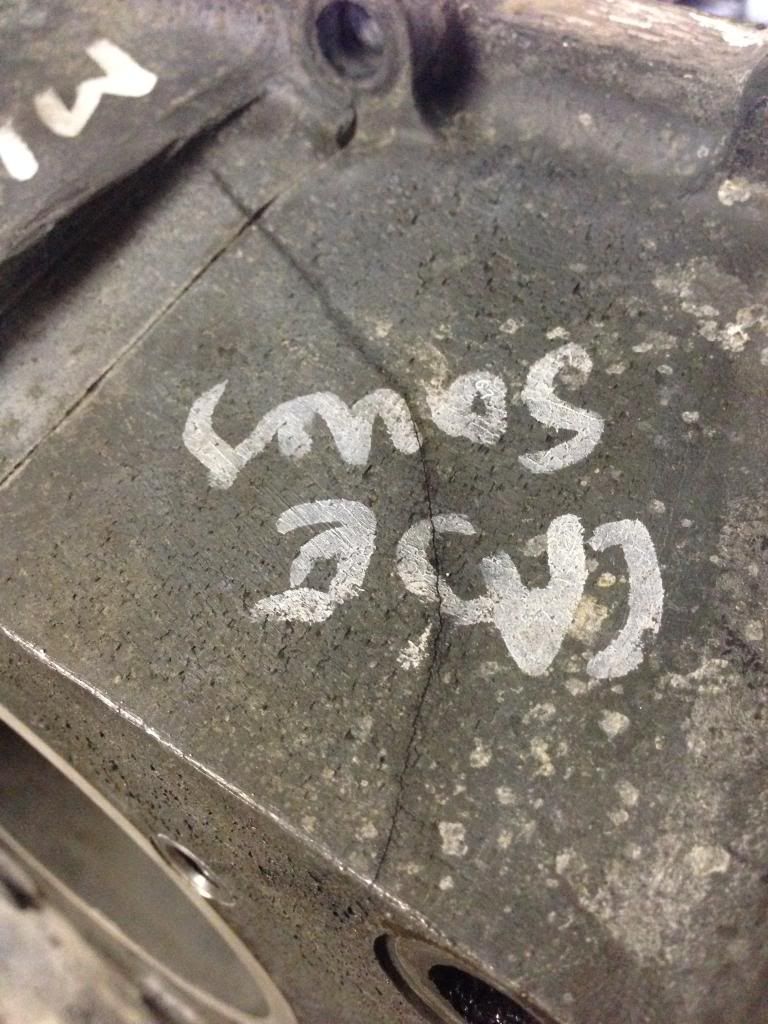
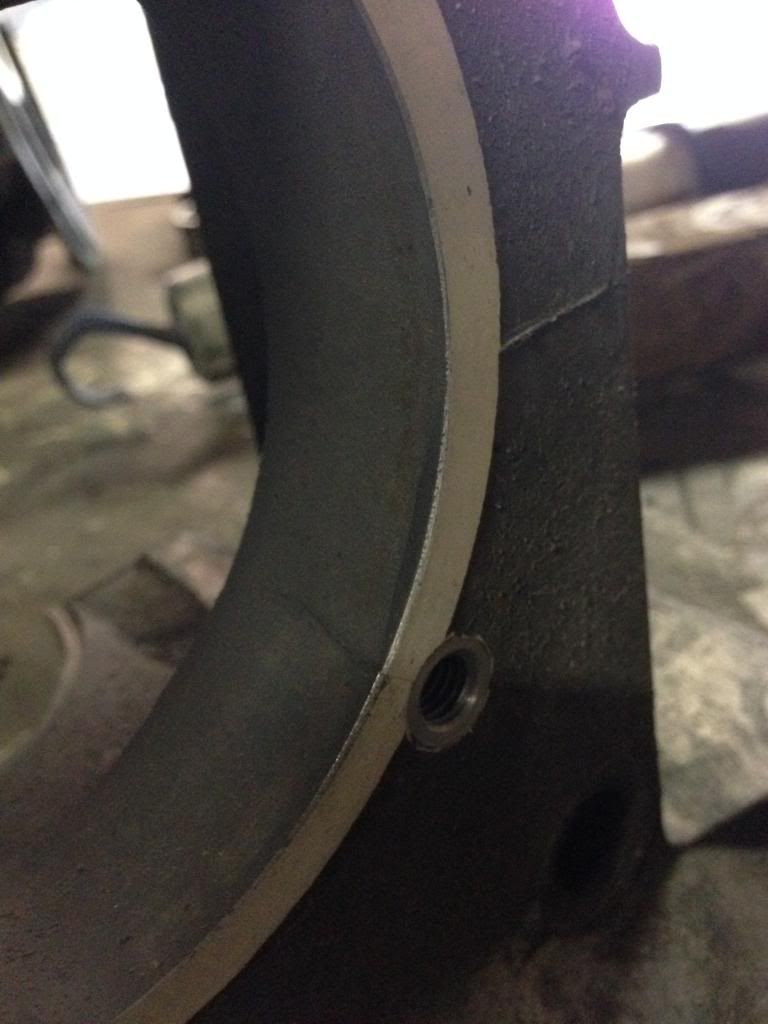
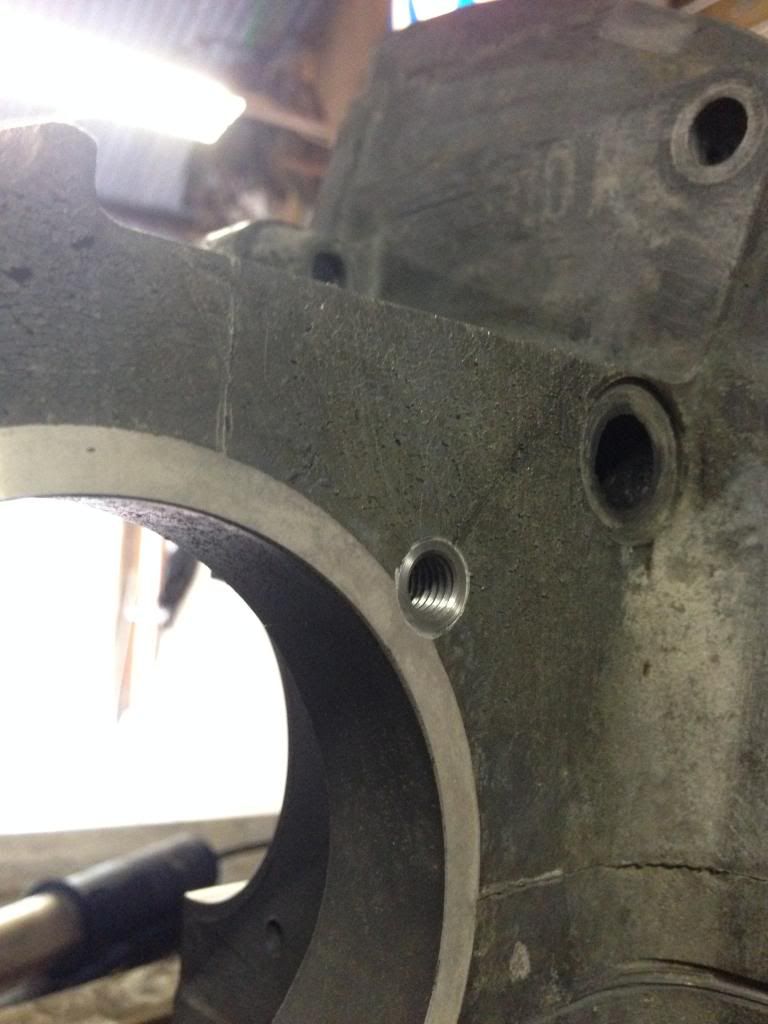
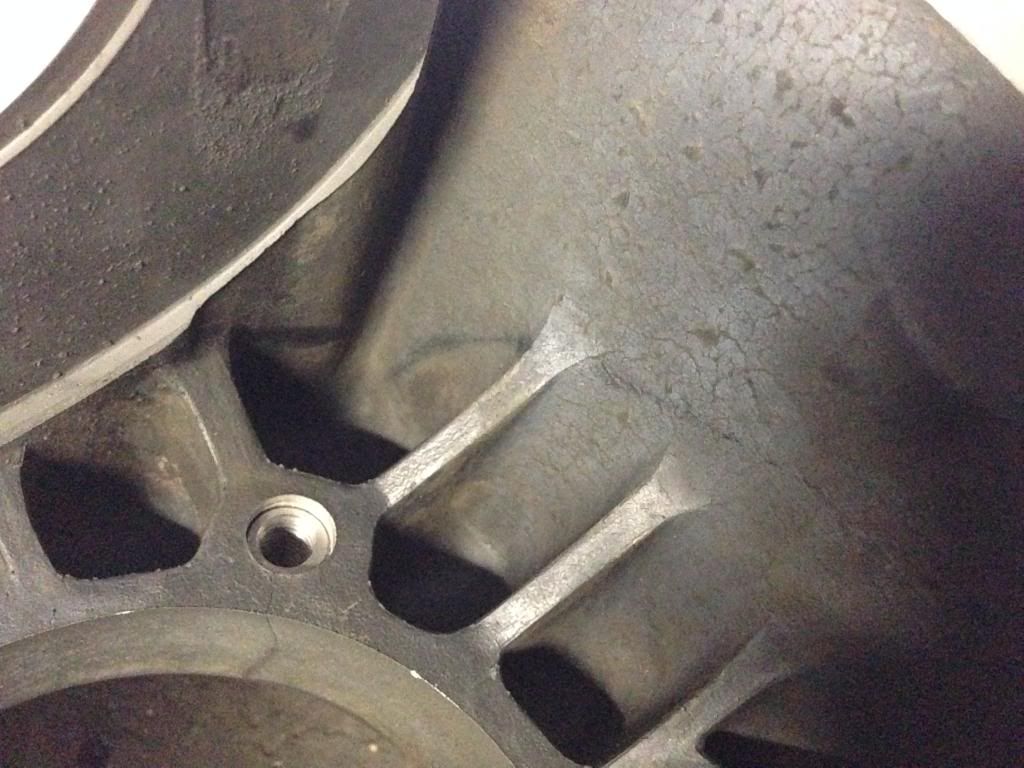
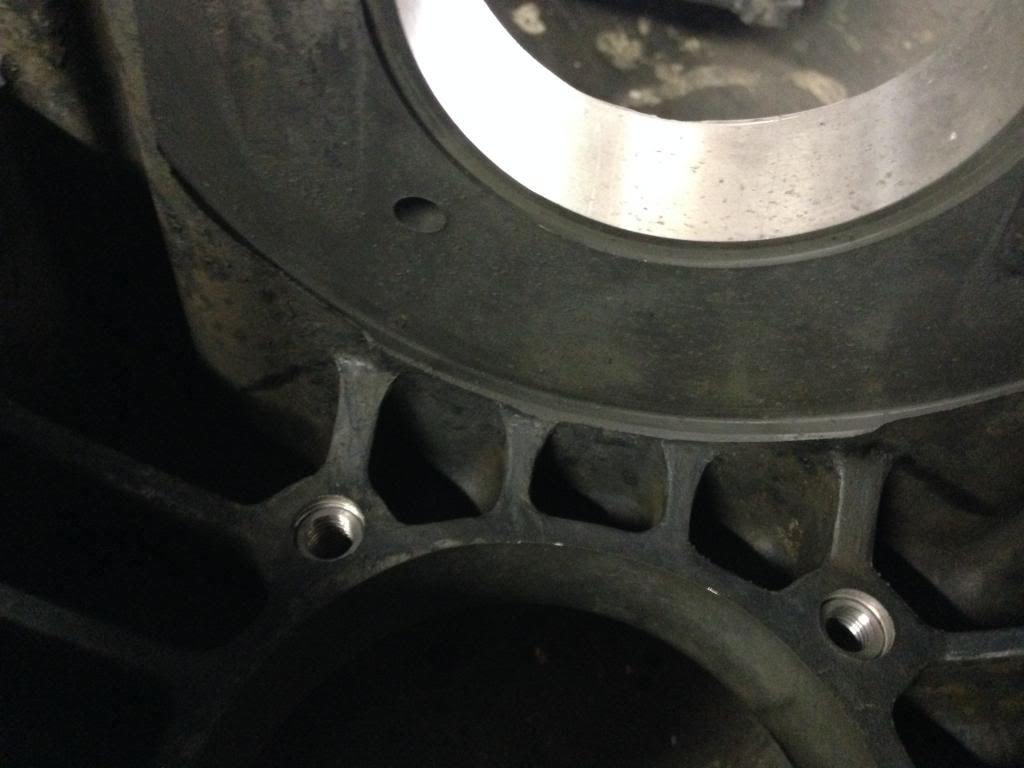
and she is all the way through…. i spent a fair bit of money on this case a few months back getting it lined bored, thrust cut, squared up/decked and
8mm case savers and now it just a door stop… *crying on the inside* i called dave butler who was a true gentleman and offered to bore another case for
me labour free if i could get it to him by tomoro before he goes on a 5 week holiday….. shit!!! spent all afternoon calling people for cases and
pulling down the only other universal case we had which showed to be cracked also…. fuck! after a few sums and a few calls to people with donor
motors… i wasn't getting out of this for under 500bucks for another used old engine. Thats half the cost of a brand new vw block and might be just as
fucked as the 2 i already have…. so it looks like ill be buying a brand new case tomorrow…. i don't think this crack is anyones fault…. i haven't
done anything at my end to warrant that crack and I'm sure dave would of seen it while inserting the case savers if it happened there as the crack
runs through the head stud hole….. just one of those things and very grateful for everyone who tried to help me out today (leroy, Matt Berry, Leons
motors)…. But most of all Dave Butler who has 0 time on his hands before a holiday but still offers and tried to honour his good word and business
ethic. Its just one of those things…. bugger
|
|
|
 matberry matberry
Super Moderator
Go hard or go home
      
Posts: 8114
Threads: 134
Registered: March 7th, 2006
Member Is Offline
Location: Cooroy Qld
Theme: UltimaBB Pro Blue
Mood: enjoying waving at all my Kombi buddies from my T3
|
| posted on June 3rd, 2014 at 08:54 PM |
|
|
Good luck with your exploits still Nugget, I thing you've made a good decision re. new case.
Seat covers.....you're a demon
Matt Berry Motorsports...air cooled advice, repairs and mods Ph 0408 704 662
OFF-ROAD,CIRCUIT,DRAG,STREET,ENDURANCE
 |
|
|
 NUG637 NUG637
Officially Full-On Dubber
  
Posts: 372
Threads: 24
Registered: November 2nd, 2009
Member Is Offline
Theme: UltimaBB Pro Blue ( Default )
|
| posted on June 4th, 2014 at 08:03 AM |
|
|
thanks matt, just don't want to take anymore chances with old cases for this rig….
waiting for rod penrose to open to get a quote from him for a new case….
its about $1000 to bring my own in from the states….
as for the seat covers…. there not perfect but i might say i have impressed myself this far 
|
|
|
 NUG637 NUG637
Officially Full-On Dubber
  
Posts: 372
Threads: 24
Registered: November 2nd, 2009
Member Is Offline
Theme: UltimaBB Pro Blue ( Default )
|
| posted on June 4th, 2014 at 02:19 PM |
|
|
This should help...
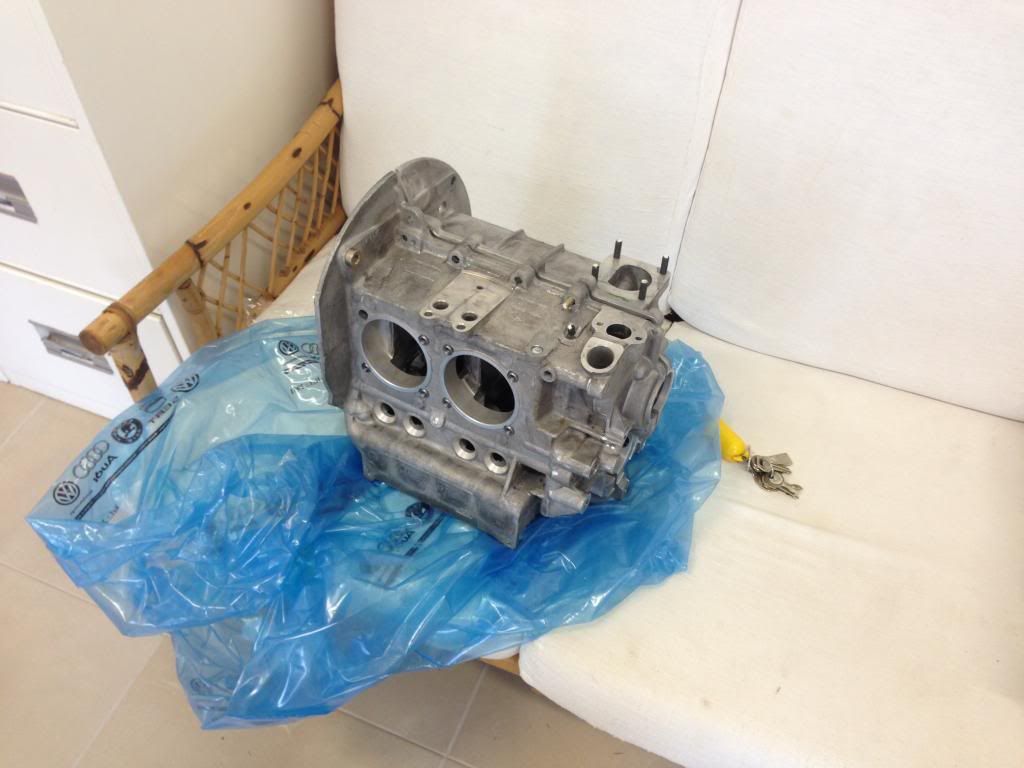
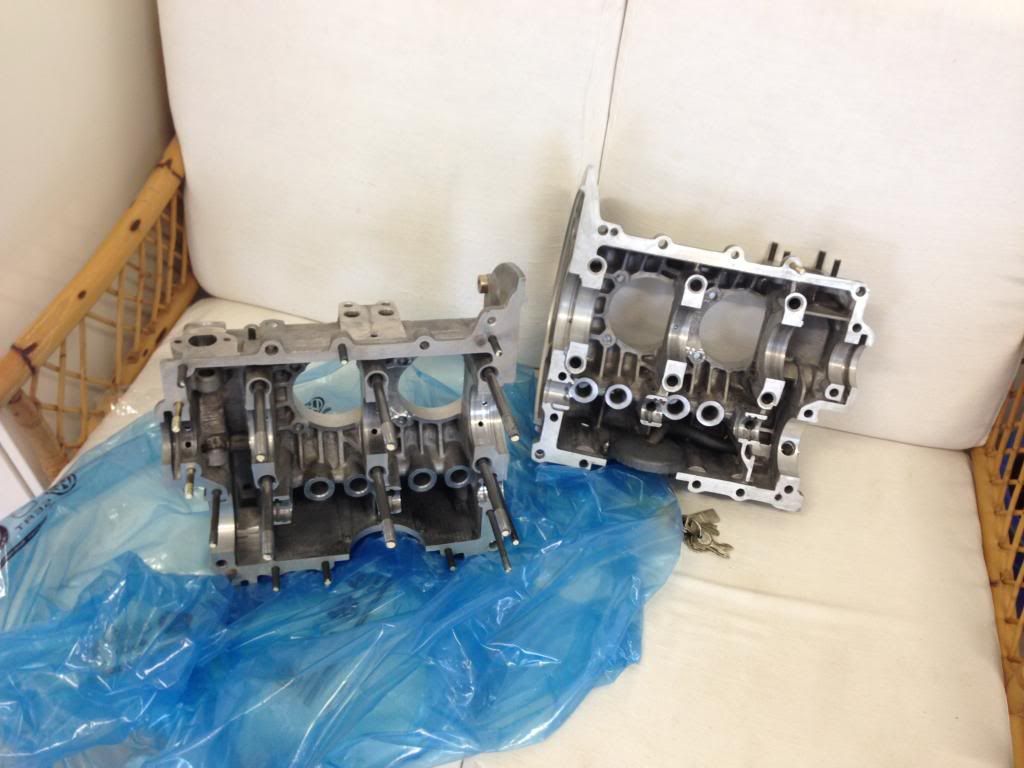
Really wasn't in our budget but we need an engine..
These should help feed power into the snail...
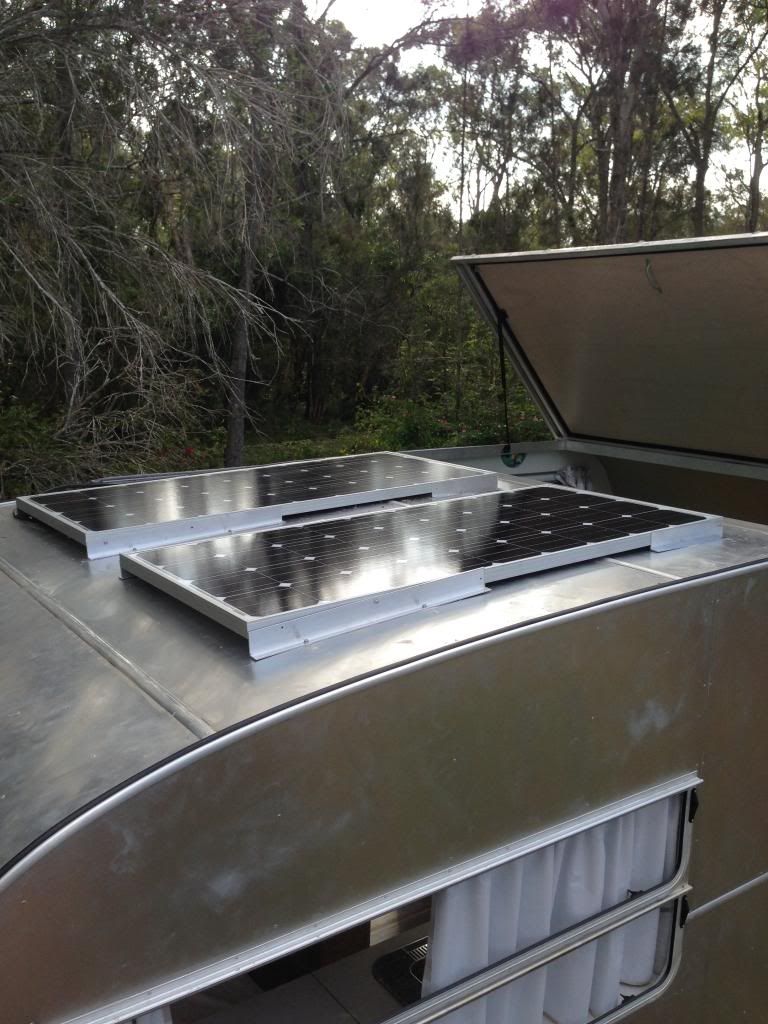
|
|
|
 pete wood pete wood
A.k.a.: figure itout
23 Windows of Awesome
       
Posts: 6828
Threads: 389
Registered: January 15th, 2004
Member Is Offline
Location: Nth Nth StMarys, Sydney
Theme: UltimaBB Pro White
Mood: upgrades = jackstands
|
| posted on June 5th, 2014 at 03:50 PM |
|
|
A new case is probably the best thing you can do. I just went through that struggle myself. 
Luckily I found one that was usable, but boy was a drama!
|
|
|
 NUG637 NUG637
Officially Full-On Dubber
  
Posts: 372
Threads: 24
Registered: November 2nd, 2009
Member Is Offline
Theme: UltimaBB Pro Blue ( Default )
|
| posted on June 8th, 2014 at 04:07 PM |
|
|
First of many trial fits. Had to clearance the bolts on the cam gear to clear the full flow oil pump... So far the 74mm crank just slots right in. It
Is a little close on the bearing web at no3 bearing but with the flywheel on it should hold it back off that. Just waiting on my 8 dowel tool to
arrive befor I can try that tho.
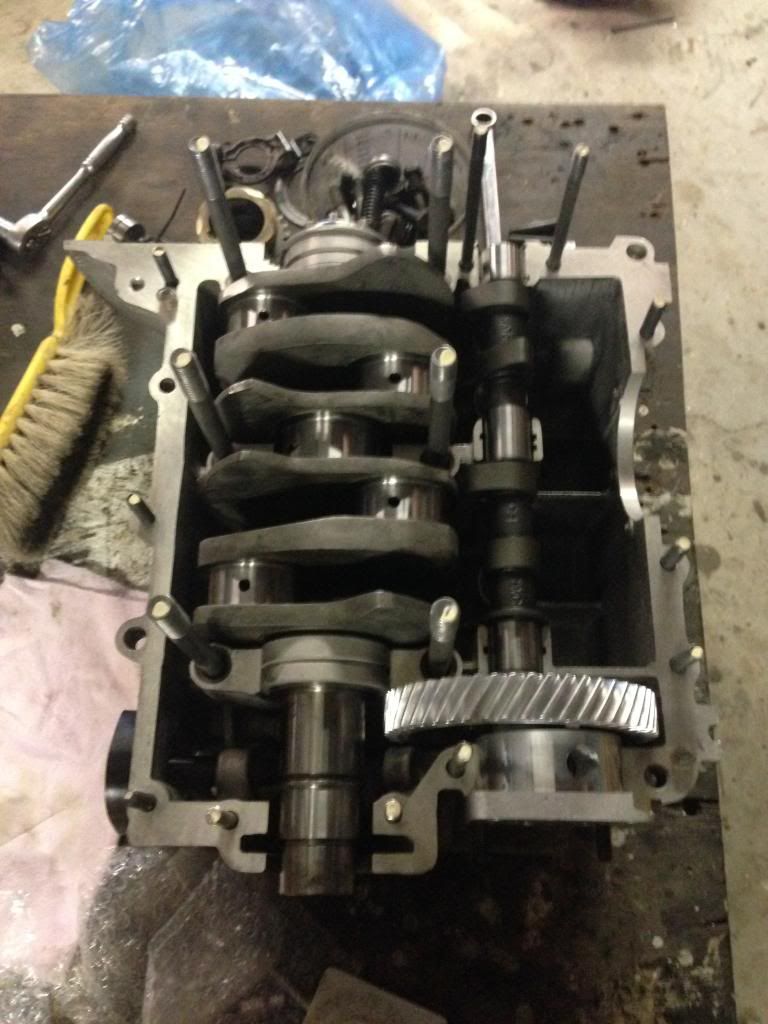
Rods to case clearance all good for no1 and no2 throw, Although I will relieve the top of the case a tad cus I would like to see more clearance
here.
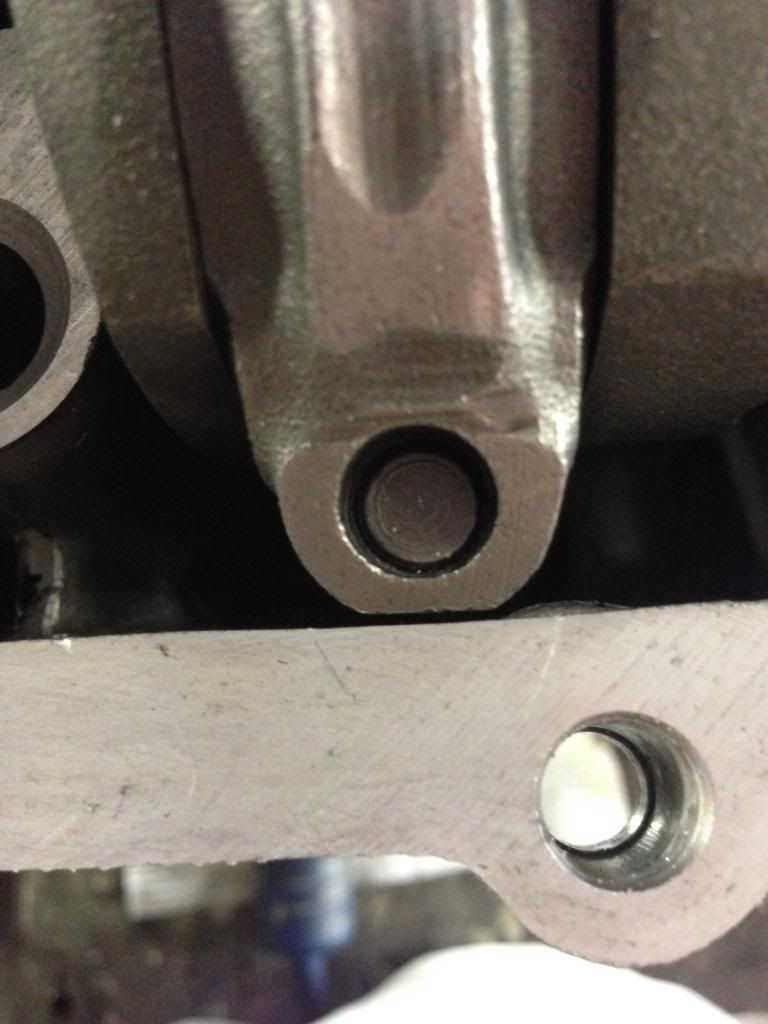
With the 74mm crank and the 5.325" rods the pistons skirts hit the counter weights so I had to clearance them to.
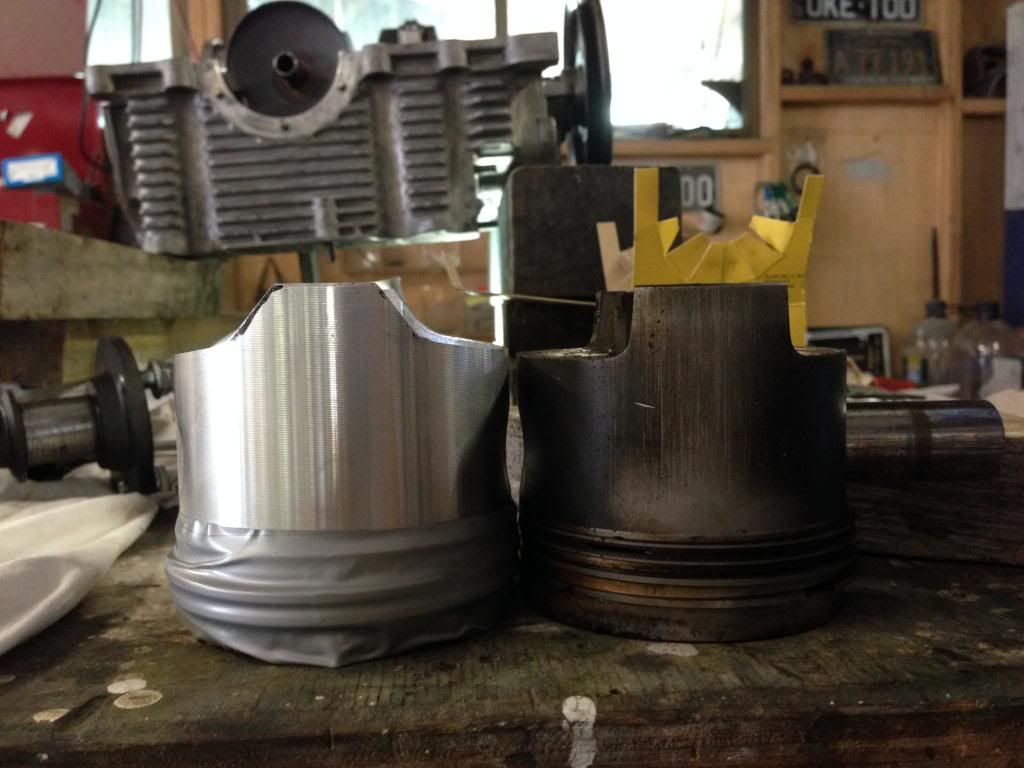
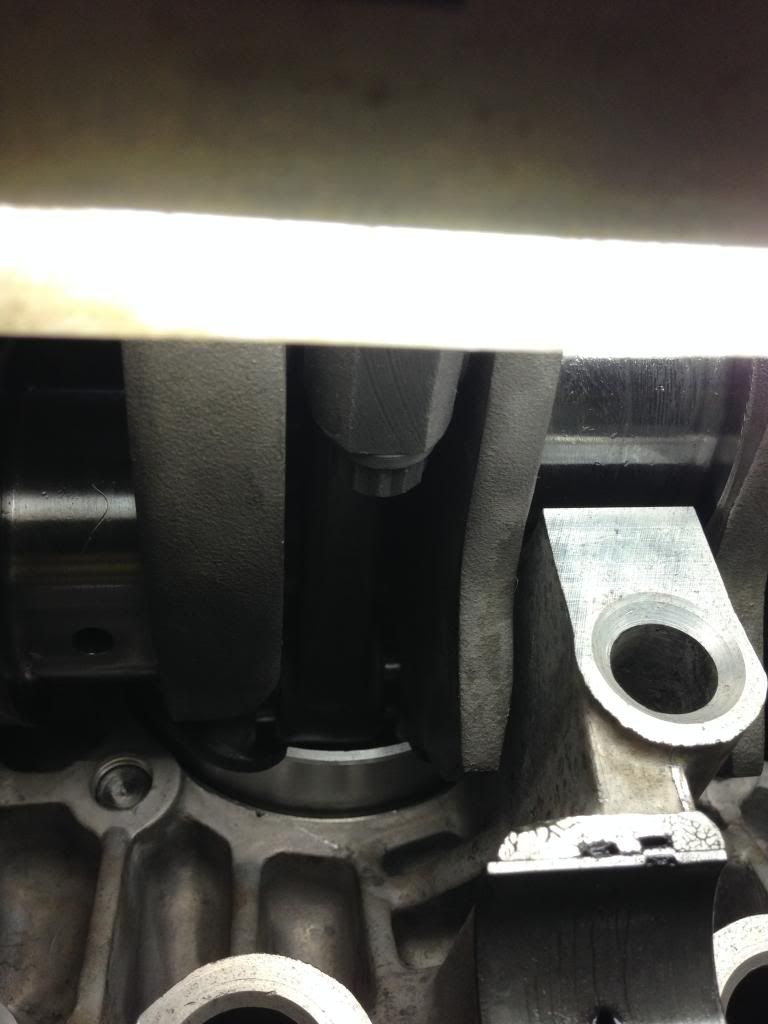
With piston 1 and 2 on and clearanced, I could finally check my deck height. With my current deck height coming in at 0.55mm and my combustion
chambers in my L3 heads should be 59cc (yet to double check that) but that gives me a compression ratio of 7.8-1 which is perfect for the my
application and no need for barrel shims etc. Stoked!
Still have piston's 3 & 4 to clearance and check. Then weigh all my pistons and grind them all within 1 gram of each other. Although this is a
very minor stroker, The new challenges that are involved have been exciting and great experience this far...
|
|
|
 vduboy vduboy
Insano Dub Head
   
Posts: 702
Threads: 41
Registered: October 6th, 2012
Member Is Offline
Theme: UltimaBB Streamlined2
Mood: Dying to get more buggy building time..
|
| posted on June 8th, 2014 at 06:24 PM |
|
|
Very cool build mate, one of my favourites to read, spewing about the case though, at least you get to give it some good motorvation now!
It will all be OK in the end, if it's not OK it's not the end!
|
|
|
 matberry matberry
Super Moderator
Go hard or go home
      
Posts: 8114
Threads: 134
Registered: March 7th, 2006
Member Is Offline
Location: Cooroy Qld
Theme: UltimaBB Pro Blue
Mood: enjoying waving at all my Kombi buddies from my T3
|
| posted on June 8th, 2014 at 06:25 PM |
|
|
Good job Nugget, getting in there and doing it seems to be a speciality of yours. Keep it up. 
Matt Berry Motorsports...air cooled advice, repairs and mods Ph 0408 704 662
OFF-ROAD,CIRCUIT,DRAG,STREET,ENDURANCE
 |
|
|
 fish26 fish26
A.k.a.: benito
Fahrvergnugen
   
Posts: 903
Threads: 38
Registered: July 13th, 2007
Member Is Offline
Location: sydney
Theme: UltimaBB Pro Grey
Mood: Ken awesome
|
| posted on June 8th, 2014 at 10:11 PM |
|
|
I'm glad my old crank found a new home which is a long story, I hope it serves you well.
This is a very cool build and your fabrication skills are exceptional, you will need every bit of Torque to keep it motoring.
bitten by the bug..........several times
|
|
|
 NUG637 NUG637
Officially Full-On Dubber
  
Posts: 372
Threads: 24
Registered: November 2nd, 2009
Member Is Offline
Theme: UltimaBB Pro Blue ( Default )
|
| posted on June 11th, 2014 at 06:09 PM |
|
|
thanks guys….. your old crank ey… you gave it to pete?
back on engine duties today…. cylinder 3 and 4 clearanced and deck heights checked… 7.8-1 8)
little more of the case clearancing… wasn't happy with how close the cylinder skirts were to the step on the case in the cylinder bores so i smoothed
them out abit while i had the die grinder clearancing the top of the case for the rods shoulders….. it really is bugger all
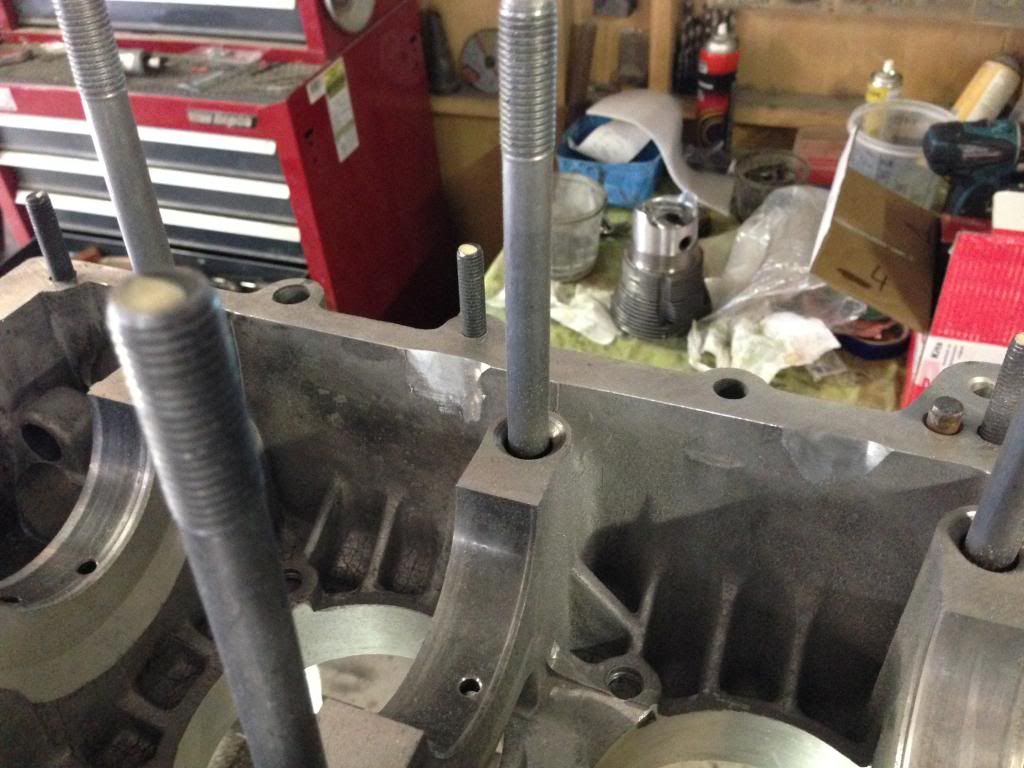
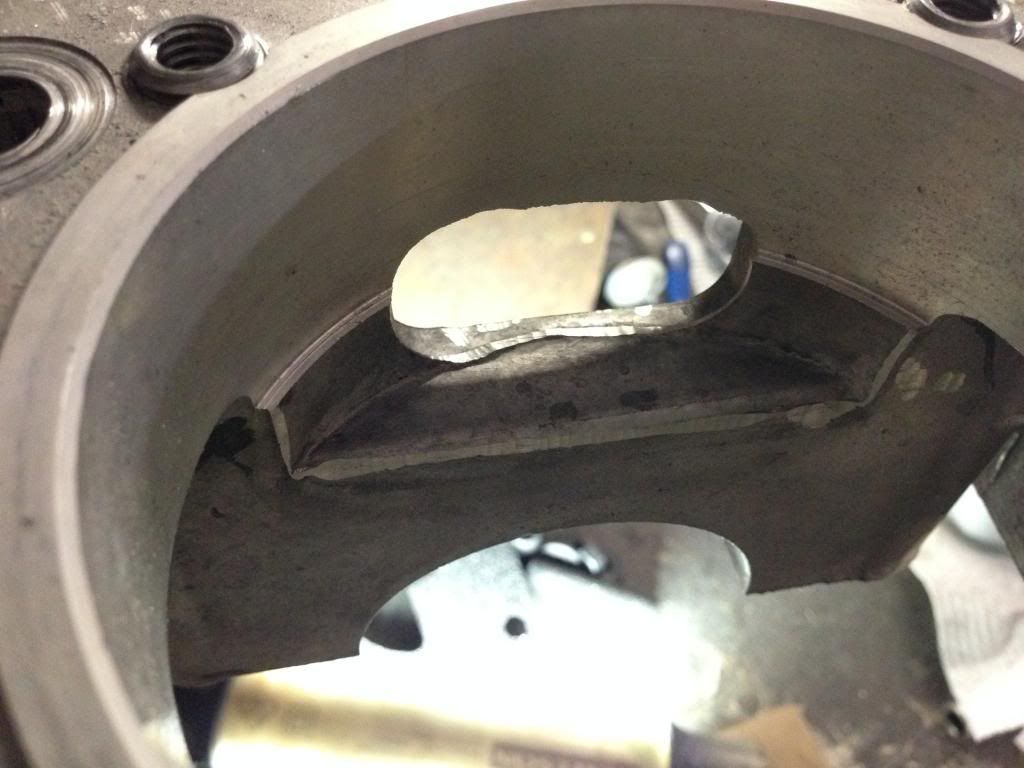
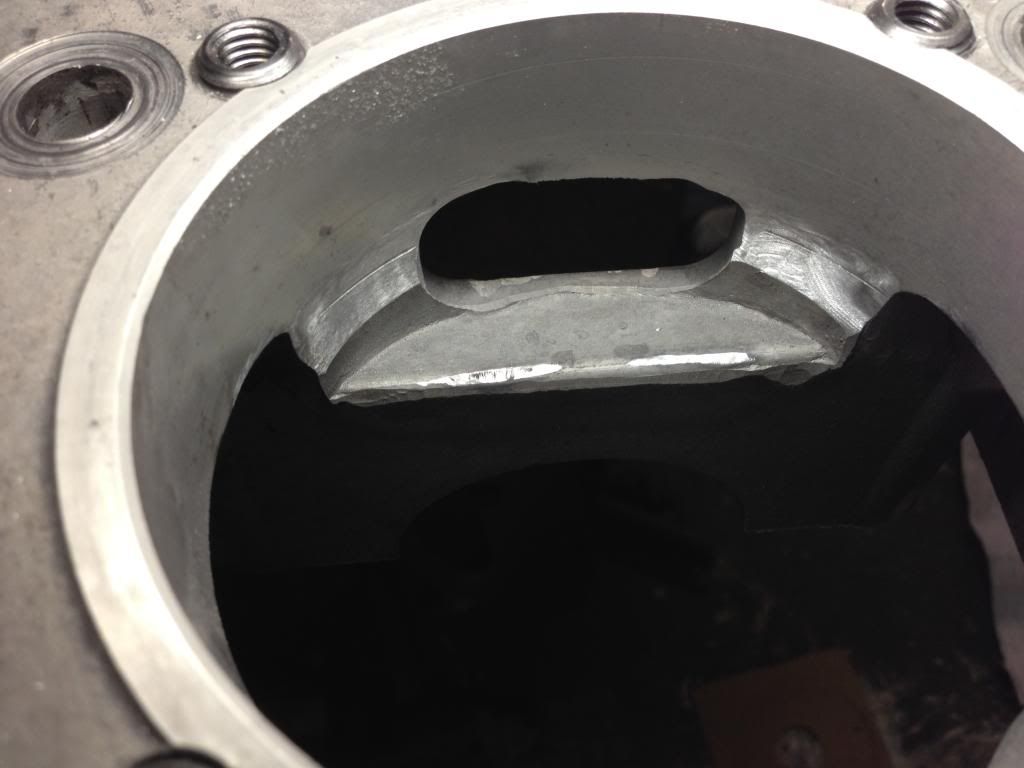
will cc the heads tomoro to make sure I'm on track with my compression ratio along with weighing all the cylinders etc…. hoping my latest cip order
arrives tomorrow to so i can 8 dowel my flywheel… get the flywheel surfaced and then get the entire assembly balanced….
|
|
|
 NUG637 NUG637
Officially Full-On Dubber
  
Posts: 372
Threads: 24
Registered: November 2nd, 2009
Member Is Offline
Theme: UltimaBB Pro Blue ( Default )
|
| posted on June 12th, 2014 at 07:21 PM |
|
|
Was really getting down to the nitty gritty today… learning every step of the way…. cc'ed my heads this morning, 59cc to the drop..
I'm told the rule of thumb is 0.040 deck height to allow for crank flex, rod stretch, heat stretch etc even tho this isn't gonna be an rpm monster…
i want it bullet proof, so with a deck height of .55mm (0.020") i was on the hunt for some .020 barrels shims for my 85.5 cylinders to bring me to a
perfect 0.40" (1mm) which brings my comp ratio down to 7.5-1, this is still ok but i was hoping for a little higher and i can still achieve this if i
was to flycut the heads but I'm starting to wondering how much money I'm gonna pump into the 1699cc. With 7.5-1 i can run really shitty 91 octain
fuel if i ever had to (remote area's?). Alot of people have asked why didn't i just go 1776? less work and more power. The main reason is torque
and longevity…. I'm hoping this set up should increase my torque by a fair bit and keeping a fairly stock top end (mild porting on the heads) should
last some serious k's. For this build hp doesnt interest me… just torque… and it seemed like abit of an interesting combo
after cc'ing my heads and finding some shims to suit i balanced my rods, balanced my pistons within 1 gram of each other, sorted out my tax and 8
dowelled my stock weight flywheel after my latest cip order arrived. Will get the flywheel surfaced tomorrow to matt with my new clutch then the
entire assembly is off to be balanced so i can start bolting this bad boy together….
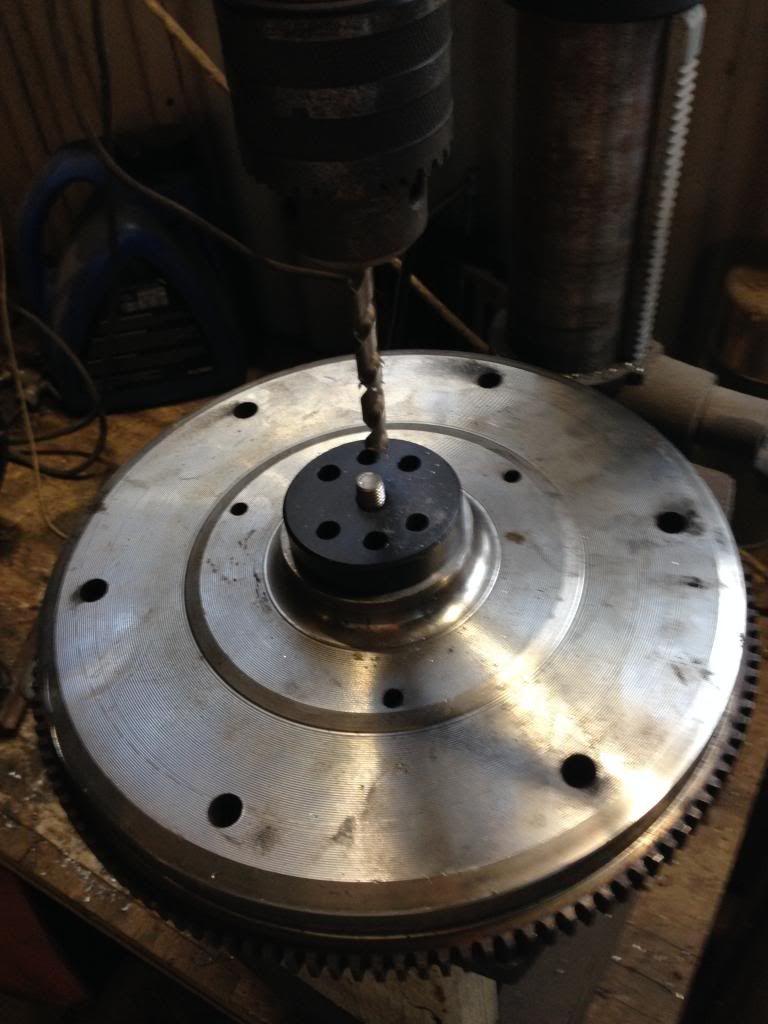
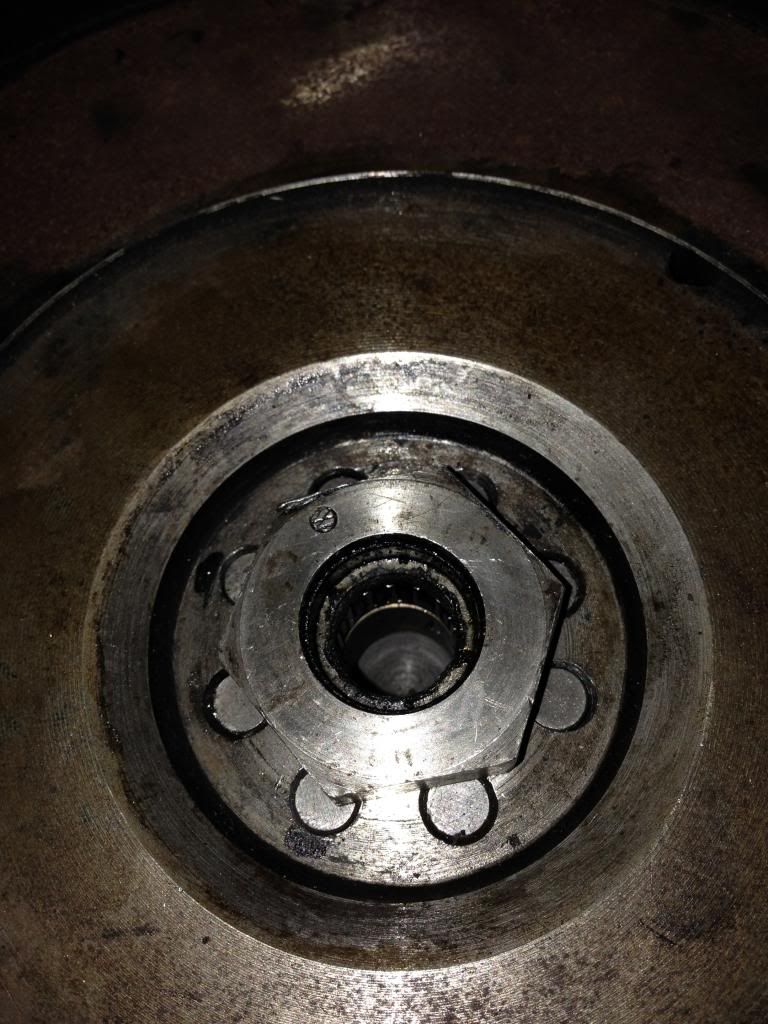
the flywheel is a tight fit. Can get it most the way down with a rubber mallet and the nut pulls it hard down, but have to rubber mallet it off. I
guess thats a good thing to help prevent a loose flywheel. My reason for not buying a lightened flywheel is for torque also…. have been told that a
heavier flywheel will help in torque once in motion? weather its true of not time will tell… makes sense in my head. Anyway my head is going a million
miles an hour each time i come to this engine and i might be going overboard but i want it sweet as a nut and so far il loving it . will be another
nerve racking run in, i always gets the shacks when running in an engine :smile grin: and matt you were spot on…. the moustache bar makes for a real
bitch for any full flow 
|
|
|
 Scottkombi Scottkombi
Officially Full-On Dubber
  
Posts: 358
Threads: 11
Registered: December 24th, 2008
Member Is Offline
Location: Terrigal NSW
Theme: UltimaBB Pro Blue ( Default )
Mood: Sick of Work
|
| posted on June 12th, 2014 at 08:58 PM |
|
|
Youre correct with the flywheel scenario Nug - the light flywheels are for the high revvers.
Torque donks have heavier flywheels for low down torque.
This is why many punters use custom bellhousings when mating subaru donks to VW gearboxes as you retain the heavier flywheel of the Scooby motor. The
adapter plates use the VW flywheel which loses some of the torque - that is noticeable as I have a mate with a T3 syncro 16" in Perth that has tried
both options - the Suby flywheel made a huge difference for him.
88 Caravelle Syncro Camper
89 Caravelle GL microbus - 5 speed
69 Microbus
05 Mk5 Golf 1.9 TDi DSG
|
|
|
 NUG637 NUG637
Officially Full-On Dubber
  
Posts: 372
Threads: 24
Registered: November 2nd, 2009
Member Is Offline
Theme: UltimaBB Pro Blue ( Default )
|
| posted on June 25th, 2014 at 09:06 PM |
|
|
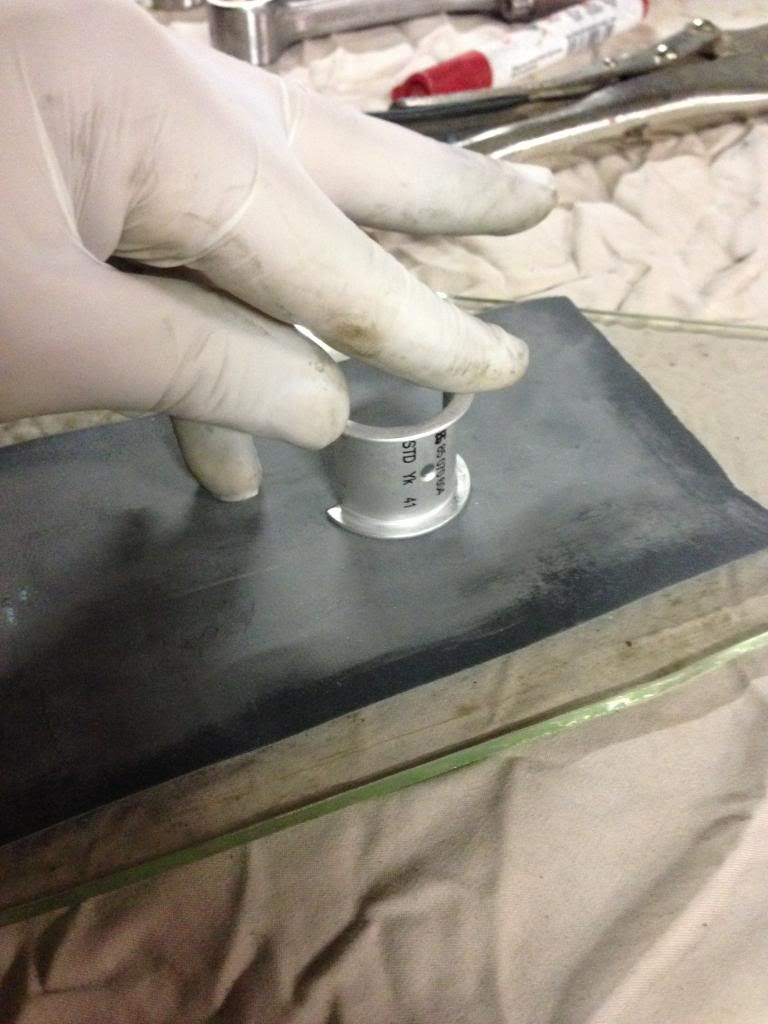
ok… lets start with the cam..first of was a really tight cam thrust bearing… so i surfaced that down to fit…
tried using an alloy empi bolt on cam gear (helical) and it was binding and crawling out of the case like a mother fucker… thought i could put my
original cam gear on the new engle 100 but found out the old cam was a 4 bolt cam and i need an earlier 3 bolt cam to bolt up to the engle…. after
searching through all our shit i found a few spare cam gears but none were the size i need and causing way to much lash… the cam out of the O.G. 1600
fits BEAUTIFULLY and that gear was a 0. All i had was plus or minus gears so i thought i would swap all my 1600 gears for 36hp gears (different
pitch)
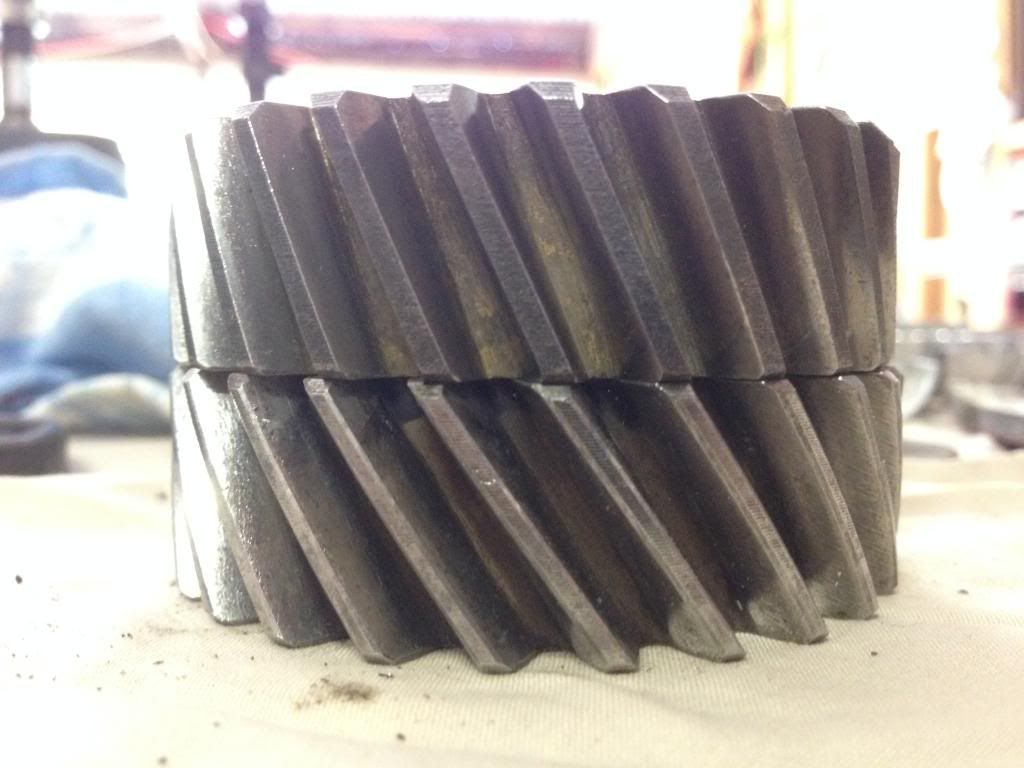
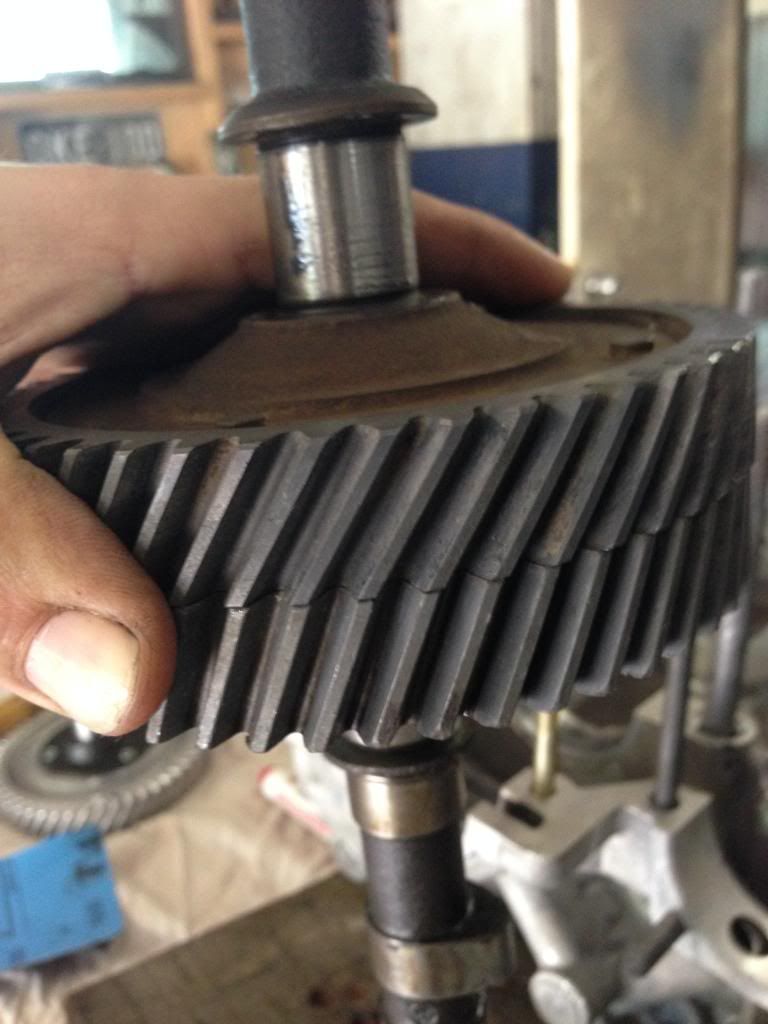
but then found the offsets are slightly different and the cam gear was rubbing on the case ever so slightly…. :roll: after a few phone calls leons
motors let me go through there shit to find a good "0" gear…. got home and its sweet as a nut so i dropped that off to be spot faced to suit
bolts,
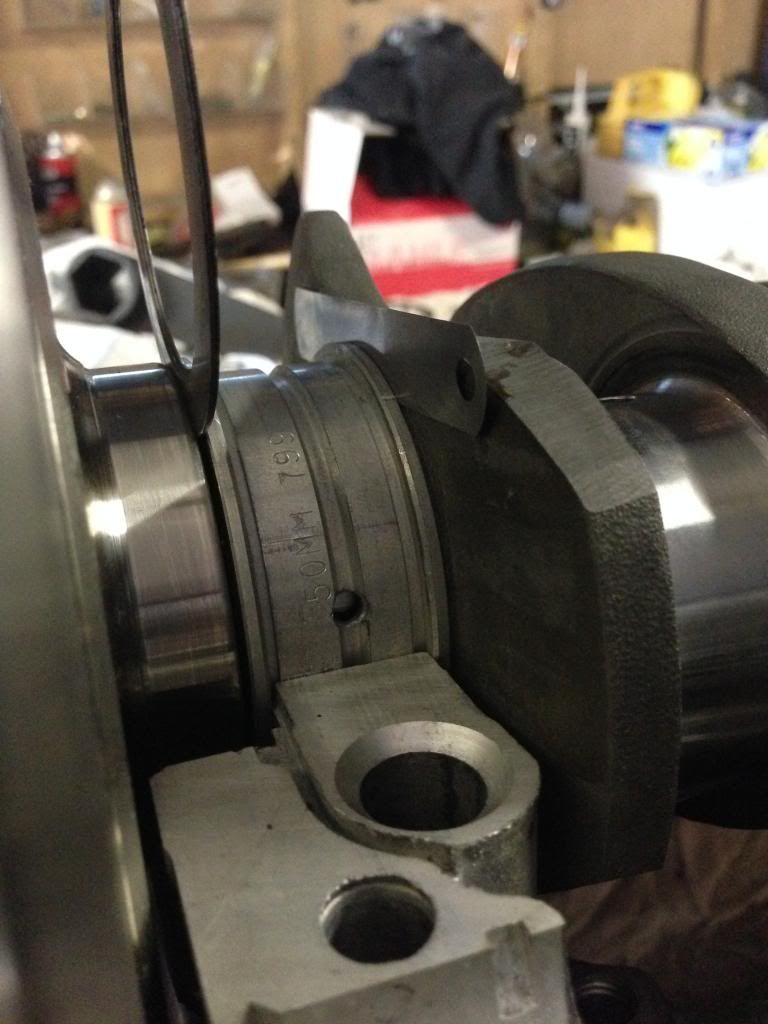
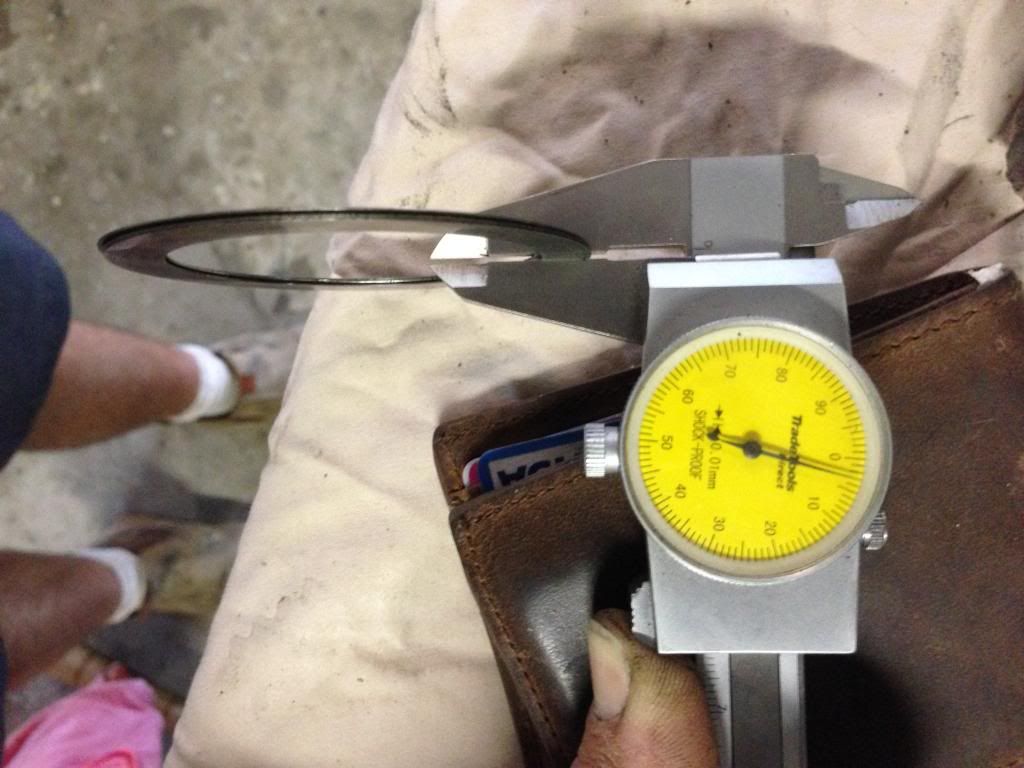
thought i would have a go a getting my end float set before i assemble as i usually leave this till last but its always a struggle…. you can see a
.10mm (0.004") feeler gauge on the crank side of the bearing which is desired spec for endplay plus or minus 0.001"…. i then had 1.02mm gap between
the flywheel and had to make this up with 3 of the right sized shims such as 3x0.34mm in a perfect world but with our odd shims i got a .36+.32+.34 =
1.02 8)
cam gear cam back ready to rock!

made sure everything turned and clearance on oil pump etc….
then came crank assembly… everything clean clean clean… check to make sure the rods fall under the own weight… i ended up torquing these arp 8740
bolts to 35lbs with loctite just to be safe…

case assembly soon followed


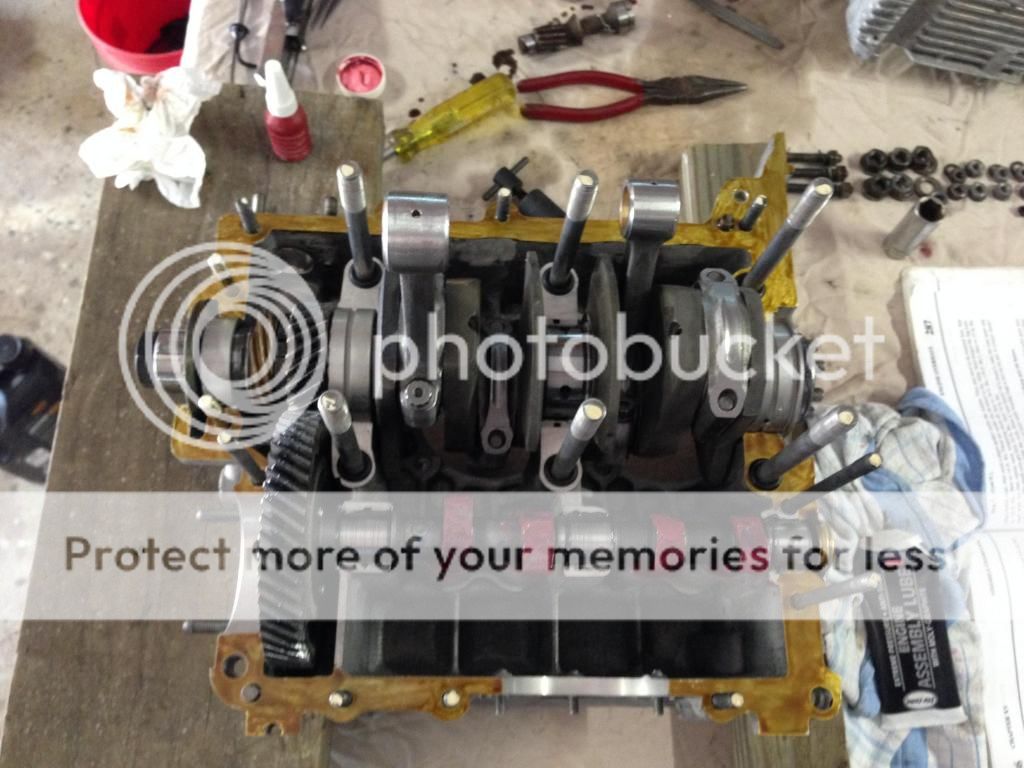
and i did this processes twice after having trouble with number 4 pulley bearing seizing my assembly once torqued to spec…. so apart it all came again
until the problem was solved… made sure there were no highs in my case befor assembling again for the last time. finally she turned free…
relief valves went in and it came time for the empi full flow which needed clearancing for the pulley… and the tinware trimmed to fit…

grabbed the three shims i had measured earlier for my end play and after checking three times to be sure it was spot on! defenly doing it that way
again 8) new genuine gland nut to be safe.

pistons and cylinder time… this is where i made i minor mistake… i forgot to clearance for the return stroke of the opposing rod. finding this out the
day after i had everything balanced i trimmed them all for clearance and was waiting for the balance shop to open the very next day. he was more then
happy to balance them again in front of me while i waited and refused to take anything for payment! another true gentleman.
i bought some 0.020" shims (.50mm) to get my deck height to a beautiful 1mm and straight out of the box they all varied in size and not one was
0.50mm :roll:

so the first one for number one cylinder i spent HOURS hand sanding to a loose .50mm to make my 1mm deck height.


on my other three cylinders i had a deckhieght (without shims) of .55mm so i had to sand the next three shims to .45mm to make 1mm. that took up my
entire friday night but i stepped up the pace with using the DA in multiple grades of grit…. check out the dust…


fucken beauty!
made sure barrels were super clean and lightly oiled…


marking sure all arrows point to the flywheel and the under cylinder tins went on….

and the heads went on.. was gonna clay my heads to see for valve to piston clearance but got talked out of it for the very mild engle 100 that I'm
running…
next hurdle was rocker gear…. bolted up ok but once on my engine became really hard to turn over but hand…. thought it might of been the hd valve
springs but i then notice the bug pack 8mm case studs where to long and fouling on my rocker gear…. fuck!!
didn't want to pull the head off again to trim them so i marked the 2 giving me grief and taped up my heads to start grinding….


the new "super stock" heads have the thicker spark plug boss along with as quoted off the website " Hi Chrome Valve Seats, Silicone Bronze Valve
Guides, HD Valve Springs, Chromoly Keepers, and Chromoly Retainers, then finished with a top notch valve job"

then the long bloke assembly… tinware fit fine with engine only being 1mm wider then stock. Cleaned up the 35 PDSIT's i picked up cheap on ebay… he
said they had only done 3000k's and i now believe him as there was a spec of crap on the inside… bought jets to jet them down abit but once i got
them apart i notice they had been replaced with what i was about to whack in… 50 idles and 140 mains.

had an old header on an engine on the shelf so i cleaned that up and bolted them to my heater boxes…. need to get creative to un heaters but should be
easy….
the 75amp alternator straight out of the box felt very rough to spin… once i tightened the cooling fan onto the back it seized also…. i tried my
combinations before i came to the conclusion the thing was fucked and contacted cup who are looking into giving me a credit under warranty but dibba
decided to pull it all apart and shim it to stop the 5mm of endplay in the shaft and got it free… still has a rough spot in a rotation but was good
enough to use on run in… and seemed to charge ok…. (thanks for the hours you put in getting that to work dibba!)
i then bolted a up bug pack breather kit and the muffler to the end of the header… ran my fuel lines… drilled and taped my manifolds for a balance
tube which will be "T" pieces to act as a vacuum for the brake booster….
then run in!!! :shock: had been a very stressful 2 weeks… with many ups and downs and a lot of swearing at mediocre aftermarket parts…
this arvo came time to clearance the bell housing on the run in bench for a 12v flywheel and bolt this sucker up…. turned it over without plugs in to
get oil pressure up first and fuel to the carbs… then plugged her in and she fired first turn 8) 8)
https://www.youtube.com/watch?v=K-lOXSaB7k4
the exhaust sounds abit poop but the price was right…. will wait and see how it sounds after the carbs are tuned right and i have it dialled in but
man I'm looking forward to a good night sleep tonight… I'm stoked on my first little stroker…. so the specs are 74mm crank x 85.5mm barrels = 1699cc
with and engle 100 and high flowing stocked valved heads… 8)
|
|
|
 NUG637 NUG637
Officially Full-On Dubber
  
Posts: 372
Threads: 24
Registered: November 2nd, 2009
Member Is Offline
Theme: UltimaBB Pro Blue ( Default )
|
| posted on June 25th, 2014 at 09:08 PM |
|
|
the pile of boxes of shit that has gone into this little engine is crazy!  i need to do a big clean again :oops: i need to do a big clean again :oops:

and a pic with the last few things on taken after run in…

I owe a big thanks to a lot of people who have donated some of their time to the questions i have had during this build… like Dave Butler, Matt Berry
and Issac. the best way i have learnt is to just get in there and learn along the way but some of the advice these three have given has really helped
me along the way 8)
and a big thanks to dibba (my brother)… although i wanted to punch your teeth in every time you walked into the shed saying "are you finished yet"
"just bolt it together" "fuck………!" i also appreciate the time you donated towards it like the alternator and hangin around this arvo during run in
although you had somewhere else to be 
|
|
|
 Dasdubber Dasdubber
A.k.a.: Alan Agyik
23 Windows of Awesome
DAS Resto Haus
       
Posts: 5746
Threads: 289
Registered: August 26th, 2002
Member Is Offline
Location: Gold Coast
Theme: UltimaBB Pro Blue
Mood: feeling fine...
|
| posted on June 26th, 2014 at 08:39 PM |
|
|
The lights at the end of the tunnel now Nug! Valla fast approaching  Fingers crossed for trouble free (From here on on in) lead up to your big trip!
|
|
|
 NUG637 NUG637
Officially Full-On Dubber
  
Posts: 372
Threads: 24
Registered: November 2nd, 2009
Member Is Offline
Theme: UltimaBB Pro Blue ( Default )
|
| posted on July 7th, 2014 at 11:31 AM |
|
|
so… what a week this far…
engine in last weekend…

the type 3 hatch has been the best mod I've done this far i recon….

had to make a way to mount a head unit behind the dash instead of cutting it to fit….


got my hydraulic crimped end lines fitted for the oil system…

Dib got most the wiring sorted… still a few things to sort out but getting there…


then we tried to start it….

got that sorted by not using the cooler for now… might try plumbing it the other way round if it starts to run abit warm….
there so many things i have done but haven't posted up on here…. like an electric pump adapted to the stock water bottle for the wiper washer
bottle… and drilling and tapping the manifolds for balance tube and brake booster vac line… clearanced carbs to fit oem shroud… modified the moustache
bar to fit past the oil pump… the list just goes on and on…. getting the the last of it…
drove it under its own steam today which put a big grin on my face…. i don't have the "first drive" on my phone but i got a video of shanas first
drive… need to fiddle with the tune again as its a little shit under load… but fine at a stand still… thinking I'm not actually idling on my idle
circuit… but on my progression circuit… so when i plant the foot to accelerate it floods abit nd runs way to rich…
anyway here is the last bit of shana first drive 
https://www.youtube.com/watch?v=n3PRvC55VHA
|
|
|
 NUG637 NUG637
Officially Full-On Dubber
  
Posts: 372
Threads: 24
Registered: November 2nd, 2009
Member Is Offline
Theme: UltimaBB Pro Blue ( Default )
|
| posted on July 7th, 2014 at 11:39 AM |
|
|
i made sure it wasnt pulling vacum at idle... Linkages off... Made sure they were synced at 8 on the snail (were 10), linkages adjusted and back on
still a smooth 8.. played with idle mixtures... Went to drive it... Really bogs in the first quarter of acceleration in first... Then pulls hard once
you power through it almost stalling... Then second and third are all good.... After this I checked fuel preSure as they say to run these between 1
and 2psi fuel pressure and I was at 5psi :shock: so tonight I've pulled down both carbs to check for anything in then and put in an adjustable fuel
pressure reg incase I was flooding them? I Donno will figure it out sooner or later... Revs up fine at idle (a little rich) but shits under load...
Will check points plugs and leads next as it's not the first time I've have been chasing what I think is a fuel problem but it's actually and
ignition issue...
Had the engineer visit today... He gave me a small list of things he would like to see... Reflectors, grills on the scoops and try round of sharp
corners... Even if it happens to fall of after Rego... 
well abit more of an in-depth look at what went down today… start off with another tune on the carbs this morning… power was out and it was 6 degrees
so it was nice to play on a warm running engine for a change 
i can't tell you how much of a good idea that type 3 hatch has been…. and with that big ass back window it makes work supper easy from all angles


my tune seems to have done nothing other then lower my idles… but we bit the bullet and loaded it on the trailer to get weighed…

with water tank full and fuel tank full she came in at a staggering 1700kg flat 8) 30kg in solar panels… 25kg in an awning…. 60L of water, 30kgs in a
house battery.. yet to add another…. a hatch, more windows etc etc… there is your 110kg right there ^ so I'm pretty happy as the gvm is something
like 2170kg… pretty sure the engineer calculates 120kg per person (including luggage) so that putts me up to 1940kgs and i can still load over 200kgs
on and be under the gvm 8) pretty happy with that…. with his visit came some stupid jobs… like reflectors and rounding out the sharp corners and
edges :roll: also have to put some kind of grill on the scoop as he thinks they are abit of a hazard but understand they NEED to be there for the
engine…. so i got something in mind to keep them looking ok… he also has to do abit of reading on how he is gonna go about a few things so no
engineers cert today… hoping monday now and if i get the engine sorted it will be rego shortly after...
tonight i pulled down the carbs to check for shit as the tank could still be flushing shit out…. both had a small amount of gunk in the bowls but
nothing i would expect to clog a jet…. but tore them down and blew them out anyways….

got them back on… and called it a night… if its still not running right… i don't want to know till tomoro morning  oh the joys oh the joys
|
|
|
 NUG637 NUG637
Officially Full-On Dubber
  
Posts: 372
Threads: 24
Registered: November 2nd, 2009
Member Is Offline
Theme: UltimaBB Pro Blue ( Default )
|
| posted on July 7th, 2014 at 11:40 AM |
|
|
I finished off what i started last night and got my fuel pressure to just below 2psi…. also increased my timing a tad just to see cus these chinese
009 sometime like more timing… fired her up and took it for a drive…. a lot more drivable but is still there so imma keep playing with shit and test
driving it… see where it gets me…
dib snapped this just before smoko
https://www.youtube.com/watch?v=Lod_9KKTOoA
|
|
|
 NUG637 NUG637
Officially Full-On Dubber
  
Posts: 372
Threads: 24
Registered: November 2nd, 2009
Member Is Offline
Theme: UltimaBB Pro Blue ( Default )
|
| posted on July 7th, 2014 at 11:42 AM |
|
|
Spent 2 hours driving it up and down the street on Friday night where I would stop... Adjust accel pump on one carb take off... Stop...adjust... Take
off ...stop... Adjust... take off and it really improved... I fatend up the idle mixtures by a turn to and it all seems to be helping.... You still
couldn't launch it off the line but it's driveable now... Will keep playing with it once it on the road... Just sounded like it was flooding or
being starved for fuel... The more I play the better it's getting
|
|
|
 NUG637 NUG637
Officially Full-On Dubber
  
Posts: 372
Threads: 24
Registered: November 2nd, 2009
Member Is Offline
Theme: UltimaBB Pro Blue ( Default )
|
| posted on July 10th, 2014 at 09:40 AM |
|
|
my brother took some picks of the mobile Wheel alignment guy that let me do the entire thing as he openly admitted he wasn't quite sure how to do it
on kombis… so i dialled in a little bit of negative camber in the front which once loaded with people, sits on 0 camber  and a total of 2mm toe in on the alinement… and a total of 2mm toe in on the alinement…
Pretty impressive setup on the mobile wheel alignment machine!


then yesterday i drove it to the mechanic for a roadworthy and by the afternoon i was bolting on my new number plates 
Didn't think we were gonna make it there for a moment.... But got there with 10 minutes to spare... Until I relised I had no money :shock: an urgent
message to dib telling him to bring his credit card and the deal was done 8) thanks ribba dibba! I owe you.... Literally 
Bit of a story behind the drive home... Lost a hubcap along the waterfront so parked up and went looking for it... With my eyes on the bushes looking
for the cap I missed the big fuck off rock infront of my feet.... And absolutely face planted it, throwing my keys, wallet and phone across someone's
front lawn infront of half a dozen joggers... Being the waterfront and all.. After getting up and collecting all the stuff I just threw. i admitted
how embarrassing that was and kept looking for the cap… once found i kept on driving the long way back to hq 8)
Put on the plates... Picked up the dog and drove it home 8)
Plates on!!!


72 Twr (tower) kinda fitting....
Shana was over the moon and wanted to drive it so she drove us to hungry jacks and dropped in to see her mum to show off.... Very good feeling
To see her so excited and proud 8)
As usuall i still have a few things left to do befor it's "finished" but It wouldn't even be on the road if dib hadn't busted his ass to wire it
all and getting it working like clockwork 8) and Shana for busting her guts and working to feed us and pay the bills while I pieced this thing
together... It was surprisingly easily tackling a project "together" even though she wasnt all hands on... Her income and her input... Verbal or
physical (sanding,sewing, painting and pop riveting) have made this possible.
Thanks dudes, so far so good 8)
|
|
|
| Pages: 1 .. 4 5 6 7 8 .. 10 |