| [ Total Views: 28298 | Total Replies: 232 | Thread Id: 74776 ] |
| Pages: 1 .. 5 6 7 8 |
|
|
 psimitar psimitar
Son of Jim - Creator of Good
     
Posts: 2506
Threads: 148
Registered: January 1st, 2009
Member Is Offline
Location: North East Melbourne, VIC
Theme: UltimaBB Psyche Blue
|
| posted on August 30th, 2012 at 12:30 AM |
|
|
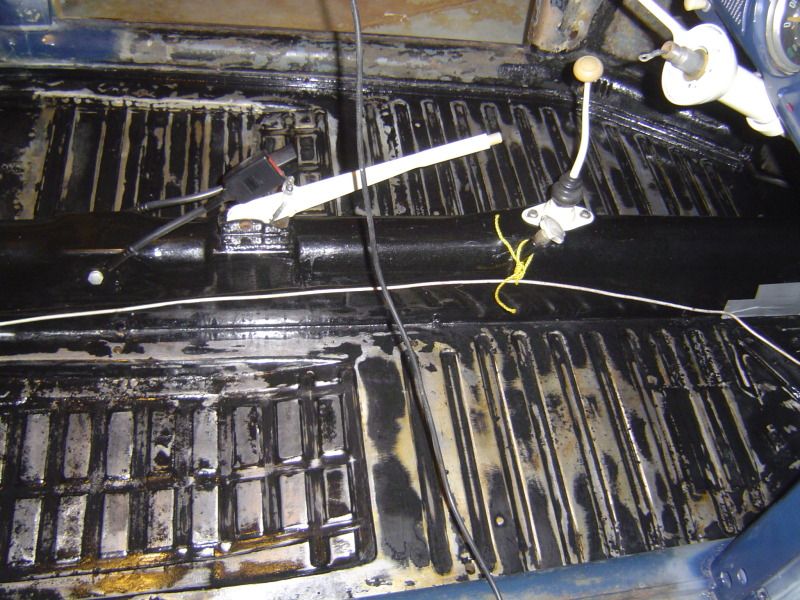
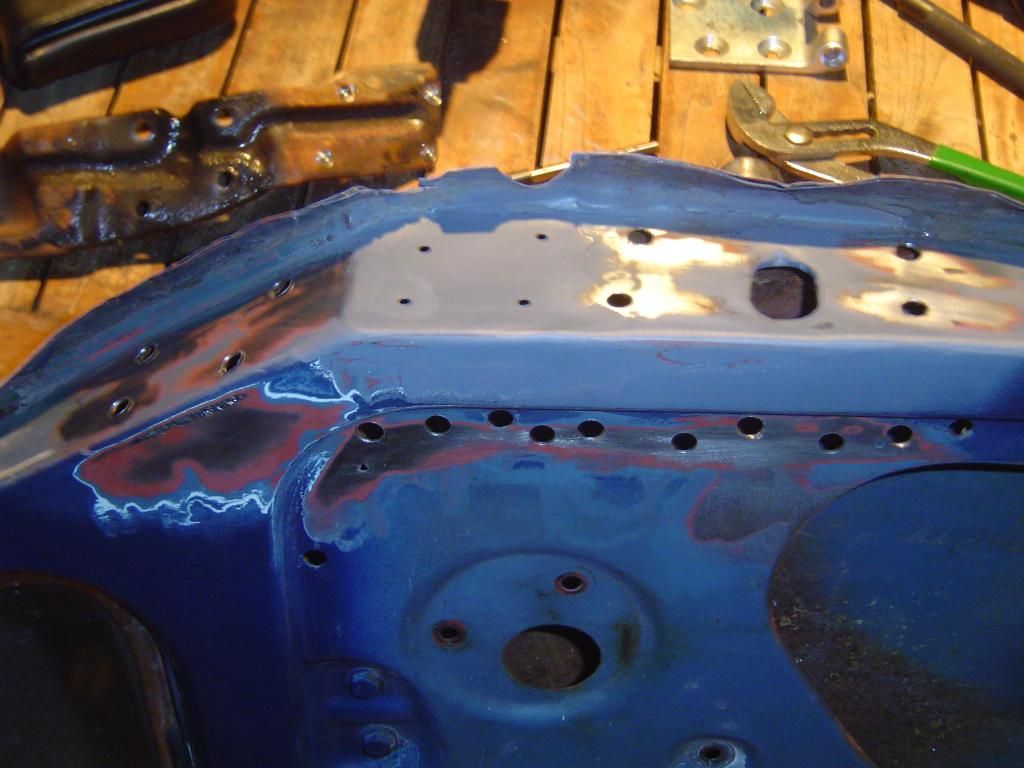
Managed to get a bit closer to re-painting the floorpan ready for the sound deadener.
Here we are sanded ready for the first coat.
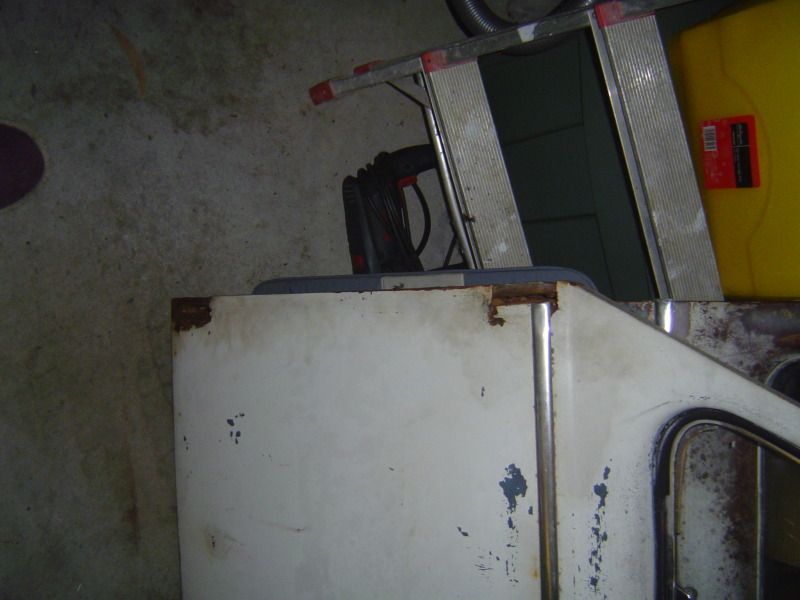
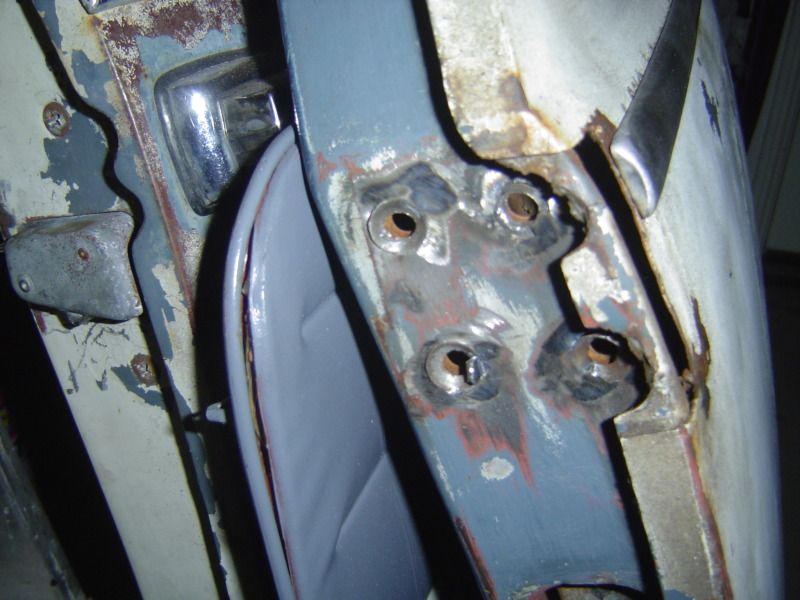
And been figuring out the passenger door hinges. Had bent the door skin nicely, pushed the upper inner strengthener backwards and fully buggered the
hinges. Oh and started to rip 3 of the upper rivets thru the door skin.
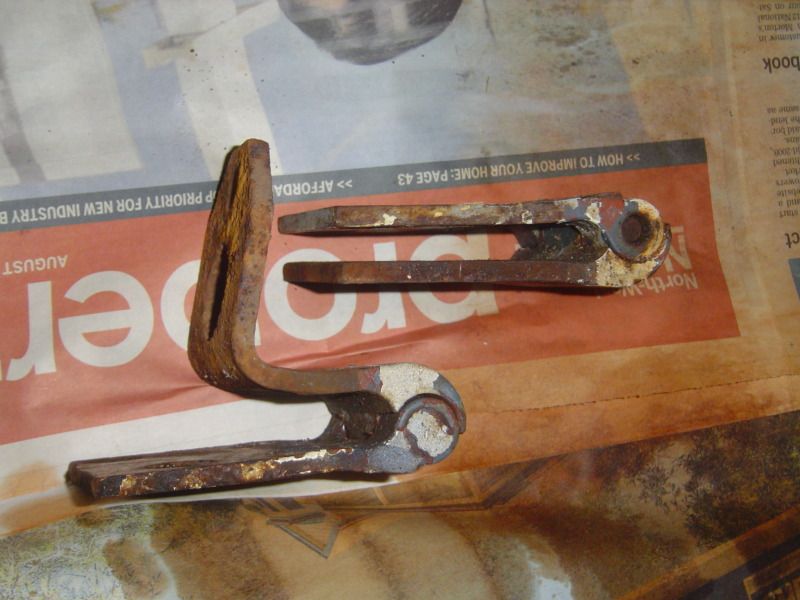
Drivers door needs OS hinge pins as got an 8mm drop from the 0.5mm pin wear.
Glad to be getting something done tho as no job and low cash flow makes it hard going.
madness is in the eye of the beholder  |
|
|
 psimitar psimitar
Son of Jim - Creator of Good
     
Posts: 2506
Threads: 148
Registered: January 1st, 2009
Member Is Offline
Location: North East Melbourne, VIC
Theme: UltimaBB Psyche Blue
|
| posted on September 9th, 2012 at 08:19 PM |
|
|
Floorpan sound deadening is finally in 
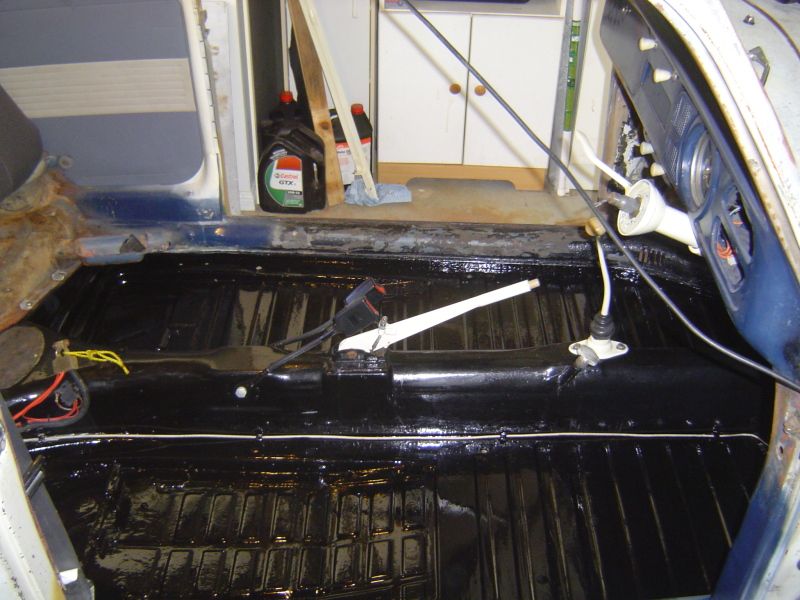
floorpan repainted. Not totally happy as did have some micro bubble issues so not a totally smooth paint job  But the deadener will cover it now as can't be arsed to do it again. But the deadener will cover it now as can't be arsed to do it again.
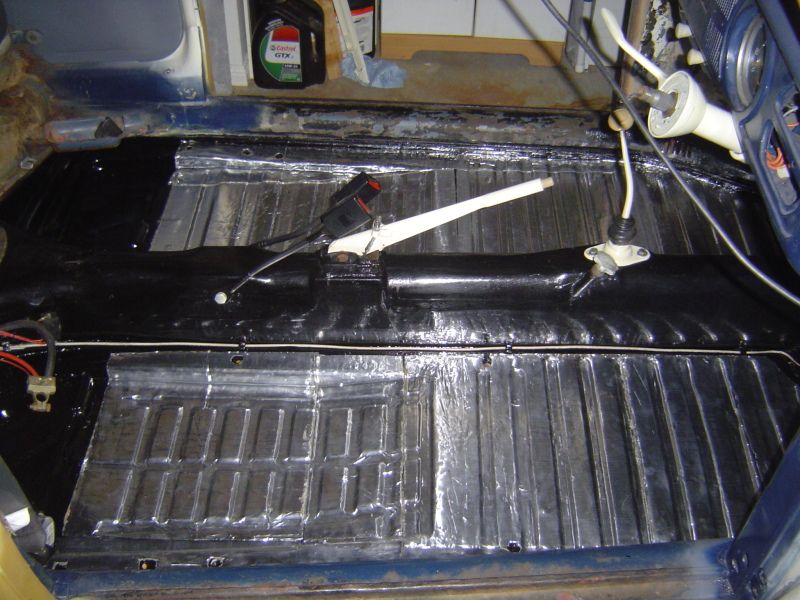
RAAMmat installed.
So get the doors fixed up with new hinges and then find some form of epoxy mastic to paint the rest of the interior in so I don't have anymore micro
bubble issues.
madness is in the eye of the beholder  |
|
|
 psimitar psimitar
Son of Jim - Creator of Good
     
Posts: 2506
Threads: 148
Registered: January 1st, 2009
Member Is Offline
Location: North East Melbourne, VIC
Theme: UltimaBB Psyche Blue
|
| posted on September 22nd, 2012 at 12:12 AM |
|
|
So last of my free funds have gone on new door hinges and pins for the old girl but having to fix the mess the PO did to the door hinges and pillar.
No pillar shots yet but here's the state of the door hinge areas
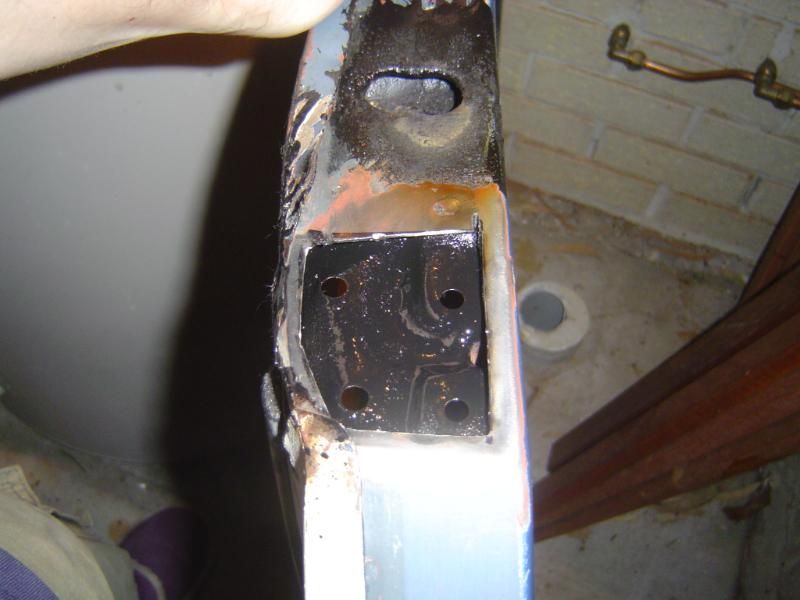
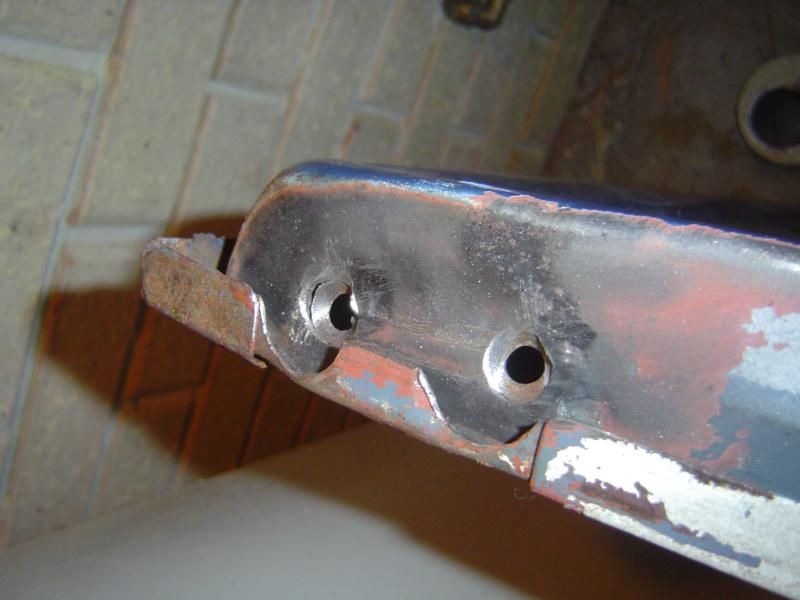
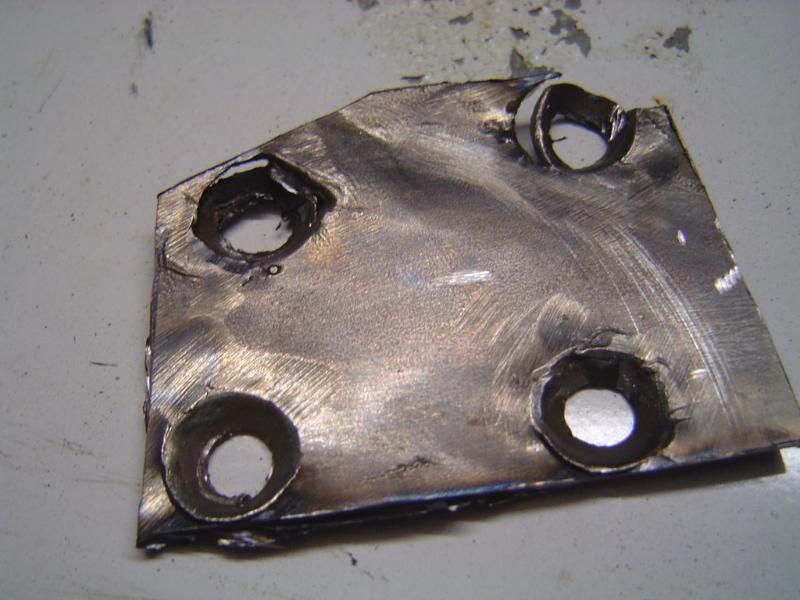
You can see in the removed metal that the hinge retaining rivets have halfway pulled thru the outer door skin. Might extend the repair panel depending
on peoples thoughts on strength of the current repair section.
Hopefully I have enough gas left, don't really need a whole new bottle 
madness is in the eye of the beholder  |
|
|
 psimitar psimitar
Son of Jim - Creator of Good
     
Posts: 2506
Threads: 148
Registered: January 1st, 2009
Member Is Offline
Location: North East Melbourne, VIC
Theme: UltimaBB Psyche Blue
|
| posted on October 19th, 2012 at 11:47 PM |
|
|
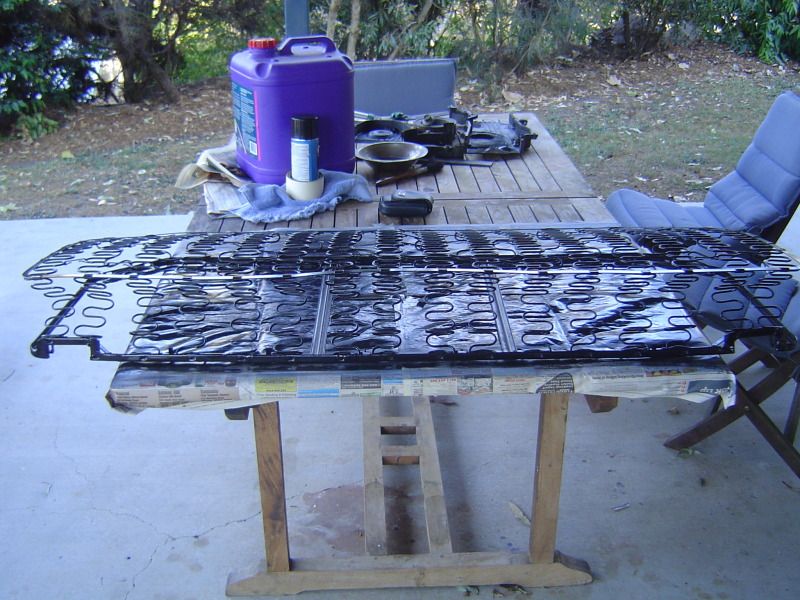
So as I've been having a such a ballache sourcing hinges, pins and tooling in Australia to get my doors back on the Bug I decided to clean up the
rear seat frame and give it a lick of rust proof paint.
Before
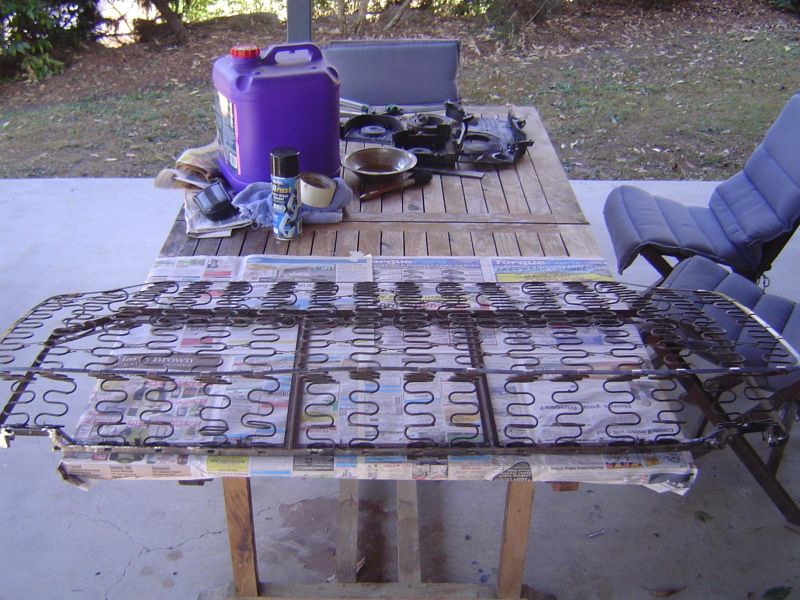
After
As for the doors I need funds for welding gas as the rivet holes need a bit of welding and machining to make them round again otherwise the door will
probably sag and move around quite quickly once back on the car.
Really quite peeved as if in the UK I would have had the parts and tools within a week but over here it's taken almost 6 weeks and I now have to find
a 60 degree 12mm centre drill so the new lower hinge can accept an early domed pin as nowhere seems to have a 60 degree countersink 
madness is in the eye of the beholder  |
|
|
 psimitar psimitar
Son of Jim - Creator of Good
     
Posts: 2506
Threads: 148
Registered: January 1st, 2009
Member Is Offline
Location: North East Melbourne, VIC
Theme: UltimaBB Psyche Blue
|
| posted on November 8th, 2012 at 10:40 PM |
|
|
So made a bit of progress with the doors n hinges as got bored of not doing anything due to a bum elbow 
Whilst trying to sort out the mess the PO had made of the hinges I've ended up having to remove the upper strengthening plate from both doors. This
shows the number of spot welds I had to drill out
This shows how the strengthening plate had been bent around and the river holes pulled into peaks instead of being flat.
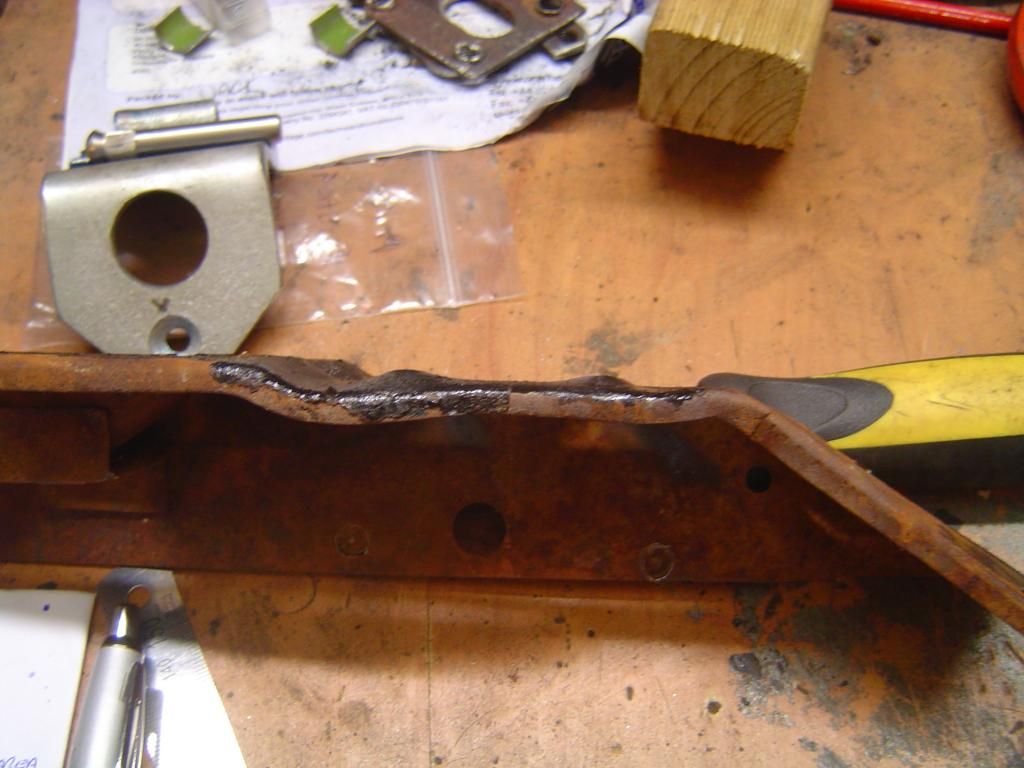
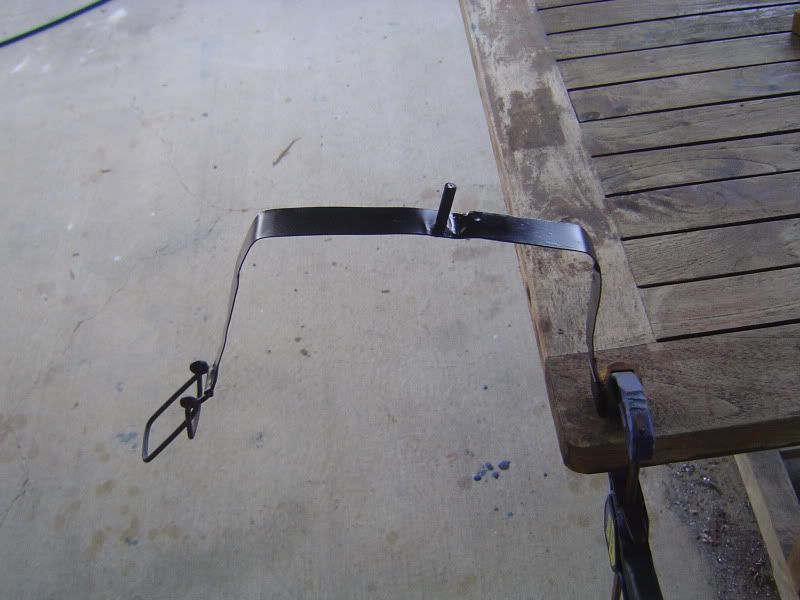
This is a little holder for a piece of 5mm rubber to hold the old skool check strap in place. New rubber needed as old stuff is 50yrs old and
buggered.
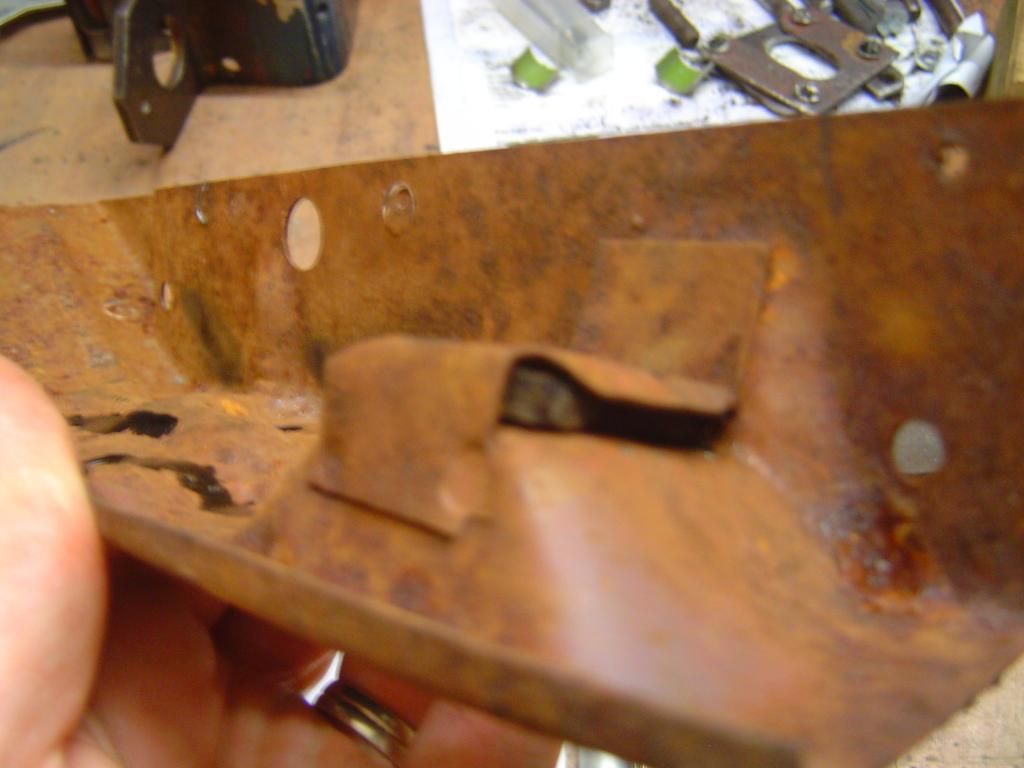
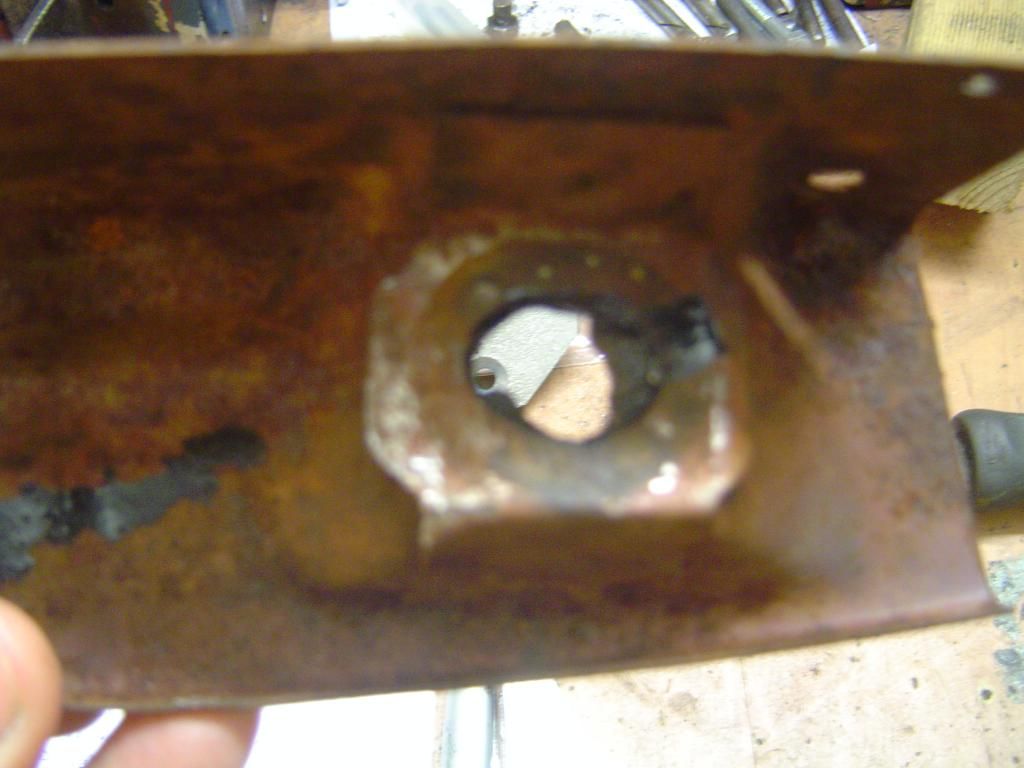
And dunno if you can make how that the rivet holes are a bit ovalled and enlarged to need welding and filing round again.
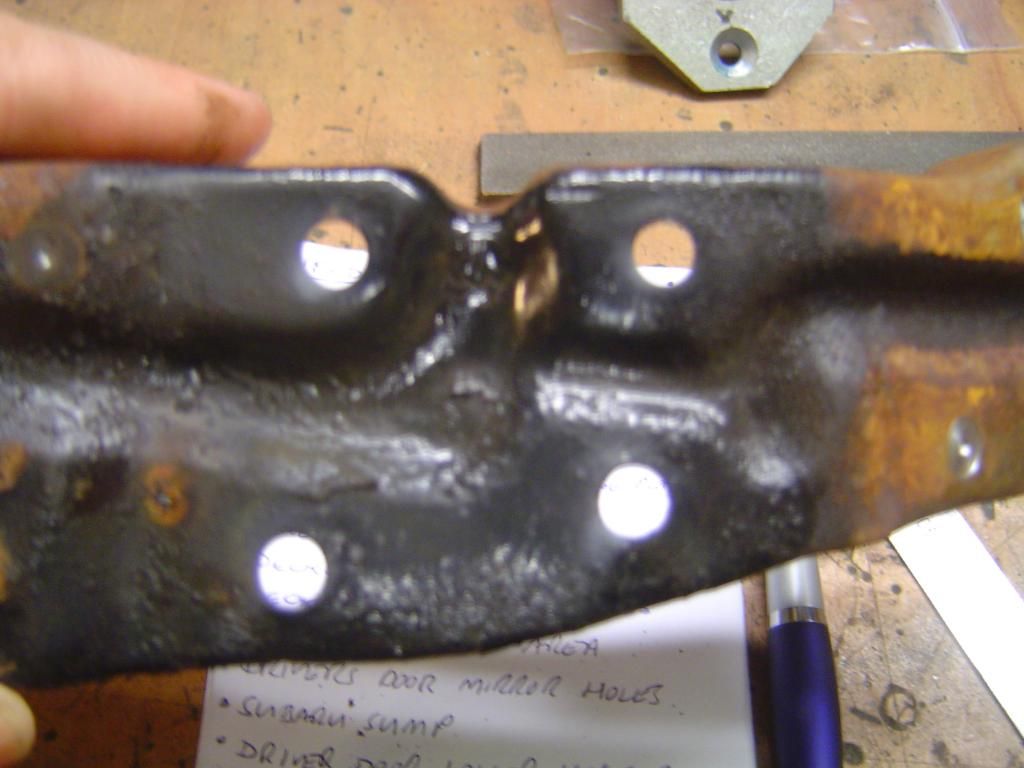
Also got me 60 degree countersink so I could get the new lower hinge to accept an early pin. Can now go and get a garage to press the pins fully in
 Yay me!!!!! Yay me!!!!!
madness is in the eye of the beholder  |
|
|
 psimitar psimitar
Son of Jim - Creator of Good
     
Posts: 2506
Threads: 148
Registered: January 1st, 2009
Member Is Offline
Location: North East Melbourne, VIC
Theme: UltimaBB Psyche Blue
|
| posted on December 28th, 2012 at 11:28 PM |
|
|
Today I r mostly been fixing me doors
So last few days after finishing the wifes easel I have been prepping all the bits to get the doors back on the Beetle with new hinges/pins. Get
ready.......
Original re-pinned hinges welded up to remove wear in mounting holes.
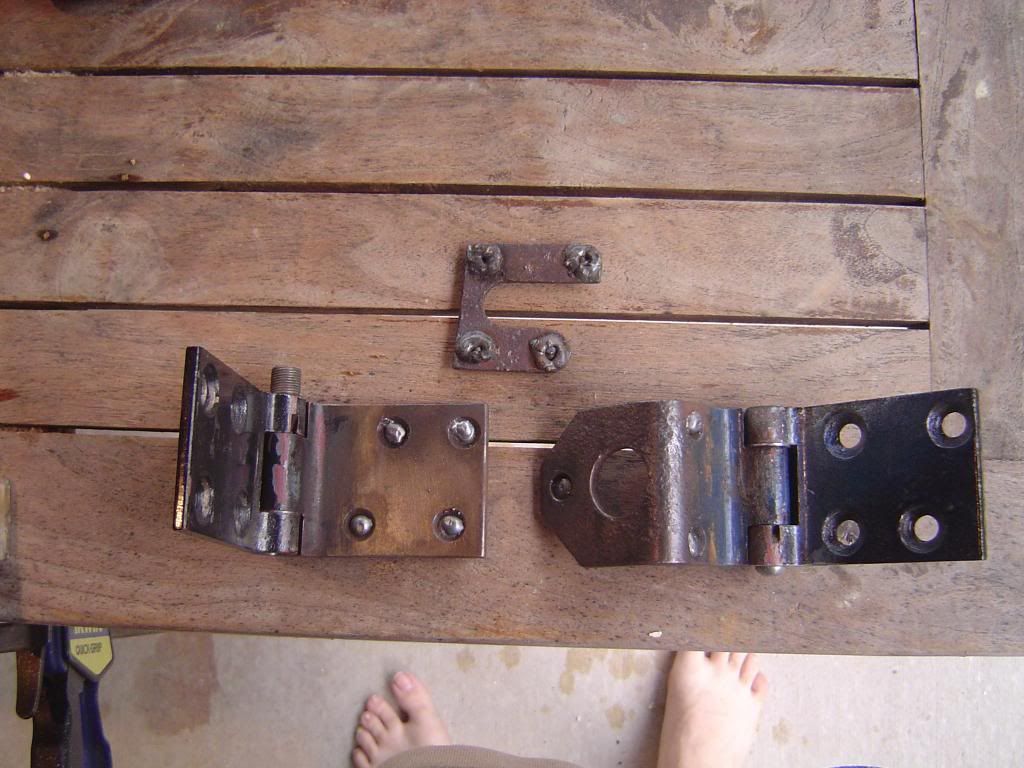
Cleaned up and re-drilled
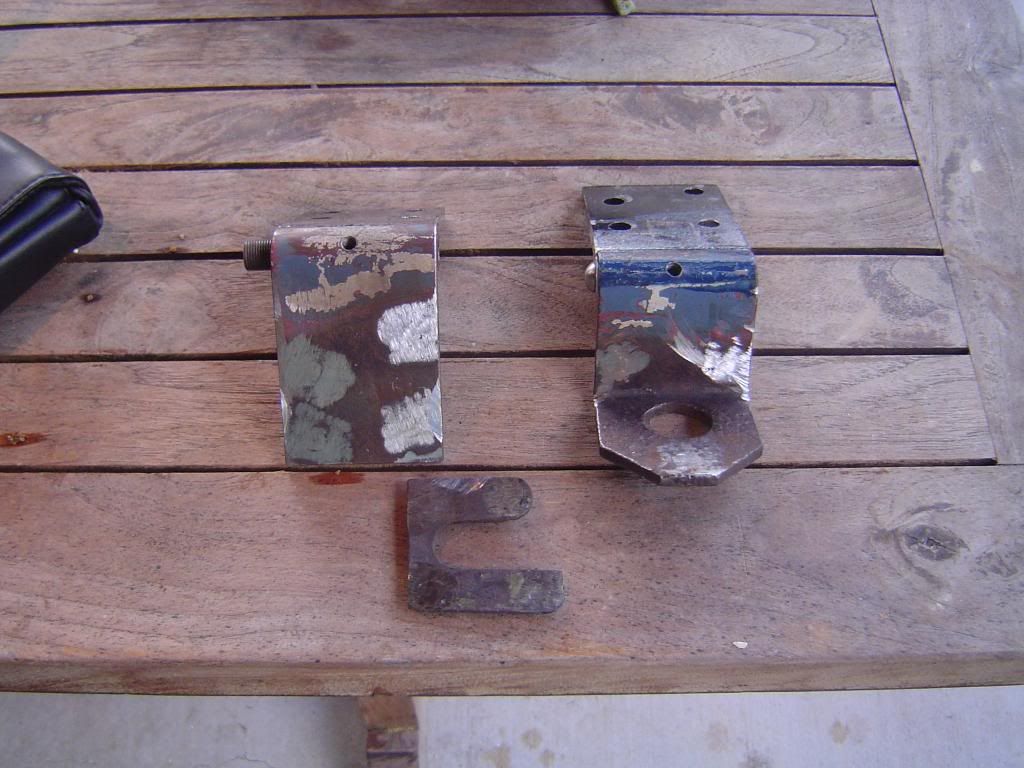
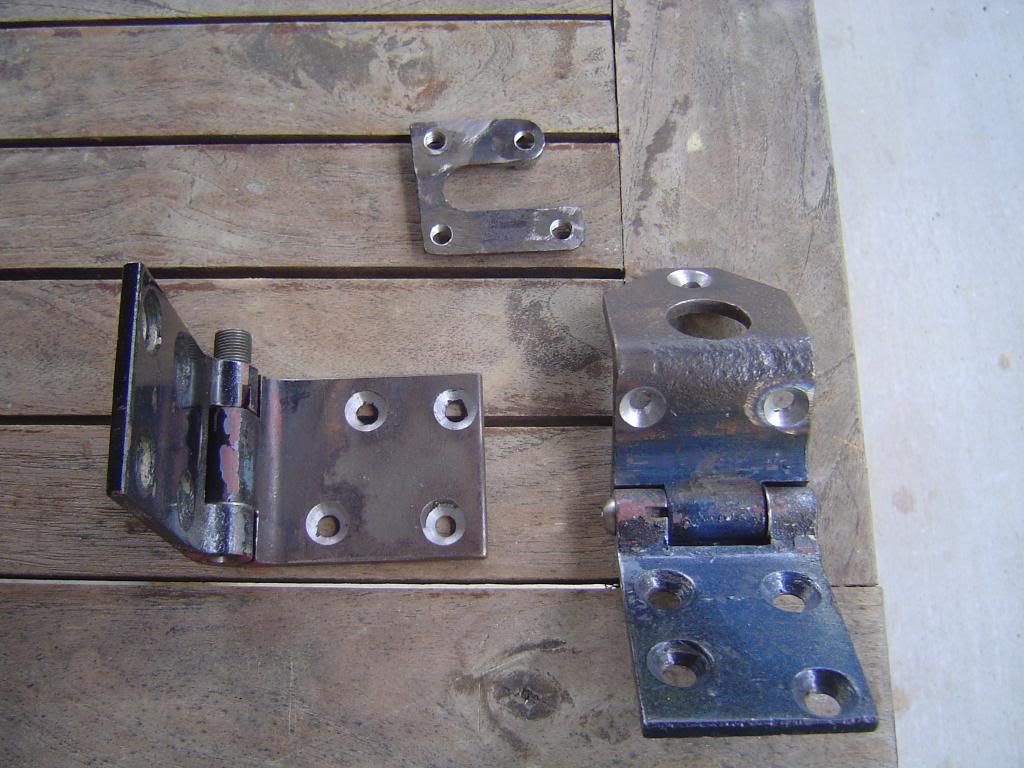
Inner door strengthener splits n ovalled hinge holes
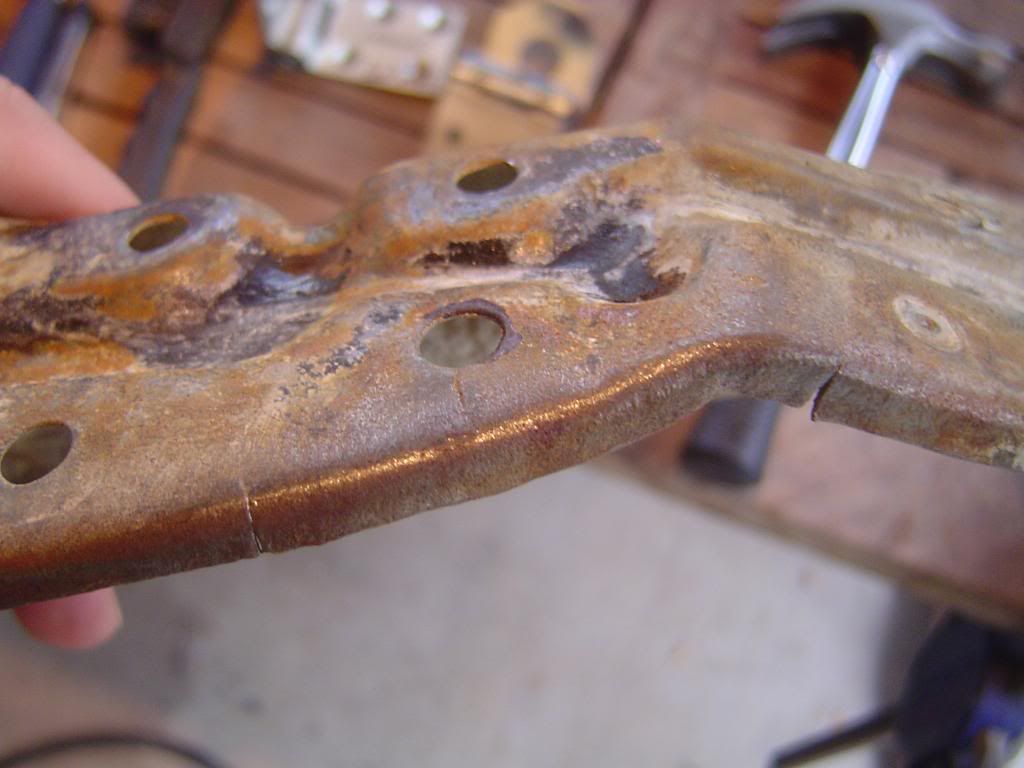
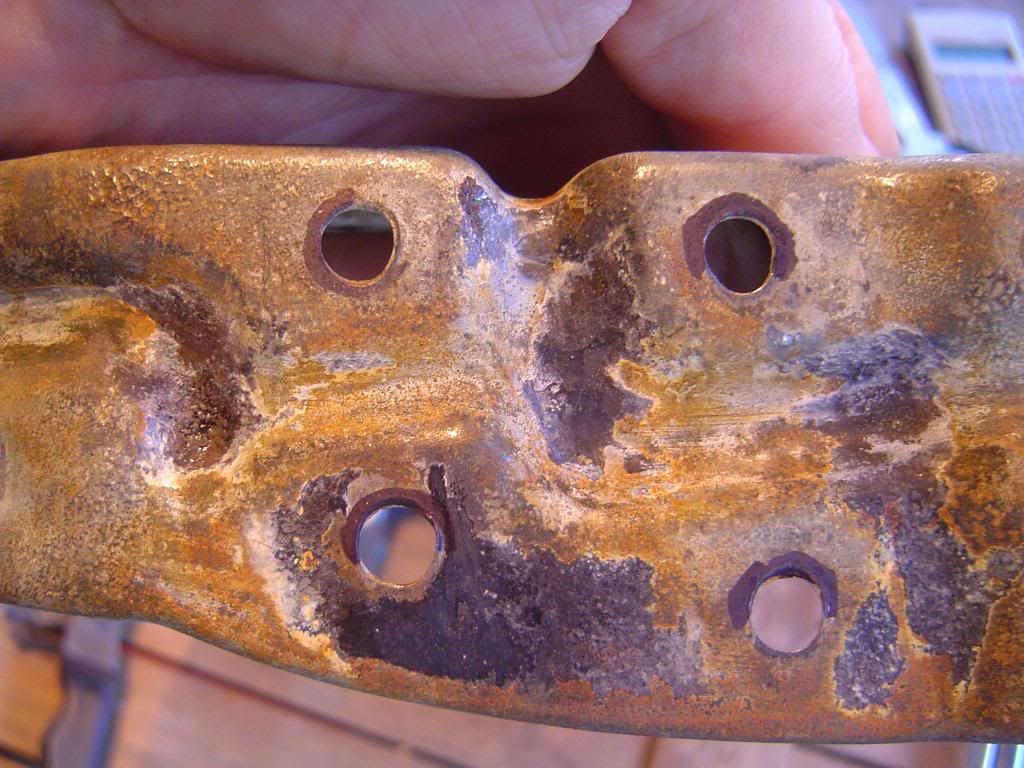
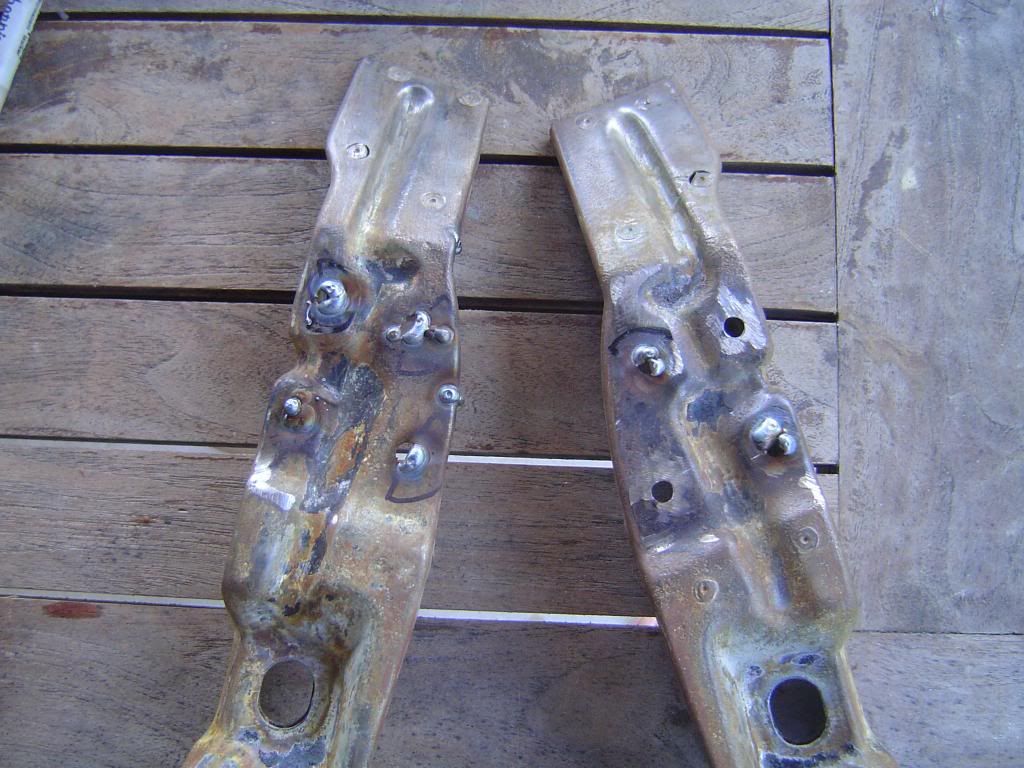
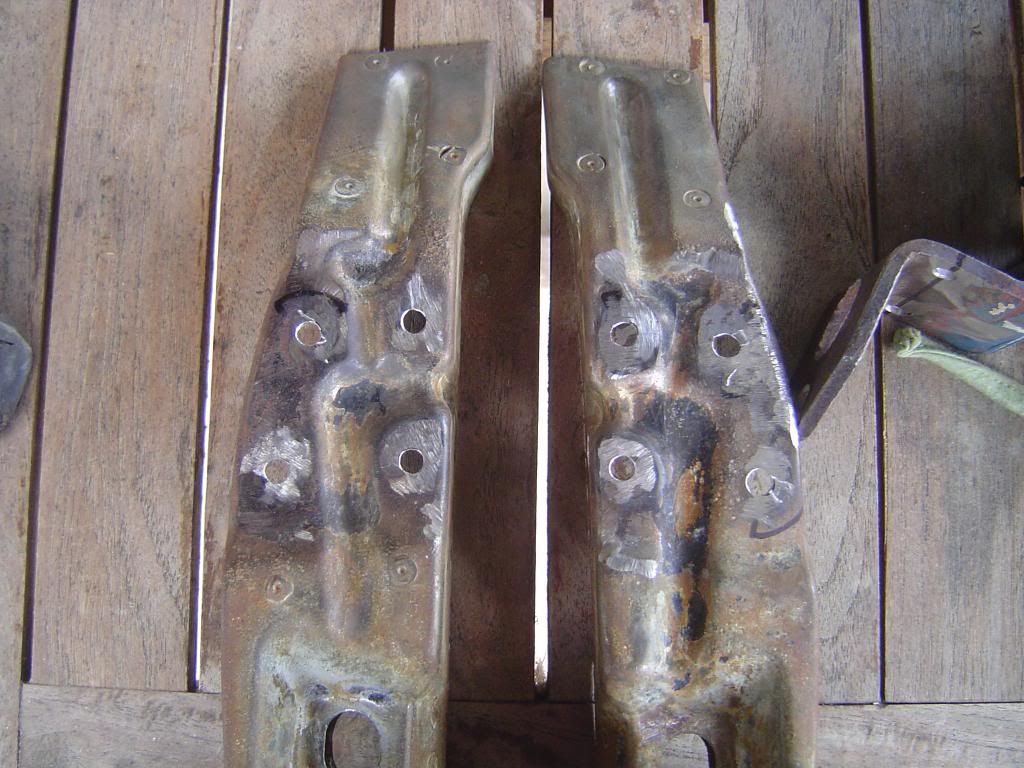
Both strengtheners welded up and fettled back to round holes
madness is in the eye of the beholder  |
|
|
 psimitar psimitar
Son of Jim - Creator of Good
     
Posts: 2506
Threads: 148
Registered: January 1st, 2009
Member Is Offline
Location: North East Melbourne, VIC
Theme: UltimaBB Psyche Blue
|
| posted on December 28th, 2012 at 11:29 PM |
|
|
And continuing......
Splits and panel beaten hinge area on passenger door
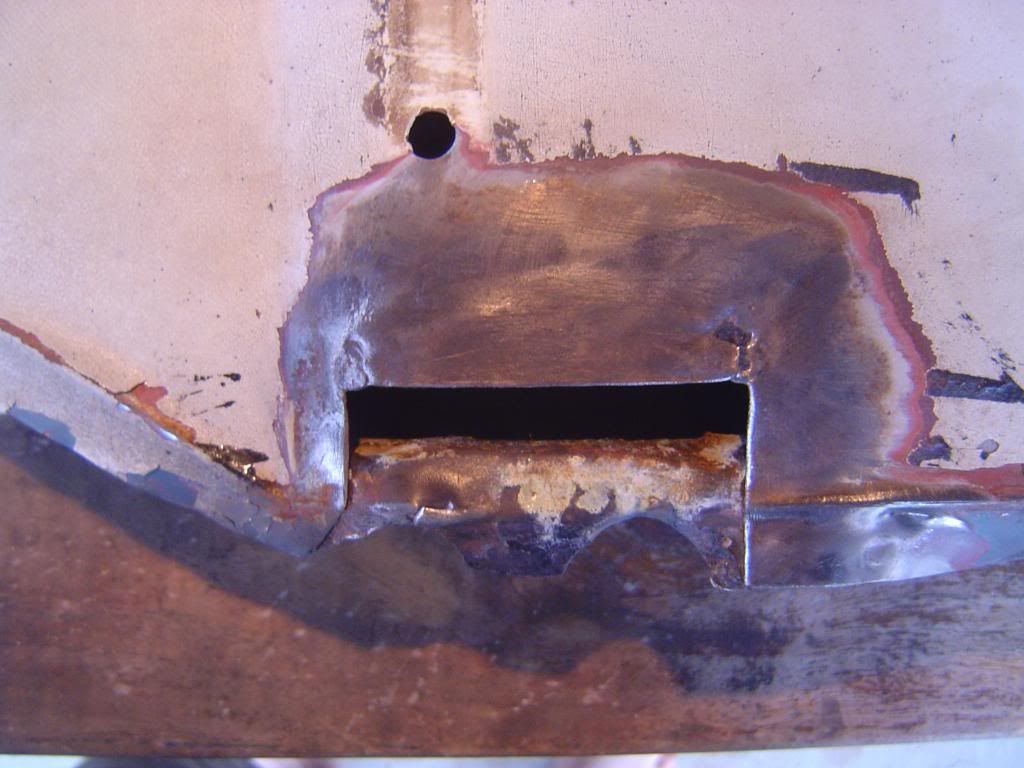
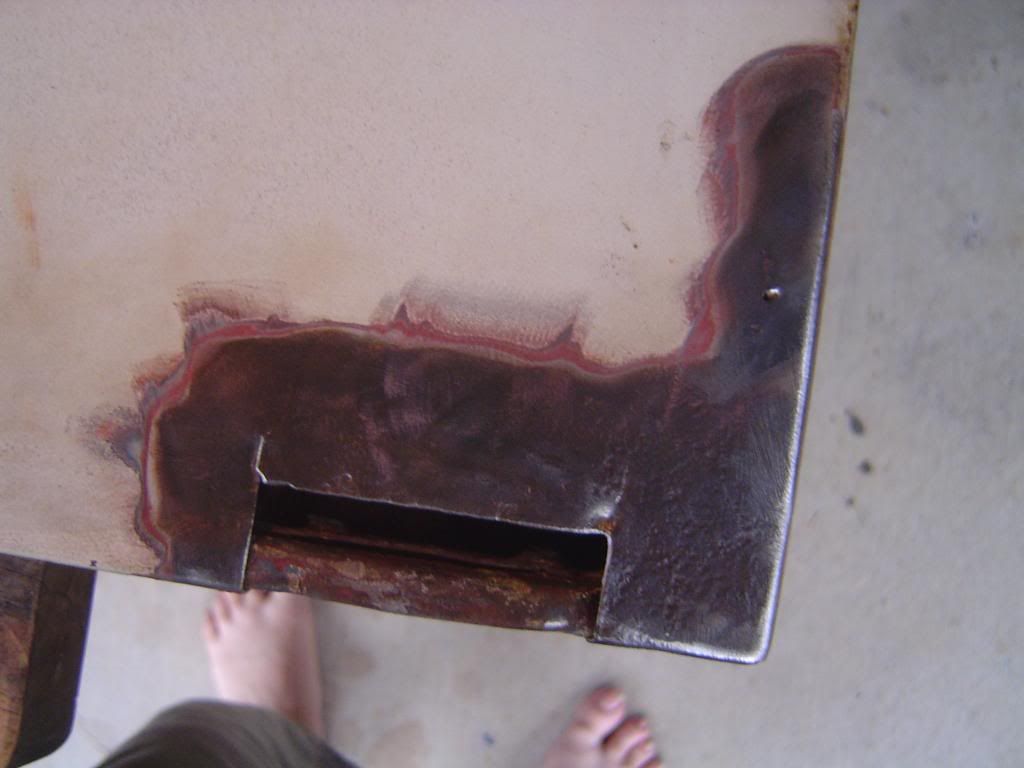
welded up and bit of filler weld in trough in panel
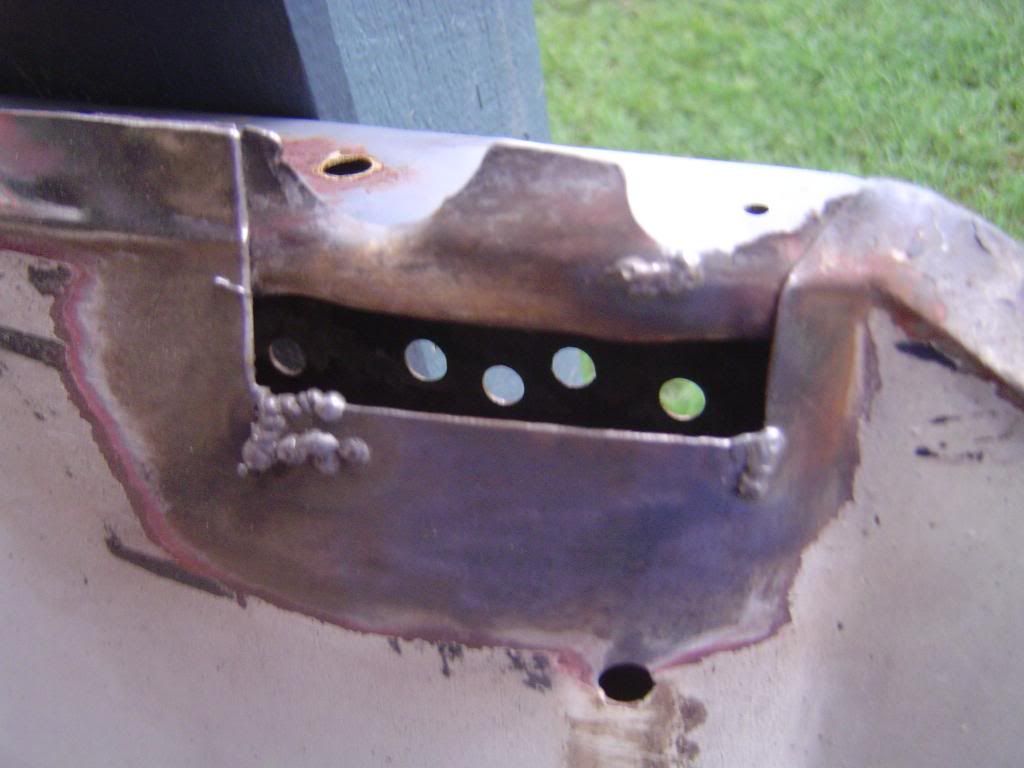
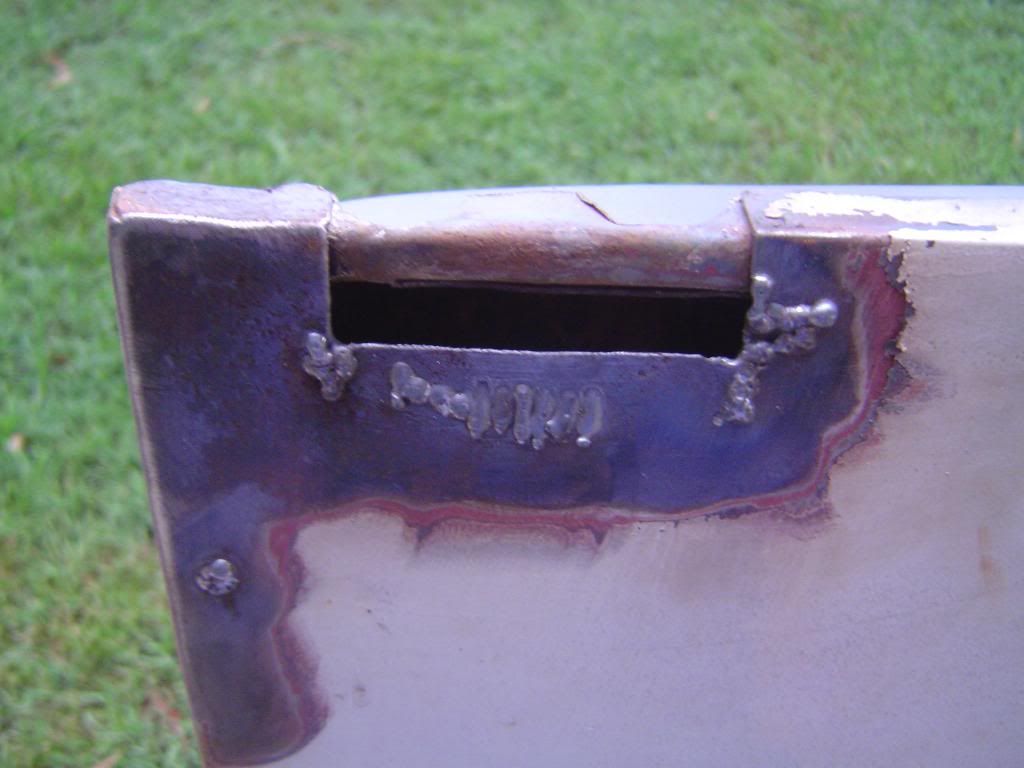
Drivers door lower hinge torn outer skin and crappy door mirror holes
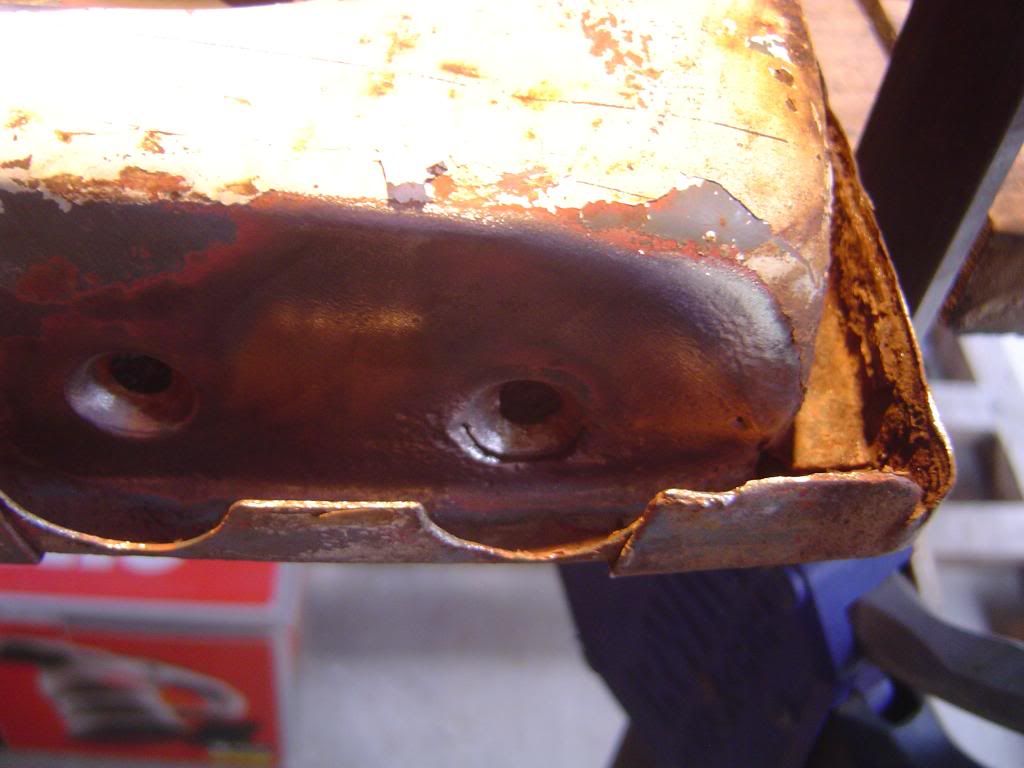
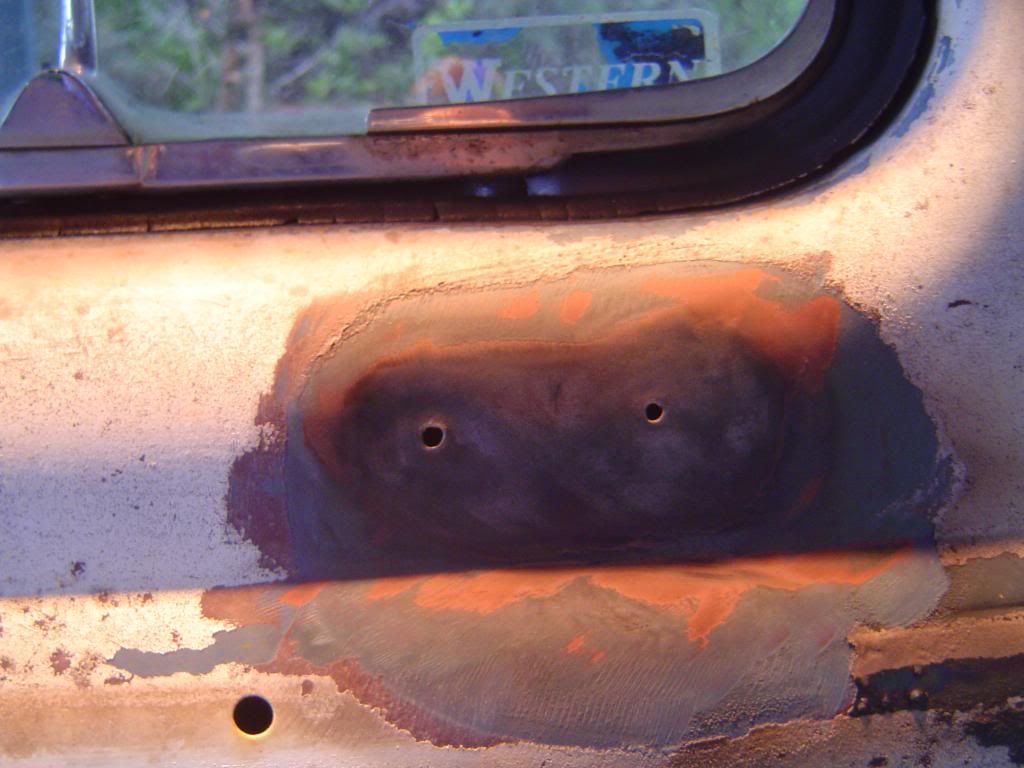
Welded up and fettled into shape
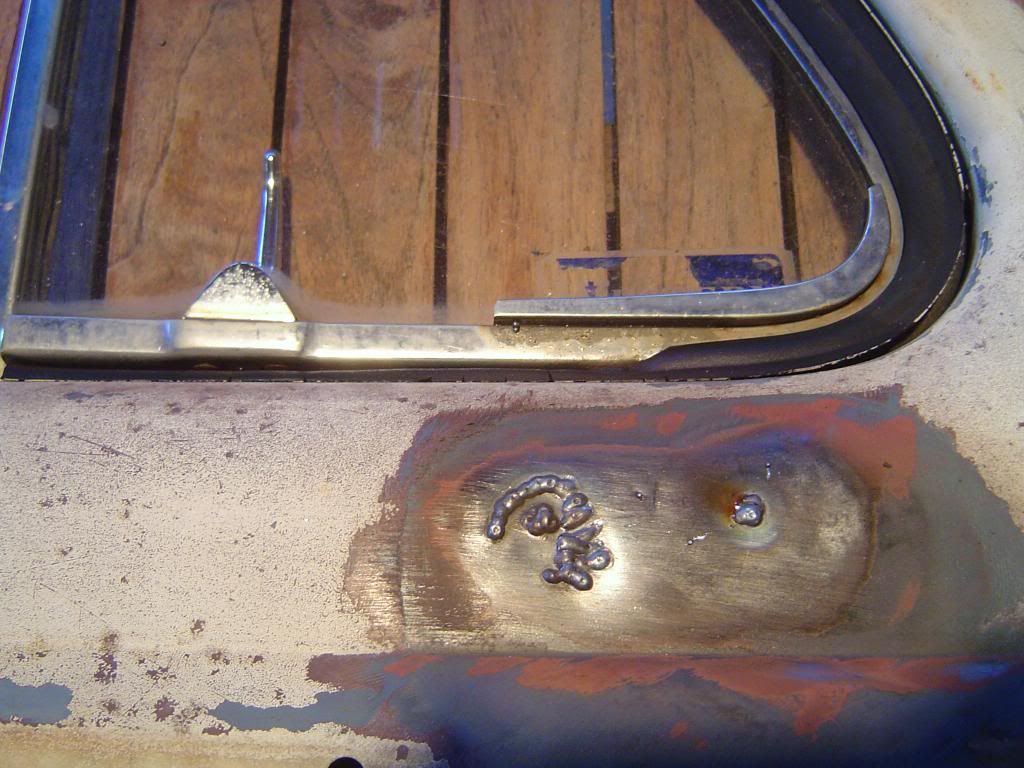
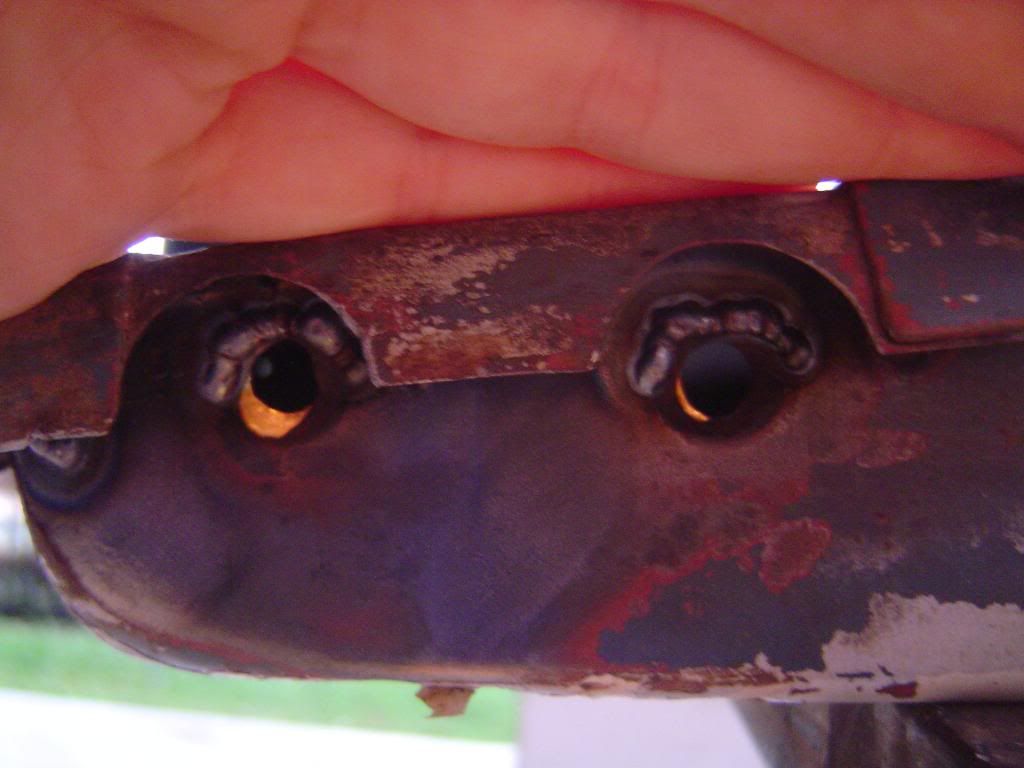
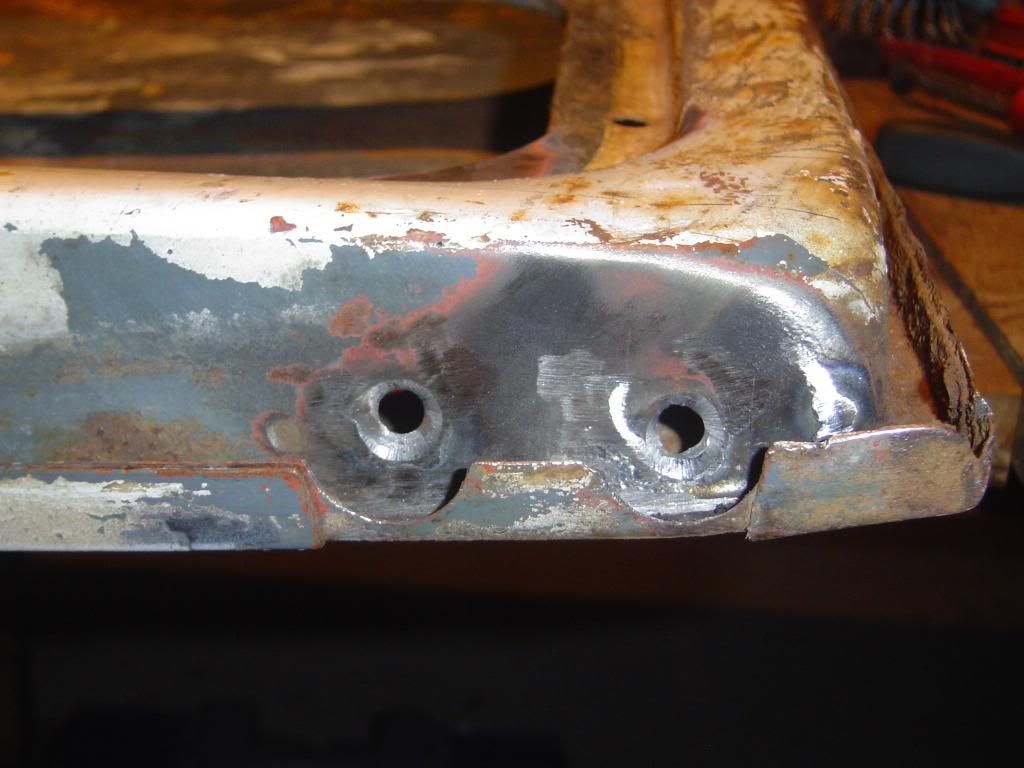
More tomoro
madness is in the eye of the beholder  |
|
|
 hyjinx hyjinx
Casual Dubber

Posts: 30
Threads: 2
Registered: October 15th, 2012
Member Is Offline
Location: Sydney
Theme: UltimaBB Pro Blue ( Default )
Mood: DPRESED
|
| posted on December 29th, 2012 at 01:02 PM |
|
|
i havent gone thru your entire thread yet but just from the 1st few pics of what this beetle looks like id have to say its one of the coolest cars ive
seen. merry xmas indeed to you  cant wait to read thru it all. cant wait to read thru it all.
|
|
|
 psimitar psimitar
Son of Jim - Creator of Good
     
Posts: 2506
Threads: 148
Registered: January 1st, 2009
Member Is Offline
Location: North East Melbourne, VIC
Theme: UltimaBB Psyche Blue
|
| posted on December 29th, 2012 at 11:07 PM |
|
|
| Quote: | Originally
posted by hyjinx
i havent gone thru your entire thread yet but just from the 1st few pics of what this beetle looks like id have to say its one of the coolest cars ive
seen. merry xmas indeed to you  cant wait to read thru it all. cant wait to read thru it all.
|
cheers dude  Ya know, one of the downsides to any welding done on the
outer body somewhat ruins the weathered patina look when you pop some new paint on. ah well Ya know, one of the downsides to any welding done on the
outer body somewhat ruins the weathered patina look when you pop some new paint on. ah well 
madness is in the eye of the beholder  |
|
|
 psimitar psimitar
Son of Jim - Creator of Good
     
Posts: 2506
Threads: 148
Registered: January 1st, 2009
Member Is Offline
Location: North East Melbourne, VIC
Theme: UltimaBB Psyche Blue
|
| posted on January 3rd, 2013 at 10:38 PM |
|
|
So a bit longer than the next day like I said but waiting for knifing putty and paint to dry chews the days up especially when you have to wait until
nitetime to apply the paint due to it being above 30 here.
Anyway,
Quick bolt welded to battery clamp to hold the plastic cover on
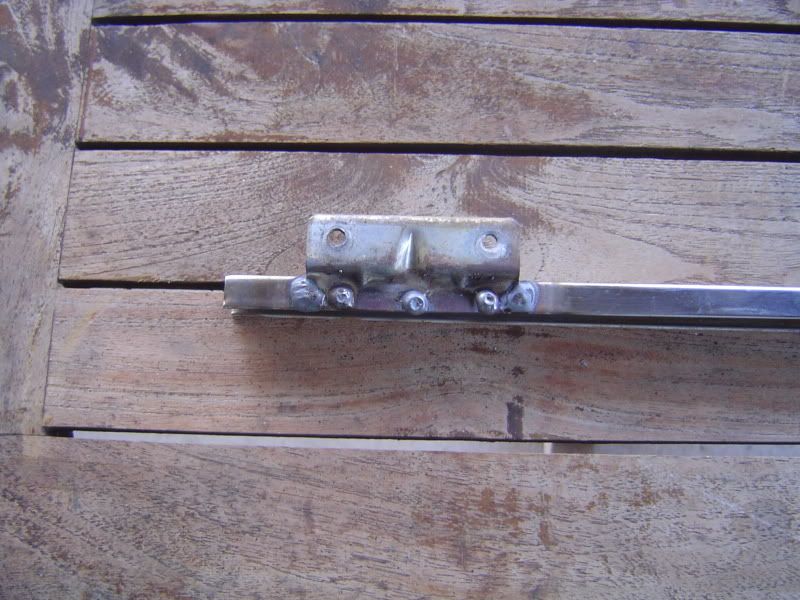
Stainless window channel repaired
Door hinge area's smoothed a little n painted
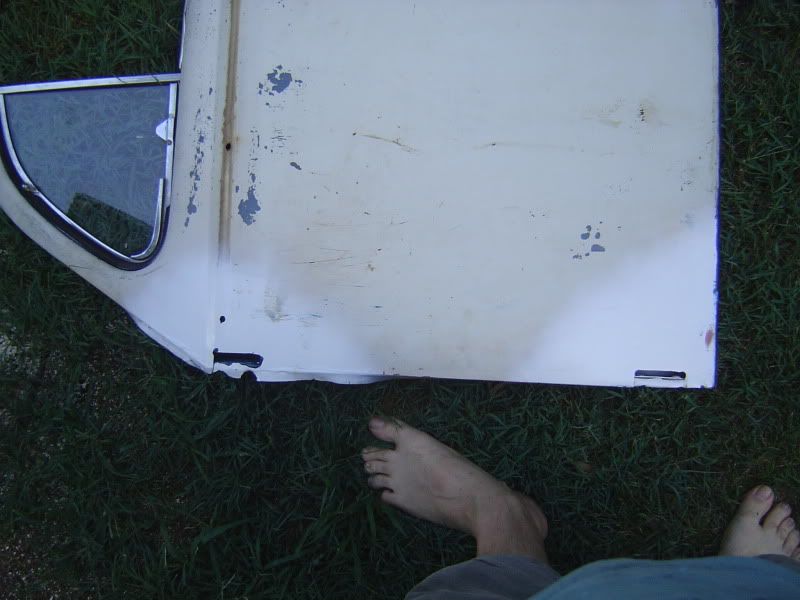
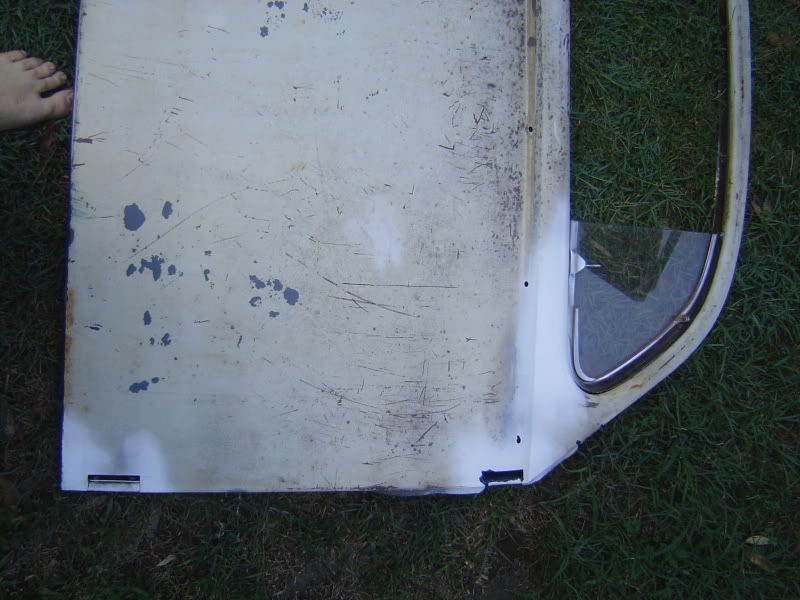
Door seal channels and bottom area de-rusted and painted
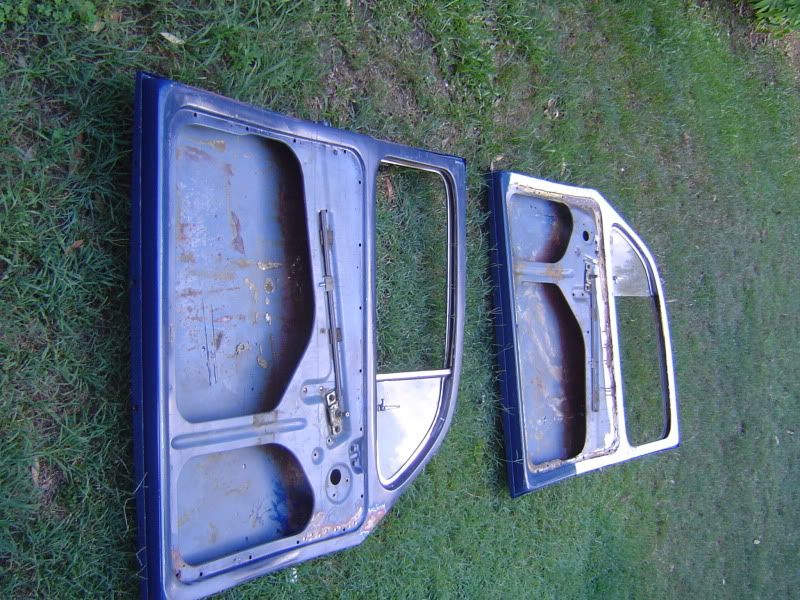
And the hinges and door inner upper support plates painted ready for welding back in
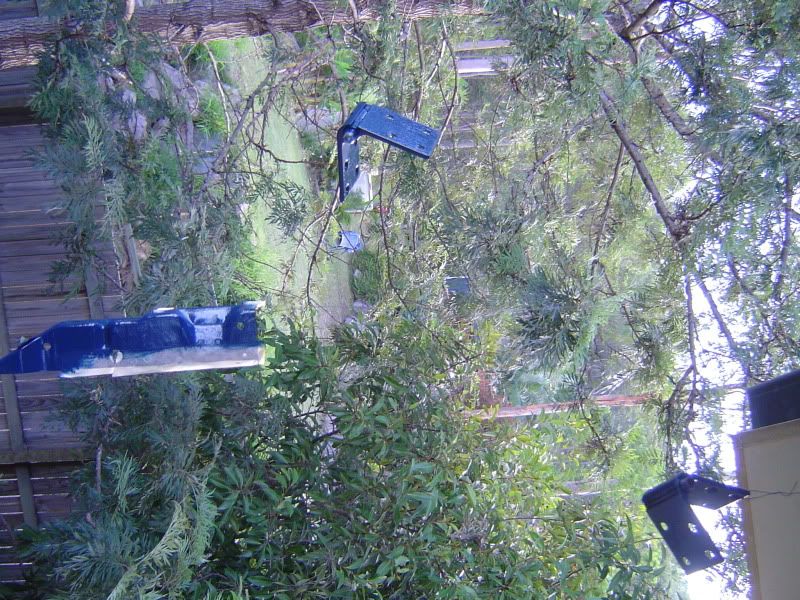
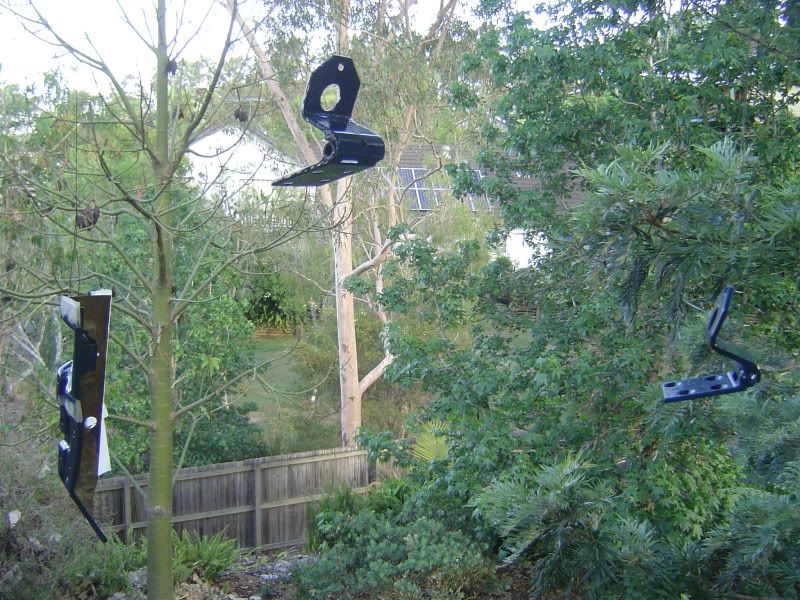
Also, getting the drivers wing bolts lubed up ready for removal so I can make a wee repair to the inner wings drain hole area and also the split to
the passengers lower hinge area.
Doors so close to going back on after 3 months or more from when I removed them to 'fix the hinges quick' 
madness is in the eye of the beholder  |
|
|
 psimitar psimitar
Son of Jim - Creator of Good
     
Posts: 2506
Threads: 148
Registered: January 1st, 2009
Member Is Offline
Location: North East Melbourne, VIC
Theme: UltimaBB Psyche Blue
|
| posted on January 7th, 2013 at 01:34 AM |
|
|
Whilst I've been waiting for the rust cure paint to harden properly in the doors so they don't react to the zinc welding spray I've been tackling
what I thought was a quick little patch at the bottom of the driver A pillar. Turned out to be rather holey after wire brushing
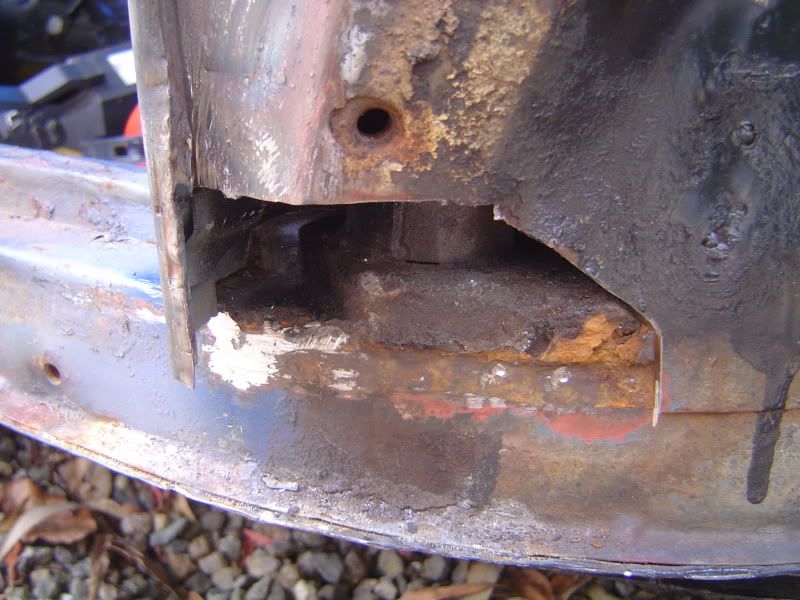
Then spent a good few hours making a multi-angle plate to replicate the original panel
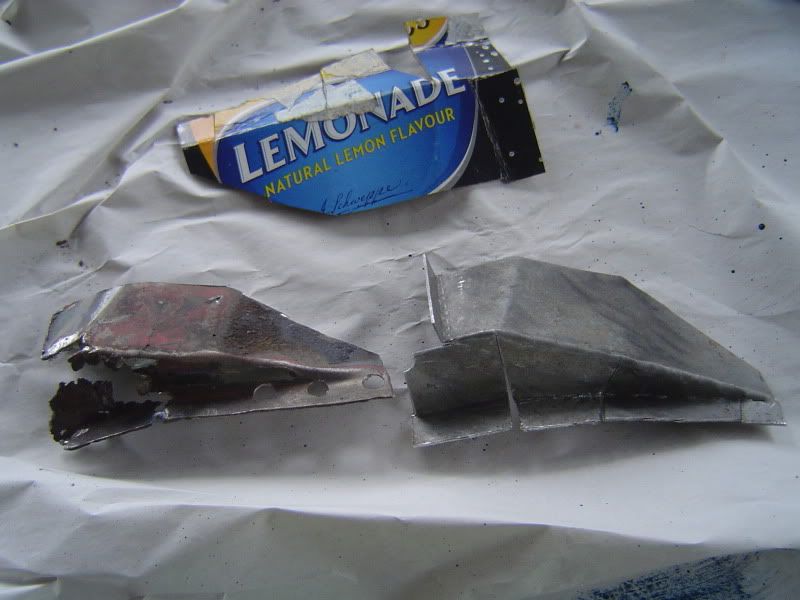
Tomoro I should hopefully get the door inner upper support plates welded back in. probably take the rear wings off to sort a few tears in the lower
return lips and then I can move me welding gear up to the Beetle for a few jobs on the body itself 
So close to doors going back on 
madness is in the eye of the beholder  |
|
|
 ian.mezz ian.mezz
Wolfsburg Elder
I never said, I could write or spell
      
Posts: 3913
Threads: 280
Registered: September 11th, 2004
Member Is Offline
Location: Newcastle
Theme: UltimaBB Pro Blue ( Default )
Mood: Happy
|
| posted on January 7th, 2013 at 01:48 PM |
|
|
good idea to leave a hole in bottom of that repair to let any water etc out, to stop it from rusting agian. in the future. just put a hole just about
where the rusty hole was. 
|
|
|
 psimitar psimitar
Son of Jim - Creator of Good
     
Posts: 2506
Threads: 148
Registered: January 1st, 2009
Member Is Offline
Location: North East Melbourne, VIC
Theme: UltimaBB Psyche Blue
|
| posted on January 7th, 2013 at 11:34 PM |
|
|
| Quote: | Originally
posted by ian.mezz
good idea to leave a hole in bottom of that repair to let any water etc out, to stop it from rusting agian. in the future. just put a hole just about
where the rusty hole was. 
|
Cheers dude.
Hole weren't drilled yet as did that after i'd welded the joins together. Went for 3 holes in strategic places to allow the water out 
madness is in the eye of the beholder  |
|
|
 psimitar psimitar
Son of Jim - Creator of Good
     
Posts: 2506
Threads: 148
Registered: January 1st, 2009
Member Is Offline
Location: North East Melbourne, VIC
Theme: UltimaBB Psyche Blue
|
| posted on January 11th, 2013 at 11:04 PM |
|
|
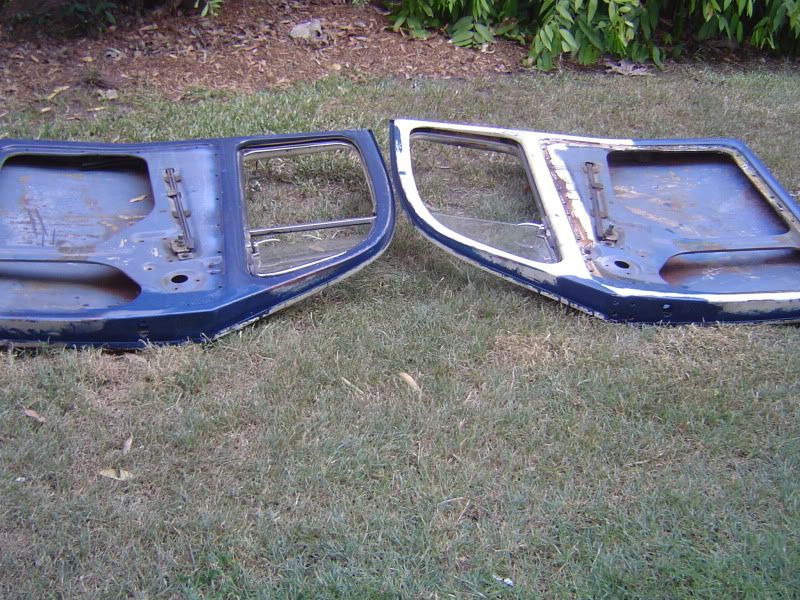
So been at it all week getting the doors finished and sorting the rear wings out. Doors still new another coat on the outside but still too fecking
hot 
Anyway, Door upper strengtheners back in
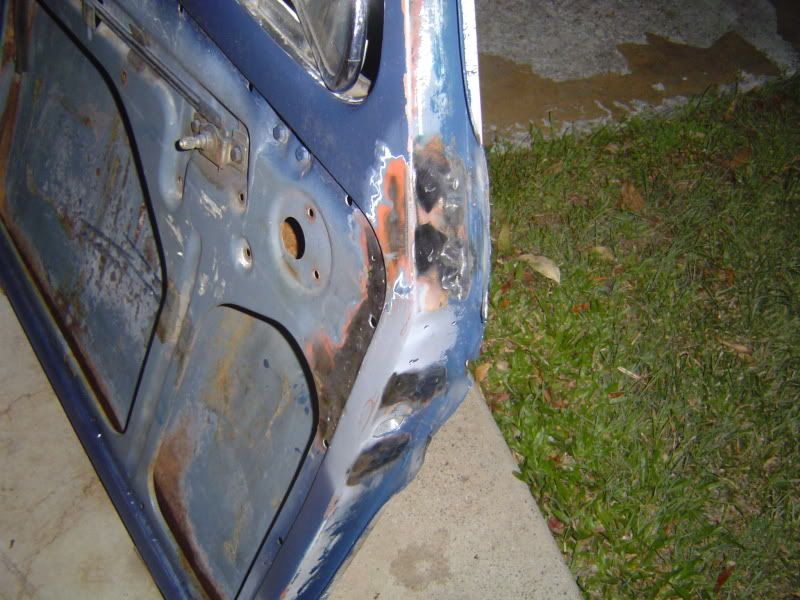
And door edges back in shape
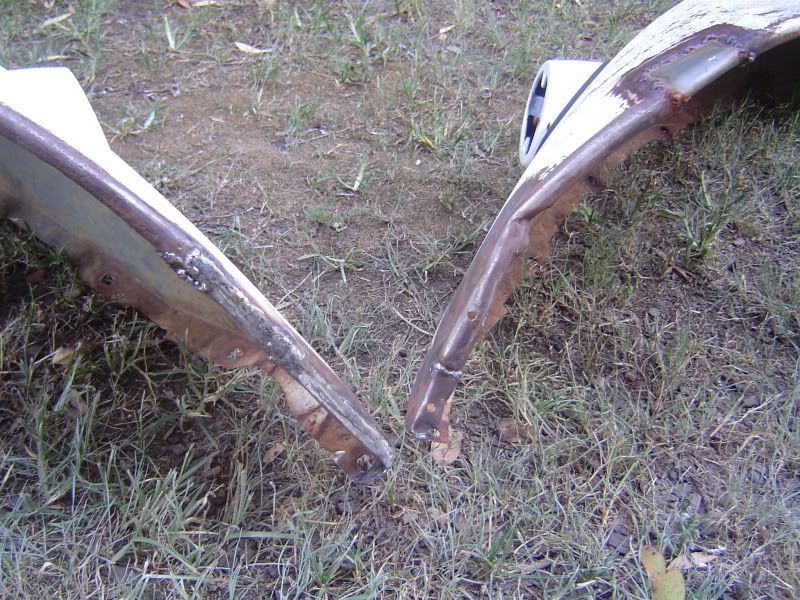
Lower rear wing edges crusty and mangled
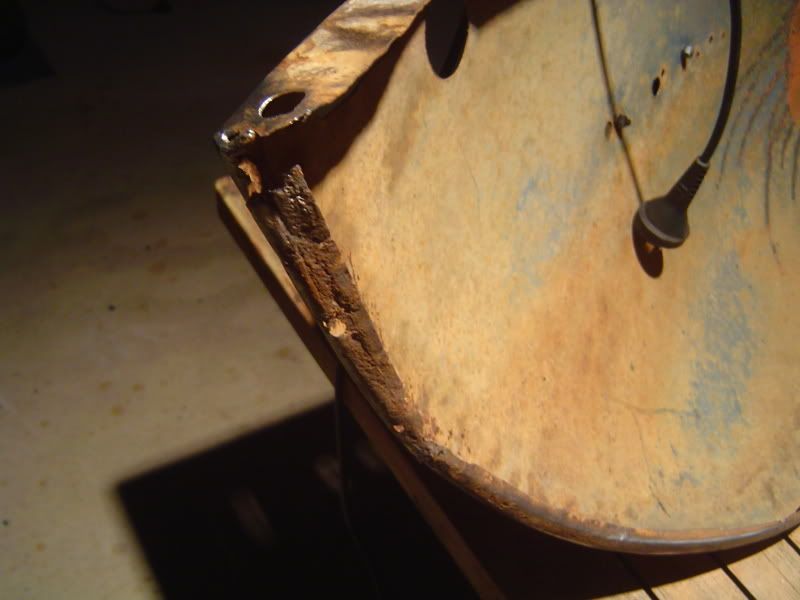
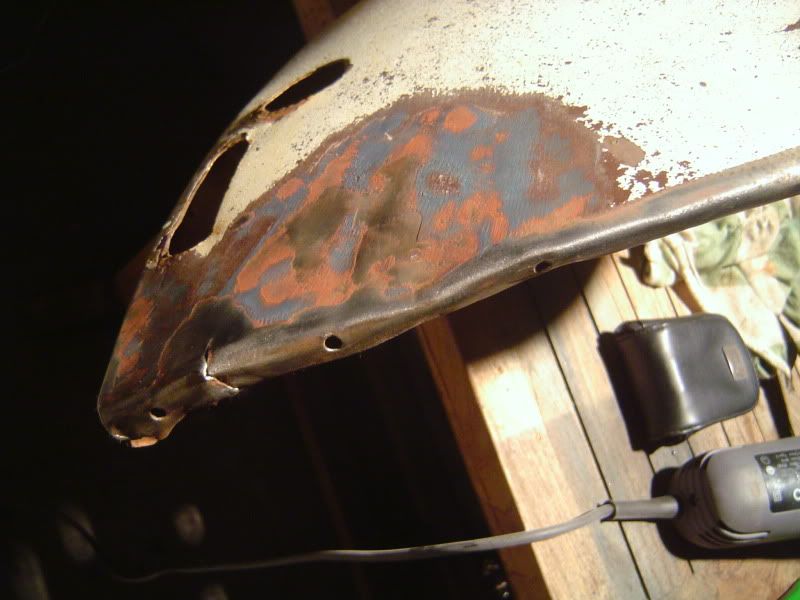
And then welded new piece in and welded any tears up and whacked em back into shape (forgot the pic of the drivers back into shape better)
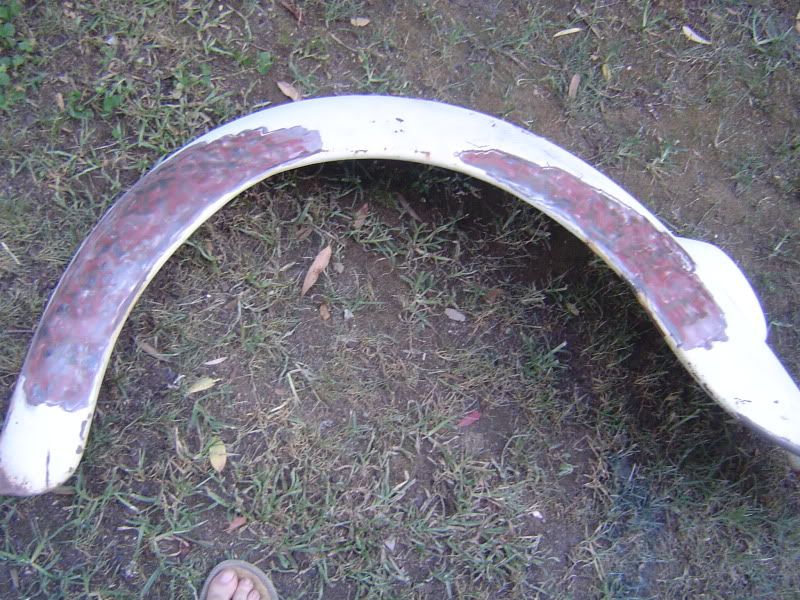
And found large areas of bog in the passenger wing. Roughly hammered back into shape but will give it some more later 
madness is in the eye of the beholder  |
|
|
 psimitar psimitar
Son of Jim - Creator of Good
     
Posts: 2506
Threads: 148
Registered: January 1st, 2009
Member Is Offline
Location: North East Melbourne, VIC
Theme: UltimaBB Psyche Blue
|
| posted on January 11th, 2013 at 11:05 PM |
|
|
And finally a few tears in the bonnet front lip welded up to stop the bonnet sagging to one side when open, the passenger door lower hinge area tears
welded up and the repair panel for the drivers A piller welded in
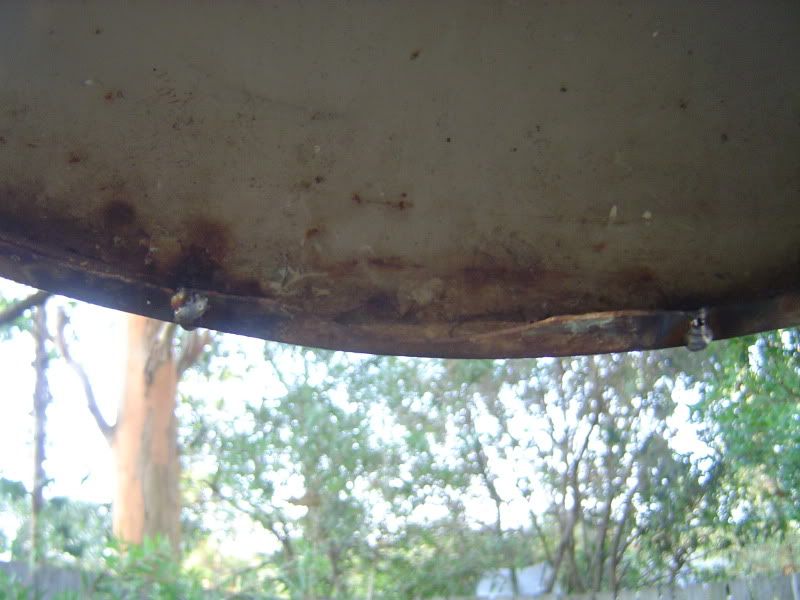
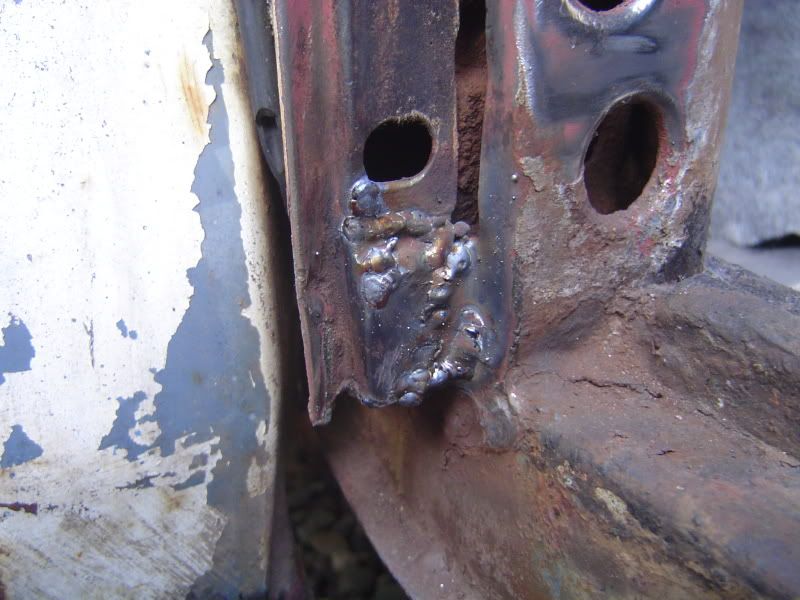
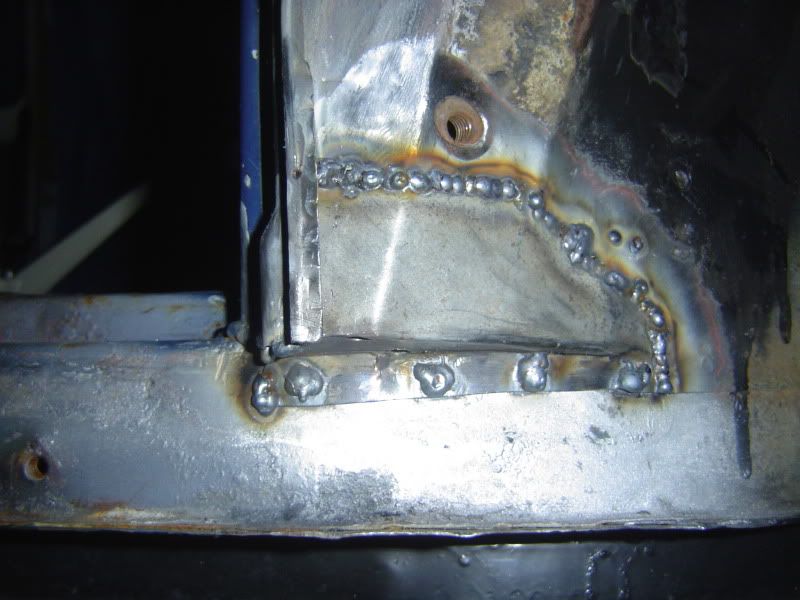
SO so close to doors back on 
madness is in the eye of the beholder  |
|
|
 psimitar psimitar
Son of Jim - Creator of Good
     
Posts: 2506
Threads: 148
Registered: January 1st, 2009
Member Is Offline
Location: North East Melbourne, VIC
Theme: UltimaBB Psyche Blue
|
| posted on January 18th, 2013 at 10:47 PM |
|
|
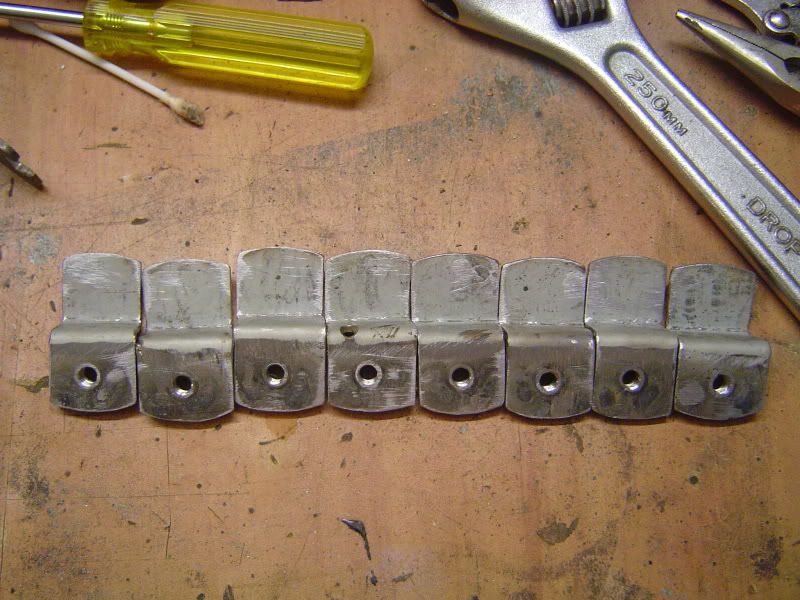
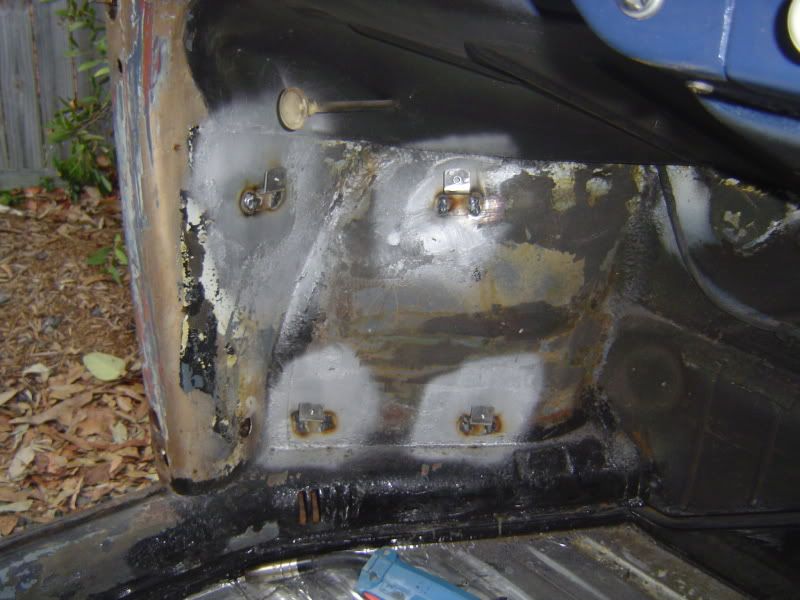
So, made up some little brackets to weld into the footwells for the speaker pods I'll make down the line sometime but whilst I have the gas I'm
getting any welding job I can think of done 
Brackets
Welded into footwell
And the unfortunate bit of rust I found when cleaning round a bolt hole for a good welding ground 
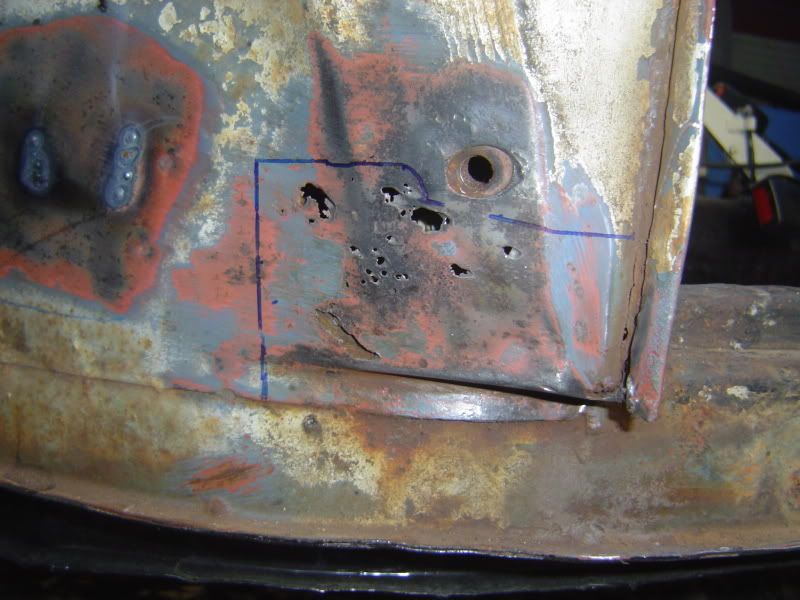
So, another wee repair panel to fab before continuing with the list of jobs for the doors to go on. Will it ever end :confused:
madness is in the eye of the beholder  |
|
|
 psimitar psimitar
Son of Jim - Creator of Good
     
Posts: 2506
Threads: 148
Registered: January 1st, 2009
Member Is Offline
Location: North East Melbourne, VIC
Theme: UltimaBB Psyche Blue
|
| posted on January 21st, 2013 at 12:29 AM |
|
|
Got the repair panel for the passenger front wing welded in today finally after titting about with a small plate on the heater channel to keep the
channel water tight. So the welder didn't like the unclean underside of the metal and took much fettling with the dremel to grind the welds down so
the outer repair could go on.
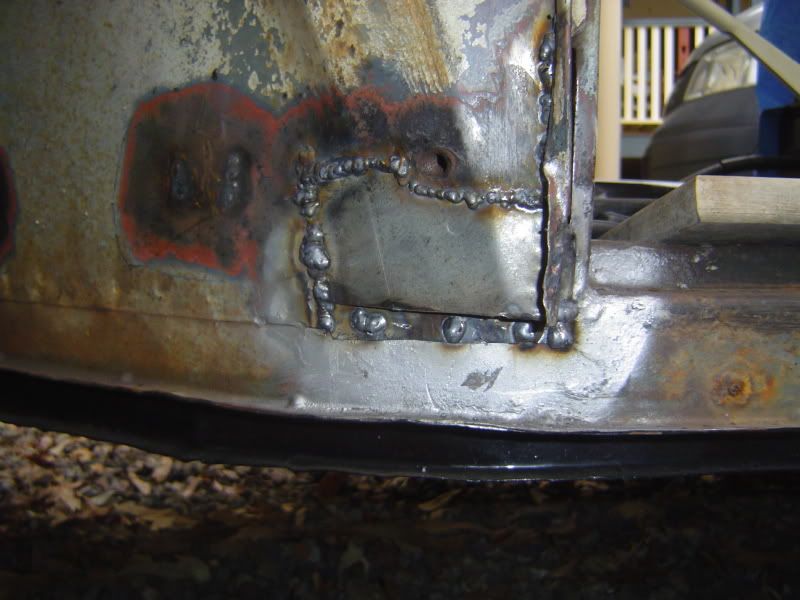
and then decided to bite the bullet and see how bad the lower passenger rear panel was with the awesomely brutal twisted wire cup brush on the
grinder.
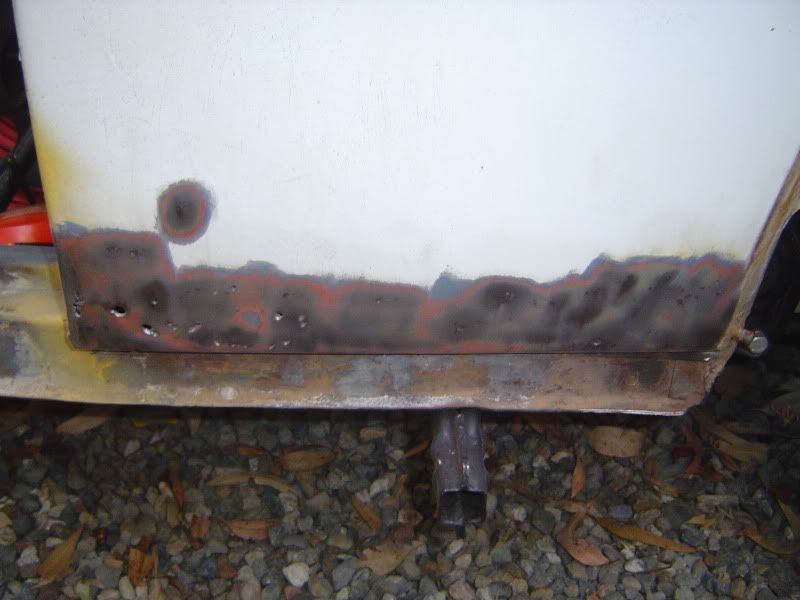
As you can see that cup brush sure shows up any dodgy areas.
Shame as the bottom folded edge is hole free but now means the panel I make has to somehow replicate the drain hole channels that early Beetles came
with. Still, apart from having to wait between stitch welds to stop panel warpage it means this should be pretty quick as a nice large panel to pop in

madness is in the eye of the beholder  |
|
|
 psimitar psimitar
Son of Jim - Creator of Good
     
Posts: 2506
Threads: 148
Registered: January 1st, 2009
Member Is Offline
Location: North East Melbourne, VIC
Theme: UltimaBB Psyche Blue
|
| posted on January 26th, 2013 at 09:18 PM |
|
|
Lower rear arch panel fabrication
So as some tropical cyclone thingy makes it very wet outside so that not even the rust converter has dried after a whole day then I have been
fashioning an accurate replica of the lower rear arch panel.
Here is the efforts of my labour
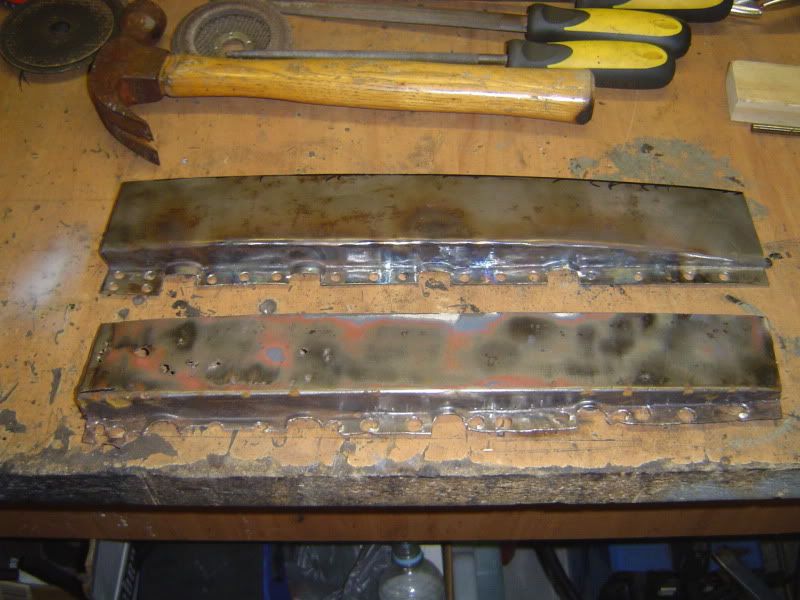
No idea when I can get it on the car as the weather is fully shite for at least the next few days 
madness is in the eye of the beholder  |
|
|
 psimitar psimitar
Son of Jim - Creator of Good
     
Posts: 2506
Threads: 148
Registered: January 1st, 2009
Member Is Offline
Location: North East Melbourne, VIC
Theme: UltimaBB Psyche Blue
|
| posted on February 2nd, 2013 at 11:59 PM |
|
|
Yay!!!!! Last bit of welding on the main body today. Well I can't think of anything else that needs welding 
Anyhow, here's the before and after of the passenger lower rear wing/arch area.
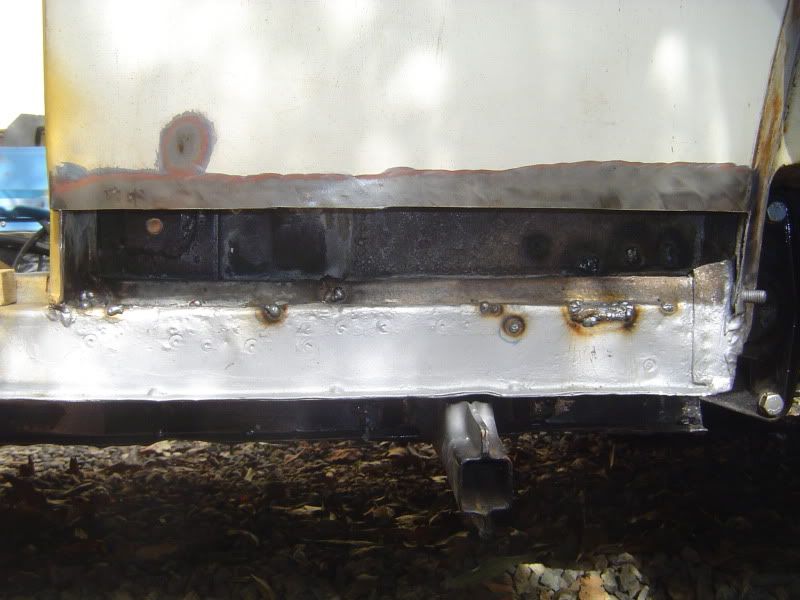
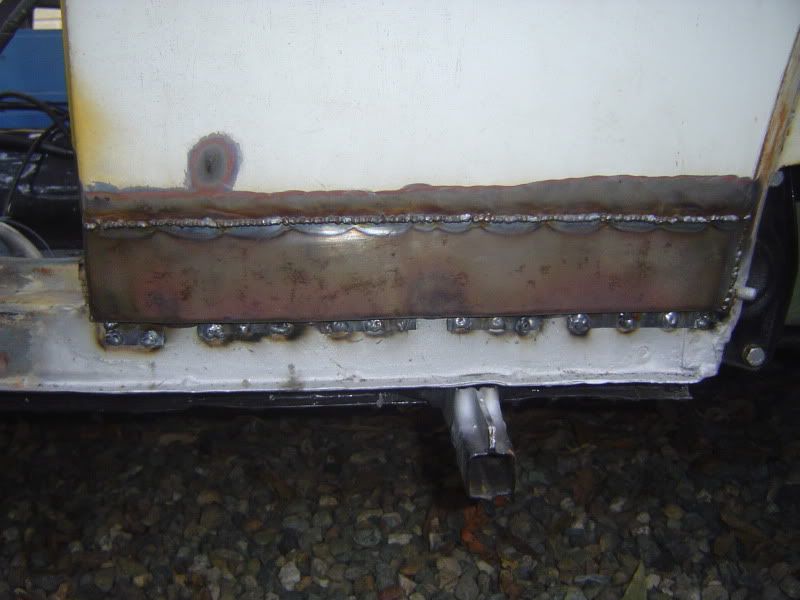
Just a few fixes on the drivers door and hopefully by the end of the weekend the doors will be back on 
But as I was tidying up the welds on the lower rear quarter and when I came to wire brush the pin hole repairs on the inner wing panel I came across
this and so thought best lop it out
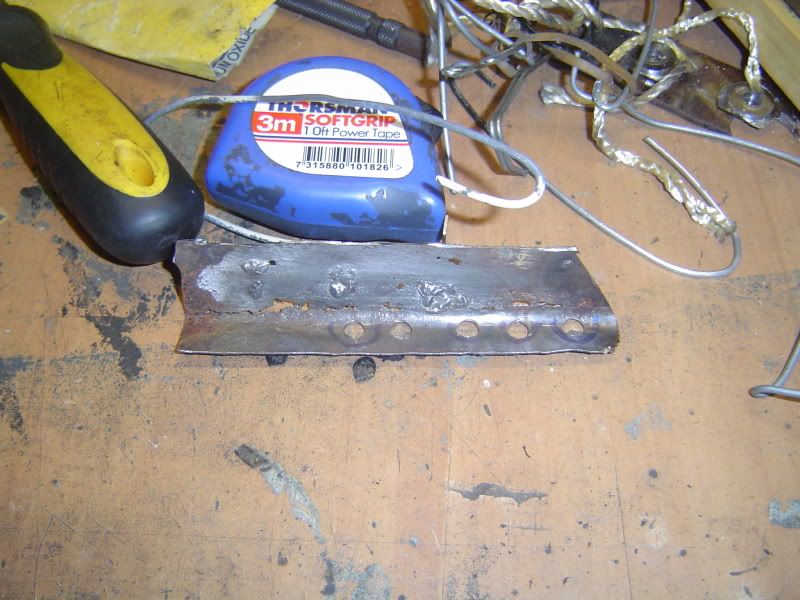
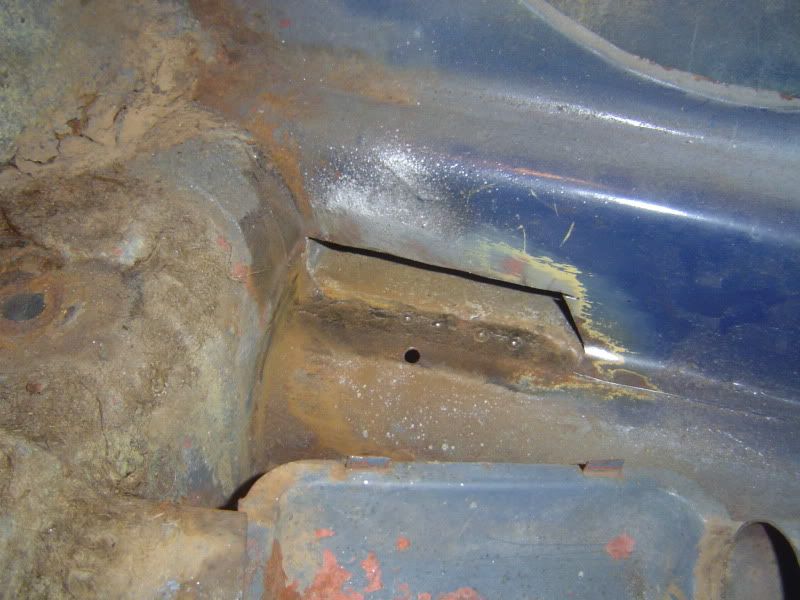
Weld ain't totally flat but it's tricky to get too and it ain't gonna be seen under the seat anyhow :P
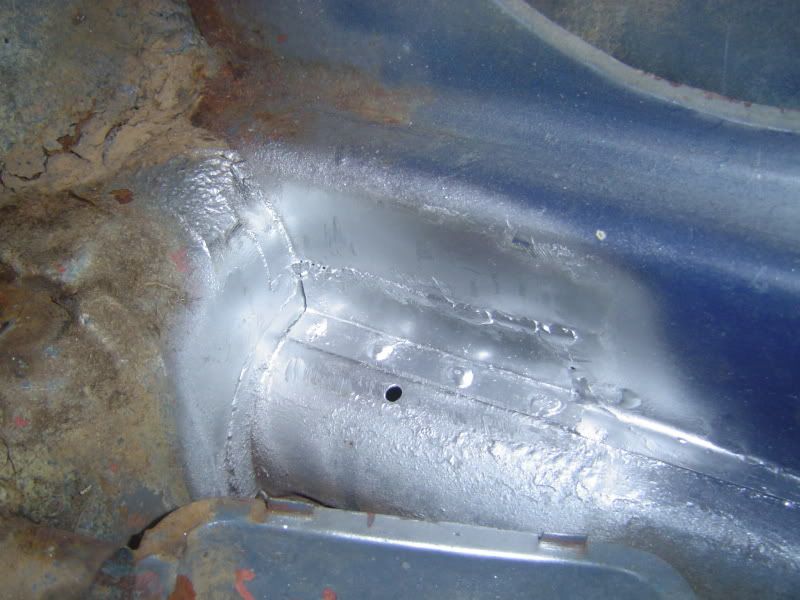
Also vacuumed and washed the floor down so it's all nice and clean for the interior to go in.
Of course as my brain is always on the go and can go from subject to subject so quick I forget what I was originally thinking of. Well basically I
remembered a bit of welding on the drivers footwell that needs grinding. Arg!!! And I just washed and vacuumed the bloody floor  DOH!!!!!! DOH!!!!!!
madness is in the eye of the beholder  |
|
|
 psimitar psimitar
Son of Jim - Creator of Good
     
Posts: 2506
Threads: 148
Registered: January 1st, 2009
Member Is Offline
Location: North East Melbourne, VIC
Theme: UltimaBB Psyche Blue
|
| posted on February 18th, 2013 at 01:15 AM |
|
|
So last weekend I took the engine out so I could put the new engine bay seals in. When I took the engine out I noticed the tinware wasn't looking too
good as it's got a bit wet in all the rain lately and seems the paint weren't very water resistant and looked like this
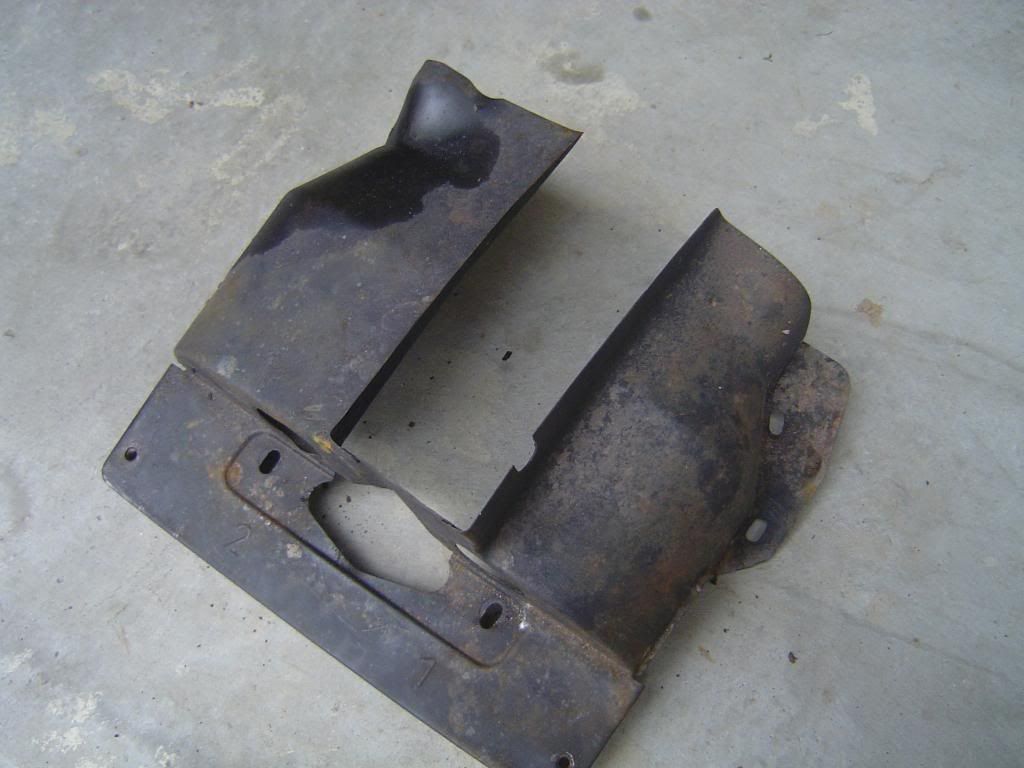
But like this on the dry side
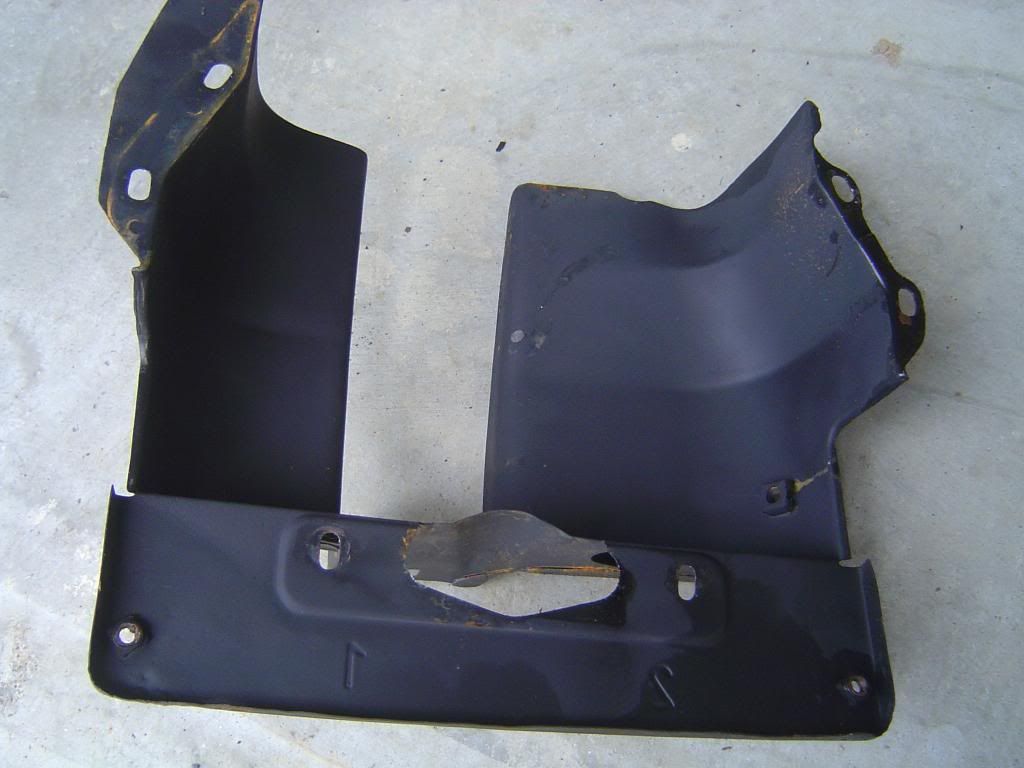
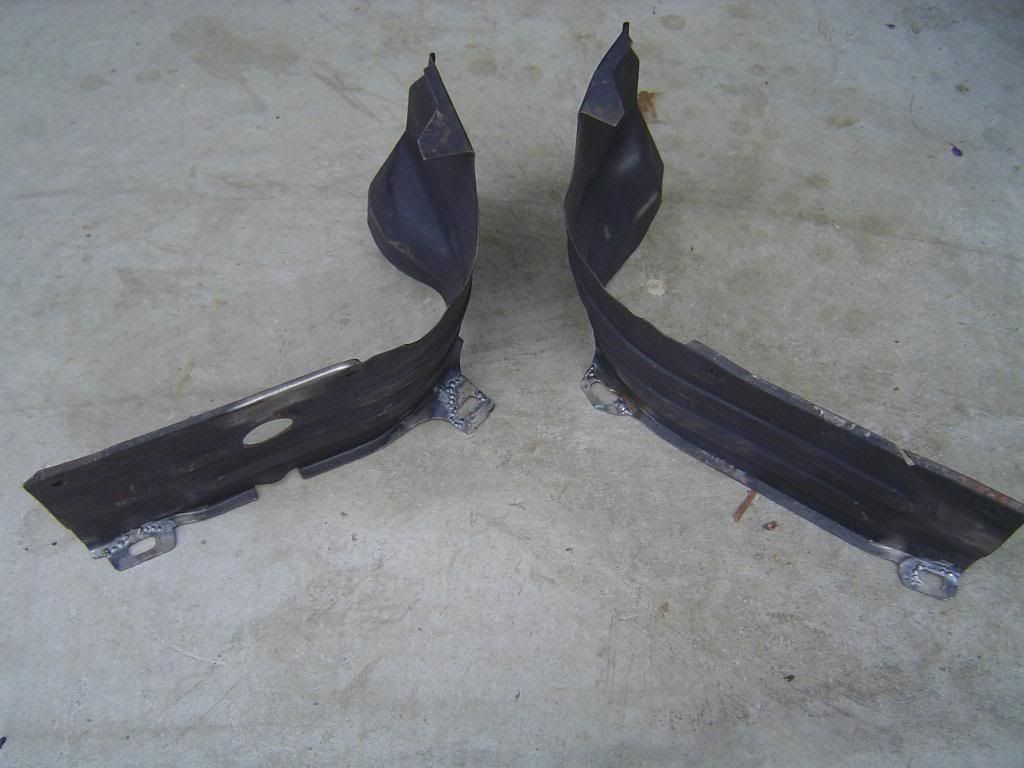
So decided after all the effort to make the engine look nice before I may as well make it look nice again and so out with the wet n dry plus gave me a
chance to fit a mist baffle to the inside of the gen stand and weld up the lower tinware mounting holes
Then taken most the week to prime and paint the tinware and only just about to do last coat on last piece, so had a look at the semi-W decklid I
bought ages ago and found myself glad I only paid $100 for it and a popes nose cos it's 'so called' good condition was rather less than good.
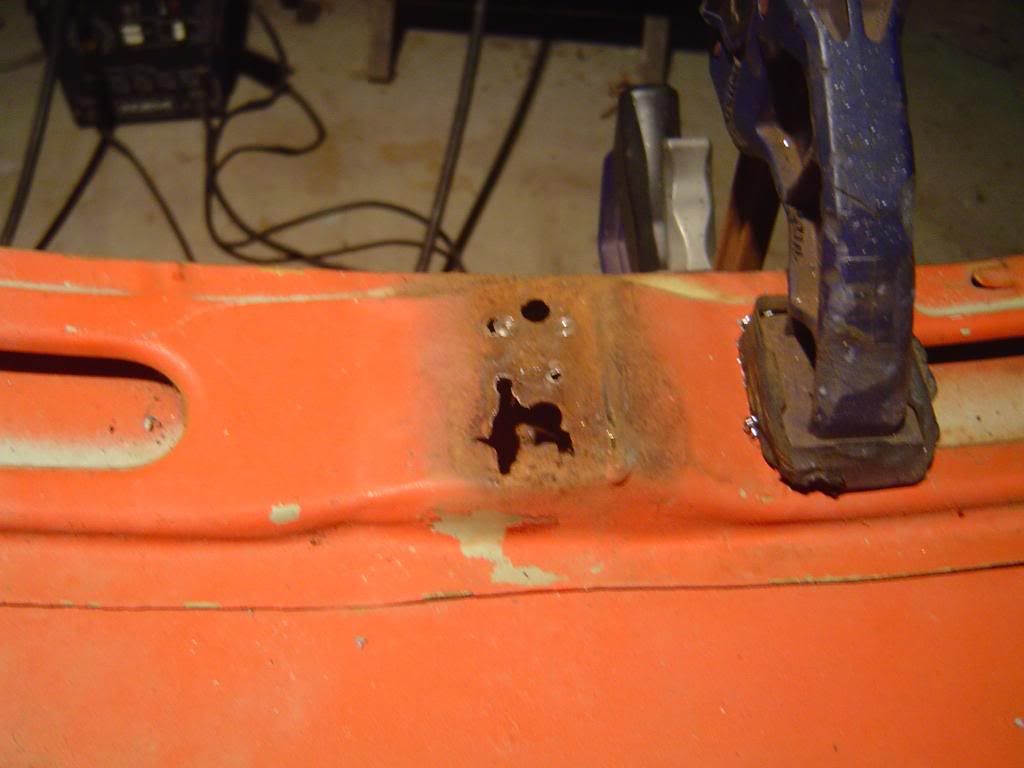
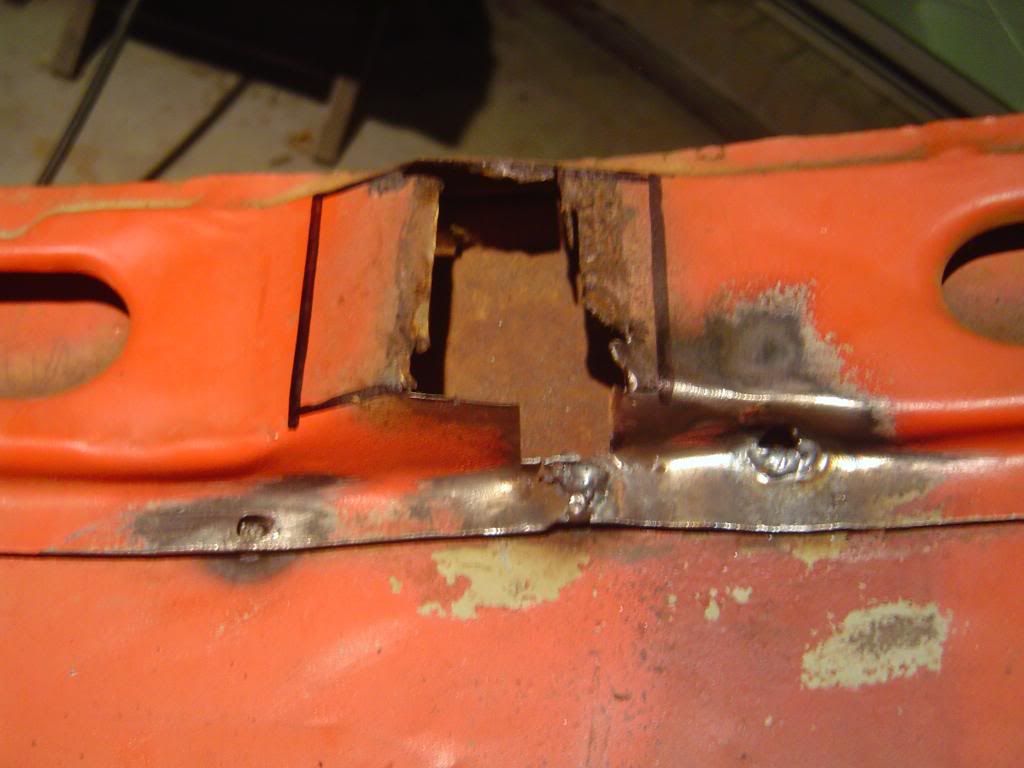
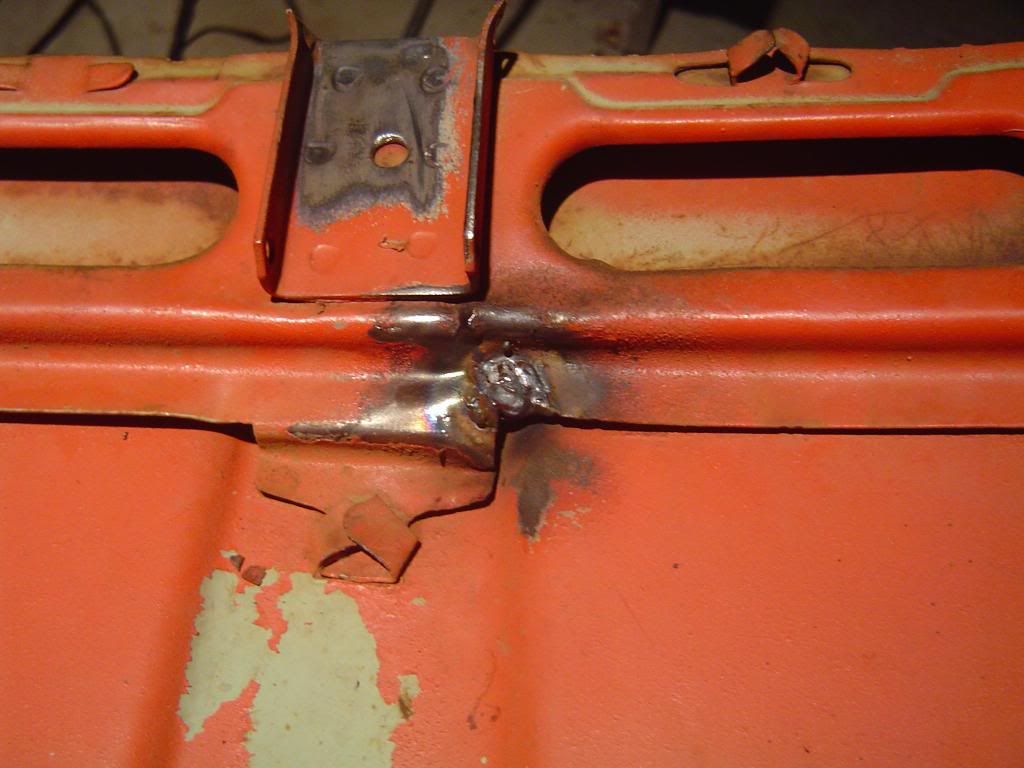
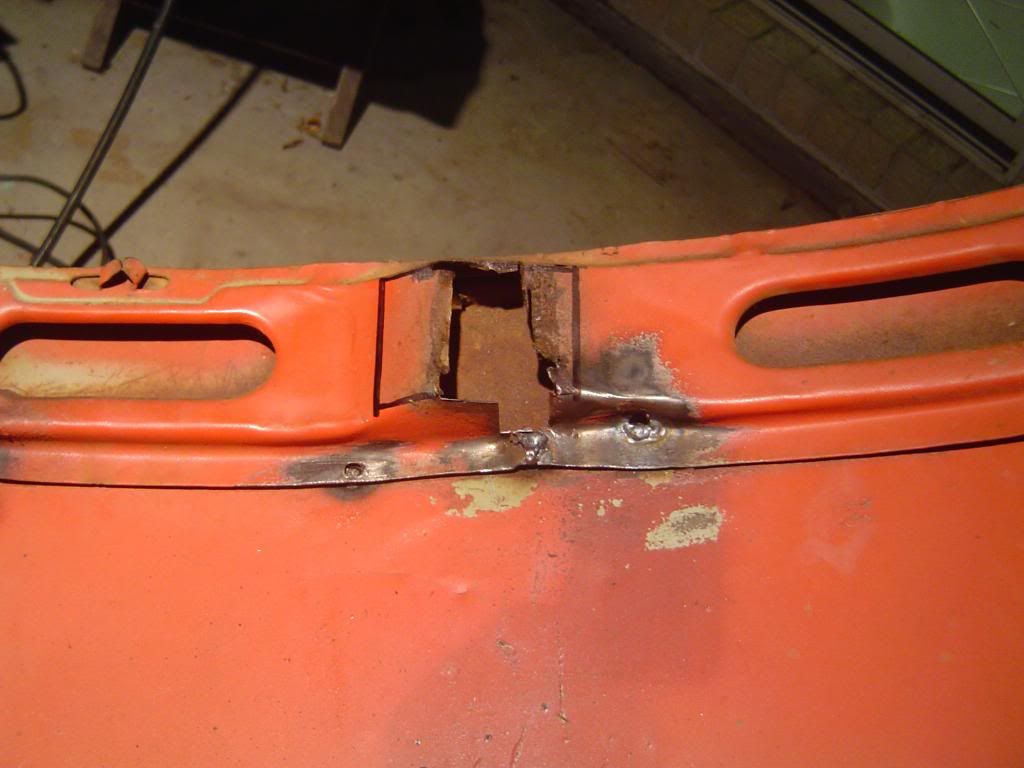
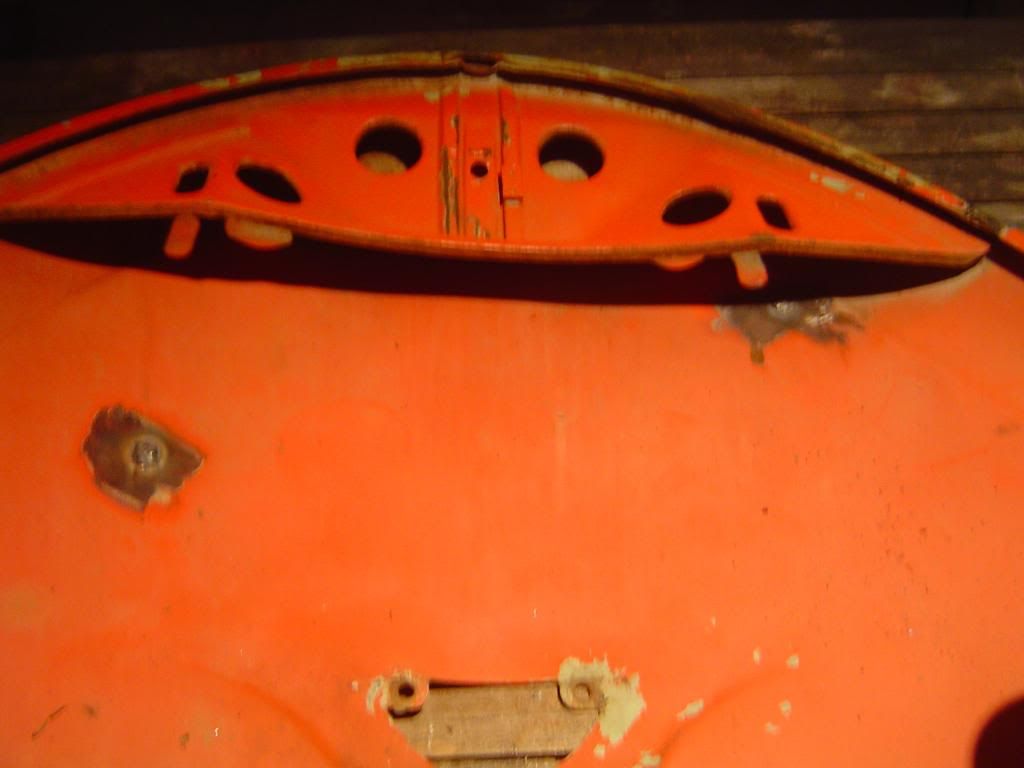
As you can see the hinge areas are pretty bad and the hinges had been brazed in place cos the spotwelded area was so rusty and weak. Then where some
logo had been drilled thru near one hinge area had badly split and torn the support area under the hinge and dented the outer panel inwards. As for
the size of holes drilled for the licence plate were 10mm and also had dented the outer panel. Oh, and the paint used is cracking off in large chunks
so dunno what type of paint it was re-sparyed in during the past 
Next is engine back in so can move her back to resting place whilst 2 wheels are removed so the valve stem holes can be welded smaller for modern
valves. 
madness is in the eye of the beholder  |
|
|
 psimitar psimitar
Son of Jim - Creator of Good
     
Posts: 2506
Threads: 148
Registered: January 1st, 2009
Member Is Offline
Location: North East Melbourne, VIC
Theme: UltimaBB Psyche Blue
|
| posted on February 28th, 2013 at 01:12 AM |
|
|
Been a slow week of fixing the Beetle but have managed to weld up the oversized valve holes in the wide 5 steels and re-drilled ready for modern size
valves. No pics of that as forgot and not all that amazing.
However I have finished repairing the semi-W decklid 
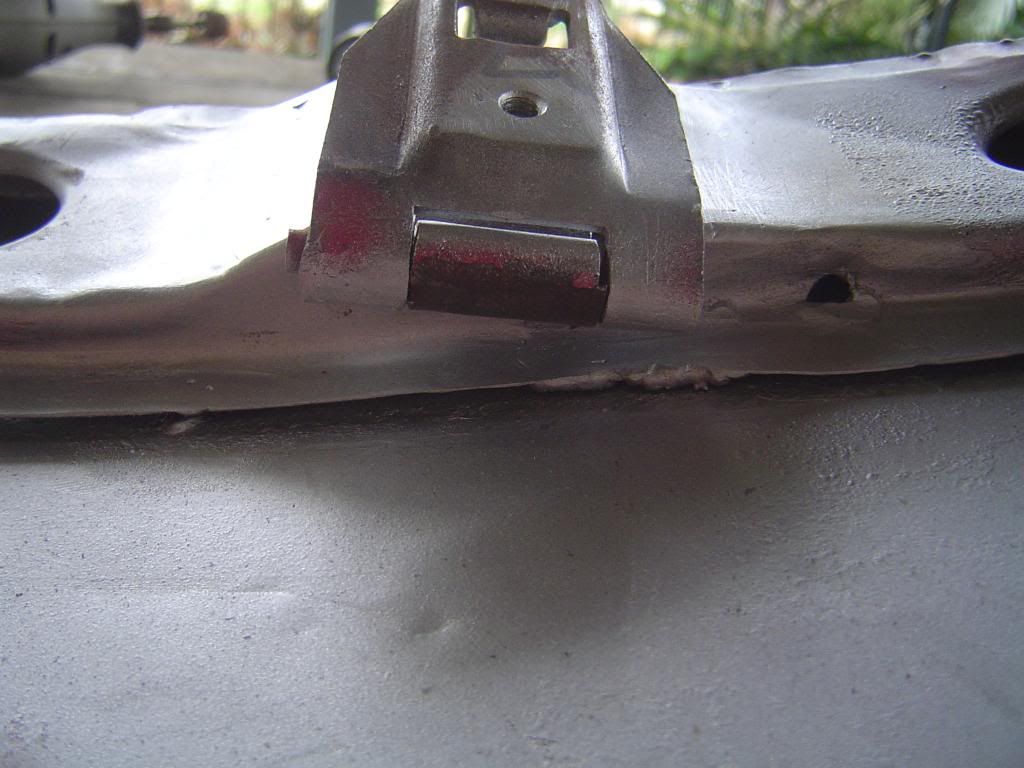
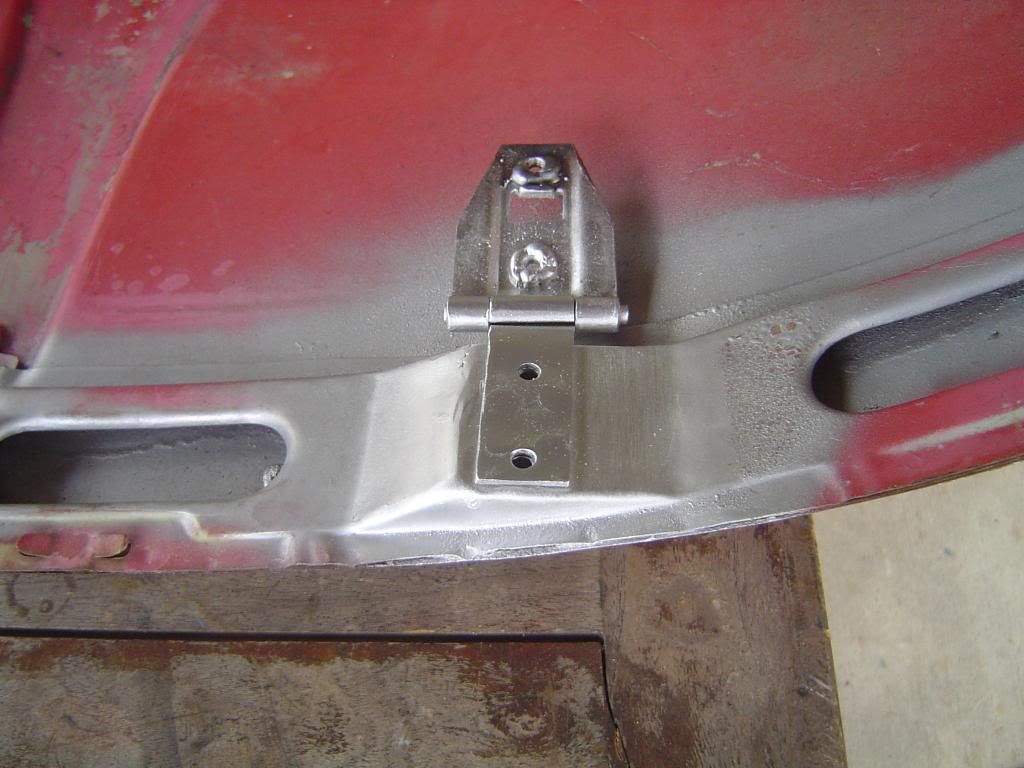
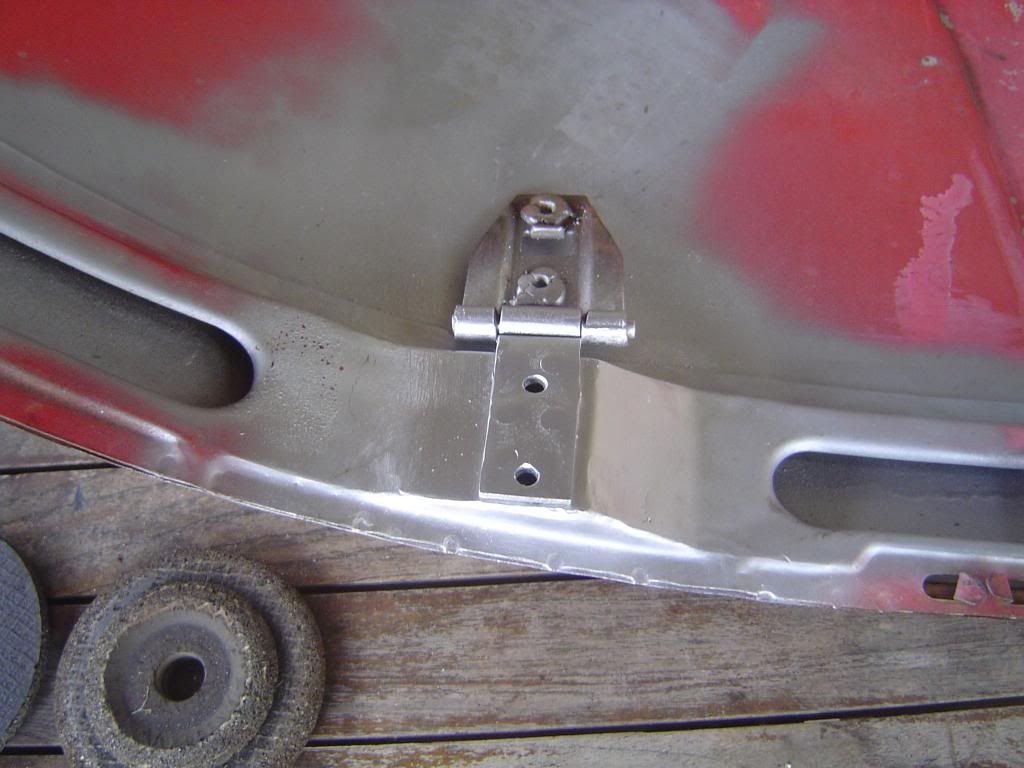
Nice solid metal again plus by using my blowtorch method to pre-heat the metal I got good plug weld penetration using 6mm holes in the hinges. 
Gotta make up some steering stops due to tyre rub at full lock, and that's a no no. So one welded to the framehead and the other to the beam upright
by the steer box.
Just trying to get some steel organised for the shortened subaru sump and reckon I may make me own running boards as I can't be arsed phoning around
the Oz VW shops to see if they sell quality ones and not cheap mexican ones. Then the welding gas can be returned 
madness is in the eye of the beholder  |
|
|
 matberry matberry
Super Moderator
Go hard or go home
      
Posts: 8114
Threads: 134
Registered: March 7th, 2006
Member Is Offline
Location: Cooroy Qld
Theme: UltimaBB Pro Blue
Mood: enjoying waving at all my Kombi buddies from my T3
|
| posted on February 28th, 2013 at 09:22 AM |
|
|
For your steering stops, if your still running K/L with stock stubs, fit longer bolts into the fwd backing plate mounting hole and adjust it;s length
accordingly.
Matt Berry Motorsports...air cooled advice, repairs and mods Ph 0408 704 662
OFF-ROAD,CIRCUIT,DRAG,STREET,ENDURANCE
 |
|
|
 psimitar psimitar
Son of Jim - Creator of Good
     
Posts: 2506
Threads: 148
Registered: January 1st, 2009
Member Is Offline
Location: North East Melbourne, VIC
Theme: UltimaBB Psyche Blue
|
| posted on February 28th, 2013 at 10:59 PM |
|
|
| Quote: | Originally
posted by matberry
For your steering stops, if your still running K/L with stock stubs, fit longer bolts into the fwd backing plate mounting hole and adjust it;s length
accordingly.
|
Matt, you're awesome  Thanks for pointing that out. Saved me a fair bit
of work there Thanks for pointing that out. Saved me a fair bit
of work there 
madness is in the eye of the beholder  |
|
|
 psimitar psimitar
Son of Jim - Creator of Good
     
Posts: 2506
Threads: 148
Registered: January 1st, 2009
Member Is Offline
Location: North East Melbourne, VIC
Theme: UltimaBB Psyche Blue
|
| posted on March 2nd, 2013 at 08:41 PM |
|
|
Shortened Subaru sump
So one of last big jobs b4 the gas bottle is returned is shortening the sump on the EJ22 motor.
Here's the first stage of welding tube over the bolt holes. Bit of a different approach as pushing the outer skin to the edge of the sump gives
1/2litre of volume so the wings don't have to be so big and the sump can be shallower.
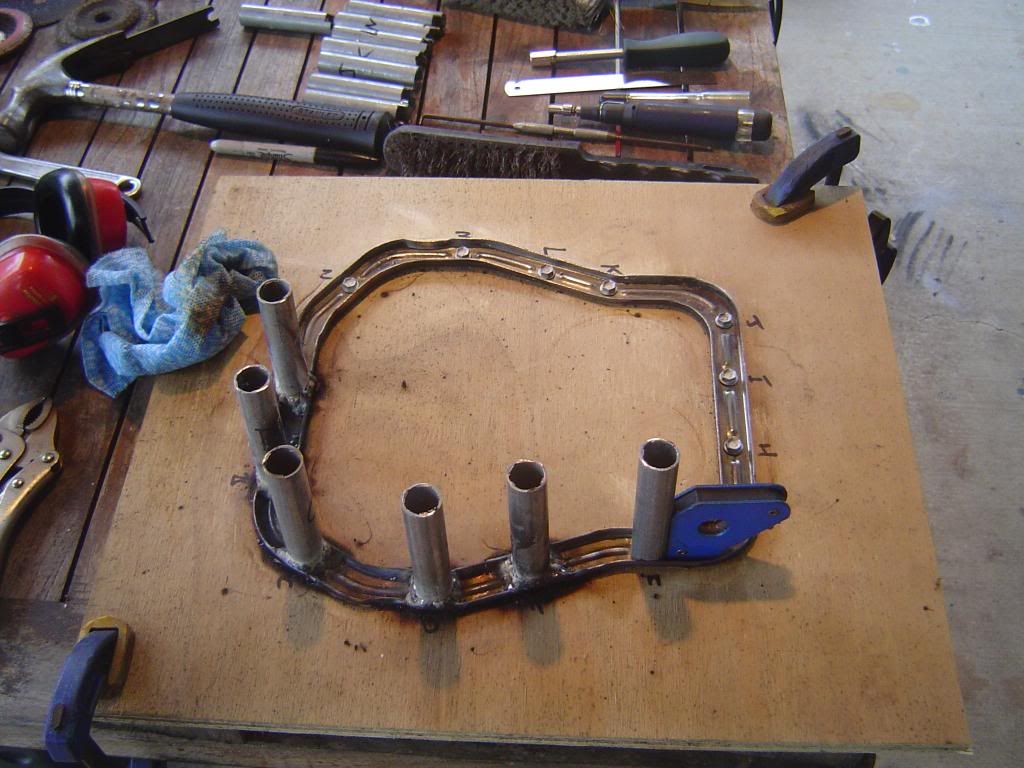
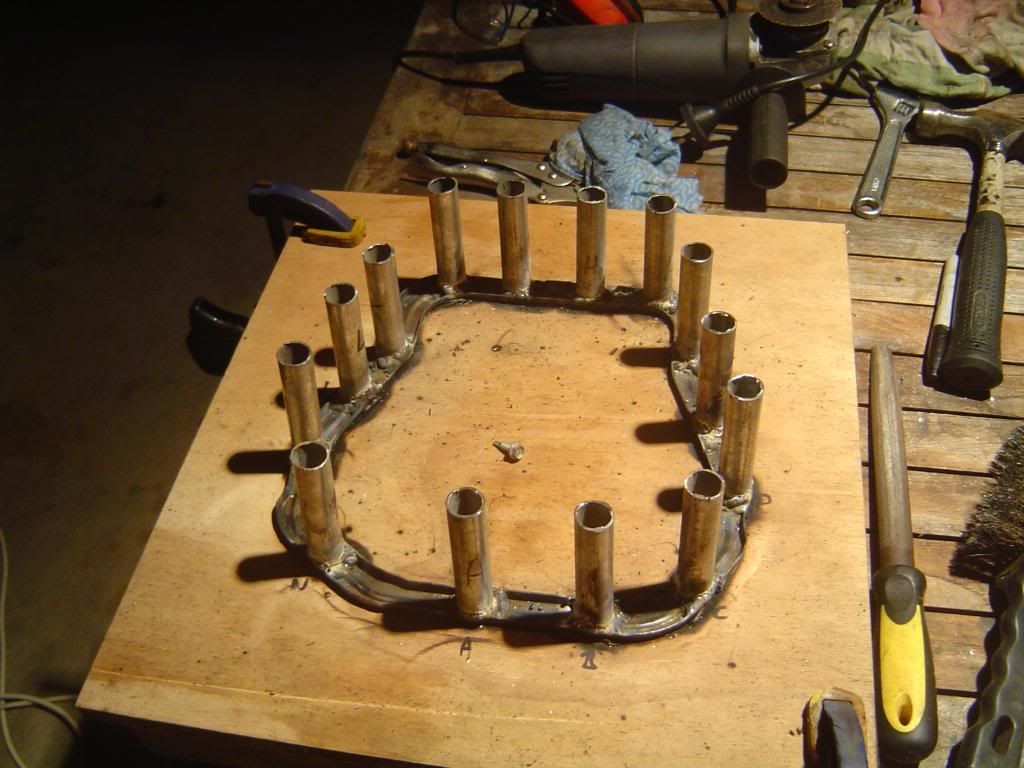
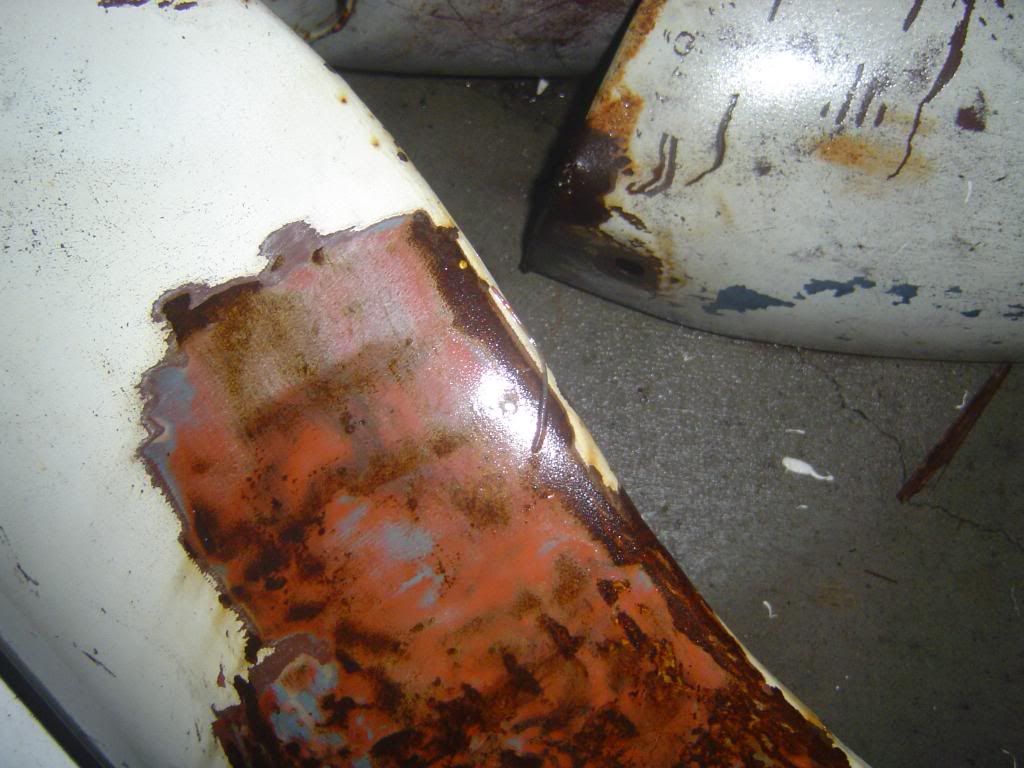
And a new meaning to the term 'tinworm' 
Thanks to Matt Berry I don't need to make steering stops now as longer bolts in the front backplate hole will act as a stop on the LP steering
knuckles 
madness is in the eye of the beholder  |
|
|
 psimitar psimitar
Son of Jim - Creator of Good
     
Posts: 2506
Threads: 148
Registered: January 1st, 2009
Member Is Offline
Location: North East Melbourne, VIC
Theme: UltimaBB Psyche Blue
|
| posted on March 20th, 2013 at 02:11 AM |
|
|
The EJ22 sump is nearly done
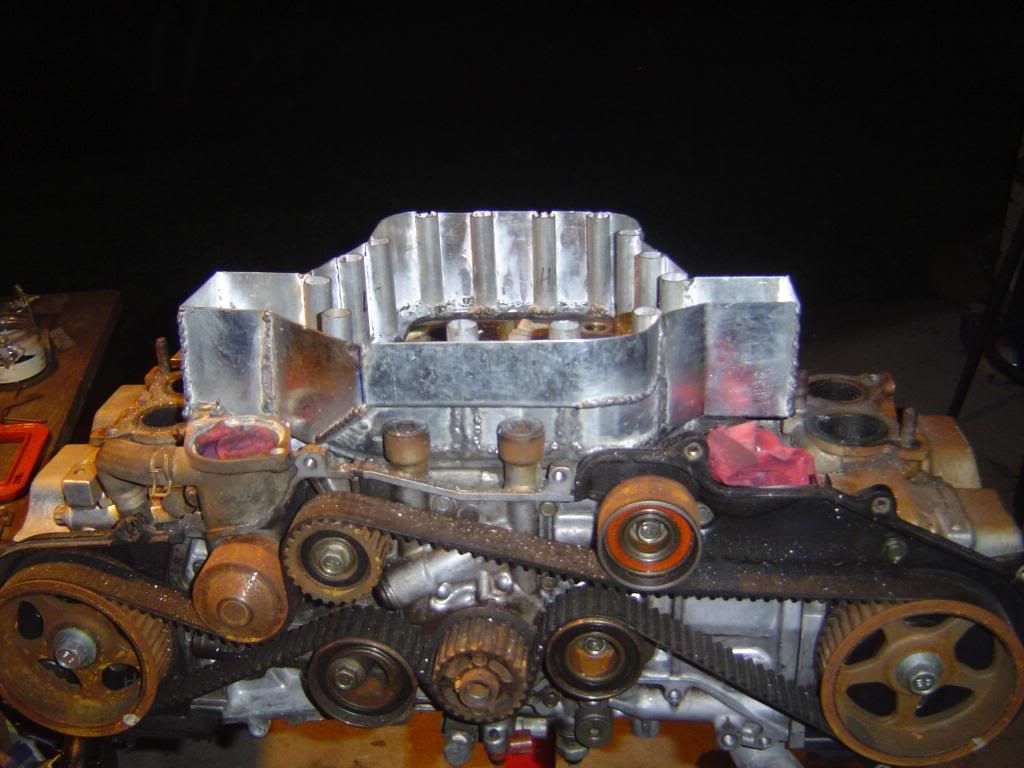
Baffle plate and bottom plate to go 
madness is in the eye of the beholder  |
|
|
 psimitar psimitar
Son of Jim - Creator of Good
     
Posts: 2506
Threads: 148
Registered: January 1st, 2009
Member Is Offline
Location: North East Melbourne, VIC
Theme: UltimaBB Psyche Blue
|
| posted on March 20th, 2013 at 02:13 AM |
|
|
So a few updates of the shortened sump.
Sizing up the pick up pipe for shortening
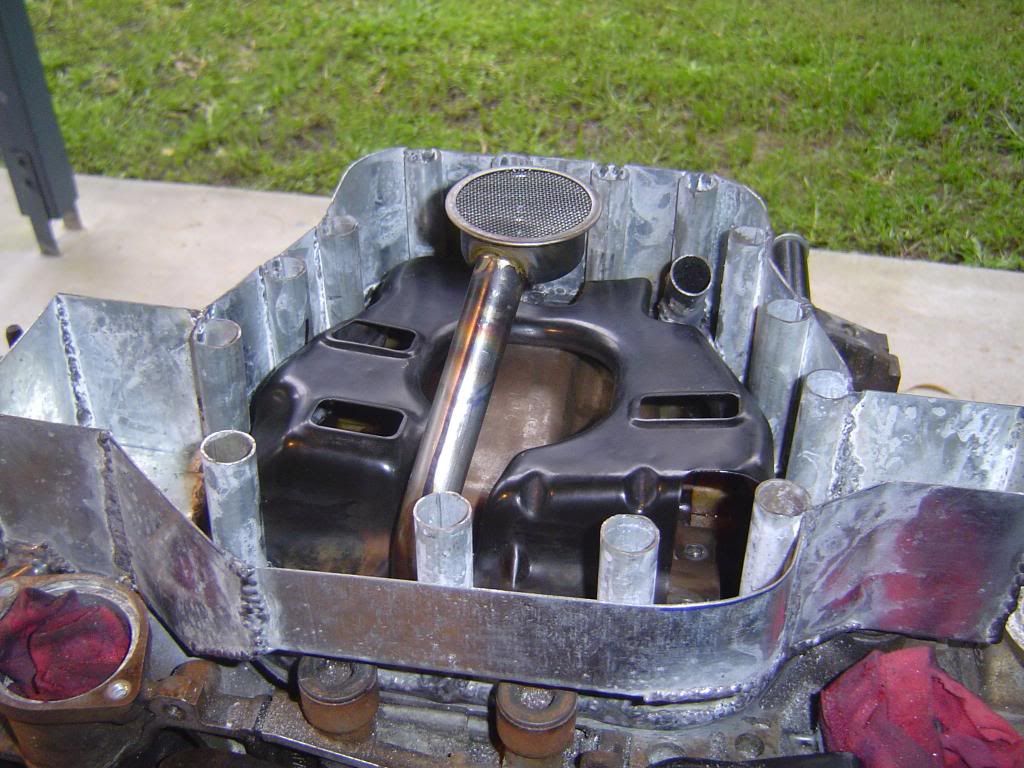
Baffle plate welded in
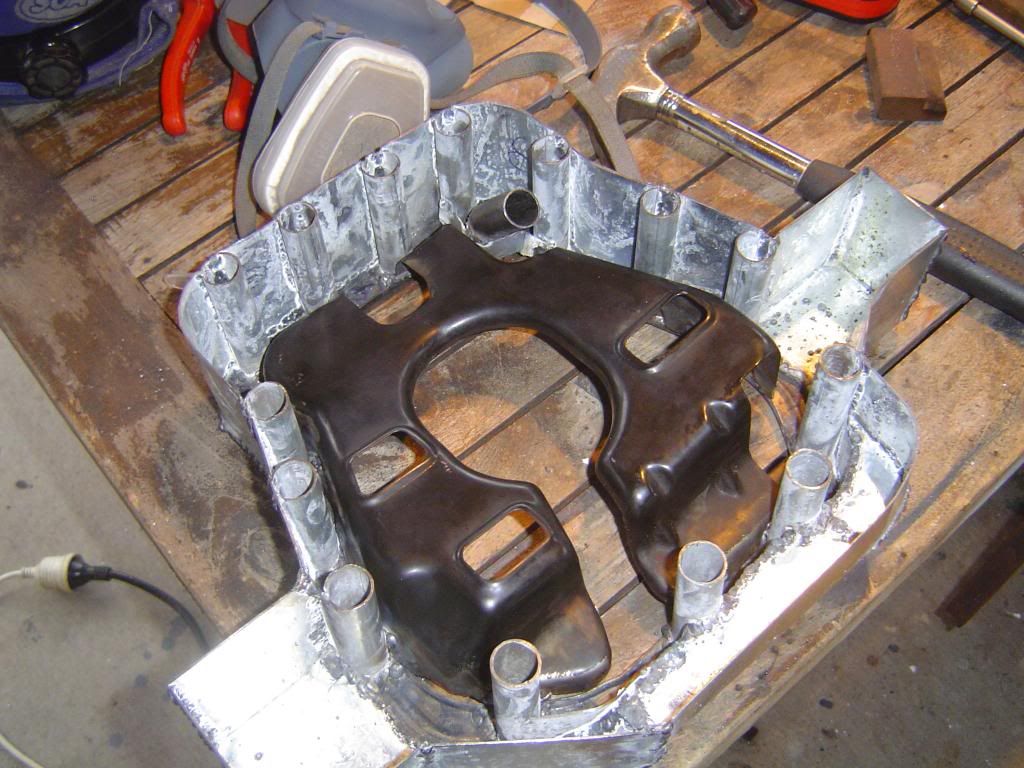
And the pick up pipe and support bracket shortened and welded up
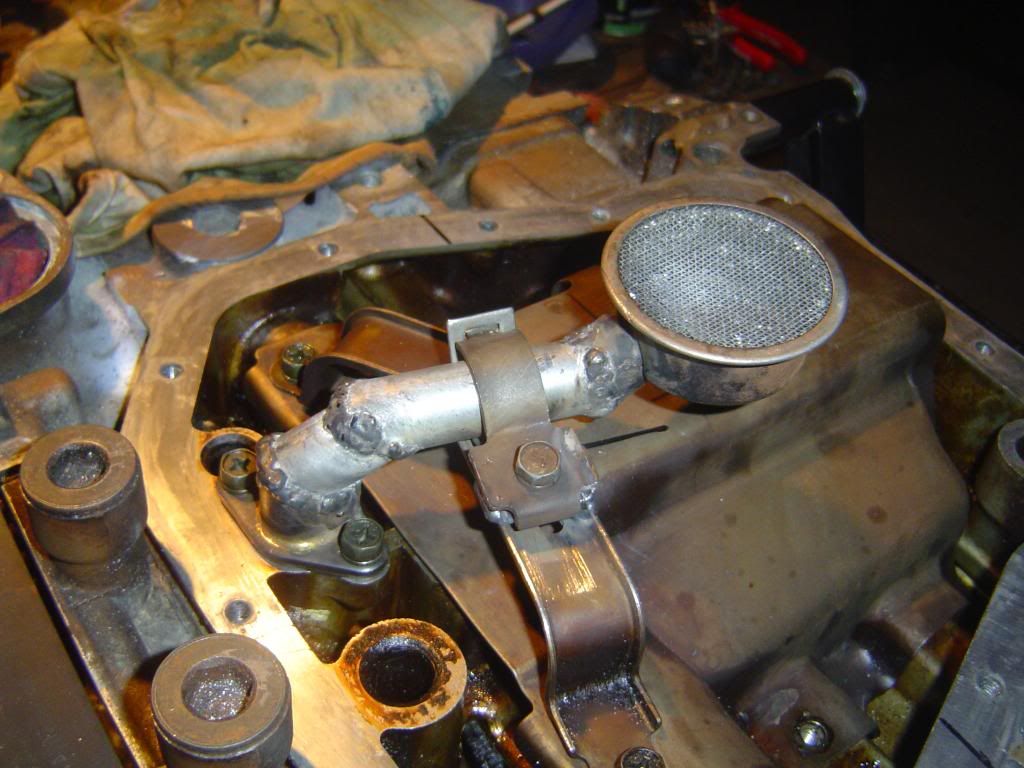
madness is in the eye of the beholder  |
|
|
 psimitar psimitar
Son of Jim - Creator of Good
     
Posts: 2506
Threads: 148
Registered: January 1st, 2009
Member Is Offline
Location: North East Melbourne, VIC
Theme: UltimaBB Psyche Blue
|
| posted on March 20th, 2013 at 02:14 AM |
|
|
Got the sump finished for the EJ22. Do wish I had a TIG welder tho as the MIG has a habit of leaving a few pinhead holes here and there even tho the
welds look complete. So bit tricky plugging them up. Seems to be watertight now tho 
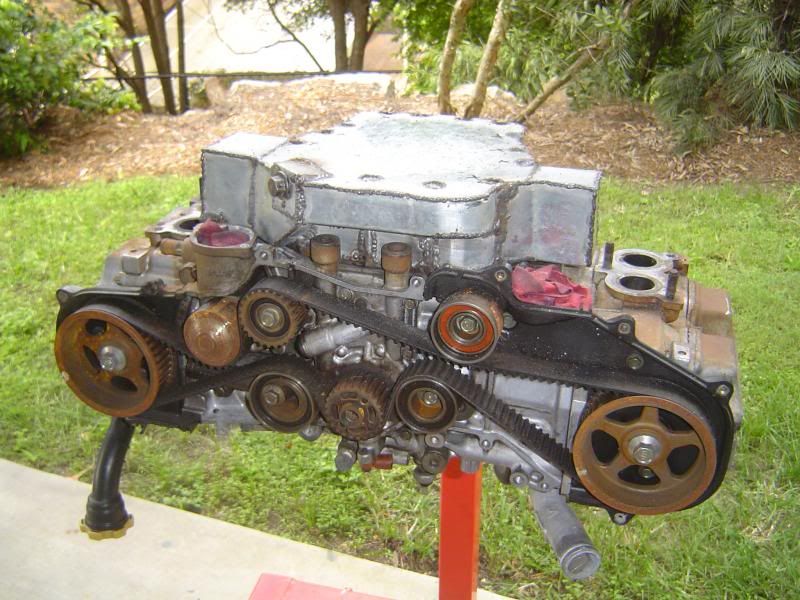
Next is to make up some running boards.
madness is in the eye of the beholder  |
|
|
 psimitar psimitar
Son of Jim - Creator of Good
     
Posts: 2506
Threads: 148
Registered: January 1st, 2009
Member Is Offline
Location: North East Melbourne, VIC
Theme: UltimaBB Psyche Blue
|
| posted on March 20th, 2013 at 02:15 AM |
|
|
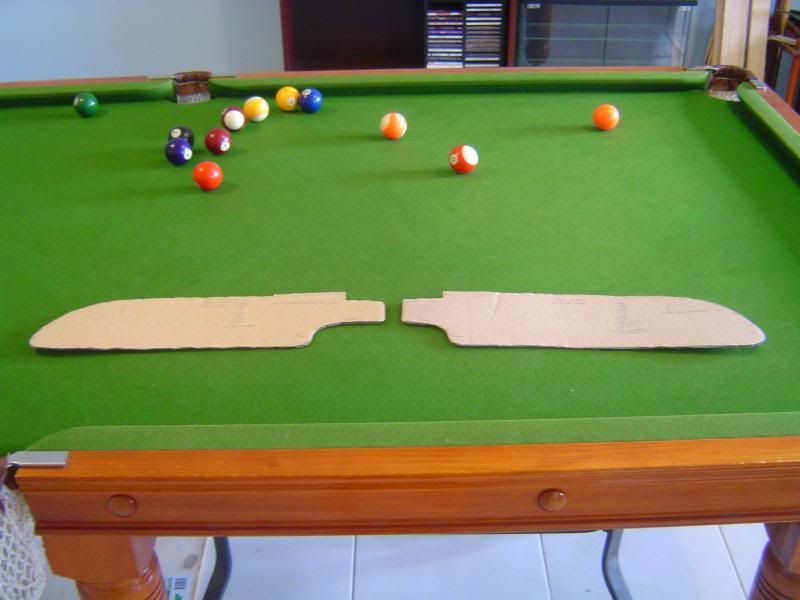
So after the dosy gardener threw a few things out whilst I was overseas I'm now making new sunvisors in the fashion they were originally made back in
the early 60's.
So make up some cardboard templates of how I want them to look. Closely fitted to the rear view mirror to minimise sun creeping past
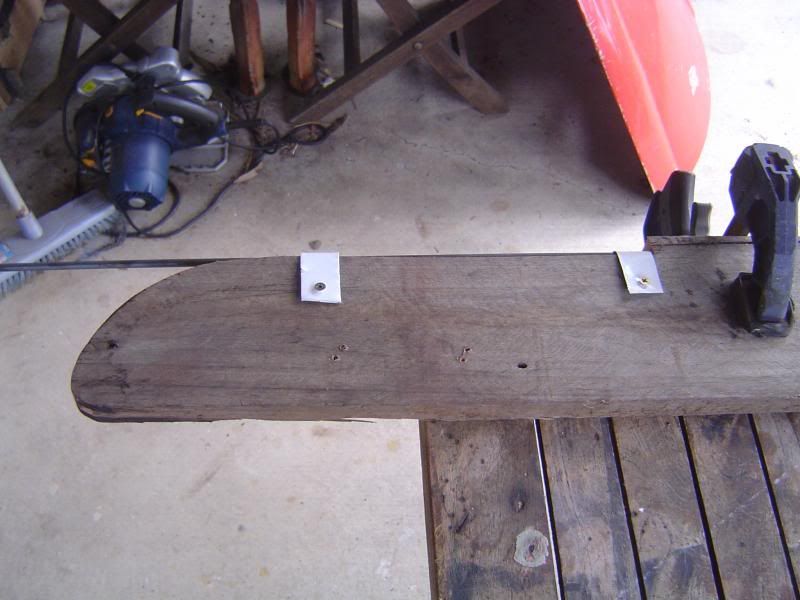
Then make up a hardwood former of the main curve of the visors.
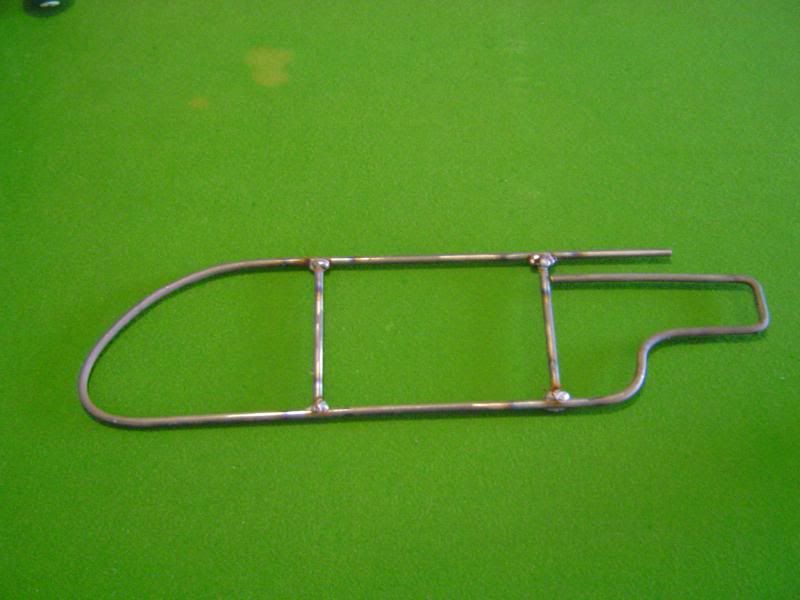
Then bend some 6mm steel rod around the former plus some varying diameter bars for the tighter curves and hey presto
Gonna weld a plate into the passenger side so I can stick a mirror in there. Modern touches to an old car 
Also started on the DIY running boards and bending the outside edge 180degrees back on itself worked out quite well 
Me Birthday tomoro and then away for rest of week so more next week 
madness is in the eye of the beholder  |
|
|
 matberry matberry
Super Moderator
Go hard or go home
      
Posts: 8114
Threads: 134
Registered: March 7th, 2006
Member Is Offline
Location: Cooroy Qld
Theme: UltimaBB Pro Blue
Mood: enjoying waving at all my Kombi buddies from my T3
|
| posted on March 20th, 2013 at 08:23 AM |
|
|
Getting there mate, hope your sump is also oil tight, those MIG welds can be sneaky  
Matt Berry Motorsports...air cooled advice, repairs and mods Ph 0408 704 662
OFF-ROAD,CIRCUIT,DRAG,STREET,ENDURANCE
 |
|
|
 psimitar psimitar
Son of Jim - Creator of Good
     
Posts: 2506
Threads: 148
Registered: January 1st, 2009
Member Is Offline
Location: North East Melbourne, VIC
Theme: UltimaBB Psyche Blue
|
| posted on March 20th, 2013 at 10:30 PM |
|
|
| Quote: | Originally
posted by matberry
Getting there mate, hope your sump is also oil tight, those MIG welds can be sneaky  
|
I know. Darn Mig Welds  I was gonna paint the entire thing in KBS as it is
hardy and oil resistant. If I had the spare cash I'd powder coat it but for all those welds I only had 5 little points that leaked so pretty good
really I was gonna paint the entire thing in KBS as it is
hardy and oil resistant. If I had the spare cash I'd powder coat it but for all those welds I only had 5 little points that leaked so pretty good
really 
madness is in the eye of the beholder  |
|
|
| Pages: 1 .. 5 6 7 8 |