| [ Total Views: 8000 | Total Replies: 57 | Thread Id: 98381 ] |
| Pages: 1 2 |
|
|
 nils nils
Fahrvergnugen
   
Posts: 971
Threads: 65
Registered: January 11th, 2008
Member Is Offline
Location: central coast
Theme: UltimaBB Pro Blue ( Default )
|
| posted on August 15th, 2012 at 08:36 PM |
|
|
subi engine and g'box - start to finish
I see alot of questions on how to do subi conversions and what problems arise, and how to wire them, and, and,and. It seems there are alot of people
interested in doing these conversions, but not as many actually posting up there work. What I will try to do is go though the whole conversion, step
by step (making mistakes along the way i'm sure, because this is the first time for me too) I'm hoping plenty of more knowledgable people to chime
in and point plenty of people to lots of online material to help.
I'll be fabbing plently of my own bits and will add designs and measurements for all to copy and add costs the best I can, because I know this is
often the BIG question with this kind of thing.
My conversion will be for a baja, so there are alot of things that would have to be different for those would still have an engine bay, but the
basics are the same.
Lets get started, doner cars come in different shapes and sizes, but the 1990- 94 liberty EJ22 seems to be the easiest base so thats where I am
starting. There is alot of talk of "low km" cars, I really don't believe it. The EJ22 may be a massive technical step forward compared to the vw,
but it is still 20 years old now, I find it hard to beleive there are that many examples that have only travelled 150k in that time and at the end of
the day highway km are still better than town km. You can tell if a car has been looked after or abused, go with your gut feeling on this one, at the
end of the day you can buy another engine on ebay for $400. The bits you really need are in the car itself, Dont get too hung up on km. Secondly, try
not to get to caught up on a bargain that is too far away, I looked at dozens of cars online, but the bottom line was once you add frieght, petrol,
trailer hire, time ect. it's not a bargain anymore. There are more of these this around than beetles these day's. you'll find a good one around the
corner. Got mine 13km from my place 
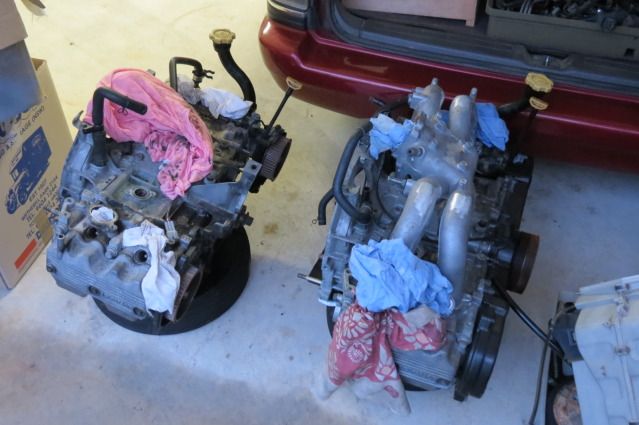
And here it is, 370k on the clock but as you can see very well loved in a past life, there is a mass of new parts on this car. Story is the head
gasket finally gave in after a long life, the owner bought a newer one for a wrecker, had the belts water pump and tensioner replaced. then decided
putting it in was more than they could handle and bought a new subi instead. So I got a running engine and one to rebuild (and cam, and port ) for later. ) for later.
plus saved me the trouble of taking the engine out

Tally so far?
car $600
trailer hire $67
Quit calling rust patina
|
|
|
 bugzla bugzla
Custom Title Time!
    
Posts: 1164
Threads: 240
Registered: June 9th, 2007
Member Is Offline
Location: townsville
Theme: UltimaBB Pro Blue ( Default )
Mood: always happy
|
| posted on August 15th, 2012 at 08:53 PM |
|
|
awesome cant wait to see the whole thing good on ya
|
|
|
 1303Steve 1303Steve
A.k.a.: Steve Carter
Scirocco Rare
        
Posts: 8650
Threads: 564
Registered: August 27th, 2002
Member Is Offline
Location: Sydney, NSW
Theme: UltimaBB Pro Blue ( Default )
Mood: Parrot Heading
|
| posted on August 15th, 2012 at 08:59 PM |
|
|
Hi
Good idea but maybe this should be in the "non VW engine conversion" section.
Good luck with the conversion
Steve
|
|
|
 11CAB 11CAB
Compulsive Aussie Vee Dubber
If ya got it....Baja it
      
Posts: 4674
Threads: 321
Registered: August 30th, 2002
Member Is Offline
Location: Brisbane Northside
Theme: UltimaBB Pro Blue
Mood: Beach'n
|
| posted on August 15th, 2012 at 09:29 PM |
|
|
Good to see Nils. I picked up a 92 Liberty with 297,000km. I've since picked up an Exhaust system that was built for a Baja, complete with stainless
muffler cheap, and an RJES bellhousing. I'm planning on doing the wiring loom myself.
65 Meyers Manx
68 Country Buggy (KO 367)
68 Country Buggy (KO 669)
68 Country Buggy (KO 789)
68 Country Buggy (KO 815)
68 Baja Bug
76 Baja Kombi Twincab
|
|
|
 nils nils
Fahrvergnugen
   
Posts: 971
Threads: 65
Registered: January 11th, 2008
Member Is Offline
Location: central coast
Theme: UltimaBB Pro Blue ( Default )
|
| posted on August 17th, 2012 at 12:08 PM |
|
|
Terry's old system, yeah? That had a nice note.
Will wire it myself and i hope to show people that it isn't scary at all, as well as shorten the sump, reverse the throttle body and mount the
radiator and heating. like I said i will add measurements and plans and web based referance for as much as I can. Hopefully help some folks out with
there own. probably a 6 month job i hope
Quit calling rust patina
|
|
|
 nils nils
Fahrvergnugen
   
Posts: 971
Threads: 65
Registered: January 11th, 2008
Member Is Offline
Location: central coast
Theme: UltimaBB Pro Blue ( Default )
|
| posted on August 18th, 2012 at 09:09 PM |
|
|
Tore the dash, bumper, headlights and gaurds off during the week to get ready to dive in head first today,
here is the work guide I am using as a referance and will save me a HUGE amount of wrighting in this thread.
www.shoptalkforums.com/viewtopic.php?f=19&t=136053
there are not alot of changes that I have found between the us and aussie model, all the wires you need are still in the left hand side and the centre
loom (there is no good reason to take off the drivers side guard that I have found) Only thing in the driverside loom is one of the fan wires, so just
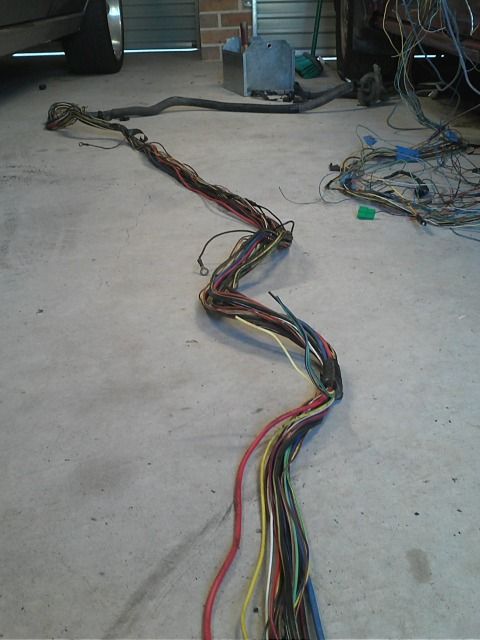
cut the fans off and start again just as outlined in the link above. Here is the pile of wires that i ended up with, actually the alternated sub loom
is not in this picture
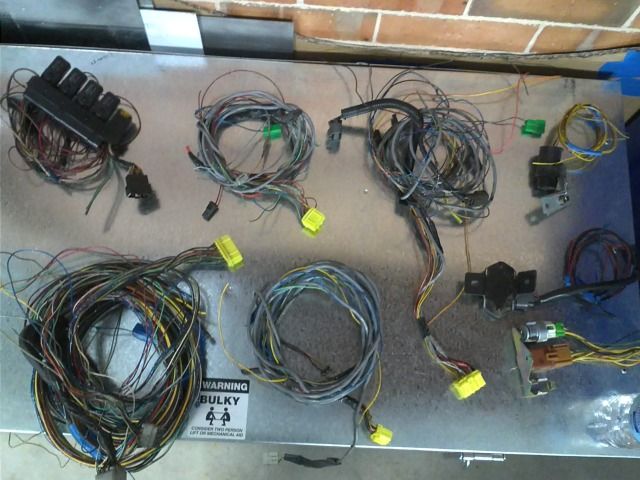
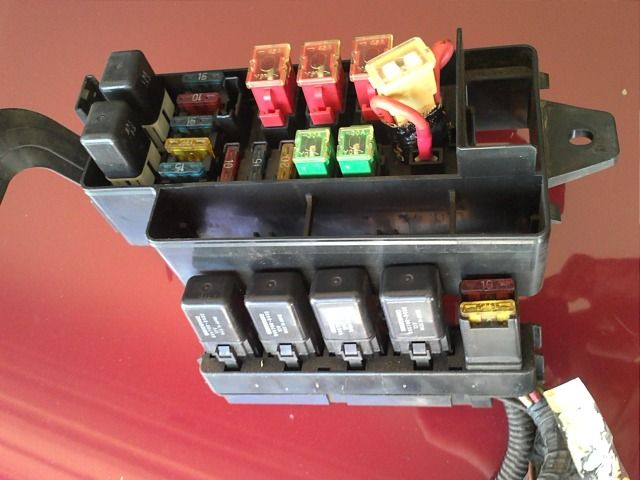
while going though the guide linked above it did take me a little while to make out where the four relay block that he kept mentioning was, Its part
of the under bonnet fuse/reley box
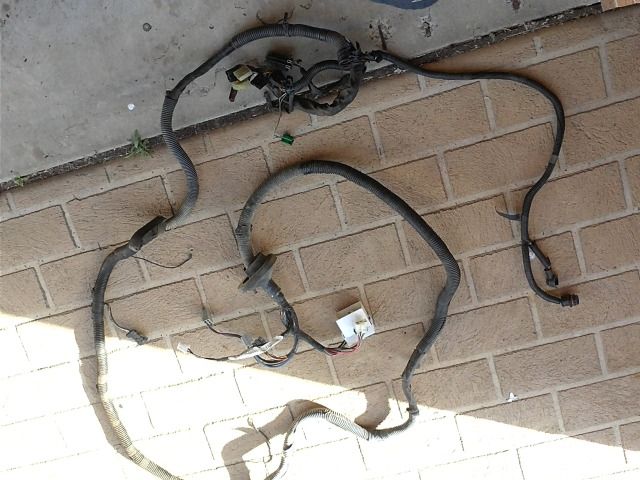
This is the driverside loom, you can see the alternater subloom in the top right hand of the picture but this seems to be the only part of it
worthwhile, though it does contain about 5 meters of great wire, if you are doing a full rewire of your car it's a good place to start,
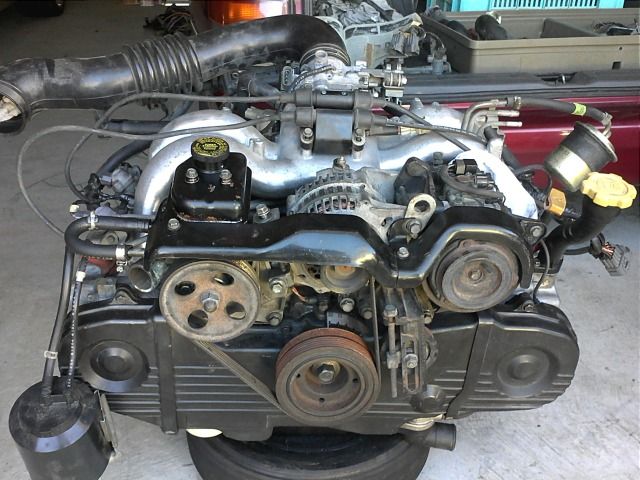
Dug though the massive pile of parts I got with this car and managed to dress the good motor, good to know all the parts are there 
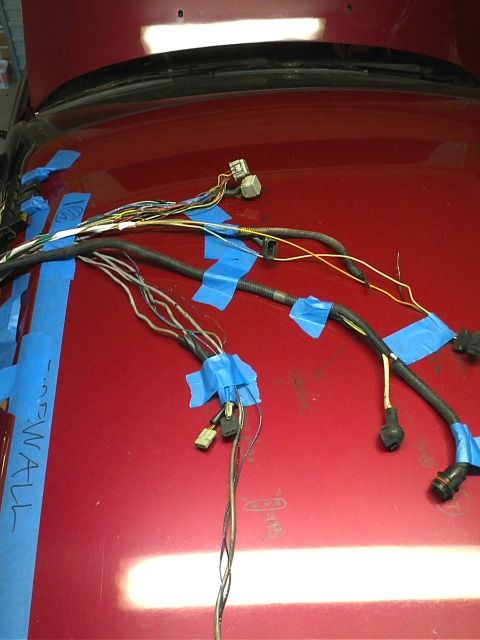
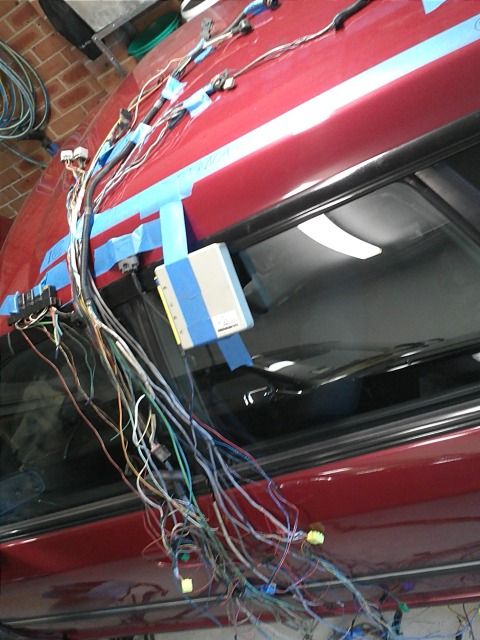
then started the loom, I am building a stand alone loom for the engine, with only the very basics spliced into teh existing because i really don't
want to start from scratch again. Starting to run short on real eastate in the garage since I dragged it home, so the roof of the car seemed like a
good flat place to mark out. (It's hard to tell but all the plug positions on the motor are marked out here on the roof and then taped down to the
there position), the blue line represents the firewall. Once things are placed roughly where they will soon end up you start to grasp just how much of
that wire that you spent hours trying not to make to short you will just not need. From top to bottom - engine plugs(2 in my case), fan harness,
altenator harness and sensor harness. see easy
Anybody wanting me to take closeups of any part of this, now is a good time. In the second picture you can see the ignitor, CPU and relay block on the
other side of the "firewall"
Few what a day, Beer O'clock

Quit calling rust patina
|
|
|
 seagull seagull
Compulsive Aussie Vee Dubber
      
Posts: 4979
Threads: 752
Registered: December 25th, 2003
Member Is Offline
Location: PerthWA
Theme: UltimaBB Pro Blue ( Default )
|
| posted on August 19th, 2012 at 11:57 PM |
|
|
I would be smashing a turbo trive line in the liberty
I have a full manual loom for that liberty with ecu & dash cluster
Looking for that special lady : PM me for coffee & cake
|
|
|
 nils nils
Fahrvergnugen
   
Posts: 971
Threads: 65
Registered: January 11th, 2008
Member Is Offline
Location: central coast
Theme: UltimaBB Pro Blue ( Default )
|
| posted on August 20th, 2012 at 05:58 AM |
|
|
Mate, if you want the body and are anywhere near me, come and grab it. The inside is as nice as the out and I went to the trouble of pulling rhe dash
nicely, not just ripping randomly. Will start ebaying parts this week, then it has 2 weeks till it gets crushed into a tiny cube
The scrap metal guy offered $100 for it, anywhere near that and its yours, its has lowered lovells springs in it if it sweetens the deal
Quit calling rust patina
|
|
|
 Joel Joel
Scirocco Rare
Now containing 100% E-Wang
        
Posts: 9368
Threads: 211
Registered: February 14th, 2006
Member Is Offline
Location: Northern Rivers NSW
Theme: UltimaBB Pro Purple
Mood: Tact Level 0.00
|
| posted on August 20th, 2012 at 07:16 AM |
|
|
Think back 20 years, same thing happened but with VWs.
I'm gonna crush this immaculate old VW beetle. I've got the engine for my buggy/trike that's all I wanted 
Going well Nils, I'll be watching the subagears part of the conversion very closely.
|
|
|
 nils nils
Fahrvergnugen
   
Posts: 971
Threads: 65
Registered: January 11th, 2008
Member Is Offline
Location: central coast
Theme: UltimaBB Pro Blue ( Default )
|
| posted on August 20th, 2012 at 12:12 PM |
|
|
Yeah, I know what you are saying joel. but I'm not too sentimental about old metal, will leave that to others. I'm quite happy to give it to someone
who is though, without a loom im not real sure how easy that will be. And i have a deadline to how long this thing is in the garage
Quit calling rust patina
|
|
|
 nils nils
Fahrvergnugen
   
Posts: 971
Threads: 65
Registered: January 11th, 2008
Member Is Offline
Location: central coast
Theme: UltimaBB Pro Blue ( Default )
|
| posted on August 26th, 2012 at 08:32 PM |
|
|
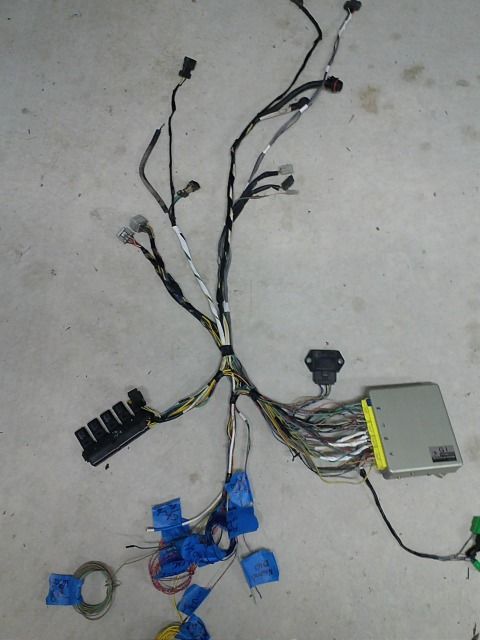
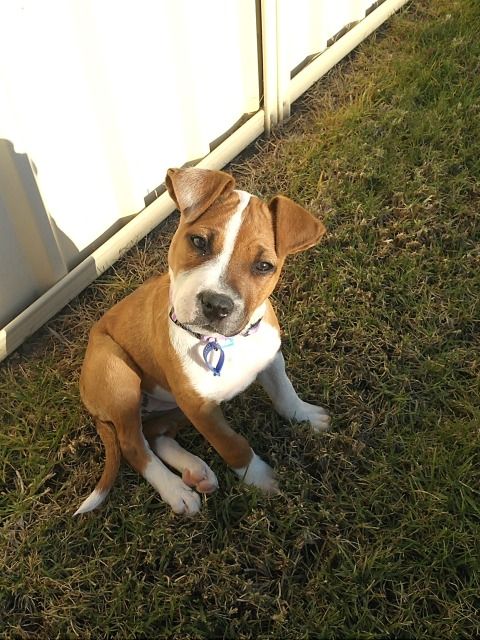
Another weekend down, well really I didn't get too much done as we went and bought a new couch and dishwasher and dog. but I did get a few hours in
during the week and finish up on the weekend. I have what looks like a real wiring loom, the work guide that I linked ealier in this thread is pretty
spot on, there really are few differences betwwen AU and US models. There are a few wires that are different colours (engine check light) and the
wire that goes from the coil to the ignitor and the wire from the water sensor to the CPU are allmost identical, one is white/green, while the other
is white/blue and with years of engine oil the two look the same.
There is a greeen wire that comes form the coil that I haven't worked out yet and find no referance to. Also a brown wire from the 'C' plug, spot
#16 I think, that is stated to be empty, but it isn't. I have some lenght left here for when I work it out or someone can enlighten me 
I would say there is about 30hrs in it and there is probably alot of stuff I would do different (like just cut everything off at the plugs and just
build from the guide and the workshop manual)------ but here it is, no idea if it works yet. Will start on the changes to the motor from here and get
to the point where I can get rid of the shell and fire this on a stand. Though I have to point out having a brewery up the road from your house sure
does take its toll quickly 
Quit calling rust patina
|
|
|
 nils nils
Fahrvergnugen
   
Posts: 971
Threads: 65
Registered: January 11th, 2008
Member Is Offline
Location: central coast
Theme: UltimaBB Pro Blue ( Default )
|
| posted on August 27th, 2012 at 07:43 PM |
|
|
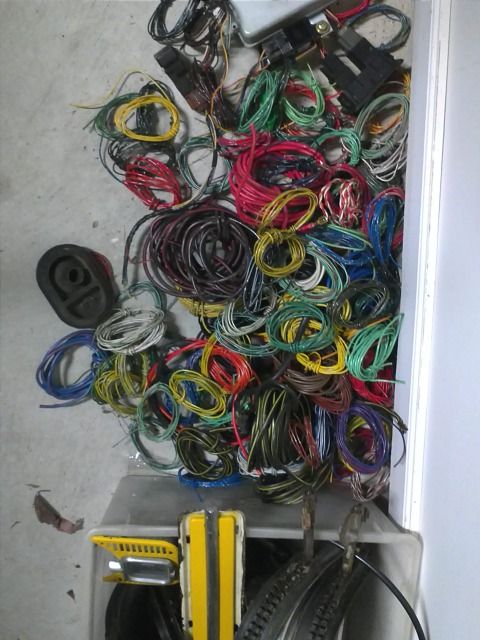
Spent some time cleaning the garage today, and have found every growing pile of colour coded wires. Anybody chasing some coloured wires for there
resto?
Quit calling rust patina
|
|
|
 nils nils
Fahrvergnugen
   
Posts: 971
Threads: 65
Registered: January 11th, 2008
Member Is Offline
Location: central coast
Theme: UltimaBB Pro Blue ( Default )
|
| posted on September 9th, 2012 at 07:24 PM |
|
|
Not really a good weekend for vw/subaru related works, I did organize to get the gearbox home and a manual starter. I sold the spare headlights and
indicators that came with the car, sold the leftover of the car. Now I have the car space back.
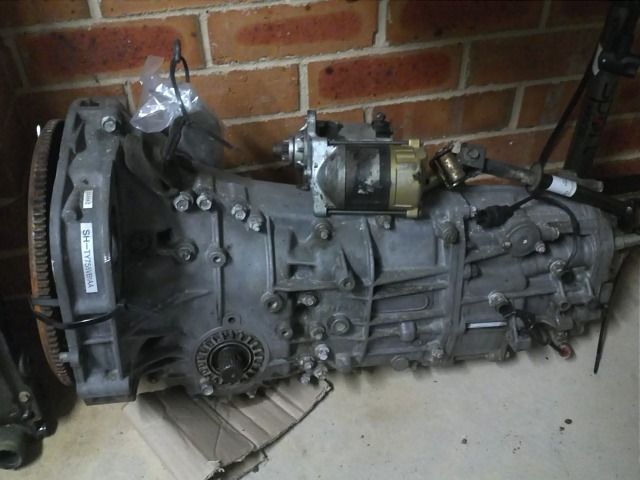
Total- $667
$250 for the gearbox
- $30 headlights sold
- $130 for what was left of the car
$757
Also the boot carpet from the liberty wagon just about fits perfectly in the back to a beetle without a back seat, just needed a little cutting around
the shock towers and rollcage. pretty happy with how it turned out
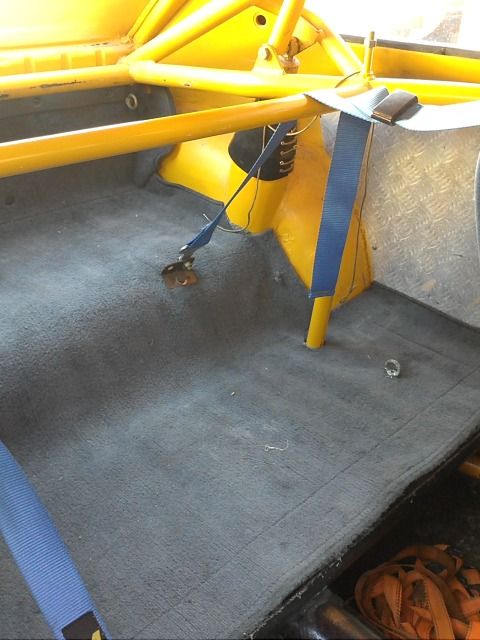
we did pick up this little monkey
Quit calling rust patina
|
|
|
 tweety tweety
Wolfsburg Wizard
  
Posts: 460
Threads: 68
Registered: February 26th, 2011
Member Is Offline
Location: Strathbogie Vic
Theme: UltimaBB Pro Blue ( Default )
|
| posted on September 9th, 2012 at 09:59 PM |
|
|
Interesting. The sight of those wires gave me a headache.
|
|
|
 Lovebuggy Lovebuggy
Seriously Crusin Dubber
 
Posts: 156
Threads: 21
Registered: December 29th, 2008
Member Is Offline
Location: Ipswich
Theme: UltimaBB Pro Blue ( Default )
Mood: Making it happen
|
| posted on September 10th, 2012 at 08:50 AM |
|
|
$250 for a gearbox and a starter is a bargine.
What is its story?
|
|
|
 wild baja wild baja
Casual Dubber

Posts: 26
Threads: 3
Registered: September 19th, 2011
Member Is Offline
Theme: UltimaBB Pro Blue ( Default )
|
| posted on September 10th, 2012 at 12:11 PM |
|
|
Ive just finished a similar conversion using a 02 foretser donor to my baja using the full dash n loom .
My tip is dont think wires of the same colour/stripe do the (same or simliar) funtions. also theres good cheap OEM diagrams on Ebay
|
|
|
 nils nils
Fahrvergnugen
   
Posts: 971
Threads: 65
Registered: January 11th, 2008
Member Is Offline
Location: central coast
Theme: UltimaBB Pro Blue ( Default )
|
| posted on September 10th, 2012 at 07:36 PM |
|
|
Am getting that impression actually wild baja, think i have it pretty much sorted. but might check that out if i get stuck, thanks. would be
interested to see your baja some time, where you from?
The gearbox? Just in the right place at the right time and happy to throw some cash at him. Fellow said he bought it as a spare fot his gt forester
because he heard they broke and then never broke it. Suppose to be good, but haven't opened it up yet. time will tell
Quit calling rust patina
|
|
|
 nils nils
Fahrvergnugen
   
Posts: 971
Threads: 65
Registered: January 11th, 2008
Member Is Offline
Location: central coast
Theme: UltimaBB Pro Blue ( Default )
|
| posted on September 12th, 2012 at 07:58 PM |
|
|
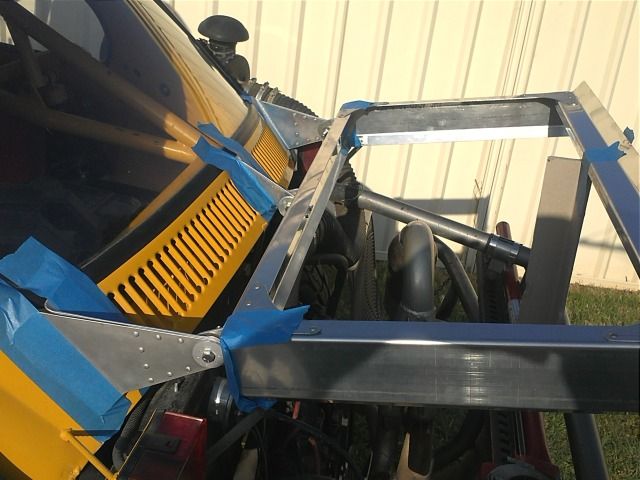
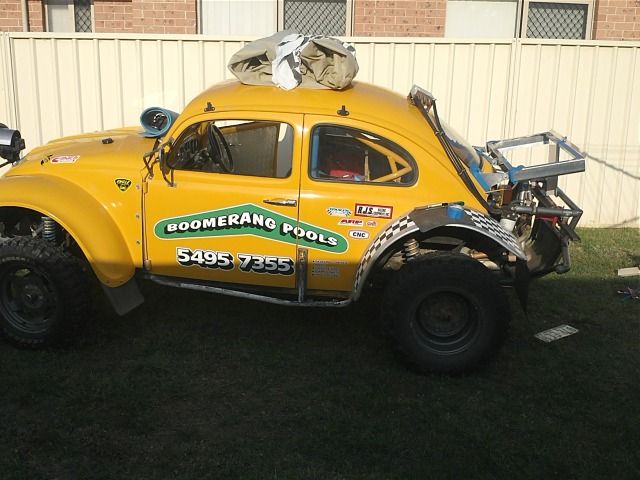
had a little bit of time today to play with the baja, (anybody else think thats wierd when you are able to say that on a weekend) mainly played with
the mounting and sizing up of the wing. Not sure if I like it yet.
Quit calling rust patina
|
|
|
 wild baja wild baja
Casual Dubber

Posts: 26
Threads: 3
Registered: September 19th, 2011
Member Is Offline
Theme: UltimaBB Pro Blue ( Default )
|
| posted on September 13th, 2012 at 12:26 PM |
|
|
I'm in Newy PM sent
|
|
|
 nils nils
Fahrvergnugen
   
Posts: 971
Threads: 65
Registered: January 11th, 2008
Member Is Offline
Location: central coast
Theme: UltimaBB Pro Blue ( Default )
|
| posted on September 16th, 2012 at 02:35 PM |
|
|
Hey wild baja, i don' t seem to be able to send or recieve pm's at the moment.
must be cause the site is "made on a mac" 
Quit calling rust patina
|
|
|
 Lovebuggy Lovebuggy
Seriously Crusin Dubber
 
Posts: 156
Threads: 21
Registered: December 29th, 2008
Member Is Offline
Location: Ipswich
Theme: UltimaBB Pro Blue ( Default )
Mood: Making it happen
|
| posted on September 16th, 2012 at 10:14 PM |
|
|
From my experience -on your wiring loom - you normally don't cut the igintion relay and fuel pump away from the loom. There is also a diode that you
need around there.
You also don't need that relay block when you strip a loom out.
You should end up only needing to terminate power, ignition, start and fuel pump from a stripped out loom to get your motor to run.
The other wires are oil pressure, temp, tacho, VSS and fans for radiator.
|
|
|
 nils nils
Fahrvergnugen
   
Posts: 971
Threads: 65
Registered: January 11th, 2008
Member Is Offline
Location: central coast
Theme: UltimaBB Pro Blue ( Default )
|
| posted on September 17th, 2012 at 06:23 AM |
|
|
Thanks for the shout out lovebuggy. its no longer wired anything like stock, check out the link that i worked from posted above. the relay block now
runs the fan and ignition duties, aswell as the fuses for the fans and cpu. oh, and the diode is in there too. the fuel pump isn't pictured because
its at the front of the car ( with the fuel tank)
the extra wires in that pile are probably vss, a bunch of earth wires for the auto/manual modes, tacho, temp gauge, acc power, fuel pump switch, ac
switch and the
2 i can 't figure out yet. so yeah theres a bunch alright. the wire i think i got sorted till i try and fire this thing
, then on to dignostic and may cut a few more out.
But thanks for putting another set of eyes over it,this is still a first timer job
Quit calling rust patina
|
|
|
 wild baja wild baja
Casual Dubber

Posts: 26
Threads: 3
Registered: September 19th, 2011
Member Is Offline
Theme: UltimaBB Pro Blue ( Default )
|
| posted on September 17th, 2012 at 12:32 PM |
|
|
Hey Nils call me on 0435901521
|
|
|
 nils nils
Fahrvergnugen
   
Posts: 971
Threads: 65
Registered: January 11th, 2008
Member Is Offline
Location: central coast
Theme: UltimaBB Pro Blue ( Default )
|
| posted on September 18th, 2012 at 07:59 PM |
|
|
will do mate,
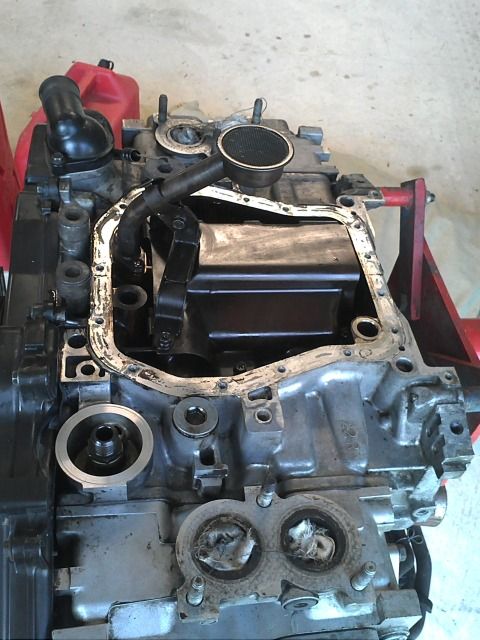
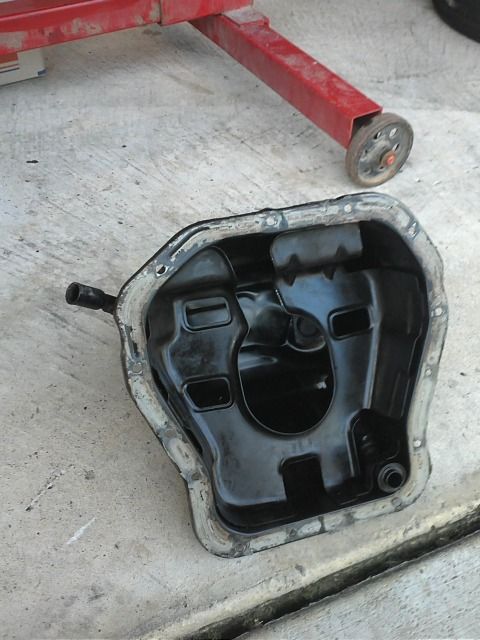
Pulled the sump off today, no surprises happily  Will start with
cutting 2 inches off and seeing what else needs modifing (pickup, dipstick or baffles) aswell as how much capasity is missing and how much I need to
add again. Am starting with only 2 because I think, and I hope Todd Triebler might chime in here and confirm, but using the the subi gearbox ends up
the engine alittle higher than the when using the vw box? Will start with
cutting 2 inches off and seeing what else needs modifing (pickup, dipstick or baffles) aswell as how much capasity is missing and how much I need to
add again. Am starting with only 2 because I think, and I hope Todd Triebler might chime in here and confirm, but using the the subi gearbox ends up
the engine alittle higher than the when using the vw box?
Quit calling rust patina
|
|
|
 nils nils
Fahrvergnugen
   
Posts: 971
Threads: 65
Registered: January 11th, 2008
Member Is Offline
Location: central coast
Theme: UltimaBB Pro Blue ( Default )
|
| posted on September 19th, 2012 at 06:44 PM |
|
|
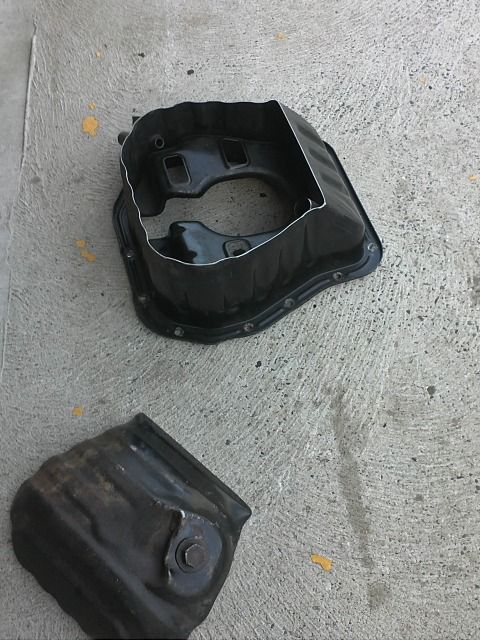
I cut the bottom 2 inches off today, measureed the capasity of the piece. 950ml, mine has a small dent in the bottom, so i'm happy to call it an even
litre.
The nxt 2 inches that i will be cutting off is pretty much straight up and down except for the triangular section which is ease enough to work out the
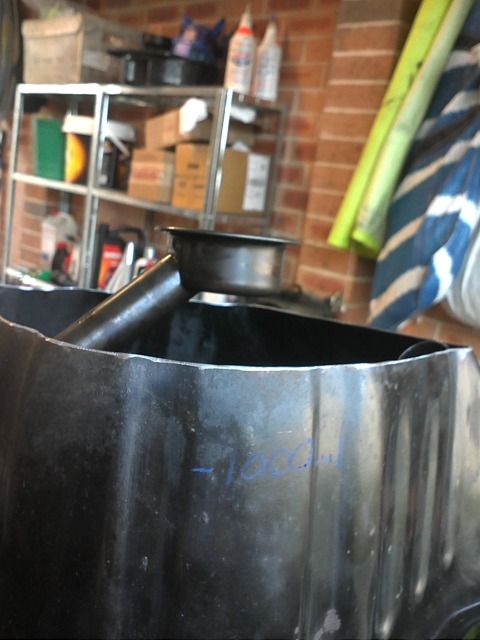
capasity aswell, but thats in the future. I put the sump, now with a big hole in it back on and measured the height of the pickup comparitively. 1 1/2
tall, so the pickup sits 1/2 from the bottom and I will make it that way on the new sump too.
Also ordered alot of peices for the exhaust and oil filter relocation today, because I guess this all needs to be taken into account when deciding
the final shape
Quit calling rust patina
|
|
|
 Subarugears Subarugears
Officially Full-On Dubber
  
Posts: 236
Threads: 17
Registered: December 24th, 2011
Member Is Offline
Location: Sydney, Australia
Theme: UltimaBB Pro Blue ( Default )
|
| posted on September 19th, 2012 at 11:28 PM |
|
|
55mm higher up using a Subie box compared to a VW box.
|
|
|
 nils nils
Fahrvergnugen
   
Posts: 971
Threads: 65
Registered: January 11th, 2008
Member Is Offline
Location: central coast
Theme: UltimaBB Pro Blue ( Default )
|
| posted on September 20th, 2012 at 05:49 AM |
|
|
Awesome, thanks todd!
Quit calling rust patina
|
|
|
 nils nils
Fahrvergnugen
   
Posts: 971
Threads: 65
Registered: January 11th, 2008
Member Is Offline
Location: central coast
Theme: UltimaBB Pro Blue ( Default )
|
| posted on September 24th, 2012 at 08:54 PM |
|
|
| Quote: | Have had plenty of
time to concider designs and variables. The subi sump has a few good ideas for baffling already, and don't plan on going crazy redesigning the wheel.
The new bottom half of the sump will be leaning toward the front of the engine because shortening the oil pickup causes it to move this way, bringing
the pickup close to back to the center. The shape will be an octaginal so that any oil movement will always be met with an ever decreasing area. I
will post up measurements on this when I am possitive on the design, it ends up with an extra 100ml all up. (sorry to the boys that work imperial when
it comes to volume I can't get my head around cu in)
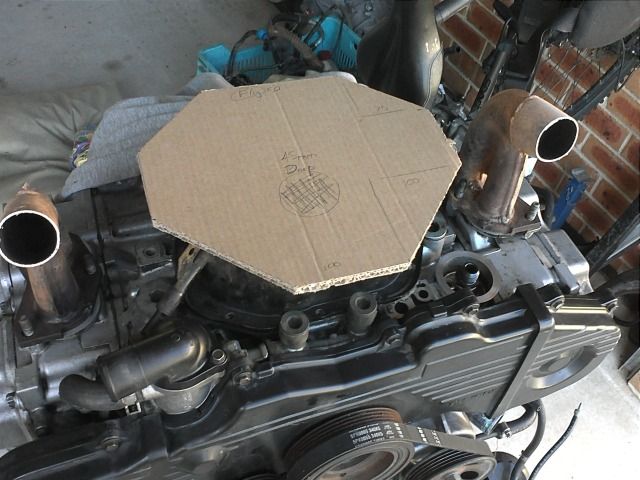
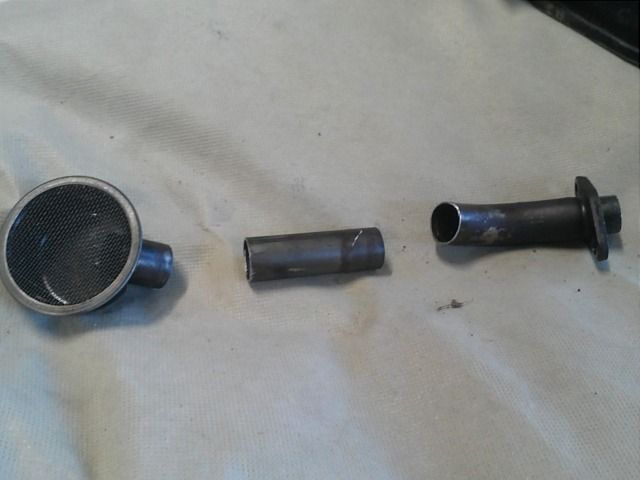
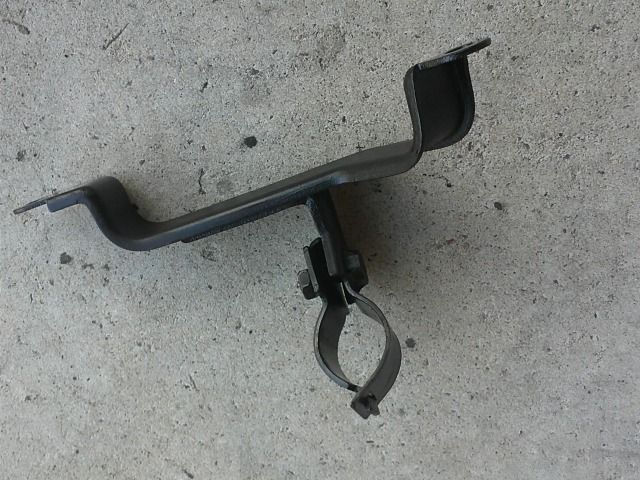
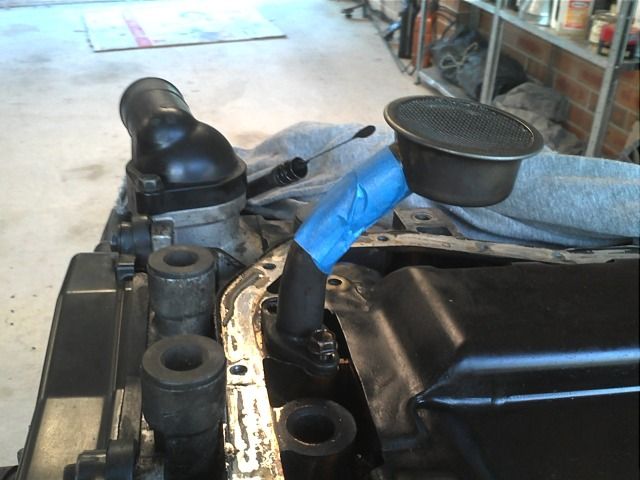
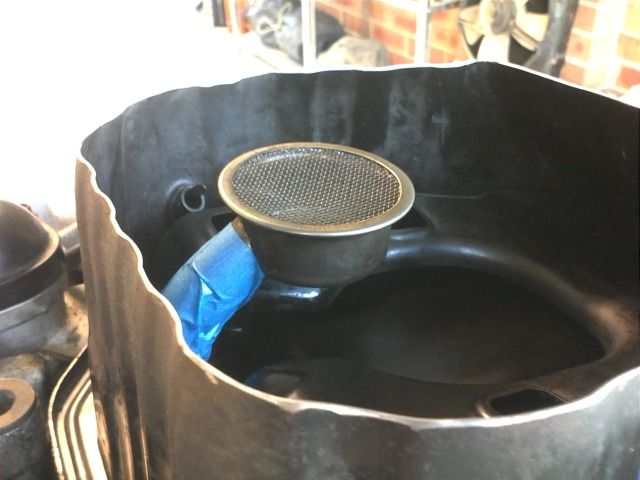
the oil pickup I cut out 2.5 inches out of the center of the tube and it requires its mounting bracket to be removed
|
Quit calling rust patina
|
|
|
 nils nils
Fahrvergnugen
   
Posts: 971
Threads: 65
Registered: January 11th, 2008
Member Is Offline
Location: central coast
Theme: UltimaBB Pro Blue ( Default )
|
| posted on September 29th, 2012 at 05:40 PM |
|
|
Not much vw works going on this weekend, having the weekend off after a HUGE week.
BUT i did spend some money on parts and things 
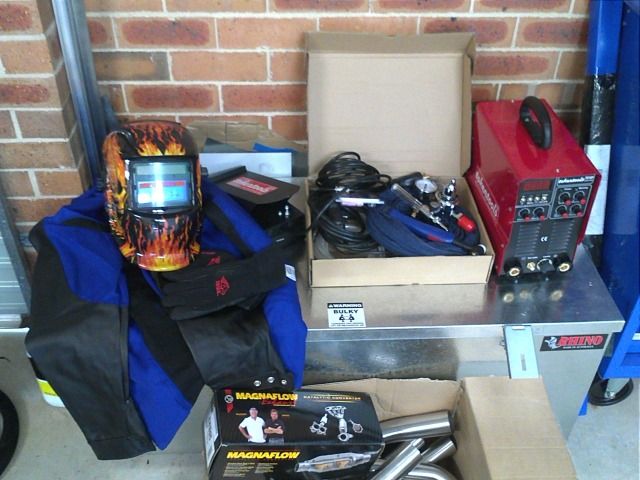
Quit calling rust patina
|
|
|
 subibaja subibaja
Wolfsburg Wizard
  
Posts: 501
Threads: 45
Registered: September 4th, 2005
Member Is Offline
Location: Brisbane, QLD
Theme: XMBX Pro Green
|
| posted on November 6th, 2012 at 04:26 PM |
|
|
Well I did say to you years ago this was the way to go
Very nice work so far nils
But you have to always consider the prices of stuff compared to the time you spend trying to save money
anyone who says it's bad to put subaru motors in vw's.....
hasnt got a clue about smoooooooooth
terry
brisbane
0403252522
you know who i am
|
|
|
| Pages: 1 2 |